
Small tattoos are like little sketches you get to carry with you—quiet, personal, and surprisingly powerful. I love how tiny designs force you to simplify down to the most meaningful lines.
Tiny Heart Outline
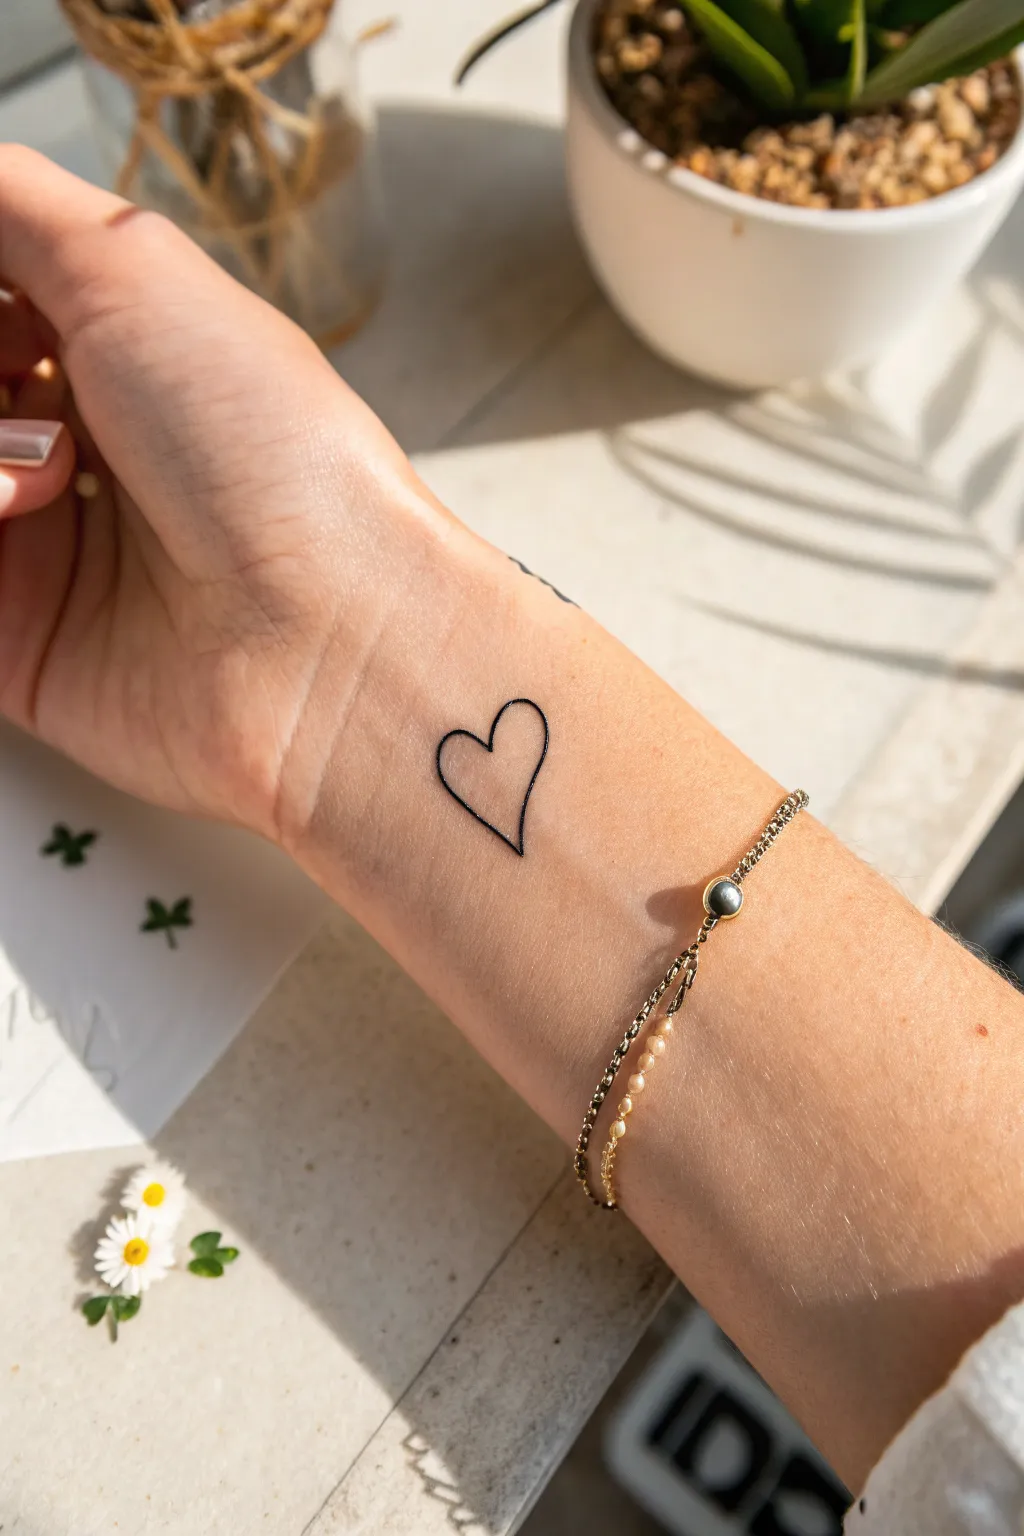
This delicate, fine-line tattoo features a simple open heart outline placed perfectly on the inner wrist. Its charm lies in the slightly asymmetrical, hand-drawn aesthetic that feels personal and timeless.
Step-by-Step Tutorial
Materials
- Professional tattoo machine (rotary or coil)
- Round Liner needle cartridge (3RL or 5RL for fine lines)
- Black tattoo ink (lining black)
- Stencil paper and transfer gel
- Green soap and squeeze bottle
- Paper towels
- Ink caps
- Disposable gloves
- Skin marker (surgical pen)
- Vaseline or tattoo glide
- Aftercare bandage (second skin)
Step 1: Preparation and Stencil
-
Design the heart:
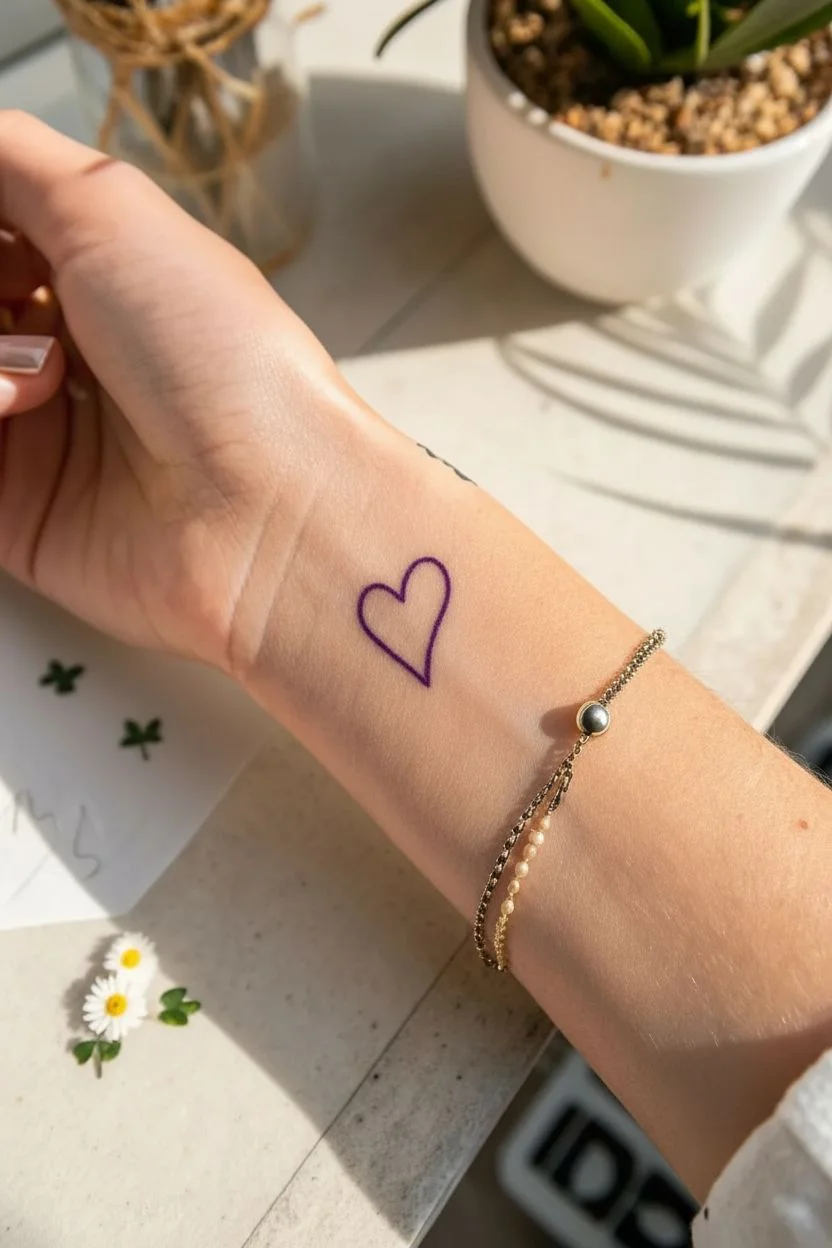
Begin by sketching the heart on paper or a tablet. Aim for a slightly imperfect, ‘doodled’ shape rather than rigid geometrical symmetry. The left side should curve gently down while the right side dips slightly before meeting at the point. -
Create the stencil:
Once satisfied with the design, trace it firmly onto the transfer sheet of your stencil paper. I find pressing hard ensures a crisp purple line that won’t rub off easily during placement. -
Prepare the station:
Set up your sanitary workstation. Pour a small amount of black lining ink into an ink cap and set out your machine with the chosen needle cartridge. -
Clean the skin:
Shave the inner wrist area gently, even if hair isn’t visible. Clean the skin thoroughly with green soap and follow with an alcohol wipe to remove oils. -
Apply the transfer:
Rub a thin, even layer of stencil transfer gel onto the wrist. Place the stencil firmly onto the skin, ensuring the heart is centered and aligned with the arm’s natural flow. Hold for a few seconds. -
Let it dry:
Peel the paper back carefully. Allow the purple stencil to dry completely on the skin for at least 10 minutes; this prevents the guide from smudging while you work.
Fixing Blowouts
If the ink spreads under the skin (blowout), the needle went too deep. You can’t erase it instantly, but once healed, white ink highlights can sometimes mask the spread.
Step 2: Tattooing the Outline
-
Set up the machine:
Run your machine at a moderate voltage suitable for lining—usually between 7 to 9 volts depending on your specific machine. Dip the needle tip into the ink cap. -
Stretch the skin:
This is crucial for the wrist. Use your non-tattooing hand to stretch the skin taut in two directions (away from the stencil). The wrist skin is thin, so a good stretch prevents ink blowout. -
Begin the first curve:
Start at the top dip of the heart (the cleavage). With a steady hand, pull the line down the left curve. Keep your needle depth consistent and shallow, just piercing the dermis. -
Complete the left side:
Continue the line smoothly towards the bottom point. Don’t rush; maintain a consistent hand speed to ensure the line weight stays even. -
Start the right arch:
Return to the top center point. Pick up the line where you started and begin curving over the right arch. -
Connect the point:
Pull the line down the right side to meet the bottom tip. Imagine you are landing a plane gently when connecting the lines so there isn’t a dark dot where they join. -
Check the saturation:
Gently wipe away excess ink with a paper towel dampened with green soap. Do not scrub. -
Touch up:
Inspect the outline closely. If there are any faint spots or ‘holidays’ (gaps in the ink), carefully re-line those specific millimeters. Avoid going over the same area multiple times to prevent trauma.
Level Up: Color Pop
Make the design unique by adding a tiny dot of red or pink ink inside the heart, or create a ‘shadow’ line in grey ink slightly offset for a 3D effect.
Step 3: Aftercare
-
Final clean:
Give the area a final, gentle cleanse with green soap to remove blood or plasma. -
Protect the art:
Pat the area dry with a clean paper towel. Apply a small amount of aftercare ointment or cover with a protective adhesive film.
Enjoy your permanent piece of minimal art


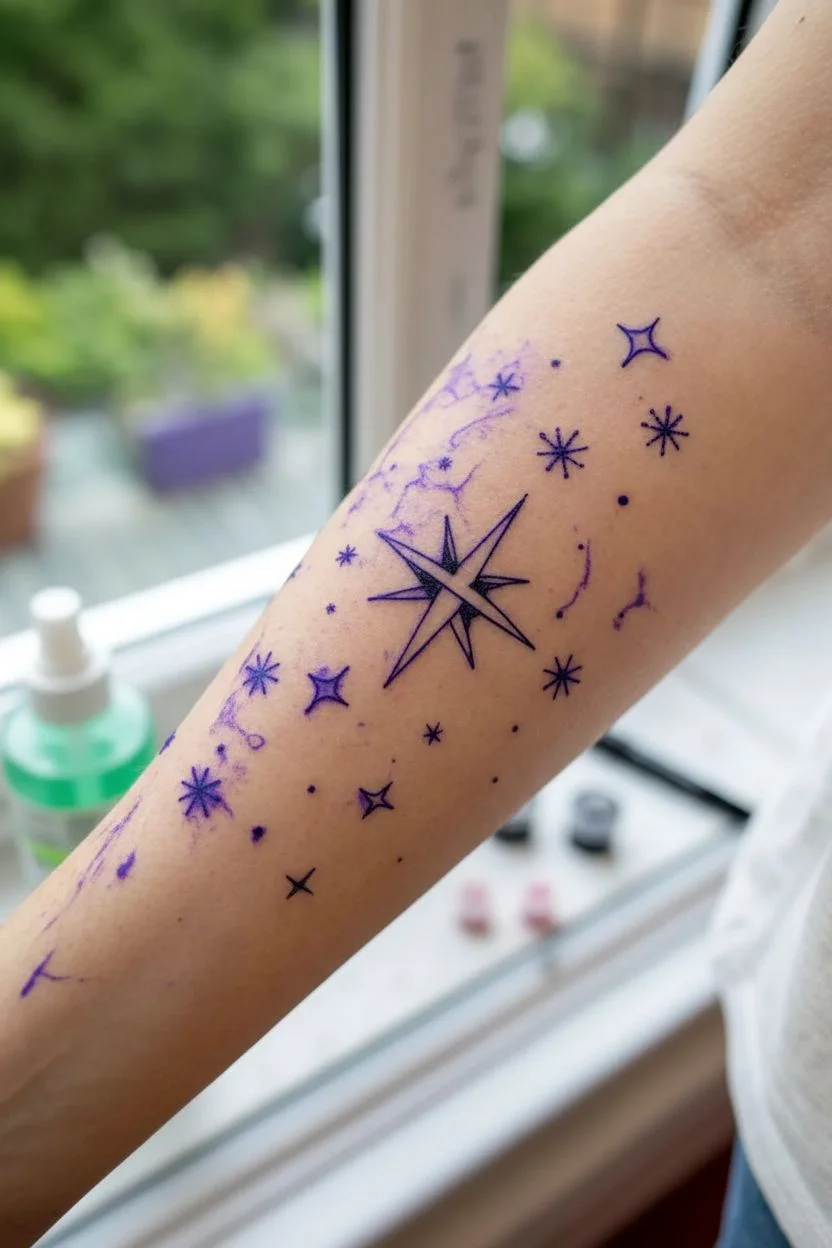
Minimal Star Cluster
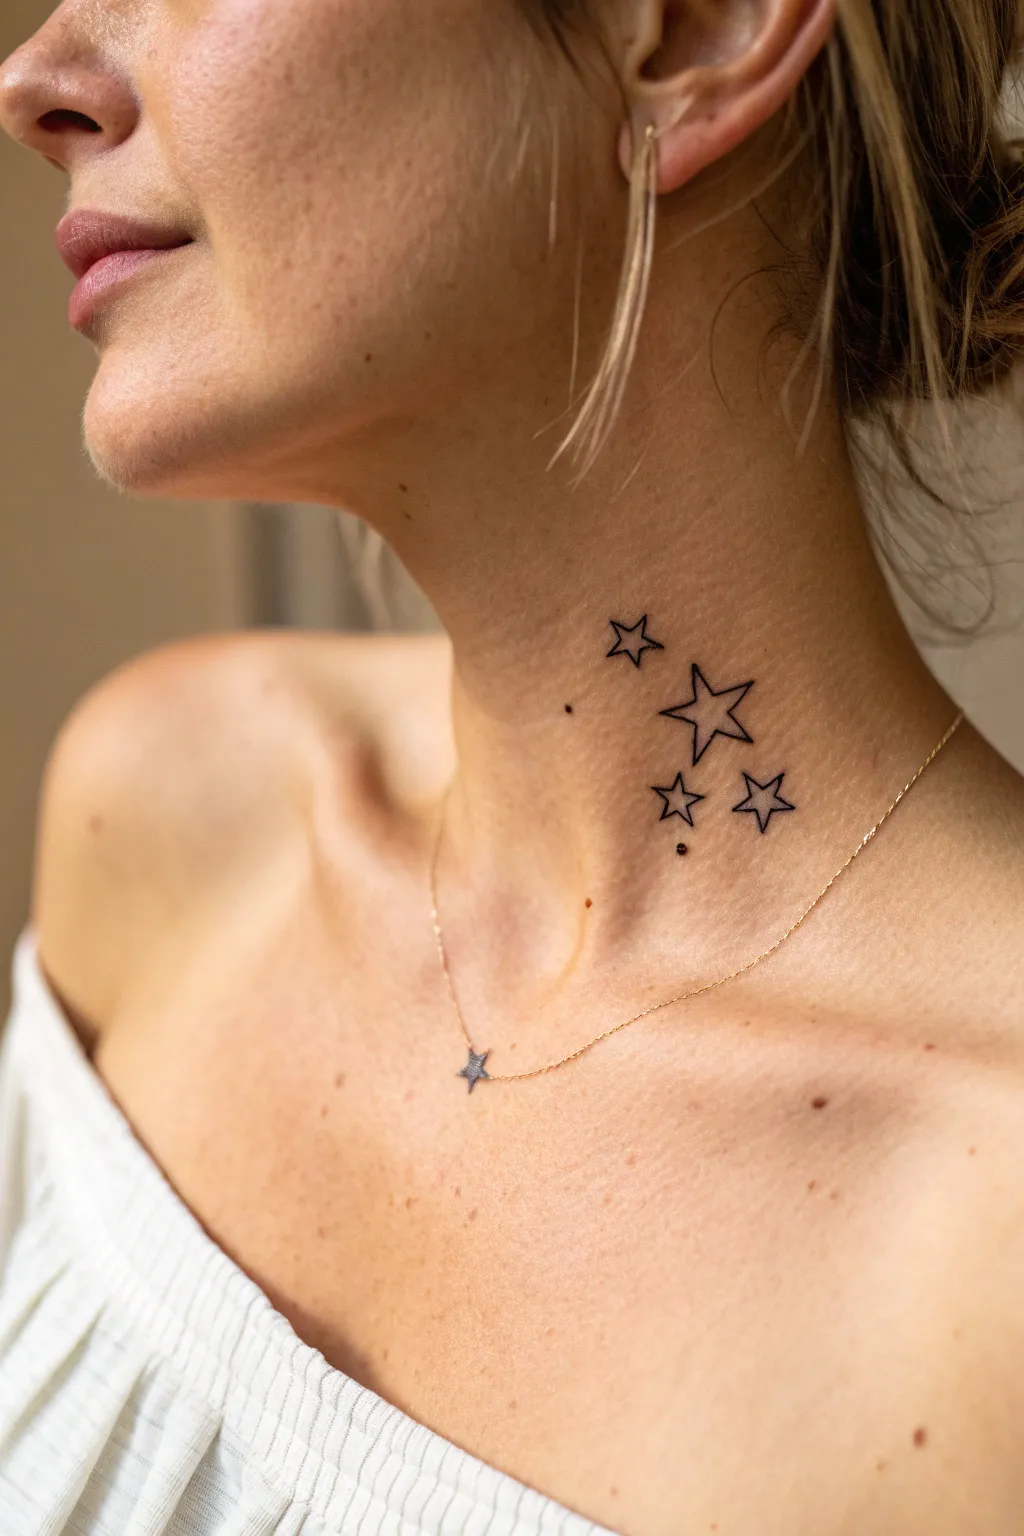
This elegant minimal star cluster design sits beautifully on the side of the neck, offering a subtle yet striking nod to the night sky. The clean linework creates a delicate constellation effect that complements the natural curves of the body.
How-To Guide
Materials
- Tattoo machine (pen style preferred for fine lines)
- Round liner needle cartridge (3RL or 5RL)
- Black tattoo ink
- Stencil paper and transfer gel
- Green soap and squeeze bottle
- Paper towels
- Vaseline or ink glide
- Disposable ink caps
- Gloves and skin-safe disinfectant
- Cleansing alcohol wipes
Step 1: Design & Stencil Preparation
-
Drafting the Constellation:
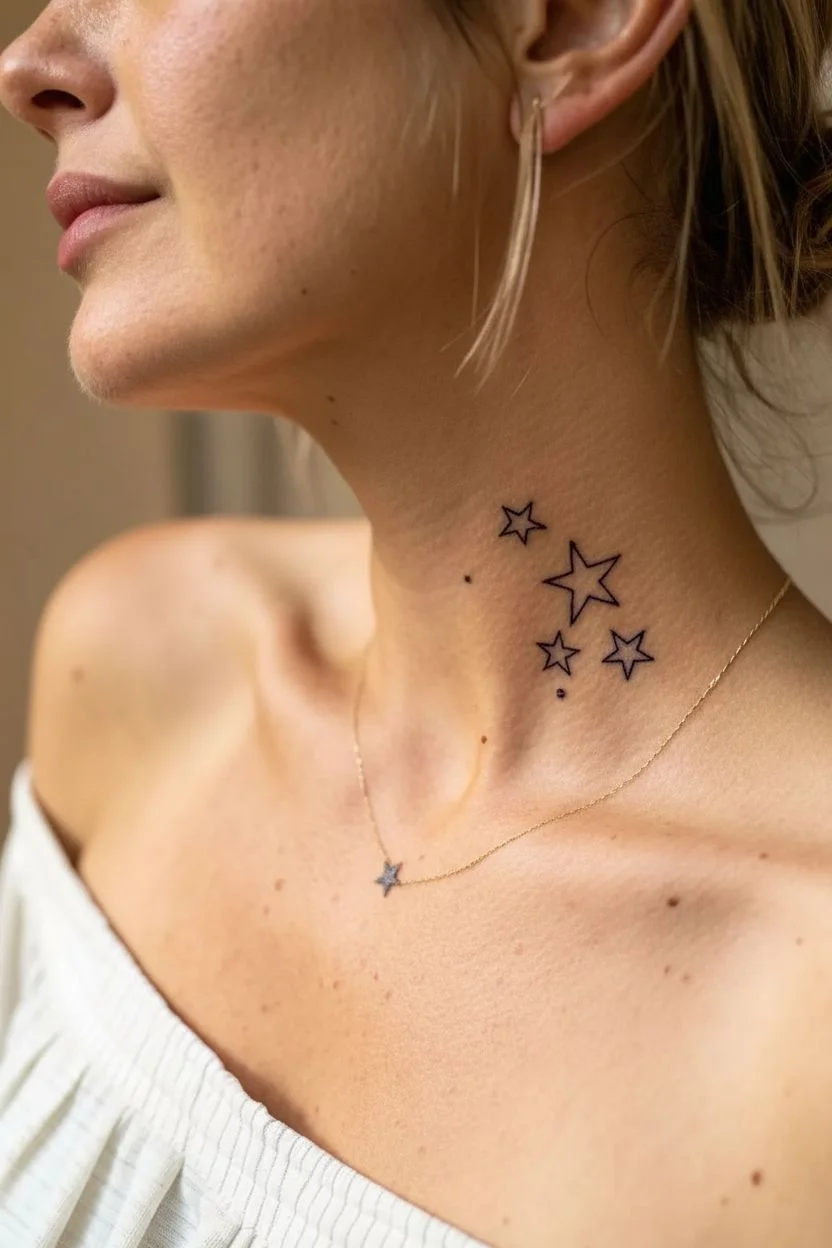
Begin by drawing four distinct five-pointed stars on paper. Create variety by drawing one medium star, slightly larger than the others, and three smaller stars. -
Composition Arrangement:
Arrange the stars in an organic, falling cluster shape rather than a straight line. The largest star should sit centrally, with the others orbiting slightly above and below. -
Adding Details:
Place two tiny dots near the stars to mimic distant planets or smaller stars, adding depth to the cluster without cluttering the design. -
Creating the Stencil:
Once satisfied with the arrangement, trace the design firmly onto thermal stencil paper. Ensure the lines are crisp and unconnected at the tips to maintain that sharp star shape.
Step 2: Placement and Setup
-
Preparing the Skin:
Clean the neck area thoroughly with green soap, then wipe it down with an alcohol pad to remove oils. Shave any fine hairs even if they aren’t immediately visible. -
Applying Transfer Gel:
Apply a thin, even layer of stencil transfer gel. Wait until it feels tacky to the touch—not wet or slippery—to prevent the stencil from blurring. -
Positioning the Art:
Have the client sit upright with their head in a neutral position. Place the stencil on the side of the neck, ensuring the flow follows the sternocleidomastoid muscle line. -
Drying Time:
Peel the paper back carefully and let the stencil dry completely for at least 10-15 minutes. This creates a durable guide that won’t wipe away during the tattooing process.
Clean Corner Tip
To get razor-sharp star points, lift your needle slightly as you reach the corner, re-position, and pull the next line away from that point.
Step 3: Tattooing the Outline
-
Machine Setup:
Load your machine with a 3RL (3 Round Liner) needle for the most delicate finish, or a 5RL if you prefer slightly bolder lines. set your voltage appropriate for lining (usually tight and fast). -
First Star Anchor:
Dip into the black ink and start with the central, largest star. Stretch the skin firmly with your non-dominant hand; neck skin is elastic and needs good tension. -
Pulling the Lines:
Execute single, confident passes for each leg of the star. I find it helpful to pull the needle away from corners rather than pushing into them to keep points sharp. -
Connecting the Points:
Don’t lift the needle unnecessarily in the middle of a line segment. Ensure each corner meets perfectly without overlapping or ‘crossing’ the lines. -
Completing the Cluster:
Move on to the surrounding smaller stars. Keep your hand consistent to ensure the line weight matches the first star perfectly. -
Adding the Micro-dots:
For the tiny dots, simply dip the needle and perform a gentle ‘dot’ motion. Do not circle; just a quick insertion is enough for these subtle accents. -
Wiping and Checking:
Gently wipe away excess ink using a paper towel dampened with green soap. Dab rather than rub to avoid irritating the sensitive neck skin. -
Final Refinement:
Inspect the lines closely. If any segments look faint, carefully re-line them, being extremely precise to land exactly on the previous pass.
Blurry Stencil?
If the stencil looks fuzzy on the skin, wipe it off immediately with alcohol and re-apply. Never guess where the line should be on a blurred stencil.
Step 4: Aftercare Application
-
Soothing the Area:
Apply a final clean of green soap mixed with a little distilled water to soothe the redness. -
Protective Layer:
Let the area air dry for a moment, then apply a very thin layer of aftercare ointment or a second-skin bandage to protect the fresh work.
Now you have a timeless piece of constellation art that will look elegant for years to come


Crescent Moon Tattoo

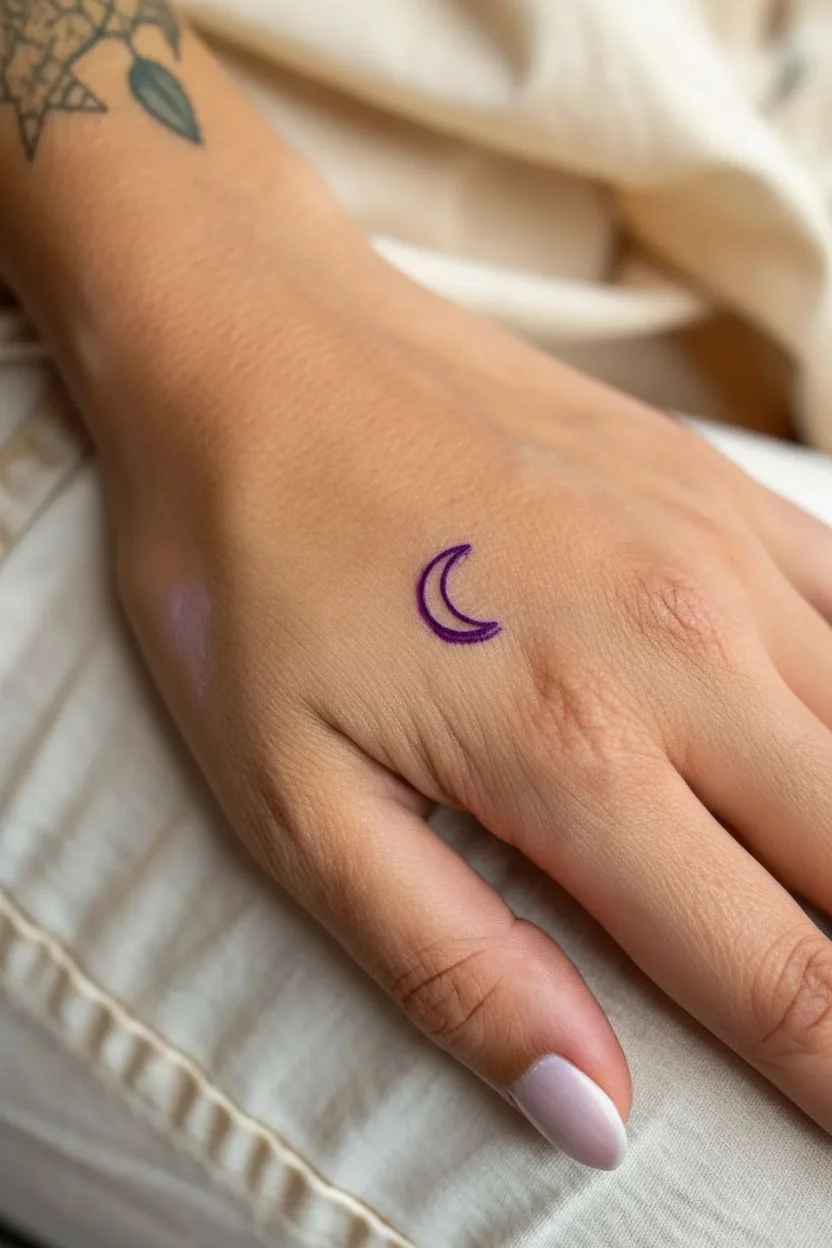
This delicate crescent moon design captures celestial beauty with just a few clean, fine lines on the hand. Its varying line weight adds a subtle dimension to an otherwise simple silhouette, making it a perfect first tattoo or a tiny addition to a collection.
Step-by-Step
Materials
- Tattoo machine (pen or coil style)
- 3RL (3 Round Liner) tattoo needle cartridge
- Dynamic Black tattoo ink (or preferred high-quality lining black)
- Tattoo stencil paper
- Stencil transfer gel (e.g., Stencil Stuff)
- Green soap and squeeze bottle
- Paper towels
- Disposable gloves
- Vaseline or tattoo glide
- Small ink cap
- Skin marker (surgical pen)
- Isopropyl alcohol
Step 1: Preparation and Stencil
-
Design the moon:
Draw a small crescent moon shape on paper or a tablet. Ensure the inner curve is slightly closer to the outer curve at the tips, creating sharp, tapering points. -
Create the stencil:
Trace your design meticulously onto the carbon side of the stencil paper. Press firmly to get a crisp, dark purple line that will be easy to follow. -
Clean the skin:
Put on your disposable gloves. Thoroughly clean the area on the back of the hand with green soap, shave any fine hairs if necessary, and sanitize with isopropyl alcohol. -
Apply transfer gel:
Apply a thin, even layer of stencil transfer gel to the skin. It should be tacky, not wet or runny, to prevent the stencil such blurring. -
Place the stencil:
Carefully press the stencil onto the skin, positioning the moon so it curves naturally with the hand’s anatomy. Hold it in place for a few seconds before peeling it off. -
Let it dry:
Allow the stencil to dry completely for at least 10–15 minutes. This is crucial—if you start too soon, the stencil will wipe away with your first pass.
Ink Bleeding?
If lines look fuzzy or ‘blown out’ immediately, your needle depth is too deep or angle is too steep. Hand skin requires a very light touch compared to arms or legs.
Step 2: Lining the Tattoo
-
Set up your station:
Pour your black ink into a small ink cap. Insert the 3RL needle cartridge into your machine and adjust your voltage; for hands, a lower voltage allows for better control on thin skin. -
Apply glide:
Spread a tiny amount of Vaseline or tattoo glide over the stencil. This protects the stencil from wiping away and helps the needle move smoothly. -
Establish hand position:
Stretch the skin gently with your non-tattooing hand. The skin on the back of the hand is thin and moves a lot, so a three-point stretch is helpful here. -
Begin the outer curve:
Dip your needle in the ink. Start at one tip of the crescent and slowly pull the outer curve line. Keep your hand steady and maintain a consistent depth. -
Check your depth:
Since hand skin is thin, be careful not to go too deep, which causes blowouts. You want the ink to sit just under the surface. -
Line the inner curve:
Starting from the same tip, draw the inner curve. Focus on maintaining a consistent gap between the two lines, widening slightly in the middle. -
Connect the tips:
Carefully taper the lines together at the bottom tip to create a sharp point. I find lifting the needle slightly as you reach the end creates a finer termination. -
Clean and inspect:
Gently dab—don’t wipe—the excess ink away with a paper towel dampened with green soap. Swiping too hard can irritate the skin immediately. -
Refine the lines:
Look closely for any faint spots. If a line looks too light, go over it one more time precisely. The thicker line effect on the outer edge can be achieved by a second, careful pass right next to the first.
Step 3: Aftercare
-
Final cleanse:
Wipe the area clean with green soap one last time to remove all plasma and surface ink. Let the skin air dry for a moment. -
Protect the tattoo:
Apply a very thin layer of aftercare ointment or a small piece of second-skin adhesive bandage if preferred.
Cosmic Duo
Add a tiny, single-needle star or dot near the moon’s upper tip. The contrast between the solid dot and the linear moon adds balance.
Enjoy your new piece of permanent celestial art


Single Stem Wildflower
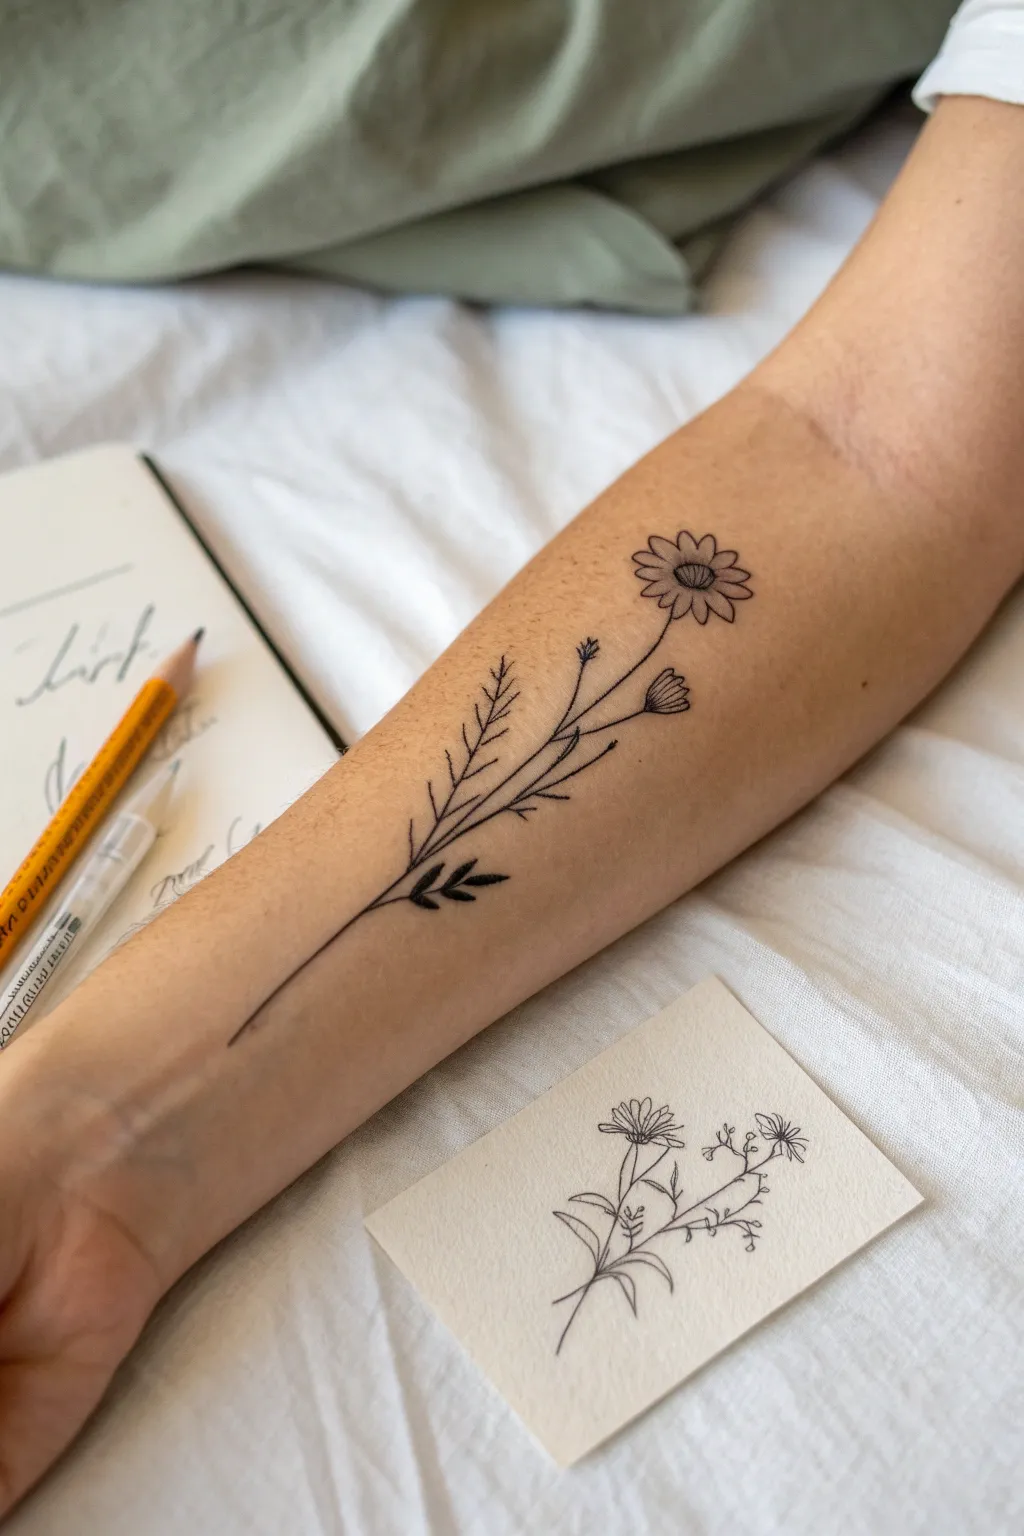
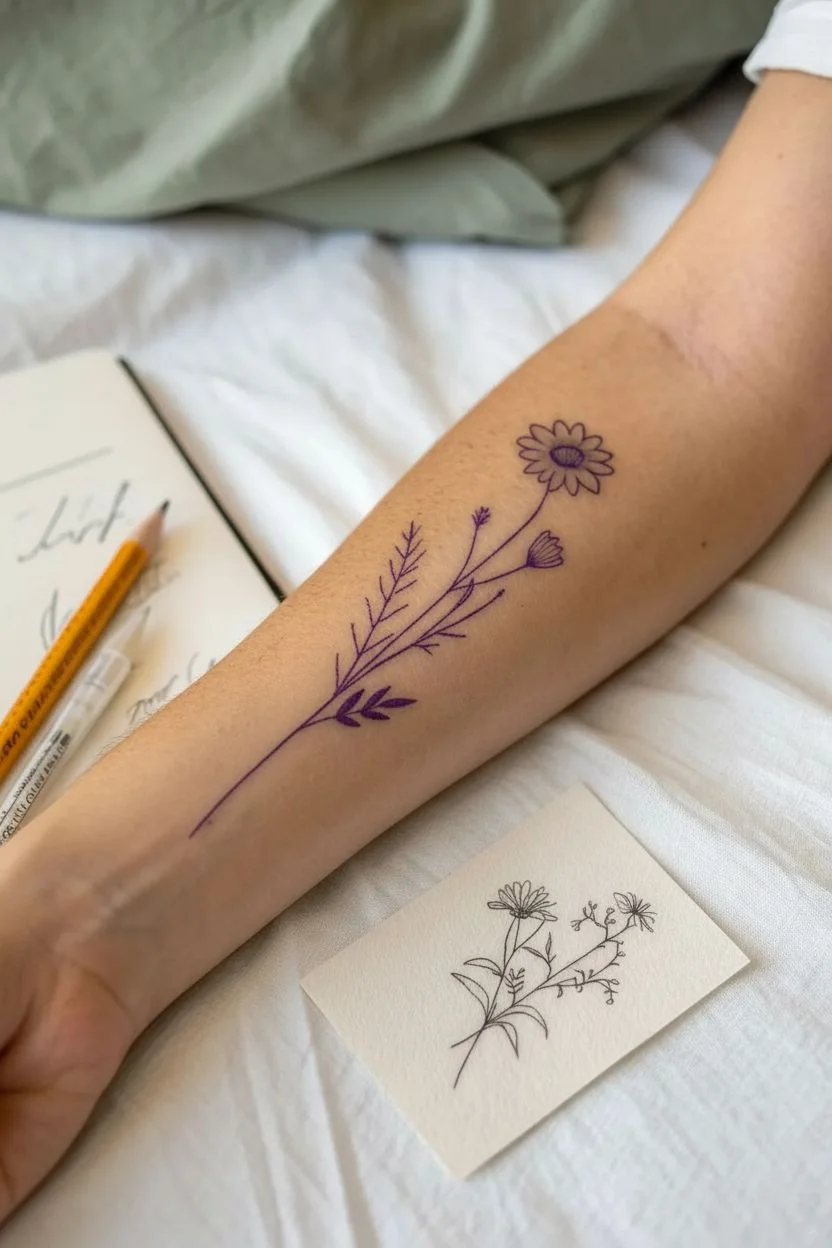
This project captures the elegance of nature with a fine-line, blackwork tattoo featuring a single stem wildflower. The design is minimalist yet detailed, sitting perfectly along the inner forearm for a subtle and graceful aesthetic.
Step-by-Step Guide
Materials
- Professional tattoo machine
- 3RL (Round Liner) tattoo needle cartridge
- 5RL (Round Liner) tattoo needle cartridge
- Dynamic Black tattoo ink (or comparable high-quality black lining ink)
- Stencil paper (thermal or freehand)
- Stencil transfer solution (e.g., Stencil Stuff)
- Green soap and distilled water mixture
- Ink caps
- Petroleum jelly or tattoo glide
- Nitrile gloves
- Razor
- Isopropanol alcohol
Step 1: Preparation and Stencil
-
Design the floral motif:
Sketch your wildflower design on paper first. For this specific look, aim for a long, slightly curved main stem that branches off into a main daisy-like bloom at the top, a smaller bud below it, and fern-like leaves on the left side. -
Prepare the stencil:
Once finalized, transfer your line drawing onto tattoo stencil paper. Ensure the lines are crisp, especially the delicate hatching inside the flower petals. -
Prep the skin:
Clean the inner forearm area thoroughly with green soap. Shave the area to remove fine hairs, then sanitize with alcohol to remove surface oils. -
Apply the stencil:
Apply a thin, even layer of stencil transfer solution. Place the stencil carefully, ensuring the stem follows the natural flow of the arm muscles. I find it helpful to have the client flex slightly to check placement before letting it dry. -
Let it dry completely:
Allow the stencil to dry on the skin for at least 10-15 minutes. This prevents the purple lines from wiping away during the tattooing process.
Needle Depth Pro-Tip
The inner forearm skin is thin and delicate. Run your machine at a slightly lower voltage and be extremely mindful of needle depth to avoid blowouts.
Step 2: Line Work
-
Set up your station:
Put on fresh gloves, wrap your machine, and pour your black ink into a small ink cap. Dip your needle and run the machine briefly to ensure ink flow. -
Start with the main stem:
Using a 5RL needle for just slightly more stability, begin at the bottom of the stem. Pull a single, clean confident line upward. The line should be consistent in weight but can taper off slightly at the very bottom. -
Outline the main flower:
Switch to a 3RL for the delicate petals. Carefully valid the outline of the daisy petals at the top. Keep your hand steady and your voltage moderate to avoid blowouts on this thin skin. -
Add the center details:
Stipple the center of the flower using the very tip of the 3RL. Create a ring of tiny dots or small loops to mimic the texture of pollen. -
Create the secondary bud:
Move down the stem to the second branch. Outline the small, cup-shaped base and the closed petals of the unbloomed bud.
Level Up: White Highlights
For extra dimension, use a single drop of white ink to add tiny highlights on the tips of the fern leaves or the very center of the daisy bloom.
Step 3: Details and Shading
-
Draw the fern leaves:
On the left side of the stem, create the fern-like or feathery leaves. Use quick, light flicks of the wrist with the 3RL to give them a sharp, organic appearance rather than a stiff geometric look. -
Add the lower dark leaves:
Near the bottom of the stem, outline the two broader leaves. Fill these in solid black (color packing) using tight circular motions with your liner, or switch to a small round shader if preferred. -
Shade the petals:
Return to the main flower head. Use whip shading—flicking the needle out towards the edge of the petals—to create depth near the center of the bloom. This gives the petals a concave look. -
Texture the stem:
Add tiny, broken lines or dots along the main stem where shadows would naturally fall, typically on the underside of curves. -
Clean and reveal:
Gently wipe away excess ink and plasma using green soap and a paper towel. Do this gently to avoid irritating the fresh lines. -
Refine highlights:
Check for any gaps in your lines or areas that need a touch more black definition and touch them up sparingly. -
Final sanitize:
Give the tattoo a final clean with distilled water or specific aftercare wash. Apply a thin layer of tattoo glide or a second-skin bandage to protect the fresh art.
Enjoy the timeless beauty of your new floral artwork
BRUSH GUIDE
The Right Brush for Every Stroke
From clean lines to bold texture — master brush choice, stroke control, and essential techniques.
Explore the Full Guide
Tiny Rosebud


This elegant blackwork rose sits perfectly above the ankle, combining crisp linework with subtle dotwork shading. Its minimalist design makes it a timeless choice that feels both delicate and grounded.
How-To Guide
Materials
- Professional tattoo machine (pen or coil)
- 3RL (3 Round Liner) tattoo needle cartridge
- 5RL (5 Round Liner) tattoo needle cartridge (optional, for bolder outer lines)
- Black tattoo ink (high-quality lining black)
- Stencil paper and transfer solution
- Green soap and squeeze bottle
- Distilled water for rinsing
- Ink caps and petroleum jelly
- Razor and clip cord covers
- Disposable gloves and paper towels
- Alcohol wipes
Step 1: Preparation and Stencil
-
Sanitize the area:
Begin by thoroughly cleaning the ankle area with green soap and water. If there is any hair, carefully shave the spot to ensure a smooth canvas for the ink. -
Final cleaning:
Wipe the area down with an alcohol pad to remove oils and sanitize the skin surface completely. Let it air dry for a moment. -
Design the rose:
Draw or print your rose design. Focus on a tight, structured bud at the top with three open petals, resting on a long, slightly curved stem with three distinct leaves. -
Apply the stencil:
Apply a thin, even layer of stencil transfer solution. Press your stencil firmly onto the skin above the ankle bone, ensuring the stem follows the natural vertical line of the leg. -
Dry time:
Allow the stencil to dry for at least 10-15 minutes. This creates a durable guide that won’t wipe away during the tattooing process.
Step 2: Outlining the Bud
-
Set up your machine:
Load your machine with a 3RL needle for fine details. Dip into your black lining ink, ensuring you don’t overfill the reservoir. -
Start the center spiral:
Begin at the very center of the rosebud. Create the tight, swirling spiral line that defines the core of the flower. -
Define the petals:
Work outward from the spiral, pulling crisp, confident lines to form the overlapping petals. Keep your hand steady to maintain consistent line weight. -
Outer petal contour:
Draw the lower, larger petals that cup the bud. These lines should curve gently to give the rose a soft, organic volume. -
Add the sepals:
Directly under the flower head, ink the small, triangular leafy structures (sepals) that point downwards.
Steady Tip
Ankles can twitch! Stretch the skin firmly with your non-tattooing hand. This prevents the skin from bouncing and ensures your lines stay crisp and straight.
Step 3: Stem and Leaves
-
Draw the stem:
Pull a single, continuous line downwards for the stem. I find a slight curve looks more natural than a ruler-straight line. -
Outline the leaves:
Add three leaves attached to the stem—two on the left, one on the right. Give them pointed tips and serrated or smooth edges depending on your preference. -
Add thorns (optional):
If your design calls for it, add tiny triangular thorns along the stem, but keep them subtle to match the delicate aesthetic.
Level Up: Color
For a vintage look, dilute a drop of red ink with water for a ‘wash’ effect inside the petals, keeping the leaves strictly black and grey.
Step 4: Shading and Details
-
Switch to dotwork:
Using the same 3RL needle, lower your voltage slightly for better control over individual dots. -
Shade the leaves:
Fill the leaves using stippling (dotwork). Pack the dots denser near the central vein and sparse towards the edges to create a gradient effect. -
Darken the stem connection:
Add a few darker dots or heavier line weight where the leaves join the stem to imply shadow and depth. -
Clean and inspect:
Wipe away excess ink with green soap and check for any faint lines that need reinforcing. -
Final wipe:
Give the finished piece a final gentle clean. Apply a thin layer of soothing balm to protect the fresh tattoo.
Enjoy your beautiful, permanent piece of floral art that adds a subtle touch of nature to your style
Small Butterfly Silhouette
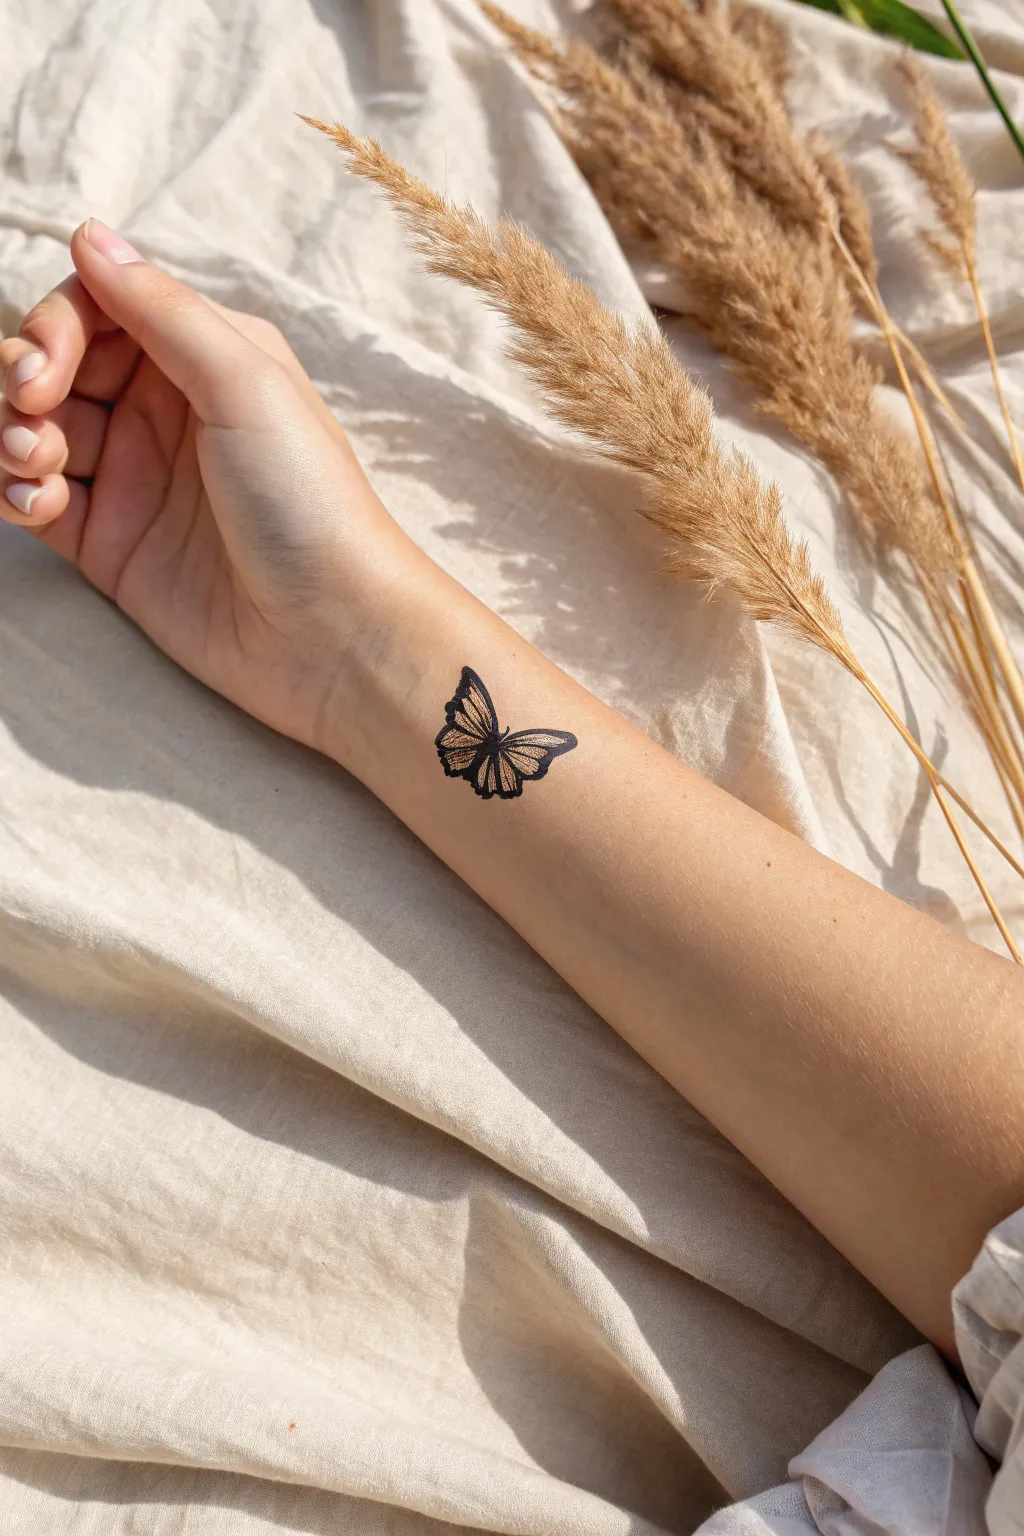
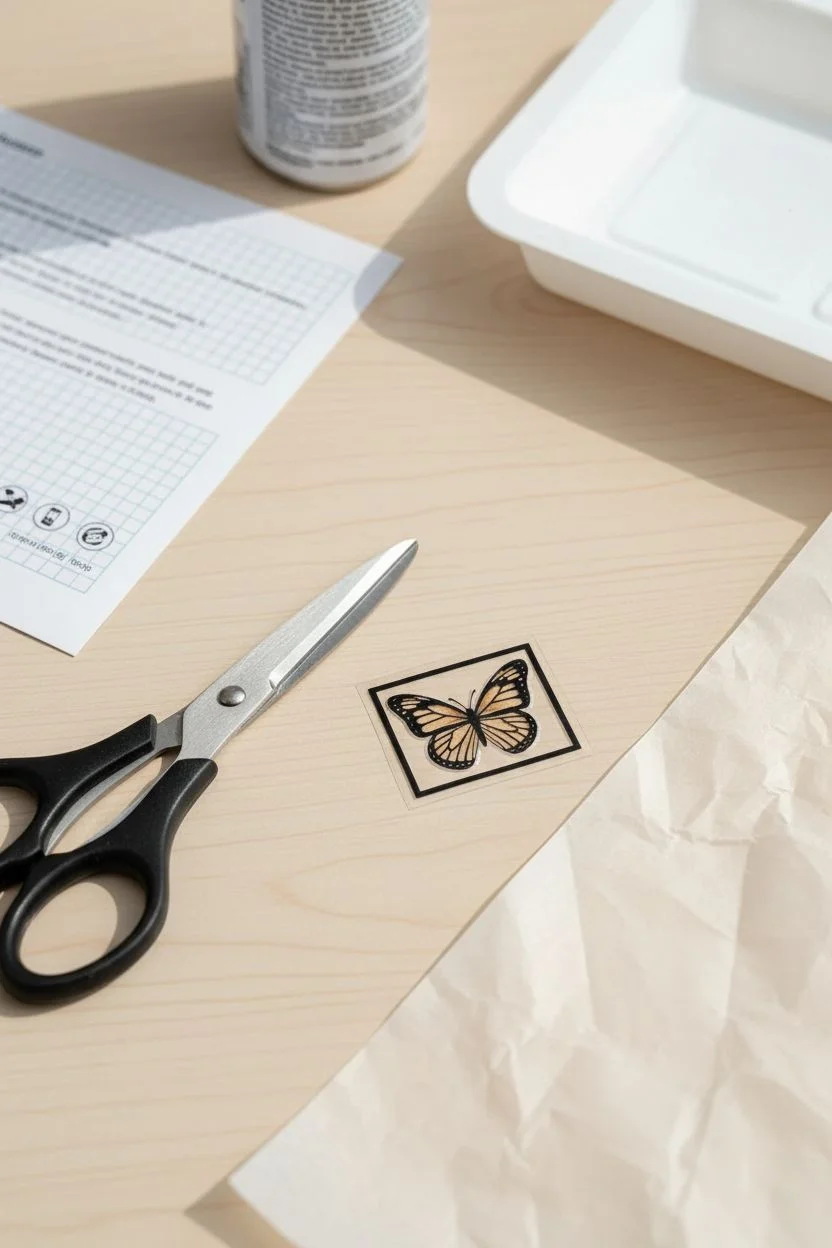
Capture the fleeting beauty of nature with this minimalist butterfly tattoo design. This small, elegant silhouette perfectly balances bold black outlines with delicate inner detailing for a timeless look.
Step-by-Step Guide
Materials
- High-quality temporary tattoo paper (water-slide decal paper)
- Inkjet or laser printer
- Clear acrylic sealant spray (for inkjet paper)
- Scissors or a precision craft knife
- Water
- Clean cloth or sponge/cotton pad
- Rubbing alcohol
- Digital design software (or the provided reference image)
Step 1: Design and Preparation
-
Source your image:
Find a clean butterfly line art image or draw your own digital design. The style here relies on thick outer wing margins and thinner interior veins. -
Mirror the design:
Open your design software and flip the image horizontally. This is crucial because the transfer process reverses the image back once applied to skin. -
Adjust sizing:
Scale the butterfly down to approximately 1.5 to 2 inches in width. This size fits perfectly on the inner wrist or forearm without being overwhelming. -
Print the decal:
Load your tattoo paper into the printer oriented correctly according to package instructions. Print the design on the glossy side. -
Apply adhesive (if required):
If your paper comes with a separate adhesive sheet, peel back the liner and carefully smooth it over your printed design to avoid bubbles.
Step 2: Creating the Transfer
-
Seal the ink:
If using an inkjet printer, take the printed sheet to a well-ventilated area. Spray a light, even coat of clear acrylic sealant over the design. -
Let it dry:
Allow the first coat of sealant to dry completely, usually about 10-15 minutes. It should not be tacky to the touch. -
Second coat:
Apply a second, slightly heavier coat of spray sealant to ensure the ink won’t blead when it touches water later. -
Final cure:
Let the sheet sit for at least an hour to ensure the sealant is fully cured and hardened. -
Cut out the design:
Using scissors, cut around the butterfly. Leave a small margin of about 1-2mm of clear film around the black ink for better adherence.
Placement Check
Before printing, cut a plain piece of paper to your design size and hold it against your arm. I always do this to verify the scale looks right on the body part.
Step 3: Application
-
Prep the skin:
Clean your inner forearm with rubbing alcohol to remove oils and lotions. This ensures the tattoo lasts longer. -
Position the tattoo:
Peel off the clear protective plastic liner from the adhesive side. Place the tattoo sticky-side down onto your skin. -
Wet the backing:
Soak a cloth or sponge with water. Press it firmly against the paper backing of the tattoo. -
Wait and hold:
Hold the wet cloth in place for about 30-60 seconds. Do not rush this; the paper needs to be fully saturated. -
Slide the backing:
Gently test if the paper backing slides easily. If it moves, slide it off completely to reveal the design. -
Rinse gently:
Carefully rinse the area with water to remove any adhesive residue, then pat (don’t rub) it dry with a soft towel. -
Remove shine:
If the tattoo looks too glossy, dust it lightly with translucent setting powder to make it look more realistic.
Sticky Edges?
If you feel sticky residue around the tattoo edge after applying, dab a tiny bit of baby oil strictly on the clear margin (avoid the ink) to dissolve the excess glue.
Enjoy your new piece of ephemeral body art

PENCIL GUIDE
Understanding Pencil Grades from H to B
From first sketch to finished drawing — learn pencil grades, line control, and shading techniques.
Explore the Full Guide
Little Bird In Flight
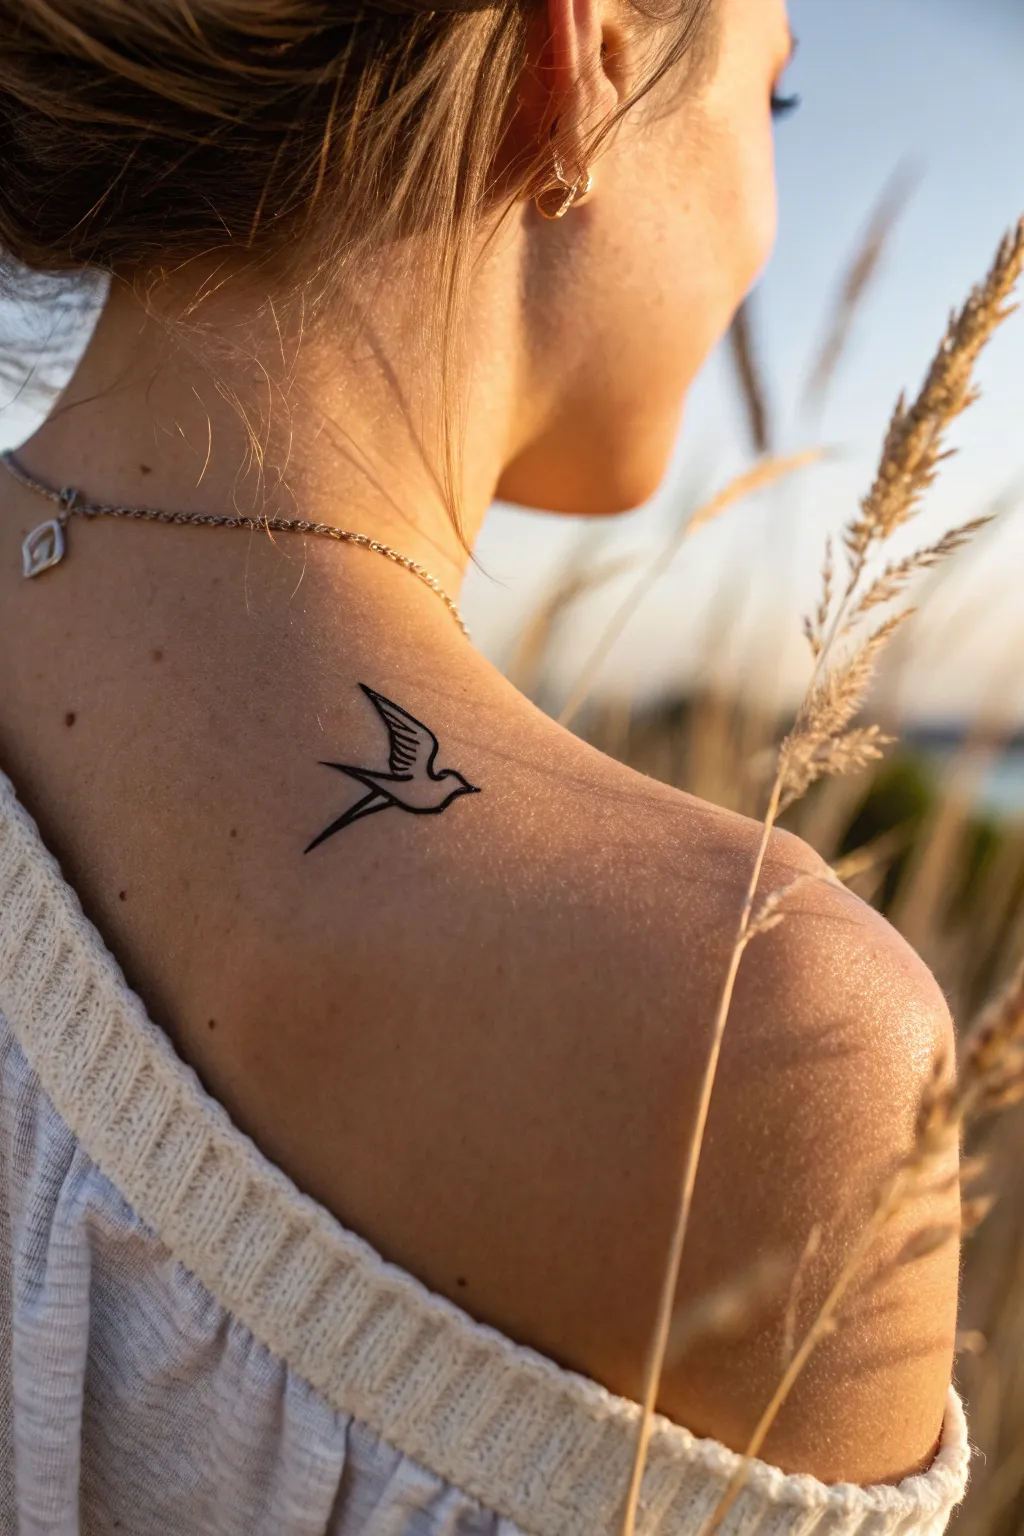
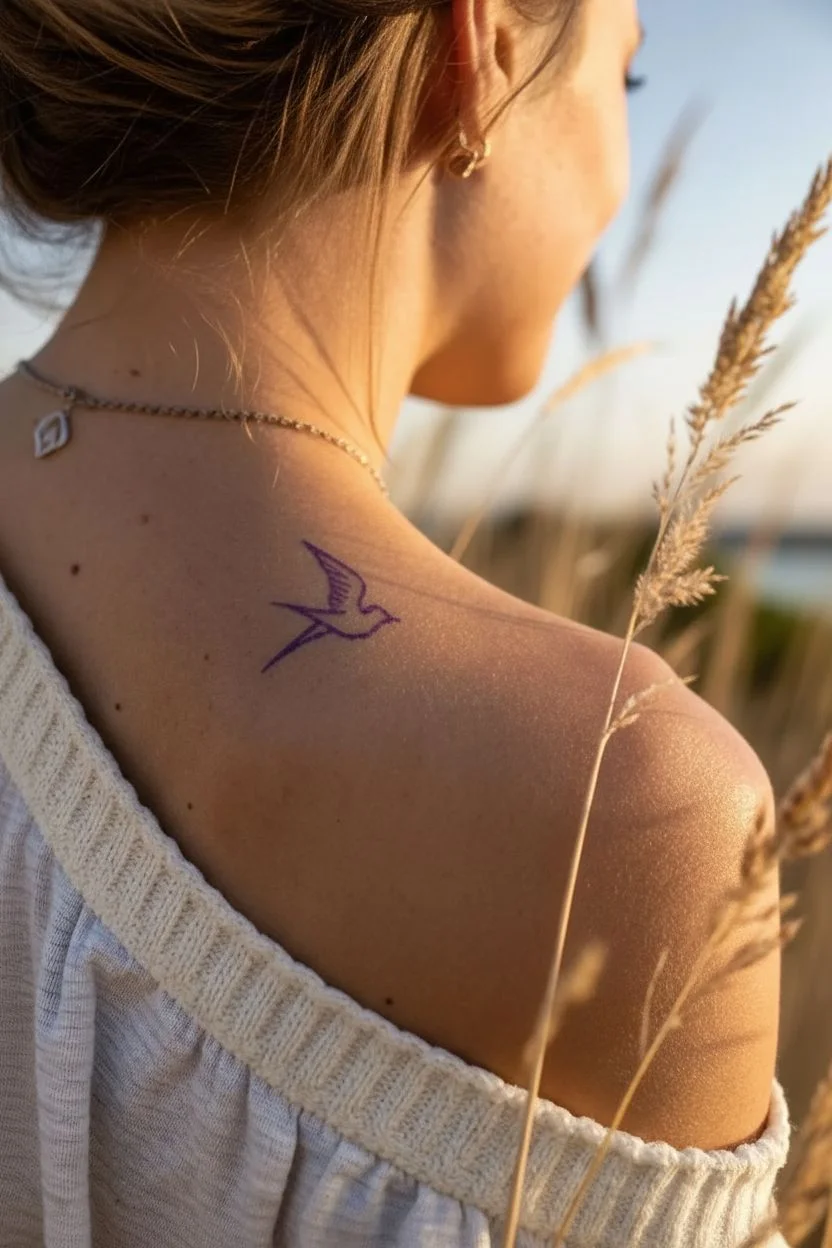
This delicate, minimalist swallow design captures the essence of freedom and movement with clean, confident line work. It is an ideal starter piece for those seeking a subtle yet meaningful addition to their body art collection.
Detailed Instructions
Materials
- Clean stencil paper
- Transfer gel or solution
- Tattoo machine (pen style or coil)
- Round Liner needle cartridge (3RL or 5RL)
- Black lining ink
- Ink cap
- Green soap and squeeze bottle
- Paper towels
- Disposable gloves
- Petroleum jelly or tattoo glide
- Alcohol wipes
- Razor
Step 1: Preparation & Stencil
-
Design the swallow:
Begin by sketching the bird on plain paper first to finalize the silhouette. Focus on the swoop of the wings and the forked tail which characterizes the swallow. -
Trace onto transfer paper:
Once satisfied with the design, place your sketch over the carbon sheet of the stencil paper. Press firmly with a ballpoint pen to create a crisp purple outline on the back of the white sheet. -
Clean the skin:
Put on your gloves. Thoroughly clean the shoulder blade area with green soap and water, then wipe it down with an alcohol pad to remove oils. -
Shave the area:
Even if the skin looks hairless, gently shave the placement area to ensure the stencil adheres perfectly and the needle doesn’t catch on fine hairs. -
Apply transfer gel:
Rub a small, thin layer of transfer solution onto the skin. It should be tacky, not wet or dripping. -
Place the stencil:
Carefully press the stencil onto the shoulder. Ask your client to stand naturally so the bird doesn’t warp when they move. hold it for a few seconds. -
Peel and dry:
Peel the paper away slowly. Let the purple stencil dry completely on the skin for at least 10–15 minutes prevents smudging during tattooing.
Step 2: Lining the Tattoo
-
Setup the machine:
While the stencil dries, load your machine with a fine liner needle—I prefer a 5RL for lines that are crisp but substantial enough to hold up over time. -
Dip the ink:
Pour black lining ink into a cap and dip your needle tip, running the machine briefly to pull the ink up into the cartridge reservoir. -
Apply glide:
Smear a tiny amount of tattoo glide or petroleum jelly over the stencil. This lubricates the skin and keeps the stencil from wiping away too instantly. -
Start the outline:
Begin at the bottom tail feather. Stretch the skin taut with your non-tatooing hand using a three-point stretch. -
Execute the long lines:
Pull the line for the lower wing in a single, smooth motion. Exhale as you pull the line to keep your hand steady. -
Detail the feathers:
Move to the upper wing. Carefuly tattoo the scalloped edges of the inner wing feathers. These small curves require slowing your hand speed down slightly. -
Connect the body:
Complete the head and beak, joining the lines back to the body. Ensure corners are sharp and not blown out. -
Wipe and check:
Gently dab—don’t rub—the excess ink away with a damp paper towel to inspect your lines. -
Refine line weight:
If any sections look too thin, go over them precisely one more time to thicken the line weight, particularly on the outer wing edge.
Don’t Rush The Dry
The biggest mistake is starting too soon. If the stencil isn’t 100% dry, your first wipe will erase the guide.
Step 3: Aftercare
-
Final cleanse:
Clean the entire area with green soap to remove blood, plasma, and excess ink. -
Protect the art:
Apply a thin layer of aftercare ointment or a second-skin adhesive bandage to seal the area.
Add Movement
Add two or three tiny dots trailing behind the tail feathers to create a ‘wind’ effect or sense of motion.
Now you have a timeless symbol of travel and loyalty to carry with you always
Simple Cat Line Drawing
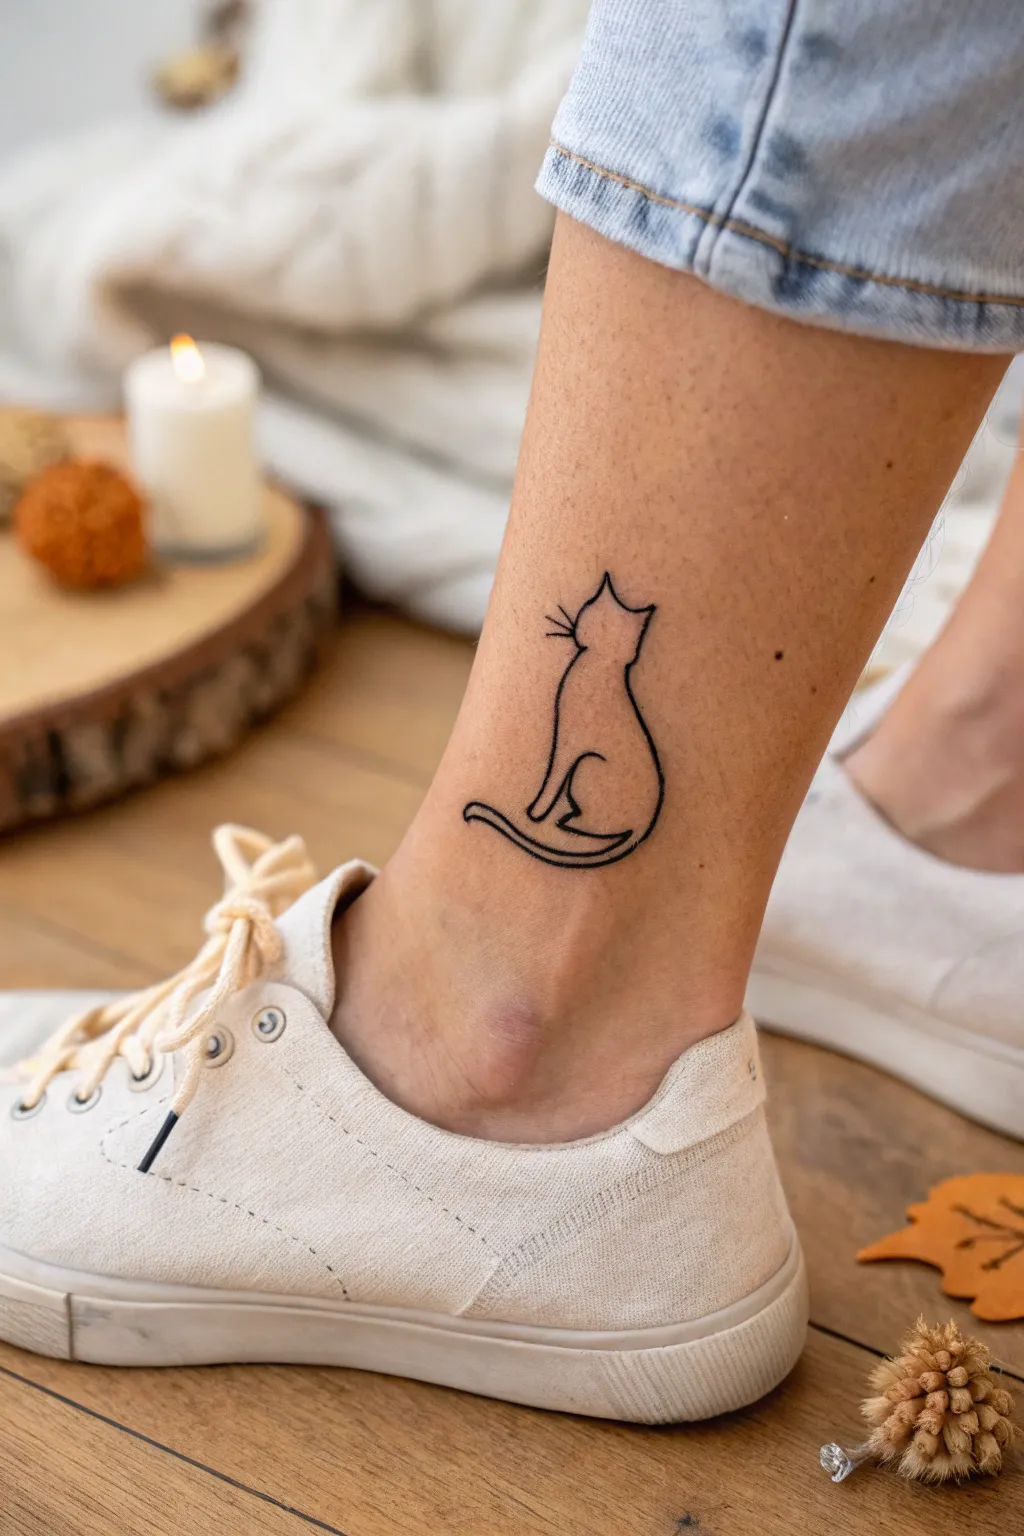
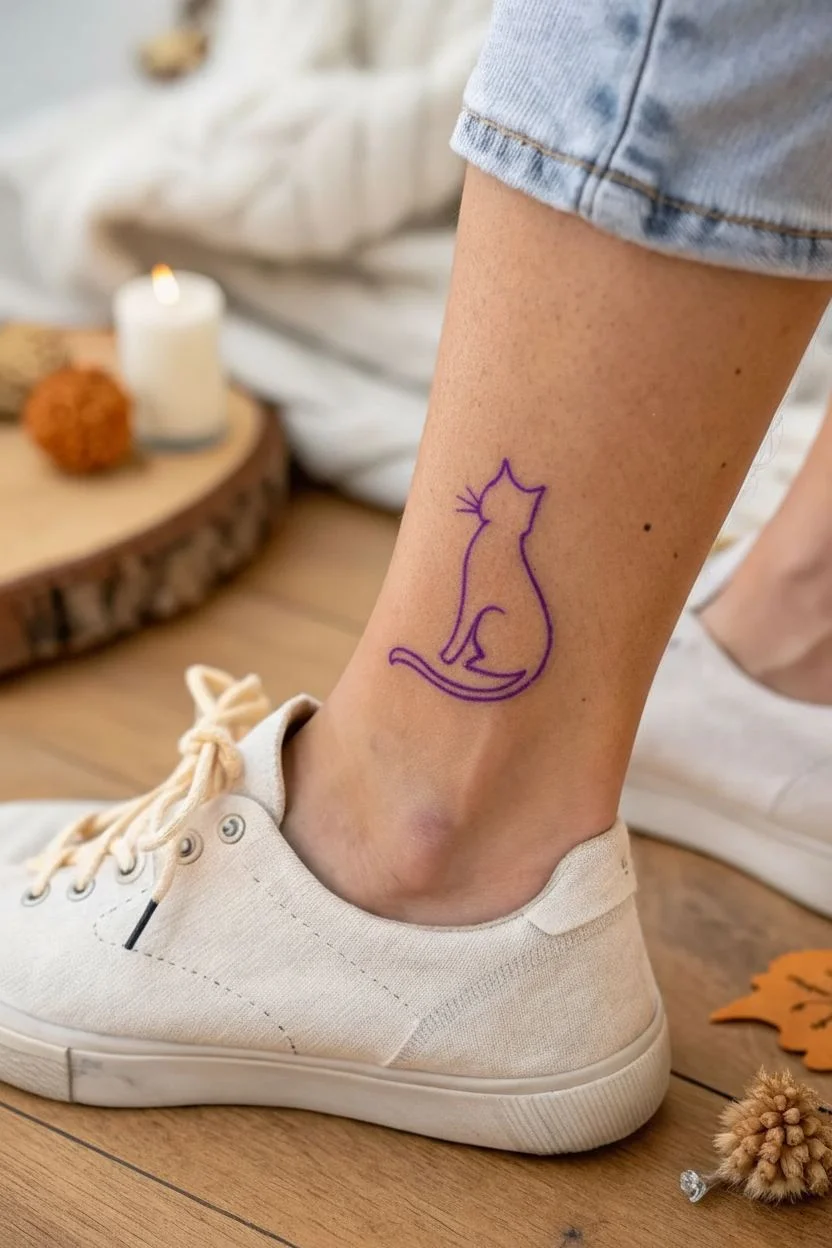
This elegant, continuous-line style design captures the poised silhouette of a sitting cat using clean, unbroken black ink. It is a perfect beginner-friendly tattoo project because its charm relies on simplicity and fluid movement rather than complex shading.
Step-by-Step Tutorial
Materials
- Tattoo machine (pen or rotary style)
- 3RL or 5RL tattoo needle cartridge (for fine lines)
- Black lining tattoo ink
- Stencil paper and thermal printer (or hand transfer pencil)
- Stencil transfer gel
- Green soap and squeeze bottle
- Distilled water
- Ink caps
- Vaseline or tattoo glide
- Paper towels
- Disposable gloves
- Clip cord sleeve and machine barrier film
- Razor (for prep)
Step 1: Preparation and Stencil
-
Design the silhouette:
Sketch the cat on paper first. Start with a vertical curve for the back, flow into the round haunches, create a simple tail loop, and finish with triangular ears. Keep the ‘face’ blank, using only three small lines for whiskers to suggest the head’s direction. -
Refine the line weight:
Ensure your drawing uses a consistent line weight throughout. The beauty of this piece is its uniformity, mimicking a single wire bent into shape. -
Create the stencil:
Transfer your final design onto the carbon sheet side of your stencil paper. Trace over it firmly with a pen or run it through a thermal printer if you have a digital file. -
Prepare the skin:
Clean the ankle area thoroughly with green soap and water. Shave the area to remove any fine hairs that could interfere with the needle or stencil. -
Disinfect the canvas:
Wipe the area down with alcohol to remove surface oils and kill bacteria. Let it air dry completely for a few seconds. -
Apply the transfer:
Apply a thin, even layer of stencil transfer gel. Press the stencil firmly against the skin, being careful not to slide it. Peel it away in one smooth motion. -
Dry the stencil:
Allow the stencil to dry on the skin for at least 10–15 minutes. This is crucial; if you start too soon, the purple lines will wipe away as you work.
Placement Pro Tip
The ankle is a high-motion area. Ask the client to flex their foot up and down while you position the stencil to ensure the cat doesn’t look distorted when they walk.
Step 2: Tattooing the Line Work
-
Setup the machine:
Load a 5RL (5 Round Liner) needle for a bold, crisp line, or a 3RL if you want it very delicate. Set your voltage appropriate for lining (usually around 7.5–8.5V depending on your machine). -
Pour the ink:
Fill a small ink cap with high-quality black lining ink. Dip only the tip of the needle into the ink while the machine is running. -
Apply glide:
Put a very small amount of Vaseline or tattoo glide over the stencil. This lubricates the skin and prevents ink from pooling and obscuring your view. -
Anchor your hand:
Stretch the skin on the ankle taut with your non-tattooing hand. The ankle can be bony, so finding a stable spot to rest your machine hand is key to a steady line. -
Start the back curve:
Begin at the top of the ear or the nape of the neck. Pull a confident, steady line down to form the cat’s back. I find simpler designs work best when you commit to the motion without hesitation. -
Execute the tail loop:
Continue the line down around the bottom. Pivot your hand slightly to navigate the curve of the tail, bringing it back up towards the body. -
Complete the body:
Connect the tail line into the front leg and chest area. Keep your needle depth consistent (about 1.5mm) to avoid blowouts on the thin skin of the ankle. -
Finish the ears:
Return to the top and carefully line the triangular ears. Ensure the points are sharp, not rounded. -
Add the whiskers:
For the three whiskers, use a very light touch or switch to a thinner needle (3RL) if available. These lines should taper off at the ends.
Step 3: Aftercare and Clean Up
-
Clean the area:
Gently wipe away excess ink and plasma using a paper towel dampened with distilled water and green soap. Dab, don’t scrub. -
Final inspection:
Check for any ‘holidays’ (gaps in the ink) and touch them up quickly if necessary while the skin is still open. -
Bandage:
Apply a thin layer of aftercare ointment or a second skin adhesive bandage to protect the fresh work.
Make It Yours
Personalize the design by adding a tiny red heart inside the silhouette, or give the cat a small collar or stylized bowtie for a pop of character.
Now you have a timeless, sleek piece of art that perfectly captures feline grace with minimal fuss


Tiny Dog Profile
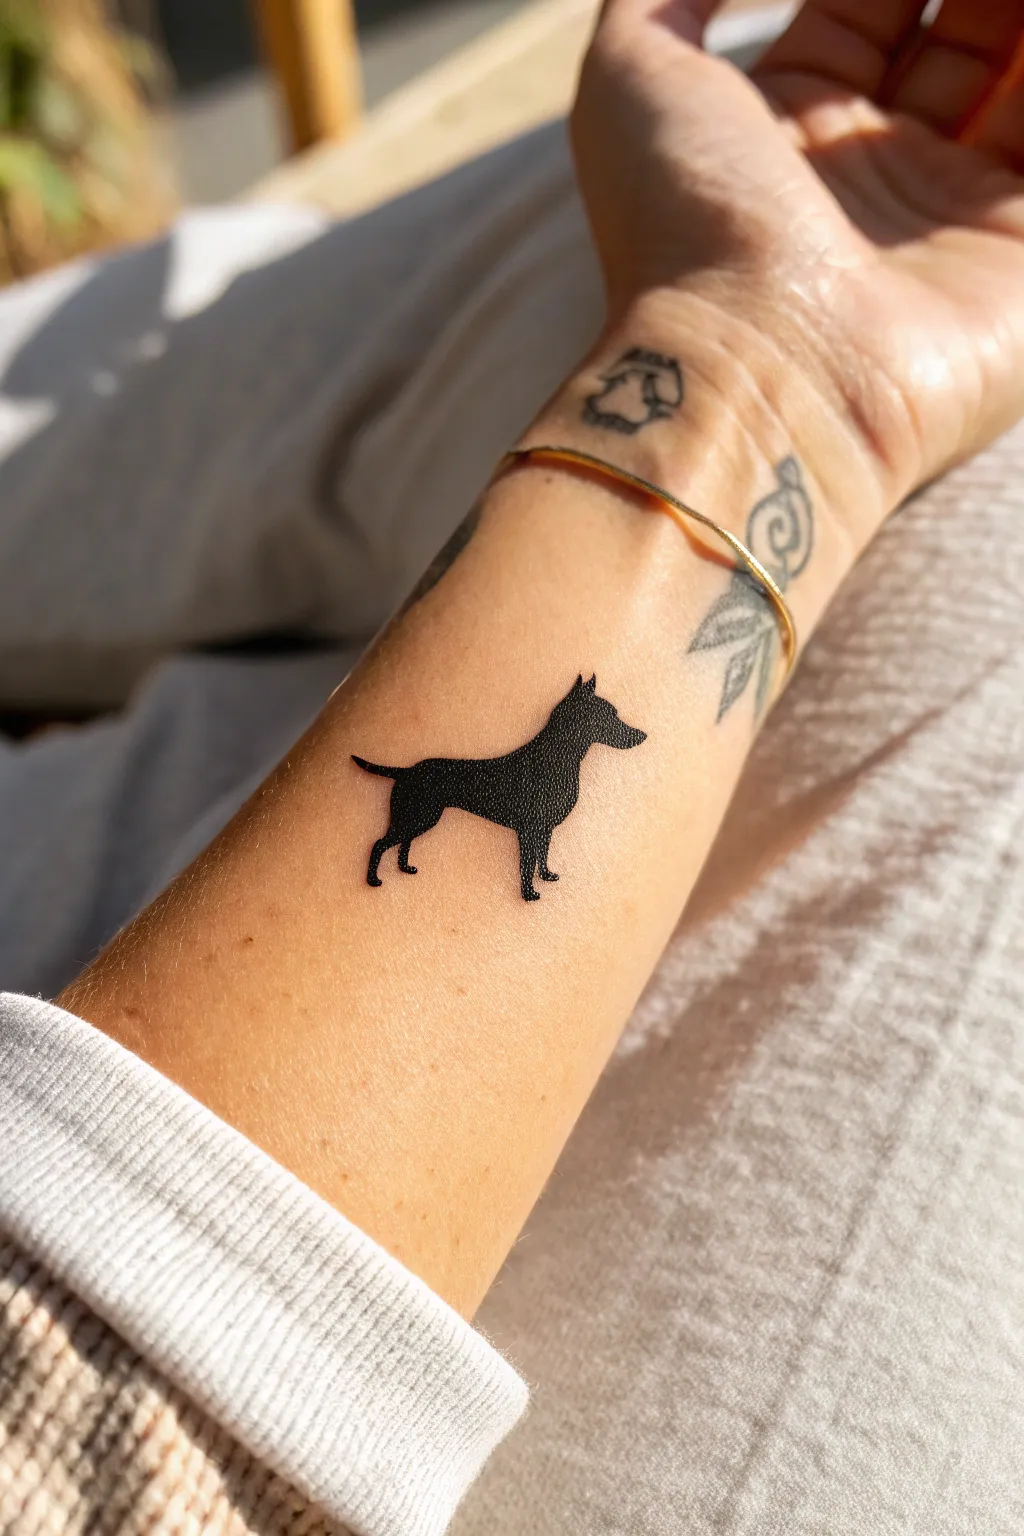
Immortalize your furry best friend with this minimal, ultra-clean silhouette tattoo. This design captures the distinct profile of a dog in solid black ink, creating a timeless and elegant tribute that fits perfectly on the forearm.
How-To Guide
Materials
- Clean reference photo of a dog profile
- Tracing paper or digital drawing tablet
- Stencil paper (thermal or freehand)
- Stencil transfer gel (e.g., Stencil Stuff)
- Black tattoo ink (high quality, e.g., Dynamic Black)
- Tattoo machine
- Needle cartridge: 3RL or 5RL (for outlining)
- Needle cartridge: 7RS or 9RS (for filling)
- Green soap and squeeze bottle
- Distilled water
- Ink caps
- Vaseline or tattoo glide
- Disposable gloves
- Paper towels
- Skin marker (surgical marker)
- Razor
- Protective film (e.g., Saniderm)
Step 1: Design and Stencil Prep
-
Capture the profile:
Begin by finding or taking a clear photo of your dog standing sideways. You need a distinct profile view where the ears, snout, and tail shape are clearly visible against a plain background for the best silhouette. -
Create the outline:
Using tracing paper or a digital app like Procreate, trace the outer boundary of the dog. Simplify complex areas like fur tufts into smoother lines to ensure the tattoo ages well at this small scale. -
Refine the shape:
Solidify the drawing into a single black shape. Check that details like the ear point and snout angle are accurate, as these define the breed’s character without internal shading. -
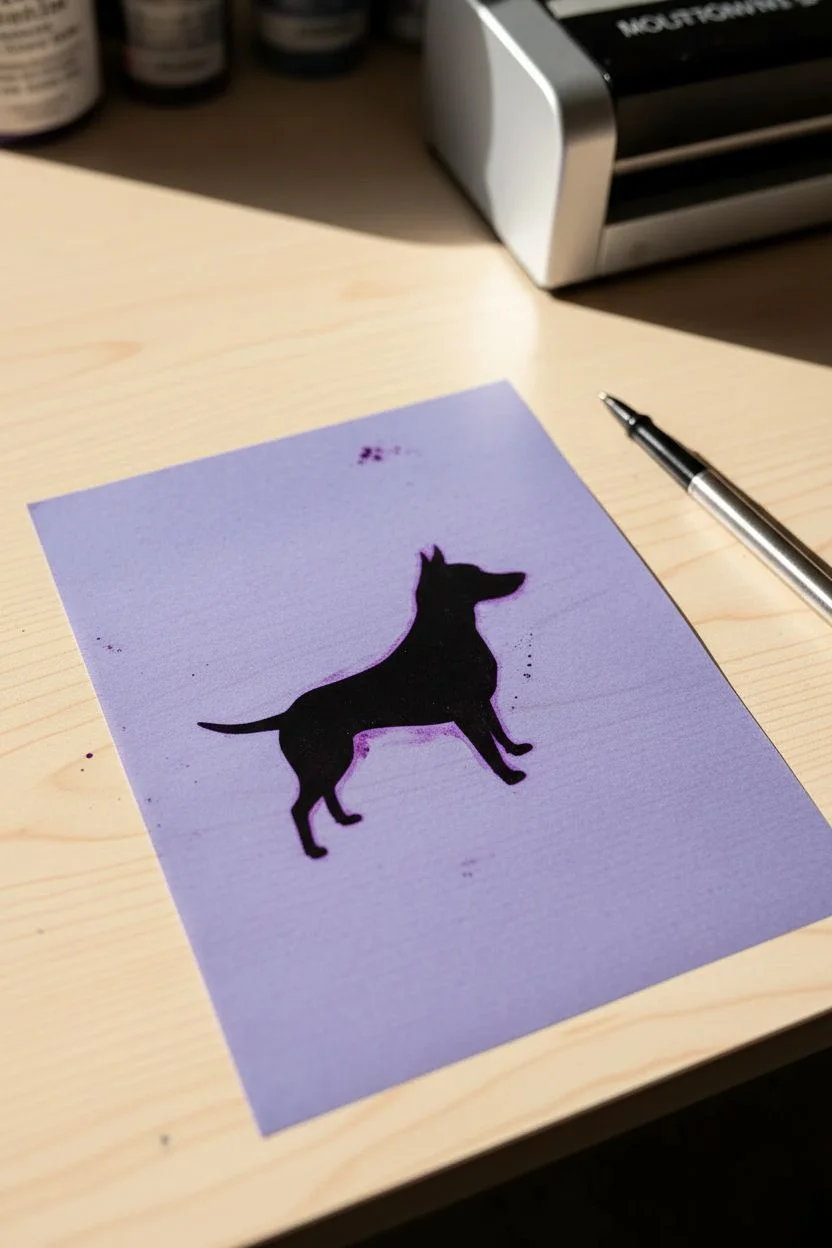
Transfer to stencil paper:
If hand-drawing, place your design over the carbon sheet of freehand stencil paper and trace firmly with a ballpoint pen. If using a thermal printer, print your digital design onto thermal stencil paper.
Stencil Sliding?
If the stencil slides or blurs during application, wipe it off immediately with alcohol and start over. Don’t guess the lines; a blurred stencil leads to a messy tattoo.
Step 2: Skin Preparation and Placement
-
Clean the area:
Wash the forearm area thoroughly with green soap and water. Dry it completely with a clean paper towel. I like to wear gloves from this point onward to maintain sterility. -
Shave the site:
Gently shave the placement area with a fresh disposable razor to remove hair, even if it looks hairless. This prevents ink interference and infection. -
Sanitize:
Wipe the area down with alcohol or a specialized skin antiseptic to remove oils and bacteria. Let the skin air dry for a moment. -
Apply transfer gel:
Rub a thin, even layer of stencil transfer gel onto the skin. It should be tacky, not wet. Too much gel will cause the purple stencil ink to bleed and blur. -
Place the stencil:
Carefully press your paper stencil onto the arm. Hold it firmly in place for a few seconds without shifting, then peel it back in one smooth motion. Let it dry for at least 10 minutes.
Step 3: Tattooing Process
-
Set up your station:
Wrap your machine and grip. Pour your black ink into a small ink cap. Put a small dab of Vaseline on the back of your gloved hand or near the stencil to lubricate the skin while working. -
Outline first:
Load your 3RL or 5RL liner needle. Dip into the black ink. Start tracing the perimeter of the stencil. Keep your hand steady and your needle depth consistent (around 1.5mm to 2mm). -
Manage the corners:
Pay special attention to sharp points like the ears and tail tip. Pull your lines outward from the body to get a crisp, sharp point rather than a rounded blob. -
Switch to shader:
Once the outline is complete and wiped clean, switch to your round shader (7RS or 9RS). This will help pack the black more efficiently than the liner. -
Fill the silhouette:
Work in small, tight circular motions to pack the solid black ink. I prefer to start from the bottom legs and work up to avoid smearing the stencil with my hand. -
Check for saturation:
Wipe the area gently with green soap and inspect for any ‘holidays’ (light spots). The black should be totally opaque. Go back over any patchy areas carefully. -
Final clean:
Give the tattoo a final cleanse with distilled water and green soap to remove excess ink and plasma. Pat dry with a fresh paper towel.
Level Up: White Highlights
Once the black is fully healed (weeks later), add tiny white ink accents on the nose or collar area to give the silhouette dimension and a pop of contrast.
Step 4: Aftercare Application
-
Apply protection:
Let the skin dry completely so no moisture is trapped. Cut a piece of protective adhesive film (Saniderm) slightly larger than the tattoo. -
Seal it up:
Peel the backing and apply the film smoothly over the fresh tattoo, pressing down the edges to seal it against bacteria and friction.
Now you have a permanent, crisp tribute to your loyal companion that will serve as a constant reminder of their friendship
Single-Word Script
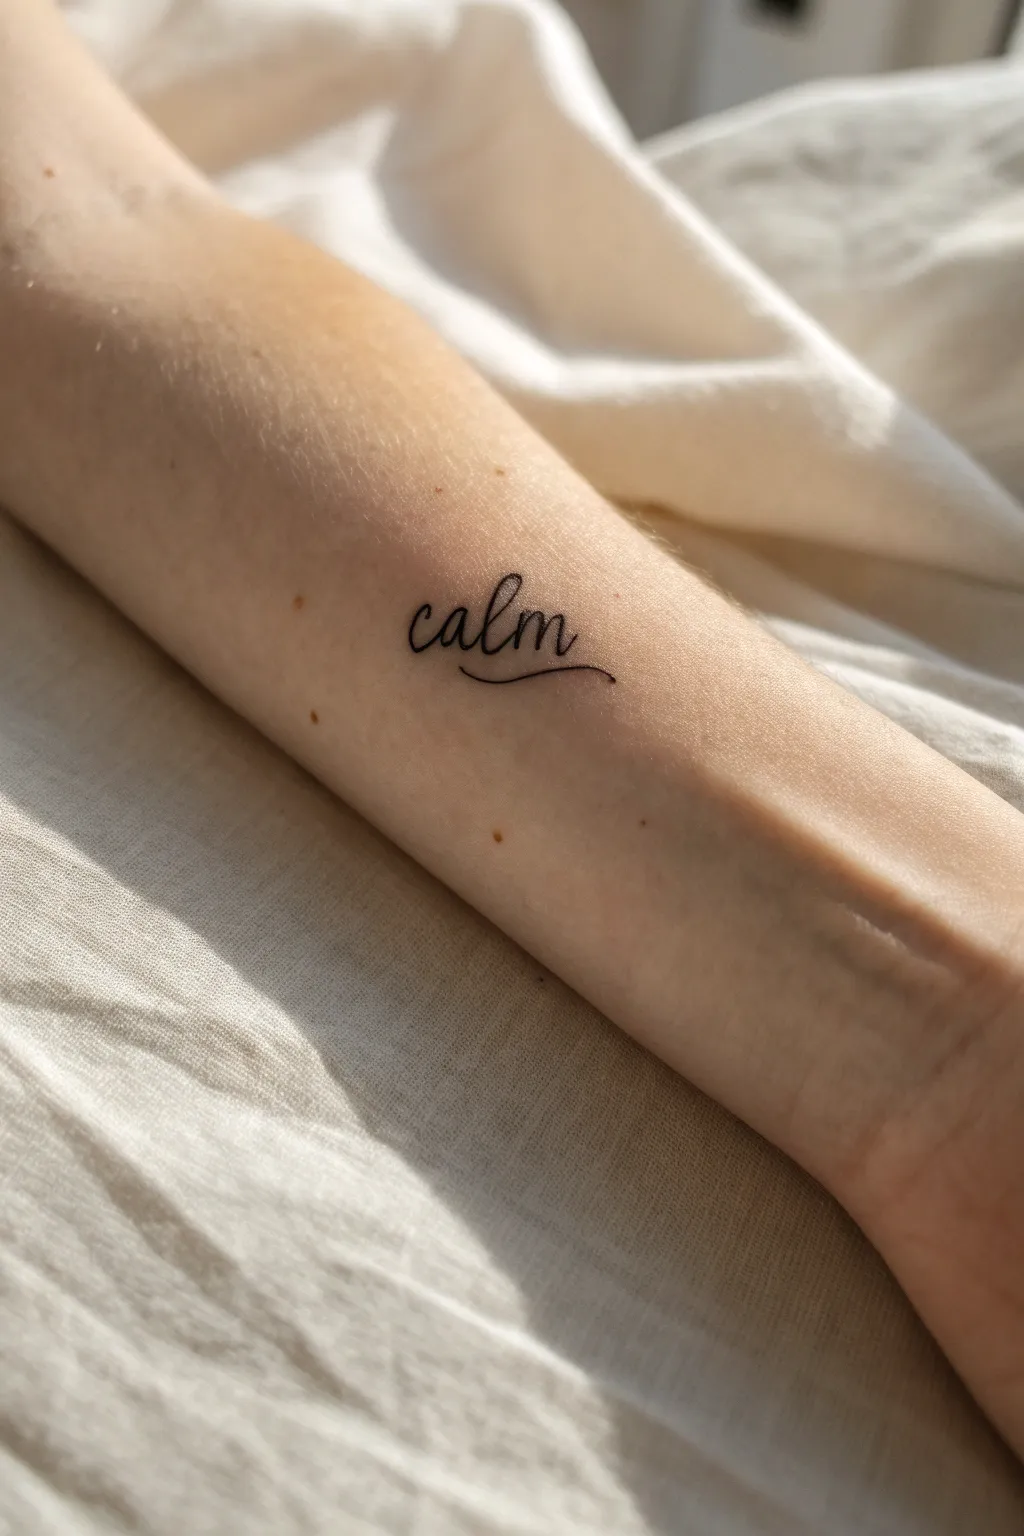
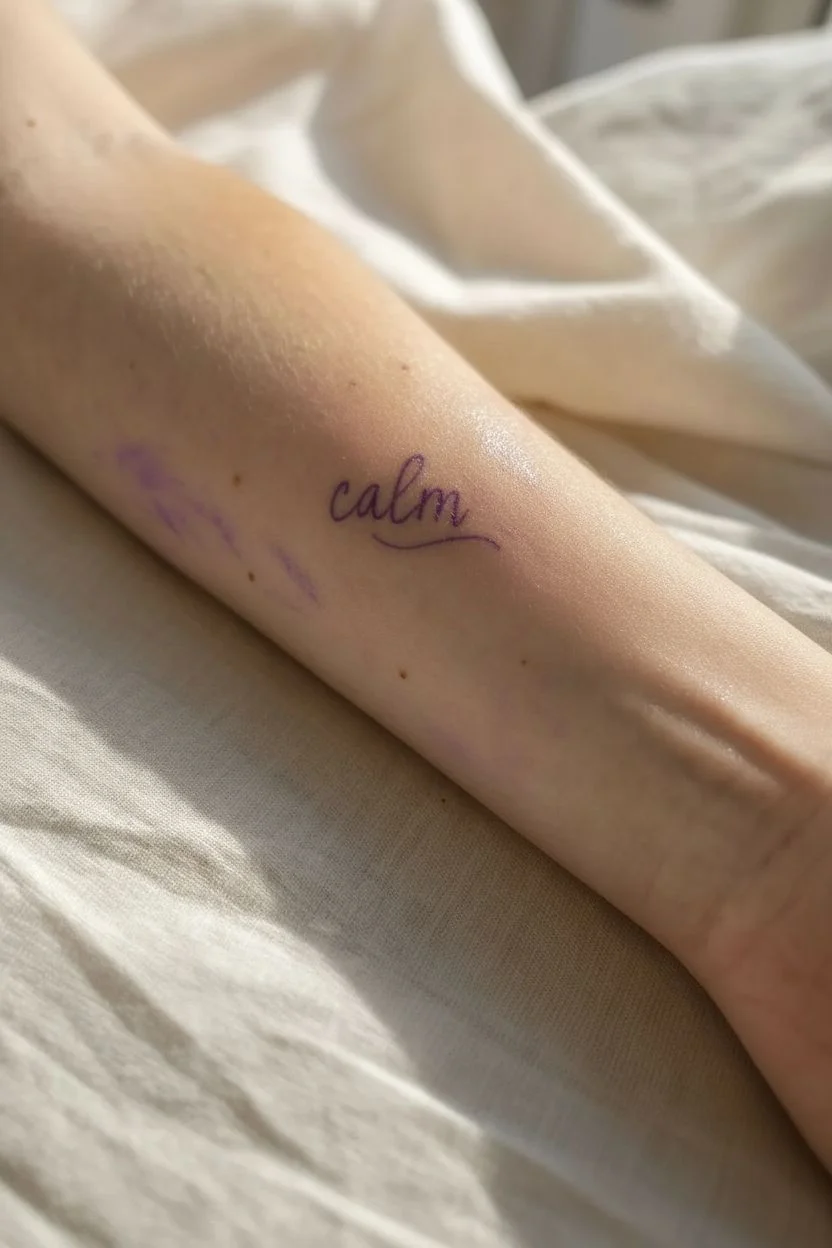
Embody serenity with this minimalist piece featuring the word ‘calm’ in a flowing, continuous line script. This delicate, single-needle style tattoo rests elegantly on the inner forearm, offering a gentle daily reminder to breathe.
Step-by-Step
Materials
- Professional tattoo transfer paper (stencil paper)
- Stencil transfer gel or cream
- Tattoo machine (pen or coil style)
- Single needle cartridge (size 1RL or 3RL for fine lines)
- High-quality black lining ink
- Ink caps
- Distilled water for dilution (optional)
- Green soap and squeeze bottle
- Professional nitrile gloves
- Razor
- Paper towels
- Skin marker (surgical pen)
- Aftercare ointment (e.g., Aquaphor or specialized tattoo balm)
- Cling film or dermal bandage
Step 1: Preparation & Stencil
-
Design the script:
Begin by selecting or drawing a font that mimics continuous handwriting. For this specific look, aim for a lowercase ‘c’ connecting fluidly into the ‘a’, ‘l’, and ‘m’, finishing with a gentle, elongated tail underneath the word. -
Create the master stencil:
Trace your design onto the top sheet of the transfer paper. Press firmly with a ballpoint pen to ensure the carbon backing transfers a crisp, purple outline to the back of the white sheet. -
Prepare the skin:
Clean the inner forearm area thoroughly with green soap. Shave the area gently with a disposable razor to remove any fine hairs that could interfere with the needle. -
Sanitize the area:
Wipe the skin down with alcohol or green soap again to ensure a sterile surface. Let it dry completely for a few moments. -
Apply transfer gel:
Spread a thin, even layer of stencil transfer gel over the placement area. It should be tacky, not wet or dripping. -
Place the stencil:
Carefully press your cutout design onto the skin. Hold it firmly in place for 3–5 seconds without sliding it, then peel it back to reveal the purple guide. -
Allow to dry:
Let the stencil dry for at least 10–15 minutes. This is crucial—if you start too soon, the stencil will wipe away as soon as you touch it.
Ink Spitting?
If ink pools on the skin obscuring your view, your voltage may be too high or needle hung out too far. Lower the voltage slightly and reduce needle depth.
Step 2: Tattooing Process
-
Setup the machine:
Load your machine with a fine liner needle (1RL is ideal for this ultra-thin look, though a 3RL offers slightly more stability). Pour black lining ink into a small ink cap. -
Establish a stable position:
Position the arm on a clean armrest. Ensure your hand is braced firmly; for fine lines, I often rest my pinky finger against the skin to act as a pivot point. -
Begin the first stroke:
Dip your needle into the ink. Start at the beginning of the ‘c’, entering the skin at a consistent depth (about 1–1.5mm). Move slowly and steadily along the stencil line. -
Maintain constant speed:
Match your hand speed to the voltage of your machine. If you move too fast, the line will be faint; too slow, and you risk blowouts for such a delicate script. -
Connect the letters:
Work through the ‘a’ and ‘l’ in one fluid motion if possible. If you need to lift the needle to dip for ink, try to pick up exactly where you left off to avoid overlapping dots or bumps. -
Complete the word:
Finish the curves of the ‘m’. Ensure the loops are open and legible, not muddied together. -
Execute the underline:
For the decorative swoosh, start from the bottom right of the ‘m’ and pull the line confidently to the right, tapering off pressure at the very end for a wispy finish. -
Wipe and check:
Gently wipe the area with a wet paper towel and green soap. Inspect the lines. If any spots are too light, carefully re-trace them, but be extremely precise to avoid double lines.
Step 3: Aftercare
-
Cleanse the tattoo:
Give the finished piece a final thorough clean with green soap to remove excess ink and plasma. -
Apply protection:
Once the skin is dry, apply a very thin layer of aftercare ointment or cover with a dermal bandage (second skin) to protect the open wound from bacteria.
Pro Tip: The breath trick
Instruct the client (or yourself) to exhale slowly while you pull the longest lines. This naturally steadies the body and reduces micro-tremors.
Enjoy the peaceful vibe of your new, delicate ink and follow proper healing protocols to keep those lines crisp.
Mini Mountain Outline


Capture the spirit of adventure with this crisp, minimal line drawing that sits perfectly above the elbow. Using the temporary tattoo method, you can create a clean, sharp replica of mountain peaks and a summer sun without the permanent commitment.
Detailed Instructions
Materials
- Tracing paper (or printable temporary tattoo paper)
- Fine-point black ink marker (waterproof if drawing directly, skin-safe)
- Isopropyl alcohol or alcohol wipe
- Cotton pads
- Scissors
- Warm water
- Washcloth
- Translucent setting powder (optional)
- Hairspray or liquid bandage spray (optional for longevity)
Step 1: Design Preparation
-
Drafting the mountains:
Begin by sketching three distinct triangles on a piece of scrap paper to practice the layout. The left peak should be slightly shorter, the middle one sharp and high, and the right one broad and lowest. Don’t worry about closing the bottom lines yet. -
Adding dimension:
Draw jagged lines down the center of each triangle to suggest ridges. I like to keep these slightly uneven to mimic natural rock formations. -
Finalizing the sun:
Position a small circle hovering above and slightly to the left of the highest peak. Add eight simple, straight rays emanating outward, keeping them short and disconnected from the center circle. -
Clean transfer:
Once happy with the sketch, trace the final design onto your tattoo transfer paper or tracing sheet using a fresh, fine-point black pen. Ensure the lines are solid black with no gaps.
Stay Sharper Longer
Avoid applying lotion or oil-based sunscreen directly over the design, as oils break down temporary tattoo adhesive quickly.
Step 2: Skin Preparation
-
Choosing the spot:
Locate the smooth area on the outer upper arm, just above the elbow crease. This spot allows the design to sit flat without too much distortion when the arm moves. -
Cleaning the canvas:
Wipe the area thoroughly with an alcohol wipe or isopropyl alcohol on a cotton pad to remove natural oils and lotions. -
Drying time:
Wait until the skin is completely dry to the touch. Any residual moisture will prevent the design from adhering properly.
Make It Yours
Add tiny stippled dots along the shaded side of the mountain ridges instead of solid lines for a textured, shading effect.
Step 3: Application
-
Cutting the design:
Cut around your traced design with scissors, leaving about a half-inch border of white space around the ink to make handling easier. -
Placement:
Remove the clear plastic backing if using tattoo paper. Place the paper ink-side down onto your arm, ensuring the mountains are level horizontally. -
Wetting the backing:
Soak a washcloth in warm water and ring it out slightly so it is dripping but not pouring. Press the cloth firmly over the paper backing. -
Holding steady:
Hold the wet cloth in place for at least 30 seconds. Do not slide the paper around; steady pressure is key here. -
The reveal:
Gently peel up one corner of the paper to check if the image has transferred. If it looks faint, press the cloth back down for another 15 seconds. -
Peeling away:
Slide the paper backing off smoothly to reveal the black lines. -
Setting the ink:
Ideally, let the area air dry for a few minutes without touching it or putting clothing over it. -
Matte finish:
To remove the shiny, sticky residue common with temporary tattoos, lightly dust the area with a bit of translucent setting powder using a fluffy brush. -
Sealing the deal:
For extra longevity, give it a quick, light mist of hairspray or liquid bandage spray from about 6 inches away.
Enjoy your new piece of nature-inspired art as you head out for the day
Wave Line Tattoo
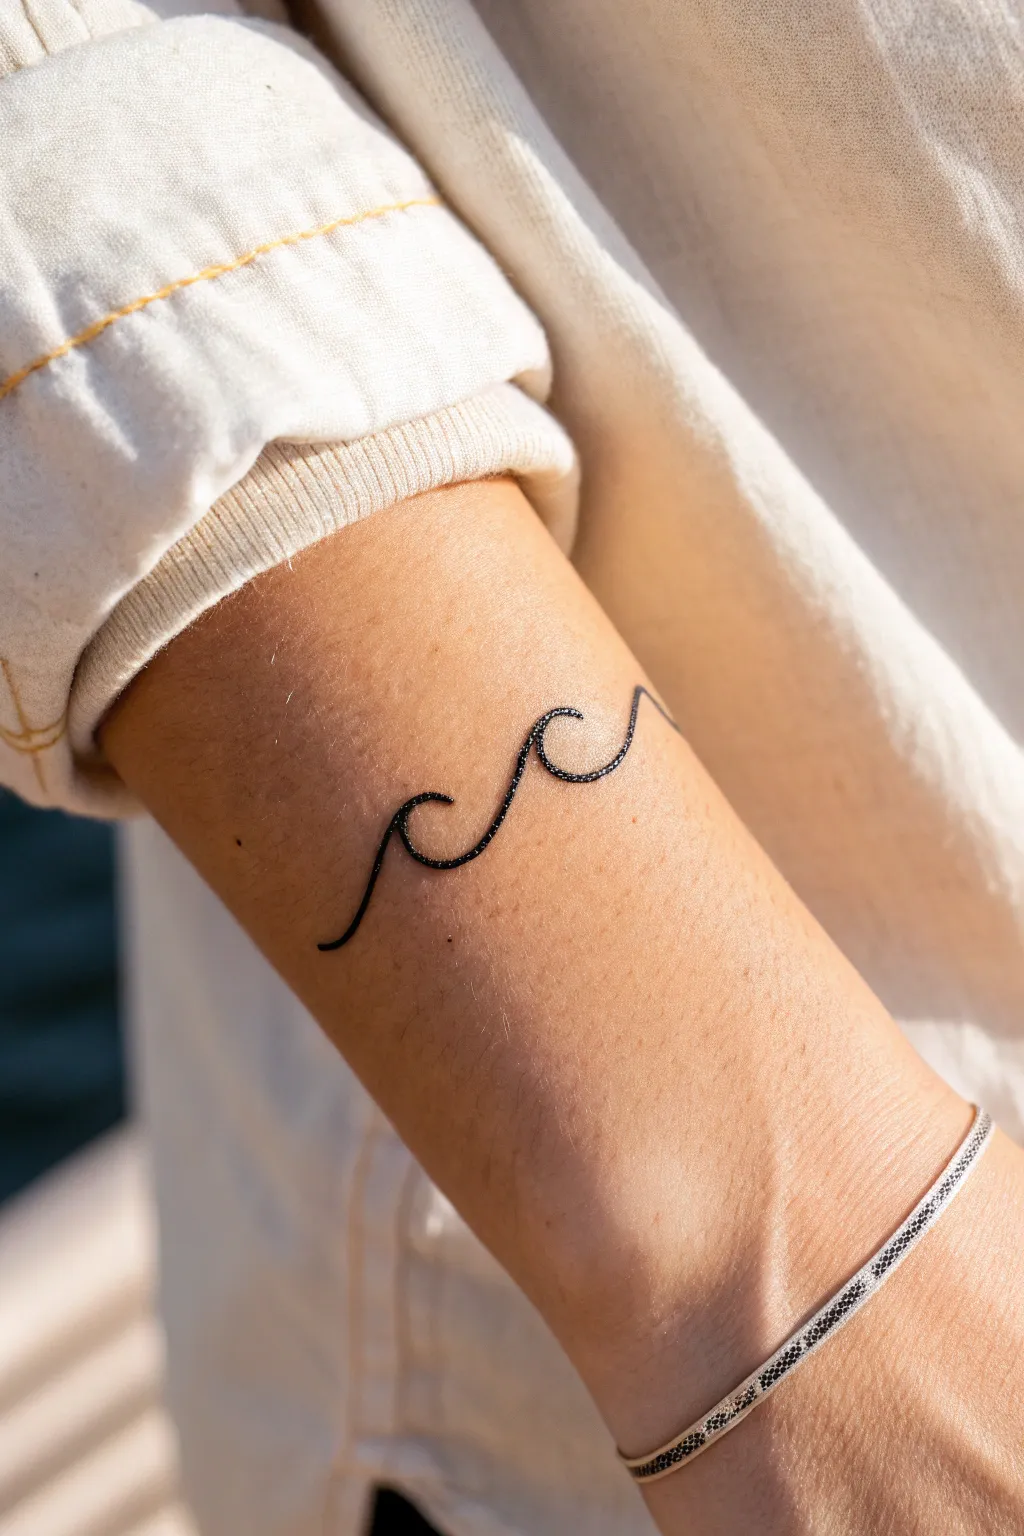
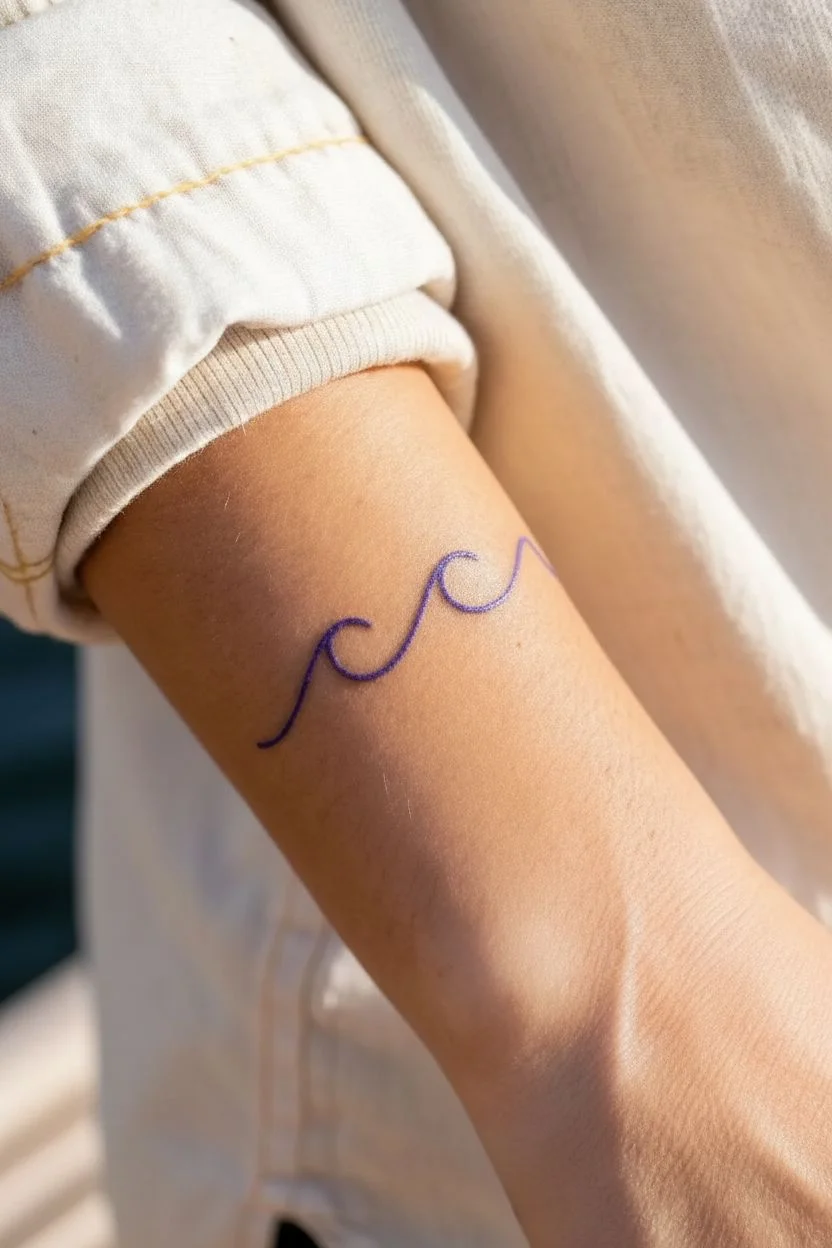
Capture the spirit of the sea with this delicate, continuous-line wave tattoo. Its simple elegance sits perfectly on the forearm, offering a subtle nod to nature’s rhythm.
Step-by-Step
Materials
- Tattoo machine (pen style or coil)
- Round liner cartridge needle (3RL or 5RL preferable)
- Black tattoo ink (high quality)
- Stencil paper
- Stencil transfer solution
- Skin safe marker (surgical pen)
- Green soap and squeeze bottle
- Paper towels
- Disposable gloves
- Vaseline or tattoo glide
- Razor
- Ink caps
Step 1: Preparation & Design
-
Clean the area:
Begin by thoroughly cleaning the forearm area with green soap and water. Wipe away any oils or dirt to ensure a clean canvas. -
Shave the site:
Carefully shave the intended tattoo placement area. Even fine hairs can interfere with the needle or trap bacteria, so aim for a smooth surface. -
Design the wave:
Sketch your wave design on paper first. For this look, draw a single, flowing line that creates two peaks—the first slightly lower, the second curling over like a breaking wave. -
Create the stencil:
Once satisfied with your drawing, trace it onto the top sheet of the transfer paper. Use firm pressure to ensure the carbon specifically transfers the clean lines. -
Apply transfer solution:
Apply a thin, even layer of stencil transfer solution to the skin. It should be tacky to the touch, not dripping wet. -
Place the stencil:
Carefully press the stencil onto the forearm. Hold it firmly in place for a few seconds without sliding, then peel it back to reveal the purple guide lines. -
Let it dry:
Allow the stencil to dry completely on the skin for at least 10 minutes. I always use this time to set up my ink caps and machine.
Clean Lines Pro Tip
Exhale slowly while pulling your longest lines. Controlling your breath steadies your hand and reduces micro-tremors for a smoother stroke.
Step 2: Tattooing Process
-
Setup the needle:
Load a fine liner needle (3RL or 5RL) into your machine. These smaller groupings are essential for achieving that crisp, delicate line work seen in the photo. -
Lubricate the skin:
Apply a very thin amount of Vaseline or tattoo glide over the stencil. This helps the needle move smoothly and prevents the ink from puddling over your guide. -
Dip the ink:
Dip your needle tip into the black ink cap. Run the machine briefly to ensure the ink flows correctly into the cartridge tip. -
Begin the line:
Start at the leftmost tail of the wave. Maintain a steady hand and consistent depth—just enough to penetrate the dermis—keeping your machine angle around 45 degrees. -
Follow the curve:
Move slowly along the stencil line. Focus on consistent hand speed; rushing the curves creates shaky or uneven lines. -
Handle the peaks:
As you navigate the crests of the waves, utilize your wrist to pivot. This creates a smoother arc than trying to drag your whole arm. -
Connect the flow:
Where the first wave dips down to start the second, ensure the line remains unbroken. The beauty of this design is its continuous nature. -
Finish the stroke:
Trail off gently at the end of the line, lifting the needle out smoothly to create a tapered finish rather than a generic blunt stop. -
Wipe and check:
Gently wipe away excess ink with a paper towel dampened with green soap. Examine the line weight. If any spots look too faint, carefully pass over them one more time.
Step 3: Aftercare
-
Apply ointment:
Once clean and dry, apply a specialized tattoo aftercare ointment to soothe the area. -
Wrap it up:
Cover the fresh tattoo with a protective film or sterile bandage to correct the healing environment.
Ink Spreading?
If ink pools on the skin making the stencil hard to see, you’re using too much glide. Wipe gently and use a minimal amount of lubricant.
Enjoy your permanent piece of the ocean and the reminder to go with the flow
Tiny Sun or Sunrise
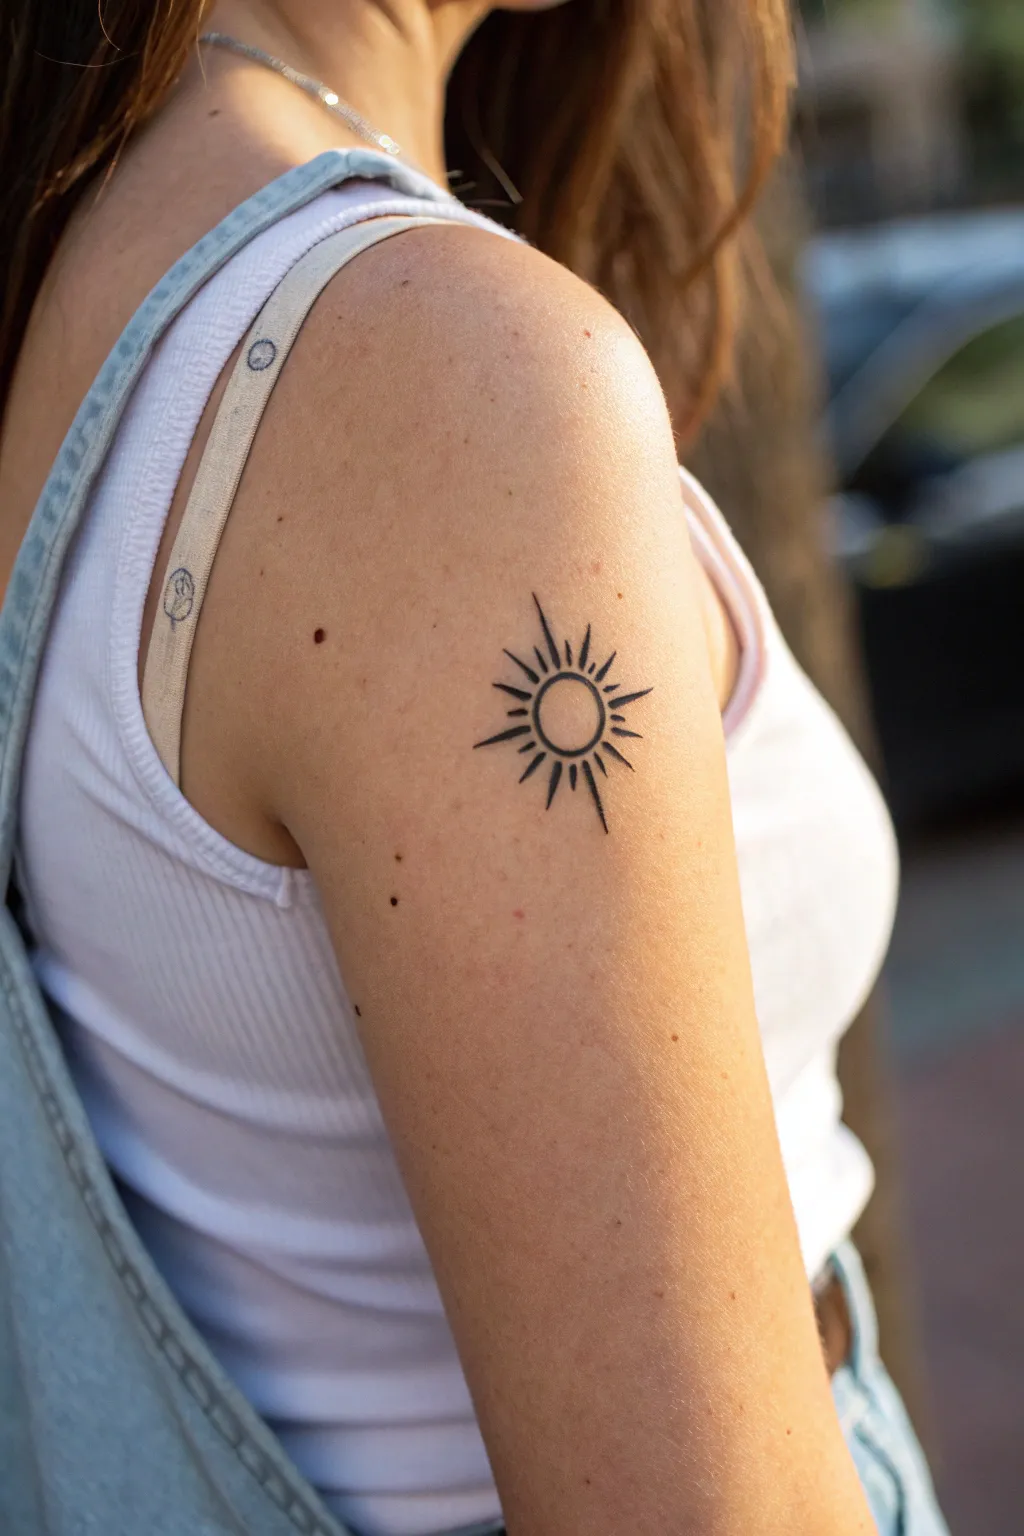
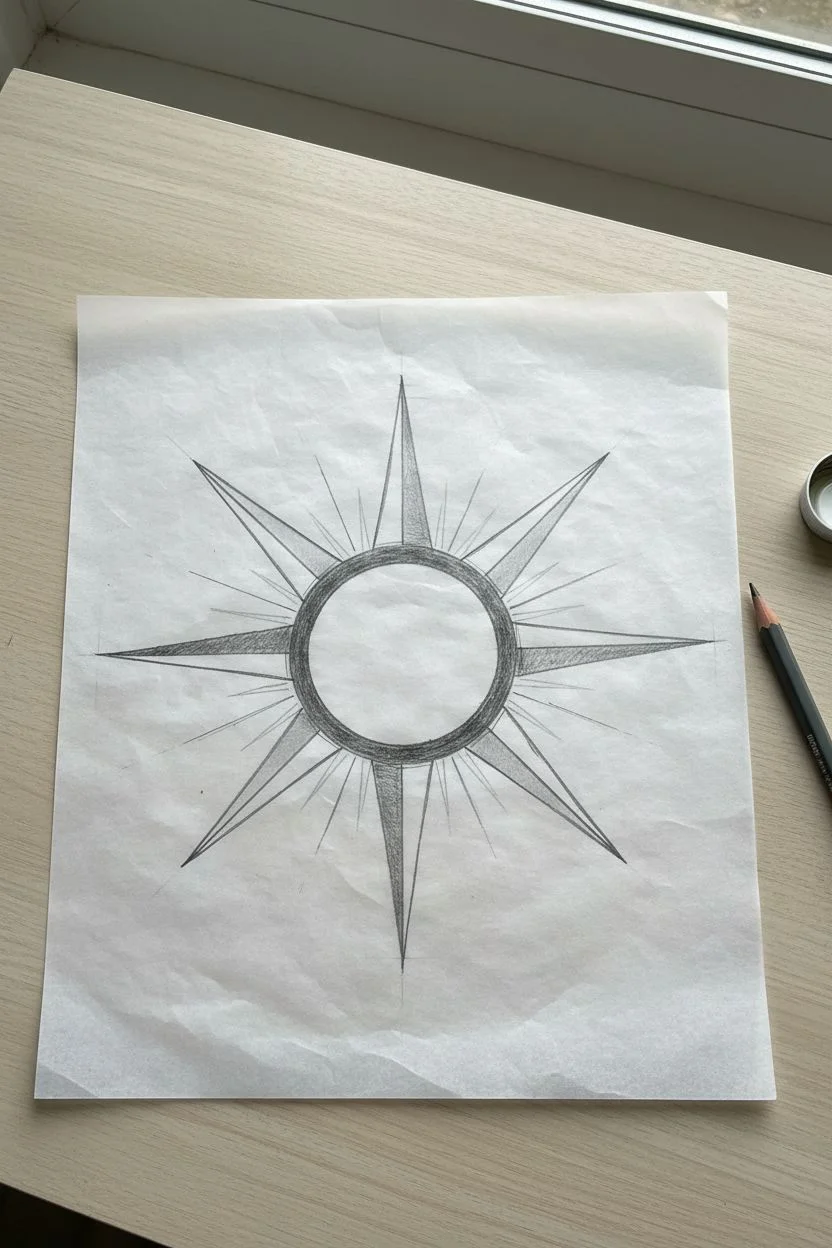
Embrace the warmth of summer with this minimalist sun tattoo design that sits perfectly on the upper arm. With its clean lines and radiating energy, this small piece offers a subtle yet striking way to carry a little sunshine wherever you go.
Detailed Instructions
Materials
- Tracing paper
- Pencil (HB or B)
- Fine-tip sterile skin marker (surgical marker)
- Isopropyl alcohol wipes
- Cotton pads
- Non-toxic temporary tattoo ink or body art marker (black)
- Optional: Stencil transfer gel (for longer-lasting stencils)
- Setting powder or talcum powder
- Hairspray or liquid bandage spray (to seal)
Step 1: Drafting the Radiant Design
-
Draw the core:
Begin on your tracing paper by drawing a perfect circle about the size of a large coin. Use a small circular object like a bottle cap to trace if you want it precise, or freehand it for an organic feel. -
Mark cardinal points:
Lightly mark four small dots at the top, bottom, left, and right of your circle. These will guide your longest sun rays to ensure the design stays balanced. -
Add primary rays:
Draw four long, sharp triangular spikes extending outward from your cardinal dots. Make them slender and ensure the points are sharp. -
Add secondary rays:
In the spaces exactly between your four main spikes, draw four slightly shorter triangular rays. You should now have an eight-pointed star shape surrounding the circle. -
Fill the gaps:
To give it that bursting effect, draw simple straight lines—just single strokes—between every triangular ray. These should be shorter than the triangles, adding texture to the sun’s corona. -
Refine the lines:
Go over your pencil sketch to darken the final lines you want to keep, ensuring the central circle is bold and the rays are clearly defined.
Fixing Smudges
If ink bleeds into fine lines, dip a cotton bud in alcohol and pinch the tip to make it thin. Use it like an eraser to sharpen points.
Step 2: Preparing the Canvas
-
Clean the skin:
Choose a spot on the outer upper arm. Thoroughly clean this area with an isopropyl alcohol wipe to remove oils and dirt, which ensures the ink adheres properly. -
Dry the area:
Let the skin air dry completely or pat it gently with a clean cotton pad. Any moisture will cause the marker ink to bleed immediately. -
Transfer the guide:
Flip your tracing paper over so the graphite side is against your skin. Dampen the back of the paper slightly with a wet cloth or sponge, pressing firmly for about 30 seconds to transfer a faint guide. -
Clarify the stencil:
Carefully peel back the paper. You should see a faint grey outline. If it’s too light, use your skin marker to lightly dot the key points of the rays and the circle’s path before the guide fades.
Level Up: Cosmic Dots
Add three tiny dots in a straight line trailing down from the bottom ray for a mystical, unparalleled boho-chic vibe.
Step 3: Inking the Sun
-
Outline the center:
Using a fine-tip black body art pen or sterile marker, carefully trace the central circle. Keep your hand steady and move slowly to maintain a consistent line width. -
Draw the main rays:
Ink the longer triangular rays next. Instead of coloring them in solid immediately, outline the triangle shape first. This keeps the points sharp. -
Ink the fillers:
Draw the single-line strokes in between the triangles. Use a quick, confident flick of the wrist for these straight lines to prevent wobbling. -
Thicken slightly:
I prefer to go back over the central circle just once more to make it slightly bolder than the rays, which adds visual weight to the center. -
Clean up edges:
If any lines look a bit fuzzy, use a cotton swab dipped in a tiny bit of rubbing alcohol to carefully erase mistakes or sharpen the tips of the sun rays.
Step 4: Setting the Art
-
Let it dry:
Allow the ink to dry completely on the skin. This usually takes about 5 to 10 minutes depending on the marker brand. -
Apply powder:
Lightly dust the area with setting powder or talcum powder. This absorbs any residual moisture and helps matte down the shiny ink look. -
Seal the deal:
Spray a light coat of hairspray or liquid bandage over the finished design from about 6 inches away. This creates a protective barrier to help your sun last longer.
Enjoy your radiant new accessory that captures the brightness of the sun right on your skin
Small Leaf or Sprig
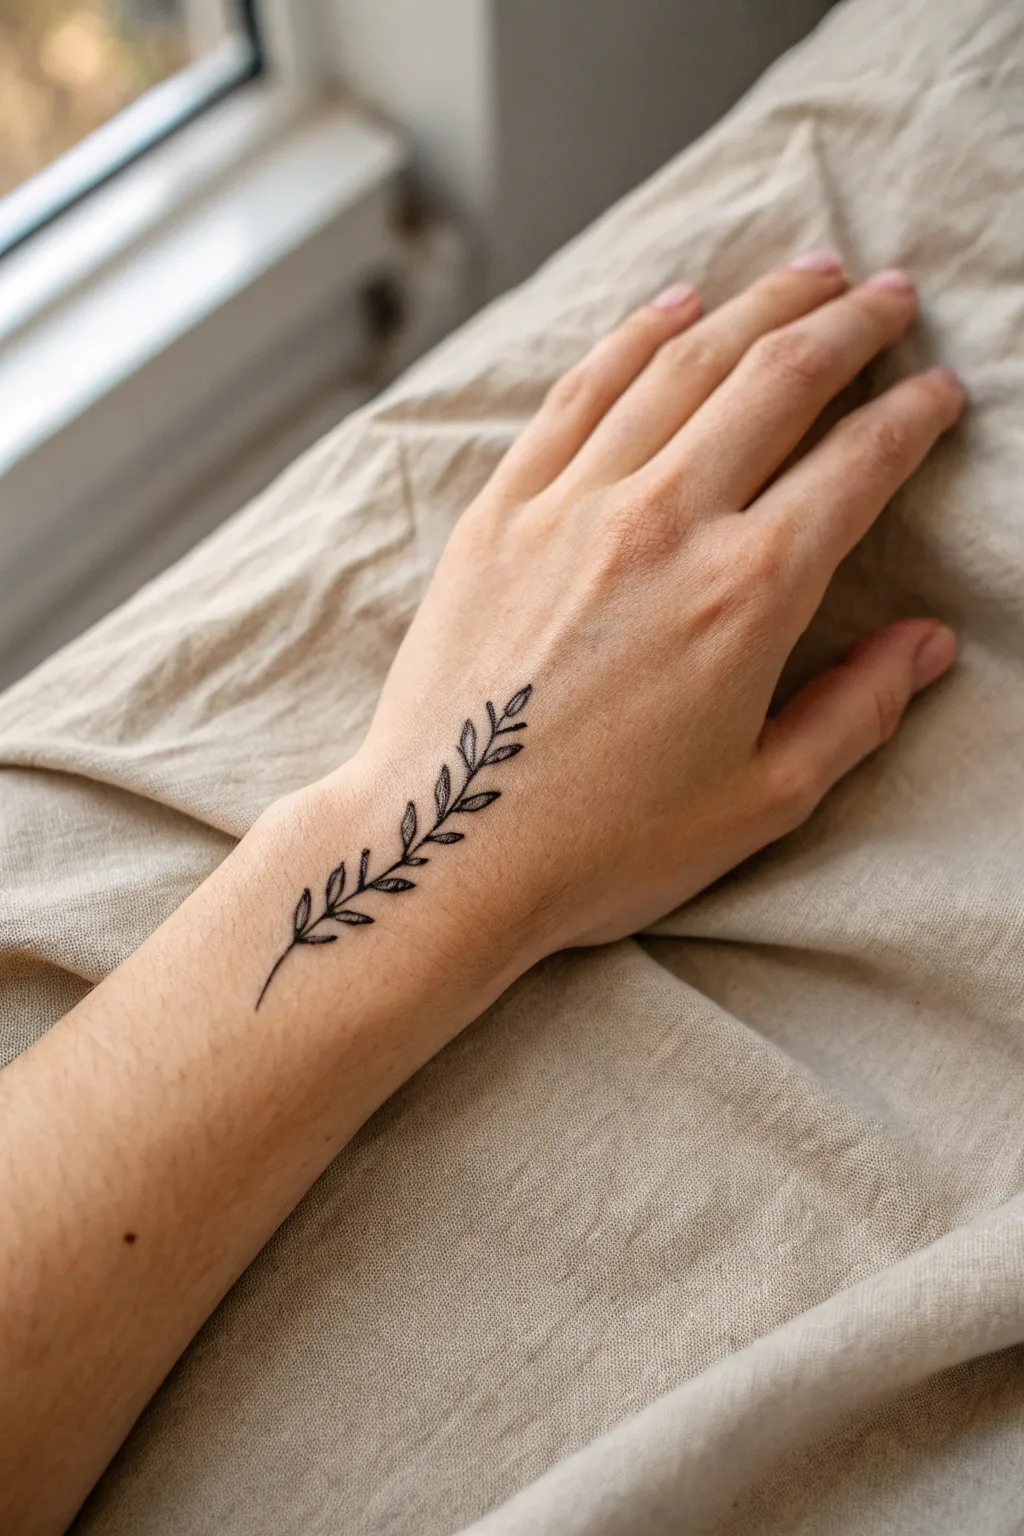
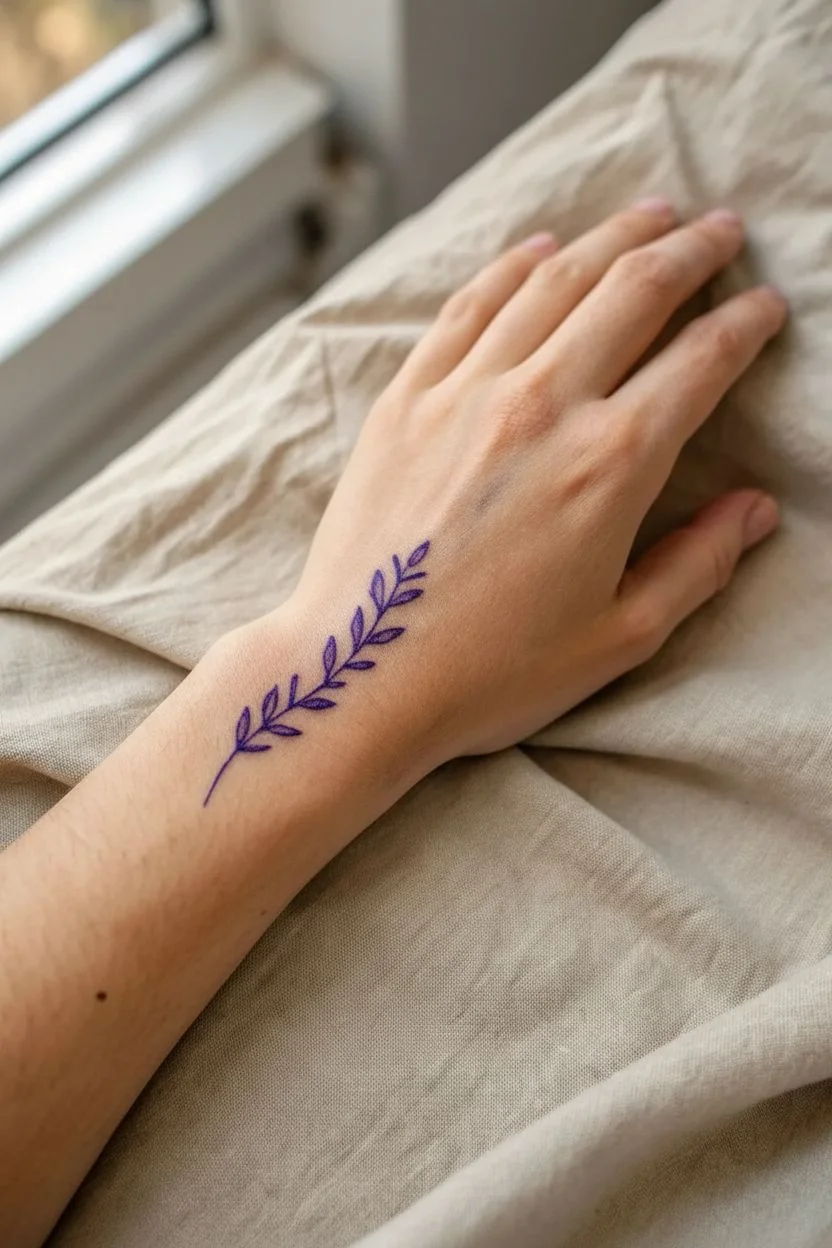
This project captures the elegance of nature with a fine-line botanical sprig that flows organically along the wrist and hand. The minimal design uses crisp black lines and subtle shading to create a timeless, graceful adornment.
Step-by-Step
Materials
- Tattoo machine (pen style or coil)
- 3RL (3 Round Liner) needle cartridge
- 5RL (5 Round Liner) needle cartridge (optional for bolder lines)
- Black tattoo ink
- Stencil paper and transfer gel
- Green soap and squeeze bottle
- Distilled water
- Ink cups
- Vaseline or tattoo glide
- Disposable gloves
- Paper towels
- Alcohol wipes
- Fine-tip sterile skin marker
Step 1: Preparation and Stencil
-
Prepare the workspace:
Begin by sanitizing your station thoroughly. Set up your ink cups, pouring a small amount of solid black ink. I always keep a cup of distilled water nearby for rinsing. -
Design the sprig:
Draw the design on plain paper first to finalize the size. The sprig should be about 3-4 inches long, starting with a single stem that gently curves, branching off into alternating small, pointed oval leaves. -
Create the stencil:
Trace your final design onto the carbon sheet of your stencil paper. Press firmly to ensure a clean purple line for the stem and the outline of each leaf. -
Prepare the skin:
Shave the area on the wrist and back of the hand. Clean the skin thoroughly with green soap, then wipe with alcohol to remove oils. -
Apply the stencil:
Apply a thin, even layer of transfer gel to the skin. Place the stencil carefully, ensuring the curve of the branch follows the natural anatomy of the hand bones. Let it dry for at least 10-15 minutes.
Ink Spreading?
If lines look fuzzy or blown out immediately, you are likely going too deep. Lighten your hand pressure and ride the ‘tube’ on your finger for stability.
Step 2: Line Work
-
Set up the machine:
Load a 3RL needle cartridge. This fine liner is crucial for achieving the delicate look seen in the photo. -
Begin the stem:
Dip your needle into the black ink. Start at the bottom of the stem on the wrist. Pull a steady, single line moving upwards towards the hand. -
Navigate the curve:
As you move up the hand, gently curve the line to follow the flow of the thumb muscle. Do not rush this; a shaky stem disrupts the flow. -
Outline the lower leaves:
Starting from the bottom, tattoo the outlines of the first few leaves. Keep the connection points to the stem sharp and precise. -
Continue upward:
Work your way up the branch, outlining the remaining leaves. Ensure the leaves get slightly smaller towards the tip of the sprig for a natural look. -
Check your consistent depth:
Periodically wipe away excess ink with a paper towel dampened with green soap to check line consistency. You want a crisp, solid black line without blowouts.
Natural Flow
Have the client flex their hand before applying the stencil. Position the stem so it curves with the movement of the tendons, not against them.
Step 3: Shading and Details
-
Plan the shading:
Looking at the reference, notice the shading is stippled or ‘whip shaded’. You will shade the base of each leaf where it meets the stem. -
Lower voltage:
Turn your machine voltage down slightly. This helps create individual dots or softer gradients rather than harsh lines. -
Whip shade the leaves:
Place your needle at the base of a leaf and flick it quickly outward towards the leaf tip. This deposits more ink at the base and fades out, creating dimension. -
Repeat for all leaves:
Systematically move up the sprig, adding this small gradient to every leaf. Keep the tips of the leaves open (negative space) to maintain lightness. -
Thicken key intersections:
Go back with your liner and very subtly thicken the little “V” shapes where the leaf stems join the main branch. This adds visual weight and realism. -
Review and refine:
Wipe the tattoo clean one last time. Look for any faint lines in the outline and reinforce them carefully if needed. -
Aftercare application:
Apply a small amount of soothing ointment or a second-skin bandage to protect the fresh artwork.
Now you have a permanent piece of botanical art that moves beautifully with the body
Geometric Triangle or Diamond
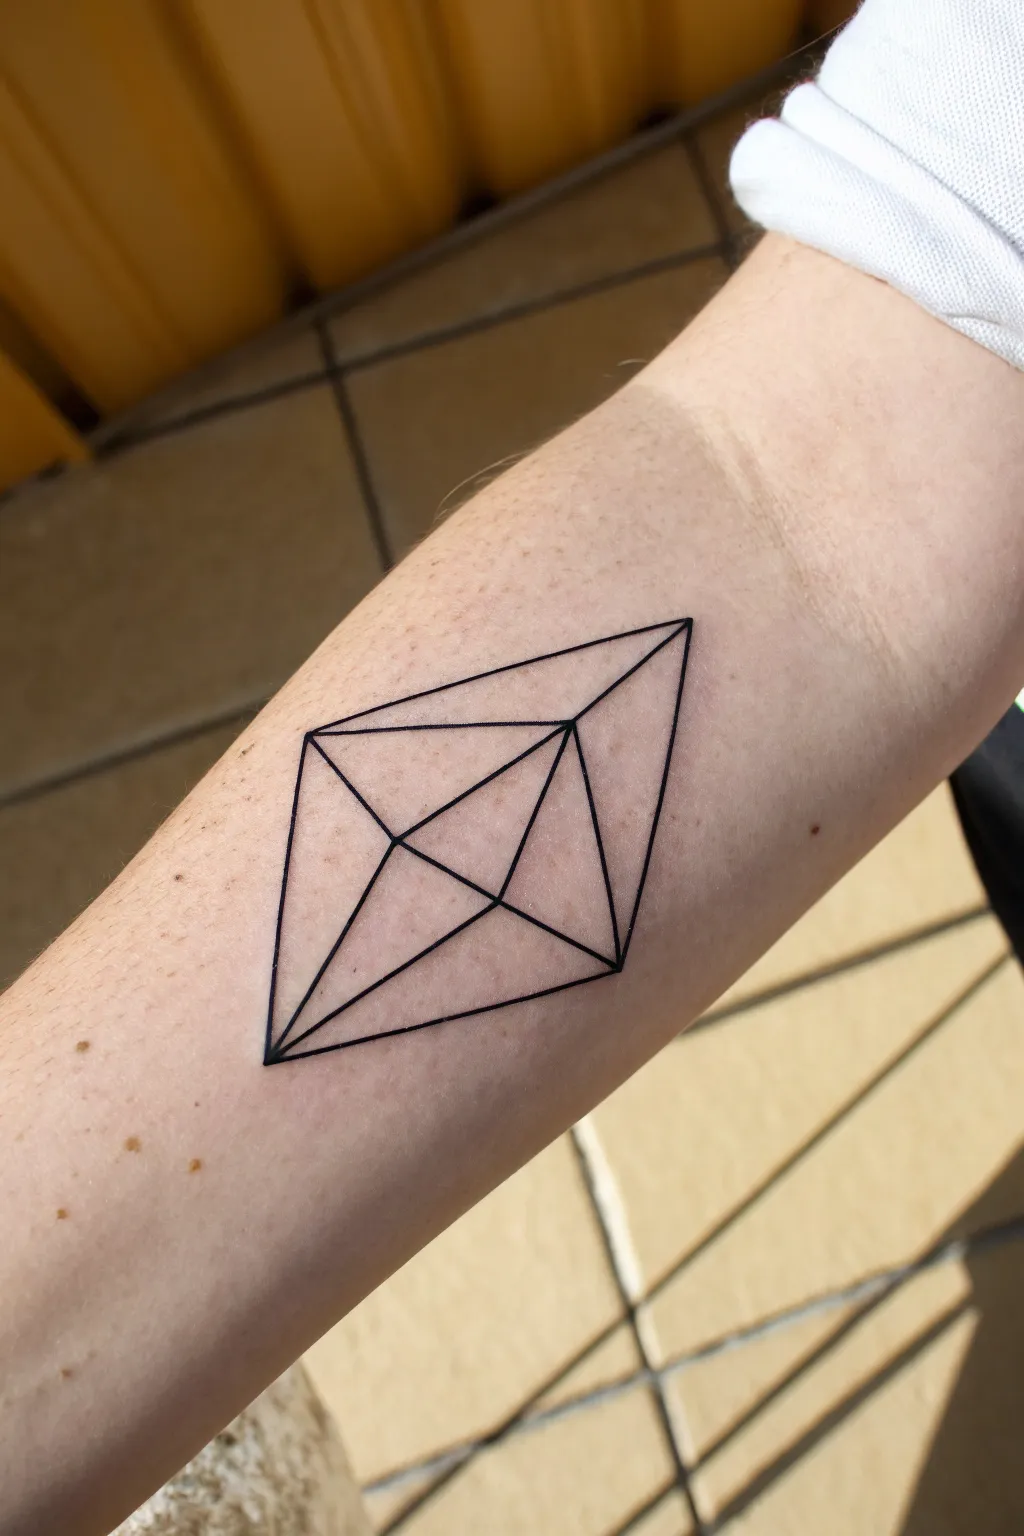
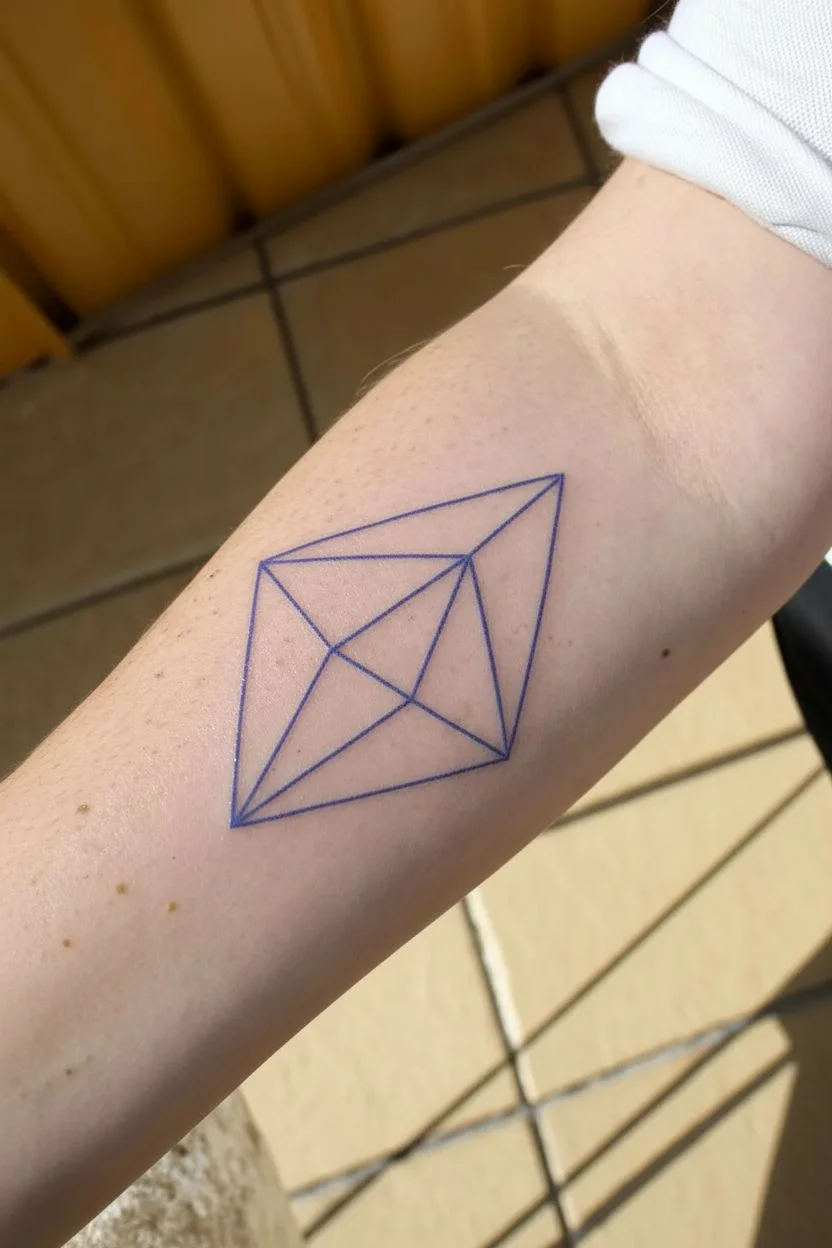
Achieving clean lines is the cornerstone of this minimalist geometric design, which resembles a crystalline octahedron. Its sharp angles and precise intersections make it a striking choice for the forearm, relying entirely on the impact of negative space and flawless symmetry.
Step-by-Step Tutorial
Materials
- Tattoo machine (pen style or coil)
- Round Liner (RL) cartridges (size 3RL or 5RL for crisp lines)
- Black tattoo ink (high viscosity lining black)
- Stencil paper and transfer gel
- Green soap and squeeze bottle
- Vaseline or tattoo glide
- Clip cord sleeves and machine bags (for hygiene)
- Disposable razors
- Gloves (nitrile)
- Ink caps
Step 1: Preparation and Stencil
-
Design the geometry:
First, draw your diamond shape on paper or a tablet. Start with a central vertical line, then draw a horizontal line crossing it slightly below the center. Connect the outer points to form a kite shape, then add the inner triangle lines to create the 3D faceted effect. -
Create the stencil:
Print your final design onto thermal stencil paper. Because this is a geometric piece, ensure your printer settings are high contrast so the straight lines don’t become pixelated or fuzzy. -
Prep the skin:
Clean the forearm area thoroughly with green soap. Shave the area with a fresh disposable razor, even if the hair seems fine, to prevent interference with the needle. -
Apply the transfer:
Apply a thin, even layer of stencil transfer gel. Press the stencil firmly onto the skin, holding it still for about 5-10 seconds. Peel it back carefully and check that every junction point aligns perfectly. -
Let it set:
Allow the stencil to dry completely for at least 10-15 minutes. This step is crucial for geometric work; if the stencil wipes away mid-session, you lose your guide for straight lines.
Stay on the Line
For long straight lines, hold your breath slightly while pulling the line. Exhale only when you lift the needle. This stabilizes your core and reduces hand tremors.
Step 2: Lining the Tattoo
-
Setup the station:
While the stencil dries, set up your machine. I generally prefer a 5RL needle for this thickness—it’s bold enough to stand out but fine enough for sharp corners. Pour your lining black ink. -
Establish a stable posture:
Position the client’s arm on a stable armrest. You need to anchor your hand solidly; try planting your pinky finger or the side of your palm on a dry spot of skin to act as a pivot. -
Start with the main outline:
Begin with the long outer perimeter lines. Dip your needle and run your machine at a medium voltage suitable for lining (usually around 7-8.5v depending on your machine stroke). Move the hand swiftly but steadily to avoid shaky lines. -
Work bottom to top:
To avoid wiping away your stencil as you work, start at the bottom of the design (closest to the wrist usually) and work your way up. This keeps your hand from resting on the fresh transfer layout. -
Connect the corners:
When approaching the sharp corners of the diamond, stop exactly at the junction point. Lift the needle vertically out of the skin, reposition your hand for the new angle, and drop back in exactly where you left off. -
Execute the internal lines:
Now focus on the internal ‘Y’ shape that gives the diamond depth. These lines must meet perfectly in the center. I like to pull these lines toward the center point rather than pushing away, so I can see exactly where they need to stop. -
Check line saturation:
Wipe the area gently with a dab of green soap on a paper towel. Check for any ‘holidays’ (gaps in the ink) or faint spots. If a line looks weak, go over it once more with extreme care to stay exactly on the existing path. -
Clean connections:
Inspect the vertices where multiple lines meet. If they don’t look sharp, use the very tip of the needle to gently taper the lines into a perfect point, but be careful not to overwork the skin here.
Step 3: Aftercare and Cleanup
-
Final cleanse:
Do a final wipe down with distilled water or witch hazel to remove blood and excess plasma. The lines should look crisp, black, and consistent in width. -
Apply protection:
Apply a very thin layer of aftercare ointment or a second skin bandage to protect the open wound.
Dotwork Dimension
Add subtle stippling (dot shading) to one side of the internal facets. This creates a lighting effect, making the geometric shape look more 3D and less flat.
With a steady hand and patience, you’ll have a timeless geometric piece that sits beautifully on the skin
Micro Doodle-Style Icon
This minimalist tattoo design stacks three clean, square frames vertically, featuring charming doodle-style weather and light icons. The fine-line aesthetic gives it a modern, sketchy notebook feel perfect for a first tattoo or a filler piece.
Detailed Instructions
Materials
- Stencil paper/transfer paper
- Stencil stuff/application gel
- Tattoo machine (pen or coil)
- 3RL (3 Round Liner) tattoo needle cartridge
- 5RL (5 Round Liner) tattoo needle cartridge (optional, for bolder lines)
- Black tattoo ink
- Ink caps
- Gloves
- Green soap and wash bottle
- Paper towels
- Petroleum jelly or tattoo glide
- Skin marker (surgical pen)
Step 1: Preparation and Stencil
-
Draft the design:
Begin by drawing three equal squares stacked vertically with about 0.5cm of spacing between them. Inside the top square, sketch a simple cloud with a lightning bolt and small stars; in the middle, a classic lightbulb; and in the bottom, a sun with sharp rays. -
Create the transfer:
Place your drawing over the hectograph transfer paper. Trace over every line firmly to ensure a crisp purple stencil is created on the back sheet. -
Prepare the skin:
Clean the forearm area thoroughly with green soap and water. Shave the area carefully to remove any hair that could interfere with the needle. -
Apply the stencil:
Apply a thin, even layer of stencil gel to the skin. I find that less is more here—too much gel makes the stencil bleed. Press the transfer paper onto the skin, hold for a few seconds, and peel it off gently. Let it dry for at least 10 minutes.
Step 2: Outlining the Frames
-
Setup the machine:
Load a 3RL needle cartridge into your machine. This fine liner is crucial for that delicate ‘doodle’ look. Pour your black ink into a cap. -
Anchor your hand:
Stretch the skin taut with your non-tattooing hand. This is the most critical step for straight lines. Rest your needle hand firmly against the arm to stabilize your movement. -
Tattoo the top square:
Starting with the top frame, pull your first straight line. Move at a consistent speed to match your machine’s voltage. Complete the four sides of the top square first. -
Middle and bottom squares:
Repeat the process for the middle and bottom squares. Check your spacing to ensure they remain distinct and parallel, not touching each other. -
Wipe and check:
Gently wipe away excess ink with a paper towel dampened with green soap. Do not wipe the stencil off the inside of the squares yet.
Straight Line Secret
For the box frames, don’t hold your breath. Exhale slowly as you pull the line. This steadies your hand and prevents the natural micro-trembles that happen when holding breath.
Step 3: Filling the Icons
-
Cloud details:
Inside the top square, outline the fluffy cloud shape first. Add the small lightning bolt slightly off-center. For the ‘rain,’ just tap or make very tiny crosses to create the star shapes. -
Lightbulb curves:
Move to the middle square. Carefully trace the bulb’s outer glass shape. The filament inside is just a jagged ‘M’ shape. Draw the screw base with three small horizontal lines. -
Sun rays:
For the bottom square, tattoo the central circle of the sun. Then, add the triangular rays radiating outward. These don’t need to be geometrically perfect; the hand-drawn look adds character. -
Refine lines:
Inspect all your lines. Since this is a single-pass line style, you usually won’t need to go over lines again, but fix any small gaps if the ink didn’t take perfectly. -
Final clean:
Apply a small amount of glide/vaseline, then give the whole tattoo a thorough wipe with green soap to remove all stencil residue and plasma. -
Aftercare prep:
Let the skin air dry for a moment, then cover with a protective tattoo film or bandage to keep bacteria out.
Customize Your Story
Swap the icons for things meaningful to your client. Try a paper plane, a tiny planet, and a coffee cup, or use phases of the moon in vertical descent.
Enjoy your new, crisp artwork and remember to keep it moisturized during the healing process
Negative Space Mini Symbol
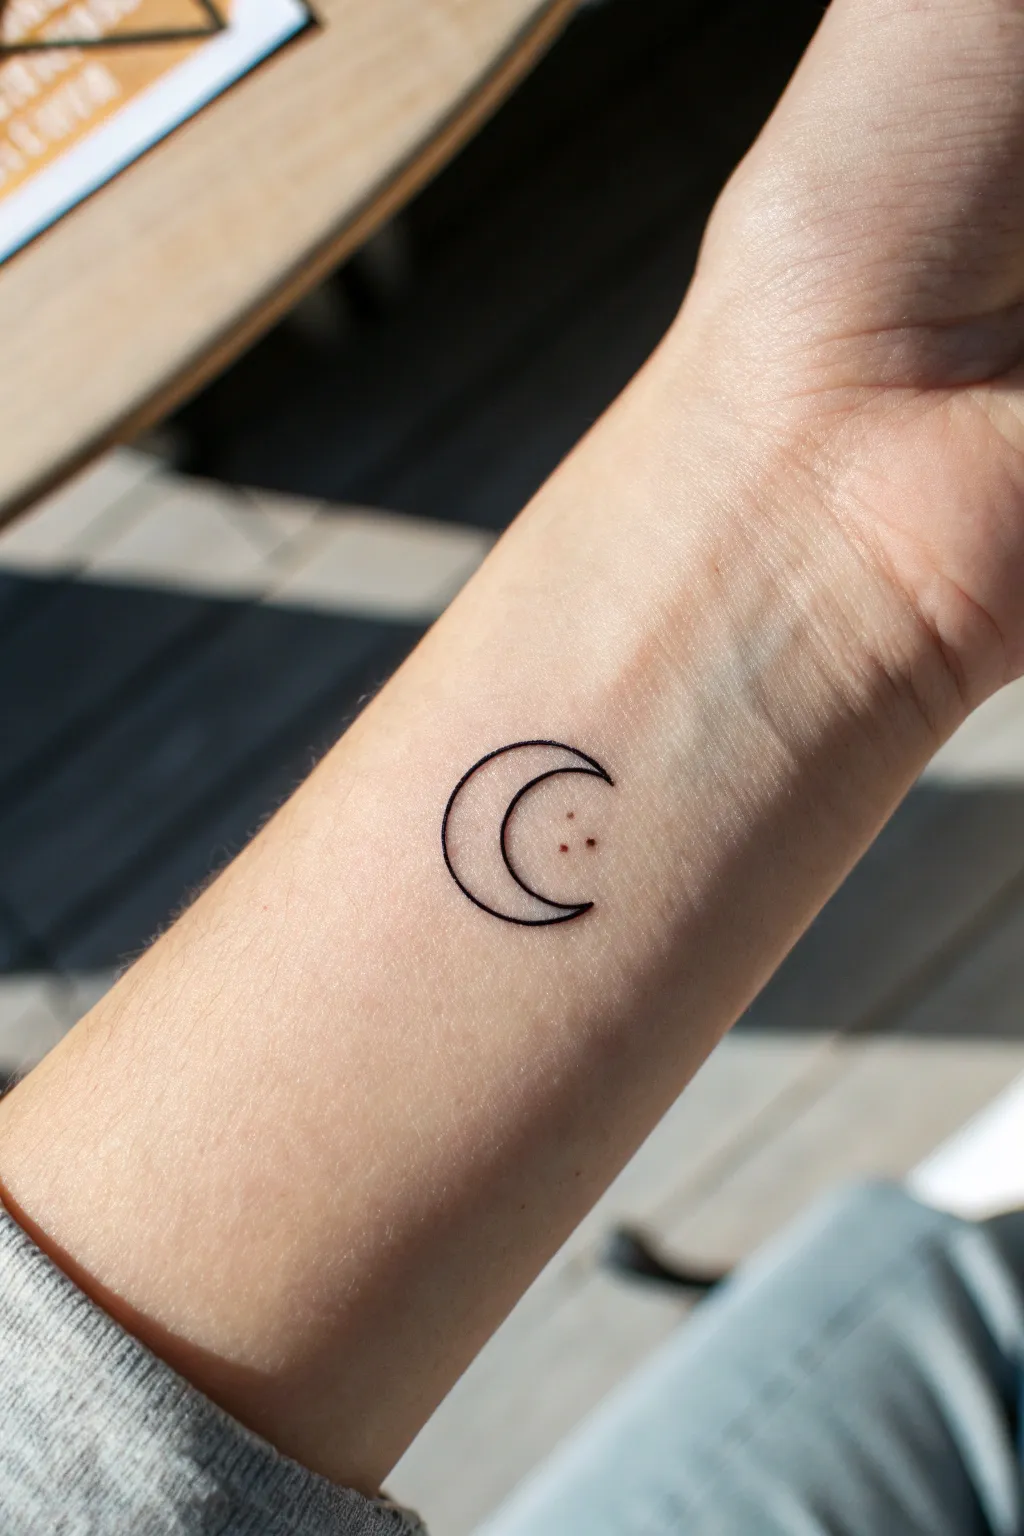
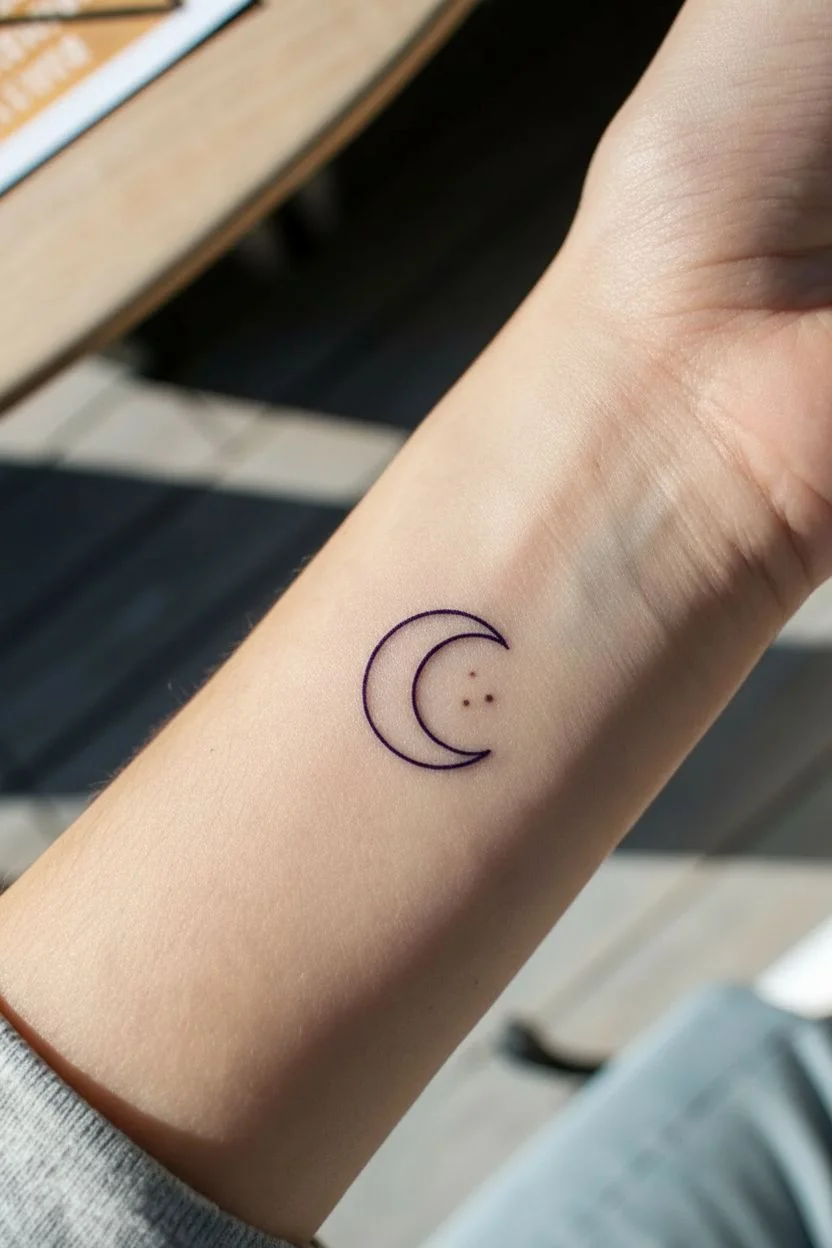
This minimalist design features a simple, clean crescent moon outline with three distinct dots nestled in the curve, creating a balanced and subtle piece of body art. The negative space concept keeps it airy and modern, perfect for placement on the inner wrist or ankle.
Step-by-Step
Materials
- Transfer paper (stencil paper)
- Skin-safe stencil adhesive (e.g., Stencil Stuff)
- Tattoo machine (pen style or coil)
- Round Liner (RL) needle cartridge (3RL or 5RL for fine lines)
- Black tattoo ink (high quality)
- Ink caps
- Green soap & distilled water wash bottle
- Paper towels
- Disposable gloves
- Petroleum jelly or tattoo process butter
- Razor (if hair removal is needed)
- Skin marker (surgical marker)
Step 1: Preparation & Stencil Design
-
Create the design:
Draw or print a perfect circle. Overlap a slightly smaller circle inside the first one, shifting it off-center to create the crescent moon shape. Erase the unwanted lines until you have a clean moon outline. -
Add the dots:
Place three small dots inside the empty curve of the crescent. Arrange them in a small, equilateral triangle formation for balance. -
Transfer to stencil paper:
Trace your final design onto the carbon sheet side of the transfer paper. Press firmly to ensure a solid, purple line is created on the master sheet. -
Prepare the skin:
Put on fresh gloves. Clean the inner wrist area thoroughly with green soap and water. If there is any fine hair, shave the area gently to prevent ingrown hairs later. -
Apply stencil stuff:
Wipe the skin with an alcohol pad to remove oils, then apply a thin, even layer of stencil adhesive. It should be tacky, not wet. -
Place the stencil:
Carefully press the stencil onto the wrist. Ask the client (or yourself) to relax the hand so the skin is in a neutral position. Hold firmly for a few seconds and peel it back. Let it dry for at least 10 minutes.
Needle Steadying Tip
Rest your pinky finger or the side of your palm against a stable surface (like the arm table) while tattooing. This anchor point prevents shaky lines.
Step 2: Tattooing the Outline
-
Setup machine:
While the stencil dries, set up your machine. Load a fine liner needle (3RL works best for this delicate look). Pour a small amount of black ink into a cap. -
Dip and lubricate:
Apply a very thin layer of petroleum jelly over the stencil to protect it from wiping. Dip your needle into the ink, ensuring the tip is saturated but not dripping. -
Start the lower curve:
Begin at the bottom point of the moon. Stretch the skin taut with your non-tattooing hand. Run a slow, consistent line following the outer curve up to the top point. -
Join the points:
Reposition your hand if needed. Connect the top point back down to the bottom point, creating the inner curve of the crescent. Focus on keeping your hand speed steady to avoid jittery lines. -
Check your consistent depth:
Ensure you are staying in the dermis layer. Listen for a consistent buzz and feel a steady vibration; if the ink is spraying or pooling excessively, you are likely too deep. -
Clean briefly:
Gently dab—don’t wipe—the area with a damp paper towel to see your line work clearly. This helps preserve the stencil for the dots.
Ink Spreading?
If lines look blurry or ‘blown out’ immediately, you’re going too deep or moving too slow. Lighten your hand pressure and slightly increase hand speed.
Step 3: Detailing & Aftercare
-
Tattoo the dots:
For the three dots I find it helpful to hold the machine vertically. Gently dip the needle into the skin for just a moment at each stencil mark. Do not create circles; just a simple ‘poke’ fills the dot sufficiently. -
Final wipe:
Once finished, clean the entire area thoroughly with green soap to remove excess ink and plasma. -
Inspect connections:
Look closely at the tips of the moon. If the lines don’t meet perfectly specifically at the sharp points, use the very tip of the needle to gently pull the ink together for a crisp finish. -
Protect the fresh art:
Apply a thin layer of aftercare ointment or a second-skin bandage to protect the open wound from bacteria.
Enjoy your new, subtle celestial ink and let it heal completely before exposing it to sun or soaking water
Tiny Filler Dots and Sparkles
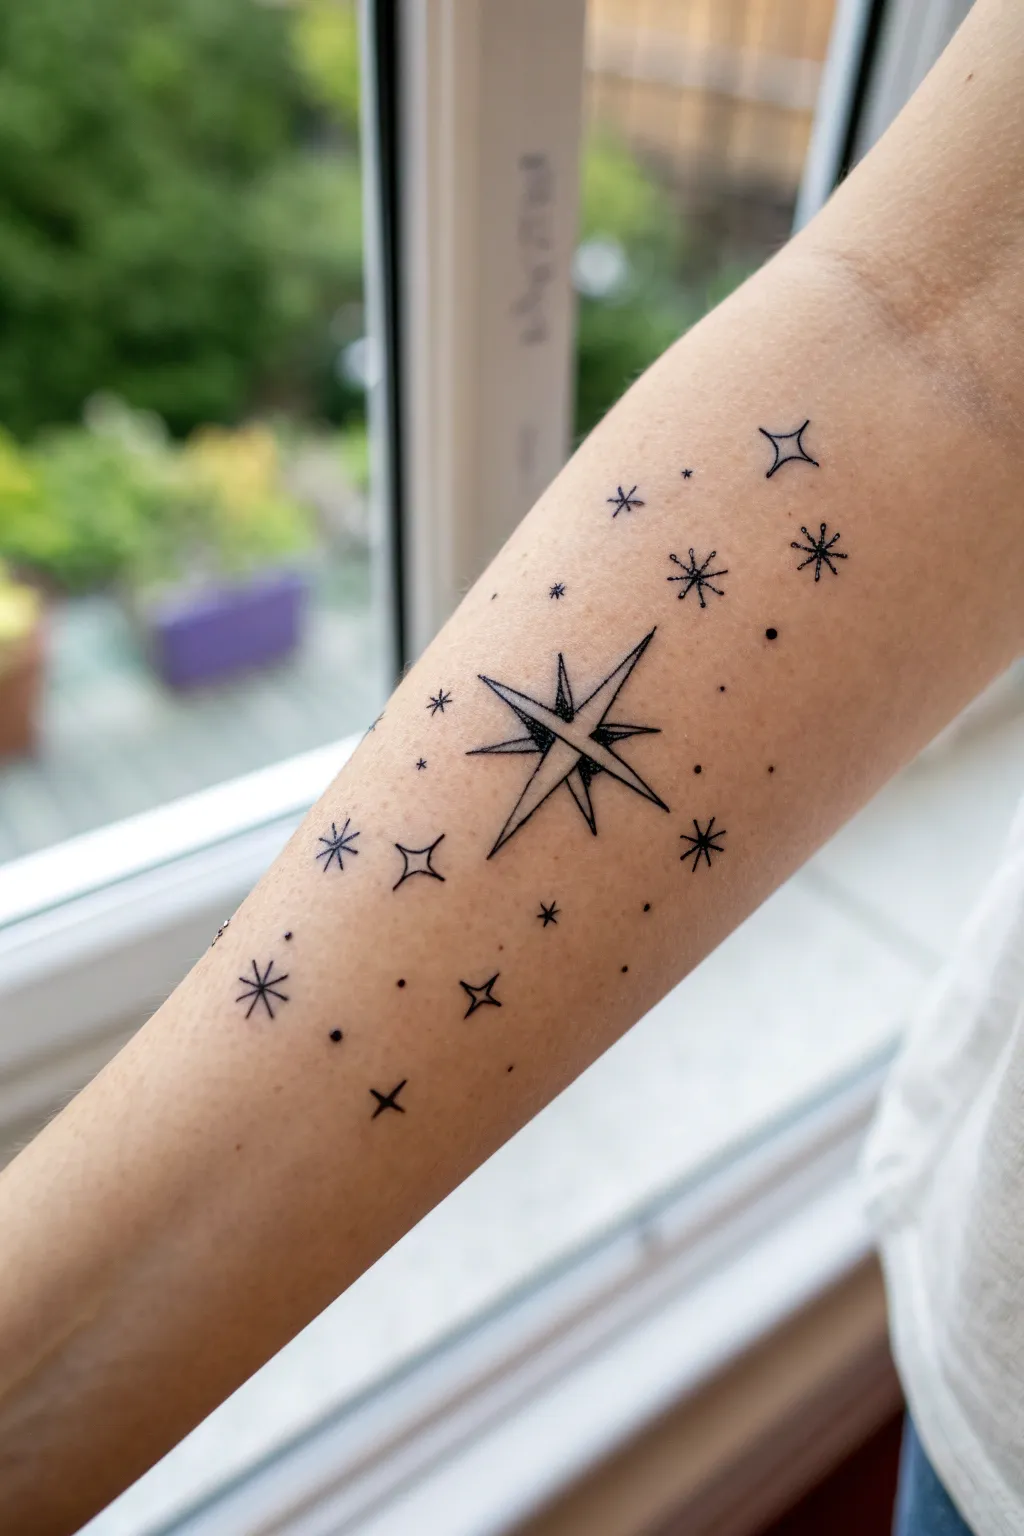
Embrace a whimsical, starry aesthetic with this collection of fine-line sparkles, dots, and a central guiding star. This minimalist design creates a delicate constellation effect on the skin, perfect for filling negative space or standing alone as a subtle statement.
Detailed Instructions
Materials
- Tattoo machine (pen or rotary style)
- 3RL (3 Round Liner) tattoo needle cartridge
- 1RL (1 Round Liner) tattoo needle cartridge (optional for finest dots)
- Black tattoo ink (high-quality lining black)
- Stencil paper and transfer gel
- Green soap and squeeze bottle
- Distilled water
- Paper towels
- Ink caps
- Vaseline or tattoo glide
- Disposable gloves
- Skin marker (surgical pen)
Step 1: Preparation and Stencil
-
Design the layout:
Sketch your constellation on paper first. Draw a large central 8-point star (a compass rose style) as the anchor. Scatter smaller elements around it: simple 4-point stars, cross-hatched stars, tiny plus signs, and random dots to simulate a galaxy. -
Create the stencil:
Trace your finalised design onto stencil transfer paper. Press firmly to ensure the fine lines transfer clearly. For the tiny random dots, you can either mark them on the stencil or free-hand them later for a more organic flow. -
Prepare the skin:
Clean the forearm area thoroughly with green soap and water. Shave the area carefully to remove any hair, then sanitize with an alcohol wipe. Allow the skin to dry completely. -
Apply the transfer:
Apply a thin, even layer of stencil transfer gel. Place your stencil carefully onto the skin, pressing down firmly without sliding. Peel it back gently and let it dry for at least 10-15 minutes so it doesn’t rub off while you work.
Needle Depth Pro Tip
For tiny dots, don’t go deep! You only need to touch the very surface of the dermis. If you see a ‘blowout’ (ink spreading), lighten your hand immediately.
Step 2: Lining the Main Star
-
Setup your machine:
Load a 3RL cartridge into your machine. Dip into your black lining ink. I prefer to keep my voltage slightly lower for fine geometry to ensure steady control. -
Outline the north-south points:
Start with the central star. Tattoo the long vertical diamond shape first. Pull your lines towards you where possible for better stability. -
Outline the east-west points:
Rotate your arm or the client’s arm slightly if needed. Tattoo the horizontal diamond shape that intersects the first one, creating a cross. -
Add the diagonal points:
Draw the four smaller points between the main arms. These should be shorter and tucked behind the main cross structure to create depth. -
Detail the center:
Add a small line splitting each point down the middle. This gives the star that classic bevelled compass look.
Level Up: White Highlights
Add tiny dots of white ink in the center of the largest black stars. This creates a striking glimmer effect once the tattoo heals.
Step 3: Creating the Constellation
-
Tattoo the medium stars:
Move outward to the secondary stars. For the ‘sparkle’ shapes (four curved lines meeting in the center), use very light hand pressure to keep the tips sharp. -
Add the starbursts:
Locate the 8-stroke starbursts (an asterisk shape). Tattoo these with single, quick, straight lines crossing over a central point. -
Incorporate the linear crosses:
Find the simple cross shapes (+) in your design. Keep these perpendicular and crisp; they act as stabilizers in the chaotic star field. -
Switch to finer details:
If you have a 1RL, you can switch now for the tiniest details, though a 3RL works if you use a light touch. Carefully add the smallest hanging stars.
Step 4: The ‘Filler’ Texture
-
Stipple the dots:
This is the most crucial step for the ‘filler’ look. Dip frequently for fresh ink. Create dots by gently touching the needle to the skin—straight in and straight out. -
Vary dot sizes:
Create visual interest by varying dot sizes. Press just a tiny bit longer for larger ‘planet’ dots, and use a barely-there touch for distant ‘star’ dust. -
Check balance:
Wipe the area gently with green soap. Step back and look at the flow. I often add a few extra freehand dots at this stage to bridge any gaps that look too empty. -
Clean up:
Do a final wipe down with distilled water and green soap to remove excess ink and plasma. Apply a thin layer of soothing aftercare balm or a second-skin bandage.
Enjoy your new piece of personal galaxy art


Have a question or want to share your own experience? I'd love to hear from you in the comments below!