Big rocks are basically the ultimate outdoor canvas—heavy, weather-tough, and already full of character. Here are my favorite large rock painting ideas that really use the boulder’s size, curves, and texture instead of fighting them.
Ladybug Boulder
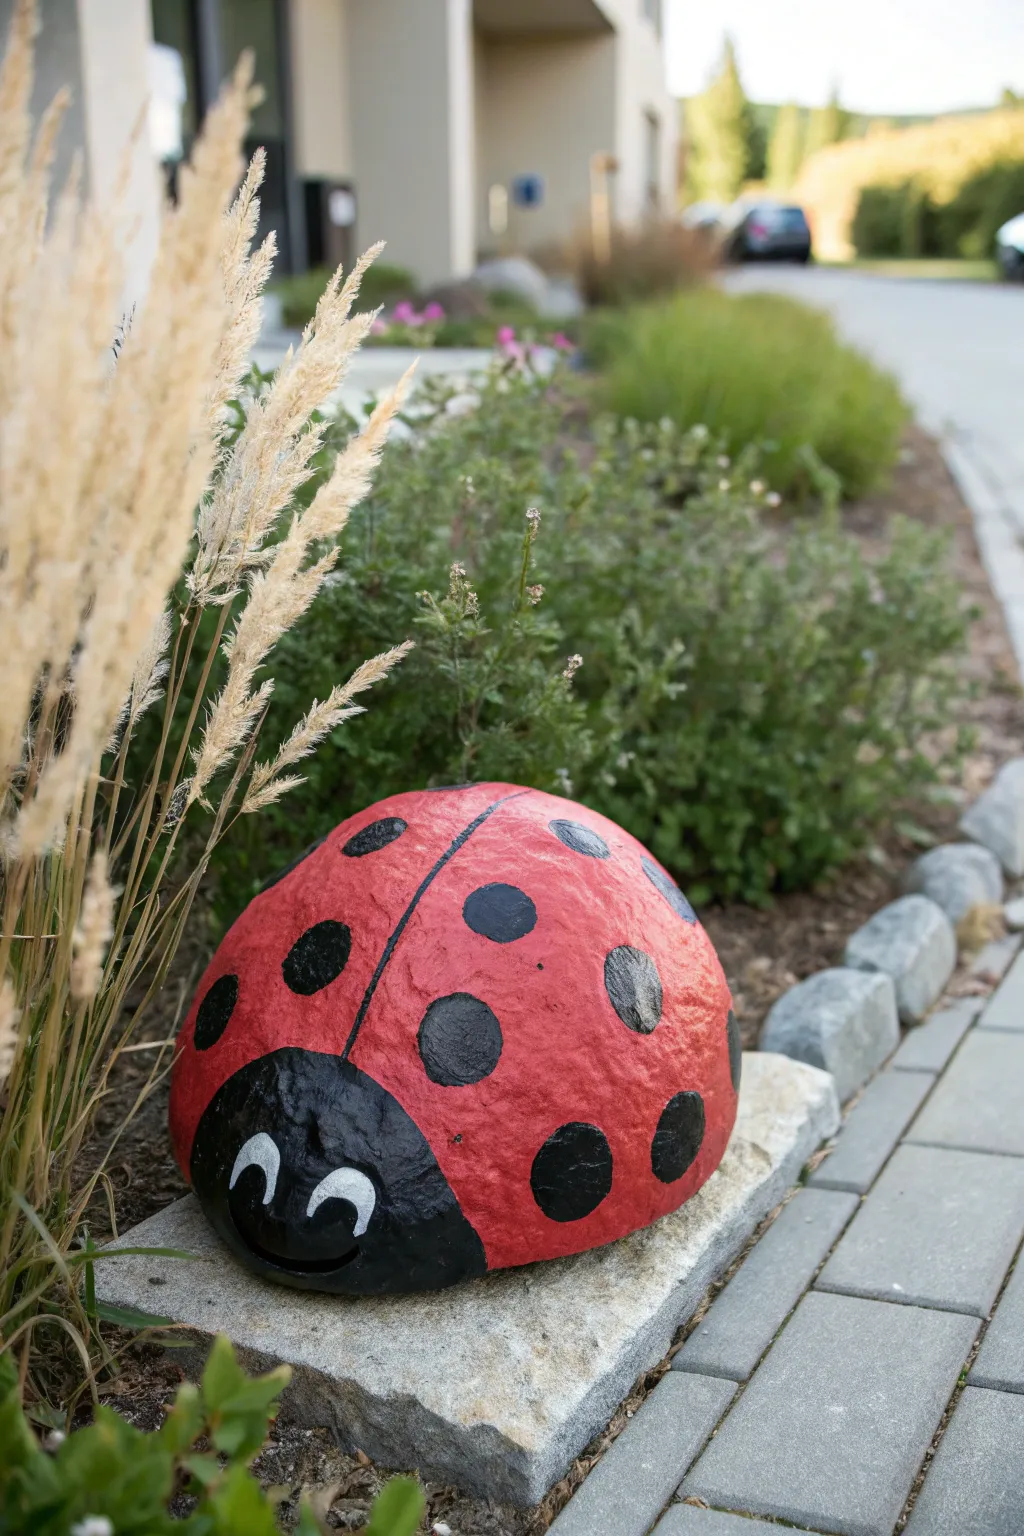
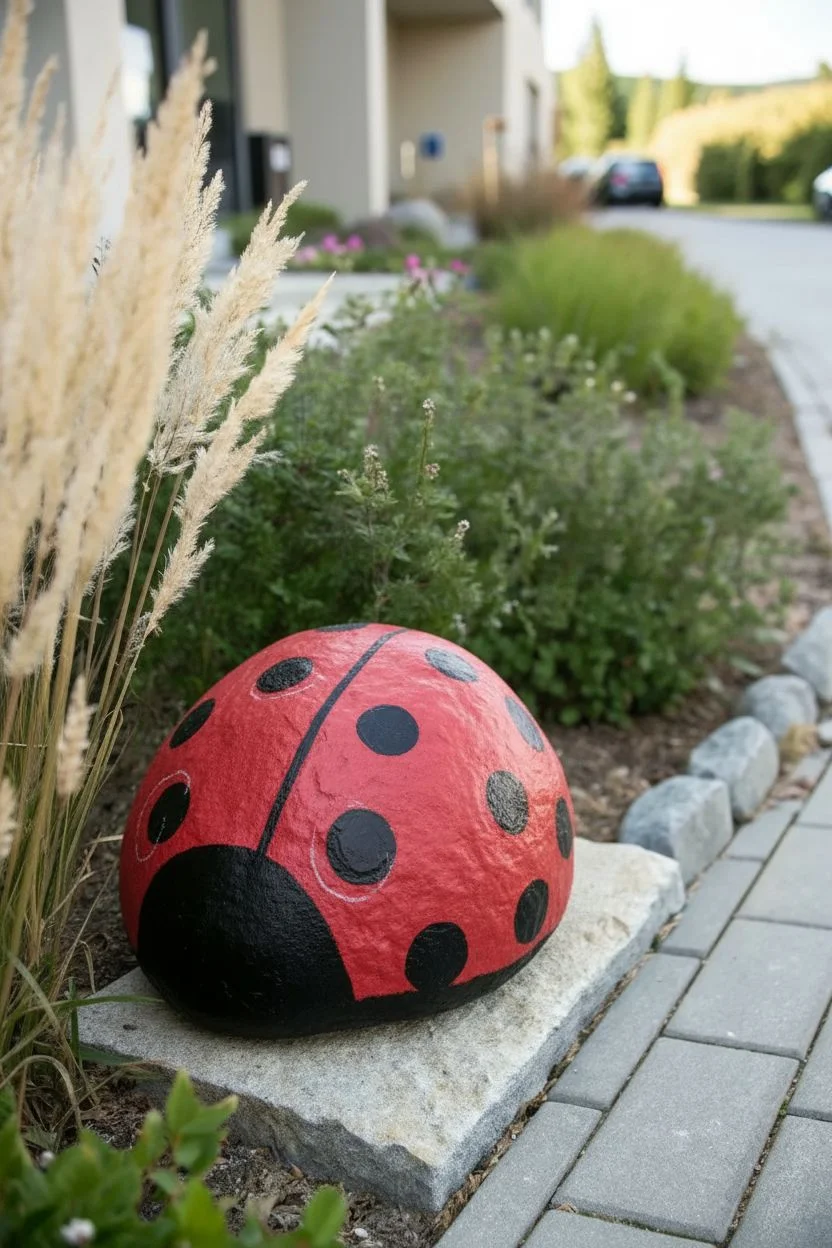
Transform a plain garden boulder into a cheerful greeting for your guests with this oversized ladybug project. The bright red shell and bold black spots create an instant focal point that adds a touch of whimsy to any flowerbed.
Detailed Instructions
Materials
- Large, round (or oval) boulder
- Pressure washer or scrub brush
- Soap and water
- Outdoor acrylic paint (Red)
- Outdoor acrylic paint (Black)
- Outdoor acrylic paint (White)
- Large flat paintbrush (2-3 inch)
- Medium round paintbrush
- Small liner brush
- Chalk or pencil
- Clear outdoor sealant spray (UV resistant)
Step 1: Preparation & Base Coat
-
Scrub it down:
Before putting brush to stone, the surface needs to be pristine. Use a hose and a tough scrub brush with soapy water to remove all dirt, moss, and lichen. Let the rock dry completely in the sun for several hours. -
Map out the design:
Using a piece of chalk, lightly sketch the outline of your ladybug directly onto the rock. Draw a curved line near the front to separate the head from the body, and a straight line down the center of the back to divide the wings. -
Paint the red shell:
Load your large flat brush with bright red outdoor acrylic paint. painting the entire body section behind the head line. You will likely need two to three coats to get a solid, opaque red, letting each layer dry for about 20 minutes in between. -
Establish the head:
Switch to black paint and fill in the semi-circular area at the front of the rock for the face. Ensure the edge where the black meets the red is neat and crisp. -
Add the dividing line:
Using a steadier hand or a smaller flat brush, paint a thick black line directly over your chalk mark running down the center of the red shell.
Uneven Surface?
If your boulder is deeply pitted, don’t try to fill every hole with paint. Instead, stipple the paint into the crevices first, then smooth it over the top for better coverage.
Step 2: Details & Sealing
-
Draft the spots:
Once the red base is fully dry to the touch, use your chalk again to sketch out circles for the spots. Varying their placement makes it look more natural, but try to keep them somewhat symmetrical on either side of the dividing line. -
Fill the spots:
Use a medium round brush and black paint to fill in your chalk circles. Start from the center of the spot and spiral outward to the edge to keep a smooth, round shape. -
Create the eyes:
On the black head section, paint two small white semi-circles or arches for the eyes. I find two coats of white are usually necessary here to keep the black background from showing through. -
Refine the expression:
Allow the white arches to dry completely. Then, using your smallest liner brush and black paint, add small pupils or curved lines inside the white area to give the ladybug a smiling or looking-up expression. -
Clean up edges:
Take a moment to inspect the bottom edge of the rock. Paint a neat border along the very bottom where the rock meets the ground so no raw stone shows when it’s placed. -
Final dry:
Let the entire painted rock cure for at least 24 hours. This ensures all the moisture has evaporated from the thick layers of paint. -
Seal for protection:
Spray the entire rock with a clear, UV-resistant outdoor sealant. Apply in light, even mists rather than one heavy coat to prevent drips.
Glow Up
Mix a small amount of glow-in-the-dark powder into your white paint for the eyes. Your ladybug will watch over the garden even after the sun goes down.
Nestle your new friend into some tall grass or mulch and enjoy the pop of color it brings to the yard


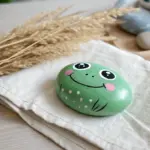
Frog Rock Garden Sculpture
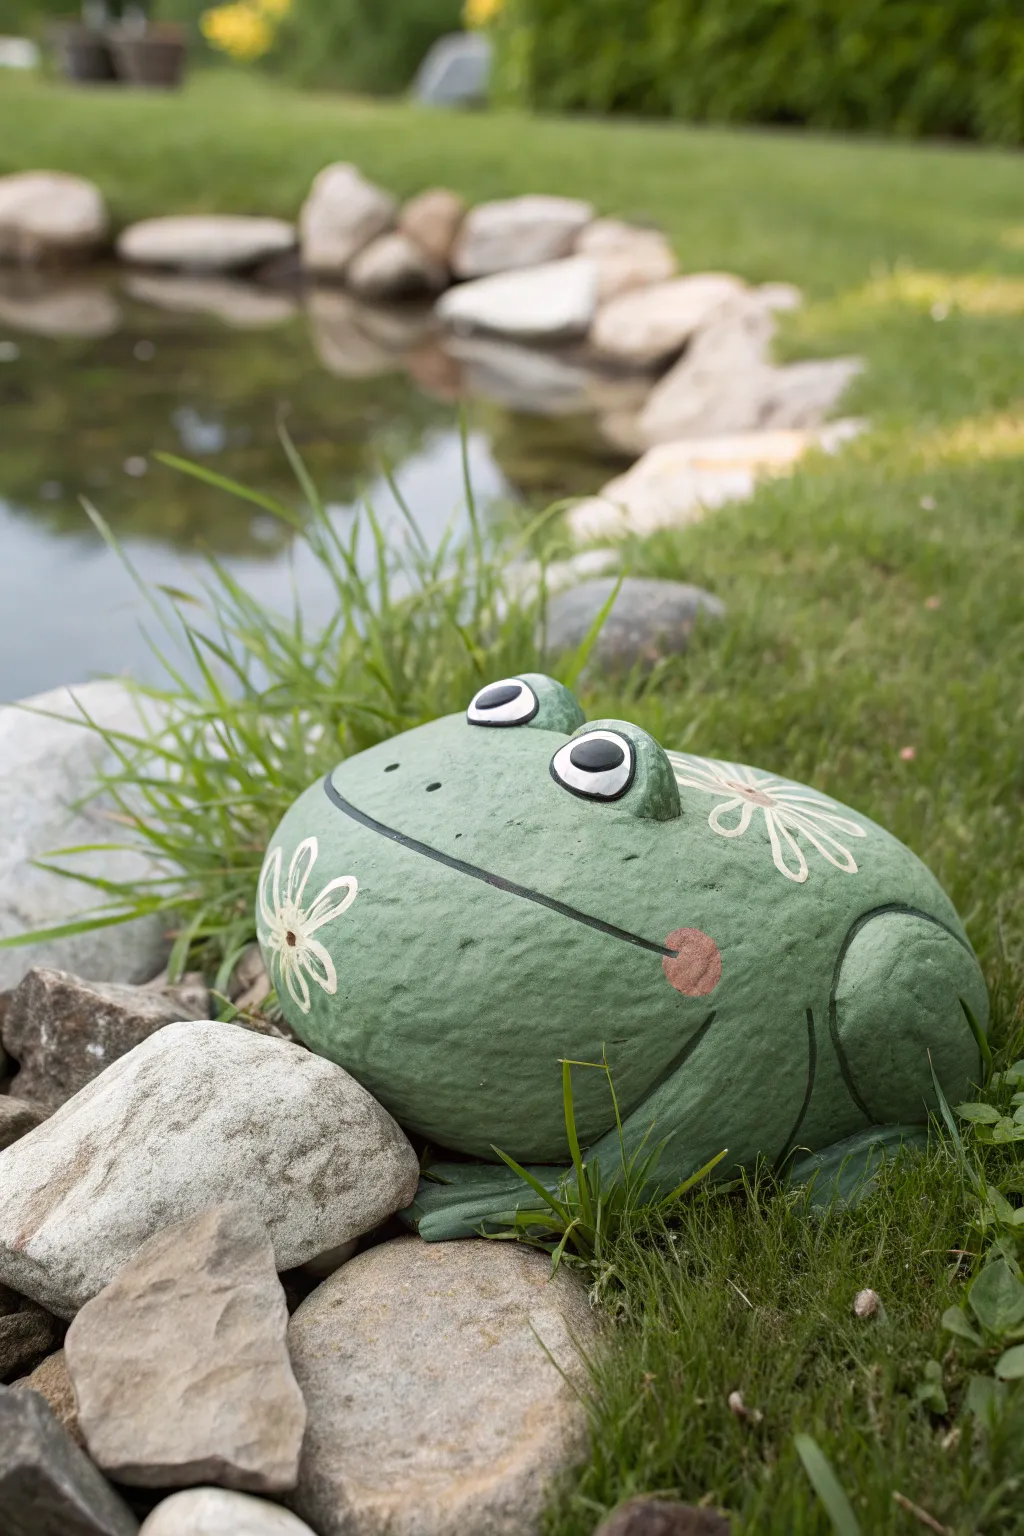
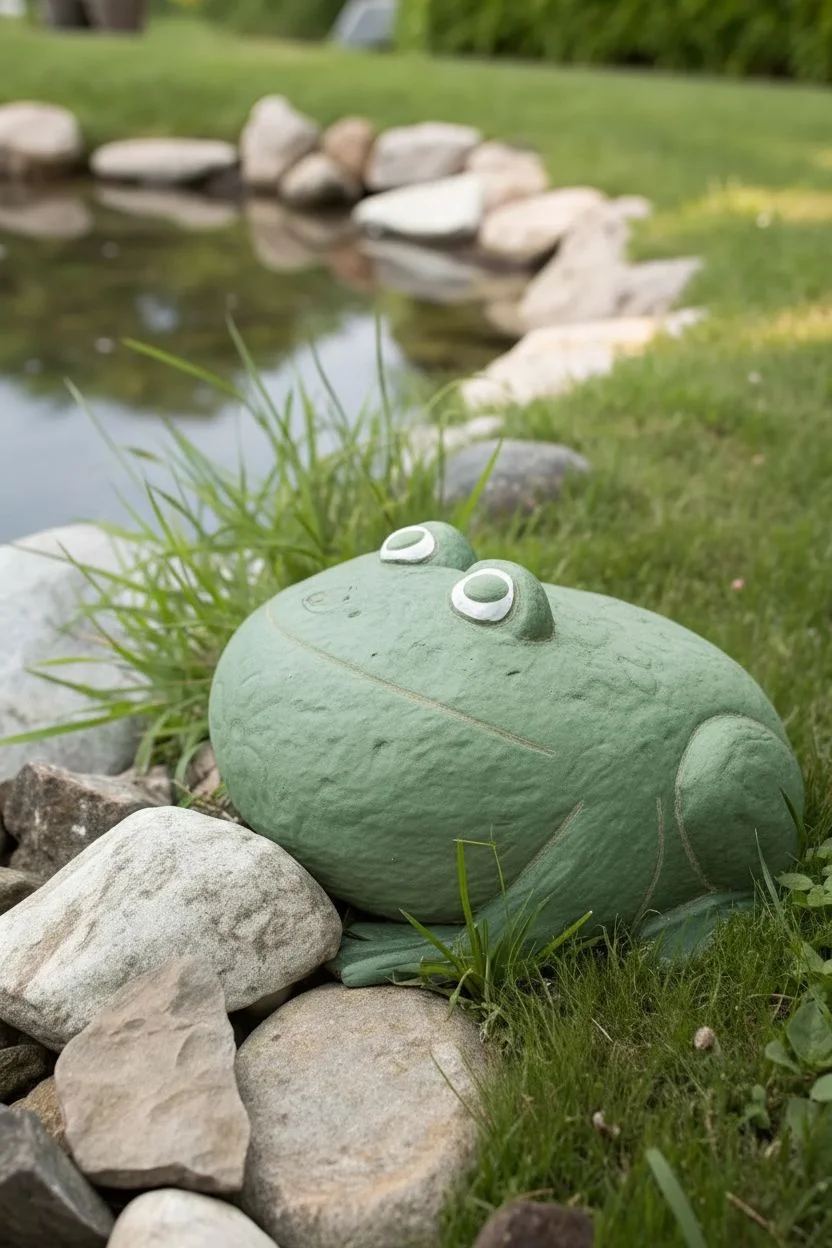
Transform a large, ordinary garden stone into a charming amphibian friend for your flowerbed or pond edge. This project uses simple shapes and bold details to create a whimsical focal point that looks right at home nestled in the grass.
Step-by-Step Guide
Materials
- Large, oval-shaped river rock (smooth surface is best)
- Outdoor acrylic paints (Sage Green, White, Black, Dark Grey, Pink)
- Pencil or white chalk pencil
- Large flat paintbrush
- Medium round brush
- Small fine liner brush
- Clear outdoor sealant spray (matte or satin finish)
- Water cup and paper towels
Step 1: Preparation & Base Coat
-
Select your stone:
Finding the right rock is half the fun. Look for a stone that is naturally rounded and slightly flattened, resembling a crouching frog shape. A smooth texture will make painting the details much easier. -
Clean the surface:
Scrub the rock thoroughly with soapy water and a stiff brush to remove any dirt, moss, or loose grit. Let it dry completely in the sun before you start painting. -
Apply the base color:
Using your large flat brush, coat the entire top and visible sides of the rock with a sage green paint. This shade gives it a natural, garden-friendly look rather than a cartoonish bright green. -
Add a second coat:
Once the first layer is dry to the touch, apply a second coat of sage green to ensure full, opaque coverage. I usually let this dry for at least an hour to prevent lifting when adding details. -
Sketch the features:
Lightly sketch the placement of the eyes, the wide mouth line, and the decorative flowers using a pencil or white chalk pencil. This helps you get the symmetry right before committing with paint.
Step 2: Face & Details
-
Paint the eye sockets:
Mix a tiny bit of white into your sage green to make a lighter shade. In the area where the eyes will go, paint two protruding humps to simulate the frog’s brow structure. -
Create the eyes:
Using a medium round brush and white paint, fill in two large ovals for the eyes. You may need two coats of white to cover the green completely. -
Add the pupils:
Once the white is dry, paint large black circles inside the white ovals. Leave a tiny white sliver or add a white dot later for a ‘glint’ to bring the frog to life. -
Outline the eyes:
Take a fine liner brush with black paint and carefully outline the white part of the eyes to make them pop against the green skin. -
Draw the mouth:
Paint a long, sweeping black line across the width of the rock for the mouth. Curve it slightly upwards at the ends to give your frog a subtle, contented smile. -
Add the cheeks:
Dip a medium round brush into pink paint. Dab a small circle at the corner of the mouth to create a rosy cheek. Repeat on the other side. -
Detail the nose:
Using the back end of a small paintbrush dipped in black paint, dot two small nostrils just above the mouth line in the center of the face.
Rock Steady
Prop your rock up on a small bowl or towel while painting. This stabilizes rounded stones and prevents them from rolling while you work on delicate details.
Step 3: Decorative Flourishes
-
Paint the flowers:
On the flanks or back of the frog, use a small round brush and white paint to create simple daisy-like flowers. Paint five or six loops radiating from a center point. -
Add flower centers:
Place a small dot of the sage green or a contrasting dark color in the very center of your white flowers. -
Define the legs:
Use a thin brush with dark grey or diluted black paint to draw curved lines on the sides of the rock. These lines suggest the folded hind legs of the frog. -
Add skin texture:
For a bit of realism, you can add tiny, faint dots or speckles in a darker green across the back, though keeping it smooth is also a nice stylistic choice. -
Seal the artwork:
After the paint has cured for 24 hours, take the rock outside and spray it with several light coats of clear, weather-resistant sealer to protect it from rain and sun.
Glow Up
Mix glow-in-the-dark powder into the white paint for the eyes. Your garden frog will keep watch at night with glowing eyes near your pathway.
Place your finished creation near a water feature or under a leafy plant to give your garden a fun personality


Sleeping Cat Boulder
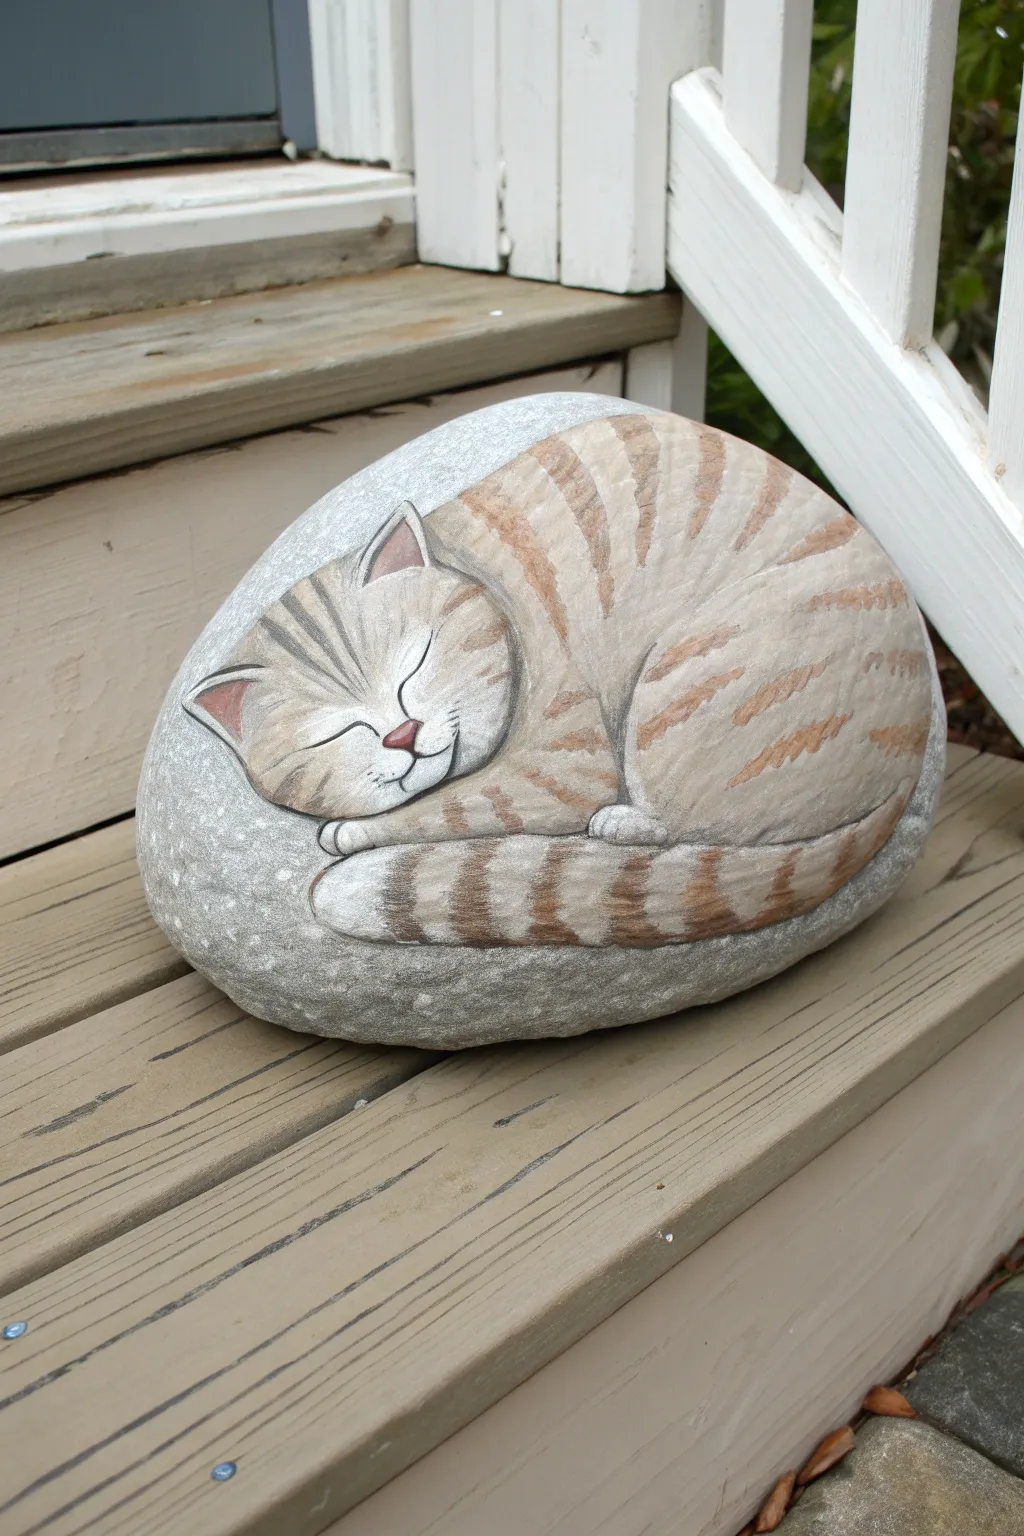
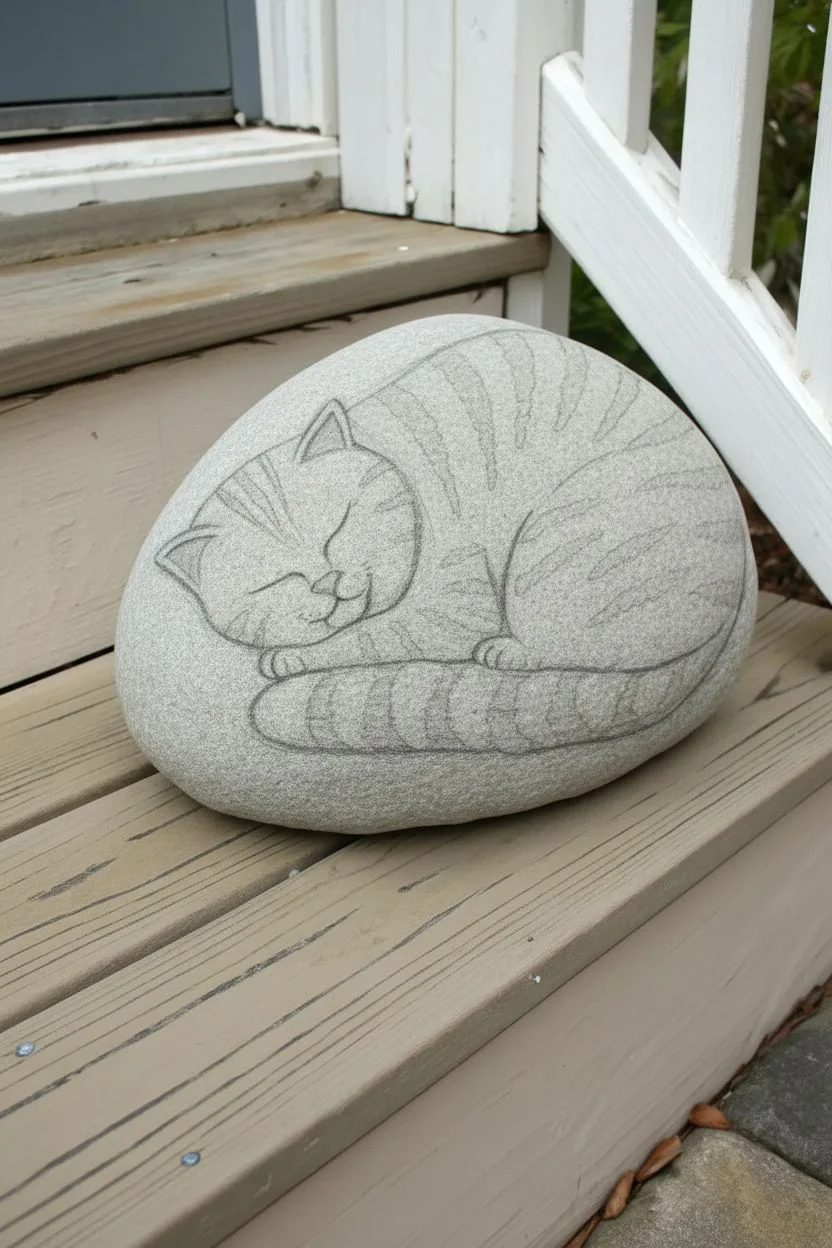
Transform a simple garden stone into a serene, sleeping tabby that will never run away. This project uses the natural shape of a rounded rock to create a cozy, curled-up cat design with soft stripes and sweet details.
Step-by-Step Tutorial
Materials
- Large, smooth, rounded river rock (approx. 8-10 inches)
- Acrylic paints (Titanium White, Unbleached Titanium or Beige, Burnt Sienna, Raw Umber, Black)
- Pencil and eraser
- Assorted paintbrushes (flat 1-inch, filbert #6, round #4, fine liner #0 or #1)
- Water container for rinsing
- Paper towels
- Palette or paper plate
- Clear outdoor sealer (spray or brush-on varnish)
Step 1: Preparation & Sketching
-
Clean Your Canvas:
Scrub your rock thoroughly with soap and water to remove any dirt or moss. Allow it to sun-dry completely so the moisture doesn’t trap underneath the paint later. -
Analyze the Shape:
Rotate your rock to find the best angle. You want the smoothest, most rounded face to be the ‘top’ where the cat is sleeping. Imagine the curve of the cat’s spine following the rock’s natural contour. -
Rough Sketch:
Using a pencil, draw a large oval shape for the main body. Then, sketch the head tucked into one side, slightly overlapping the body. Add the tail wrapping around the bottom curve. -
Refining the Lines:
Clarify the ears—triangles with rounded tips—and the paws tucked underneath the chin. Don’t worry about erasing perfectly; the paint will cover faint graphite marks.
Uneven Coverage?
If the rock’s texture is showing through too much, apply a layer of gesso or white primer just inside your sketched outline before starting the color coats for a smoother finish.
Step 2: Blocking in Color
-
Base Coat:
Mix Titanium White with a small amount of Unbleached Titanium or Beige to create a creamy, off-white base color. Paint the entire shape of the cat with a flat brush, leaving the raw rock exposed for the background. -
Opacity Check:
Let the first coat dry. Rocks often soak up paint, so I usually apply a second coat here to ensure the cat looks solid and opaque against the grey stone. -
Defining the Shape:
Once the base is dry, use a round brush with a slightly darker beige mix to outline the separation between the head, the rear leg curve, and the tail. This ‘mapping’ helps you see the 3D form.
Step 3: Adding Texture & Details
-
Furry Texture:
Using a filbert brush and the original creamy base color, tap or stipple slightly over the harsh outline edges to make the fur look soft rather than like a hard cutout. -
Painting the Stripes:
Mix Burnt Sienna with a touch of Beige. Using a #4 round brush, paint gentle, curving stripes radiating from the spine down the body. Remember to curve them to follow the rock’s roundness. -
Face Stripes:
Switch to a smaller brush. Paint the characteristic ‘M’ shape on the forehead and delicate stripes on the cheeks. Use a light hand so the lines taper naturally. -
Tail Details:
Add ringed stripes to the tail using the same brown mixture. The stripes should wrap around the visual cylinder of the tail form. -
Deepening Shadows:
Mix Raw Umber with a tiny bit of water to make a glaze. Paint this into the crevices where the tail meets the body, under the chin, and between the paws to create depth.
Pro Tip: Soft Fur
To make the fur look extra soft, mix a glazing medium into your stripe color. It makes the paint semi-transparent, allowing the base coat to glow through for a realistic effect.
Step 4: Fine Features
-
The Face:
Use a fine liner brush and dark grey or black paint to draw two simple, downward-curving arcs for the closed eyes. Add a tiny triangle nose using pink or watered-down Burnt Sienna. -
Ear Details:
Fill the inner triangles of the ears with a soft pinkish-beige. Outline the outer ear edge with the base cream color to make it pop. -
Whiskers & Highlights:
With your finest liner brush and thinned white paint, add a few stray whisker lines on the muzzle. Add tiny white highlights on the nose and the top of the head stripes for a sun-kissed look. -
Seal It Up:
Allow the rock to dry for at least 24 hours. Apply two coats of clear outdoor sealer to protect your sleeping feline from the elements.
Place your sleeping stone cat in a garden nook or on a sunny porch step for a peaceful decorative touch


Owl Boulder With Feather Texture
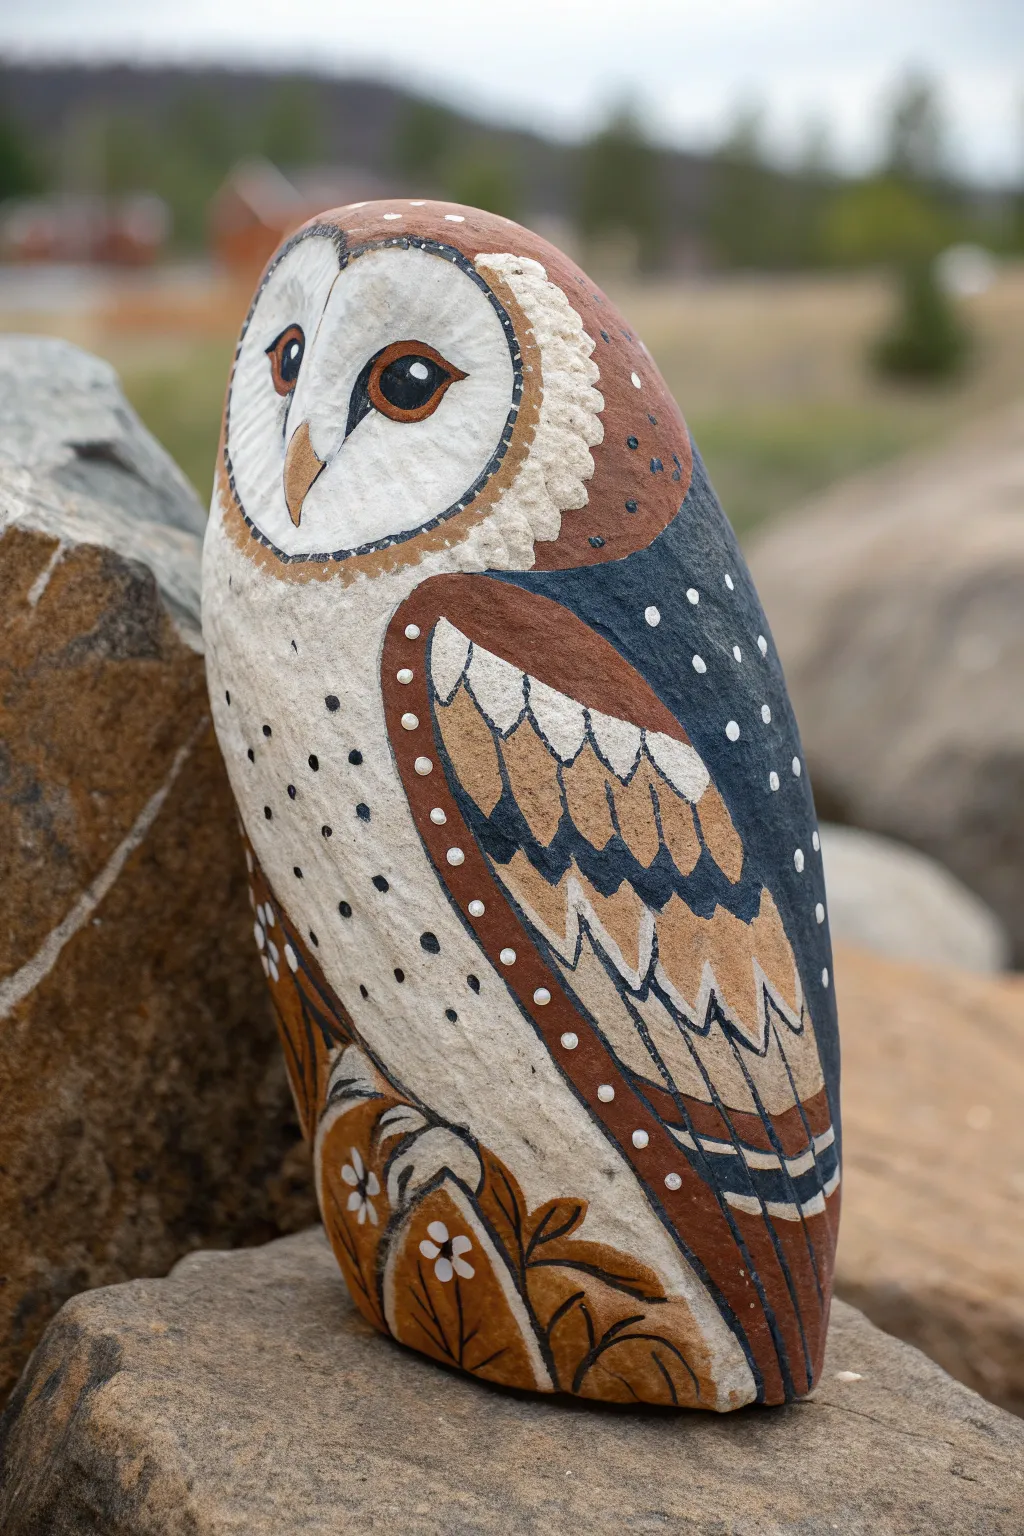
Transform a smooth, standing stone into a stunning barn owl featuring intricate feather details and stylized floral accents. This project combines bold blocking with delicate line work for a piece that looks equally at home in a garden or on a bookshelf.
Detailed Instructions
Materials
- Large, smooth river rock (oblong shape preferred)
- Acrylic paints (White, Black, Tan/Beige, Dark Brown, Terracotta/Rust Orange, Dark Blue-Grey)
- Pencil for sketching
- Assorted brushes (Wide flat brush, medium round brush, fine liner brush)
- Dotting tools or toothpicks
- Matte or satin sealant spray
- Water cup and palette
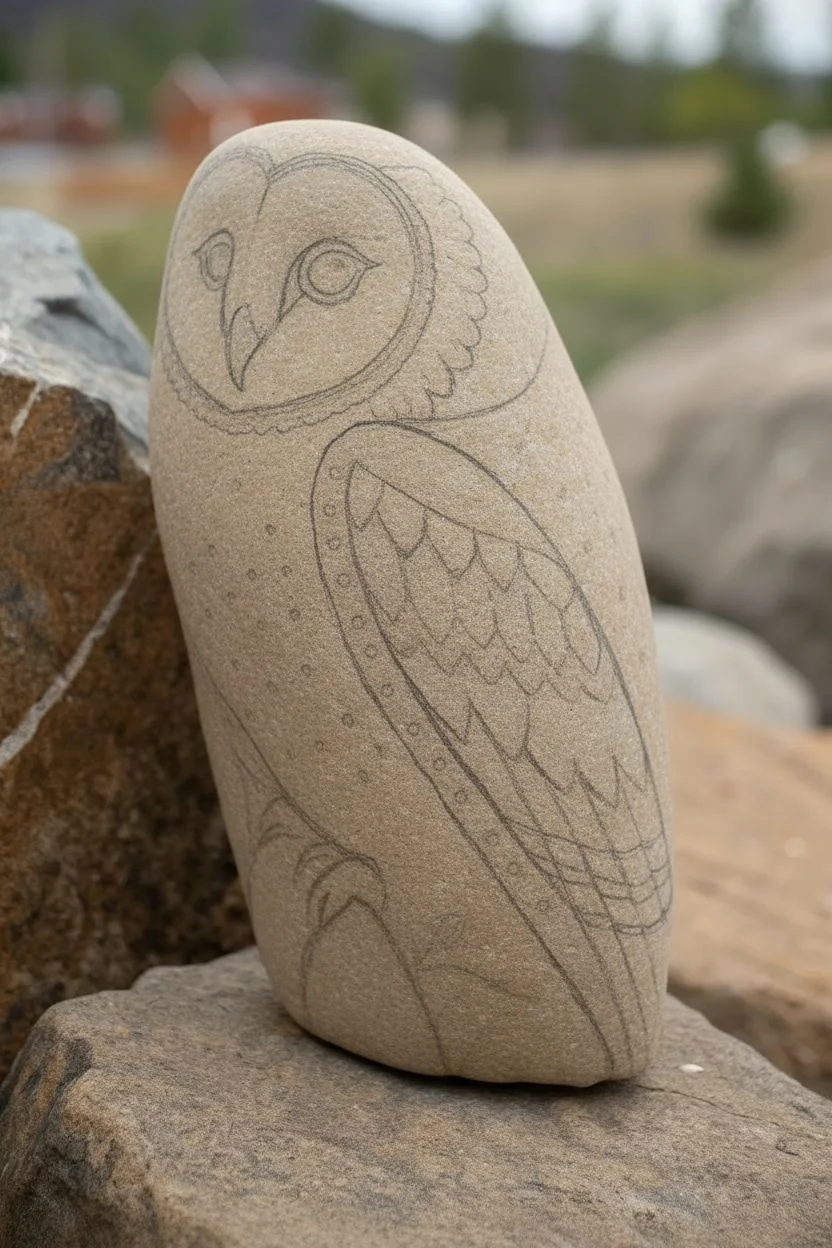
Step 1: Base and Sketching
-
Clean your canvas:
Begin by scrubbing your rock with soap and water to remove any dirt or grease. Let it dry completely in the sun or use a hairdryer to speed things up. -
Establish the shape:
Sketch the owl’s outline directly onto the bare stone using a pencil. Draw the heart-shaped face mask near the top, the curve of the wing down the right side, and the body shape. -
Define the face:
Inside the heart shape, lightly mark where the eyes and beak will go. This central anchor point helps ensure the rest of your proportions stay balanced.
Uneven Surfaces?
If your rock has pits, don’t fight them. Use the thicker paint of the ‘wing’ sections to fill small divots, or let the texture add rugged character to the feather layers.
Step 2: Blocking in Colors
-
Paint the face mask:
Fill in the heart-shaped face area with white paint. You might need two thin coats here to ensure it’s opaque against the stone’s natural color. -
Block the body:
Paint the chest and stomach area with a creamy beige or off-white. Use curved brushstrokes that follow the contour of the rock to suggest roundness. -
Create the dark wing:
Paint the upper back and outer wing area with a dark blue-grey color. Extend this color around the side to create the silhouette of the folded wing. -
Add warmth:
Using the terracotta or rust orange paint, fill in the upper shoulder of the wing, the top of the head cap, and the base area where the feet will be.
Step 3: Adding Feather Textures
-
Detail the wing feathers:
Mix a light tan color. On the dark blue wing section, use a medium brush to paint overlapping U-shapes or scallops to represent the flight feathers. -
Outline the feathers:
Once the tan scallops are dry, outline them with your dark blue-grey paint to make them pop. Add small central lines inside each feather for texture. -
Create the facial disk:
Mix a light brown and use a fairly dry brush to stipple small dashes around the edge of the white face mask. This creates that fluffy, soft border barn owls are known for. -
Paint the eyes:
Paint two large circles with terracotta orange. Once dry, add smaller black circles inside, and finish with a tiny white reflection dot in each pupil. -
Define the beak:
Paint a downward-pointing diamond shape for the beak in a mix of tan and yellow, outlining it thinly in black.
Sharp Lines
For the crispest feather outlines, slightly water down your black acrylic. It should be the consistency of ink to flow smoothly off your liner brush without dragging.
Step 4: Fine Details and Finishing
-
Outline the major sections:
Using a fine liner brush and black paint (or a paint pen), outline the separation between the wing, the body, and the head cap. -
Decorate the wing edge:
Use a dotting tool dipped in white paint to add a row of evenly spaced dots along the terracotta stripe of the shoulder. -
Add chest speckling:
Dip your fine brush or a toothpick into black paint. Add random, tiny dots across the white chest area to mimic the speckled plumage. -
Paint the floral base:
At the bottom rust-colored section, paint stylized leaf shapes in black outline. I like to add small white dots inside the leaves to look like simple flowers. -
Starry details:
On the dark blue back section, add a few scattered white dots to suggest a night sky or starry pattern on the feathers. -
Final seal:
Allow the rock to cure for at least 24 hours. Coat it with a matte or satin spray sealant to protect your artwork from the elements.
Now you have a wise little guardian ready to watch over your garden path or desk.
BRUSH GUIDE
The Right Brush for Every Stroke
From clean lines to bold texture — master brush choice, stroke control, and essential techniques.
Explore the Full Guide
Turtle Rock for Garden Beds
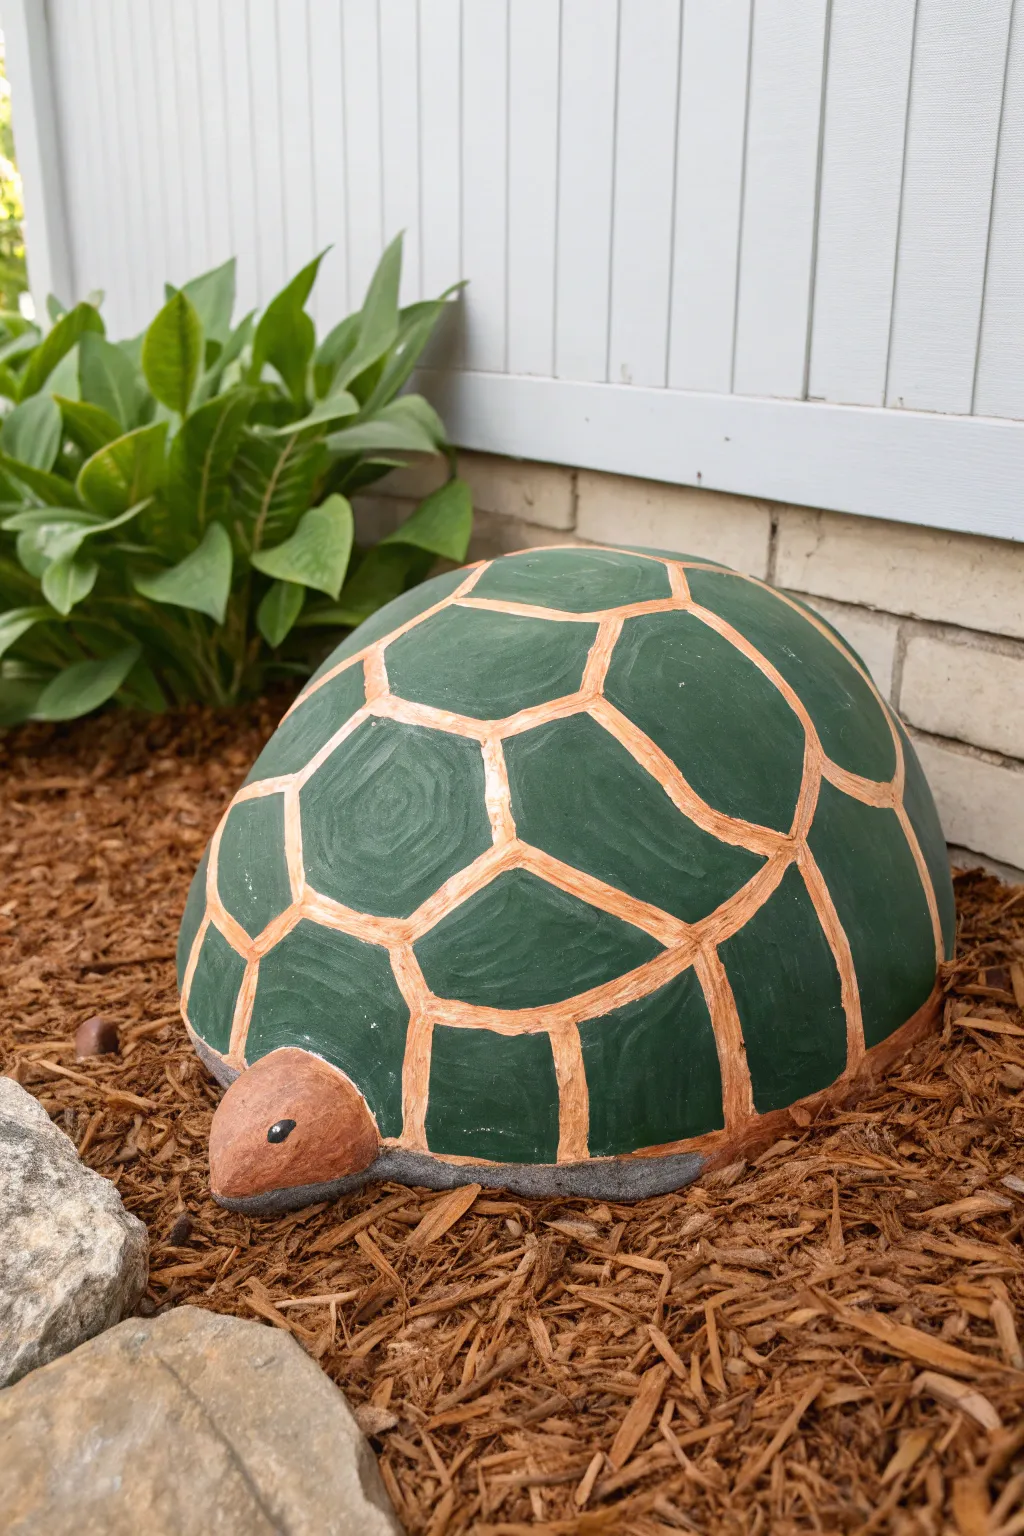
Transform a simple rounded stone into a charming garden companion with this painted turtle project. The deep forest green shell and contrasting terracotta lines create a natural, earthy look that blends perfectly with mulch and greenery.
Step-by-Step
Materials
- Large, smooth, round river rock (football or basketball size)
- Air-dry clay or outdoor epoxy sculpting clay (for the head)
- Acrylic outdoor craft paints: Forest Green, Terracotta/Light Brown, Black, White, Grey
- Paintbrushes: Large flat brush, medium round brush, fine liner brush
- Pencil or white chalk pencil
- Outdoor spray sealant (clear, matte or satin finish)
- Water bonding glue or strong adhesive (if using air-dry clay)
- Sandpaper (optional)
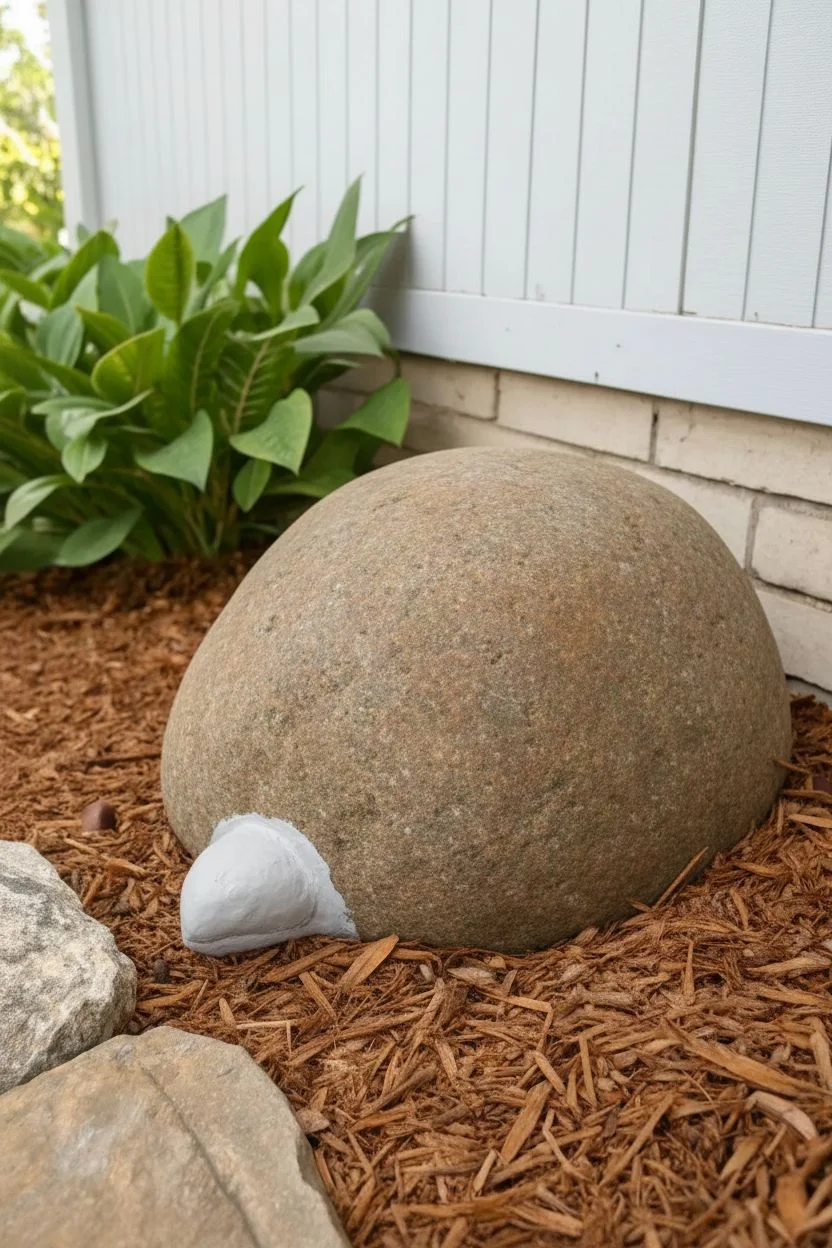
Step 1: Shaping the Turtle
-
Clean the stone:
Begin by thoroughly scrubbing your rock with soap and water to remove any dirt or moss. Let it dry completely in the sun so your clay and paint will adhere properly. -
Position the stone:
Find the most stable side of your rock to be the bottom. The top should have a nice, domed curve ideally suited for a turtle shell. -
Form the head base:
Take a handful of sculpting clay and roll it into a thick, tapered oval shape. Press one end firmly against the front edge of the rock to form the turtle’s head and neck. -
Secure the head:
Blend the edges of the clay onto the rock surface to create a seamless transition. If the clay doesn’t stick well on its own, apply a little strong adhesive or water bonding glue to the contact point before pressing it down. -
Smooth the clay:
Dip your fingers in a little water and smooth out the surface of the clay head so it’s clean and rounded. Let the clay cure fully according to the package instructions.
Natural Texture
Don’t aim for perfect geometric shapes. Wobbly, slightly uneven lines for the shell pattern actually make the turtle look more organic and realistic.
Step 2: Designing the Shell
-
Sketch the pattern:
Using a pencil or chalk pencil, lightly draw the shell pattern onto the rock. Start with a pentagon or hexagon in the very center of the dome. -
Expand the grid:
Draw surrounding polygon shapes radiating out from that center shape. These lines will become the separation between the shell plates (scutes). -
Connect to the edge:
Continue the pattern down the sides of the rock until you reach the bottom edge, creating larger, somewhat rectangular shapes along the rim. -
Paint the divider lines:
Load a medium round brush with your Terracotta or Light Brown paint. Trace over all your pencil lines, making them fairly thick and deliberate. You want these to look like the raised ridges of a shell. -
Apply a second coat:
The light brown color needs to be opaque. Once the first pass is dry, go over the lines again to ensure solid coverage.
Step 3: Painting the Details
-
Fill the scutes:
Use a smaller flat brush to fill in the spaces between the brown lines with Forest Green paint. Be careful to paint up to the brown lines without covering them completely. -
Add shell texture:
While the green is still slightly wet, I like to mix a tiny drop of lighter green or yellow into the brush and create subtle swirls in the center of each plate for dimension. -
Paint the head:
Paint the clay head with the Terracotta color. You might need two coats here since clay can be absorbent. -
Detail the face:
Using a fine liner brush and black paint, draw a small almond-shaped eye on the side of the head. Add a tiny white dot in the upper corner of the eye for a reflection. -
Define the rim:
Paint a thin strip of grey along the very bottom edge of the rock where the shell meets the ground, simulating the turtle’s underside or legs tucked in. -
Touch up lines:
If any green paint went over your nice brown lines, take a small brush and tidy up the edges with the Terracotta paint for a crisp finish. -
Protect your work:
Once all paint is thoroughly dry (at least 24 hours), take the rock outside and spray it with 2-3 coats of clear, outdoor-rated sealant to protect it from rain and sun.
Clay Won’t Stick?
If the dried clay head pops off, don’t panic. Use two-part epoxy glue or heavy-duty construction adhesive to reattach it permanently to the stone.
Place your new shelled friend in a flower bed where he can peek out from under the hostas
Fairy House Door and Windows
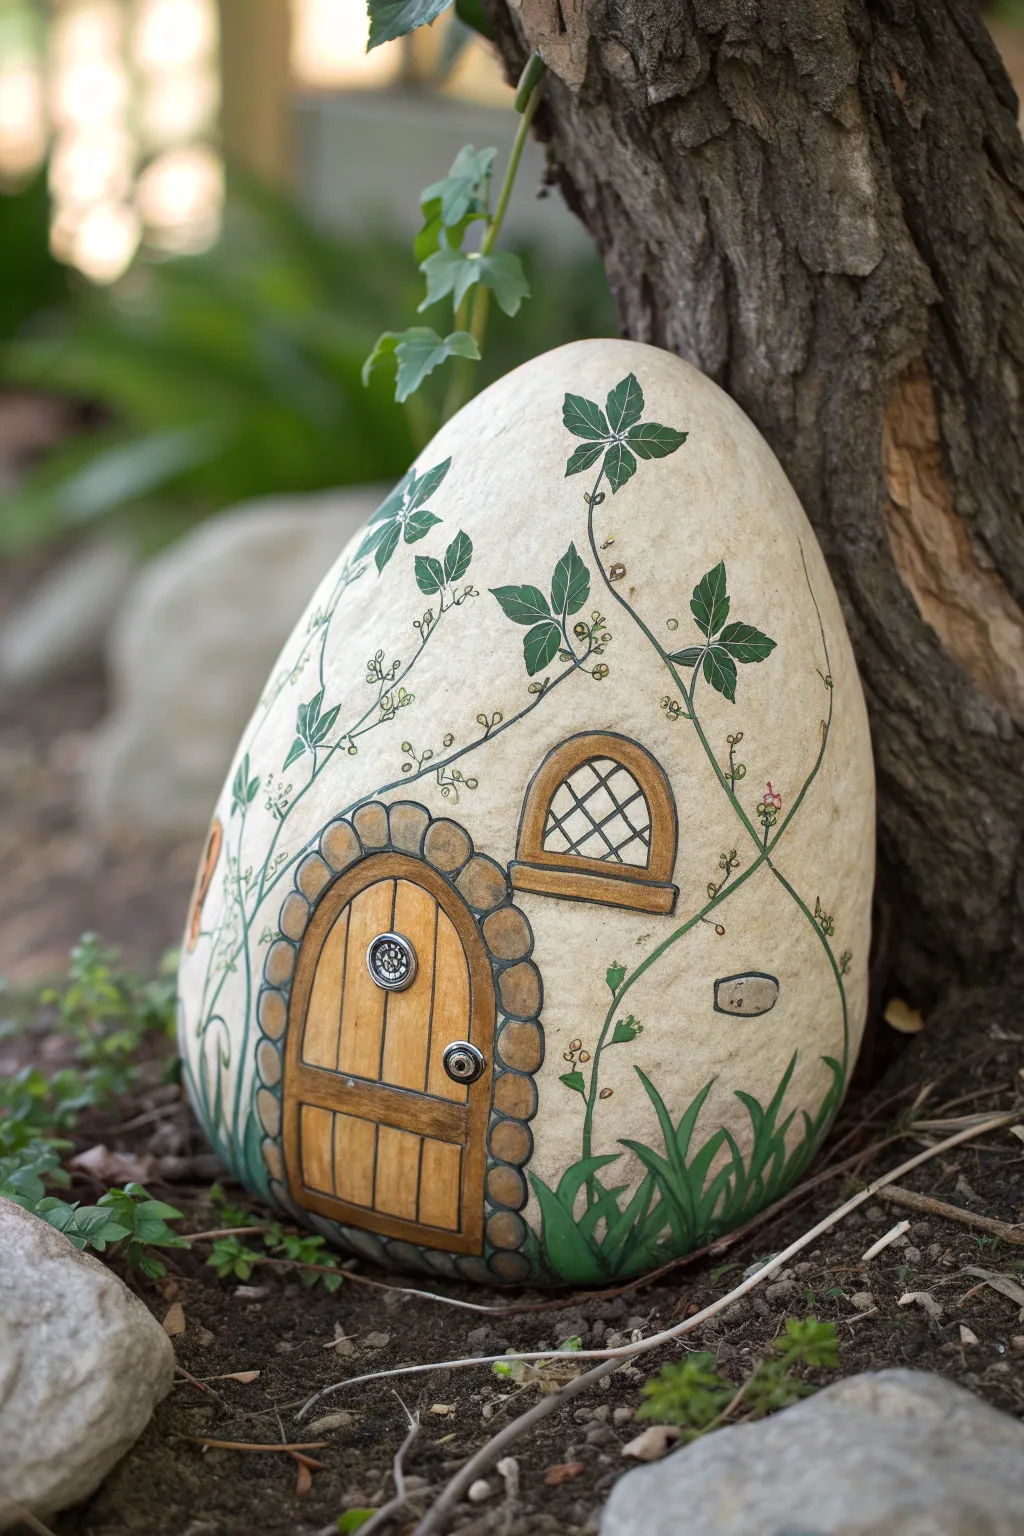
Transform a smooth, egg-shaped river stone into a charming woodland abode for the fae folk. This design features a rustic wooden door, a cozy arched window, and delicate climbing ivy that looks as though it’s growing right out of the stone.
Detailed Instructions
Materials
- Large, smooth egg-shaped rock (light colored is best)
- Acrylic paints: warm white/cream, burnt sienna, yellow ochre, dark brown, grey, leaf green, lush green, black
- Pencil and eraser
- Assorted brushes: flat shader, small round, and fine liner (00 or 000)
- Black paint pen or fine tip permanent marker
- Spray sealer (matte or satin finish)
- Water cup and palette
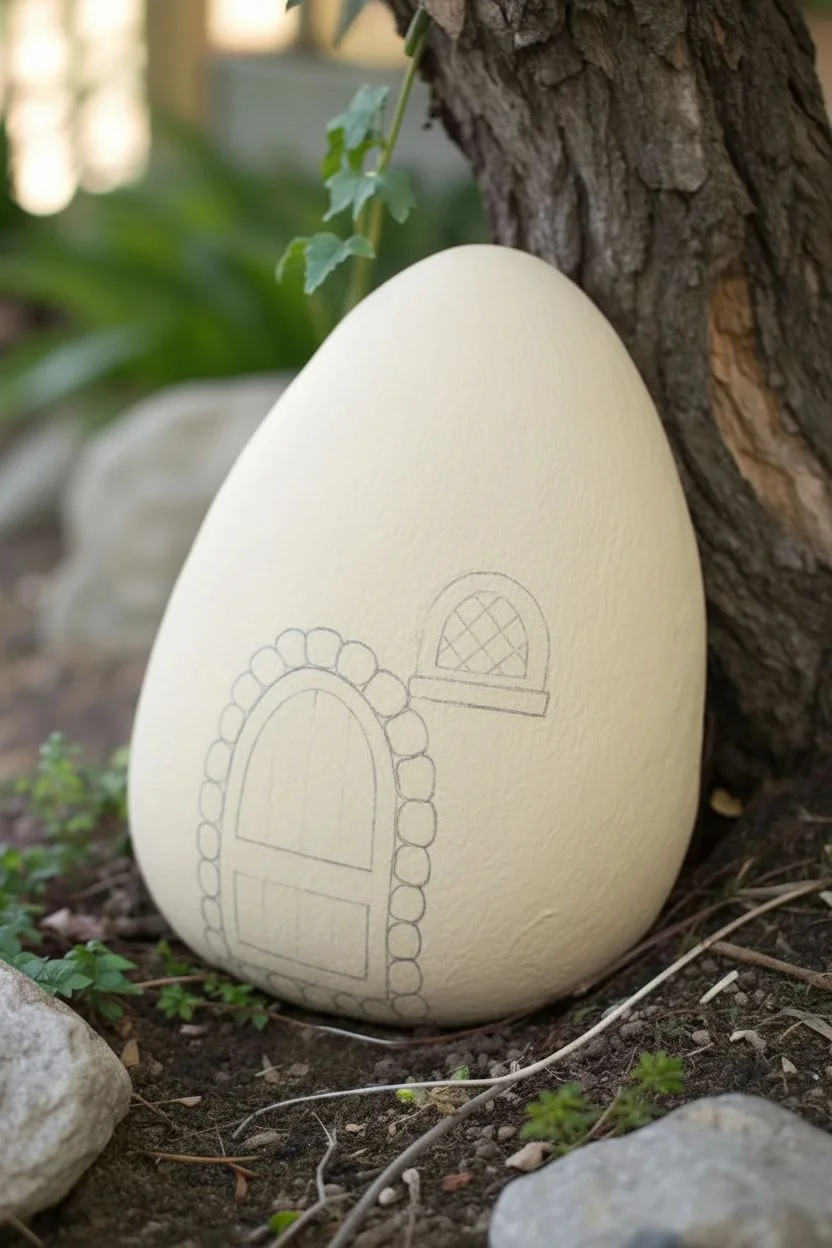
Step 1: Preparation and Base Layout
-
Prepare the canvas:
Scrub your rock thoroughly with soap and water to remove any dirt or oils. Let it dry completely in the sun before starting. -
Apply the base coat:
Mix a warm cream or off-white color. Using a large flat brush, coat the entire surface of the rock. You might need two layers to get an opaque, matte finish that resembles plaster or light stone. -
Sketch the architectural elements:
Once the paint is bone dry, lightly sketch the outline of a large arched door near the bottom center. Add a smaller arched window to the upper right of the door. -
Add the stonework outline:
Sketch a border of rounded, irregular shapes around the door frame to represent the stone archway. Keep the shapes organic, as if built by hand.
Step 2: Constructing the Entrance
-
Paint the door planks:
Fill in the door area with yellow ochre. While wet, streak in a little burnt sienna to simulate wood grain vertical planks. -
Define the door details:
Use a liner brush and dark brown paint to draw vertical lines separating the planks. Add horizontal cross-beams near the top and bottom for a sturdy look. -
Paint the stone archway:
Fill in the stone shapes around the door using grey paint. I like to mix a tiny drop of brown into the grey so it doesn’t look too cold against the warm door. -
Add dimension to the stones:
Once the grey is dry, add a highlight to the top of each stone with white, and a shadow on the bottom with dark grey, giving them a 3D rounded appearance. -
Install the hardware:
Using silver or metallic grey paint, add a small circle for the handle and a decorative hinge. Outline these with a fine black liner to make them pop.
Wobbly Lines?
If your hands shake while painting fine vines, rest your pinky finger against the dry part of the rock to stabilize your hand while using the liner brush.
Step 3: Window and Trim
-
Paint the window frame:
Outline the window shape with the same wood colors used for the door—ochre and sienna. -
Add the window sill:
Paint a slightly thicker, rectangular piece of wood at the bottom of the window to act as a sill. -
Fill the panes:
Paint the inside of the window white or very light cream to suggest light coming from inside, or use a diamond grid pattern with thin black lines for a leaded glass effect.
Bonus Magic
Mix a tiny amount of glitter into the white paint for the window panes to make it look like there is magical candlelight flickering inside the house.
Step 4: Bringing it to Life
-
Sketch the vines:
Lightly draw wandering, vine-like lines curving up from the base and wrapping around the window and over the top of the rock. -
Paint the main stems:
Use a fine liner brush and brown paint to trace your vine sketches. Keep the lines thin and slightly jittery for a natural look. -
Leaf placement:
With the leaf green paint, add groups of three or five pointed leaves (like ivy) stemming from the main vine. -
Add detailed veins:
Once the green leaves are dry, use your finest liner brush or a paint pen to add central veins to the larger leaves for realism. -
Plant the grass:
Using lush green paint and flicking motions, paint blades of grass rising from the very bottom of the rock, partially obscuring the bottom of the door frame. -
Final outlines and sealing:
Go over any key architectural lines with a very fine black outline if they got lost. Allow the rock to cure for 24 hours, then spray with a weather-resistant sealer.
Place your finished fairy cottage in a garden nook or near a tree root to delight anyone who spots it

PENCIL GUIDE
Understanding Pencil Grades from H to B
From first sketch to finished drawing — learn pencil grades, line control, and shading techniques.
Explore the Full Guide
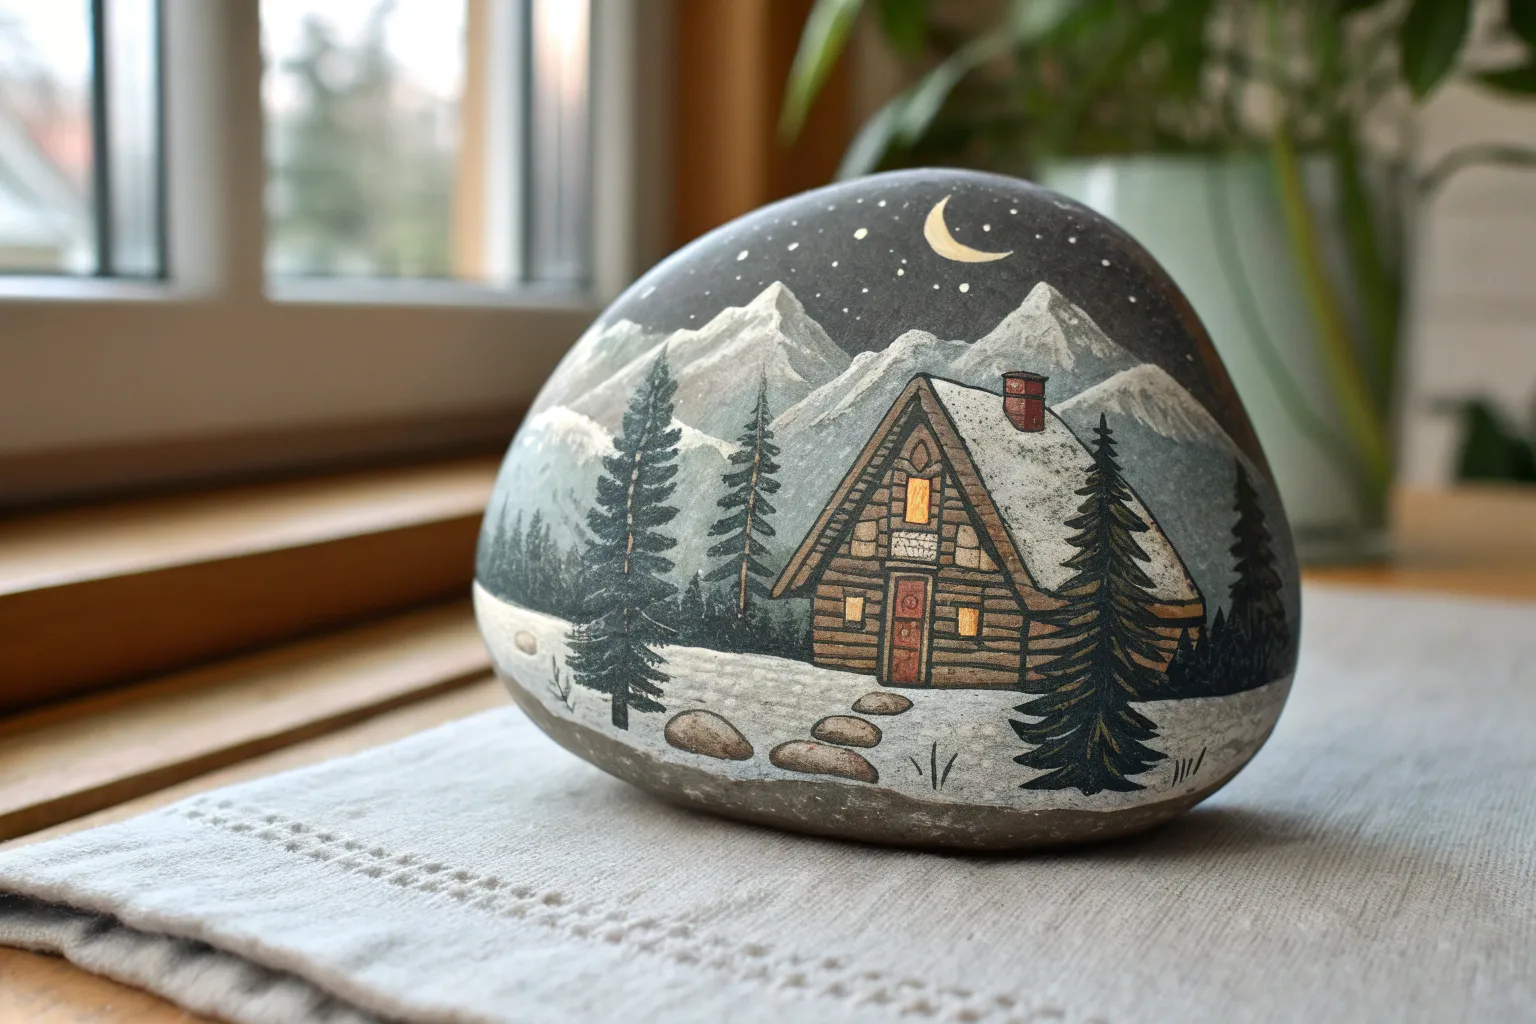
Stone Cottage With Roof Illusion
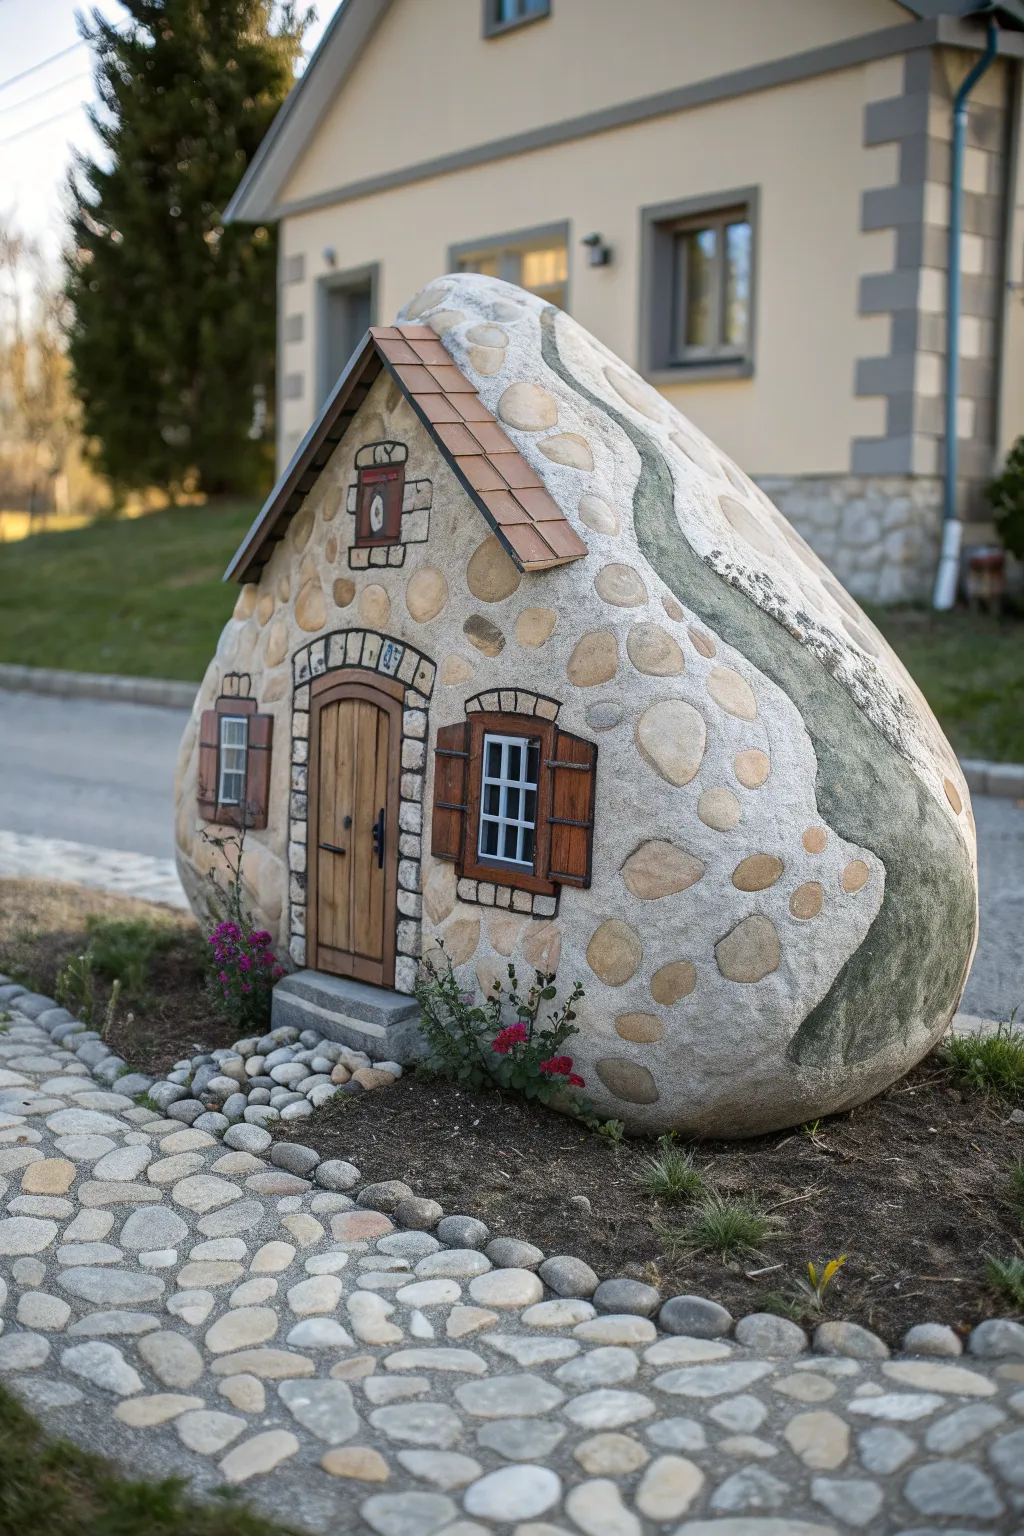
Transform a large garden boulder into a charming fairy tale dwelling with clever painting techniques. This project uses the natural shape of the rock to create a convincing illusion of a peaked roof and rustic stone walls.
Step-by-Step Guide
Materials
- Large, peaked garden rock (cleaned and dry)
- Exterior acrylic paints (slate grey, warm beige, terracotta, dark brown, white, black, moss green)
- Assorted brushes (large flat brush, medium flat brush, liner brush)
- Chalk or pencil for sketching
- Exterior spray sealer (matte/satin)
- Small cedar shingles or wooden craft sticks (optional for 3D roof effect)
- Strong outdoor adhesive (if using wood pieces)
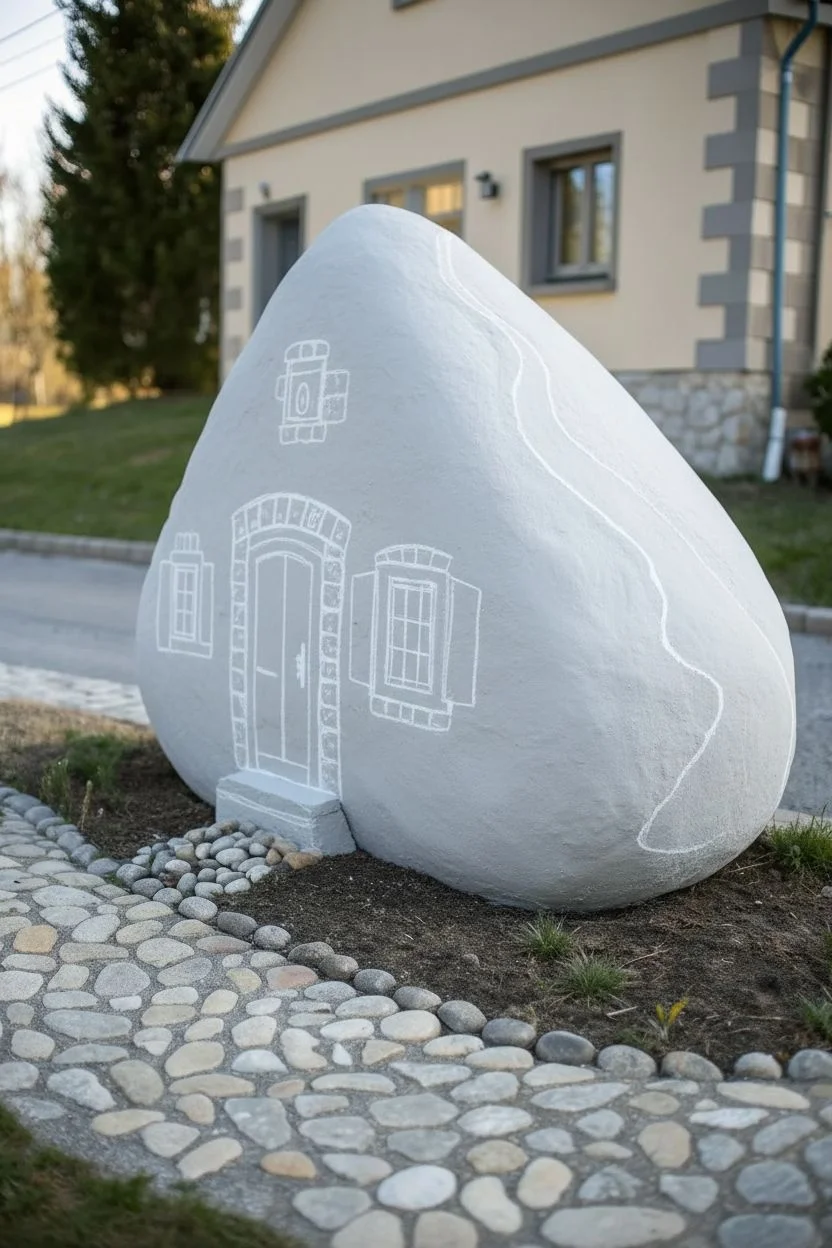
Step 1: Preparation & Mapping
-
Clean the canvas:
Scrub your rock thoroughly with soapy water and a stiff brush to remove all dirt and moss. Let it dry completely in the sun for at least a few hours. -
Plan the architecture:
Look at the rock’s natural contours. Identify the highest point for your roof peak. Sketch the outline of the roofline, a central door, and two windows onto the stone surface using chalk. -
Base coat the mortar:
Mix a large amount of light grey or off-white paint to act as the mortar color. Using a large brush, paint the entire ‘house’ area below your roofline, working around your sketched door and windows.
Step 2: Stonework & Details
-
Paint the wall stones:
Load a medium brush with warm beige and light brown tones. Paint irregular, rounded shapes onto the dried mortar base to simulate river stones. Vary the sizes and spacing for a natural look. -
Add dimension to stones:
Create depth by mixing a slightly darker shade of your stone color. Paint a thin shadow line along the bottom and right edge of each painted stone to make them pop. -
Draft the door frame:
Using a dark grey or black paint and a steady hand, paint the arched frame around your door sketch. Add a similar frame around the window areas to define the structure. -
Wood grain door:
Fill the door area with a warm honey-brown base coat. Once dry, use a liner brush with dark brown paint to draw vertical lines, simulating wooden planks. -
Window details:
Paint the interior of the window frames dark grey. Use a fine liner brush and white paint to carefully create the muntins (the grid bars) inside the window, giving it a classic cottage feel. -
Shutters:
Paint rectangular shutters on either side of the windows using a reddish-brown hue. I like to add horizontal black lines to suggest slats or hinges.
Paint Peeling?
If paint lifts off, the rock wasn’t clean enough or wasn’t dry. Scrub the spot, let it bake in the sun, and re-prime before painting again.
Step 3: The Roof Illusion
-
Define the roofline:
Paint a sharp, dark brown line along the angled top edge where you want the roof to sit. This visual break separates the roof from the wall. -
Paint or attach tiles:
For a painted roof, create overlapping rectangle shapes in terracotta color along the slope. If you want the 3D effect shown in the image, glue small pieces of weather-treated craft wood or shingles onto this painted area. -
Add the ridge:
If painting, darken the very top edge of the rock to look like a roof ridge. If gluing wood, place a final row of material along the spine to cover any gaps. -
Natural weathering:
Using a dry brush technique with moss green and dark grey paint, lightly stipple areas on the right side of the rock (the non-house part) to blend the painted illusion back into natural stone.
Glow at Night
Use glow-in-the-dark paint for the windows so your little cottage looks inhabited after the sun goes down.
Step 4: Finishing Touches
-
Highlights:
Add tiny dot highlights of white to the window panes to suggest glass reflection. Add a small black dot and handle to the door. -
Landscaping the base:
For a grounded look, paint a small grey step at the bottom of the door. You can also paint small vines or flowers climbing up the side of the walls. -
Seal for protection:
Once all paint is thoroughly dry (give it 24 hours), spray the entire rock with multiple thin coats of UV-resistant clear sealer to protect your artwork from rain and sun.
Place your new cottage in a garden bed and watch as visitors do a double-take at your charming illusion
Four Seasons Tree Panorama
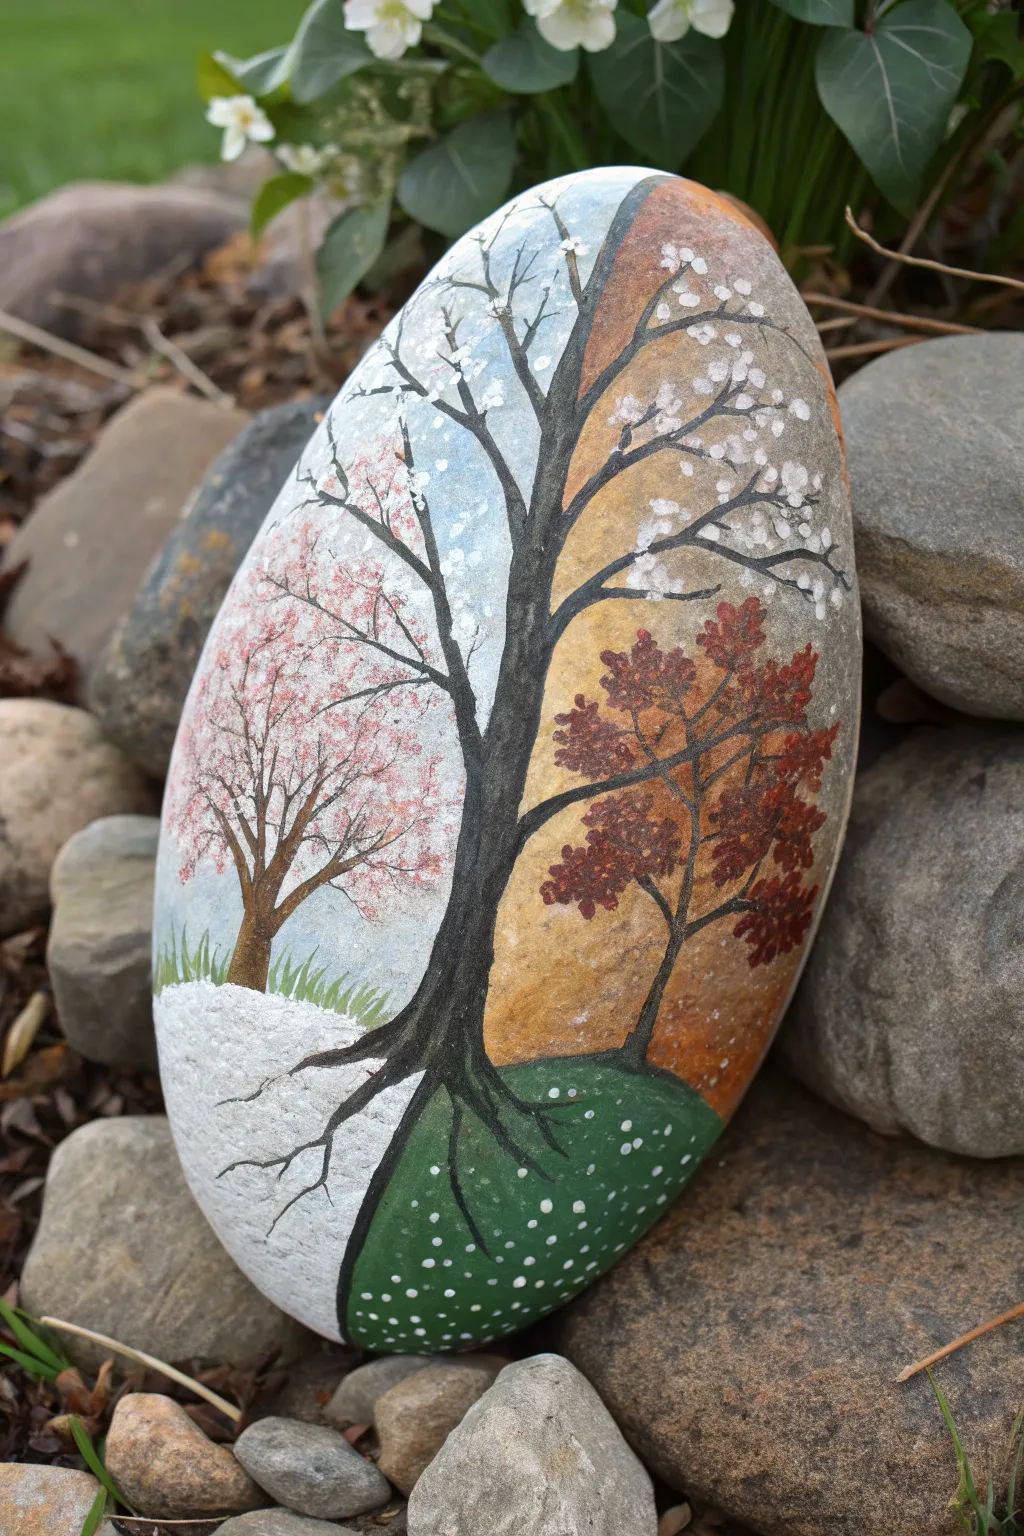
Capture the passing of time on a single stone with a stunning four-part tree design. This project divides a large, smooth rock into distinct quadrants representing winter, spring, summer, and autumn, all anchored by a striking black silhouette.
Step-by-Step
Materials
- Large, smooth oval river rock (at least 6-8 inches tall)
- Acrylic paints: Black, White, Sky Blue, Dark Green, Light Green, Golden Yellow, Orange, Red, Brown, Dark Brown
- Pencil for sketching
- Assorted brushes: Flat shader brush, medium round brush, fine liner brush (0 or 00)
- Small sponge (optional for texture)
- Clear acrylic sealant (spray or brush-on)
Step 1: Planning and Backgrounds
-
Clean your canvas:
Begin by thoroughly washing your rock with soap and water to remove any dirt or oils. Let it dry completely before starting. -
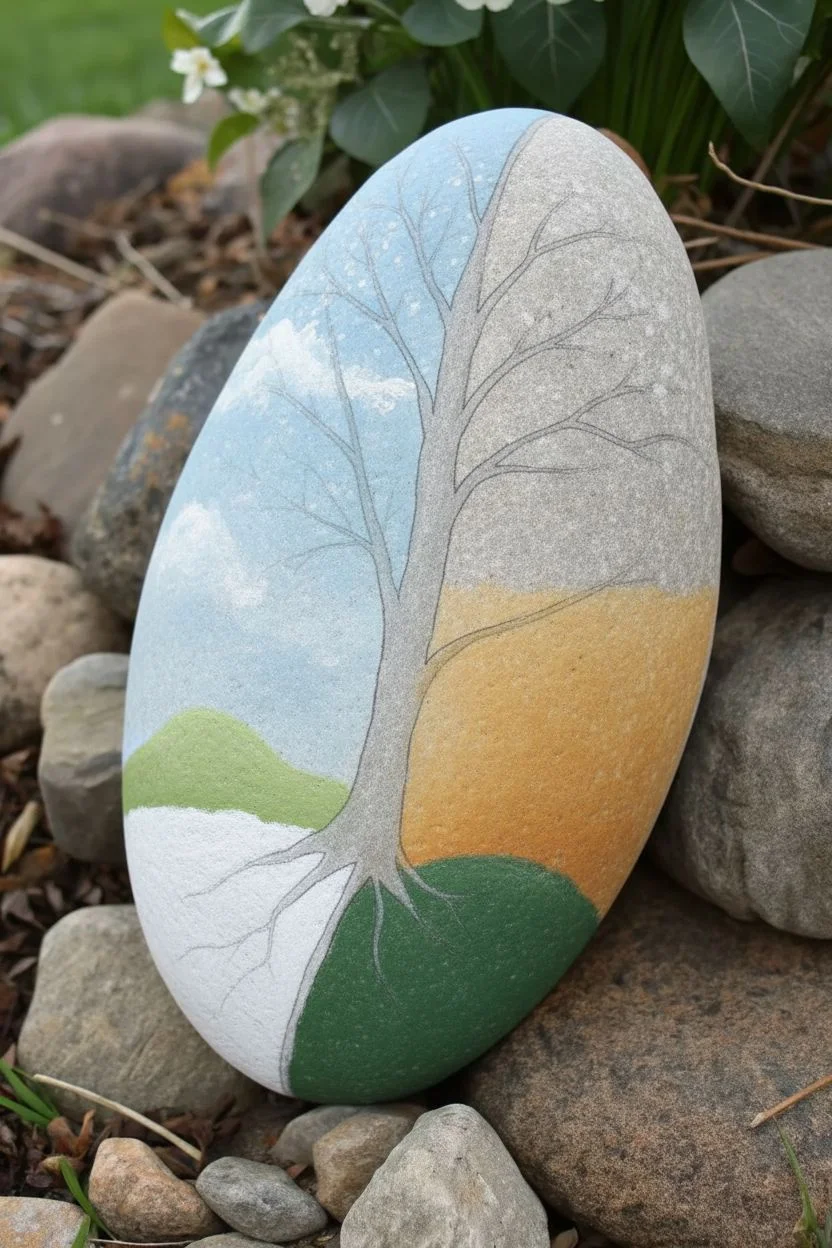
Sketch the quadrants:
Using a pencil, lightly divide your rock into four organic sections. Imagine a large X, but make the lines slightly curved to follow the rock’s shape. These lines will eventually become the main branches and roots. -
Paint the Winter sky:
Fill the bottom-left quadrant with solid white paint to represent snowy ground. The area directly above the ‘ground’ line can also be white or a very pale grey for a winter sky. -
Paint the Spring sky:
Moving clockwise to the top-left, paint the background a soft, cloudy sky blue. You can dab a little white in for clouds while the blue is wet. -
Paint the Summer sky:
For the top-right section, the background can be a mix of the natural stone color if yours is light grey, or a very pale warm beige to suggest summer heat. Let the natural stone show through if you like that texture. -
Paint the Autumn background:
In the bottom-right section, paint a warm golden-orange hue. This creates a sunset glow typical of fall evenings. -
Add the ground layers:
Paint a curved mound at the bottom of the Autumn section using dark green for grass. In the Spring section (top-left), add a small hill of light green grass at the base of where the tree limb will be.
Branch technique tip
For realistic tiny branches, mix a drop of water into your black paint. Thinner paint flows off the liner brush smoother, creating finer lines.
Step 2: The Central Tree
-
Draft the trunk:
Load your medium round brush with black paint. Paint a thick, sturdy trunk right in the center where your quadrant lines meet. The trunk should be the anchor for the whole design. -
Extend the main limbs:
Extend four main thick branches outward along the lines you sketched earlier, separating the seasons. These should taper as they reach the edge of the rock. -
Add secondary branches:
Switch to your fine liner brush. From the main black limbs, paint smaller, thinner branches reaching into the sky sections. Keep your hand loose to make them look organic and twiggy. -
Draw the roots:
Extend the black paint downwards into the Winter and Autumn sections to create wandering roots. Use the liner brush to make them look gnarled and deep.
Paint looking transparent?
Yellows and light blues can be translucent. If the rock shows through too much, paint a layer of white first, let it dry, then paint the color over it.
Step 3: Seasonal Details
-
Winter details:
In the bottom-left Winter section, leave the branches stark and bare. Paint thin grey cracks in the white ‘snow’ ground to simulate ice or uneven terrain. -
Spring blossoms:
Dip a small brush or a Q-tip into pink paint. Gently dot clusters of flowers onto the branches in the Spring section. Add a tiny secondary tree contour in brown here if you want extra depth. -
Summer canopy:
In the top-right Summer section, use white paint to dot small flowers or leaves onto the branches. This design uses white blossoms extensively here to contrast with the grey stone. -
Autumn foliage:
For the Autumn section (middle-right), stipple red, orange, and brown leaves onto the branches. I prefer to layer these colors, starting with dark red and highlighting with orange. -
Autumn ground details:
In the bottom-right green grass area, add tiny white dots. These can look like fallen debris or magical fireflies against the dark green. -
Final touches:
Once everything is dry, check your black silhouette lines. If the background paint overlapped them, go back over the trunk and main branches with fresh black paint to make them crisp. -
Seal the artwork:
After the paint has cured for 24 hours, apply two coats of clear acrylic sealant to protect your seasonal masterpiece from chipping.
Now you have a beautiful centerpiece representing the full cycle of nature.


Sunset Silhouette Landscape
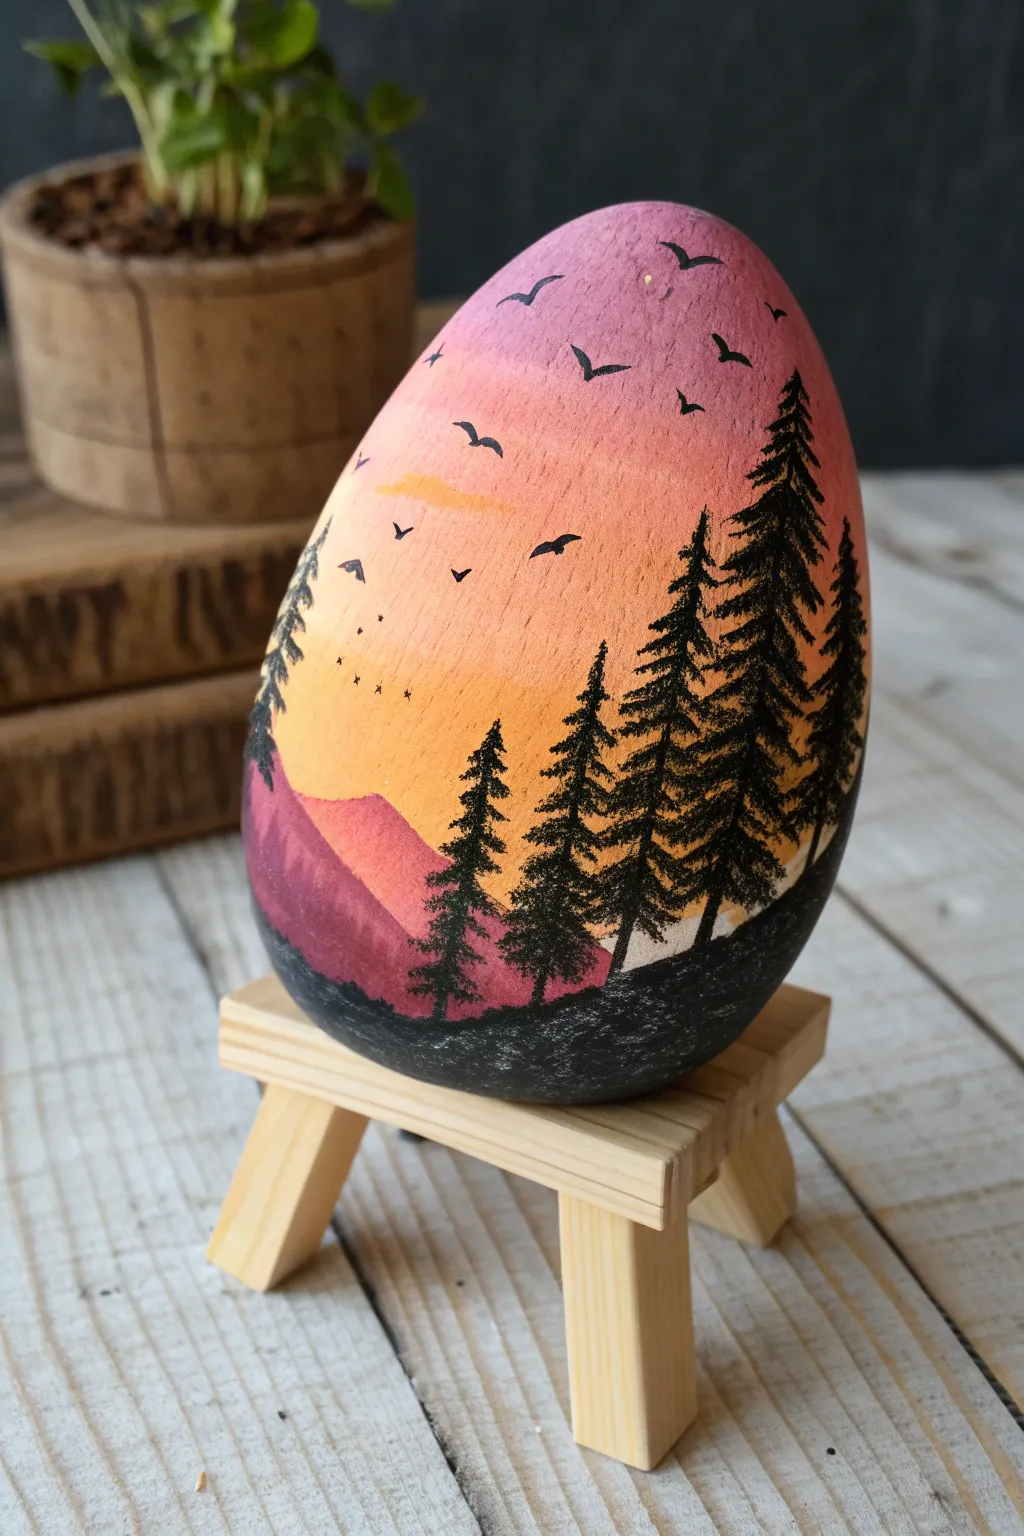
Transform a smooth, egg-shaped stone into a dreamy twilight landscape using a simple gradient technique and bold graphical silhouettes. This striking project captures the serene beauty of a mountain sunset with vibrant pinks and oranges contrasting against deep black pine trees.
Step-by-Step Guide
Materials
- Large, smooth, egg-shaped rock (or wooden egg)
- Acrylic paints: Titanium White, Bright Yellow, Tangelo Orange, Magenta/Pink, Black
- Flat shader brush (medium size)
- Make-up sponge or dense foam sponge
- Fine liner brush (size 0 or 00)
- Black fine-point paint pen (optional but recommended)
- Palette or paper plate
- Water cup and paper towels
- Matte finish spray sealant
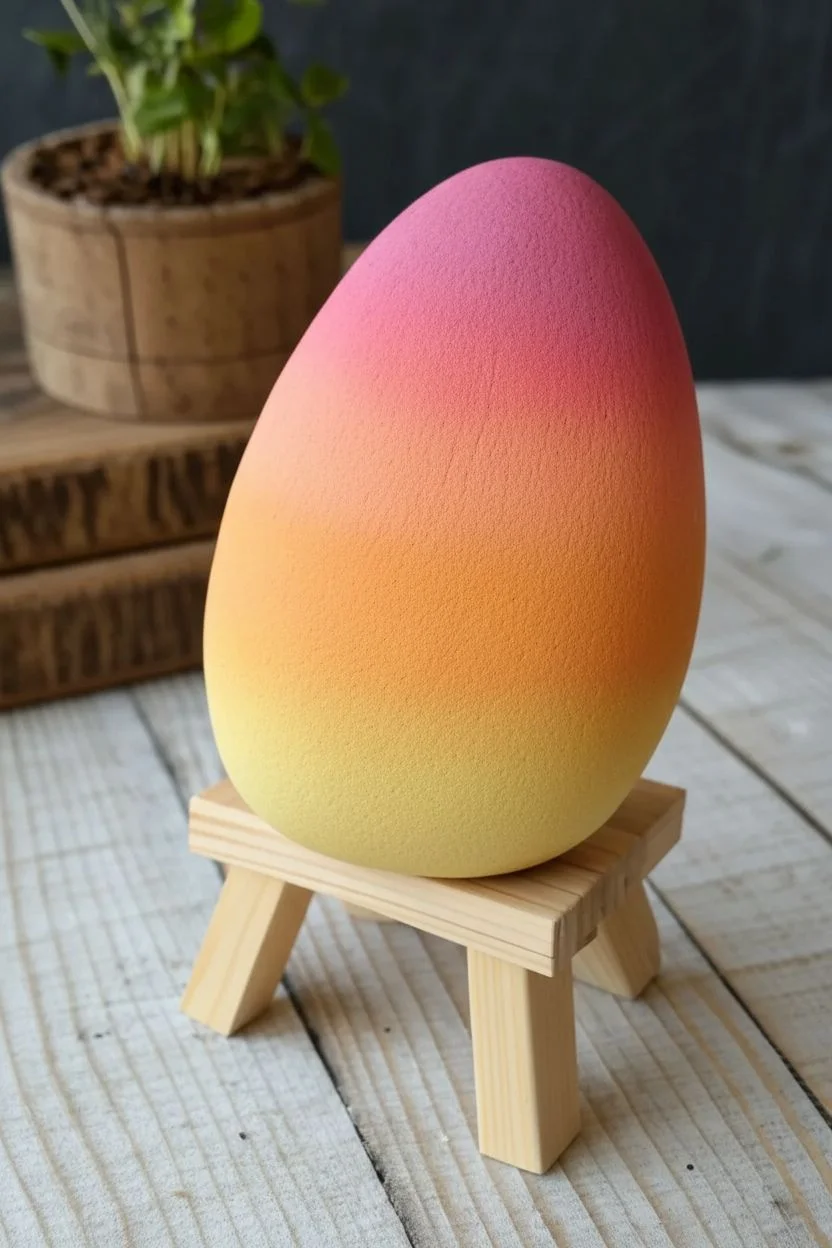
Step 1: Creating the Sunset Gradient
-
Base coat:
Begin by scrubbing the rock clean and letting it dry completely. Apply a base coat of Titanium White over the entire surface to ensure your sunset colors will pop. Let this dry fully before proceeding. -
Prepare your palette:
Squeeze out small blobs of Magenta, Tangelo Orange, Bright Yellow, and Titanium White onto your palette. You want them ready to go because blending works best while the paint is still slightly wet. -
Start at the top:
Using a slightly damp make-up sponge, dab into the Magenta paint. Softly sponge the top 1/3 of the rock. Don’t create a solid line at the bottom; fade it out gently. -
Blend the middle:
Pick up some Tangelo Orange on the same dirty sponge (this helps blending) and sponge the middle section of the rock, working upward into the wet pink to create a seamless transition. -
Finish the bottom light:
Wipe the sponge off slightly or use a clean corner to pick up Bright Yellow mixed with a touch of White. Sponge this onto the lower section, blending upward into the orange. The gradient should flow from pink to orange to pale yellow. -
Smooth it out:
If any transition looks harsh, lightly tap over the line with your sponge while the paint is tacky to soften the blend. Allow the sunset background to dry completely.
Step 2: Painting the Foreground
-
Sketch the horizon:
Use a pencil to very lightly sketch a curved horizon line near the bottom third of the rock. Add a couple of larger triangles to represent the distant mountain peaks on the left side. -
Paint the mountains:
Mix a tiny dot of Black into your Magenta paint to create a dusty, dark purple-red. Fill in your mountain shapes with a small flat brush. This creates depth so they aren’t as stark as the foreground trees. -
Solid black ground:
Using pure Black acrylic, paint the bottom curved section solid black. This ground layer provides the anchor for your trees. -
Tree trunks:
Switch to your fine liner brush or a black paint pen. Draw vertical lines of varying heights rising from the black ground. Make the ones on the right side taller and more prominent. -
Adding pine branches:
Starting at the top of a trunk, use a tiny dabbing or stippling motion with your fine brush to create branches. Keep the top very narrow and widen the tree as you move down. -
Texture technique:
I find that keeping the brush fairly dry helps creates that bristly, pine-needle texture. Focus on the right side for the largest, most detailed trees. -
Flying birds:
Using the very tip of your fine liner brush or a black ultra-fine marker, add tiny ‘V’ or ‘M’ shapes in the sky area. vary their sizes to suggest distance. -
Final details:
Add a few tiny dots of faint yellow or white in the upper pink section to hint at early evening stars if desired. -
Seal the work:
Once the black paint is absolutely dry (give it extra time), apply a spray matte sealant to protect the artwork without adding distracting glare.
Sponge Tactics
Don’t wash the sponge between colored layers. Letting the pigment linger on the sponge as you switch colors creates a much smoother, more natural ombre effect.
Starry Night Effect
Before painting the trees, use an old toothbrush dipped in watered-down white paint to flick tiny stars across the pink sky for a magical galaxy feel.
Display your finished miniature landscape on a small shelf or mini-easel to evoke the peaceful feeling of dusk
Twilight Sky With Star Splatter
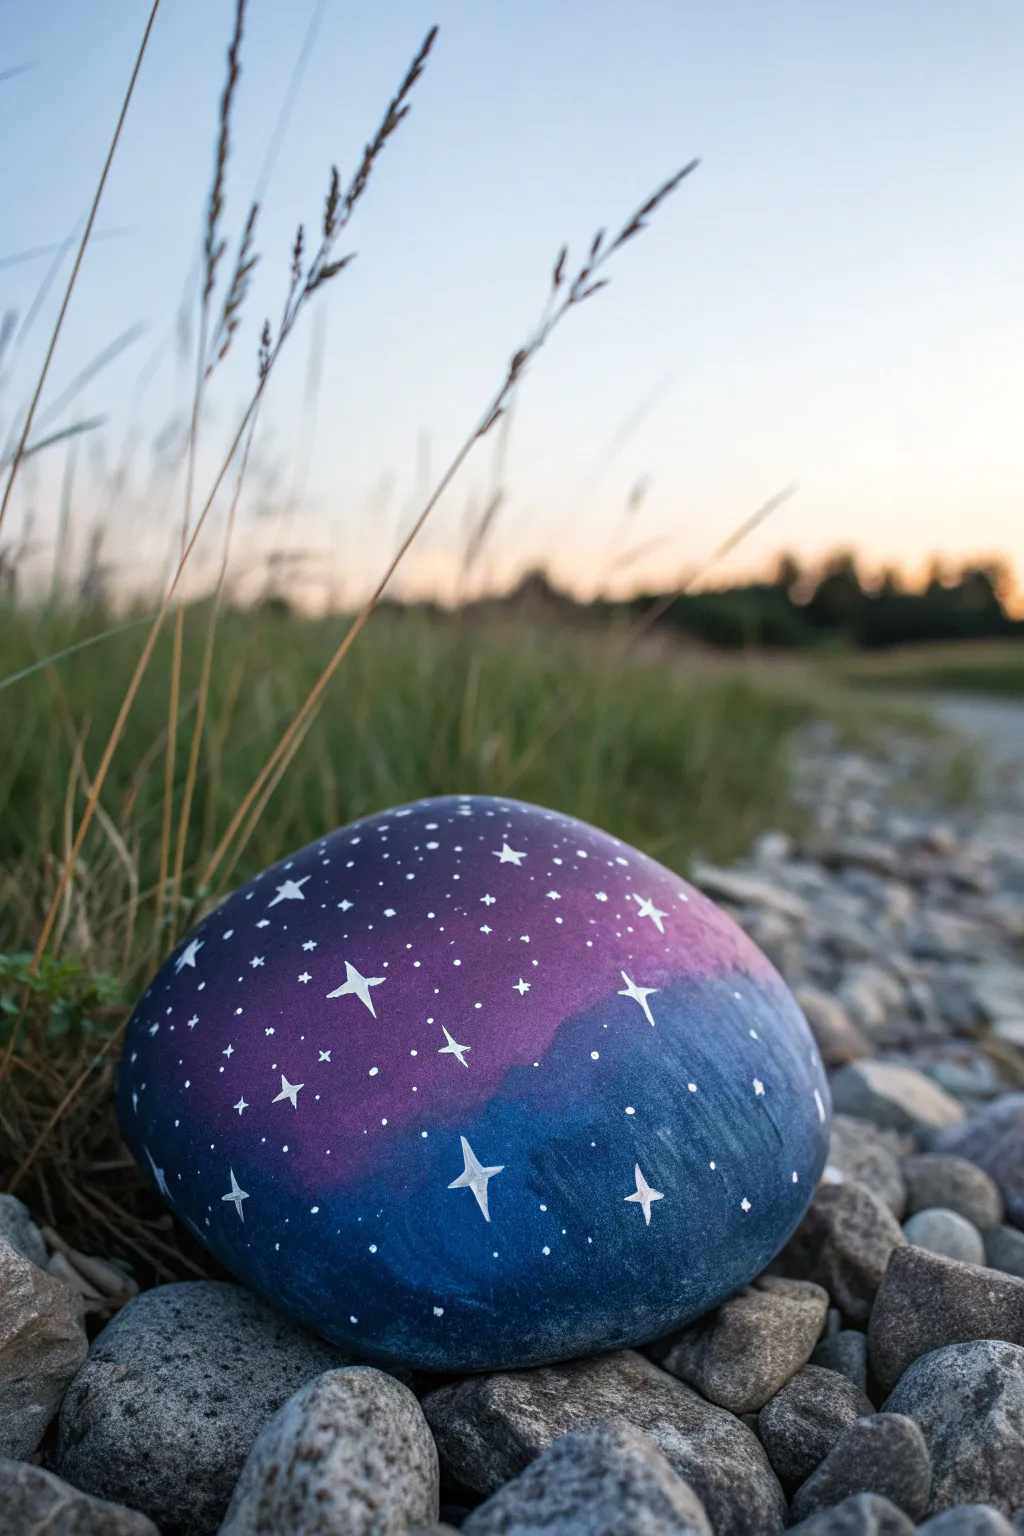
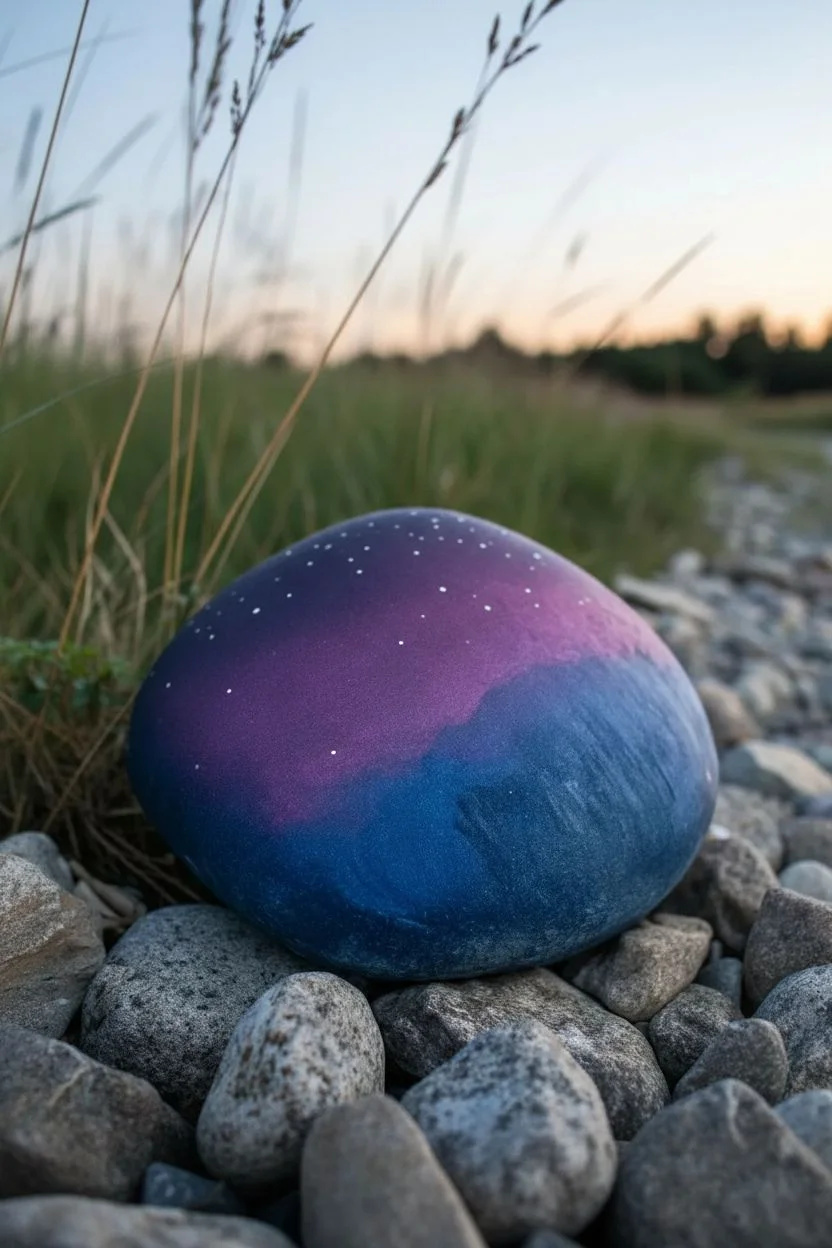
Capture the magic of dusk with this dreamy rock painting project. Using blending techniques and simple star designs, you can transform an ordinary stone into a piece of the night sky.
Step-by-Step Tutorial
Materials
- Large, smooth river rock (rinsed and dried)
- Acrylic paints (dark navy blue, royal blue, purple, magenta, white)
- Flat shader brushes (medium size)
- Small round detail brush (size 0 or 00)
- Old toothbrush (optional for splatter)
- Water cup and paper towels
- Clear acrylic sealer (spray or brush-on)
- Palette or wax paper
Step 1: Creating the Base Gradient
-
Select your stone:
Choose a rock with a smooth, rounded surface. Wash away any dirt or grit with soapy water and let it dry completely before starting. -
Start with deep blue:
Pour a generous amount of dark navy blue paint onto your palette. Using a flat brush, cover the bottom third of the rock’s surface, wrapping the color around the sides for a 3D effect. -
Add the mid-tone:
While the navy is still slightly wet, load your brush with royal blue. Apply this to the middle section of the rock, allowing it to overlap slightly with the navy edge. -
Blend the blues:
Gently stroke back and forth where the two blues meet to create a soft, seamless transition. I like to keep my brush slightly damp to help the acrylics merge smoothly. -
Introduce purple:
Clean your brush, then pick up purple paint. Apply this above the royal blue, blending downwards into the blue layer just as before. -
Top with magenta:
Finish the gradient by painting the very top of the rock with magenta or a deep pink. Blend this into the purple layer so there are no harsh lines, creating a glowing twilight effect. -
Let it cure:
Allow the base coat to dry completely. This usually takes about 15-20 minutes, depending on how thick your paint application was.
Step 2: Adding the Stars
-
Prepare the white paint:
Squeeze out a small amount of white acrylic paint. If it feels too thick, thin it with a tiny drop of water until it has an ink-like consistency. -
Paint large stars:
Using your smallest detail brush, paint a few large four-pointed stars. Draw a vertical line first, then cross it with a horizontal line, tapering the ends to sharp points. -
Add medium stars:
Paint smaller four-pointed stars scattered randomly across the surface. Varying the sizes makes the sky look deeper and more realistic. -
Create distant stars:
Dip the tip of your detail brush or a toothpick into the white paint. Gently dot the surface to create tiny, distant stars, filling in the empty spaces between the larger ones. -
Optional splatter effect:
For a dense galaxy look, dip an old toothbrush in thinned white paint. Test it on paper first, then run your thumb across the bristles to flick tiny specks onto the rock. -
Refine the shapes:
Once the stars are dry, you can go back over the larger ones with a second coat of white if they look a bit transparent against the dark background.
Blending Trouble?
If acrylics dry too fast to blend, mix in a slow-drying medium or lightly mist the rock with water while painting.
Step 3: Finishing Touches
-
Check for gaps:
Inspect the sides of the rock to ensure your gradient and stars wrap around nicely, so the stone looks good from every angle. -
Seal the artwork:
Once the paint is fully cured (give it at least an hour), apply a coat of clear acrylic sealer. A glossy finish works particularly well to make the colors pop.
Glow Up
Mix a tiny bit of glow-in-the-dark pigment into your white paint for the stars so your rock lights up at night.
Place your celestial creation in the garden or on a windowsill to enjoy a little piece of the night sky anytime
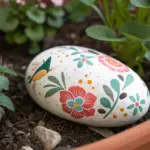
Wildflower Bouquet “Rock Vase”
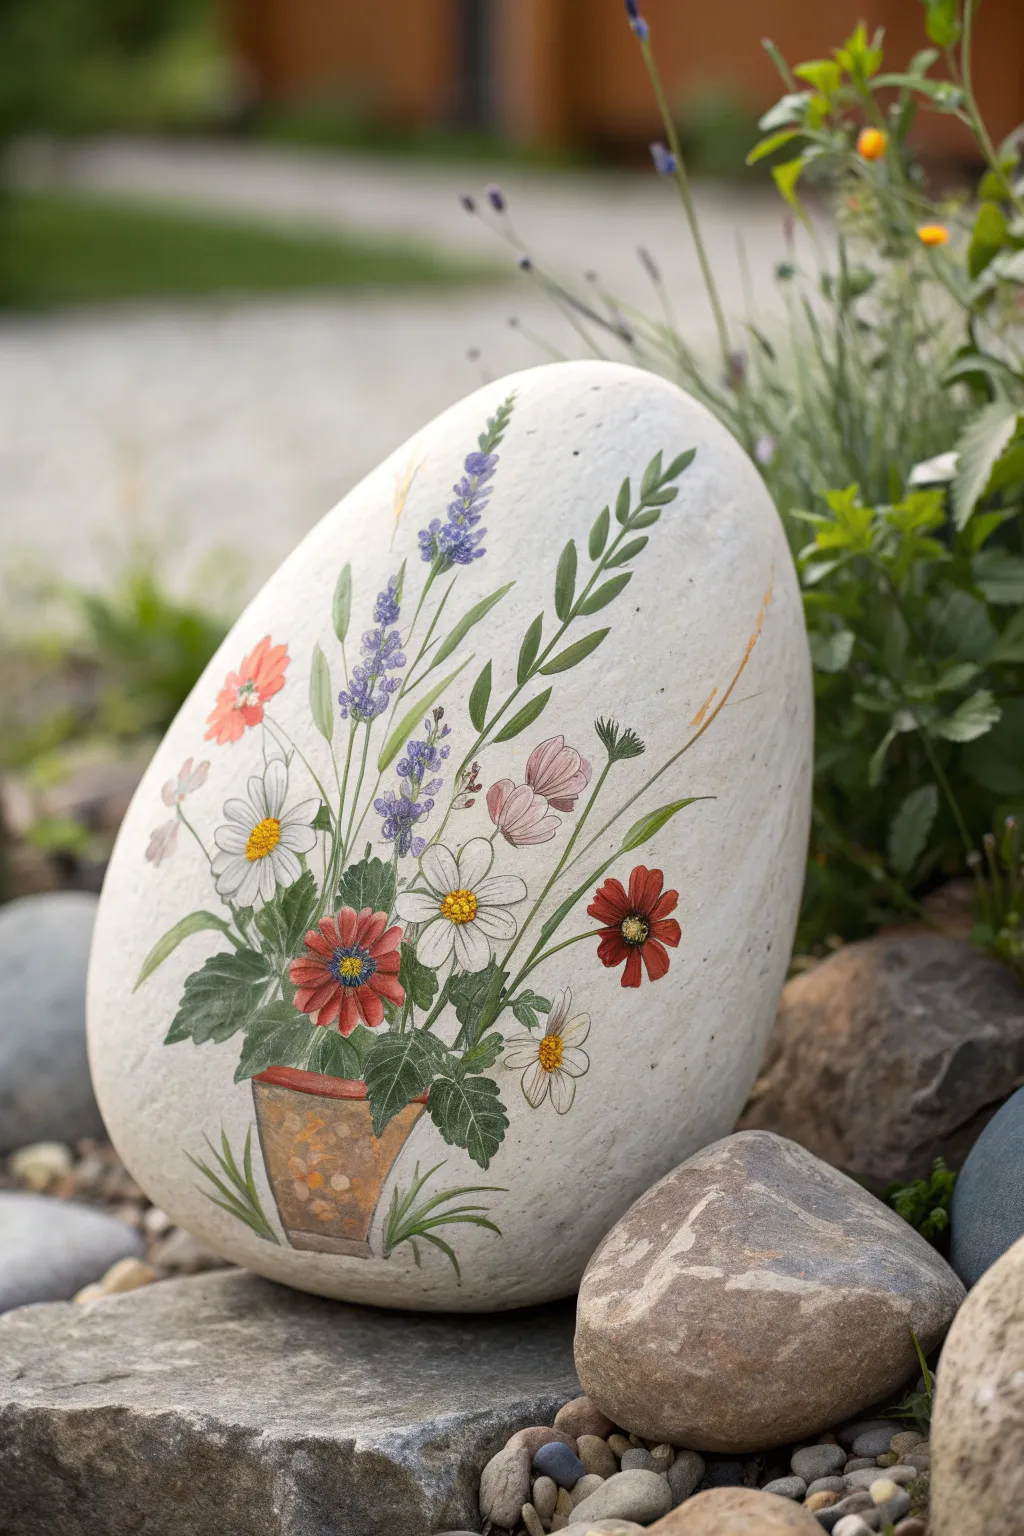
Transform a large, smooth stone into a permanent bouquet with this delicate wildflower design. Using fine details and a soft color palette, you’ll create a charming garden scene that looks fresh picked, complete with tiny stems and diverse blooms “growing” from a painted pot.
Step-by-Step Guide
Materials
- Large, smooth, egg-shaped river rock (cleaned and dried)
- White gesso or primer paint
- Acrylic paints: white, terracotta (burnt sienna), forest green, sage green, cadmium yellow, lavender/purple, coral pink, bright red
- Fine liner brushes (sizes 000 and 00)
- Small flat brush (size 2 or 4)
- Pencil for sketching
- Matte or satin spray sealant
- Palette or small plate for mixing
- Cup of water and paper towels
Step 1: Preparation & Base Coat
-
Clean the canvas:
Begin by scrubbing your rock thoroughly with soap and water to remove any dirt or oils. Let it dry completely, ideally in the sun for an hour. -
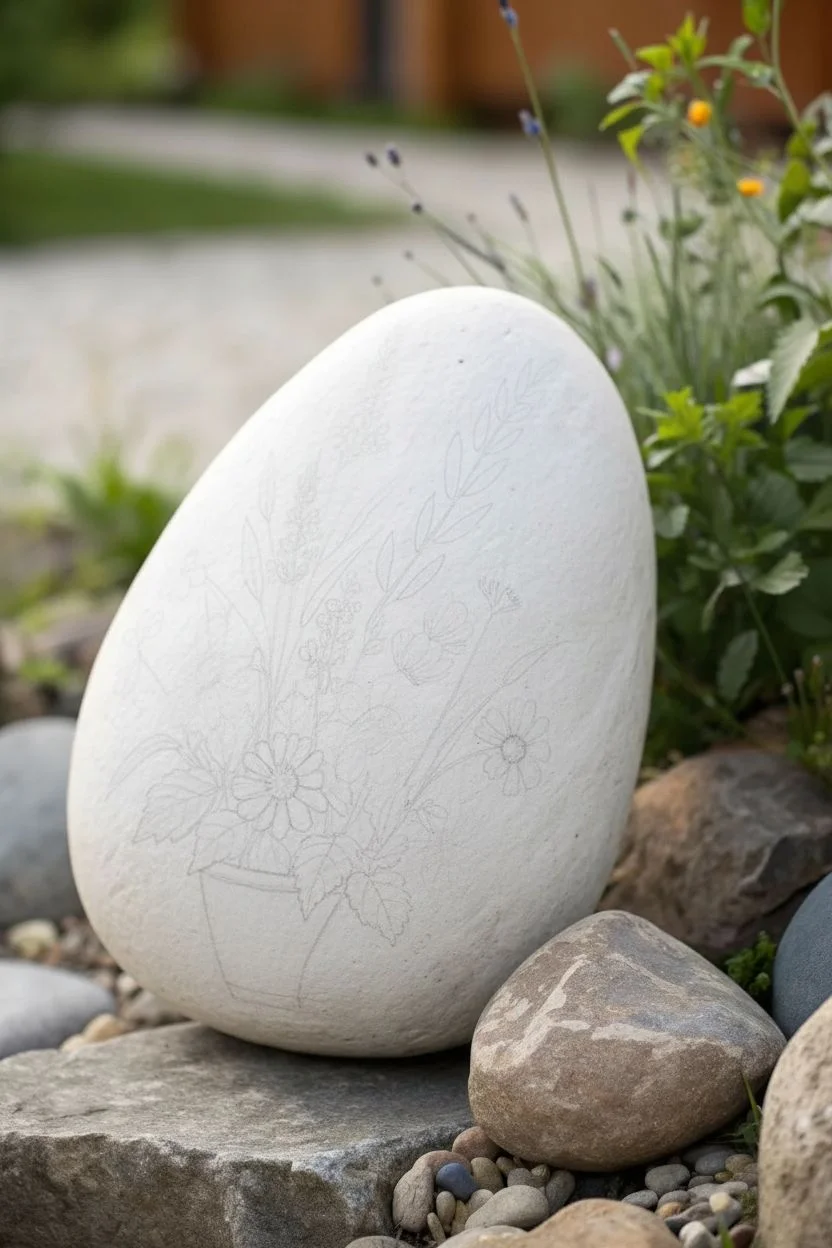
Prime the surface:
Apply a coat of white gesso or primer over the front face of the rock. This creates a bright, grippy surface for your colors and mimics the eggshell texture seen in the photo. -
Lightly sketch:
Once the primer is dry, use a pencil to very lightly sketch the outline of the pot at the bottom center and draw faint guidelines for the main stems, fanning them out like a bouquet.
Step 2: Painting the Pot
-
Base color:
Using a small flat brush, fill in the pot shape with a terracotta or burnt sienna paint. Don’t worry about texture yet; just get solid coverage. -
Shape the rim:
Paint a slightly darker, thin horizontal band at the top of the pot to represent the rim. This adds dimension. -
Add texture:
While the terracotta paint is still slightly tacky, dab in tiny spots of lighter beige or yellow ochre to give it that weathered, clay look. -
Grass accents:
Use a liner brush with green paint to flick a few blades of grass curving upwards from the very bottom of the rock, framing the base of the pot.
Jittery Hands?
Rest your painting wrist on a stable surface or on the rock itself to steady your liner brush for those tiny stems.
Step 3: Adding the Foilage
-
Main stems:
Mix a medium green with a touch of water to improve flow. Use your finest liner brush to paint the main stems radiating outward from the pot. -
Leaf variety:
Add different types of leaves to the stems. Paint small, paired oval leaves on the central stems and longer, slender fern-like leaves on the taller side stems. -
Base foliage:
At the base where the stems meet the pot, paint broader, darker green leaves (like geranium leaves) to create a sense of fullness and weight at the bottom. -
Highlighting greens:
I like to go back over the leaf tips with a lighter sage green or yellow-green mix to simulate sunlight hitting the foliage.
Pro Tip: Depth
Mix a tiny drop of blue into your green paint for shadows under the leaves. This makes the bouquet look 3D, not flat.
Step 4: Blooming Flowers
-
Daisies:
Using white paint, create simple daisy shapes with elongated oval petals. Place two prominent ones near the center-left. Once dry, dot the centers with bright yellow, stippling in a tiny bit of brown for texture. -
Lavender spikes:
For the tall purple stalks, use a stippling motion (rapid dots) with lavender paint along the upper stems. Darken the bottom of the flower clusters with a deeper purple for depth. -
Coral poppies:
Paint the poppy-like flowers on the left using coral or bright orange. Keep the edges slightly uneven and organic. -
Red focal point:
Add the deep red flower on the right side using distinct, separated petals. Add a dark center dot to ground it. -
Pink filler flowers:
Paint soft pink cup-shaped blooms near the center. These can be simple semicircle shapes with faint lines painted inside to suggest petals. -
Delicate details:
Use your thinnest brush or a paint pen to add extreme details: tiny veins on leaves, minute red centers on the white daisies, or thin outlines if needed for clarity.
Step 5: Finishing Touches
-
Final drying:
Allow the entire painting to dry for at least 24 hours to ensure the thickest parts of the paint are fully cured. -
Seal for outdoors:
Spray the rock with a matte or satin clear acrylic sealer. Apply 2-3 thin coats to protect your garden art from rain and UV fading.
Place your everlasting bouquet in a sunny corner of the garden where these blooms will never fade
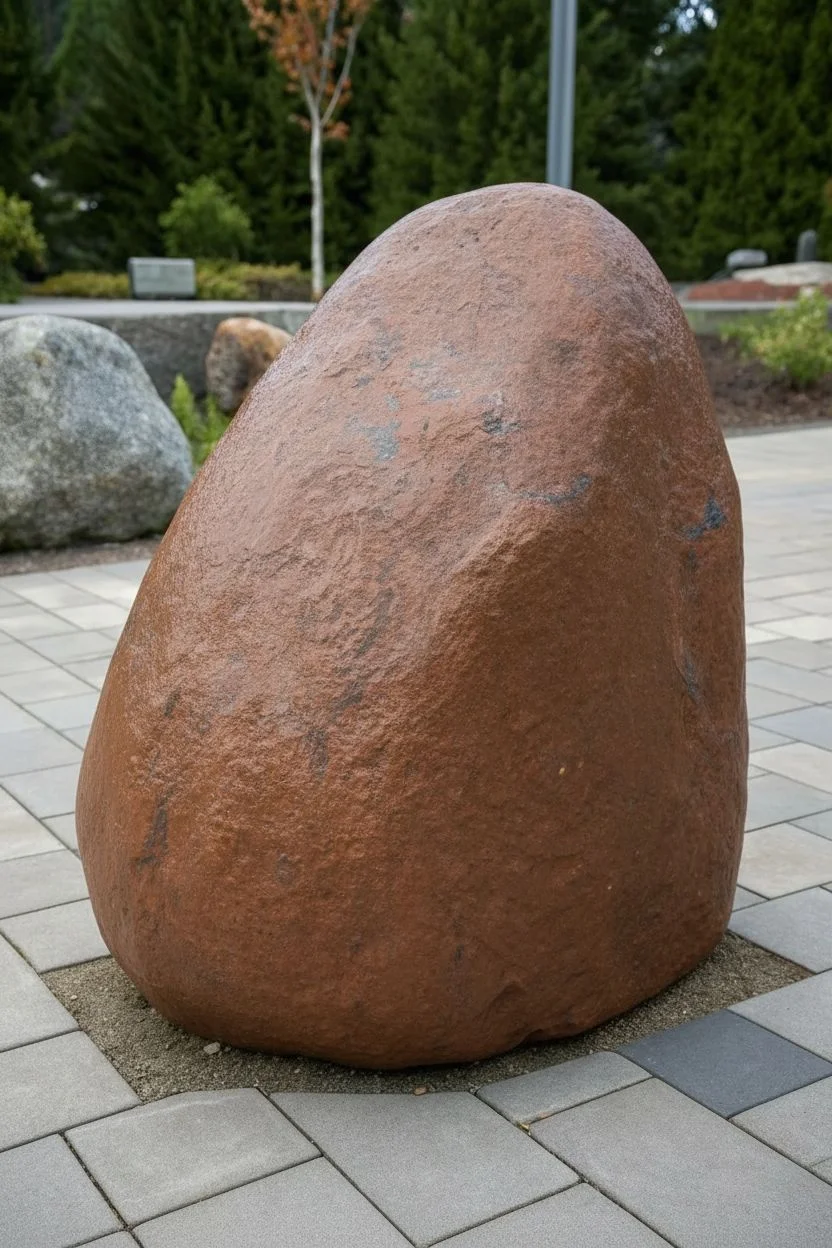
Garden Marker Boulder With Painted Lettering

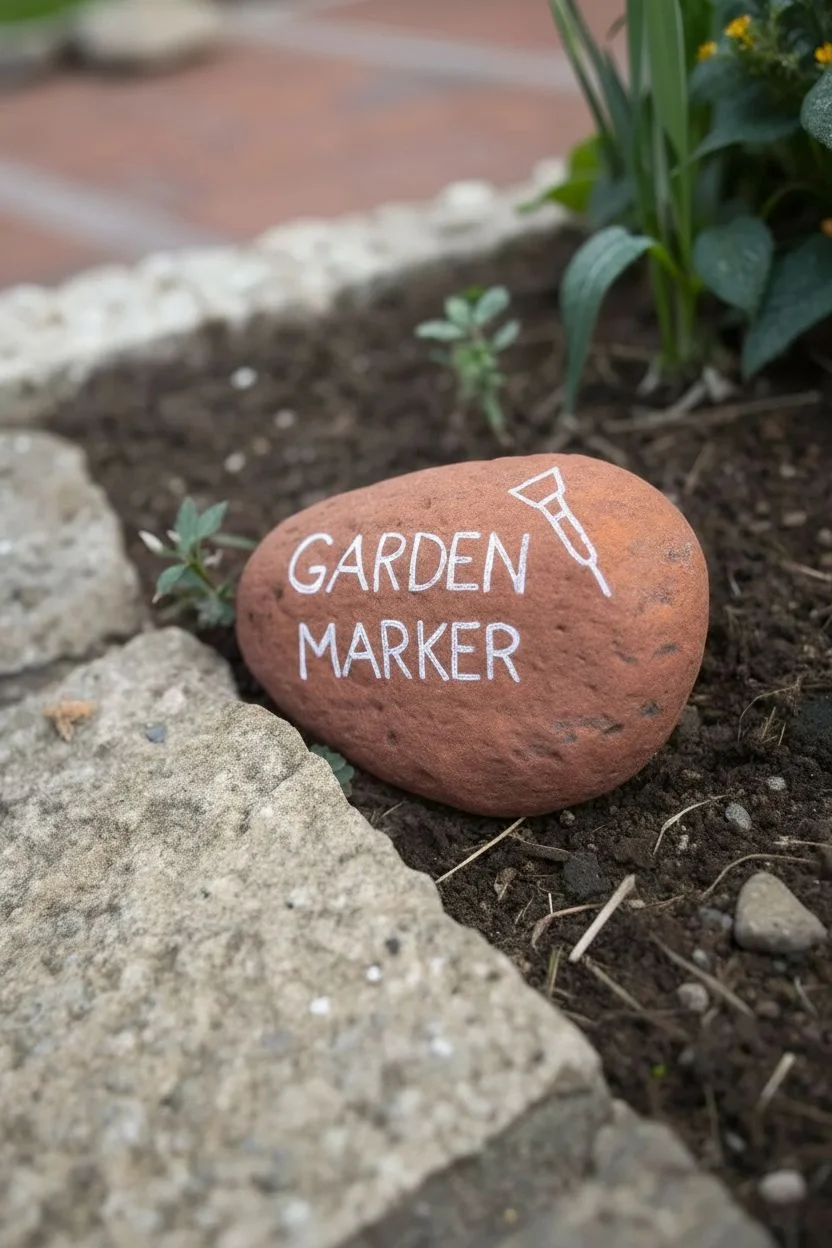
Add a touch of whimsy and organization to your flower or vegetable beds with this rustic garden marker. The natural reddish-brown stone provides the perfect contrast for crisp white lettering, making it both a practical tool and a charming decorative accent.
Step-by-Step
Materials
- Medium-sized, smooth river rock (reddish-brown hue)
- White outdoor acrylic paint
- Fine-point round paintbrush (size 0 or 1)
- Soap and water
- Stiff scrub brush
- White charcoal pencil or chalk
- Kneaded eraser (optional)
- Clear outdoor sealant spray (matte finish)
Step 1: Preparation & Planning
-
Source the perfect stone:
Look for a river rock that is roughly the size of a grapefruit but somewhat flattened. A reddish-brown tone, like sandstone or oxidized quartzite, will make the white paint pop beautifully. -
Clean the surface:
Scrub the rock thoroughly with warm soapy water and a stiff brush to remove any garden soil, moss, or loose grit. This is crucial for paint adhesion. -
Dry completely:
Set the stone in the sun or a dry area. Wait until all moisture has evaporated from the pores of the rock before proceeding. -
Draft the layout:
Using a white charcoal pencil or a piece of chalk, lightly sketch your design. Write ‘GARDEN’ on the top line and ‘MARKER’ slightly below it, keeping the text centered. -
Add the icon:
To the right of the top word, sketch a simple outline of a garden tool, such as a hand hoe or trowel, angled diagonally.
Pro Tip: Stick Advice
Rest your painting hand on a smaller rock or a block of wood while you work. This stabilizes your wrist and greatly reduces shakiness for straighter lines.
Step 2: Painting the Design
-
Prepare your palette:
Squeeze a small amount of white outdoor acrylic paint onto a palette or paper plate. If the paint feels too thick, thin it with a single drop of water to improve flow. -
Load the brush:
Dip your fine-point brush into the paint, rolling it slightly to keep the tip sharp. Avoid overloading the ferrule with paint. -
Paint vertical strokes:
Begin painting the letters, starting with the vertical lines of ‘GARDEN’. Use a steady hand and pull the brush toward you for cleaner lines. -
Complete the letters:
Fill in the horizontal and curved portions of the letters. I like to rotate the rock as I work to maintain a comfortable hand position for the curves. -
Paint the second line:
Repeat the process for the word ‘MARKER’, trying to match the font weight and size of the top line. -
Paint the icon:
carefully trace the outline of your garden tool sketch. Keep the lines simple and consistent with the thickness of your lettering. -
Check opacity:
Let the first coat dry for about 10-15 minutes. If the rock color is showing through the white paint, apply a second coat over the letters for a brighter, solid finish. -
Cleanup sketches:
Once the paint is fully hard to the touch, use a damp cloth or a kneaded eraser to gently wipe away any visible chalk or charcoal guidelines.
Step 3: Finishing Touches
-
Seal the artwork:
Take the rock to a well-ventilated area. Hold your clear matte sealant spray about 10 inches away and apply a light, even coat over the painted face. -
Apply a second coat:
Wait for the first coat to dry according to the can’s instructions, then apply a second coat to ensure weatherproofing against rain and sun. -
Final cure:
Allow the finished rock to cure for at least 24 hours before placing it in the garden soil.
Level Up: Color Coding
Paint the background of the tool icon (like the trowel handle) in a specific color—orange for carrots, red for tomatoes—to visually label your crops.
Place your new custom marker next to your favorite plants and enjoy the rustic charm it adds.
Monarch Butterfly Boulder (Oversized Wings)
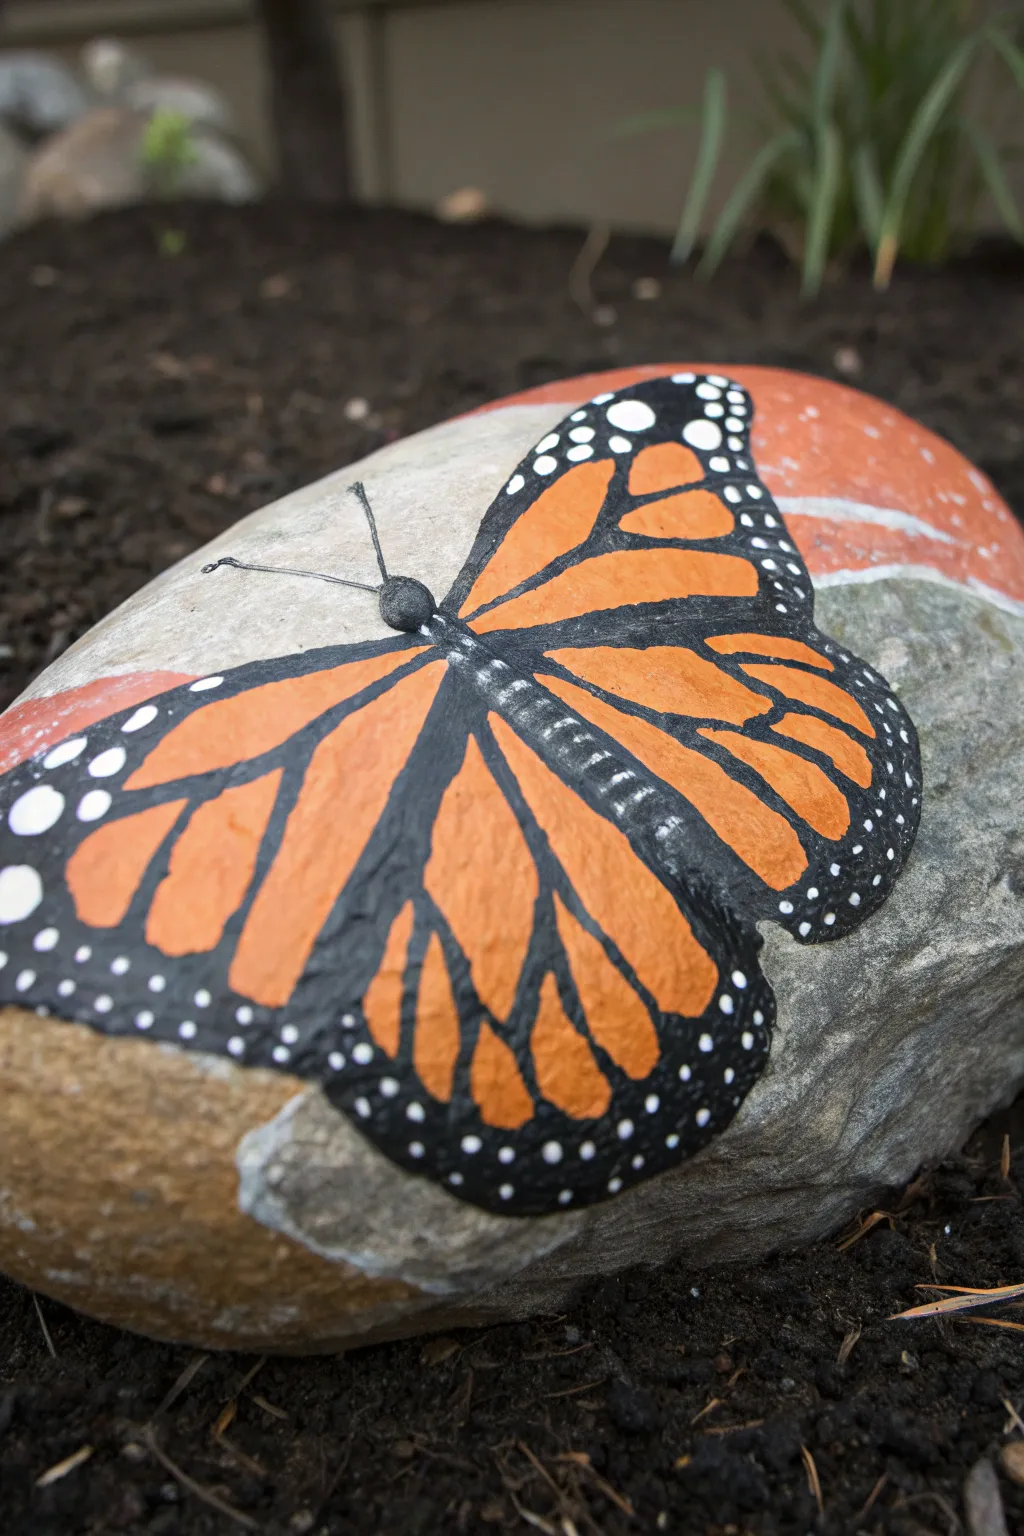
Transform a smooth garden stone into a vibrant piece of art with this striking Monarch butterfly design. The contrast between the brilliant orange wings and the deep black veins creates a piece that looks ready to take flight right out of your garden bed.
Detailed Instructions
Materials
- Large, smooth river rock (oval shape works best)
- Acrylic paints: Bright Orange, Black, White, Terracotta/Red-Brown
- Paintbrushes: Medium flat brush, small round brush, fine liner brush
- Pencil for sketching
- Water cup and palette
- Clear outdoor sealant spray (gloss or matte)
Step 1: Base Preparation
-
Clean the Surface:
Begin by thoroughly scrubbing your rock with soap and warm water to remove any dirt or grit. Let it dry completely in the sun before painting to ensure good adhesion. -
Paint a Background Swath:
Using a medium flat brush, paint a wide, curved band of terracotta or reddish-brown paint across the upper third of the rock. This doesn’t need to cover the whole stone; leaving some natural grey exposed adds a nice organic touch. -
Dry Time:
Allow this background layer to dry for about 15-20 minutes. While waiting, study the wing shape of a Monarch; notice how the upper wings are elongated triangles and the lower ones are more rounded.
Smoother Lines
Add a few drops of water to your black acrylic paint until it has an ink-like consistency. This helps the paint flow off the liner brush for crisp, uninterrupted veins.
Step 2: Sketching the Outline
-
Sketch the Body:
Using a pencil, lightly draw the butterfly’s body—a long, thin oval shape—diagonally across the center of the rock. -
Draft the Wings:
Sketch the outline of the four wings extending from the body. Make the top wings larger reaching toward the upper right, and the bottom wings curving downward. Don’t worry about perfect symmetry; a natural pose is often slightly angled. -
Map the Veins:
Lightly draw the major vein lines inside the wings. These will act as your guide for where to put the orange color versus the black later on.
Shaky Hands?
If you struggle with fine lines, rest your pinky finger on a dry part of the rock to stabilize your hand while painting the delicate veins and antennae.
Step 3: Adding Color
-
Fill the Orange Sections:
Load a small round brush with bright orange paint. Carefully fill in the wing sections, leaving a small gap between them where the black veins will go. You may need two coats here to get that vivid pop of color. -
Intensify the Edges:
For a bit of depth, I sometimes mix a tiny dot of red into the orange and apply it near the body of the butterfly, fading it out toward the wing tips. This creates a subtle gradient. -
Let Colors Set:
Allow the orange layers to dry completely. If the paint is still wet when you add the black, the colors will muddy and you’ll lose that crisp definition.
Step 4: Detailing the Veins & Border
-
Outline the Wings:
Using black paint and a fine liner brush, trace the outer perimeter of the butterfly wings. Make this border thick, especially at the tips of the upper wings. -
Paint the Veins:
Carefully paint the black veins connecting the sections of orange. Use a light hand with your liner brush to keep these lines distinct but fluid. -
Fill the Body:
Paint the central body black. Add a small rounded head at the top and paint two thin, delicate antennae extending outward. -
Create Texture on the Body:
Once the body is dry, you can dry-brush a tiny amount of grey or white on the thorax to give it a fuzzy, dimensional look. -
Refine the Borders:
Go back over any patchy black areas on the wing borders to ensure they are solid and opaque.
Step 5: The Final Touches
-
Add White Spots:
This is the signature Monarch characteristic. Dip the tip of your finest brush or a toothpick into white paint. Dot small white circles along the black outer edges of the wings. -
Vary Dot Sizes:
Make the dots slightly larger near the wing tips and tinier as they move toward the bottom of the wings. Add a few tiny white specks on the black body for realism. -
Protect Your Work:
After the painting has cured for at least 24 hours, take it outside and spray it with a clear, UV-resistant acrylic sealer to protect it from the elements.
Place your finished stone among greenery to give your garden visitors a delightful surprise
Mandala Dot Art on a Large Rock Face
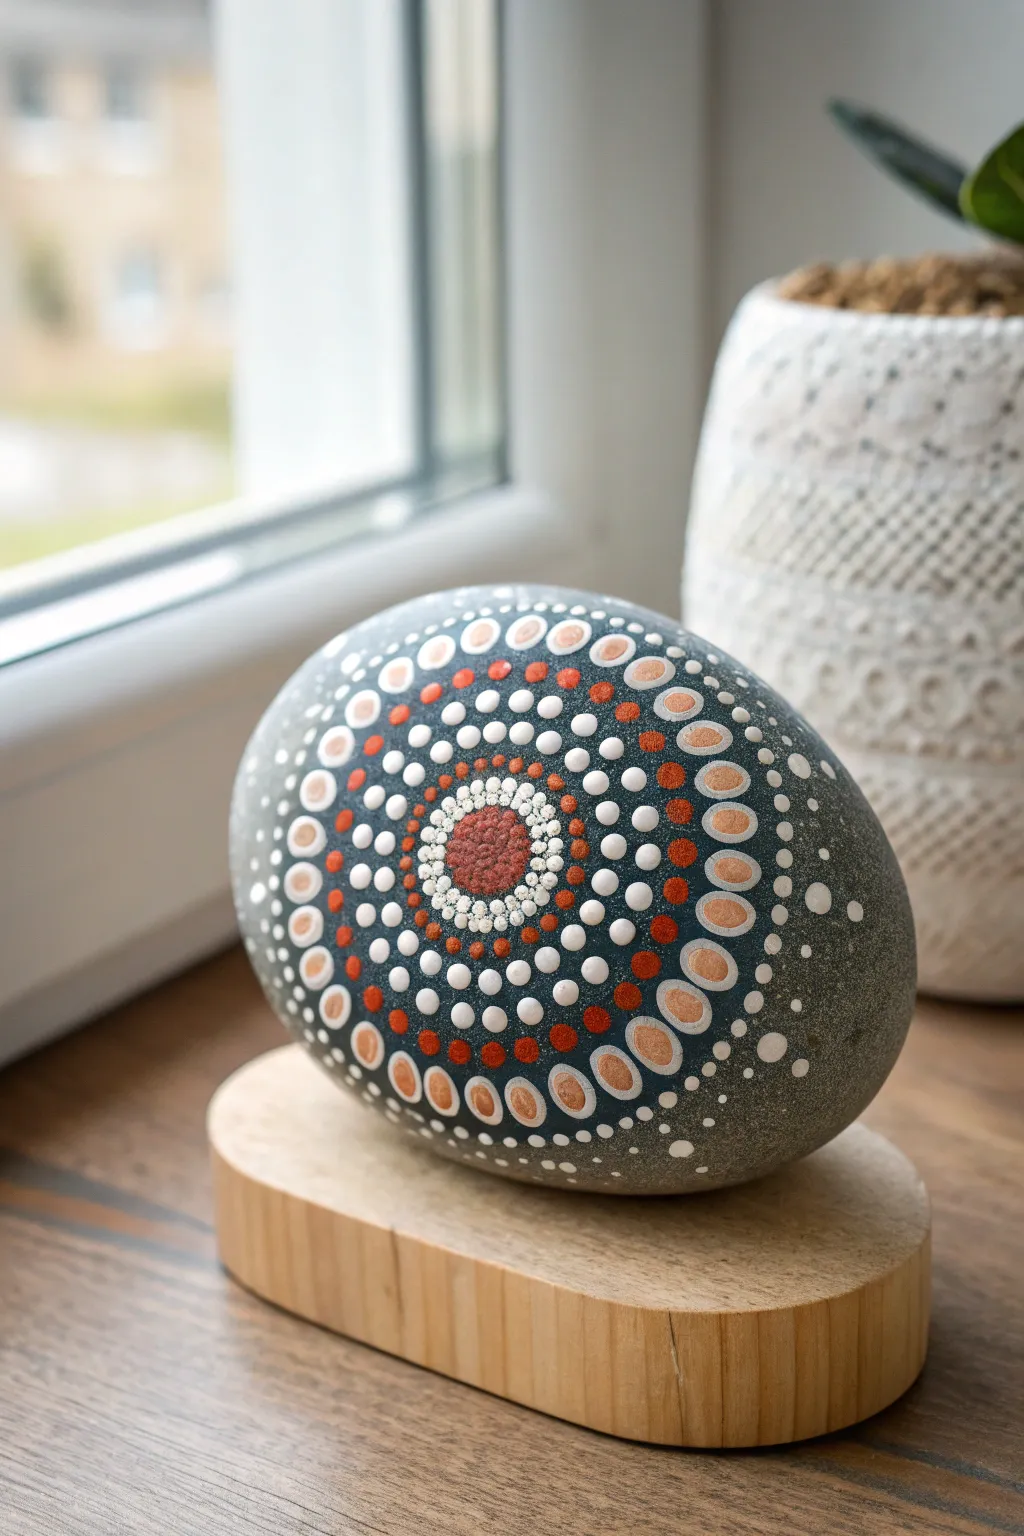
Transform a simple river rock into a mesmerizing centerpiece with this mandala design featuring warm earthy tones of rust, peach, and crisp white. The symmetrical pattern radiates outward on a natural grey background, creating a soothing piece of art perfect for a sunny windowsill display.
Step-by-Step Guide
Materials
- Large, smooth oval river stone (natural grey)
- Acrylic paints: White, Rust/Terracotta, Peach/Salmon
- Dotting tools (set of graduating sizes)
- Fine detail brush or needle tool
- Pencil and eraser
- Compass or circle stencil (optional)
- Matte or satin varnish sealer
- Palette for mixing paint
- Damp cloth for clean up
Step 1: Preparation & Base
-
Clean the canvas:
Begin by thoroughly washing your stone with soapy water to remove any dirt or oils. Let it dry completely to ensure the paint adheres properly. -
Find the center:
Ideally, locate the exact center of the stone’s face. You can eyeball this or use a flexible ruler to measure across the width and height, marking a faint ‘X’ with a pencil.
Step 2: Creating the Core
-
The central anchor:
Load a medium-sized dotting tool with rust/terracotta paint. Place a single, perfect circle right on your center mark. This is the heart of your mandala. -
First ring of white:
Using a smaller tool, place a ring of tiny white dots immediately surrounding the rust center. Keep them close together but not touching. -
Second ring detail:
With an even smaller tool, add a second row of very fine white micro-dots around the previous ring. This creates a lace-like effect around the central hub. -
The petal ring:
Switch back to the rust color. Create a ring of larger dots around the white section. While the paint is wet, drag a needle tool or toothpick through the center of each dot inward to create a subtle teardrop or petal shape.
Perfect Paint Consistency
For perfectly round, raised dots, your acrylics should be the texture of heavy cream. Too thick leaves peaks; too thin flattens out.
Step 3: Expanding the Pattern
-
Contrast layer:
Using a medium tool and white paint, place a dot in the ‘valley’ between each rust petal from the previous row. This establishes the ‘walking the dots’ rhythm. -
Building outward:
Add a second, slightly larger white dot directly above each white dot you just placed. This begins to radiate the pattern outward in spokes. -
Introducing peach:
In the spaces between the newest white dots, place small rust-colored dots. Then, place a medium-sized peach/salmon dot directly above those. -
The major ring:
This is a key visual element. Using a large dotting tool, place prominent rust-colored dots all around the perimeter of your current design, spacing them evenly. -
Walking the dots:
Dip a small tool in white paint. Place a specific pattern around each large rust dot: one dot at the top, then walk smaller dots down each side to frame it like a halo.
Fixing a Wonky Dot
Placed a dot in the wrong spot? Don’t panic. Wait for it to dry completely, then gently scrape it off with a craft knife or toothpick.
Step 4: The Outer Rim
-
Large oval formation:
For the outermost main ring, mix a light peach shade. Create large oval shapes or heavy dots around the entire design. I find tilting the tool slightly as I lift helps elongate the dot into an oval. -
Inner oval details:
Once the large peach ovals are tacky-dry, place a smaller rust dot inside the bottom curve of each oval to create a layered, two-tone look. -
Outer framing:
Using your smallest tool and white paint, create a chain of tiny dots that swoop around the top of each peach oval, connecting the entire design together. -
Final filler dots:
Look for empty triangular spaces near the outer edges. Fill these gaps with single, medium-sized white dots to balance the composition. -
Scattered stardust:
To soften the edge where the design meets the bare stone, place tiny, random white dots fading away from the main mandala towards the sides of the rock.
Step 5: Finishing Touches
-
Dry completely:
Let the rock sit undisturbed for at least 24 hours. The thick layers of dotting paint take much longer to dry than standard brushstrokes. -
Erase guidelines:
If any pencil marks are still visible from your initial centering, gently erase them now that the paint is hard. -
Seal for protection:
Apply a coat of satin or matte varnish. Avoid brush-on varnish if possible, as it can smear the dots; a spray sealant is safer for this type of texture.
Place your finished mandala stone on a stand or display it flat to bring a touch of Zen to your space
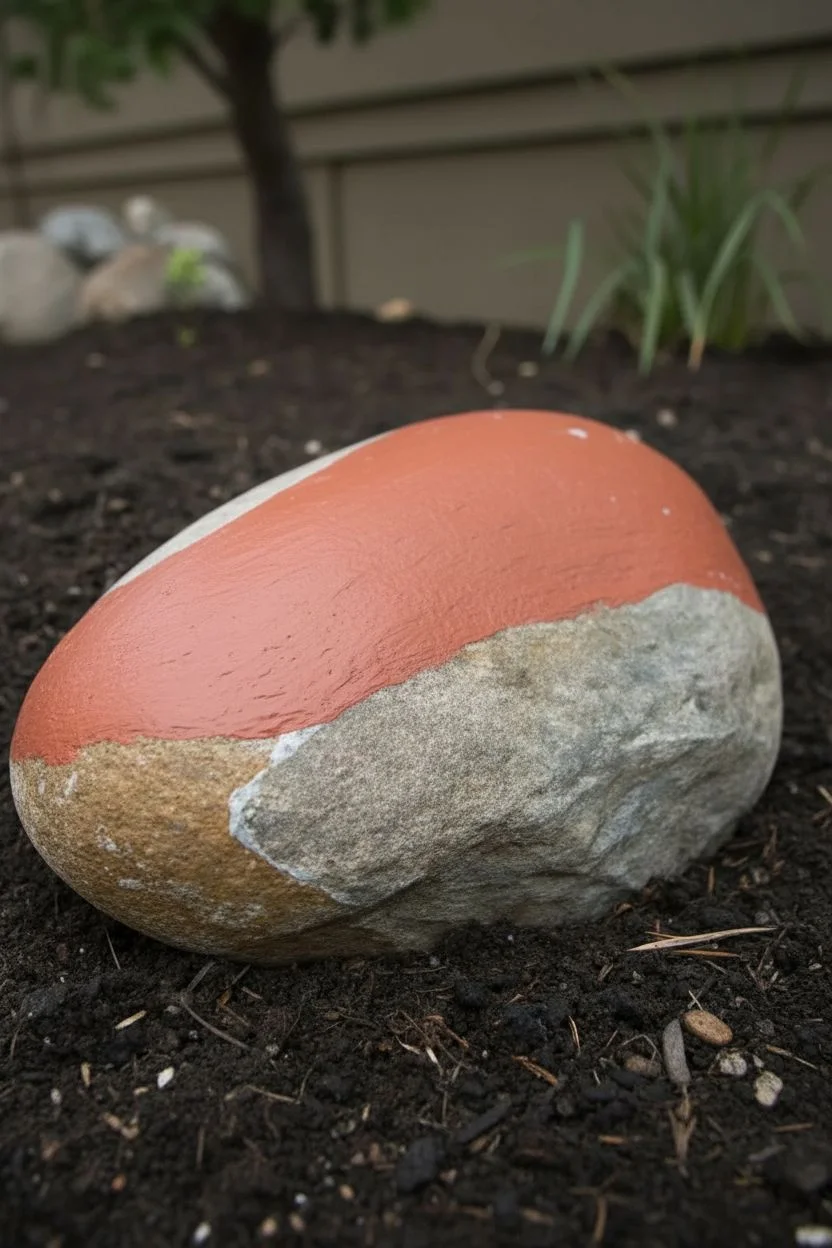
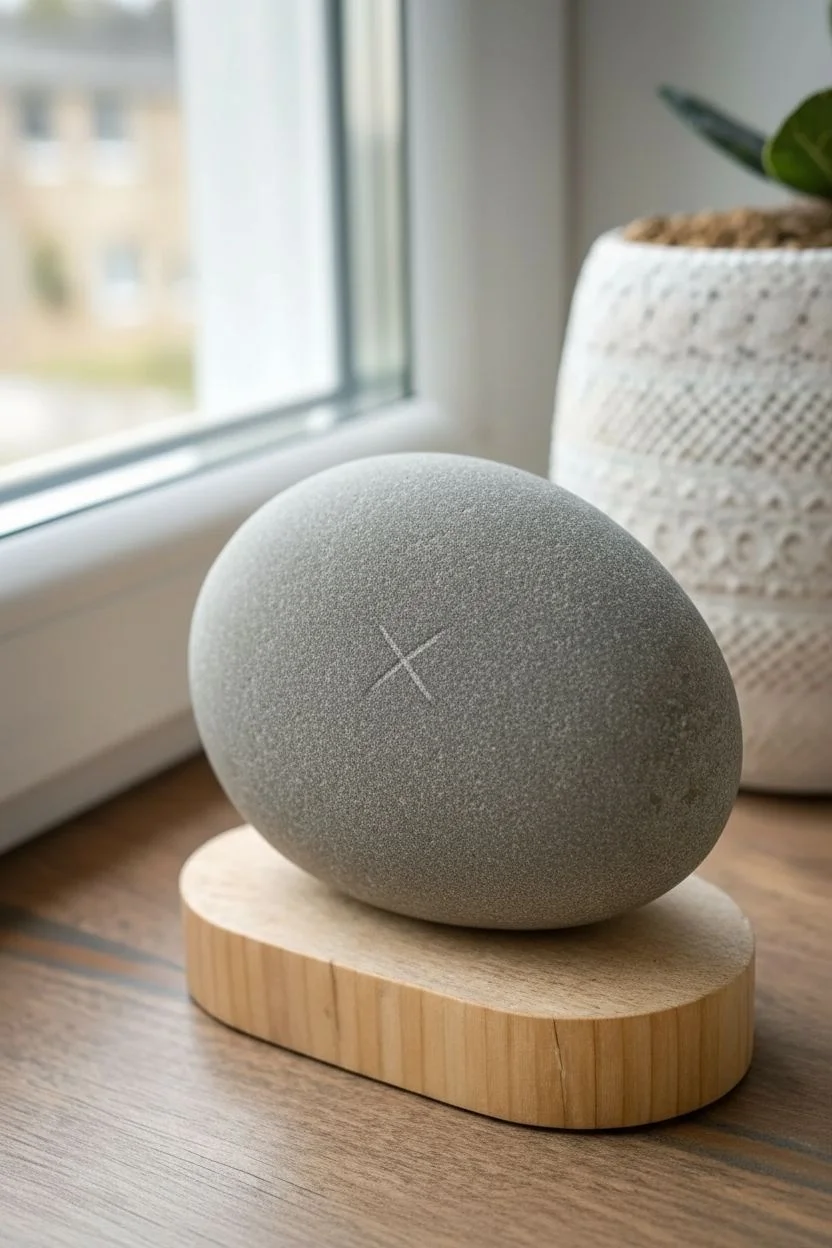
Faux Stacked Stones Illusion Boulder
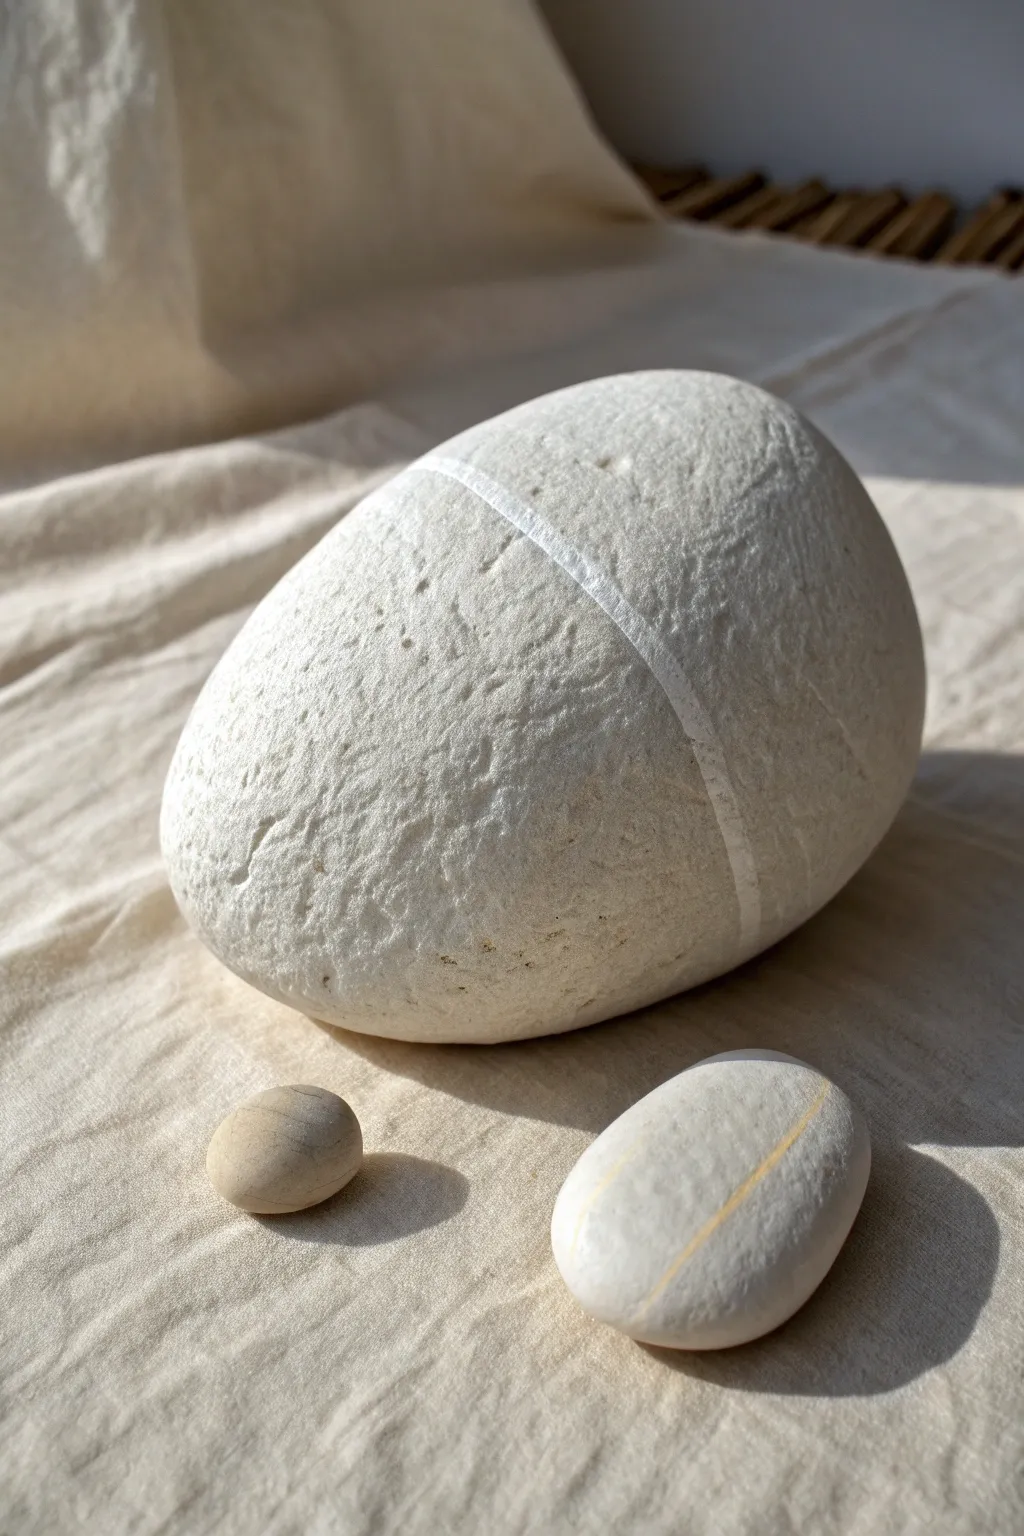
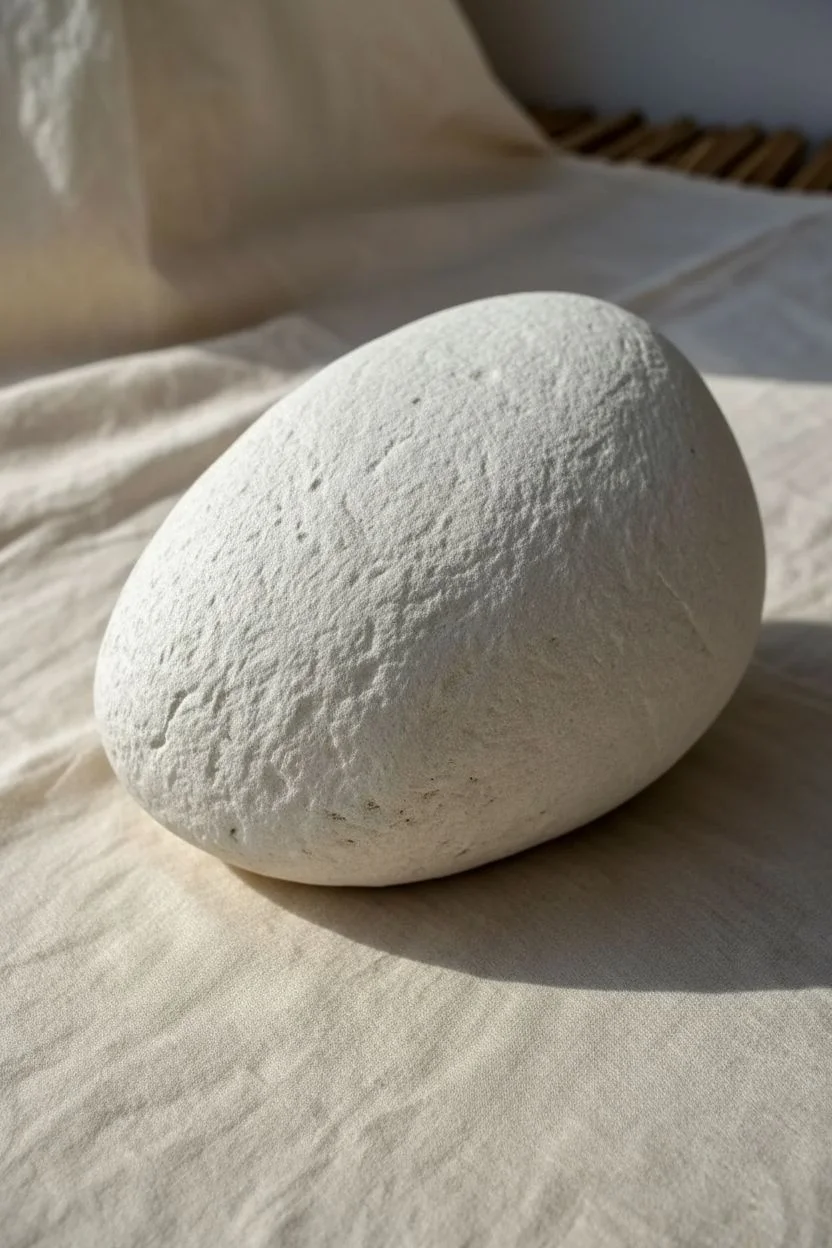
Embrace the understated beauty of nature with this simple yet striking rock painting project that transforms ordinary garden stones into Zen-inspired decor. By adding a single, crisp line to mimic a quartz vein, you can create a sophisticated illusion that looks like a high-end sculptural element.
Step-by-Step
Materials
- One large, rounded river rock with a textured surface
- Two smaller smooth pebbles (optional, for styling)
- White acrylic paint or a white paint marker (w/ fine tip)
- Ivory or cream acrylic paint (for base coat)
- Matte or satin acrylic varnish
- Medium flat paintbrush
- Fine detail paintbrush (if painting the line by hand)
- Painter’s tape or flexible masking tape (optional)
- Soap and water for cleaning
- Sandpaper (fine grit)
Step 1: Preparation & Base Coat
-
Select the Perfect Canvas:
Begin by finding a large, relatively round stone. Look for one with a bit of natural pitting or texture, as this will add character to the finished piece. Avoid rocks with deep cracks that might disrupt your painting surface. -
Clean Thoroughly:
Scrub your chosen rock with warm, soapy water to remove all dirt, moss, and oils. This step is crucial for paint adhesion. Rinse well and let it dry completely in the sun or a warm spot. -
Sand for Adhesion:
Lightly scuff the surface with fine-grit sandpaper if the rock is extremely smooth. This gives the paint a better ‘tooth’ to grab onto. -
Mix the Base Color:
Create an off-white or very pale cream shade. Pure white can look too stark against natural textures, so I like to mix a tiny drop of brown or yellow into white acrylic to warm it up just a touch. -
Apply the First Base Layer:
Using your medium flat brush, coat the entire top surface of the rock. Apply the paint somewhat thinly; you want to cover the color of the rock but let the natural pitting and texture show through. -
Build Texture:
Once the first coat is dry to the touch, apply a second coat. Instead of brushing smoothly, try a dabbing or stippling motion to enhance the stone-like texture. Let this base coat dry fully, preferably for at least an hour.
Step 2: Creating the Quartz Vein
-
Plan the Line Placement:
Visualize where a natural vein would run through the stone. Usually, an off-center line that wraps slightly around the curve looks most organic. -
Mask the Area (Option A):
For a super crisp edge, apply two strips of flexible painter’s tape across the rock, leaving a gap of about 1/8th to 1/4th of an inch between them. Press the edges down firmly. -
Freehand Sketch (Option B):
If you prefer a more natural, wandering line, lightly sketch the path with a pencil directly onto the painted surface. -
Paint the Vein:
Using pure bright white paint (lighter than your base coat), fill in the vein. If you used tape, paint over the gap. If freehanding, use your fine detail brush to carefully follow your pencil line. -
Remove Tape:
If you used the taping method, peel the tape away while the white paint is still slightly wet to prevent the dried paint from cracking or lifting at the edges. -
Refine the Edges:
Use the fine detail brush to touch up any bleed-through or jagged edges. A true quartz vein isn’t perfectly straight, so slight wobbles actually add to the realism. -
Create the Secondary Stone:
For the smaller companion stone shown in the image, repeat the process but use a very thin brush and a muted yellow or raw sienna color for the vein line to create variety.
Tape Bleeding?
If paint bleeds under your tape, wait for it to dry, then gently scrape the excess away with a craft knife or touch it up with your base color.
Step 3: Finishing Touches
-
Dry Completely:
Allow all paint layers to cure. This might take several hours or overnight depending on humidity. -
Seal the Artwork:
Apply a coat of matte or satin varnish to protect the paint. Avoid high-gloss finishes, as they will make the rock look like plastic rather than natural stone.
Add Metallic Flair
Use metallic gold or silver paint for the vein line instead of white. This creates a luxurious ‘kintsugi’ effect inspired by Japanese pottery repair.
Arrange your new minimalist stones in a sunny spot or on a shelf to bring a calming, grounded atmosphere to your space
Topographic Map Painted Boulder
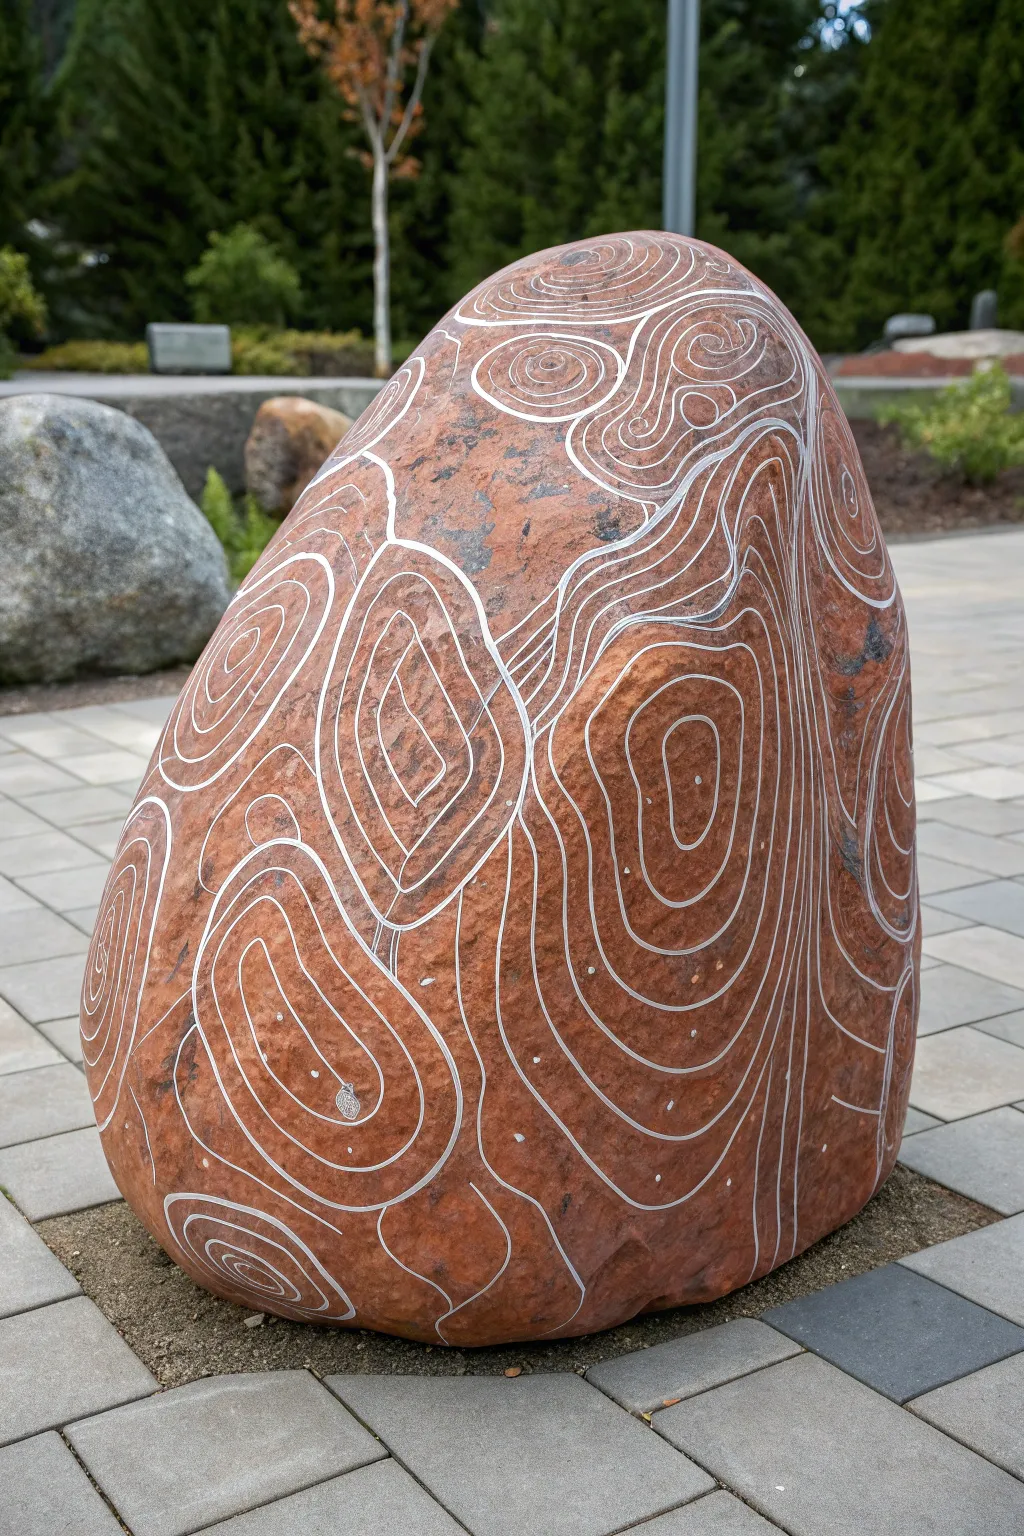
Transform a natural boulder into a piece of modern art by highlighting its inherent topography with flowing lines. This project embraces the organic shape of the stone, using simple white line work to create a mesmerizing, map-like visual effect that mimics geological strata.
How-To Guide
Materials
- Large, smooth boulder (reddish-brown or granite tones work best)
- White paint marker (oil-based, medium tip)
- White paint marker (fine tip)
- Scrub brush
- Water and mild soap
- Clean rag or towel
- Clear outdoor sealant spray (matte or satin finish)
- Chalk or slate pencil (optional, for sketching)
Step 1: Preparation & Cleaning
-
Select your canvas:
Find a large rock with an interesting natural shape. Look for one with a fairly smooth surface but some slight bumps or ridges, as these will guide your pattern. A reddish or terra-cotta colored stone provides excellent contrast for white lines. -
Wash thoroughly:
Using water, mild soap, and a stiff scrub brush, vigorously clean the entire surface of the rock. Dirt, moss, and loose grit will prevent the paint markers from adhering properly. -
Dry completely:
Rinse off all soap residue and dry the rock with a towel. Let it sit in the sun for at least an hour to ensure all moisture has evaporated from the porous surface.
Step 2: Mapping the Design
-
Identify high points:
Look at your rock and identify the ‘peaks’ or the roundest parts of the surface. These will be the centers of your concentric circles. -
Optional sketching:
If you are nervous about freehanding, use a piece of chalk or a slate pencil to lightly sketch out the main ‘islands’ or circular zones where your lines will begin. -
Start the centers:
Using your medium-tip white paint marker, draw small, imperfect circles or ovals at the very center of your identified peaks. Avoid making them perfect circles; wobbly organic shapes look more like a real map.
Shake It Up
Shake your paint pens frequently! Rocks have rough textures that can clog tips. Shake with the cap on, then pump the nib on a scrap piece of cardboard to get the flow moving again.
Step 3: Drawing contours
-
Create the first rings:
Draw a second ring around your center shape, maintaining a roughly consistent distance from the first line. I generally aim for about a quarter-inch to half-inch gap. -
Expand outward:
Continue adding concentric rings radiating outward from each center point. As you move further out, let the lines follow the natural curvature of the rock. -
Navigate distinct zones:
Allow your independent circle groups to grow until they nearly touch each other. You should have several separate ‘bullseyes’ on the rock face at this stage. -
Merge the patterns:
When two sets of rings meet, draw a line that encompasses both of them, creating a figure-eight or peanut shape. This transitions the separate peaks into a unified elevation map. -
Fill the gaps:
Continue drawing lines that wrap around the entire group of shapes. If you encounter awkward empty triangular spaces between contour sets, fill them with smaller, nested loops. -
Vary line weight (Optional):
For extra depth, you can re-trace every fifth line to make it slightly thicker, mimicking the index contours on real topographic charts.
Metallic Upgrade
Instead of plain white, try using a metallic silver or gold paint pen. The shimmer will catch the sunlight and make the rock look like it has veins of precious metal running through it.
Step 4: Refining & Sealing
-
Add detail dots:
Using the fine-tip marker, gently tap small white dots into some of the wider gaps between lines. This adds texture and breaks up the monotony of the stripes without overwhelming the design. -
Check connectivity:
Walk around the rock to ensure the lines flow seamlessly from one side to the other. Connect any orphaned lines so the map looks continuous from all viewing angles. -
Clean up errors:
If a line went stray or overlaps messily, scratching it gently with a fingernail or a damp abrasive pad while the paint is fresh can often remove the mistake. -
Let the paint cure:
Allow the paint marker design to dry completely. Oil-based markers can take a few hours to truly set on stone. -
Seal the artwork:
Apply a light, even coat of clear matte outdoor sealant. This protects the white lines from UV fading and rain, keeping your topographic map crisp for years.
Place your finished topographic stone in a garden bed or along a walkway to add an intriguing, modern focal point to your landscape


Have a question or want to share your own experience? I'd love to hear from you in the comments below!