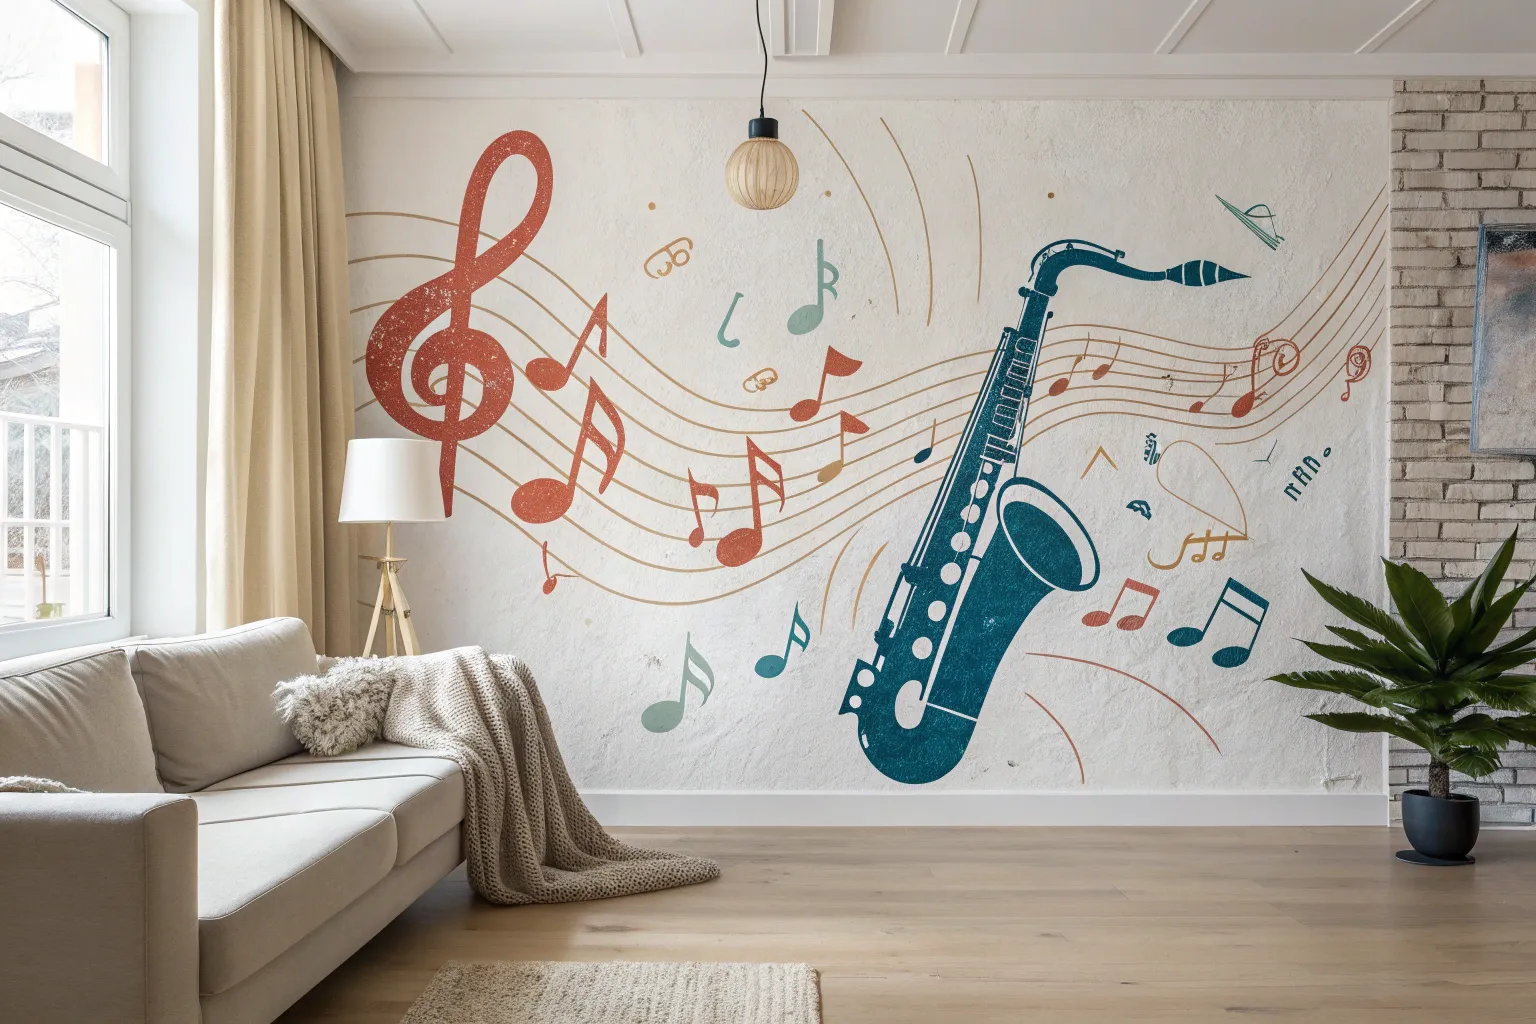
A music mural can turn a plain wall into something that feels like it’s humming with rhythm, even when the room is quiet. I love how these big, bold visuals let you show your style—whether you’re into clean classics or wild, colorful sound-energy.
Oversized Musical Notes and Staff Lines
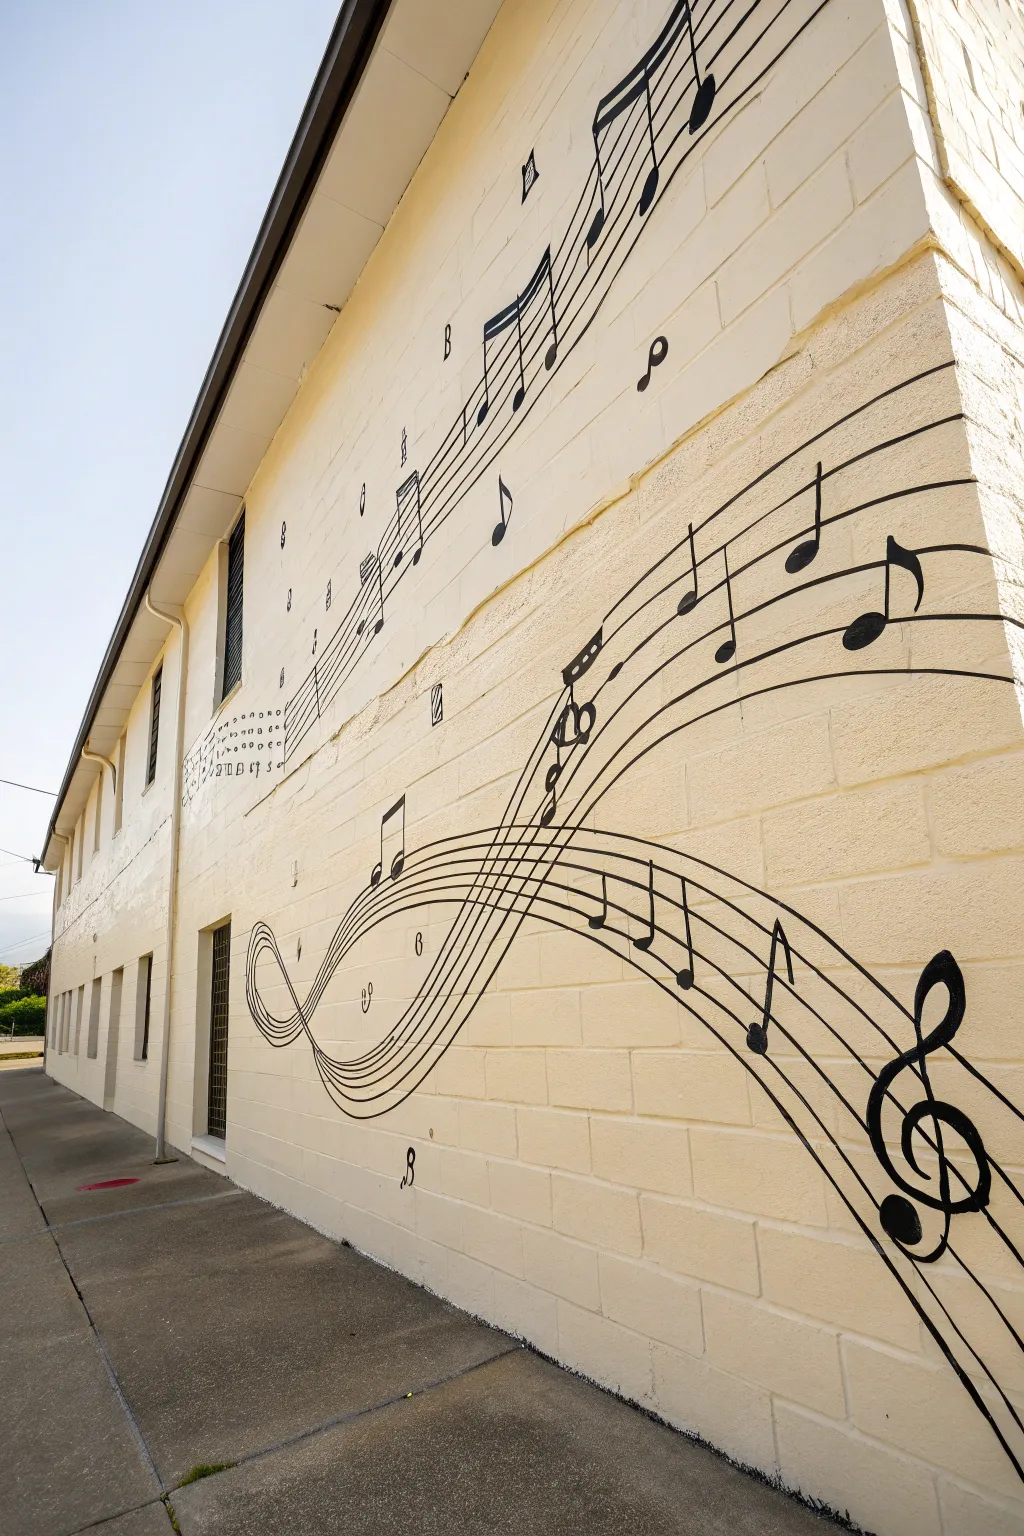
Transform a plain exterior wall into a symphony of visual sound with this bold, monochromatic mural. Using sweeping staff lines and oversized musical notation, this project creates a dynamic sense of movement that dances across the brickwork.
Step-by-Step Tutorial
Materials
- Exterior masonry primer (white or cream)
- Exterior latex paint (cream/off-white for base)
- High-quality exterior black paint (semi-gloss or satin)
- Large paint rollers and extension pole
- Assorted paintbrushes (angled sash brushes, small detail brushes)
- Chalk snap line or long straight edge
- Carpenter’s pencil or white chalk
- Projector (optional but recommended)
- Painter’s tape
- Ladder or scaffolding
- Drop cloths
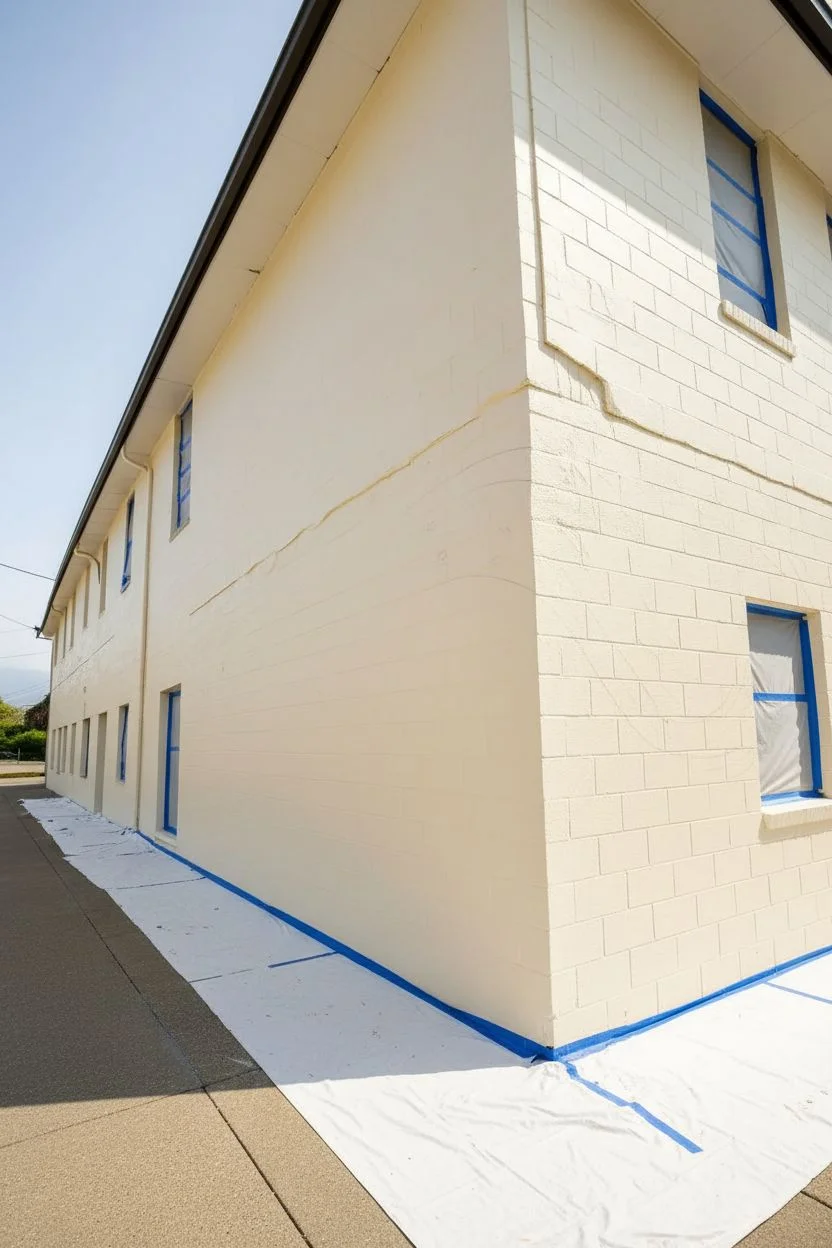
Step 1: Preparation and Base Coat
-
Clean the Surface:
Begin by thoroughly pressure washing the brick wall to remove dirt, moss, and loose debris. Let the masonry dry completely, which may take 24–48 hours depending on the weather. -
Protect the Area:
Lay down drop cloths along the base of the wall to protect the sidewalk or ground. Use painter’s tape to mask off any windows, vents, or trim that you want to keep paint-free. -
Prime the Masonry:
Apply a generous coat of high-quality masonry primer using a thick-nap roller designed for rough surfaces. Ensure the primer gets into the mortar joints. -
Apply the Base Color:
Once the primer is dry, roll on your cream or off-white exterior latex paint. You will likely need two coats to get a solid, opaque finish that hides the original brick color.
Smooth Moves
When painting lines over brick, don’t overload your brush. Push the paint into the mortar grooves with a dabbing motion rather than a long stroke to keep lines crisp.
Step 2: Designing the Composition
-
Plan the Flow:
Sketch your design on paper first. Note how the staff lines in the example swoop and curve rather than running perfectly straight; this adds energy to the piece. -
Mark the Staff Lines:
For the long, sweeping curves, I find it helpful to freehand the path lightly with chalk first to establish the motion. If you want straighter sections, use a chalk snap line to create parallel guides. -
Project or Grid the Notes:
Set up a projector at night to cast your musical sheet design onto the wall for tracing. If a projector isn’t feasible, use a grid method to scale up your drawing, marking key points for the treble clef and larger notes. -
Refine the Sketch:
Go over your chalk guides with a pencil to make the lines distinct enough to see while painting, paying special attention to the thickness variation in the staff lines.
Metallic Accent
For a stunning interactive element, paint the note heads with a metallic gold or silver paint that catches the sunlight and glimmers at certain times of day.
Step 3: Painting the Music
-
Outline the Staves:
Using a 1-inch angled sash brush and your black exterior paint, carefully cut in the edges of the five parallel staff lines. Keep a steady hand to handle the bumps in the mortar. -
Fill the Lines:
Once outlined, fill in the body of the staff lines. They should be thick and bold—about 1 to 2 inches wide—to be visible from a distance. -
Paint the Treble Clef:
Start on the large treble clef at the bottom right. Focus on the graceful curve and the varying thickness of the line, making the ‘belly’ of the clef thicker than the tail. -
Add the Notes:
Paint the note heads (the oval parts) solid black. Ensure they sit correctly on their respective lines or spaces. -
Connect with Stems and Beams:
Draw the vertical stems connected to the note heads. For groups of eighth or sixteenth notes, paint the thick beams connecting the tops of the stems. -
Detail Work:
Add the smaller musical symbols like sharps, flats, flags on single notes, and rests. Use a smaller detail brush here to navigate the texture of the brick. -
Touch Up Edges:
Stand back to inspect the mural. Use a small brush and your base cream color to clean up any black drips or wobbly edges where the paint may have bled into the mortar.
Step back and admire how the melody now visually resonates across your building


Piano Keys Across the Wall
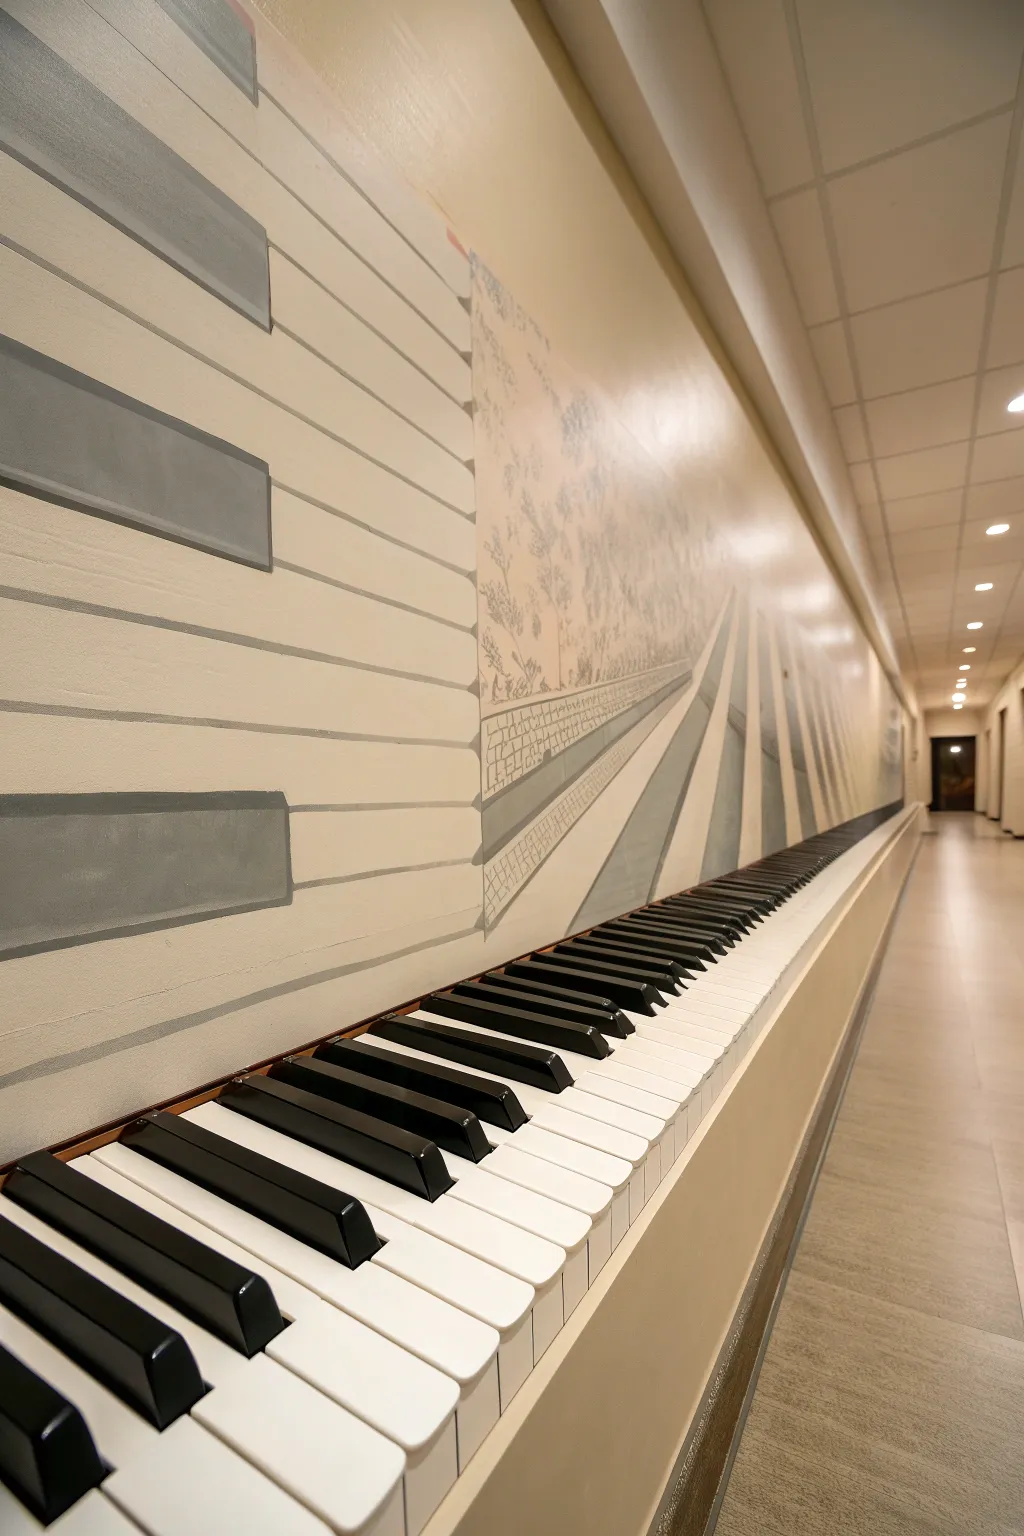
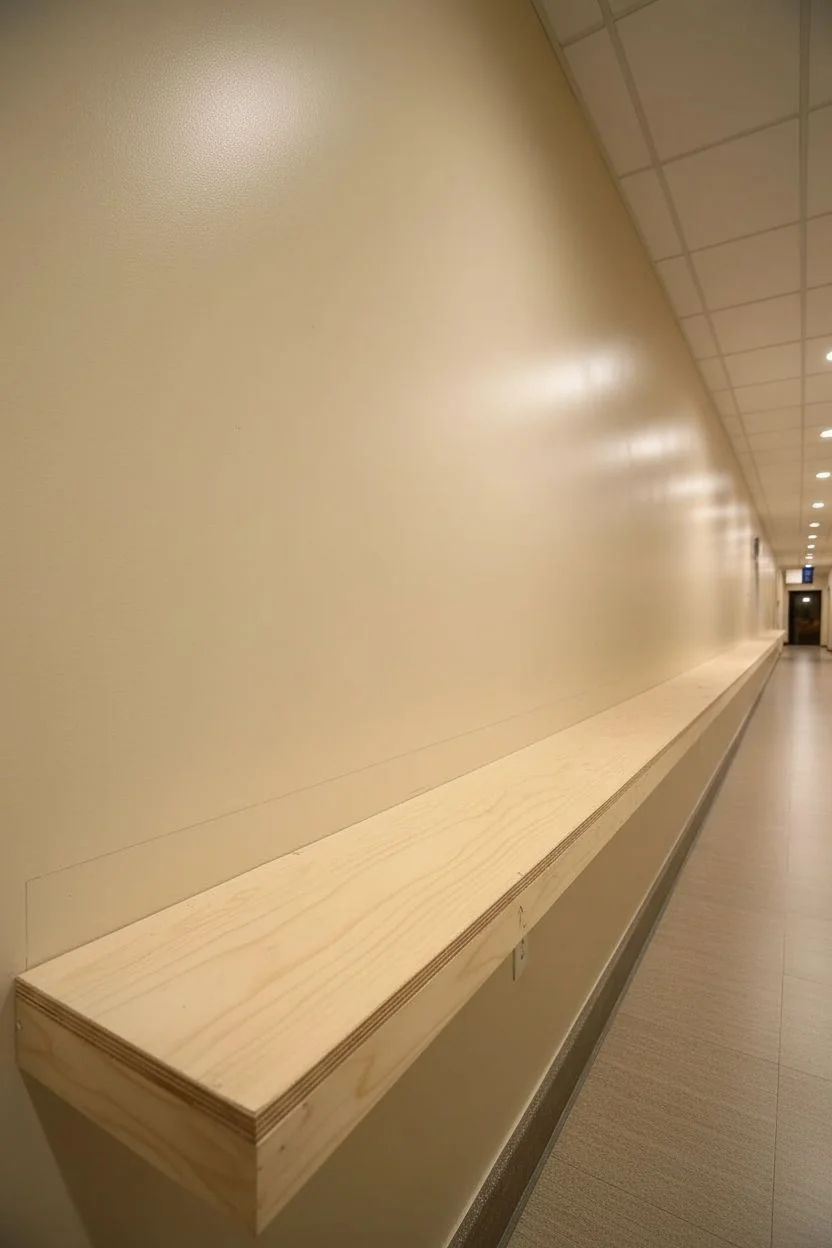
Transform a long hallway into a musical journey with this clever forced-perspective mural. By combining a 3D shelving element with a painted wall graphic, you’ll create the illusion of piano keys stretching infinitely into a distant landscape.
Detailed Instructions
Materials
- Long floating shelf or ledge (MDF or wood)
- Glossy white acrylic paint (for keys)
- Glossy black acrylic paint (for sharp/flat keys)
- Matte beige or cream wall paint (base color)
- Grey acrylic paints (various shades for shading)
- Painter’s tape (various widths)
- Long ruler or straight edge
- Pencil and eraser
- Fine detail brushes
- Medium flat brushes
- Laser level (optional but helpful)
- Reference photo of landscape or sheet music
Step 1: Setting the Stage
-
Prep the canvas:
Begin by cleaning your hallway wall thoroughly to remove dust and grease. Apply a base coat of matte beige or cream paint to the entire length of the wall where the mural will live. Let this dry completely overnight to ensure a stable surface for the detailed work. -
Install the ledge:
Mount your floating shelf or wooden ledge at roughly waist height (about 30-32 inches from the floor). This ledge will serve as the physical ‘white keys’ of your piano. Make sure it is securely anchored and perfectly level, as this horizontal line anchors the entire perspective. -
Map the horizon:
Decide where you want your ‘vanishing point’ to be further down the hall. Use a pencil to lightly mark a horizon line on the wall that aligns with the top surface of your mounted ledge. This is crucial for the 3D effect to work.
Step 2: Sculpting the Keys
-
Mark the key widths:
On your mounted ledge, use a ruler to mark out standard piano key widths (approx. 23-24mm for white keys). Use a framing square to extend these lines straight back to the wall. -
Paint the white keys:
Paint the entire ledge with high-gloss white paint. Apply multiple thin coats, sanding lightly between them, to achieve that slick, ivory-like finish of a real piano. -
Block out black keys:
Once the white base is cured, mask off the areas for the black keys. Remember the pattern: groups of two, then three. Paint these raised blocks with glossy black paint. For a true 3D effect, you might even glue small rectangular blocks of wood onto the ledge before painting.
Pro Tip: Perspective Check
Stand at the start of the hallway frequently while sketching the perspective lines. Take a photo with your phone to check the alignment; accurate angles are easier to spot on a small screen.
Step 3: The Mural Perspective
-
Extend the lines:
This is the trickiest part. Using your straight edge, lightly draw lines extending from the back of your physical piano keys on the wall. Angle them slightly so they converge toward your chosen vanishing point down the hall. These will become the ‘road’ or abstract path. -
Draft horizontal staff lines:
Above the keys in the foreground (closest to the viewer), use a long level to draw parallel horizontal lines. These represent the musical staff running across the wall. -
Blend staff into scenery:
As you move down the wall toward the vanishing point, let the rigid staff lines soften. Begin sketching a landscape—perhaps a tree line or city street—that emerges from these lines. The lines of the staff should morph into architectural elements or the perspective lines of the scenery. -
Tape the grey bars:
Use painter’s tape to mask off the large grey horizontal bars that mimic the piano’s structure on the wall above the keys. These add weight and depth to the composition. -
Paint the graphic elements:
Fill in your taped areas with a medium grey paint. Ensure your brush strokes are smooth to maintain the clean, graphic look of the foreground.
Level Up: Functional Keys
Cut the wooden keys individually on the shelf instead of painting a solid board. The slight gaps between blocks heighten the realism and cast real shadows.
Step 4: Painting the Distance
-
Create the faded landscape:
For the distant landscape section, use a ‘dry brush’ technique with very light grey tones. You want this area to look sketchy and faint, like a memory or an old etching. I find keeping the paint very thin here helps it blend into the beige background. -
Converging paths:
Paint the pathways that extend from the keys in alternating shades of light and medium grey. Make the sections narrower as they get further away to force the perspective. -
Detailing the transition:
Where the physical ledge meets the wall mural, use specific shadowing. Paint a thin, dark line right at the junction to create a shadow, making the shelf look like it’s seamlessly part of the painted world. -
Refining the staff lines:
Go back over your horizontal staff lines with a steady hand and a liner brush. Keep them crisp in the foreground but let them fade out as they reach the landscape section. -
Final clear coat:
Once all paint is fully dry, protect the physical ledge (the ‘keys’) with a durable clear polyurethane topcoat. This ensures the shelf can withstand being touched or used.
Step back and enjoy the melody of lines and depth you’ve brought to your hallway


Guitar Silhouette With Radiating Sound
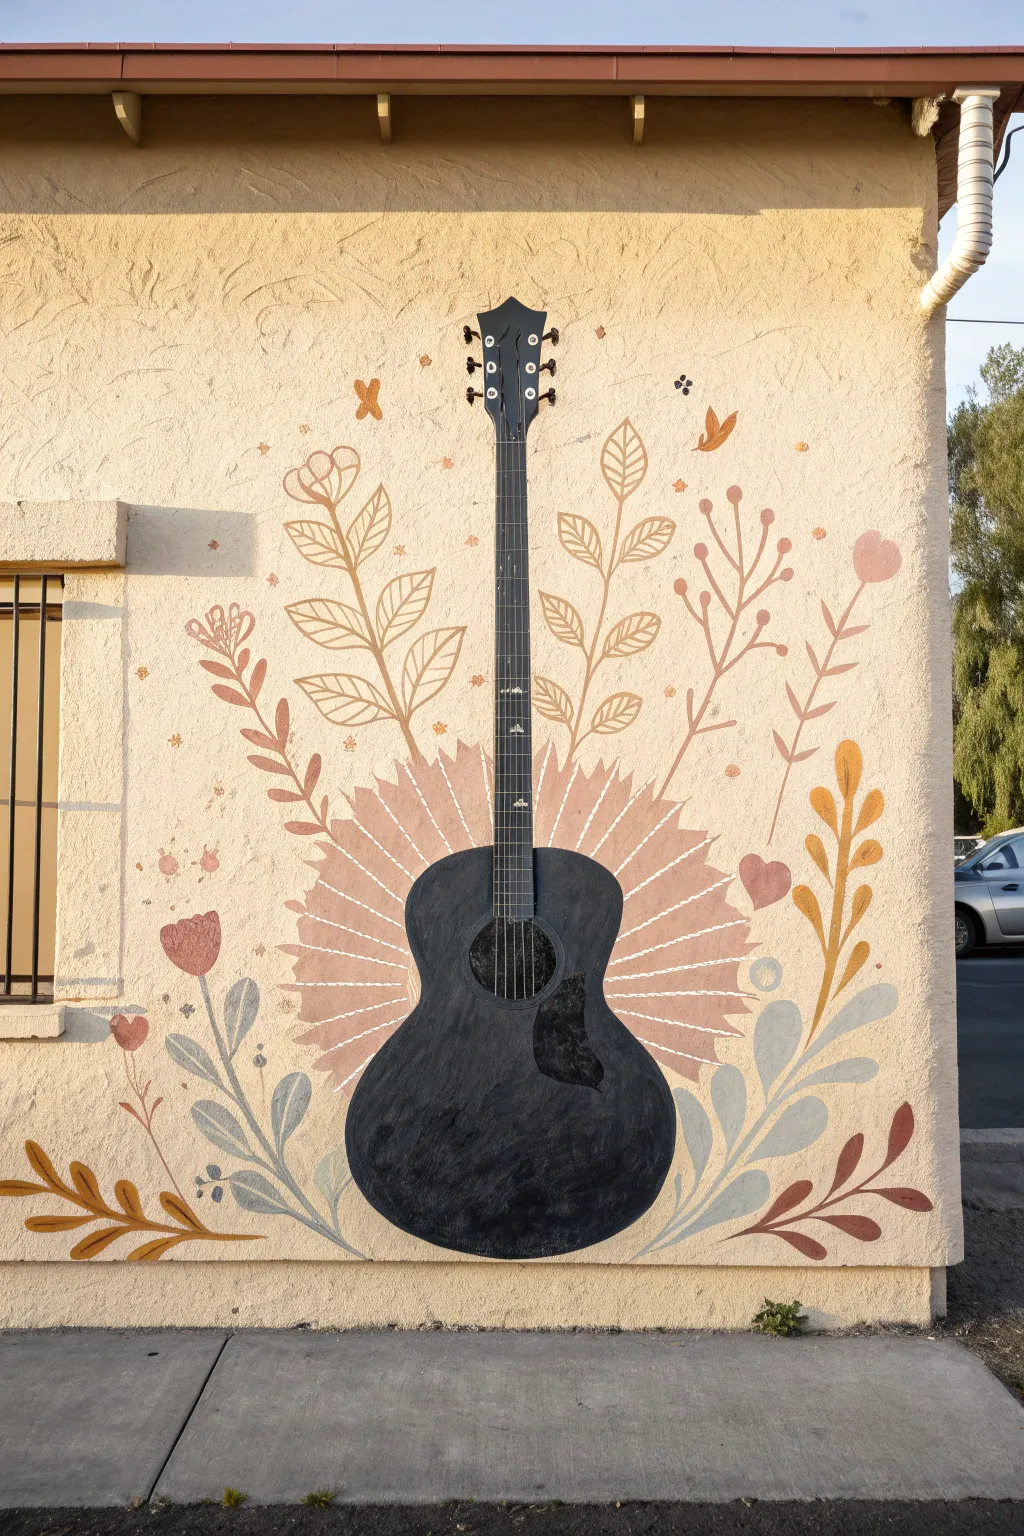
Transform a plain exterior wall into a harmonious display of art with this mural featuring a bold acoustic guitar silhouette. The design combines stark black lines with soft, earthy floral elements and a radiating sunburst pattern that brings dynamic energy to a stucco surface.
Step-by-Step
Materials
- Exterior masonry primer (white or cream)
- Exterior acrylic latex paints (charcoal black, dusky rose, muted pink, sage green, mustard yellow, burnt orange)
- Chalk or pastel stick for sketching
- Painter’s tape
- Assorted paintbrushes (large angle brush for base, medium round for leaves, fine liner for details)
- Small roller and tray (for background)
- Ladder (if painting high)
- Measuring tape or yardstick
Step 1: Preparation and Background
-
Clean surface:
Begin by thoroughly cleaning the stucco wall to remove dust, cobwebs, or loose debris. Use a stiff brush or a light power wash, ensuring the wall is completely dry before proceeding. -
Apply base coat:
If your wall isn’t already a warm cream color, roll on a layer of exterior masonry paint in a light cream or off-white shade to create a neutral canvas. -
Center the design:
Measure the wall width to find your center point. Using a yardstick and chalk, lightly mark a vertical centerline where the guitar neck will eventually sit to ensure symmetry.
Step 2: The Sunburst Layer
-
Sketch the burst:
From the center point (roughly where the guitar body will be), sketch radiating lines outward using chalk. These don’t need to be perfectly even; a slightly organic feel matches the floral theme. -
Paint the background rays:
Mix a muted, dusky rose color using your exterior paints. Fill in the sunburst shape behind where the guitar will go, extending the rays outward. -
Add texture:
While the pink paint is wet, you can feather the edges slightly so they don’t look too rigid against the stucco texture. -
Detail the rays:
Once the base rose color is dry, take a fine liner brush with white or cream paint and add thin, dashed lines radiating from the center over the pink area to create a ‘stitched’ or vibrating look.
Stucco Success
Painting on rough stucco eats up brushes. Don’t use your expensive sable brushes here; opt for durable synthetic bristles that can handle the abrasion of the masonry surface.
Step 3: The Guitar Silhouette
-
Outline the body:
Using your chalk, carefully draw the silhouette of the acoustic guitar directly over the sunburst. Focus on the curves of the body and the straight, long neck. -
Fill with black:
Use a medium angled brush and charcoal black exterior paint to fill in the guitar shape. Stucco can be tricky, so use a dabbing or stippling motion to get the paint into the deep crevices of the texture. -
Define the headstock:
Switch to a smaller brush to paint the headstock at the top of the neck. Paint six small circles for the tuning pegs. -
Add silver details:
Mix a tiny amount of white into your black (or use grey/silver paint) to add the frets, the strings, and the centers of the tuning pegs. Keep these lines very fine. -
Create dimension:
Paint the sound hole in the center of the body with pure black (if you used a charcoal base) to give it depth, and outline a pickguard shape on the side.
Make It Personal
Instead of generic flowers, customize the botanical elements to feature the state flower or local wildflowers native to your specific region for a rooted, local feel.
Step 4: Botanical Elements
-
Draft the stems:
Sketch long, flowing stems rising up from the bottom and sides of the guitar using chalk. Aim for a balanced, symmetrical composition that frames the central instrument. -
Paint large leaves:
Using sage green and a muted teal, paint the large leaves near the bottom. I find that mixing a little of the wall color into the leaf color helps them feel more integrated with the background. -
Add supporting foliage:
Switch to burnt orange and mustard yellow paints for the secondary branches. Paint leaf shapes that look like simple outlines or filled-in teardrops. -
Paint floral accents:
Add small floral buds and floating petals using soft pink and rose tones. Scatter small dots or ‘stars’ around the upper open spaces to fill the void without cluttering it. -
Refine edges:
Step back and check your work. Use the wall base color to clean up any smudges or to sharpen the points of your leaves if the stucco texture made them too fuzzy. -
Seal (optional):
If your mural faces harsh weather, apply a clear, matte exterior masonry sealer over the design once it has cured for at least 48 hours.
Now you have a stunning piece of street art that celebrates music and nature in perfect harmony


Vinyl Record Wall With Groove Lines
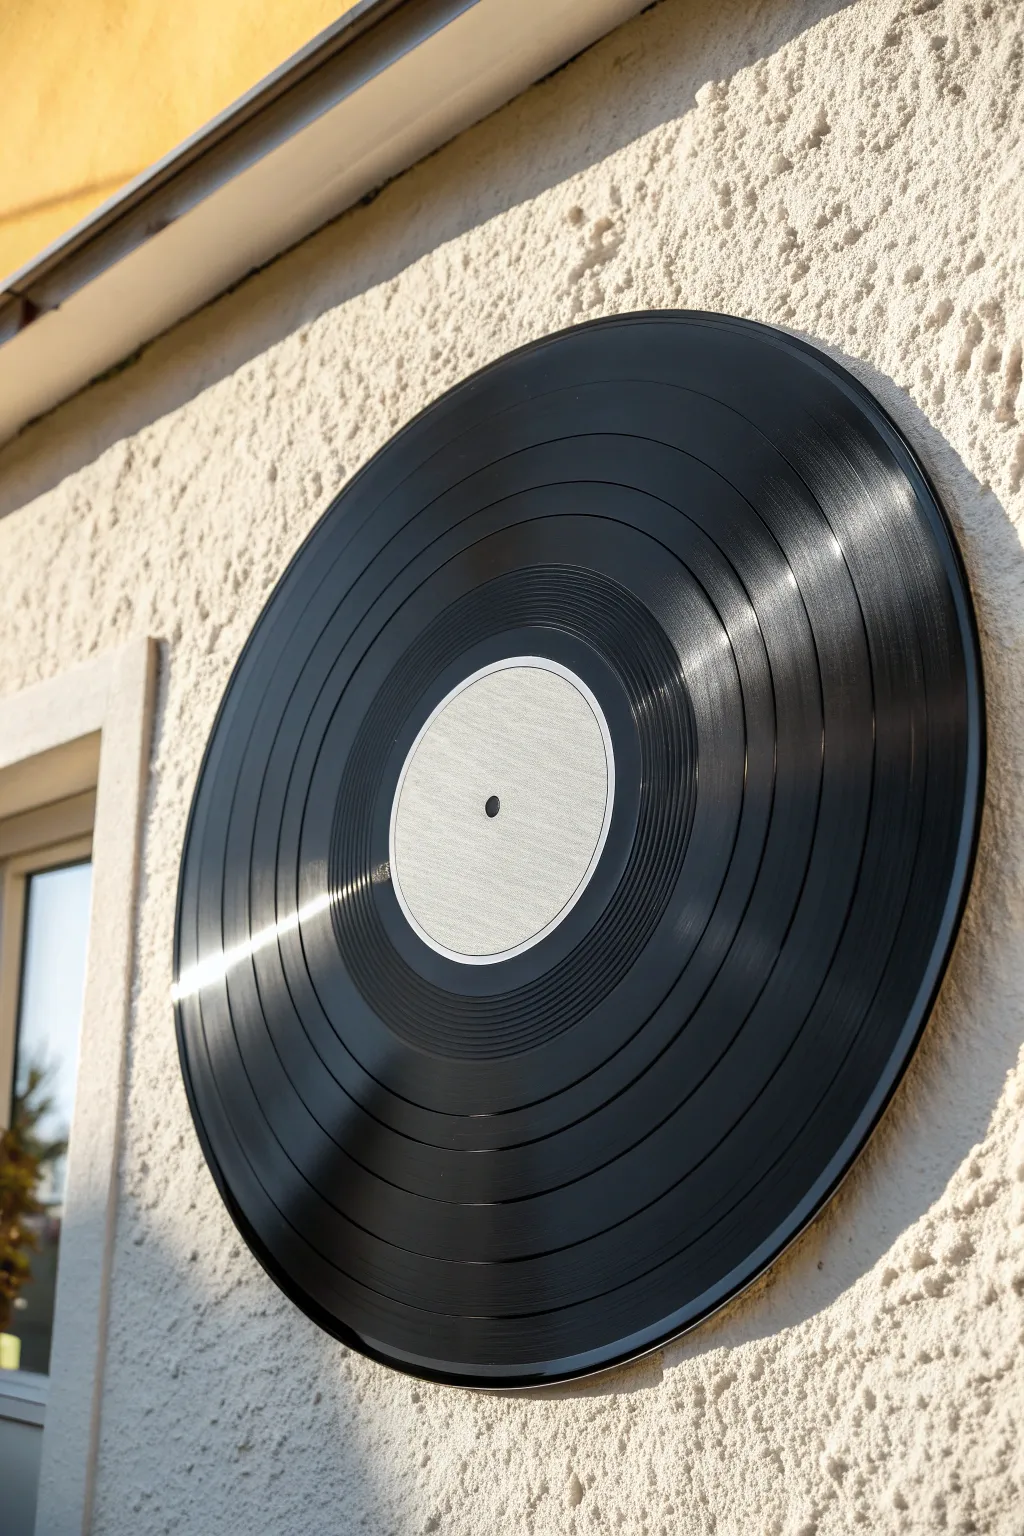
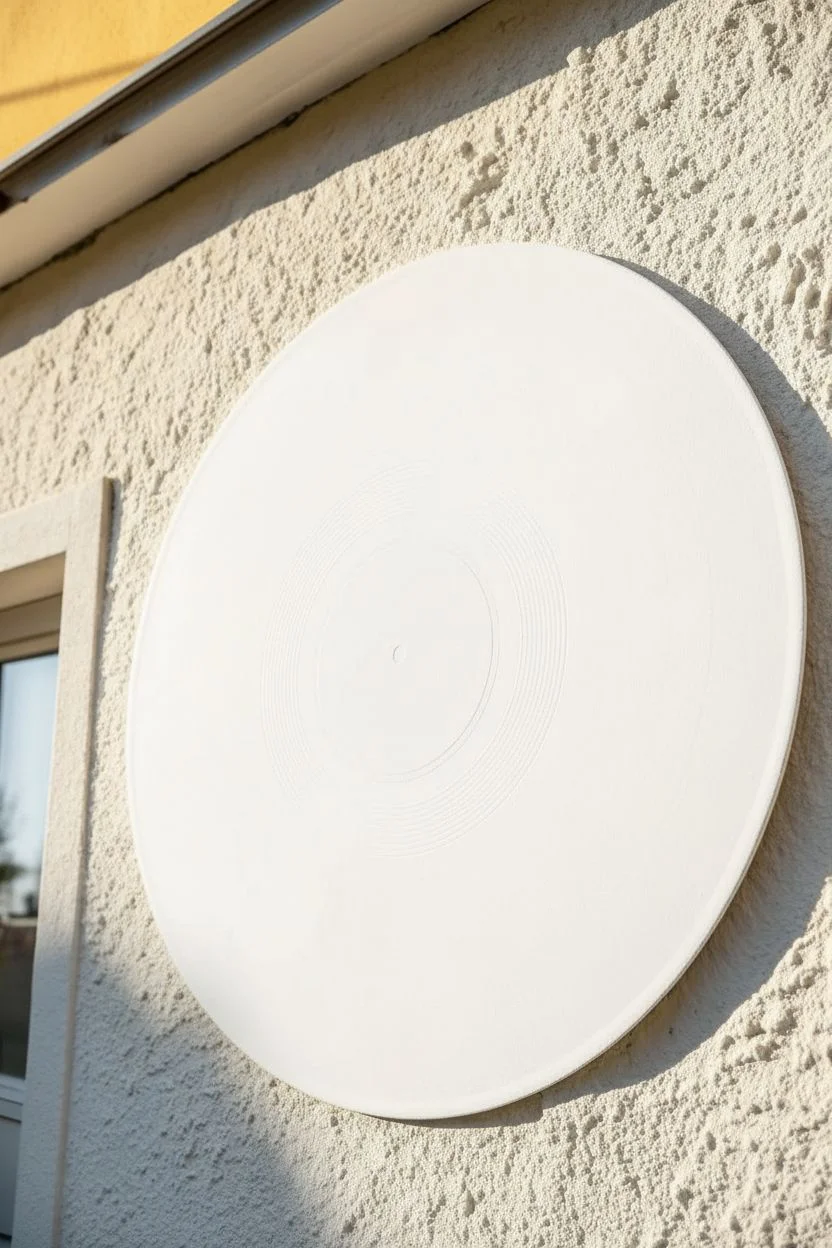
Transform a plain exterior wall into a music lover’s paradise with this striking trompe-l’œil vinyl record mural. The high-contrast black finish and carefully painted grooves create a realistic, glossy 3D effect that pops against textured stucco.
How-To Guide
Materials
- Large circular template (plywood or cardboard)
- Pencil and string (for compass)
- Exterior primer
- High-gloss black exterior latex paint
- Matte white exterior paint
- Dark grey acrylic paint (for grooves)
- Painter’s tape
- Wide paintbrush or roller
- Fine-grit sandpaper
- Detail brush
- Ruler
Step 1: Preparation & Base
-
Measure and Mark:
Find the center point on your chosen wall area. Using a pencil tied to a string or a large compass, draw a perfect circle with your desired diameter (the example shown is approximately 3-4 feet wide). -
Surface Prep:
Clean the wall surface thoroughly to remove dust and debris. If the stucco is extremely rough, consider sanding the high points gently within your circle, though maintaining some texture adds character. -
Prime the Circle:
Apply a coat of high-quality exterior primer to the entire circle area. This ensures the black paint will adhere properly and appear opaque. -
Define the Center Label:
Once the primer is dry, measure the exact center again. Use a smaller circular template or compass to draw the inner label circle, roughly one-third the size of the total diameter.
Smooth Paint Tip
For the cleanest edges on rough stucco, dab clear acrylic gel medium along your tape edge before painting black. This seals the texture bumps and prevents bleed-under.
Step 2: Painting the Record
-
Apply the High-Gloss Black:
Paint the outer ring (the ‘vinyl’ part) with high-gloss black exterior paint. Use a wide brush or foam roller, working in circular motions to mimic the direction of record grooves. -
Build Up Opacity:
Allow the first coat to dry completely, then apply a second coat of black to achieve a deep, rich finish. -
Paint the Label:
Fill in the center circle with matte white exterior paint. You may need two coats here to cover the primer or any underlying marks fully. -
Add the Spindle Hole:
Paint a small black dot in the dead center of the white label to represent the spindle hole.
Step 3: Creating the Grooves
-
Mix Your Groove Color:
Mix a small amount of dark grey paint. I prefer a charcoal shade that is just slightly lighter than the black base. -
Paint Concentric Lines:
Using a fine detail brush or a steady hand with a paint marker, draw thin, concentric circles within the black area. These don’t need to be perfectly continuous, but they should follow the curve. -
Vary Line Thickness:
Make some groove lines slightly thicker or closer together near the outer edge and the label edge to imply different tracks. -
Add the ‘Dead Wax’:
Leave a narrow band of solid black immediately around the white label to represent the run-out groove or ‘dead wax’ area.
Level Up: Custom Label
Personalize the white center label by painting the name of your favorite band, your family name, or a significant date using a stencil for a clean, typographic look.
Step 4: Highlights & Finishing
-
Determine Light Source:
Decide where your imaginary light source is coming from (usually top left or top right) to place your reflections realistically. -
Add Gloss Highlights:
Using diluted white paint or a very light grey, dry-brush a sweeping, curved highlight across the grooves on one side of the record. -
Soften the Glare:
If the highlight looks too stark, lightly glaze over it with a wash of watery black paint to blend it back into the surface. -
Clean Edges:
Use a small brush to touch up any jagged edges where the black vinyl meets the wall texture. -
Final Seal:
Apply a clear, exterior-grade UV-resistant topcoat over the entire mural to protect the colors from fading in the sunlight.
Now you have a timeless piece of musical art that brings rhythm to your outdoor space
BRUSH GUIDE
The Right Brush for Every Stroke
From clean lines to bold texture — master brush choice, stroke control, and essential techniques.
Explore the Full Guide
Cassette Tape Retro Music Wall
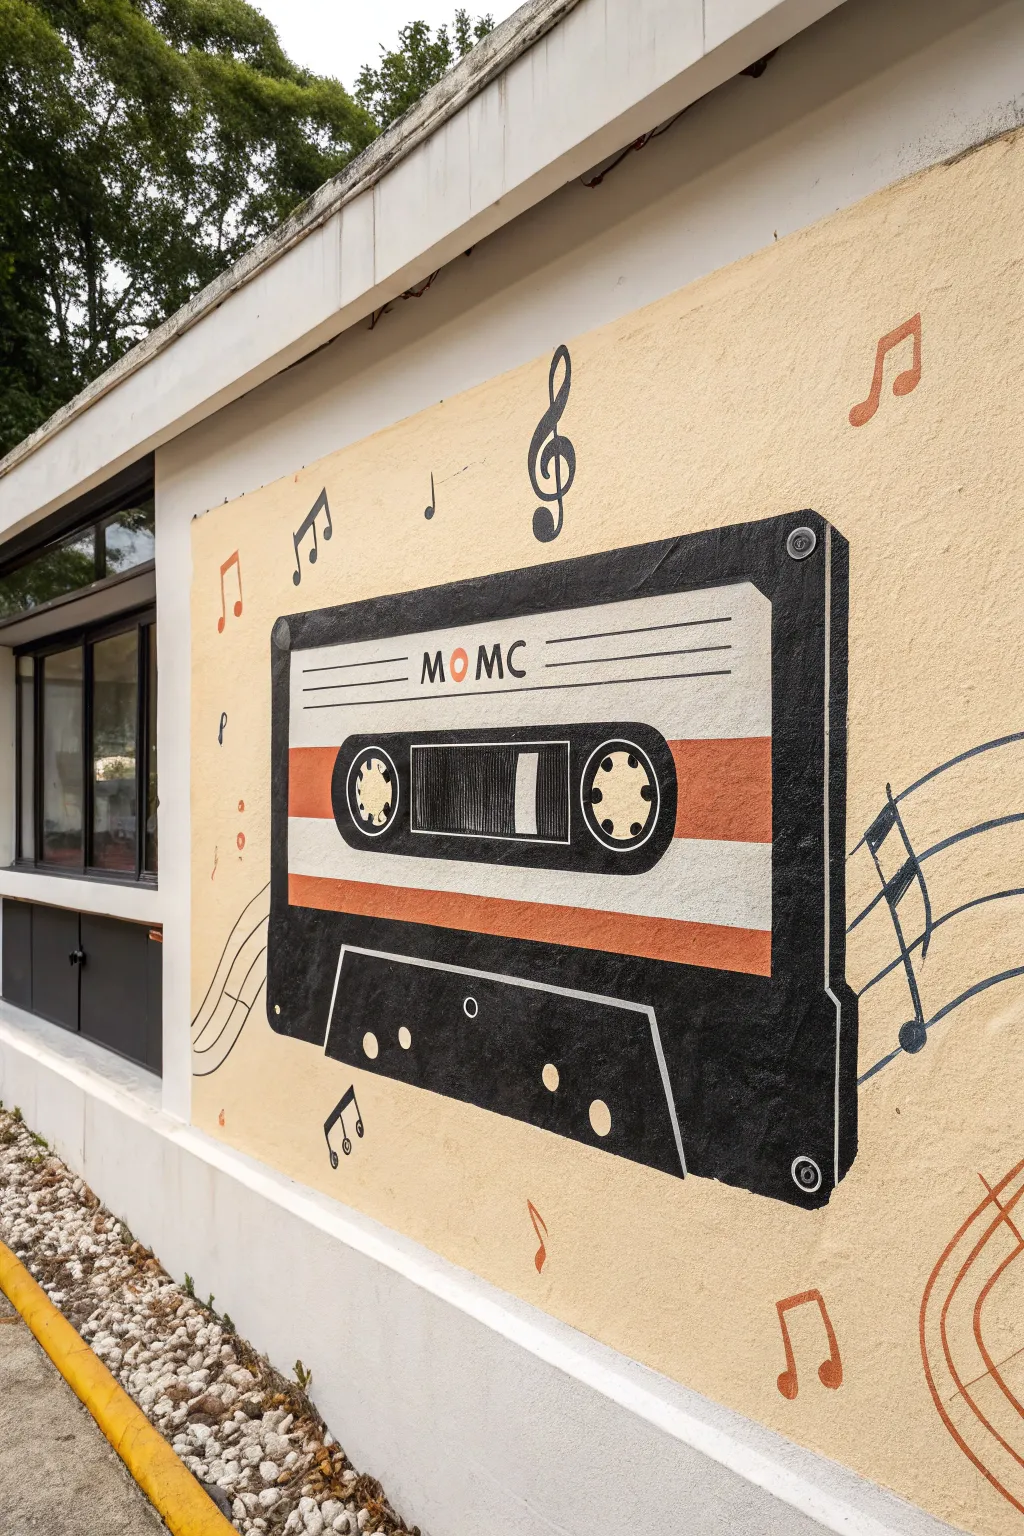
Transport your space back to the mixtape era with this large-scale cassette tape mural. Featuring bold black outlines, a classic orange-and-white label, and floating musical notes, this design pops beautifully against a warm, textured background.
Step-by-Step Tutorial
Materials
- Exterior or interior latex paint (Cream/Beige for base)
- Black acrylic or latex paint (High opacity)
- Burnt orange acrylic or latex paint
- White acrylic or latex paint
- Pencil and large eraser
- Carpenter’s level or laser level
- Painter’s tape (various widths)
- Chalk snap line (optional for long straight lines)
- Assorted paintbrushes (1-inch flat, medium round, fine liner)
- Paint rollers and tray
- Projector (optional but recommended for text layout)
Step 1: Preparation and Base
-
Prepare the surface:
Clean your wall thoroughly to remove dust and grime. Since this mural is often done on textured stucco or concrete, use a stiff bristle brush to get into the crevices first. -
Apply the base coat:
Roll on two coats of your cream or warm beige background color. Let the first coat dry completely before applying the second to ensure a solid, even canvas. -
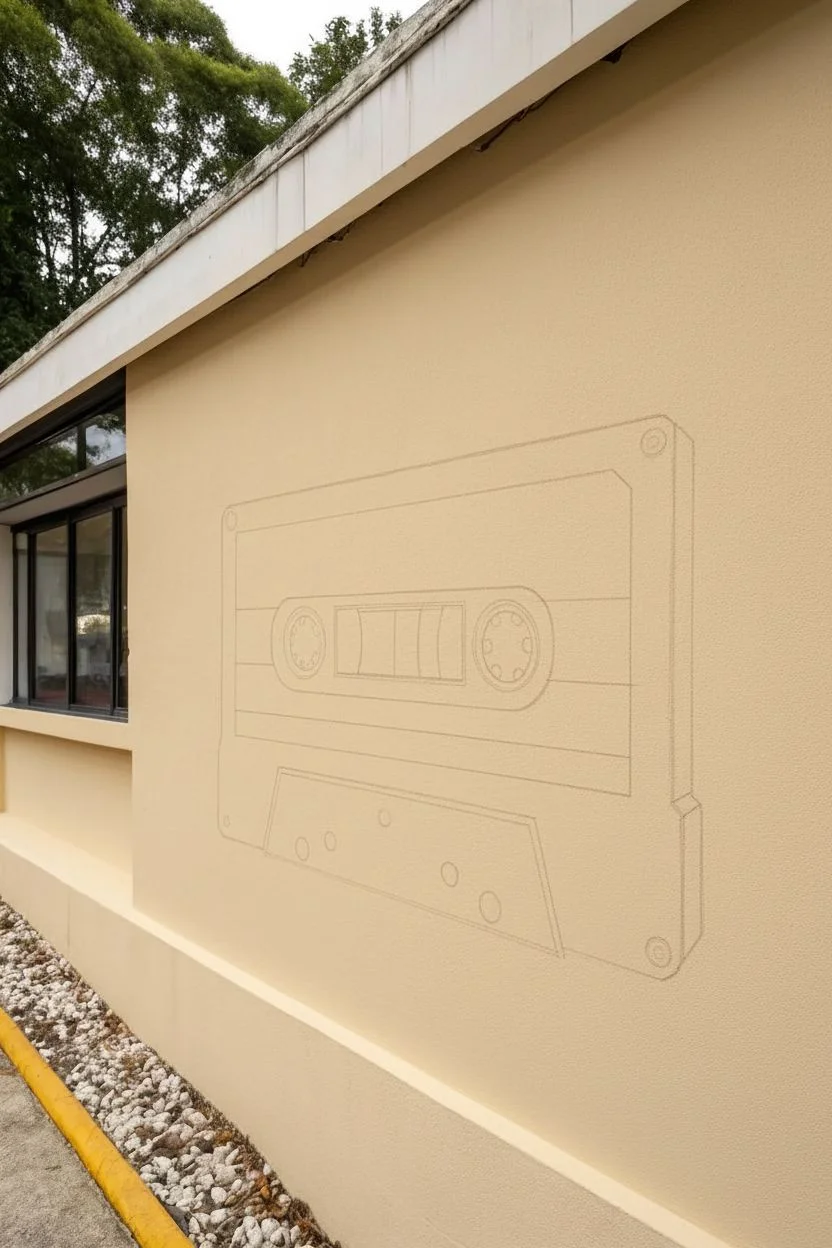
Sketch the perimeter:
Using a pencil and a level, lightly draw the large rectangle for the cassette body. This cassette is viewed at a slight 3D angle, so draw the front face first, then add the thinner side panel to the right for depth. -
Block in internal shapes:
Measure and sketch the inner rectangle for the label area. Within that, draw the smaller trapezoid shape for the raised cassette window section in the center.
Pro Tip: Texture Taming
On rough stucco, ‘stippling’ (jamming the brush bristles straight onto the wall rather than dragging) helps get paint into deep pits without drips.
Step 2: Painting the Structure
-
Outline the black body:
Load a 1-inch flat brush with black paint. Carefully paint the thick outer border of the cassette, including the side panel that creates the 3D effect. The textured wall might require dabbing the brush to fill pits. -
Fill the bottom section:
Paint the large trapezoid shape at the bottom of the cassette with black. Leave two small circles unpainted near the bottom edge for the screw holes. -
Create the white label:
Fill the main label area with white paint. This might take two or three coats to cover the beige background opaquely, especially if the wall is rough. -
Add orange stripes:
Once the white is dry, tape off two horizontal bands across the label. Paint these with your burnt orange color to mimic the classic Memorex or TDK style branding. -
Paint the tape window:
In the center trapezoid, paint the background black. Then, use white to paint the two spools (reels) on the left and right. -
Detail the reels:
Inside the white spools, paint the small gear teeth or ‘snowflake’ pattern using a fine liner brush and black paint. I find steadying my hand against the wall with my pinky helps here. -
Add the magnetic tape:
Between the two reels, paint a dark grey or black strip to represent the actual magnetic tape, adding vertical white highlight lines to show sheen.
Step 3: Lettering and Finishing Touches
-
Draft the text:
Pencil in the text ‘MOMC’ (or your chosen word) in the upper white section of the label. Use a stencil or projector if you aren’t confident with freehand lettering. -
Paint the text:
Fill in the letters carefully with black paint. For the ‘O’, you can paint it in orange to match the stripes for a pop of color cohesion. -
Add label lines:
Using a liner brush and a straight edge, paint two thin horizontal black lines above and below the text area to complete the label design. -
Detail the screws:
Go back to the corners and the bottom edge where you left gaps or painted black. Add small grey or white circles with a dot in the center to represent the assembly screws. -
Sketch musical elements:
Lightly sketch musical notes (eighth notes, treble clefs) and sweeping staff lines floating around the cassette. Vary their sizes to create a sense of movement. -
Paint floaters black:
Fill in the sketched notes and the treble clef above the tape with solid black paint. -
Paint floaters orange:
Paint the remaining scattered notes and the sweeping staff lines on the right side with the burnt orange color to balance the composition. -
Final inspection:
Step back and check for any beige spots showing through the black or orange paint. Touch up edges with a small brush to ensure crisp lines on the rough surface.
Level Up: Metallic Pop
Use metallic silver or gold paint for the screws and the magnetic tape area to make the cassette gleam when sunlight hits the wall.
Enjoy the nostalgic vibes your new retro wall art brings to the neighborhood
Music Quote Lettering as Mural Art
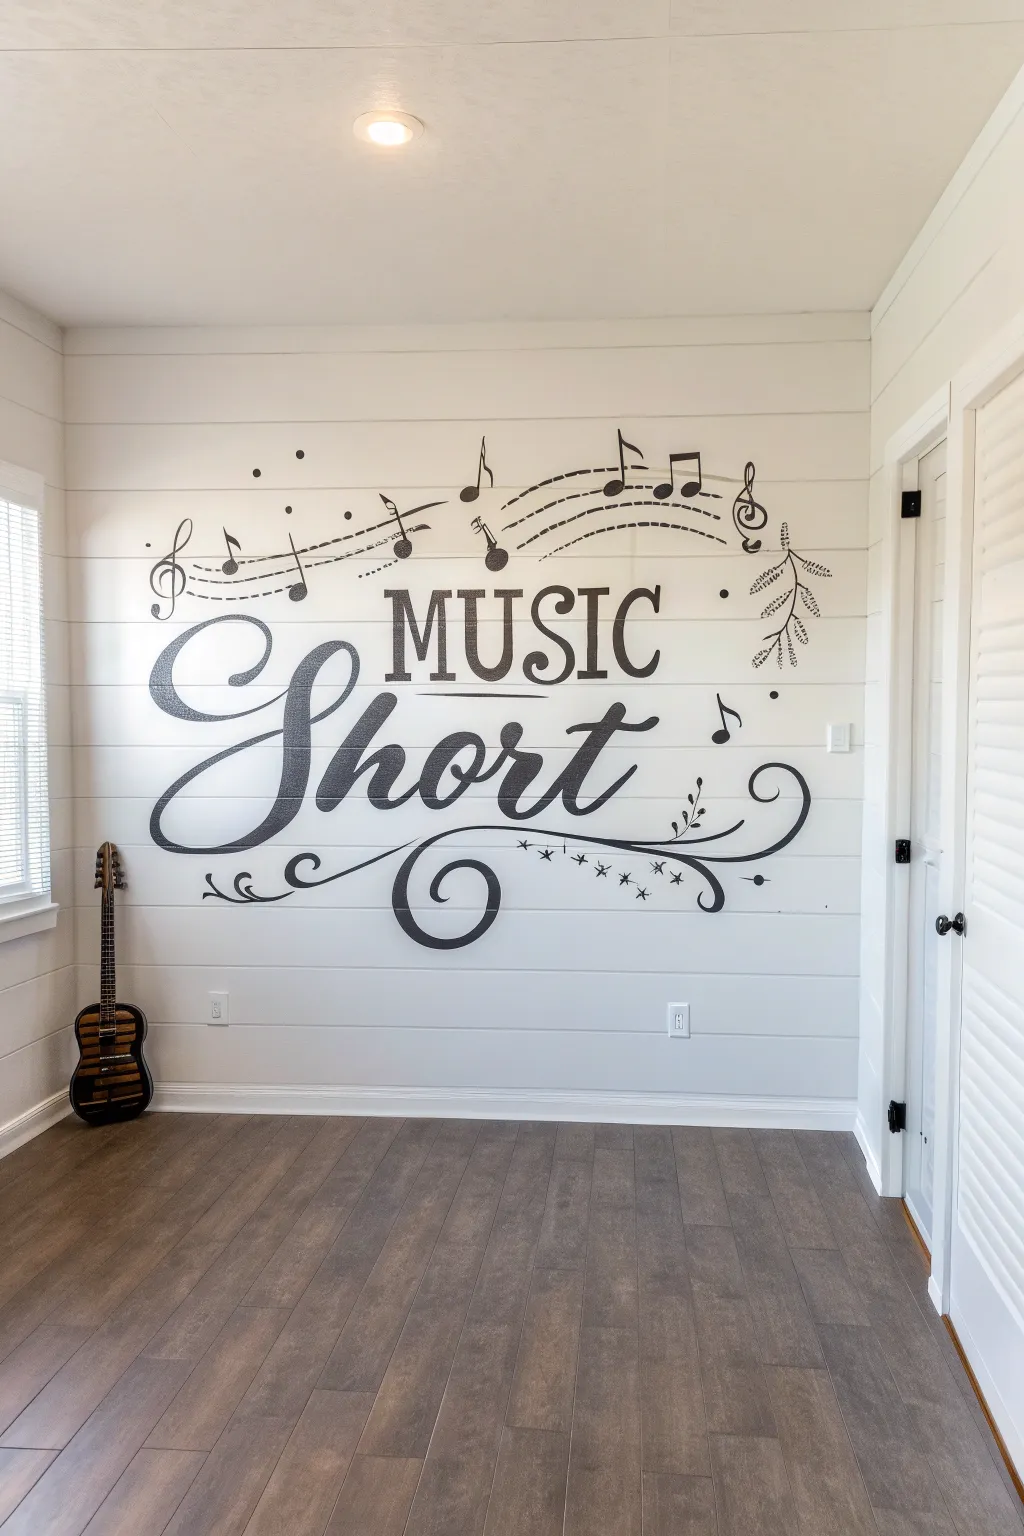
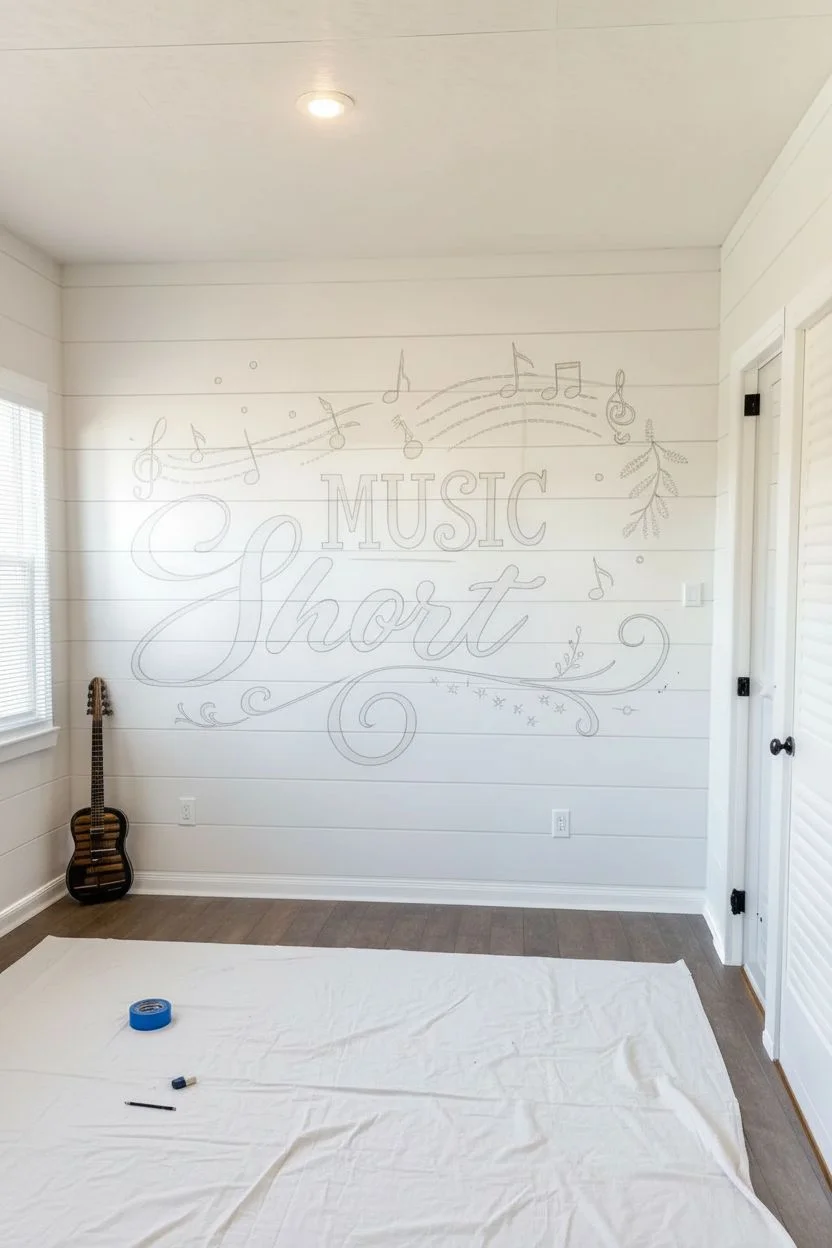
Transform a plain wall into a lyrical masterpiece with this high-contrast typographic mural. Featuring bold lettering, swirling flourishes, and musical motifs on a shiplap background, this project brings rhythm and personality to any music room or studio space.
Detailed Instructions
Materials
- Computer with projector or overhead projector
- Digital design file or transparency of the quote
- Pencil
- High-quality painter’s tape (blue or green)
- Black acrylic paint or latex wall paint (satin finish)
- Small angled sash brush (1 inch)
- Fine liner or script liner brush
- Flat artist brush (medium size)
- Damp rag or sponge
- Drop cloth
- Eraser
Step 1: Preparation and Projection
-
Clean surface:
Begin by wiping down your shiplap wall to remove any dust or oils. This ensures your paint adheres perfectly and crisp lines are achieved. -
Setup:
Place your drop cloth on the floor to protect the flooring from potential drips. Clear the area along the wall. -
Design prep:
Create your digital design reading ‘Music Short’—or your preferred phrase—incorporating the musical staff, treble clef, and decorative swirls. Ensure the aspect ratio matches your wall segment. -
Project and align:
Set up your projector on a table or tripod across from the wall. Turn off the room lights and project the image onto the shiplap, adjusting the distance until the size feels impactful but balanced. -
Trace outlines:
Using a pencil, lightly trace the outline of all letters and musical elements. Because you’re working on shiplap, be mindful of the gaps; trace gently over the grooves so the design flows visually across the horizontal boards.
Bleed Prevention
Shiplap texture varies. If your paint bleeds into the wood grain, seal your pencil outlines with a clear matte medium first before applying black paint.
Step 2: Painting the Typography
-
Outline letters:
Starting with the large word ‘Short,’ use your fine liner brush and black paint to carefully outline the script edges. Keeping your hand steady is key here. -
Fill the script:
Switch to a medium flat brush to fill in the body of the script letters. Apply thin, even coats to prevent dripping, especially near the shiplap grooves. -
Groove detail:
When the lettering crosses a shiplap gap, use the smallest brush to dab paint *inside* the groove. This connects the letter visually so it doesn’t look broken. -
Block lettering:
Move on to the serif font for the word ‘MUSIC.’ Use the flat edge of your artist brush to get sharp, clean corners on the serifs. -
Second coat:
Once the first layer is dry to the touch, apply a second coat of black to ensure deep, solid opacity without streaks.
Step 3: Adding Musical Flourishes
-
Staff lines:
Paint the dashed lines representing the musical staff above the text. Use short, deliberate strokes to keep the dashes uniform in thickness. -
Notes and clefs:
Paint the treble clef and musical notes. I find it easiest to paint the round ‘head’ of the note first, then pull the brush upward for the stem. -
Decorative swirls:
Execute the large bottom swash and the side flourishes using a long-bristled liner brush. Load the brush well with paint to create long, uninterrupted organic curves. -
Star details:
Use the very tip of your fine brush to add the small stars and dots scattered around the swash, giving the piece a magical finish. -
Leaf motif:
Paint the delicate leaf sprig on the right side. Start with the central stem and add the small leaves with quick, single-stroke dabs.
Metallic Accent
For a glamorous touch, paint the small stars or the center of the music notes with metallic gold or silver leafing paint to catch the light.
Step 4: Final Touches
-
Scan for gaps:
Step back and look at the mural from a distance. Check for any uneven edges or spots where the white wall shows through the black paint. -
Cleanup:
Use a small brush with your base wall color (white) to clean up any wobbles or mistakes on the black edges. -
Erase guidelines:
Wait at least 24 hours for the paint to fully cure, then gently erase any visible pencil marks remaining around the edges.
Now you have a stunning focal point that sets the perfect tone for your creative space

PENCIL GUIDE
Understanding Pencil Grades from H to B
From first sketch to finished drawing — learn pencil grades, line control, and shading techniques.
Explore the Full Guide
Music Notes Turning Into Birds
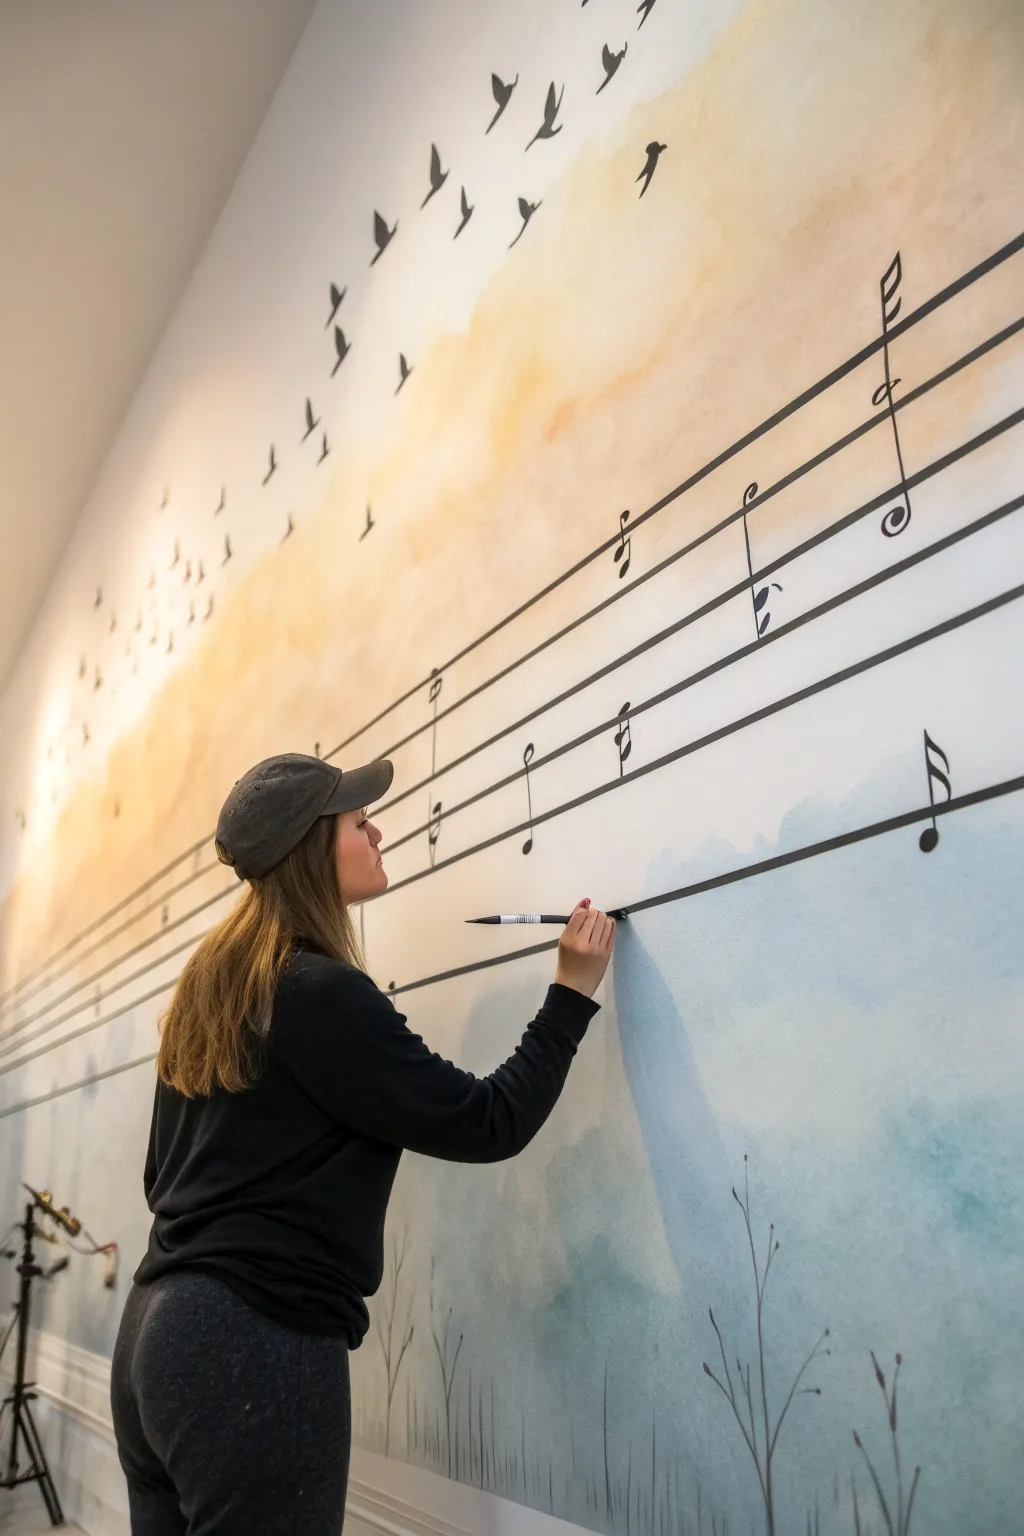
Transform a blank wall into a whimsical masterpiece where musical notes break free and take flight as soaring birds. This mural combines precise lines with a dreamy, watercolor-style background for a look that is both structured and ethereal.
How-To Guide
Materials
- Interior latex paint (white base)
- Acrylic paints or wall glazes (light blue, peach, soft orange)
- Black acrylic paint or high-quality mural paint
- Large sponge or color-washing brush
- Painter’s tape or masking tape
- Long level or laser level
- Pencil and eraser
- Fine liner brush (size 1 or 2)
- Medium round brush (size 4 or 6)
- Flat brush (1 inch)
- Ruler or yardstick
- Water bucket and rags
Step 1: Setting the Atmosphere
-
Prepare the canvas:
Start with a clean, white or off-white wall. If necessary, apply a fresh coat of primer or base paint to ensure your colors pop and blend smoothly. -
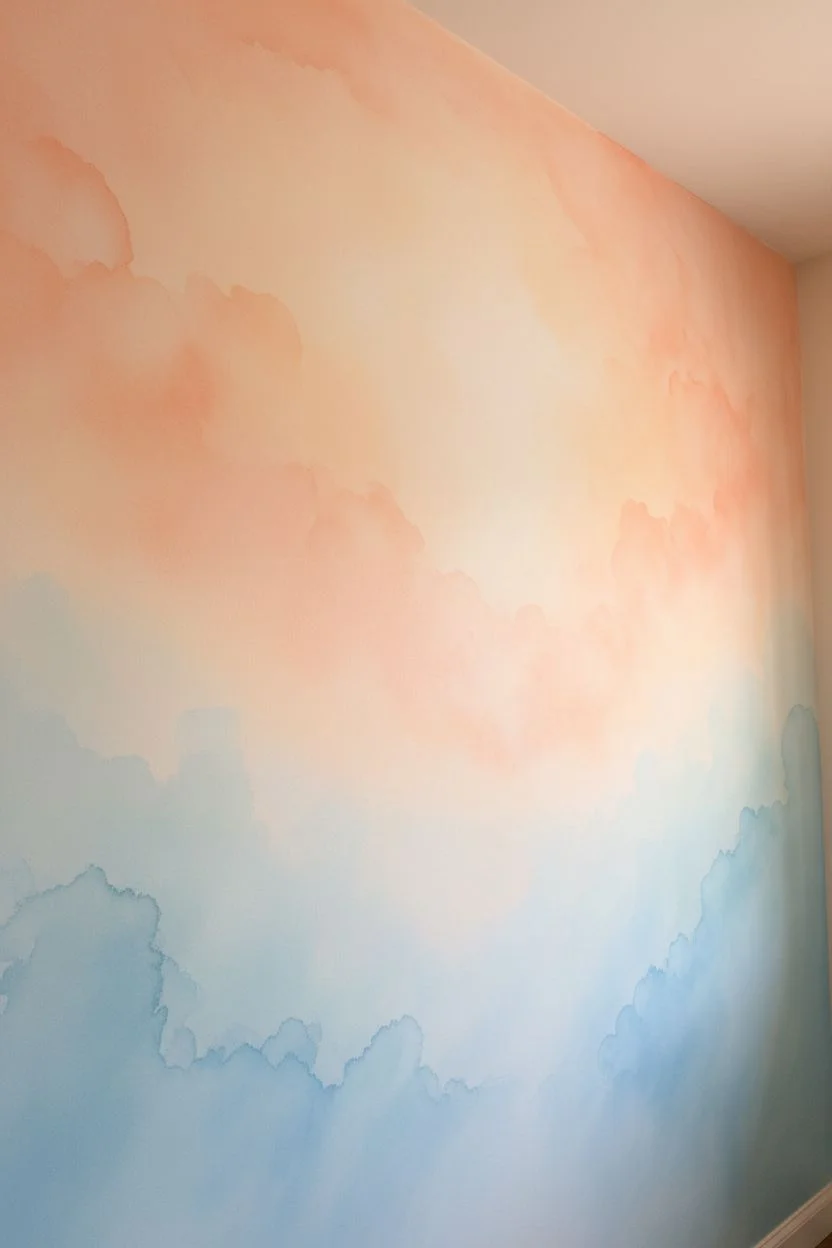
Mix the sky colors:
Prepare your background colors by diluting acrylics or using a glaze medium. You want a very translucent, watery consistency for the blue bottom section and the peach/orange top section. -
Apply the blue wash:
Using a wet sponge or rag, dab the light blue glaze along the bottom third of the wall. Use irregular, cloud-like motions rather than solid strokes to create a soft texture. -
Create the warm upper sky:
Apply the peach and soft orange glazes to the upper and middle sections. Overlap slightly with the blue area while everything is still damp to encourage a natural, misty transition between the colors. -
Soften the edges:
Take a clean, damp cloth and gently blot the edges of your colored areas to feather them out, ensuring there are no hard lines in your background gradient. -
Let it cure:
Allow the background washes to dry completely before attempting any line work. This usually takes at least 4-6 hours depending on humidity.
Step 2: Composing the Staff
-
Mark the staff lines:
Decide on the angle of your music staff. Using a laser level (or a long level and pencil), lightly mark five parallel lines across the wall that ascend slightly from left to right. -
Define the spacing:
Ensure the distance between each line is equal—usually about 3 to 4 inches apart works well for a wall-sized mural. Use a ruler to double-check vertical spacing at multiple points. -
Paint the staff lines:
Load a flat brush or a specialized lining brush with black paint. Carefully paint over your pencil marks. I find using a mahl stick or steadying my hand against the wall with my pinky helps keep the lines crisp. -
Add vertical measures:
Draw vertical bar lines at regular intervals to divide the staff into measures, maintaining the same thickness as your horizontal lines.
Use Tape for Crisp Lines
For the long staff lines, apply painter’s tape above and below the line space. Paint the gap black, then peel the tape while wet for razor-sharp edges.
Step 3: Notes Taking Flight
-
Sketch the notes:
Lightly sketch musical notes (quarter notes, eighth notes, treble clef) on the staff. Towards the left and top, begin morphing the round note heads into bird silhouettes. -
Paint the solid notes:
Using a medium round brush and black paint, fill in the standard musical notes on the lower right lines. Make the heads solid and the stems perfectly vertical. -
Paint the transforming notes:
Moving upward and leftward, paint notes that look like they are peeling off the lines. Paint the note ‘tails’ becoming wings. -
Create the bird flock:
Above the staff, paint a flock of black bird silhouettes in various stages of flight. Vary their sizes; larger birds should be lower, getting smaller as they fly ‘higher’ up the wall. -
Add ground details:
At the very bottom within the blue wash, use a fine liner brush to paint delicate, wispy grass stalks in grey or soft black to ground the composition. -
Refine the details:
Go back with your smallest brush to sharpen the tips of the bird wings and the corners of the musical flags for a professional finish. -
Final clean up:
Once the black paint is fully dry, gently erase any visible pencil marks from your initial sketching phase.
Wobbly Lines?
If a line gets shaky, wait for it to dry completely. Then, use a small brush with your wall’s base color (white) to carefully ‘erase’ and reshape the uneven edge.
Step back and enjoy the visual rhythm of your beautiful new wall art
Dancing Figure With Musical Motion Lines
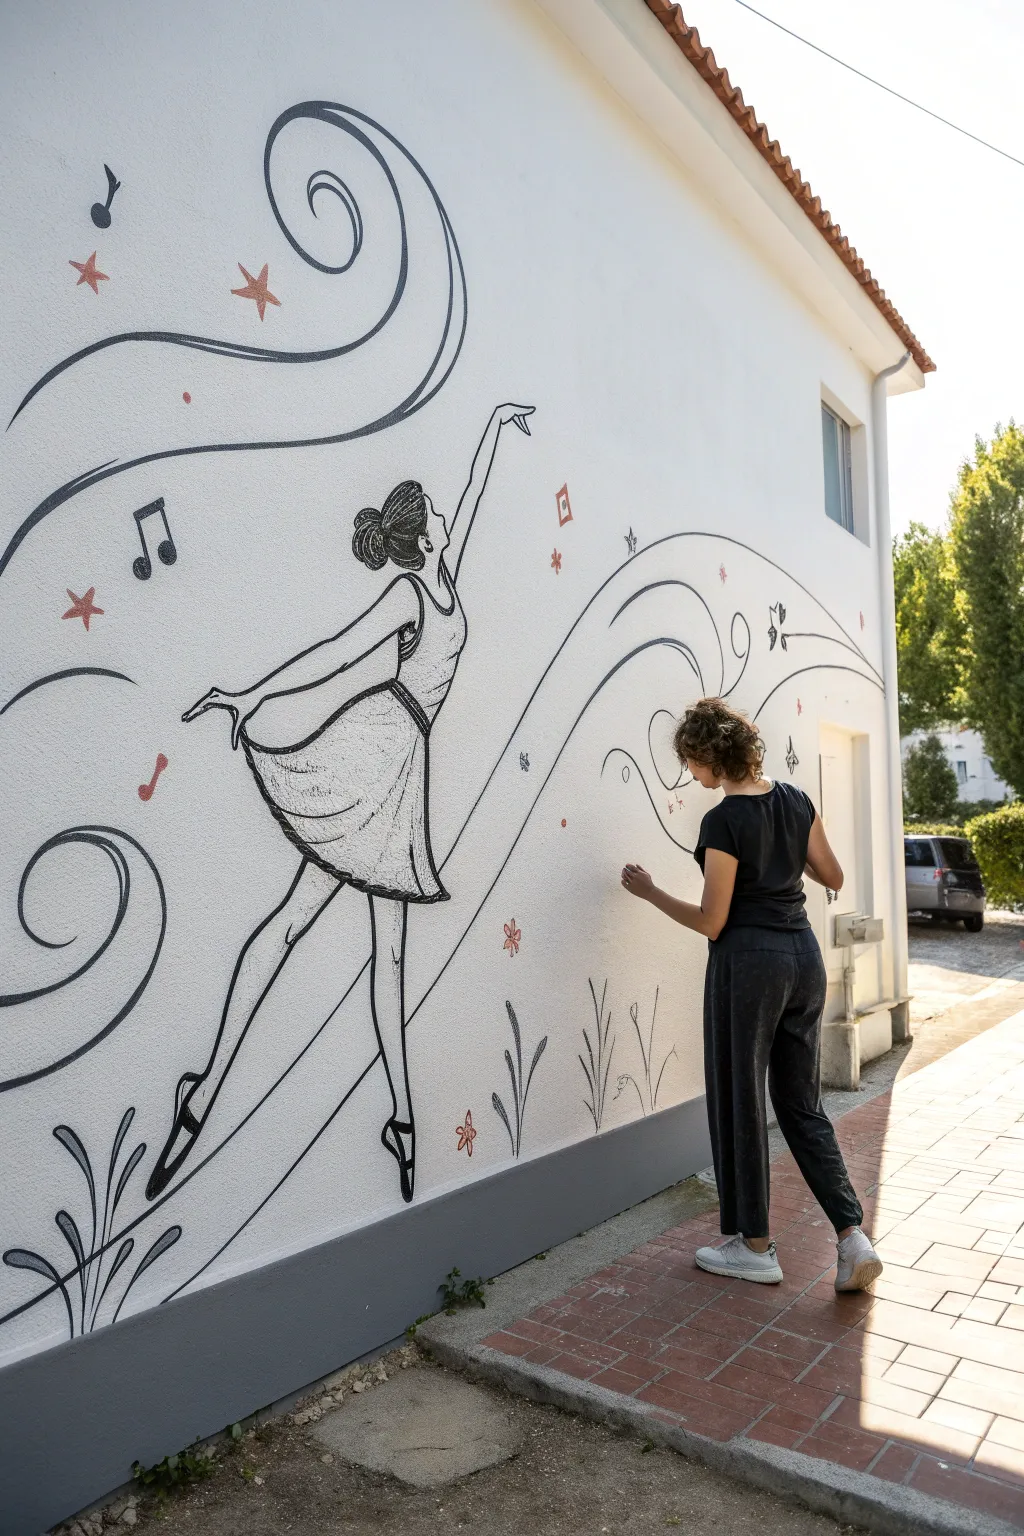
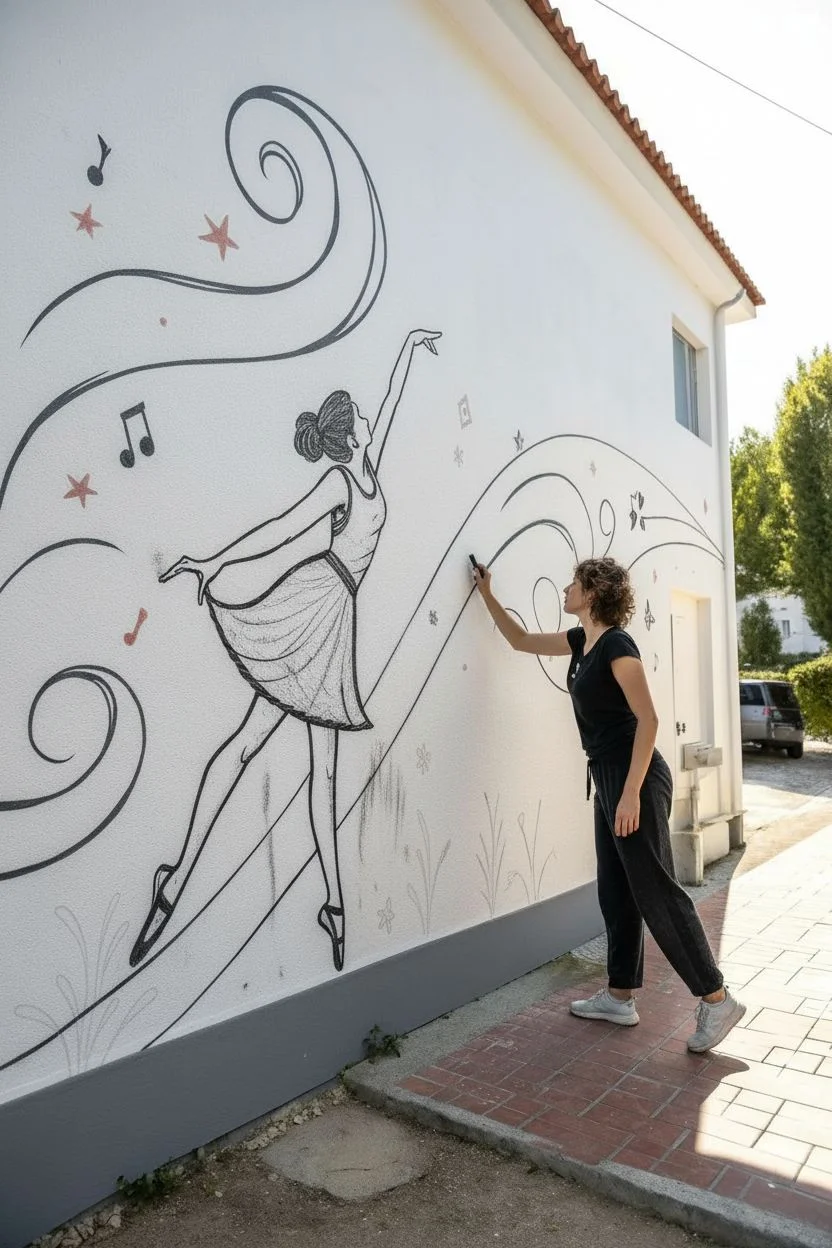
Transform a plain exterior wall into a stage for performance with this elegant, line-art style mural. Featuring a leaping dancer surrounded by flowing ribbons of melody and scattered stars, this design uses simple black contours and minimal color accents to create a sense of joyful movement.
Step-by-Step Guide
Materials
- Exterior acrylic latex paint (White for base coat, if needed)
- Black exterior acrylic paint or high-quality mural paint
- Burnt orange or terracotta acrylic paint for accents
- Soft charcoal pencils or vine charcoal for sketching
- Assorted round brushes (sizes 4, 8, and 12)
- Wide flat brush (2-inch) for large fills
- Ladder or sturdy step-stool
- Drop cloth
- Sealer or clear UV-resistant topcoat (optional)
Step 1: Preparation and Sketching
-
Prepare the surface:
Begin by cleaning the exterior wall thoroughly to remove dust and grime. If the existing paint is faded or dirty, apply a fresh coat of white exterior latex paint to creating a crisp, bright canvas for your artwork. -
Map out composition:
Stand back and visualize where the dancer will be positioned. The figure should be central but off-set slightly to allow room for the sweeping motion lines that extend across the wall. -
Sketch the main curves:
Using a soft charcoal pencil, lightly draw the large, sweeping S-curves first. These dominant lines define the flow of the music and movement, starting from the left and swirling rightward. -
Outline the figure:
Sketch the ballerina’s body within the flow of the lines. Focus on the gesture—the arched back, the extended arm reaching upward, and the pointed toes—rather than intricate anatomical details. -
Add floating elements:
Lightly sketch in the scattered musical notes, stars, and small diamond shapes around the figure and along the motion lines to create rhythm. -
Draft the grass line:
At the very bottom, sketch simple, tufted grass shapes to ground the composition so the dancer isn’t floating in a void.
Drip Disaster?
Keep a damp rag in your pocket. If paint drips down the stucco, wipe it immediately while wet. If it dries, paint over the mistake with your original white wall color.
Step 2: Painting the Line Work
-
Mix your paint:
Pour your black exterior paint into a container. I prefer to add a tiny splash of water to improve the flow, making it easier to pull long, smooth lines with the brush. -
Paint the swoops:
Using a size 12 round brush, paint over your charcoal lines for the large, sweeping wind swirls. Vary your pressure: press harder for thick sections and lift slightly as the line tapers off. -
Define the dancer’s silhouette:
Switch to a size 8 brush to outline the dancer. Use confident strokes for her legs and arms. Don’t worry about perfect smoothness; a slightly sketchy quality adds character to this style. -
detail the dress:
For the dancer’s skirt, use quick, short strokes to mimic fabric texture and folds. Keep the bottom hem loose and energetic to suggest movement. -
Fill the hair:
Use the black paint to fill in the dancer’s hair bun, leaving small slivers of white negative space to represent highlights or strands. -
Anchor the bottom:
Paint the grass tufts at the base of the wall using upward, flickering strokes that start thick at the root and taper to a sharp point.
Step 3: Adding Accents and Finishing
-
Paint musical notes:
Fill in the musical notes with solid black. Ensure the stems are straight and the flags have a distinct curl. -
Apply color accents:
Load a clean size 4 brush with the burnt orange paint. Carefully fill in the star shapes and small diamonds scattered throughout the composition. -
Add subtle motion details:
Use the orange paint to add a few secondary floating shapes, like the small leaf-like curved forms near the dancer’s waist, to echo the black lines. -
Clean up sketch lines:
Once the paint is completely dry to the touch, use a damp cloth or a large clean sponge to gently wipe away any visible charcoal sketch lines. -
Seal the work:
If your wall gets heavy sun exposure, apply a clear, UV-resistant exterior varnish over the painted areas to prevent fading and protect the line work.
Make It Sparkle
Mix a small amount of gold metallic outdoor paint into your orange accent color. It will catch the sunlight beautifully during the day for a magical effect.
Step back and enjoy the visual rhythm you’ve created on your wall


Equalizer Bars in Bold Color Blocks

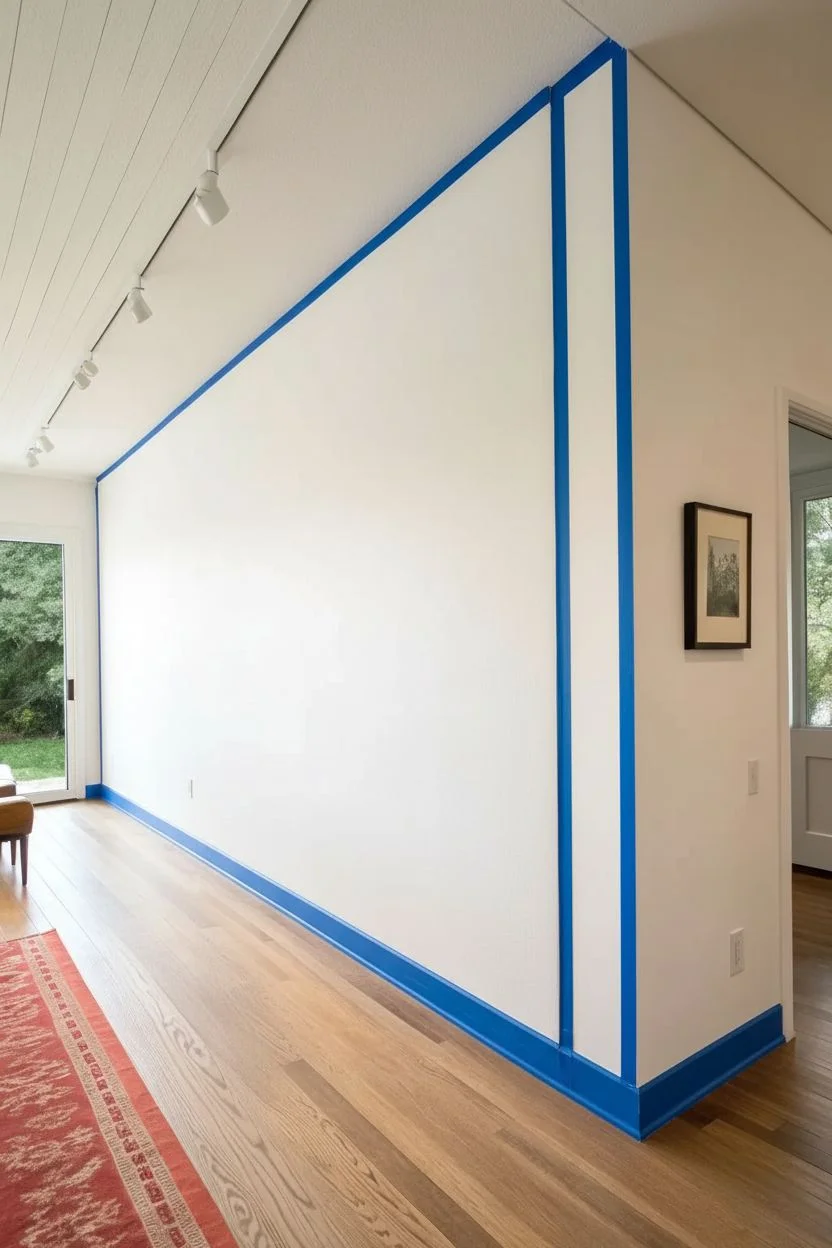
Transform a plain hallway into a visual symphony with this bold, graphic mural inspired by music equalizer bars. The design features crisp vertical stripes that transition smoothly from cool teals to warm oranges, creating a rhythmic flow of color that elongates the space.
Detailed Instructions
Materials
- Interior latex paint (Eggshell or Satin finish) in 8-10 distinct gradient colors
- Painter’s tape (high-quality, specifically for sharp lines)
- Laser level or traditional spirit level
- Pencil
- Measuring tape
- 4-inch foam rollers (one for each color family)
- Roller handle
- Small angled sash brush (1.5 or 2 inch)
- White primer (if covering dark walls)
- Drop cloth
- Step ladder
- Damp rag for clean-up
Step 1: Planning and Prep
-
Measure the canvas:
Measure the total width of the wall section you intend to paint. This mural looks best when centered or spanning a significant portion of a hallway. -
Calculate stripe width:
Divide your total width by the number of colors you plan to use. Don’t forget to account for the white ‘negative space’ gaps between the colored bars. A good ratio is 5-6 inches for the color bar and 1-2 inches for the white gap. -
Prepare the surface:
Clean the wall thoroughly with a damp rag to remove dust and oils. If your base wall color isn’t already a clean, bright white, roll a fresh coat of white paint over the entire area now. This will serve as your ‘gap’ color later. -
Protect the perimeter:
Apply painter’s tape along the baseboards, ceiling line, and adjacent walls to prevent accidental splatters.
Step 2: Drafting the Design
-
Set vertical lines:
Using a laser level is the easiest way to ensure perfectly plumb lines. Mark the vertical edges of your first stripe using a pencil, then measure the gap space, then the next stripe, and repeat across the wall. -
Tape the first set:
Begin taping off your vertical stripes. You can’t tape every single stripe at once because the tape for one stripe would overlap the wet paint of its neighbor. Start by taping off every *other* stripe (Stripe 1, Stripe 3, Stripe 5, etc.). -
Seal the edges:
Press the tape edges down firmly with a credit card or putty knife. This prevents paint bleed-under. -
The ‘seal’ trick:
I always lightly brush a tiny amount of the *base wall color* (white) over the edge of the tape where the colored paint will go. This seals the tape edge so if any paint bleeds, it’s just the white, not the color.
Bleeding Lines?
If paint sneaks under the tape, wait for it to fully dry. Then, place a piece of tape precisely over the colored line and brush the base wall color over the imperfection to erase it neatly.
Step 3: Painting the Gradient
-
Mix your palette:
Organize your paint cans in the order they will appear on the wall (e.g., dark teal, light teal, cream, yellow, orange, red). This prevents accidental color swapping. -
Roll the first batch:
Using a 4-inch foam roller, paint the sections you have taped off (the odd-numbered stripes). Foam rollers provide a smoother finish with less texture than nap rollers. -
Cut in the top and bottom:
Use the small angled brush to carefully paint the very top and bottom of the stripes near the ceiling and floor tape. -
Apply second coat:
Let the first coat dry to the touch (usually 1-2 hours), then apply a second coat for full opacity. -
Remove tape while damp:
Carefully peel off the tape while the second coat is still slightly tacky. Pulling at a 45-degree angle away from the paint line usually gives the sharpest edge.
Pro Tip
For a true gradient effect, select paint chips from the same display strip at the hardware store, or mix your own transition shades by blending neighboring colors together.
Step 4: Completing the Pattern
-
Let it cure:
Allow the first set of stripes to dry completely—ideally overnight. This is crucial because you will need to place tape over these painted areas to mask off the remaining stripes. -
Tape the remaining stripes:
Once dry, tape off the remaining even-numbered stripes (Stripe 2, Stripe 4, etc.). Be gentle when applying tape over your fresh paint. -
Paint the second batch:
Repeat the painting process: seal the edges, roll the color, cut in the ends, and apply two coats. -
Final reveal:
Remove the final surveyor’s tape and the perimeter tape carefully. -
Touch ups:
Inspect your lines. Use a tiny artist’s brush and your base white paint to correct any small bleeds or uneven spots.
Now step back and enjoy the vibrant rhythm your new wall brings to the home
Sound Wave Line Mural From a Favorite Song
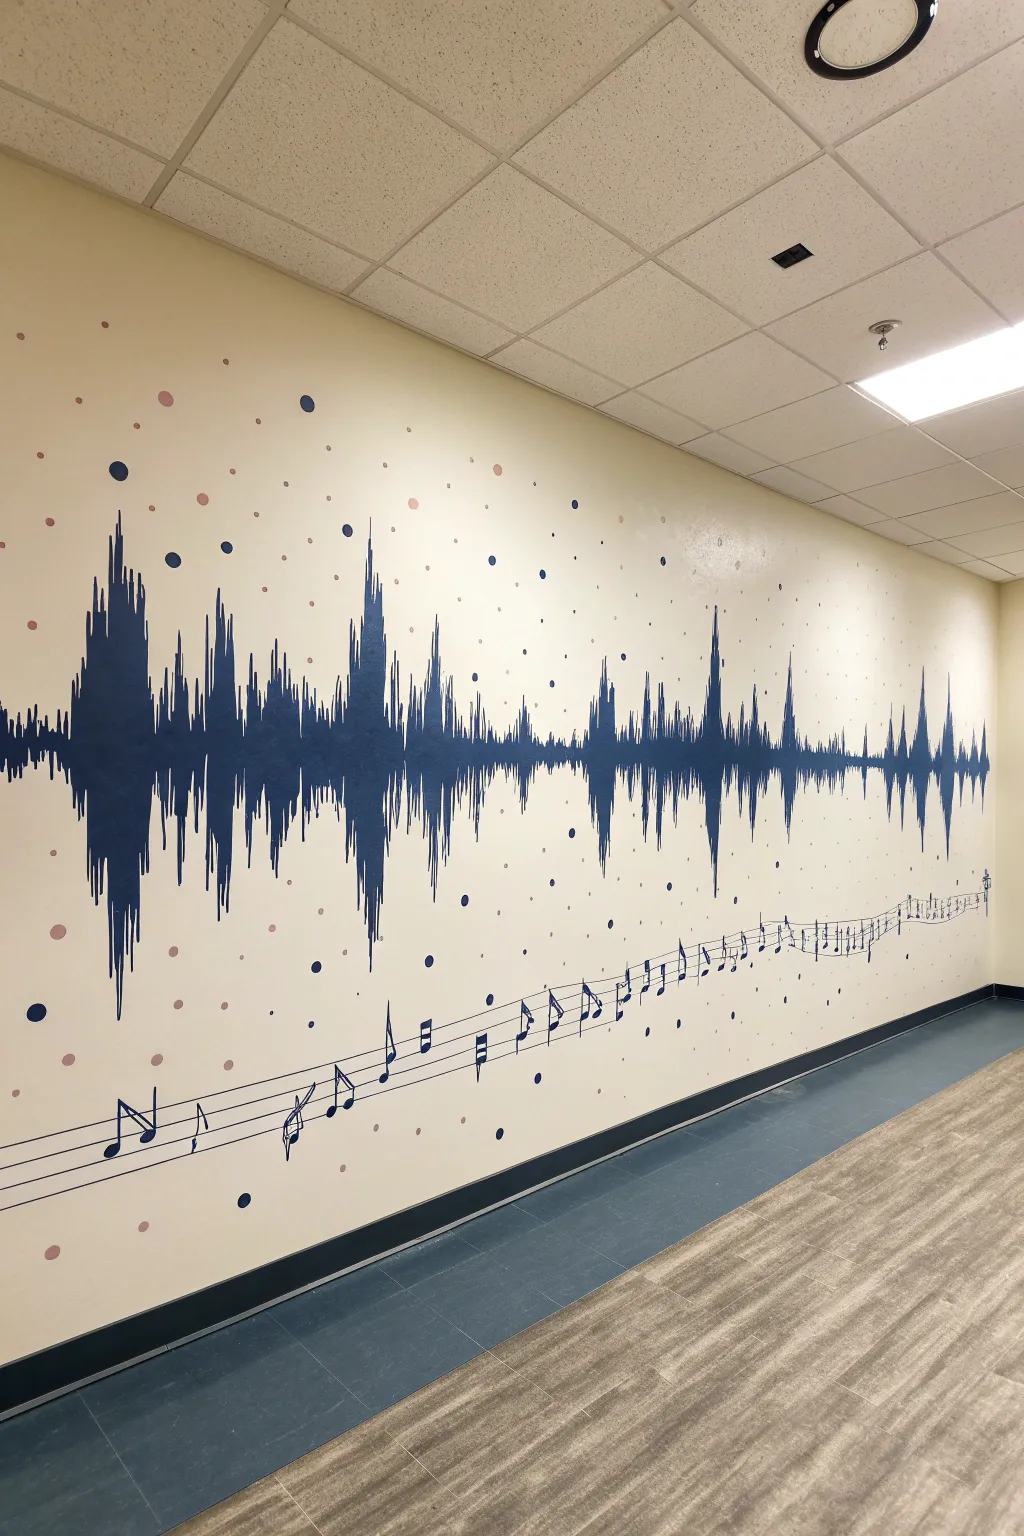

Bring your favorite song to life on your walls with this dynamic sound wave mural that combines digital precision with artistic flow. This project captures the heartbeat of music through a striking navy waveform paired with whimsical floating notes.
Step-by-Step Guide
Materials
- Navy blue interior semi-gloss paint
- Cream/off-white base wall paint
- Soft pink accent paint
- Projector (digital or overhead)
- Pencil and eraser
- Painter’s tape
- Assorted brushes (1-inch flat, #4 round, #0 detail brush)
- Ruler or level
- Computer with audio editing software (e.g., Audacity)
- Paper towels and water cup
Step 1: Preparation & Mapping
-
Prepare the sound wave:
Before touching the wall, select your song and open it in a basic audio editor like Audacity. Zoom out until you see the distinct peaks and valleys of the entire track or a specific chorus you love. -
Capture the image:
Take a screenshot of the waveform. You want high contrast, so if possible, change the interface view to black on white to make tracing easier later. -
Pre-paint the wall:
Ensure your wall is clean and painted with your base cream color. Let this dry completely for at least 24 hours so your pencil marks and tape don’t damage the surface. -
Project the design:
Set up your projector to cast the waveform screenshot across the center of the wall. Adjust the distance until the wave spans the full width of your desired mural space. -
Trace the waveform:
Using a light pencil, carefully trace the outline of the sound wave. Focus on the major peaks and the jagged edges that give it energy, but don’t worry about every single pixelated detail.
Paint Hack
Use round foam pouncers instead of brushes for the floating dots. It guarantees perfect circles instantly without needing to hand-paint the edges.
Step 2: Painting the Wave
-
Outline the edges:
Dip a #4 round brush into the navy blue paint. Carefully paint along your pencil lines, creating the crisp outer boundary of the sound wave. -
Fill the center:
Switch to a 1-inch flat brush to fill in the large, solid areas of the wave. Keep your strokes vertical to mimic the digital bars of the audio display. -
Detail the sharp lines:
Go back with your #0 detail brush to sharpen the very tips of the sound spikes. These sharp points are crucial for that electric, energetic look. -
Create the drip effect:
Extend a few of the bottom spikes downward slightly longer than the projection, tapering them off to thin points. This adds a stylized, artistic interpretation to the gathered data.
Interactive Twist
Paint a QR code in the corner that links directly to the song on a streaming platform so guests can listen to the mural.
Step 3: Adding the Melody
-
Draw the staff lines:
Below the wave, use a long level and a ruler to draw five parallel, undulating lines that swoop across the bottom of the wall. These represent the musical staff. -
Paint the staff:
Using your detail brush and the navy paint, go over these pencil lines. Keep your hand steady, but embrace slight variations in thickness to maintain a hand-painted charm. -
Determine note placement:
Sketch musical notes along the staff. You can replicate the actual sheet music of the song or arrange them aesthetically to follow the curve of the staff. -
Paint the notes:
Fill in the note heads and stems with navy paint. Ensure the flags on the notes flow in the same direction to guide the viewer’s eye across the wall.
Step 4: Final Flourishes
-
Add polka dots:
Load a small round brush with the navy paint and stamp random circles of varying sizes around the sound wave. Repeat this process with the soft pink accent paint. -
Touch up edges:
Inspect your work for any pencil marks still visible. Gently erase them or touch up with the cream base paint if needed. -
Check for consistency:
Step back to the other side of the room. Look for any areas in the sound wave that look patchy and apply a second coat of navy blue if necessary for opacity.
Now you have a stunning visual representation of your favorite tune that fills the room with silent music
Graffiti-Style Music Wall With Symbol Layers
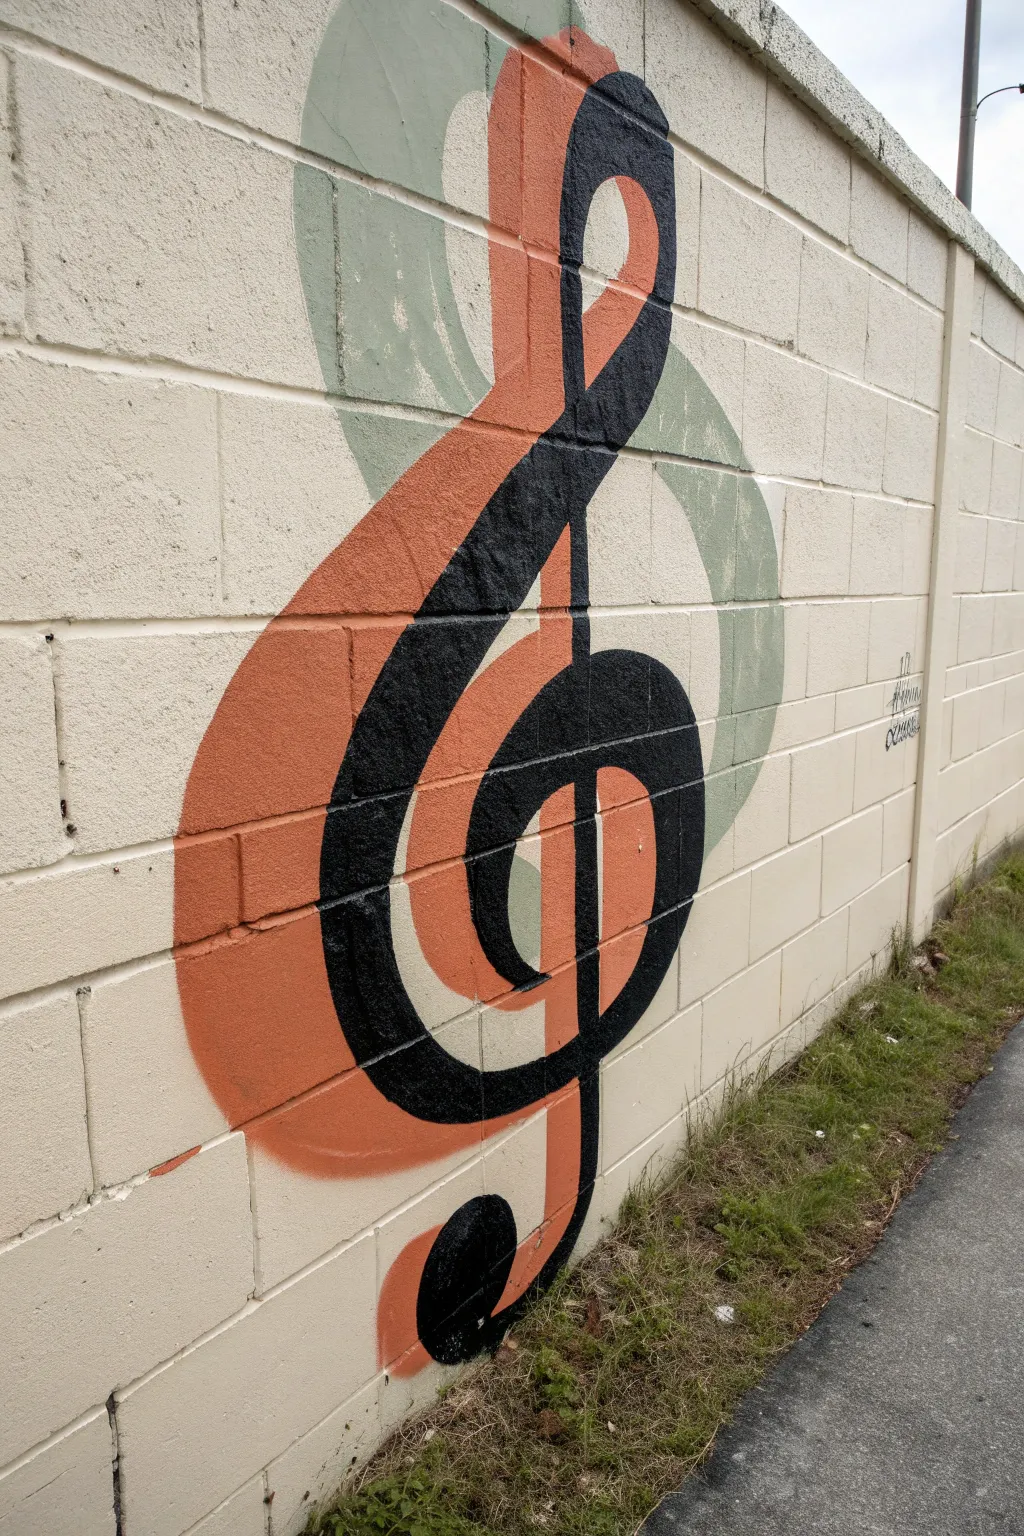
Transform a plain exterior brick wall into a vibrant musical statement using a clever layering technique. This project combines faint background echoes with bold, graphic lines to create a sense of movement and depth.
Detailed Instructions
Materials
- Exterior masonry primer
- Spray paint (sage green, flat finish)
- Spray paint (burnt orange or terracotta, matte finish)
- Black acrylic masonry paint or high-quality black spray paint
- Cardboard or poster board for stencils
- Utility knife
- Painter’s tape
- Drop cloth
- Chalk or pencil
- Cleaning brush and soapy water
Step 1: Preparation and Design
-
Clean the Surface:
Begin by thoroughly cleaning the brick wall. Use a stiff brush and soapy water to remove dirt, moss, or loose grit that could prevent the paint from adhering properly. -
Dry and Prime:
Allow the wall to dry completely for at least 24 hours. Once dry, apply a coat of masonry primer to the area where the mural will go to ensure vibrant colors. -
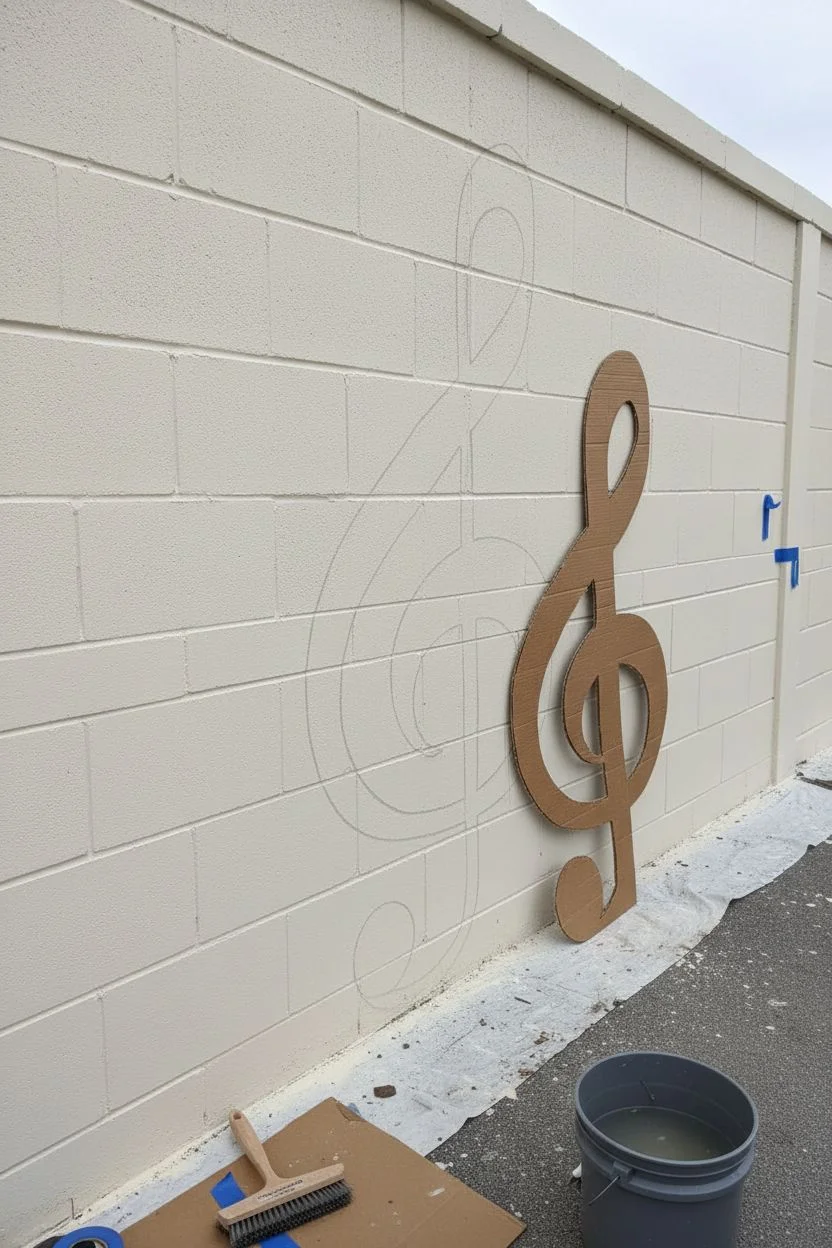
Create the Template:
Draft a large treble clef on a piece of cardboard or poster board. You can project an image to trace or freehand it. Cut it out to use as a master template. -
Plan the Placement:
Hold your template against the wall to determine the spacing. Mark the center point where the final black layer will sit with chalk.
Clean Lines on Brick
On rough brick, tape often bleeds. Instead, hold a stiff piece of cardboard firmly against the wall as a moving shield while you spray to keep edges sharp.
Step 2: Layer 1: The Green Shadow
-
Position the First Layer:
Shift your template slightly up and to the right from your center mark. This creates the background ‘shadow’ effect seen in the reference. -
Trace Faintly:
Lightly trace the outline of the treble clef using chalk. You don’t need perfect lines here, just a guide. -
Apply the Base Coat:
Using the sage green spray paint, fill in this traced shape. Keep the nozzle moving to create a slightly misty, textured application rather than a solid block of color. -
Dry Time:
Let this green layer dry to the touch, usually about 15-20 minutes depending on the weather conditions.
Step 3: Layer 2: The Orange Mid-Tone
-
Offset the Second Layer:
Take your template and move it down and to the left, positioning it roughly halfway between the green layer and your intended center point. -
Trace the Shape:
Trace the template again, ensuring this new shape overlaps portions of the green background. -
Paint the Orange Layer:
Fill in this shape with the burnt orange paint. Apply this layer more opaquely than the green, ensuring strong coverage on the brick texture. -
Refine Edges:
If necessary, use a piece of cardstock as a loose shield while spraying to get slightly crisper edges on this orange layer. -
Allow to Cure:
Wait for the orange paint to dry completely. This is crucial because the final black layer needs a stable surface.
Add a Graffiti Tag
Personalize the mural by adding your signature or a date in the corner using a silver or white paint marker for a street-art authenticity.
Step 4: Layer 3: The Bold Black Outline
-
Mark the Final Position:
Place your template in the original center position. It should significantly overlap the orange layer. -
Define the Main Shape:
Trace the template one last time. This is your hero layer, so take care to get the curves elegant and smooth. -
Paint the Outline:
Using the black paint, carefully outline the treble clef. I prefer using a brush for this step on rough brick to get sharp lines that spray paint might miss. -
Fill the Black Layer:
Fill in the body of the black treble clef. Work the paint into the mortar joints and crevices of the brick for a solid, permanent look. -
Clean Up:
Step back and check for any drips or uneven edges. Touch up with the appropriate color if needed while the paint is still workable.
Step back and admire the rhythmic movement your layered mural brings to the space
Instrument Collage in Monochrome Line Art

Transform a plain exterior brick wall into a massive musical statement using simple, bold black line art. This tutorial guides you through creating an oversized, whimsical collage of instruments that feels both playful and iconic.
Step-by-Step Guide
Materials
- Exterior masonry primer (cream/off-white)
- Exterior acrylic latex paint (black)
- Small angled sash brush (2-inch)
- Assorted round brushes (sizes 4, 8, and 12)
- Chalk or charcoal sticks
- Overhead projector (optional but recommended)
- Painter’s tape
- Ladder or scaffolding
- Paint tray and liners
- Clean rags for mistakes
Step 1: Preparation and Base Coat
-
Prepare the surface:
Begin by thoroughly cleaning the brick wall with a pressure washer or a stiff bristle brush and soapy water. Let the masonry dry completely for at least 24 to 48 hours to ensure adhesion. -
Prime the background:
Roll on a coat of high-quality exterior masonry primer. Choose a cream or warm off-white shade to mimic the look in the photo; this provides a neutral canvas that makes the black lines pop. -
Apply the base color:
Once the primer is dry, apply two coats of your chosen cream-colored exterior paint. Ensure full coverage, especially in the mortar joints, to create a smooth visual field.
Rough Texture Help
If the brick is very deep or rough, don’t force the brush into every pore. Let the brush skip slightly over the deepest recesses to maintain the ‘sketch’ look.
Step 2: Sketching the Composition
-
Plan your layout:
On a piece of paper or digital tablet, sketch out your collage of instruments. Focus on varying scale—notice how the central guitar and keyboard dominate, while notes and smaller instruments fill the gaps. -
Project or grid the design:
For a wall this size, I find using an overhead projector at night saves hours of work. If that’s not possible, use a grid method to scale your drawing up. -
Trace the outlines:
Using chalk or charcoal, lightly trace the outlines of your design onto the brick. Don’t worry about perfect straight lines yet; just get the general shapes and placement locked in. -
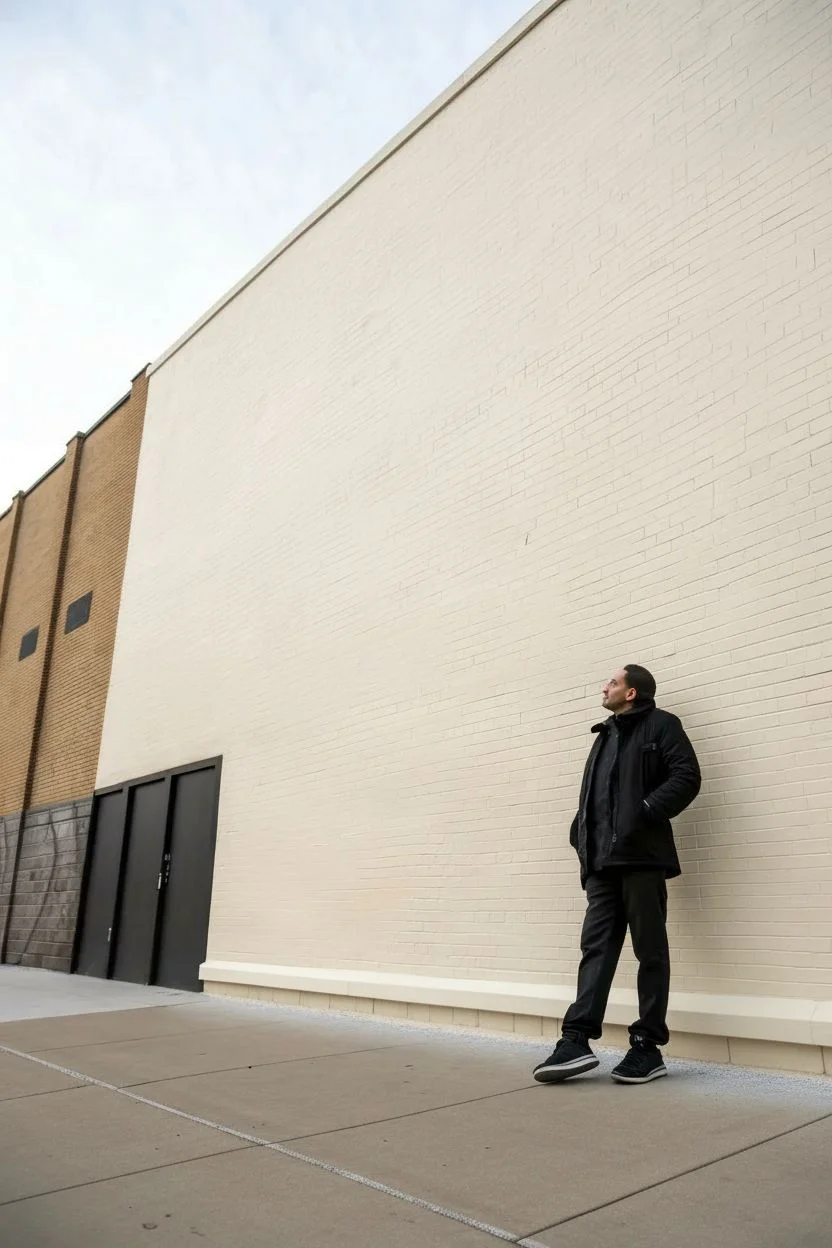
Step back and assess:
View your sketch from a distance, just like the viewer in the photo. Adjust the angle of the keyboard or the curve of the saxophone now before paint touches the wall.
Step 3: Painting the Line Art
-
Start with main outlines:
Dip a 2-inch angled sash brush into black exterior paint. Purposefully drag the brush to create confident, thick outlines for the largest instruments like the guitar body and piano keyboard. -
Paint the piano keys:
For the piano keyboard, alternate between solid black fills for the sharps/flats and simple outlines for the white keys. Keep the lines slightly loose to maintain that hand-drawn aesthetic. -
Detail the guitar strings:
Switch to a size 12 round brush / liner brush. Carefully paint the parallel lines for the guitar neck and strings. Use the brick texture to your advantage; breaks in the line add character. -
Add the brass instruments:
Paint the saxophone and trumpet shapes. Use concentric circles inside the bells to suggest depth, and add simple perpendicular lines for the valves and keys. -
Incorporate circular elements:
Add the vinyl records, drum heads, or abstract circles. Use a steady hand to paint concentric circles or radial lines to distinguish these shapes from the instruments. -
Fill in the shading:
Use a technique called ‘hatching’ (closely spaced parallel lines) to add shading to areas like the guitar body or drum sides. This mimics a pen-and-ink drawing style. -
Add musical notes:
Scatter eighth notes, quarter notes, and treble clefs into the negative spaces. Varies their sizes and angles to suggest movement and rhythm. -
Include decorative icons:
Paint small stars, sparkles, or abstract geometric shapes around the instruments to fill awkward gaps and balance the composition.
Level Up: Pop of Color
Choose one accent color (like teal, gold, or red) and fill in just one small element—like a single guitar pick or a specific piano key—for a surprising focal point.
Step 4: Refinement
-
Clean up edges:
Walk the length of the wall with a small brush and your cream base paint. Touch up any black drips or lines that became too thick or messy. -
Strengthen thin lines:
Go back over any lines that look too faint against the brick texture. The goal is bold contrast, so don’t be afraid to double-load your brush for a darker stroke. -
Clear coating (optional):
If the wall is in a high-traffic or weather-exposed area, apply a matte, non-yellowing masonry sealer over the entire mural to protect your work.
Enjoy the rhythm and flow of your new monumental artwork
Jazz-Inspired Shapes and Rhythm Blocks
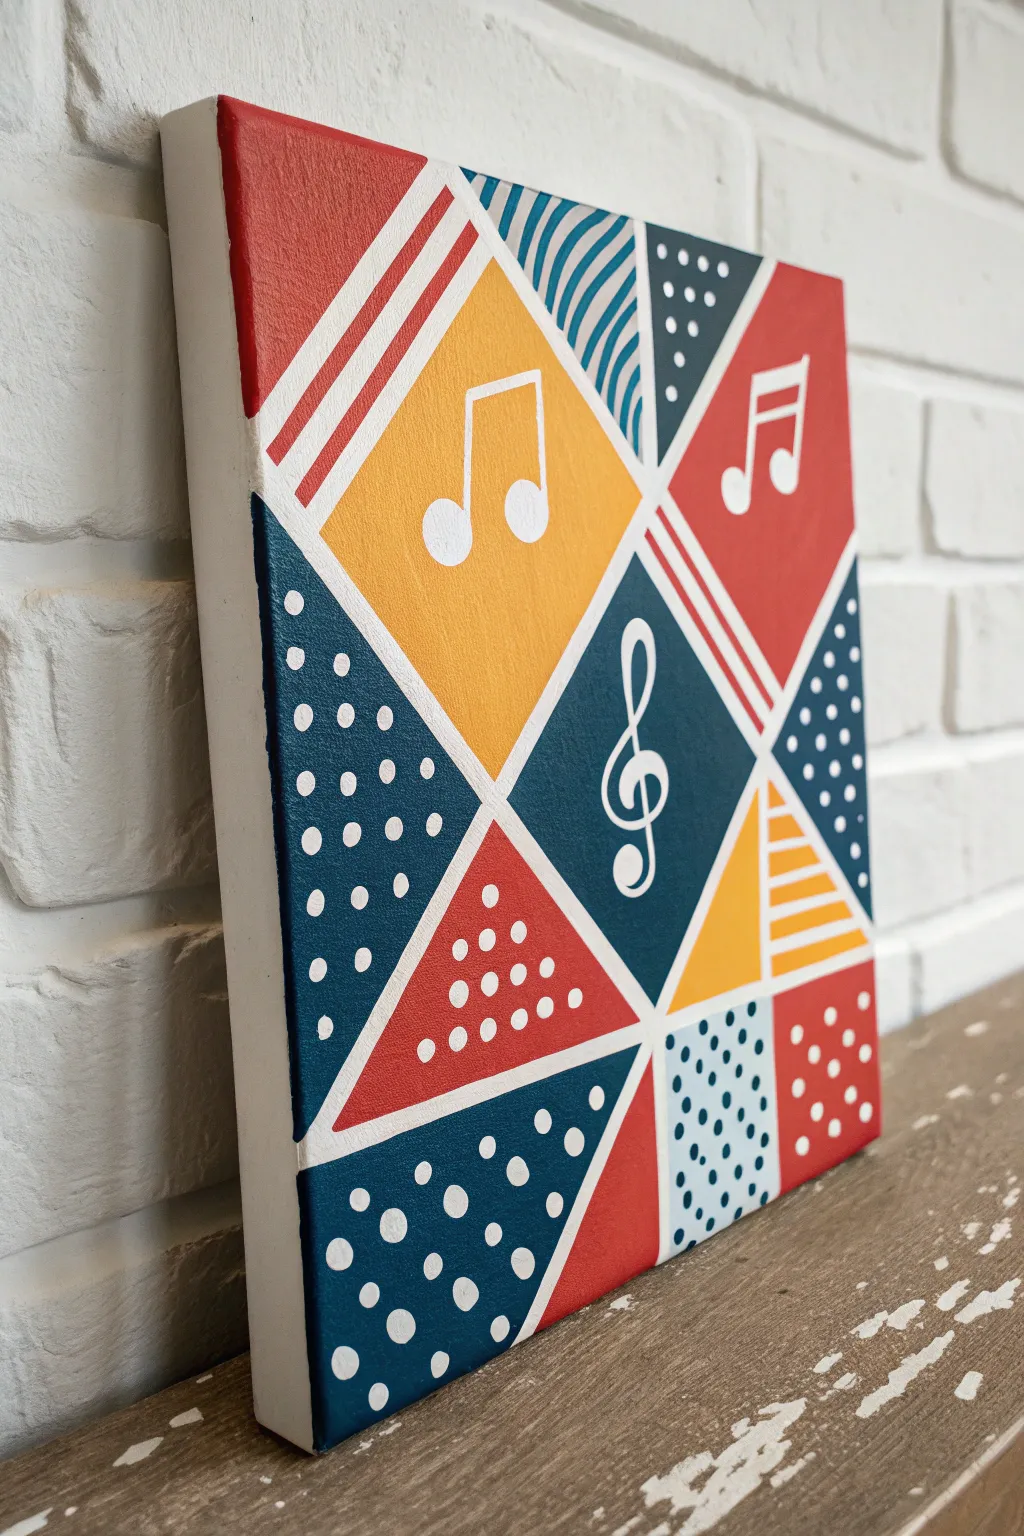
Bring the bounce of jazz and the structure of geometry together in this vibrant canvas project. Featuring bold, intersecting triangles, clean white lines, and musical motifs, this piece mimics the improvisational yet orderly feel of a great rhythm section.
Step-by-Step Tutorial
Materials
- Square stretched canvas (12×12 inches suggested)
- Painter’s tape (varying widths: 1/4 inch and 1 inch)
- Acrylic paints (Navy Blue, Barn Red, Mustard Yellow, White)
- Flat synthetic paintbrushes (varying sizes)
- Small round detail brush
- Pencil and eraser
- Ruler or straight edge
- Paint palette
- Optional: White paint marker (fine tip)
Step 1: Drafting the Design
-
Base Preparation:
Start by painting your entire canvas with two coats of titanium white acrylic paint to ensure a bright foundation. Let this dry completely before moving forward. -
Creating the Grid:
Using a pencil and ruler, lightly sketch a large ‘X’ corner to corner to find your center point, then subdivide the canvas into large triangles and diamonds. Reference the reference photo to mimic the specific fragmentation. -
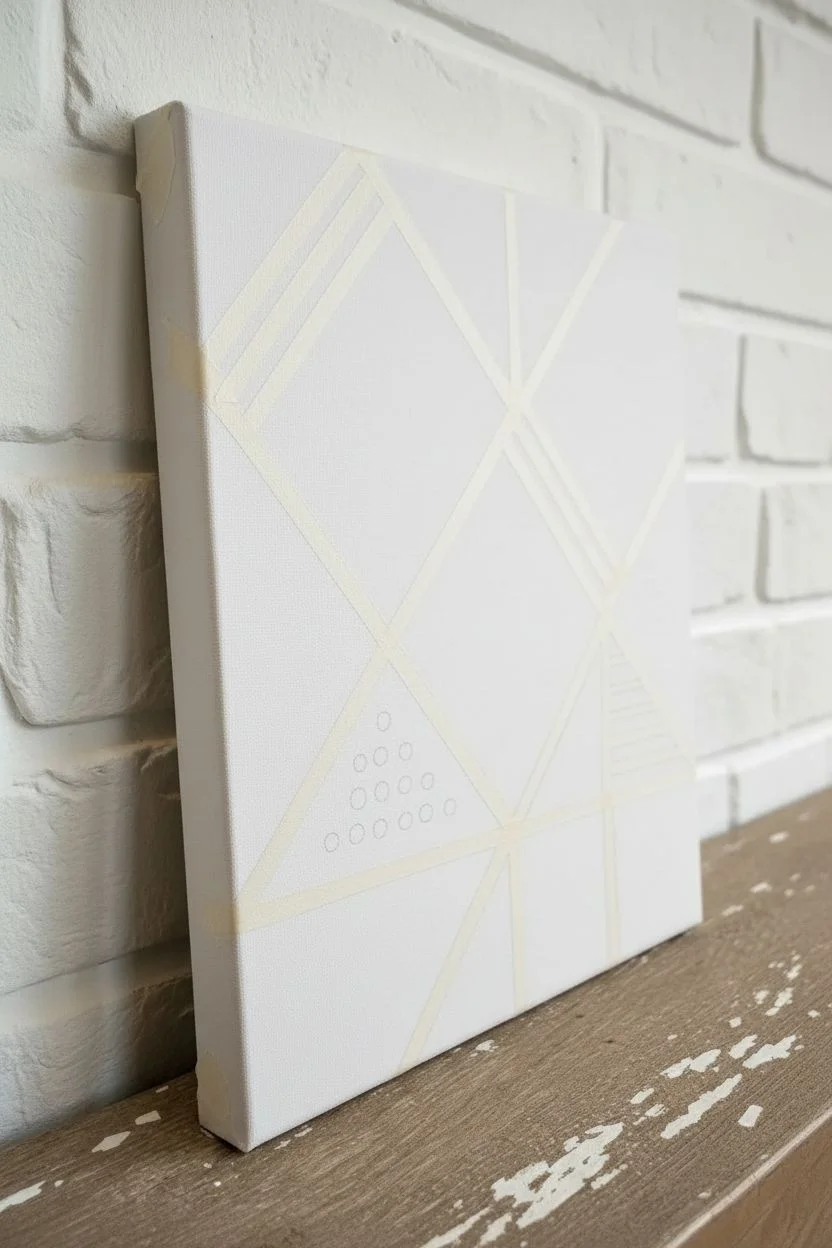
Masking Off Lines:
Apply 1/4 inch painter’s tape over your pencil lines. These taped areas will remain white, creating the clean positive space between your colored shapes. -
Securing the Tape:
Run a clean finger or a plastic card firmly over the edges of the tape to seal them preventing paint bleed. I like to apply a very thin layer of white paint over the tape edges to lock them in perfectly.
Clean Lines Secret
Apply a thin layer of matte medium over your reporter’s tape before painting colors. It seals the edge completely, ensuring zero bleed-under for razor-sharp lines.
Step 2: Applying Color Blocks
-
The Navy Sections:
Identify the sections meant for navy blue—primarily the central diamond on the bottom right and the large side triangles. Paint these areas with smooth, even strokes. -
Adding Warmth:
Fill in the top-left diamond and lower-right triangle accents with Mustard Yellow. This color often needs two or three coats for full opacity. -
Red Accents:
Paint the remaining designated geometric zones with Barn Red. Be careful near the tape edges; brush away from the tape if possible to minimize seepage. -
Pattern prep:
While the main blocks are drying, look for sections that need stripes (like the top left or center right corners). You can hand-paint these now or wait to tape them off later for sharper lines. -
The Reveal:
Once the paint is dry to the touch but not fully cured, slowly peel back the main grid tape at a 45-degree angle to reveal your crisp white framework.
Texture Twist
Mix a tiny amount of modeling paste into the yellow or red paint for specific sections. This adds a raised, tactile element that makes the mural feel more dynamic.
Step 3: Details & Motifs
-
Polka Dot Texture:
Dip the handle end of a paintbrush into white paint to create perfect dots. Stamp these onto the large navy blue sections and the small bottom red triangle. -
Striping Details:
For the striped sections inside certain triangles, use a liner brush or a white paint pen to draw parallel lines. Varing the direction of lines (diagonal vs horizontal) adds visual energy. -
Curved Accents:
In the top center blue triangle, hand-paint curved, wave-like lines to break up the rigid straight edges of the rest of the composition. -
Drafting Music Notes:
Lightly sketch a treble clef in the central blue diamond and eighth notes in the yellow and red diamonds. Ensure they are centered within their geometric blocks. -
Painting Symbols:
Using your smallest round brush or a white paint marker, carefully fill in the musical symbols. You may need two coats of white to make them pop against the dark background. -
Clean Up:
Inspect your white grid lines. If any color bled through, use a small flat brush and white paint to touch up and sharpen the edges. -
Final Coat:
Once everything is fully dry (give it overnight), apply a coat of clear semi-gloss varnish to unify the sheen of the different paint colors and protect your artwork.
Hang this rhythmic masterpiece in a grouping or solo to add a visual beat to your space
Surreal Floating Instruments in Painted Space
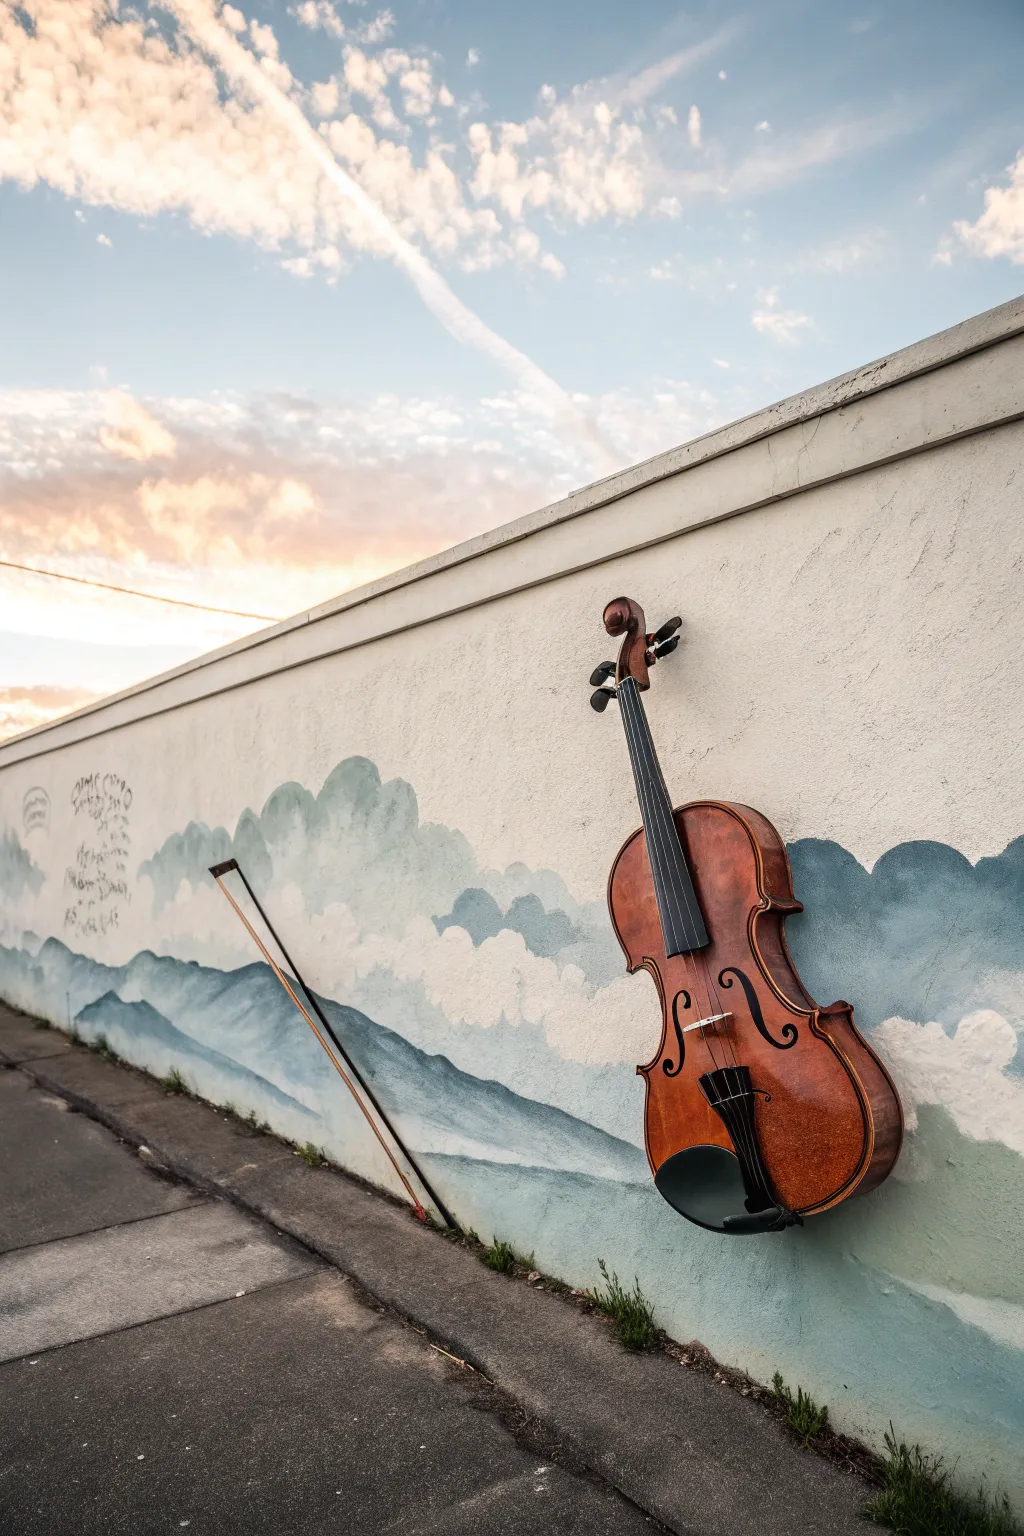
Transform a plain exterior wall into a surreal soundscape with this clever mixed-media installation. By combining a painted mountainous backdrop with a mounted, weather-treated violin, you create a captivating illusion where music literally emerges from the art.
Step-by-Step
Materials
- Exterior masonry primer
- Exterior acrylic latex paints (White, Sky Blue, Navy Blue, Grey)
- Set of large bristle brushes (for blending)
- Synthetic angle brushes (for details)
- Graphite transfer paper or projector (optional)
- Second-hand or broken 4/4 violin (do not use a playable instrument)
- Violin bow
- Heavy-duty outdoor mounting adhesive (e.g., construction adhesive)
- Wall anchors and screws (for masonry)
- Clear outdoor polyurethane sealant (satin finish)
- Drill with masonry bits
- Picture hanging wire
- Sandpaper (medium grit)
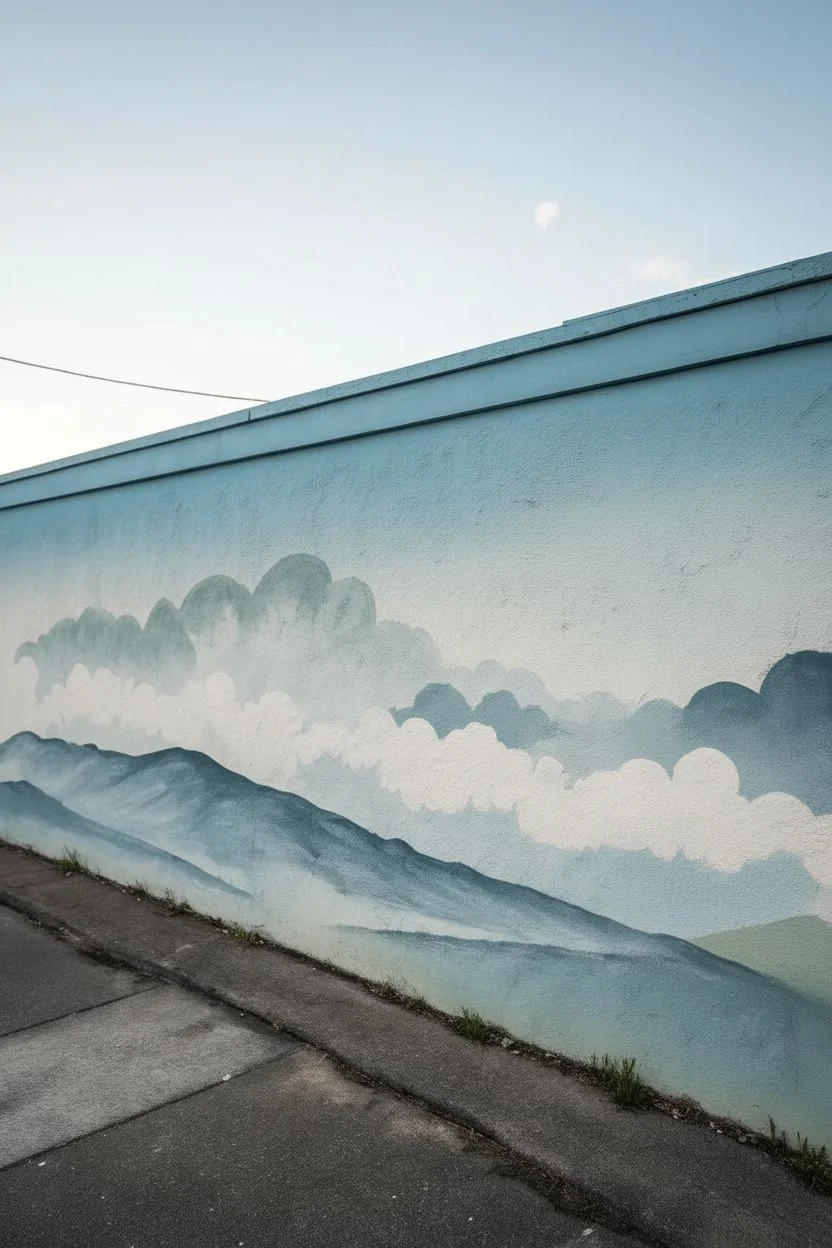
Step 1: Painting the Atmospheric Backdrop
-
Surface Preparation:
Clean your chosen wall section thoroughly with a stiff brush and water to remove dirt and loose debris. Allow the masonry to dry completely before applying a generous coat of exterior masonry primer to ensure your colors adhere properly. -
Establishing the Horizon:
Using a light pencil sketch, define a low horizon line where the mountains will sit. Keep the composition simple, focusing on rolling shapes rather than jagged peaks to mimic the curves of the instrument. -
Painting the Sky Gradient:
Start at the top of the wall with your Sky Blue paint. As you work downward, gradually mix in white to create a soft fade. I like to keep the sky quite pale near the horizon to increase the sense of depth. -
Adding Cloud Texture:
While the blue is still slightly tacky, use a dry, round brush with white paint to scumble in soft cloud shapes. Use circular motions to create fluffy, cumulus-style clouds that drift diagonally, leading the eye across the space. -
Layering the Mountains:
Paint the distant mountain range using a mix of Sky Blue and a touch of Grey. Keep these shapes flat and hazy. Once dry, paint the foreground mountains in Navy Blue mixed with a little Grey for contrast. -
Texturing the Landscape:
Using a dry brush technique, drag a slightly lighter blue-grey vertically over the foreground mountains to suggest ridges and slopes. This shouldn’t be hyper-realistic; a painterly, impressionistic style works best. -
Sealing the Mural:
Allow the paint to cure for at least 24 hours. Apply a coat of clear outdoor polyurethane over the painted section to protect your work from the elements.
Step 2: Preparing and Mounting the Instrument
-
Prepping the Violin:
Take your non-playable violin and remove the strings and bridge temporarily if they are loose. Lightly sand the back of the violin body to roughen the varnish; this helps the adhesive bond stronger. -
Weatherproofing the Instrument:
Apply three thin coats of clear outdoor polyurethane to the entire violin and bow, including the scroll and f-holes. Let each coat dry completely. This is crucial to prevent the wood from warping or rotting outdoors. -
Reassembling Elements:
Once the sealant is dry, reattach the bridge (you can glue it down for stability) and tighten the strings. Glue the bow hair to the wood of the bow if it’s loose, ensuring it stays in a rigid shape. -
Installing Anchors:
Hold the violin against the wall in your desired position—tilting it slightly adds dynamism. Mark two spots behind the violin body. Drill holes into the masonry and insert heavy-duty wall anchors. -
Mounting the Violin:
Install screws into the anchors, leaving the heads protruding slightly. Wrap sturdy picture wire around the violin’s internal blocks or through the f-holes (concealed as much as possible) to hang it securely on the screws. -
Reinforcing with Adhesive:
For permanent installation, apply construction adhesive to the back of the violin where it touches the wall. Press firmly until the adhesive grabs. This prevents the instrument from swinging in high winds. -
Attaching the Bow:
Position the bow diagonally to the left of the violin on the painted mountains. Use construction adhesive to glue it directly to the wall surface, or use small C-clamps to hold it while the glue cures. -
Final Touch-ups:
Check the mural around the instrument mounting points. If any paint was chipped during installation, use a small brush to touch up the blue mountain hues, blending them right up to the edge of the wood.
Pro Tip: Shadow Play
Paint a subtle gray drop shadow on the wall under the violin and bow. This enhances the 3D effect, making the instruments look like they are truly floating off the surface.
Troubleshooting: Sagging Violin
If the violin tilts forward, use a small block of wood or a spacer adhering to the back of the neck scroll. This keeps the instrument parallel to the wall for a cleaner look.
Step back and admire how the wooden textures pop against your serene painted sky, creating a whimsical scene that invites viewers to imagine the music.
Music Constellations in a Night Sky Mural
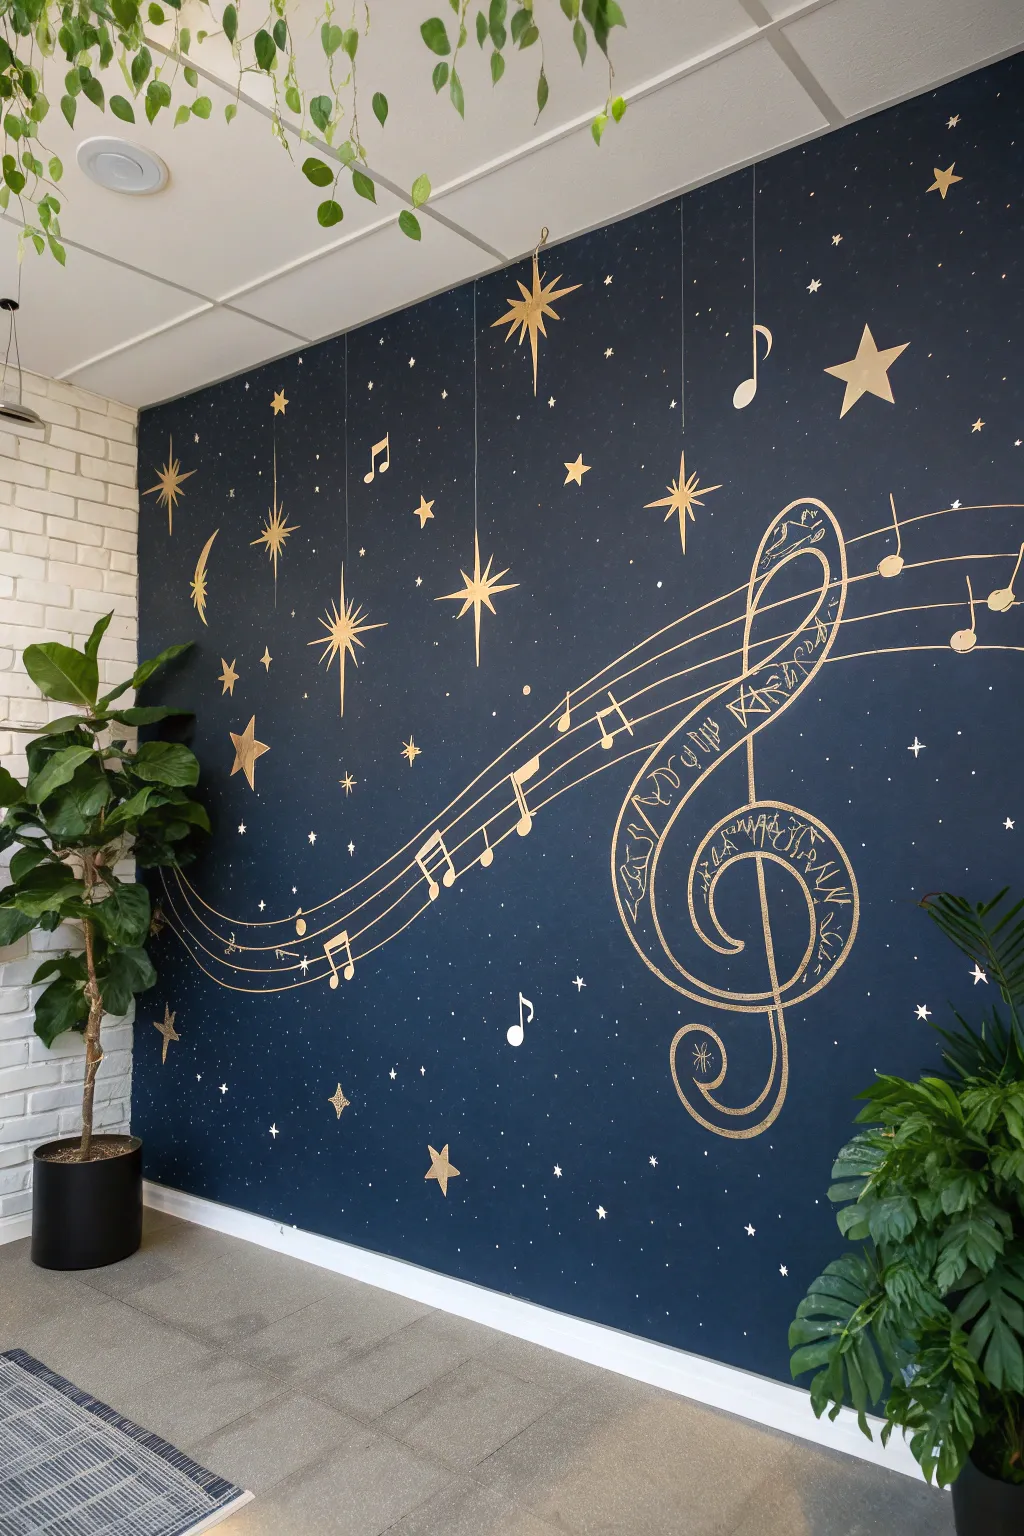
Transform a plain wall into a midnight masterpiece where musical notes dance among the stars. This stunning mural combines a deep navy backdrop with shimmering gold details, featuring a giant, intricate treble clef as the centerpiece of a flowing musical stave.
Step-by-Step Guide
Materials
- Deep navy blue interior wall paint (matte or eggshell finish)
- Gold metallic paint (acrylic or latex based)
- White chalk or a watercolor pencil (light gray or white)
- Painter’s tape
- Large paint roller and tray
- Assorted paintbrushes (1-inch flat, #4 round, and #0 fine liner)
- Ruler or long straight edge
- Measuring tape
- Step ladder
- Drop cloth
- Damp rag for clean up
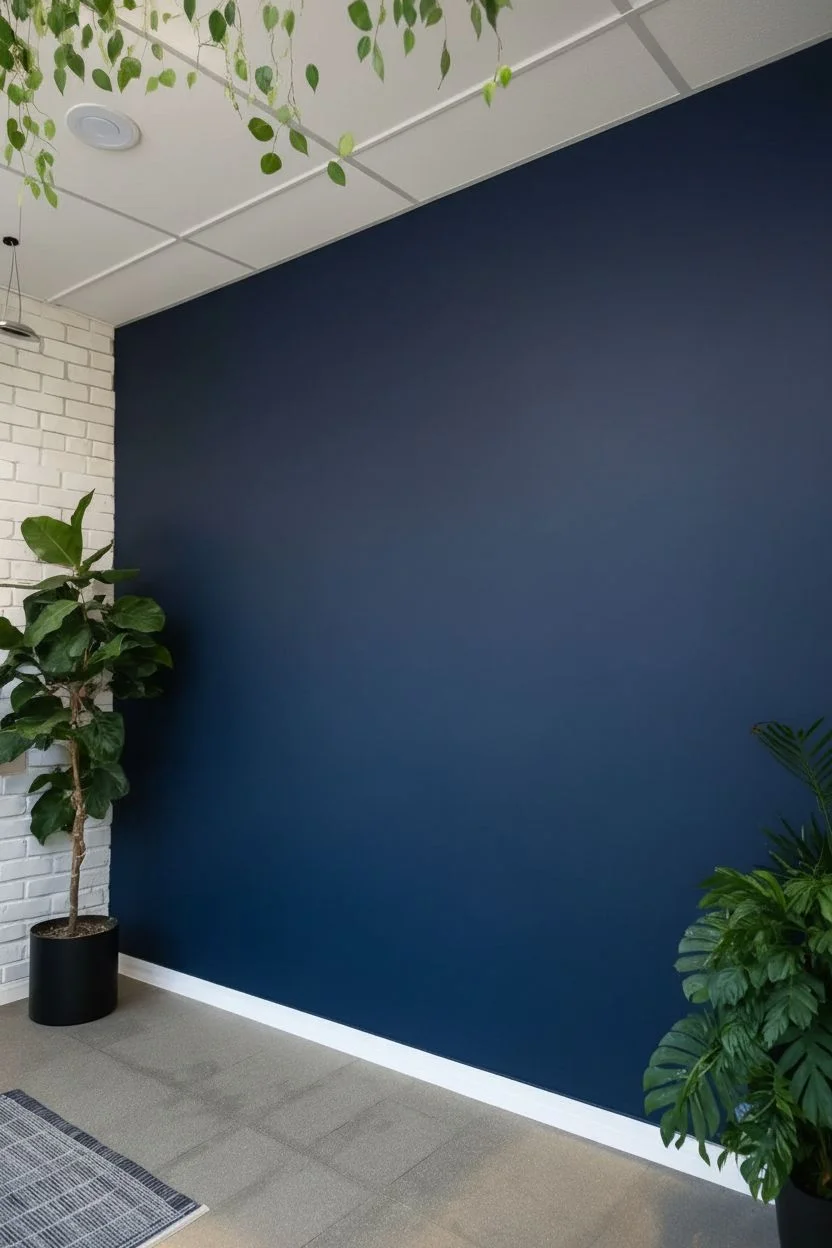
Step 1: Setting the Midnight Scene
-
Prep the canvas:
Begin by clearing the wall space and laying down your drop cloth. If your base wall has significant texture or holes, patch and sand them smooth now, as the gold metallic paint will highlight imperfections later. -
Apply the base coat:
Cut in the edges of the wall with the deep navy blue paint using a brush. Then, use your roller to cover the main surface. This dark color often requires two coat for full opacity; allow at least 2-4 hours of drying time between coats. -
Inspect the coverage:
Once the second coat is fully dry (I like to wait overnight to be safe), check for any patchy areas under good lighting. The background needs to be a solid, consistent void for the stars to pop against.
Step 2: Drafting the Musical Constellation
-
Sketch the flow:
Using white chalk, lightly sketch the large swooping curves of the musical stave. Start low on the left side and sweep upward towards the right, roughly following the rule of thirds for a pleasing composition. -
Draft the treble clef:
Draw the outline of the large treble clef on the right side of the mural. It should be the largest element, spanning nearly half the wall’s height. Don’t worry about the internal details yet; just get the silhouette shape correct. -
Place the notes:
Sketch in the musical notes along the stave lines. Vary their placement—some high, some low—to simulate a melody. Add the stems and flags, making sure they follow the curve of the stave. -
Mark the stars:
Mark positions for your major stars. Include a mix of large 5-point stars, 8-point bursts (like a compass rose), and smaller diamond shapes. Scatter them around the music, leaving some negative space to avoid clutter. -
Add hanging elements:
Draw thin vertical lines dropping from the ceiling line to ‘hang’ specific stars or notes, creating a mobile-like effect.
Wobbly Lines?
If your hand isn’t steady enough for the long stave lines or hanging strings, use painter’s tape to mark the path. Paint over the edge of the tape, let it dry, and peel for a crisp line.
Step 3: Painting the Gold Details
-
Paint the stave lines:
Load a #4 round brush with metallic gold paint. Carefully trace over your chalk lines for the five parallel lines of the stave. Keep a steady hand and reload your brush often to ensure the gold is opaque and crisp. -
Fill the treble clef:
Outline the treble clef with a slightly thicker brush. This specific design features a double-line outline rather than a solid fill. Leave the interior empty for now. -
Add interior script:
This step requires patience. Use your fine liner brush (#0) to paint the intricate, script-like text or patterns inside the body of the treble clef. You can write lyrics, names, or simply abstract squiggles that mimic handwriting. -
Paint the notes:
Fill in the musical notes. For the note heads, you might want to use a stencil or a small round foam pouncer to get perfect circles, or just freehand it if you feel confident.
Glow Up
Mix glow-in-the-dark additive into your white or light yellow paint and trace over the smallest stars. During the day it looks normal, but at night the constellation will truly shine.
Step 4: Starry Night Embellishments
-
Paint major stars:
Paint the large stars you sketched earlier. For the sharp points of the stars, start your brush stroke at the center of the star and flick outward to get a sharp, tapered point. -
Create the hanging strings:
Use a straight edge or just a very steady hand with the fine liner brush to paint the thin vertical lines connecting the top stars and notes to the ceiling. -
Splatter the galaxy:
For the tiny, distant stars, mix a small amount of gold paint with a drop of water to thin it. Dip a toothbrush or stiff brush into the mix and flick the bristles with your thumb to spray tiny speckles across the wall. -
Add the crescent moon:
Paint a slender crescent moon on the left side to balance the weight of the treble clef on the right. -
Clean up:
Once the gold paint is dry to the touch (usually 1 hour), use a slightly damp cloth to gently wipe away any visible chalk guidelines.
Step back and admire your celestial composition, which brings a quiet rhythm to the room even when there is silence
Anamorphic 3D Music Notes Illusion
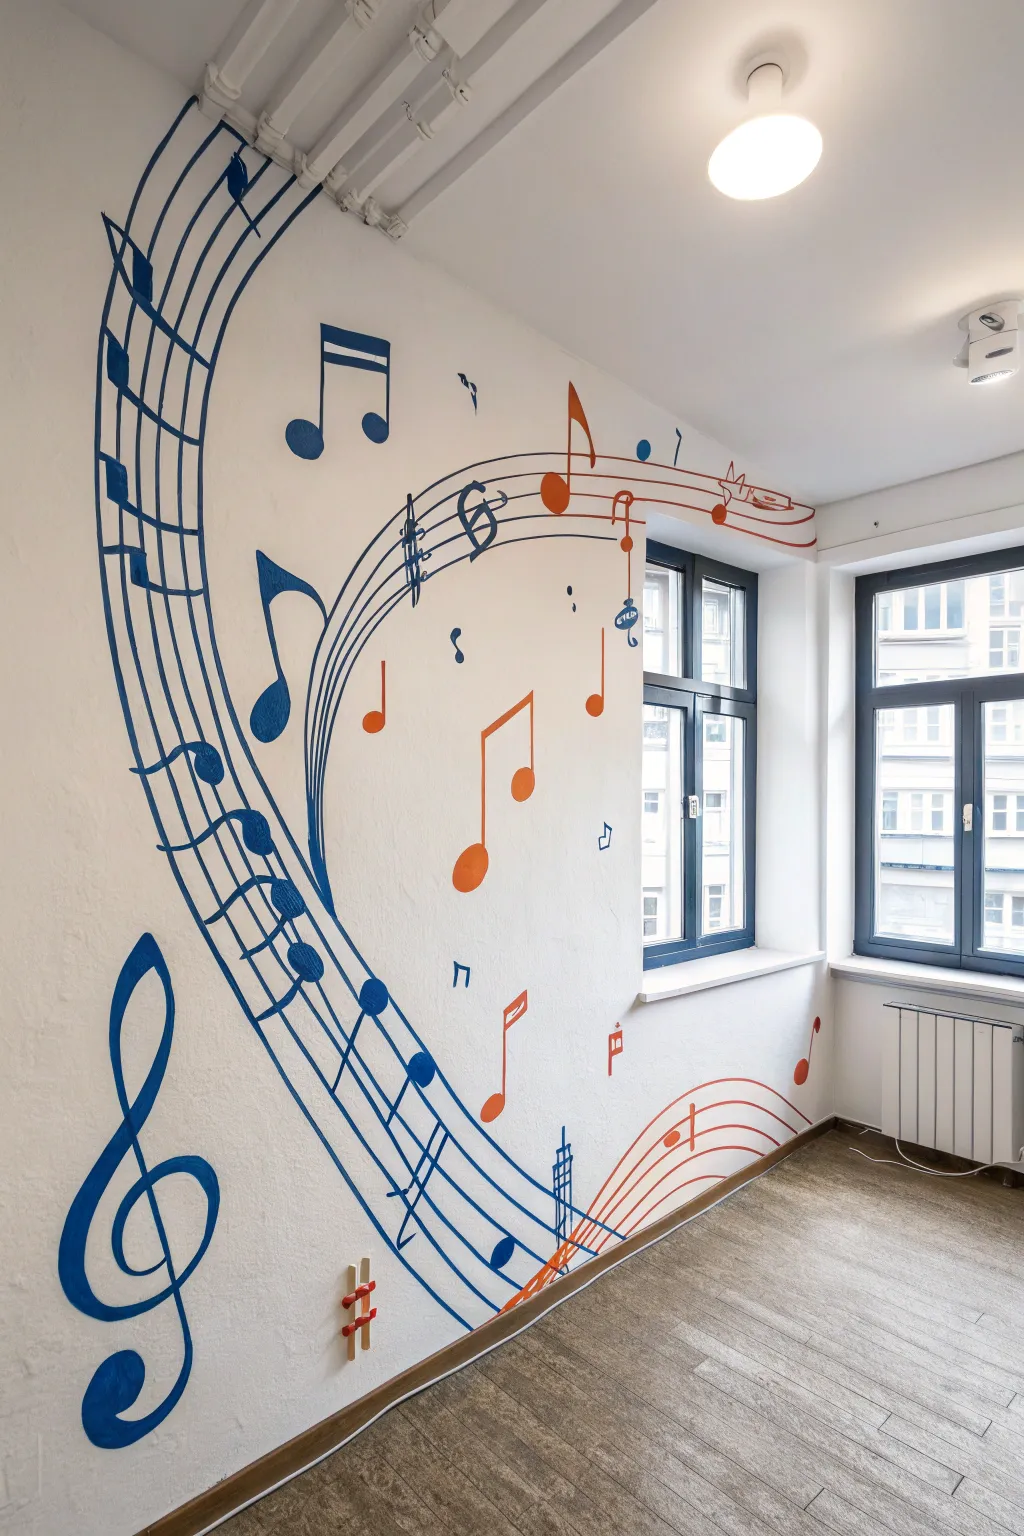
Transform a plain white room into a melodic masterpiece with this large-scale wall mural featuring sweeping musical staves and dancing notes. The dynamic composition uses the room’s geometry to create movement, with blue and orange notes that appear to float off the wall.
Step-by-Step
Materials
- Interior latex paint (White for base, Dark Blue, Orange/Red-Orange)
- Pencil and eraser
- Painter’s tape (various widths, especially thin/fineline tape)
- A flexible measuring tape or string
- Projector (optional but recommended)
- Small foam roller
- Angled sash brush (1.5 to 2 inch)
- Artist brushes (flat and round, sizes 4-10)
- Drop cloths
- Step ladder
- Level or laser level
Step 1: Preparation and Layout
-
Prep the canvas:
Begin by ensuring your walls are clean and the base coat of white paint is fresh and fully dry. Lay down drop cloths to protect the flooring. -
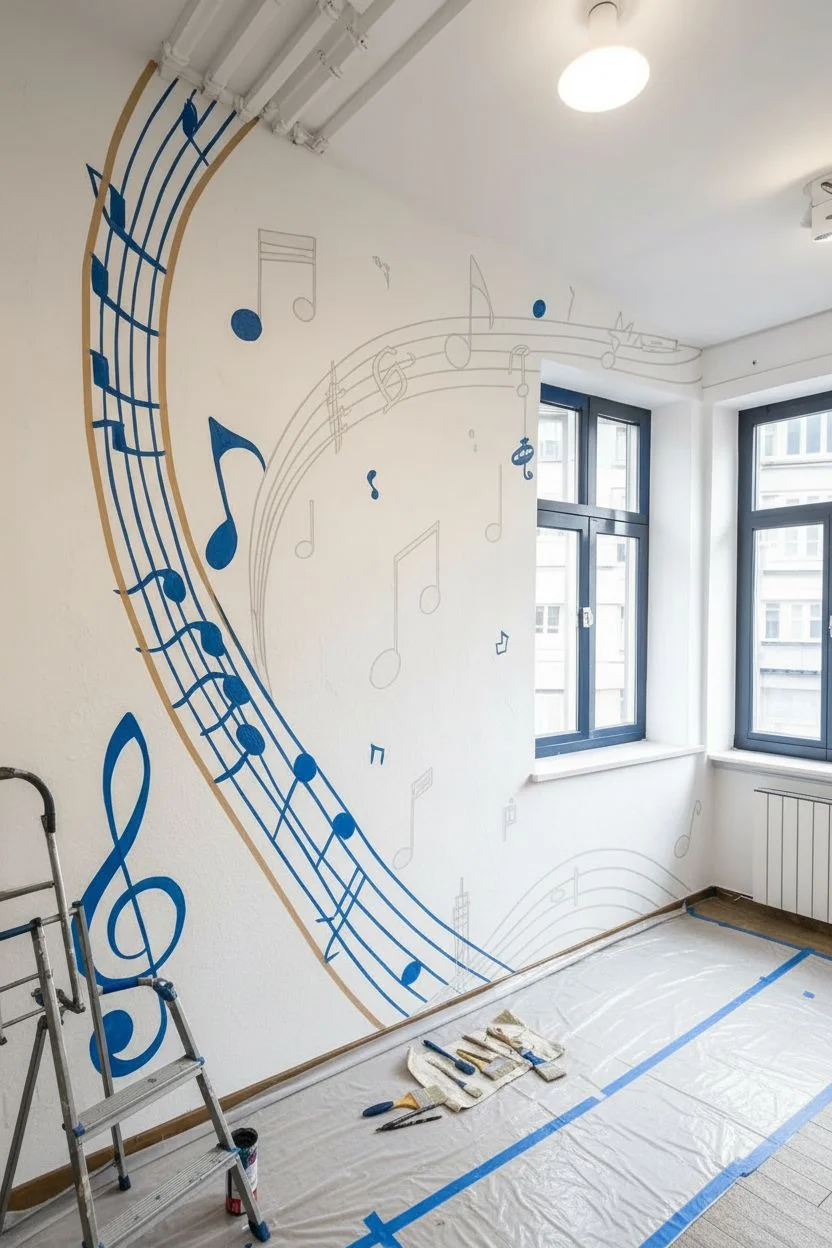
Map out the big swoop:
The main feature is the large blue staff curving from the upper left ceiling corner down to the floor. Use a pencil to lightly sketch the five parallel lines. If you’re freehanding, use a long string pinned at a pivot point to create smooth, consistent arcs. -
Sketch the secondary staff:
Draw the smaller, orange-red staff coming from the bottom right corner. This one should curve upward to meet or visually interact with the main blue staff. -
Mock up the notes:
Sketch the placement of the large treble clef on the left and scattered music notes throughout. Don’t worry about perfection yet; just focus on getting a balanced distribution between the blue and orange elements. -
Refine with a projector:
For the most professional look, I recommend projecting a digital image of sheet music onto the wall to trace crisp musical symbols, especially for the complex treble clef.
Step 2: Painting the Staff Lines
-
Tape the lines:
This is the most critical step for sharp lines. Use high-quality painter’s tape to mask off the five lines of your music staves. A laser level can help keep straight sections true, but flexible tape is needed for the curves. -
Seal the tape edges:
lightly brush a small amount of your white base wall paint over the edges of the tape. This seals the gap and prevents the colored paint from bleeding underneath. -
Paint the blue staff:
Using a small foam roller or brush, fill in the lines of the large left-side staff with your dark blue paint. Apply two thin coats rather than one thick one for better coverage. -
Paint the orange staff:
Repeat the process for the lower-right staff using your orange/red-orange paint. Let the paint set until it’s tacky but not fully dry before carefully peeling off the tape.
Bleeding Lines?
If paint bleeds under the tape, wait for it to dry completely. Then, place a piece of tape over the colored line and touch up the edge with your base white wall paint.
Step 3: Adding the Notes and Symbols
-
Block in the treble clef:
Using an angled sash brush, fill in the large blue treble clef. Start with the thickest parts of the curve and work your way to the tapered tail. -
Paint the note heads:
Switch to a medium-sized round artist brush. Paint the oval heads of the music notes (both blue and orange) solid. Rotate your brush slightly to keep the oval shapes smooth. -
Draw the stems:
Use a small flat artist brush to paint the straight vertical stems of the notes. Use a distinct, single stroke if possible to keep lines straight. -
Add flags and beams:
Paint the flags (the curvy tails on single notes) and beams (the thick lines connecting groups of notes). Pay attention to the direction; stems going up have flags on the right. -
Detail work:
Add smaller symbols like the sharps (#), flats (b), and rests. I like to use a very fine liner brush for these delicate shapes to ensure they don’t look blobby. -
Create variation:
Mix it up by making some notes ‘hollow’ (half notes) and others filled in. Ensure the orange notes pop against the white background by giving them a second coat if needed.
Pro Tip: Consistent spacing
Make a simple cardboard spacer tool cut to the width of the gap between staff lines. Use this to double-check your tape placement as you move along the curve.
Step 4: Finishing Touches
-
Clean up edges:
Once all paint is completely dry, use a small brush and your white base paint to touch up any smudges or jagged edges around the notes. -
Erase pencil marks:
Gently erase any visible pencil sketch lines that weren’t covered by paint. A white eraser works best here to avoid scuffing the wall. -
Final inspection:
Step back to the center of the room to view the composition as a whole. Fix any inconsistencies in paint density, especially on the long staff lines.
Now you have a dynamic wall feature that brings rhythm and energy to the entire room


Have a question or want to share your own experience? I'd love to hear from you in the comments below!