There’s something extra magical about Christmas finger painting—it’s quick, cheerful, and perfectly messy in the best way. I love how a few simple fingerprints can turn into keepsake-worthy cards and decorations in minutes.
Fingerprint Christmas Tree Triangle
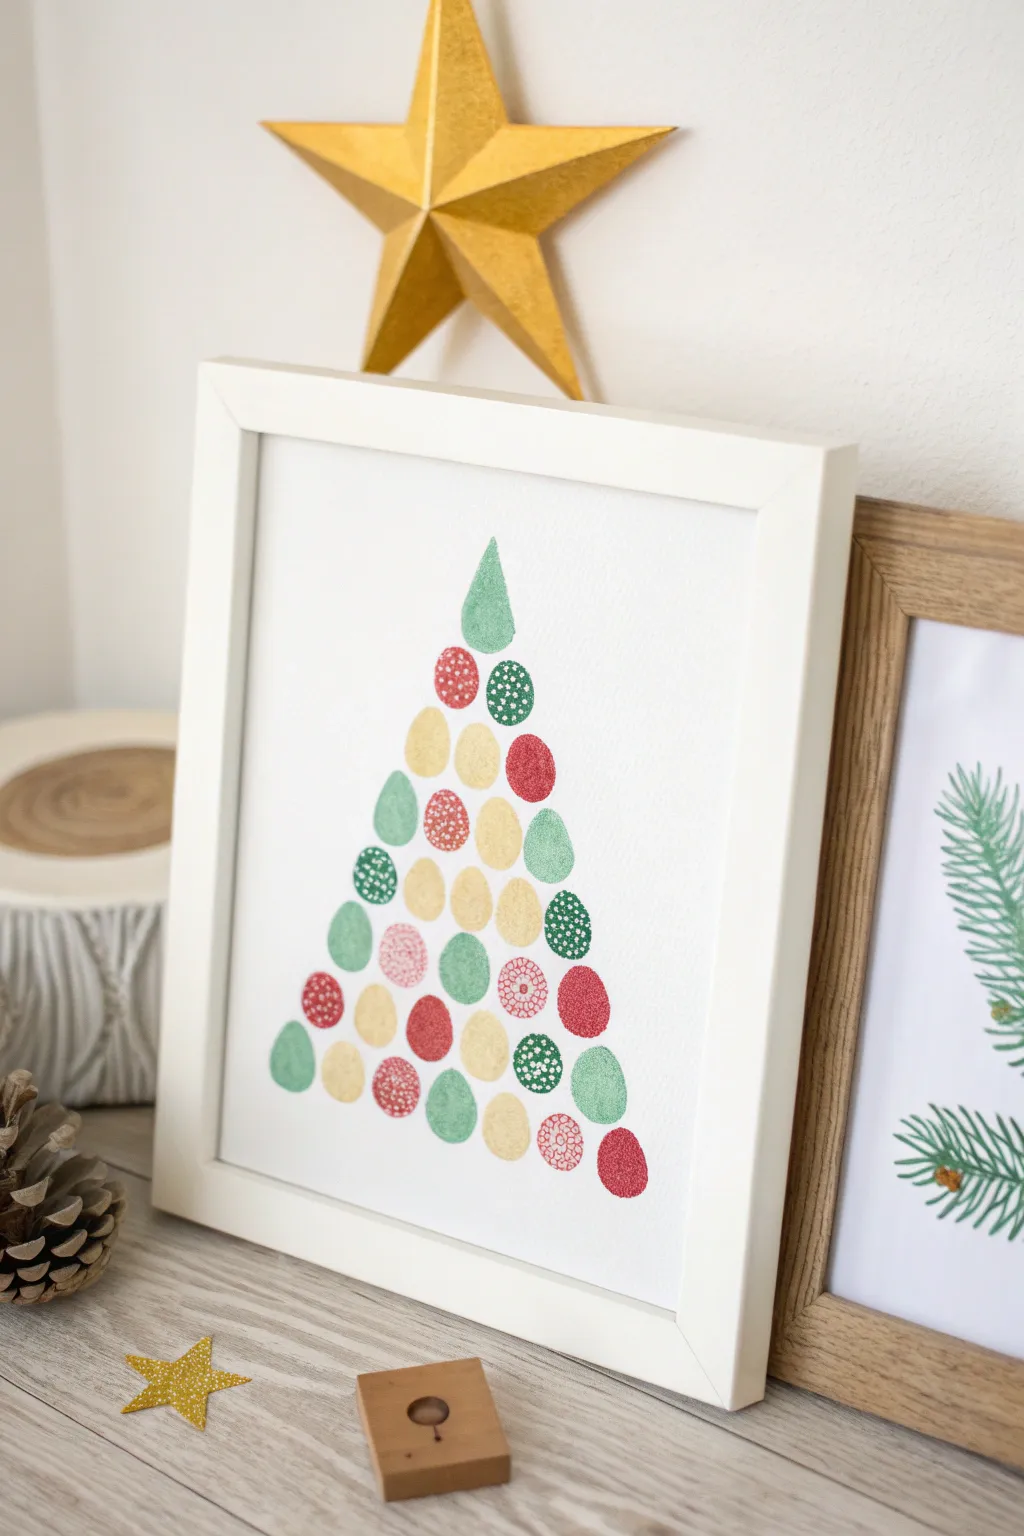
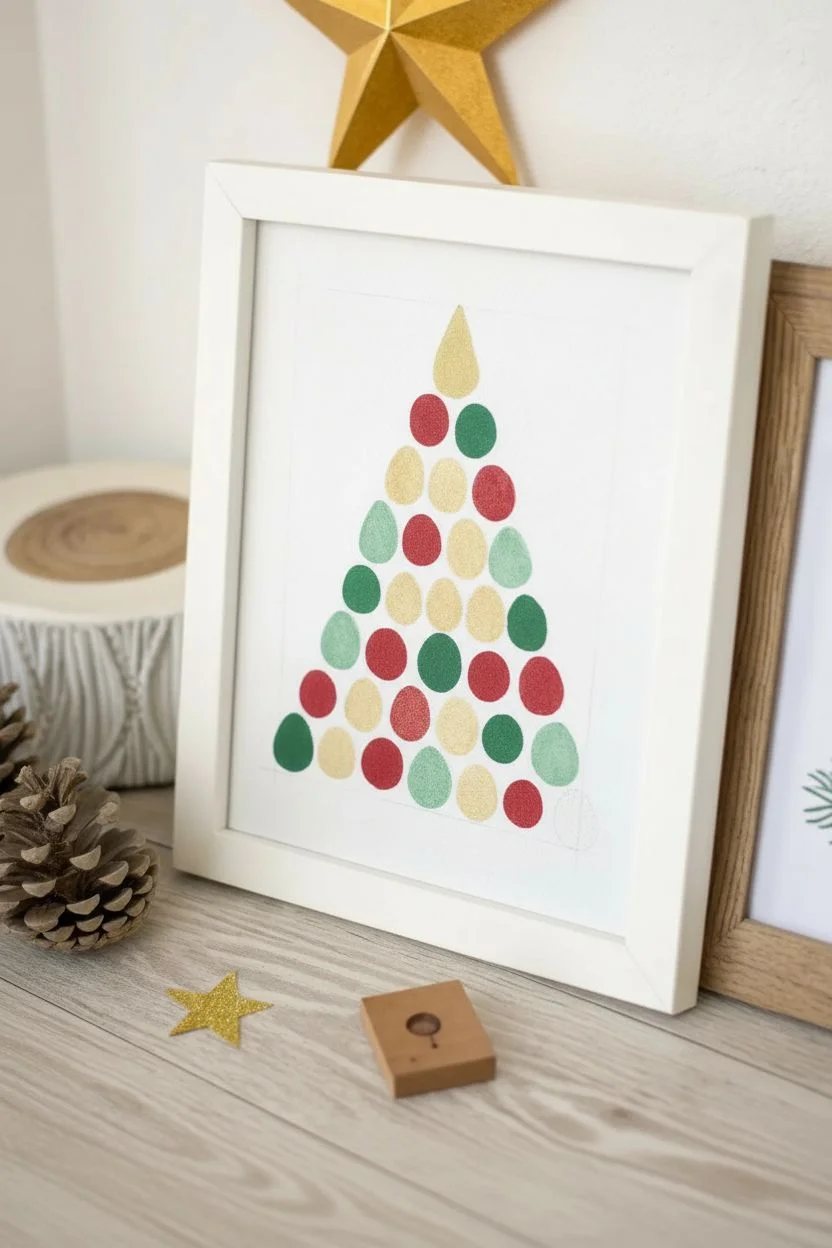
This whimsical holiday project transforms simple fingerprints into a modern, geometric Christmas tree art piece. By layering festive colors with intricate white doodles, you create a charming, framed decoration perfect for a mantle or entryway.
How-To Guide
Materials
- Heavyweight white cardstock or watercolor paper (8×10 inch)
- Ink pads in holiday colors: deep red, forest green, light sage green, and metallic gold
- Fine-point white gel pen or white paint marker
- Pencil
- Ruler
- Eraser
- White or light wood frame (8×10 inch)
- Scrap paper for testing prints
Step 1: Planning and Printing
-
Prepare your canvas:
Cut your cardstock to size so it fits perfectly inside your chosen frame. Lay it on a flat, clean surface. -
Mark the guide:
Using a ruler and a very light pencil touch, draw a faint triangle shape centered on the paper. This will serve as the outer boundary for your fingerprint arrangement. -
Test your colors:
On a scrap piece of paper, press your thumb into the ink pads and test the pressure. You want a clear oval shape without too much smudging around the edges. -
Start the base row:
Begin at the bottom of your pencil triangle. Press your thumb into a desired ink color—let’s say deep red—and stamp it firmly on the bottom left corner of your guide. -
Complete the bottom row:
Continue stamping fingerprints across the bottom row, alternating between your reds, greens, and gold colors. Aim for about 7 prints for the base, keeping them close but not touching. -
Build the next layer:
Move up to the second row from the bottom. These prints should nestle in the valleys between the prints below, creating a brick-laying pattern. This row will have one less print than the base. -
Continue upward:
Repeat this process, reducing the number of prints by one for each new row you climb. Keep switching ink colors randomly to ensure a balanced distribution of hues. -
Create the topper:
When you reach the very top, stamp a single print. Instead of a standard oval, try to angle your thumb slightly or use your index finger to create a teardrop shape pointing upward. -
Let it dry completely:
Allow the ink to dry fully before moving to the next step. Wait at least 15-20 minutes to prevent the ink from smearing when you add details. -
Erase guidelines:
Once the ink is bone dry, gently erase any visible pencil marks from your original triangle guide.
Smudge Control
If you make a mistake or smudge a print, turn it into a unique ornament. Cover the smudge completely with a white paint marker circle or star pattern later.
Step 2: Adding Details
-
Select your tool:
Take your fine-point white gel pen or paint marker. Test it on the scrap paper over a dried fingerprint to ensure the ink flows smoothly. -
Add first patterns:
Choose a few random red prints and draw tiny polka dots on them. The contrast of white on red looks especially crisp. -
Draw geometric accents:
On several green prints, draw small grid lines or cross-hatching patterns. I find this adds a nice textural element that mimics distinct ornaments. -
Create floral motifs:
Use the pen to draw simple flower shapes or circles with dots in the center on the lighter sage green prints. -
Detail the gold prints:
Leave some of the gold prints plain to let the metallic shine through, but on others, add simple stripes or zig-zags. -
Finish the topper:
For the top pointed print, you can leave it solid or outline it gently with the white pen to highlight its special position. -
Final drying time:
Let the white gel ink set for at least 10 minutes. If you frame it while the ink is wet, it might transfer to the glass. -
Frame your art:
Place your finished artwork into the frame, secure the backing, and display it alongside other seasonal decor.
Level Up: 3D Texture
For a tactile finish, use puffy fabric paint instead of a gel pen for the white details. It will raise the patterns slightly off the paper when dry.
Now you have a piece of personalized holiday art that captures a moment in time through your unique fingerprints


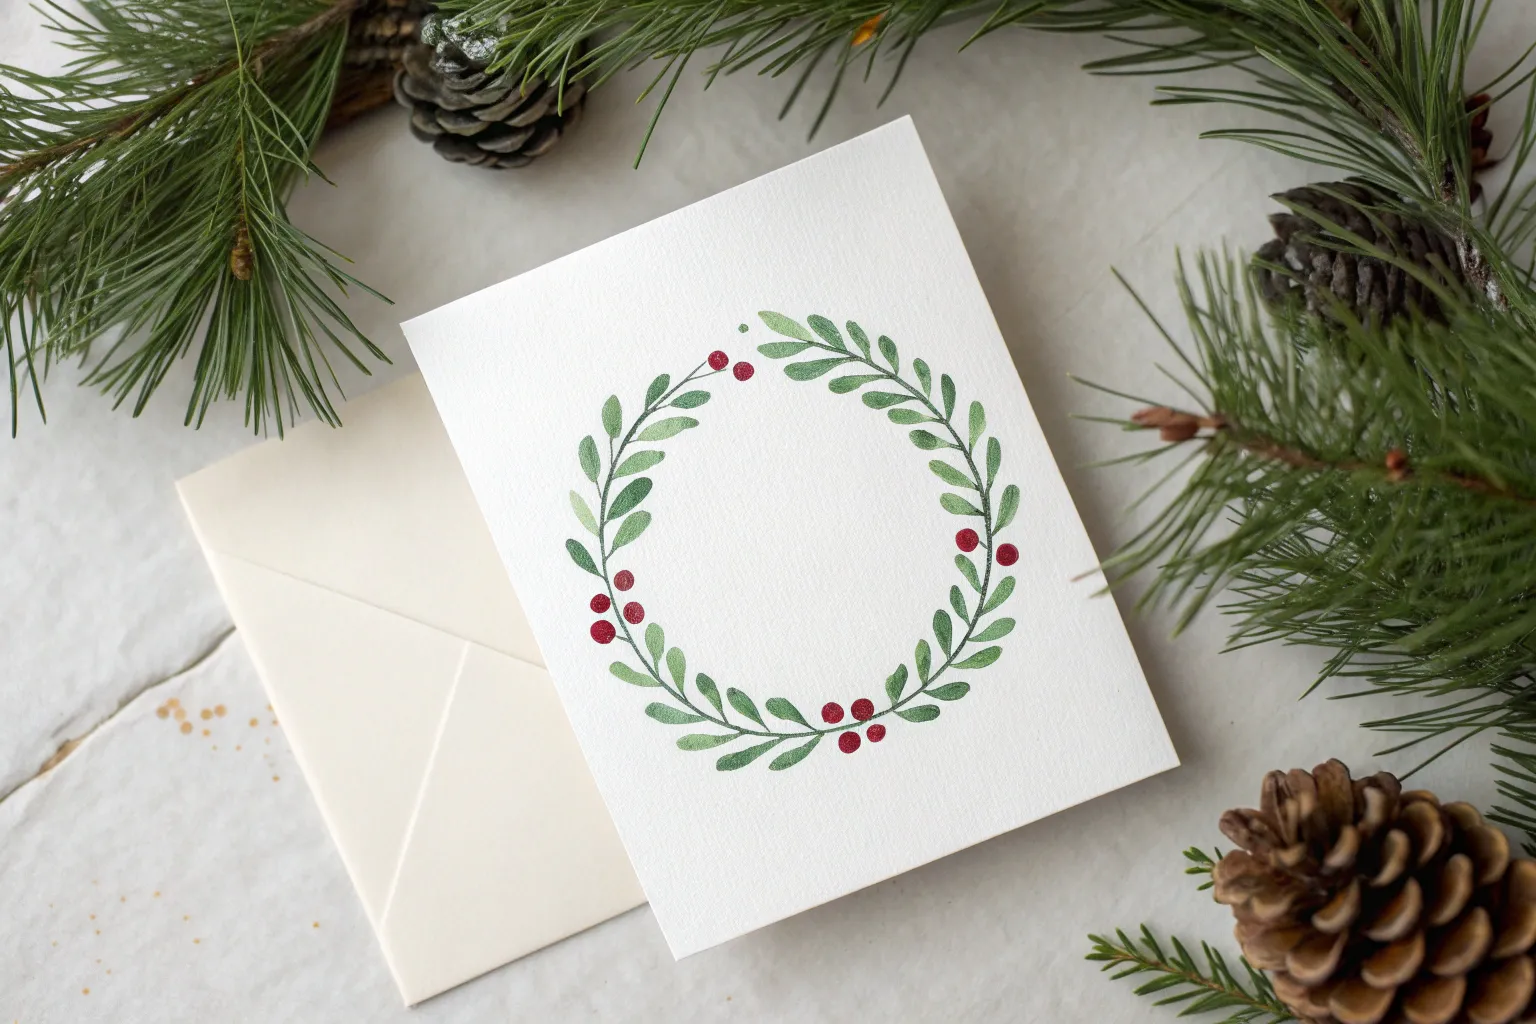
Fingerprint Wreath With Berry Dots
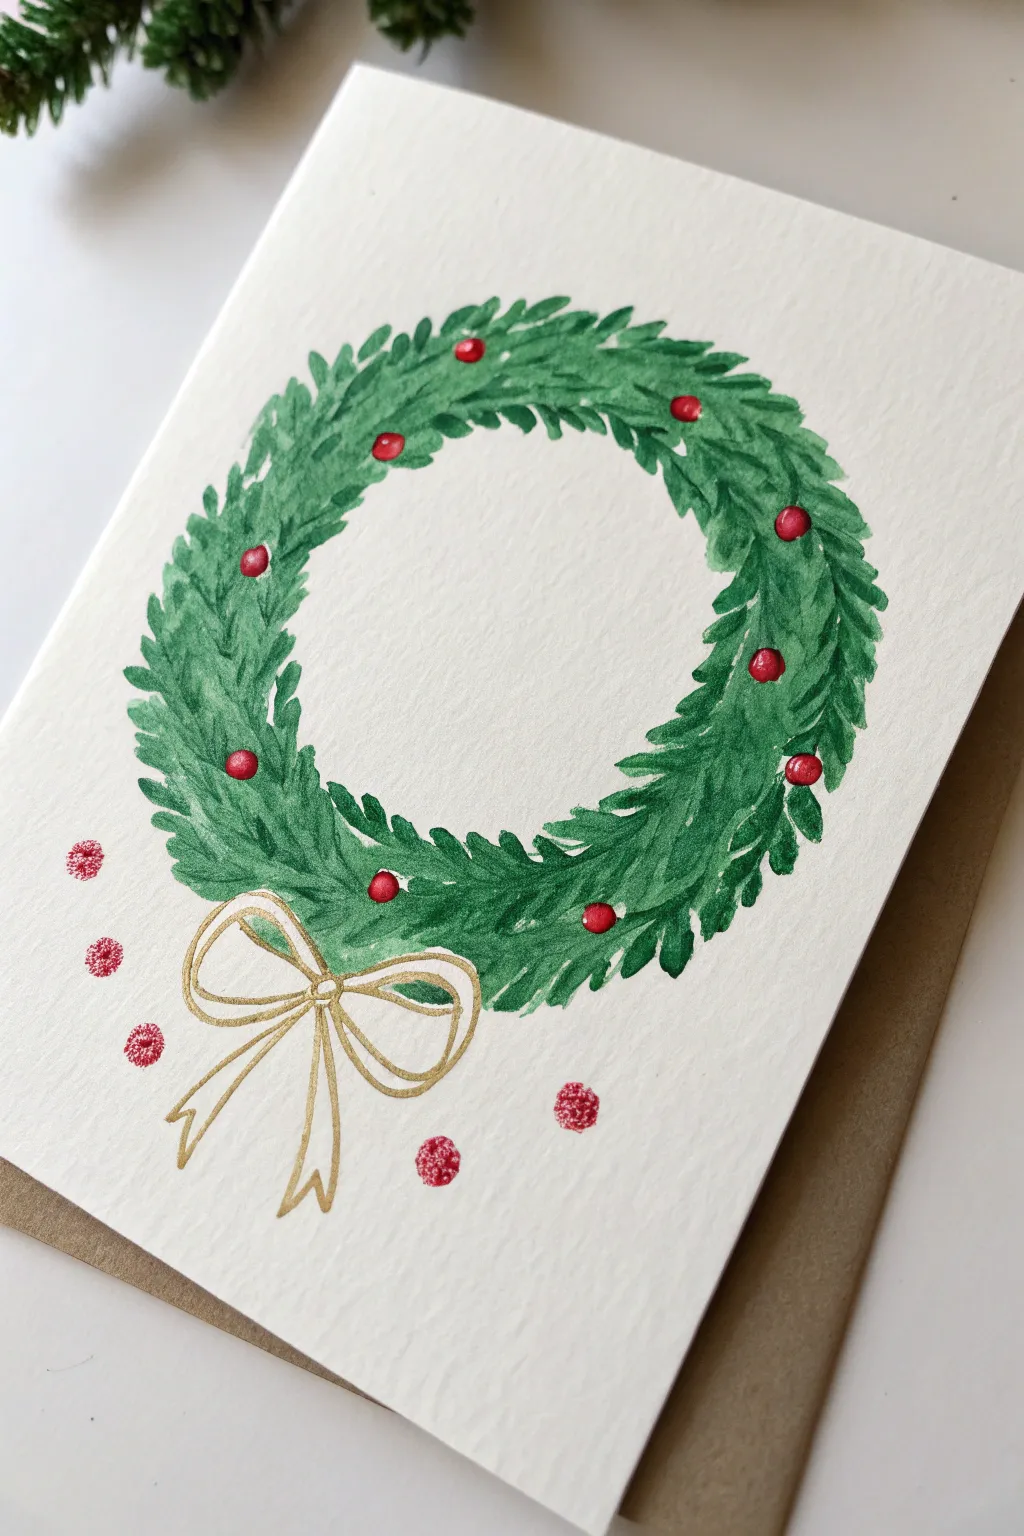

This elegant greeting card combines the charm of handmade watercolor textures with the playful simplicity of fingertip art. The result is a lush, evergreen wreath dotted with festive crimson berries and finished with a shimmering gold bow.
Step-by-Step Guide
Materials
- High-quality watercolor paper (cold press texture recommended)
- Green watercolor paint (sap green or forest green)
- Red watercolor paint or gouache
- Metallic gold paint or gel pen
- Small round paintbrush (size 2 or 4)
- Small flat brush (optional)
- Palette for mixing
- Paper towels
- Blank cardstock or folded card base
- Clean water
Step 1: Painting the Foliage Base
-
Mix your greens:
Start by mixing a rich, leafy green on your palette. Add a tiny touch of water to make it flow, but keep the pigment concentrated for vibrancy. -
Mark the circle:
Lightly visualize a circle on your paper. You can trace a round object very faintly with a pencil if you need a guide, but freehand looks more organic. -
Create the first leaves:
Using your round brush, paint small, elongated leaf shapes that curve along your imaginary circle. Think of them as curved dashes. -
Vary the direction:
Paint leaves pointing both inward and outward from the circle line to create a sense of fullness and volume. -
Layering tones:
While the first green is still slightly damp, mix a slightly darker shade of green and add a second layer of leaves over the first. -
Building texture:
Continue adding leaves until the wreath looks dense and full. The natural variation in water and pigment will create beautiful depth. -
Dry completely:
Let the green foliage layer dry completely before moving on to the berries to prevent bleeding.
Step 2: Adding Berries and Accents
-
Prepare the red:
Dip your index finger or pinky finger into the red paint. Make sure your fingertip is coated but not dripping. -
Test prints:
Press your finger onto a scrap piece of paper a few times to ensure you are getting a clean, round shape without too much gloop. -
Add wreath berries:
Press your finger gently onto the dried green wreath to place berries at random intervals. Odd numbers usually look best visually. -
Highlight the berries:
Once the red prints are dry, you can use a tiny dab of white paint or leave a small negative space unpainted to create a shiny reflection highlight. -
Create floating dots:
Using a more textured technique—perhaps dabbing off most paint first—add a few scattered red dots to the lower left of the card for a whimsical touch. -
Paint the bow outline:
Load your small brush or gold gel pen with metallic gold pigment. Draw the center knot of the bow at the bottom of the wreath. -
Form the loops:
Draw two large loops extending outward from the knot. Keep the lines fluid and slightly varied in thickness to mimic ribbon. -
Add the tails:
Paint two ribbon tails hanging down from the bow, adding a little twist or curve to make them look effortless. -
Final assembly:
If you painted this on a separate sheet, trim the artwork and mount it onto your folded card base (kraft paper looks wonderful) using double-sided tape or glue.
Textured Touch
For the loose dots outside the wreath, try dipping a dry brush or a Q-tip into semi-dry paint. Dab it onto paper to create a stippled, airy texture rather than a solid print.
Fixing Smudges
If a red berry bleeds into the green leaves, don’t panic. Let it dry completely, then go over the muddy area with a thicker, opaque layer of gold paint to turn it into a decorative ornament.
Once the gold ink shimmers in the light, your handcrafted holiday card is ready to be shared with someone special


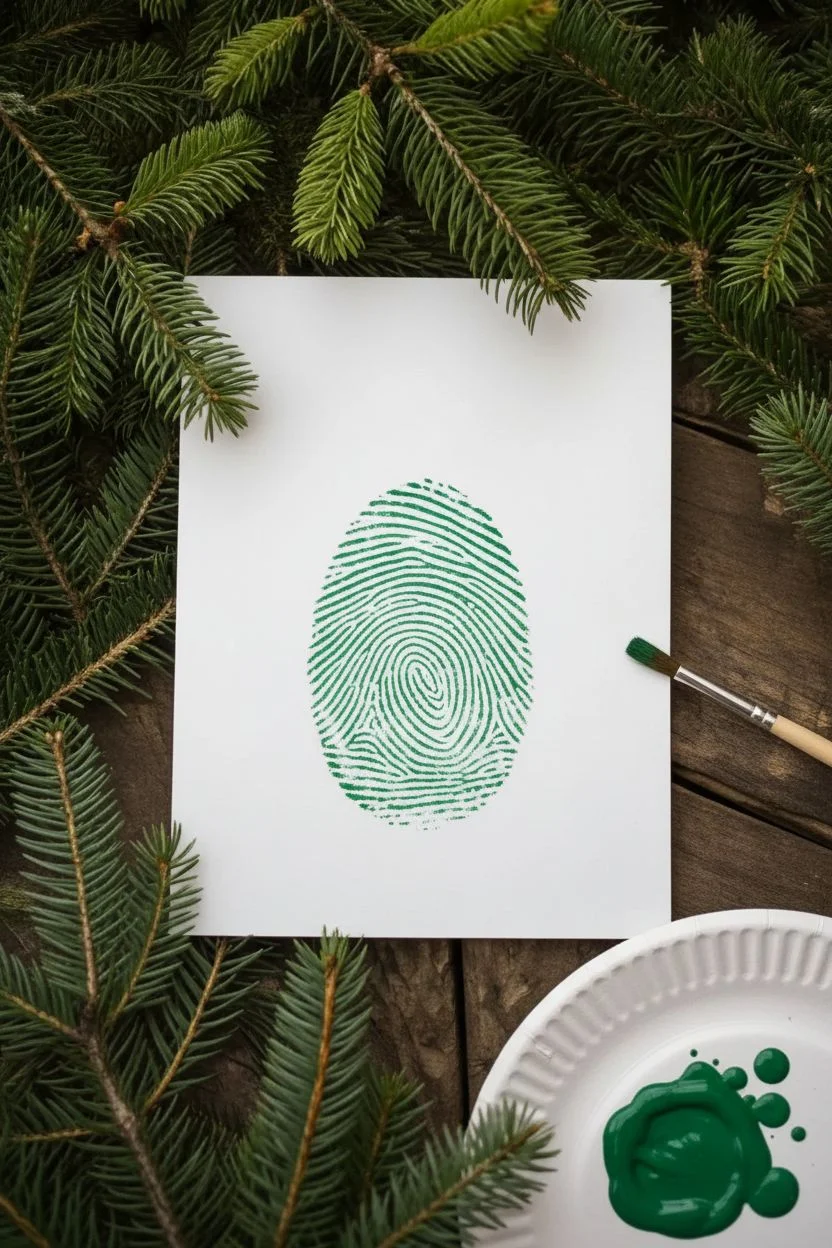
Christmas Ornament Fingerprint Fill-In
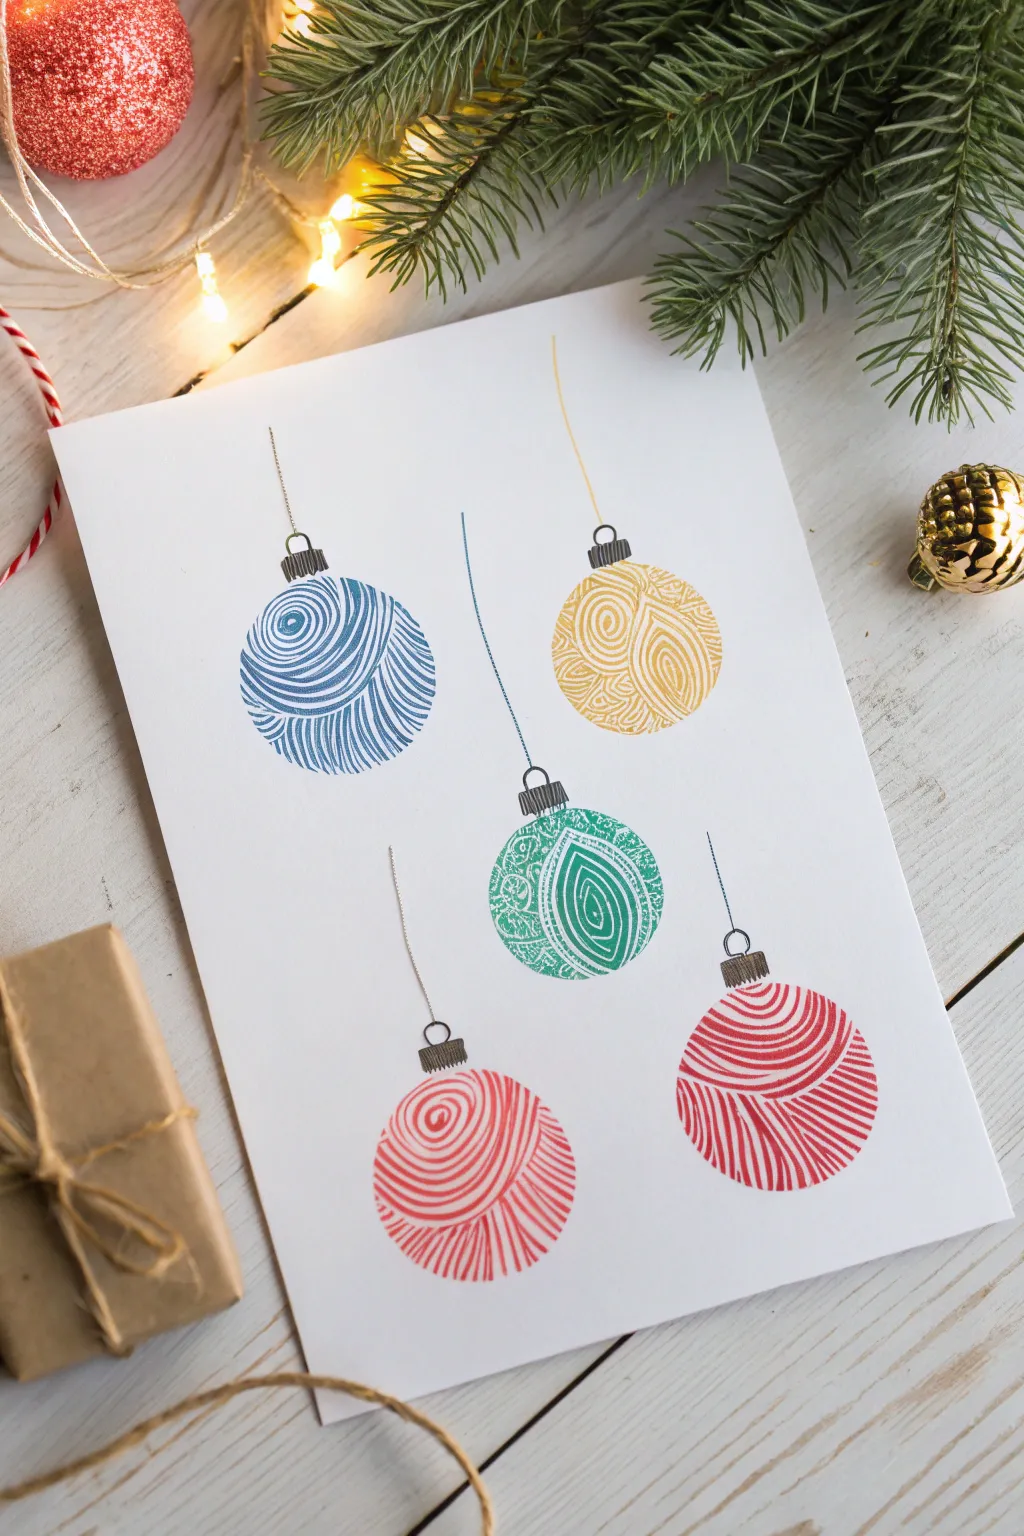
Transform simple fingerprints into elegant Christmas ornaments with this clever drawing technique. Using ink pads and fine liners, you’ll create a set of five uniquely patterned baubles that look intricate but are surprisingly simple to master.
Detailed Instructions
Materials
- White cardstock or heavy drawing paper (A5 size)
- Ink pads in holiday colors (blue, yellow, green, red)
- Black fine liner pen (0.3mm or 0.5mm)
- Ruler (optional, for straight strings)
- Pencil and eraser (for sketching shapes)
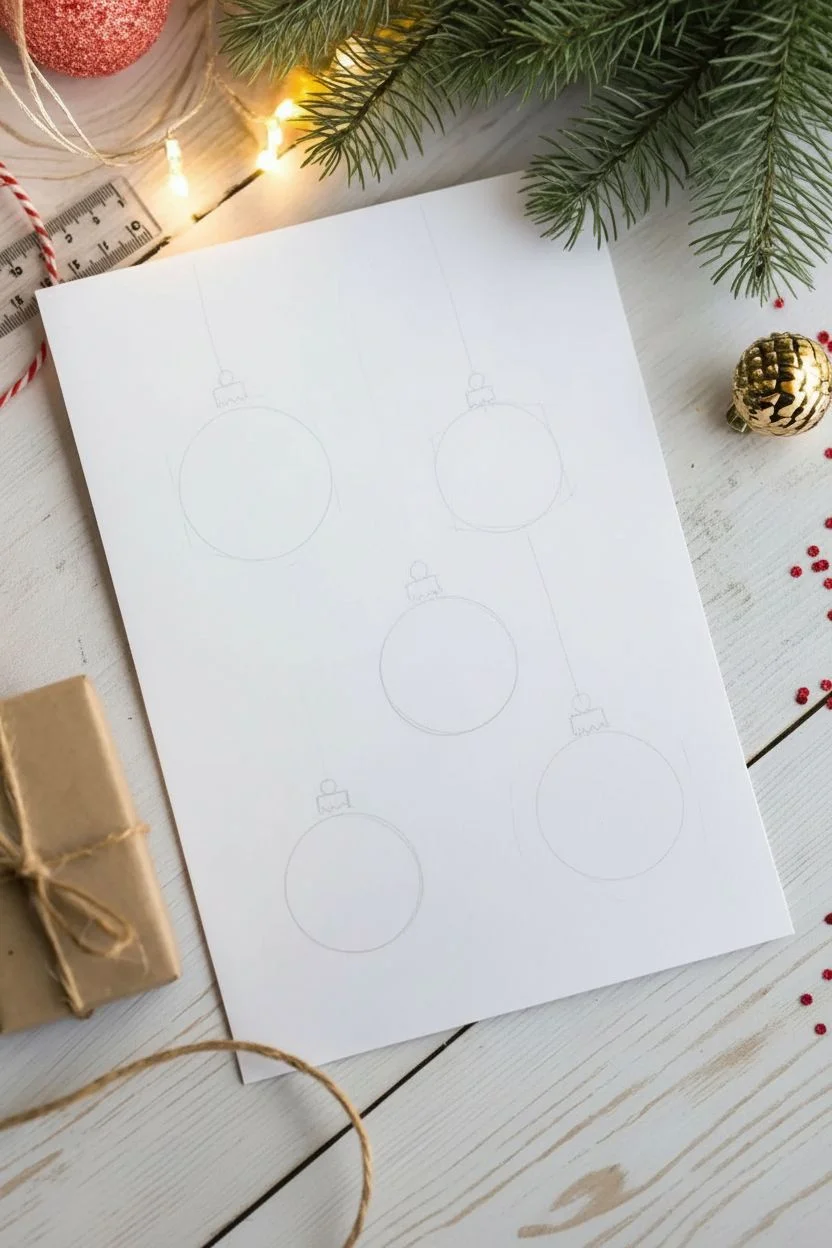
Step 1: Planning the Layout
-
Arrange the composition:
Visualize where your five ornaments will hang on the cardstock. Aim for a staggered look, placing them at different heights rather than a straight line to create visual interest. -
Lightly sketch circles:
Using a pencil, very lightly draw five circles where you want the ornaments to be. You can trace a small coin or bottle cap to get perfect circles, or freehand them for a more organic feel. -
Check spacing:
Ensure there is enough vertical space above each circle to draw a hanging string later without running off the top edge of the paper.
Smudge Alert
If you are left-handed, work from right to left (or vice versa) to avoid dragging your hand through fresh ink. A piece of scrap paper under your hand also helps!
Step 2: Creating the Fingerprint Base
-
Ink your thumb:
Press your thumb firmly onto your first ink pad color (e.g., blue). Make sure your skin is evenly coated but not dripping with ink. -
Stamp the first ornament:
Press your inked thumb onto one of your penciled circles. For a larger ornament like these, you might need to stamp twice, slightly overlapping or pivoting your thumb to fill the circular shape. -
Change colors:
Clean your thumb thoroughly with a wet wipe or damp cloth before switching to the next color. -
Complete the set:
Repeat the stamping process for the remaining four circles using yellow, green, and red inks. Let the overlapping prints dry completely—this usually takes about 5-10 minutes depending on the ink. -
Erase guidelines:
Once the ink is bone dry, gently erase any visible pencil marks from your initial circle sketches.
Pattern Variety
Don’t just make spirals! Try concentric arches (like a rainbow) or a double-loop whirl to mimic the three main types of real fingerprints: whorls, loops, and arches.
Step 3: Adding the Swirl Details
-
Study the pattern:
Look closely at the example image. The pattern mimics the ridges of a fingerprint but exaggerates them into decorative swirls and loops using white space or a darker ink layer. -
Draw the ridges:
Since we are recreating the *look* of the image which uses white lines over color, use a white gel pen if your ink is dark. However, the image actually shows the reverse: colored lines on white paper forming the fingerprint shape. Let’s adjust for accuracy: Use fine colored pens that match your ink pads to draw the swirl pattern *over* a faint ink base, OR simply draw the swirled maze-like pattern directly with colored markers in a circle shape. -
The direct drawing method:
To match the crisp lines in the photo perfectly, skip the ink pad! Instead, take a colored fine-tip marker (blue, for instance) and start in the center of your imaginary circle. -
Create the whorl:
Draw a small, slightly squashed spiral or loop. Continue drawing lines that hug the previous curves, expanding outward until you form a complete circle. -
Vary the line width:
Keep your lines close together to simulate the texture of a fingerprint ridge. Repeat this process for all five colors, changing the ‘center’ point of the swirl for variety.
Step 4: Hardware and Hanging
-
Draw the ornament cap:
Using your black fine liner, draw a small rectangle sitting directly on top of each colored orb. -
Add texture to the cap:
Fill the little rectangle with tiny vertical lines to mimic the ridges of a metal ornament cap. -
Add the loop:
Draw a tiny semi-circle or loop on top of the metal cap you just drew. -
Draw the strings:
Starting from the top loop of each ornament, draw a single, thin line extending all the way to the top edge of the paper. -
Add movement to strings:
I prefer to freehand these lines with a slight curve or wobble rather than using a ruler; it makes the ornaments look like they are gently swinging. -
Final touches:
Check your strings. If any ornament is positioned ‘behind’ another visually, make sure the string doesn’t cross over the front ornament weirdly. Let all ink dry completely before handling.
Now you have a charming, minimalist holiday card ready to share with friends and family


Fingerprint Star Burst Tree Topper
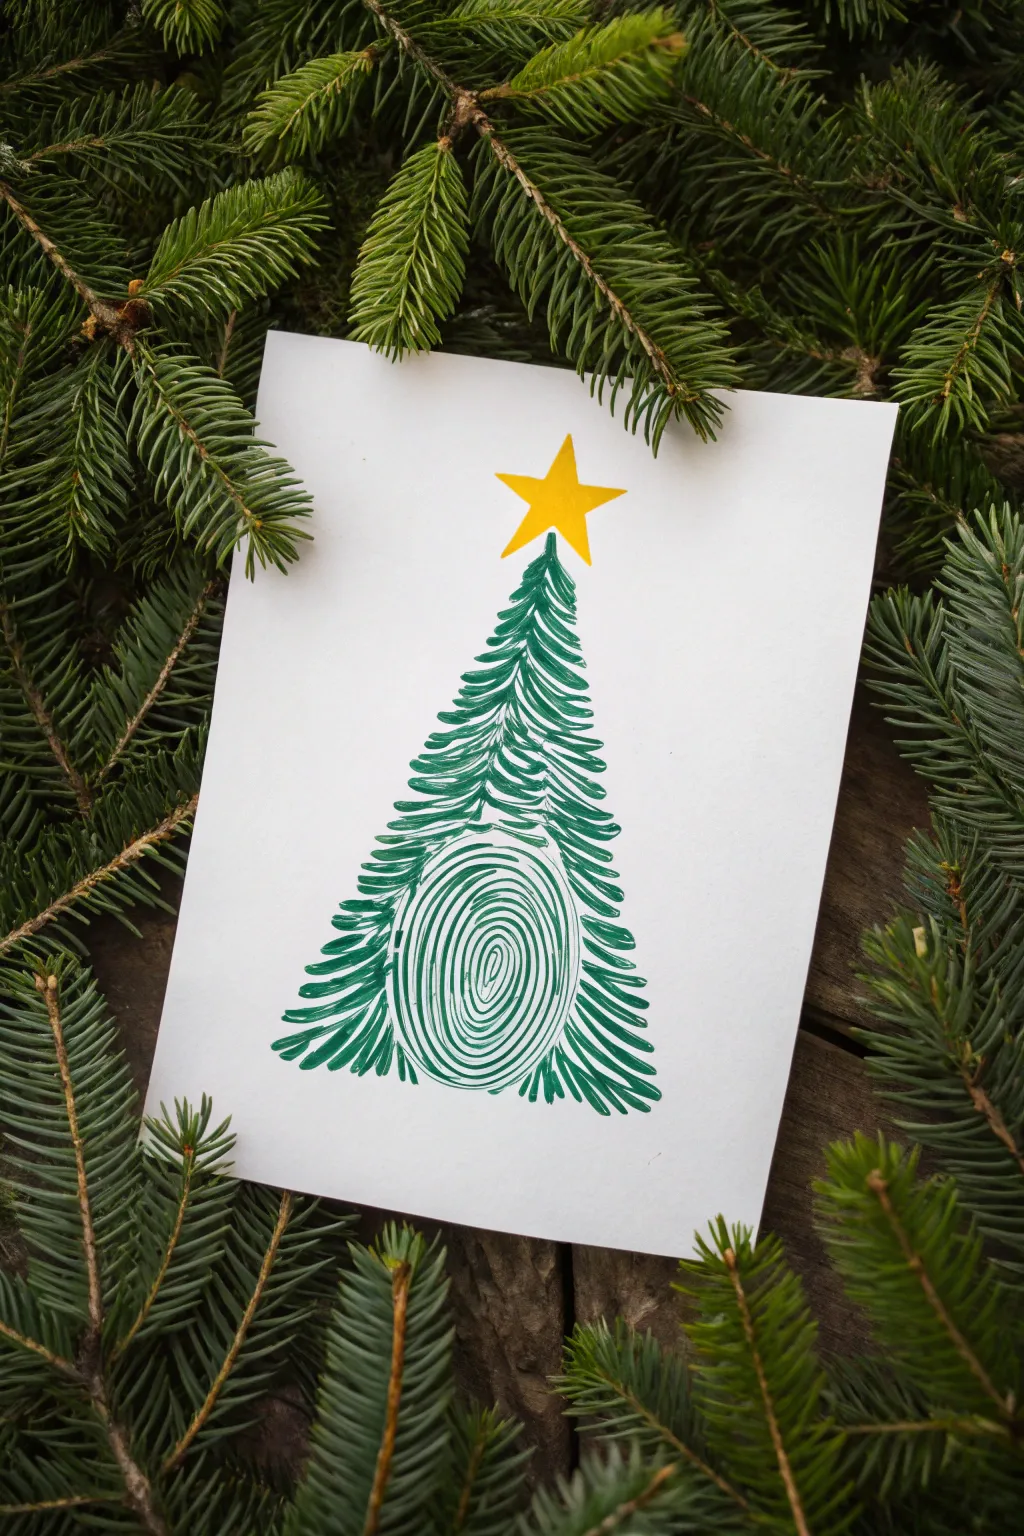
This charming holiday card transforms the intricate lines of a thumbprint into the heart of a festive evergreen tree. It creates a modern, minimalist design where stylized pine needles radiate outward from a central, organic core to capture the holiday spirit.
Step-by-Step
Materials
- White cardstock or watercolor paper (heavyweight)
- Green acrylic paint or poster paint
- Yellow acrylic paint
- Fine-tip paintbrush (size 0 or 1)
- Medium round paintbrush (size 4 or 6)
- Paper plate or palette
- Cup of water
- Paper towels
Step 1: Creating the Central Core
-
Prepare your palette:
Squeeze a small amount of green acrylic paint onto your paper plate. You want a consistency that flows smoothly but holds its shape, so add a tiny drop of water if it feels too thick. -
Position the card:
Place your white cardstock vertically on a flat surface. Visualize where you want the bottom center of the tree to be, leaving plenty of room at the top for the star. -
Paint the central oval:
Using your fine-tip brush, paint a small, vertical oval shape near the bottom middle of the page. This forms the very center of your fingerprint design. -
Add the first ring:
Carefully paint a ring around your central oval. Keep the line thin and leave a small gap of white space between the oval and this new ring. -
Continue concentric rings:
Paint concentric rings outward, mimicking the ridges of a fingerprint. I find it helpful to vary the line thickness slightly to make it look organic rather than mechanically perfect. -
Expand the shape:
Keep adding rings until you have a larger oval shape, roughly the size of a thumbprint or slightly larger. This acts as the trunk or core of the tree. -
Clean up edges:
If any lines merged, use the very tip of a clean, damp brush to lift away the excess paint while it’s still wet to re-establish the white gaps.
Steady Hand Trick
Rest your pinky finger on the paper (use a scrap sheet under it to avoid smudges) to stabilize your hand while painting the fine concentric circles.
Step 2: Growing the Branches
-
Start the top section:
Reload your fine brush with green paint. Starting from the top of your fingerprint oval, paint upward strokes that mimic pine boughs, tapering them to a point to form the tree’s peak. -
Developing the left side:
Begin adding branches to the left side of the fingerprint core. These strokes should start near the core and swoop outward and slightly downward. -
Developing the right side:
Mirror the process on the right side. Paint sweeping, curved lines that extend outward, creating the triangular silhouette of a Christmas tree. -
Layering the texture:
Go back over your branches adding shorter, quick strokes to simulate thick pine needles. Vary the starting points so the tree looks full and lush. -
Blend the transition:
Ensure the branches visually connect to the central fingerprint section. You want the fingerprint to look like it is hidden inside the foliage, not just sitting on top of it. -
Add bottom fullness:
Extend the lower branches down past the bottom of the fingerprint oval. Curve them outward significantly to give the tree a wide, stable base. -
Review the silhouette:
Step back and check the overall shape. Add a few stray ‘needles’ sticking out at the edges to break up any perfectly straight lines for a more natural look.
Step 3: The Crowning Star
-
Switch colors:
Thoroughly rinse your brush or switch to a clean one. Put a dab of bright yellow paint on your palette. -
Paint the top point:
Paint a vertical triangle pointing upward directly above the peak of your green tree. -
Add side points:
Paint two horizontal triangles extending from the base of your first triangle to create the arms of the star. -
Finish the star shape:
Add the two bottom points of the star, angling them downward. Fill in the center of the star to make it solid and opaque. -
Final drying:
Let the entire piece dry completely flat for at least 30 minutes before handling or placing it in an envelope.
Make It Sparkle
Once the green paint is fully dry, brush a very thin layer of clear glue over the branches and sprinkle fine silver glitter for a frosty, snowy effect.
This personalized card is now ready to send warm holiday wishes to someone special
BRUSH GUIDE
The Right Brush for Every Stroke
From clean lines to bold texture — master brush choice, stroke control, and essential techniques.
Explore the Full Guide
Mistletoe Fingerprint Cluster
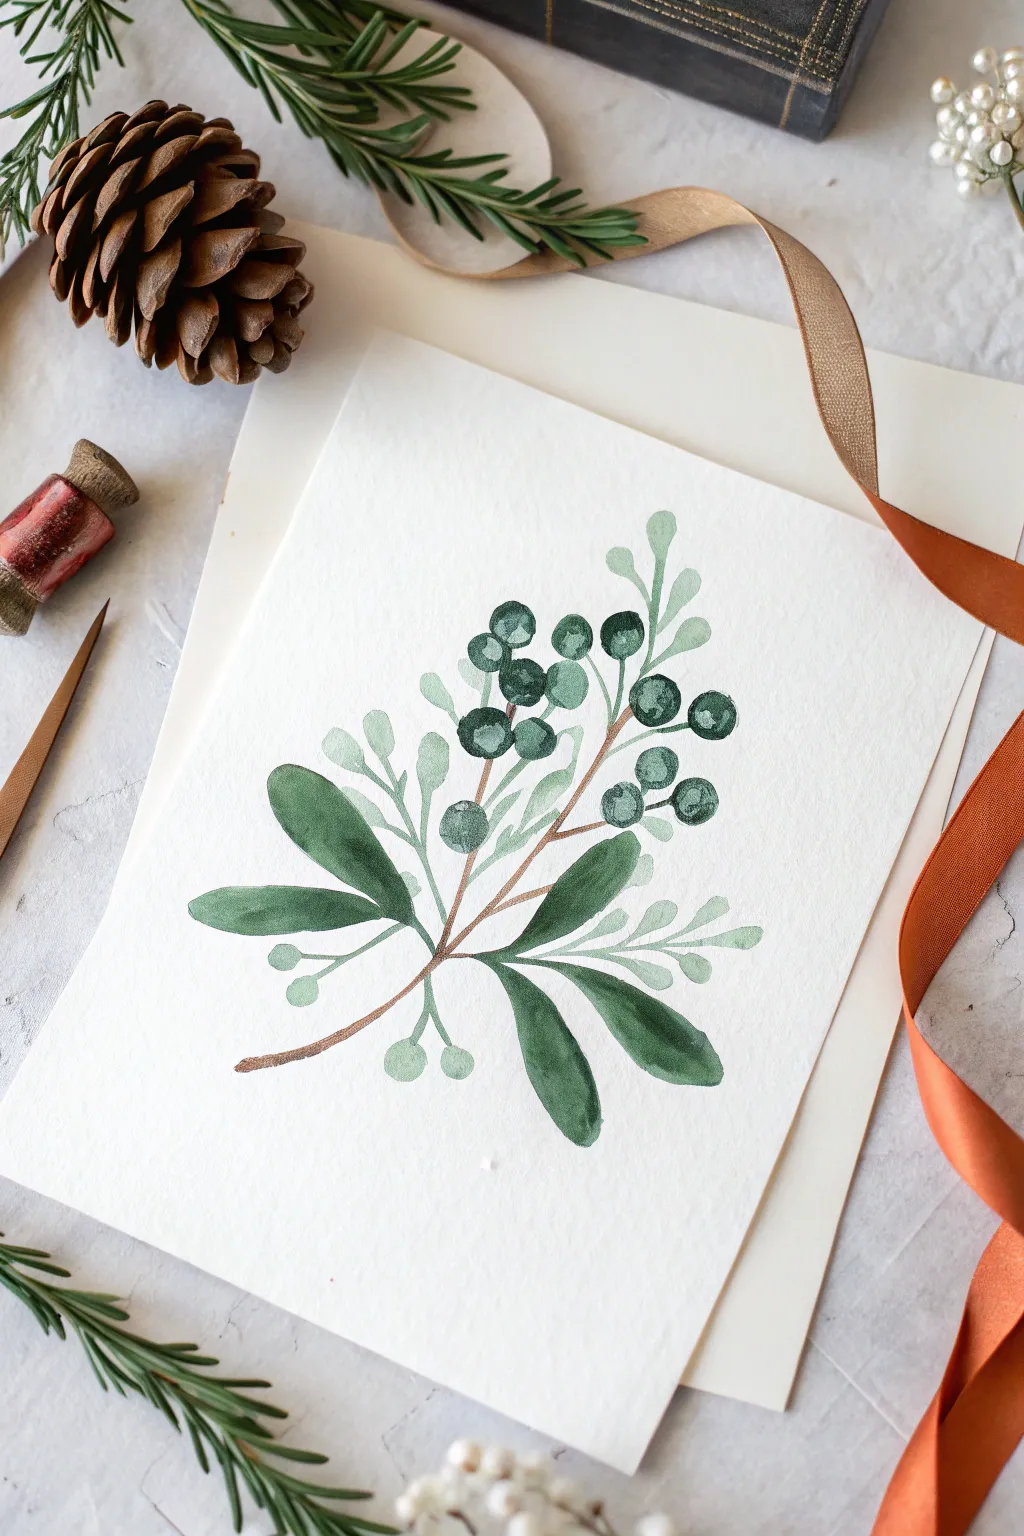
This elegant greeting card features a beautifully loose watercolor interpretation of mistletoe, blending soft, translucent berries with bold evergreen foliage. The organic shapes and delicate branches create a sophisticated yet handmade look perfect for holiday stationery.
Detailed Instructions
Materials
- High-quality watercolor paper (cold press texture recommended)
- Watercolor paints (Dark Viridian, Sap Green, Burnt Sienna)
- Round watercolor brushes (Size 2 and Size 6)
- Pencil for light sketching
- Jar of clean water
- Paper towels
- Optional: Masking fluid
Step 1: Planning and First Layers
-
Outline the Composition:
Begin by lightly sketching main stem structure with a pencil. Draw a central curved line for the main branch, extending a few thinner lines outward where the berry clusters and leaves will sit. -
Paint the Light Stems:
Mix a watery wash of Sap Green with just a hint of water to make it very pale. Using your Size 2 brush, paint delicate, thin sprigs branching out from the central area towards the top right and bottom left. -
Add Pale Leaf Accents:
While you have that pale green mixture, paint small, elongated oval leaves on these lighter stems. Keep them translucent and ghostly to create a sense of depth in the background. -
Create the Berry Base:
Instead of fingerprints, use a loaded Size 6 brush to drop in imperfect circles for the berries. Use a darker blue-green mix (Viridian with a touch of blue) for these. Place them in loose clusters near the center and upper right. -
Vary Berry Tone:
While the berries are still wet, drop in a tiny dot of water or a darker pigment on one side of each berry to create natural volume and lighting effects.
Water Control Tip
For the translucent ‘ghost’ leaves in the background, ensure your brush carries more water than pigment. Test the opacity on a scrap paper first.
Step 2: Adding Depth and Foliage
-
Paint the Main Branch:
Switch to a thin mixture of Burnt Sienna. With your fine brush, paint the central woody stem, connecting your berry clusters. Let the lines be slightly shaky and organic rather than perfectly straight. -
Connect the Elements:
Extend thin brown twigs from the main branch to hold the berries you painted earlier. This anchors the floating circles to the plant. -
Mix Deep Green:
Create a rich, saturated green by mixing Dark Viridian with a touch of the brown you just used. This will be for the primary leaves. -
Paint the Lower Leaves:
Use the Size 6 brush to paint the large leaves at the bottom. Press the belly of the brush down to widen the stroke, then lift as you pull away to create a tapered point. -
Add Upper Leaves:
Paint two or three medium-sized dark leaves near the middle of the composition, checking that they don’t overlap your berries too heavily unless the berries are fully dry. -
Layering Contrast:
Notice how the dark leaves sit ‘in front’ of the pale stems from step 2. This layering builds a nice 3D effect, so don’t be afraid to let a dark leaf cross over a pale stem line.
Make It Sparkle
Once dry, paint a very thin layer of clear glistening medium or iridescent watercolor over just the berries to give them a festive, pearlescent shimmer.
Step 3: Final Details
-
Enhance the Berries:
Once the berries are completely dry, use your smallest brush to add tiny, dark C-shaped shadows on the bottom edge of a few berries to make them pop. -
Add Highlights:
If your berries look too flat, you can add a tiny dot of white gouache or white gel pen to the upper left of each sphere for a crisp highlight. -
Refine Stem Connections:
Look closely at where stems meet leaves. Add tiny triangular thickenings at these joints with the brown paint to make the anatomy look more realistic. -
Balance the Composition:
Step back and look at the whitespace. If the cluster feels lop-sided, add a tiny pale green sprig or a single berry to balance the weight. -
Final Dry:
Let the entire piece dry completely before erasing any visible pencil marks. Watercolor paper is fragile when wet, so patience here prevents tearing.
Now you have a stunning, hand-painted holiday card ready to be shared with someone special
Collaborative Family Fingerprint Tree Ornaments
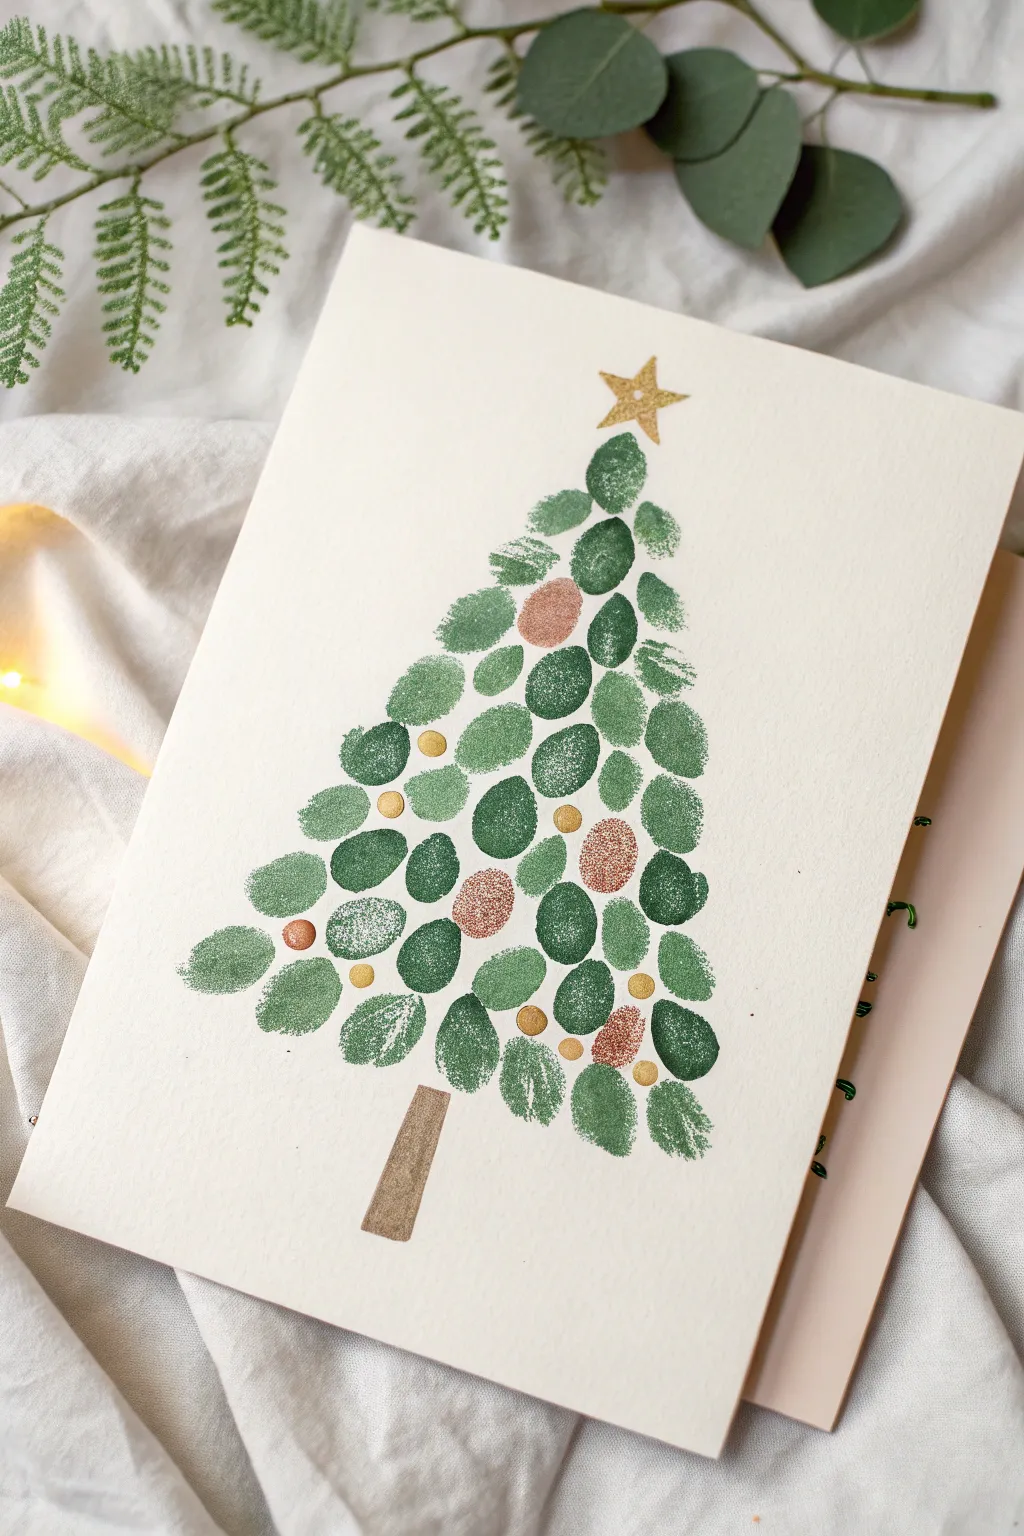
Create a charming, personalized holiday greeting with this simple fingerprint Christmas tree. Using overlapping thumbprints in varied shades of green and adding metallic touches creates a lovely textured look that feels both rustic and festive.
Step-by-Step
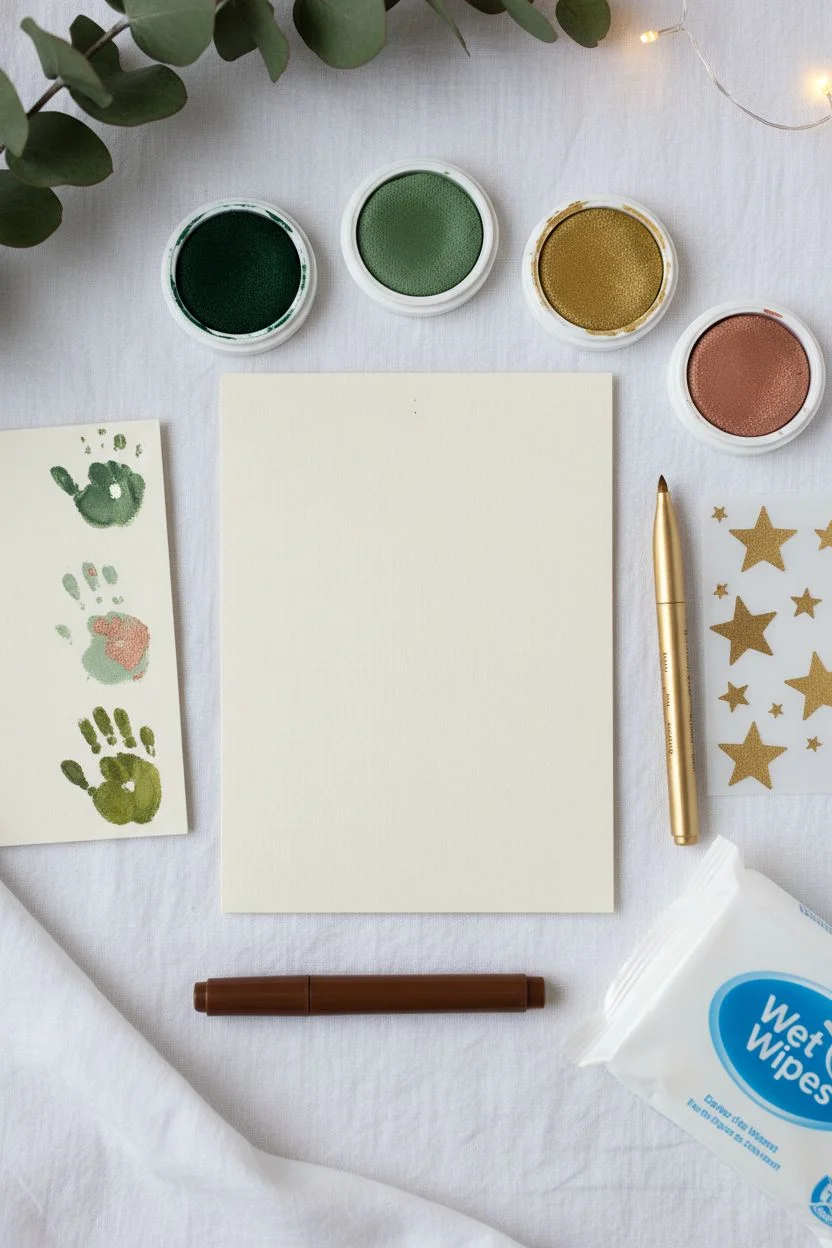
Materials
- Blank cardstock (cream or white)
- Ink pads in 2-3 shades of green (forest, sage, olive)
- Metallic ink pads (gold and copper/rose gold)
- Gold star sticker or gold paint pen
- Brown marker or paint (for the trunk)
- Wet wipes (essential for clean fingers!)
- Scrap paper for testing
Step 1: Planning and Preparation
-
Set up your workspace:
Lay out your cardstock on a flat surface. Open all your ink pads so they are ready to use. Keep your wet wipes very close by—you’ll be switching colors often. -
Test your prints:
Before touching the final card, practice stamping your thumb or index finger on scrap paper. Experiment with different pressure levels to see how the ink texture changes and how opaque the prints appear. -
Mark the top:
Lightly mark a tiny dot with a pencil where you want the top of the tree to be. This helps ensure your pyramid shape stays centered on the card.
Clean Prints
For the crispest fingerprints, press your finger onto the ink pad gently rather than squishing it. Too much ink creates a blob; a light touch preserves the unique ridge details.
Step 2: Building the Tree
-
Start the top layer:
Press your finger onto a medium-green ink pad. Stamp a single print vertically right below your pencil mark. This is the peak of your tree. -
Create the second row:
Clean your finger or switch to a slightly different green shade for variety. Stamp two prints directly below the first one, angling them ever so slightly outward to begin the triangle shape. -
Expand to row three:
For the third row, aim for about three prints. Mix up your greens here—maybe use a darker forest green on the outside and a lighter sage in the middle to create depth. -
Add a metallic ornament:
In the fourth row (aiming for four prints), substitute one of the green fingerprints with a copper or rose gold metallic print. This acts as a large ‘bauble’ integrated right into the branches. -
Continue widening the base:
Continue adding rows, increasing the number of prints by one each time (row 5 has 5 prints, etc.). Keep alternating your green shades randomly so the tree looks organic rather than striped. -
Incorporate more metallic prints:
As you build the lower, wider layers, intersperse one or two more metallic copper or gold fingerprints. Spacing them out irregularly looks best. -
Complete the bottom row:
Finish the foliage with a final wide row of green prints. Ensure the bottom line is relatively straight but still has that natural, bumpy texture of leaves.
Step 3: Finishing Touches
-
Paint the trunk:
Using a brown marker or a rectangle of brown paint, draw a simple tree trunk centered at the bottom of your foliage. A slightly angled ‘brush stroke’ look matches the organic feel of the prints. -
Add the star:
Place a gold star sticker at the very top of the tree. Alternatively, use a gold paint pen to hand-draw a star for a more handcrafted finish. -
Dot the gold ornaments:
Dip the very tip of your pinky finger or the back end of a small paintbrush into gold ink or paint. Dab small gold dots randomly across the green sections to represent smaller ornaments. -
Let it dry completely:
Ink can smudge easily when fresh. I like to set the card aside for at least 15 minutes before writing any message inside to ensure everything is crisp.
Level Up
Add dimension by using a fine-tip black pen to doodle tiny strings or hooks connecting the gold dots to the ‘branches,’ making them look like hanging ornaments.
Now you have a beautiful, personal keepsake card ready for mailing


Have a question or want to share your own experience? I'd love to hear from you in the comments below!