Whenever I’m craving a quick, satisfying art project, I reach for Christmas mugs—they’re practical, personal, and honestly just fun to make. Here are my favorite christmas mug ideas that range from classic holiday icons to a few artsy twists you can totally pull off at your own pace.
Classic Red-and-Green Plaid
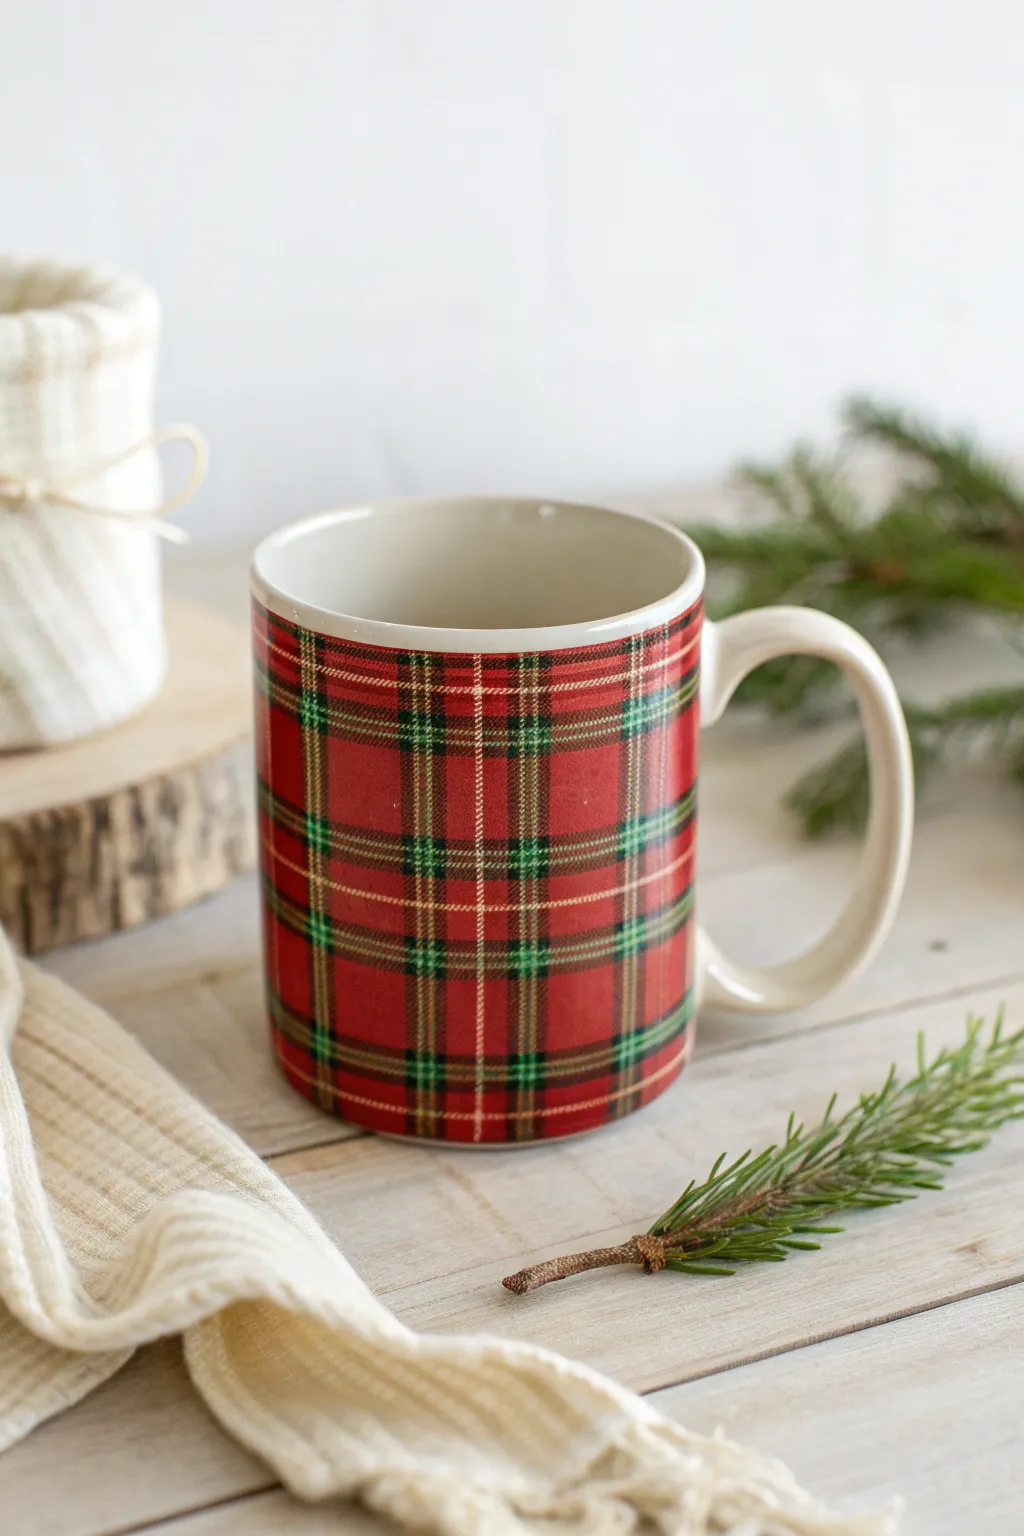
Bring the cozy warmth of a Scottish highland winter to your morning coffee with this DIY painted plaid mug. The classic red base interwoven with green and gold lines creates a sophisticated, traditional Christmas look that feels store-bought but is lovingly handmade.
Detailed Instructions
Materials
- White or cream ceramic mug (clean and dry)
- Red porcelain or ceramic paint (gloss finish)
- Forest green porcelain or ceramic paint
- Metallic gold porcelain paint or paint pen
- Flat shader brush (medium width)
- Fine liner brush
- Painter’s tape or masking tape (various widths)
- Rubbing alcohol
- Cotton pads
- Paper plate or palette
- Oven (for curing)
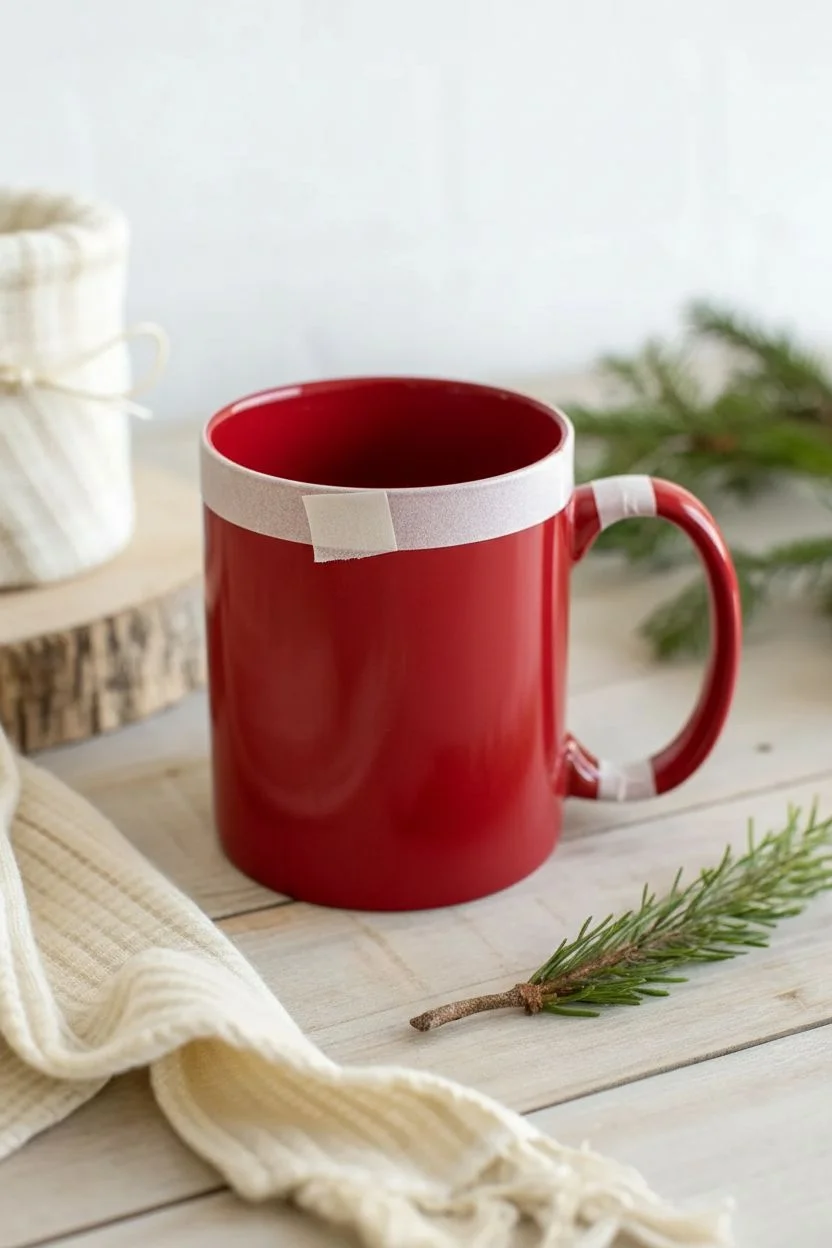
Step 1: Preparation & Base Coat
-
Clean surface:
Begin by thoroughly wiping down the entire outer surface of your mug with rubbing alcohol on a cotton pad. This removes any oils or fingerprints that might prevent the paint from adhering properly. -
Tape the rim:
Apply a strip of painter’s tape around the top rim (and bottom edge if desired) to keep the drinking area and base clean and white, just like in the photo. -
Tape the handle:
Carefully tape off the handle connection points so the handle remains the original mug color, creating a nice contrast. -
Apply red base:
Using your flat shader brush, paint a solid, even coat of red over the entire exposed area of the mug. Work in long, vertical strokes to minimize texture. -
Dry and repeat:
Let the first coat dry to the touch (usually 15-20 minutes). If the red looks streaky or translucent, apply a second coat for full opacity. -
Full dry:
Allow the red base coat to dry completely, preferably for at least an hour, to ensure your tape won’t lift it in the next steps.
Uneven Lines?
If you struggle with freehand straight lines, use thin strips of painter’s tape or washi tape to mask off your grid before painting the green stripes.
Step 2: Creating the Plaid Grid
-
Vertical green stripes:
Load your flat brush with forest green paint. Paint wide vertical stripes spaced evenly around the mug. Aim for about an inch between each stripe depending on your mug’s size. -
Horizontal green stripes:
Paint matching horizontal green stripes around the circumference of the mug. Where the vertical and horizontal green lines cross, the color will naturally be darker, creating that authentic plaid depth. -
Dry green layer:
Let these green stripes dry fully. I find using a hairdryer on a cool setting helps speed this up without bubbling the paint.
Step 3: Detailing & Finishing
-
Isolate thin lines:
Switch to your fine liner brush. You are now going to add the thinner, darker accents that define the pattern. -
Add detail stripes:
Paint very thin green lines in the center of the red squares formed by your previous grid. You can also add thin red lines inside the wide green stripes if you want extra complexity. -
Gold accents:
Using a gold paint pen or fine brush with metallic gold paint, draw thin lines bordering the wide green stripes. This metallic touch adds the holiday sparkle. -
Cross-hatching:
For a textile look, add tiny, tick-mark strokes of white or lighter red in the background red areas to mimic the weave of fabric. -
Remove tape:
While the paint is still slightly tacky set but not fully hardened, carefully peel away the tape at the rim and handle. Pull the tape away from the paint line at a 45-degree angle to get a crisp edge. -
Clean up edges:
If any paint bled under the tape, use a cotton swab dipped in rubbing alcohol or a craft knife to gently scrape it away for a perfect line. -
Cure in oven:
Place the mug in a cool oven. Set the temperature to the manufacturer’s instructions for your specific paint (usually around 300-350°F). Once it reaches temperature, bake for 30 minutes, then turn the oven off and let the mug cool down inside completely.
Make it a Set
Use the same technique on a saucer or small plate, but inverse the colors—green base with red stripes—for a stunning mis-matched holiday breakfast set.
Enjoy sipping your hot cocoa from a mug that captures the spirit of the season


Simple Christmas Tree Silhouettes

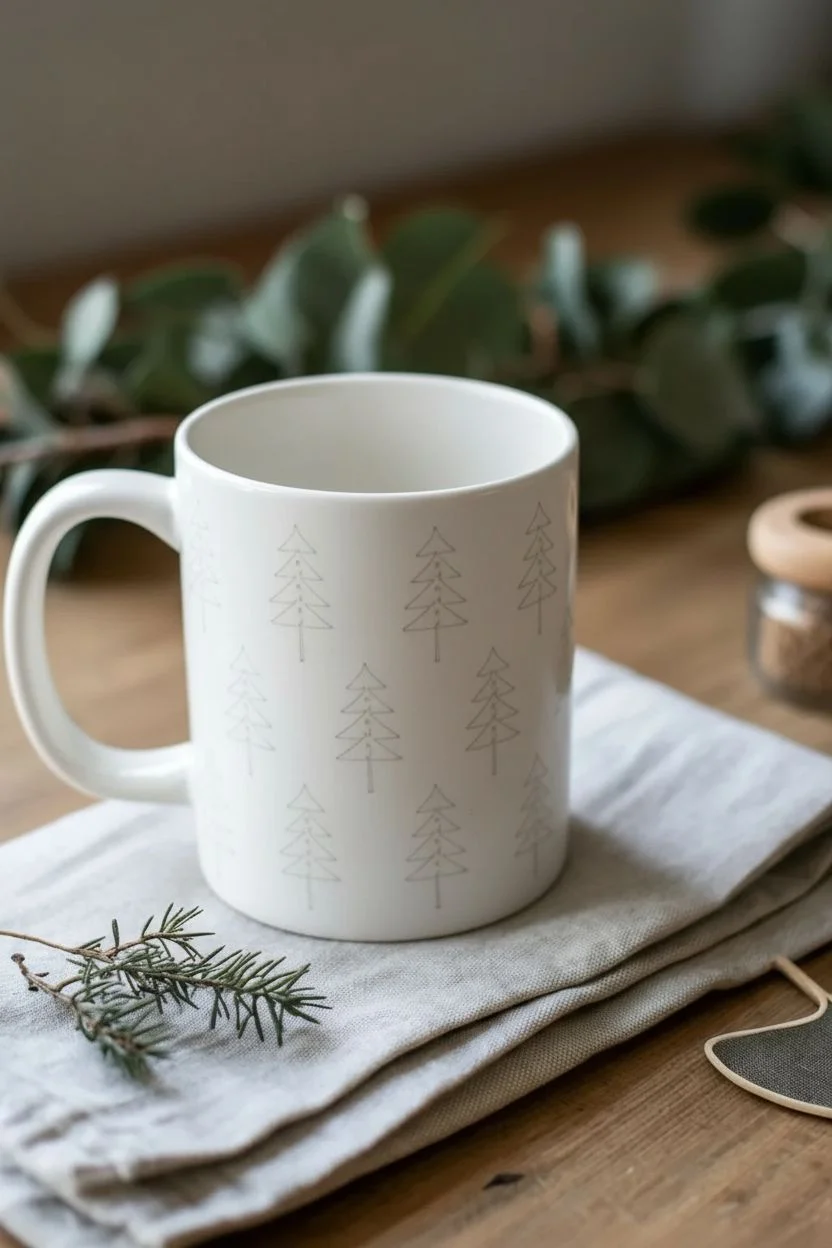
Embrace the quiet beauty of a winter forest with this understated ceramic painting project. Using simple geometric shapes and a steady hand, create a staggered repeat pattern of stylized evergreens that feels modern yet festive.
Step-by-Step Guide
Materials
- White or cream ceramic mug (clean and dry)
- Deep forest green porcelain or enamel paint
- Fine-point detail brush (size 0 or 00)
- Rubbing alcohol and cotton pads
- Small palette or ceramic tile
- Pencil (optional)
- Oven (for curing)
Step 1: Preparation and Planning
-
Clean the surface:
Before you begin painting, it is crucial to remove any oils or fingerprints from the mug. Wipe the entire outer surface thoroughly with a cotton pad soaked in rubbing alcohol and let it air dry completely. -
Map out the grid:
To ensure your trees are evenly spaced, use a pencil to lightly mark small dots where the base of each tree trunk will go. Create a staggered ‘brick’ pattern: one row with trees spaced about 1.5 inches apart, and the next row shifting so the trees sit in the windows of the row above. -
Prepare the paint:
Squeeze a small amount of deep forest green porcelain paint onto your palette. If the paint feels too thick, check the manufacturer’s instructions for thinning, though usually, using it straight from the bottle works best for crisp lines.
Pro Tip: Stencil Hack
Cut a small triangle out of painter’s tape to use as a quick guide for the outer shape of every tree, ensuring identical sizes.
Step 2: Painting the Tree Structure
-
Start the first trunk:
Dip your fine-point brush into the green paint. Starting at one of your bottom pencil marks, paint a simple, thin vertical line about half an inch long to create the trunk. -
Outline the triangle:
From the top of your trunk line, visualize a tall, narrow triangle floating just above it. Paint the outline of this triangle shape. The base of the triangle should be wider than the trunk but not too broad; keep the silhouette slender. -
Fill the branches:
Instead of coloring the triangle in solid, paint a zigzag line starting from the top point and moving back and forth horizontally down to the base. This creates the illusion of stylized branches. -
Add texture dots:
While the paint is still wet, gently dot the tip of your brush into the white spaces between your zigzags. These tiny stippled dots add texture and mimic the look of pine needles or snow. -
Complete the first row:
Continue around the mug, painting trees at each interval marker you made earlier. Try to keep the height and width of each tree consistent, though slight hand-painted variations add charm.
Troubleshooting: Blobby Paint
If the brush creates blobs, wipe it frequently on a paper towel. Detail brushes hold more paint than they look like they do!
Step 3: Creating the Pattern
-
Start the second row:
Move up to your next staggered row. These trees should be positioned so their trunks align vertically with the empty space between the two trees below them. -
Repeat the motif:
Recreate the same tree design: vertical trunk, triangular outline, zigzag fill, and stippling dots. I find it helpful to rotate the mug frequently so my hand stays in a comfortable painting position. -
Handle the curves:
When you reach the handle area, you may need to paint partial trees or adjust spacing slightly. If a tree would land awkwardly halfway on the handle, simply skip that spot to keep the look clean. -
Work your way up:
Continue painting rows until you reach about half an inch from the rim. Leaving a small gap at the top makes the mug more comfortable to drink from. -
Check for consistency:
Take a step back and look at your pattern. If any trunks look too faint, carefully go over them again with a very light touch to darken the line.
Step 4: Curing and Finishing
-
Clean up errors:
If you made any stray marks or smeared a tree, use a damp cotton swab or a toothpick to scrape away the mistake while the paint is wet. -
Remove guide marks:
Once the paint is dry to the touch (usually after an hour), gently erase any visible pencil marks with a clean, soft eraser. -
Let it dry completely:
Allow the mug to sit undisturbed for at least 24 hours. This ensures the paint settles properly before the heat curing process. -
Bake to set:
Place the mug in a cold oven. Turn the heat to 350°F (or the temperature specified by your paint brand). Once the oven reaches temperature, bake for 30 minutes. -
Cool down slowly:
Turn the oven off and leave the mug inside to cool down completely with the door closed. Removing it too quickly can cause the ceramic to crack due to thermal shock.
Now you have a cozy, custom piece of drinkware in your cabinet ready for hot chocolate season


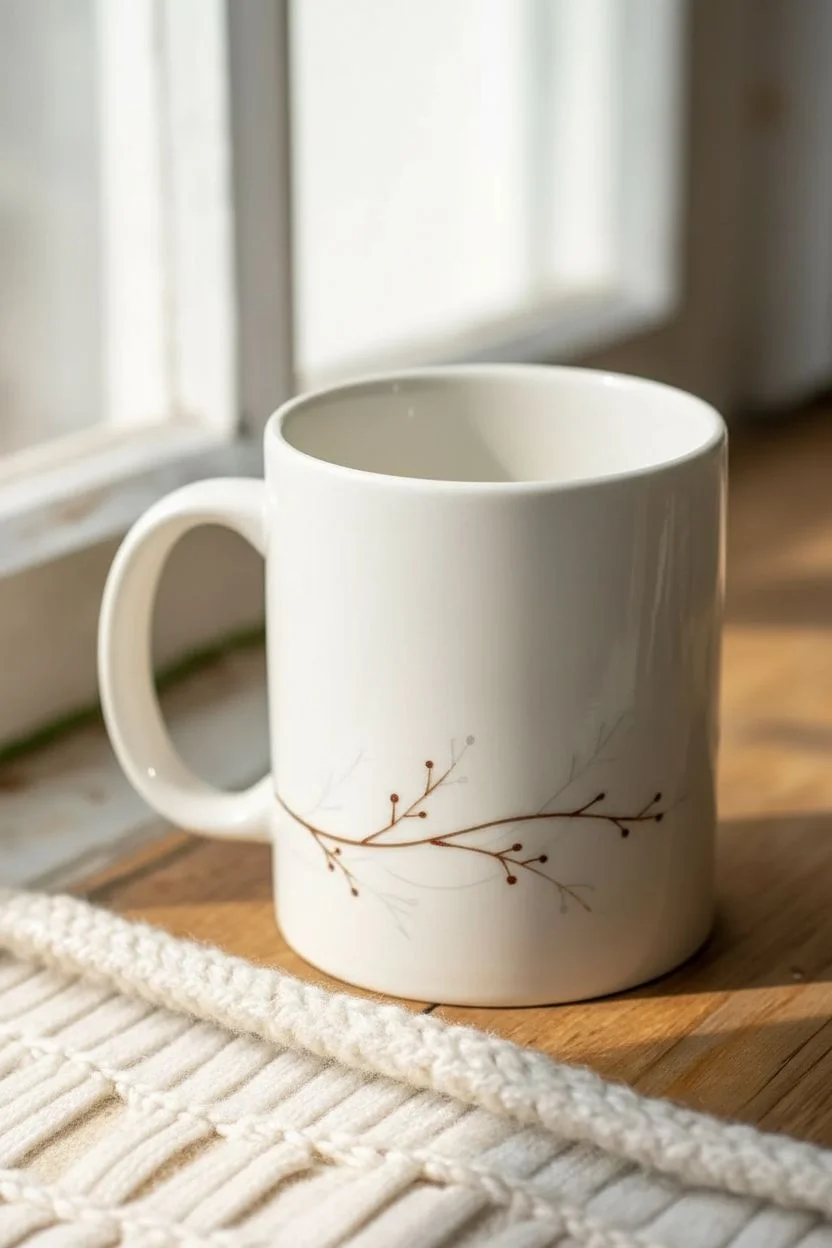
Delicate Snowflake Wraparound
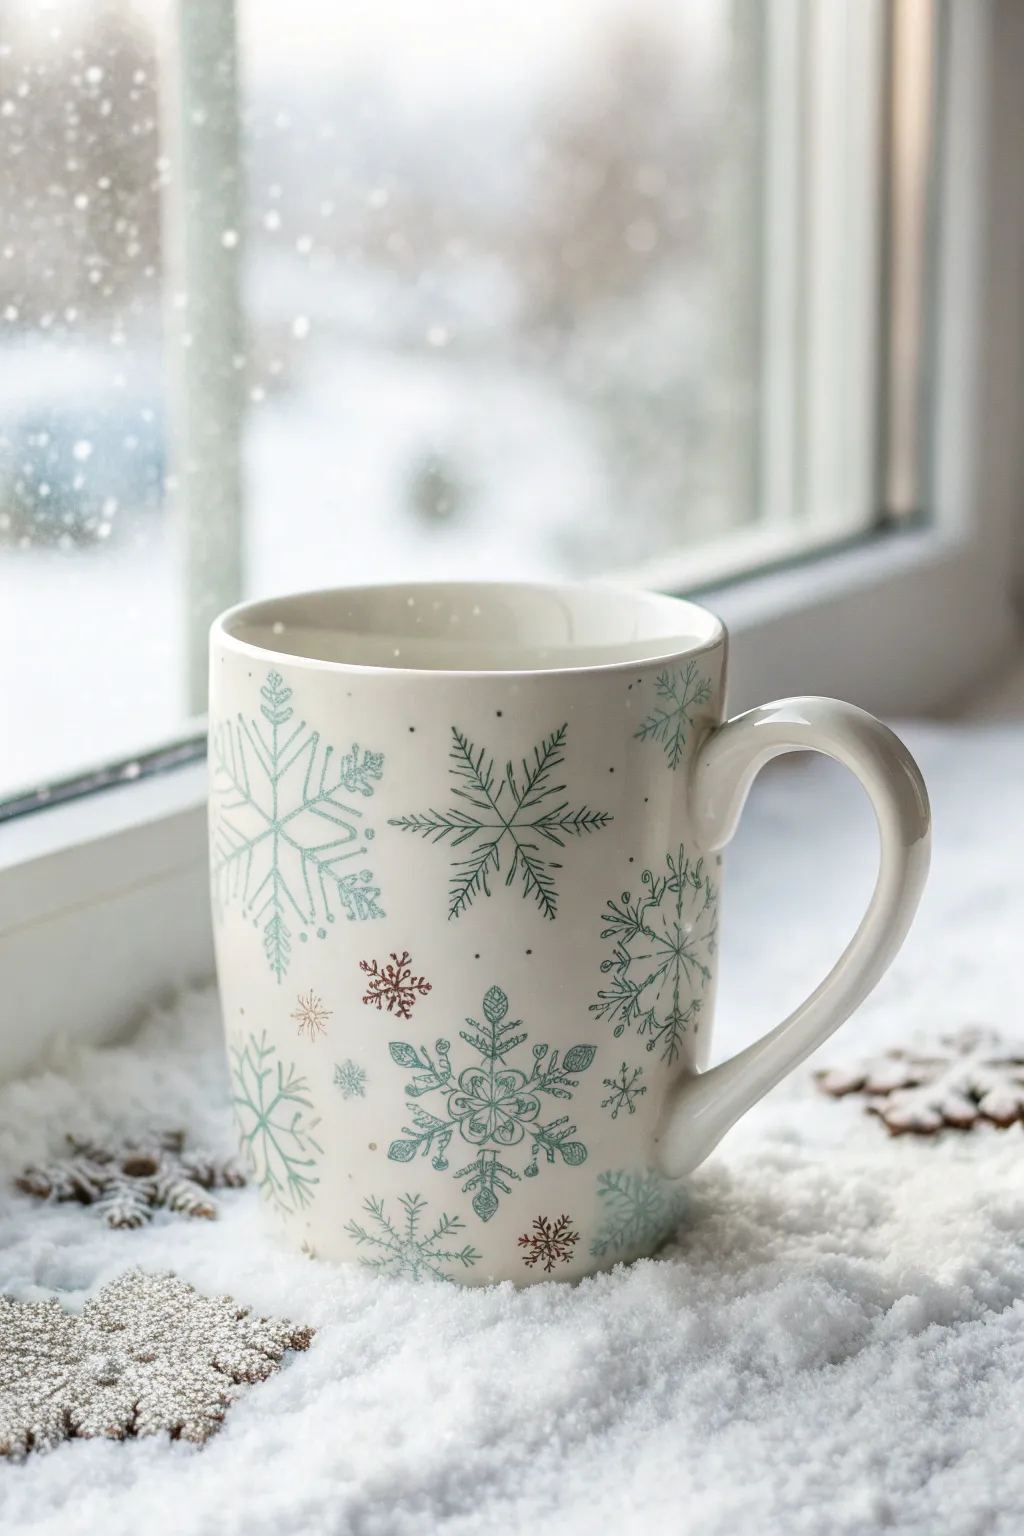
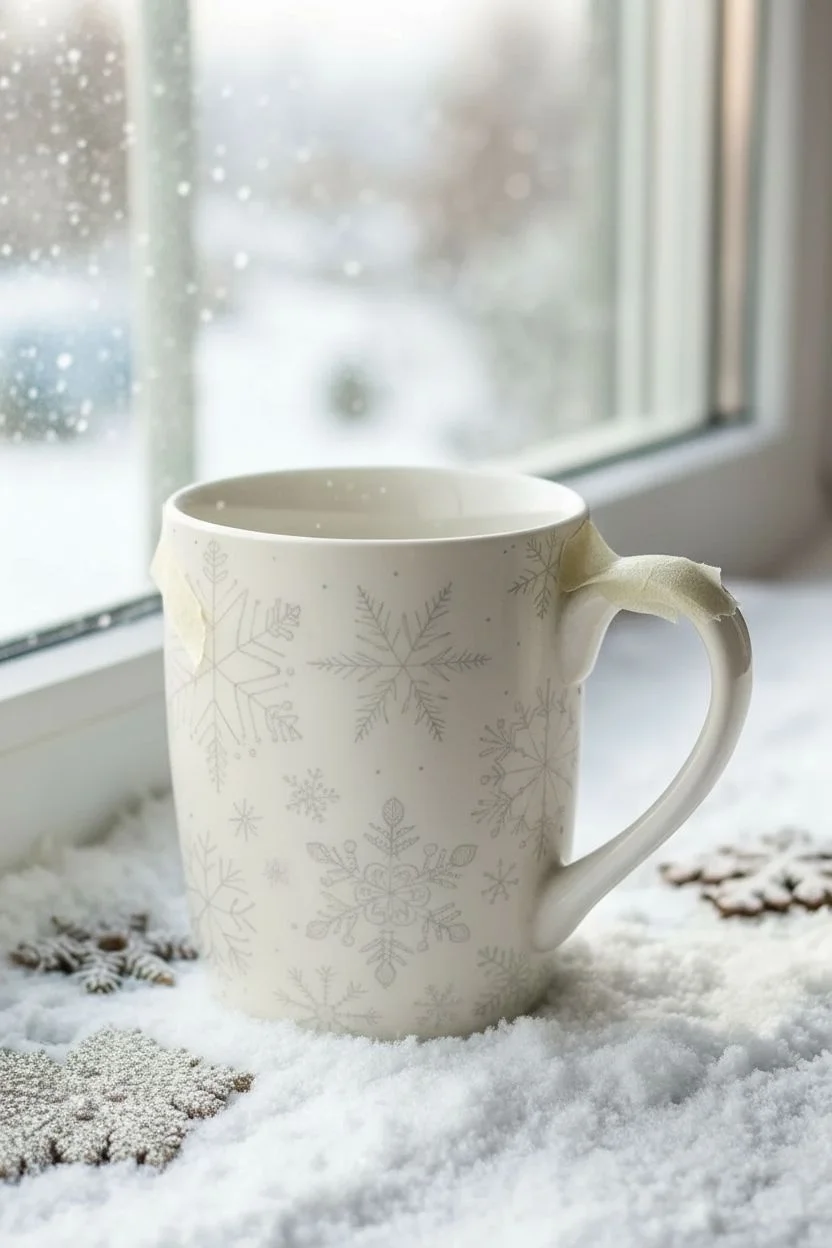
Capture the stillness of a snowy morning with this delicate porcelain painting project featuring intricate, fine-line snowflakes. The design combines soft teal, icy blue, and deep forest green tones for a sophisticated and airy wraparound pattern.
How-To Guide
Materials
- Plain white ceramic mug (smooth surface)
- Pebeo Porcelaine 150 paints (or similar bake-on ceramic paint)
- Colors: Turquoise, Deep Green, Sepia/Burgundy, Shimmering Silver (optional)
- Fine liner brush (size 00 or 000)
- Rubbing alcohol and cotton pads
- Pencil and masking tape
- Tracing paper
- Q-tips (for cleanup)
- Oven (for curing)
Step 1: Preparation & Design
-
Clean the Surface:
Before thinking about paint, wipe the entire exterior of the mug with rubbing alcohol. This removes unseen oils and fingerprints that prevent paint from adhering properly. -
Draft the Snowflakes:
On a piece of tracing paper, sketch out 4-5 different snowflake designs. Vary their sizes and styles—some with six distinct points, others with crystallized, branching arms. -
Transfer the Guide:
Cut out your paper snowflakes. Lightly tape them around the mug to plan your spacing. Using a soft pencil, heavily shade the back of the tracing paper, then tape it back onto the mug and trace the design to leave a faint graphite guide. -
Plan the Color Palette:
Decide which snowflakes will be which color. Looking at the reference, aim for a mix where large teal flakes are balanced by smaller green ones, with tiny sepia stars filling the gaps.
Step 2: Painting the Details
-
Load the Fine Brush:
Dip your 000 liner brush into the turquoise paint. You want the paint fluid but not dripping; if it’s too thick, the lines will be chunky. -
Paint the Primary Structure:
Starting with the largest snowflake, paint the six main intersecting lines first. Creating this central cross gives you a symmetrical framework to build upon. -
Add Decorative Prongs:
Working outward from the center, add the ‘V’ shapes and small hash marks along the main arms of the snowflake. Keep your hand light to maintain thin, delicate lines. -
Switch to Green:
Rinse your brush thoroughly. I find that switching to the deep green for the medium-sized flakes creates beautiful depth. Paint these with sharper, more needle-like points than the teal ones. -
Layering Centers:
For the largest flakes, you can add a tiny circular detail or a hexagon in the very center using a contrasting color like silver or a darker blue outline. -
Add the Sepia Accents:
Use the sepia or burgundy paint to create the smallest, simplest star-shaped flakes. These act as filler confetti between the larger designs. -
Create Depth with Dots:
Dip the very tip of your brush handle (or a toothpick) into paint and add tiny dots around the perimeter of the snowflakes to mimic falling snow dust.
Steady Hand Trick
Rest your pinky finger against the mug surface as an anchor while painting. This stabilizes your hand for drawing those ultra-thin, straight snowflake arms.
Step 3: Finishing Touches
-
Clean Up Edges:
If any lines look wobbly or too thick, dip a Q-tip in rubbing alcohol and carefully wipe away the mistake while the paint is wet. -
Dry Time:
Allow the mug to dry completely for at least 24 hours. While it might look dry sooner, the inner layers of paint need this time to settle before baking. -
Bake to Set:
Place the mug in a cold oven. Set the temperature to 300°F (150°C) and bake for 35 minutes. Let it cool completely inside the oven to prevent cracking.
Paint Bead Issues
If paint beads up or separates on the ceramic, the surface is too oily. Wipe that specific spot with alcohol again and let it dry before reapplying paint.
Now you have a frosty, custom piece perfect for sipping hot cocoa by the window


Holly and Berry Border
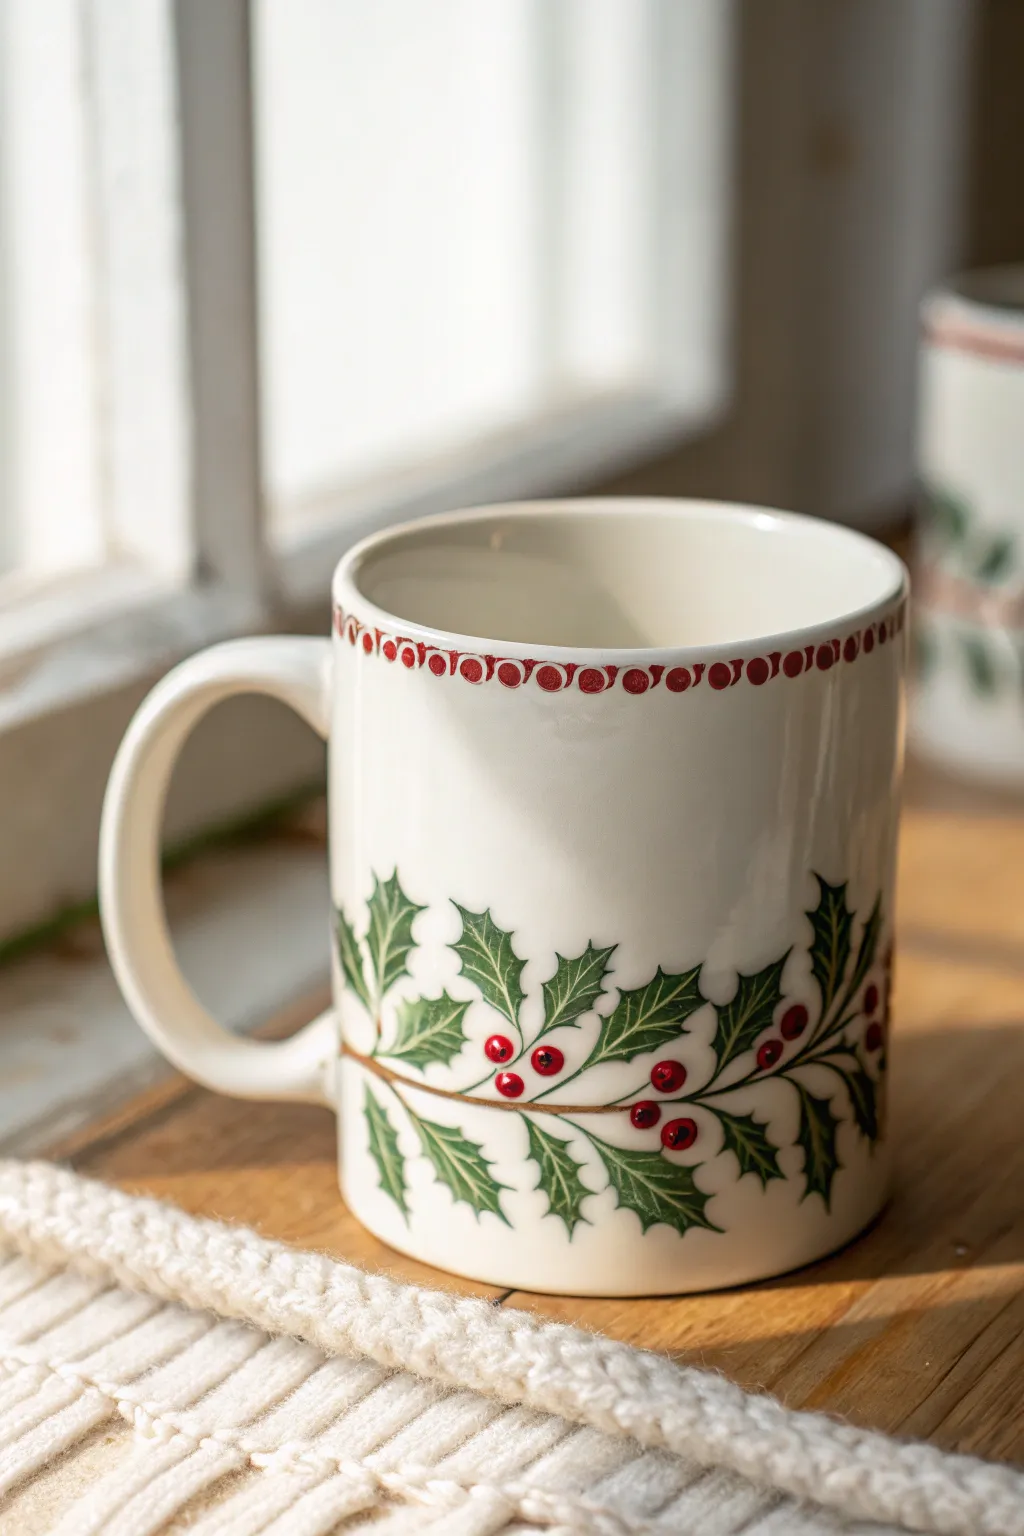
Transform a plain ceramic mug into a festive favorite with this elegant holly and berry design. The combination of a delicate rim border and a sweeping botanical garland creates a timeless piece perfect for cozy winter mornings.
How-To Guide
Materials
- Plain white ceramic mug
- Ceramic or porcelain paints (emerald green, dark forest green, bright red, brown)
- Fine detail paintbrush (size 0 or 00)
- Small round paintbrush (size 2)
- Rubbing alcohol and cotton pads
- Oven (for curing)
- Q-tips (for corrections)
- Small palette or ceramic tile
- Pencil (optional)
Step 1: Setting the Decoration
-
Clean the surface:
Before you begin, wipe down the entire outer surface of the mug with rubbing alcohol. This removes oils and fingerprints that could prevent the paint from adhering properly. -
Sketch the vine:
Using a pencil, lightly sketch a sweeping, curved line around the lower third of the mug. This will serve as the main branch for your garland. Don’t worry about perfection; pencil marks will burn off in the oven. -
Paint the main branch:
Mix a small amount of brown paint with a tiny drop of water to improve flow. Using your fine detail brush, paint a thin, steady line following your pencil sketch. Add tiny offshoot twigs where you plan to place distinct leaf clusters.
Fixing Smudges
Make a mistake? Don’t panic. Wet a Q-tip with a little rubbing alcohol to erase wet paint cleanly without ruining the surrounding area.
Step 2: Painting the Foliage
-
Outline the holly leaves:
Switch to emerald green. Along your brown branch, paint the outline of the spiky holly leaves. I find it easiest to paint two curved lines that meet at points, creating that classic prickly shape. -
Fill in the base color:
Fill in the leaf outlines with the same emerald green. Apply the paint somewhat thinly to avoid textural lumps; you can always add a second coat later for opacity. -
Add dimension:
While the green is still slightly wet, dip the very tip of your brush into the dark forest green. painting a thin line down the center of each leaf to create a vein. -
Feather the shadows:
Gently gently feather that dark line outward slightly to create depth, making the leaves look less flat and more three-dimensional. -
Dry break:
Let the green layer dry for about 15 to 20 minutes before moving on to the berries to prevent any muddy color mixing.
Add Some Sparkle
Mix a tiny amount of gold ceramic paint into your green for the leaf veins to give the design a subtle, festive shimmer under holiday lights.
Step 3: Adding the Berries and Border
-
Place the main berries:
Using the back end of your paintbrush handle or a large dotting tool, dip into the bright red paint. Stamp clusters of three dots near the leaf intersections on the main branch. -
Refine the berry shape:
If the dots aren’t perfectly round, use your smallest brush to gently smooth the edges. Add a tiny white speck on each berry for a highlight if you want extra realism. -
Start the rim border:
For the top border, you want a consistent pattern. Load your small round brush with red paint. Carefully dab small circles about a quarter-inch below the rim. -
Connect the border dots:
Spacing is key here. Try to keep the dots about 2mm apart. If you have a steady hand, you can connect them with a faint, thin line, or simply leave them as a stippled row for a lighter look. -
Clean up edges:
Use a damp Q-tip to wipe away any stray marks or clean up the bottom edge of the rim pattern if it became uneven.
Step 4: Finishing Up
-
Full drying time:
Allow the mug to dry completely for at least 24 hours. The paint needs to fully set before the heat curing process. -
Bake to cure:
Place the mug in a cold oven. Turn the heat to 350°F (175°C). Once the oven reaches temperature, set a timer for 30 minutes. -
Cool down:
Turn the oven off and leave the mug inside until it is completely cool. Removing it while hot can cause thermal shock and crack your beautiful work.
Now you have a charming custom mug ready to be filled with hot cocoa and marshmallows
BRUSH GUIDE
The Right Brush for Every Stroke
From clean lines to bold texture — master brush choice, stroke control, and essential techniques.
Explore the Full Guide
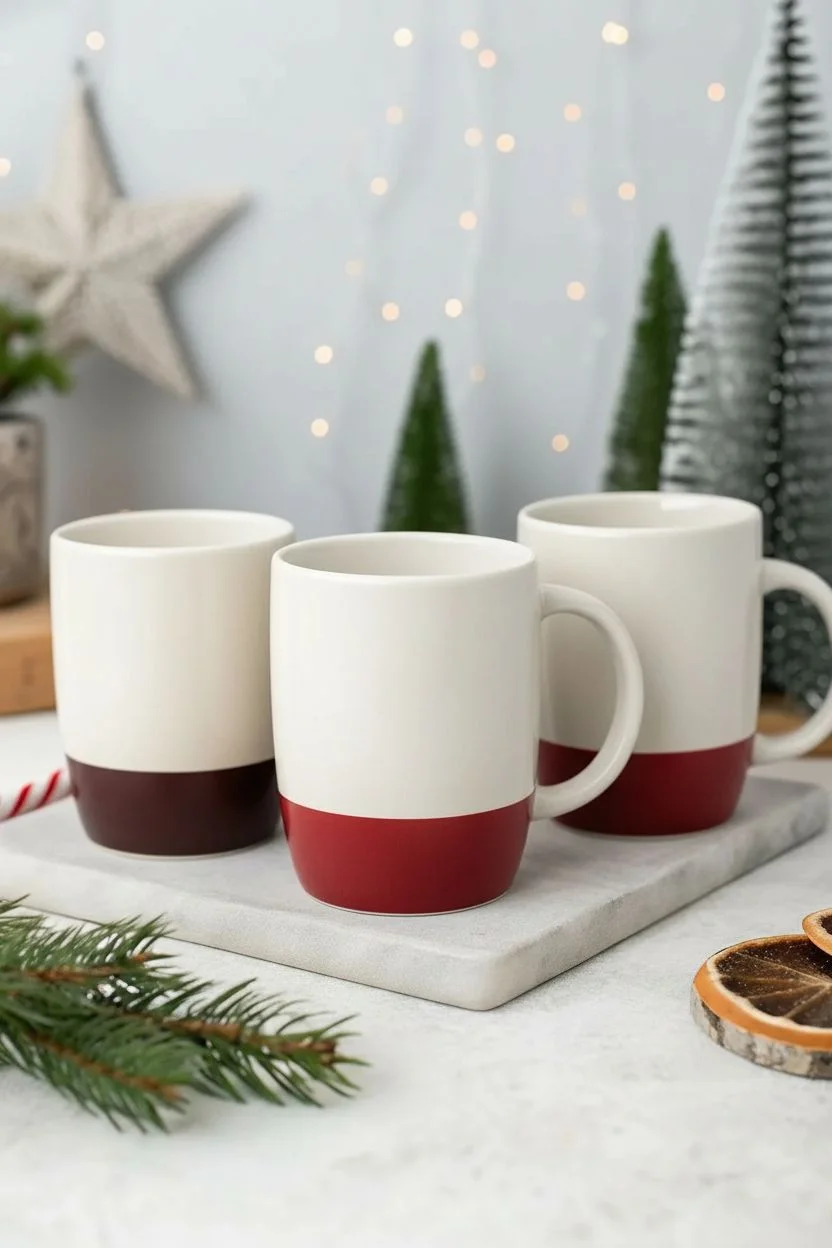
Candy Cane Stripes
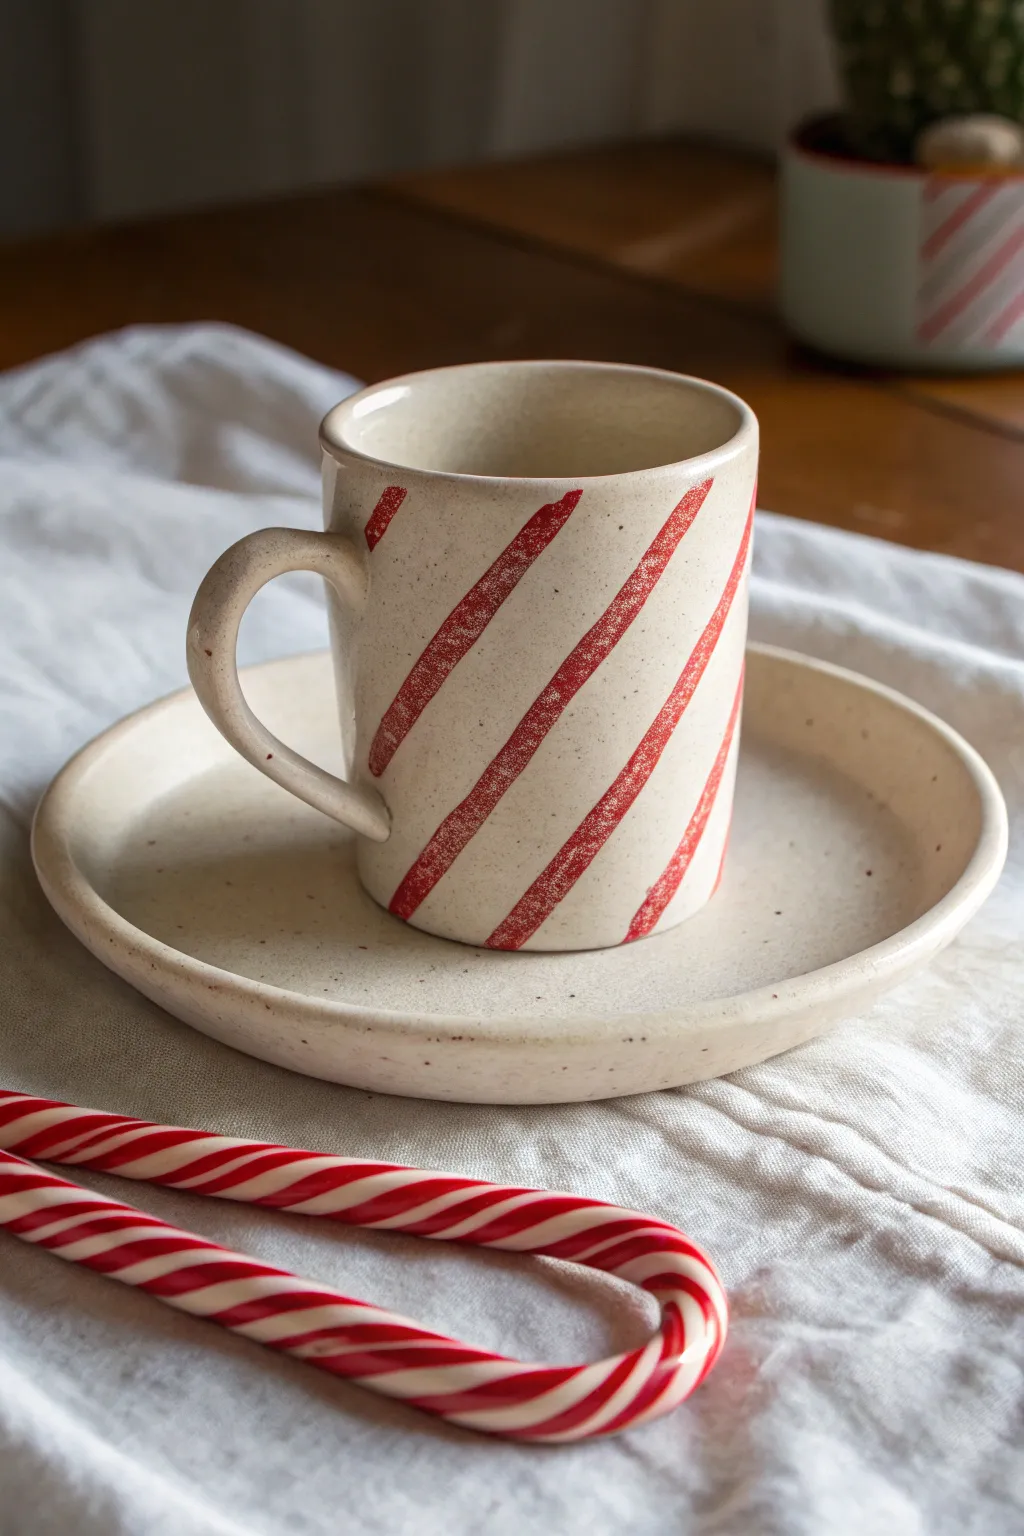
Transform a plain ceramic set into a festive staple with this simple yet striking candy cane stripe design. Using a dry-brush technique, you’ll achieve that charming, slightly vintage texture that makes these pieces feel beautifully handmade.
Step-by-Step
Materials
- Plain beige or cream ceramic mug and saucer
- Pebeo Porcelaine 150 paint (Scarlet or similar deep red)
- Flat shader paintbrush (size 6 or 8)
- Rubbing alcohol
- Cotton pads
- Masking tape or painter’s tape (1/4 inch width)
- Domestic oven for baking
Step 1: Preparation and Masking
-
Clean surface:
Begin by thoroughly wiping down the outside of your mug and the top of the saucer with rubbing alcohol on a cotton pad. This removes any invisible oils or fingerprints that might prevent the paint from adhering properly. -
Plan the angles:
Before applying tape, visualize the angle of your candy cane stripes. For this look, we want a steep, consistent diagonal slant. -
Apply first tape strip:
Place your first strip of masking tape diagonally across the mug. Press it down firmly, especially at the edges, to create a sharp seal. -
Create spacing guide:
To keep your stripes even without measuring every time, place a temporary piece of tape right next to the first one as a spacer. -
Continue taping:
Place the next permanent tape strip on the other side of your spacer. Remove the spacer tape and reuse it to measure the next gap. Repeat this process around the entire mug. -
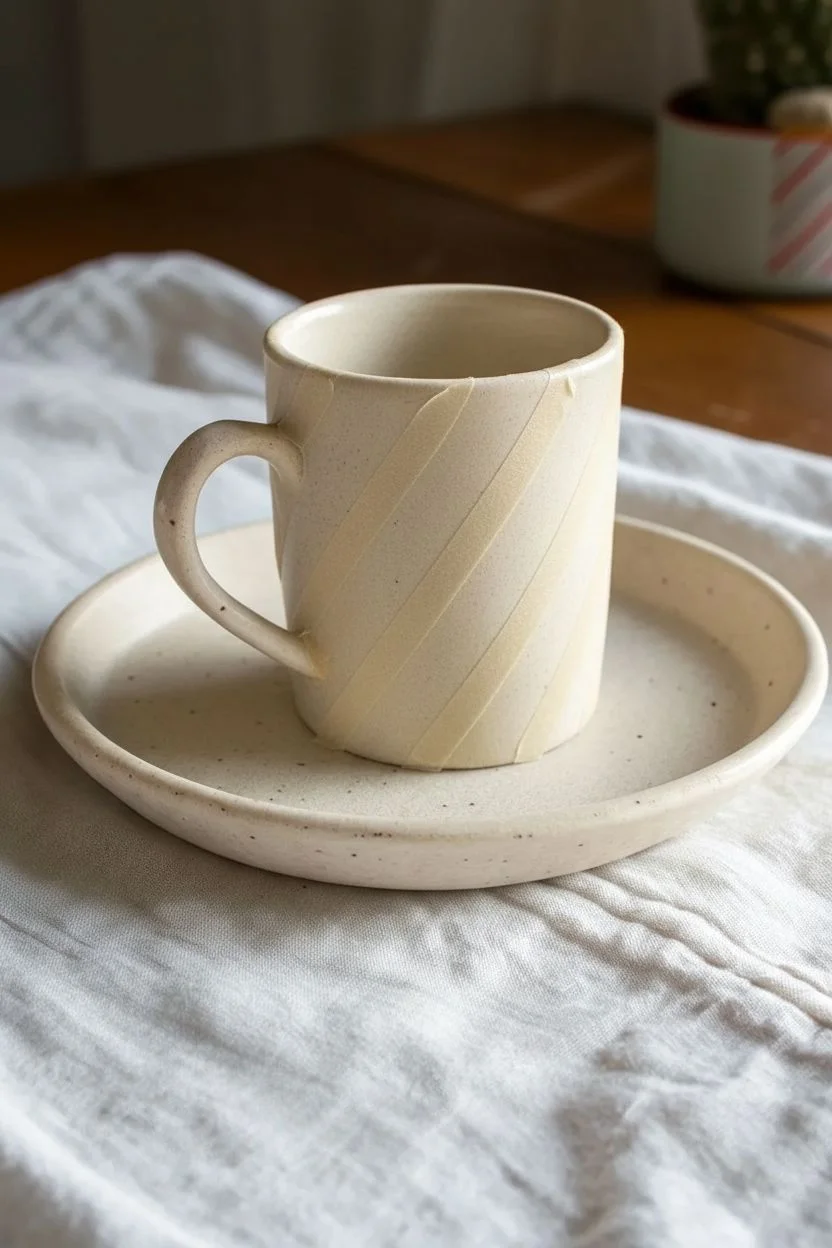
Tape the saucer:
The saucer is distinct in this project—it is left unpainted to provide contrast. Ensure it is clean but do not tape it unless you wish to extend the pattern there. -
Seal edges:
Run your fingernail or a credit card edge firmly along all the tape edges on the mug. This is crucial for preventing paint bleed.
Step 2: Painting the Stripes
-
Load the brush:
Squeeze a small amount of red porcelain paint onto a palette or glossy paper plate. Dip your dry flat shader brush into the paint, but don’t overload it. -
Offload excess paint:
I find it helpful to dab the brush on a paper towel a few times before touching the mug. You want a ‘dry brush’ consistency to achieve that slightly textured, vintage look seen in the photo. -
Paint the stripes:
Apply the paint between your tape strips. Use confident, single strokes following the direction of the tape. Don’t worry about perfect opacity; the slight texture adds character. -
Mind the handle:
When you reach the handle area, carefully paint up to the handle join, but stop just short of painting the handle itself to keep the design clean. -
Check for gaps:
Do a quick visual scan. If any areas look too pale, dab a tiny bit more paint on, but maintain that textured finish rather than a thick, glossy coat.
Vintage Texture Trick
Use a stiff-bristled brush instead of a soft one. The stiffer bristles will leave visible streak marks in the paint, mimicking the look of old-fashioned hard candy.
Step 3: Finishing Touches
-
Remove tape immediately:
Don’t wait for the paint to dry completely. While it is still slightly tacky, carefully peel back the tape at a sharp angle. This helps prevent the paint from chipping at the edges. -
Clean up edges:
If any paint bled under the tape, use a cotton swab dipped in rubbing alcohol or a toothpick to gently scrape away the excess while the paint is fresh. -
Dry time:
Allow the mug to air dry for at least 24 hours. The paint needs to fully set before the baking process. -
Bake to cure:
Place the mug into a cold oven. Set the temperature to 300°F (150°C). Once the oven reaches temperature, bake for 35 minutes. -
Cool down:
Turn off the oven and leave the mug inside to cool down gradually with the oven door closed. This prevents thermal shock cracks.
Paint Peeling Off?
If the paint peels away with the tape, you likely waited too long. The tape must come off while the paint is still wet so it cuts a clean line rather than pulling up the dry film.
Enjoy your customized holiday mug with a warm cup of cocoa or coffee
Reindeer Face and Antlers
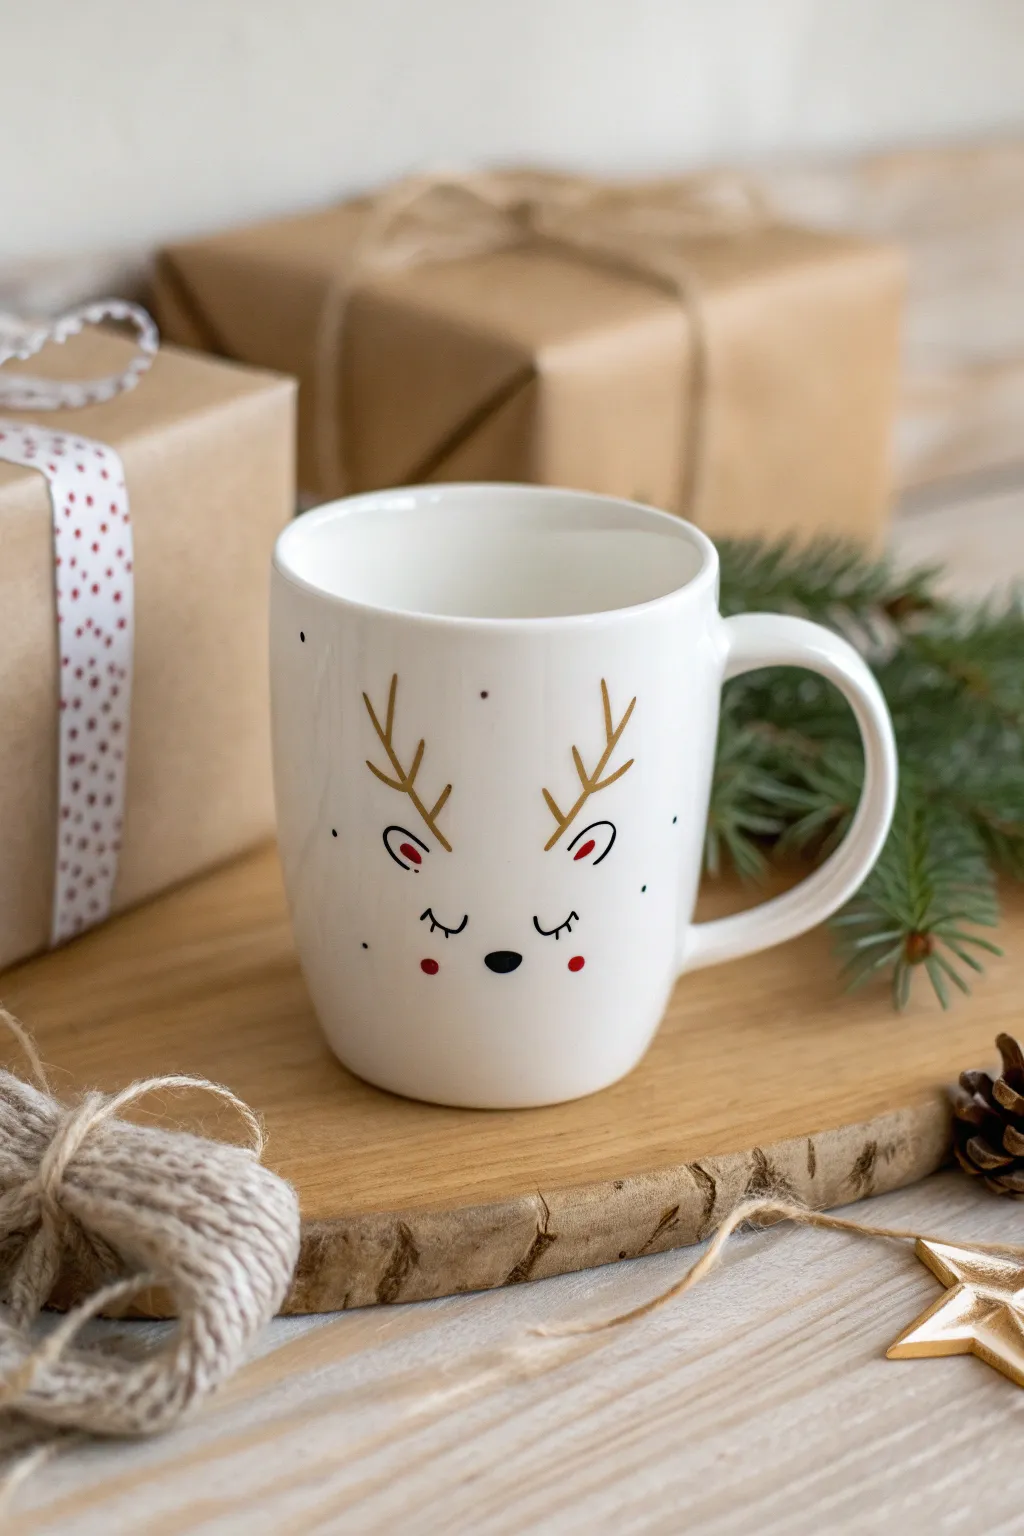
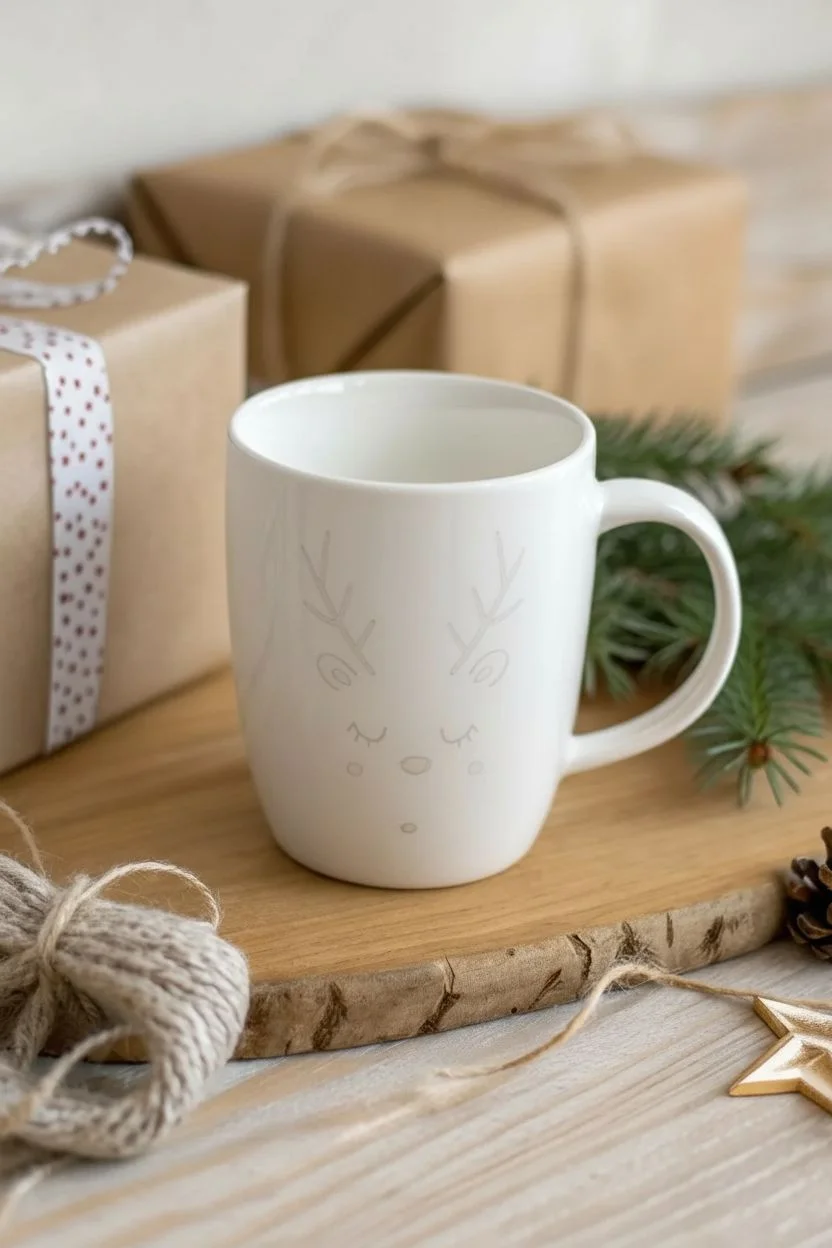
Capture the magic of the holidays with this darling reindeer mug featuring delicate gold antlers and a sweet, sleeping face. The minimalist design makes it perfect for a modern festive aesthetic, relying on fine lines and subtle pops of color to create a whimsical character.
Step-by-Step Guide
Materials
- White porcelain or ceramic mug (clean and dry)
- Gold oil-based sharpie or porcelain paint pen (fine point)
- Black porcelain paint pen (extra fine point)
- Red porcelain paint pen (fine point)
- Rubbing alcohol
- Cotton pads
- Pencil
- Oven (for curing)
- Damp cotton swab (for mistakes)
Step 1: Preparation & Sketching
-
Clean surface:
Before you begin any artwork, wipe the entire surface of the mug down with rubbing alcohol and a cotton pad. This removes invisible oils from your fingers that could prevent the paint from adhering properly. -
Find the center:
Ideally, locate the center of the mug opposite the handle to ensure your design is balanced. You can lightly mark the center point near the bottom rim with a pencil if you need a guide. -
Light sketch:
Using a pencil, very lightly sketch out the placement of the eyes, nose, and antlers. The graphite might not show up perfectly, but it gives you enough of a ghost line to verify symmetry before committing with paint.
Oops, smudged it?
Keep a Q-tip dipped in rubbing alcohol nearby while painting. You can erase wet paint errors instantly without ruining the whole design.
Step 2: Drawing the Base Features
-
Draw the nose:
Start with the black porcelain pen. Draw a small, oval nose right in the center of the lower third of the mug, filling it in completely for a solid black look. -
create the eyes:
Slightly above and to the sides of the nose, draw two U-shaped curves for the closed eyelids. Keep the lines thin and steady. -
Add eyelashes:
From the center of each eyelid curve, draw three tiny lashes pointing downward. I find it helps to flick the pen slightly at the end of the stroke for a tapered look. -
Outline the ears:
Move up and out from the eyes. Draw two small, leaf-shaped loops for the ears using the black pen. They shouldn’t be too large; think of them as cute little accents. -
Dry briefly:
Let the black ink sit for about 10–15 minutes. This prevents smudging while you work on the rest of the design.
Step 3: Adding Gold & Color
-
Start the antlers:
Switch to your gold paint pen. Draw a main vertical stem rising from the top of the head area, angling slightly outward. -
Add antler branches:
Add two or three smaller branches coming off the main gold stem. Make them slightly irregular so they look organic rather than perfectly geometric. -
Detail the ears:
Using the red paint pen, fill in a small oval shape inside the black ear outlines you drew earlier. Leave a tiny white gap between the red fill and the black line for a professional illustrative style. -
Blush cheeks:
Add two small red dots just outside and below the lash lines to create rosy cheeks. Keep these quite small and subtle. -
Add freckles:
Switch back to the black pen and add two or three tiny dots on the cheeks near the outside of the face for texture. -
Background magic:
Use the black pen to add very sparse, tiny dots around the antlers and face to mimic failing snow or magical dust.
Make it Sparkle
Before baking, adhere tiny flat-backed crystals to the antler tips using heat-safe glass glue for a glamorous 3D effect.
Step 4: Refining & Curing
-
Cleanup:
Check your lines. If any pencil marks are still visible, wait until the paint is dry to the touch and gently erase them, or wipe them away with a damp Q-tip if the paint is fully set. -
Initial dry:
Allow the mug to dry completely for at least 24 hours. This step is crucial for durability. -
Bake to set:
Place the mug in a cold oven. Set the temperature to 350°F (175°C). Once the oven reaches temperature, bake for 30 minutes. -
Cool down:
Turn the oven off and leave the mug inside until it cools down completely. Removing it while hot can cause cracking.
Enjoy your customized reindeer mug with a warm cup of cocoa all season long

PENCIL GUIDE
Understanding Pencil Grades from H to B
From first sketch to finished drawing — learn pencil grades, line control, and shading techniques.
Explore the Full Guide
Snowman Expressions

Transform plain white ceramics into a jolly winter family with these adorable snowman character mugs. Featuring hand-painted carrot noses and cozy red bottoms, this simple project adds instant holiday cheer to your morning coffee routine.
How-To Guide
Materials
- plain white ceramic mugs
- enamel paint or porcelain paint pens (black, orange, dark red, brown)
- white enamel paint or marker
- rubbing alcohol
- cotton pads
- painter’s tape
- small flat paintbrush
- fine tip paintbrush or dotting tool
- oven (for curing)
Step 1: Preparation & Base Coat
-
Clean surface:
Before you begin, wipe down the entire exterior surface of your mugs with rubbing alcohol and a cotton pad. This removes oils and fingerprints that might prevent the paint from adhering properly. -
Define the scarf line:
Decide how high you want the ‘scarf’ or sweater base to go. Wrap a piece of painter’s tape horizontally around the lower third of the mug, ensuring it is level and sealed tightly, especially near the handle. -
Paint the base color:
Using a flat paintbrush and your dark red or brown porcelain paint, fill in the area below the tape line. Apply smooth horizontal strokes for even coverage. If the color looks streaky, let it dry for 20 minutes and add a second coat. -
Reveal clean lines:
Carefully peel away the painter’s tape while the paint is still slightly tacky but not wet. This helps prevent the paint from chipping at the edge, leaving a crisp horizon line.
Clean Lines Secret
Burnish the edge of your painter’s tape with a credit card or fingernail before painting the base. This seal prevents paint bleed.
Step 2: Snowman Face Details
-
Mark eye placement:
Visualize the center of the mug face. Using a fine-tip paintbrush or a black paint pen, create two solid black circles for eyes. Place them fairly wide apart to give that classic, friendly snowman look. -
Paint the carrot nose:
With orange paint, draw a sideways triangle centered just below the eyes. Make the base of the triangle slightly rounded and let the point extend to the right for a playful profile-like effect. -
Form the smile:
Dip a dotting tool or the back of a paintbrush into black paint. Create a curved smile using a series of 5-7 distinct dots, starting below the nose area. -
Add rosy cheeks (optional):
If desired, lightly dab a tiny amount of diluted red paint near the ends of the smile for subtle cheeks, though the original design keeps it clean and minimal. -
Create the upper border:
To frame the face, use a fine tip brush or red paint pen to add small dots along the very top rim of the mug. Space them evenly, about half an inch apart. -
Add floating dots:
For extra detail, add a few tiny black dots scattered near the larger red rim dots, adding a whimsical confetti feel.
Step 3: Scarf & Sweater Accents
-
Add white buttons:
Once the red base section is completely dry, use white paint to add details. On the center front of the red band, paint two or three vertical white dots to resemble buttons on a sweater. -
Paint a snowflake:
On one of the mugs, instead of buttons, try painting a simple white snowflake on the red band. Start with an ‘X’, add a vertical line through it, and add tiny ‘V’ shapes at the ends of each line. -
Detail the nose:
To give the carrot nose depth, I like to mix a tiny bit of red into the orange and paint a thin line along the bottom edge of the triangle for shadow. -
Review and refine:
Check all your dots and lines. If any edges are messy, use a damp cotton swab or a toothpick to gently scrape away excess paint before it fully cures.
Textured Snow Effect
Make the base ‘buttons’ fluffy by dabbing thick white paint with a sponge instead of a brush for a tactile, raised texture.
Step 4: Curing
-
Air dry:
Let the mugs sit undisturbed for at least 24 hours. This allows the paint to settle and bond initially with the ceramic surface. -
Oven bake:
Place the mugs in a cool oven. Turn the heat to 350°F (175°C) and bake for 30 minutes. Starting with a cool oven prevents the ceramic from cracking due to sudden temperature changes. -
Cool down:
Turn the oven off and leave the mugs inside until the oven is completely cool. This gradual cooling process ensures the durability of your design.
Fill your new mugs with hot cocoa and enjoy the warmth of your handmade winter friends
Gingerbread Line Art
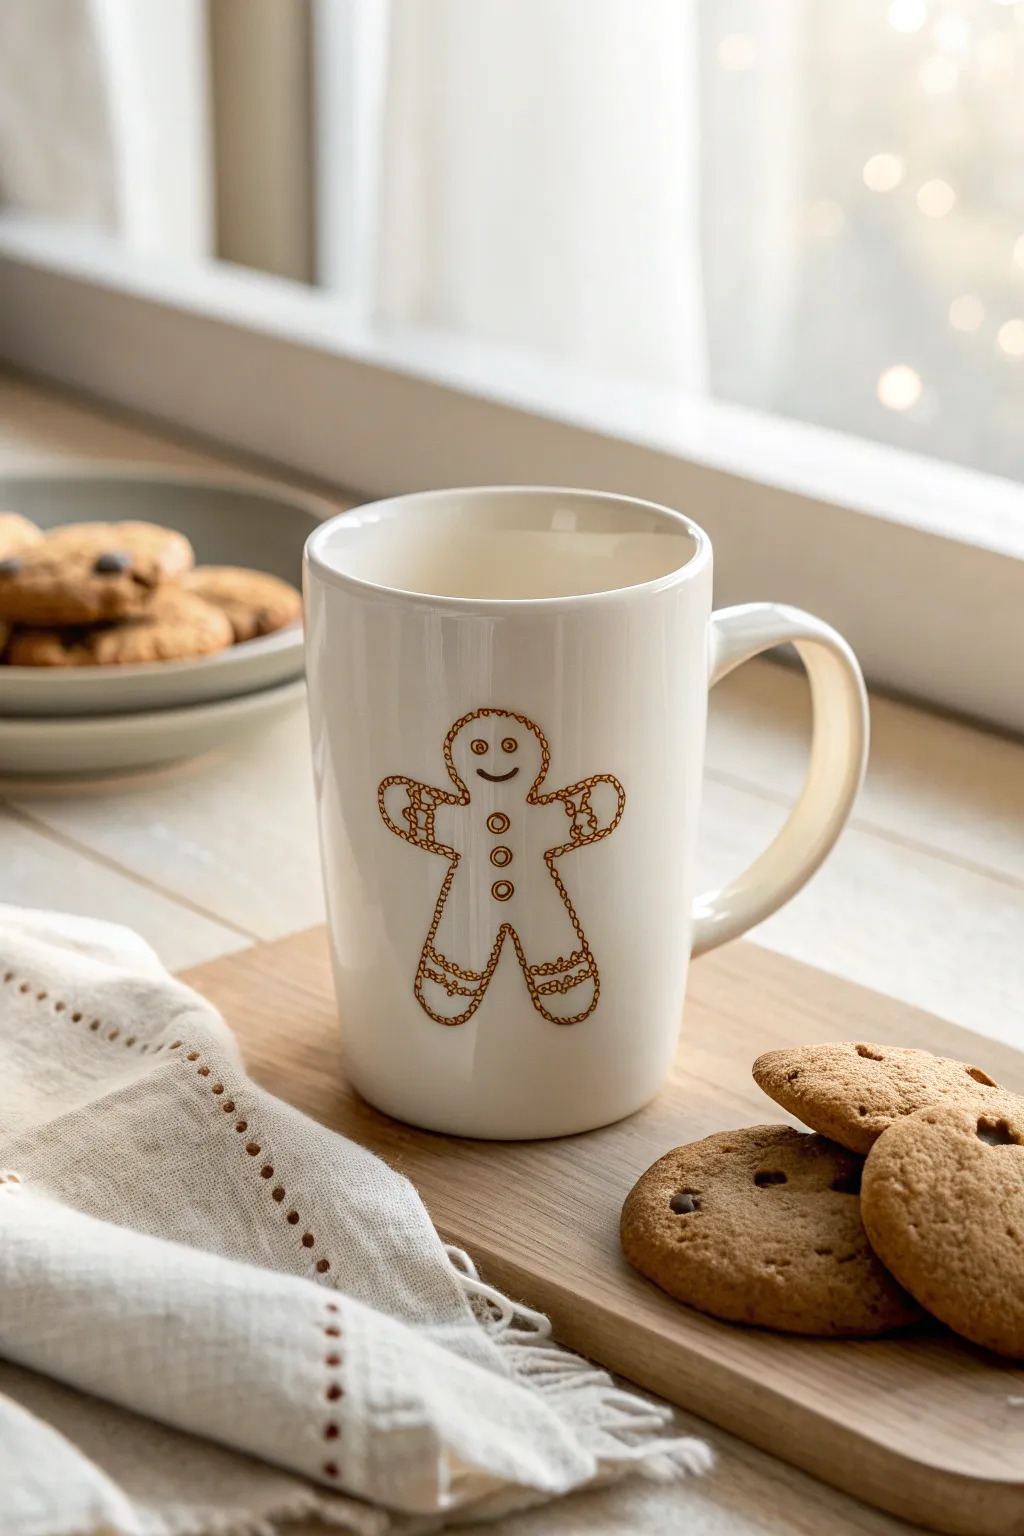
Transform a plain ceramic mug into a festive favorite with this delicate gingerbread man design. Using a special oil-based marker, you’ll create a charming line-art illustration that mimics the look of intricate piping on a holiday cookie.
Step-by-Step
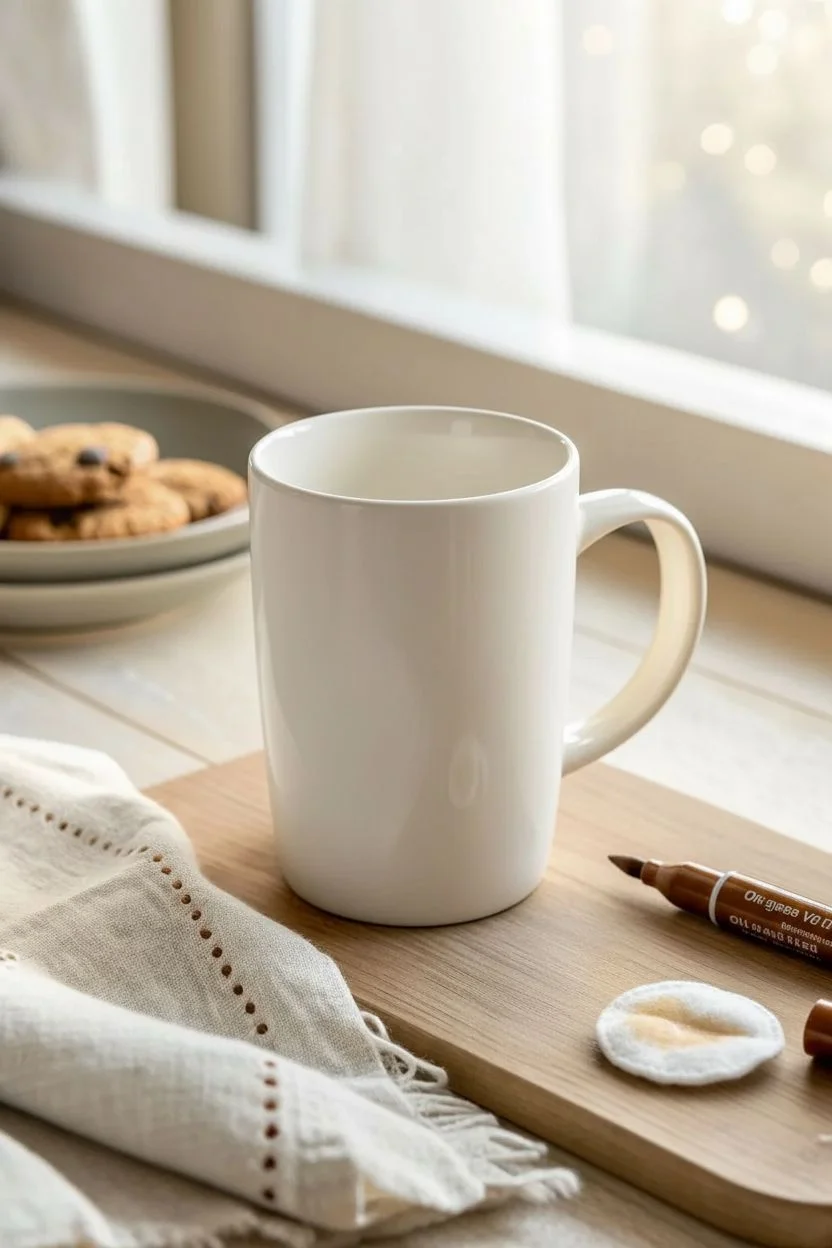
Materials
- White or cream ceramic mug (smooth glaze)
- Oil-based paint marker (Fine point, bronze or metallic light brown)
- Rubbing alcohol
- Cotton pads or paper towel
- Pencil (optional for sketching)
- Oven (for curing)
- Q-tips (for cleanup)
Step 1: Preparation & Planning
-
Clean surface:
Before you make a single mark, ensure the mug’s surface is free of oils and fingerprints. Wipe the entire exterior area where you plan to draw with rubbing alcohol and a cotton pad. -
Dry completely:
Let the alcohol evaporate fully. A completely dry surface ensures the paint adheres properly and doesn’t bead up. -
Prime the marker:
Shake your metallic brown or bronze paint marker vigorously. Press the nib down on a scrap piece of paper until the ink flows smoothly, but ensure it isn’t puddling.
Smudge Control
Work left to right (if right-handed) to avoid smearing wet ink. If you smudge, wipe immediately with alcohol before it sets.
Step 2: Drawing the Outline
-
Start the head:
Begin near the upper middle of the mug. Draw a simple circle for the gingerbread man’s head. Keep your hand steady but don’t worry about perfect symmetry; a little handmade wobble adds charm. -
Extend the arms:
From the neck area, draw two rounded stubs extending outward for the arms. They should be slightly curved, as if reaching out for a hug. -
Draw the body:
Continue the line down from the armpits to create the torso, curving slightly inward for the waist and then widening back out. -
Legs and finish:
Draw two rounded legs at the bottom, joining them in a small inverted ‘V’ shape at the crotch to complete the main outline. -
Clean up errors:
If a line went astray, dampen a Q-tip with a tiny bit of rubbing alcohol and gently wipe away the mistake while the paint is still wet.
Level Up: Texture
Use a white paint pen to highlight the ‘icing’ zigzags on the wrists and ankles, giving a two-tone 3D cookie effect.
Step 3: Adding the Details
-
Add the face:
Carefully dot two small eyes using just the tip of the marker. Below them, draw a simple upward-curving line for a happy smile. -
Draw buttons:
Down the center of the torso, draw three small circles for buttons. Inside each circle, add a tiny dot to make them look dimensional. -
Create the ‘icing’ details:
This is the signature step. On the wrists and ankles, draw wavy or zigzag lines that span the width of the limb. -
Detail the squiggle:
Go over your zigzag lines carefully. I find drawing tiny loops or a chain pattern here mimics real royal icing texture better than straight lines. -
Double the detail:
Add a second, parallel wavy line just below the first one on both the arms and legs to thicken the decorative cuffs. -
Inspect the work:
Look over the entire drawing. If any lines look too thin or faint, trace over them lightly a second time to build opacity.
Step 4: Curing the Design
-
Air dry first:
Allow the mug to sit undisturbed for at least 24 hours. This air-drying period allows the solvents to evaporate before heat is applied. -
Cold oven start:
Place your mug into a cold oven. Do not preheat the oven, as sudden temperature changes can crack the ceramic. -
Bake:
Turn the oven to 350°F (175°C). Once it reaches temperature, set a timer for 30 minutes. -
Cool down:
Turn the oven off after 30 minutes but leave the mug inside. Let it cool down completely with the oven ensuring the ceramic adjusts slowly.
Your new custom mug is ready to be handled with care and filled with warm holiday cocoa


Ornament Garland Around the Mug
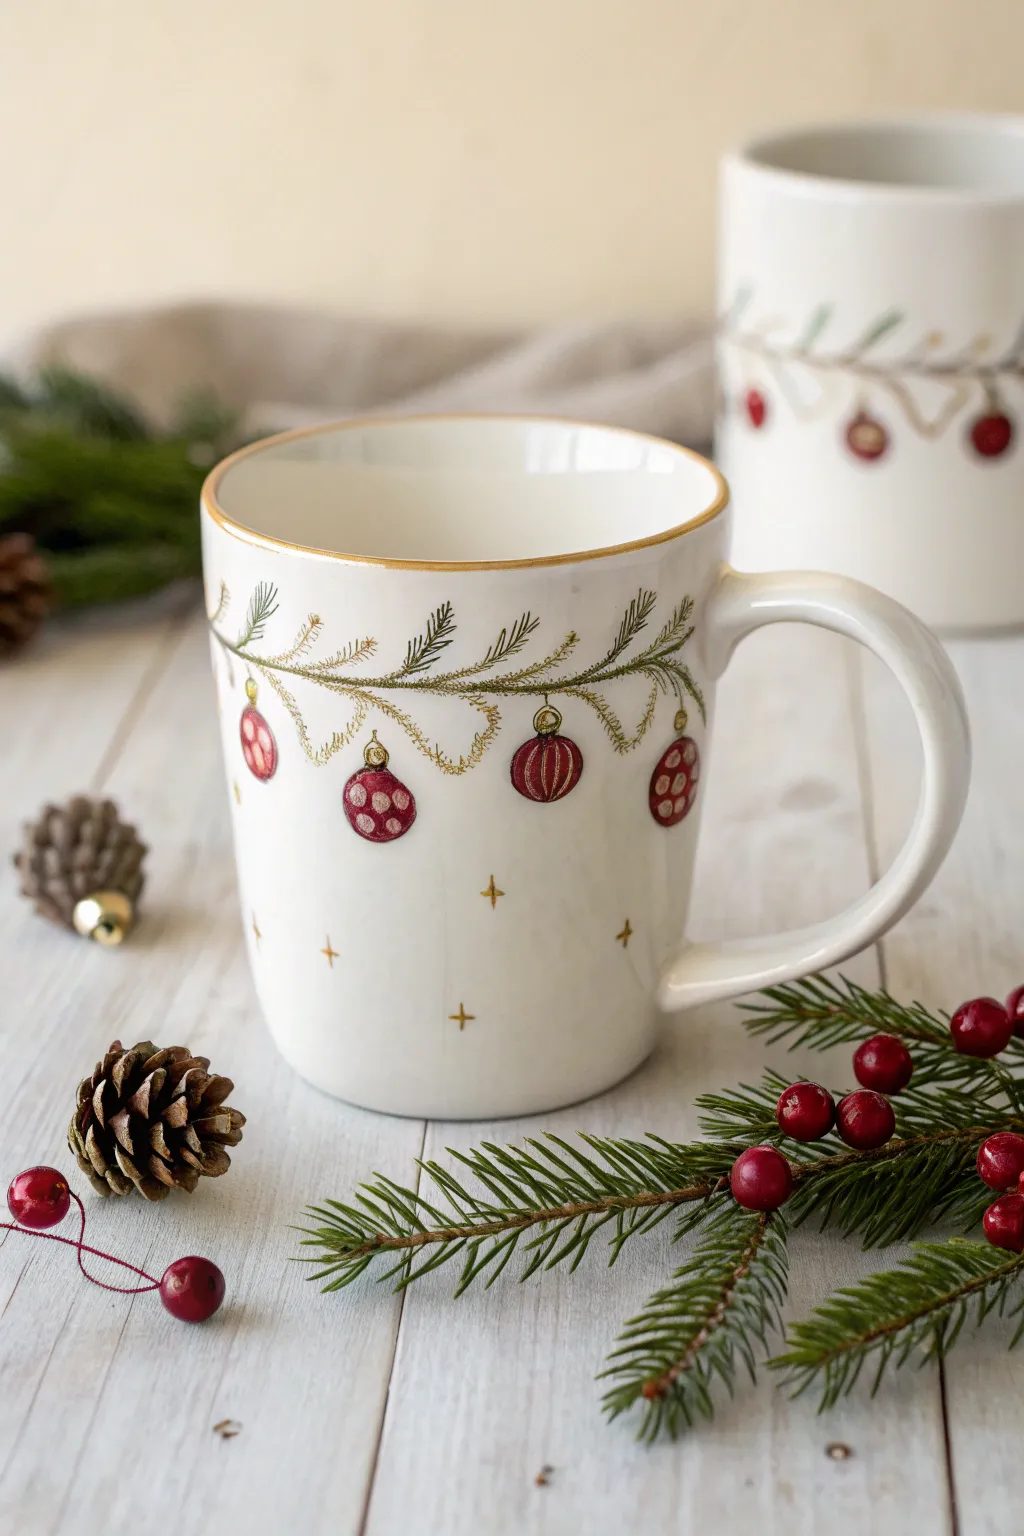
Transform a plain white mug into a festive holiday keepsake with this elegant hand-painted design. Featuring delicate pine branches and whimsical red ornaments, this project uses ceramic paints to create a cozy, high-end look without needing a kiln.
Step-by-Step Guide
Materials
- White porcelain or ceramic mug (clean and dry)
- Pebeo Porcelaine 150 paints (or similar bake-able ceramic paint) in: Pine Green, Cherry Red, Gold, White
- Fine liner brush (size 0 or 00)
- Small round brush (size 2)
- Rubbing alcohol and cotton pads
- Paper palette or foil
- Oven for curing
Step 1: Preparation and Planning
-
Clean the Surface:
Wipe the entire exterior of the mug with rubbing alcohol. This removes any invisible oils or fingerprints that could prevent the paint from adhering properly. -
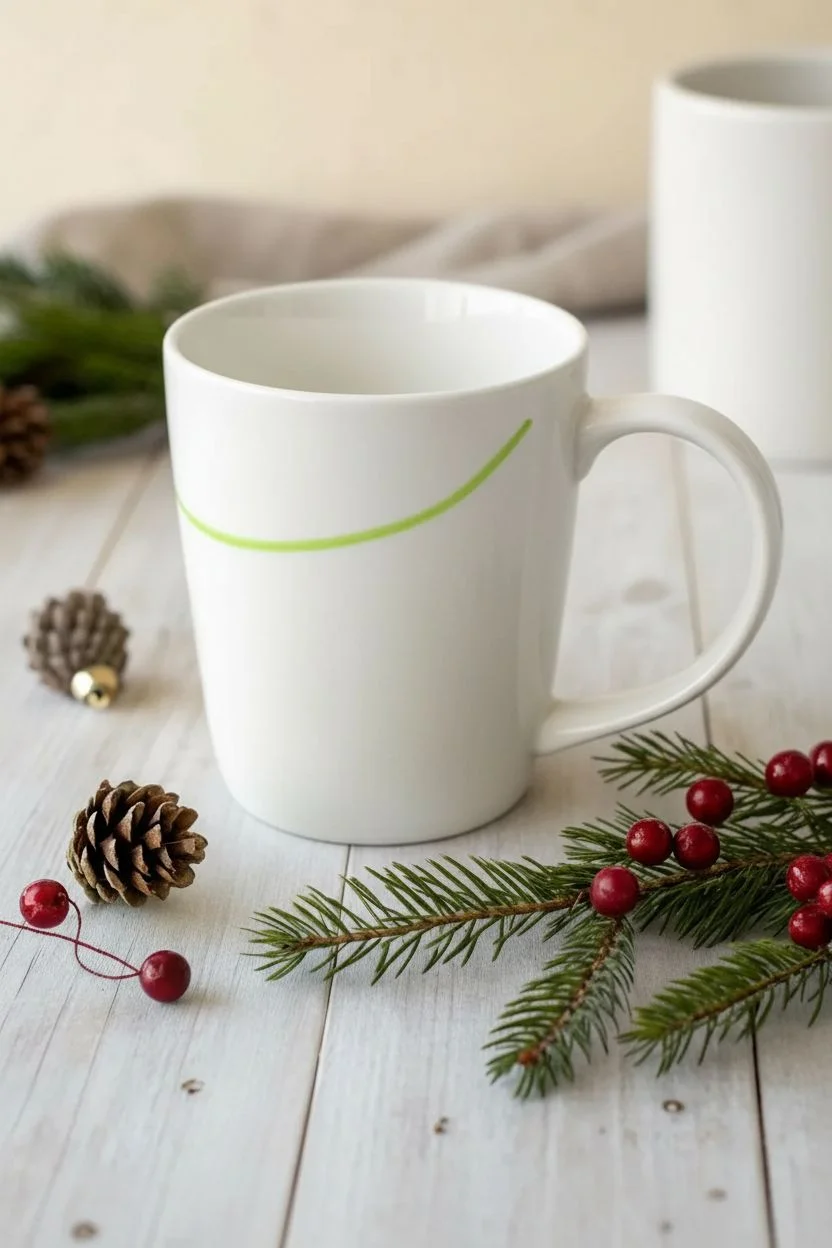
Outline the Garland:
Using your fine liner brush and a very small amount of diluted green paint (or a water-erasable fabric marker), sketch a gentle, waving line about an inch below the rim. This will be the spine of your garland.
Step 2: Painting the Greenery
-
Paint the Pine Needles:
Load your liner brush with Pine Green paint. Starting from your guide line, flick the brush outwards in short, quick strokes to create the pine needles. -
Direction matters:
Angle the needles slightly backward along the branch direction to mimic how real pine grows. Keep the strokes loose and varying in length for a natural appearance. -
Creating Density:
Go back over certain areas with a second layer of needles once the first is dry to the touch, making the foliage look fuller. -
Adding Gold Accents:
Once the green is dry, take a clean liner brush with Gold paint. Add thin, swishy lines interwoven with the greenery to suggest tinsel or a gold ribbon wrapping through the branches.
Fixing Smudges
Paint dried somewhere you didn’t want it? Use a craft knife or razor blade to gently scratch it off the smooth ceramic surface before baking.
Step 3: Adding the Ornaments
-
Paint the Hanger Strings:
Using the liner brush and Gold paint, draw short vertical lines dropping down from the main branch at irregular intervals where you want your ornaments to hang. -
Base Shape of Ornaments:
Switch to the small round brush and Cherry Red paint. Carefully paint circles or slight teardrop shapes at the end of each gold string. -
Solid Coloring:
Fill these shapes in solid red. I find that doing two thin coats rather than one thick globs works best to prevent dripping. -
Drying Time:
Allow the red base circles to dry completely for at least 30 minutes. If you paint details too soon, the colors will muddy. -
Detailing the Ornaments:
Using the liner brush with White or a lighter shade of red, add patterns to the ornaments. Try polka dots on one, vertical stripes on another, and a grid pattern on a third. -
Ornament Caps:
Add a tiny rectangle of Gold right where the ornament meets the string to represent the metal cap.
Add Dimension
Mix a tiny drop of white into your red paint to create a highlight color. Add a small curved stroke on the top left of each ornament for a 3D glass effect.
Step 4: Finishing Touches
-
Scattered Stars:
Dip the very tip of your liner brush into Gold paint. Dot small four-point stars or simple cross shapes in the empty white space below the ornaments. -
Rim and Handle:
Carefully paint a thin Gold line along the very rim of the mug. If you’re feeling steady, add a stripe down the center or sides of the handle as well. -
Clean Up Edges:
If you made any mistakes, use a damp cotton swab or a toothpick to gently scrape away the paint before it cures. -
Dry and Cure:
Let the mug air dry for 24 hours. Then, place it in a cool oven, set the temperature to 300°F (150°C), and bake for 35 minutes (or follow your specific paint’s instructions). Let it cool completely in the oven.
Your beautiful, custom-painted holiday mug is now ready for hot cocoa or gifting to a special friend
Hand-Drawn Photo Memory Style
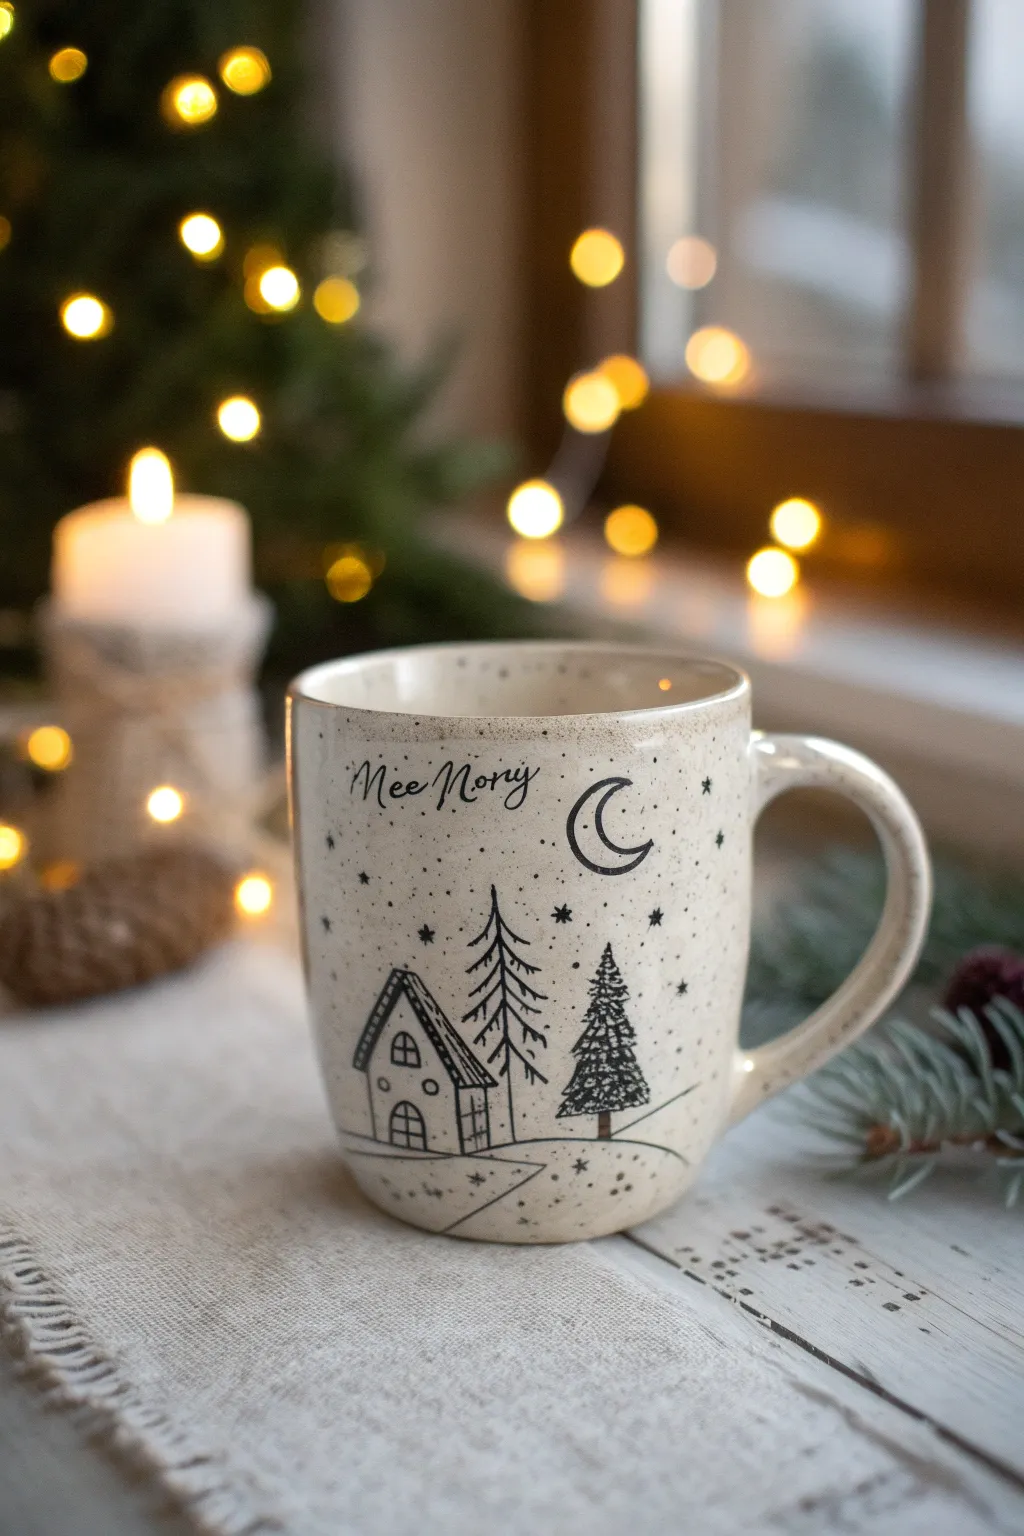
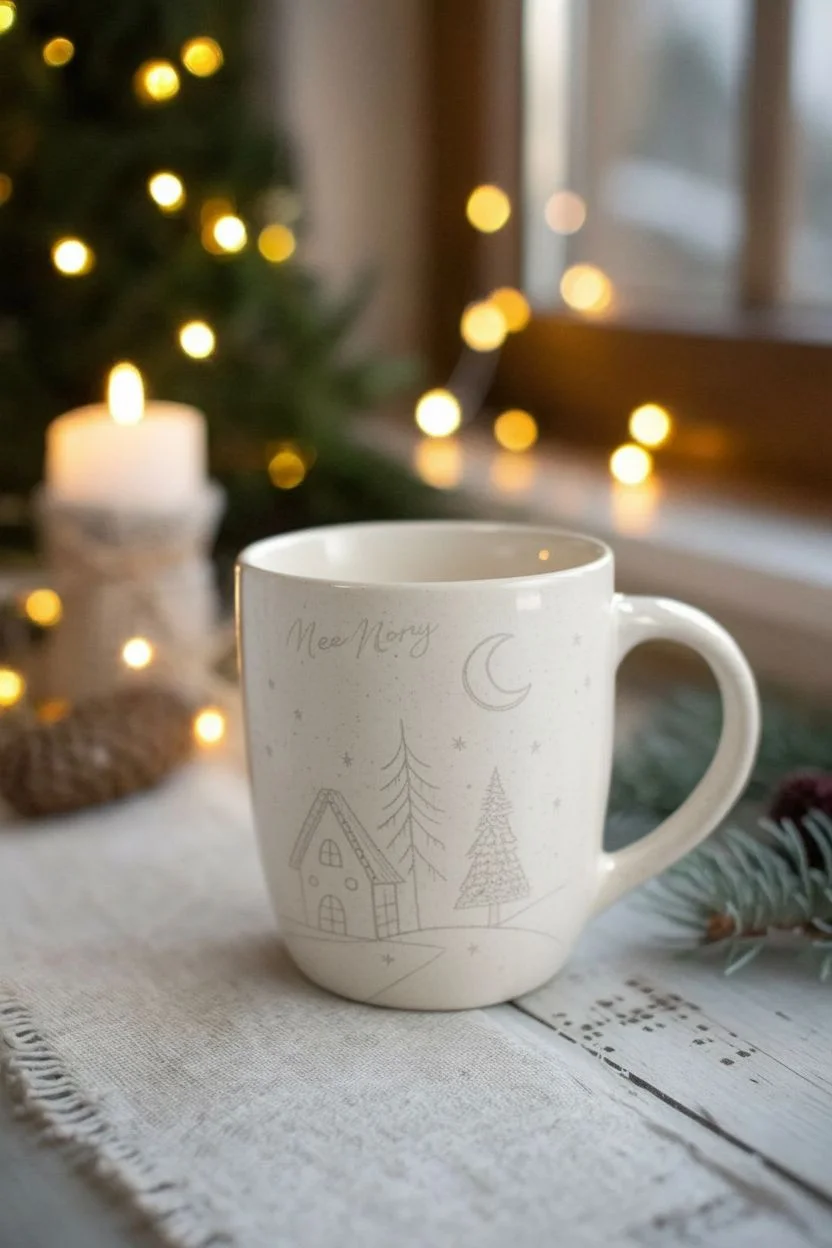
Capture the stillness of a winter’s night with this cozy, hand-drawn mug design featuring a charming cabin scene beneath a crescent moon. Using simple porcelain markers on a speckled ceramic base creates a rustic, storybook feel that makes every sip of cocoa feel magical.
Detailed Instructions
Materials
- Cream or beige ceramic mug (ideally with a speckled glaze finish)
- Black oil-based paint marker (fine tip)
- Black oil-based paint marker (extra-fine tip)
- Rubbing alcohol
- Cotton pads
- Pencil
- Soft eraser
- Oven (for curing)
- Paper towels
Step 1: Preparation & Sketching
-
Clean surface:
Begin by thoroughly cleaning the outside of your mug with warm soapy water to remove any stickers or residue. -
Degrease:
Wipe the creative area down with rubbing alcohol on a cotton pad. This step is crucial because oils from your fingers can prevent the marker ink from adhering properly. -
Pencil outline:
Lightly sketch your design directly onto the mug using a soft pencil. Start with a horizontal, slightly curved line near the bottom third to establish the snowy ground. -
Draft the cabin:
Draw a simple A-frame house shape on the left side of your ground line. Include a roof overhang and a small chimney. -
Position trees:
Sketch vertical lines to mark the placement of two pine trees—one taller tree behind the cabin and a smaller, fuller one to the right. -
Add celestial details:
Place a crescent moon in the upper right quadrant and mark small dots where you want your stars to twinkle.
Step 2: Inking the Design
-
Trace ground line:
Using the fine-tip black paint marker, trace over your ground line. Keep it organic and slightly wavy to mimic snow drifts. -
Outline the cabin:
Carefullyink the main structure of the cabin. Use the extra-fine tip for smaller details like the window panes and the door arch to keep them crisp. -
Detail the roof:
I like to add small texture lines or cross-hatching on the roof to give it a tiled or shingles appearance. -
Draw the tall tree:
For the tree behind the cabin, use quick, downward strokes that branch off the main trunk. Keep these lines fairly sparse to suggest a bare or lightly branching winter tree. -
Draw the evergreen:
For the pine tree on the right, use a zig-zag motion or dense triangular scribbles, getting wider as you move down the trunk to create a full, bushy look. -
Add the moon:
Draw the crescent moon outline with the fine tip marker. You can leave it open or fill it in depending on your preference, but a bold outline matches this style perfectly. -
Lettering:
Write your chosen text (like ‘Memory’ or a name) in a loose, cursive script near the top rim. Don’t worry about perfection; the hand-written look adds charm. -
Starry sky:
Dot the sky with various small stars. Mix simple dots with a few five-point star shapes to create depth in your night sky.
Fixing Mistakes
Make a wobbly line? While the ink is still wet, quickly wipe it away with a Q-tip dipped in rubbing alcohol. Dry the spot completely before re-drawing.
Step 3: Finishing Touches
-
Cleanup:
Allow the ink to dry for at least 15 minutes. Once dry, gently wipe away any visible pencil marks with a damp paper towel or soft eraser. -
Drying time:
Let the mug sit for 24 hours before baking. This allows the paint to fully settle into the ceramic pores. -
Bake to cure:
Place the mug in a cold oven, then turn it to 350°F (175°C). Bake for 30 minutes. Turn the oven off and let the mug cool completely inside to prevent cracking.
Creative Spark
Add a touch of magic by using a metallic gold marker for just the moon and the centers of the stars to make them shimmer against the ceramic.
Your new custom mug is now ready to hold your favorite warm winter beverages
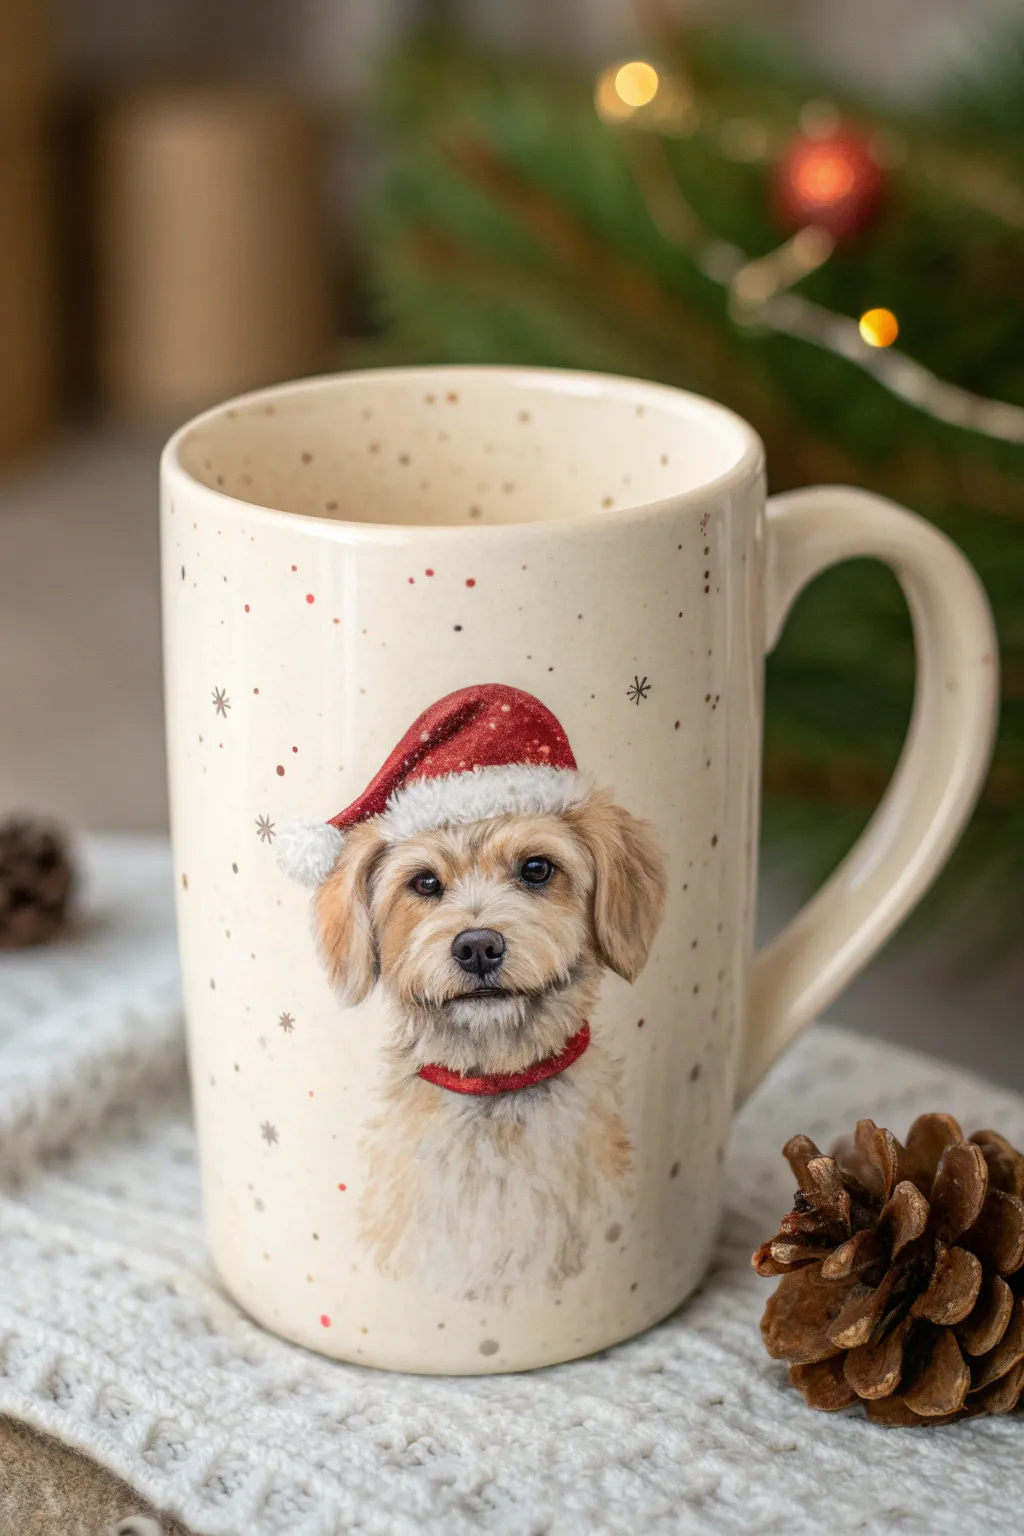
Pet Portrait With Santa Hat

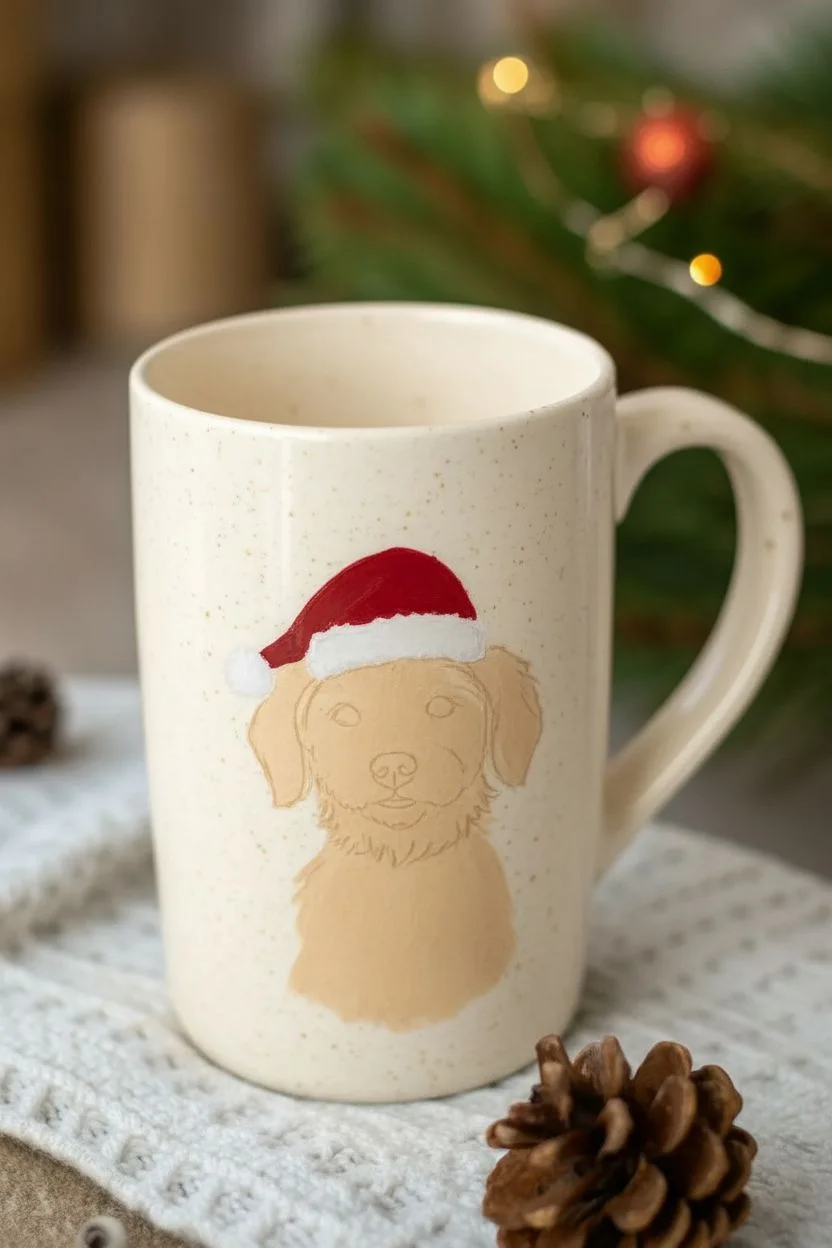
Transform a plain ceramic mug into a custom holiday keepsake featuring a realistic portrait of your furry friend in festive gear. This project uses ceramic paints to capture soft fur textures and a charming Santa hat, all set against a speckled, creamy background.
Step-by-Step Tutorial
Materials
- Plain ceramic mug (creamy white or oatmeal color)
- Ceramic or porcelain paints (tan, white, dark brown, black, red)
- Small flat shader brush (size 2 or 4)
- Fine liner brush (size 0 or 00)
- Small round brush (size 1)
- Rubbing alcohol and cotton pads
- Carbon transfer paper (optional)
- Reference photo of your pet
- Palette or small plate for mixing
- Oven for curing (if required by paint brand)
Step 1: Preparation and Base Sketch
-
Clean surface:
Begin by thoroughly wiping the mug surface with rubbing alcohol on a cotton pad. This removes any oils or fingerprints that might prevent the paint from adhering properly. -
Outline the portrait:
You can freehand the outline of the dog’s head, ears, and the Santa hat using a very light wash of tan paint. If you aren’t comfortable drawing freehand, tape your reference photo over carbon paper and trace the main shapes. -
Block in base colors:
Using the flat shader brush, apply a base coat of tan for the dog’s face and ears. Don’t worry about fur texture yet; just get a solid layer of color down. -
Paint the hat base:
Fill in the main body of the hat with a deep red ceramic paint. Leave the brim and the pom-pom area unpainted for now so the white stays bright later.
Fixing Mistakes
If you make a mistake with wet paint, don’t panic. Use a damp Q-tip to wipe it away immediately. If it has dried, scratch it off gently with a fingernail before baking.
Step 2: Painting the Fur Texture
-
Start the mid-tones:
Mix a slightly darker brown shade. With a small round brush, start adding directional strokes to mimic the growth of the fur around the snout and forehead. -
Deepen the shadows:
Using an even darker brown, define the areas under the ears, around the muzzle, and the neck area. This creates depth and makes the face look three-dimensional. -
Add facial features:
Switch to your fine liner brush and black paint. Carefully paint the nose, the eyes, and the mouth line. Leave a tiny speck of unpainted ceramic (or add a dot of white) in the eyes for a life-like reflection. -
Highlight the fur:
Once the darker layers are dry to the touch, use the liner brush with a creamy white or very light tan. Flick varied strokes over the ears, muzzle, and chest to build fluffy, realistic texture.
Step 3: Festive Details
-
Texture the hat brim:
For the white brim of the Santa hat, use a stippling motion (dabbing straight down) with a round brush loaded with thick white paint. This creates a fluffy, wool-like texture. -
Highlight the red hat:
Mix a tiny bit of white into your red paint to create a highlight color. Gently brush this on the curve of the hat to give it volume. -
Add the collar:
Paint a simple red band around the neck area. I like to add a slightly darker red line along the bottom edge of the collar to serve as a shadow. -
Create the background speckle:
Dilute some brown and red paint slightly. Dip an old toothbrush or stiff brush into the paint and flick the bristles with your thumb to spray tiny speckles across the mug surface. -
Paint snowflakes and stars:
Using the fine liner brush and brown or metallic bronze paint, add small asterisks, dots, and simple snowflake shapes scattered around the portrait.
Fluffier Fur Tip
Work in layers! Let your dark base coat dry fully, then layer lighter fur strokes on top. The more layers of different tans and creams you add, the more realistic the fur looks.
Step 4: Finishing Touches
-
Clean up:
Check for any unwanted smudges or stray paint marks. You can scrape these away gently with a craft knife or wipe them with a damp cotton swab before the paint sets. -
Dry completely:
Allow the painted mug to dry for at least 24 hours. This ensures the moisture has fully evaporated from the paint layers. -
Bake to cure:
Place the mug in a cold oven and set it to the temperature recommended by your paint manufacturer (usually around 300°F/150°C). Let it heat up with the oven, bake for the required time (often 30-40 minutes), and then let it cool down inside the oven completely.
Your custom pet portrait mug is now ready to hold your favorite hot cocoa or be gifted to a dog lover


Have a question or want to share your own experience? I'd love to hear from you in the comments below!