When you throw a kids paint party, you’re basically hosting a mini art studio plus a celebration—my favorite kind of chaos. Here are my go-to kids paint party ideas that keep the setup simple, the kids happy, and the finished art totally frame-worthy.
Classic Canvas Paint-Along
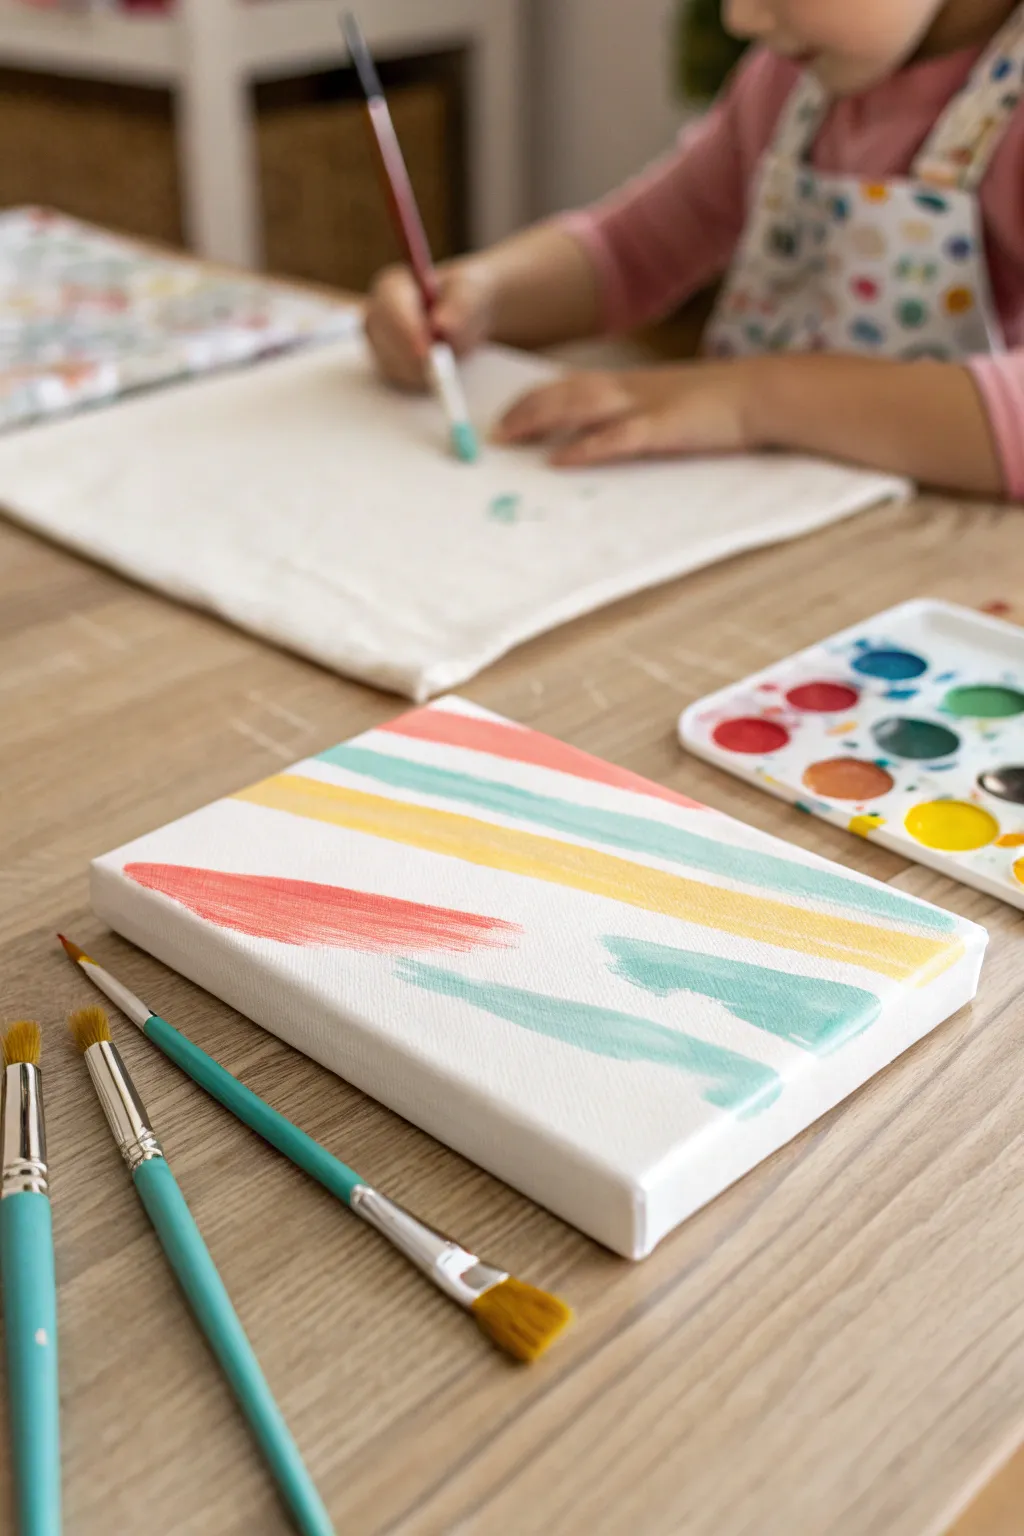

This simple yet striking canvas project introduces young artists to the joy of abstract expression using a soft, cheerful palette. With just a few broad strokes, kids can create a modern art piece that looks fantastic on a bedroom wall.
Step-by-Step
Materials
- Small rectangular stretched canvas (e.g., 5×7 or 8×10 inches)
- Acrylic or tempera paints (Peach/Coral, Mint Green/Teal, Sunshine Yellow)
- Flat paintbrushes (medium width, approx. 1/2 inch)
- Cup of water for rinsing
- Paper towels
- Palette or paper plate
Step 1: Preparation & Planning
-
Set up your workspace:
Lay down a protective covering on your table to catch any drips. Place your small canvas in the center, ensuring it’s free of dust. -
Prepare your palette:
Squeeze a coin-sized amount of peach, mint green, and yellow paint onto your palette. Keep them separate to ensure the colors stay bright and clean. -
Visualize the composition:
Before painting, look at the canvas and imagine where your stripes will go. This design uses diagonal strokes that don’t quite touch the edges, leaving plenty of white space.
Brush Technique Tip
For those lovely feathered ends on your stripes, lift your brush briskly off the canvas at the end of the stroke, like an airplane taking off.
Step 2: Painting the Stripes
-
Load the brush with peach:
Dip your flat brush into the peach or coral paint. Make sure the bristles are fully coated but not dripping. -
Paint the top stripe:
Start near the upper left corner. Drag your brush diagonally across towards the upper right, lifting off before you reach the edge to create a feathered end. -
Add a lower peach accent:
Using the same color, paint a shorter, thicker stroke in the lower left quadrant of the canvas. I like to press a bit harder here to widen the stroke. -
Rinse and dry:
Thoroughly rinse your brush in water and dry it well on a paper towel. A clean, dry brush is crucial for keeping the next colors distinct. -
Apply the mint green stripe:
Load your clean brush with the mint green paint. Paint a long stroke just below your top peach line, following the same diagonal angle. -
Create a second green mark:
Add another green stroke near the bottom right area. Let this one be a bit more organic or wavy if you like, adding variety to the shapes. -
Clean the brush again:
Give your brush another good rinse. Any leftover green will turn your yellow muddy, so ensure the bristles are clear. -
Paint the yellow highlight:
Load up with yellow paint. Place a bold stripe right in the middle, sandwiched between the upper green stripe and the lower peach stroke. -
Fill in gaps:
Look for empty spots that feel unbalanced. Add a small touch of yellow or green where needed, but remember that white space is a key part of this look.
Step 3: Finishing Touches
-
Check for texture:
If some areas look too thin, gently go over them with a second coat of the same color while the paint is still tacky to add richness. -
Clean up edges:
If you accidentally smudged paint on the sides of the canvas, wipe it away quickly with a damp paper towel or paint over it with white later. -
Let it dry completely:
Leave the canvas flat on the table to dry. This usually takes about 20-30 minutes for acrylics.
Add Some Sparkle
Once the paint is fully dry, paint a thin layer of glitter glue over just one of the stripes (like the yellow one) to make it pop.
Now you have a piece of modern, abstract art ready to brighten up any room


Pre-Drawn Outline Designs
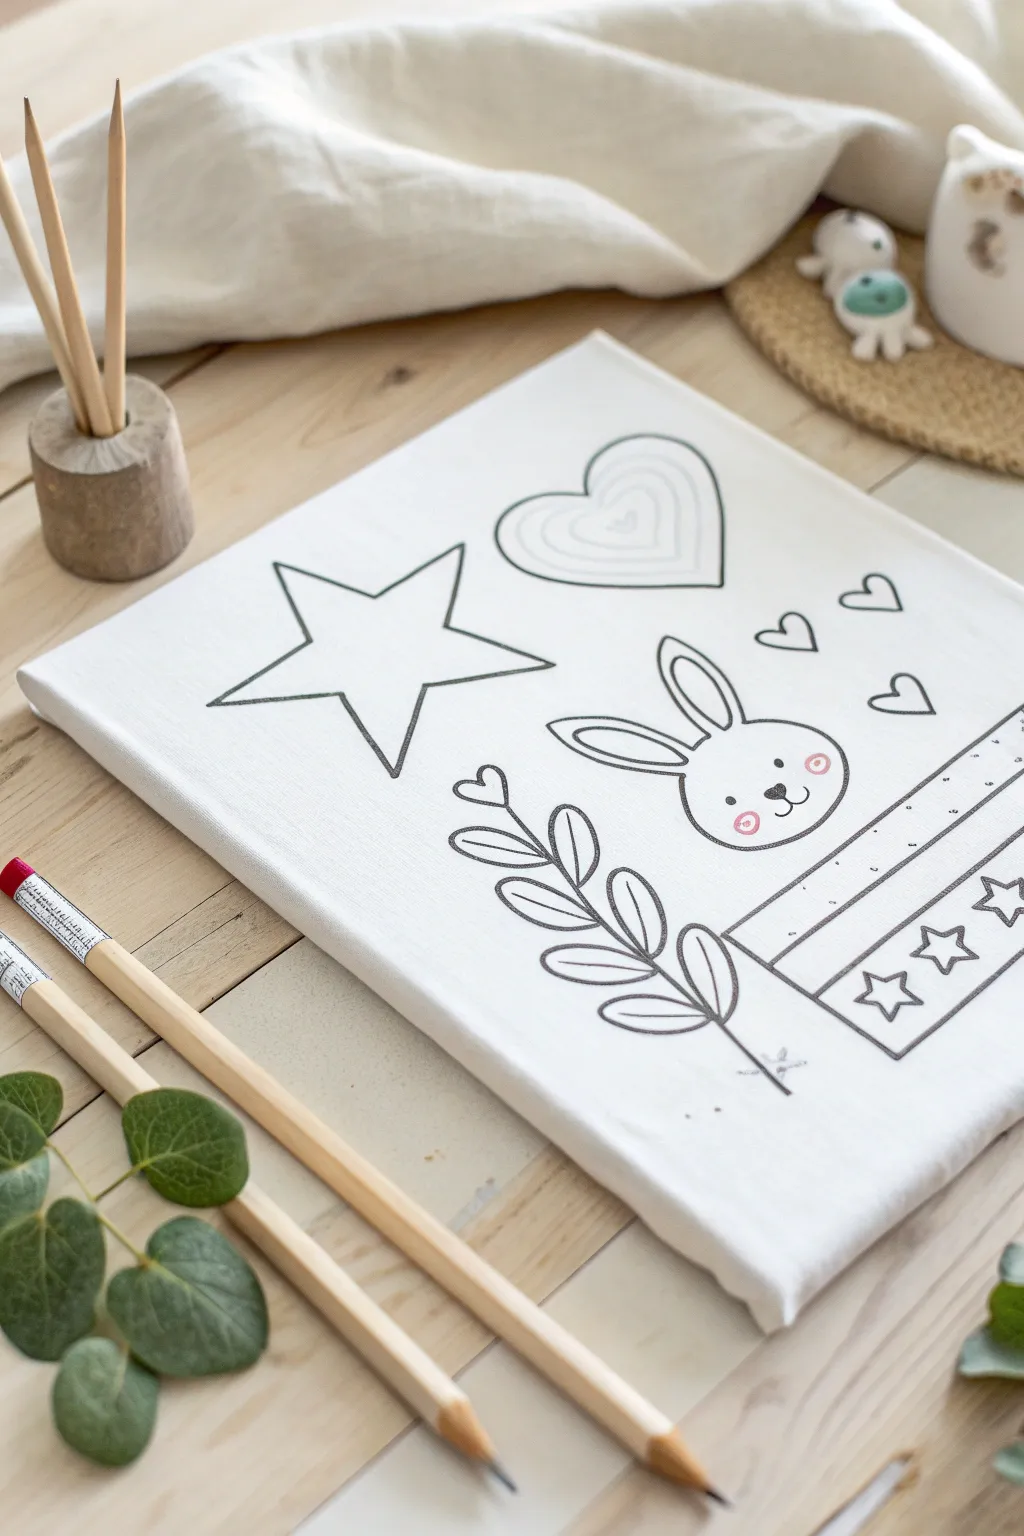
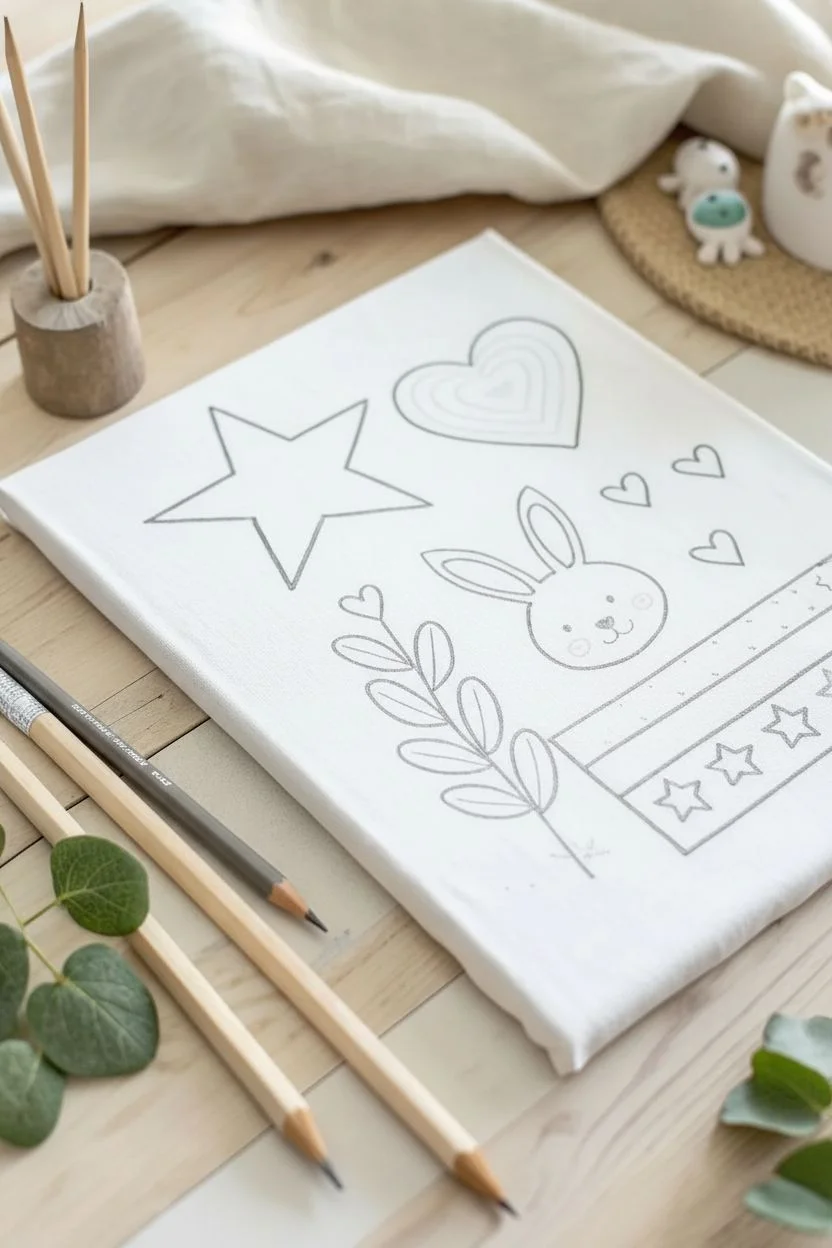
Set the stage for artistic success with these charming, pre-drawn canvas designs featuring a sweet bunny, stars, and botanical elements. The crisp black lines invite young artists to fill them with color while providing a stress-free framework for their creativity.
Step-by-Step Tutorial
Materials
- Small square stretched canvas (approx. 8×8 or 10×10 inches)
- Pencil and eraser
- Ruler
- Fine-point black permanent marker (e.g., Sharpie)
- Medium-point black permanent marker
- Pink colored pencil or marker (for cheeks)
- Circular stencils or household objects (cups, lids)
- Star stencil (optional)
Step 1: Planning and Sketching
-
Prepare the workspace:
Lay your canvas flat on a clean table. Ensure you have good lighting so you can see your pencil lines clearly against the white texture. -
Map out composition:
Visualize where the main elements will go. The large star sits on the left, the heart at the top center, and the bunny on the right. Sketch very faint circles to mark these general placements. -
Sketch the large star:
On the left side, lightly sketch a five-pointed star. Start by drawing an upside-down ‘V’, then cross the lines horizontally and diagonally. Don’t worry about perfection yet; just get the shape down. -
Add the heart:
Near the top center, draw a standard heart shape. Inside it, sketch two smaller hearts getting progressively smaller towards the center to create a radiant effect. -
Outline the bunny head:
Draw a smooth circle for the bunny’s head on the right side. Add two long, oval-shaped ears sticking straight up from the top of the head. -
Create the botanical branch:
Starting from the bottom center, draw a curved line extending upwards towards the star. Add teardrop-shaped leaves along both sides of this stem. -
Design the bottom border:
Use your ruler to draw a horizontal line across the bottom right section, creating a distinct area. Add a second parallel line below it. -
Fill the border details:
Inside the bottom strip, sketch a few smaller stars. Above the strip, add faint dots or small dashes for texture.
Smudge-Free Lines
Work from the top-left corner down to the bottom-right (if right-handed) when inking. This prevents your hand from resting on fresh ink and smearing the design.
Step 2: Inking and Finalizing
-
Start with the medium marker:
Take your medium-point permanent marker and carefully trace over the main structural lines: the large star, the main heart outline, and the bunny’s head shape. -
Refine the bunny ears:
Outline the ears with the medium marker. Inside each ear, draw a smaller oval shape to mimic the inner ear detail. -
Ink the botanical details:
Switch to the fine-point marker for the branch. Trace the stem and leaves, adding a small line down the center of each leaf for a vein detail. -
Add the bunny face:
Use the fine-point marker to draw two small dots for eyes, a tiny triangle nose, and a simple ‘w’ shape for the mouth. Add three small whiskers floating on the right side. -
Trace the hearts:
Carefully trace the concentric hearts. Keeping your hand steady here is key to getting those smooth curves. -
Finish the decorative border:
Ink the ruler lines and the small stars within the bottom border. I find it safest to lift the ruler straight up after tracing to avoid smudging wet ink. -
Add floating hearts:
Draw three small, floating hearts to the right of the main heart design using the fine-point marker to fill in the empty space. -
Erase pencil marks:
Wait at least 5-10 minutes to ensure the ink is totally dry. Gently erase all visible pencil sketches underneath your ink lines. -
Add minimal color:
Take your pink pencil or marker and add two soft, circular blush marks on the bunny’s cheeks. This small touch of color brings the character to life immediately.
Personalize It
Leave the bottom banner empty so each child can write their name or a special date inside the strip before they start painting.
Now you have a delightful, professionally outlined canvas ready for the kids to bring to life with their favorite colors


Kid-Sized Tabletop Studio Setup
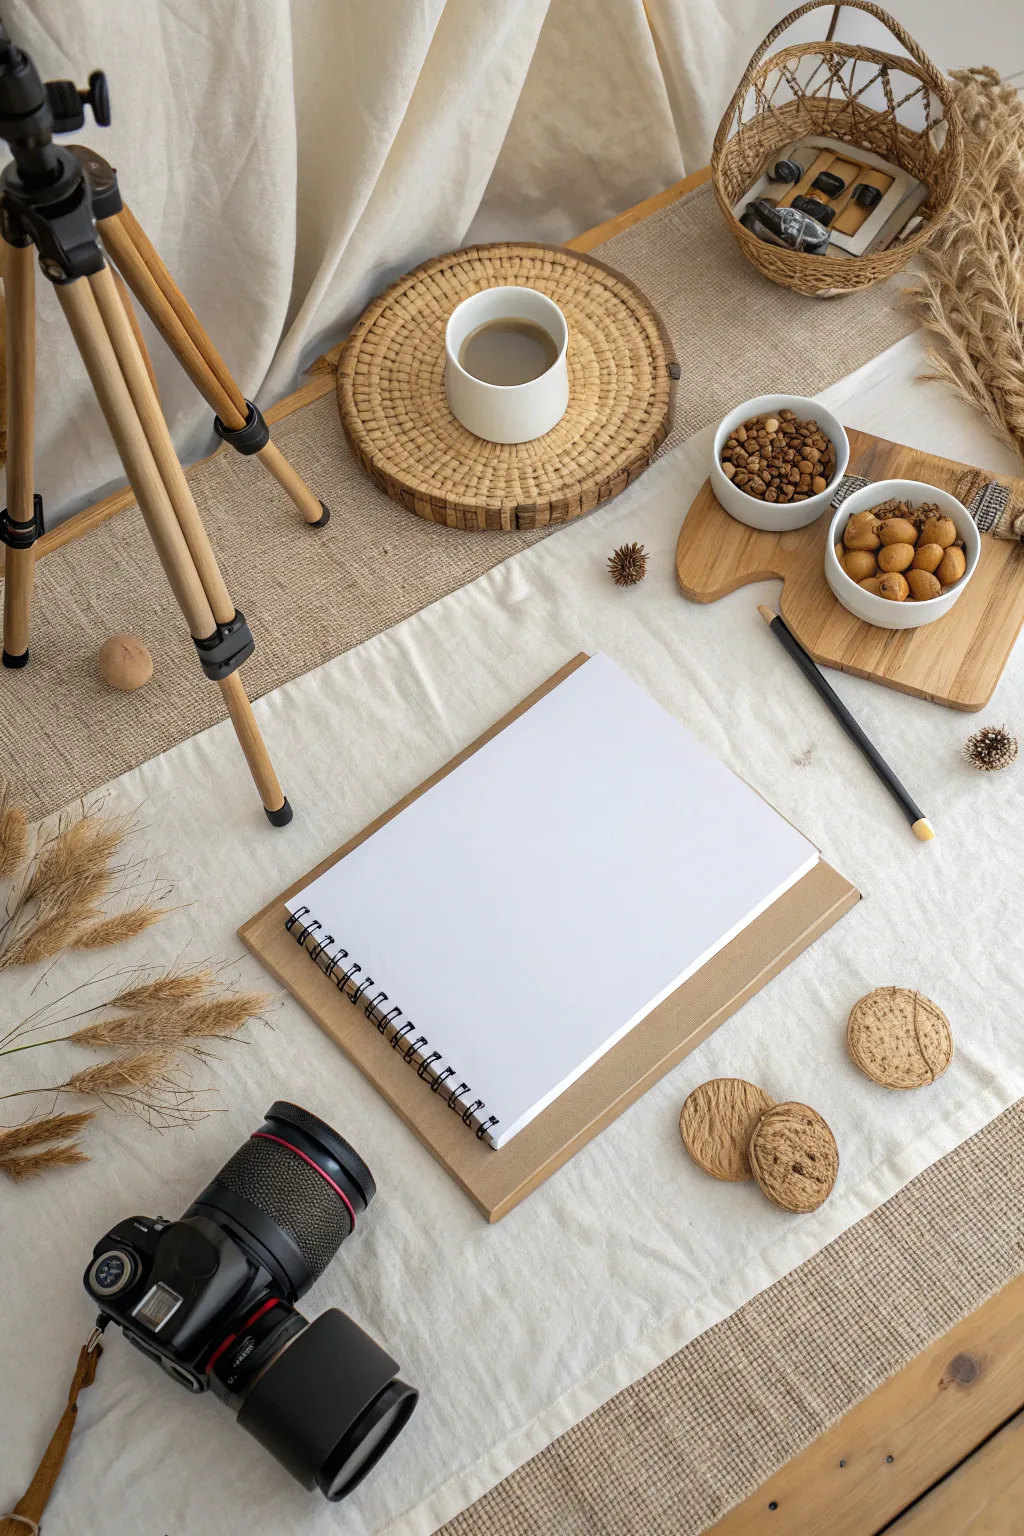
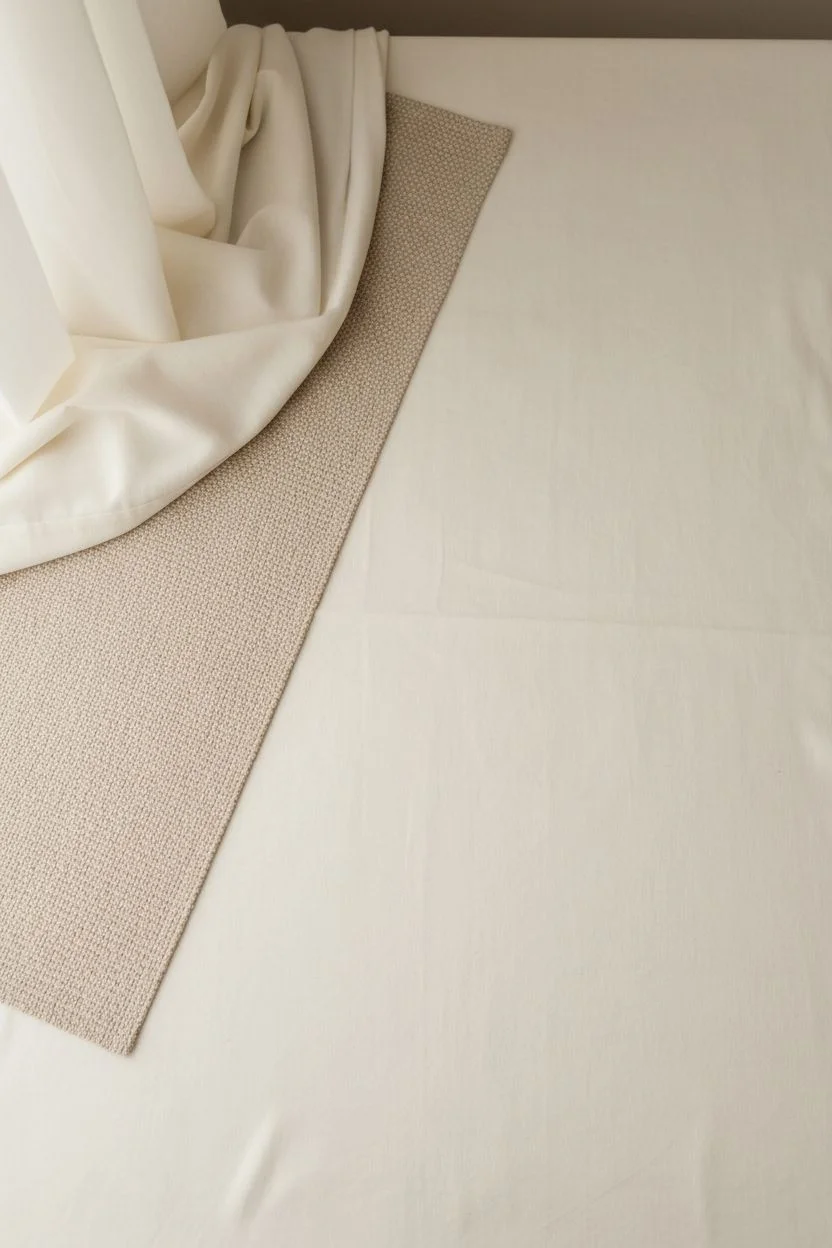
Transform a simple tabletop into a professional-looking art studio vignette perfect for showcasing your child’s creativity. This tutorial guides you through arranging a balanced, aesthetically pleasing flat lay composition that highlights a blank canvas ready for imagination.
Detailed Instructions
Materials
- Blank spiral-bound sketchbook (A4 or similar size)
- Wooden drawing board or thin plywood sheet (slightly larger than notebook)
- Textured beige fabric table runner or placemat
- Cream or off-white fabric backdrop (for draping)
- Wooden camera tripod
- DSLR camera with lens
- Small round woven coaster or trivet
- White ceramic mug with coffee or tea
- Wooden palette-shaped serving board
- Two small white ramekins
- Dried chickpeas or hazelnuts (for filling ramekins)
- Black drawing pencil or charcoal stick
- Dried ornamental grass or wheat stalks
- Small dried pinecones or seed pods
- Round biscuits or cookies (optional props)
- Small woven basket with art supplies (optional)
Step 1: Base and Background
-
Prepare the surface:
Start with a clean, flat table surface. Lay down your cream or off-white fabric as the primary base. It should be relatively smooth but soft wrinkles are acceptable for texture. -
Add texture layers:
Place the beige textured runner or placemat diagonally or vertically across the left side of your setup. This adds a nice contrast to the smoother cream fabric. -
Create the backdrop drape:
Arrange some of the cream fabric in the upper left corner to hang vertically or bunch up slightly, creating a soft, gathered curtain effect that suggests a messy but cozy studio corner.
Step 2: Central Composition
-
Position the drawing board:
Place the wooden board in the center of your workspace, angled slightly diagonally towards the right. This serves as a frame for your sketchbook. -
Placement of the sketchbook:
Lay the spiral-bound sketchbook directly on top of the wooden board. Ensure the spiral binding is on the left side and the paper is pristine white. -
Add the drawing tool:
Place a black pencil or charcoal stick to the right of the sketchbook. Angle it naturally as if someone just set it down, pointing towards the top left.
Lighting Fix
If shadows are too harsh, diffuse your light source with a thin white sheet or use indirect natural window light for a softer look.
Step 3: Key Props Placement
-
Set up the tripod:
Position the wooden tripod legs in the upper left corner. Extend the legs so they frame the corner of the image, with one leg coming down towards the center left. It provides strong leading lines. -
Place the camera:
Set your DSLR camera in the bottom left corner. Angle the lens towards the center of the image, creating a sense that the artwork is the subject being photographed. -
Arrange the coffee station:
Place the woven coaster above the sketchbook, near the top center. Set the white mug filled with coffee or tea on top. The liquid inside adds a dark contrast point.
Pro Tip
Use a reflector or white foam board opposite your light source to bounce light back into the shadows for a brighter image.
Step 4: Details and Fillers
-
Prepare snack bowls:
Fill your two small ramekins with dried chickpeas, nuts, or beads. Place them on the wooden palette-shaped board. -
Position the palette board:
Set the palette board with the ramekins to the upper right of the sketchbook. This balances the visual weight of the tripod on the left. -
Add natural elements:
Tuck a few stalks of dried wheat or ornamental grass near the camera in the bottom left and perhaps peeking into the frame from the top right. This softens the tech edges. -
Scatter small accents:
Place 2-3 biscuits or round cookies near the bottom right corner of the sketchbook. Add a couple of small dried pinecones or seed pods randomly in empty negative spaces to break up the white fabric. -
Final adjustments:
Step back and look at the composition from above. Nudge items so no two objects are touching awkwardly (unless intentional) and check that the spiral binding is straight.
Now you have a beautifully styled creative space ready to inspire your next masterpiece

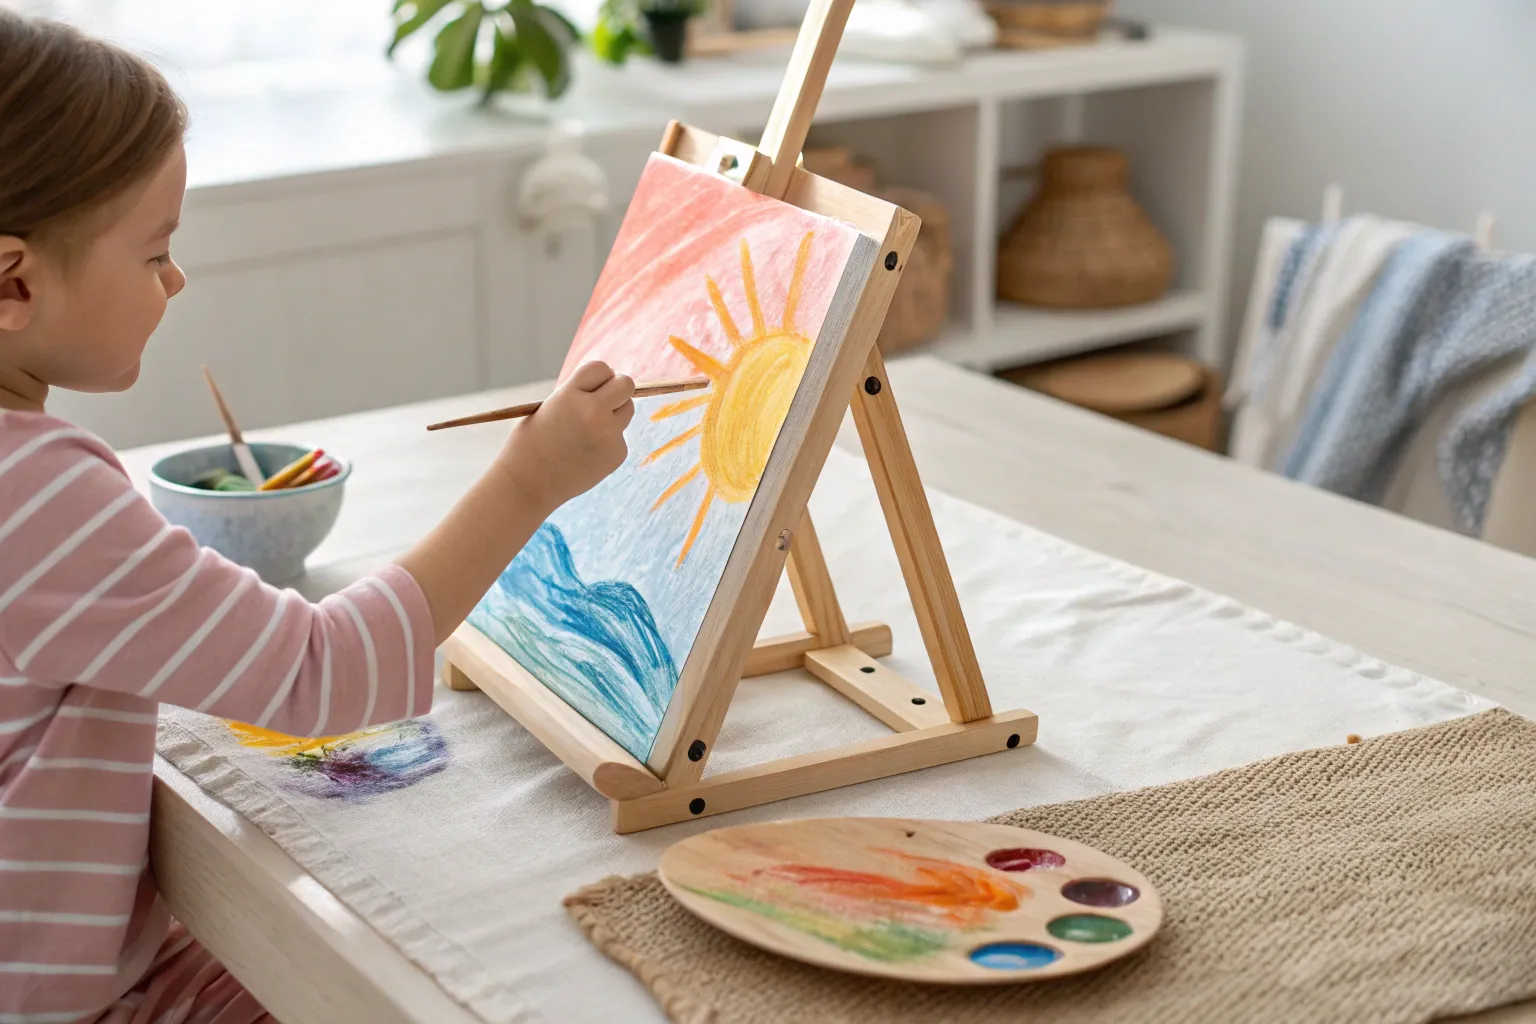
Outdoor Easel Painting Party

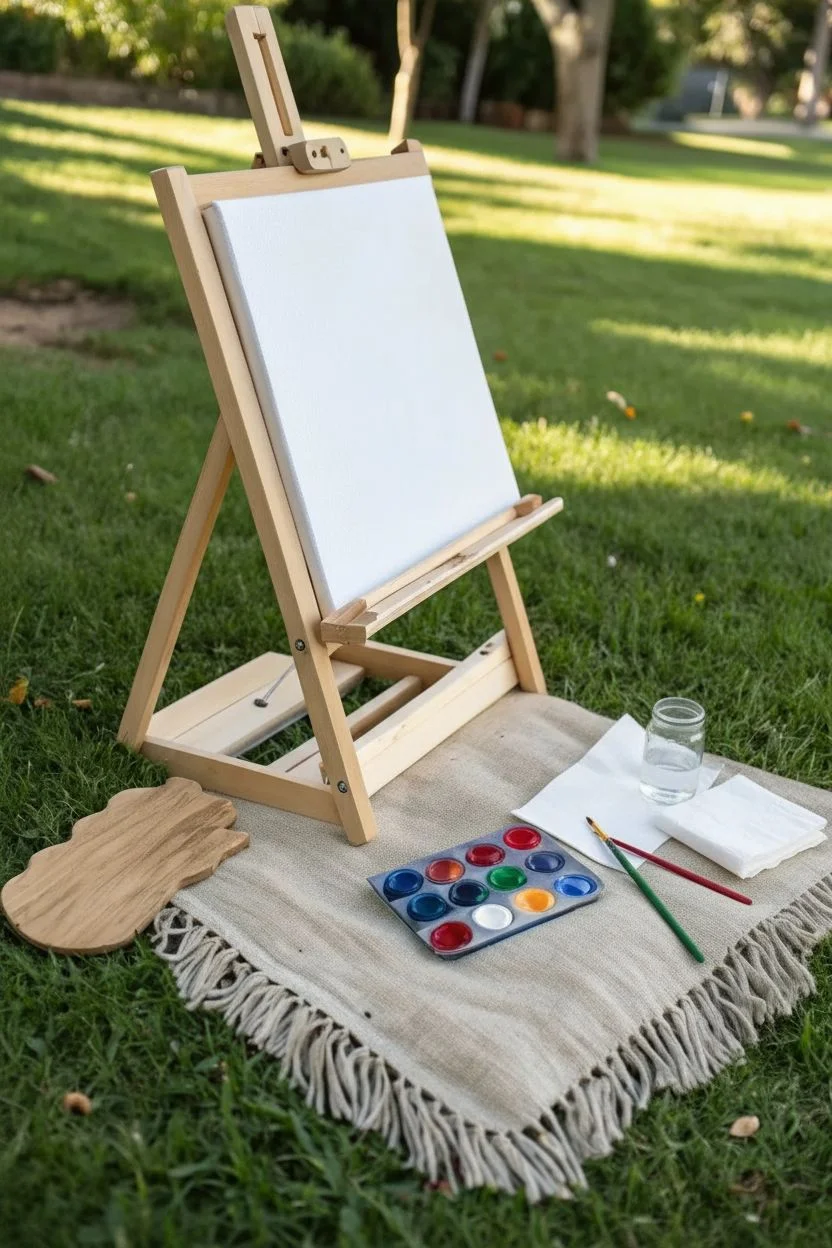
Transform a sunny patch of grass into a creative studio with this delightful outdoor easel setup. It’s the perfect way for young artists to enjoy nature while unleashing their imagination on a fresh, blank canvas.
Step-by-Step
Materials
- Wooden tabletop easel (tripod style)
- Small to medium stretched canvas (white)
- Textured fabric mat or rug (neutral color)
- Wooden palette (can be shaped like a hand or artist palette)
- Plastic paint tray with multiple wells
- Set of liquid poster paints or tempera cakes (red, yellow, blue, green, etc.)
- Assortment of paintbrushes (various sizes)
- Glass jar or container for water
- Wooden mixing stick or spatula
- Paper towels (for cleanup)
Step 1: Setting the Scene
-
Select the perfect spot:
Find a flat, grassy area with dappled sunlight. You want enough light to see colors clearly, but not so much direct sun that the paint dries instantly or kids get overheated. -
Lay the foundation:
Spread out a textured fabric rug or sturdy placemat on the grass. This defines the creative zone and protects brushes from getting lost in the green blades. -
Position the easel:
Place the wooden easel firmly on one side of the rug. Ensure the legs are locked or stable so it doesn’t tip over during enthusiastic painting sessions. -
Prepare the canvas:
Rest the white stretched canvas on the easel’s bottom ledge. Adjust the top clamp or holder if your easel has one to secure the canvas in place.
Sun & Shade
Position the easel so the canvas is backlit or in indirect light. Direct sun on the white surface is blinding and distorts color perception while painting.
Step 2: Preparing the Palette
-
Organize the paints:
Set out the plastic tray containing the paint cakes or liquid paints. A tray with distinct circular wells works best to keep vibrant colors from muddying into brown too quickly. -
Setup the wooden palette:
Place the wooden mixing palette on the rug. If using liquid paints, add small dabs of primary colors (red, blue, yellow) here so kids can experiment with mixing. -
Ready the water station:
Fill a small glass jar or heavy plastic cup about halfway with water. Place a wooden mixing stick inside—this helps prevents the jar from tipping easily and gives a spot to rest a brush. -
Arrange the tools:
Lay out a few different brushes on the rug. Offering a mix of flat brushes for backgrounds and round pointed brushes for details encourages variety in their work.
Nature Stencils
Gather interesting leaves or tall grass blades from the park. Press them onto the wet canvas or paint over them to create beautiful natural silhouettes.
Step 3: Creative Process
-
Observe nature:
Before painting, encourage looking around. Ask the young artists to spot colors in the trees, grass, or sky that they might want to use. -
Create a wash:
Start by wetting a large brush and picking up a light color like sky blue. Apply a thin wash over the top of the canvas to establish the background atmosphere. -
Block in shapes:
Using a slightly thicker paint consistency, block in large shapes. This could be a green hill, a brown tree trunk, or just abstract blobs of color. -
Mix custom colors:
Use the wooden palette to mix secondary colors. I find it helpful to show how yellow and blue make green right on the wood surface before applying it to the canvas. -
Add texture:
Dab the brush rather than stroking it to create the look of leaves or fluffy clouds. Don’t smooth everything out perfectly. -
Detail work:
Switch to a smaller, fine-tip brush. Add little details like flowers, birds, or patterns on top of the dried background layers. -
Clean up edges:
Once the main image is done, paint the sides of the canvas a solid color for a finished, professional look without needing a frame.
Now stepping back, you can admire how a simple outdoor setup transforms into a gallery of fresh, nature-inspired art
BRUSH GUIDE
The Right Brush for Every Stroke
From clean lines to bold texture — master brush choice, stroke control, and essential techniques.
Explore the Full Guide
Color-Coded Aprons and Seats
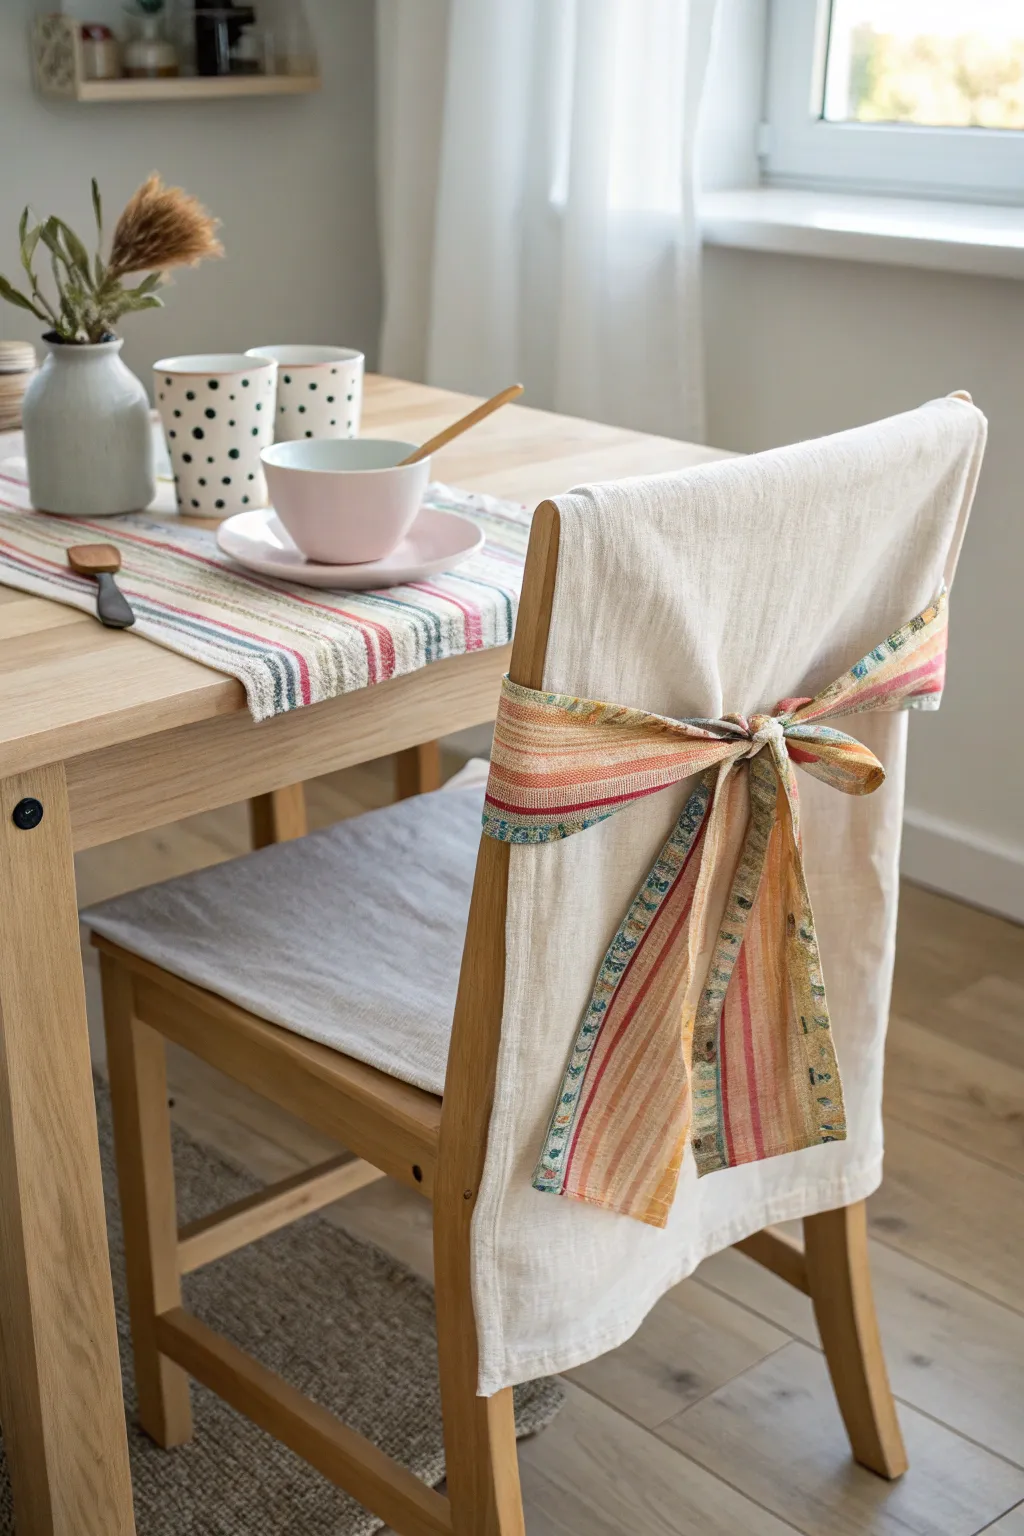

Transform ordinary seating into a personalized party station with these charming fabric chair covers and sashes. The soft linen texture paired with vibrant, striped ribbons creates an inviting look that helps designate spots for your little artists.
How-To Guide
Materials
- Lightweight cream linen or cotton fabric (approx. 1 yard per chair)
- Striped fabric for sashes (scraps or fat quarters work well)
- Fabric scissors or rotary cutter
- Sewing machine with matching thread
- Iron and ironing board
- Pins or sewing clips
- Measuring tape
- Fray check liquid (optional)
Step 1: Creating the Base Slipcover
-
Measure the chair back:
Using your measuring tape, measure the height of the chair back from the top edge down to the seat. Add 2 inches to this measurement for seam allowances. -
Determine the width:
Measure the widest part of the chair back and add 3 inches to ensure a loose, slip-on fit that isn’t too tight. -
Cut the main fabric:
Cut a long rectangular strip of your cream linen based on your measurements. It should be double the height measurement (so it folds over the top) by the width measurement. -
Hem the bottom edges:
Before sewing the sides, hem what will be the front and back bottom edges. Fold the raw edge up by 1/2 inch, press, fold again, and stitch across for a clean finish. -
Sew the side seams:
Fold the long fabric rectangle in half width-wise, right sides together. Pin down both vertical sides. -
Test the fit:
Slide the pinned cover over your chair back to ensure it fits comfortably. If it’s too loose, adjust your pins inward slightly. -
Stitch the sides:
Sew along your pinned lines on both sides using a straight stitch. Backstitch at the start and end for durability. -
Turn and press:
Turn the slipcover right side out. Use a chopstick or turning tool to poke out the top corners gently, then iron the seams flat.
Step 2: Making the Striped Sash
-
Select your accent fabric:
Choose a colorful striped fabric that matches your party theme. Since this acts as a ribbon, a medium-weight cotton works best. -
Cut the sash strips:
Cut a strip of fabric approximately 6 inches wide and 45-50 inches long. You may need to join two strips together if your fabric bolt is short. -
Fold and press:
Fold the long strip in half lengthwise to find the center, then unfold. Fold both long raw edges inward to meet that center crease and press firmly. -
Create the finished ribbon:
Fold the strip in half lengthwise again, enclosing the raw edges inside. The sash should now be about 1.5 inches wide. -
Stitch the sash closed:
Topstitch very close to the open edge down the entire length of the sash. I usually stitch the folded edge as use for a symmetrical look. -
Finish the ends:
For the ends of the sash, you can either fold them under and stitch or cut them at an angle and apply a little Fray Check to prevent unraveling. -
Attach the sash:
Find the vertical center of your slipcover’s back panel. Pin the center of the sash to the slipcover at a comfortable tying height. -
Secure the sash:
Stitch a small vertical rectangle or ‘X’ box directly through the sash and the back layer of the slipcover to attach it permanently. -
Tie the bow:
Place the cover on the chair and tie the sash in a simple, loose knot or bow to complete the look.
Sash Slipping?
If the sash feels too heavy and drags the fabric down, add a small stitch tacking the sash to the side seams of the slipcover to keep it lifted.
Name Tag Upgrade
Before sewing the sash on, embroider or fabric-paint the child’s name onto one of the sash tails for a custom place setting.
Now you have a set of adorable, custom seats ready for a creative afternoon
Paint Palette Snack Table
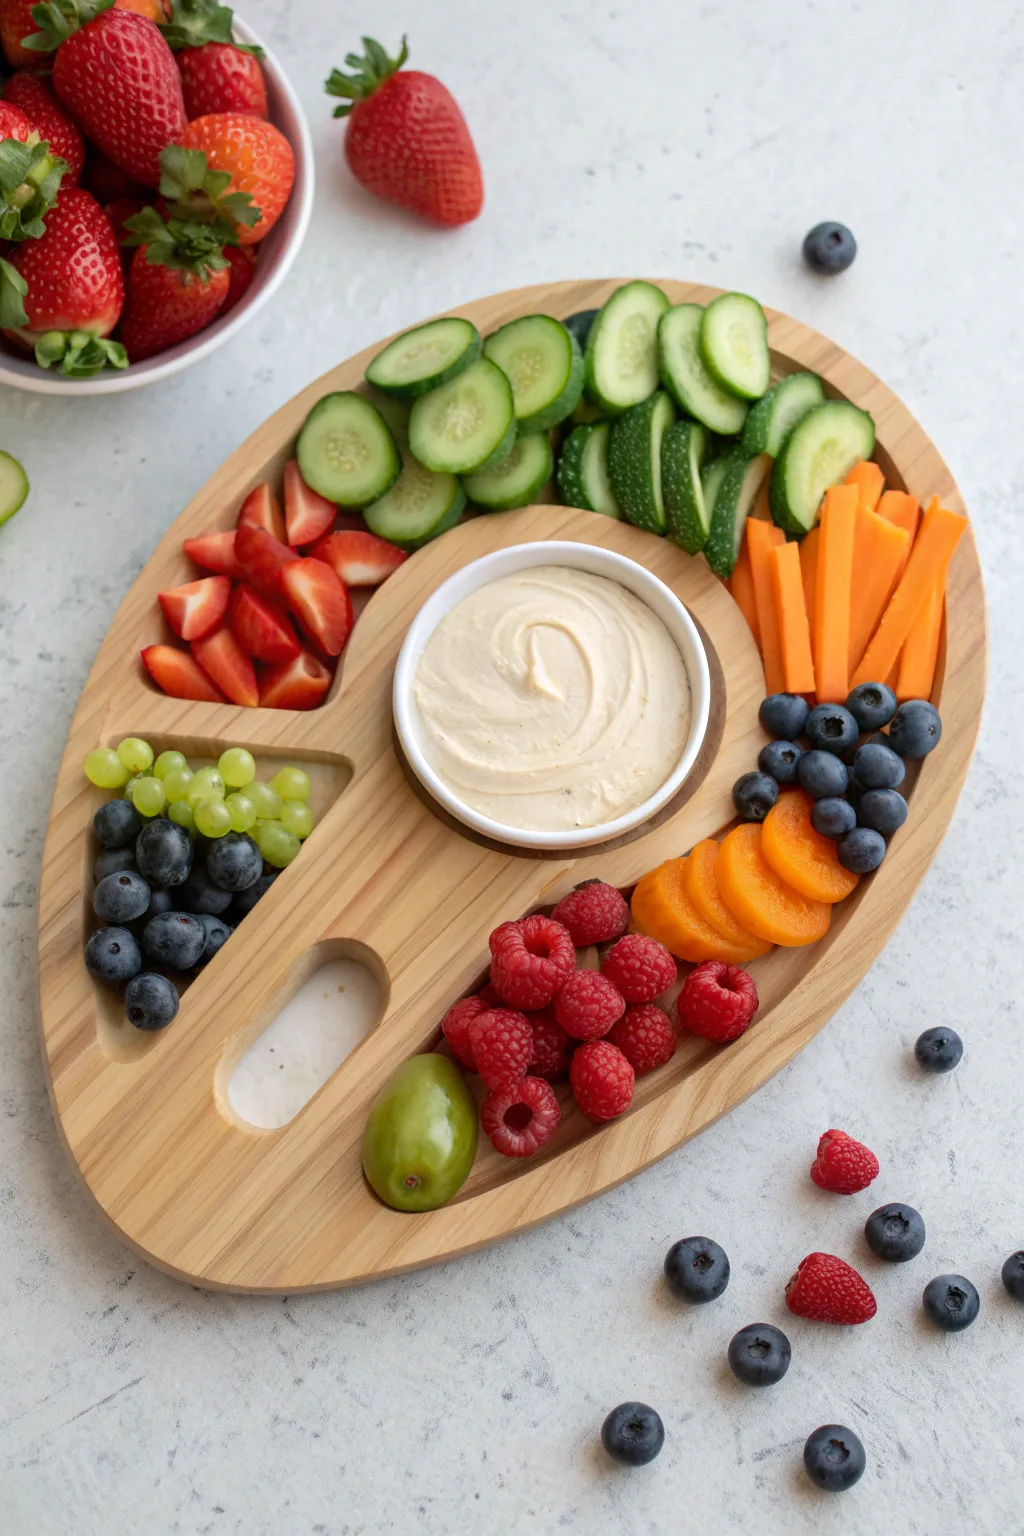
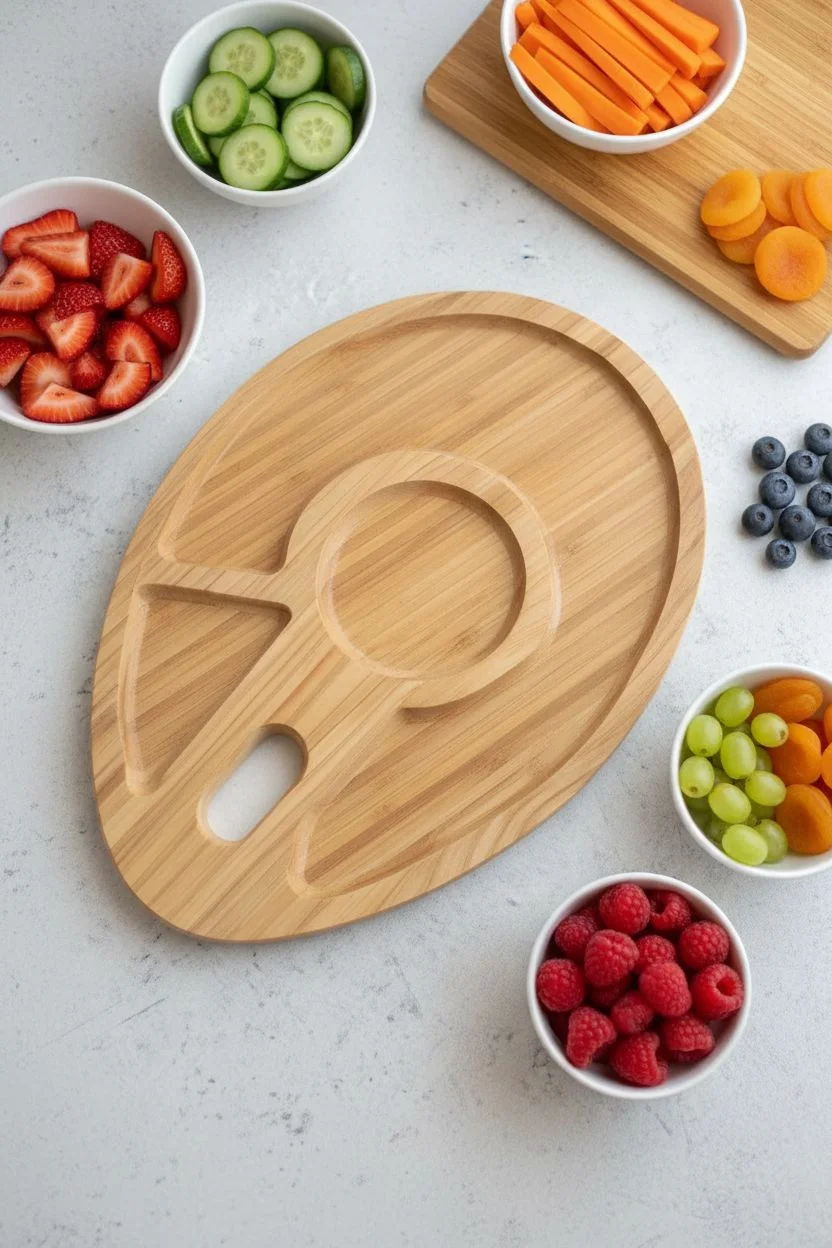
Transform healthy snacking into an interactive art experience with this clever paint palette arrangement. This colorful spread mimics a real artist’s workspace, featuring rows of vibrant fruits and veggies that look just like dollops of fresh paint.
Step-by-Step
Materials
- Large wooden artist’s palette (clean, food-safe treated)
- Small white ceramic dipping bowl (ramekin)
- Hummus or ranch dip
- Strawberries
- Cucumber (English or Persian)
- Carrot sticks
- Blueberries
- Green grapes
- Dried apricots or orange slices
- Raspberries
- Knife and cutting board
Step 1: Preparation
-
Clean the palette:
Since most artist palettes aren’t sold as food-safe, ensure you purchase a new, untreated wooden palette. Wash it thoroughly with warm soapy water and treat it with a food-safe mineral oil or beeswax conditioner if the wood feels raw. Alternatively, line the surface with a shaped piece of parchment paper. -
Prep the produce:
Wash all your fruits and vegetables thoroughly. Dry them completely with paper towels; excess moisture can make the board soggy and cause colors to bleed into each other. -
Slice the cucumbers:
Slice the cucumber into rounds. Leave some rounds whole, and cut others in half to create versatile shapes for stacking. -
Slice the strawberries:
hull the strawberries and slice them into quarters or thick slices so they are easy for small fingers to grab. -
Cut the carrots:
Peel and cut your carrots into uniform rectangular sticks, about 2-3 inches long. I find these mimic the look of flat brushes or palette knives. -
Slice the apricots:
If using dried apricots, slice them into smaller rounds or half-moons to create uniform bite-sized pieces.
Loose Berries?
If blueberries keep rolling off the flat board, use a tiny dab of honey or cream cheese on the bottom of the first layer to anchor them in place.
Step 2: Arrangement
-
Place the dip bowl:
Position your small white ramekin directly in the center of the palette. Fill it generously with hummus or your preferred white dip to mimic a large mixing medium or gesso. -
Add texture to dip:
Use the back of a spoon to swirl the top of the hummas, creating a little spiral peak that looks artistically intentional. -
Start the green section:
Begin arranging the cucumbers at the top left curve of the palette. Fan them out slightly, layering the half-moons against the full rounds to create volume. -
Place the red section:
Below the cucumbers on the left side, pile the sliced strawberries. Ensure they are contained within their ‘zone’ but full enough to look abundant. -
Fill the carrot zone:
On the top right side, stack the carrot sticks vertically. Lean them against the rim of the palette so they stand up slightly. -
Create the blue zone:
Below the carrots, arrange a cluster of fresh blueberries. These tend to roll, so you can anchor them against the carrot sticks or the side of the ramekin. -
Add the orange details:
Nestle the sliced apricots or orange segments right next to the blueberries, moving downward along the curve. -
Add the pink zone:
Fill the bottom right curve with fresh raspberries. Pile them gently so they don’t get crushed. -
Detail the thumb hole:
Near the thumb hole cutout on the bottom left, place a small cluster of green grapes and blueberries. Add a single whole green grape or kiwi slice at the bottom to accent the curve. -
Scatter for effect:
Finally, scatter a few loose blueberries and raspberries on the table surface around the palette to create an ‘art in progress’ vibe.
Sweet & Savory
Create a second palette for dessert using chocolate dip in the center, surrounding it with marshmallows, pretzels, cookies, and lighter fruits.
Now you have an edible masterpiece ready to fuel your little artists’ creativity

PENCIL GUIDE
Understanding Pencil Grades from H to B
From first sketch to finished drawing — learn pencil grades, line control, and shading techniques.
Explore the Full Guide
Paintbrush-Inspired Treats
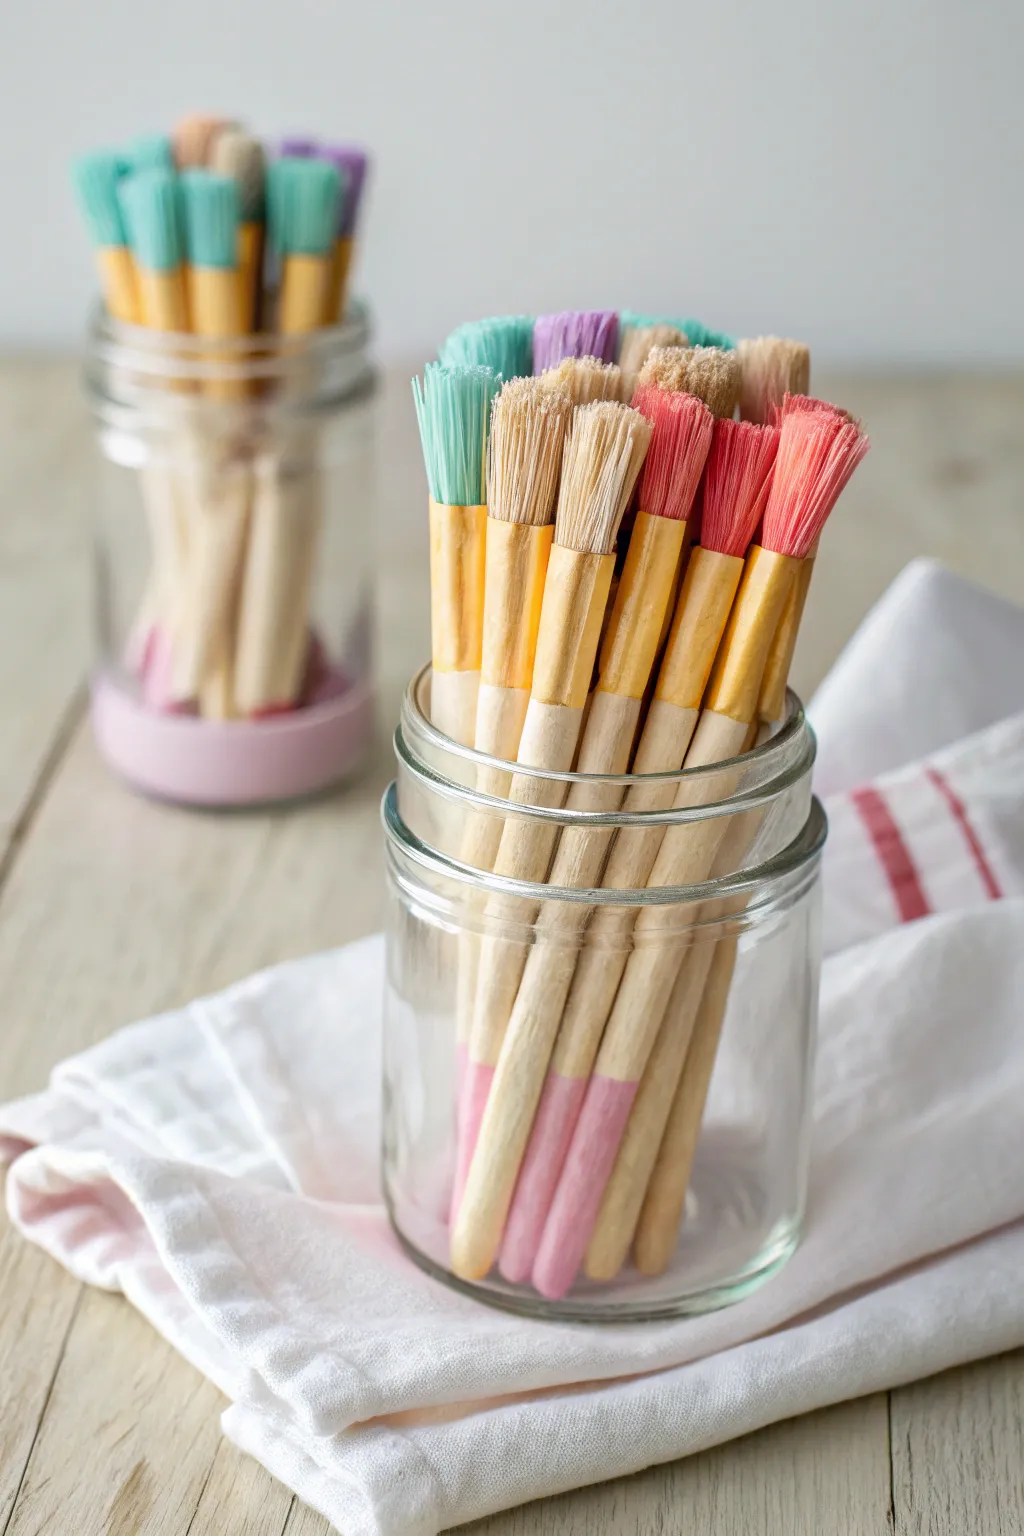
These delightful treats disguise crispy marshmallow snacks as colorful paintbrushes, making them a perfect centerpiece for an art-themed party. Best of all, they’re completely edible from the wooden handle to the candy-coated bristles.
Step-by-Step Tutorial
Materials
- Prepared Rice Krispie treats (homemade or store-bought sheet)
- Candy melts (various colors like teal, pink, purple, and yellow)
- Long wooden pretzel rods or thick biscuit sticks
- Edible gold food paint or luster dust mixed with vodka
- Small food-safe paintbrush
- Wax paper or parchment paper
- Microwave-safe bowls
- Sharp knife
- Clean kitchen scissors (optional)
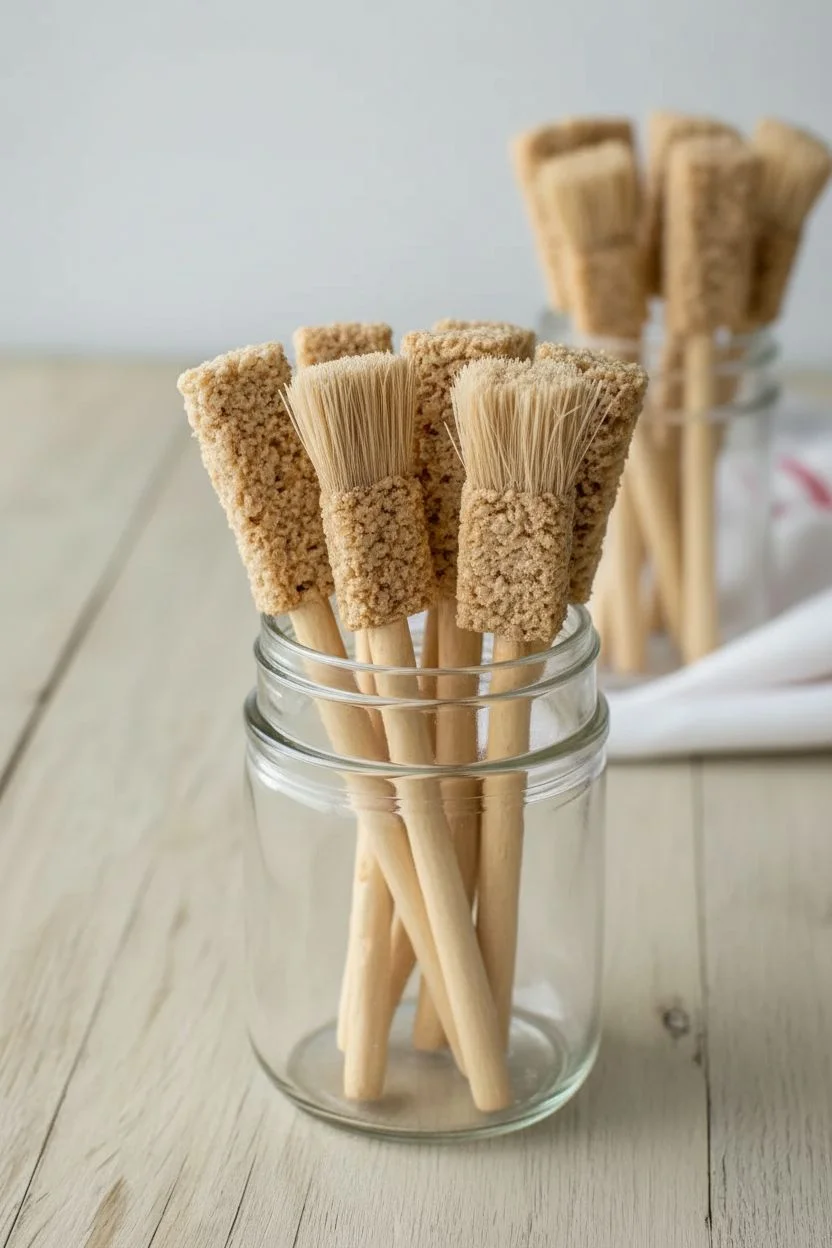
Step 1: Shaping the Bristles
-
Prepare the treats:
If using a large sheet of Rice Krispie treats, cut them into small rectangles, roughly 1.5 inches long by 1 inch wide. You want these to resemble the bristle head of a large paintbrush. -
Adjust the texture:
Gently mold the rectangular treat with your fingers. Squeeze the top slightly to fan it out while keeping the bottom portion (where the handle goes) more compressed. This mimics the shape of a real brush head. -
Insert the handle:
Take a pretzel rod or biscuit stick and carefully insert it into the center of the bottom of your shaped Rice Krispie treat. Push it in about an inch deep so it stays secure without cracking the treat. -
Secure the connection:
Give the marshmallow treat a firm squeeze around the pretzel rod to ensure they are bonded together tightly.
Step 2: Creating the Ferrule
-
Melt yellow candy:
Melt a small amount of yellow or gold-colored candy melts in a microwave-safe bowl according to package instructions. Stir until smooth. -
Dip the connection point:
Dip the area where the pretzel rod meets the Rice Krispie treat into the melted yellow candy. You want to cover about half an inch of the pretzel and the bottom quarter-inch of the treat. -
Clean the lines:
Use a toothpick or knife to create a clean, straight edge on the candy coating if dipping didn’t result in a crisp line. This band creates the metal ‘ferrule’ that holds bristles on a real brush. -
Let it set:
Place the dipped brushes on a sheet of wax paper and allow the yellow band to harden completely before moving to the next step. I like to pop them in the fridge for five minutes to speed this up.
Treats Falling Off?
If the treat slides off the pretzel, dip the tip of the pretzel in melted chocolate before inserting it into the Rice Krispie. This acts as edible glue once hardened.
Step 3: Adding Color
-
Prepare bristle colors:
Melt your chosen colors of candy melts (teal, pink, orange, etc.) in separate small bowls. -
Dip the tips:
Dip just the top half-inch of the Rice Krispie ‘bristles’ into the colored candy melts. Let any excess drip off. -
Add texture:
While the colored candy is slightly tacky but not fully set, take a clean toothpick or skewer and gently drag it through the colored section to create vertical lines that look like individual paintbrush hairs. -
Optional handle detail:
For extra flair, dip the very bottom inch of the pretzel rod handle into a matching color of candy melt to look like a painted wooden handle. -
Final drying:
Lay the finished brushes back on the wax paper to fully harden.
Paint-Dipped Look
Instead of coloring the whole tip, keep the bristles ‘natural’ (plain cereal) and just dip the very top 1/4 inch in bright colors to look like wet paint.
Step 4: Gilding the Details
-
Mix the gold:
In a very small dish, mix a tiny amount of gold luster dust with a few drops of vodka or lemon extract to create a thick metallic paint. -
Paint the ferrule:
Using a dedicated food-safe brush, carefully paint over the yellow candy band you created earlier. This turns the yellow candy into a shiny gold metal connector. -
Dry and display:
Let the gold paint dry for a few minutes. Once dry, arrange your edible paintbrushes upright in clean glass jars for an adorable presentation.
Watch the kids’ faces light up when they realize they can eat their art supplies
Take-Home Drying and Carry Kits
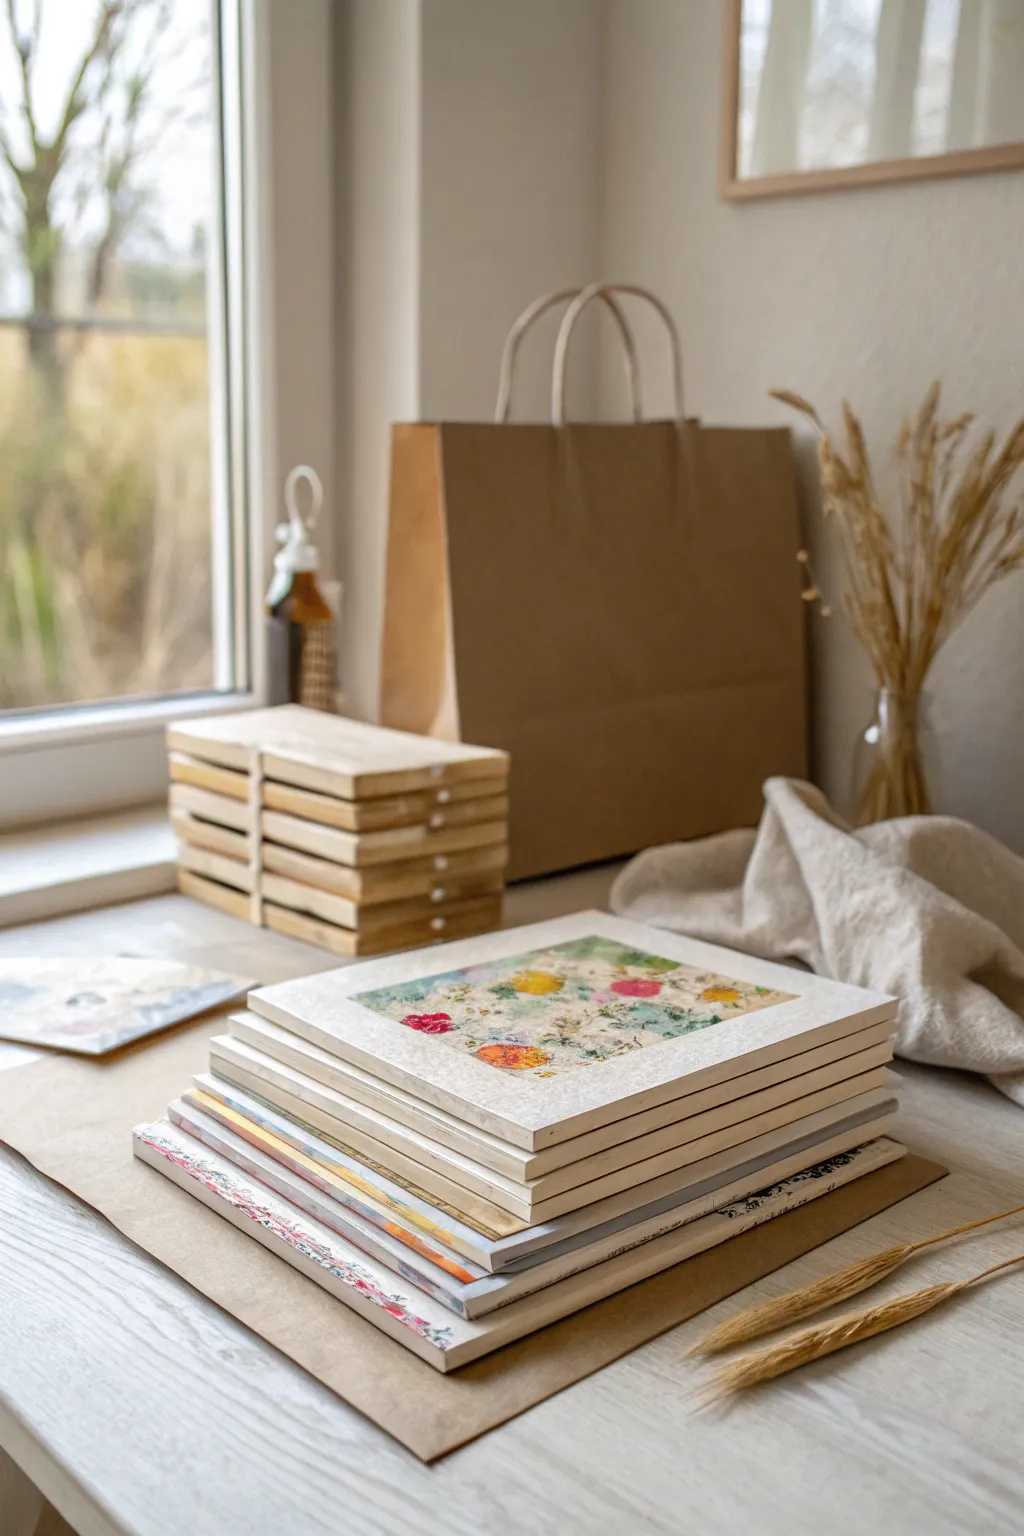
Solving the age-old problem of how to transport wet paintings, this project creates a sturdy, stackable system that doubles as a protective drying rack. Using simple wooden spacers, multiple canvas panels can be safely carried home in a single bag without the dreaded smudge.
How-To Guide
Materials
- 5×7 inch or 6×8 inch canvas panels (one per guest)
- Small square wooden dowels or balsa wood strips (approx 1/4 inch thick)
- PVA glue or strong wood glue
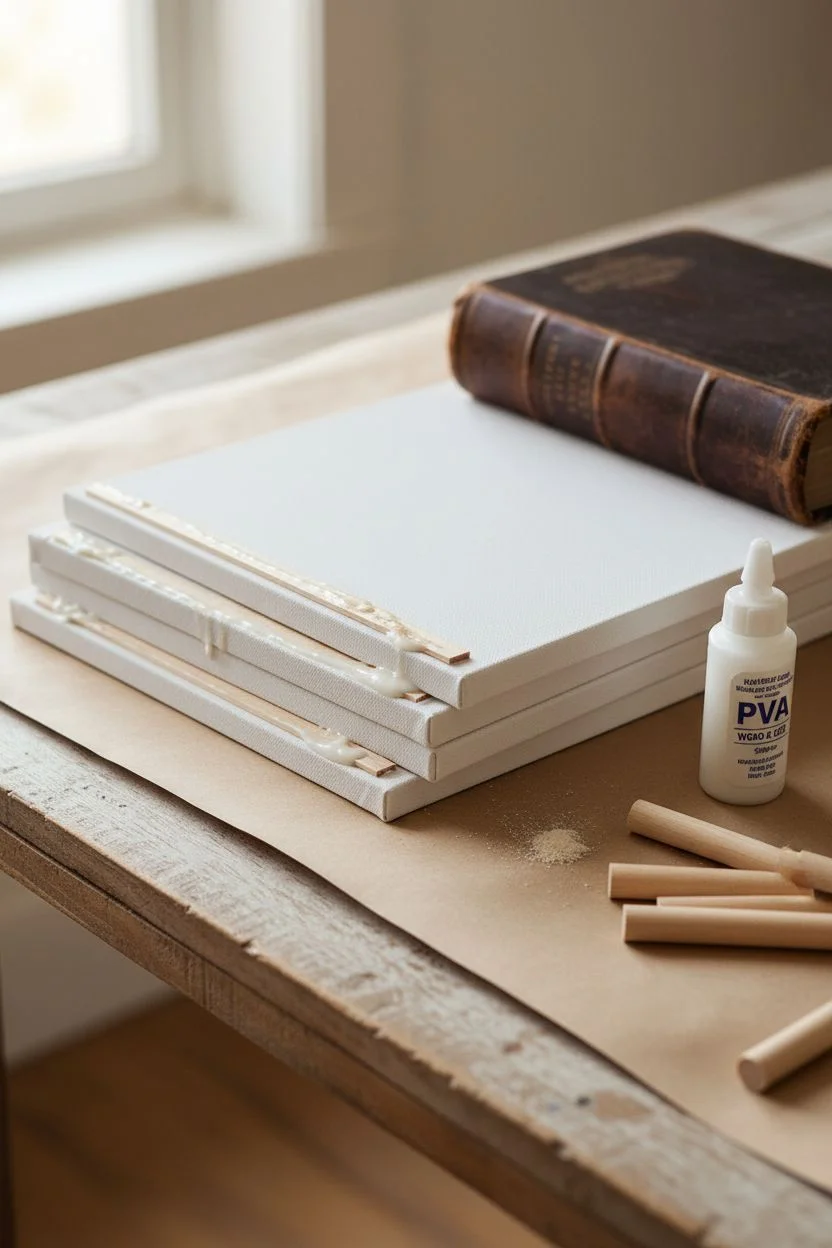
- Large kraft paper shopping bags with handles
- A stack of thick cardboard or chipboard (cut slightly larger than the canvases)
- Heavy books (for pressing glue)
- Optional: Washi tape for decoration
Step 1: Preparing the Spacers
-
Measure the strips:
Cut your wooden dowels or balsa strips to match the short width of your canvas panels. For a standard 5×7 panel, you will need two 5-inch strips per child. -
Sand edges:
Give the cut ends of the wood a quick sanding to remove any splinters, ensuring they are safe for little hands to handle. -
Check the height:
Verify that your wood strips are at least 1/4 inch high. This height is crucial because it creates the gap that prevents the wet paint from touching the backing board above it.
Sticky Situation
Use hot glue instead of wood glue for the spacers if you are in a rush. It dries instantly, meaning you can prep these kits minutes before the party starts.
Step 2: Creating the Stack System
-
Base construction:
Take a piece of thick cardboard or chipboard that is slightly wider and longer than your canvas panels. This will serve as the rigid floor for the stack. -
Position the first spacers:
Apply a line of wood glue to two wooden strips. Place them on the cardboard base, positioned exactly where the left and right edges of the canvas will sit. -
Test the fit:
Briefly place a dry blank canvas on top of your glued strips to ensure the spacing is correct. The canvas should be supported on the edges but ‘hover’ in the middle. -
Glue the panel spacers:
For the actual carry-home mechanism, you will be gluing spacers directly to the *back* of each kid’s canvas panel prior to the party. Apply glue to two wood strips. -
Attach to canvas back:
Press the glue-coated strips onto the back of the canvas panel, flush with the left and right edges. -
Let them cure:
Stack the prepared canvases under a heavy book for at least an hour to let the glue set firmly. This ensures the spacers won’t pop off during transport.
Decorate the Gap
Color the wooden spacer strips with markers or cover them in bright washi tape before gluing. It adds a pop of color to the side profile of the finished stack.
Step 3: Assembly & Use
-
Prep the bags:
Open your large kraft paper bags. Place the rigid cardboard base (the one you made first) flat at the bottom of the bag to create a level surface. -
Paint time:
Allow the children to paint their masterpieces on the front side of the canvas panels. Emphasize keeping the paint relatively flat—avoid massive globule textures if possible. -
Initial stacking:
Once the painting session is done, take the first child’s wet canvas. Carefully lower it into the bag so it rests on the base. The spacers on the back of *this* canvas aren’t used yet, but they add structural integrity. -
Layering up:
For the subsequent layers, place a sheet of clean chipboard or heavy cardstock on top of the first artwork. Because of the wooden spacers you made earlier, this cardstock ‘roof’ won’t touch the wet paint below. -
Repeat the process:
Place the next wet canvas on top of that cardstock separator. Repeat until the bag is full or the party is over. -
Secure the bag:
I usually ask parents to carry the bag from the bottom rather than just the handles, just to be extra safe against swinging.
This simple construction guarantees that every masterpiece makes it to the fridge door intact


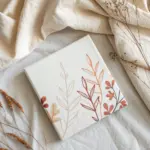
Mini Art Gallery Wall
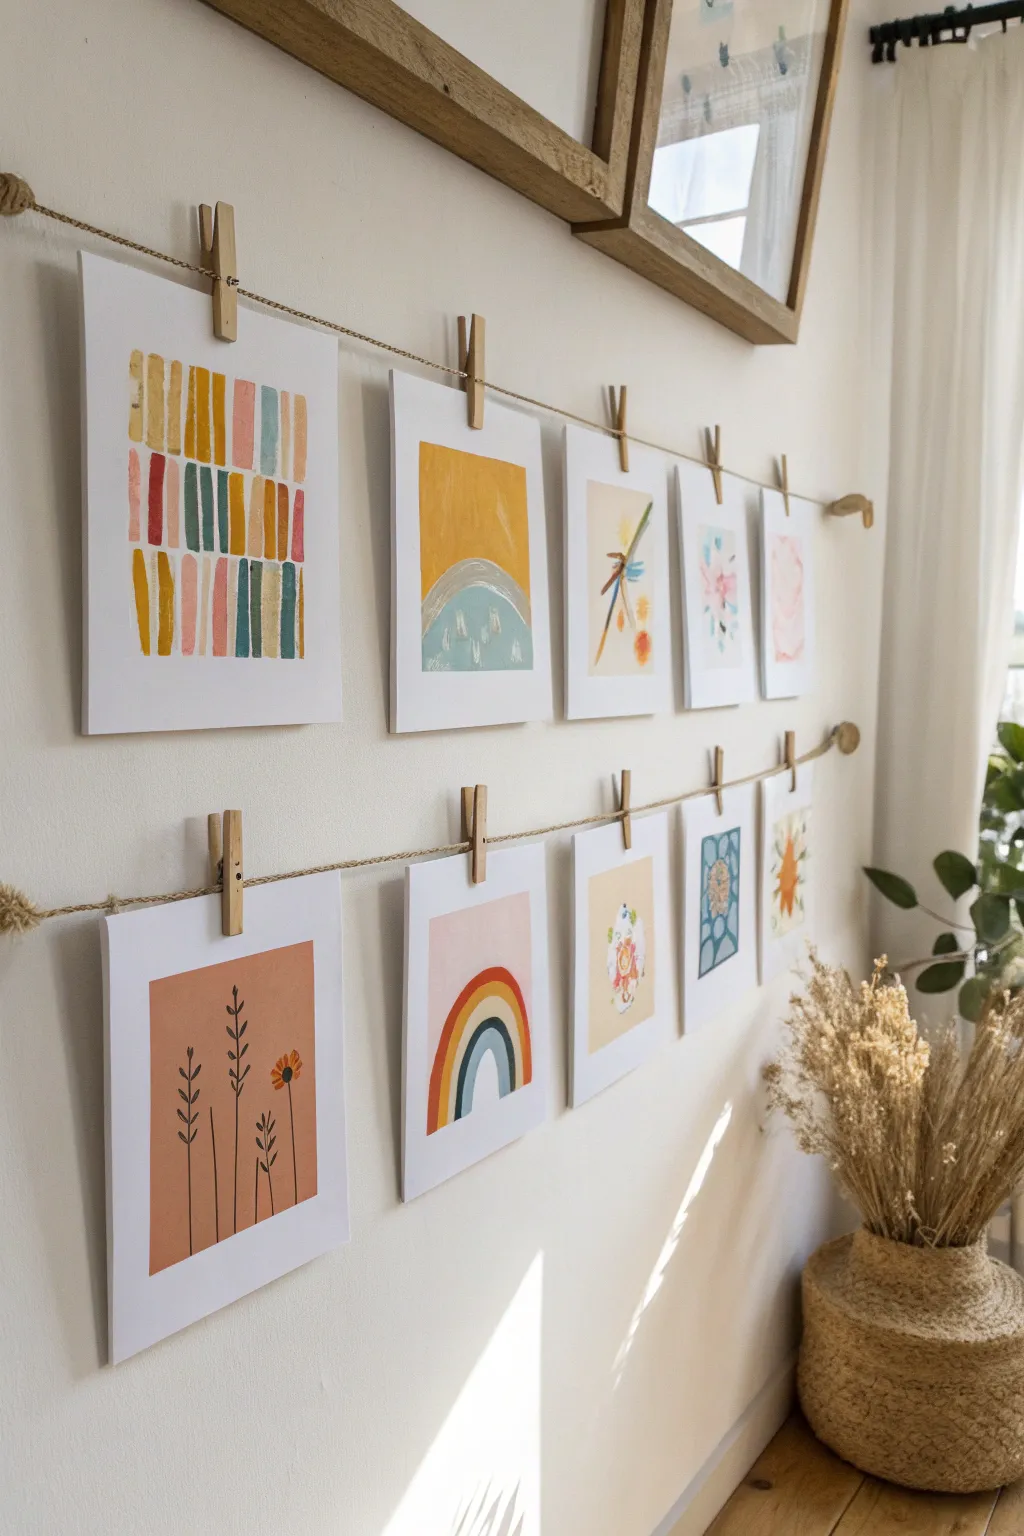
Transform a blank wall into a rotating exhibition of your children’s creativity with this charming and rustic display system. Using simple materials like twine and clothespins, you can easily swap out mini canvas boards or heavy cardstock paintings as new masterpieces are created.
Step-by-Step Guide
Materials
- Heavyweight watercolor paper or mixed media paper (cut to 5×7 or A5 size)
- Thick jute twine or natural hemp cord
- Wooden clothespins (natural finish)
- Small wooden wall hooks or drawer knobs (4 total)
- Selection of acrylic or tempera paints (mustard yellow, terracotta, sage green, dusty pink, etc.)
- Assorted paintbrushes (flat wash, round detail, liner)
- Painter’s tape or wash tape
- Scissors
- Wall anchors and screws (if needed for heavy traffic areas)
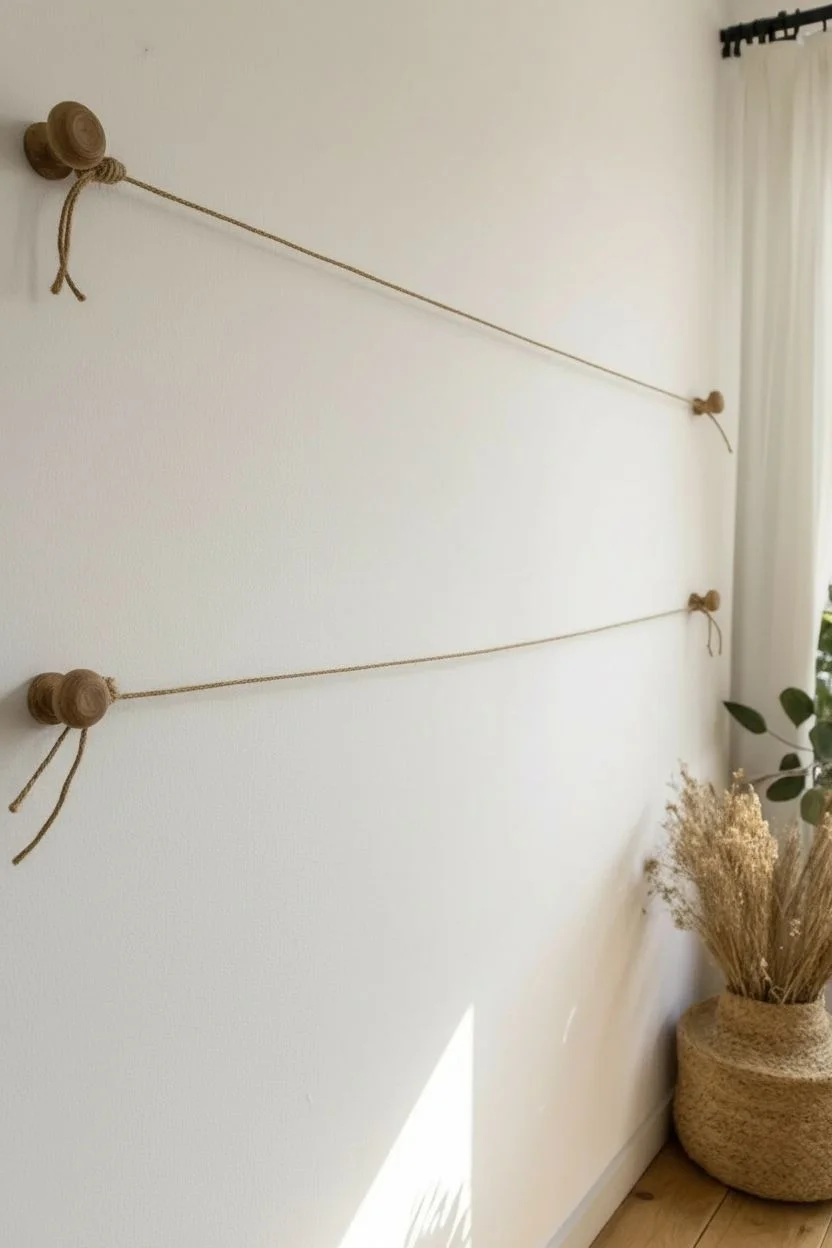
Step 1: Setting the Stage
-
Measure and mark:
Begin by deciding where your gallery rows will live. Measure two horizontal lines on your wall, spacing them about 12-14 inches apart vertically to leave room for the artwork to hang freely without overlapping. -
Install the anchors:
Install your four wooden knobs or hooks at the ends of your marked lines. Ensure they are securely fastened into studs or use drywall anchors, as the tension on the twine needs a solid base. -
String the twine:
Cut two lengths of jute twine, leaving about 6 inches of excess on each side. Tie one end firmly to the left knob, stretch it across to the right knob, and pull it taut before tying it off. Trim the excess tails for a clean look.
Step 2: Creating the Art Collection
-
Prep the paper:
Cut your watercolor or mixed media paper into uniform rectangles. Using a standard 5×7 inch size works beautifully for this scale. -
Geometric stripe painting:
For the first style seen in the top left, arrange vertical strips of painter’s tape on the paper if you want crisp lines, or freehand it for a more organic feel. Mix a palette of muted mustard, terracotta, sage, and pale pink. -
Apply the blocks:
Paint rectangular blocks of color in vertical columns so they look like stacked bricks or books. Vary the heights of the color blocks to keep the composition dynamic. -
Abstract landscape:
For the yellow painting, use a flat brush to fill the top two-thirds with a solid mustard yellow. Let this dry completely. -
Add distinct shapes:
Once the yellow is dry, paint a soft blue semi-circle at the bottom. Add a grey arch separating the yellow and blue, and use a detail brush to add tiny white vertical dashes in the blue area for texture. -
Floral silhouettes:
For the botanical piece on the bottom left, paint a solid background in a warm terracotta or peach tone. -
Detail work:
Switch to a fine liner brush and black or dark grey paint. Carefully paint slender stems rising from the bottom, adding small leaves and simple flower heads at the tips. -
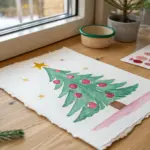
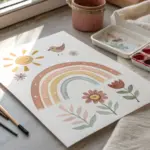
Rainbow arch:
On a fresh sheet, lightly sketch a rainbow shape. Paint distinct, thick bands of color—red, yellow, dusty blue—leaving a small gap of white space between each arch for a modern illustrative look. -
Create variety:
Continue painting simple motifs on the remaining sheets. Think about single flower stems, abstract sun bursts, or simple grid patterns to balance out the more complex paintings. -
Drying time:
Lay all the artwork flat to dry completely. If the paper buckles slightly from the moisture, you can press them under a heavy book overnight once they are touch-dry.
Drooping Twine?
If the twine sags too much under the weight of the paper, loop the string around the knob an extra time to shorten it, or un-tie one end and pull it tighter before re-knotting.
Step 3: Curating the Gallery
-
Arrangement strategy:
Should lay out your dried paintings on a table first to find a pleasing balance of colors. Try not to put two similar colors (like the two yellow-heavy paintings) right next to each other. -
Clip and hang:
Take a wooden clothespin and clip the top center of each painting to the twine. I usually attach the outer paintings first and work my way inward to ensure even spacing. -
Final adjustments:
Step back and gently slide the clothespins along the twine until the gaps between the artworks look equal and balanced.
Level Up: 3D Elements
Glue small dried flowers, buttons, or fabric scraps directly onto a few of the painted cards to add texture and turn the gallery into a mixed-media display.
Now you have a dynamic display that celebrates your little artist’s work and can change as quickly as their imagination does
Pass-the-Painting Game
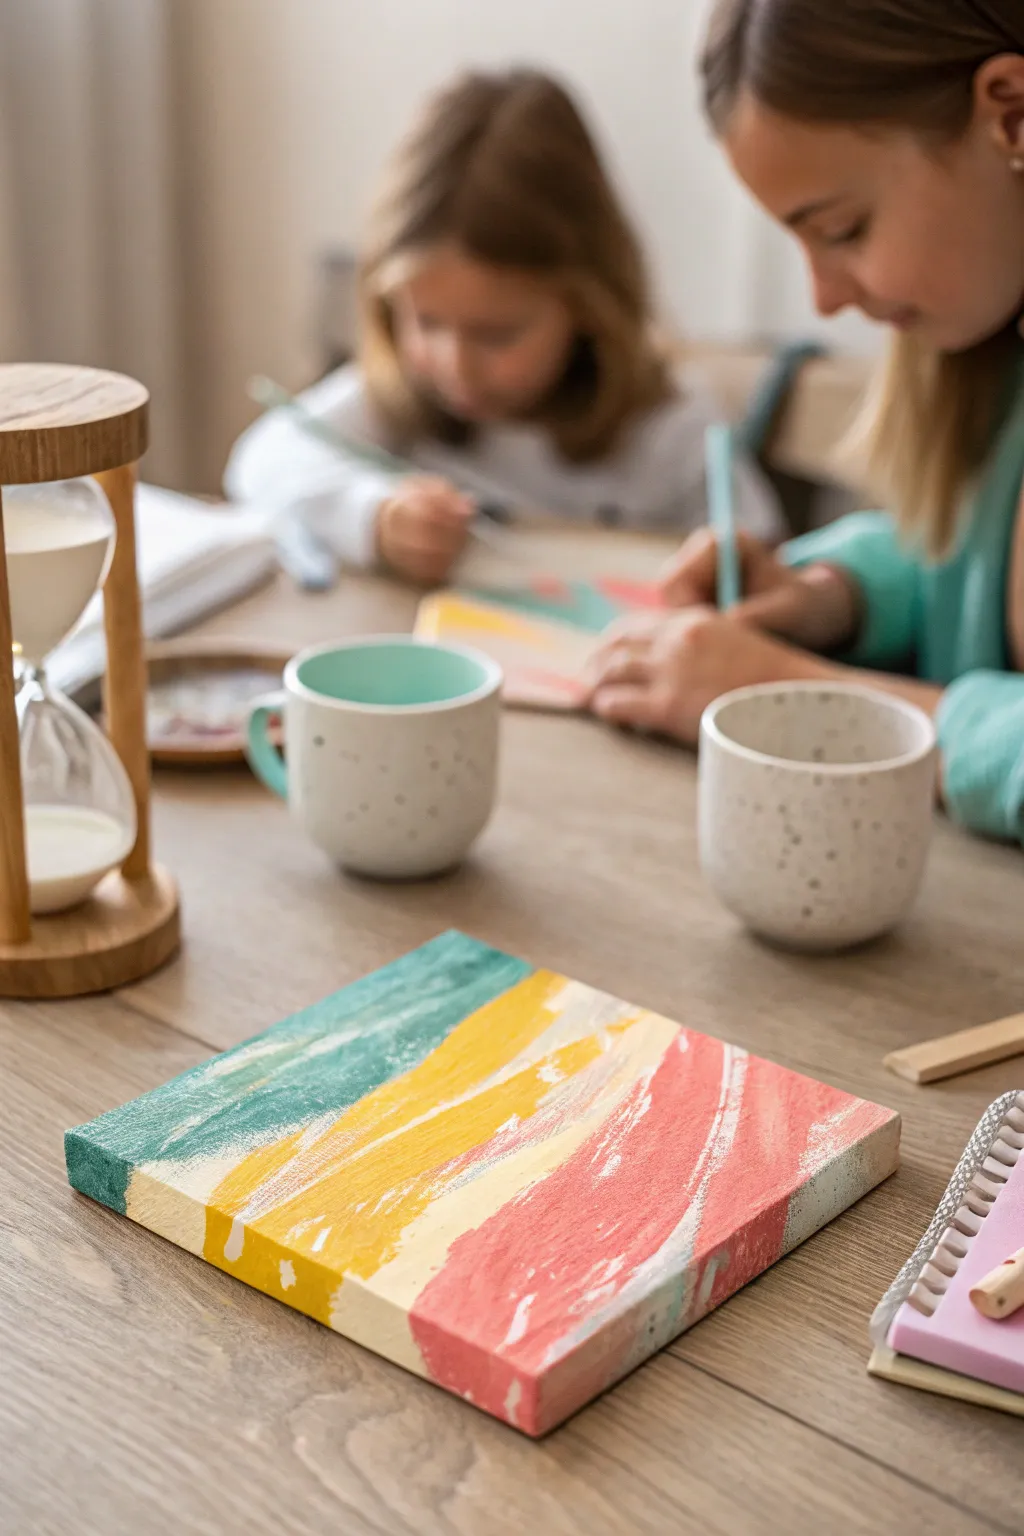
Create a vibrant, modern abstract piece that captures the carefree spirit of summer with splashy diagonals of teal, yellow, and coral. This project focuses on textured layering and spontaneous brushwork to produce an energetic yet balanced composition.
Step-by-Step
Materials
- Small square canvas (e.g., 6×6 or 8×8 inches)
- Acrylic paints: Teal/Turquoise, Bright Yellow, Coral/Pink, Cream/Off-White
- Flat bristle brushes (medium and large)
- Palette or paper plate
- Water cup
- Paper towels
- Table covering (for protection)
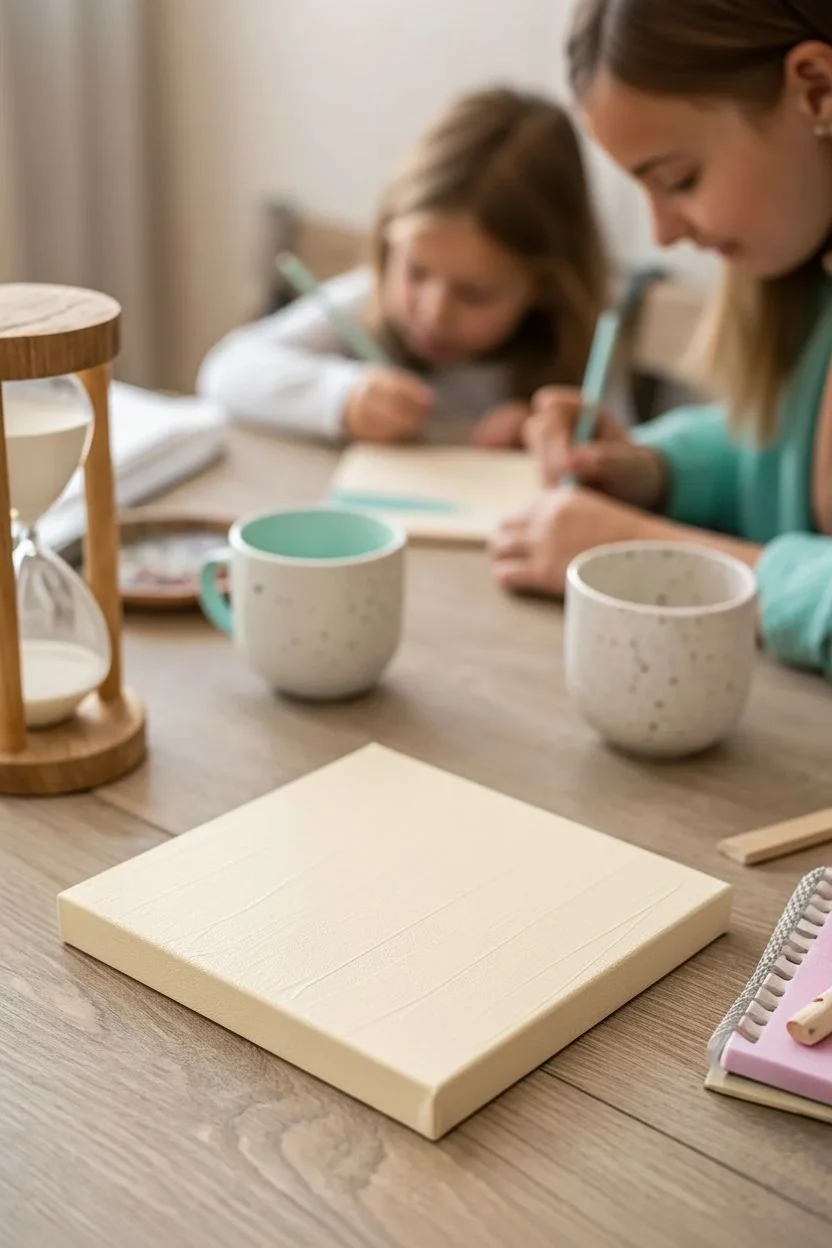
Step 1: Preparation & Base Coat
-
Prepare your space:
Lay down a protective table covering to catch any stray drips, as acrylics can be tricky to remove once dry. -
Set up the palette:
Squeeze out small dollops of your cream, teal, yellow, and coral paints onto your palette, keeping them separate for now. -
Apply the background:
Load a large flat brush with the cream or off-white paint. -
Cover the canvas:
Paint the entire face of the canvas with the cream color, using long, smooth horizontal strokes. -
Paint the edges:
Don’t forget to wrap the cream color around the sides of the canvas for a professional, finished look. -
Let it dry completely:
Allow this base layer to dry fully before moving on; this ensures your colorful top layers stay bright and don’t get muddy.
Dry Brush Technique
To get that scratchy, textured look, wipe most of the paint off your brush onto a paper towel before hitting the canvas. Less is more here.
Step 2: Layering the Colors
-
Start with teal:
Load a medium flat brush with the teal or turquoise paint. Remove a little excess paint on a paper towel so the brush isn’t dripping wet. -
Create the first diagonal:
Starting from the top left corner, sweep the brush diagonally downwards towards the center. Apply uneven pressure to create a textured, streaky effect where the background peeks through. -
Switch to yellow:
Rinse your brush thoroughly or grab a clean one. Pick up a generous amount of bright yellow paint. -
Add the middle stripe:
Paint a broad diagonal stroke right next to the teal section. I like to overlap the edges just slightly to create a sense of movement between the colors. -
Texture the yellow:
Go back over the yellow area with a drier brush to add streaks and white space, mimicking the loose style of the teal section. -
Apply the coral:
Clean your brush again and load it with the coral or pink paint. -
Finish the bottom corner:
Fill the remaining bottom right corner with the coral paint using the same diagonal sweeping motion. -
Extend to the sides:
Carry each colored stripe over the edge of the canvas so the design wraps around the painting’s thickness.
Add Some Sparkle
Once the paint is fully dry, paint a thin line of gold metallic paint between the color blocks to make the abstract shapes pop.
Step 3: Final Touches
-
Dry brush blending:
With a clean, very dry brush, lightly whisk over the transition areas between colors to soften lines without fully mixing them. -
Add highlights:
Dip a small brush into the cream paint and add a few quick, impulsive dashes over the colored sections to bring back some brightness. -
Check for gaps:
Look closely at the canvas weave; if you see too much raw canvas (unless intentional), dab a little more paint into those spots. -
Final drying time:
Let the painting sit undisturbed until completely dry to the touch.
Display your cheerful abstract painting on a mini easel or mount it on the wall to add a pop of color to any room
Big Group Mural Backdrop
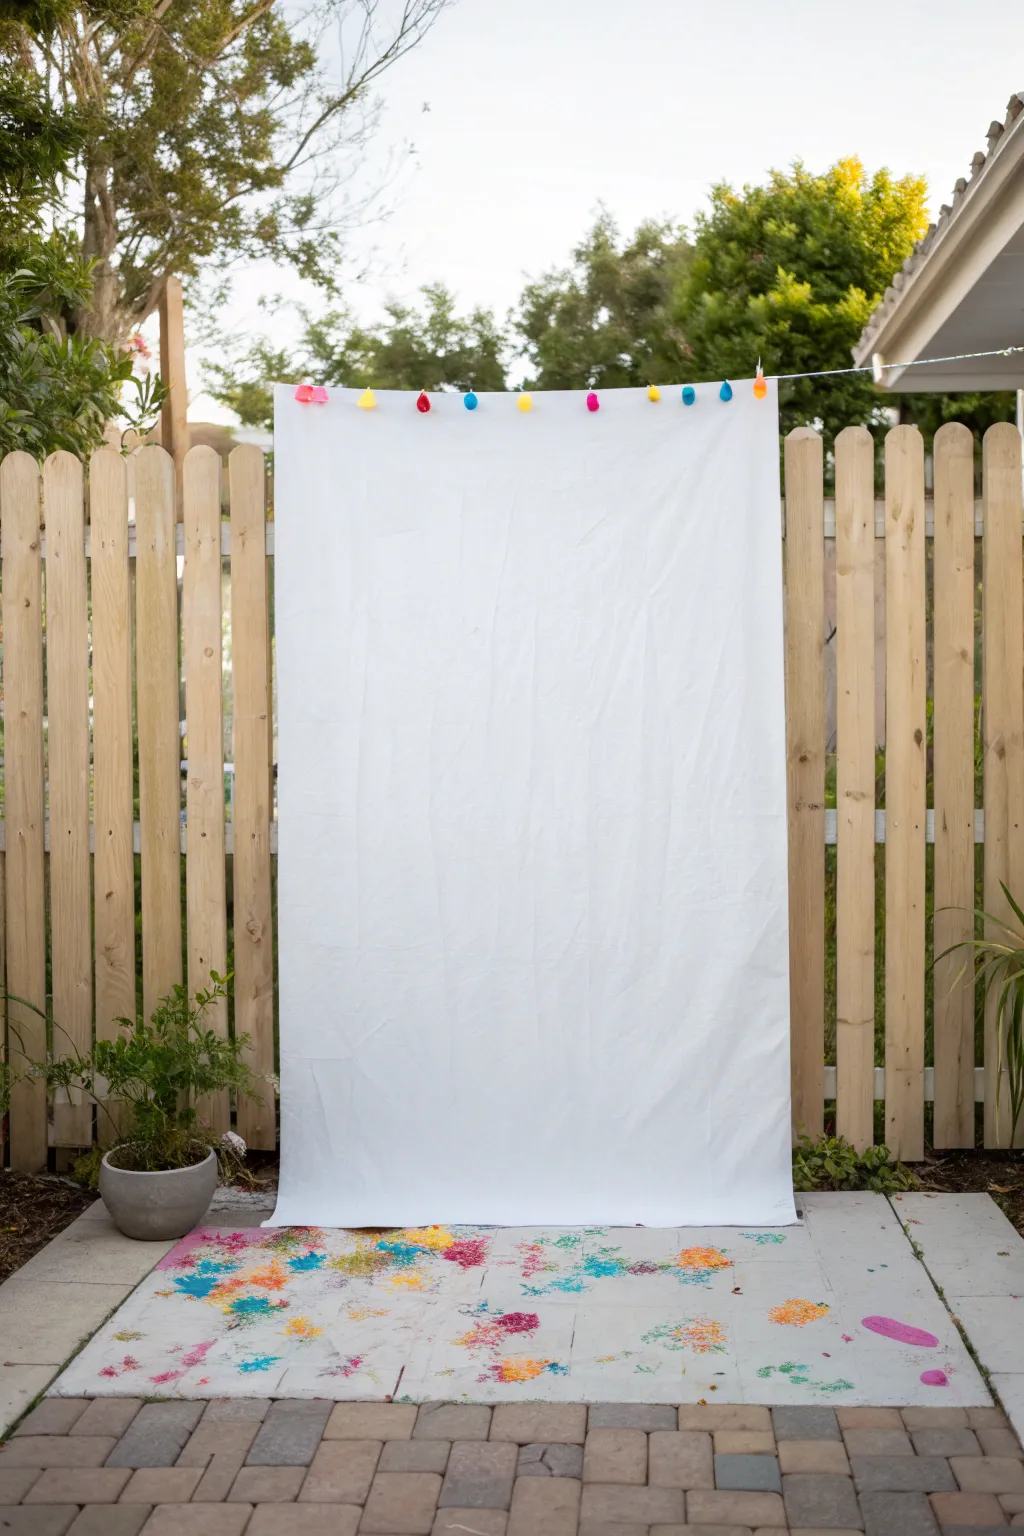
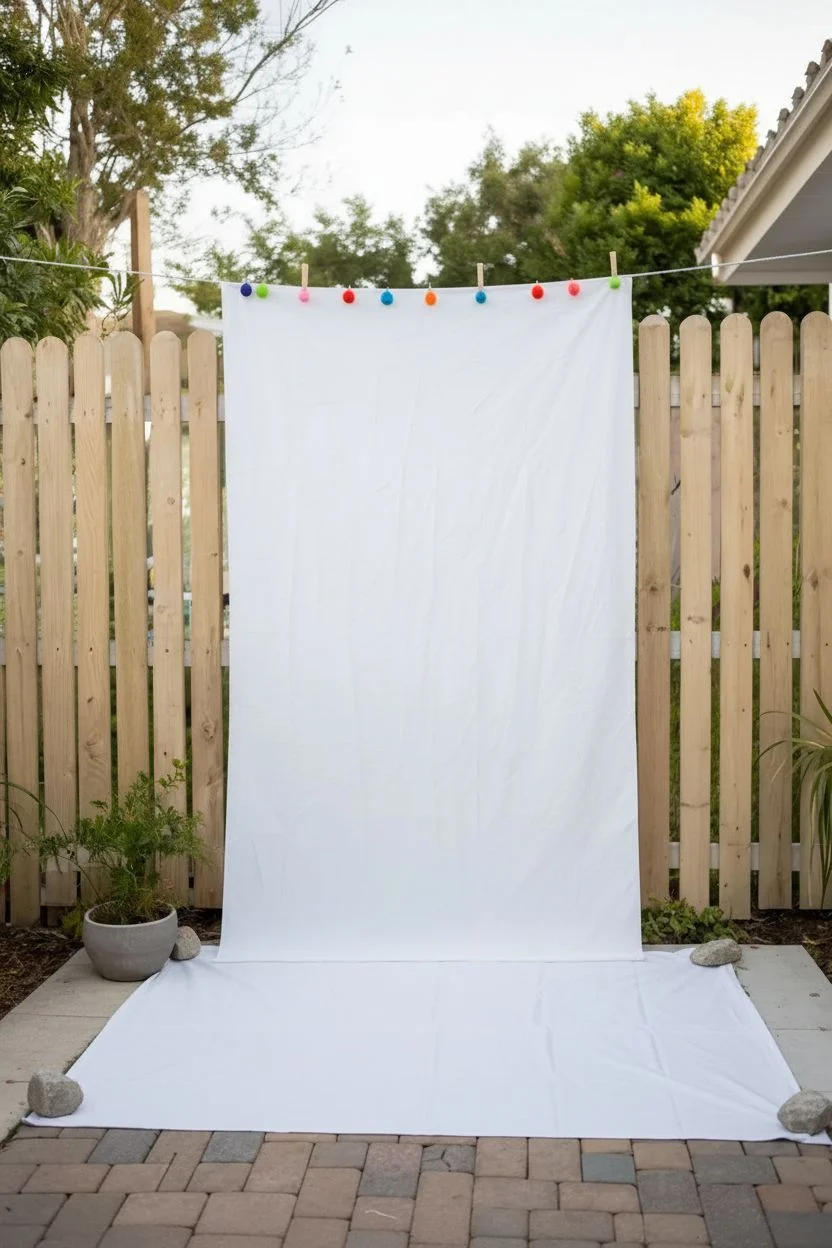
Transform your backyard fence into an oversized artist’s easel with this simple yet impactful setup. A sprawling white canvas invites collaborative creativity while a splash-ready floor covering catches all the colorful chaos.
Step-by-Step Tutorial
Materials
- Large white cotton drop cloth or king-size flat sheet
- Heavy-duty clothesline rope
- Assorted clothespins or clips
- Colorful pompoms (optional)
- Hot glue gun and glue sticks (optional)
- Large canvas drop cloth (for the floor)
- White primer or gesso
- Fabric paint or acrylic paint (various colors)
- Painters tape or heavy rocks
Step 1: Setting the Scene
-
Choose your location:
Scout your backyard for a spot with a sturdy fence or two strong trees spaced about 8-10 feet apart to anchor your clothesline. -
Secure the line:
Tie your heavy-duty clothesline rope tight between your anchor points. Ensure it is high enough that the huge sheet won’t bunch on the ground, but low enough that kids can reach the middle. -
Clip customization:
For a festive touch, I like to hot glue small, bright pompoms onto the gripping end of plain wooden clothespins. Let the glue cool completely before using. -
Hang the canvas:
Drape your large white sheet or lightweight drop cloth over the line. If using a sheet, loop the top edge over the rope slightly for extra stability. -
Pin it tight:
Use your embellished clothespins to secure the sheet along the top wire. Space them every 6-8 inches to prevent the fabric from sagging in the middle. -
Smooth the surface:
Pull the bottom corners of the hanging sheet gently to ensure the fabric hangs flat and relatively wrinkle-free, creating an inviting blank surface.
Wind Defense
If it’s a breezy day, add fishing weights or heavy washers to the bottom hem of the hanging sheet. This keeps it from flapping wildly while kids try to paint.
Step 2: Preparing the Splash Zone
-
Lay the ground cloth:
Position your second canvas drop cloth directly underneath the hanging sheet. This protects your patio pavers or grass from inevitable spills. -
Prime the base:
To make the floor decoration really pop like in the photo, roll a layer of white primer or gesso over the floor drop cloth and let it dry completely. -
Anchor the corners:
Place heavy rocks on the corners of the floor cloth, or use painter’s tape if you are setting up on a paved surface, to keep it from blowing in the breeze. -
Add pre-party color:
Before the guests arrive, splatter some bright acrylic paints onto the white floor cloth. This signals that ‘mess’ is allowed here and adds immediate visual energy. -
Create texture:
Use a stiff-bristled brush to flick paint droplets, or press painted sponges onto the floor cloth to mimic the look of creative chaos. -
Dry time:
Allow your pre-splattered floor decoration to dry to the touch so guests don’t track wet paint away from the designated art zone immediately. -
Final check:
Stand back and ensure your vertical canvas is centered over the floor cloth. The setup creates a defined stage for the painting activity to begin.
Make it Waterproof
Swap the cotton sheet for a white vinyl shower curtain liner. The paint will glide more slippery, but it’s easier to hose down for reuse later.
Now you have a perfect blank slate ready for a group masterpiece
Texture Tool Tasting Bar
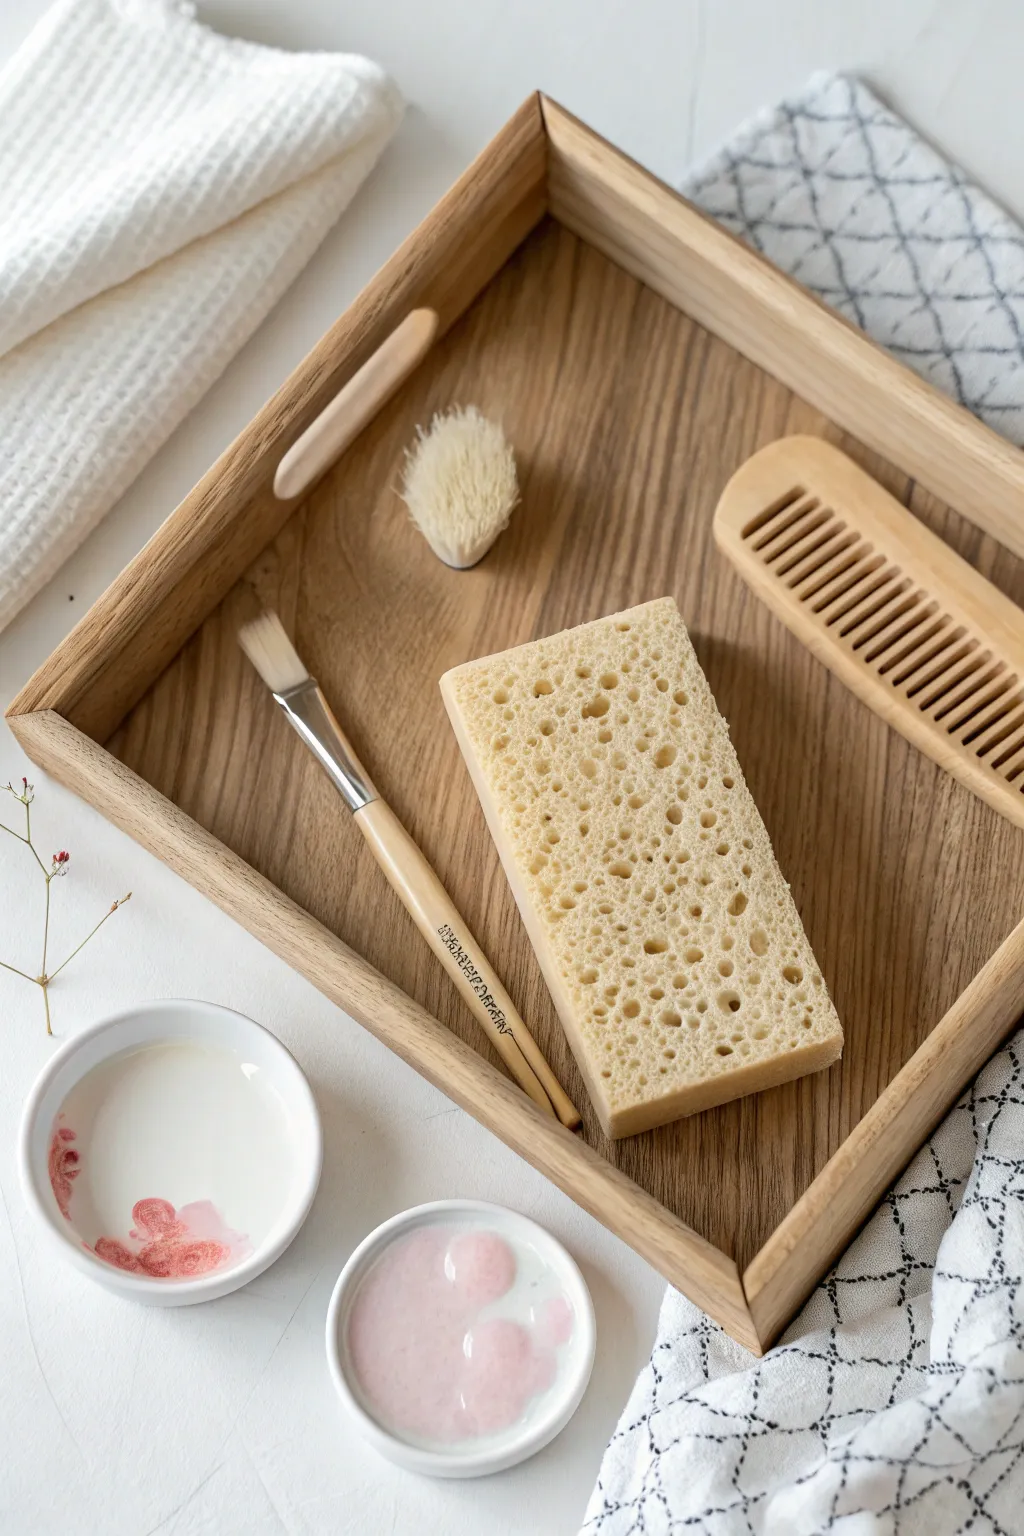
Transform ordinary household items into an exciting sensory art station that invites kids to explore beyond standard brushes. This simple but inviting setup creates a ‘menu’ of textures for young artists to sample, turning painting into a tactile experiment.
Step-by-Step Guide
Materials
- Wooden tray or shallow box (approx. 12×16 inches)
- Rectangular cellulose sponge (clean and dry)
- Wide-tooth wooden comb
- Small round bristle brush or stencil brush
- Fine-tipped paintbrush
- Small white ceramic bowls (2-3)
- Washable tempera or acrylic paints (white and pink/red shown)
- Patterned tea towel or cloth napkin
- White waffle-weave towel
- Textured paper or canvas for testing
Step 1: Curating the Tools
-
Find a dedicated container:
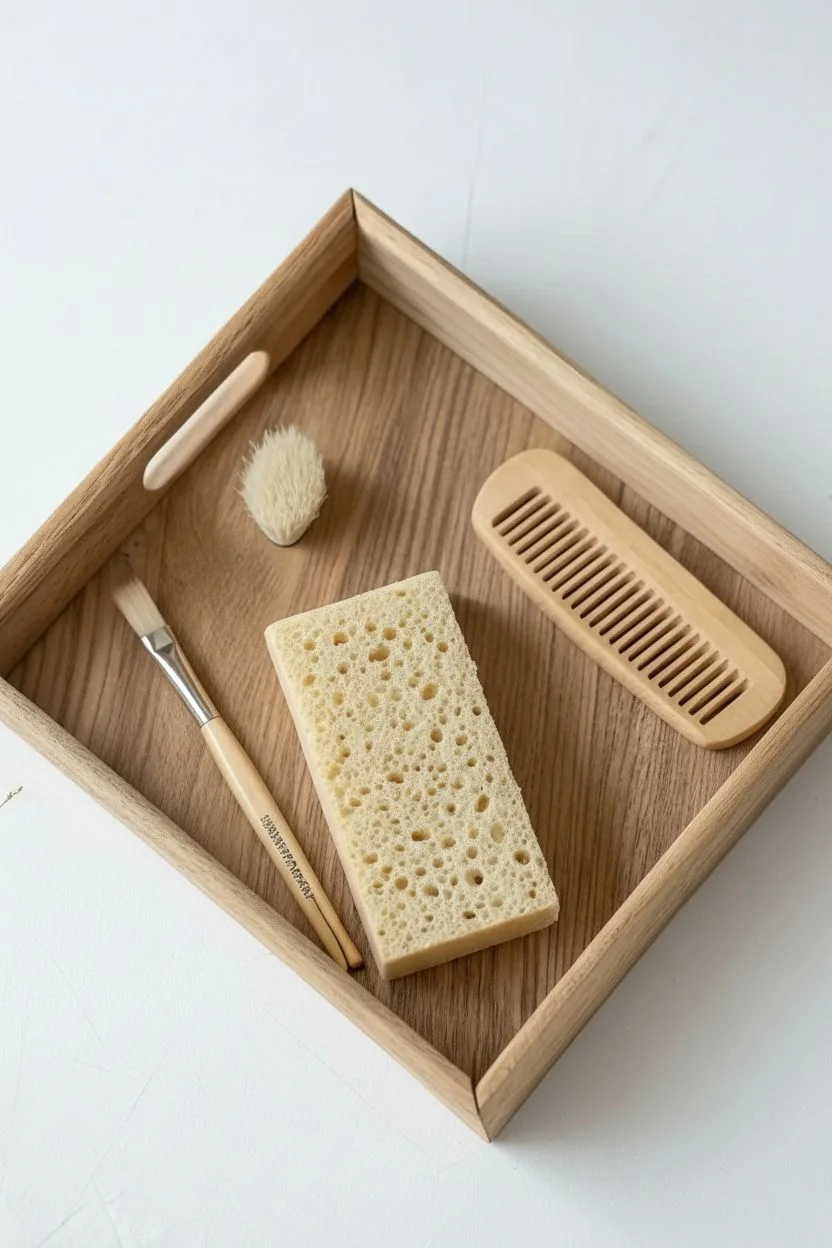
Begin by selecting a shallow wooden tray to serve as the ‘platter’ for your tools. A tray with raised edges keeps everything contain and makes the activity feel special, like a meal being served. -
Select the sponge:
Place a clean, rectangular cellulose sponge in the center of the tray. Look for one with large, varied pores, as these create the most interesting bubble-like prints when stamped onto paper. -
Add the comb:
Position a wide-tooth wooden comb on the right side of the tray. This tool is perfect for dragging through wet paint to create parallel lines, waves, and cross-hatching effects. -
Include brushes:
Place a fine-tipped paintbrush diagonally across the tray for detailed work. Add a small, round bristle brush near the top; its stiff bristles are excellent for stippling and creating fur-like textures.
Step 2: Preparing the Paint Palette
-
Choose your vessels:
Use small, shallow ceramic bowls for the paint. These are sturdy enough not to tip over easily and their white color helps kids see the true hue of the paint clearly. -
Pour the base color:
Fill the first bowl with a generous amount of white paint. This will act as a base or mixing medium to create tints. -
Add color accents:
In the same bowl or a separate one, add a few drops of red or pink paint. I like to swirl it just slightly—leaving it partially unmixed creates beautiful marble effects when the kids dip their tools. -
Create a wash:
In a second bowl, mix a watered-down version of your pink paint. This thinner consistency behaves differently with the sponge, soaking in more deeply and creating softer, watercolor-style textures.
Keep it Clean
Keep a damp rag or a ‘rinsing bowl’ specifically for the comb and sponge so colors don’t get muddy between texture experiments.
Step 3: Styling the Station
-
Arrange the textiles:
Lay down a neutral white waffle-weave towel to the left of the tray and a patterned cloth (like the grid pattern shown) to the right. This defines the workspace and handles spills practically. -
Check the layout:
Ensure the tools are spaced out comfortably within the tray. The goal is to make each tool easy to grab without knocking others over. -
Add a natural touch:
For a final aesthetic detail, place a small dried flower stem near the tray. It signals that this is a creative, gentle space. -
Invite exploration:
Place the paint bowls just outside the tray, ready for dipping. The setup is now ready for kids to ‘taste’ the different textures on their paper.
Texture Hunt
Add natural items like pinecones, leaves, or feathers to the tray. Each natural object offers a completely unique stamp pattern.
Watch as the kids discover that painting is about so much more than just brushstrokes by experimenting with this tactile buffet
Tape-Resist Rainbow Names
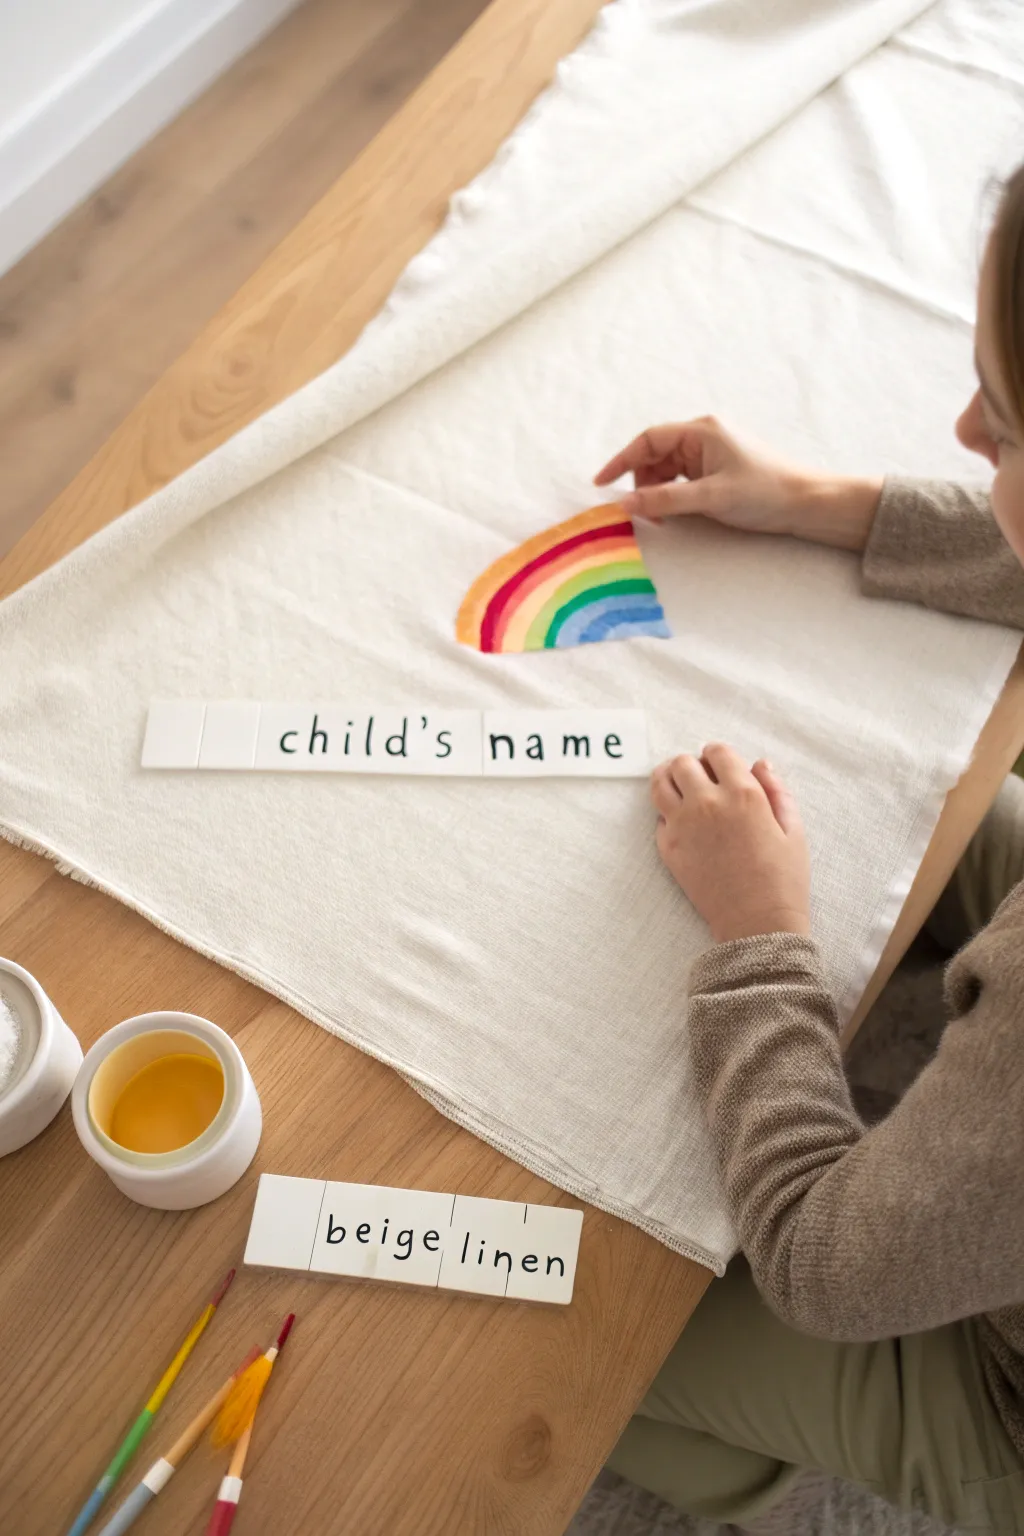
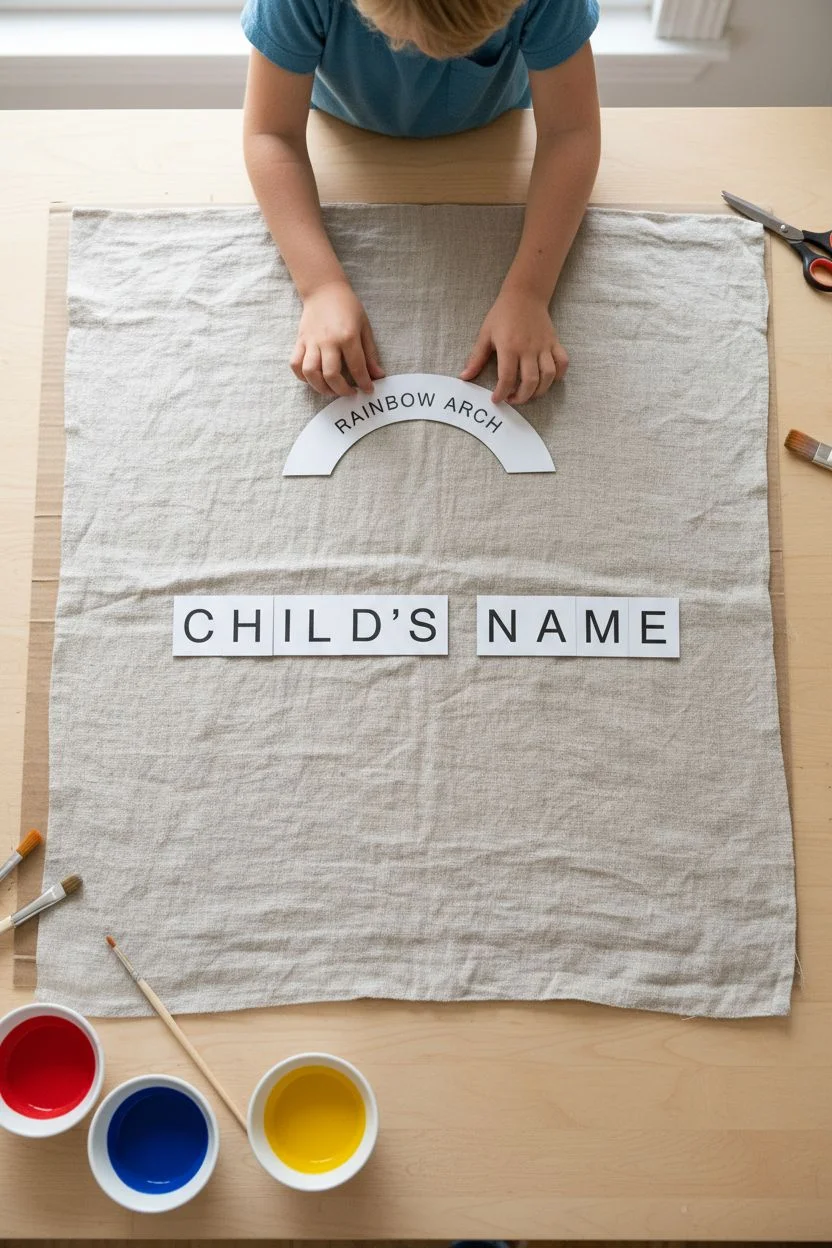
Create a personalized, vibrant wall hanging that celebrates a child’s name with colorful arches. Using a simple tape-resist technique on natural linen fabric, this project results in crisp, legible lettering surrounded by a bright, painted rainbow.
How-To Guide
Materials
- Beige linen fabric (or canvas)
- Painter’s tape or masking tape (various widths)
- Fabric paints (red, orange, yellow, green, blue)
- Paintbrushes (flat and round)
- Scissors
- Cardboard or plastic placemat (to protect surface)
- Small bowls for paint
- Water cup for rinsing brushes
Step 1: Preparation
-
Prepare the fabric:
Cut a rectangular piece of beige linen to your desired size. A good starting size is about 12 inches by 18 inches, depending on the length of the name. -
Protect your workspace:
Lay down a piece of cardboard or a plastic placemat underneath the linen. Fabric paint can bleed through, so this protects your table. -
Plan the name placement:
Decide where you want the name to appear. The center or slightly below center usually works best for balancing the rainbow arch above it.
Step 2: Taping the Letters
-
Create the tape letters:
Tear or cut strips of painter’s tape to form the letters of the child’s name. Use narrower pieces for curved letters like ‘S’ or ‘C’, overlapping small bits of tape to get the shape right. -
Position the letters:
Press the tape letters firmly onto the fabric in a straight line. Ensure the edges of the tape are completely sealed against the fabric to prevent paint from seeping underneath. -
Add spacing guides (optional):
If you want perfectly even spacing, you can lightly mark the baseline with a pencil before sticking down the tape.
Tape Trouble?
If paint bleeds under the tape, use a stiff brush dipped in water to gently scrub the excess while it’s still damp, or touch up with beige paint.
Step 3: Painting the Rainbow
-
Mix your colors:
Pour small amounts of your fabric paint into separate bowls. If the paints are very thick, you can dilute them slightly with water, but keep them opaque enough to cover the fabric. -
Paint the first arch:
Start with the innermost color, usually blue or purple, right above the taped name. Paint a curved arch that frames the name. -
Continue upward:
Move to the next color (green) and paint a stripe directly above the blue one. Follow the curve of the first arch carefully. -
Add warm tones:
Paint the yellow stripe next. I like to overlap the wet edges just slightly to create a softer transition between colors. -
Finish the rainbow:
Paint the final orange and red arches at the top. Extend the paint down past the sides of the name if you want a larger rainbow, or keep it floating above. -
Cover the tape edges:
Make sure you paint thoroughly over the tape letters where the rainbow intersects them. The paint needs to cover the area around the tape completely to define the letters later.
Crisp Lines Secret
Press the tape edges down with your fingernail or a spoon before painting. Start brush strokes on the tape and move outward to avoid forcing paint under.
Step 4: Finishing Touches
-
Let it dry completely:
Allow the paint to fully dry. This is crucial; peeling tape from wet paint can smudge the crisp lines. -
Peel the tape:
Once dry, carefully peel off the tape letters. Pull slowly at a 45-degree angle to reveal the clean, unpainted fabric underneath. -
Touch up edges:
If any paint bled under the tape, use a tiny brush with a bit of white paint or a fabric marker to tidy up the letters. -
Set the paint:
Follow the instructions on your fabric paint bottle to heat-set the design, usually by ironing the reverse side of the fabric. -
Hem or hang:
You can leave the edges raw for a rustic look or fold and glue/sew a small hem. Attach a dowel or string to hang your new banner.
Now you have a charming, personalized decoration ready to brighten up any room
Monogram Canvas Party Favors
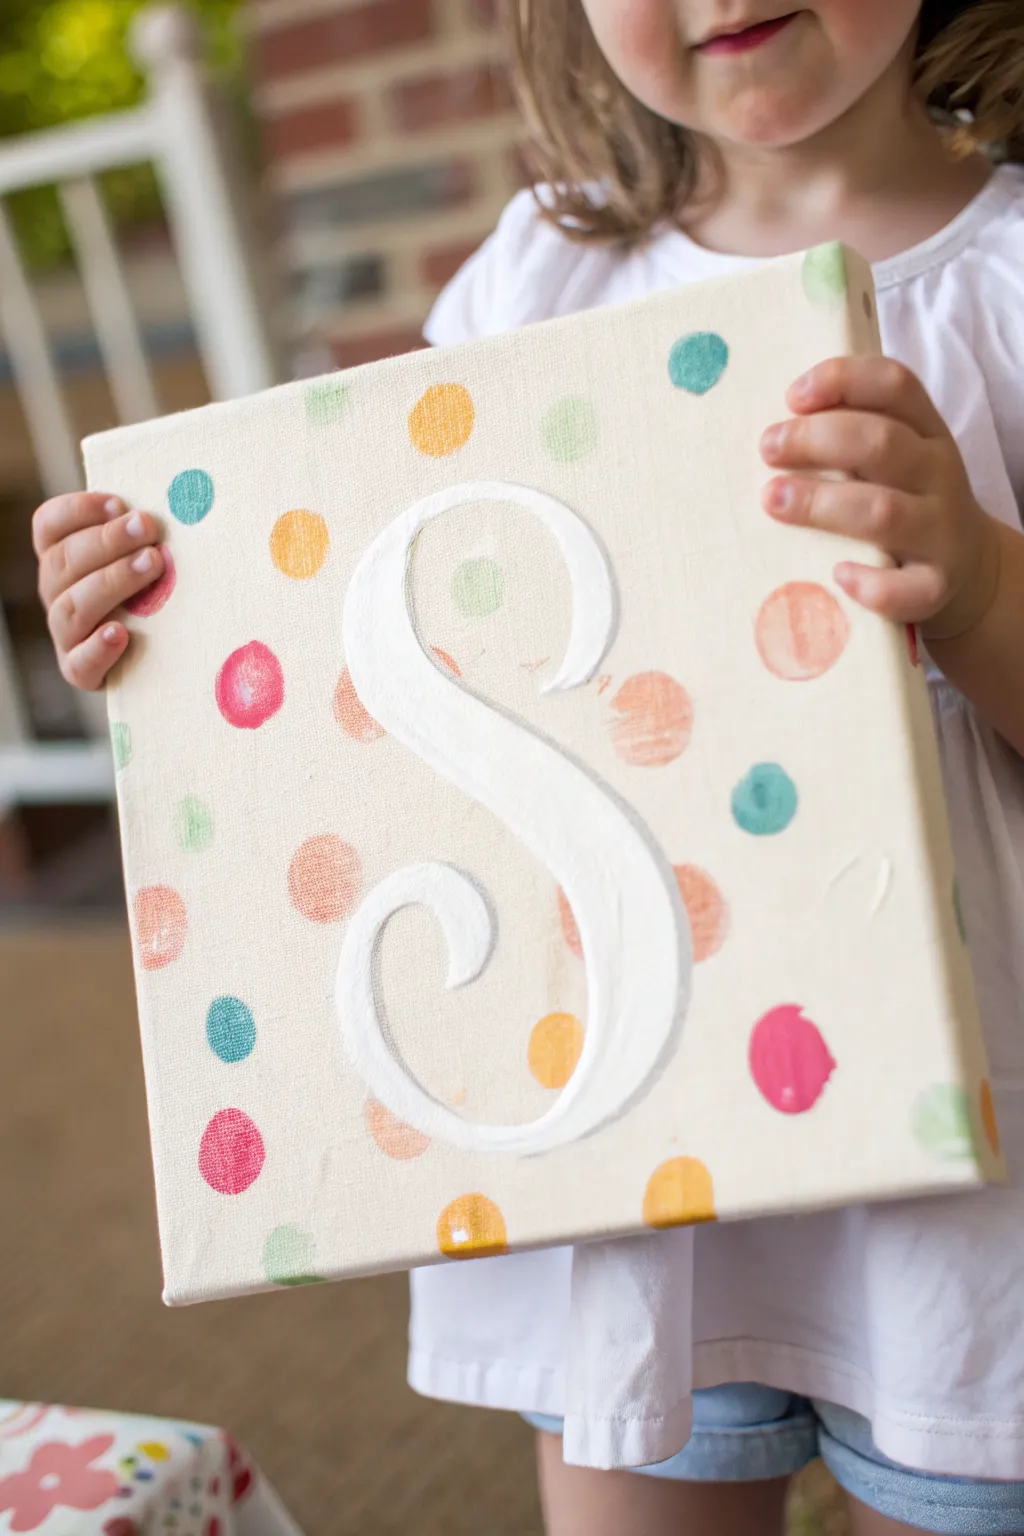
Create a personalized keepsake party favor that doubles as adorable room decor. This project features a bright, dimensional monogram surrounded by a confetti-like scatter of colorful painted dots on a gallery-wrapped canvas.
Step-by-Step
Materials
- Small square canvas (8×8 or 10×10 inches)
- White acrylic paint
- Assorted acrylic craft paints (pink, orange, teal, yellow, green)
- Large foam letter sticker or vinyl letter decal (for masking)
- Round foam pouncer brushes (small and medium sizes)
- Fine detail paintbrush
- Painter’s tape or stencil adhesive (optional)
- Paper plate or palette
Step 1: Preparing the Canvas
-
Clean the surface:
Wipe down your canvas gently with a dry cloth to ensure there is no dust or lint that might interfere with the paint adhesion. -
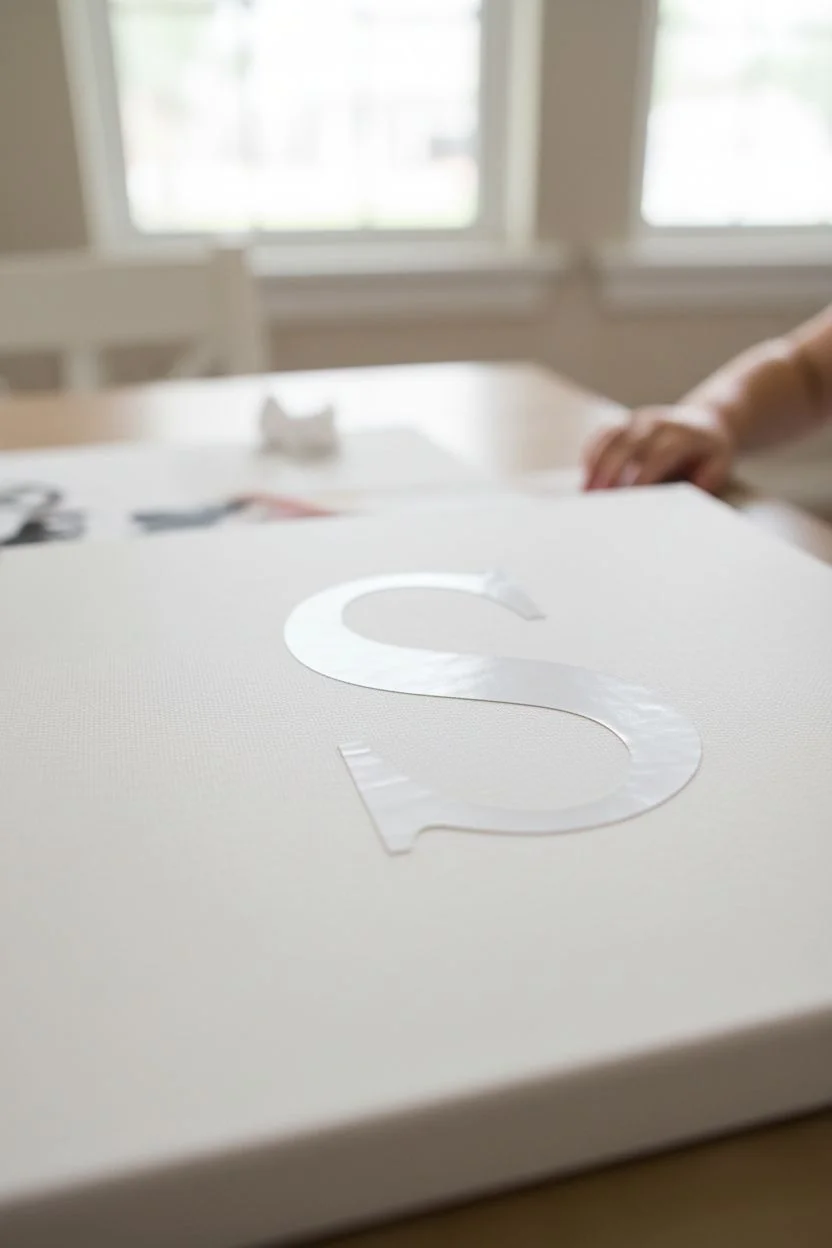
Position the letter:
Place your large letter sticker or decal directly in the center of the canvas. This will act as a mask to keep the letter shape clean and white. -
Secure the edges:
Press down firmly along the entire edge of the letter sticker. You want to make sure there are no gaps where paint can seep underneath.
Clean Stamp Trick
Twist the foam pouncer slightly as you lift it off the canvas. This breaks the suction and prevents the paint from forming a weird peak in the center of your dot.
Step 2: Creating the Polka Dots
-
Prepare your palette:
Squeeze dime-sized amounts of your colorful acrylic paints onto a paper plate. Keep colors separated to avoid muddying them. -
Load the pouncer:
Dip a round foam pouncer into your first color. Tap off excess paint on a clean part of the plate so the sponge is coated but not dripping. -
stamp the first color:
Press the pouncer straight down onto the canvas and lift straight up to create a perfect circle. Repeat randomly across the canvas. -
Add variety:
Switch to a new color and repeat the stamping process. I like to swap between different sizes of foam pouncers to create visual interest with both small and large dots. -
Overlap the letter:
Make sure several dots intentionally overlap the edges of the sticker letter in the center. This defines the shape of the negative space later. -
Paint the edges:
Don’t forget to stamp a few dots that wrap around the sides of the canvas for a finished, professional look. -
Let it dry:
Allow the polka dots to dry completely. Acrylics usually dry fast, but give it about 15-20 minutes to be safe.
Add Little Sparkles
Once the colored dots are dry, maximize the fun by adding a layer of clear glitter glue or iridescent medium over just the polka dots for a shimmery finish.
Step 3: Revealing the Monogram
-
Remove the mask:
Carefully peel up the corner of the letter sticker and slowly pull it off the canvas to reveal the crisp white canvas underneath. -
Inspect the edges:
If any paint bled under the sticker, use a tiny amount of white paint on a detail brush to touch up the edges and clean up the line.
Step 4: Adding the Dimensional Letter
-
Sketch the outline:
Using a very fine brush and white paint, create a subtle outline just slightly outside the negative space of the letter to define it further. -
Hand-paint the letter:
Paint the interior of the “S” shape with a fresh coat of white paint. You want this to look thick and slightly raised compared to the raw canvas. -
Build up texture:
Go over the white letter with a second layer of white paint. Use generous strokes to give it a visible brush texture, making it stand out against the flat dots. -
Smooth the curves:
Use your detail brush to carefully round out any serif ends or curves, ensuring the white letter looks polished and deliberate. -
Final dry:
Let the entire project sit undisturbed until the thick white paint is fully hardened.
Display this cheerful monogram on a shelf or hang it on a bedroom door to celebrate creativity and color
Glow-in-the-Dark Paint Night
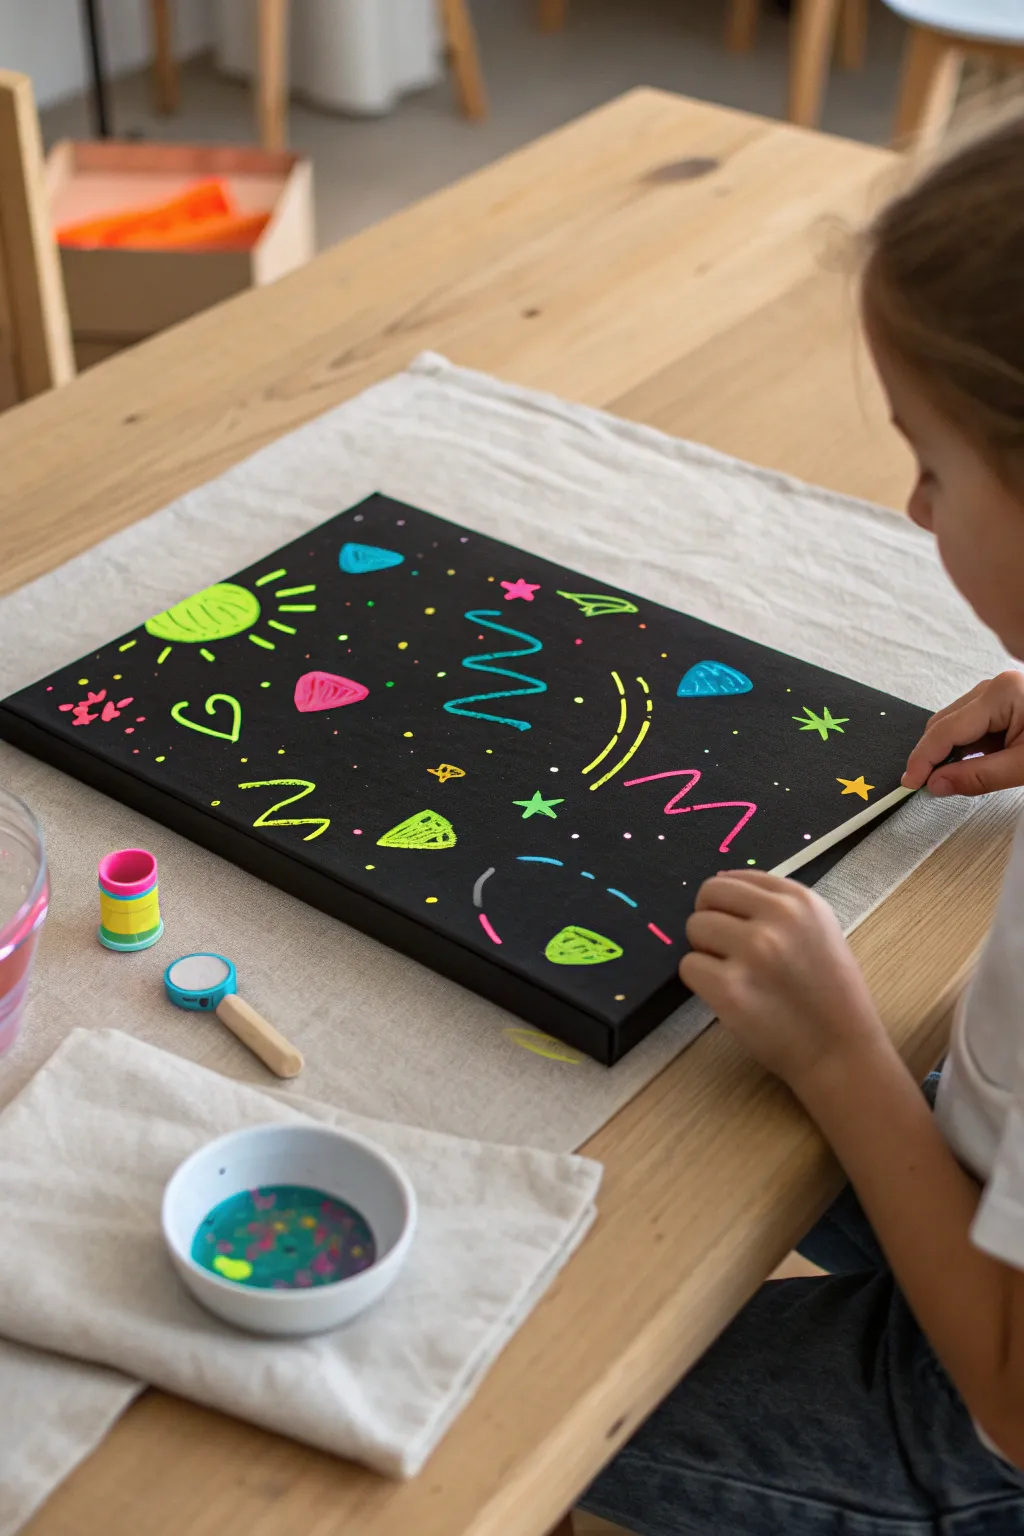
Turn out the lights and watch creativity shine with this vibrant space-themed art project. Using a black canvas as a backdrop makes the neon colors pop with an electric, almost glowing effect that kids absolutely love.
Step-by-Step Guide
Materials
- Black stretched canvas (8×10 or similar size)
- Neon or glow-in-the-dark acrylic paints (green, pink, blue, yellow)
- Small detail paintbrushes
- Pointed paint markers (optional, for finer lines)
- pencil (for initial sketching)
- Paper plate or palette
- Water cup and paper towels
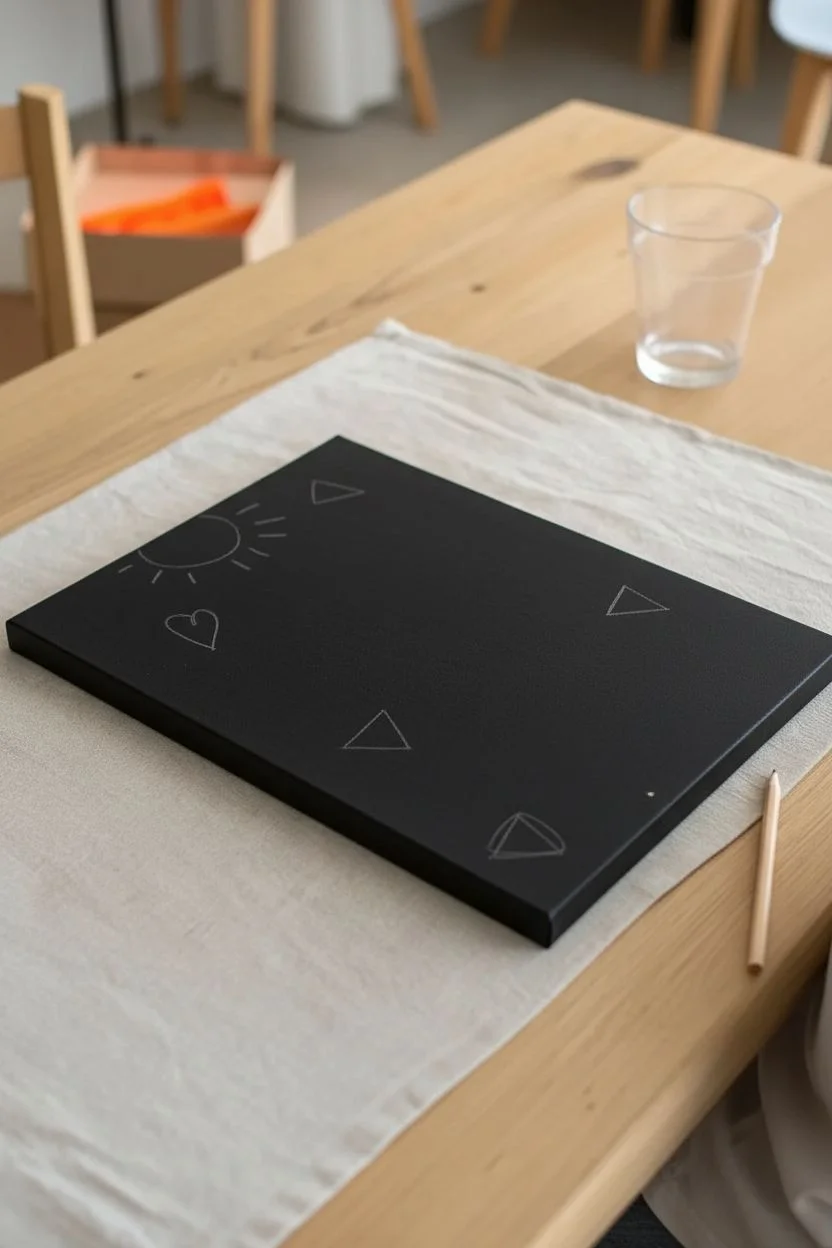
Step 1: Planning the galaxy
-
Prep the surface:
Start with a pre-primed black canvas to save time. If you only have white canvases, give them a solid coat of black acrylic paint and let them dry completely before the excitement begins. -
Sketch loosely:
Using a regular pencil, very lightly sketch out where the main elements will go. The graphite will shine just enough against the black for you to see it, but won’t interfere with the paint later. -
Design the sun:
Draw a semi-circle or full circle in one of the corners to represent a glowing planet or sun. Add little radiating lines coming off it. -
Add geometric shapes:
Scatter a few triangles and simple diamond shapes around the empty space. These will become floating ‘space rocks’ or asteroids.
Step 2: Adding neon color
-
Paint the sun:
Dip a small brush into neon green or yellow paint. Fill in your sun shape first; you may need two coats to ensure the black canvas doesn’t show through too much. -
Define the asteroids:
Switch to a brilliant neon blue or pink. Paint the triangles you sketched earlier, keeping the edges as crisp as possible. -
Fill the details:
Once the main shapes are filled, use a fine-tip brush or a paint marker to add squiggles or lines inside the shapes for texture. For example, add zig-zags inside the green sun. -
Create movement:
Now, draw wavy lines or zig-zags floating freely in the black space. Use alternating colors like cyan, magenta, and lime green to make the composition dynamic. -
Draw a heart or star:
Find an empty spot and outline a simple heart shape or a five-pointed star using a contrasting neon color. -
Add ‘comet’ tails:
Next to some of your shapes, add three small curved lines to suggest motion, like they are zooming through space.
Glow Like a Pro
For the best effect, use a UV blacklight while painting. It helps you see how the colors will pop in the dark instantly.
Step 3: Final glowing touches
-
Sprinkle the stars:
Dip the very end of your brush handle (not the bristles) into yellow or white neon paint. -
Dot the background:
Gently press the paint-dipped handle onto the canvas to create perfect little round dots. Scatter these everywhere to look like distant stars. -
Add painted stars:
Paint a few traditional cross-shaped stars or asterisks (*) using your finest brush to create variety in your galaxy field. -
Highlight the shapes:
If the first layer of paint has dried, go back over the brightest parts with a second layer. I find this makes the fluorescent effect much stronger. -
Let it dry:
Set the canvas aside to dry completely. Acrylics usually dry fast, but thicker globs of neon paint might need an extra hour.
Fixing Smudges
Neon paint mistakes on black are easy to fix. Let the mistake dry fully, then paint over it with black acrylic before trying again.
Hang your cosmic creation on the wall and wait for nightfall to see it truly come to life
Cardboard Castle Paint Build
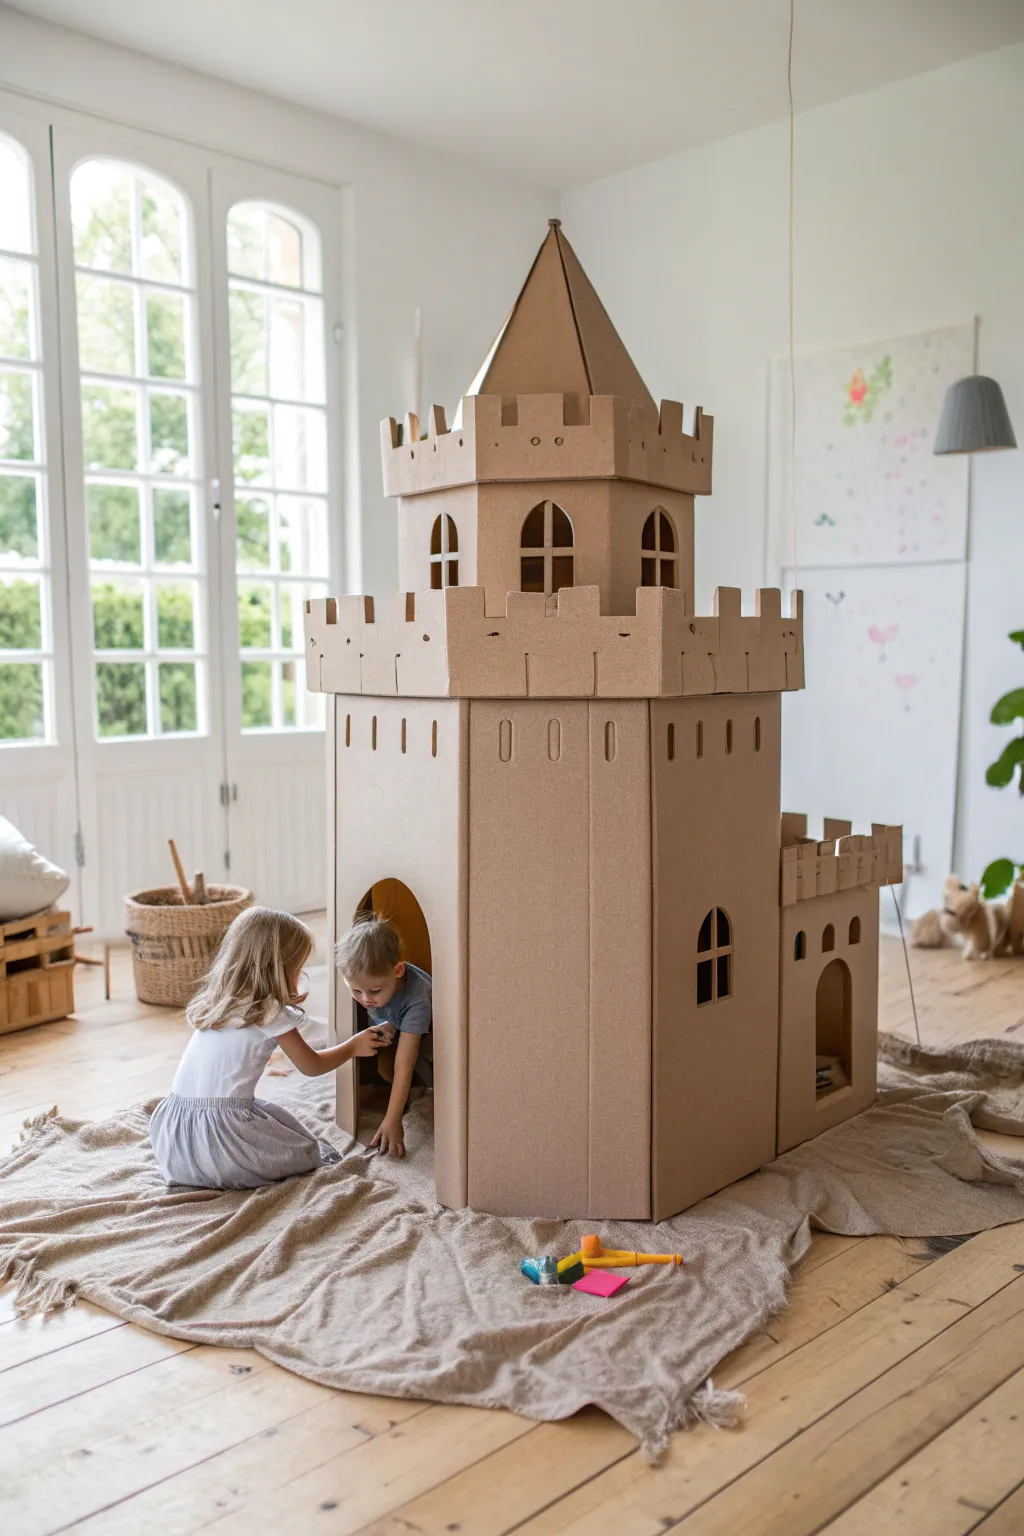
Transform your living room into a medieval wonderland with this epic cardboard fortress. Featuring a grand octagonal tower, crenellated battlements, and a pointed spire, this sturdy structure is the perfect blank canvas for a pre-party build before the painting fun begins.
Step-by-Step
Materials
- Multiple large, heavy-duty cardboard boxes (appliance boxes work best)
- Box cutter or X-Acto knife (adult use only)
- Strong duct tape (brown or beige to blend in)
- Hot glue gun and glue sticks
- Long straight edge or T-square
- Pencil or marker
- Large cutting mat or surface protector
- Zip ties (optional for structural support)
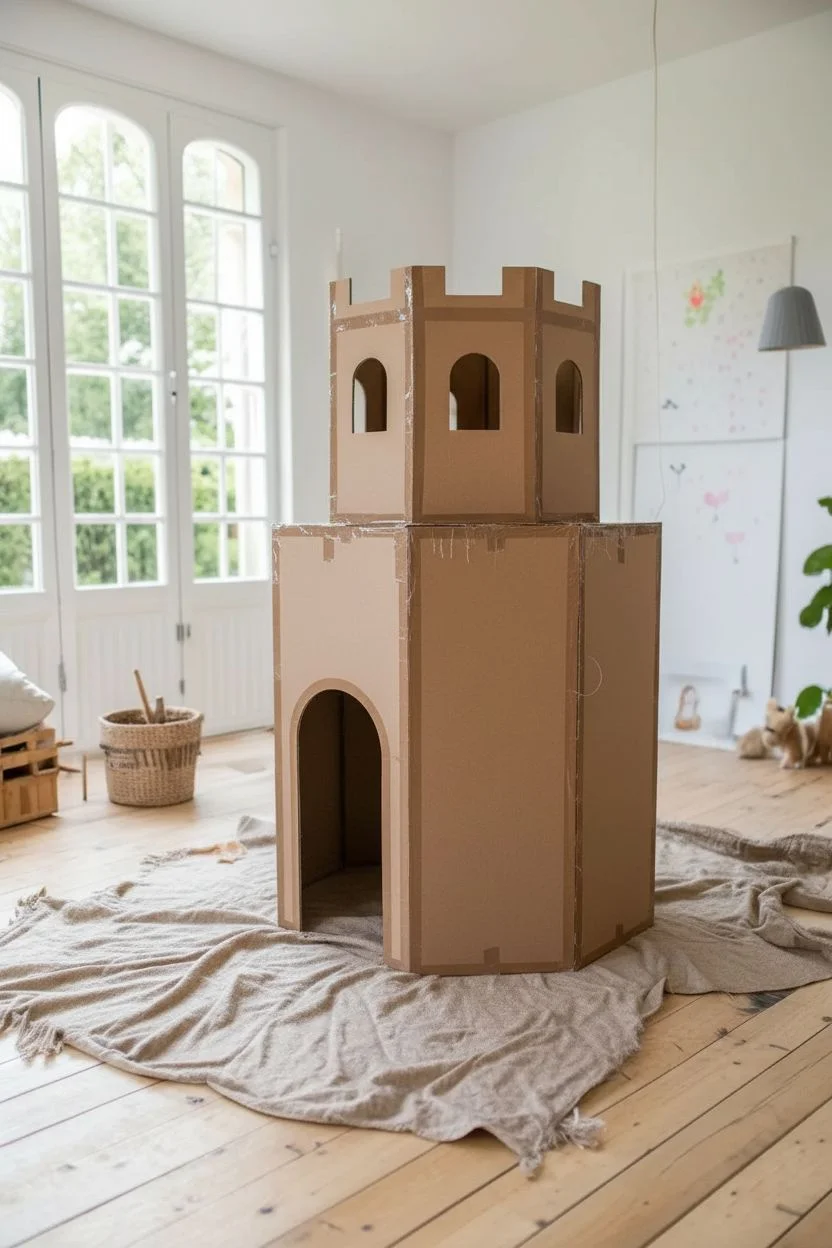
Step 1: Constructing the Main Tower Base
-
Determine dimensions:
Decide on the height and width of your main tower. For a castle children can sit inside, you’ll want panels at least 3-4 feet tall. Cut eight identical long rectangular panels to form the octagonal base. -
Score the folds:
Instead of cutting separate pieces, try to keep large sections intact. If you have a massive box, measure eight equal vertical sections and lightly score the cardboard (don’t cut all the way through) to create clean, sharp folds for the octagon shape. -
Join the structure:
Stand the panels upright. If you are using separate pieces, tape them securely on the inside seams with duct tape. I prefer to reinforce the outside seams with hot glue for extra stability before taping. -
Cut the entrance:
On one of the front-facing panels, sketch a large arched doorway. Carefully cut this out using your box cutter. Save the cutout piece—it can be reused for smaller details later. -
Add ventilation slots:
Near the top of the base level, cut small vertical slits around the perimeter. These aren’t just decorative; they help keep the interior airy for playing kids.
Step 2: Building the Upper Turret
-
Create the platform deck:
Cut a large octagon that is slightly wider than your base tower. This will act as the floor for the second level and the overhang for the battlements. -
Make the second level walls:
Construct a smaller, shorter octagon for the upper room. This should be about half the height of the bottom level. Cut ample arched windows on several sides to let in light. -
Form the battlements:
Cut long strips of cardboard about 6 inches tall. Measure and cut out notches (crenels) along the top edge to create the classic castle look. -
Attach the battlements:
Glue these notched strips around the outer edge of your platform deck, creating a walkway illusion between the upper wall and the edge. -
Assemble the levels:
Center the upper room onto the platform deck and glue it down. Then, attach this entire upper assembly onto the top of your main base tower. Reinforce the connection from the inside with generous amounts of tape.
Structural Secret
For a sturdier build, double-layer your cardboard panels by gluing two sheets together with the grain running in opposite directions (cross-grain).
Step 3: The Spire and Side Annex
-
Shape the roof panels:
To make the pointed roof, cut eight tall, thin triangles. The base of each triangle should match the width of your upper tower’s wall panels. -
Construct the spire:
Tape the triangles together side-by-side to form a pyramid. Place this roof on top of the upper tower and secure it with hot glue along the rim. -
Add a side keep:
For the smaller side extension, build a simple square or rectangular box structure attached to the main tower. Cut a matching arched doorway and windows. -
Finish with details:
Add a final strip of crenellated battlements around the top of the side keep. Check over the whole structure for any loose seams and add tape where necessary to ensure it withstands enthusiastic play.
Party Time Idea
Pre-draw outlines of bricks, vines, or shields on the castle walls with a black marker so the kids have a guide to ‘color in’ during the party.
Now that the structure is built, you have a massive canvas ready for the kids to paint and personalize


Have a question or want to share your own experience? I'd love to hear from you in the comments below!