Senior murals are one of my favorite ways to turn that end-of-year buzz into something you can feel every time you walk by it. Here are my best senior mural ideas for celebrating the graduating class, starting with the classics and ending with some artsy, unexpected twists.
Giant Graduation Year Letters

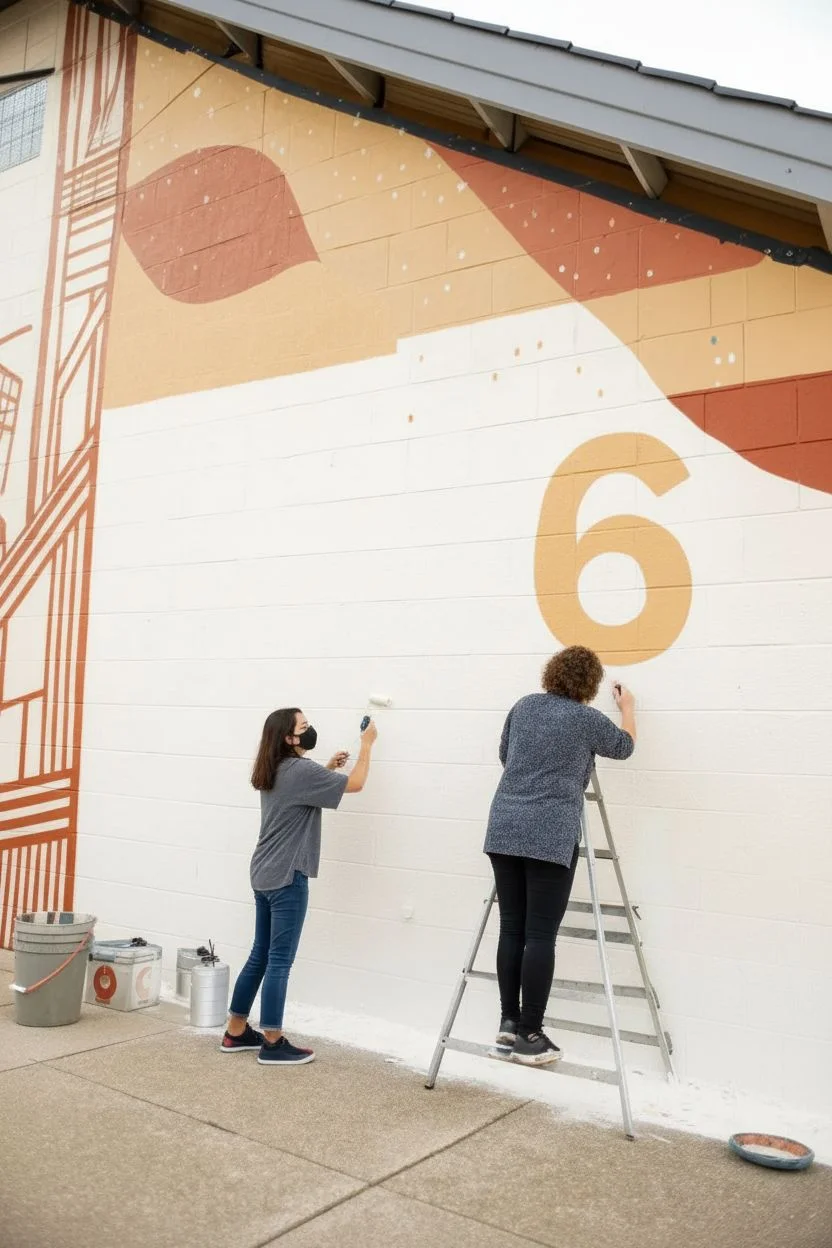
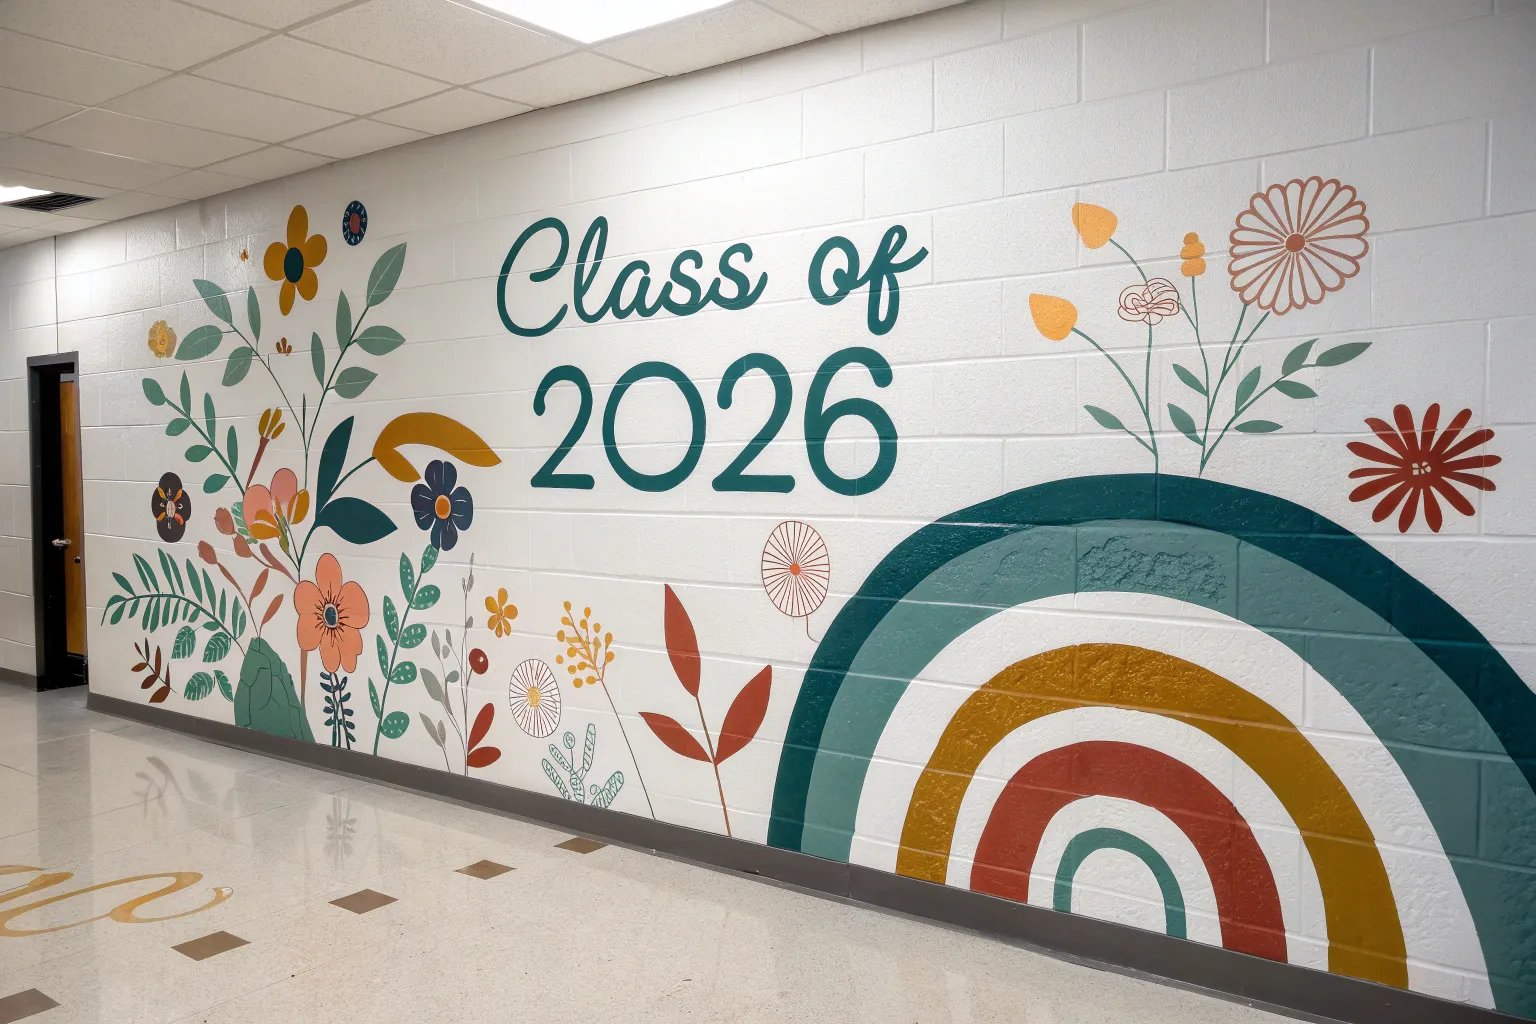
Make a huge statement for the graduating class with this bold, graphic outdoor mural. Combining clean typography with organic, terraced background shapes in warm earth tones, this design turns a plain cinder block wall into a memorable photo backdrop.
How-To Guide
Materials
- Exterior latex primer
- Exterior acrylic latex paint (white, dark navy blue, tan, ochre/yellow, rust/terracotta)
- Assorted synthetic brushes (2-inch flat, 1-inch angled sash, detail liners)
- Paint rollers and tray
- Painter’s tape or chalk snap line
- Chalk for sketching
- Ladder or step stool
- Measuring tape
- Digital projector (optional but recommended for numbers)
Step 1: Preparation and Background Base
-
Prep the Surface:
Clean the cinder block wall thoroughly with a stiff brush and water to remove dirt and cobwebs. Allow it to dry completely before applying a coat of exterior primer to ensure your colors pop. -
Establish the White Base:
Using a roller, paint the lower two-thirds of the wall—where the numbers will go—with a clean, warm white exterior paint. This provides the negative space for the text. -
Map Out the Organic Shapes:
With chalk, lightly sketch the flowing, hill-like curves for the upper background. These shapes should originate from the top corners and dip down, creating layers. -
Block in the Top Colors:
Apply the rust/terracotta color to the topmost sections of your sketched curves. Use a smaller angled brush to cut in the edges cleanly against the white or adjacent sections. -
Add Middle Tones:
Paint the intermediate curving sections with your ochre/yellow and tan shades, blending the edges slightly if a softer look is desired, or keeping hard lines for a graphic style. -
Detail the Left Column:
On the far left, use the rust color to paint the vertical geometric patterns. I find using a long straightedge or snap line helps keep these vertical stripes perfectly parallel.
Step 2: Typography and Details
-
Draft the ‘2026’:
Determine the center point of your white space. Project the number ‘2026’ onto the wall at night for perfect tracing, or use a grid method with chalk to draw large, block serif numbers. -
Paint the Number Fill:
Fill in the main body of the numbers with dark navy blue paint. Use a steady hand and a 1-inch angled sash brush to get crisp edges along the curves of the ‘2’ and ‘6’. -
Apply Shadows:
Load a liner brush with an orange or lighter rust color to create the drop shadow effect. Paint a consistent line to the bottom and left of each navy stroke, leaving a small gap of white space between the blue and the orange. -
Add Patterned Texture:
In the white space above the numbers (specifically near the top left), paint overlapping semi-circle patterns using grey or light blue to create a scallop or ‘fish scale’ texture. -
Paint the Scallops:
Repeat the scallop pattern on the lower right side of the wall, keeping the lines thin and consistent. -
Intersperse White Dots:
Go back to the colored upper sections (the rust and ochre areas). Using a small round brush, dab small white dots randomly across the surface to mimic a starry sky or texture. -
Add Colorful Confetti:
Scatter small dots of blue, orange, and teal in the white open spaces above the numbers to connect the background colors to the typography area. -
Final Touch-Ups:
Inspect your edges, especially around the numbers and the geometric stripes. Use a small detail brush with the background white color to clean up any drips or wobbly lines.
Muralist’s Secret
When painting over rough concrete or cinder block, use a brush with stiffer bristles to work the paint into the deep pits and pores.
Interactive Twist
Paint the ‘0’ or ‘6’ slightly lower so students can easily stand inside the loop or sit on the curve for fun graduation photos.
Step back and admire how these vivid colors transform the building into a celebration of the upcoming graduating class


Mascot Centerpiece With Senior Energy
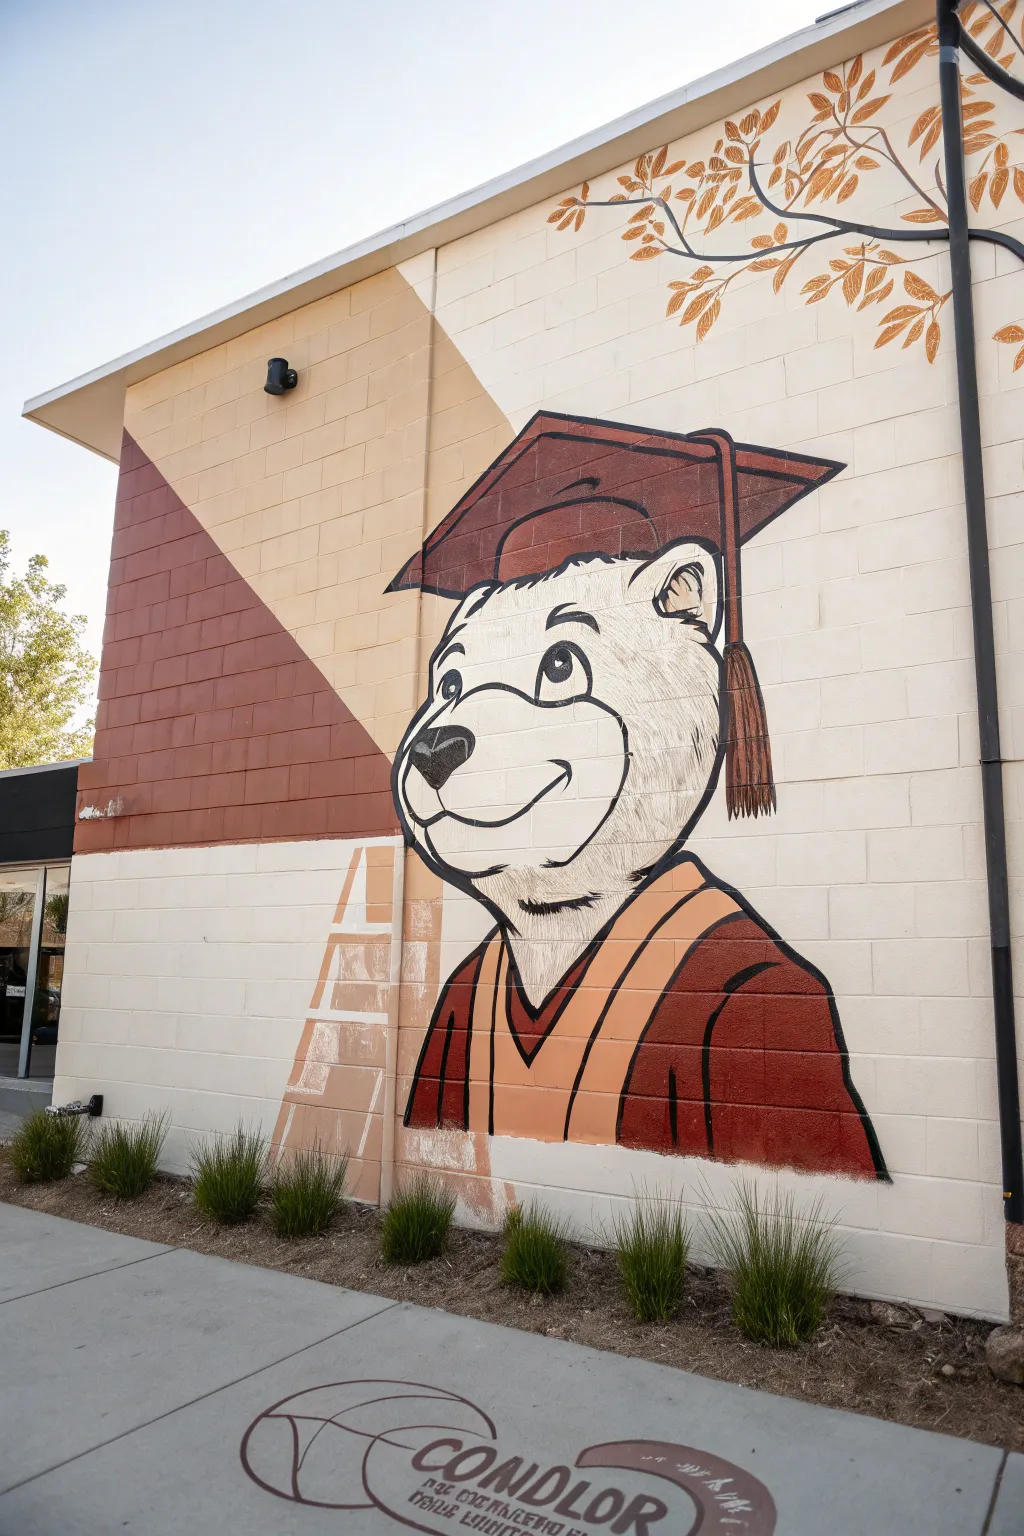
Celebrate school pride with this large-scale exterior mural featuring a friendly bear mascot dressed in graduation attire. The design combines bold character illustration with sleek geometric background shapes for a polished, spirited display.
Step-by-Step Tutorial
Materials
- Exterior masonry paint (cream, tan, dark brown, maroon, white)
- Wide painters tape (1.5 – 2 inch)
- Chalk or pastel sticks for sketching
- Digital projector (optional but recommended)
- Assorted brushes (large rollers, wide flat brushes, and fine detail brushes)
- Extension pole for rollers
- Drop cloths
- Ladder or stepladder
- Stiff bristle brush for cleaning masonry
- Primer suitable for brick/cinder block
Step 1: Preparation & Background
-
Surface prep:
Begin by thoroughly cleaning the cinder block wall with a stiff bristle brush to remove dirt, cobwebs, and loose debris. If the wall is previously unpainted, apply a masonry primer to ensure the paint adheres well and the colors remain vibrant. -
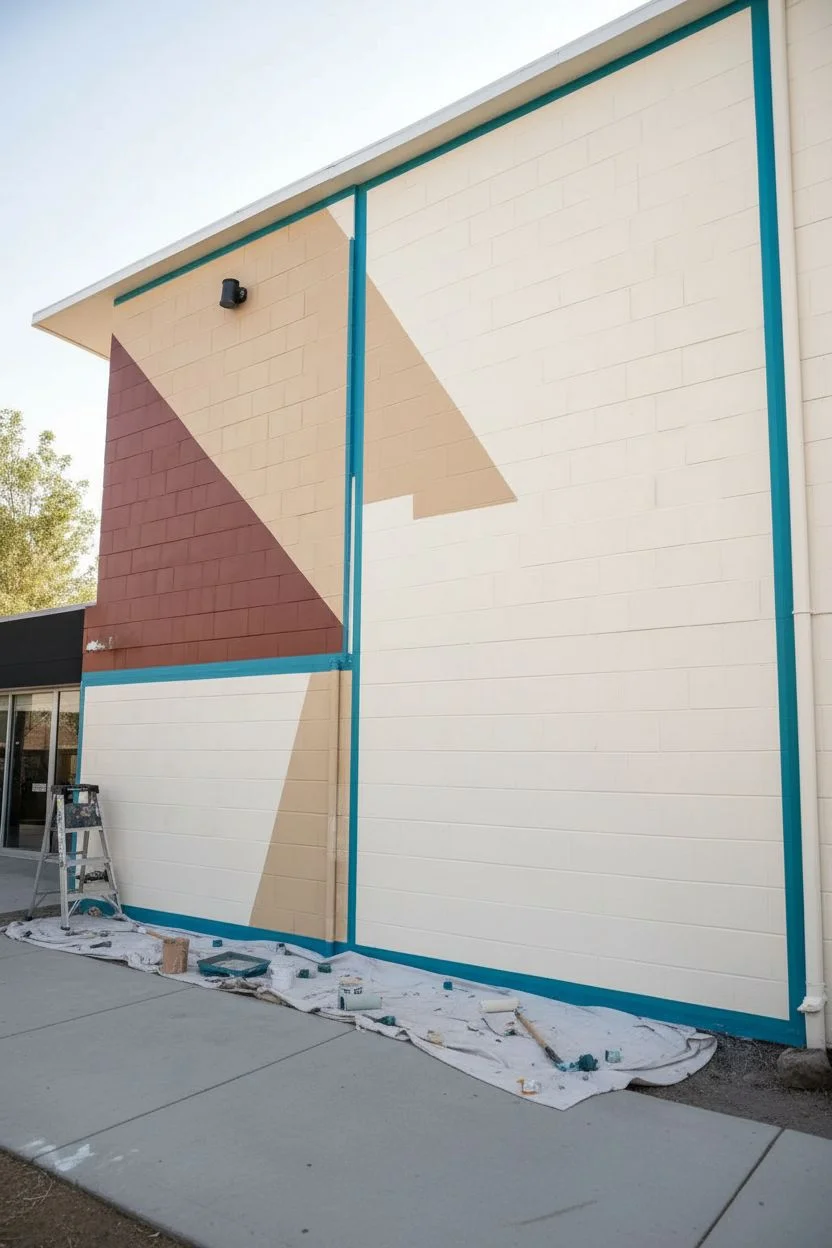
Tape the geometric shapes:
Using wide painter’s tape, mask off the large angular background shapes. Looking at the reference, create a large diagonal line starting from the top left corner to define the maroon triangle, and another for the tan accent shape. -
Paint the color blocks:
Fill in the taped sections using large rollers. Use a deep maroon for the far left triangle and a warm tan for the adjacent geometric shape. I find it helpful to run a putty knife over the tape edges before painting to prevent bleed-through. -
Base coat the main area:
Roll the remaining wall area with a creamy white or off-white exterior paint. This will serve as the background for your mascot and needs to be completely dry before you start sketching.
Rough Texture Help
Cinder blocks have deep grooves. If your straight lines look jagged, use a smaller angle brush to push paint deep into the crevices for a crisp edge.
Step 2: Sketching & Outlining
-
Project or grid the design:
Once the background blocks are dry, project your bear mascot design onto the wall at night for the most accurate proportions. Alternatively, use a grid method with chalk to map out the head, cap, and shoulders. -
Rough sketch:
Trace the projected lines or connect your grid points using a light-colored chalk or pastel. Focus on getting the tilt of the graduation cap and the curve of the smile correct. -
Define the perimeter:
Step back to check the scale. The bear should feel like the dominant centerpiece, slightly overlapping the geometric background shapes for depth.
Pro Tip: Step Back
Walk 10-15 feet away from the wall every 20 minutes. Up close, lines may look shaky, but from a distance, they often visually smooth out.
Step 3: Painting the Mascot
-
Block in the gown:
Start painting the graduation gown with the maroon paint. Use a medium flat brush to cut in the edges cleanly, then fill the larger areas. Leave the V-shaped stole/sash area blank for now. -
Paint the sash colours:
Fill in the graduation stole with the warm tan color used in the background geometric shape. This ties the color palette together nicely. -
Base the fur:
For the bear’s head, use a white or very light grey paint. Don’t worry about texture yet; just get a solid, opaque coat on the face and ears. -
Paint the cap:
Use a dark brown paint for the mortarboard cap. Be precise with the straight lines of the square top. -
Detail the tassel:
Using the same dark brown mixed with a touch of tan, paint the tassel hanging down the side. Use vertical brush strokes to mimic the texture of the threads.
Step 4: Line Work & Details
-
Outlining the character:
This is the crucial step for that illustrative look. Use a smaller round brush and black or very dark brownish-black paint to outline the entire character. Keep your hand steady and vary the line weight slightly—thicker on the bottom curves, thinner on top. -
Facial features:
Paint the nose black, leaving a small white spot for a highlight. carefully outline the eyes, filling in the pupils but preserving a white glint in them to make the character look alive. -
Fur texture:
Add small, jagged line strokes around the cheeks, chin, and neck areas to suggest fur texture without coloring in every single hair. -
Ladder detail:
Going back to the geometric background, paint a stylized ladder or grid pattern in the lower tan section using a lighter cream shade to add visual interest near the bottom. -
Sidewalk decal (Bonus):
If you have a customized stencil, use a dark maroon spray paint to add your school logo or ‘Condor’ text to the concrete path directly in front of the mural to extend the art off the wall.
Now you have a permanent tribute to the graduating class that will brighten up the campus for years to come


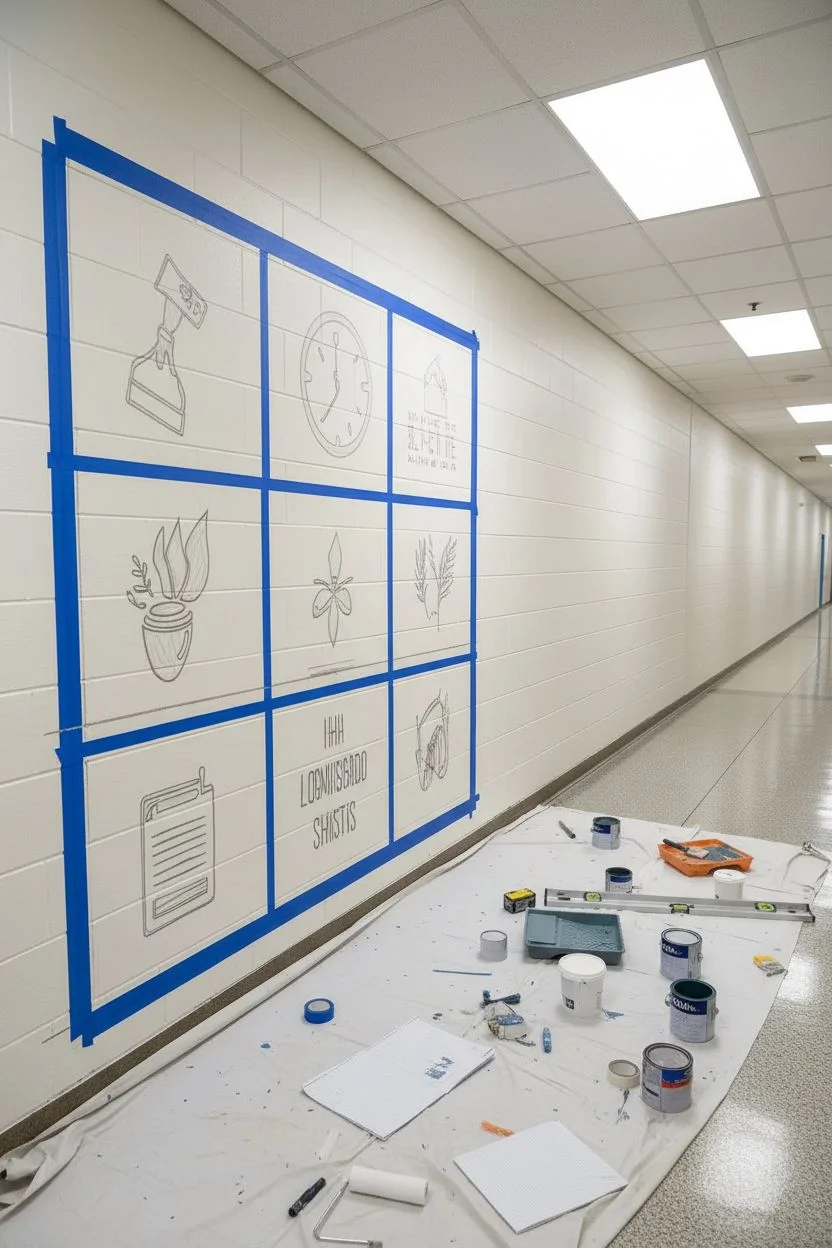
Class Motto in Big Typography

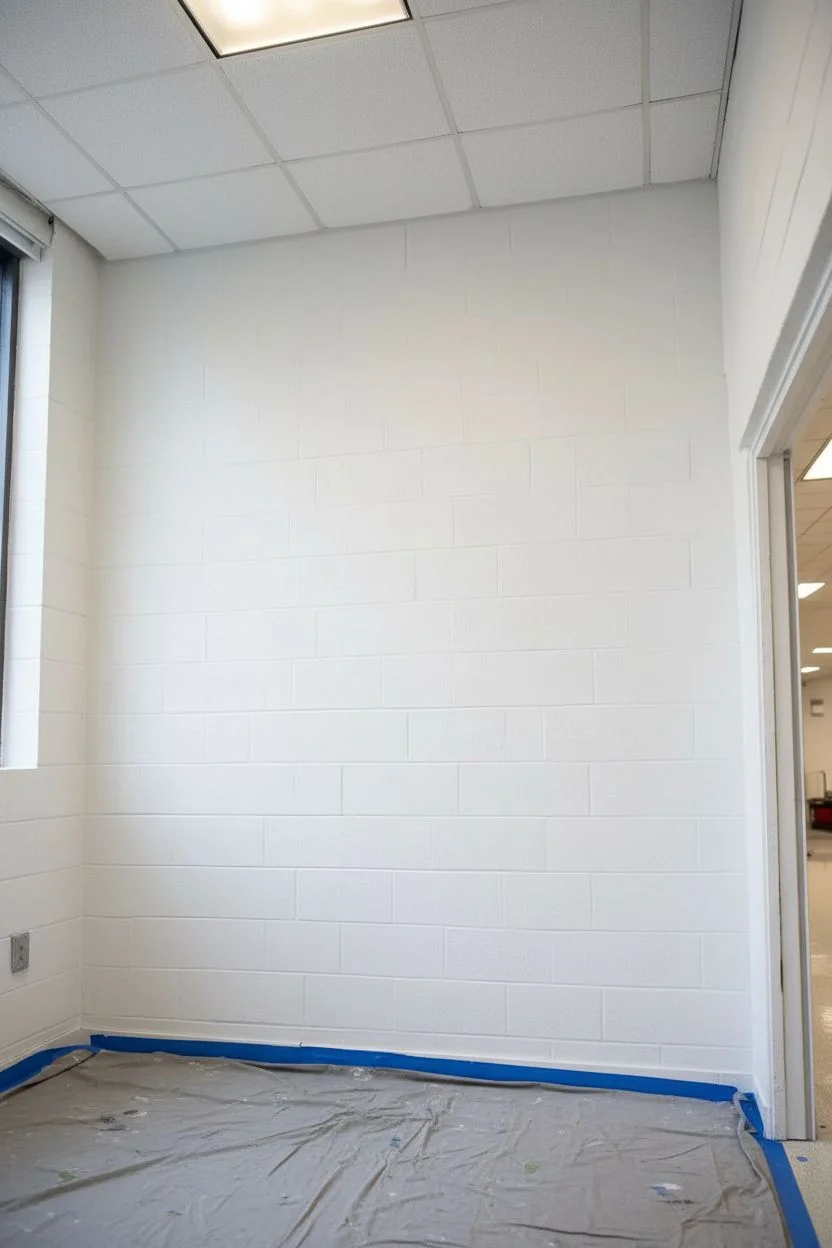
Capture your graduating class spirit with this elegant yet playful mural featuring bold, flowing calligraphy surrounded by charming hand-drawn icons. The stark black-on-white design creates a modern, clean aesthetic that pops against standard school hallway cinder blocks.
Step-by-Step Tutorial
Materials
- High-quality interior latex paint (White for base, Black for design)
- Wide painter’s tape
- Pencil and eraser
- Chalk or a projector (optional but recommended)
- Assorted paintbrushes (1-inch flat brush, round liner brushes sizes 2-6)
- Small roller and tray
- Drop cloth
- Ladder or step stool
- Reference sketch of your layout
Step 1: Preparation & Base Coat
-
Clean the surface:
Begin by wiping down the cinder block wall with a damp cloth to remove any dust, grime, or oils that could prevent paint adhesion. -
Protect the area:
Lay down your drop cloth along the base of the wall and tape off the trim or floor edges with painter’s tape to ensure crisp lines. -
Refresh the background:
Even if the wall looks white, apply a fresh coat of white latex paint using a roller. This provides a clean, uniform canvas and makes errors much easier to fix later. -
Dry completely:
Let the white base coat dry fully according to the manufacturer’s instructions, usually at least 4-6 hours.
Step 2: Drafting the Design
-
Center key elements:
Measure the width of your wall section and lightly mark the vertical center line with a pencil. This ensures your main text stays balanced. -
Sketch the baseline:
For the calligraphy, use your pencil or chalk to draw very faint horizontal guidelines where the main text will sit. -
Project or sketch outline:
If you have a projector, cast your digital design onto the wall and trace the outlines of ‘Gladiolus Class’ and the icons. If sketching by hand, start with light, loose gestures to get the spacing right before darkening your lines. -
Draft the serif details:
Pay special attention to the large ‘G’ and ‘C’. Their swooping tails should interlock slightly or frame the text, just like in the reference image.
Handling Texture
Cinder blocks are bumpy! Use a stiffer brush and a ‘stippling’ motion (dabbing straight on) to force paint into deep pores without smudging lines.
Step 3: Painting the Typography
-
Outline the letters:
Dip a medium round brush (size 4 or 6) into your black paint. Carefully paint the outer edges of the large script letters first. -
Fill the thick strokes:
Switch to a larger flat brush to fill in the thick downstrokes of the calligraphy. Maintain a steady hand and pull the brush smoothly to avoid jagged edges on the rough cinder block texture. -
Refine the thin strokes:
Use your smallest liner brush (size 2) for the delicate updrafts and connecting lines of the cursive script. -
Add secondary text:
Paint the ‘GRADUATION YEAR’ text below in a simple, clean sans-serif font using a small flat brush to keep the block letters crisp.
Interactive Element
Leave the stars or the inside of the lantern unpainted (just outlined) and have every senior sign their name inside a shape with a permanent marker.
Step 4: Adding Illustrative Icons
-
Paint the volleyball:
Draw the circle for the volleyball first, then add the curved internal lines. Keep the lines consistent in thickness. -
Create the music notes:
Paint the flowing music staff and notes in the upper right corner, utilizing the liner brush for the whimsical curves. -
Add the stars and sparkles:
Scatter different star shapes—some solid five-point stars, some outlined, and some simple four-point sparkles—around the open negative spaces. -
Detail the objects:
Fill in the specific class symbols like the paintbrush/broom, the lantern, and the vegetable icon. Use varied line weights to give them a hand-drawn illustration feel. -
Final touch-ups:
Step back to look for any uneven edges or spots where the textured wall caused missed paint. Dab white paint over any mistakes to erase them.
Step back and admire how this personalized mural transforms a simple hallway into a memorable legacy piece


Yearbook Snapshot Grid

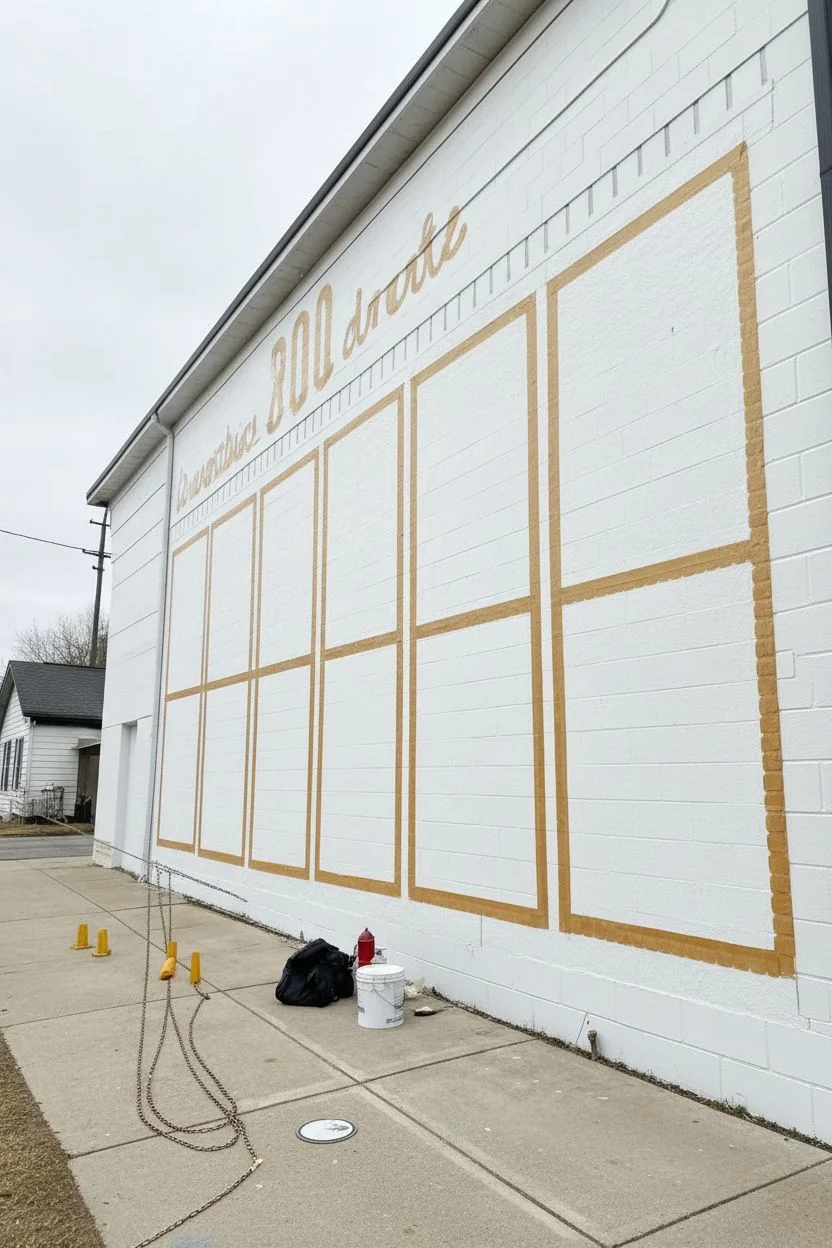
Capture the essence of your graduating class with this bold, graphic mural that mimics the look of a yearbook layout. Using a clean grid system and high-contrast illustrations, this project turns a blank outdoor wall into a lasting visual time capsule.
Step-by-Step Guide
Materials
- Exterior masonry primer (white)
- Exterior latex paint (white, black, gold/ochre)
- Assorted synthetic paintbrushes (2-inch sash, 1-inch flat, fine liner brushes)
- Paint rollers and tray
- Painter’s tape (various widths)
- Chalk line or laser level
- Measuring tape
- Pencils and chalk
- Ladder or scaffolding
- Projector (optional but recommended)
- Cardboard or stencil acetate (optional)
Step 1: Preparation and Gridding
-
Clean the surface:
Begin by thoroughly cleaning the brick or concrete wall to remove dirt and grime. A pressure washer works best here, but a stiff scrub brush and soapy water will do. Let the surface dry completely for at least 24 hours. -
Prime the wall:
Roll on a thick coat of high-quality exterior masonry primer. This ensures your topcoat adheres well and colors stay true. For textured brick, use a thick-nap roller to get into all the crevices. -
Apply base color:
Once primed, apply your white exterior base coat. Two coats are usually necessary to get a solid, opaque background that will make your grid work pop. -
Measure the layout:
Calculate the dimensions of your grid. Determine how many rectangular ‘yearbook photos’ will fit across and down the wall, leaving equal spacing for the borders. -
Snap the lines:
Using a chalk line and a helper, snap vertical and horizontal lines to create your grid. I find it helpful to use a level frequently to ensure the grid doesn’t drift on uneven ground. -
Tape the borders:
Apply painter’s tape along your chalk lines to define the thick rectangular frames. Press the edges of the tape down firmly to prevent bleed-under on the textured surface.
Step 2: Painting the Framework
-
Paint the frames:
Using the gold or ochre exterior paint, fill in the taped-off borders. Use a brush to stipple paint into the mortar joints if the roller misses them. -
Add decorative corners:
To mimic the look of photo corners or decorative molding seen in the reference, use a small brush to paint rounded or square embellishments at the intersections of the grid. -
Remove the tape:
Carefully peel back the painter’s tape while the paint is slightly tacky to achieve crisp lines. Touch up any bleed-through with your white base paint. -
Lettering guidelines:
Above the grid, measure and mark the space for the main header text (like ‘Class of 20XX’ or a school motto). Use chalk to sketch the letter forms lightly.
Bleeding Lines?
On rough brick, paint bleeds under tape. Seal the tape edge with a thin layer of the *base* wall color first. This fills the gaps so your gold line stays crisp.
Step 3: Illustrating the Snapshots
-
Draft the imagery:
Decide on the symbols for each box (e.g., sports gear, graduation caps, club logos). Projection is the easiest way to transfer these designs onto the wall at night, tracing the outlines with a pencil. -
Freehanding technique:
If you are working during the day without a projector, sketch the designs using a grid method or freehand with chalk, which wipes off easily if mistakes happen. -
Block in darks:
Using black exterior paint and medium brushes, fill in the main silhouettes of your illustrations. Focus on high-contrast shapes—like the solid black graduation cap—for readability. -
Add intricate details:
Switch to a fine liner brush for detailed work, such as the laces on a sneaker, the text on a poster, or the lines on a basketball. -
Layering colors:
In the reference, a basketball is painted with an orange/gold tone inside the black lines. Apply these secondary colors carefully, allowing the black outlines to dry first to avoid muddying the colors. -
Paint the text:
Fill in your header text above the grid using the gold paint. A script font adds a classic academic feel. -
Final touches:
Step back to view the mural from a distance. Use the white base paint to ‘cut in’ and tidy up any graphic edges that look wobbly. -
Seal the work:
For longevity, apply a clear, non-yellowing UV-resistant masonry sealer over the entire mural once the paint has cured for a few days.
Projector Pro Tip
If using a projector for the icons, tape a cardboard ‘hood’ over the lens if there’s ambient street light. This boosts contrast so you can trace easier.
Step back and admire how these simple framed snapshots come together to celebrate school spirit on a grand scale
BRUSH GUIDE
The Right Brush for Every Stroke
From clean lines to bold texture — master brush choice, stroke control, and essential techniques.
Explore the Full Guide
Handprints and Signatures Border
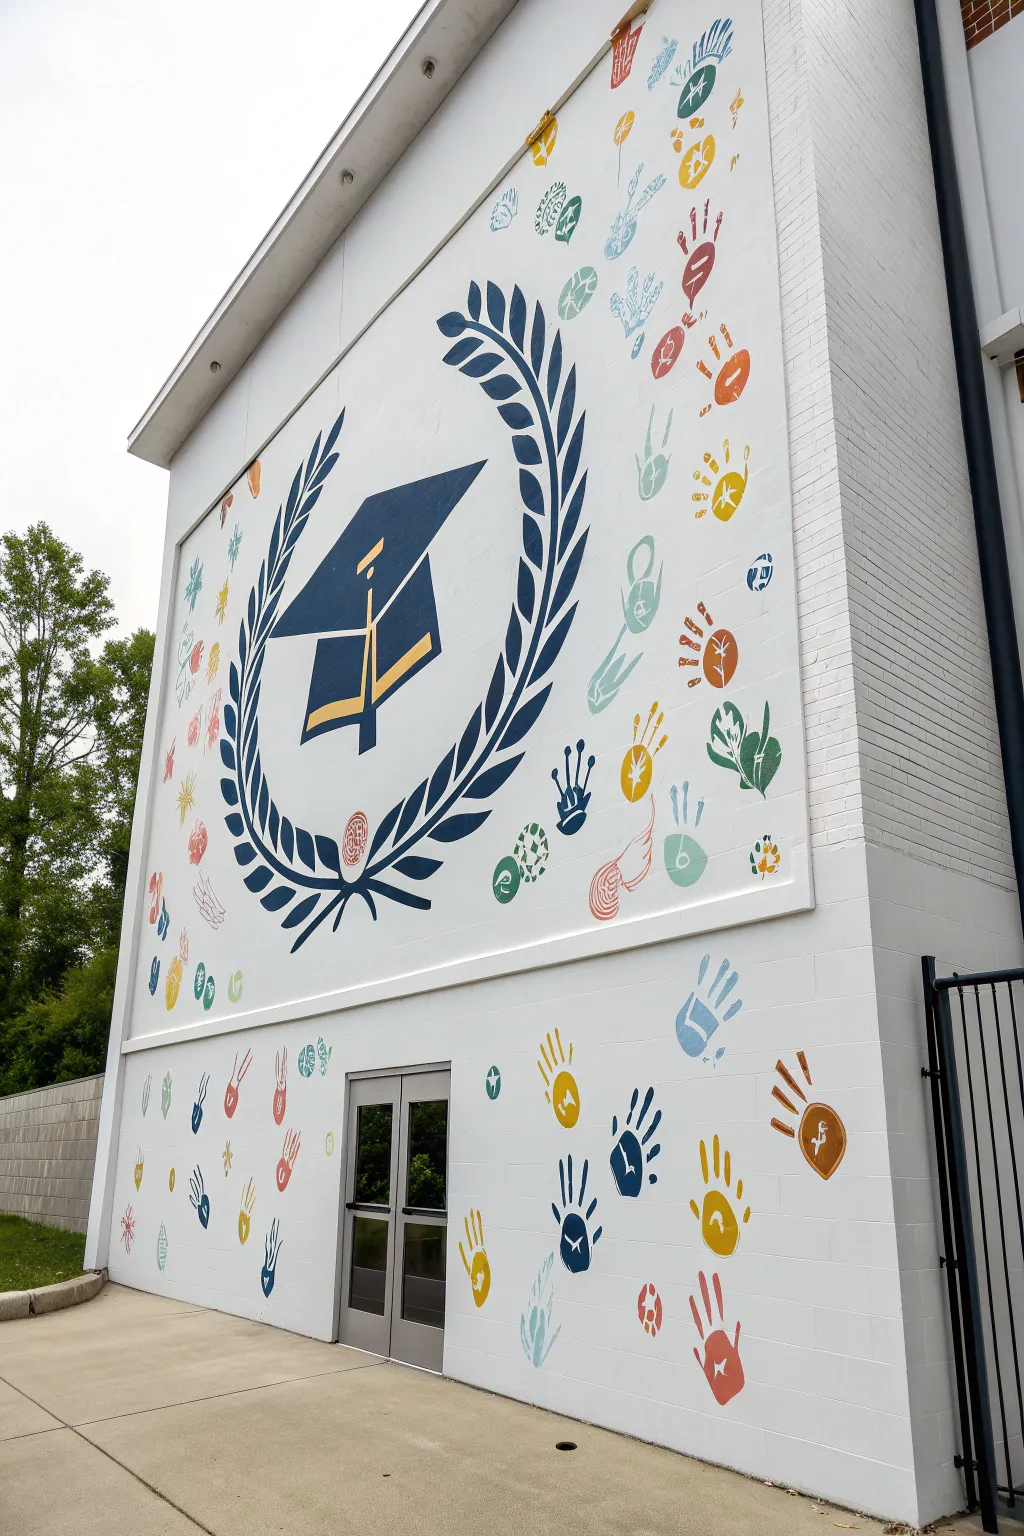

Transform a plain exterior wall into a vibrant celebration of the graduating class with this large-scale mural. Featuring a central school emblem surrounded by colorful, personalized handprints, this project creates a permanent and touching tribute to the students.
Step-by-Step
Materials
- Exterior masonry primer (white)
- Exterior latex paint (white for base coat)
- Exterior latex paint (navy blue, gold/yellow)
- Assorted exterior acrylic paints (red, teal, yellow, green, orange, light blue)
- High-density foam paint rollers and extension poles
- Projector (powerful enough for outdoor use/evening tracing)
- Chalk or watercolor pencils
- Painter’s tape
- Ladders or scaffolding
- Drop cloths
- Cleaning supplies (soap, water, scrub brushes)
- Small detail brushes
- Paper plates or shallow trays for handprints
Step 1: Wall Preparation
-
Clean the surface:
Begin by thoroughly cleaning the brick or cinder block wall. Use a stiff scrub brush with soap and water or a pressure washer on a low setting to remove dirt, mildew, and loose debris. -
Protect the area:
Lay down heavy-duty drop cloths along the base of the wall to catch drips. Tape off any door frames, metal railings, or pipes like the black downspout seen on the right with painter’s tape. -
Prime the masonry:
Apply a coat of high-quality masonry primer using a thick-nap roller. This is crucial for porous surfaces like cinder block to ensure the topcoat adheres properly. -
Apply the base coat:
Once the primer is dry, roll on two coats of exterior white latex paint to create a crisp, clean canvas. Allow full drying time between coats according to the manufacturer’s instructions.
Smudge Control
If a handprint smudges, don’t panic. Quickly wipe it off with a wet rag while the paint is wet. If it stains, let it dry completely, paint over it with the white wall color, and try again.
Step 2: The Central Emblem
-
Project the design:
Wait until dusk or evening for visibility. Set up your projector to cast the image of the graduation cap and laurel wreath onto the upper center of the wall. Adjust the size until it fits proportionately within the space. -
Trace the outline:
Carefully trace the projected lines using chalk. Use a light touch so the chalk doesn’t show through the final paint layers. -
Paint the leaves:
Using a small angled sash brush, fill in the laurel wreath leaves with navy blue exterior paint. Work from the top down to avoid smudging your work. -
Fill the cap base:
Paint the main body of the mortarboard cap with the same navy blue. Use a steady hand or use painter’s tape to keep the geometric edges sharp. -
Add gold accents:
Once the blue is dry, paint the tassel and the band on the cap with a bright gold or yellow exterior paint. You may need two coats of yellow to get good coverage over the white background.
Step 3: The Handprint Border
-
Plan the placement:
Mentally divide the wall into zones. You want the handprints to frame the central logo first, then scatter downwards towards the doors. I find it helpful to mark light ‘target’ spots with chalk to ensure even distribution. -
Prepare the paint stations:
Set up stations with paper plates or shallow trays, pouring a different color of acrylic paint into each. Have a bucket of soapy water and towels nearby for cleaning hands immediately after printing. -
Apply paint to hands:
Have students (or volunteers) coat their palms with a thin, even layer of paint. Using a brush to apply the paint to the hand often works better than dipping, as it prevents globs that might drip. -
Press and print:
Instruct the participant to press their hand firmly against the wall, holding steady for a second before pulling straight back. Place prints in various orientations—some upright, some angled—to create a dynamic flow. -
Create the upper frame:
Focus on creating a dense cluster of prints around the graduation cap logo first. Alternate colors (red, teal, yellow, green) to keep the look balanced and energetic. -
Cascade down the wall:
Continue adding handprints down the sides and bottom of the wall, spacing them out slightly more as you get lower to create a ‘falling leaf’ effect. -
Add the icons:
Once the handprints are fully dry, use a small detail brush or a paint pen to draw small white icons inside the palms. These can be subject-specific symbols (atoms, music notes, balls) or initials representing the student. -
Final touch-ups:
Inspect the wall for any drips or smudges. Use your white base paint to cover any accidental splatters, and remove the painter’s tape from the trim.
Sign the Palms
Instead of drawing icons, have each senior sign their name inside their dried handprint using a black oil-based paint marker for a permanent, personal autograph.
Step back and admire how individual contributions come together to form a unified, spirited masterpiece.
Freshman-to-Senior Timeline
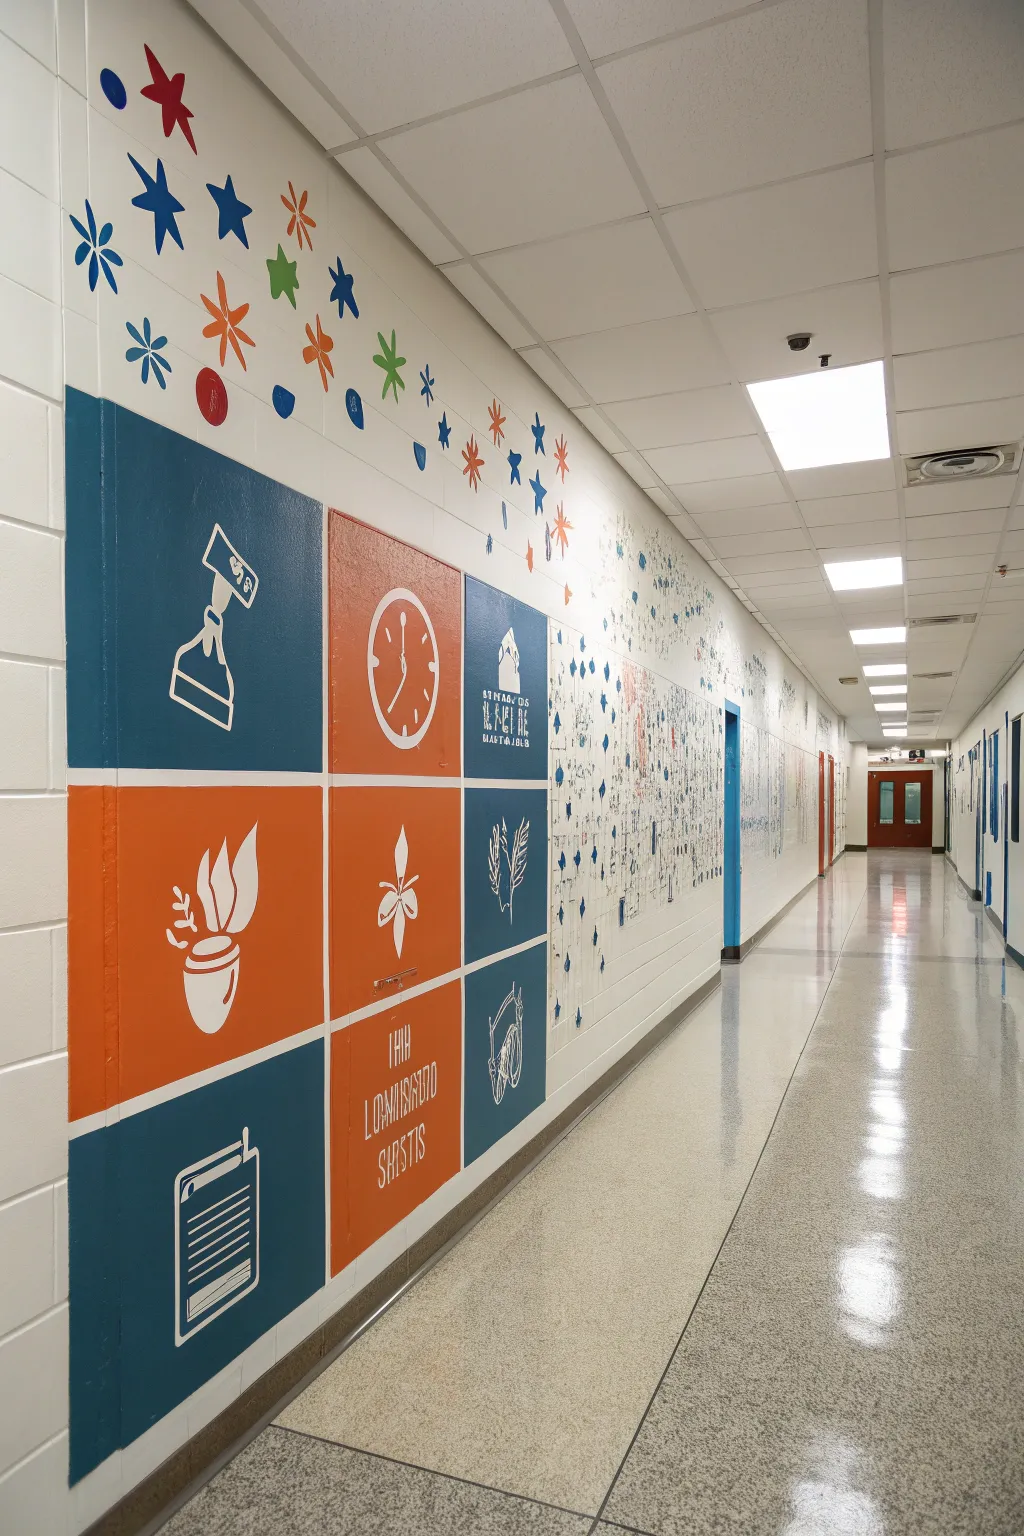
Transform a plain school corridor into a vibrant timeline that captures the high school experience, from novice freshman to graduating senior. This striking mural combines clean, graphic iconography with free-flowing collaborative elements to tell a visual story.
Step-by-Step Tutorial
Materials
- Interior semi-gloss latex wall paint (white, teal blue, burnt orange)
- Painter’s tape (1-inch and 2-inch widths)
- White chalk or watercolor pencils
- Assorted paintbrushes (1-inch flat, medium round, fine liner)
- Mini paint rollers and tray
- Measuring tape and level
- Graph paper for drafting icons
- Stencils (star shapes, asterisks)
- Drop cloths
Step 1: Planning and Grid Layout
-
Draft your timeline:
Before painting, sketch your iconography on graph paper. Design simple, bold symbols representing each stage of high school—like a pencil for freshman year, a clock for time passing, rising plants for growth, or a diploma for senior year. -
Prepare the surface:
Clean the wall thoroughly with a mild detergent solution to remove dust and oils. Lay down drop cloths to protect the hallway floors. -
Measure the grid:
Using your measuring tape and level, mark out a large 3×3 grid (or 3×4 depending on ceiling height) on the left side of your feature wall. Each square should be roughly 18-24 inches. -
Tape the boundaries:
Apply 1-inch painter’s tape along your pencil lines to create crisp geometric boundaries between the future blocks of color. Press the edges down firmly to prevent bleed-under.
Step 2: Painting the Color Blocks
-
Apply the base colors:
Using mini rollers, fill in the grid squares with your teal blue and burnt orange paints. Alternate the colors in a checkerboard pattern for high visual contrast. -
Second coat application:
Allow the first layer to dry for at least 4 hours. Apply a second coat to ensure the colors are opaque and vibrant against the white cinder blocks. -
Peel the tape:
Carefully peel away the painter’s tape while the paint is still slightly tacky to reveal clean white lines separating your distinct color blocks.
Tape Trick
Paint over your tape edges with the WALL base color (white) first. This seals the tape so your colored blocks have razor-sharp lines.
Step 3: Detailed Iconography
-
Transfer the designs:
Once the background blocks are fully cured (giving it overnight is best), lightly sketch your chosen icons onto the squares using white chalk. The chalk wipes away easily if you make a mistake. -
Outline in white:
Using a medium round brush and white semi-gloss paint, carefully trace over your chalk outlines. I find it helpful to keep a damp rag nearby for quick corrections. -
Fill the primary icons:
Fill in the larger white areas of your symbols—like the body of the beaker or the leaves of the plant—using a small flat brush for smooth coverage. -
Add fine details:
Switch to a fine liner brush to add text, clock hands, or intricate lines within the icons. These small details define the story of each block. -
Clean up sketch lines:
After the white paint is completely dry, gently wipe away any remaining chalk marks with a slightly damp microfiber cloth.
Interactive Legacy
Turn the ‘cloud’ section into a permanent autograph wall where every graduating senior gets to sign a specific color-coded brick.
Step 4: The Flowing Timeline
-
Start the confetti trail:
Above the grid, create a flowing stream of shapes. Use your stencils to paint colorful asterisks, stars, and dots in blue, orange, red, and green. -
Extend down the hallway:
Continue painting these small shapes further down the wall, allowing the design to dissipate and ‘float’ down the corridor, leading students toward the next section. -
Add collaborative signatures:
In the lighter, cloud-like sections further down the wall, invite seniors to sign their names or add small thumbprint art using permanent markers or designated paint colors. -
Final touch-ups:
Walk the length of the mural to check for any uneven edges or paint drips. Use a small brush with the wall’s base color (white) to tidy up any mistakes.
Step back and admire how this structured graphic design transitions beautifully into a celebration of student spirit

PENCIL GUIDE
Understanding Pencil Grades from H to B
From first sketch to finished drawing — learn pencil grades, line control, and shading techniques.
Explore the Full Guide
Open Door to the Next Chapter
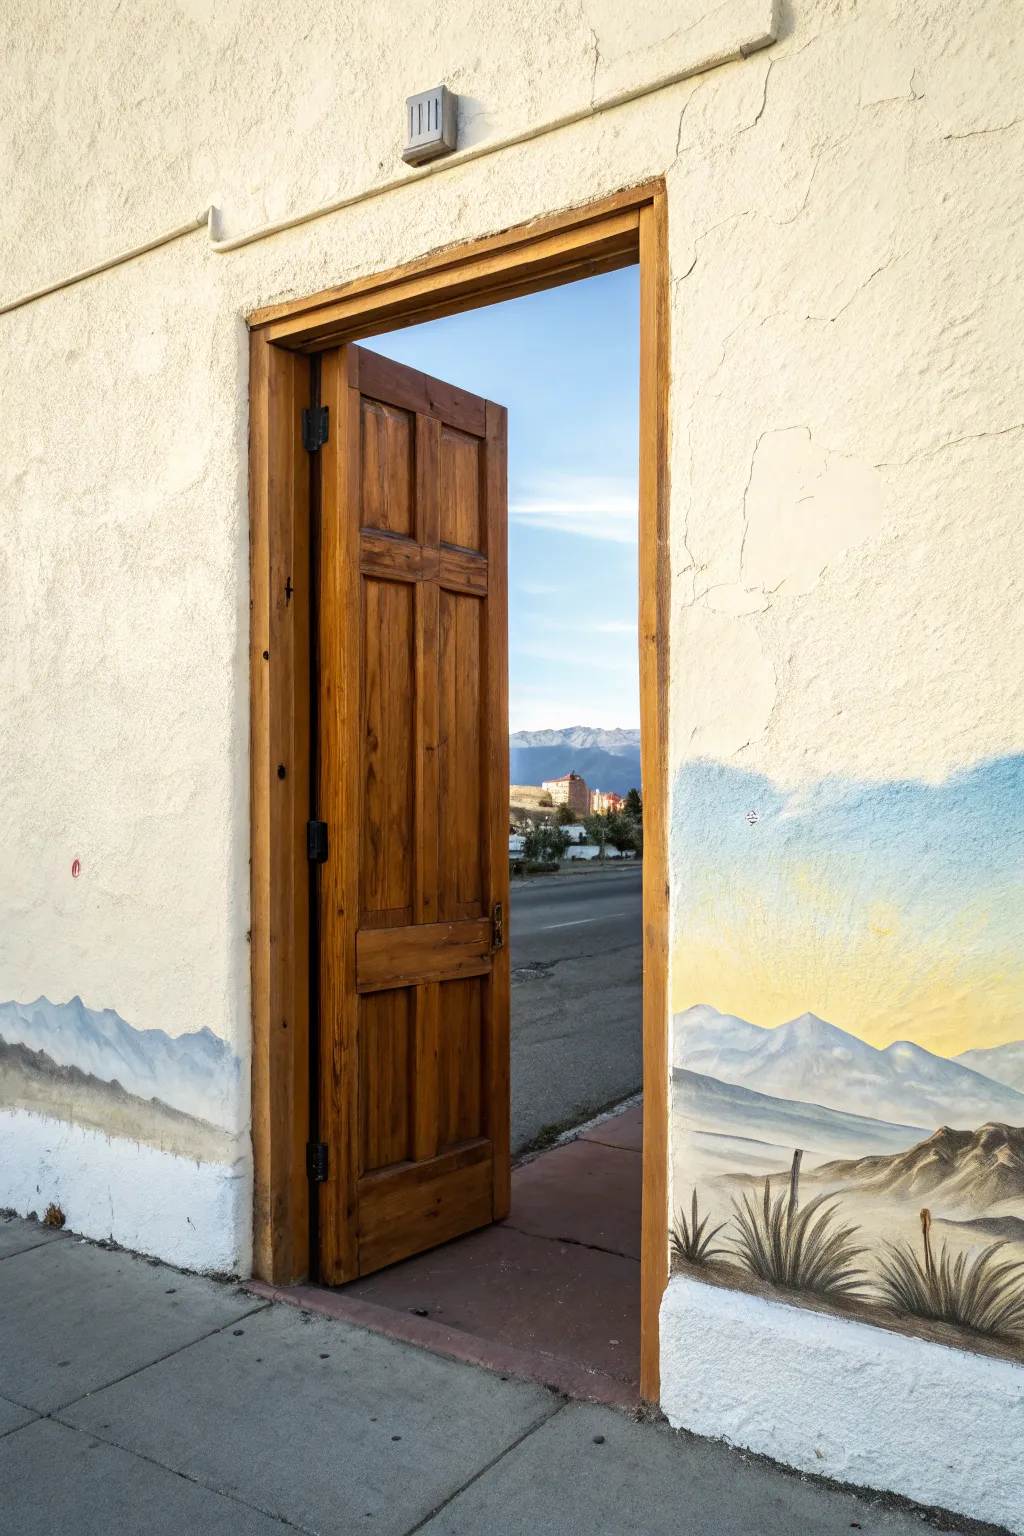
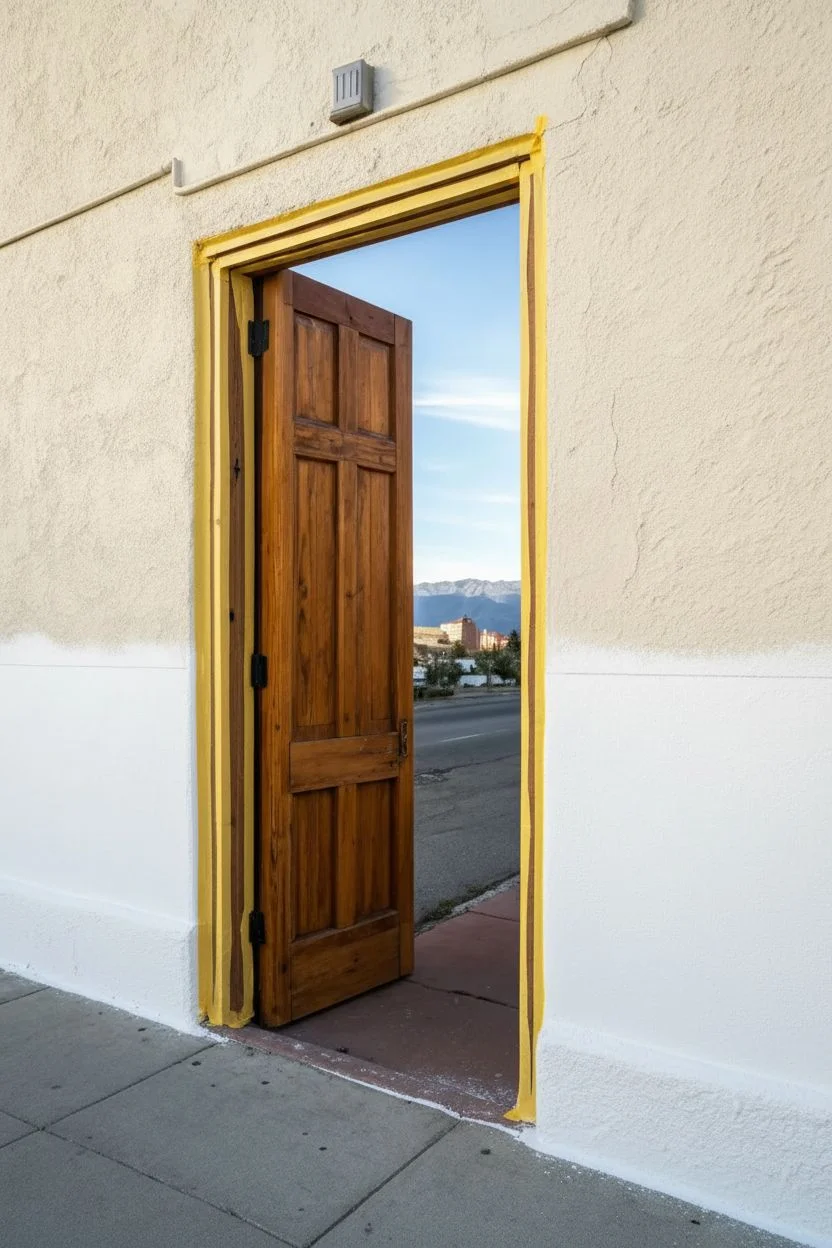
This captivating senior class mural project blends physical architecture with painted scenery, turning an ordinary exterior doorway into a portal to new adventures. The design features a serene desert landscape that wraps around an existing doorframe, creating a surreal transition between the painted world and the real street scene visible through the open door.
Step-by-Step Tutorial
Materials
- Exterior masonry primer
- Exterior acrylic latex house paints (White, Light Blue, Deep Blue, Yellow, Tan, Brown, Black)
- Assorted paintbrushes (large rollers, 2-inch angled sash brush, detail art brushes)
- Painter’s tape (exterior grade)
- Drop cloths
- Chalk or charcoal for sketching
- Wire brush or stiff bristled scrub brush
- Clear exterior sealant (UV resistant)
- Mixing buckets and trays
Step 1: Preparation & Priming
-
Clean surface:
Begin by thoroughly cleaning the exterior stucco wall. Use a stiff scrub brush or wire brush to remove loose dirt, debris, and any flaking paint from the area surrounding the doorframe. -
Protect the frame:
Carefully mask off the wooden doorframe with exterior-grade painter’s tape. Since the wood is a central feature, you want to keep the paint lines crisp and prevent any mural paint from staining the natural timber. -
Prime the base:
Apply a coat of high-quality exterior masonry primer to the lower section of the wall where the mural will go. I like to feather the top edge of the primer so it blends into the existing wall texture rather than creating a hard line. -
Establish the horizon:
Once the primer is dry, step back and look through the open door. Use chalk to mark a horizon line on the wall that roughly matches the visual horizon seen through the doorway, creating continuity between art and reality.
Step 2: Sky & Background
-
Paint the sky gradient:
Start with the sky area above your horizon line. Mix a pale yellow into a soft blue to create a sunrise effect. Apply the yellow just above the mountains and blend it upward into the blue, letting the paint fade into the wall’s natural color near the top. -
Block in distant mountains:
Using a light blue-grey shade, paint the silhouette of the distant mountain range. Keep the edges soft and atmospheric; these shouldn’t be too detailed as they represent the far background. -
Add middle ground details:
Mix a slightly darker, warmer blue-grey and paint a second, lower range of hills in front of the distant mountains. This layering creates depth and mimics the atmospheric perspective seen in real landscapes.
Dry Brushing Stucco
On rough stucco, use very little paint on your brush and drag it lightly. This catches only the high points of the wall texture, creating an instant, realistic sandy effect.
Step 3: Foreground Landscape
-
Base the desert floor:
For the sandy ground, mix tan and white paint. Apply this color below the mountain ranges, using a dry-brush technique to drag the paint over the stucco texture this enhances the feeling of rough terrain. -
Create mid-ground hills:
On the right side of the door, add the rolling desert hills using sandy browns and darker tans. Follow the natural slope of the land, bringing the hills down towards the bottom right corner. -
Add shadows:
Mix a diluted brown-black glaze. Paint subtle shadows on the unlit sides of the hills to give them volume. The light source should appear to be coming from the direction of your painted sunrise. -
Enhance texturing:
Use a rough brush to dab spots of darker brown and grey across the foreground. These speckles suggest rocks, pebbles, and uneven ground without needing to paint every single stone.
Interactive Element
Hide small, school-specific symbols or the graduation year within the landscape—like carving initials into the painted cacti or hiding a mascot in the hills.
Step 4: Flora & Finishing Details
-
Sketch plant placement:
Using charcoal, lightly outline where the yucca plants and desert scrub will go in the immediate foreground, focusing on the bottom corners to frame the door. -
Paint foliage base:
Load a sash brush or a round artist’s brush with dark green-black paint. Paint the long, spiky leaves of the yucca plants, starting from the center and flicking the brush outward to get sharp tips. -
Highlight the leaves:
Mix a lighter olive or sage green. Paint thin highlights on the upper edges of the yucca leaves where the sun would hit them. This separation makes the plants pop against the sandy background. -
Add dried stalks:
With a fine liner brush and brown paint, add the tall, thin stalks rising from the center of the yucca plants. Add small details at the top to suggest dried flower pods. -
Ground the plants:
Paint small, dark shadows directly underneath the base of each plant to anchor them to the ground. -
Seal:
Once the acrylics are completely cured (check the manufacturer’s time), apply a clear, matte UV-resistant sealer to protect the mural from fading and weather damage.
Step back and admire how your painted world now opens up seamlessly into the real one
Wings for Senior Photos
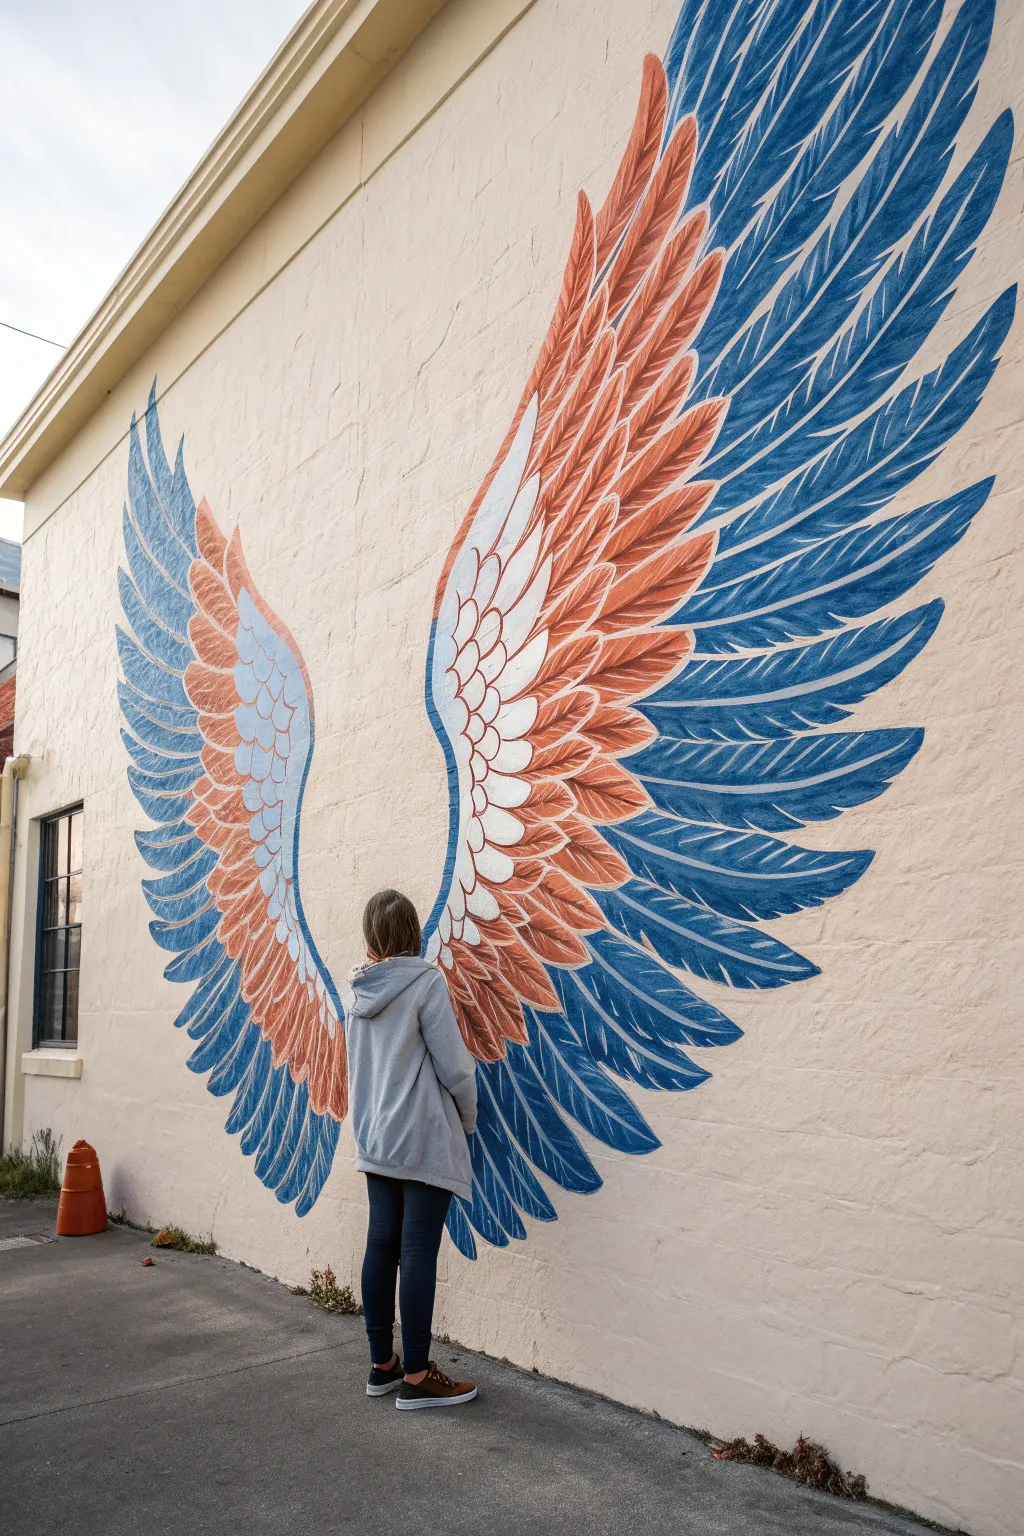
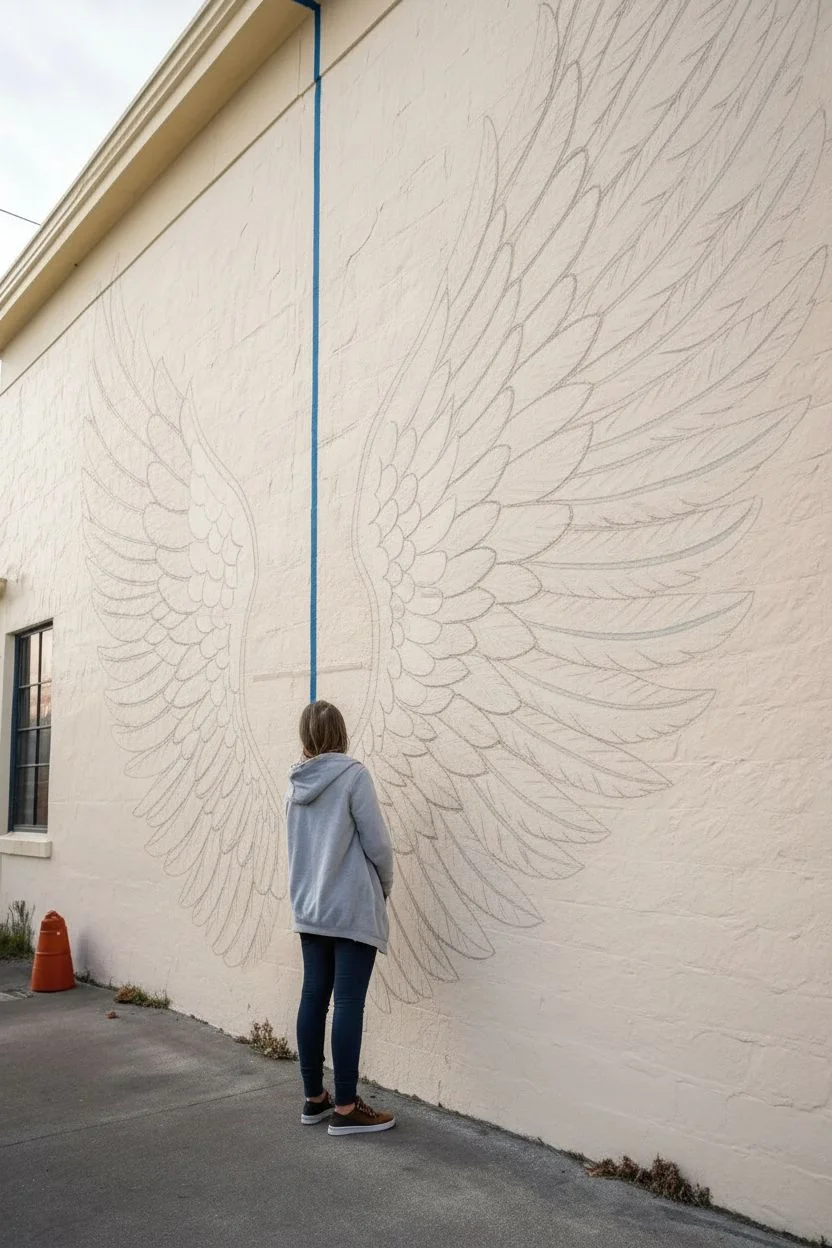
Transform a plain exterior wall into an interactive photo op with these striking, stylized angel wings. Featuring a dynamic tricolor palette of navy blue, deep terracotta, and brilliant white, this mural uses bold feather shapes to create a sense of lift and movement.
Step-by-Step Guide
Materials
- Exterior masonry primer
- Exterior latex house paint (Navy Blue, Terracotta/Rust, Bright White)
- Chalk snap line
- Tailor’s chalk or soft vine charcoal
- Large cardboard or kraft paper (for stencils/templates)
- Synthetic angled sash brushes (2-inch and 3-inch)
- Small round detail brush (Size 6 or 8)
- Painter’s tape
- Drop cloth
- Stepladder
- Extension pole (optional)
Step 1: Planning and Surface Prep
-
Select the wall:
Choose a smooth or lightly textured exterior wall with good lighting. Measure the space to ensure the wings will fit comfortably around a standing person. -
Clean the surface:
Power wash or scrub the wall with soap and water to remove dirt, moss, or peeling paint. Let it dry completely for 24 hours. -
Determine scale:
Have a friend stand against the wall and lightly mark where their shoulders sit. This ensures the wings sprout from the correct height. -
Establish the centerline:
Use a chalk snap line to create a vertical center guide. The space between the wings should be roughly 18-24 inches to accommodate the subject’s body.
Uneven Texture?
Rough brick can make straight lines hard. Use a dabbing motion (stippling) with a stiff bristle brush to push paint into crevices rather than dragging.
Step 2: Sketching the Design
-
Draft the primary curves:
Using tailor’s chalk, draw the main upper curve of the wing, sweeping up and out dramatically. Mirror this on the other side. -
Block in feather zones:
Instead of drawing every feather instantly, divide the wing into three curving bands. The top/outer band will be blue, the middle band terracotta, and the inner section white. -
Sketch the primary foundations:
Draw the largest, longest flight feathers first at the bottom and outer edges. These should be long, tapered finger-like shapes. -
Fill in secondary feathers:
Sketch rows of medium-sized, rounded feathers overlapping the primary ones, moving inward toward the ‘spine’ of the wing. -
Detail the coverts:
Draw the smallest, scale-like feathers near the top arch where the wings meet the imagined shoulders. I like to keep these fairly loose sketches since paint will refine them.
Level Up: 3D Shadow
Mix a glaze of black paint and water (1:4 ratio). Paint a faint drop shadow under the bottom curve of each wing to make them pop off the wall.
Step 3: Painting the Wings
-
Paint the background feathers (Blue):
Starting with the outermost band, use the 3-inch brush to fill in the Navy Blue feathers. Follow the curve of the feather strokes to keep edges clean. -
Add the mid-tone layer (Terracotta):
Paint the middle section with the Terracotta/Rust color. Ensure these feathers overlap the blue section slightly for a layered look. -
Apply the highlights (White):
Fill in the innermost section and the very top edges with Bright White paint. This creates the highest contrast near the subject’s head. -
Refine the edges:
Once the base coats are tacky but not fully dry, use the angled sash brush to crisply define the tips of each feather against the wall background. -
Add separation lines:
Using the small round brush and a bit of white paint, carefully add thin lines or ‘quills’ inside the blue and terracotta feathers to separate them visually. -
Add texture strokes:
With a fairly dry brush, add quick, flicking strokes of white inside the colored sections to suggest the fibrous texture of barbs. -
Clean up the outline:
If any paint bled or edges look rough, use a small brush and the original wall color (if available) to cut back in and sharpen the silhouette. -
Seal the mural:
If the wall is exposed to harsh weather, apply a clear, matte exterior masonry sealer over the dried mural to protect the colors from fading.
Step back and admire your new interactive landmark, ready for seniors to step in and take height.


Road to the Horizon
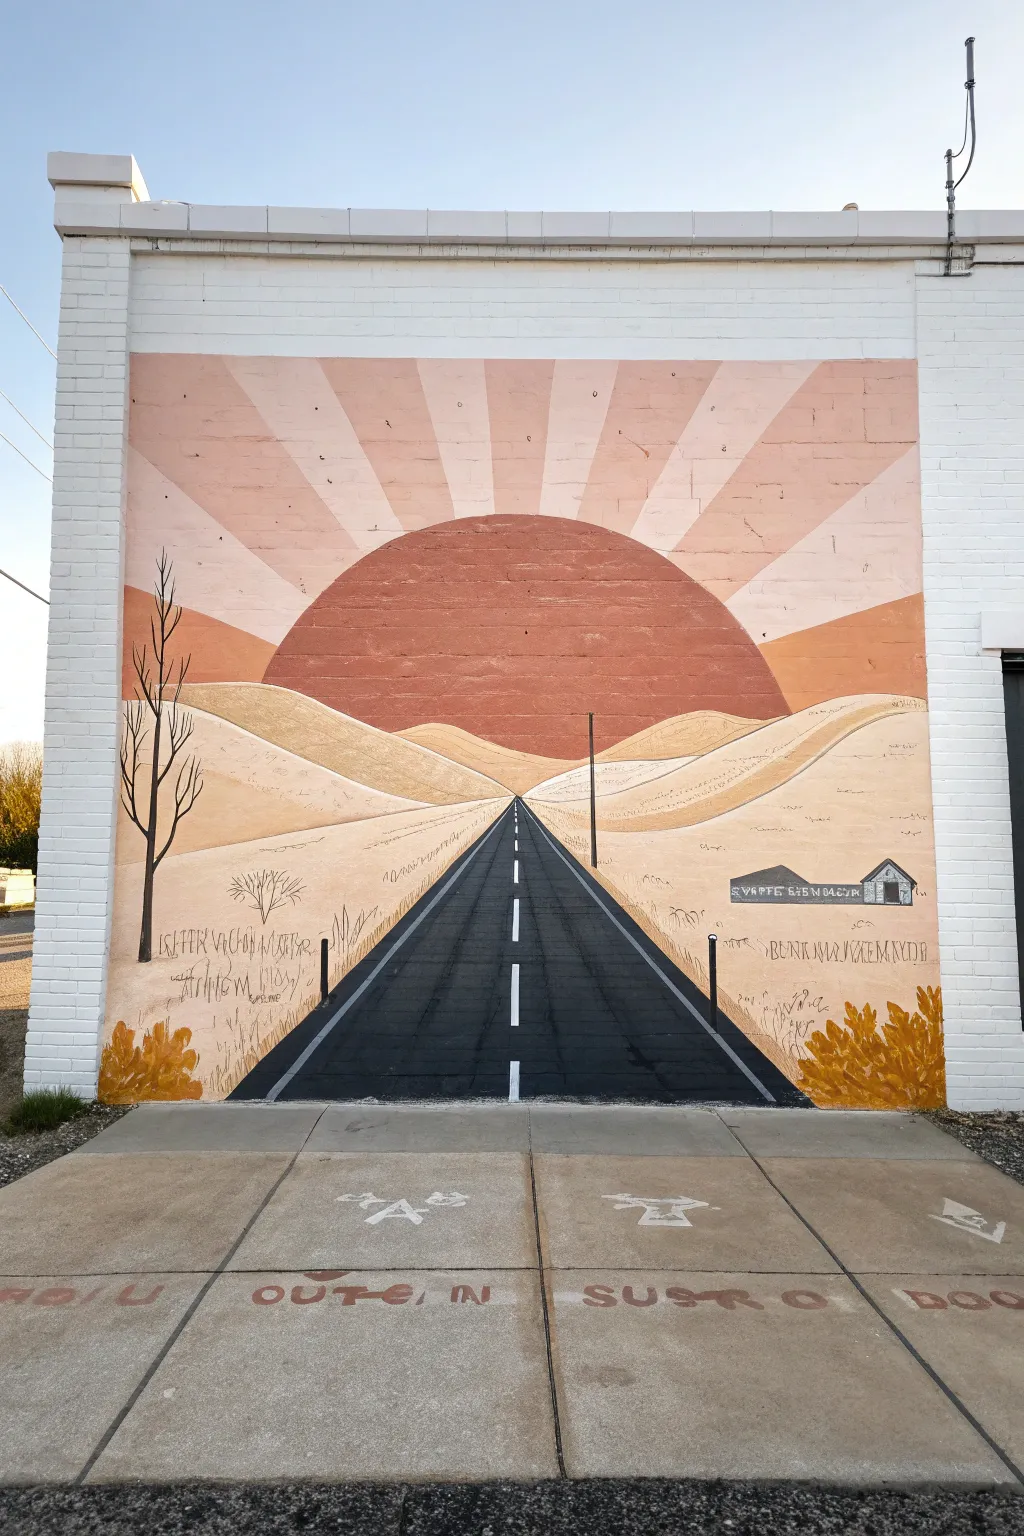
This captivating mural transforms a blank brick wall into an endless journey, featuring a bold, vanishing-point roadway leading toward a massive, radiating sun. The warm, tonal palette of terracotta, peach, and beige creates a nostalgic, desert-highway vibe that symbolizes moving forward.
Step-by-Step
Materials
- Exterior masonry primer (white)
- Exterior acrylic latex paint (white, black, terracotta/rust, light peach, beige/sand, dark brown)
- Paint rollers (large for background, smaller for details)
- Assorted paintbrushes (angled sash brush, fine liner brush)
- Painter’s tape (various widths)
- Chalk or pastel stick for sketching
- Long straightedge or level
- String and a nail (for the sun compass)
- Extension pole for rollers
Step 1: Setting the Scene
-
Prepare the Surface:
Begin by thoroughly cleaning the brick wall to remove dirt and debris. Once dry, apply a full coat of high-quality white masonry primer to ensure your colors pop and adhere properly to the textured surface. -
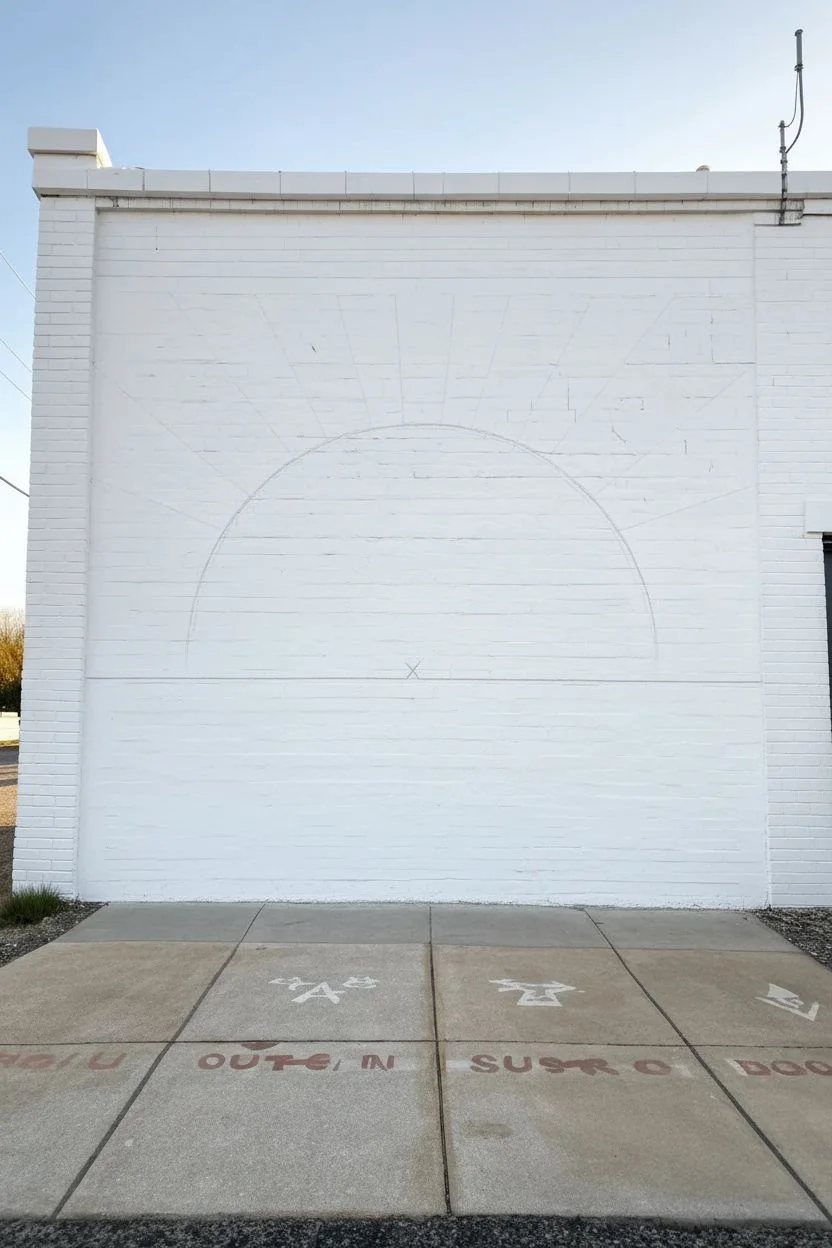
Establish the Horizon:
Determine where your horizon line will sit. For this design, place it slightly below the vertical center of the wall. Use a long level and chalk to snap or draw a perfectly straight horizontal line across the width of your mural space. -
Map the Vanishing Point:
Mark a single focal point in the exact center of your horizon line. This vanishing point is critical, as all lines for the road and fencing will radiate from here to create the illusion of depth. -
Sketch the Sun:
To create the perfect large semi-circle sun, use a makeshift compass. Tap a small nail or have a friend hold a string at the vanishing point (or slightly above it on the horizon line), tie chalk to the other end, and swing an arc upward to create the sun’s outline.
Don’t Fight the Texture
Brick is hungry! Use a thick-nap roller (at least 3/4 inch) to get paint into the mortar grooves without struggling.
Step 2: Painting the Sky and Sun
-
Block in the Sun:
Fill in the large sun semi-circle using your deep terracotta or rust-colored paint. Use an angled brush to cut in the crisp curved edge first perfectly, then fill the center with a roller for even coverage. -
Mark Sun rays:
Once the sun is defined, use your straightedge to draw faint chalk lines radiating outward from the center of the sun to the edges of the wall. These will guide your sunbeams. -
Paint the Sky Rays:
Paint alternating sections of the sky. Leave white space or paint light peach for the lighter rays, and use a slightly darker peach or soft pink for the contrasting rays. I like to tape off these lines for razor-sharp edges, removing the tape while the paint is still slightly tacky. -
Dry and Assess:
Allow the upper half of the mural to dry completely before moving down. This prevents accidental smudging of your sky while working on the landscape.
Step 3: The Landscape and Road
-
Outline the Road:
From your central vanishing point, snap two chalk lines diagonally downward to the bottom corners of your mural area. This defines the width of your road. -
Paint the Hills:
Sketch rolling dunes or hills on either side of the road using organic, wavy lines. Fill these areas with your beige or sand-colored paint. Add subtle shadows in a slightly darker tan on the undersides of the dunes to give them volume. -
Fill the Asphalt:
Paint the triangular road shape with black or dark charcoal outdoor paint. Press the roller firmly into the brick mortar joints to ensure no white speckles remain showing through the asphalt. -
Add Road Stripes:
Once the black road is dry to the touch, use white paint to add the center dividing lines. Remember that the dashes should get smaller and thinner as they get closer to the vanishing point to enhance the perspective effect. -
Line the Edges:
Paint narrow white or light grey lines along the outer edges of the black road. This simple step separates the dark road from the beige sand and creates a finished look.
Wobbly Lines?
If tape won’t stick to crumbling brick, use a stiff angled brush and a steady hand, or a ‘paint shield’ tool to mask edges as you go.
Step 4: Details and Finishing
-
Add Vertical Elements:
Use a darker brown or black to paint the silhouette of a bare tree on one side and fence posts on the other. Ensure the posts get progressively smaller as they recede into the distance. -
Paint the Building Silhouette:
On the right side horizon, add small geometric shapes to represent a barn or house utilizing grey and black paints. Keep it simple; distance obscures detail. -
Foreground Details:
In the bottom corners, dab on some golden ochre or rust paint to suggest bushes or tumbleweeds. Use a stippling motion with an old brush to create a leafy texture. -
Final clean-up:
Walk back to view the mural from a distance. Touch up any brick crevices that were missed and ensure your horizon line looks straight from the street.
Step back and admire how this simple perspective trick opens up an entirely new world on your wall
Removable Painted Panel Senior Wall

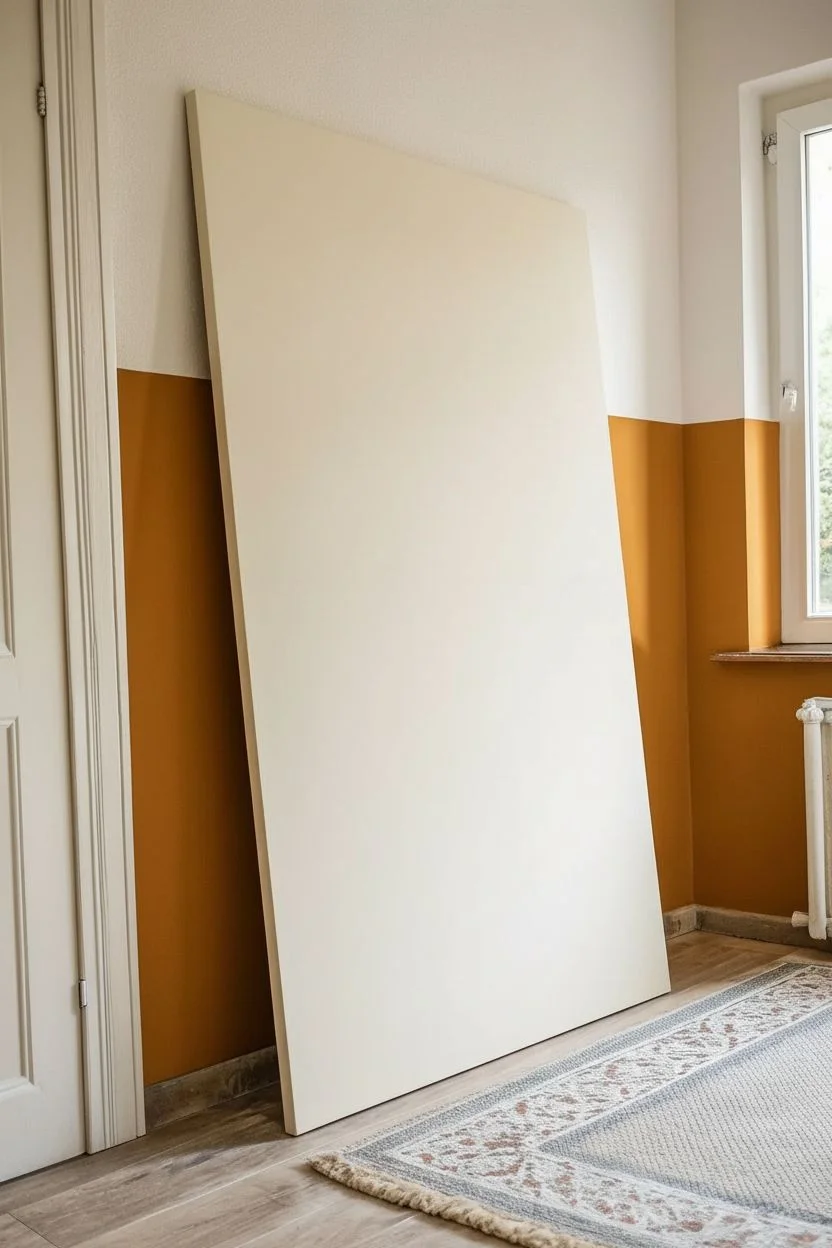
Transform a blank space without committing to permanent paint by creating a stunning, portable mural on a large wooden panel. This project features a graceful painted archway adorned with muted botanical illustrations, perfect for adding a touch of Scandinavian folk charm to a room.
Detailed Instructions
Materials
- Large plywood or MDF panel (approx. 4′ x 6′ or custom size)
- White primer
- Cream or off-white acrylic latex paint (base color)
- Acrylic craft paints (terracotta, light sage green, dark olive green)
- Pencil and eraser
- String and pushpin (for drawing the arch)
- Painter’s tape
- Assorted paintbrushes (medium flat brush, small round detail brush)
- Ruler or yardstick
- Sandpaper (fine grit)
Step 1: Preparing the Canvas
-
Sand the surface:
Begin by lightly sanding your plywood or MDF panel to remove any rough patches or splinters. Wipe it down with a damp cloth to ensure it’s completely dust-free. -
Prime the panel:
Apply a coat of white primer over the entire front surface and edges. This seals the wood and ensures your topcoat looks even and opaque. -
Apply base color:
Once the primer is fully dry, paint the entire panel with your cream or off-white acrylic latex paint. You may need two coats for full coverage; let it dry thoroughly between applications.
Clean Curves
If you struggle with painting smooth curves freehand, use fine-line tape (often used for auto detailing) to mask off the arch borders before painting. It creates crisp, perfect edges effortlessly.
Step 2: Drafting the Design
-
Measure the arch:
Find the vertical center of your board near the top. Decide how wide you want your arch to be and mark the starting points for the vertical sides of the arch. -
Draw the curve:
To get a perfect semi-circle, tie a string to a pencil. Pin the other end of the string to the center point of your arch width, and swing the pencil like a compass to draw the top curve. -
Connect the sides:
Use a long ruler or yardstick to draw straight vertical lines down from the ends of your semi-circle to the bottom of the board. -
Create the border:
Draw a second, slightly smaller arch inside the first one (about 1.5 to 2 inches apart) to create the defined border for your floral vine design. Keep these pencil lines faint. -
Sketch the vine structure:
Lightly sketch a wavy, undulating line that travels up inside the borders of the arch. This will be the main stem for your leaves. -
Sketch the center floral:
At the bottom center of the open archway, sketch a small, standalone floral cluster with vertical stems rising up, as seen in the reference photo.
Step 3: Painting the Details
-
Paint the arch lines:
Using a thin round brush and terracotta paint, carefully trace over your pencil lines that define the inner and outer edges of the archway. -
Paint the corner details:
In the top corners outside the arch, paint the decorative triangular motifs using terracotta and white. You can keep this abstract or mimic weaving patterns. -
Paint main stems:
Mix your sage green paint. Using a steady hand and a small brush, paint the central vine stems that wind their way up the side columns. -
Add large leaves:
Using the same sage green, paint the larger leaves extending from the vine. Use a ‘press and lift’ motion with your brush to get tapered tips. -
Add contrasting leaves:
Switch to a darker olive green or a muted brown-green to add smaller, contrasting leaves or veins to give the greenery depth. -
Paint floral elements:
Using your terracotta paint, add the small circular flowers and leaf-shaped buds along the vine. Stipple the brush slightly for the flower centers to add texture. -
Detail the central plant:
Move to the bottom center design. Paint the vertical stems green and top them with terracotta blooms. I usually paint the stems first so I know exactly where to place the flower heads. -
Add fine details:
Once the main blocks of color are dry, use your finest brush or even a paint pen to add tiny veins to leaves and dots to the flower centers for a finished illustrative look. -
Erase guidelines:
Allow the paint to cure for at least 24 hours. Once completely hard and dry, gently erase any visible pencil marks, being careful not to rub off the paint.
Dimension Boost
For a subtle 3D effect, mix a tiny drop of white into your green paint and add a highlight line to the upper edge of every leaf. It makes the foliage pop.
Now you have a beautiful, movable piece of art that brings architectural interest to any wall without damaging the surface underneath
Campus Map With Senior Landmarks
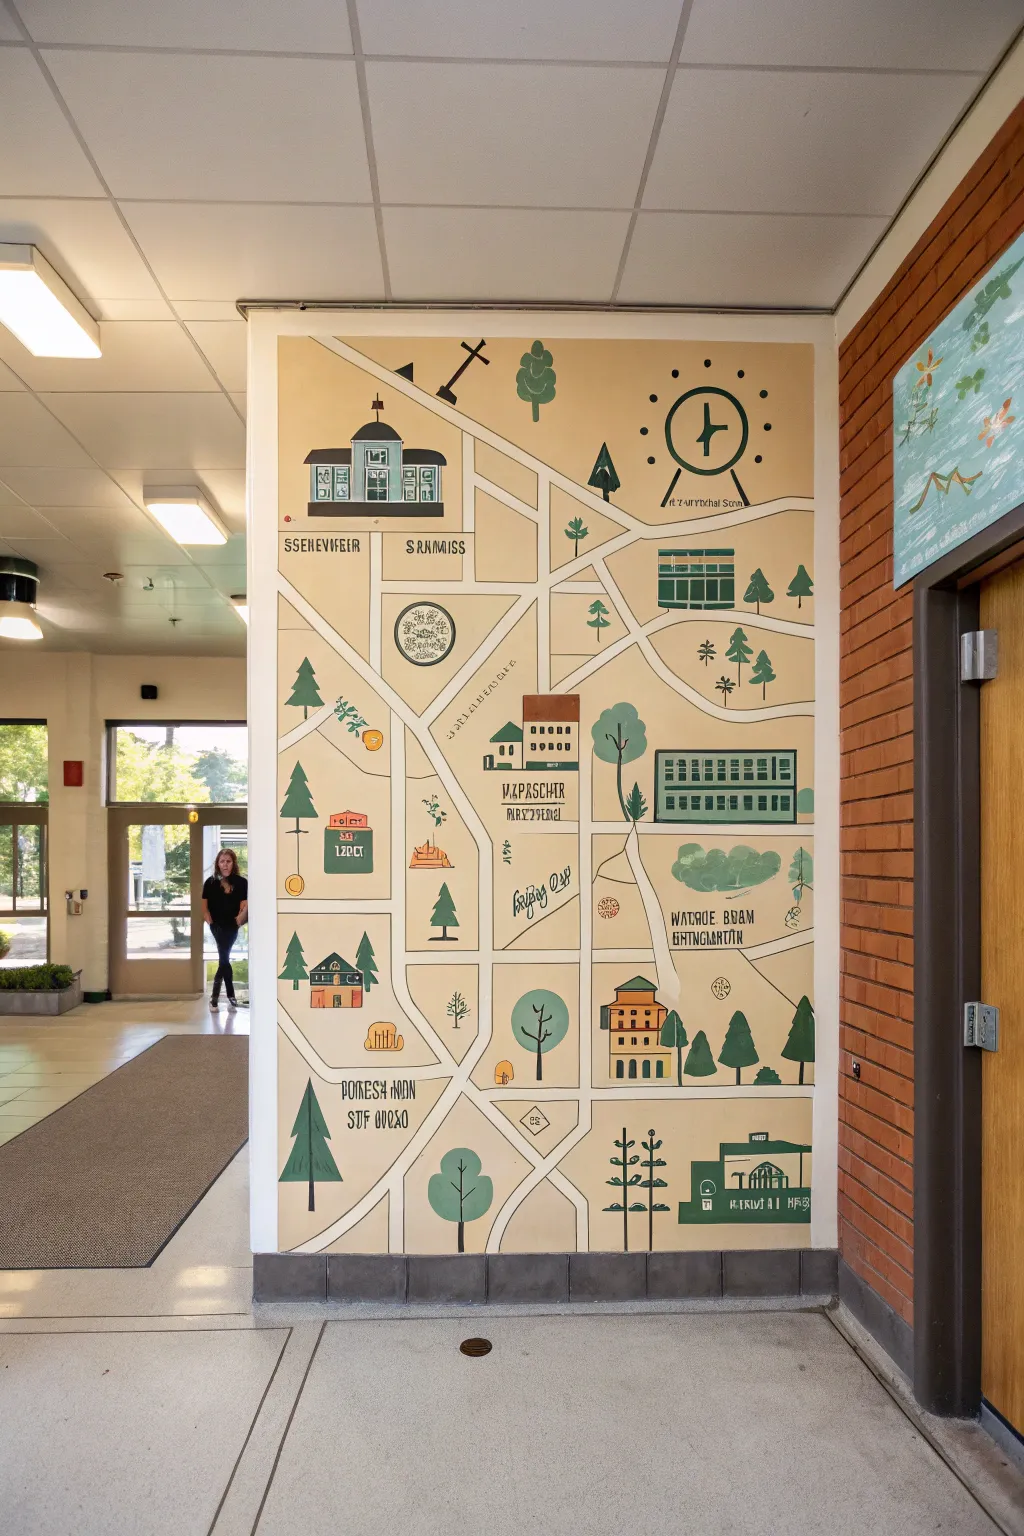
Immortalize your favorite senior spots with this charming, stylized campus map mural. Featuring a warm, muted palette and simplified architectural graphics, this large-scale art piece turns school hallways into a nostalgic guide to your graduating class’s history.
Step-by-Step
Materials
- Interior latex paint (beige/tan for background)
- Acrylic paints (forest green, sage green, terracotta orange, navy blue, black, white)
- Painter’s tape (various widths)
- Chalk or projector
- Pencils and large erasers
- Assorted paintbrushes (large rollers, medium flats, fine detailed liners)
- Yardstick or long straight edge
- Drop cloth
- Ladder or stepstool
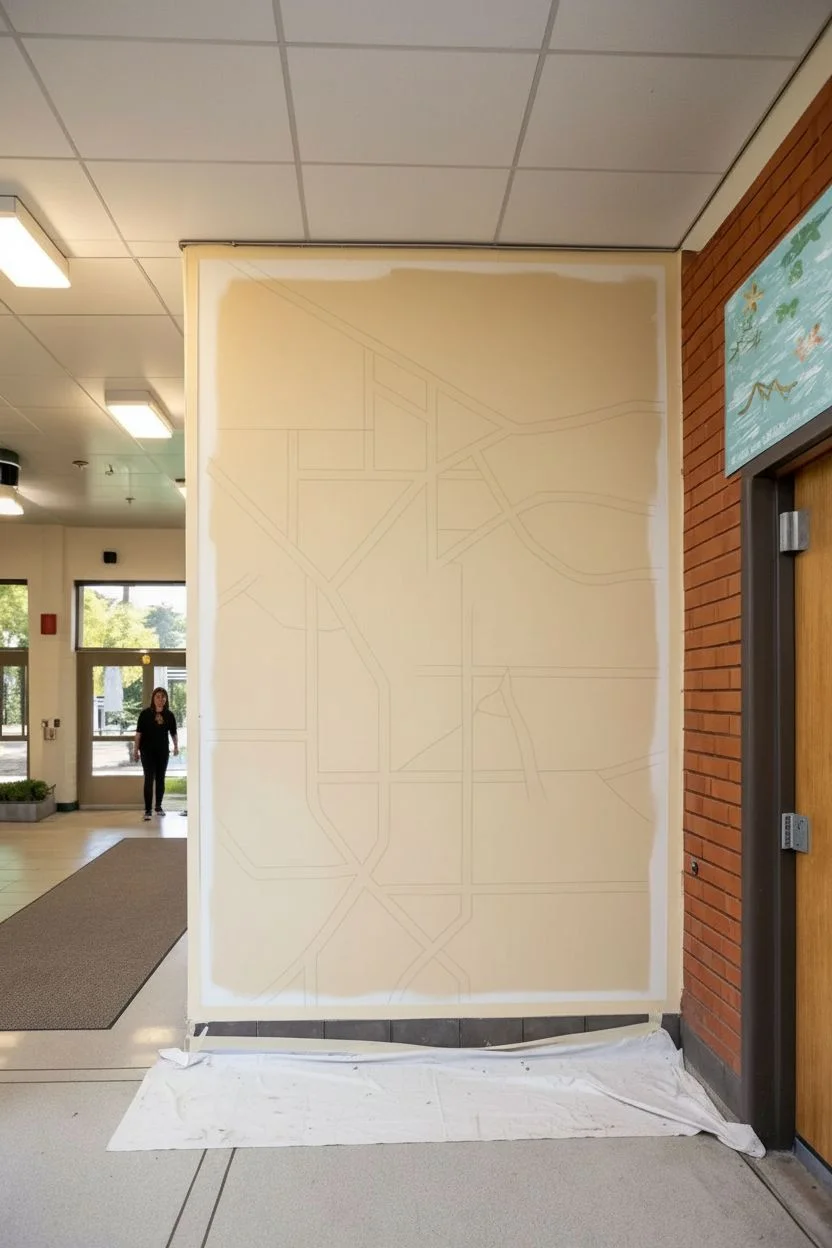
Step 1: Preparation & Base Coat
-
Prepare the surface:
Begin by cleaning the wall surface thoroughly to remove any dust or oils. Lay down your drop cloth and tape off the edges of the mural area, including baseboards and any ceiling tiles. -
Apply the background:
Using a roller, cover the entire rectangular area with a warm beige or tan latex paint. This serves as the ‘paper’ color for your map. Apply two coats for solid coverage, letting it dry completely between layers. -
Draft the layout:
Once the base is cured, lightly sketch the road system. You can project a digital map design onto the wall for accuracy, or freehand the main arteries using chalk and a yardstick to keep lines straight.
Use a Snap Line
For the long, straight road lines, use a chalk snap line tool. It’s faster than a yardstick and ensures your grid spans the full wall perfectly straight.
Step 2: Mapping the Roads
-
Tape the streets:
Apply painter’s tape along the outside edges of your sketched roads. This is crucial for achieving those crisp, graphic lines seen in the reference. -
Paint the pavement:
Paint the roads a lighter cream or soft white color. To prevent bleed-under, I often seal the tape edge with a thin layer of the background beige first before applying the road color. -
Create intersections:
Ensure your intersections connect smoothly. If you need rounded corners, you can freehand these later with a small brush after removing the main tape grid. -
Reveal the grid:
Carefully peel away the tape while the paint is still slightly tacky to avoid pulling up chips. Fix any uneven edges with a small angle brush and your background color.
Step 3: Adding Landmarks & Architecture
-
Sketch the buildings:
Identify key locations on your map (gym, cafeteria, library). Sketch simplified, 2D versions of these buildings in the open spaces between roads. Focus on distinctive roof shapes and window patterns rather than perfect perspective. -
Block in building colors:
Paint the main geometric shapes of the buildings using flat colors like terracotta for roofs and muted teal or grey for walls. Keep the paint application flat and opaque. -
Detail the architecture:
Using a fine liner brush and black or dark navy paint, add windows, doors, and outlines. Simplicity is key here—rows of small rectangles work perfectly for school windows. -
Add nature elements:
Paint stylized trees throughout the map. Use triangles for pine trees and circles or cloud shapes for deciduous trees. Vary your greens from deep forest to soft sage to create visual interest without clutter.
Fixing Smudged Text
If lettering gets messy, don’t wipe it! Let it dry completely, paint over it with a patch of the background beige, and try again on the fresh surface.
Step 4: Typography & Finishing Touches
-
Label the landmarks:
Pencil in the names of buildings or areas. Use a stenciled font or very careful hand-lettering in a bold, dark serif style to match the vintage map aesthetic. -
Paint the text:
Fill in your lettering with black acrylic paint. A square-tipped brush helps maintain crisp edges on block letters. -
Add symbolic icons:
Include small details like the clock face icon or compass rose seen in top right. These graphic elements help balance the composition. -
Border the mural:
For a polished look, you can paint a thin white border around the entire map, or simply ensure your original taped edge is clean. A dark grey painted baseboard strip at the bottom adds weight. -
Final inspection:
Step back to view the whole piece. Use the background beige paint to touch up any accidental smudges or wobbly lines around trees and buildings.
Now you have a permanent visual record of your campus footprint to inspire future classes
Puzzle Pieces for Every Senior
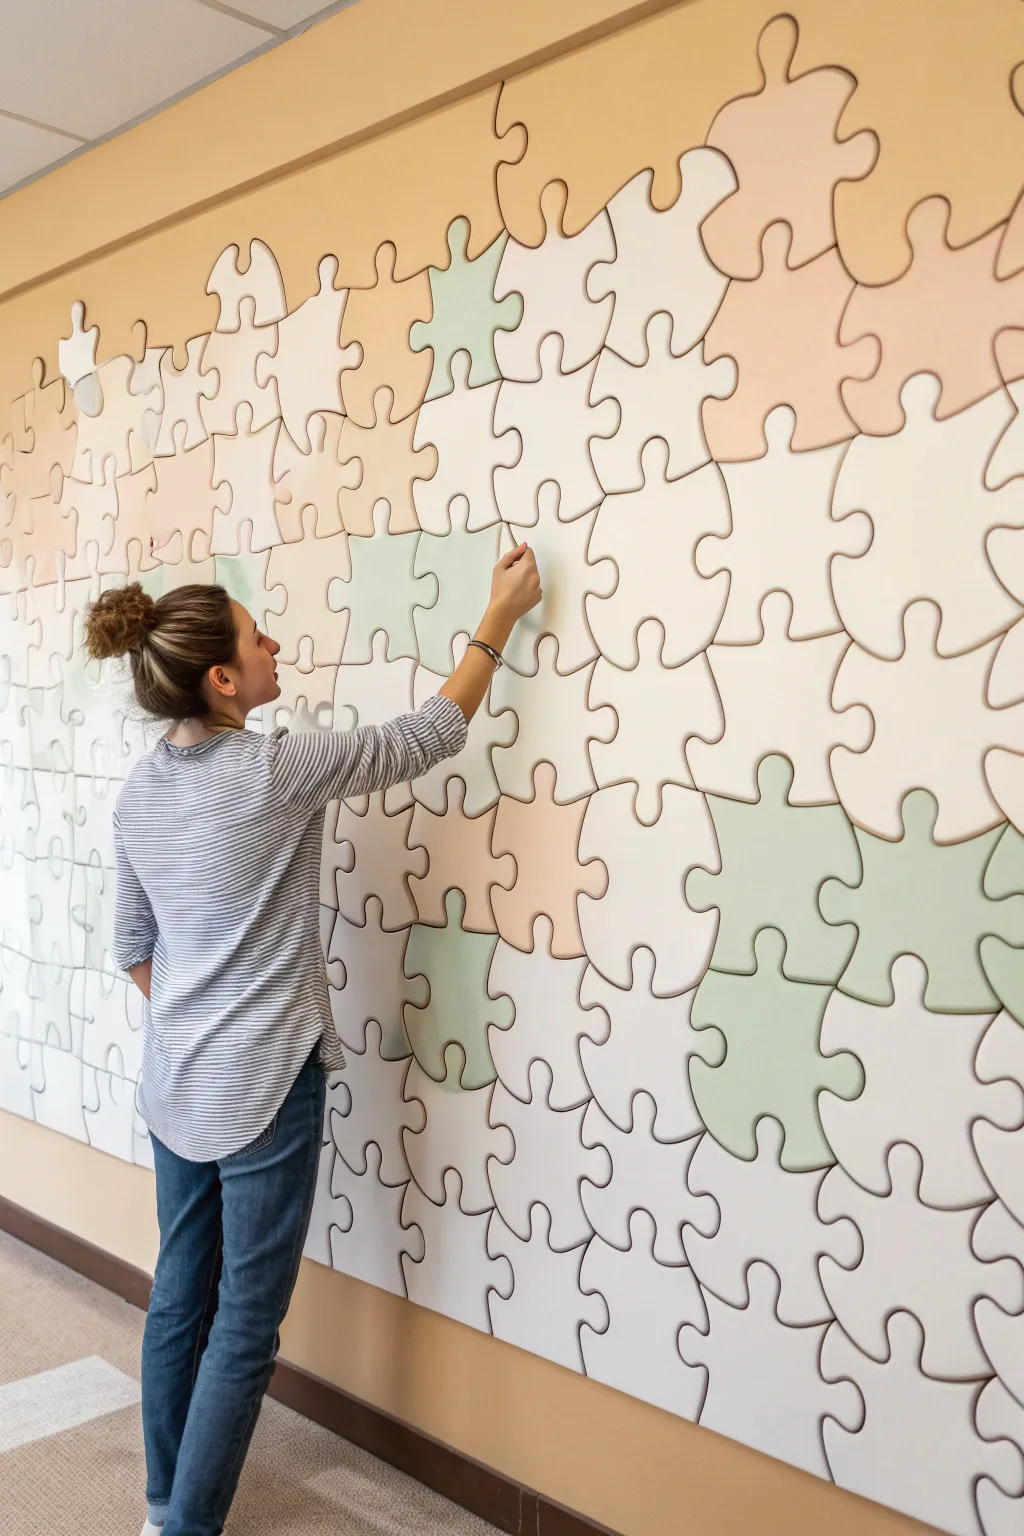
This large-scale installation turns a blank wall into a beautiful symbol of unity, where every student is an essential piece of the bigger picture. The finished mural features custom-cut, oversized puzzle pieces painted in a cohesive, soft palette of creams, beiges, and sage greens, creating a sophisticated and communal artwork.
Step-by-Step
Materials
- Large sheets of 1/8-inch or 1/4-inch hardboard or MDF
- Jigsaw or CNC machine (if available)
- Pencil and large puzzle template
- Sandpaper (120 and 220 grit)
- Interior latex paint (various soft earth tones: creams, beige, sage green)
- Small foam rollers and paint trays
- Command strips or heavy-duty double-sided mounting tape
- Primer (water-based)
- Black Sharpie or paint pen (for signing names)
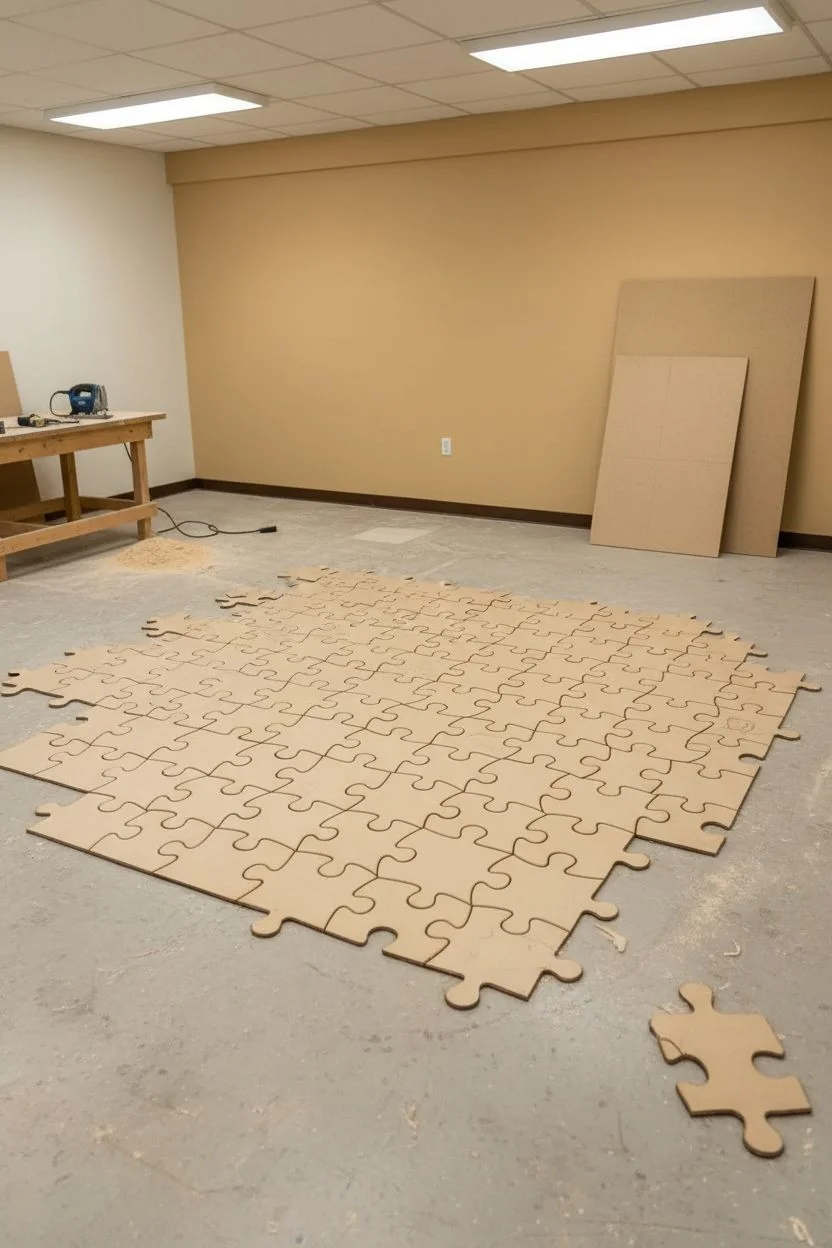
Step 1: Planning and Cutting
-
Measure the wall:
Before buying materials, measure the total wall space you intend to cover to determine how many 4×8 MDF sheets you will need. -
Draft the grid:
On your wood sheets, draw a light grid to ensure your puzzle pieces will be roughly uniform in size, aiming for pieces about 12-18 inches wide. -
Draw the interlocking shapes:
Sketch the classic puzzle shapes freehand or use a large cardboard stencil to ensure the ‘innies’ and ‘outies’ of adjacent pieces will actually fit together. -
Cut the shapes:
Using a jigsaw, carefully cut along your drawn lines. Consistency is key here, so move slowly to keep the curves smooth. -
Label the back:
As you cut them out, lightly number the back of adjacent pieces so you know exactly how to reassemble the puzzle on the wall later. -
Check the fit:
Lay the pieces out on the floor entirely to ensure they lock together correctly before moving on to finishing steps.
Master the Fit
Don’t cut pieces fully separate at first. Cut the whole sheet into columns, then cut the puzzle curves. This keeps the fit tighter.
Step 2: Painting and Prep
-
Sand the edges:
Use 120-grit sandpaper to smooth out any rough edges created by the jigsaw, ensuring no splinters remain. -
Clean surface:
Wipe down all pieces with a tack cloth or slightly damp rag to remove sawdust, which is crucial for a smooth paint finish. -
Prime the surface:
Apply a coat of water-based primer to the front and edges of each piece. -
Sand lightly:
Once the primer is dry, I like to do a quick pass with 220-grit sandpaper to knock down any raised grain. -
Select your palette:
Choose 3-4 distinct earthy colors—like the cream, tan, and soft green shown—to create a visually pleasing pattern. -
Apply base color:
Using small foam rollers, paint the individual pieces. Organize the painting so that adjacent pieces on your floor map don’t share the same color. -
Add second coat:
Let the first coat dry completely, then apply a second coat for full opacity and a professional look.
Gaps happen!
If pieces don’t fit perfectly on the wall due to paint thickness, shave edges slightly with a rasp file. Only file the back edge to hide it.
Step 3: Installation
-
Personalize (Optional):
Before mounting, have each senior sign a piece or write a short message in black marker. -
Map the starting point:
Choose a corner or bottom edge to start your installation on the wall, using a level to ensure the first row is straight. -
Apply adhesive:
Attach heavy-duty mounting tape or Command strips to the back of the first piece. -
Press and hold:
Firmly press the piece against the wall for 30 seconds to ensure a secure bond. -
Continue the pattern:
Following your numbered system, install the subsequent pieces, interlocking them tight against the previous ones. -
Touch ups:
Once the full mural is up, inspect the edges and use a small artist’s brush to touch up any paint that may have chipped during installation.
Step back and admire how individual differences come together to create a unified and lasting memory for the graduating class
Geometric Pattern Hiding the Year
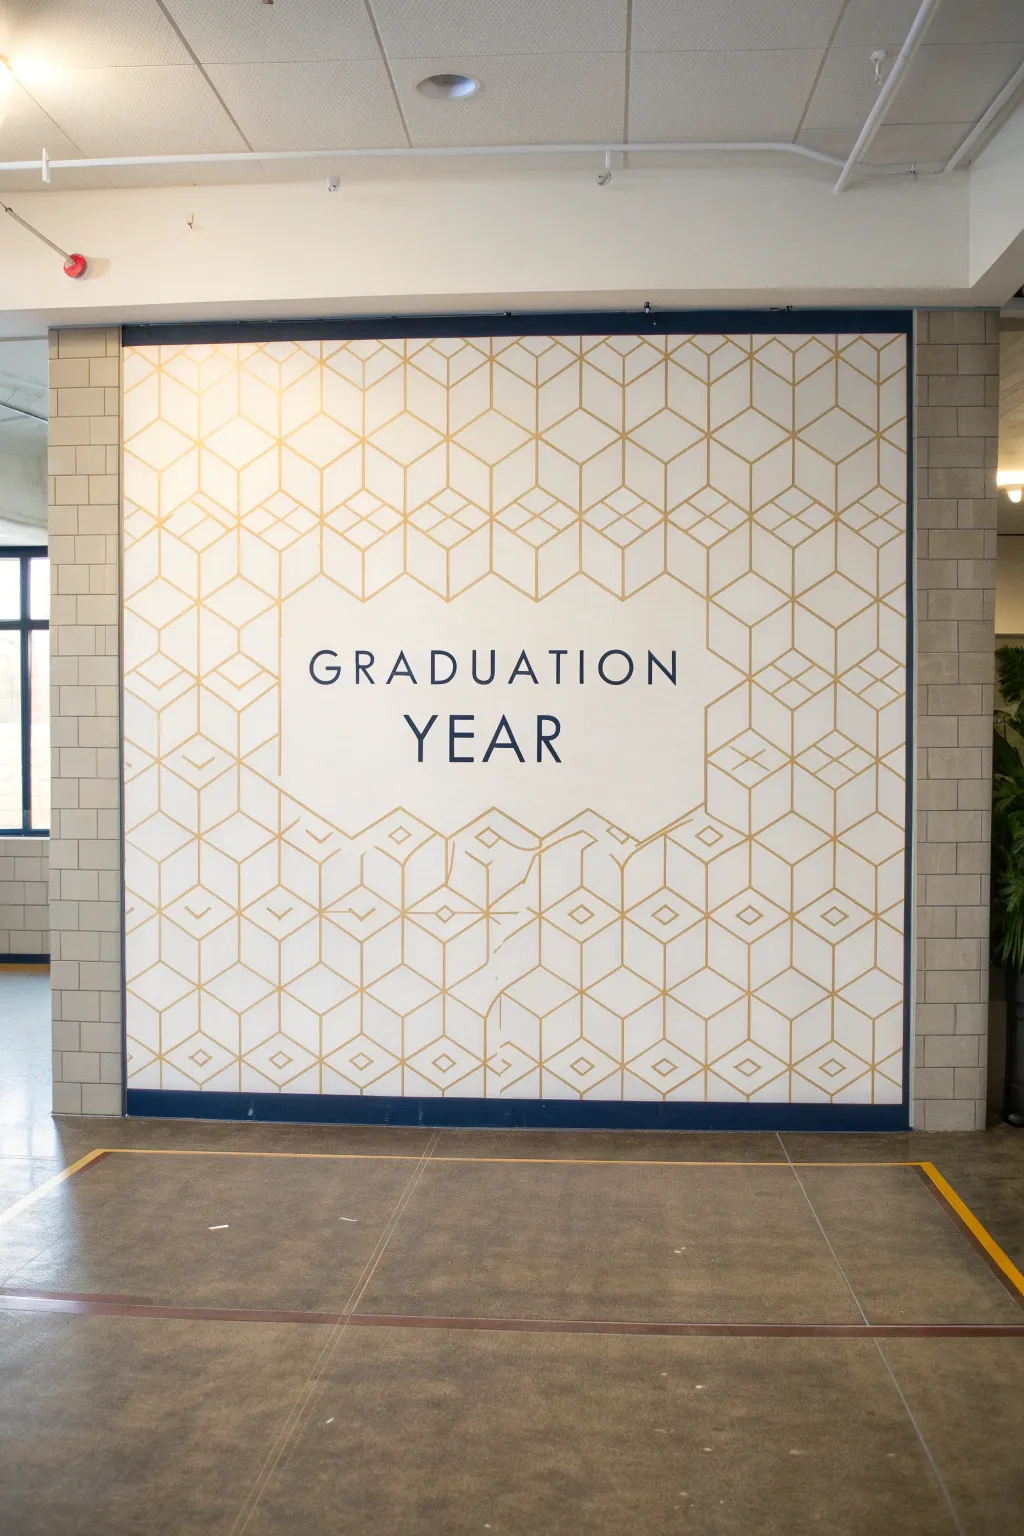
This striking mural uses an isometric grid pattern to create a sophisticated, modern backdrop perfect for senior photos. By combining precise gold linework with a clean white negative space, you create a 3D cube illusion that frames your graduation year beautifully.
Step-by-Step Guide
Materials
- Large wall space (primed white)
- High-quality painter’s tape (1-inch width)
- Laser level or long spirit level
- Pencil and large eraser
- Measuring tape
- Metallic gold latex paint
- Deep navy blue latex paint
- Small foam rollers (4-inch)
- Detail brushes (angled shader and fine liner)
- Yardstick or long straight edge
- Projector (optional but recommended for text)
Step 1: Planning and Grid Layout
-
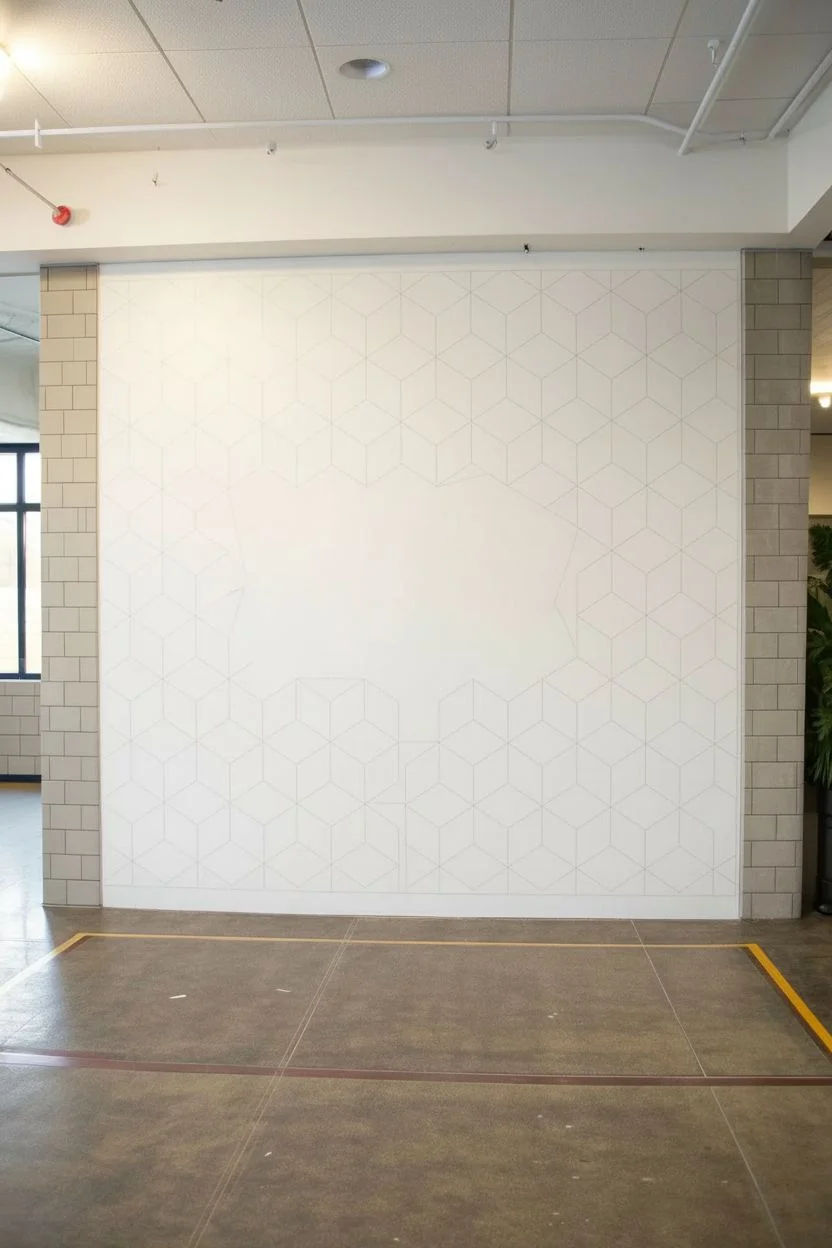
Prepare the Surface:
Begin by ensuring your wall is clean, smooth, and painted a fresh, crisp white. The white base coat acts as the background for the cubes, so any imperfections here will show through later. Let this base coat cure fully for at least 24 hours before taping. -
Define the Central Void:
Determine the center of your wall where the text will go. Lightly sketch a large, irregular geometric shape using a pencil. This shape should look like the pattern has been ‘erased’ or broken away. Keep the edges angular, following the potential lines of the hexagon pattern you are about to create. -
Establish Vertical Guides:
Using a laser level or a plumb line, mark vertical lines spaced evenly across the wall. For the scale shown in the photo, space these lines about 12-14 inches apart. These will form the vertical spines of your hexagonal grid. -
Mark Intersection Points:
Along each vertical line, measure and mark points at equal intervals. If your vertical lines are 12 inches apart, try marking points every 7 inches vertically. Stagger the starting point on every other line so the dots create a diamond formation across the wall. -
Connect the Diamonds:
Use a yardstick to lightly pencil diagonal lines connecting your staggered dots. You should start seeing a honeycomb or isometric cube pattern emerge. I find it helpful to stand back frequently to ensure the angles look consistent.
Tape Tearing Paint?
If lifting tape pulls up base paint, score the edge gently with a utility knife before peeling. Pull slowly at a sharp angle to prevent further damage.
Step 2: Painting the Gold Pattern
-
Tape the Lines:
Carefully apply painter’s tape along your pencil lines. The goal is to paint the lines themselves, not the shapes inside. You will need to tape ‘outside’ the pencil line on both sides to create a consistent 1/4 inch to 1/2 inch gap where the gold paint will go. -
Seal the Tape Edges:
To get crisp lines, take a small amount of your white base paint and brush it lightly over the edges of the tape. This seals the gap and prevents the gold paint from bleeding under. -
Apply the Gold Paint:
Using a small 4-inch foam roller or a sash brush, fill in the taped gaps with metallic gold paint. Metallic paints are often semi-transparent, so apply thin, even coats rather than one thick gloopy one. -
Second Coat:
Allow the first coat of gold to dry to the touch (usually 1-2 hours) before applying a second coat for full opacity and shimmer. -
Address the Central Void:
When taping and painting near the center, stop your gold lines abruptly where they meet your sketched central shape. This creates the ‘broken’ edge effect. The lines should look like they disappear into the white space. -
Remove the Tape:
Peel off the tape while the final coat of paint is still slightly tacky. Pull the tape at a 45-degree angle away from the painted line for the sharpest edge.
Step 3: Adding Detail and Typography
-
Project the Text:
Set up a projector to cast your ‘GRADUATION YEAR’ text into the center white space. Ensure it is perfectly level and centered. If you don’t have a projector, can print large letters, cut them out, and trace them. -
Trace the Letters:
Lightly trace the outline of the letters with a pencil. Use a ruler for straight edges on letters like ‘A’, ‘T’, and ‘R’ to keep them looking professional. -
Paint the Text:
Fill in the letters carefully using the deep navy blue paint and a fine angled shader brush. Use a liner brush for any sharp corners or serifs. -
Add Small Geometric Details:
Looking at the reference, notice small diamond shapes inside the lower cubes and near the center void. Use a simple stencil or tape off small diamond shapes in random lower sections and paint them with the gold outline to add complexity. -
Paint the Baseboard Trim:
Tape off a thick horizontal band at the very bottom of the wall, about 4-6 inches high. Paint this the same deep navy blue as the text to anchor the mural visually. -
Final Cleanup:
Once everything is fully dry, gently erase any visible pencil marks. Use a small artist’s brush and white paint to touch up any spots where the gold lines might have bled or looked uneven.
Crisp Line Hack
Burnish down your tape edges with a credit card or spoon back. This extra pressure ensures a tight seal on textured walls, keeping lines razor sharp.
Step back and admire how the simple lines come together to create a sophisticated, dimensional backdrop for the graduating class
Single-Line Senior Portrait Wall
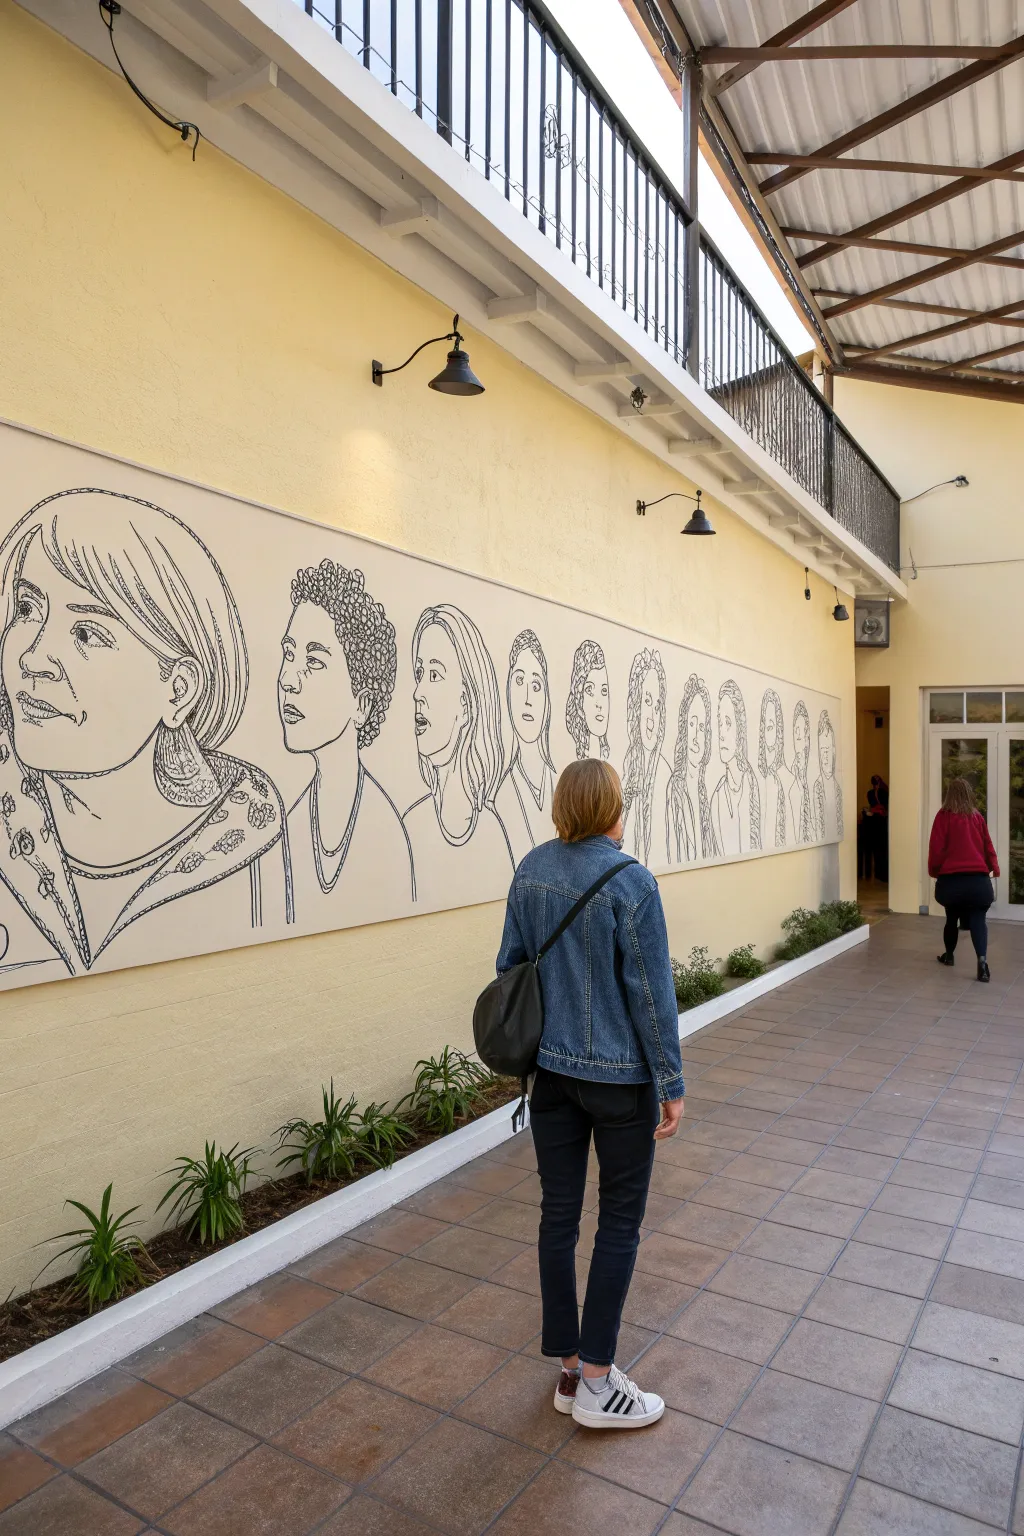
Transform a blank hallway into a permanent yearbook with this striking linear portrait mural. Using a minimalist continuous-line drawing style, this large-scale installation captures the unique profiles of the graduating class in a cohesive, modern way.
Step-by-Step Tutorial
Materials
- Large wooden panels (MDF or plywood sheets)
- White or off-white primer/base paint
- Paint rollers and trays
- Projector
- Laptop or tablet with digital photos
- Pencil and eraser
- Black acrylic paint or high-quality mural paint
- Round brushes (sizes 2, 4, and 6)
- Black paint markers (broad tip) for details
- Clear sealant (matte or satin)
- Mounting hardware (cleats or screws)
- Level and measuring tape
Step 1: Preparation and Photography
-
Gather the subjects:
Organize a photo day for the seniors involved. Have each student stand in profile or a 3/4 turn against a plain background for consistency. -
Capture the images:
Take clear photos of each student. Focus on capturing distinct features like hair texture, glasses, and jawlines, as these will define the sketch. -
Digitize and edit (optional):
If you are comfortable with digital tools, use Photoshop or a free app to turn the photos into high-contrast black and white images or apply a sketch filter. This makes tracing easier later. -
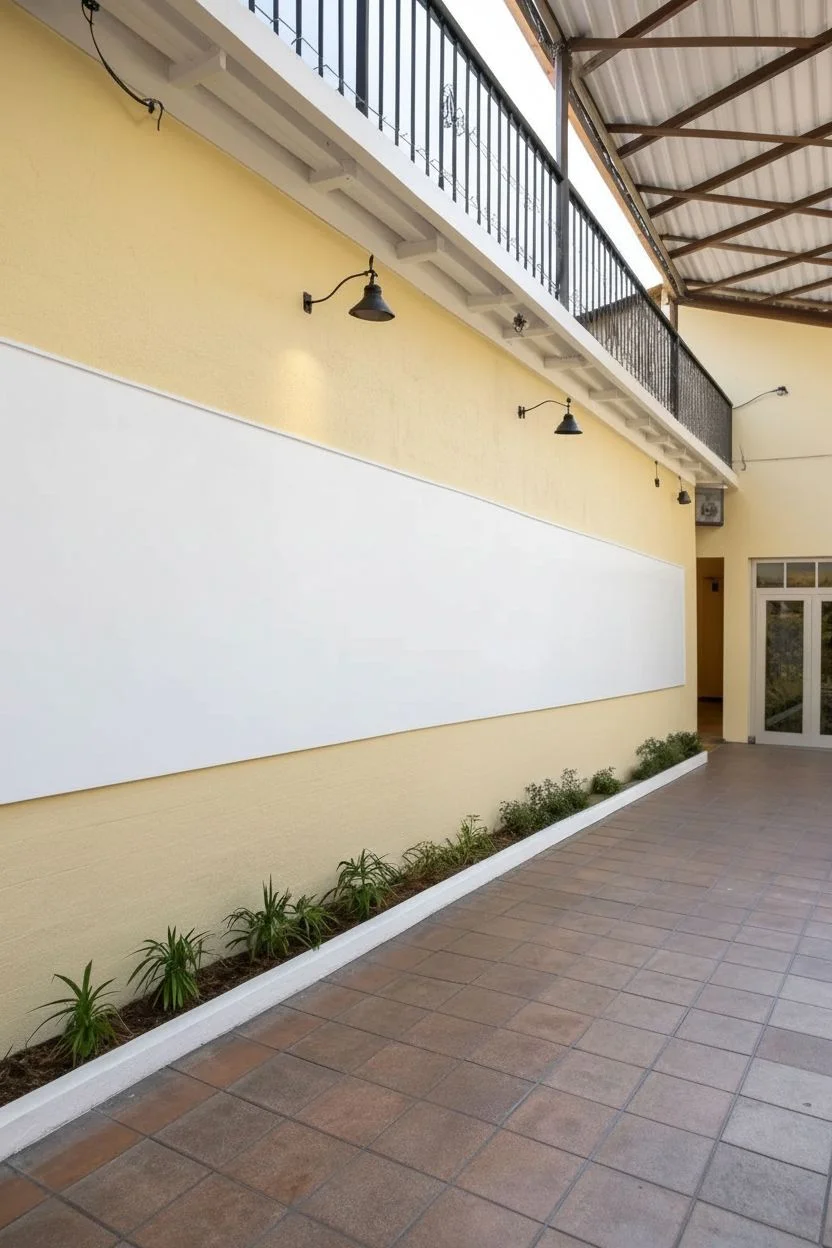
Prepare the panels:
Cut your wooden panels to fit the dimensions of your wall space. Sand down any rough edges to ensure a smooth surface for the artwork. -
Prime the surface:
Apply two coats of white or off-white primer to the panels. Let the first coat dry completely before applying the second to ensure opacity.
Step 2: Drafting the Design
-
Set up the projector:
Position your projector so it casts the image onto the primed panel. Adjust the distance until the head size is approximately life-size or slightly larger. -
Compose the layout:
Line up the portraits in an overlapping or side-by-side composition. It helps to alternate profiles and 3/4 views to create visual rhythm. -
Trace the outlines:
Using a pencil, lightly trace the key contours of the projected faces. Focus on the main lines: the profile, the hairline, the eyes, and the neck. -
Simplify the details:
As you trace, resist the urge to draw every eyelash. The goal is a ‘continuous line’ look, where lines flow into one another without many breaks. -
Check for consistency:
Turn off the projector periodically to check that the scale of all the heads looks balanced relative to one another.
Smoother Lines
Use a specialized ‘liner’ or ‘rigger’ brush. These have very long bristles that hold more paint, allowing you to drag long, continuous lines without stopping to reload.
Step 3: Painting the Line Work
-
Prepare the black paint:
Pour your black acrylic mural paint into a small container. I find adding a tiny drop of water helps the paint flow more smoothly for long strokes. -
Paint main contours:
Start with a size 6 round brush for the bold outer outlines (face shape, shoulders, hair volume). Keep your hand steady and pull the brush towards you. -
Refine facial features:
Switch to a size 4 brush for the internal features like eyes, nose, and mouth. The line weight should be slightly thinner here. -
Add texture and pattern:
For curly hair or detailed clothing patterns, use a size 2 brush or a broad-tip paint marker. Use loops, squiggles, or repeated lines to suggest texture without shading. -
Review and touch up:
Step back about ten feet to view the mural as a whole. Thicken any lines that disappear from a distance or clean up shaky edges with a bit of white paint.
Interactive Element
Embed small QR codes near each portrait collar. When scanned, people could see a quote from that student or a time-lapse video of their portrait being painted.
Step 4: Installation
-
Seal the artwork:
Once the black paint is fully cured (give it at least 24 hours), roll on a layer of clear matte sealant to protect the mural from scuffs and fingerprints. -
Mount the panels:
Using a level and mounting cleats, attach the long wooden panels to the wall. Ensure they are straight and securely fastened. -
Final wipe down:
Clean off any installation dust with a microfiber cloth to reveal the crisp, high-contrast portraits.
Now you have a timeless tribute that celebrates individual personalities while uniting the class in a single work of art


Have a question or want to share your own experience? I'd love to hear from you in the comments below!