
There’s something so satisfying about painting a square rock—those straight edges basically beg for clean lines, patterns, and tiny “mini canvas” moments. Here are my favorite square rock painting ideas that lean into that flat, geometric shape in the most fun ways.
Classic Checkerboard Pattern
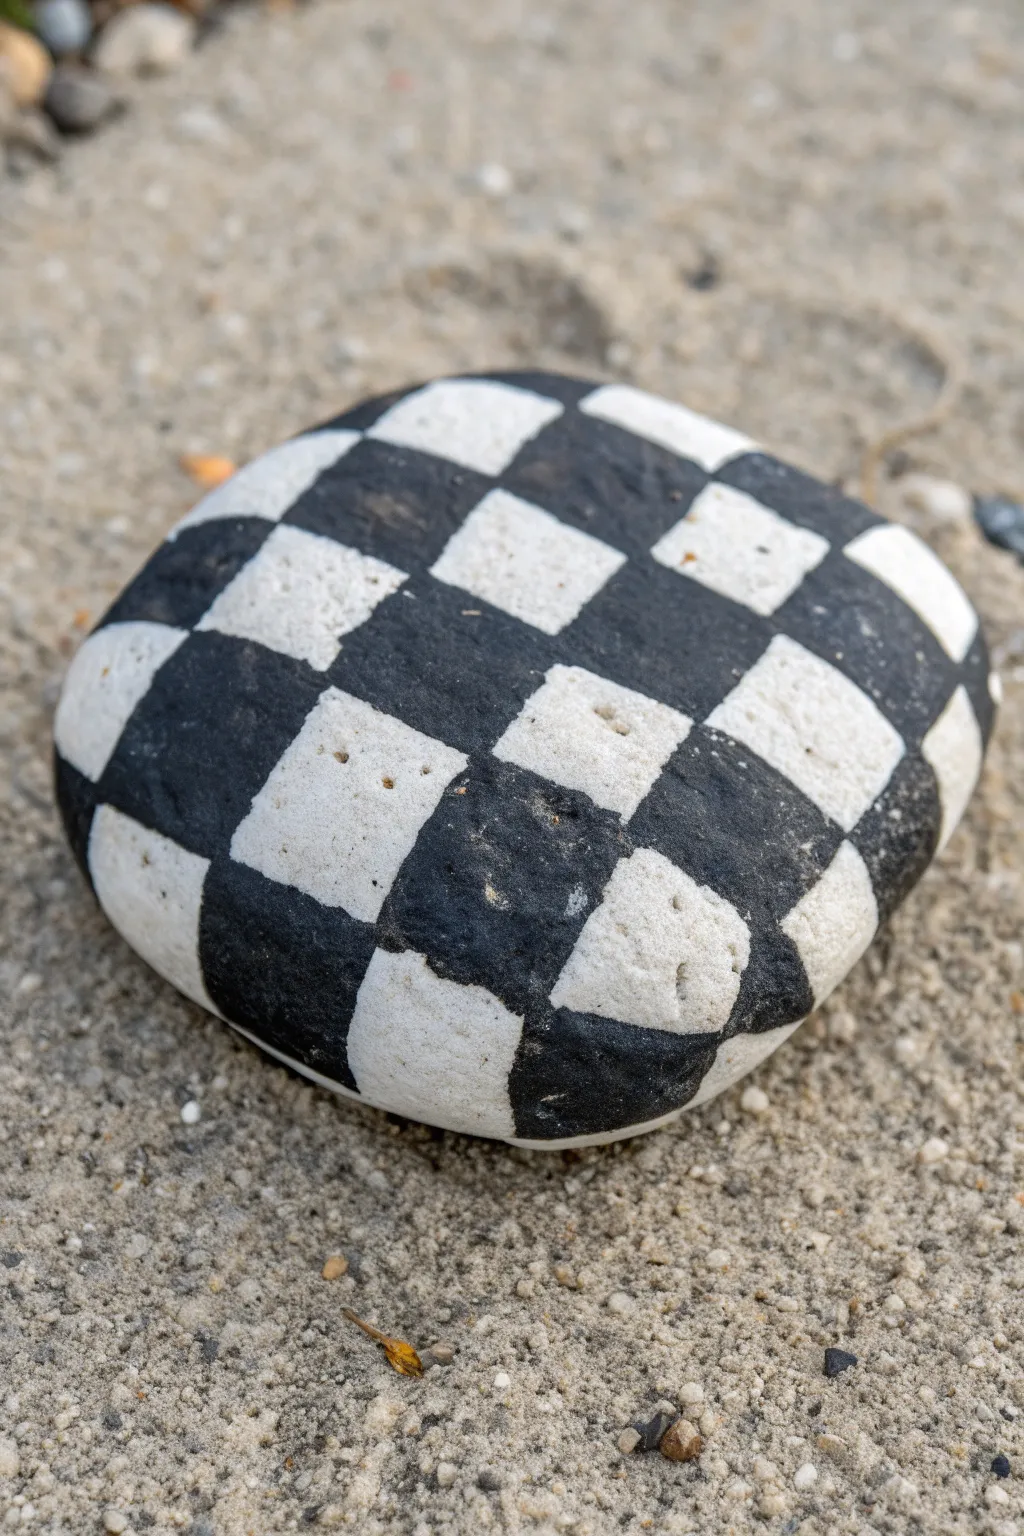
Transform a smooth, rounded stone into a striking optical illusion with this classic black and white checkerboard design. The finished piece has a wonderfully tactile, geometric look that stands out beautifully in any garden or rock collection.
Step-by-Step Guide
Materials
- Smooth, round river rock (approx. palm-sized)
- White acrylic paint (high opacity)
- Black acrylic paint
- Flat shader brush (small to medium)
- Fine liner brush (for edges)
- Pencil
- Flexible ruler or measuring tape
- Matte or satin sealant spray
Step 1: Preparation and Base Coat
-
Clean surface:
Begin by thoroughly washing your rock with soap and water to remove any dirt or oils. Let it dry completely before starting, as moisture will trap underneath the paint and cause peeling later. -
Base layer application:
Using your flat brush, apply a layer of white acrylic paint over the entire top surface of the rock. Depending on the opacity of your paint, you may need two or three coats to get a solid, bright white finish. -
Ensure dryness:
Allow the white base coat to dry fully. If the paint is even slightly tacky, the pencil sketching in the next phase will drag and ruin the smooth surface.
Wobbly Lines?
If you struggle with steady hands, use thin washi tape or painter’s tape to mask off the grid lines. Press edges down firmly to prevent bleed-under.
Step 2: Mapping the Grid
-
Find the center:
With a pencil, lightly mark the approximate center of the rock. This will serve as the anchor point for your grid to ensure the pattern looks balanced. -
Draw vertical lines:
Using a flexible ruler or tape measure, gently sketch a central line curving over the rock’s surface. Add parallel lines on either side, spacing them about 1.5 to 2 centimeters apart. Follow the curve of the stone rather than drawing straight ruler lines. -
Draw horizontal lines:
Cross your vertical lines with horizontal ones, maintaining the same spacing to create square-ish shapes. Because the rock is round, the squares near the edges will naturally distort into trapezoids—this is exactly what creates the 3D effect. -
Refine the grid:
Step back and look at your pencil grid. If any lines look too wonky, lightly erase and adjust them now before paint touches the stone.
Step 3: Painting the Patter
-
Mark the black squares:
To avoid confusion, place a tiny dot with your pencil inside every square that needs to be painted black. It is surprisingly easy to lose track of the pattern once you start painting. -
Outline first square:
Dip your fine liner brush into black acrylic paint. Start with the central-most square marked with a dot. Carefully outline the edges of the box first to establish crisp boundaries. -
Fill the center:
Switch to a slightly larger flat brush or continue with the liner to fill in the center of that square. I find that pulling the paint from the edge toward the center helps keep the lines neat. -
Work outwards:
Move to the next marked square, preferably one not touching the wet paint of the first one if possible, or work systematically in rows. Continue outlining and filling all the ‘black’ squares. -
Mind the edges:
As you reach the rounded sides of the rock, continue the pattern down the curvature. Let the squares fade off naturally at the bottom edge of the rock. -
Touch up white:
Once the black paint is dry, inspect your white squares. If you smudged any black paint into them, use a clean brush and white paint to tidy up the edges.
Rock Choice Matters
The flatter and smoother the rock, the easier the grid is to map. Bumpy rocks distort lines, which is harder for beginners but creates cool effects.
Step 4: Finishing Touches
-
Check density:
If your black squares look streaky or greyish, apply a visible second coat of black paint to make them opaque and bold. -
Final dry:
Let the rock sit undisturbed for at least 24 hours to ensure all layers of paint have cured completely. -
Seal:
Take the rock to a well-ventilated area and apply a spray sealant. A matte finish looks very natural, while a gloss finish will make the pattern pop like a polished tile.
Enjoy displaying your modern, monochromatic stone art on a desk or tucked into a flower pot


Tic-Tac-Toe Game Rock
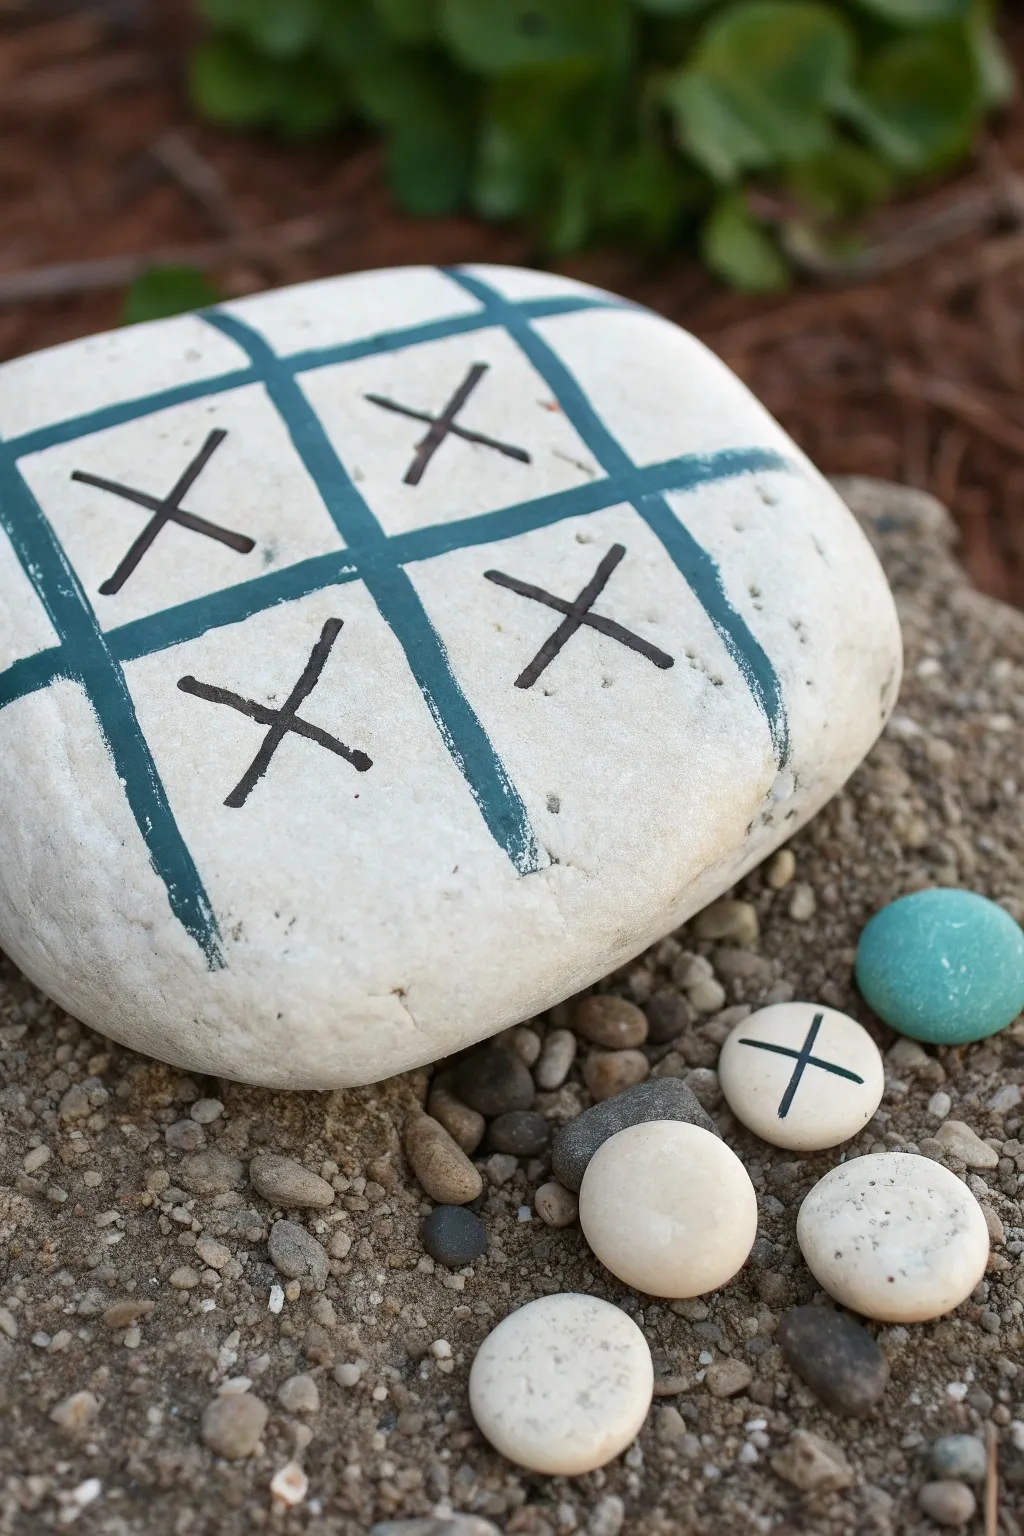
Turn a simple stone into a portable game board with this charming Tic-Tac-Toe set. The large base rock serves as the playing field with a crisp painted grid, while smaller pebbles act as the game pieces for endless outdoor fun.
Detailed Instructions
Materials
- One large, flat rock (white or light gray, approximately 5-6 inches)
- 5-10 small, flat pebbles or glass gems
- Acrylic paint (dark teal or forest green)
- Black acrylic paint or paint pen
- Fine detail paintbrush or flat shader brush
- Clear acrylic sealant (spray or brush-on)
- Pencil for sketching
- Ruler or straight edge
- Water cup and paper towels
Step 1: Preparing the Game Board
-
Clean and dry:
Begin by scrubbing your large base rock and the smaller game pieces with soap and water to remove any dirt or oils. Let them dry completely in the sun before starting. -
Map out the grid:
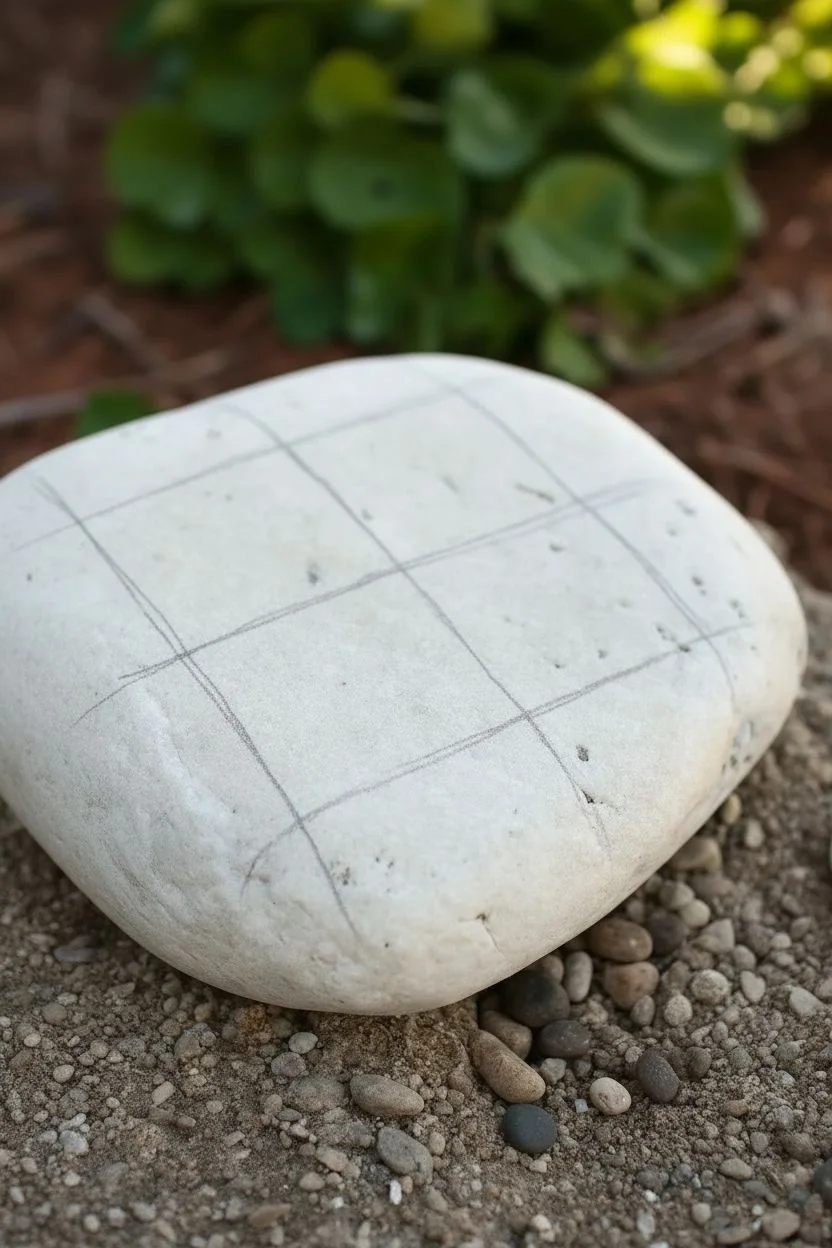
Using a pencil and a ruler, lightly sketch a Tic-Tac-Toe grid onto the face of the large stone. Aim for four intersecting lines—two vertical and two horizontal—to create nine open spaces. -
Adjust the proportions:
Before painting, check that your spaces are large enough to actually hold the smaller game piece pebbles. If the squares are too tight, erase and widen the grid lines slightly.
Step 2: Painting the Grid
-
Load the brush:
Dip your flat shader brush into the dark teal or forest green acrylic paint. You want enough paint for a solid line, but not so much that it drips. -
Paint vertical lines:
Carefully trace over your pencil marks for the two vertical lines first. I find it helpful to pull the brush toward me rather than pushing it away for a straighter line. -
Paint horizontal lines:
Once the verticals are tacky to the touch, paint the two horizontal lines across them. Don’t worry if the edges are slightly rough; it gives the stone a rustic, hand-crafted look. -
Add pre-filled moves (optional):
To mimic the look in the photo, paint bold ‘X’ marks in a few of the squares using black or very dark brown paint. This makes the rock look decorative even when not in use. -
Second coat:
If the stone’s natural color shows through your paint, apply a second coat to the grid lines once the first layer is fully dry. -
Let it cure:
Allow the large stone to dry completely for at least an hour while you move on to the game pieces.
Straight Line Secret
Struggle with straight lines? Use strips of painter’s tape or masking tape to mark off the grid channels. Paint between the tape strips, let dry slightly, and peel for crisp edges.
Step 3: Creating the Game Pieces
-
Select your pieces:
Gather your small pebbles. You will need about five for the ‘X’ player and five for the ‘O’ player. -
Mark the X’s:
Using a fine detail brush and black paint, or a paint marker for easier control, draw a simple ‘X’ on five of the small white pebbles. -
Create the O’s:
For the opposing pieces, draw ‘O’s on the remaining pebbles. Alternatively, you can use a different colored stone, like the teal glass gem shown in the inspiration photo, to represent the second player without painting anything. -
Dry the pieces:
Set these small stones aside on a piece of paper towel until the paint is dry to the touch so they don’t smudge.
Travel Pouch
Sew or buy a small drawstring fabric bag to store the small game pieces. You can even paint the grid directly onto the bag so the pouch itself doubles as a travel board.
Step 4: Sealing and Finishing
-
Prepare for sealing:
Ensure all paint on the big board and the small pieces is 100% dry. Trapped moisture can ruin the finish. -
Apply sealant:
Spray or brush a layer of clear acrylic sealant over the painted surface of the large rock. This protects the grid from chipping when the smaller stones are placed on it. -
Seal the pieces:
Give the smaller game pieces a coat of sealant as well. Since these get handled a lot, a second coat is often a good idea for durability. -
Final cure:
Let everything cure overnight in a well-ventilated area before your first match.
Now you have a durable, weatherproof game set perfect for the garden or your next camping trip


Sticky Note Style Quote
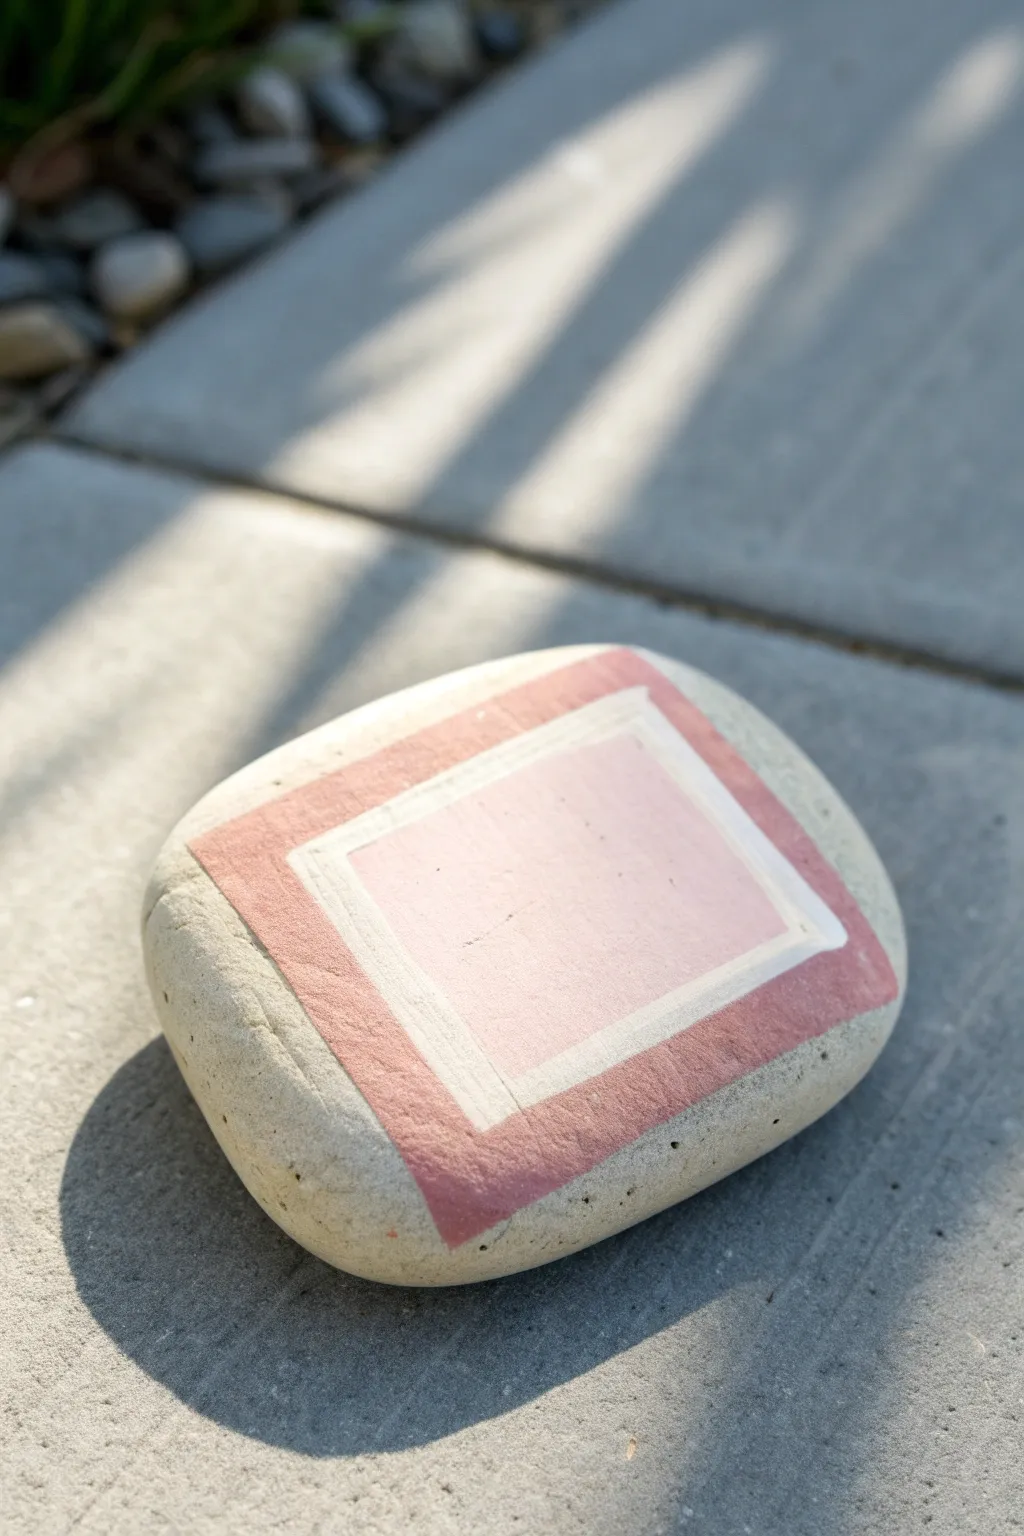
Transform a smooth river rock into a charming faux-sticky note ready for an inspirational quote. This minimalist design uses soft pinks and crisp white lines to create a clean, graphic look that pops against the natural stone texture.
Step-by-Step Tutorial
Materials
- Smooth, flat river rock (light gray or white)
- Acrylic paint (Light Pink, Dusty Rose/Mauve, Titanium White)
- Flat shader brush (small)
- Fine liner brush or detail brush
- Painter’s tape or masking tape (optional but helpful)
- Pencil
- Ruler or straight edge
- Matte sealer spray
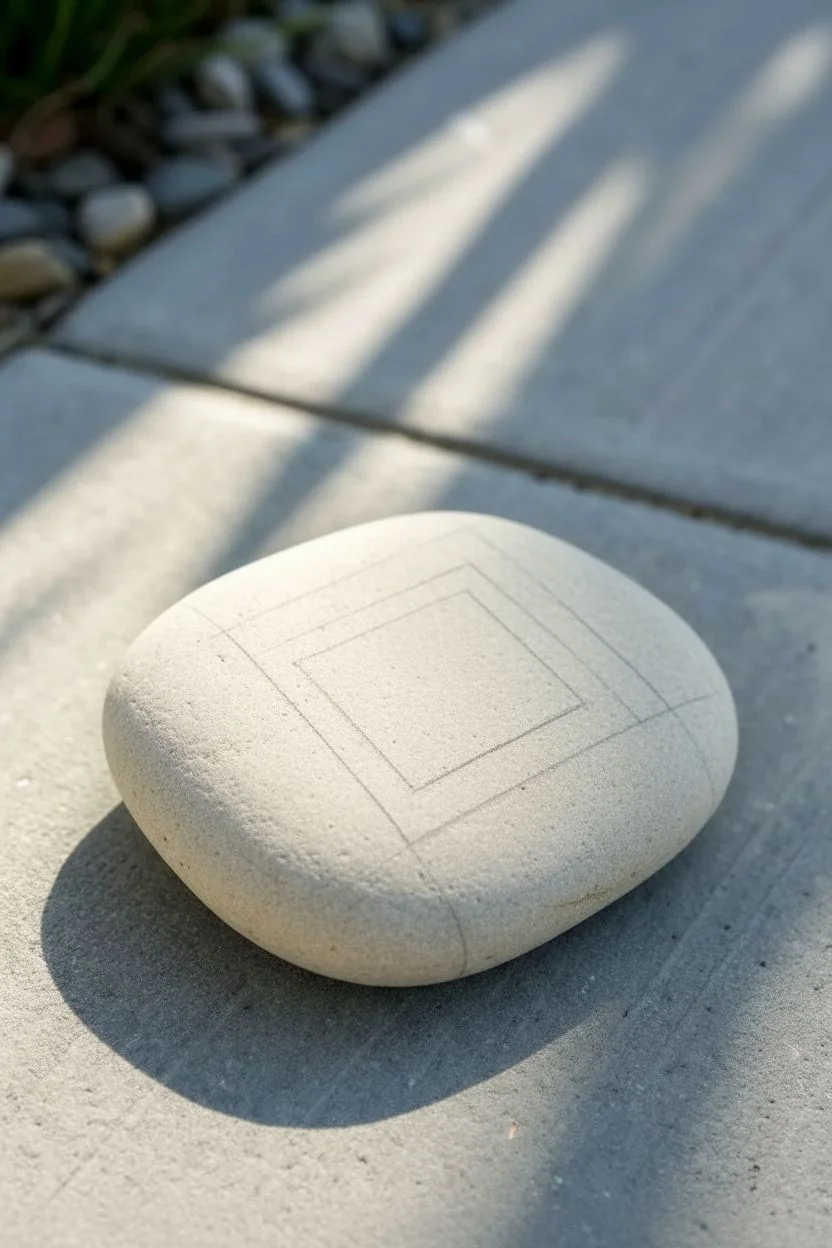
Step 1: Preparation & Base Layout
-
Clean the surface:
Before starting, ensure your rock is scrubbed clean with soapy water and completely dry to remove any dirt or oils that might repel the paint. -
Mark the center:
Using a pencil and a ruler, lightly mark the center of the rock where you want your sticky note design to sit. -
Draft the outer square:
Draw a faint square shape around your center point. For this design, you don’t want it perfectly straight; tilt it slightly for a realistic, casual look. -
Draft the inner square:
Sketch a smaller square inside the first one, leaving a consistent gap of about a quarter-inch between the lines to create the border area.
Step 2: Painting the Design
-
Paint the center square:
Dip your flat shader brush into the Light Pink acrylic paint. Carefully fill in the smallest inner square. -
Apply a second coat:
Acrylics can be translucent, especially light pinks. Once the first layer is touch-dry, apply a second coat for solid, opaque coverage. -
Mix the border color:
If you don’t have a pre-mixed dusty rose, create one by mixing your Light Pink with a tiny touch of brown or purple to deepen it. -
Paint the outer border:
Using the flat brush again, paint the thick outer border using your Dusty Rose color. Be careful not to paint over the gap you left for the white line. -
Refine the edges:
Go over the outer edges of the rose square to ensure they are crisp and straight. You can use tape here if you struggle with freehand lines.
Straight Line Secret
For ultra-crisp edges on such a small scale, use Washi tape instead of painter’s tape. It’s less sticky, won’t pull up base layers, and conforms better to the rock’s bumpy surface.
Step 3: Adding the Details
-
Create the white divide:
Load a fine liner brush with Titanium White paint. I find slightly thinning the paint with a drop of water helps it flow smoother for long lines. -
Paint the separation line:
Carefully paint the white strip between the light pink center and the dusty rose border. This acts as the ‘frame’ of the design. -
Clean up mistakes:
If your white line wobbled into the rose or pink areas, wait for it to simple dry and then touch up the colored areas with your flat brush. -
Add a shadow (optional):
To give the sticky note a 3D effect, you can mix a very watery gray glaze and paint a thin line along the bottom and right edge of the square on the bare rock. -
Let it cure:
Allow the entire design to dry completely for at least an hour before handling it too much. -
Seal the rock:
Finish by spraying the rock with a matte sealer. This protects the paint from chipping and keeps that nice, non-glossy paper look.
Add Your Message
Once dry, use a fine-tip black paint pen to write a short quote or daily affirmation inside the light pink square to complete the sticky note effect.
Now you have a permanent reminder of positivity that fits right in your pocket


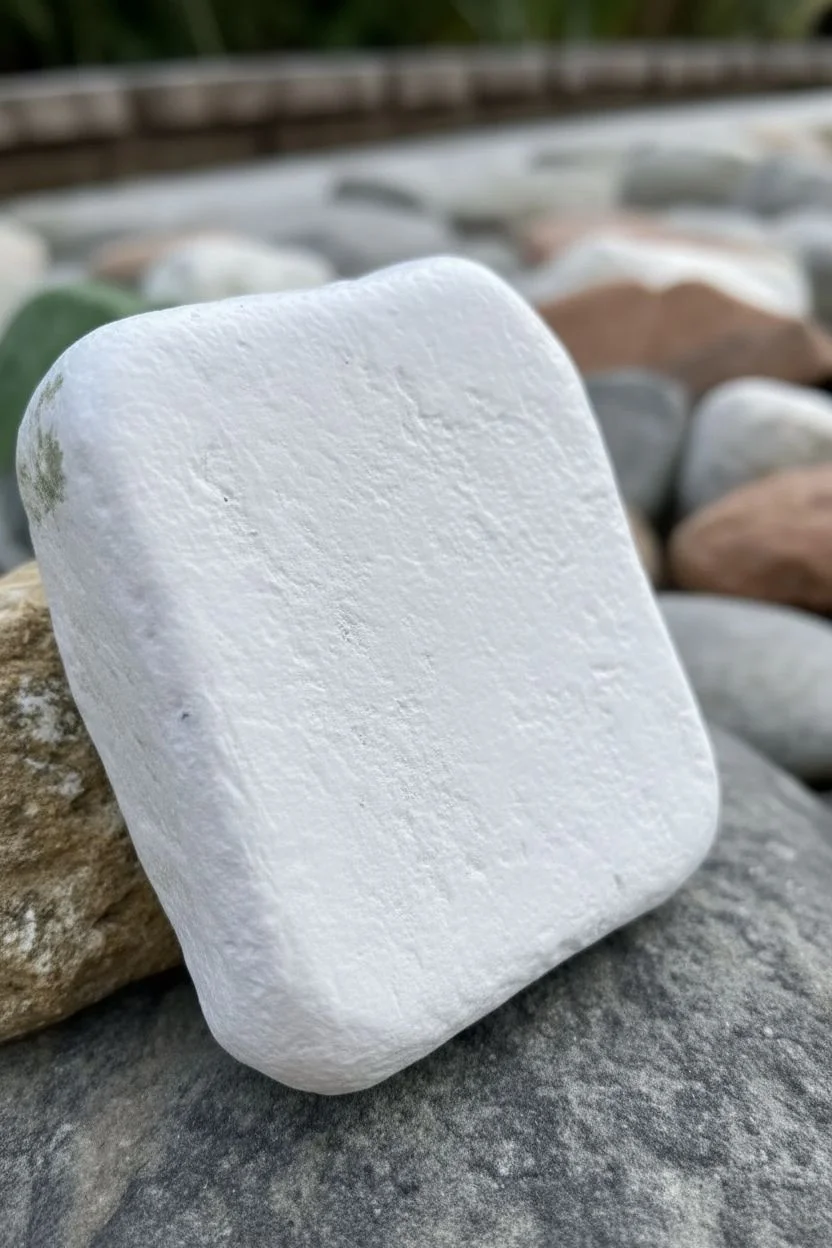
Mini Signboard With Border
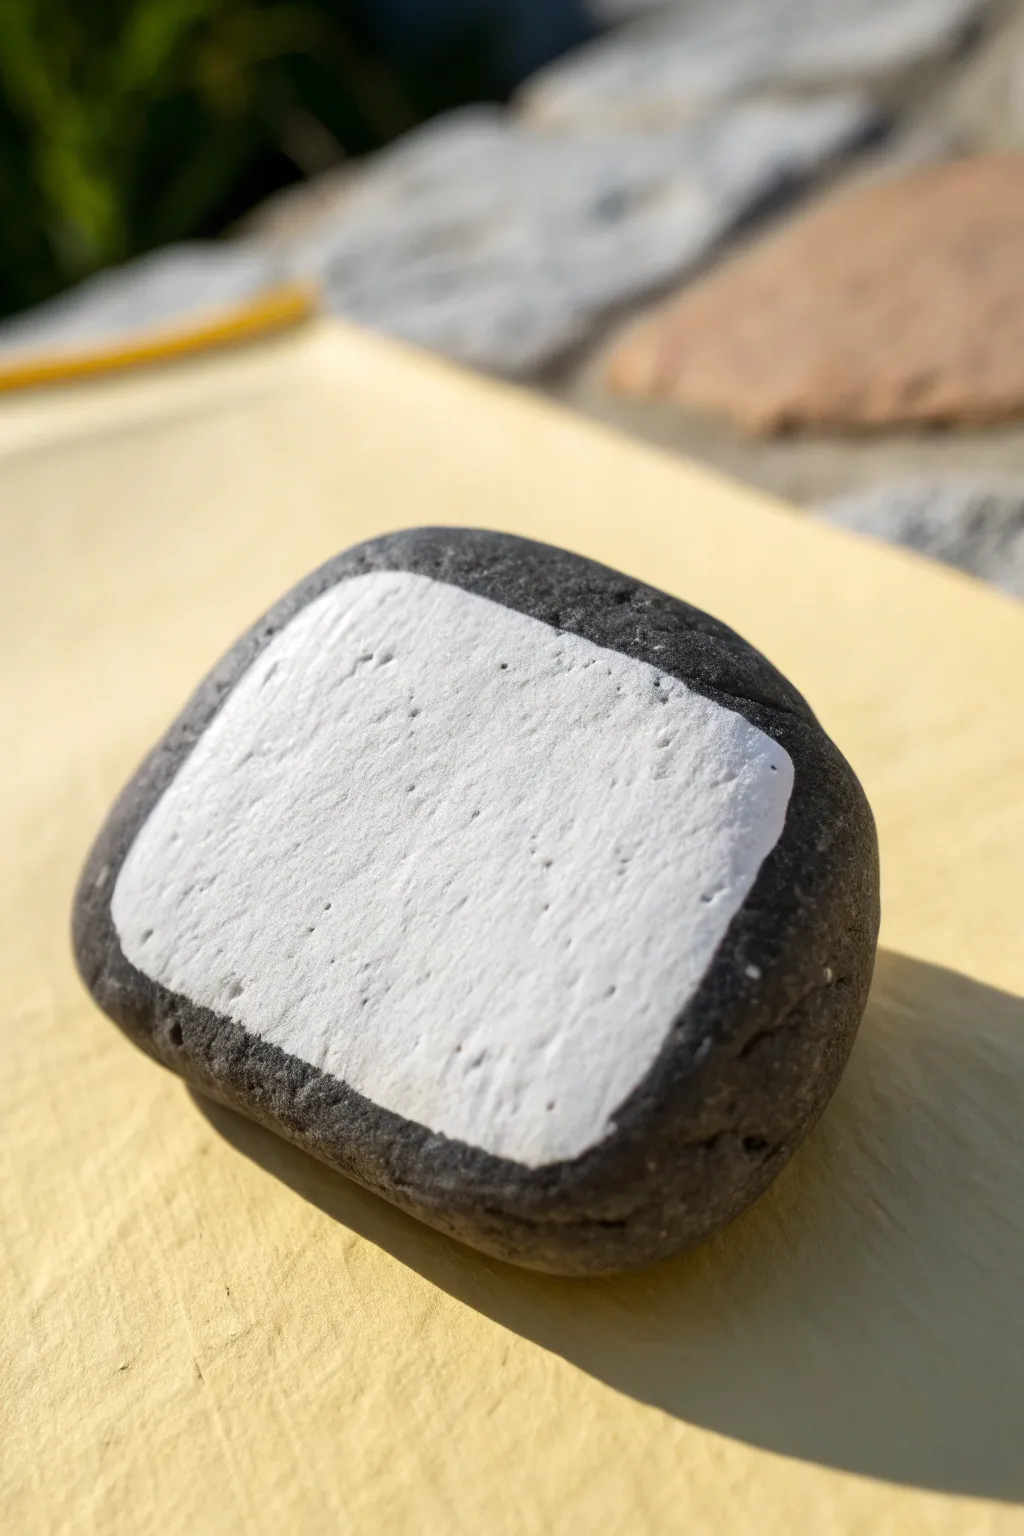
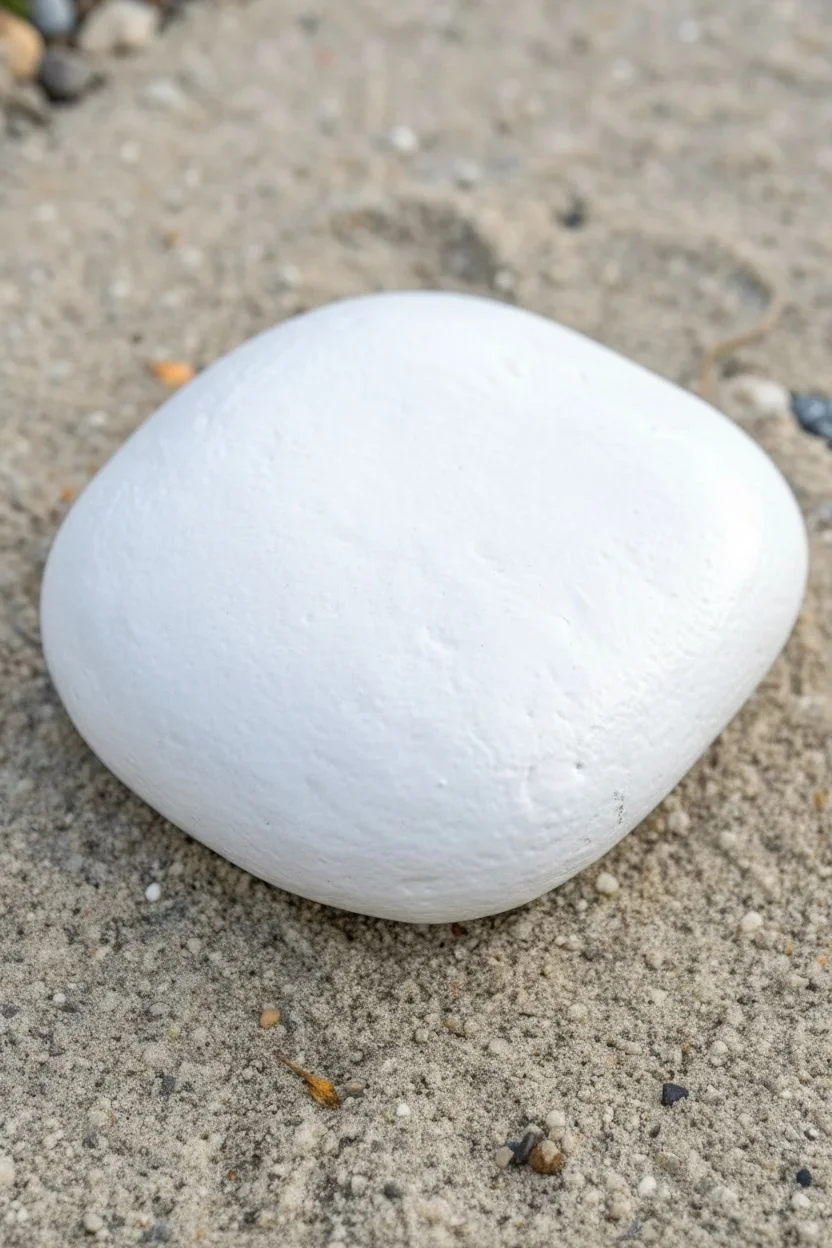
Embrace simplicity with this clean, high-contrast design that turns a humble rock into a stark mini canvas. The dark natural stone creates a perfect built-in frame for the bright white center, ready for your own tiny message or illustration.
How-To Guide
Materials
- Smooth, dark river rock (flat surface preferred)
- White acrylic paint (high opacity)
- Flat shader brush (size 4 or 6)
- Washi tape or masking tape (optional)
- Matte varnish or sealant
- Soap and water
- Small mixing palette
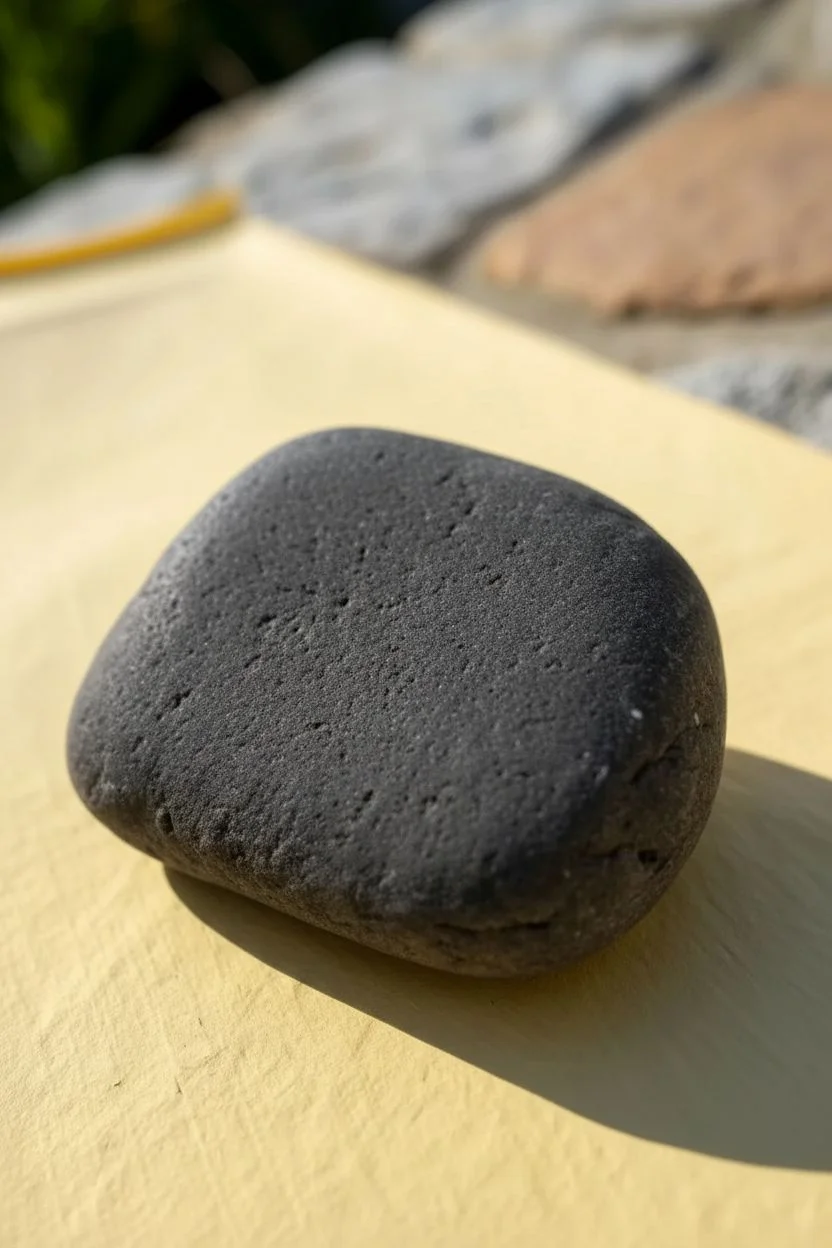
Step 1: Preparation
-
Select your stone:
Look for a rock that is naturally dark—black or dark grey basalt works best—to provide high contrast against the white paint. A relatively flat top surface will make painting the square much easier. -
Clean the surface:
Wash the rock thoroughly with warm soapy water to remove any dirt, oils, or moss. Scrub gently with an old toothbrush if needed to get into the pores. -
Dry completely:
Let the rock dry fully in the sun or use a hairdryer. Any trapped moisture underneath will prevent the paint from adhering properly.
Uneven Edges?
If your paint bleeds into the rock’s texture, wait for it to dry, then use a black permanent marker or black paint to touch up the border and straighten the line.
Step 2: Creating the Shape
-
Plan the square:
Visualize where you want your white square to sit. Ideally, aim for the center, leaving an even border of natural stone around all four edges to act as the frame. -
Mark the corners:
Using a very small dot of white paint or a chalk pencil, lightly mark the four corners of your intended square. This acts as a guide before you commit to the full shape. -
Outline the box:
Load your flat shader brush with white acrylic paint. Carefully connect your corner dots to create the outline of the square. Use the flat edge of the brush to keep the lines crisp. -
Refine the edges:
If you struggle with freehand straight lines, you can apply strips of washi tape to mask off the rock’s border area, ensuring a perfect rectangle.
Step 3: Filling and Finishing
-
First layer fill:
Fill in the outline with white paint. Don’t worry if it looks streaky or if the rock’s color shows through; thin layers are better than one thick glob. -
Allow to dry:
Wait about 10-15 minutes for the first coat to dry to the touch. Painting over wet acrylic will just lift the previous layer. -
Second layer application:
Apply a second coat of white paint. I find that dabbing the paint on rather than dragging the brush helps fill the tiny pits in the rock’s texture for a solid look. -
Check opacity:
Inspect the white square. If the dark rock still creates a grey cast, apply a third thin coat, focusing on the center. -
Rounded corners (optional):
For a softer look like the reference image, gently round off the sharp 90-degree corners of your white square using the tip of your brush. -
Clean up edges:
If any white paint strayed into the border area, use a damp cotton swab or a toothpick to scratch it away while it’s semi-dry. -
Let it cure:
Allow the painted area to dry completely, preferably overnight, to ensure maximum durability. -
Seal the deal:
Apply a coat of matte varnish over the entire face of the rock. This protects the white paint from chipping and deepens the color of the dark stone border.
Make it Sparkle
Mix a tiny pinch of white mica powder or iridescent medium into your final layer of white paint to give the signboard a subtle, pearly shimmer in the sunlight.
Your miniature signboard is now ready to display a quote or stand alone as a piece of modern art
BRUSH GUIDE
The Right Brush for Every Stroke
From clean lines to bold texture — master brush choice, stroke control, and essential techniques.
Explore the Full Guide
Corner-to-Corner Symmetry
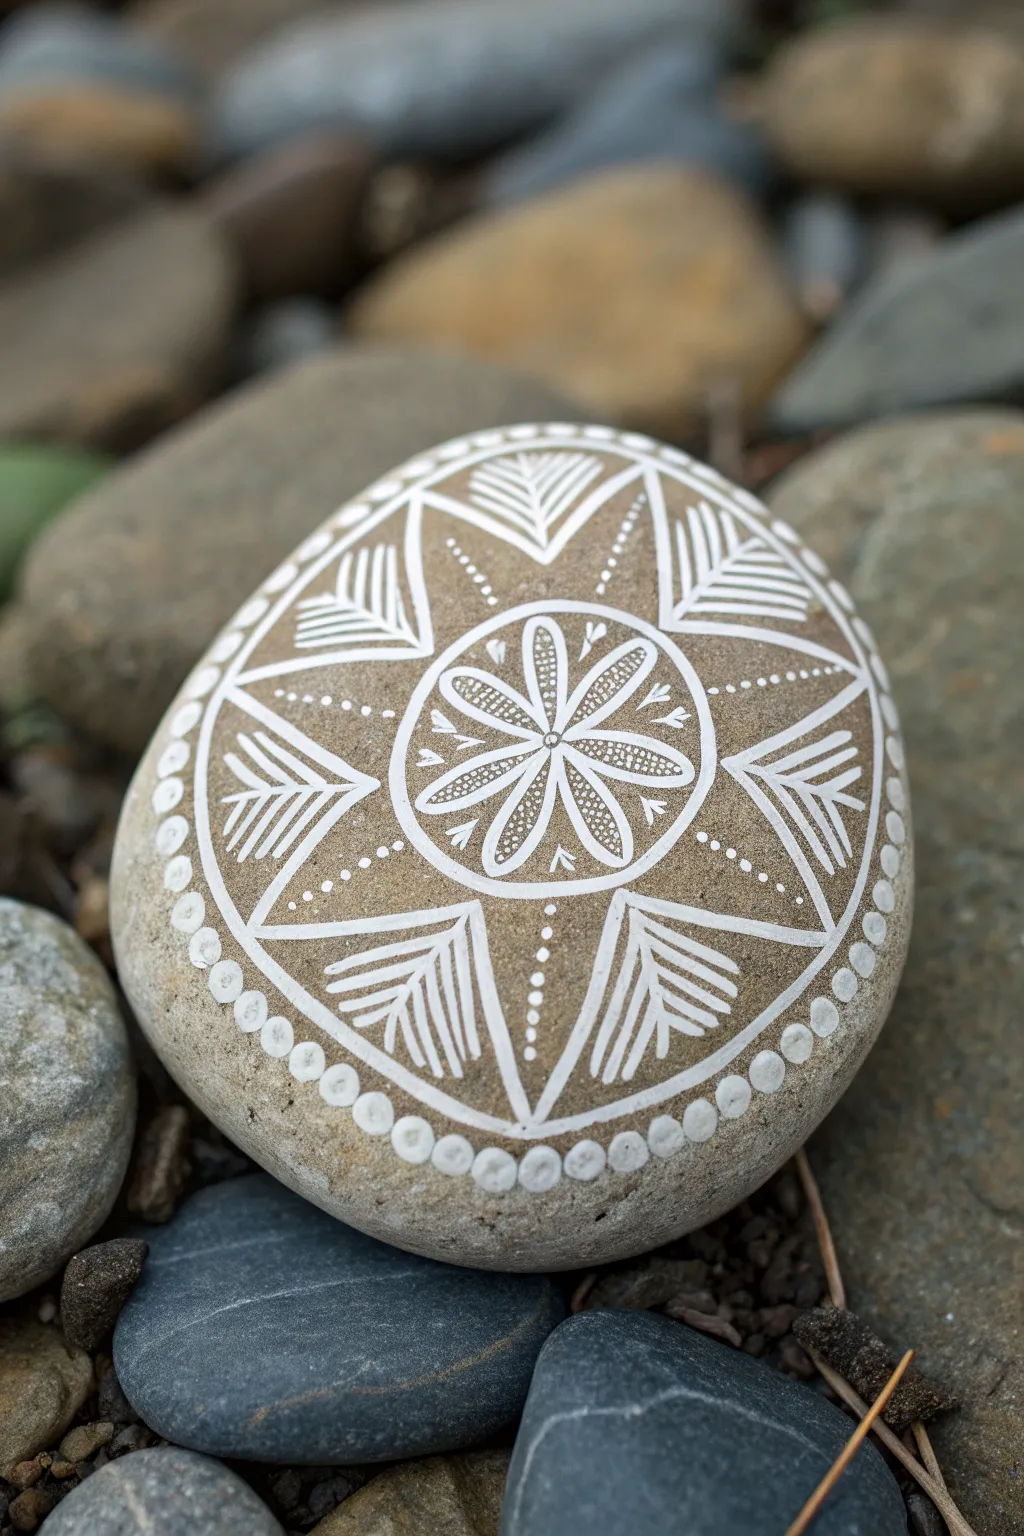
This elegant stone painting project features a crisp white mandala design on a natural beige river rock. The eight-pointed star pattern radiates from a central floral motif, creating a stunning piece of nature-inspired decor.
Step-by-Step
Materials
- Smooth, oval river rock (beige or tan)
- White acrylic paint or specialized white paint pen (extra fine tip)
- Small round brush (size 00 or 000) if not using a pen
- Pencil and eraser
- Ruler or flexible measuring tape
- Clear matte sealant spray
Step 1: Planning and Foundation
-
Clean the Canvas:
Begin by scrubbing your rock with warm, soapy water to remove any dirt or oils. Let it dry completely in the sun, ensuring a perfectly clean surface for the paint to adhere to. -
Find the Center:
Using your pencil, lightly mark the absolute center of the rock. This dot will be the anchor for your entire symmetrical design. -
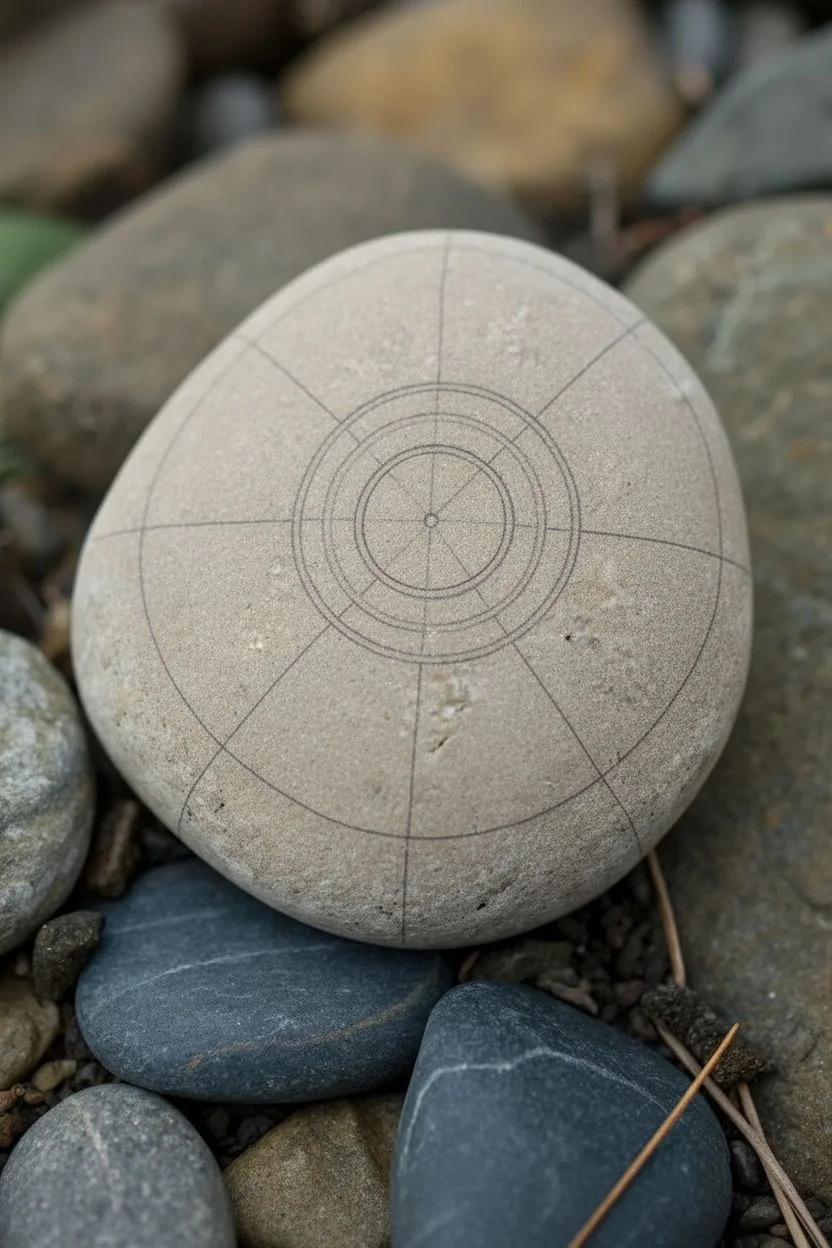
Map the Radiating Lines:
Lightly sketch eight lines radiating from the center dot, like a pizza cut into eight slices. Try to keep the spacing between them equal, as these will guide your star points. -
Draft the Circles:
Sketch a small circle around the center point (about 1 inch diameter) for the floral core. Draw a second, larger circle closer to the rock’s edge to mark where the star points will end.
Step 2: Drawing the Core
-
Create the Petals:
Using your white paint pen or fine brush, draw eight flower petals inside the central circle. Each petal should align with one of your eight pencil guidelines. -
Add Inner Detail:
Inside each petal, draw a line of tiny dots running from the flower center to the petal tip. This stippling effect adds texture without overwhelming the design. -
Outline the Core:
Trace the pencil circle surrounding the flower with a solid white line. This circular frame separates the floral center from the outer star. -
Detail the Frame:
Paint another line of dots inside the circle frame, nestled between the petals. Add tiny ‘V’ shapes or hearts in the negative space between petal tips if you have room.
Uneven Lines?
If your paint pen sputters or creates blobby lines, wipe the tip on a scrap paper frequently. Working from the center outward helps prevent smudging.
Step 3: Constructing the Star
-
Define the Points:
Draw the main eight-pointed star shape. Connect the outer edge of the central circle to your outer guideline circle, creating tall triangles along your eight radial lines. -
Fill the Triangles:
Inside every other triangle point (4 total), draw a ‘fern’ or chevron pattern. Do this by painting angled lines that point downward toward the center, mimicking leaf veins. -
Stipple the Alternates:
For the remaining four triangles, I like to simply draw a straight line of dots down the middle. This alternating pattern of lines and dots creates visual interest. -
Add Outer Dots:
Between the star points, in the triangular negative spaces, add decreasing rows of dots. Start with larger dots near the center and make them smaller as you move outward.
Steady Hands
Rest your painting hand’s wrist or pinky finger on the table (or a sturdy book) to stabilize your stroke when drawing the fine chevron lines.
Step 4: Finishing Touches
-
The Border:
Create the final border by painting a ring of uniform dots around the entire perimeter of the design. This contains the energy of the mandala. -
Clean Up:
Once the white paint is bone dry, gently erase any visible pencil guidelines. Be careful not to press too hard on the paint. -
Seal the Work:
Spray the rock with a clear matte sealant to protect your design from chipping and weather damage if placed outdoors.
Place this serene stone on your desk or in a garden nook for a touch of tranquility
Gradient Dot Grid
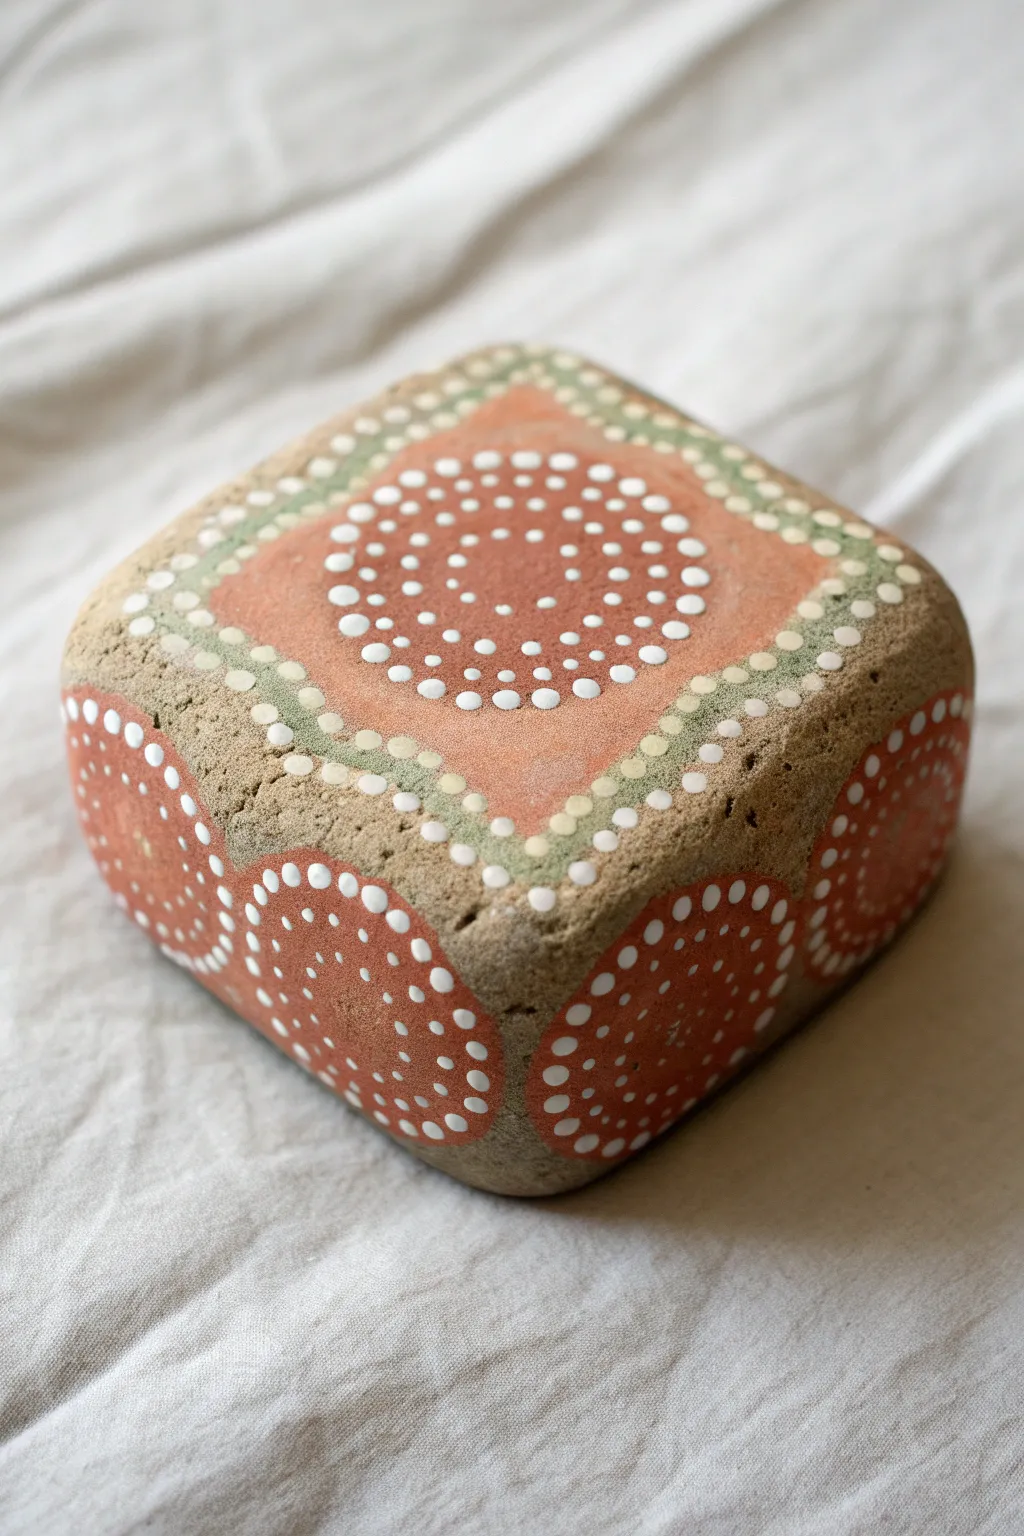
Transform a smooth, square stone into a stunning piece of geometric decor with this mandala-inspired design. Featuring earthy terracotta tones paired with soft mint green borders and crisp white dot work, this project creates a warm, textured look that feels both ancient and modern.
Detailed Instructions
Materials
- Square or cube-shaped smooth rock (approx 3-4 inches wide)
- Acrylic paints: warm terracotta/rust orange, light sage or mint green, titanium white
- Paintbrushes: medium flat brush (for base coating) and liner brush
- Dotting tools (various sizes, from fine to medium)
- Pencil (optional for guidelines)
- Matte spray sealant
Step 1: Base Painting & Grid Setup
-
Clean surface:
Begin by scrubbing your rock with soapy water and letting it dry completely to ensure the paint adheres properly. -
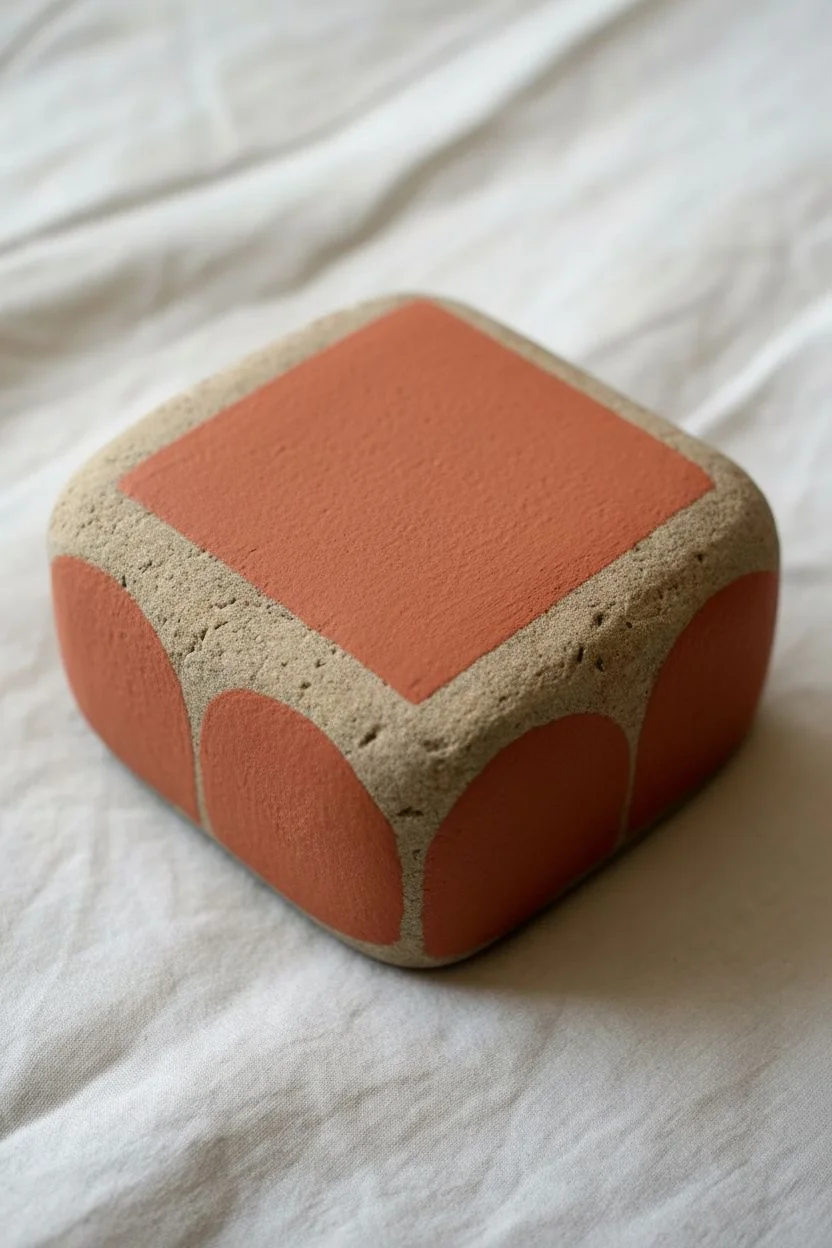
Paint the top square:
Using the terracotta paint and a flat brush, paint a large square on the top face of the rock. Leave a border of exposed stone around the edges. -
Refine the edges:
Rotate the stone to access different angles, carefully sharpening the corners of your terracotta square so they are crisp. -
Paint side semi-circles:
On the vertical sides of the rock, paint large semi-circles or arches that connect to the bottom edge. Imagine these as rising ‘suns’ on each side face. -
Dry thoroughly:
Allow these base shapes to dry completely. A hairdryer on a low cool setting can speed this up if you’re impatient like I am sometimes.
Step 2: The Sage Border
-
Start the green outline:
Load a liner brush or fine dotting tool with the sage green paint. Start creating a dotted or solid thick line framing the terracotta square on top. -
Create a diamond shape:
Instead of following the square exactly, extend the green border outwards at the corners to form a soft diamond shape that surrounds the inner square. -
Layering the border:
To get that gradient look, apply closely spaced dots of sage green along this diamond path. Let the dots touch slightly or overlap to create a unified band. -
Second border layer:
Add a second row of sage dots directly next to the first one, moving inward toward the terracotta center to thicken the frame.
Paint too transparent?
Terracotta and light greens can be sheer. If the rock shows through, let the first layer dry completely and apply a second coat before starting any dot work.
Step 3: Detailed Dot Work
-
Center dot:
Dip a medium-sized dotting tool into white paint and place a single dot in the dead center of the top terracotta square. -
First circle ring:
Using a slightly smaller tool, place a ring of small white dots around the center dot used as your anchor. -
Expanding the spiral:
Continue adding concentric rings of white dots, moving outward. Try to keep the spacing between rings consistent. -
Corner accents:
As the circles get larger and approach the corners of the square, allow the dot pattern to break, filling the corners with partial arcs to maintain the square illusion. -
Decorate the green border:
Using your smallest tool, add tiny white dots on top of or between the sage green border dots to add brightness and highlight the frame.
Dotting Pro Tip
For perfectly round dots, reload your tool with fresh paint for every single dot. The ‘second’ dot from one dip will always be smaller and less crisp.
Step 4: Side Details & Finishing
-
Outline side arches:
Moving to the vertical sides, use white dots to outline the top curve of your terracotta semi-circles. -
Fill side patterns:
Fill the interior of these side shapes with concentric arcs of white dots, mirroring the circular style of the top face. -
Add floating dots:
Place a few specific, larger white dots in the negative space (the bare rock areas) between the painted sections to tie the design together. -
Final inspection:
Check for any uneven dots. If you have a wonky dot, you can gently scratch it off with a toothpick once it’s half-dry or paint over it. -
Seal the stone:
Once absolutely dry, spray the entire rock with a matte sealant to protect the paint from chipping without adding unnatural shine.
Place this geometric beauty on a desk or shelf to add a touch of handcrafted calm to your space

PENCIL GUIDE
Understanding Pencil Grades from H to B
From first sketch to finished drawing — learn pencil grades, line control, and shading techniques.
Explore the Full Guide
Pixel Art Mini Icon
Go retro with this charming pixel art heart painted on a smooth river stone. The clean grid lines and soft terracotta color give it a nostalgic video game vibe that works perfectly as a small paperweight or garden accent.
Step-by-Step Tutorial
Materials
- Smooth, flat river stone (light color preferred)
- Pencil
- Ruler or straight edge
- Eraser
- Acrylic paint: Terracotta or Salmon Pink
- Acrylic paint: Dark Chocolate Brown or Black
- Fine detail paintbrush (size 0 or 00)
- Flat shader brush (small)
- Clear matte varnish or sealant
- Graph paper (optional but helpful)
Step 1: Preparation and Grid
-
Clean the surface:
Start by washing your stone with warm soapy water to remove any dirt or oils. Let it dry completely in the sun, ensuring a perfectly clean canvas for your paint. -
Plan your design:
It helps to sketch the pixel heart on a piece of graph paper first so you know exactly how many squares wide and tall your design needs to be. -
Mark the center:
With a pencil, lightly mark the center of your stone. This will be the anchor point for your grid to ensure the heart sits nicely in the middle. -
Draw the grid lines:
Using a ruler, lightly draw a grid of small squares on the stone surface. Aim for squares about 5mm x 5mm, though you can adjust the size depending on your rock’s dimensions. -
Refine the grid:
Check your grid against your graph paper plan. You don’t need to grid the entire stone, just an area slightly larger than the heart itself. -
Outline the pixels:
Lightly shade or mark the specific squares that will become the heart shape with your pencil. This acts as a ‘fill map’ so you don’t accidentally paint the wrong square later.
Wobbly Lines?
If painting straight lines is difficult, use tiny strips of washi tape or painter’s tape to mask off the grid rows before painting. Paint one direction, dry, re-tape, and paint perpendicular lines.
Step 2: Painting the Heart
-
Mix the interior color:
Prepare your terracotta or salmon pink acrylic paint. You want an opaque creamy consistency; add a tiny drop of water if it feels too thick. -
Fill the center pixels:
Using a small flat brush or detail brush, carefully fill in the inner squares of the heart. Try to stay neatly within your pencil grid lines. -
Apply a second coat:
Let the first layer dry for about 10 minutes. I usually apply a second coat to ensure the color is solid and vibrant against the stone’s natural hue. -
Prepare the outline color:
Load your fine detail brush with dark brown or black paint. Wipe off excess paint so you have crisp control over the bristles. -
Paint the border pixels:
Carefully paint the individual squares that form the outline of the heart. Instead of drawing a continuous line, think of it as filling inside each tiny box individually to maintain that blocky look. -
Connect corners:
Check the corners where pixels touch diagonally. Ensure the corners are sharp and distinct; pixel art relies on crisp 90-degree angles. -
Touch up edges:
If you went outside the lines, wait for the paint to dry fully, then gently scrape the excess away with a toothpick or paint over it with a color matching the stone.
Step 3: Finishing Touches
-
Erase guidelines:
Once the paint is 100% dry (give it at least an hour), very gently erase any visible pencil grid lines around the exterior of the design. -
Seal the artwork:
Apply a layer of matte varnish over the entire stone. This protects the pixel edges from chipping and keeps the stone looking natural. -
Final cure:
Let the varnish cure overnight before placing your rock outside or handling it excessively.
Level Up: Health Bar
Paint three identical stones with red hearts and line them up on a shelf to recreate a classic video game ‘life meter’ or health bar display.
Now you have a perfect little token of digital affection tailored for the real world
Patchwork Quilt Blocks
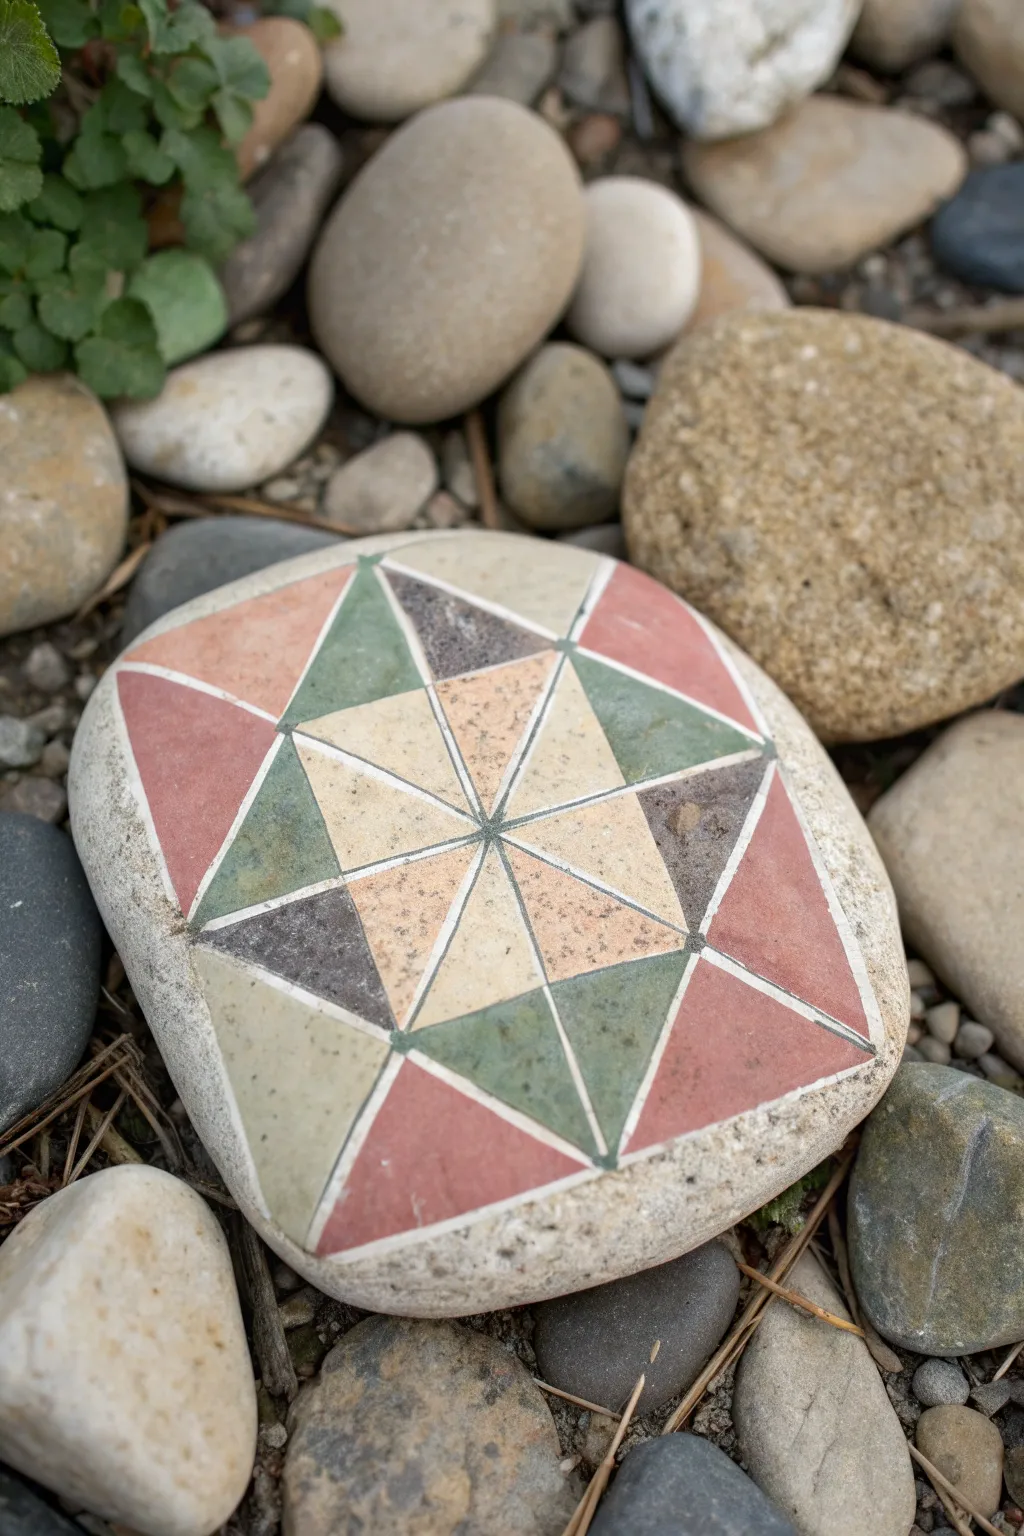
Transform a smooth, rounded stone into a piece of folk art with this intricate geometric star design. The muted earth tones and crisp white lines mimic the comforting look of a traditional patchwork quilt block.
Detailed Instructions
Materials
- Smooth, relatively flat river rock (roughly square or round)
- Acrylic paints (Terracotta, Sage Green, Cream/Beige, Dark Grey/Brown, White)
- Pencil and eraser
- Ruler or straight edge
- Fine liner brush (size 0 or 00)
- Flat shader brush (small)
- Palette for mixing
- Matte finish sealer spray
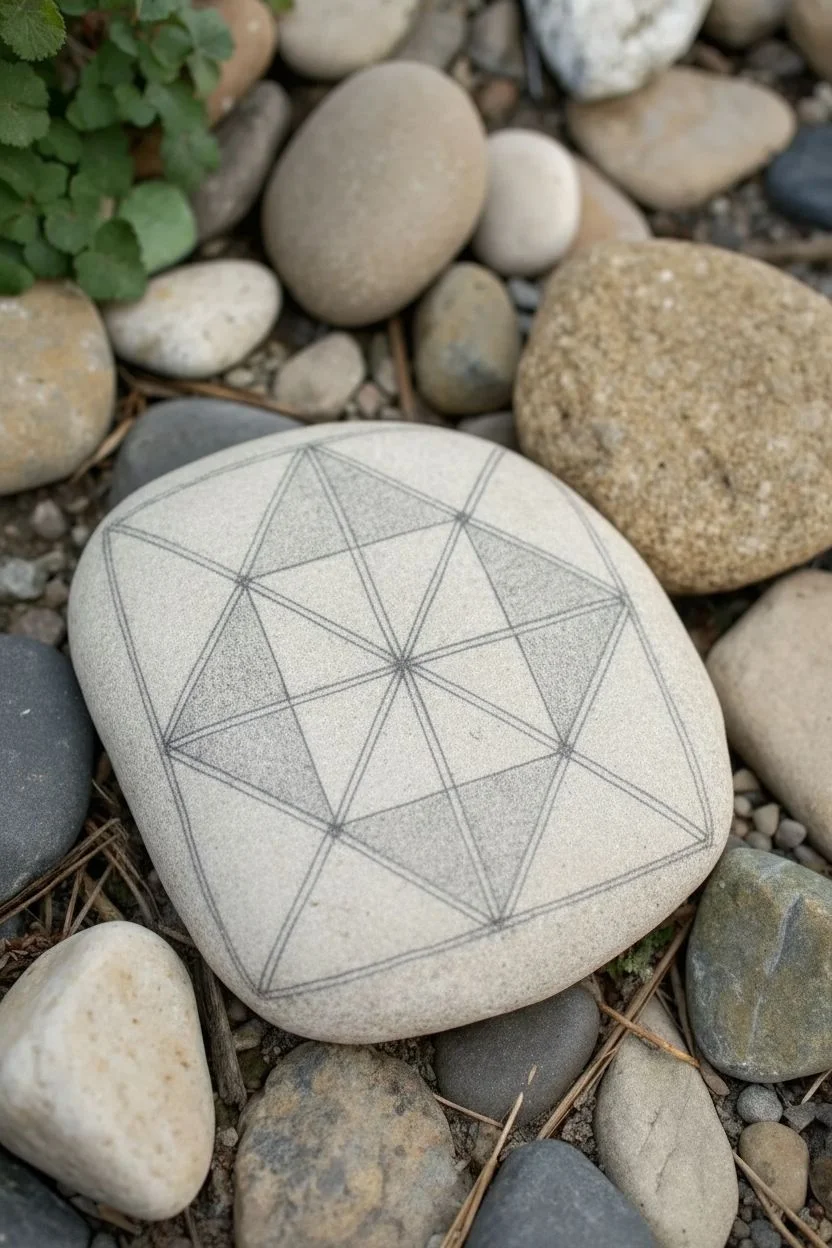
Step 1: Preparation & Mapping
-
Clean the canvas:
Scrub your rock thoroughly with soap and water to remove any dirt or oils. Let it dry completely before beginning. -
Base coat (optional):
If your rock is very dark or uneven in color, apply a thin layer of cream or white paint over the top surface. If you like the natural stone look showing through the gaps, skip this step. -
Mark the center:
Using a pencil and ruler, lightly mark the absolute center of your rock face. This point will be the anchor for the entire starburst design. -
Draw the main axes:
Draw a vertical line and a horizontal line crossing at the center point. Then, draw two diagonal lines crossing through the center, creating eight equal pie-slice sections radiating from the middle. -
Create the outer square:
Connect the tips of your lines to form a rough square shape. Since rocks aren’t perfect squares, adjust these outer box lines to fit the natural curve of the stone. -
Draft the inner star points:
Measure about halfway out from the center on each radiating line. Connect these midpoints to form a smaller, inner octagon or diamond shape, depending on how you want your star points to intersect. -
Finalize the grid:
Refine the pencil lines until you see the distinct pattern: eight central triangles pointing inward, surrounded by triangles and quadrilaterals forming the outer border.
Uneven Lines?
If painting straight lines on a specific curved rock is difficult, use thin strips of painter’s tape or washi tape to mask off sections before painting for crisp edges.
Step 2: Painting the Quilt Block
-
Paint the central star:
Start with the eight triangles touching the center point. Alternate between a cream/beige tone and a slightly darker tan or light metallic gold. I find mixing a tiny bit of white into the beige helps cover pencil marks better. -
Fill the star points:
Moving outward, paint the next ring of triangles. Alternate colors like sage green and a dark brownish-grey. Use a small flat shader brush to keep the edges straight. -
Add the corners:
Paint the four large corner sections in a warm terracotta or brick red. This heavy color anchors the design and gives it that classic quilt vibe. -
Fill remaining gaps:
If your design includes side triangles between the corners (like the image), paint these in contrasting colors like sage green or cream to balance the composition. -
Second coats:
Acrylics often dry darker or more transparent than expected. Apply a second coat to each section to ensure the colors are solid and opaque.
Faux Stitching
Instead of solid white lines, paint tiny white dashes along the seams. This creates a realistic ‘stitched’ thread effect, making the rock look like a soft fabric cushion.
Step 3: Refining & Sealing
-
Outline the grid:
Once the color blocks are fully dry, load a size 00 fine liner brush with slightly thinned white paint. Carefully paint over the pencil lines that separate the colored shapes. -
Clean up edges:
If your white lines wobble or get too thick, wait for them to dry, then gently touch up the adjacent color block with your original paint color. -
Add texture (optional):
To mimic fabric, you can gently sponge a tiny amount of a lighter shade onto the terracotta or green sections for a weathered look. -
Let it cure:
Allow the rock to sit undisturbed for at least 24 hours to ensure all layers are devoid of moisture. -
Seal the deal:
Spray the rock with a matte finish sealer. A glossy finish might look too plastic; matte preserves the natural, earthy feel of the stone and the ‘fabric’ look of the paint.
Place your finished stone in a garden bed or on a bookshelf for a touch of rustic charm


Faux Ceramic Tile Pattern
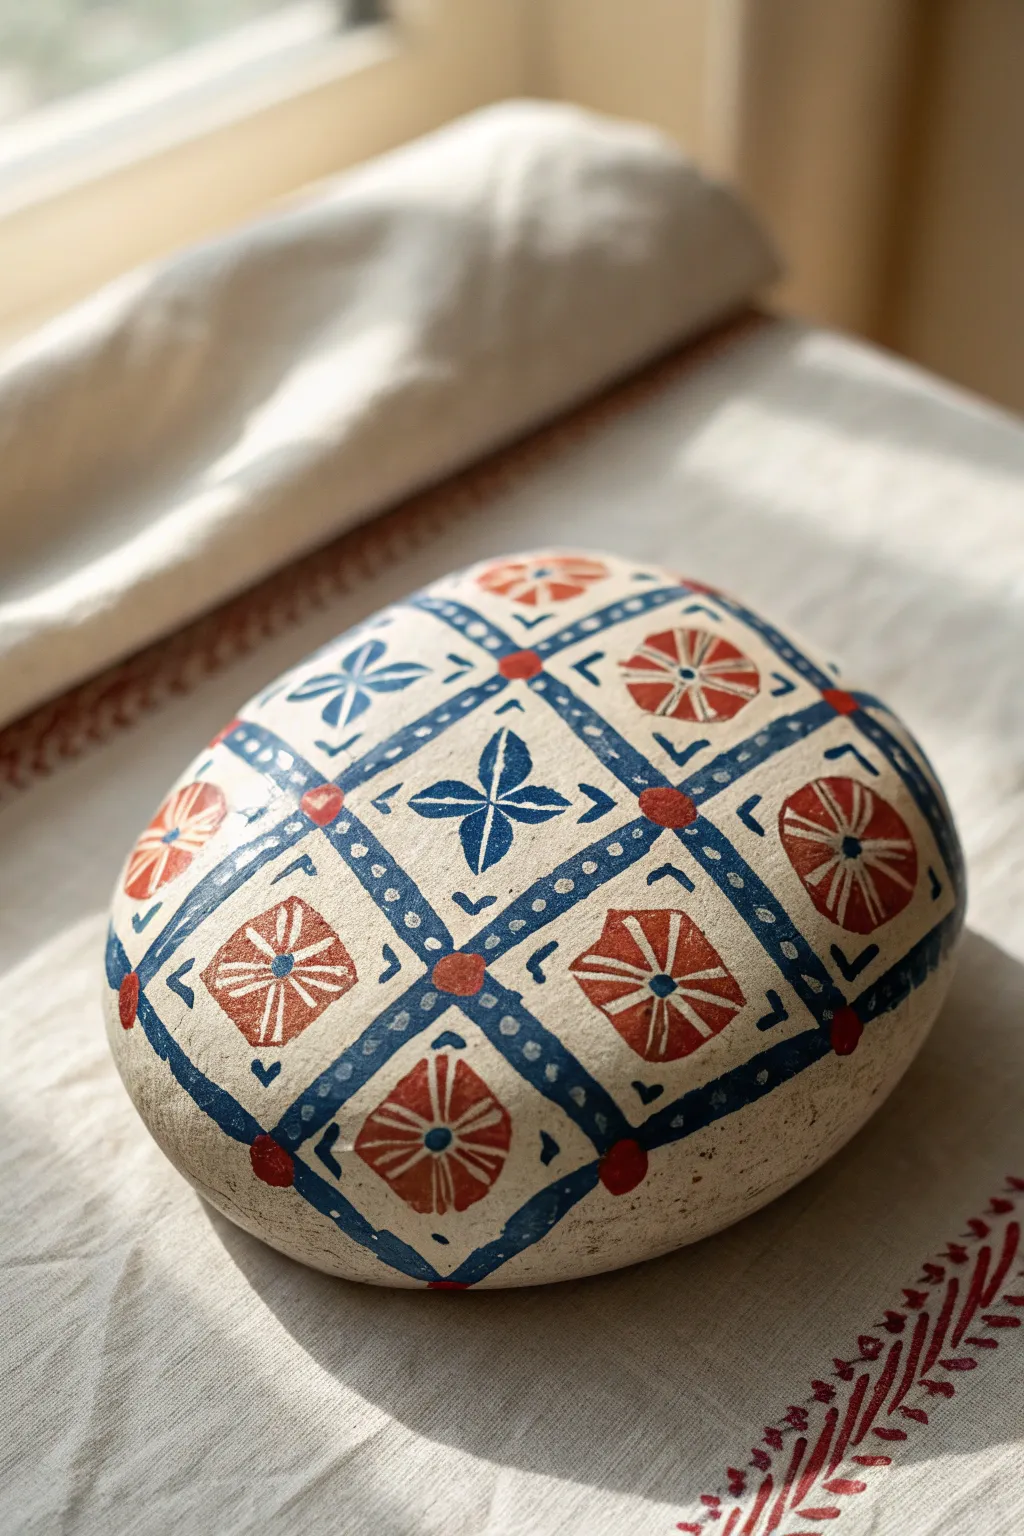
Transform a smooth garden stone into a stunning piece of faux pottery with this geometric tile design. The clever use of blue and red acrylics mimics the look of traditional folk ceramics, creating a deceptive and beautiful illusion.
Step-by-Step Guide
Materials
- Large, smooth round stone (light colored)
- Acrylic paints (Navy Blue, Rust Red, Cream/Off-White)
- Fine detail brush (size 0 or 00)
- Small flat brush
- Dotting tools (or toothpicks/matchsticks)
- Pencil and eraser
- Ruler or flexible measuring tape
- Matte or satin spray varnish
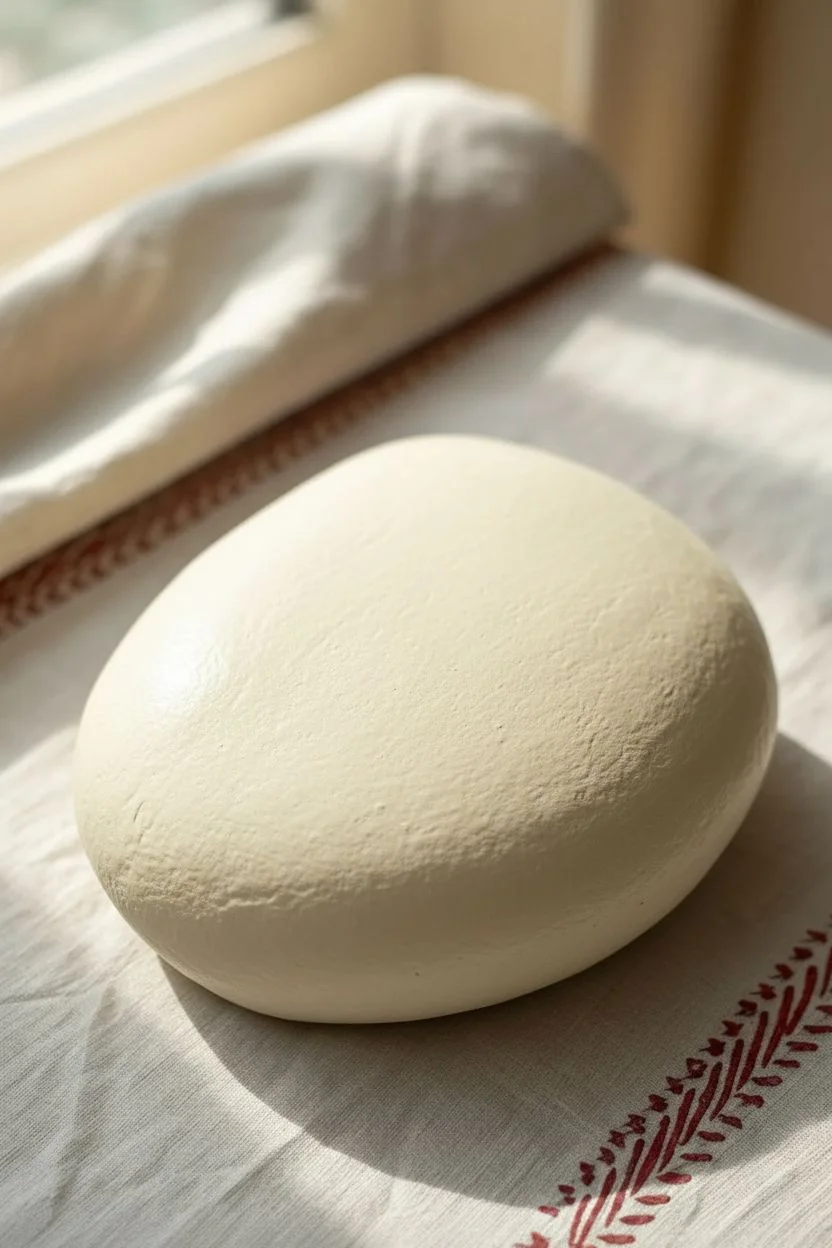
Step 1: Preparation & Base Coat
-
Clean the Stone:
Scrub your stone thoroughly with warm soapy water to remove any dirt or oils. Let it dry completely, preferably in the sun. -
Apply the Base:
Using a flat brush, coat the entire top surface of the stone with a cream or off-white acrylic paint. This creates the ‘ceramic’ background. -
Add a Second Layer:
Once the first coat is dry to the touch, apply a second layer to ensure opacity. The stone’s natural color shouldn’t show through the base coat.
Uneven Grid Lines?
Don’t panic if your diamonds stretch or warp near the edges. Real hand-painted pottery often has these quirks, and it actually adds to the authentic folk-art charm.
Step 2: Drafting the Grid
-
Mark the Center:
Find the rough center of your stone and mark it lightly with a pencil. This will anchor your grid. -
Sketch the Diamonds:
Lightly sketch a grid of diamond shapes across the surface. Use a flexible ruler to help guide lines over the curve, keeping the diamonds roughly equal in size. -
Create Double Lines:
Go back over your diamond grid and add a second parallel line inside each diamond shape. This creates the thick border where the blue pattern will go.
Smooth Operator
Mix a tiny drop of water or flow medium into your navy blue paint. This helps the paint glide smoothly off the liner brush for crisp, uninterrupted grid lines.
Step 3: Painting the Structure
-
Paint the Blue Borders:
Load your fine liner brush with navy blue paint. Carefully fill in the space between your double pencil lines to create the thick blue grid structure. -
Add Intersection Dots:
Dip a medium-sized dotting tool or the back of a brush into the rust red paint. Place a solid red dot at every point where the blue grid lines intersect. -
Create the Dotted Details:
Using a white or cream paint and your smallest dotting tool (or a toothpick), add a row of tiny dots running down the center of each blue grid line.
Step 4: Adding the Motifs
-
Start the Center Flower:
Select a central diamond for the blue flower motif. Paint four teardrop shapes meeting in the center using navy blue paint to create petals. -
Add Radial Lines:
Inside the center of the blue flower petals, paint a very fine white line radiating outward for extra detail. -
Paint the Red Pinwheels:
In the diamonds surrounding the blue flower, paint octagons or circles using the rust red paint. Leave a small gap between this shape and the blue grid. -
Detail the Pinwheels:
While the red paint is wet, you can scratch out lines, or wait for it to dry and paint thin cream lines radiating from the center to create a ‘pinwheel’ or starburst effect. -
Add Centers:
Place a small navy blue dot in the very center of each red pinwheel motif. -
Fill Remaining Diamonds:
Continue the pattern across the stone, alternating between the blue four-petal flower and the red pinwheel design in each diamond section.
Step 5: Finishing Touches
-
Corner Accents:
In the corners of the diamonds containing the blue flowers, paint tiny navy blue ‘V’ shapes or hearts pointing inward toward the flower. -
Clean Up:
Once the paint is fully dry, gently erase any visible pencil marks that weren’t covered by paint. -
Seal the Artwork:
Spray the stone with a matte or satin varnish. I find a glossy finish ruins the faux-ceramic effect, so matte is best for that authentic tile look.
Place your finished stone on a shelf or in the garden to enjoy the handmade charm of your new faux tile art
Playing Card Face Design
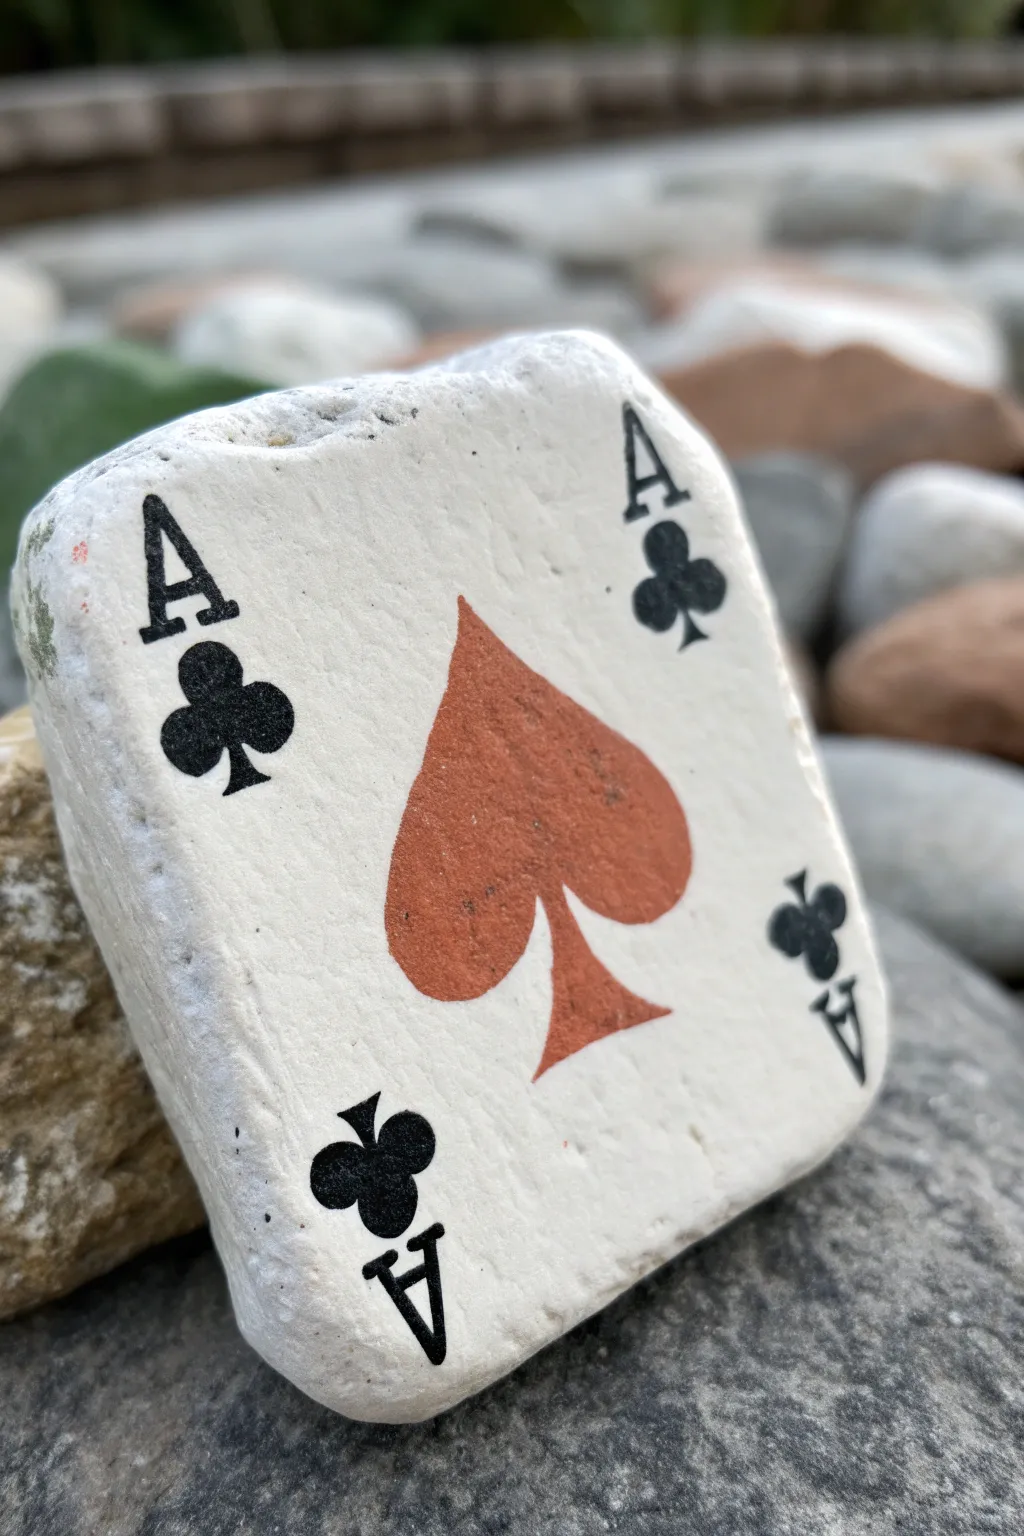
Transform a simple square stone into a unique piece of game room decor with this playing card design. The textured surface of the rock gives the Ace of Spades a rustic, weathered look while keeping the classic card layout crisp.
Step-by-Step Tutorial
Materials
- Square or rectangular smooth rock (approx. palm-sized)
- White acrylic paint (matte finish)
- Black acrylic paint or fine-point black paint pen
- Red-orange or terracotta acrylic paint
- Small flat paintbrush
- Fine detail paintbrush (size 0 or 00)
- Pencil for sketching
- Matte clear sealant spray
Step 1: Base Preparation
-
Clean the canvas:
Scrub your chosen rock thoroughly with soap and water to remove any dirt or oils that might prevent paint adhesion. Let it dry completely, preferably in the sun. -
Prime the surface:
Apply a base coat of white acrylic paint to the front face of the rock. Use a flat brush for even coverage. -
Build opacity:
Since rocks are porous, you will likely need 2-3 coats of white to get a solid, card-like background. Allow 15-20 minutes of drying time between each layer. -
Texture check:
Don’t worry if the rock’s natural pits and bumps still show through; this adds to the weathered effect, making it look like an antique stone artifact.
Step 2: Drafting the Design
-
Sketch the center:
Lightly draw a large spade shape in the very center of the rock with a pencil. Although the real card is a spade, notice the image uses a red color for the central symbol, making it a unique stylistic choice. -
Mark the corners:
In each of the four corners, pencil in a small letter ‘A’. Orient them so the top two are upright and the bottom two are upside down, mirroring a real playing card layout. -
Add corner suits:
Below the top ‘A’s and above the bottom ‘A’s, sketch small club symbols. Yes, we are mixing suits here—a large red spade in the center and black clubs in the corners—to create an eclectic, custom design.
Wobbly Lines?
If your brushwork feels shaky on the uneven surface, try a fine-tip permanent marker or acrylic paint pen for the letters and corner symbols instead of a brush.
Step 3: Painting the Details
-
Paint the central spade:
Using your red-orange or terracotta paint and a small brush, fill in the large central spade shape. Painting it red creates a striking contrast against the black corner details. -
Refine the edges:
Go over the edges of the red spade carefully to ensure the curves are smooth and the point is sharp. You might need a second coat of red for vibrancy. -
Letter the corners:
Switch to black paint and your finest detail brush (or a paint pen for easier control). Carefully paint the ‘A’ in each corner. Using a serif font style gives it that authentic card look. -
Fill the clubs:
Paint the small club symbols in the corners with black. Start with three small dots in a clover shape and connect them to a small stem at the bottom. -
Check orientation:
Remember to rotate the rock when working on the bottom corners so you aren’t trying to paint upside down.
Full Deck
Make three more rocks featuring the other suits—hearts, diamonds, and clubs—to create a complete set of ‘Aces’ for a garden display or poker table centerpiece.
Step 4: Finishing Touches
-
Clean up errors:
If any black or red paint smudged onto the white background, wait for it to dry completely, then touch it up with a small dab of white paint. -
Dry thoroughly:
Let the entire rock sit for at least an hour to ensure all thick layers of paint are fully cured. -
Seal the deal:
Take the rock outside and spray it with a matte clear sealant. This protects the paint from chipping and keeps the white background bright without adding an unnatural glossy shine.
Place your finished stone card on a bookshelf or garden path for a lucky charm that won’t blow away in the wind
Isometric Cube Illusion
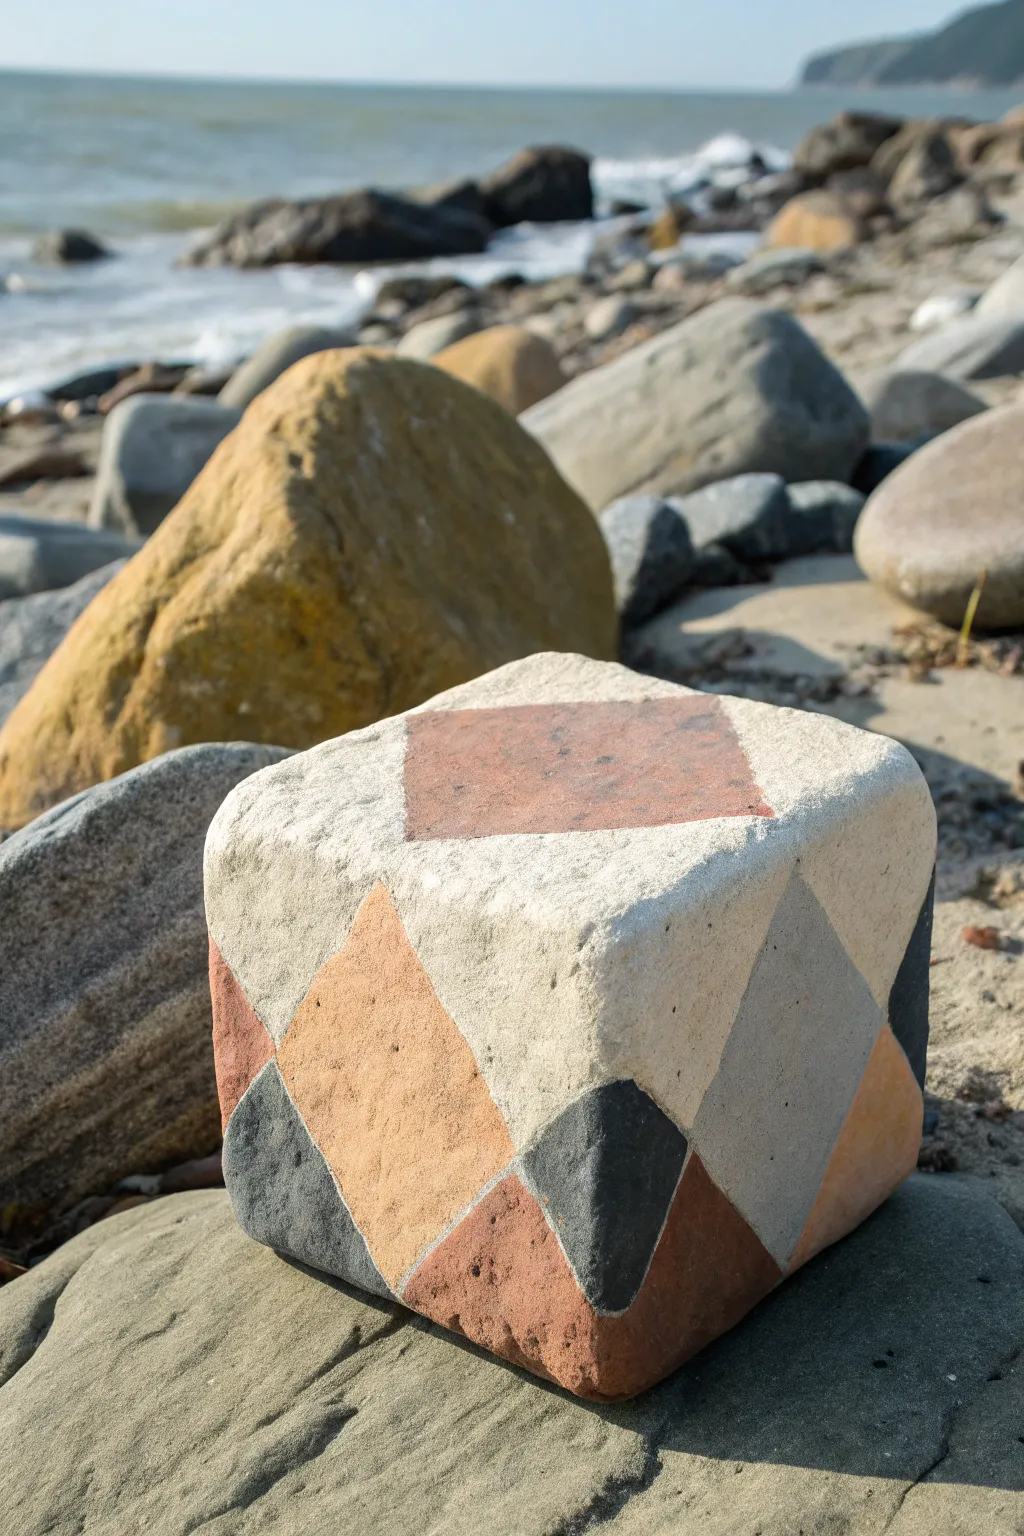
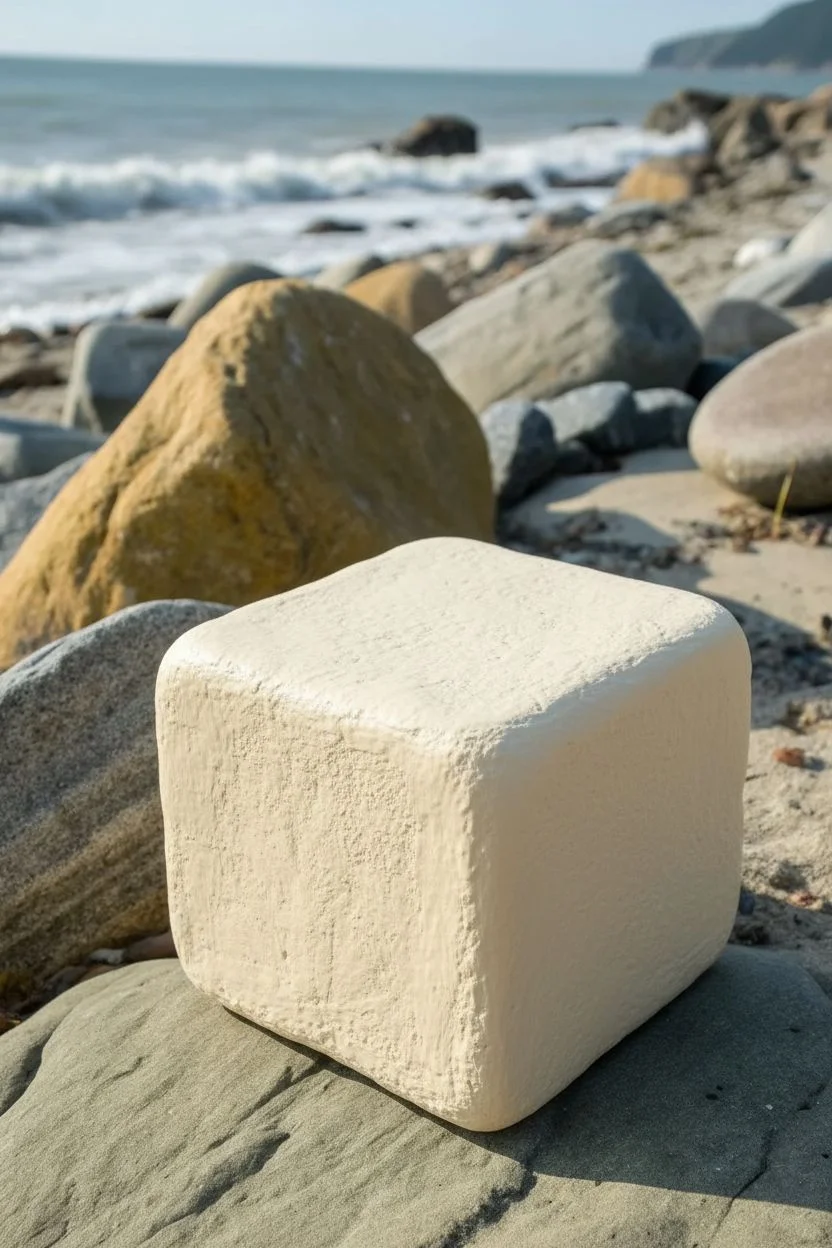
Transform a chunky, square-ish rock into a stunning optical illusion using an isometric grid pattern. This design uses natural, earthy hues to mimic the surrounding landscape while creating a captivating 3D effect on a 2D surface.
Step-by-Step
Materials
- A clean, square or rectangular rock (preferably smooth)
- Acrylic paints (Titanium White, Burnt Sienna, Yellow Ochre, Paynes Grey, Mars Black)
- Pencil (HB or lighter)
- Ruler or straight edge
- Painter’s tape (optional but helpful for crisp lines)
- Flat shader brushes (sizes 4 and 6)
- Fine liner brush (size 0 or 1)
- Matte finish spray sealant
Step 1: Preparation & Base Coat
-
Clean your canvas:
Scrub the rock thoroughly with warm soapy water and a stiff brush to remove any dirt, salt, or moss. Let it dry completely in the sun or use a hairdryer to speed things up. -
Prime the surface:
Mix a small amount of Yellow Ochre with plenty of Titanium White to create a very pale, warm cream color. -
Apply the base:
Paint the entire rock with this cream mixture. You may need two or three coats to get distinct, opaque coverage, especially if the original rock is dark. -
Let it cure:
Allow the base coat to dry fully before sketching. If the paint is tacky, your pencil will dig in and ruin the smooth finish.
Tape it Up
For razor-sharp straight lines on a curved rock surface, use thin automotive detailing tape (1/8 inch). It bends around curves much better than standard blue painter’s tape.
Step 2: Mapping the Isometric Grid
-
Mark the center:
Lightly mark the center point on the top face of the rock with your pencil. -
Draw the central square:
Draw a diamond shape (a square rotated 45 degrees) centered on the top face. This will be the reddish top panel seen in the photo. -
Extend the lines:
From the corners of your top diamond, extend lines downwards onto the side faces of the rock. These vertical lines will define the corners of the ‘cubes’ on the side. -
Create the side diamonds:
On the side faces, draw intersecting diagonal lines to create a row of diamond shapes that connect with the top panel. The goal is to make a grid of diamonds that wrap around the corners. -
Refine the triangles:
Fill in the gaps between the diamonds with triangle shapes. This creates the classic tumbling block or Argyle-style pattern.
Faux Stone Texture
Before the paint fully dries, lightly dab the surface with a crumpled paper towel or a dry sponge. This removes tiny bits of paint, revealing the texture below for a realistic gritty look.
Step 3: Painting the Colors
-
Mix the top color:
Combine Burnt Sienna with a touch of the cream base mix to create a muted, reddish-terracotta tone. -
Paint the top face:
Fill in the central diamond on the top of the rock with this terracotta mix. Use a flat shader brush to keep the edges sharp. -
Mix the side highlight:
Create a warm tan shade by mixing Yellow Ochre with Titanium White and a tiny dot of Burnt Sienna. -
Apply the tan diamonds:
Paint the large prominent diamonds on the front face with the tan mixture. I find applying two thin layers prevents brush strokes from showing. -
Create the grey tones:
Mix Paynes Grey with white to create a medium stone-grey color. -
Fill the grey sections:
Identify the side panels of your illusion cubes and paint them grey. Refer to the image frequently to ensure the pattern logic holds up. -
Add the contrast:
Use Mars Black (or a very dark grey) to paint the triangular shadow areas between the main diamond shapes. -
Balance the colors:
Paint the remaining lower triangles with the terracotta mix you used for the top, tying the design together.
Step 4: Finishing Touches
-
Touch up edges:
Use your cream base color and a fine liner brush to clean up any lines where the colors may have bled over. The cream lines act as the ‘grout’ between the tiles. -
Soften the texture:
If the colors look too flat, lightly stipple a slightly lighter shade of each color in the center of its respective shape to give it a stone-like texture. -
Seal the work:
Once entirely dry (give it a few hours), spray the rock with a matte clear coat. This protects the paint from weathering without adding an unnatural glossy shine.
Set your geometric masterpiece in the garden and watch how the optical illusion pops against the natural landscape
Faux Stitched Sampler
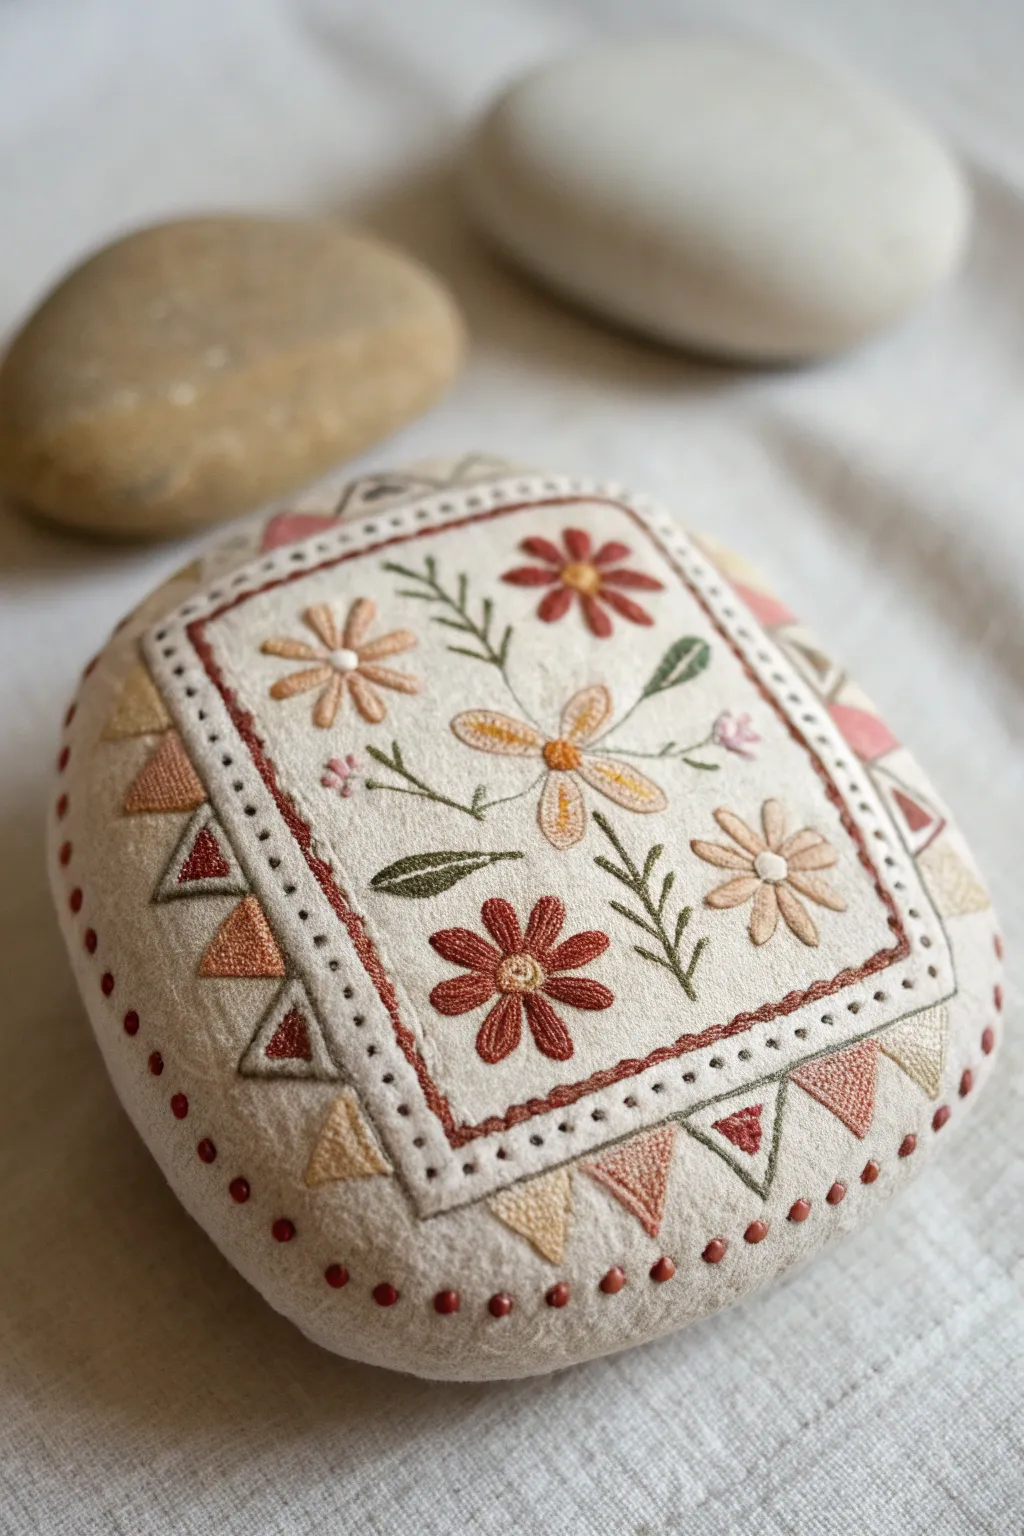
Transform a smooth, square-ish stone into a charming piece of faux needlework with this clever painting technique. By layering muted acrylics and tiny, deliberate brushstrokes, you’ll create the cozy illusion of stitched fabric, complete with floral motifs and embroidery textures.
Detailed Instructions
Materials
- Smooth, roughly square or rectangular river stone
- Acrylic paints (Titanium White, Unbleached Titanium/Cream, Burnt Sienna, Yellow Ochre, Sage Green, Olive Green, Soft Pink)
- Wide flat brush for base coating
- Fine liner brush (size 0 or 00)
- Small round brush (size 1)
- Pencil (HB or lighter)
- Matte varnish or sealer
- Palette or small dish for mixing
- Water cup and paper towels
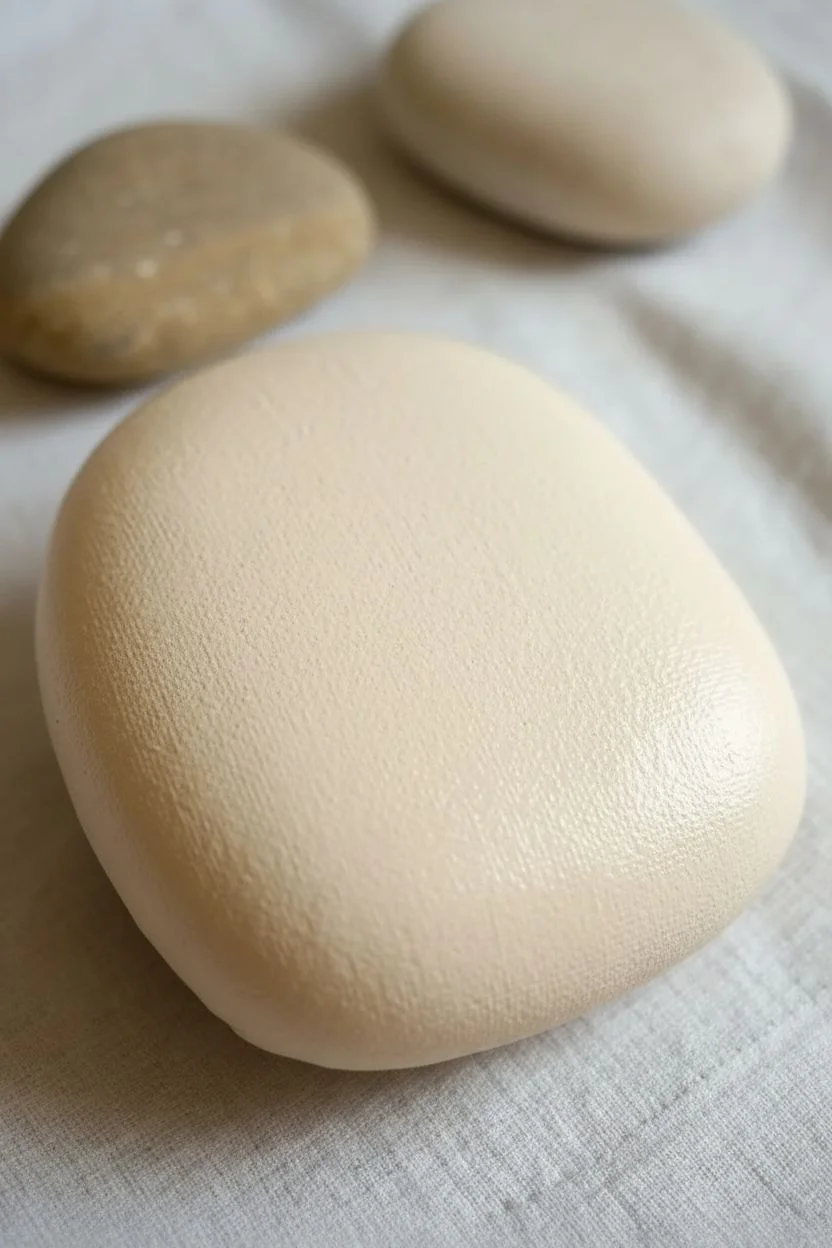
Step 1: Fabric Foundation
-
Clean and Prep:
Wash your stone thoroughly with soap and water to remove any dirt or oils. Let it dry completely before starting. -
Mix the Fabric Color:
Create an off-white ‘fabric’ shade by mixing Titanium White with a very small drop of Burnt Sienna or Unbleached Titanium. You want a warm, natural linen color, not a stark white. -
Apply Base Coat:
Paint the entire top surface of the rock with your linen mix using a wide flat brush. I prefer to apply two thin coats rather than one thick one to avoid visible brush ridges. -
Create Texture (Optional):
To enhance the fabric look, you can gently stipple the second coat with a dry sponge while it’s still slightly tacky, giving it a subtle woven texture.
Uneven Lines?
If your ‘stitches’ look shaky, don’t worry. Real hand embroidery has imperfections too! Variations in line thickness actually make the faux-thread effect look more realistic and handmade.
Step 2: Sketching and Zoning
-
Outline the Sampler:
Once the base is bone dry, lightly sketch a rounded rectangle in the center of the stone using a pencil. Leave about a half-inch margin around the edges for the border details. -
Draft the Florals:
Inside the rectangle, lightly sketch your floral design. Draw a large central daisy, smaller daisies in the corners, and meandering leafy vines connecting them. -
Plan the Border:
Sketch a triangular bunting pattern (zig-zags) around the outside of your central rectangle. This will act as the decorative border.
Dimensional Paint
For an even more realistic texture, mix a tiny pinch of cornstarch or baking soda into your acrylic paint. This thickens the body, making your brushstrokes stand up physically like real thread.
Step 3: Painting the Motifs
-
Block in Flower Centers:
Using a small round brush, paint the centers of your flowers with Yellow Ochre or a muted gold tone. -
Petal Painting:
Paint the petals of the larger flowers using Burnt Sienna (rust red) and Soft Pink. Keep your paint slightly thick to mimic the raised volume of embroidery thread. -
Add Greenery:
mix Sage Green and Olive Green for the leaves and stems. Use a liner brush for the stems to keep them thin and delicate. -
Fill the Bunting:
Paint the triangles in the border with alternating colors from your palette—rust, ochre, and sage. Leave a small gap between the triangles and the central rectangle.
Step 4: Stitching Details
-
Simulate Thread Texture:
Go back over your flower petals and leaves. Paint tiny, short lines in a slightly lighter shade of the base color on top of each shape. These represent the individual stitches of thread. -
The Running Stitch:
Outline your central rectangle with a rust-colored paint using a liner brush. Instead of a solid line, paint short dashes to look like a running stitch border. -
Detailing the Bunting:
Outline each triangle with a thin, darker shade of its fill color. Add tiny vertical lines inside the triangles to simulate satin stitching. -
French Knots:
Dip the very tip of your liner brush (or a toothpick) into thick paint and carefully dot the centers of the flowers to create the look of French knots. -
Outer Edging:
Add a ring of small distinct dots in a deep red or brown around the very outer edge of the stone, framing the entire sampler. -
Final Highlights:
Add microscopic highlights of pure white to the tops of your ‘stitches’ (the dashes and dots) to make them look glossy, like embroidery floss catching the light.
Step 5: Finishing Touches
-
Dry Time:
Allow the detailed paintwork to dry for at least 3-4 hours or overnight. -
Seal:
Apply a coat of matte varnish. Matte is crucial here because glossy varnish will ruin the illusion of soft fabric.
Place your finished faux-embroidery stone on a stack of books or a linen napkin to enjoy its cozy, handcrafted vibe
Tape-Edge Abstract Color Blocks
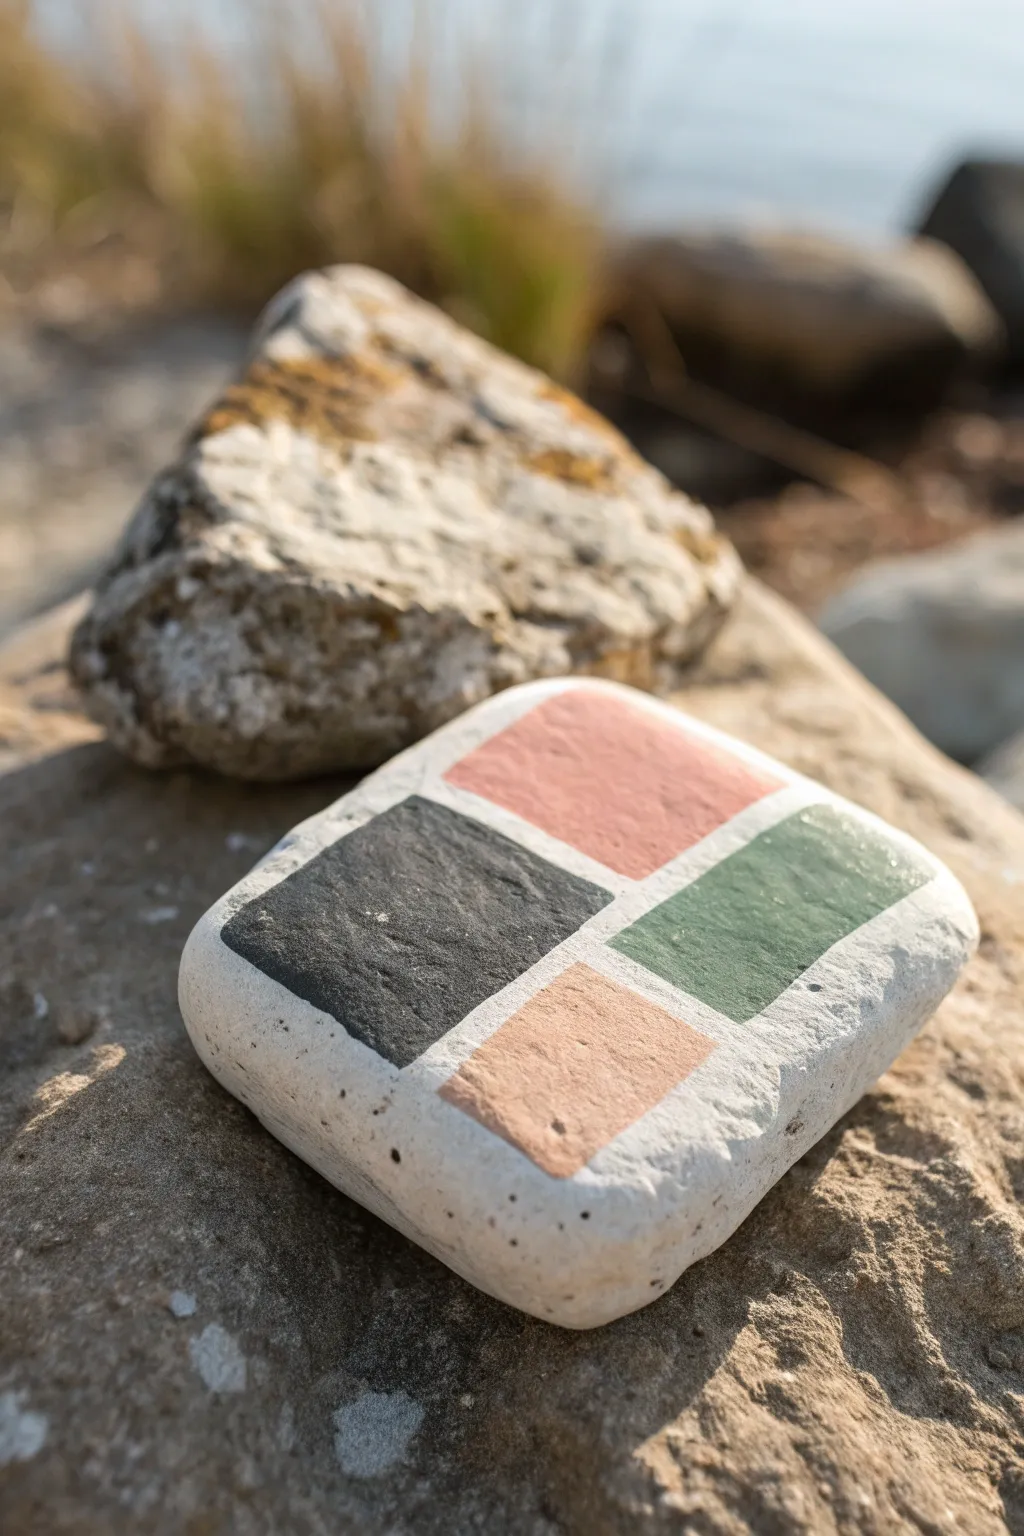
Transform a naturally smooth, square-shaped rock into a piece of modern art with this color-blocking technique. The clean white lines of the untouched stone create a stunning contrast against the matte, earthy tones of black, sage, coral, and blush.
Step-by-Step
Materials
- Smooth, squarish river rock
- Painter’s tape or masking tape (approx. 1/4 inch width)
- Acrylic craft paints (matte finish recommended)
- Paint colors: Charcoal Black, Sage Green, Coral Pink, Pale Terra Cotta
- Small flat paintbrush
- Scissors
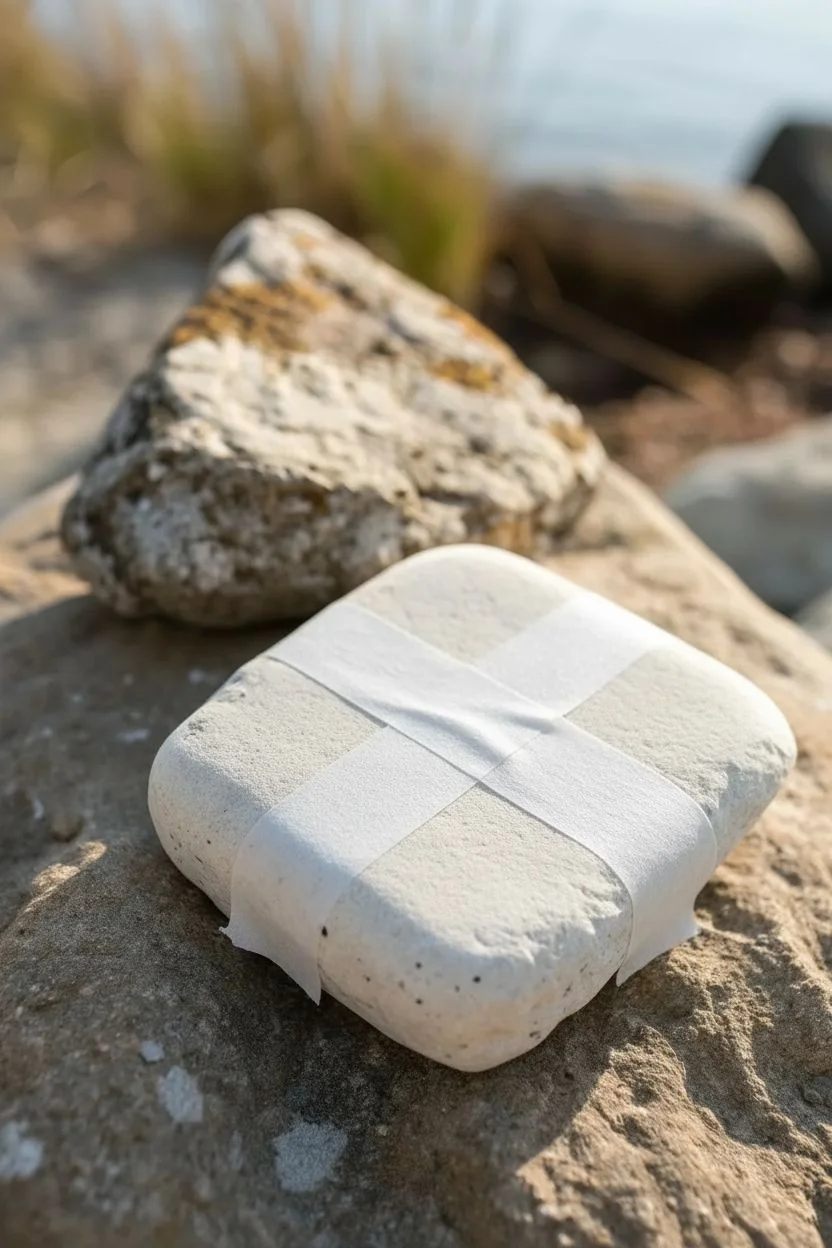
Step 1: Preparation and Taping
-
Clean surface:
Begin by washing your rock thoroughly with soap and water to remove any dirt or oils. Let it dry completely before starting. -
Create the center line:
Measure a strip of painter’s tape that spans the entire width of the rock. Apply it directly across the center, pressing down firmly to ensure a tight seal against the stone’s texture. -
Create the cross line:
Cut a second strip of tape and place it perpendicular to the first one, crossing right in the middle. This divides your rock into four distinct quadrants. -
Seal edges:
I like to run my fingernail or the back of a spoon along the edges of the tape strips. This creates a barrier so paint won’t bleed underneath, keeping those lines crisp.
Step 2: Painting the Color Blocks
-
First gradient: Coral:
Select the top right quadrant (or whichever you prefer) and paint it with the Coral Pink acrylic. Use smooth strokes from the center outward. -
Second gradient: Sage:
Clean your brush thoroughly. Move to the adjacent quadrant and apply the Sage Green paint, being careful not to push too much paint under the tape edge. -
Third gradient: Charcoal:
Paint the quadrant diagonal to the Sage Green with your Charcoal Black paint. This dark anchor color adds necessary visual weight to the composition. -
Fourth gradient: Terra Cotta:
Fill the final remaining square with the Pale Terra Cotta shade. Aim for an even coat so the rock’s texture shows through slightly but the color is solid. -
Check coverage:
Let the first coat dry for about 10 minutes. If the colors look streaky or transparent, apply a second thin coat to ensure opacity.
Sealing the Deal
For sharper lines, paint a thin layer of clear matte medium over the tape edges before adding color. This seals gaps so only clear coat bleeds under.
Step 3: The Reveal
-
Wait for dryness:
Allow the paint to become touch-dry. It shouldn’t be tacky, but don’t let it cure fully for hours, as the tape might pull up dry paint chips. -
Remove vertical tape:
Carefully peel back the top layer of tape first. Pull it slowly at a 45-degree angle away from the painted edge. -
Remove horizontal tape:
Remove the bottom strip of tape just as carefully. You should now see crisp, unpainted lines of natural stone separating your color blocks. -
Clean up edges:
If any tiny seepages occurred, you can gently scrape them away with a toothpick or cover them with a tiny amount of white paint if your rock is very pale. -
Final dry:
Let the stone sit undisturbed for at least an hour to fully harden before handling or displaying.
Level Up: Texture Play
Mix a small pinch of baking soda into your acrylic paints. This creates a textured, terracotta-like finish that looks amazing on stone.
Enjoy the calm simplicity of your new geometric stone art on your desk or in the garden


Have a question or want to share your own experience? I'd love to hear from you in the comments below!