Split paintings are one of my favorite ways to make a single image feel bigger, bolder, and way more dynamic on the wall. You’re basically painting one composition across multiple canvases, letting those little gaps create extra visual rhythm and drama.
Classic Panoramic Landscape Triptych
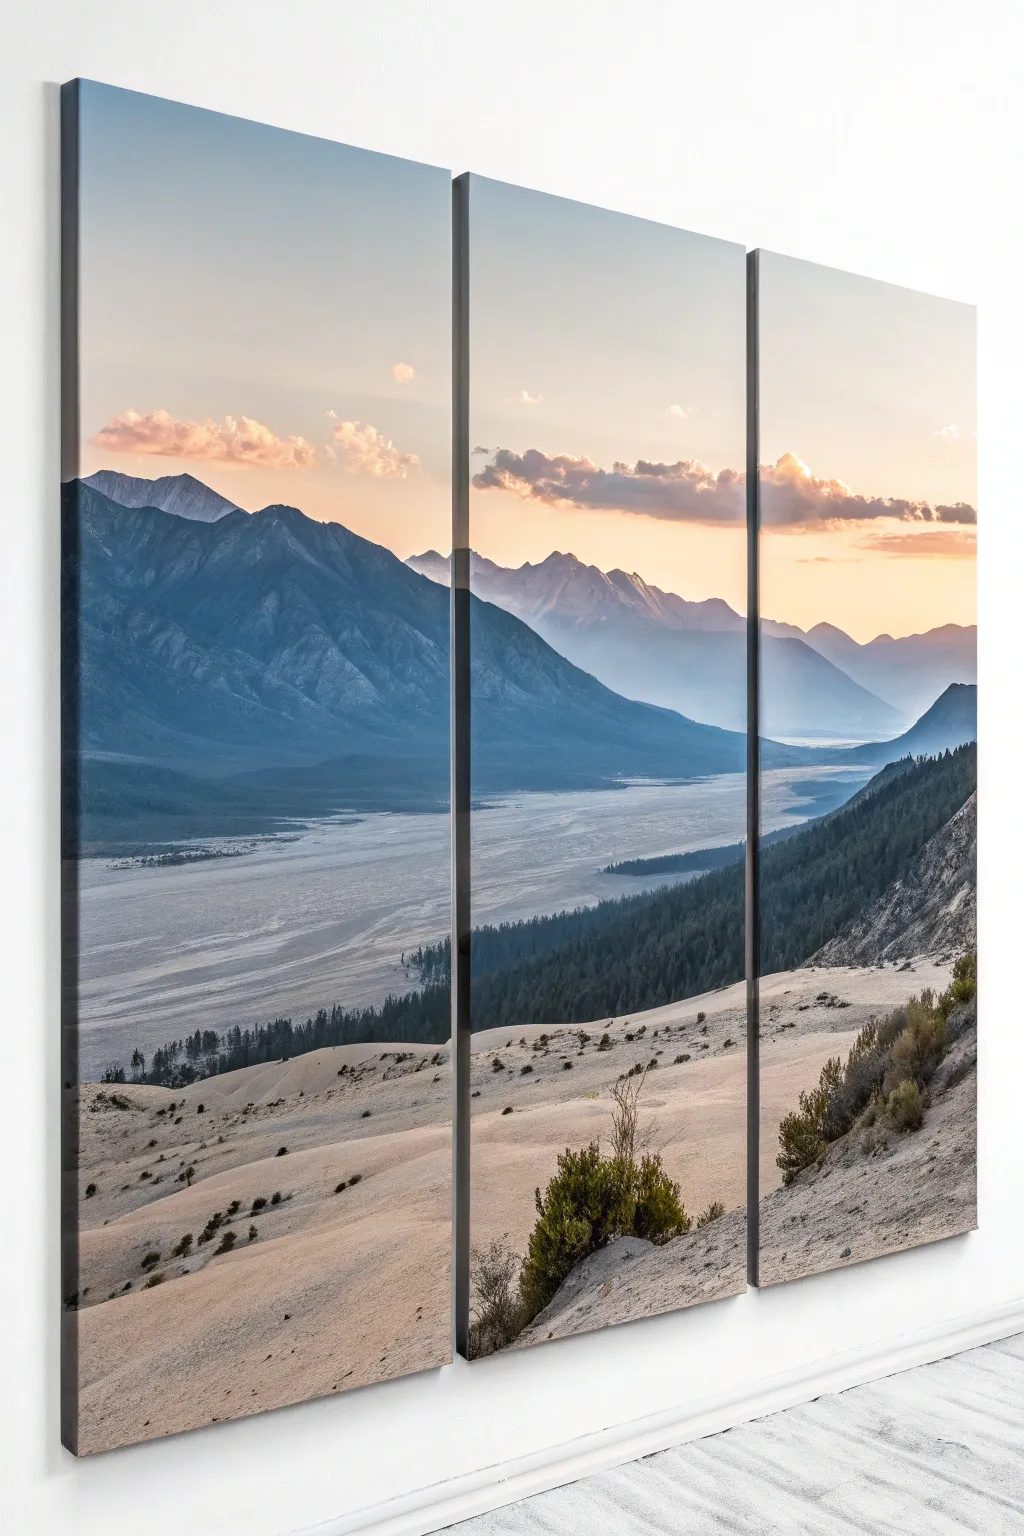
Transform a single stunning photograph into grand wall décor by splitting it across three large canvases. This triptych captures the depth of a mountain valley with a professional gallery-wrapped look that adds impressive scale to any room.
Step-by-Step Tutorial
Materials
- High-resolution landscape digital photo (300 DPI recommended)
- Three matching rectangular stretched canvases (e.g., 24×36 inches each)
- Matte or satin photo paper roll (wide format)
- Heavy-duty spray adhesive or gel medium
- Sharp crafting knife (X-Acto frame)
- Self-healing cutting mat
- Metal ruler or straight edge
- Black acrylic paint
- 1-inch foam brush
- Wall mounting hardware (D-rings and wire or sawtooth hangers)
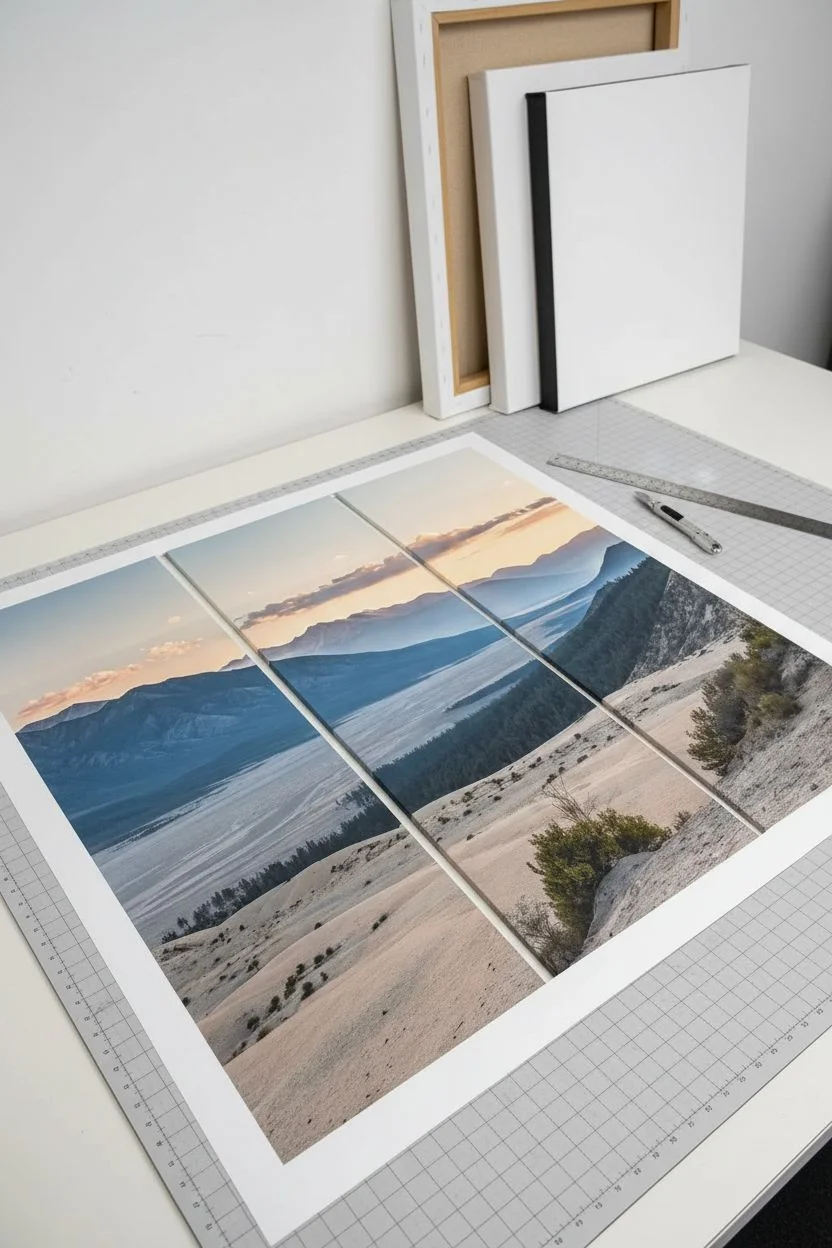
Step 1: Digital Preparation
-
Measure and scale:
Begin by measuring your three canvases. Calculate the total width by adding the width of all three plus approximately 1-2 inches for the gaps between them to ensure the image flow looks natural on the wall. -
Crop the image:
Open your chosen landscape photo in photo editing software. Crop the image to match the total aspect ratio of your three combined canvases. -
Split the file:
Divide the digital image into three separate vertical files. If you are wrapping the image around the sides (gallery wrap), add an extra 2 inches of image bleed on all sides of each panel. -
Print the panels:
Print the three segments on high-quality matte or satin photo paper using a large-format printer, or order prints from a professional lab. Ensure the prints are slightly larger than the canvas face.
Step 2: Mounting the Artwork
-
Paint the edges:
If you aren’t doing a full image wrap, paint the sides (depth) of each canvas with black acrylic paint using a foam brush. This creates a sharp, modern border that makes the colors pop. Let this dry completely. -
Apply adhesive:
Working with one panel at a time, spray a generous, even coat of heavy-duty spray adhesive onto the face of the canvas. I prefer doing this outdoors or in a ventilated box to avoid mess. -
Position the print:
Carefully align the top corners of your print with the top corners of the canvas. Slowly smooth the paper down the length of the canvas, pressing firmly from the center outward to push out air bubbles. -
Secure the edges:
Flip the canvas over onto a clean, soft surface. If you printed an image bleed for wrapping, fold the excess paper tight over the wooden frame and staple it to the back. -
Trim excess paper:
If you painted the edges black instead of wrapping the image, place the canvas face down on a cutting mat. -
The final cut:
Use a sharp crafting knife and run it directly along the edge of the canvas frame to trim away the overhanging paper for a perfectly flush edge.
Mind the Gap
When editing, account for the wall gap! Delete a 1-inch strip of the image where the gap will be. This prevents the image from looking “stretched” across the void.
Step 3: Sealing and Hanging
-
Seal surface (optional):
To protect the print from UV light and dust, apply a thin layer of clear acrylic varnish or gel medium over the surface using a soft, wide brush. -
Install hardware:
Flip the canvases over and attach your mounting hardware. Ensure the hardware is placed at the exact same height on the back of each frame. -
Level the first panel:
Hang the center panel first. Use a spirit level to ensure it is perfectly straight before marking the positions for the side panels. -
Space the panels:
Hang the left and right panels, leaving a 1 to 2-inch gap between them. This negative space is crucial for the triptych effect. -
Final adjustment:
Step back and check the horizon line. If the mountain ridges or river banks don’t align visually, adjust the hanging wire or nail height slightly until the landscape flows seamlessly.
Bubbles Beneath?
If an air bubble appears under the print after mounting, prick it gently with a small sewing needle and press the air out, smoothing it flat with a brayer or cloth.
Now you have a breathtaking panoramic view that commands attention in your living space
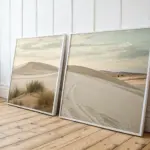

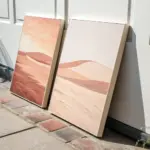
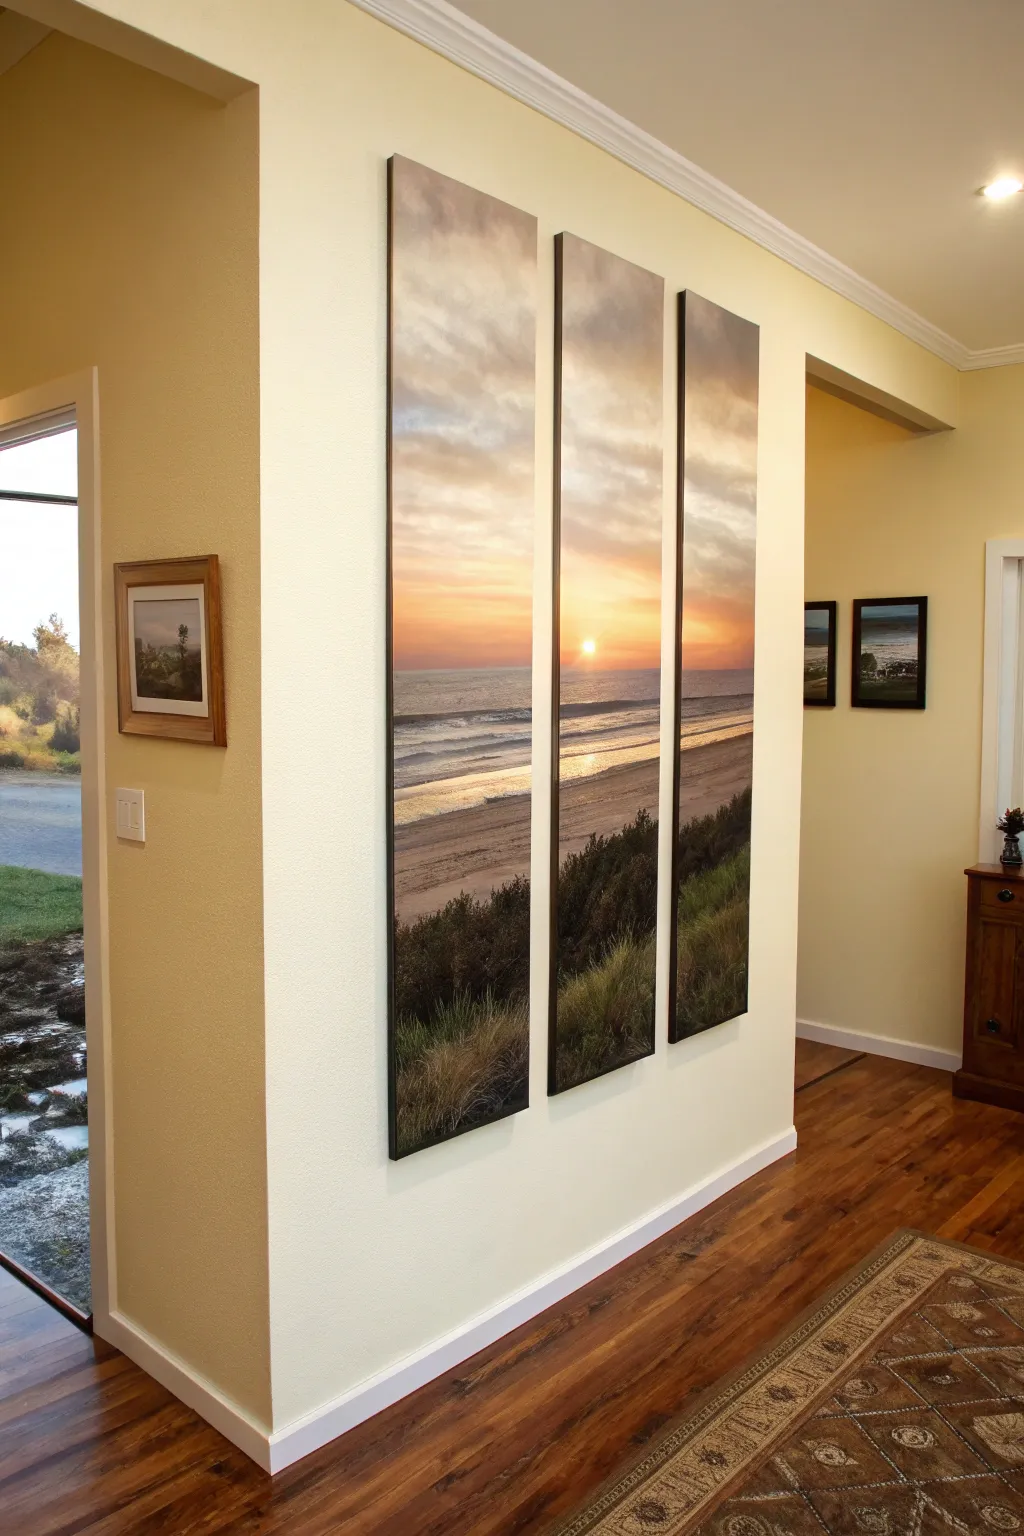
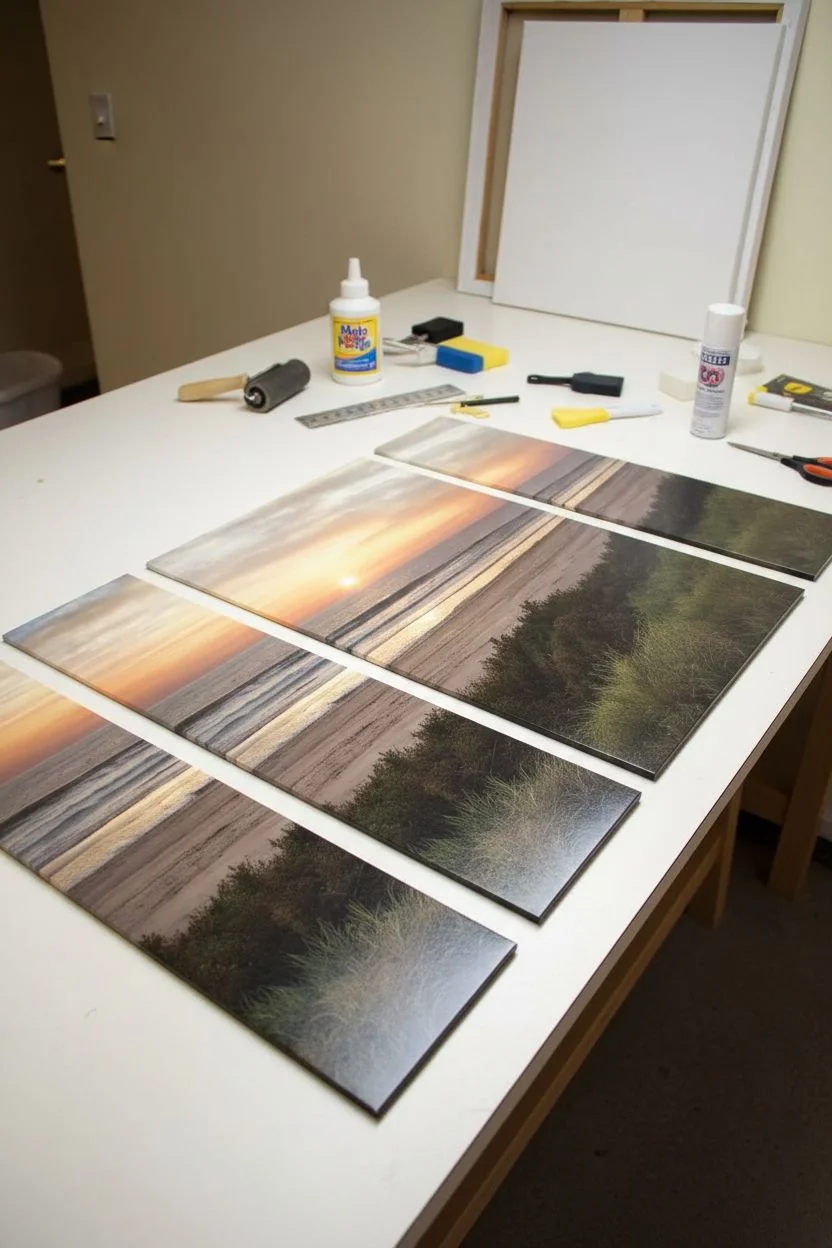
Ocean Horizon Split Across Three Panels
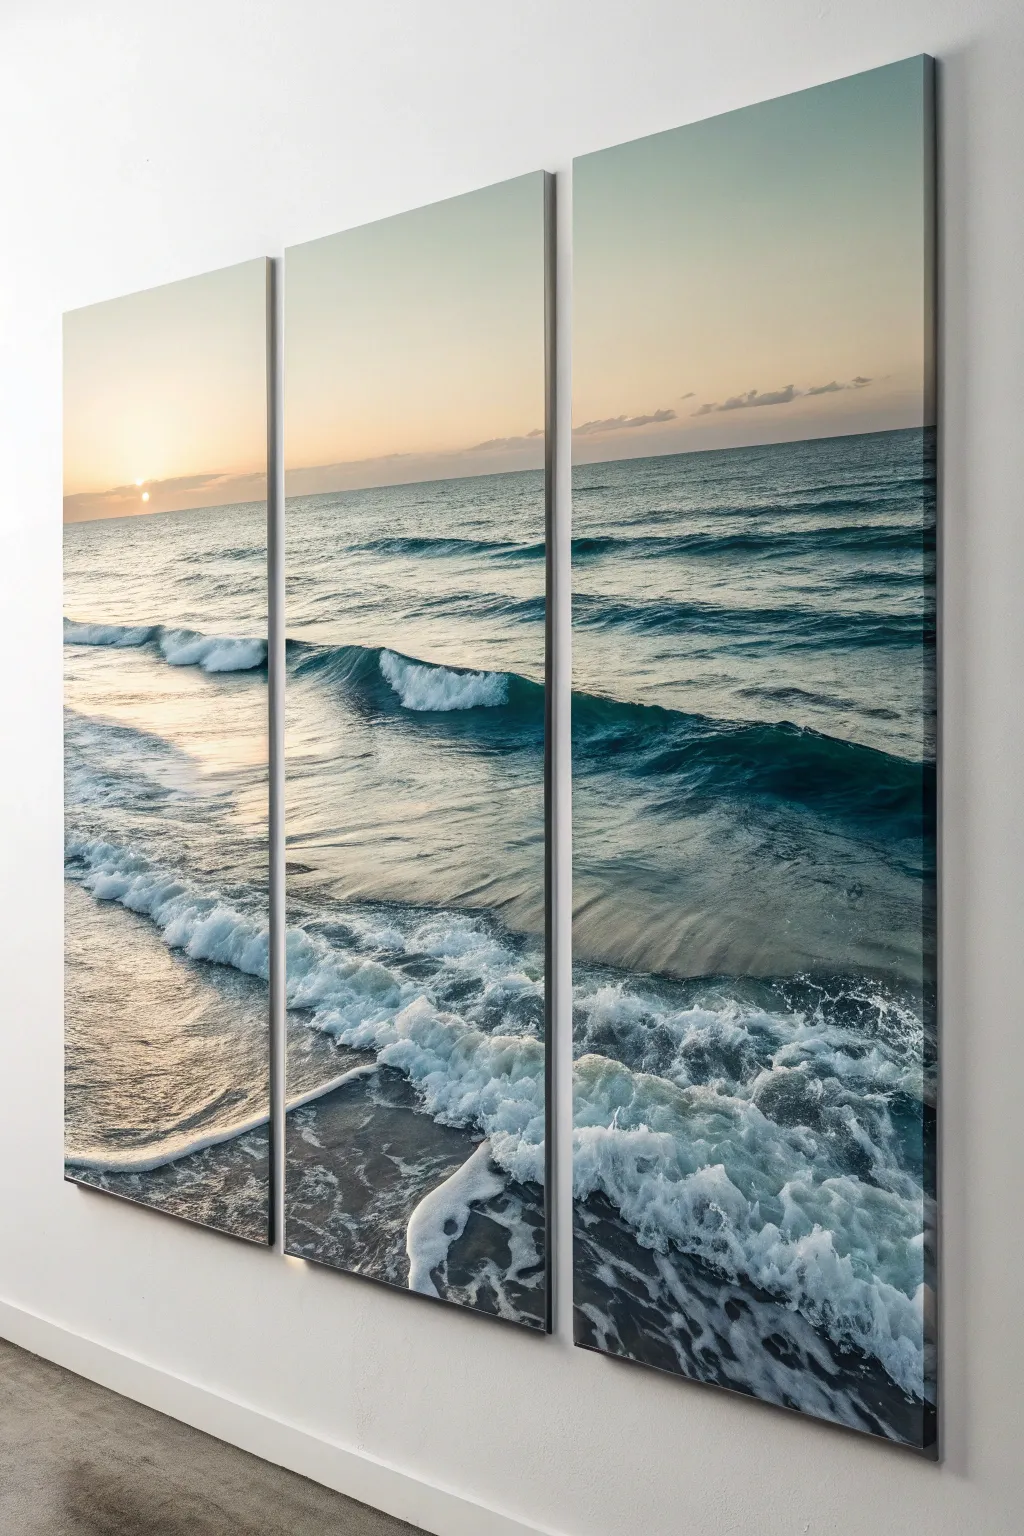
Bring the calming vastness of the ocean into your home with this stunning horizon split across three vertical panels. This project guides you through taking a high-resolution seascape image and mounting it onto three separate canvases to create a modern, gallery-style triptych.
How-To Guide
Materials
- High-resolution digital photo of a horizon
- Three tall, rectangular canvases (same size, e.g., 20×40 inches)
- Spray adhesive or photo-safe glue gel
- Sharp craft knife or rotary cutter
- Self-healing cutting mat
- Metal ruler
- Brayer or rubber roller
- Matte or glossy UV archival varnish spray
- Printer/printing service access
- Sandpaper (fine grit)
Step 1: Image Preparation & Printing
-
Select the right image:
Choose a high-resolution landscape photo where the horizon line is straight. Ensure the focal point, like a sun or a specific wave, won’t be awkwardly cut off by the gaps between panels. -
Measure your canvases:
Note the exact dimensions of your three canvases. You will need to account for the thickness of the canvas sides if you plan to wrap the image around the edges. -
Digital slicing:
Using photo editing software, resize your image to the total width of all three canvases combined, plus a 1-inch bleed on all sides for wrapping or trimming. -
Create the split:
Slice the digital image into three vertical strips. If you want the image to flow continuously without losing details in the gaps, just slice it directly. If you want a ‘window-pane’ effect, delete narrow strips where the gaps will be. -
Print the panels:
Send your files to a large-format printer or a professional photo lab. Request printing on high-quality archival paper or adhesive-backed vinyl for easier application.
Seamless Horizons
When hanging, use a laser level to ensure the horizon line matches perfectly across all three panels. Even a millimeter off can break the illusion.
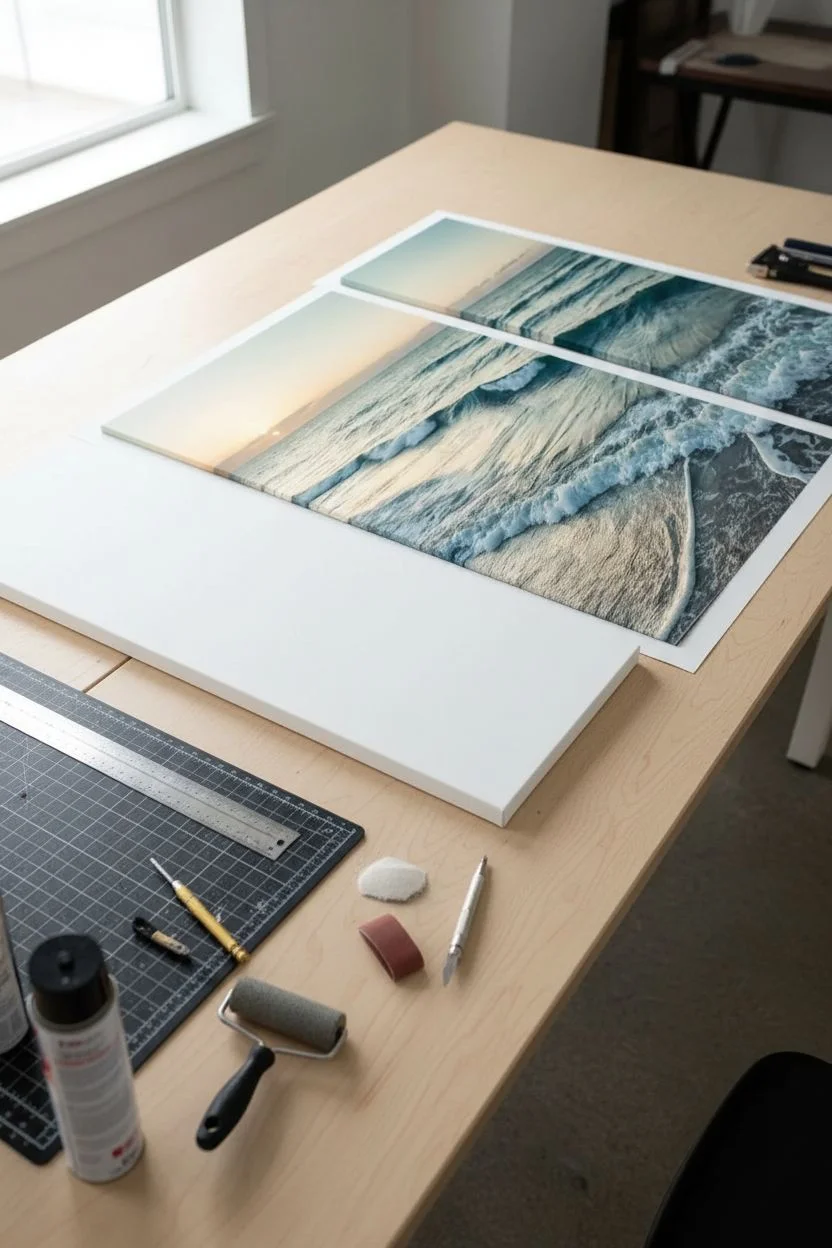
Step 2: Mounting the Artwork
-
Prep the canvases:
Lightly sand the face of the canvases to remove any rough texture that might show through the print. Wipe away the dust with a tack cloth. -
Align the first print:
Lay your first print face down on a clean surface. Place the canvas face down on top of it, checking for even margins on all sides. -
Apply adhesive:
If not using self-adhesive vinyl, spray an even coat of spray adhesive on the canvas surface. Wait a few moments for it to become tacky. -
Mount the face:
Carefully flip the canvas over onto the back of the print (or smooth the print onto the canvas). Start from the center. -
Smooth it out:
Use a brayer or a soft cloth to press the print firmly onto the canvas, working from the center outward to push out any trapped air bubbles.
Gallery Edge Move
Paint the sides of your canvas black or dark blue before mounting. Trim the photo to the face edge instead of wrapping it for a sharp, modern floating look.
Step 3: Finishing Touches
-
Wrap the edges:
At the corners, cut a specific notch (often called a library fold) to allow the paper to fold neatly around the side of the canvas frame without bulking up. -
Glue the sides:
Apply adhesive to the side edges of the canvas frame. Fold the excess paper print tightly around the edge and press firmly. -
Secure the back:
I find it helpful to use a staple gun or strong tape to secure the extra paper flap to the back of the wooden frame for a professional hold. -
Repeat for all panels:
Repeat the mounting and wrapping process for the remaining two panels, ensuring you don’t mix up the order of the seascape. -
Seal the surface:
Once the adhesive is fully cured, take the panels to a well-ventilated area. Apply a light mist of UV archival varnish to protect the ink from fading and moisture. -
Final drying:
Let the varnish dry completely according to the manufacturer’s instructions before attempting to hang the art.
Step back and enjoy the view of your personally crafted ocean sunrise


Tree Silhouette Stretching Over Multiple Canvases
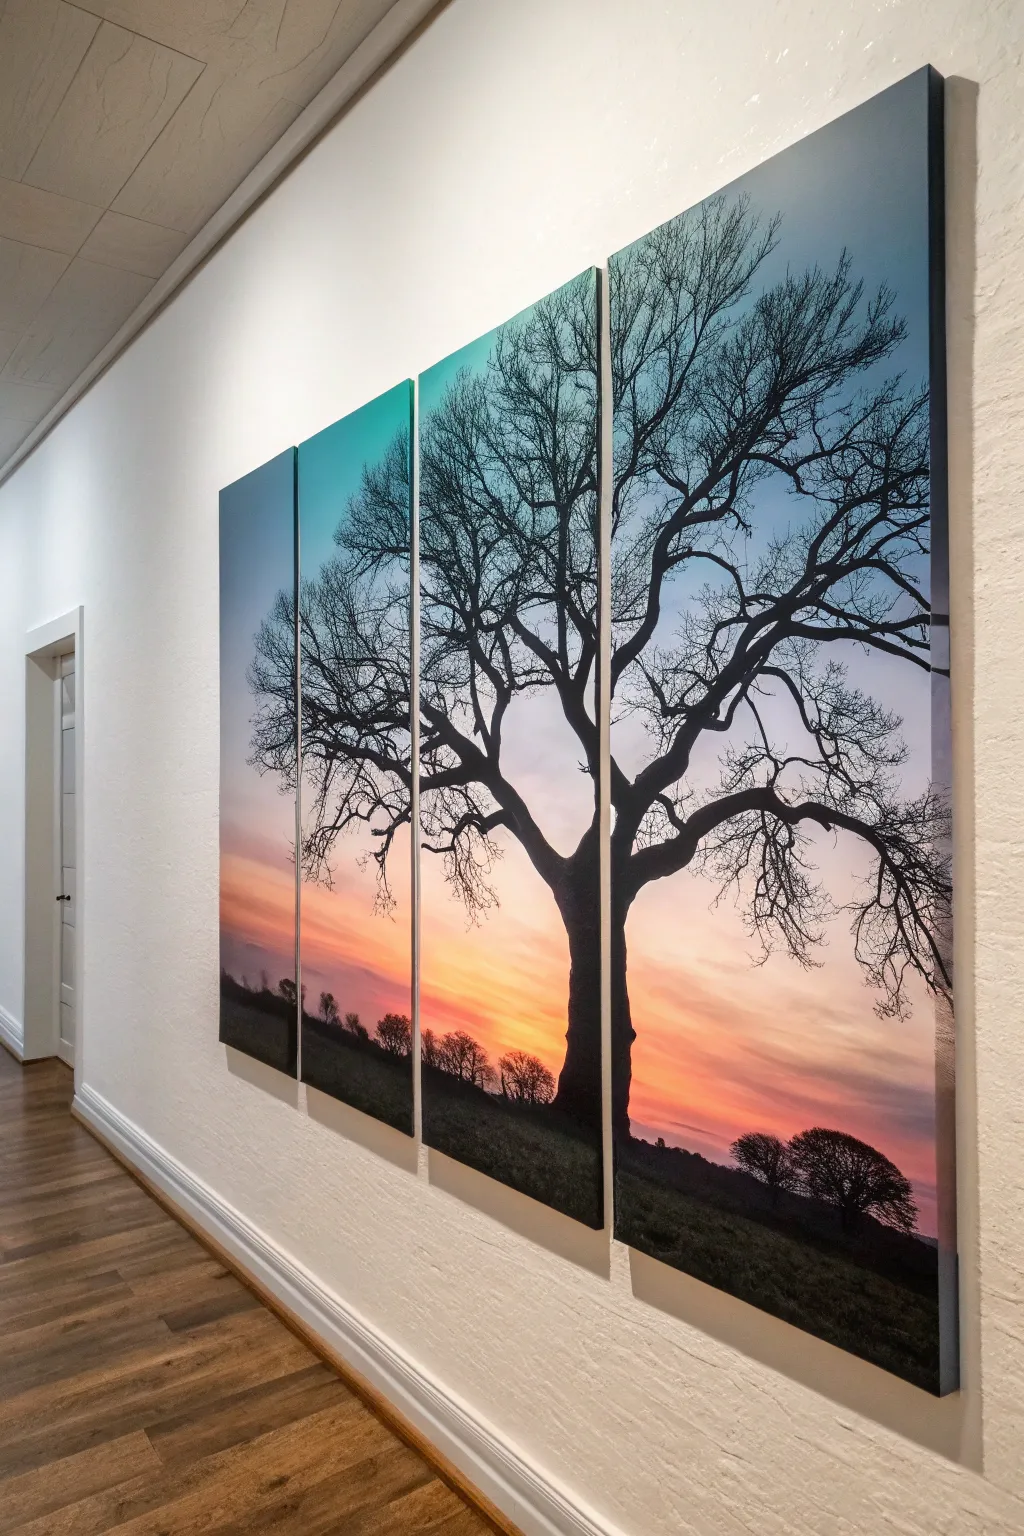
Transform a blank wall into a window overlooking a serene landscape with this striking four-panel painting. By stretching a single tree silhouette across multiple canvases, you create a sense of scale and drama that a single frame simply cannot capture.
Detailed Instructions
Materials
- 4 gallery-wrapped canvases (12×36 inches or similar tall, narrow size)
- Acrylic paints (Titanium White, Cadmium Yellow, Orange, Alizarin Crimson, Phthalo Blue, Mars Black)
- Wide flat brush (2-3 inch) for blending background
- Medium filbert brush for clouds and land
- Small round brush for bright details
- Fine liner brush for tree branches
- Easel or large flat workspace
- Masking tape or painter’s tape
- Palette and water cup
- Chalk or pastel pencil for sketching
Step 1: Preparation and Sky Gradient
-
Arrange the Canvases:
Lay your four vertical canvases side-by-side on your workspace or mount them temporarily to a large easel. Leave a tiny gap (about 1/8 inch) between them to mimic how they will hang, but close enough to paint across easily. -
Secure the Group:
If working flat, place a long strip of masking tape across the back of the canvases to hold them together as a single unit. This prevents them from shifting while you blend the sky. -
Mix the Sky Colors:
Prepare a gradient palette. You will need a deep blue for the top, transitioning into lighter blue, then crimson, orange, yellow, and finally a warm white near the horizon. -
Paint the Upper Sky:
Start at the very top of the canvases with your wide flat brush and the deep blue mixture. Paint horizontally across all four panels in long, sweeping strokes. -
Blend Downward:
While the blue is still wet, introduce the lighter blue and then the crimson as you move down the canvas. Use a clean, slightly damp brush to blur the lines between colors for a smooth transition. -
Create the Horizon Glow:
Continue blending downwards with orange and then yellow. Near the bottom third of the canvas (where the horizon will be), blend in your brightest yellow and warm white to create the effect of the sun just below the skyline.
Step 2: Painting the Landscape
-
Define the Horizon Line:
Using black mixed with a tiny bit of brown, paint a low, rolling horizon line across the bottom of all four panels. Keep it rough and organic rather than perfectly straight. -
Add Distant Trees:
With a medium brush, dab small shapes along the horizon to suggest distant tree lines and bushes. These shouldn’t be detailed; just textured silhouettes against the bright sunset. -
Detail the Foreground:
Darken the foreground area completely with your black mixture. Use a dry brush technique near the edges of the black area to simulate grass texture catching the last light. -
Sketch the Main Tree:
Once the background is completely dry, use a piece of chalk to lightly sketch the skeleton of your main tree. Place the trunk off-center—perhaps spanning the seam between the second and third canvas—and extend branches into all four panels.
Seamless Edges
When painting across gaps, don’t stop at the front face. Wrap the design around the sides of each canvas so the image continues even when viewed from the side.
Step 3: The Silhouette Tree
-
Paint the Trunk:
Load a medium filbert brush with pure Mars Black. Fill in the main trunk shape, tapering it upward. Ensure the paint goes right to the wrapped edges of the canvas where the panels meet. -
Extend Main Branches:
Switch to a smaller round brush to pull thick branches outward from the trunk. Follow your chalk lines, letting the branches reach dramatically towards the top corners of the outer canvases. -
Paint the Edge Wraps:
I usually take a moment here to paint the sides of the canvas. Wherever a branch ‘exits’ one panel and ‘enters’ the next, paint the side edge black so the image doesn’t break when viewed from an angle. -
Add Fine Twigs:
Using your fine liner brush and thinned black paint (add a drop of water for flow), create the intricate network of smaller twigs. Use a shaky hand motion to make them look organic and gnarled. -
Review Balance:
Step back and look at the composition. Add more small twigs to empty sky areas if needed to balance the visual weight across all four panels. -
Final Varnish:
Allow the paint to cure for at least 24 hours. Apply a coat of satin or gloss varnish to deepen the black silhouette and protect the vibrant colors of your sunset.
Golden Hour Glow
Glaze a tiny amount of transparent yellow paint over the edges of the tree trunk and lower branches to make it look like the sunset is glowing from behind.
Hang your new masterpiece with about an inch of space between each panel to fully enjoy the split-view effect


City Skyline in a Five-Panel Set

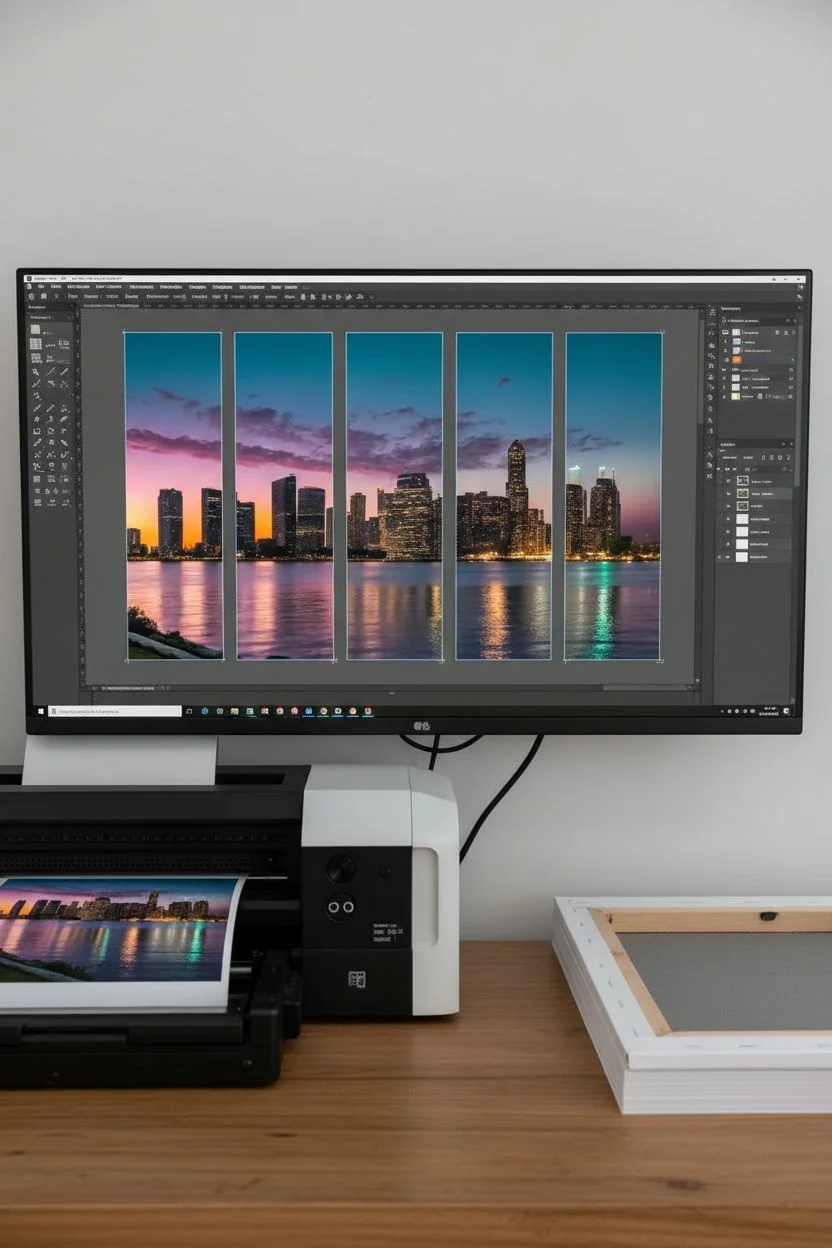
Transform a single breathtaking cityscape photo into a dramatic wall installation with this five-panel split canvas project. The resulting pentaptych creates a modern, gallery-worthy aesthetic that brings the vibrant energy of a skyline at dusk right into your living space.
Step-by-Step Tutorial
Materials
- High-resolution digital photo of a city skyline
- 5 stretched canvases (12×36 inches recommended for vertical orientation)
- Computer with photo editing software (Photoshop or GIMP)
- Inkjet printer capable of large format (or access to a print shop)
- High-quality canvas paper roll or heavy matte photo paper
- Spray adhesive (heavy duty)
- Craft knife or rotary cutter
- Metal ruler
- Cutting mat
- Black acrylic paint
- Foam brush
- Clear UV-resistant varnish spray
- Wall mounting hardware
Step 1: Digital Preparation
-
Select your image:
Choose a high-resolution landscape photo. A city skyline works best because the horizontal horizon line creates continuity across the split panels. -
Set canvas dimensions:
Measure your physical canvases. Create a new digital file that matches the total width and height of all five canvases combined, adding about 2 inches of bleed on all sides for wrapping. -
Create the split guides:
Using your software’s guide tools, mark five equal vertical sections. Important: Add a gap allowance (usually 1-2 inches) between each section in the digital file to account for the wall spacing, or the image will look disjointed when hung. -
Slice the image:
Crop the image into five individual vertical strips based on your guides. Ensure each strip has enough extra border material (bleed) to wrap around the wooden frame of your canvases. -
Print the panels:
Print each strip on high-quality canvas paper or heavy photo paper. If you don’t have a large-format printer, take these files to a professional print shop.
Step 2: Mounting the Photograph
-
Paint edges black:
While you wait for prints, use a foam brush to paint the sides of your five canvases with black acrylic paint. I find this gives the finished piece a much cleaner, sharper look than trying to wrap the image perfectly around the corner. -
Trim the prints:
Place your prints on a cutting mat. Using a metal ruler and craft knife, trim away any white unprinted paper, leaving just the image and the bleed area you calculated. -
Apply adhesive:
In a well-ventilated area, apply a generous, even coat of heavy-duty spray adhesive to the front surface of the first canvas. Wait 30-60 seconds for it to become tacky. -
Position the print:
Carefully align the top corners of your print with the canvas corners. Smooth the paper down slowly from top to bottom, using a soft cloth to push out air bubbles as you go. -
Wrap the excess:
Fold the excess paper over the top and bottom edges of the canvas frame. Secure it to the back using a staple gun or strong double-sided tape. -
Finish the vertical edges:
Since we painted the sides black, you can either trim the paper flush with the front face or wrap it slightly just to cover the corner edge for a seamless transition. -
Repeat the process:
Continue mounting the remaining four prints, ensuring you keep them in the correct order so the skyline matches up perfectly.
Wrinkles in the paper?
If you get a bubble while mounting, don’t pull the paper up. Instead, use a pin to prick a tiny hole in the center of the bubble and smooth the air out toward the hole.
Step 3: Sealing and Hanging
-
Seal the artwork:
Once the adhesive is fully cured, take the panels outside. Spray a light, even coat of UV-resistant clear varnish over each panel to protect the ink from fading and moisture. -
Let it cure:
Allow the varnish to dry for at least 24 hours in a dust-free area before handling. -
Mark the wall:
Measure your total wall space. Mark the center point for the middle (third) canvas first. From there, measure outward for the other panels. -
Space it out:
Use a spacer (like a 1-inch block of wood) between panels while hanging to ensure the gap is perfectly consistent across the entire installation.
Add texture
For a painterly effect, apply a clear acrylic gel medium over the prints with a brush before varnishing. Follow the lines of the buildings/water to simulate brushstrokes.
Step back and admire how the split view adds dynamic movement and scale to your majestic skyline
BRUSH GUIDE
The Right Brush for Every Stroke
From clean lines to bold texture — master brush choice, stroke control, and essential techniques.
Explore the Full Guide
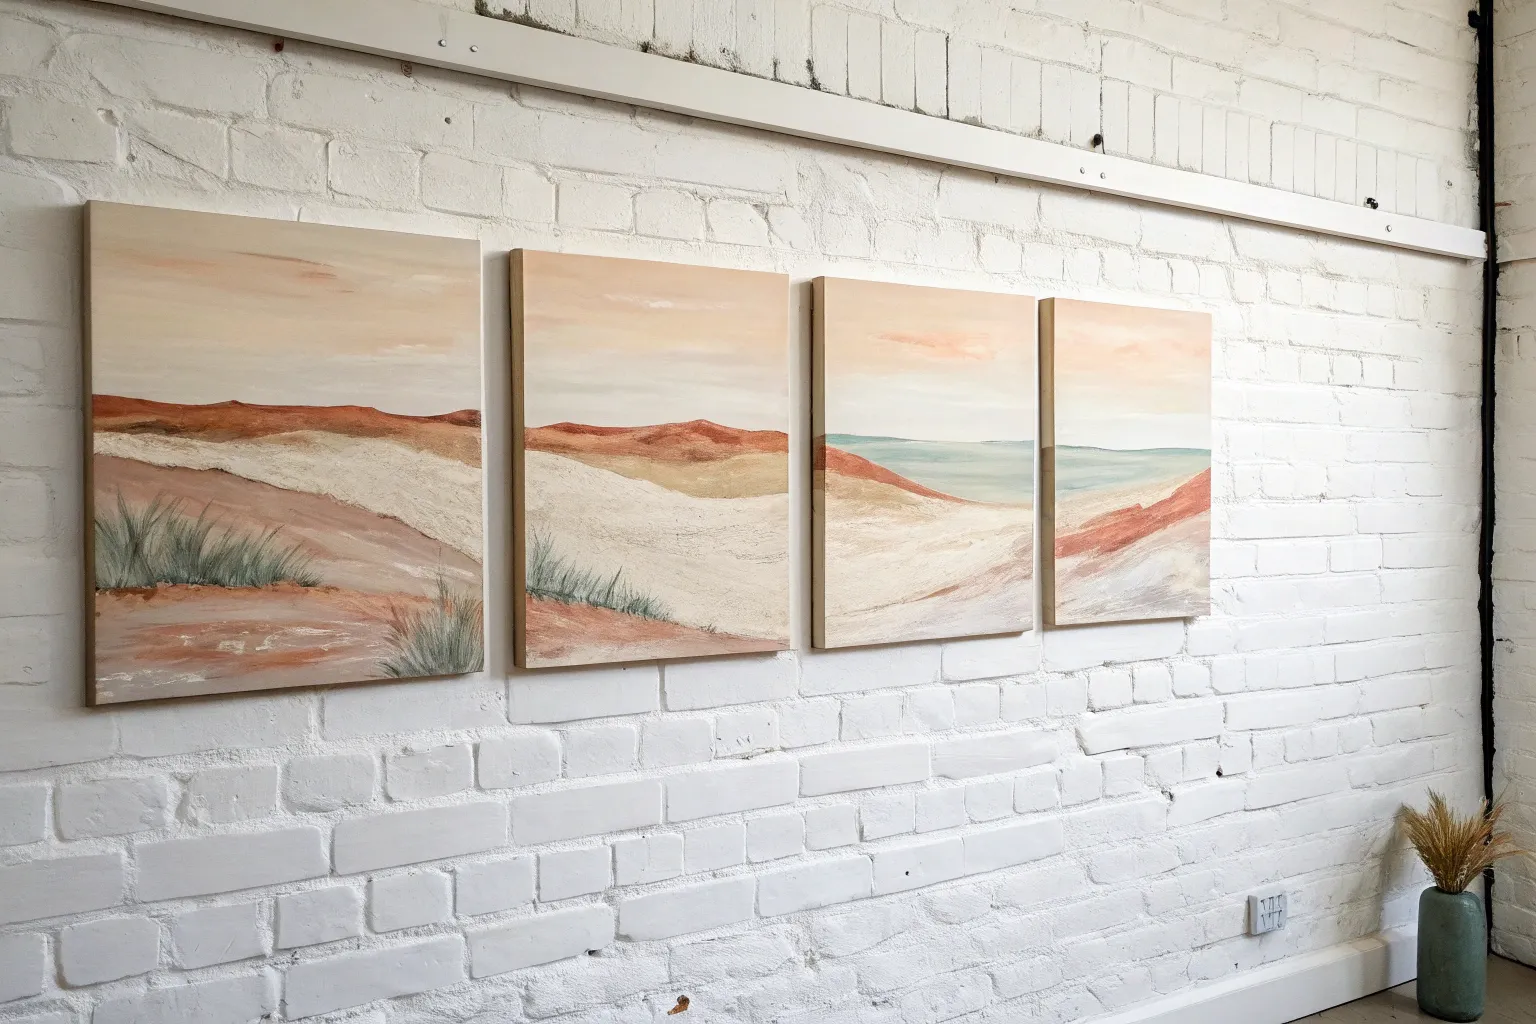
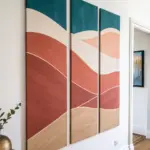
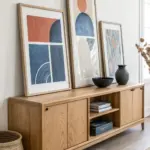
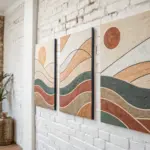
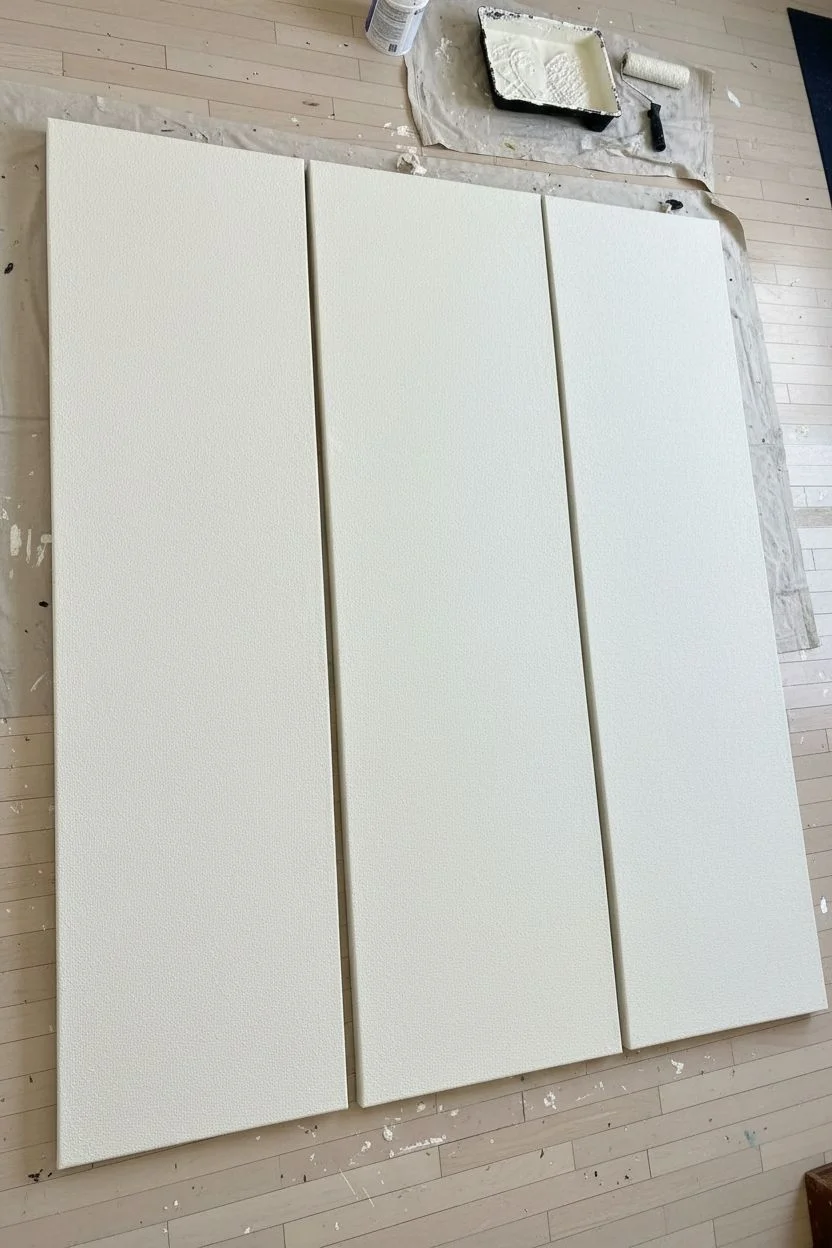
Abstract Color Blocks as a Clean Triptych
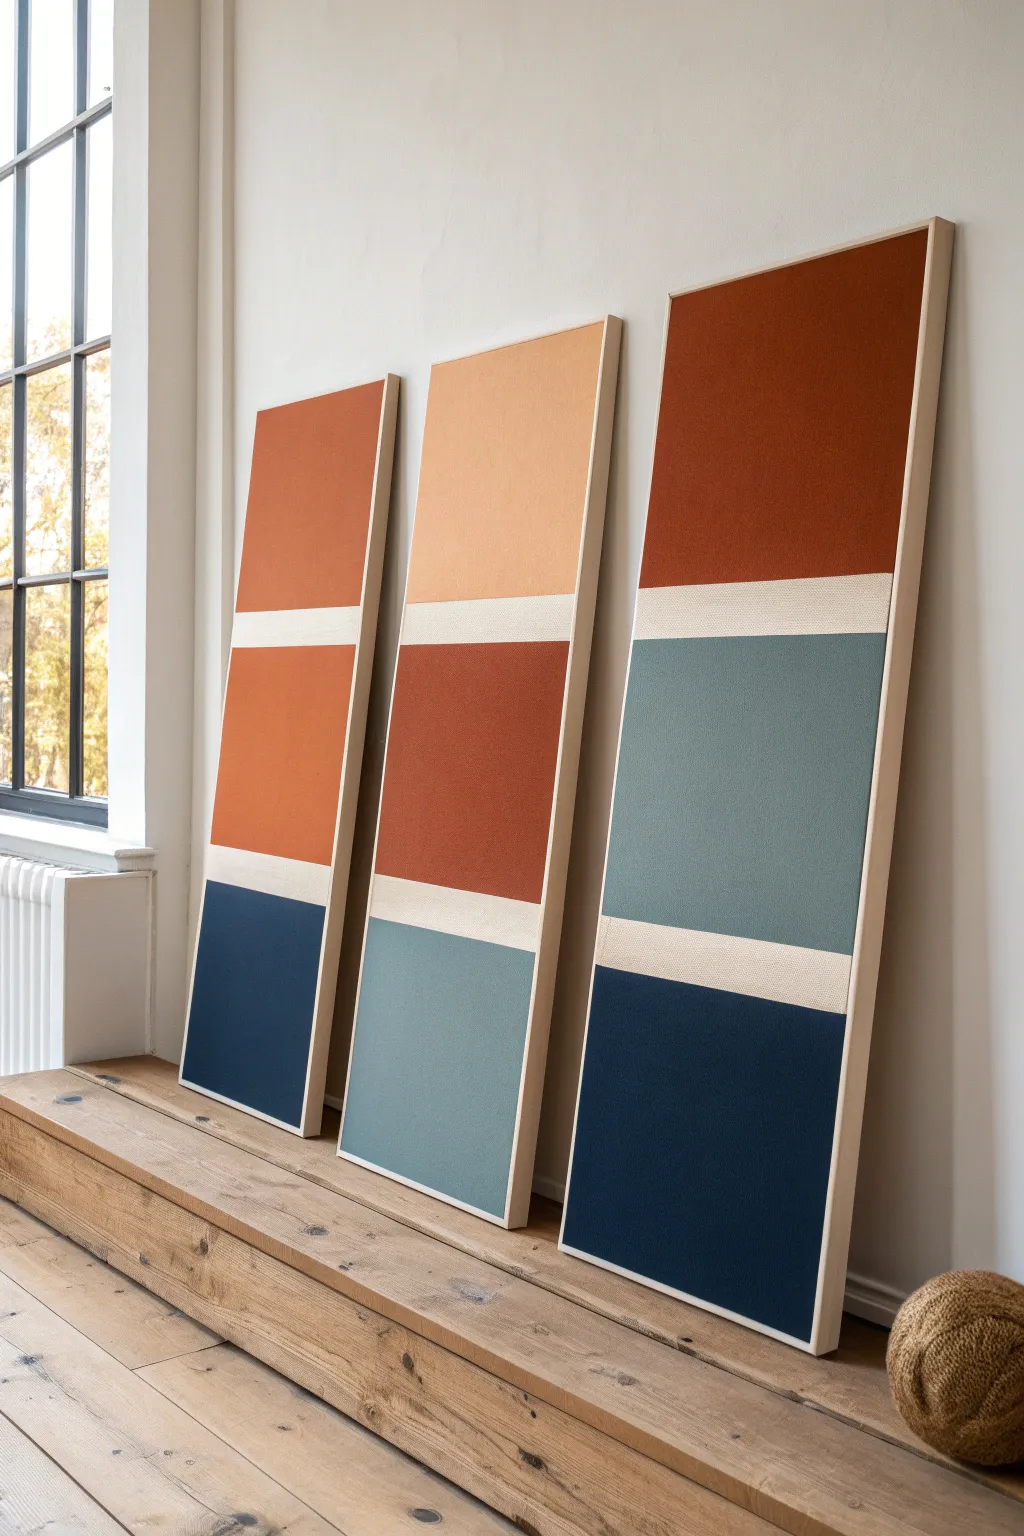
Bring warmth and structure to your space with these three cohesive abstract panels featuring bold geometric zones. This project combines earthy terracotta tones with calming blues and clean cream lines for a sophisticated, gallery-worthy statement piece.
Step-by-Step
Materials
- 3 large stretched canvases (e.g., 20×60 inches or similar tall, narrow size)
- Acrylic paints (Terracotta/burnt orange, light peach, cream/off-white, rust red, dusty teal blue, navy blue)
- Painter’s tape (high quality, 1-inch and 2-inch widths)
- Flat synthetic paintbrushes (2-inch and 4-inch)
- Ruler or measuring tape
- Pencil
- Floetrol or acrylic medium (optional, for smoother flow)
- 3 floating frames (custom built or store-bought to fit canvas size)
- Matte varnish
- Drop cloth
Step 1: Preparation and Planning
-
Plan your palette:
Before touching the canvas, finalize your color scheme. This triptych relies on colors echoing across panels. You’ll need a ‘family’ of warm tones (peach, terracotta, rust) and cool tones (teal, navy), tied together by a unifying cream stripe. -
Measure the zones:
Lay your three canvases side by side on a flat surface. Decide on the height of your color blocks. In the reference, the top block is the tallest, followed by a middle block, and a bottom block, separated by thin cream negative spaces. -
Mark the separation lines:
Using your ruler and pencil, lightly mark horizontal lines across all three canvases simultaneously to ensure the horizon lines match perfectly. You want a gap of about 2-3 inches for the cream stripes between the main color blocks.
Clean Lines Only
If paint bleeds under the tape, wait for it to fully dry. Then, place a fresh piece of tape over the colored area and repaint the line with your cream color.
Step 2: Taping and Base Coats
-
Tape the separation lines:
Apply painter’s tape to mask off the horizontal cream stripes. Press the edges of the tape down firmly with a credit card or your thumbnail to prevent paint bleed. -
Seal the tape edges:
A trick I usually do is to paint a very thin layer of matte medium or white paint over the tape edges first. This seals the tape so your colored lines will be razor-sharp later. -
Paint the cream stripes:
Paint the area inside the taped lines with your cream or off-white color. Even though these will be mostly masked later, painting the base now ensures solid coverage.
Step 3: Painting the Color Blocks
-
Start with the top sections:
For the left panel, paint the top section a warm terracotta. For the middle, use a soft peach. For the right panel, go with a deep rust red. Use a large flat brush and long, vertical strokes for a smooth finish. -
Apply second coats:
Acrylics often need two coats for full opacity, especially with warm earth tones. Let the first coat dry completely before applying the second. -
Paint the middle sections:
Move to the middle block. Left panel gets a brighter orange-rust; middle panel gets a deep rust; right panel introduces a cool dusty teal. Be careful near the taped edges. -
Paint the bottom sections:
Finally, paint the bottom weights. The left is a deep navy; the middle is a lighter dusty blue; the right is the same deep navy to balance the composition. -
Paint the canvas edges:
Don’t forget to wrap your paint colors around the sides of the canvas if you aren’t framing it, or simply paint them a neutral color if you are using a floating frame.
Texture Twist
Mix baking soda or texture paste into your paint for a grainy, stone-like finish that adds tactile depth to the minimalist blocks.
Step 4: Finishing Touches
-
Remove the tape:
Once the paint is tacky but not fully cured (about 30 minutes after the last coat), carefully peel off the painter’s tape at a 45-degree angle to reveal your crisp cream lines. -
Touch up edges:
If any paint bled through, use a small detail brush and your cream paint to carefully tidy up the lines. -
Varnish the artwork:
Apply a coat of matte varnish over the entire surface. This unifies the sheen of the different paint colors and protects the surface from dust. -
Install floating frames:
Place your finished canvases into light wood floating frames. Secure them from the back with offset clips. The light wood complements the earthy tones perfectly.
Step back and admire how these simple blocks of color create a harmonious and modern focal point for your room
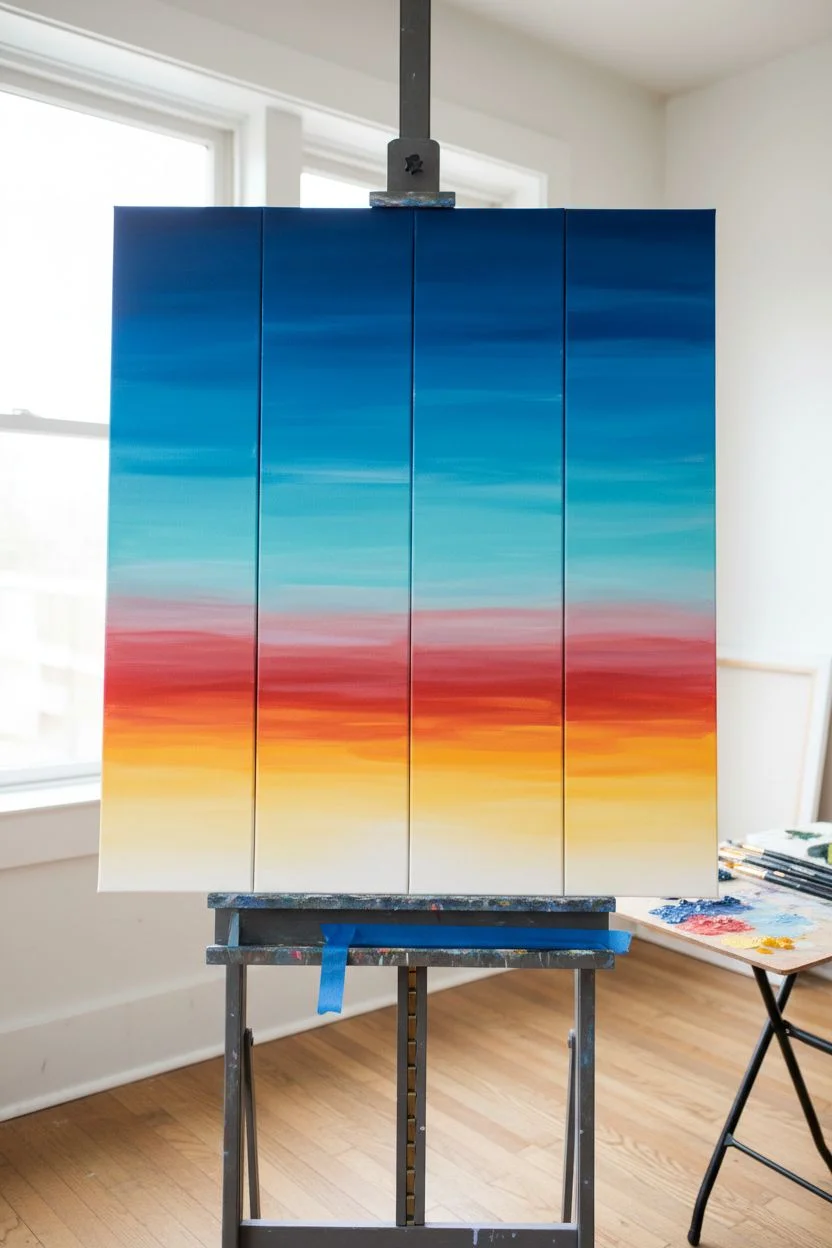
Sunset-to-Night Gradient Split Painting
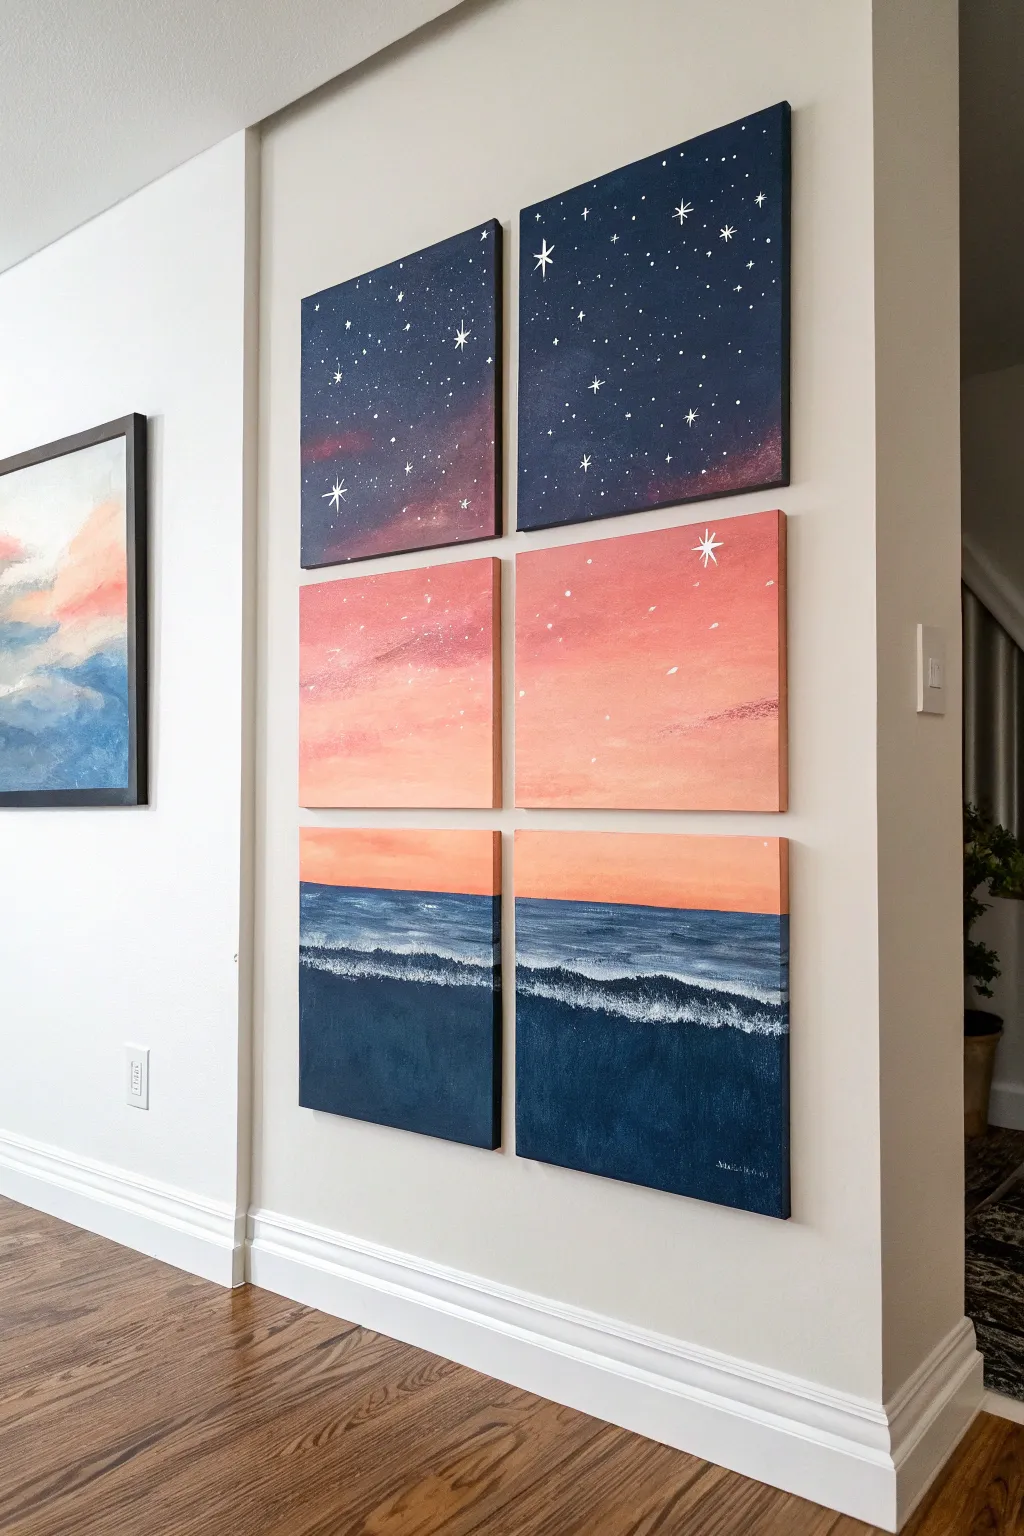
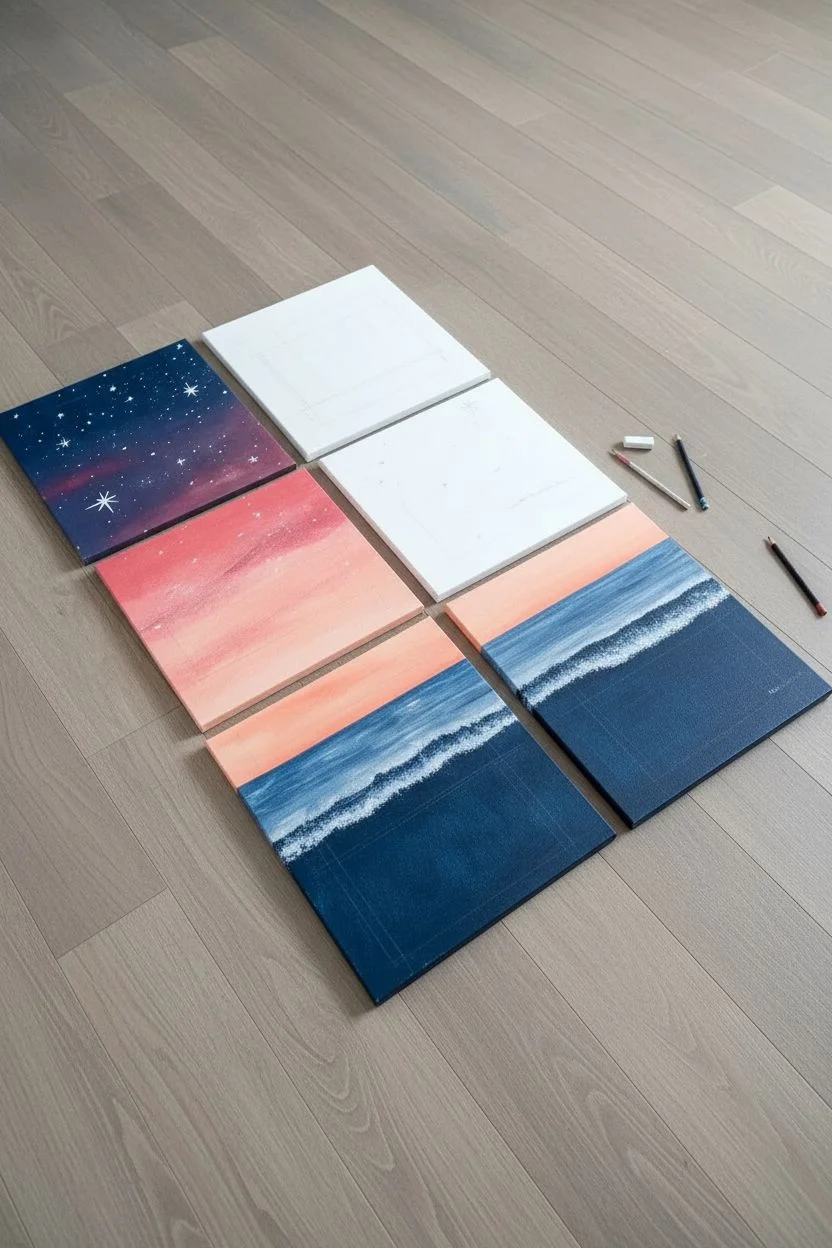
Transform a blank wall into a window overlooking a dreamy seascape with this six-canvas split painting. By blending deep navy blues into warm coral sunsets and crashing waves, you create a cohesive scene that feels both vast and intimate.
Step-by-Step Tutorial
Materials
- 6 square stretched canvases (12×12 inches recommended)
- Acrylic paints (Navy Blue, Phthalo Blue, Black, Titanium White, Coral/Salmon, Orange, Deep Red)
- Set of acrylic brushes (large flat brush, medium flat brush, fan brush, small detail brush)
- Water cup and palette (or paper plate)
- Painter’s tape or masking tape
- Easels (optional) or a large flat workspace
- Chalk or pencil
- Old toothbrush (for stars)
Step 1: Preparation and Layout
-
Arrange your canvas grid:
Lay out your six canvases on a flat surface in a 2-wide by 3-high grid, exactly how they will hang on the wall. Touching edges should be flush against each other for now. -
Mark the horizons:
Using chalk or a light pencil, sketch a continuous horizon line across the bottom two canvases, separating the sea from the sky. Lightly mark where the colors will transition from the sunset to the night sky on the upper canvases. -
Label the backs:
Flip the canvases over and number them on the back (e.g., Top-Left, Mid-Right) so you don’t lose track of their position once you start painting individual pieces.
Pro Tip: Seamless Flow
When blending colors across two adjacent canvases, push them together and paint across the gap simultaneously. Separating them immediately afterward prevents them from sticking.
Step 2: The Night Sky (Top Tier)
-
Mix the midnight hue:
On your palette, mix Navy Blue with a touch of Black to create a deep, dark indigo. Apply this to the top 2/3 of the top two canvases. -
Create the atmospheric fade:
While the indigo is still wet, mix in a little Phthalo Blue and Red to create a purplish transition color near the bottom of these top canvases. -
Blend downward:
Use a clean, damp large brush to blend the dark top section smoothly into the purplish hue at the bottom edge, hinting at the sunset to come below. -
Paint the edges:
Don’t forget to paint the sides of your canvases! Wrap the dark blue around the top and side edges for a finished, gallery-wrap look.
Step 3: The Sunset (Middle Tier)
-
Base coat the sky:
For the middle two canvases, mix a soft Coral or Salmon color with plenty of White. Paint the entire surface of these canvases with this base gradient. -
Intensify the colors:
Add touches of Orange and Deep Red near the bottom of these canvases, blending upward into the softer pinks. This creates the ‘golden hour’ glow. -
Connect the gradient:
Use a slightly darker, purplish-pink tone at the very top edge of these middle canvases so they will visually connect with the bottom of the night sky tier you just painted. -
Add cloud wisps:
Using a smaller flat brush and very little paint (dry brush technique), gently streak some purple-grey clouds horizontally across the pink sky.
Level Up: Metallic Pop
Mix a tiny amount of iridescent mixing medium or silver metallic paint into your white star paint. The stars will catch the light and glimmer as you walk past the wall.
Step 4: The Ocean (Bottom Tier)
-
Paint the deep sea:
On the bottom two canvases, paint the area below your horizon line with a mix of Phthalo Blue and a tiny bit of Black for a rich, deep ocean color. -
Establish the horizon:
Carefully paint the strip of sky right above the water using the same Orange/Coral mix from the middle tier, ensuring a sharp, straight line where water meets sky. -
Add wave motion:
Using a medium flat brush, add horizontal strokes of lighter blue and white into the water to suggest movement and depth.
Step 5: Details and Finishing
-
Splatter the stars:
Once the top tier is dry, dip an old toothbrush into watered-down Titanium White paint. Run your thumb over the bristles to flick tiny speckles onto the dark blue areas for a starry effect. -
Paint focal stars:
Use your smallest detail brush to hand-paint a few larger, four-pointed majestic stars. Place one prominently on the transition line between the blue and pink sections. -
Create the crashing wave:
On the bottom tier, use a fan brush or a scruffy round brush with pure White paint to dab in the foam of a crashing wave running horizontally across both canvases. -
Refine the foam:
Add a few thin, white lines trailing back from the foam into the deep water to show the pull of the tide. -
Final check:
Line up all six canvases again to ensure the colors flow logically from one panel to the next, touching up any disjointed areas before letting them dry completely.
Hang your masterpiece with about 2 inches of spacing between frames to complete the modern window-pane effect

PENCIL GUIDE
Understanding Pencil Grades from H to B
From first sketch to finished drawing — learn pencil grades, line control, and shading techniques.
Explore the Full Guide
Four-Season Tree Across Four Panels
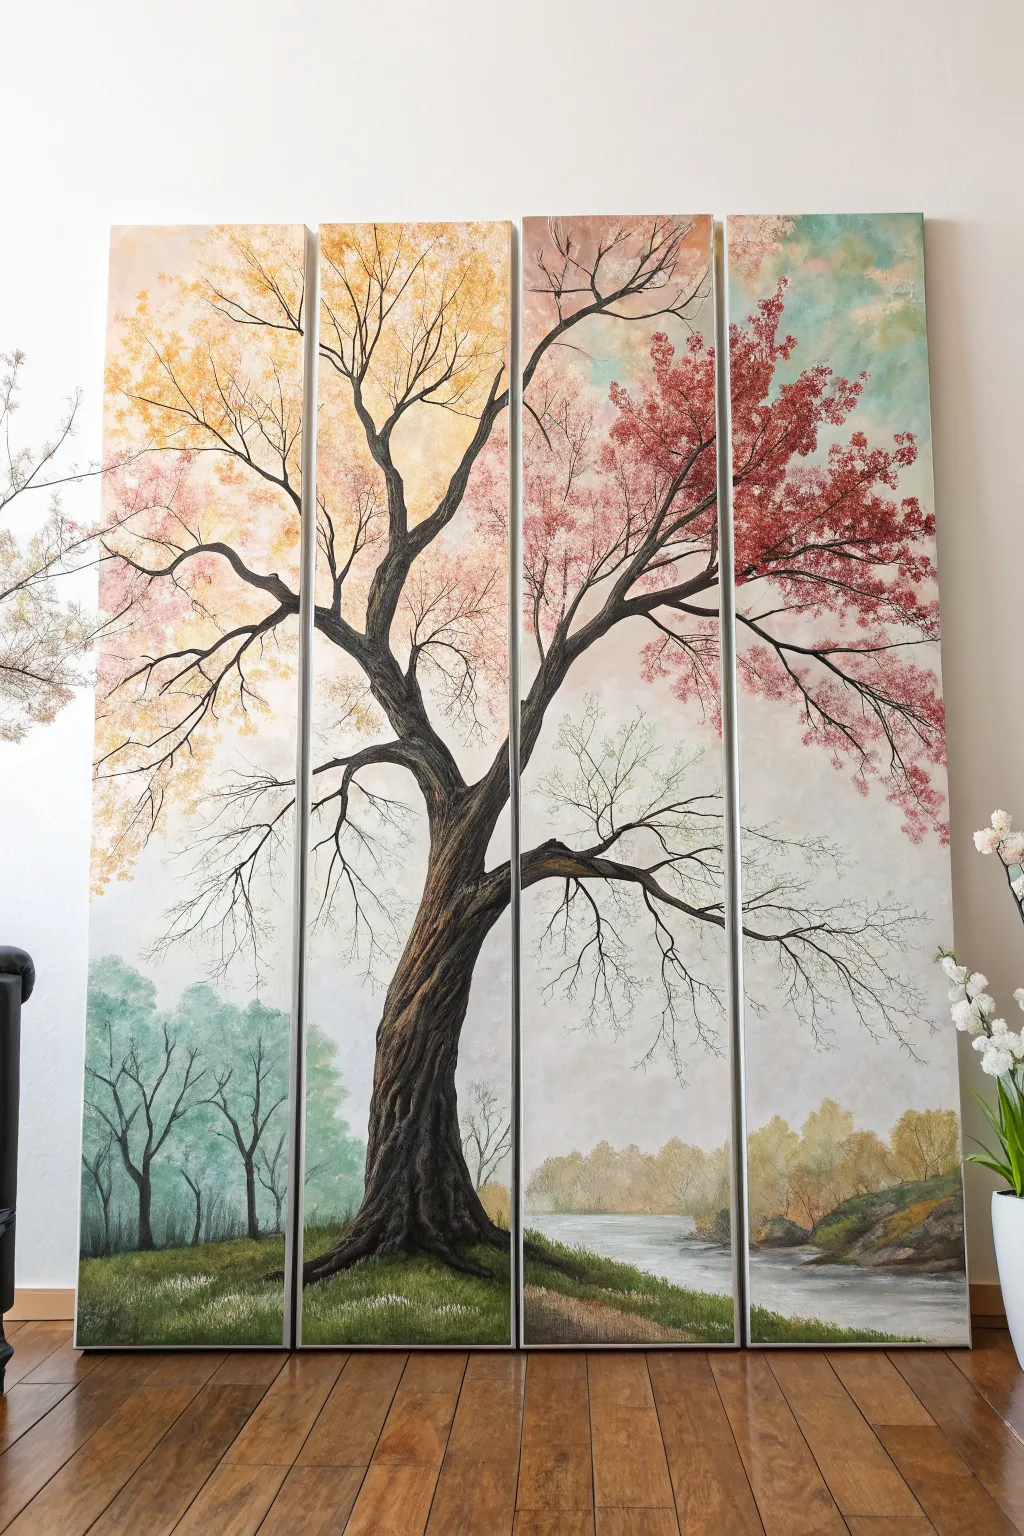
Create a stunning statement piece by spanning a single majestic tree across four distinct canvases, capturing the beauty of seasonal transitions. This project blends soft, atmospheric backgrounds with the sharp, textured details of gnarled bark for a sophisticated vertical landscape.
Step-by-Step Guide
Materials
- 4 large rectangular canvases (same size, e.g., 12×36 inches)
- Acrylic paints (Titanium White, Burnt Umber, Mars Black, Sap Green, Yellow Ochre, Cadmium Red, Alizarin Crimson, Phthalo Blue)
- Large flat brushes (2-inch and 1-inch)
- Medium filbert brush
- Small round liner brush or rigger brush
- Fan brush (optional)
- Sea sponge or stippling brush
- Easel or large flat work surface
- Palette and water container
- Chalk or pastel pencil for sketching
Step 1: Setting the Stage
-
Prepare the workspace:
Lay your four canvases side-by-side on the floor or mount them together on a large wall easel. Ensure there is a tiny gap (about 1cm) between them to account for the gallery wrap edge, but close enough to sketch a continuous line. -
Create the atmospheric sky gradient:
Mix Titanium White with a tiny touch of Phthalo Blue and Yellow Ochre. Using a large flat brush with plenty of water, paint the upper two-thirds of all canvases in a soft, washed-out gradient. Keep the tone very pale and neutral, hinting at blue sky peeking through clouds. -
Establish the ground layer:
On the bottom third, paint the grassy hill. Use Sap Green mixed with a little Burnt Umber for the foreground hill on the left two panels. As you move to the right panels, flatten the color into a more neutral ochre and grey for the distant riverbank. -
Paint the distant tree line:
Using a diluted mix of Sap Green and White, dab in faint, misty tree shapes in the background on the far left. On the far right panels, use Yellow Ochre and White to suggest autumnal trees in the distance. These should be soft and out of focus. -
Block in the river:
On the two right-hand panels, paint the river flowing horizontally. Use horizontal strokes of Grey mixed with Phthalo Blue and White. Keep the edges soft where the water meets the land.
Wrap It Around
Don’t stop painting at the front face! Continue your branches, sky, and grass onto the sides (gallery wrap edges) of the canvas. This makes the art look finished from every angle without a frame.
Step 2: Constructing the Tree
-
Sketch the skeleton:
With a piece of chalk, lightly draw the main trunk starting heavily in the second panel from the left. Extend the branches outward so they reach into the far left and far right panels. The composition relies on these reaching limbs connecting the separate pieces. -
Base coat the trunk:
Fill in your trunk sketch with a solid coat of Burnt Umber mixed with a touch of Black. Don’t worry about texture yet; just establish the silhouette and the heavy, twisting shape of the main trunk. -
Highlighting the bark texture:
Mix a lighter brown using Burnt Umber and White. Using a filbert brush, paint vertical, twisting strokes up the trunk to mimic deep grooves in the bark. I find it helpful to follow the natural curve of the tree to emphasize its gnarled age. -
Deepening the shadows:
Take nearly pure Mars Black on a smaller brush and reinforce the darkest crevices of the bark, particularly on the shadowed side of the trunk and under the main branch splits. -
Refining the smaller branches:
Switch to your liner or rigger brush. With thinned dark brown paint, extend fine, twig-like branches off the main limbs. Let your hand shake slightly to create natural, organic lines rather than perfect straight ones.
Step 3: Applying the Foliage
-
Left panels: Spring and Summer:
Starting on the far left panel, use a sea sponge or stippling brush to dab Yellow Ochre and White for bright, fresh growth. As you move toward the second panel, introduce faint touches of pale pink. -
Right panels: Autumn transition:
On the third and fourth panels, transition your foliage color palette. Mix Alizarin Crimson with White for pinkish-red tones, and Cadmium Red for bolder accents. Sponge these clusters near the ends of the right-side branches. -
Create depth in the leaves:
Go back over your sponge clusters with a darker shade of the same color (e.g., deep red on the right, dark yellow-green on the left) near the bottom of each leaf cluster to suggest shadow and volume. -
Add floating leaves:
Use a small round brush to dab individual dots of color drifting away from the main branches, especially on the outer edges of the far left and right canvases. This breaks up the solidity of the clumps. -
Detail the ground foliage:
On the bottom foreground of the left panels, use a fan brush with Sap Green to flick upward, creating blades of grass. Add tiny dots of white to represent small wildflowers in the grass. -
Final atmosphere check:
Once everything is dry, you can optional apply a very thin glaze of water and white paint over the distant river area to push it further into the background.
Season Shift
To emphasize the seasonal theme, you can make the ground underneath the tree change too—green grass on the left panel fading into fallen red and orange leaves on the far right panel.
Hang your panels with consistent spacing to watch your seasonal landscape come to life across your wall
Moon Phases Marching Across a Split Set
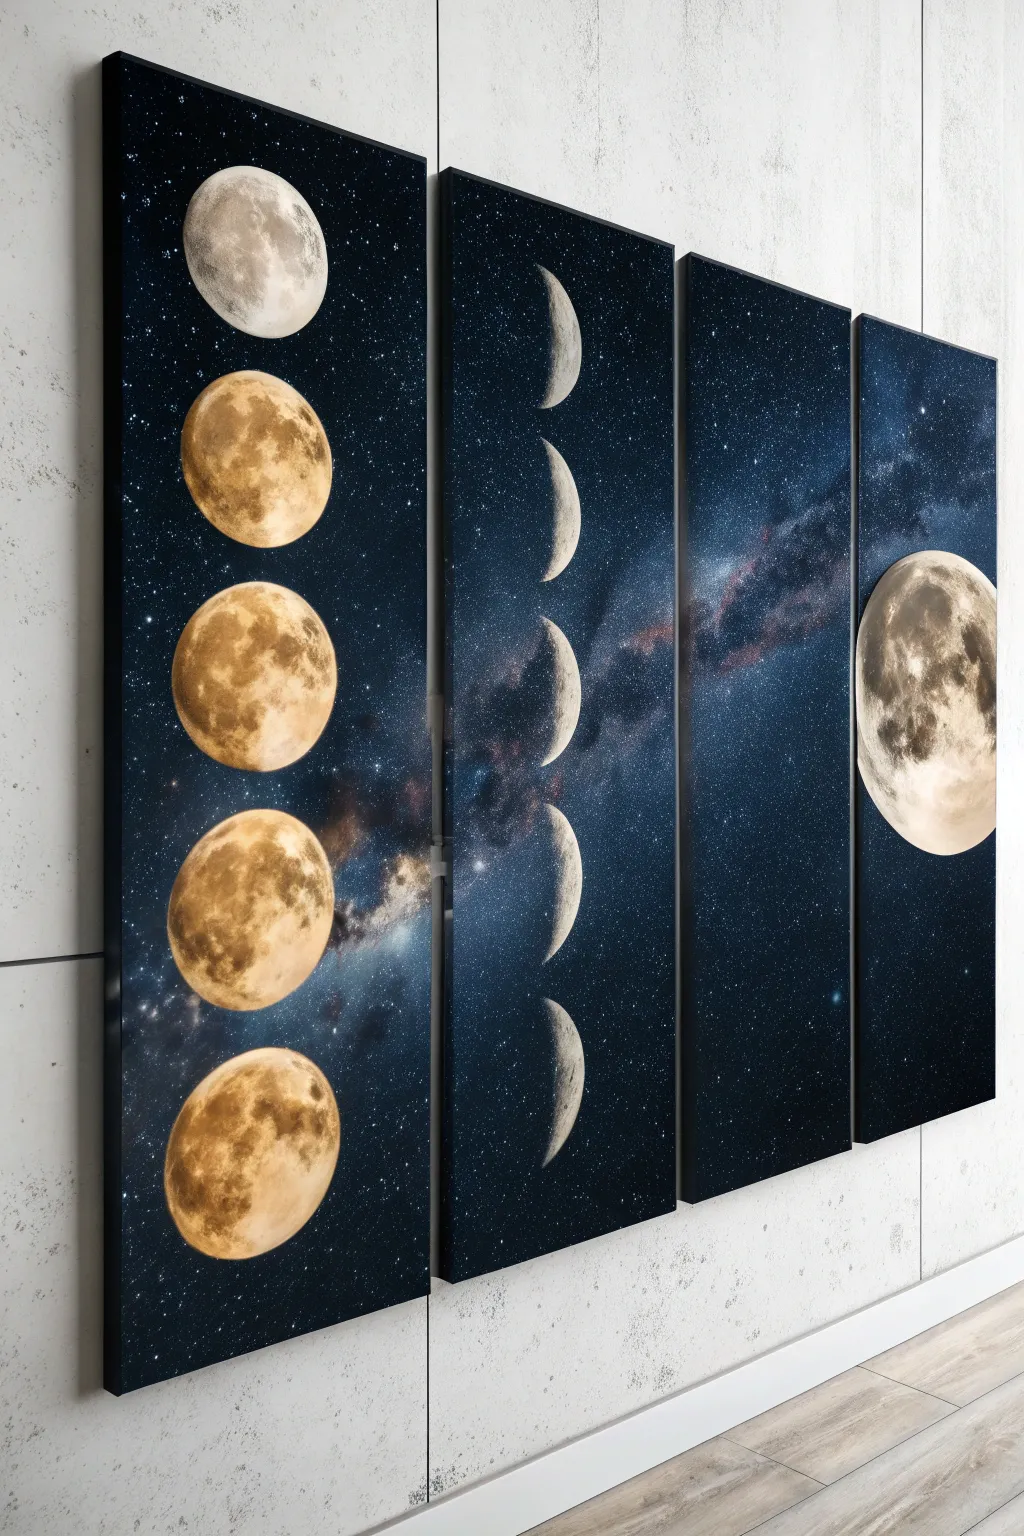
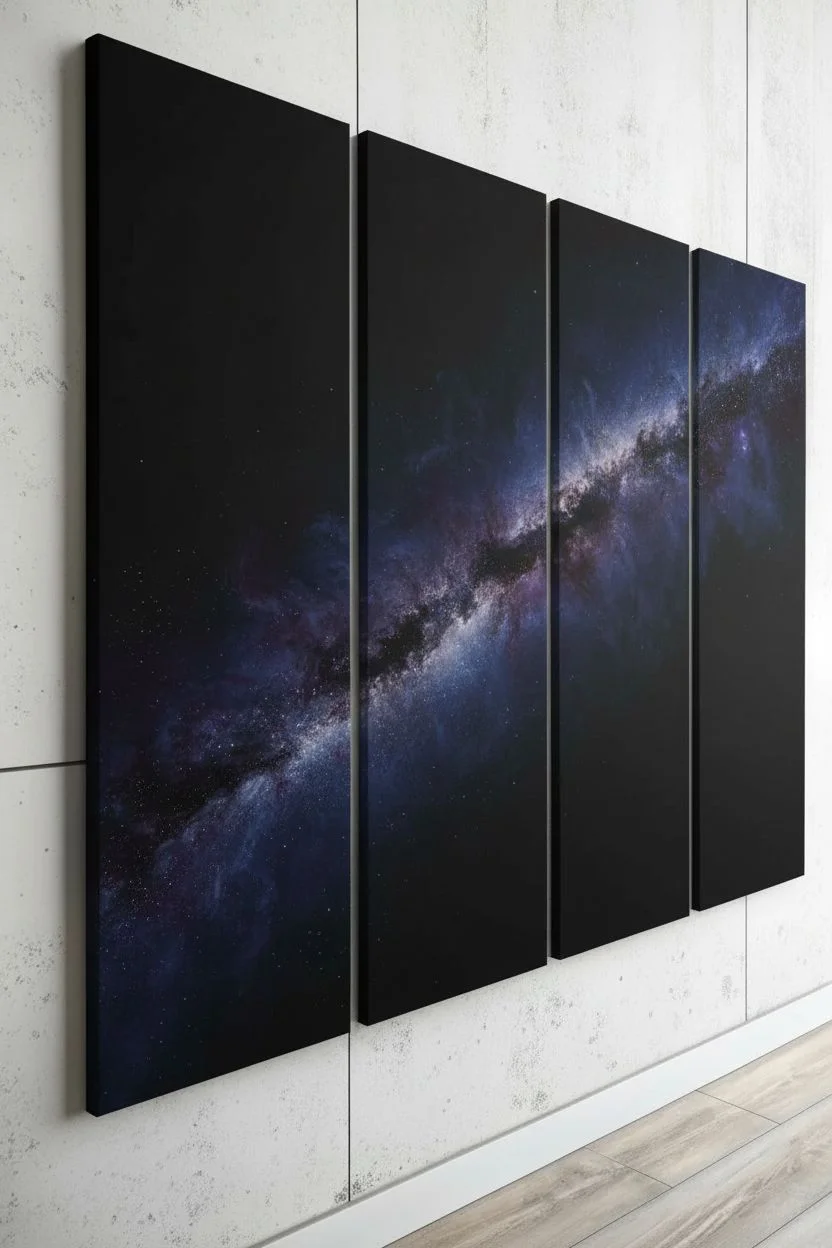
Capture the mystic beauty of the lunar cycle with this stunning four-piece wall art set. By combining deep space backgrounds with detailed moon painting techniques, you will create a modern, high-impact focal point for any room.
Step-by-Step Tutorial
Materials
- 4 stretched canvases (tall and narrow, e.g., 10×30 inches)
- Acrylic paints: Black, Pthalo Blue, Dioxazine Purple, Titanium White, Raw Sienna, Burnt Umber, Yellow Ochre
- Large flat brush (2-inch)
- Medium round brush
- Small liner brush
- Old toothbrush (for stars)
- Circular stencils or compass
- Chalk or pastel pencil
- Glazing medium
- Mixing palette
- Masking tape or painter’s tape
Step 1: Preparing the Void
-
Surface Preparation:
Begin by laying out all four canvases side-by-side on your work surface, leaving a small gap (about an inch) between them. This ensures your background flows seamlessly across the split. If the canvas surfaces feel rough, give them a light sanding before you start. -
Base Coat Application:
Mix a generous amount of Black with a touch of Pthalo Blue. Using your large flat brush, cover all four canvases completely. Don’t forget to paint the sides and edges for a professional, gallery-wrapped look. -
Building Atmosphere:
While the black is still slightly tacky, mix Dioxazine Purple and Pthalo Blue with a little glazing medium. Apply this in irregular patches across the center of the panels to create the subtle nebula clouds found in deep space. -
Creating the Milky Way:
Load a dry brush with a tiny amount of Titanium White and wipe most of it off. Gently scumble (rub) a diagonal hazy line across the middle two panels, connecting the purple areas. This creates the dusty backbone of the galaxy.
Step 2: Mapping the Moons
-
Planning Positions:
Let the background dry completely. Using chalk and your circular stencils or a compass, lightly outline five circles vertically on the far-left panel. These should be evenly spaced. -
Aligning the Phases:
On the second panel, mark five crescent shapes that correspond horizontally with the circles on the first panel. I prefer to sketch a full circle first and then erase the part I don’t need to ensure the curve is accurate. -
The Solitary Giant:
On the far-right panel, outline one large, dominant full moon near the center. This moon serves as the visual anchor for the composition. -
Starry Background:
Before painting the moons, create the stars. Dilute Titanium White with water until it’s inky. Dip an old toothbrush into the mix and flick the bristles to create a spray of fine stars across all panels. Let the stars dry completely.
Uneven Spacing?
If your sketched moons look wobbly or unevenly spaced, use a ruler to mark a vertical centerline down the canvas. Center your stencil on this line for perfect vertical alignment.
Step 3: Painting the Lunar Surface
-
Underpainting the Moons:
Mix Titanium White with a dot of Raw Sienna. Fill in all your traced moon shapes with this off-white base coat to block out the dark background. -
Texturing the Grey Moon:
For the top-left moon and the large right-side moon, mix White with a tiny bit of Black to make a light grey. Sponge or dab this color on to create craters and maria (the dark plains), keeping the brightest white at the edges. -
The Golden Moons:
For the lower moons on the left panel, we want a warm, harvest-moon look. Mix Yellow Ochre, Raw Sienna, and White. Apply this mixture, stippling darker Raw Sienna into the ‘crater’ areas while the paint is wet. -
Adding Depth:
On the golden moons, mix a thin glaze of Burnt Umber. Lightly brush this over the shadowed areas to deepen the brown tones, giving the spheres a 3D effect. -
Highlighting:
Using your smallest brush and pure Titanium White, add tiny dots and distinct rim lighting to the craters on all moons. This sharp contrast makes the surface look rocky and realistic. -
Painting the Crescents:
Move to the second panel. Paint the magnificent crescents using the same grey-white mixture as the top moon. Keep the inner edge of the crescent soft and feathery where it fades into the shadow, rather than a hard line.
Level Up: Glow in the Dark
Mix phosphorescent medium with your final white highlights. The moons and brightest stars will charge during the day and softly illuminate when the lights go out.
Step 4: Final Details
-
Enhancing the Glow:
Once the moons are dry, create a very thin wash of White (mostly water). Gently glaze around the large moon on the right panel to give it a soft atmospheric glow. -
Reviewing Continuity:
Line the canvases up again. Check that your diagonal galaxy cloud flows naturally from panel to panel behind the moons. If there’s a break, lightly dry-brush more white mist to connect them. -
Varnishing:
Allow the paintings to cure for at least 24 hours. Apply a coat of satin or gloss varnish to deepen the black background and protect the paint surface.
Hang your panels with slight spacing to let your personal galaxy expand across the wall


Botanical Vine Crawling Through the Gaps

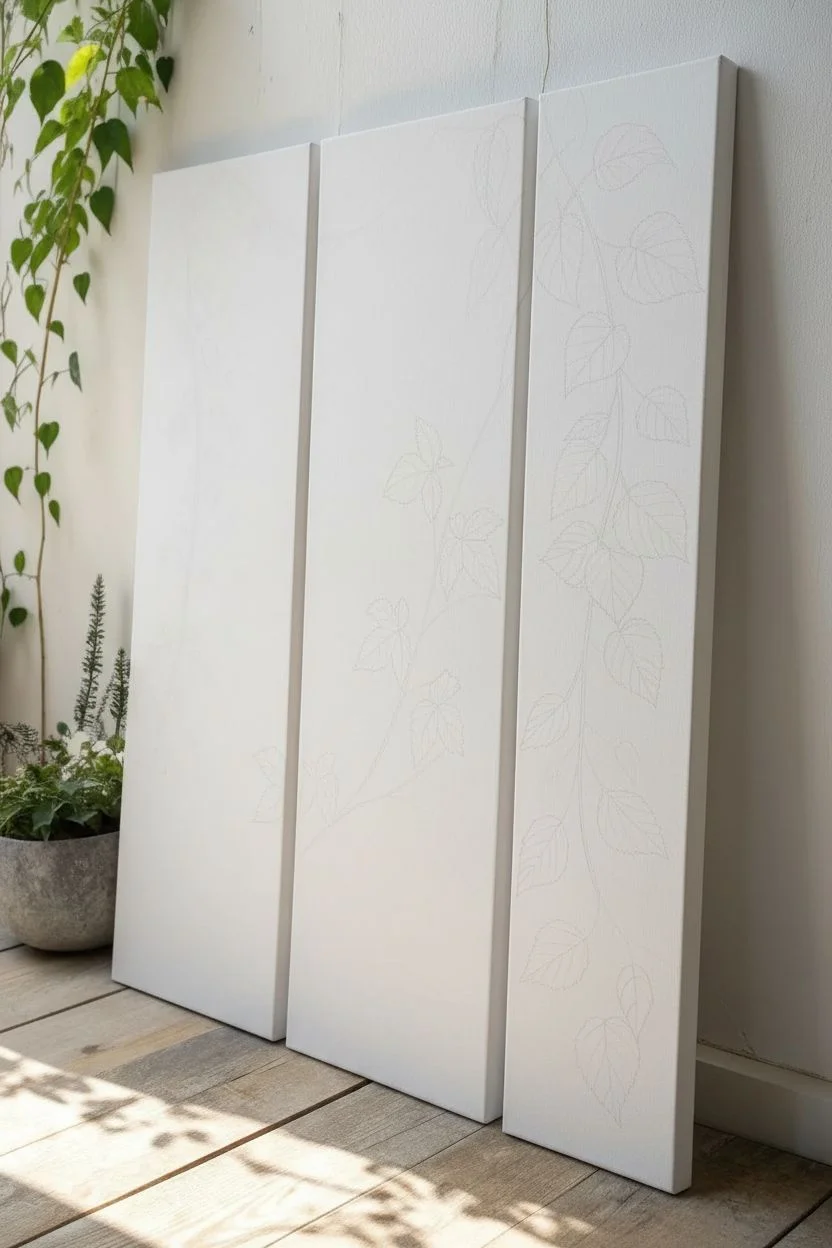
Bring the outdoors in with this elegant triptych painting, where delicate vines and leaves appear to grow continuously across three separate panels. The design features a mix of broad, serrated leaves and dainty white blooms on a clean white background, creating a fresh, airy aesthetic perfect for a vertical wall space.
How-To Guide
Materials
- 3 narrow, vertical canvases (e.g., 10×30 inches each)
- White acrylic gesso (if canvases aren’t pre-primed)
- Acrylic paints: Titanium White, Sap Green, Hooker’s Green, Burnt Umber, Yellow Ochre, Alizarin Crimson
- Synthetic brushes: Round #2, Round #6, and a fine liner or rigger brush
- Pencil (HB or H) for sketching
- Eraser
- Palette and water cup
- Paper towels
- Easel or flat work surface
Step 1: Preparation and Sketching
-
Prime the Surface:
Even if your canvases are pre-primed, apply a fresh coat of white gesso to all three canvases to ensure a smooth, uniform texture. Let this dry completely before moving forward. -
Align the Triptych:
Lay the three canvases side-by-side on your workspace or an easel, leaving a small gap (about 1 inch) between them to simulate how they will hang on the wall. This is crucial for planning the visual flow. -
Plan the Vine Flow:
Lightly sketch the main stems with a pencil. Start the stems from the top right, cascading down and splitting towards the left. Imagine the vine ‘jumping’ across the gaps; draw the line stopping at one edge and continuing on the next canvas at the same height. -
Sketch the Foliage:
Add leaf shapes along the vines. On the right panel, draw larger, birch-like leaves with serrated edges. In the center, sketch lobed leaves resembling currants or maple, along with a few daisy shapes. On the left panel, keep the leaves smaller and more delicate, adding tiny trailing vines.
Step 2: Painting the Structure
-
Paint the Stems:
Mix Burnt Umber with a touch of White and maybe a tiny bit of Green to create a soft, woody brown. Using your fine liner or rigger brush, paint the stems following your pencil lines. Vary the pressure to make the stems slightly thicker near the top and wispy at the ends. -
Base Coat the Leaves:
Mix a mid-tone green using Sap Green and a little Yellow Ochre. With the #6 round brush, fill in the leaf shapes. Don’t worry about perfect coverage yet; a little translucency adds to the botanical watercolor look. -
Add Leaf Details:
While the green is still slightly tacky, mix a darker green (Hooker’s Green + tiny bit of Burnt Umber). Use the #2 round brush to paint the veins and serrated edges on the birch leaves (right panel) and the lobed leaves (center). -
Highlight the Leaves:
Mix a pale, lime green by adding more Yellow Ochre and White to your base green. Add small strokes on the upper edges of the leaves to suggest light hitting the foliage.
Uneven Lines?
If your vine lines look shaky, dilute your paint slightly with water or flow medium until it has an ink-like consistency. This helps the liner brush glide smoothly.
Step 3: Flowers and Refinements
-
Base the White Flowers:
For the daisy-like flowers on the center panel, mix Titanium White with a tiny drop of Yellow Ochre (just to warm it up, so it’s not stark white). Paint the petals using long, teardrop strokes radiating from a center point. -
Paint Flower Centers:
Once the petals are dry, use pure Yellow Ochre or mix it with a dot of Burnt Umber to stipple distinct centers into the white flowers. This adds texture and realism. -
Add Pink Accents:
On the far left panel and bottom center, paint the small floral buds. Mix Alizarin Crimson with plenty of White to get a soft baby pink. Paint simple, round shapes for these delicate blooms. -
Detail the Small Vines:
Switch back to your liner brush with a light olive green mix. Add the very fine, spiraling tendrils and tiny leaves on the left panel. These should look almost like lace against the white background. -
Refine the Edges:
Check the edges of the canvases where the image splits. Ensure the paint wraps slightly around the side edge if you aren’t framing them, or simply ends cleanly at the corner. -
Final Highlights:
With a very dry brush and almost pure Titanium White, add tiny highlights to the tips of the leaves and the centers of the pink flowers to make them pop. -
Erase and Seal:
Once the paint is thoroughly dry (give it at least 24 hours), gently erase any visible pencil marks. If desired, apply a matte varnish to protect the surface without adding unwanted gloss.
Add 3D Texture
Mix modeling paste into your white acrylic before painting the daisy petals. Use a palette knife to apply it for raised, impasto flowers that stand out from the canvas.
Hang your panels with consistent spacing to see your garden grow across the wall
Waterfall Flowing Across Three Canvases
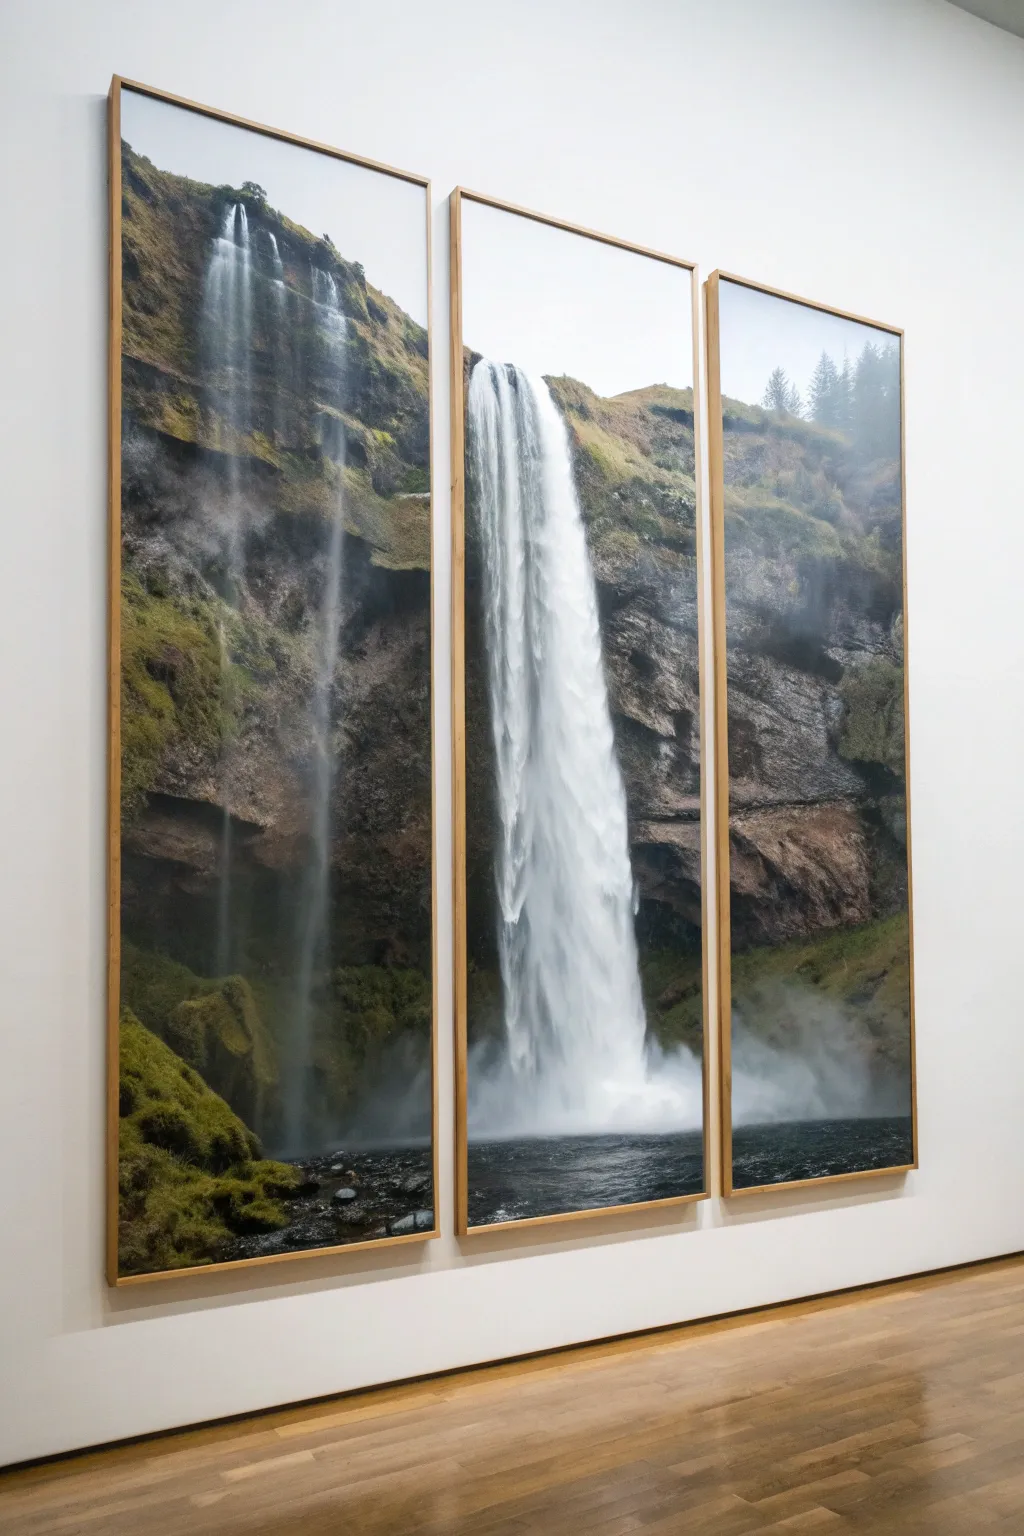
Bring the grandeur of nature indoors with this stunning split-panel waterfall display. This project transforms a single high-resolution image into a cohesive triptych that creates a window-like effect on your wall.
Step-by-Step Guide
Materials
- High-resolution digital photo of a waterfall (tall portrait orientation works best)
- Three large canvases or foam core boards (e.g., 24×60 inches each)
- Light oak or pine strip wood (for custom framing)
- Spray adhesive (heavy duty)
- Sharp crafting knife or rotary cutter
- Metal ruler/straight edge
- Cutting mat
- Wood glue
- Fine-grit sandpaper
- Saw (miter or hand saw)
- Corner clamps (optional but helpful)
- Hanging hardware
Step 1: Planning and Printing
-
Select the perfect image:
Choose a high-resolution vertical photo of a waterfall. A vertical shot is crucial because you will be splitting it across three tall, narrow panels. -
Measure your wall space:
Determine the total size relative to your wall. Remember to account for the gaps between the frames—usually 2-3 inches—so the image flows visually across the breaks. -
Edit and crop:
Using photo editing software, crop your image into three equal vertical strips. Ensure the resolution remains high (at least 300 DPI) for large-format printing. -
Order prints:
Have these strips printed professionally on high-quality matte or satin photo paper. Order them slightly larger than your backing boards to allow for trimming.
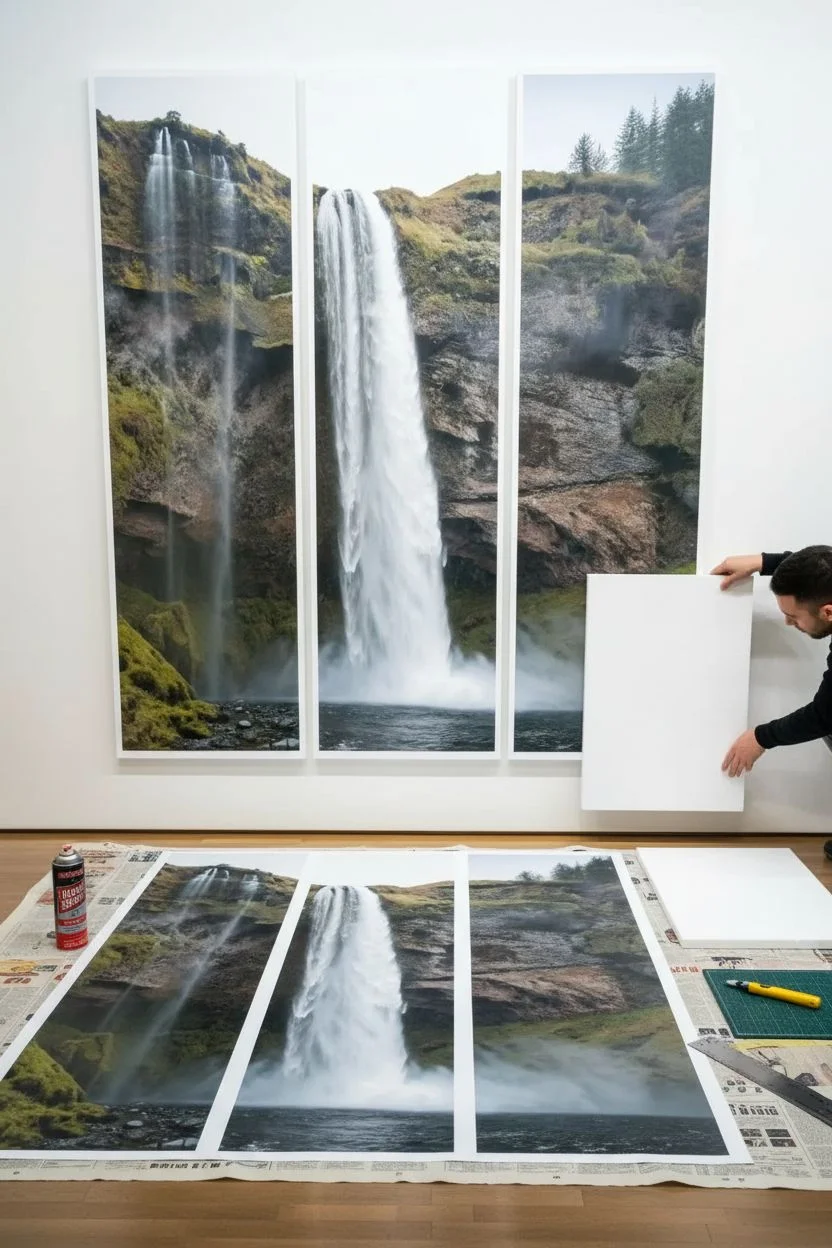
Step 2: Mounting the Artwork
-
Prepare the workspace:
Lay down a drop cloth or old newspapers in a well-ventilated area, as spray adhesive fumes can be strong. -
Clean the backing boards:
Wipe down your foam core or canvas panels to ensure no dust or debris gets trapped under the photo. -
Apply adhesive:
Spray a generous, even layer of heavy-duty spray adhesive onto the first backing board. I usually wait about 30 seconds for it to become tacky. -
Position the print:
Carefully align the top edge of your first print with the top of the board. Gently smooth it down from the center outward to prevent air bubbles. -
Secure the edges:
Press firmly along all edges to ensure a permanent bond. Repeat the mounting process for the remaining two panels. -
Trim the excess:
Flip the mounted panels face down on a cutting mat. -
Cut cleanly:
Using a fresh blade on your craft knife and a metal ruler, trim any overhanging paper flush with the board’s edge.
Alignment Check
If the waterfall doesn’t line up perfectly across the gap, don’t worry. Our eyes naturally ‘fill in’ the missing space, so slight misalignments often disappear once hung.
Step 3: Creating the Floating Frames
-
Measure frame pieces:
Measure the height and width of your mounted panels. You’ll need two long side pieces and two shorter top/bottom pieces for each panel. -
Cut the wood strips:
Cut your thin oak or pine strips to length. Miter the corners at 45 degrees for a professional look, or use simple butt joints for a rustic feel. -
Sand and smooth:
Lightly sand the cut edges and the surface of the wood to remove splinters and prep for finishing. -
Assemble the frames:
Glue the wood strips directly onto the sides of the foam core or canvas (or build a frame around it). Use corner clamps to hold everything square while the glue dries. -
Install hardware:
Attach sawtooth hangers or wire to the back of each frame. Ensure they are measured at the exact same height on each panel for perfect alignment. -
Hang and enjoy:
Mount the panels on the wall, leaving a 1-to-2-inch gap between them to create that distinctive split-view effect.
Add Texture
For a painterly look, apply a layer of clear acrylic gel medium over the prints with a stiff brush, following the direction of the water flow.
Step back and admire how the split perspective adds movement and drama to your space
Desert Dunes as a Wide Split Panorama

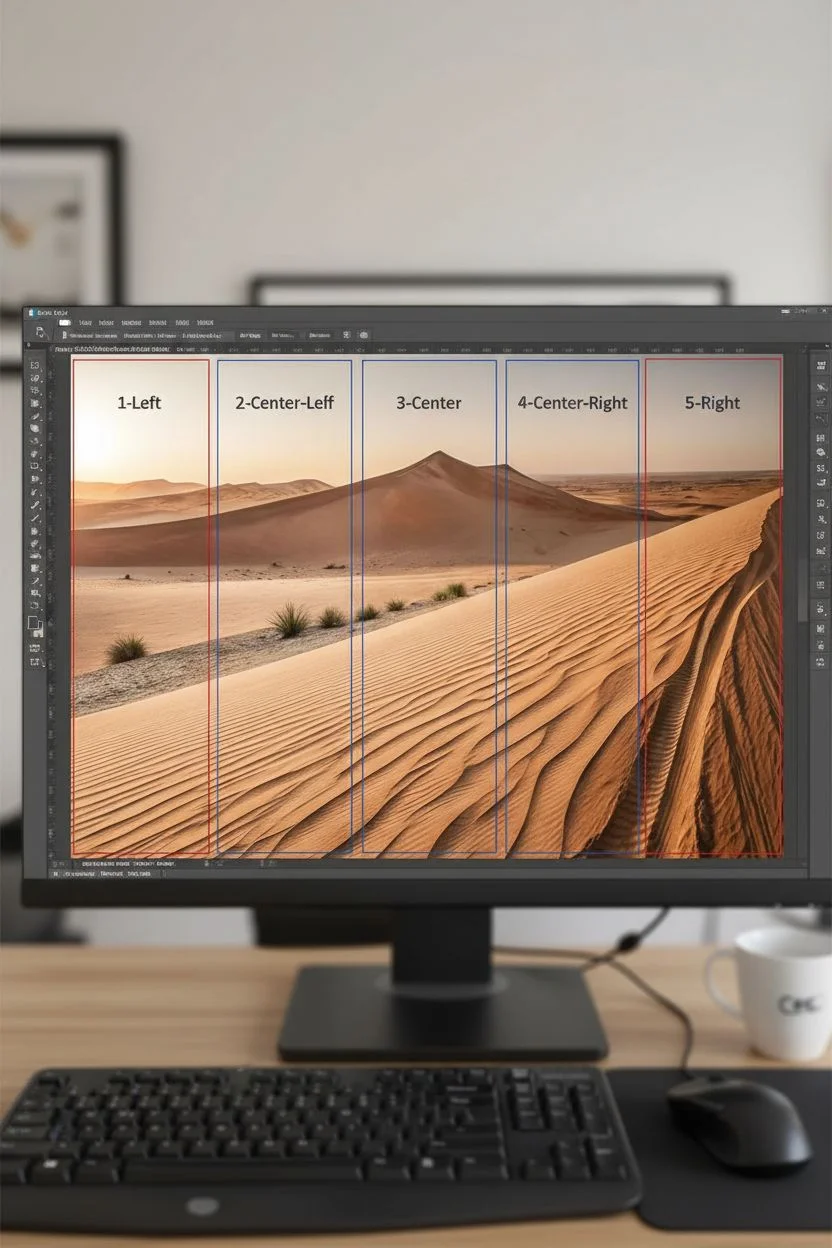
Bring the warmth and vastness of the Sahara into your living space with this striking five-panel split artwork. This project transforms a single high-resolution landscape photo into a monumental architectural statement that plays with perspective and depth.
Step-by-Step Tutorial
Materials
- High-resolution desert landscape digital image
- 5 Gallery-wrapped blank canvases (tall vertical orientation, e.g., 12×36 inches)
- Photo transfer medium (or access to a large format printer)
- Matte finish clear coat spray
- Laser level
- Pencil and measuring tape
- Heavy-duty mounting tape or Z-clips
- Craft knife and metal ruler
- Computer with image editing software (Photoshop or GIMP)
Step 1: Digital Preparation & Sizing
-
Measure your wall space:
Before touching the computer, measure the total wall area you want to cover. Remember to account for a 1-2 inch gap between each of the five panels to create that airy, window-like effect. -
Crop and divide the image:
Open your desert photo in your editing software. Crop the image to a wide panoramic ratio that matches your total wall dimensions. I find it helpful to use the ‘rulers’ tool to mark exactly where the cuts will be. -
Account for the wrap:
If you are wrapping the image around the edges of the canvas, add approximately 1.5 to 2 inches of ‘bleed’ area to every side of each individual slice. If the image doesn’t have enough data for this, you can mirror the edges or choose solid color sides. -
Export the files:
Save each of the five slices as a separate, high-quality TIFF or JPG file. Label them strictly from ‘1-Left’ to ‘5-Right’ to avoid confusion later.
Step 2: Creating the Panels
-
Print the segments:
Send your five files to a professional canvas printer for the best results, or print them on high-quality paper if you plan to decoupage them onto existing canvases. -
Align the print:
If mounting paper prints yourself, lay the first canvas face down on the back of the print. Ensure the image is perfectly centered so the horizon line will match its neighbor. -
Adhere the image:
Apply a thin, even layer of spray adhesive or gel medium to the canvas face. Press it firmly onto the print, smoothing from the center outward to banish any air bubbles. -
Wrap the edges:
Fold the excess paper or canvas over the wooden frame bars. Treat the corners like a present—tucking them neatly for a sharp 90-degree angle—and secure them with a staple gun on the back. -
Seal the surface:
Once assembled, take the panels outside and apply a coat of UV-resistant matte clear spray. This protects the desert tones from fading in sunlight and reduces glare.
Uneven Gaps?
Cut a scrap piece of wood to your exact gap width (e.g., 1.5 inches). Use this ‘spacer block’ between panels while hanging to guarantee perfect spacing without measuring tape errors
Step 3: Installation Alignment
-
Determine the center point:
Find the dead center of your wall space. This is where the middle of the third (central) panel will hang. -
Mark the horizon line:
Decide on the perfect eye level height (usually 57-60 inches from the floor) and use a laser level to project a horizontal guide across the entire width of the installation area. -
Hang the center panel:
Install the middle panel first. Use your level to ensure it is perfectly plumb vertical. -
Install outward:
Moving to the left and right panels, use a spacer block (a small piece of wood cut to exactly 1.5 inches) to ensure the gap between canvases is identical every time. -
Verify the flow:
Step back frequently to check that the dune lines and horizon flow seamlessly across the gaps. Small adjustments now prevent crooked hills later. -
Secure the bottom corners:
For tall, narrow panels like these, use a small loop of painter’s tape or a command strip at the bottom corners to keep them vanishingly flat against the wall.
Add Dimension
Mount the canvases on spacer blocks or French cleats to float them 1 inch off the wall. This creates a drop shadow behind the panels, adding architectural depth to the display
Step back and admire how the split view transforms your wall into a window overlooking the golden sands
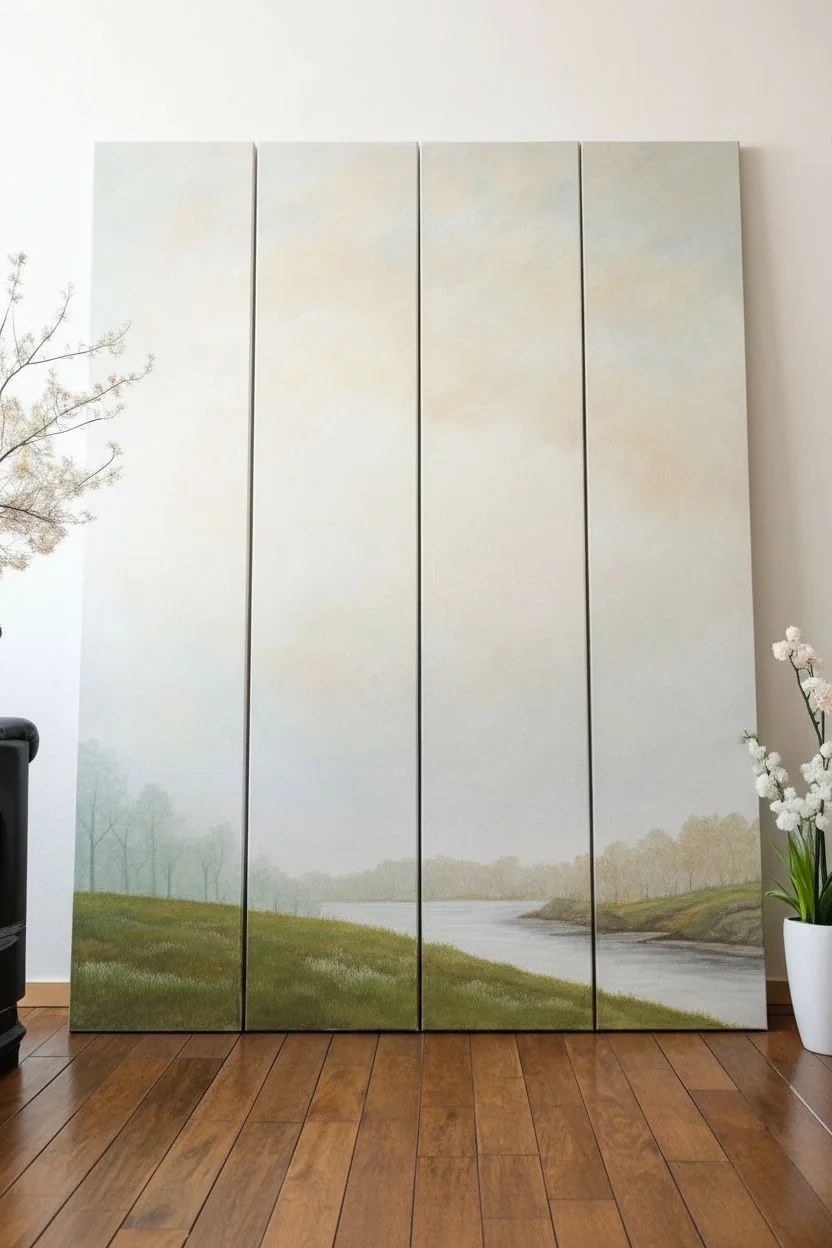
Misty Forest Layers in a Triptych
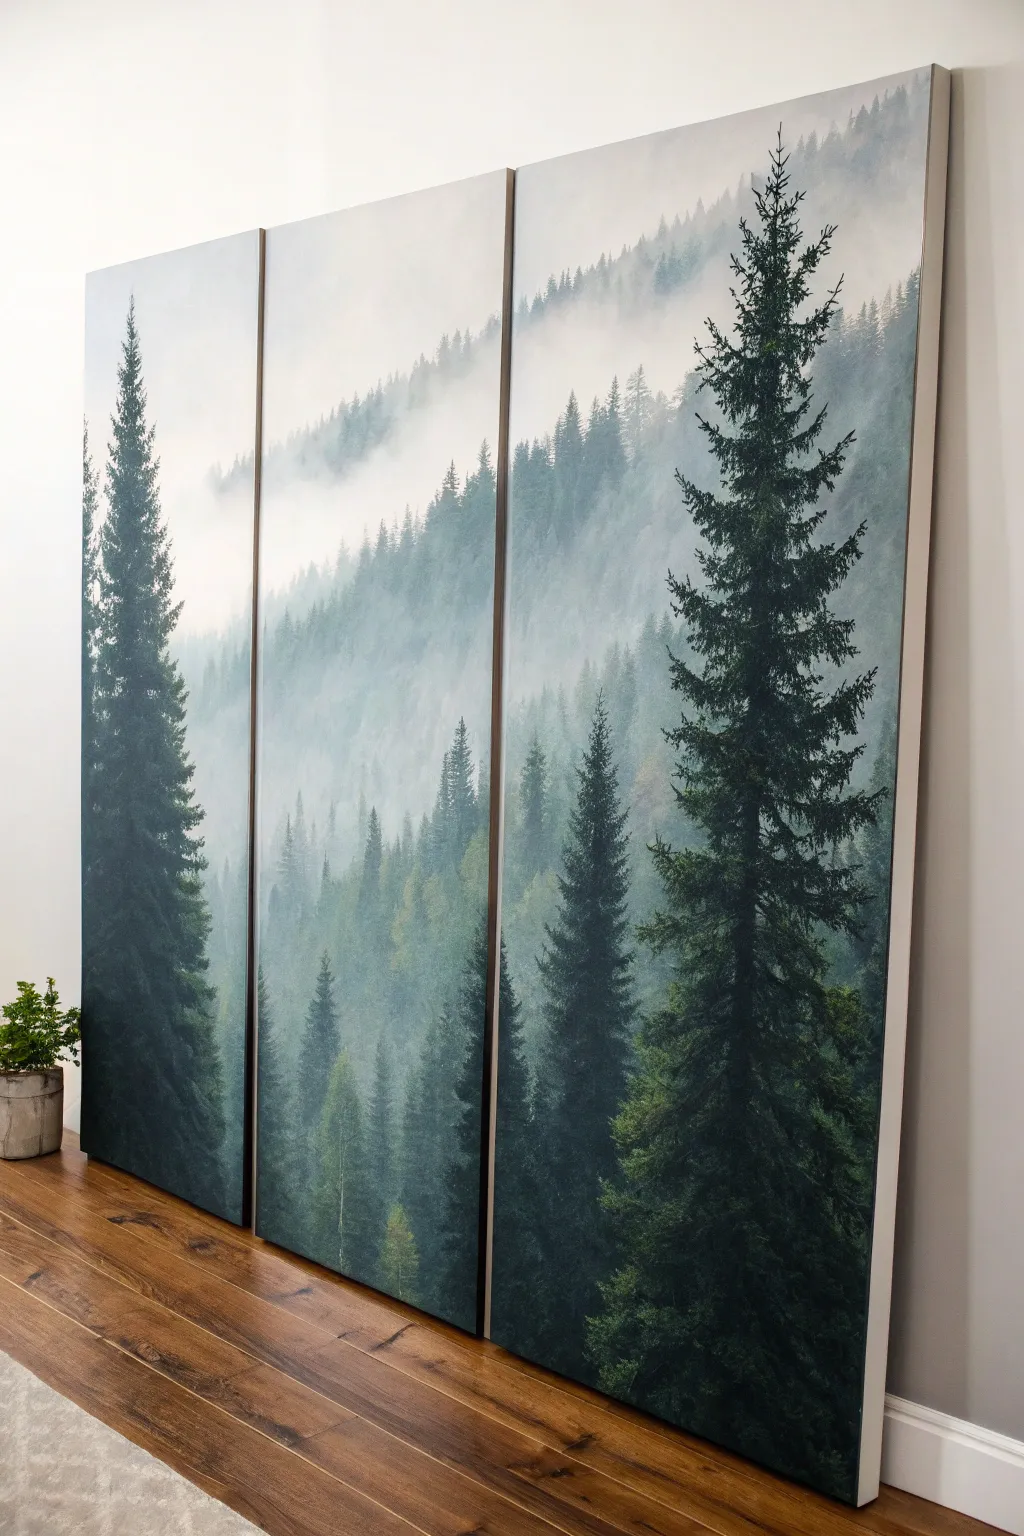
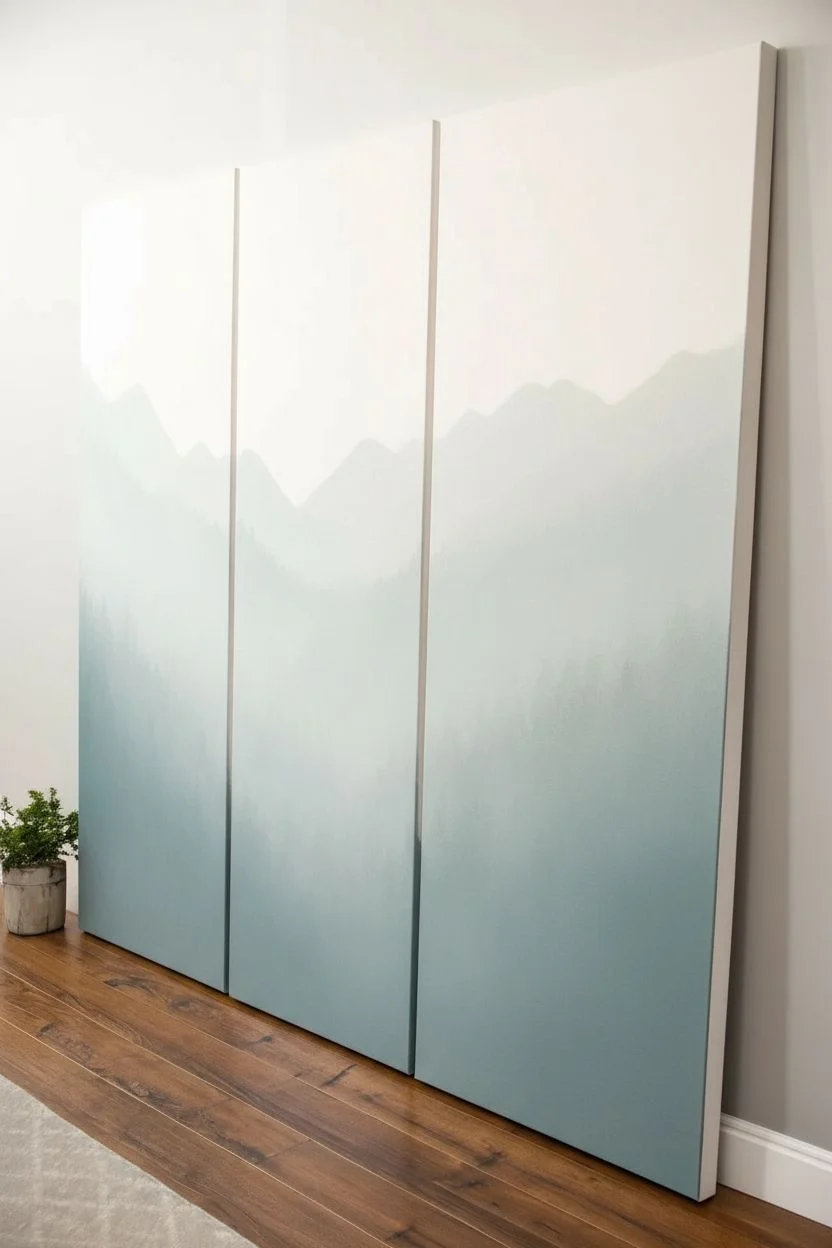
Capture the serene silence of a mountain forest with this atmospheric three-panel painting. Using simple layering techniques and glazing, you will create depth that makes the trees feel like they are fading into a thick, cool fog.
How-To Guide
Materials
- Three tall, narrow canvases (e.g., 12×36 or 15×45 inches each)
- Acrylic paints: Titanium White, Mars Black, Phthalo Green, Hooker’s Green, Burnt Umber
- Acrylic glazing medium
- Large flat brush (2-inch)
- Fan brushes (various sizes)
- Small round detail brush
- Natural sea sponge
- Palette knife
- Easels or flat table workspace
Step 1: Setting the Atmosphere
-
Canvas Alignment:
Push all three canvases together so they touch side-by-side. You want to paint the background as if it is one single surface to ensure the horizon lines and gradients match perfectly. -
Mixing the Fog:
Create a large amount of ‘fog grey’ by mixing Titanium White with a tiny dot of Mars Black and a whisper of Phthalo Green. It should be very pale, almost white. -
Gradient Base:
Using your large flat brush, paint the upper third of all three canvases with pure Titanium White. While wet, blend your fog grey into the middle and lower sections, creating a smooth, soft gradient. -
Distant Ghost Ridges:
Mix a slightly darker grey-green. Using a dry brush or a sponge, lightly tap in the silhouette of a distant mountain ridge across the center of the composition. Keep edges soft and blurry.
Don’t Bridge the Gap
When painting across the gap, don’t try to paint the ‘missing’ inch of air between canvases. Simply stop the brush stroke at one edge and resume it on the next canvas for a cleaner look.
Step 2: Building the Forest Layers
-
The Faint Background Trees:
Mix a pale, hazy green (lots of white, little green). Using a small fan brush, lightly tap in vertical tree shapes along the distant ridge line. These should lack detail, appearing as mere shadows in the mist. -
Creating Depth with Mist:
Once the background trees are dry, mix glazing medium with a little white paint. Lightly wash over the bottom half of these trees to make them look like they are sinking into deep fog. -
Mid-Ground Layer:
Mix a medium forest green tone. On the middle and left panels, paint a layer of trees that is slightly lower and larger than the background ones. Use the corner of the fan brush to create pine branches. -
Softening the Mid-Ground:
Before the paint fully dries, take a crumpled paper towel or dry sponge and gently dab the bottom of these trees to diffuse them into the white fog below. -
Separating the Canvases:
Now, separate the canvases by an inch or two. This helps you focus on the composition of each individual panel while checking that the flow remains consistent across the gaps.
Level Up: Floating Frames
To elevate the modern aesthetic, install these canvases into simple, light wood floating frames. The natural wood tone complements the forest greens without overpowering the misty vibe.
Step 3: The Foreground Giants
-
Mixing Deep Shadows:
Create your darkest value by mixing Phthalo Green, Mars Black, and a touch of Burnt Umber. This deep, rich color will bring the main trees forward. -
The Dominant Right Tree:
On the far right panel, use a flat brush to paint a straight vertical line for the trunk of the largest foreground tree, extending from the bottom almost to the top edge. -
Foliage Texture:
Load a large fan brush with the dark mixture. Starting at the top of the trunk, tap the brush horizontally, rocking it back and forth to create irregular pine boughs that get wider as you go down. -
The Left Anchor:
Repeat this process on the left panel, creating a tall, dark tree that balances the composition. I like to make this one slightly shorter or thinner than the right-hand giant for variety. -
Foreground Details:
Switch to your small round brush. Add sharp, distinct branches sticking out from the main dark trees. These crisp details contrast beautifully with the blurry background. -
Final Mist Pockets:
Dip a dry sponge into pure Titanium White (remove most paint first). Lightly dab ‘clouds’ of mist drifting between the foreground giants and the mid-ground trees to enhance the 3D effect. -
Edge Painting:
Paint the sides of each canvas (the depth edges). Use dark green for the bottom half and fade to white at the top to match the artwork. This gives a professional ‘gallery’ finish. -
Varnish:
Once fully cured (wait 24 hours), apply a satin varnish to unify the sheen of the darks and lights.
Hang your panels with about two inches of space between them and enjoy your serene mountain escape.
Koi Fish Swimming Through a Diptych
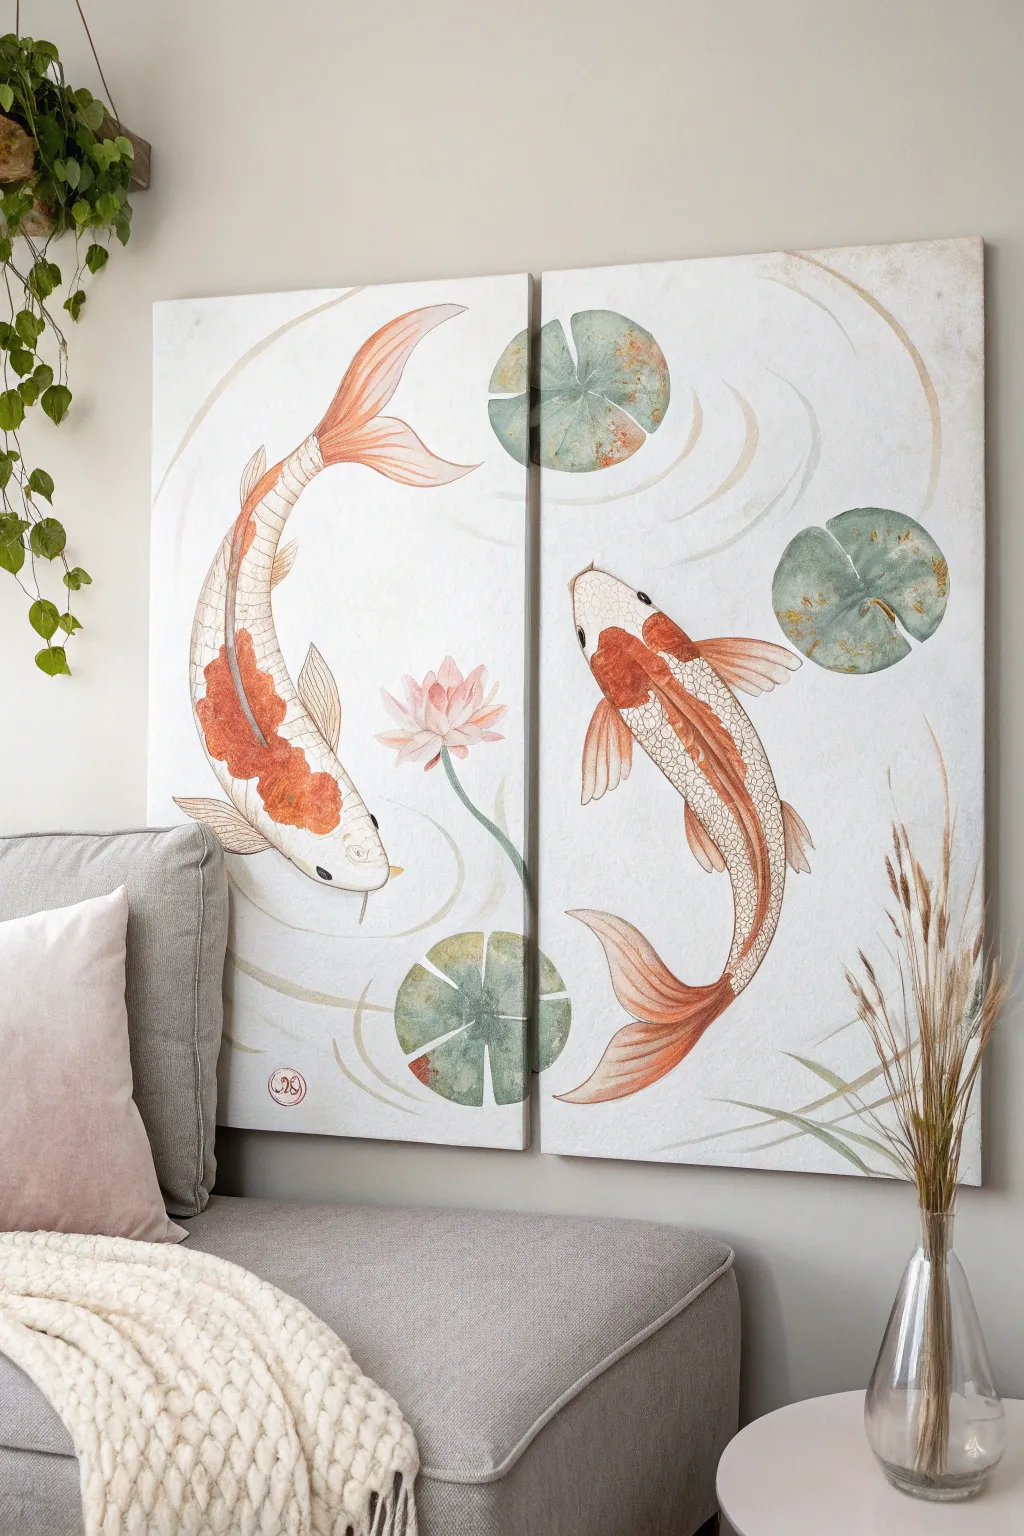
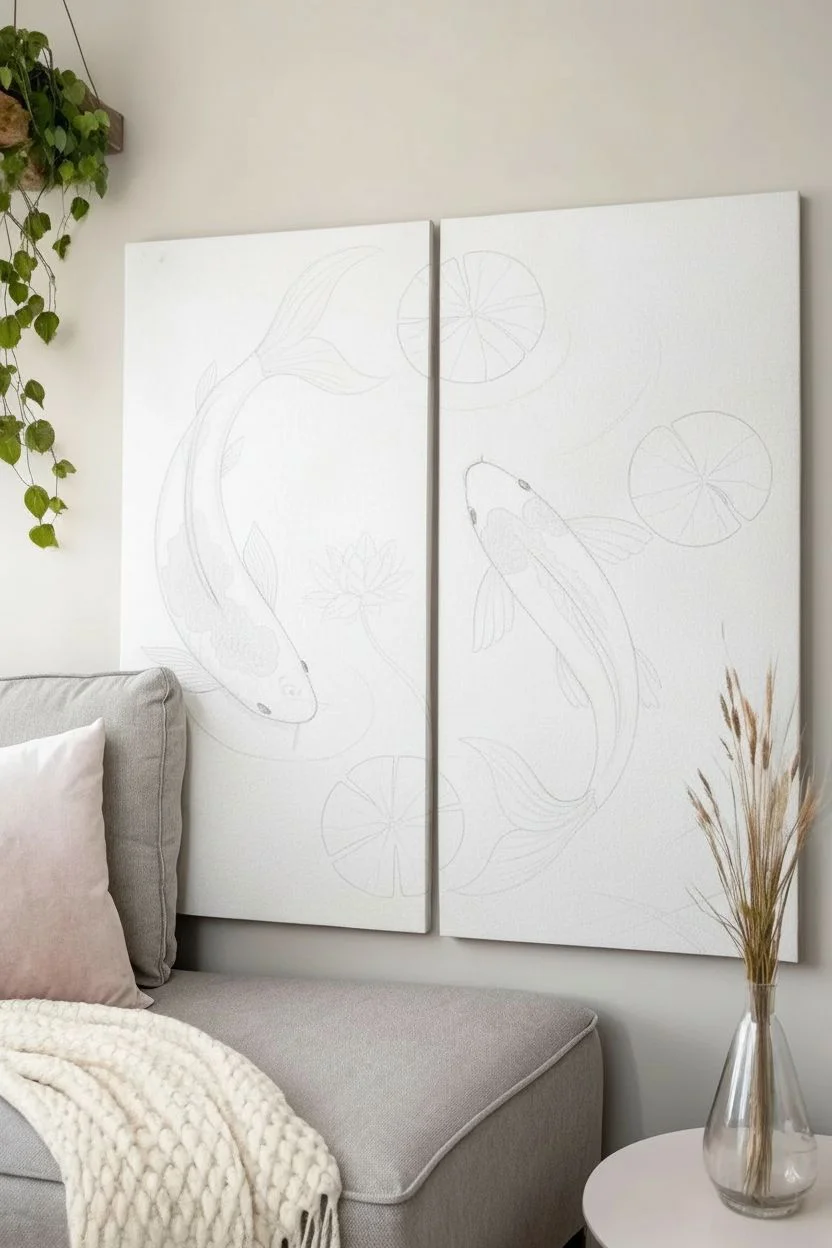
Bring a sense of tranquil movement to your space with this elegant two-panel painting. By splitting the composition of swimming koi across two canvases, you create a dynamic flow that feels both modern and peaceful.
Detailed Instructions
Materials
- Two stretched canvases (e.g., 20×30 inches each)
- Acrylic paints (Titanium White, Cadmium Orange, Burnt Sienna, Raw Umber, Sap Green, Phthalo Blue)
- Acrylic glazing medium or flow improver
- Pencil for sketching
- Large flat brush (1-2 inch)
- Medium round brush
- Fine liner brush
- Palette
- Water container
- Paper towels
Step 1: Preparation and Sketching
-
Prepare the background:
Start by mixing Titanium White with a tiny drop of Raw Umber and plenty of water or glazing medium to create an off-white, antique wash. Apply this freely over both canvases to remove the stark white glare, creating a soft, parchment-like base. -
Align the canvases:
Lay your two dry canvases side-by-side on a flat surface or easel, leaving a small gap (about 1 inch) between them to simulate how they will hang. This ensures your drawing flows naturally across the split. -
Sketch the composition:
Lightly sketch the outlines of two koi fish using a pencil. Draw the left fish curving upwards on the first panel and the right fish swimming downwards on the second panel. I find it easiest to focus on the ‘S’ curve of their bodies first. -
Add floating elements:
Draw three large lily pads: one split perfectly between the two canvases at the top, and two whole ones elsewhere. Sketch a single lotus flower near the center of the left panel. -
Review the flow:
Step back and check your pencil lines. Ensure the lily pad that crosses the gap lines up visually. The lines should look continuous even with the physical break.
Step 2: Painting the Koi
-
Base coat for the fish:
Mix a very pale cream using White and a touch of Cadmium Orange. Fill in the bodies of the koi fish, keeping the paint thin so the texture of the canvas shows through slightly. -
Layering the orange details:
Using a medium round brush, mix Cadmium Orange with a bit of Burnt Sienna. Paint the distinctive patches on the koi’s backs and heads. Keep edges somewhat soft to mimic a watercolor style. -
Define the fins and tails:
Dilute your orange mix with glazing medium to make it translucent. Gently paint the flowing tails and fins, using long, sweeping strokes. The transparency is key here to make them look delicate. -
Draw the scales:
With a fine liner brush and thinned Raw Umber paint, carefully outline the scales on the white parts of the fish bodies. Keep the lines very thin and broken in places; you don’t need to outline every single scale perfectly. -
Add facial details:
Paint the eyes using black or dark grey. Add small dots for nostrils and subtle shading around the gill covers using a diluted grey-brown wash.
Pro Tip: Watercolor Look
To get that watercolor effect with acrylics, use way more water or glazing medium than you think. Build up many thin, transparent layers rather than one thick coat.
Step 3: Flora and Water Ripples
-
Paint the lily pads:
Mix Sap Green, a touch of Phthalo Blue, and White to get a muted sage green. Fill in the lily pads. While wet, drop in hints of Burnt Sienna to create rusty spots or aged edges on the leaves. -
Create the lotus flower:
Paint the lotus petals with a mix of White and a tiny bit of Red or Pink. Keep the center of the flower slightly darker and the tips of the petals almost pure white. -
Detail the plant life:
Use your liner brush and dark green paint to add veins to the lily pads and a slender stem for the lotus flower. -
Paint water ripples:
Mix a very pale grey-blue using White and the tiniest amount of Phthalo Blue and Raw Umber. Paint concentric circular lines emanating from the fish and plants to suggest ripples. -
Enhance the ripple effect:
Soften these ripple lines with a clean, damp brush so they fade into the background. They should be barely visible suggestions of movement, not hard stripes.
Troubleshooting: Mismatched Split
If the lily pad edges across the gap don’t match up when hung, paint slightly over the edge of the canvas sides (the gallery wrap) to bridge the visual gap.
Step 4: Finishing Touches
-
Revisit the split:
Re-align your canvases and double-check the split lily pad at the top. Ensure the color and shading match perfectly on both sides of the gap. -
Add signature seal:
If you like, paint a small red circle with a stylized character or initial in the bottom corner to mimic a traditional Asian stamp signature. -
Final varnish:
Once completely dry (give it at least 24 hours), apply a satin or matte varnish to protect the painting and unify the sheen across both panels.
Hang your new masterpiece with a small gap between panels to fully appreciate the elegant split composition
Mountain Reflection Split Symmetry
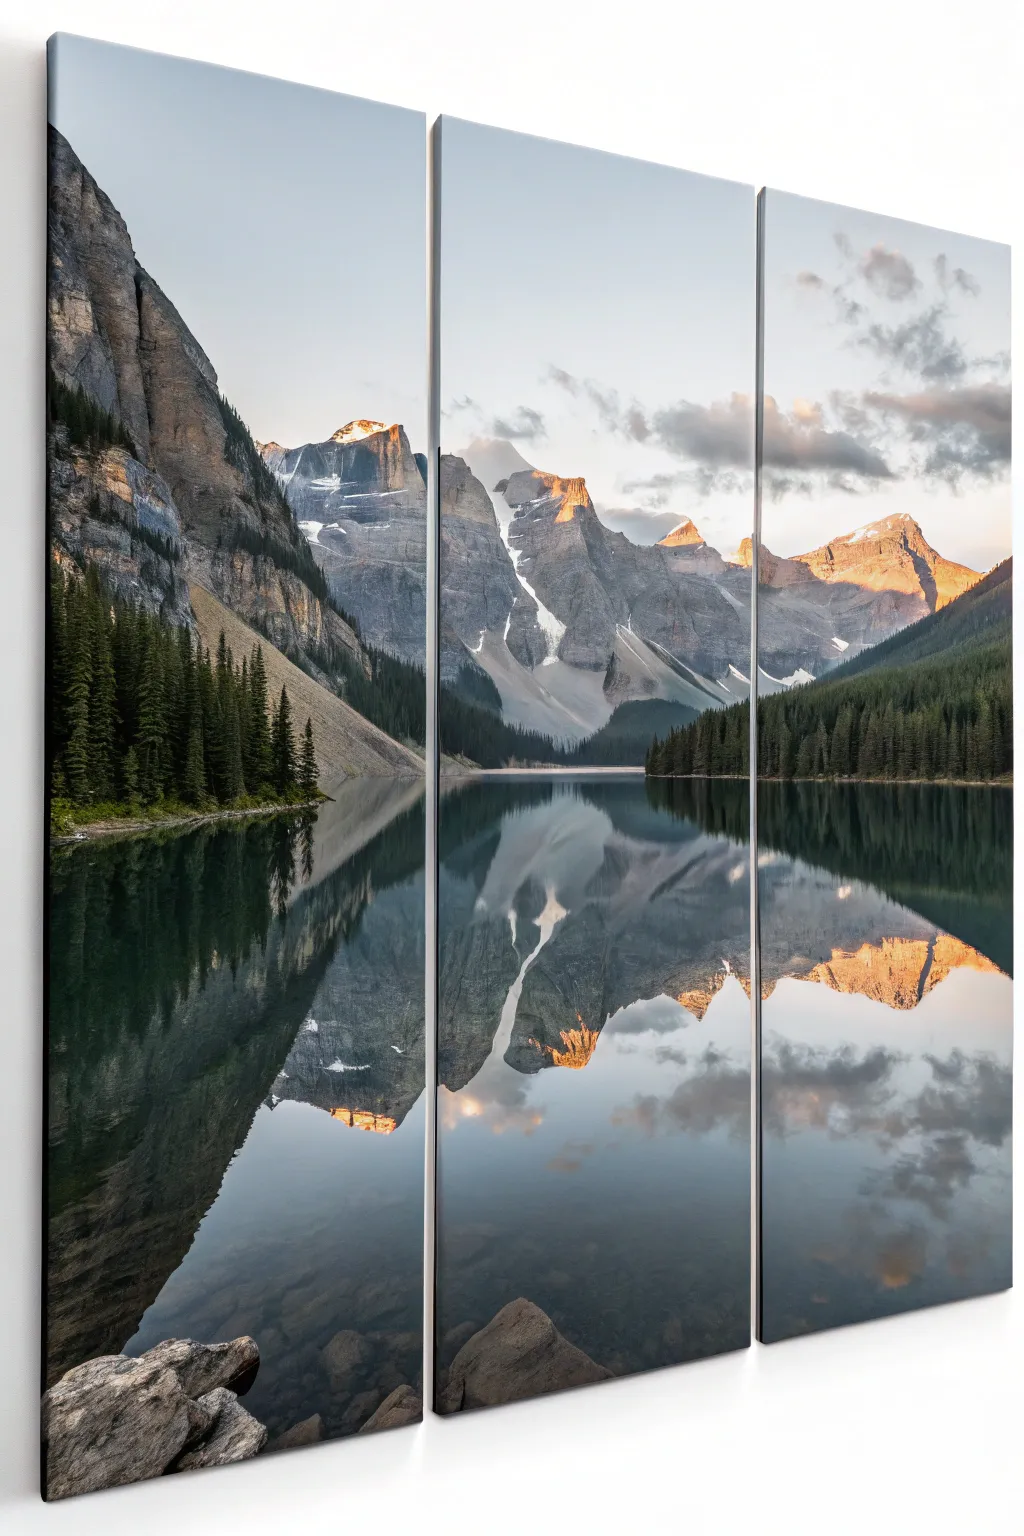
Bring the majesty of the Rockies into your home with this stunning three-panel split canvas project. By dividing a single grand landscape across multiple surfaces, you create a modern, window-like effect that adds depth and architectural interest to any wall.
Step-by-Step
Materials
- High-resolution digital photo of a mountain landscape (Moraine Lake style)
- Three pre-stretched canvases (tall orientation, equal size, e.g., 12×24 inches)
- Glossy photo paper or printable canvas sheets
- High-quality inkjet printer (or access to a print shop)
- Spray adhesive or Mod Podge (matte finish)
- Sharp craft knife or rotary cutter
- Metal ruler
- Cutting mat
- Black acrylic paint (for canvas edges)
- Foam brush
- UV-resistant clear acrylic sealer spray
- Wall mounting hardware (Command strips or sawtooth hangers)
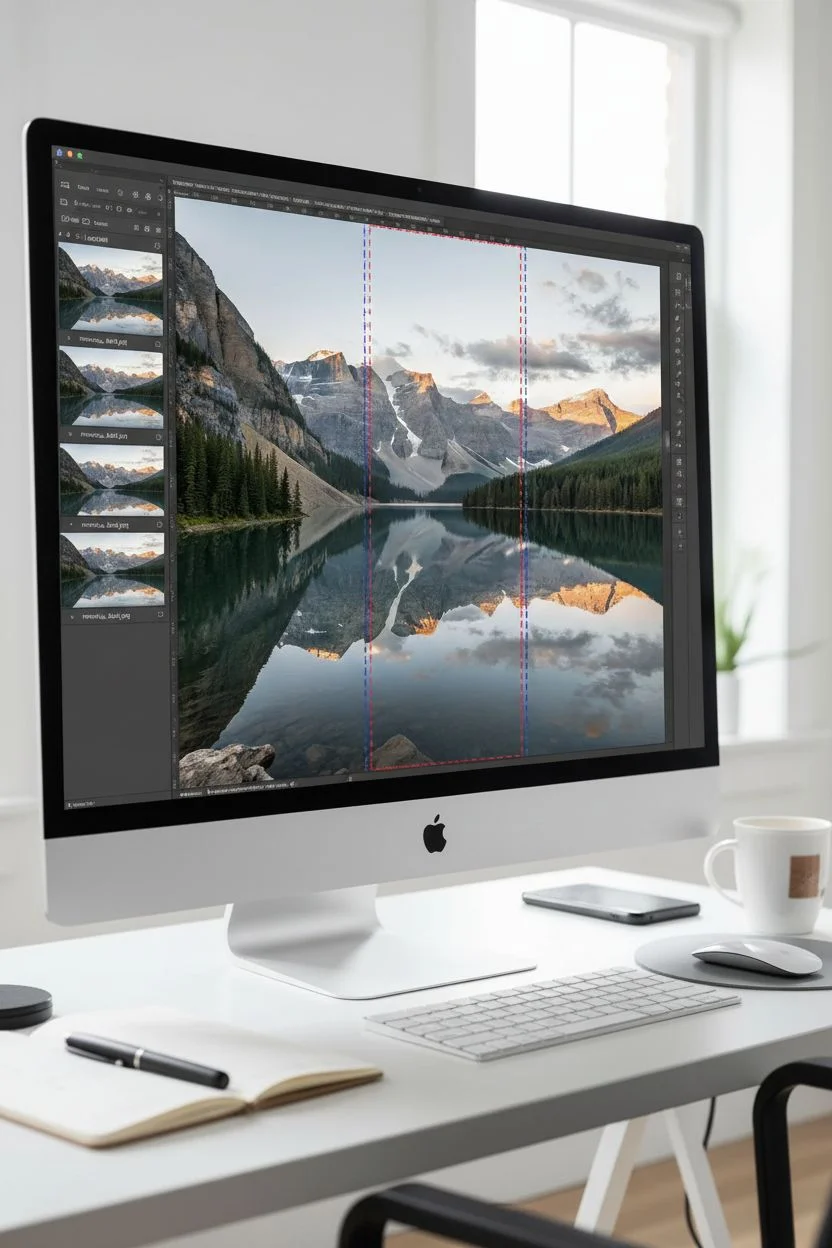
Step 1: Digital Preparation
-
Select your image:
Choose a high-resolution landscape photo. A scene with a strong central focal point and a reflection, like this mountain lake, works best for vertical panels. -
Measure your canvases:
Measure the total width of your three canvases placed side-by-side, including a 1-2 inch gap between them if you plan to hang them spaced out. However, for a seamless split like this, just measure the total width of the three canvases combined. -
Crop and split digitally:
Using photo editing software, crop your image to the aspect ratio of your combined canvases. Then, use the ‘slice’ tool or crop function to divide the image into three equal vertical strips. Save each strip as a separate high-quality file.
Step 2: Printing & Cutting
-
Print the panels:
Print each of the three image files onto your glossy photo paper or printable canvas. Ensure you print at 100% scale so the edges will line up perfectly. -
Trim the excess:
Place your prints on a cutting mat. Using a metal ruler as a guide, carefully trim away any white borders with a fresh craft knife to ensure razor-sharp edges. -
Dry fit the layout:
Lay your three canvases on a clean table and place the trimmed prints on top of them. Check that the horizon lines and mountain peaks flow naturally from one panel to the next.
Bubble Trouble
If a stubborn air bubble appears under the paper, prick it gently with a sewing needle to release the air, then smooth it down with your brayer.
Step 3: Mounting the Artwork
-
Paint the edges:
Paint the sides of each canvas with black acrylic paint using a foam brush. This creates a professional ‘gallery wrap’ illusion and hides the white canvas edge if your print doesn’t wrap around. -
Apply adhesive to the first panel:
Work with one canvas at a time. In a well-ventilated area, apply an even coat of spray adhesive to the front surface of the first canvas. I find waiting about 30 seconds for it to get tacky helps prevent bubbles. -
Position the print:
Carefully align the top corners of your first print with the top corners of the canvas. Ideally, the print should be exactly the size of the canvas face. -
Smooth it down:
Gently press the print down from the center moving outward. Use a clean, soft cloth or a brayer roller to push out any air bubbles and ensure firm adhesion. -
Repeat for remaining panels:
Repeat the gluing and smoothing process for the center and right panels. Be extra careful to ensure the vertical alignment matches the first panel.
Textured Effect
Brush a layer of clear acrylic gel medium over the print, following the lines of the mountains, to create the look of real painted brushstrokes.
Step 4: Finishing Touches
-
Check the seams:
Inspect the edges where the paper meets the canvas. If any corners are lifting, apply a tiny dot of craft glue or Mod Podge with a toothpick and press down. -
Seal the surface:
Once the adhesive is fully cured, take the panels outside and spray them with a thin, even coat of UV-resistant clear sealer. This protects the ink from fading and moisture. -
Install hanging hardware:
Attach sawtooth hangers to the center back of each frame. Ensure they are measured to the exact same height on every frame to keep the horizon line level. -
Hang with spacing:
Mount the panels on the wall. For the best split-image effect, leave a gap of about 1 to 1.5 inches between each canvas.
Step back and admire how the split perspective adds a grand, panoramic feel to your room
Minimal Line Art Across Multiple Panels
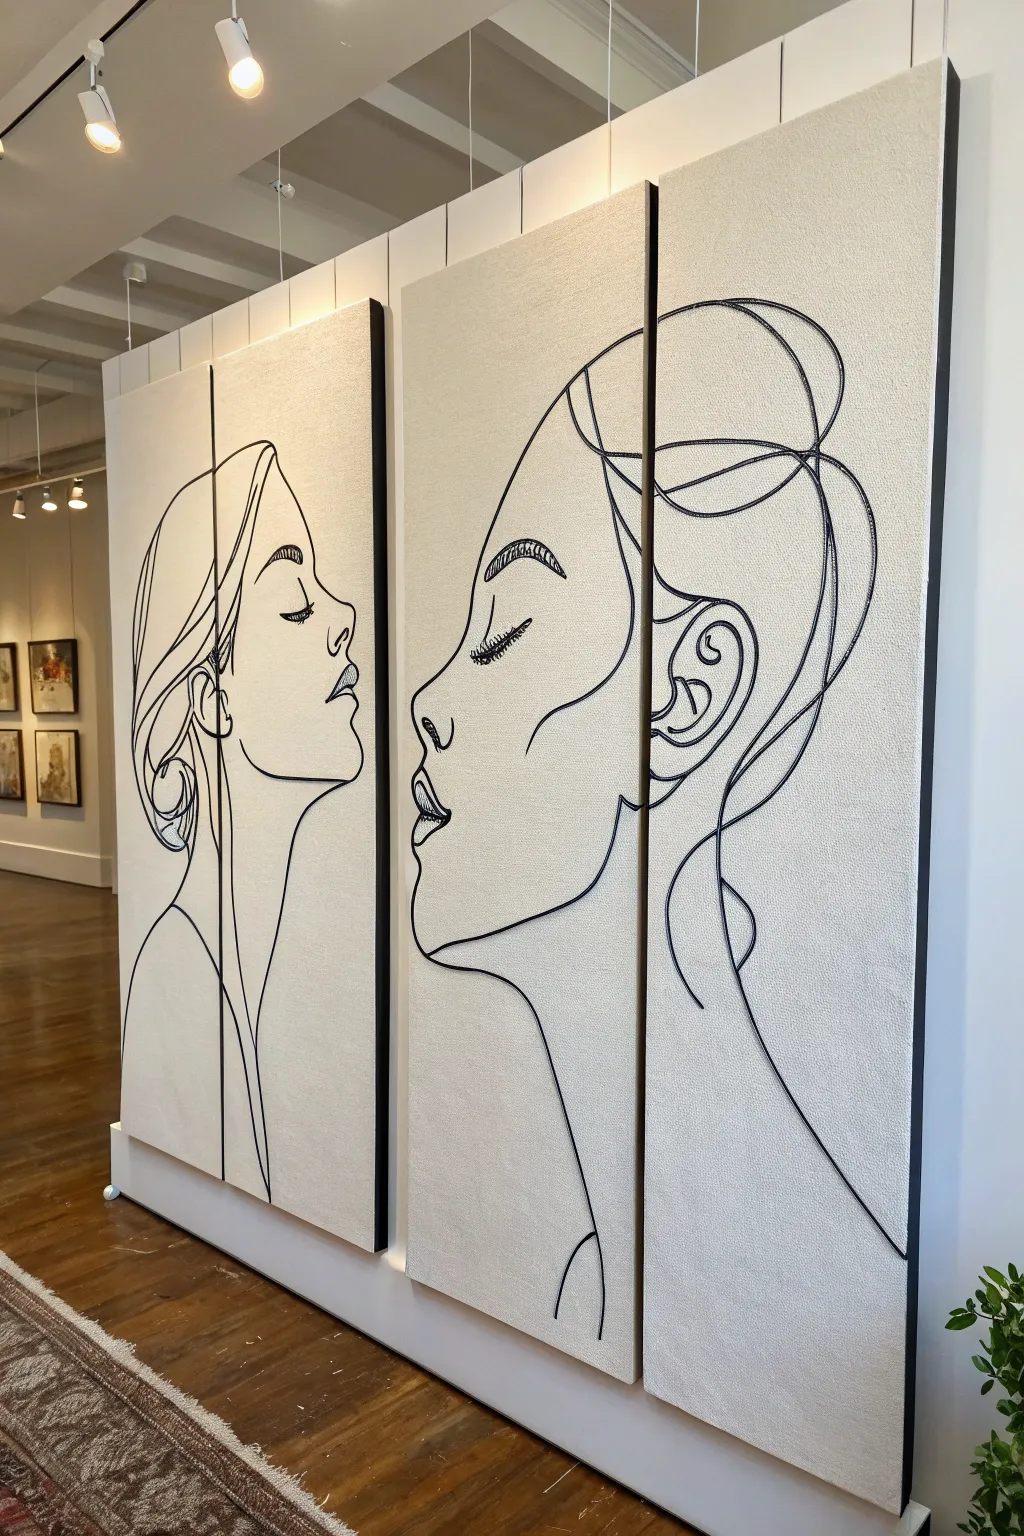
Achieve a sophisticated gallery look with this striking three-panel installation, featuring continuous line art that flows across separated canvases. The raised, wire-like texture creates an elegant shadow play against the minimalist background, giving the faces a sculptural quality.
Step-by-Step Tutorial
Materials
- 3 Large tall canvases (pre-stretched)
- White or cream latex wall paint (matte finish)
- Texturing paste or fine sand additive
- Paint roller and tray
- Black flexible wire (approx. 12 gauge) or thick cotton piping cord (3-4mm)
- Heavy-duty construction adhesive or clear drying craft glue
- Tailor’s chalk or light pencil
- Wire cutters
- Painter’s tape
- Matte black spray paint (if using wire/cord)
Step 1: Preparation & Base Coat
-
Prepare the canvas arrangement:
Lay your three canvases side-by-side on a large flat surface or floor. Ensure they are spaced apart exactly as you intend to hang them (about 1-2 inches) so your drawing lines will align perfectly across the gaps. -
Mix the textured base:
Pour your white or cream paint into a tray. To replicate the stony, matte look seen in the photo, mix in a generous amount of texturing paste or a fine sand additive. You want a consistency that holds a little grain without being chunky. -
Apply the first coat:
Using a roller, apply a thick, even coat of the textured paint across all three canvases. Don’t worry about being perfectly smooth; a little stipple texture adds to the organic feel. -
Let it dry completely:
Allow the first coat to dry fully, which usually takes 2-4 hours. Applying a second coat ensures full opacity and a richer, more expensive-looking finish. -
Secure the spacing:
Once fully dry, you may want to temporarily tape the backs of the canvases together with a spacer in between to keep them from shifting while you sketch the design.
Clean Cuts
Wrap a small piece of tape around the cord before cutting it. Cut through the tape to stop the cord ends from frying or unraveling at the canvas edge.
Step 2: Sketching the Design
-
Draft the faces:
Lightly sketch your design using tailor’s chalk or a very faint pencil. Draw two profiles facing each other—one split between the first and second panel, and the other occupying the second and third. -
Refine the split points:
Pay special attention to where the lines cross the gaps between canvases. The line should stop at the edge of one canvas and pick up at the exact same height on the next. -
Simplify your lines:
Step back and look at your sketch. Erase unnecessary details; the beauty of this style relies on confident, continuous curves rather than short, scratchy strokes.
Step 3: Creating the 3D Lines
-
Prepare your line material:
If you are using cotton piping cord, take it outside and spray paint it matte black. Let it dry completely. If using black wire, simply unspool it and straighten out any kinks. -
Start gluing the main contours:
Begin with the longest continuous line, like the profile of the face. Apply a thin but steady bead of heavy-duty adhesive directly over your chalk line on the canvas. -
Lay the material:
Gently press your black cord or wire into the glue. I prefer to work in 6-inch sections to ensure the glue doesn’t dry before I can position the material perfectly. -
Handling the gaps:
When you reach the edge of a canvas, snip the cord/wire cleanly with cutters right at the edge. Start a fresh piece exactly on the opposite edge of the adjacent canvas to create the illusion of a continuous line. -
Forming tight details:
For intricate areas like the eyes or ears, you might need to use tweezers to hold the material in place while the glue sets. If using wire, pre-bend it with pliers before gluing. -
Connect intersecting lines:
Where one line meets another (like the jawline meeting the neck), carefully butt the ends of the cord together so there is no gap, or slightly overlap them if using thin wire. -
Clean up adhesive:
Inspect the canvas for any glue that might have seeped out from under the cord. Wipe it away immediately with a damp cloth or Q-tip before it hardens.
Go High Contrast
Instead of black on white, try a moody terracotta background with gold wire, or a navy blue textured base with stark white piping for immediate drama.
Step 4: Finishing Touches
-
Final drying time:
Allow the adhesive to cure for at least 24 hours. The bond needs to be completely secure before you hang the panels vertically. -
Touch-ups:
If you see any shiny glue residue after drying, dab a tiny bit of your matte background paint over the glue spot to disguise it. -
Hanging the trio:
Install the canvases on your wall, using a level to ensure the horizontal alignment is perfect. The ‘magic’ of this piece relies entirely on the precise gap spacing you planned earlier.
Step back and admire how the negative space between the panels becomes part of the art itself
Asymmetrical Step-Panel Split Composition
Transform a single stunning beach landscape into a modern statement piece by splitting the image across three tall, vertical canvases. This project creates an immersive window to the ocean that elongates your wall space and adds a sophisticated, gallery-style touch to your home decor.
Detailed Instructions
Materials
- High-resolution digital photo of a beach sunset (landscape orientation)
- Three tall, narrow artist canvases (e.g., 12×36 inches or similar ratio)
- Photo editing software (Photoshop, GIMP, or online splitter)
- Mod Podge (Matte or Satin finish)
- White acrylic paint (for canvas edges)
- Foam brushes and a brayer roller
- Spray adhesive (optional but recommended)
- Self-healing cutting mat and craft knife
- Measuring tape and level for installation
- Sandpaper (fine grit)
Step 1: Preparing the Image
-
Select your photo:
Choose a high-resolution landscape photo. The image needs to be crisp even when zoomed in, as we are focusing on a vertical slice of the horizon. -
Measure your canvases:
Before touching the software, measure the exact face dimensions of your three canvases. Calculate the total width by adding the three widths together—do not account for the gaps between them yet. -
Crop digitally:
Open your photo software. Create a crop box that matches your total combined canvas width and height. Position this box over the most compelling part of the sunset, ensuring the horizon line is straight. -
Split the file:
Divide your cropped image into three equal vertical sections. It’s crucial to save these as separate high-quality files (TIFF or high-res JPG) labeled Left, Center, and Right. -
Print the panels:
Send these files to a professional printer or print shop. Request them to be printed on high-quality photo paper or light cardstock, exactly matching your canvas face dimensions.
Bubbles under the print?
If a bubble appears after mounting, don’t peel it up. Prick the center with a fine sewing needed to let air escape, then press it flat with the roller.
Step 2: Mounting the Photograph
-
Prep the canvases:
I prefer to lightly sand the face of the canvases to remove any rough texture that might show through the print. Wipe away the dust with a damp cloth. -
Paint the edges:
Paint the sides (deep edges) of each canvas with dark brown or black acrylic paint. This creates a shadow-box effect that makes the image pop off the wall. -
Apply adhesive:
In a well-ventilated area, spray the back of your first photo print with an even coat of spray adhesive. Alternatively, apply a thin, uniform layer of Mod Podge to the canvas face. -
Align the print:
Carefully align the top corners of the print with the canvas. Slowly smooth it down towards the bottom to prevent misalignment. -
Remove air bubbles:
Use a brayer roller or a clean, soft cloth to press firmly from the center outward. This ensures a specialized bond and pushes out trapped air. -
Repeat for all panels:
Complete the mounting process for the remaining two panels, being careful not to mix up the order of the scenery.
Level Up: Gallery Wrap
Print the photos 2 inches wider on all sides. Wrap the image around the edges of the canvas frame for a seamless, professional gallery-wrap finish.
Step 3: Sealing and Hanging
-
Seal the surface:
Pour a small amount of Mod Podge onto the center of the mounted photo. Use a foam brush to spread it horizontally in long, smooth strokes. -
Add texture (optional):
If you want a ‘painted’ look, use a bristle brush to add slight texture to the wet sealer, following the lines of the waves or clouds. -
Let it cure:
Allow the panels to dry completely for at least 24 hours. The sealer will turn from milky white to clear. -
Plan the spacing:
Lay the finished canvases on the floor. Ideally, leave a 1.5 to 2-inch gap between them. This spacing tricks the eye into connecting the image across the void. -
Mark the wall:
Find the center point of your wall space. Mark the position for the middle canvas first, ensuring the horizon line is at standing eye level. -
Install the outer panels:
Measure outward from the center panel, accounting for your chosen gap distance. Use a long level to ensure the top edges of all three canvases align perfectly.
Step back and admire how your panoramic shoreline brings warmth and depth to the room.
One Subject, Shifting Viewpoints Across Panels
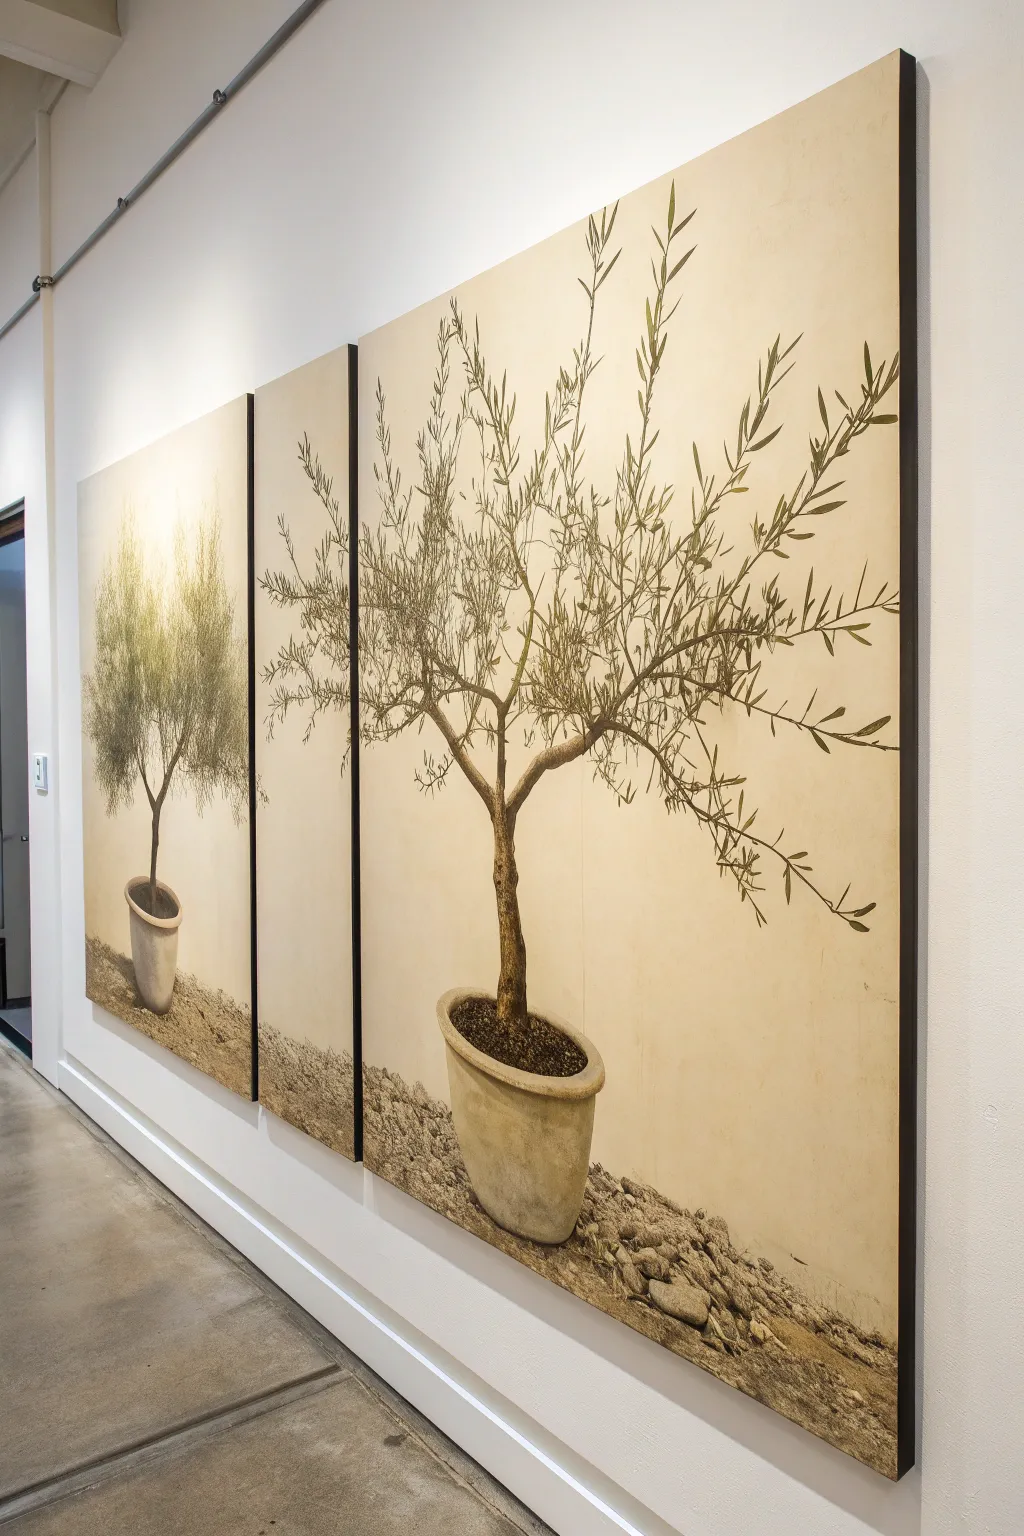
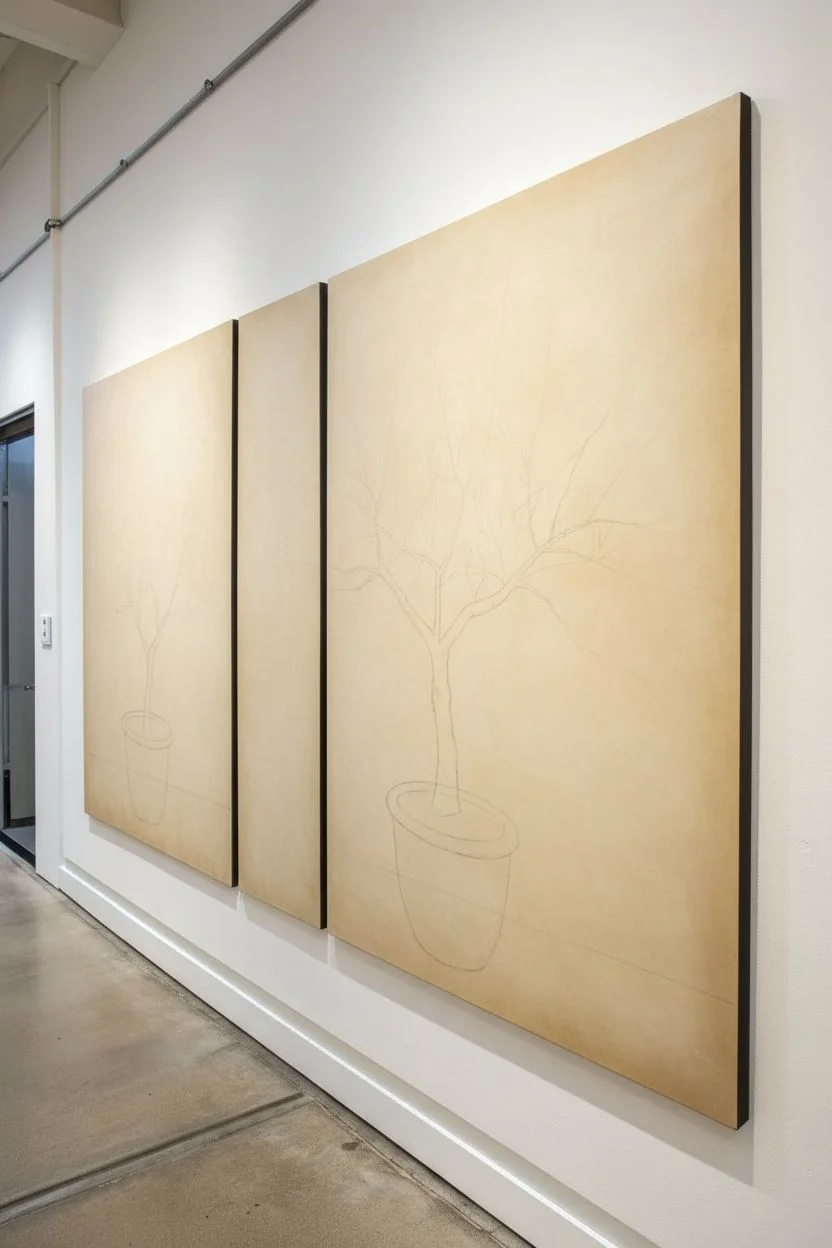
This sophisticated triptych project plays with scale and distance, featuring a delicate olive tree depicted across three separate panels in a warm, monochromatic palette. The result is a modern gallery-style installation where one panel shows the full subject at a distance, while the larger adjacent panels invite the viewer into an intimate, zoomed-in perspective.
Step-by-Step
Materials
- Three gallery-wrapped canvases (one smaller/narrower, two larger/wider)
- Acrylic paints (Raw Umber, Burnt Sienna, Unbleached Titanium, Titanium White, Mars Black)
- Matte medium or glazing liquid
- Large flat brushes for background
- Assorted round brushes (sizes 2, 4, and 6) for branches and leaves
- Old scruffy brush or sea sponge for texture
- Graphite pencil (2H)
- Reference photo of a potted tree
- Easel or large wall space
- Varnish (matte or satin)
Step 1: Background & Layout
-
Prepare the canvas surface:
Begin by coating all three canvases with a mix of Unbleached Titanium and a tiny touch of Burnt Sienna. This creates that warm, parchment-like base tone visible in the image. -
Add subtle variations:
While the base coat is still tacky, use a large dry brush to feather in slightly lighter areas near the center and darker, shadowy tones near the edges to create a gentle vignetting effect. -
Plan the composition:
Arrange your canvases side-by-side. On the far left panel, sketch a small, full version of the potted tree in the lower third. On the center and right panels, sketch a much larger, zoomed-in version that spans across the gap. -
Draft the horizon line:
Lightly mark a horizon line where the ‘ground’ meets the ‘wall.’ Ensure this line is consistent across the bottom of all three panels to unify the space.
Alignment Issues?
If the branches don’t line up perfectly across the gap, lean the canvases against a wall with their final spacing (usually 2 inches). Sketch the connecting lines in pencil across the gap before painting.
Step 2: The Pots & Ground
-
Block in the planters:
Mix Raw Umber and White to create a stone-grey tone. Paint the basic cylindrical shapes of the pots. The left pot should be small; the right pot (bridging the distinct panels) should be significantly larger and more detailed. -
Add dimension to the pots:
Using a darker mix of Raw Umber and Mars Black, paint the interior soil area. Add shadows to the side of the pot facing away from your light source to create roundness. -
Create the rocky texture:
For the ground, use an old scruffy brush or a sponge. Stipple a mix of greys, browns, and creams along the bottom edges. Let these marks mimic loose gravel and stones. -
Detail the stones:
Once the stippling is dry, go back with a small round brush and outline a few individual ‘rocks’ in the foreground with shadow and highlight to give them three-dimensional weight.
Pro Tip: Depth of Field
Make the small tree on the left panel slightly blurrier or softer than the large tree. This mimics a camera’s depth of field, emphasizing the distance difference between the two subjects.
Step 3: Trunk & Branches
-
Paint the main trunks:
Mix Burnt Sienna with Mars Black for a deep, bark-like color. Paint the sinuous, twisting trunk of the large tree, letting it flow naturally from the center panel to the right panel. -
Texture the bark:
While the trunk is wet, streak in some Raw Umber and lighter tan tones. Use a liner brush to create vertical grooves and knots characteristic of olive wood. -
Extend the branches:
Switch to a thinned, inky consistency of brown paint. Use a size 4 round brush to pull long, elegant branches outward, tapering them to fine points as they reach the canvas edges. -
Repeat for the distant tree:
On the left panel, paint the miniature tree using the same technique but with a much smaller brush (tier 0 or 1), keeping details simplified.
Step 4: Foliage & Finishing
-
Mix leaf colors:
Prepare three shades of dull green-grey. Olive trees have silvery leaves, so mix your green with plenty of Unbleached Titanium and a touch of black to desaturate it. -
Paint the leaves:
Using the tip of a round brush, press and lift to create elongated tear-drop shapes. Group them in clusters along the branches, ensuring they point in various directions for realism. -
Layering density:
Start with your darkest leaf color for the background foliage, then layer the mid-tones, and finish with the lightest ‘silvery’ pale green on the tips to catch the light. -
Add casting shadows:
Mix a transparent glaze of black and brown. Lightly paint a soft shadow on the wall behind the main branches and on the ground beneath the pots to anchor the objects. -
Final unifying wash:
If I feel the contrast is too sharp, I like to apply a very thin, watery wash of Raw Umber over the entire dried painting (glazing) to antique the look and bind the colors together. -
Varnish:
Once completely dry (wait at least 24 hours), apply a coat of matte or satin varnish to protect the surface and even out the sheen.
Hang your panels with consistent spacing and enjoy the serene atmosphere they bring to your room
Paint Drips That Continue Panel to Panel
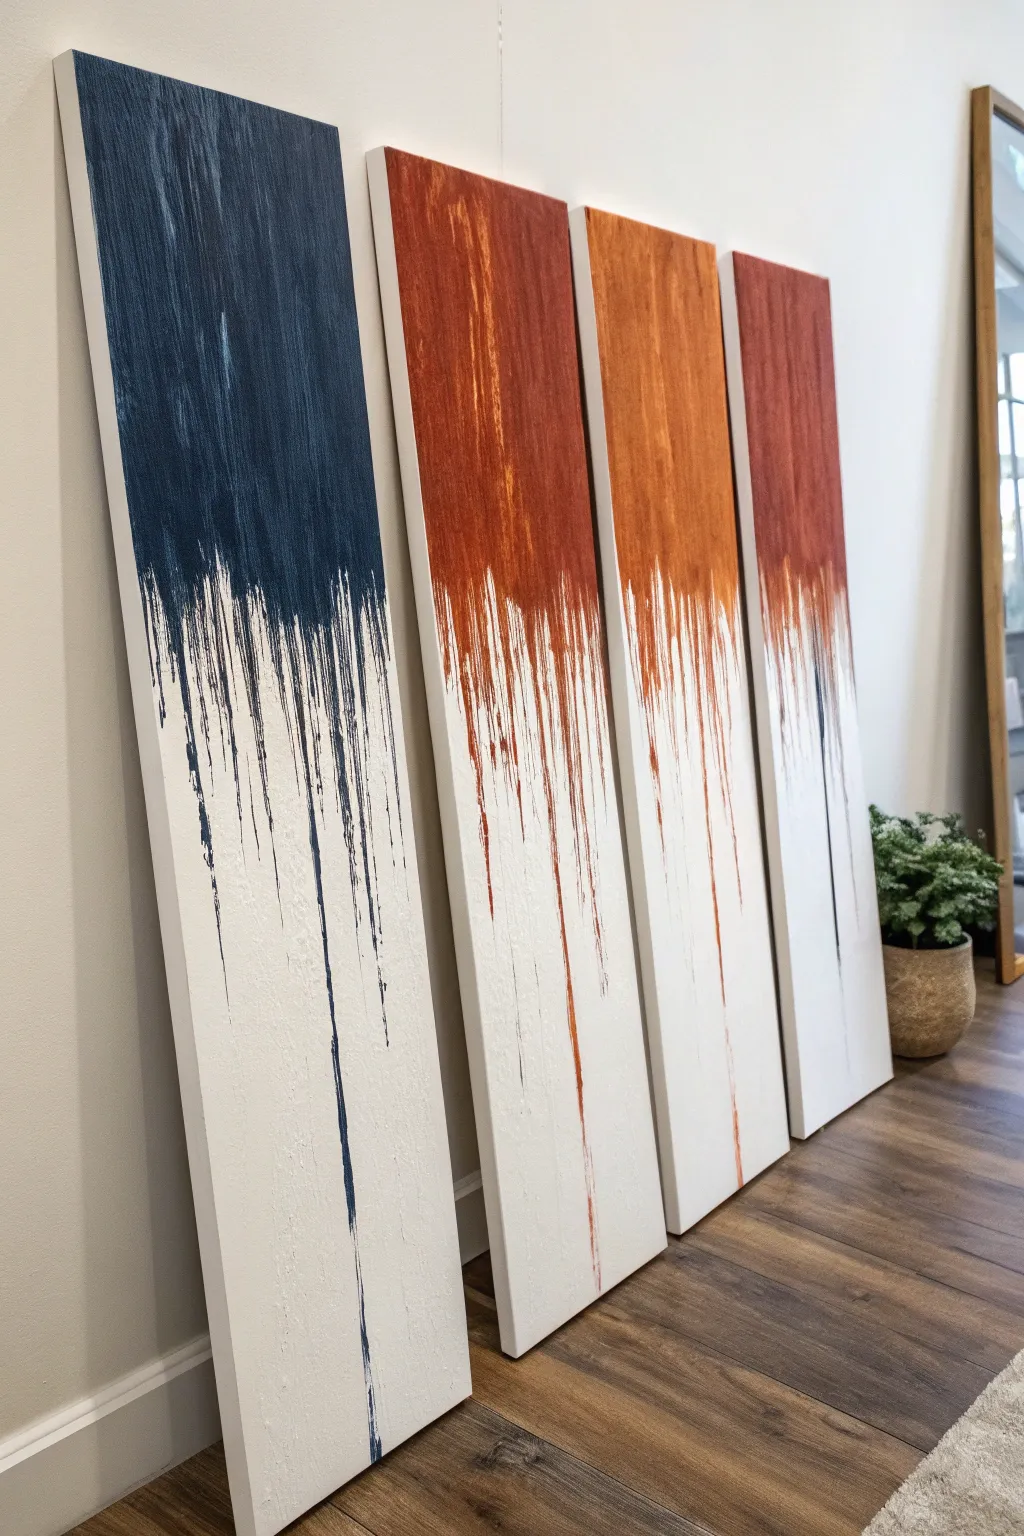
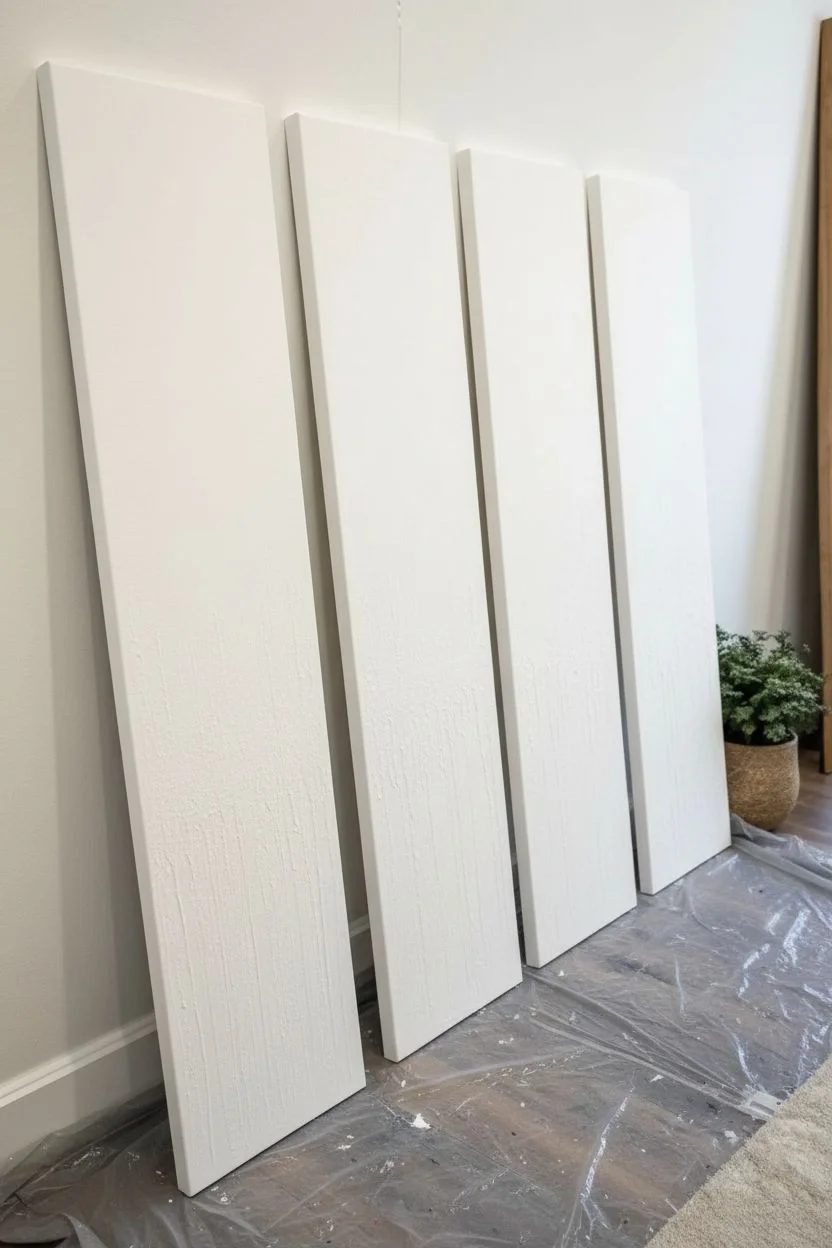
Transform four separate canvases into a cohesive statement piece with this striking drip-effect design. The bold, textured color blocks at the top dramatically bleed into a clean white negative space, creating movement and modern elegance.
Detailed Instructions
Materials
- 4 tall, narrow gallery-wrapped canvases (e.g., 10×30 or 12×48 inches)
- White gesso or heavy body white acrylic paint
- Heavy body acrylic paints (Navy Blue, Burnt Sienna, Terracotta, Ochre)
- Wide flat brush (2-3 inch)
- Medium round brush
- Palette knives (assorted sizes)
- Spray bottle with water
- Drop cloth or plastic sheeting
- painter’s tape (optional)
- Easel or wall mounting strips (for working)
Step 1: Preparation and Base Layer
-
Prepare the workspace:
Since this project involves dripping paint, cover your floor and wall area extensively with a drop cloth. Prop the four canvases upright against a wall, side-by-side with equal spacing (about 1-2 inches apart). -
Prime the surface:
Even if your canvases are pre-primed, apply a fresh coat of white gesso or white acrylic paint to the entire surface. This ensures a uniform texture and bright background. -
Create texture:
While the white base is still wet, use a palette knife to create subtle vertical ridges, especially in the bottom two-thirds. This texture will help guide the drips later. -
Let it dry completely:
Allow the white base layer to cure fully before adding any color.
Drip Control
If a drip is moving too fast or getting too wide, quickly use a dry paper towel to catch the bottom or tilt the canvas flat on the floor to stop flow immediately.
Step 2: Applying the Color Blocks
-
Mix your palette:
Prepare your four distinct colors. You want a deep Navy Blue for the first panel, followed by a gradient of warm tones: deep Burnt Sienna, a mid-tone Terracotta, and a lighter Ochre-orange. -
Thin the paint slightly:
Mix a small amount of water or flow medium into your colored paints. You want a heavy cream consistency—thick enough to hold brushstrokes but fluid enough to run when prompted. -
Paint the top sections:
Using a wide flat brush, paint the top 1/3 to 1/2 of each canvas with its designated color. Apply the paint thickly, using vertical strokes to mimic the look of wood grain or rain. -
Feather the bottom edge:
Don’t create a hard line where the color stops. instead, lift your brush as you pull downward, creating a rough, jagged edge where the color meets the white space.
Step 3: Creating the Drit Effect
-
Prepare for gravity:
Ensure the canvases are standing almost vertically. Step back and check that the color levels look balanced across the set. -
Spray and encourage drips:
Lightly mist the bottom edge of the wet colored paint with your spray bottle. Don’t soak it; just add enough moisture to encourage gravity to pull the pigment down. -
Guide the major drips:
For the long, dramatic lines that reach near the bottom, use a medium round brush loaded with diluted paint. Touch the wet edge of the color block and physically drag a line down. -
Enhance texture with a knife:
I like to use a palette knife to scrape downward through the main color block while it’s wet. This removes some paint, revealing the canvas texture, and pushes excess paint down into the drip zone. -
Create the jagged transition:
Use a dry brush to flick downward rapidly right at the transition line. This creates the ‘scratchy’ transitional area between the solid block and the long drips. -
Refine the long lines:
Some drips might look too perfect or wobbly. Refine them with a thin detail brush to ensure they look sharp and naturally tapered as they descend. -
Add variance:
Ensure no two canvases have the exact same drip pattern. Let the navy blue drip longer in one spot, while the ochre might have shorter, more clustered drips.
Metallic Accent
Mix a metallic gold or copper medium into your warm rust colors for a subtle shimmer that catches the light within the textured drip areas.
Step 4: Finishing Touches
-
Check the sides:
Paint the sides of the top portion to match the front, stopping the color where the main block ends on the face. Keep the sides of the bottom white section clean white. -
Clean up stray splashes:
If unwanted specks of color landed in the pure white negative space, wait for them to dry, then carefully paint over them with titanium white acrylic. -
Apply varnish:
Once the artwork is cured (give it at least 24 hours due to the thick paint application), apply a satin or matte varnish to protect the surface and unify the sheen.
Hang these panels with evenly spaced gaps to let the eye bridge the colors together for a sophisticated gallery feel
Torn-Edge Collage Look as a Split Painting
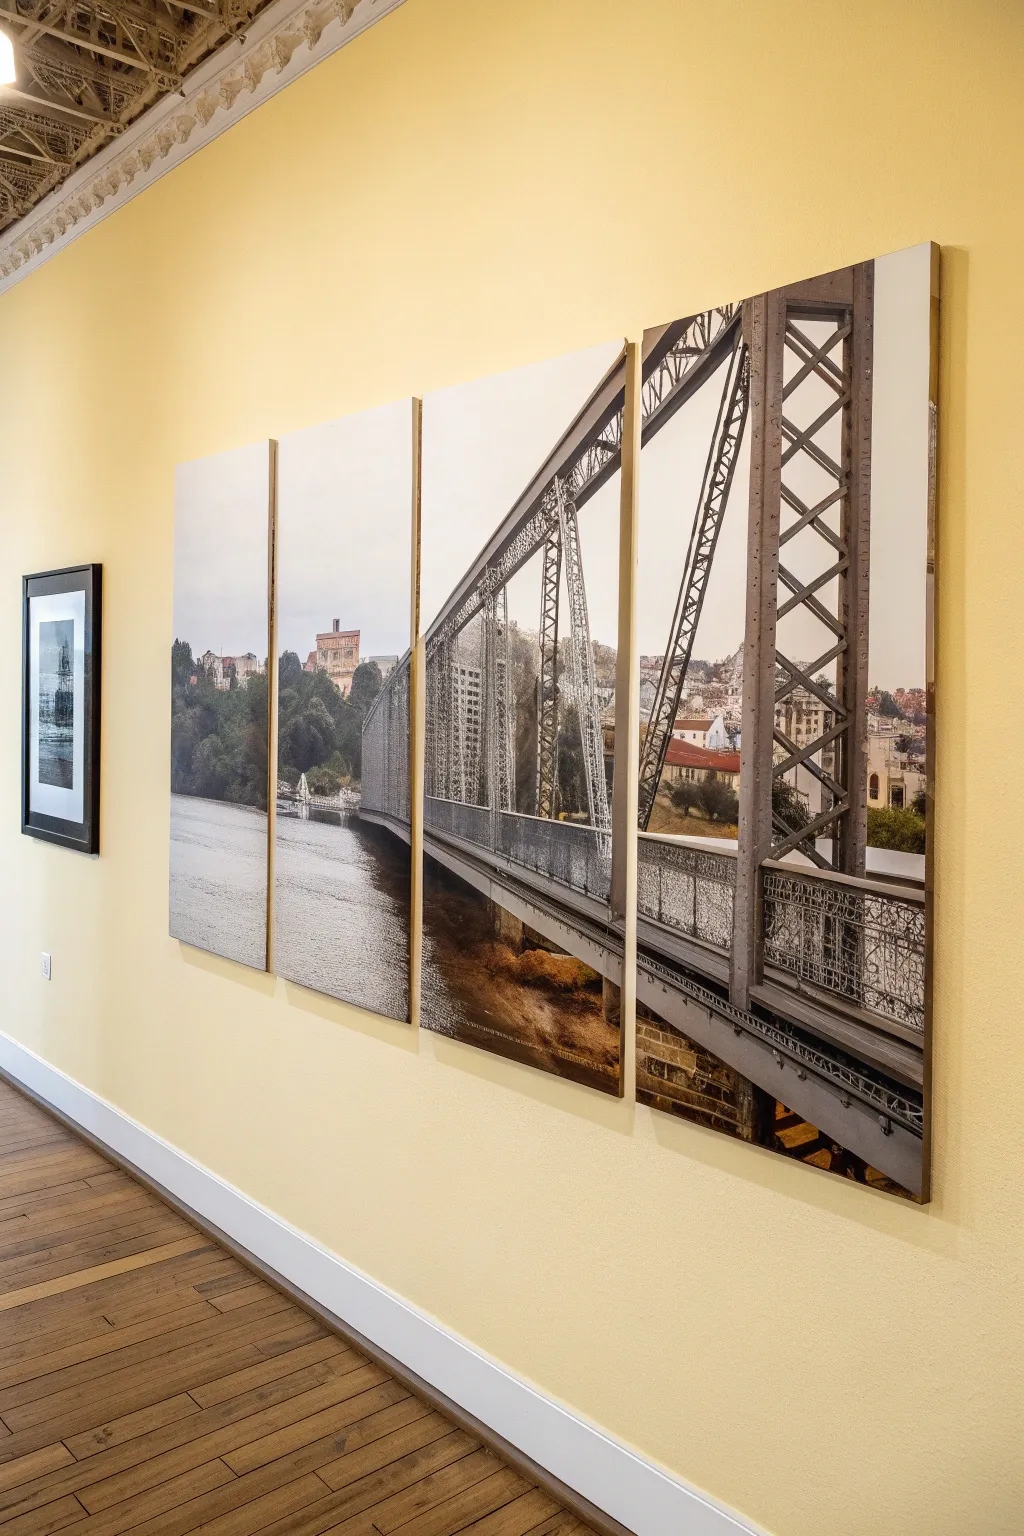
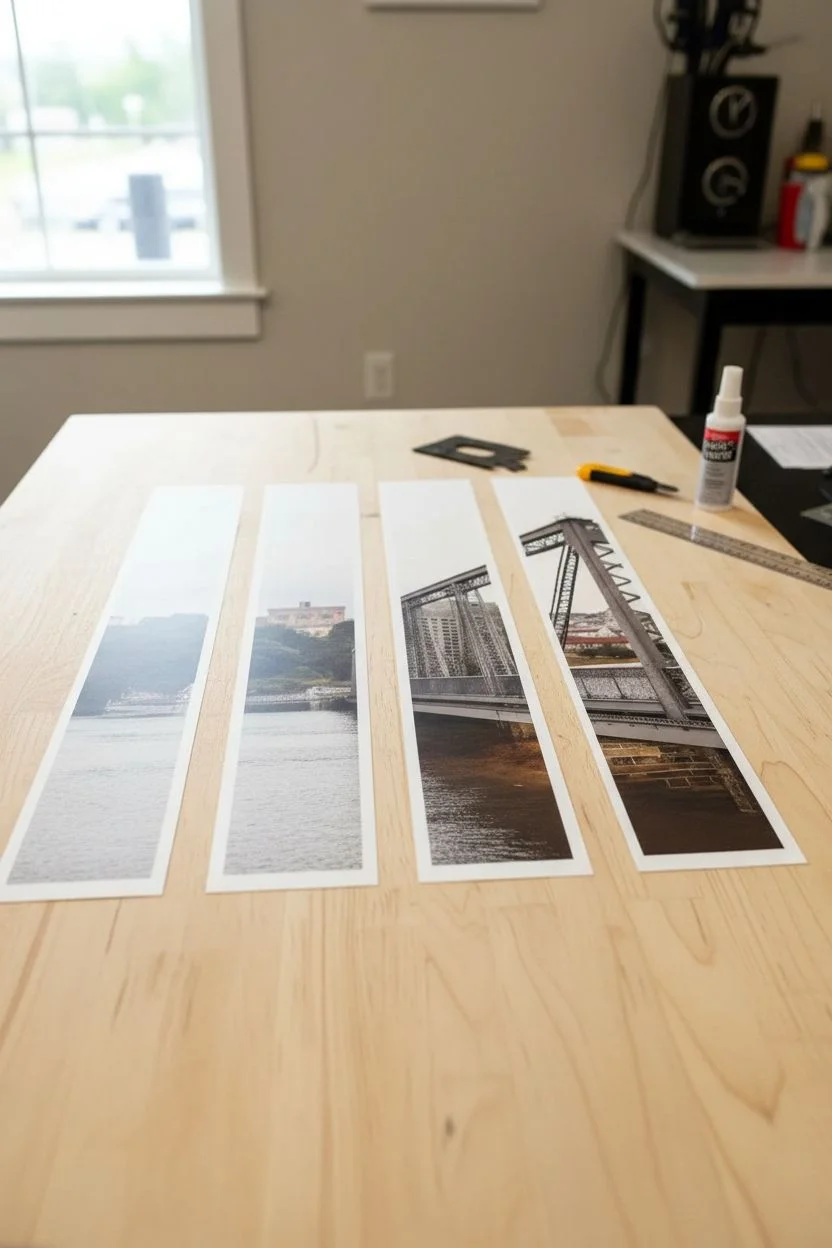
Transform a single stunning landscape photograph into a dramatic gallery wall by splitting it across multiple vertical panels. This technique creates visual rhythm and allows you to cover a large wall space while maintaining a sleek, modern aesthetic.
Step-by-Step Guide
Materials
- High-resolution digital photograph (landscape orientation)
- Four 12×36-inch (or custom size) wooden art panels or gallery-wrapped canvases
- Spray adhesive suitable for photo mounting
- Sharp utility knife or X-Acto knife with fresh blades
- Self-healing cutting mat or large cardboard surface
- Painter’s tape
- Acrylic matte medium or photo-safe varnish (optional)
- Wide foam brush
- Brayer (rubber roller) or soft clean cloth
- Wall mounting hardware (French cleats or sawtooth hangers)
- Level and measuring tape
Step 1: Planning and Printing
-
Select the right image:
Choose a high-resolution photo with a strong horizontal composition. Architectural elements like bridges or skylines work exceptionally well for this split style because the lines encourage the eye to jump across the gaps. -
Measure your wall space:
Determine the total width you want the artwork to cover, including a 1-2 inch gap between each panel. This project uses four tall, narrow panels to create vertical interest. -
Digital slicing:
Using photo editing software, crop your image into four equal vertical strips. It is crucial to account for the ‘bleed’ if you plan to wrap the image around the edges of the canvas; add an extra 2 inches to all sides of each strip digitally. -
Order prints:
Have your four image strips printed on high-quality matte photo paper or canvas material. Ensure the print size matches your panel dimensions plus the bleed allowance.
Step 2: Mounting the Photograph
-
Prepare the workspace:
Set up a clean, dust-free area with your cutting mat. Lay out your first wooden panel or blank canvas face up. -
Dry fit the print:
Place the first print over the panel to check alignment. The key details of the photo should sit exactly where you intended on the face of the panel. -
Apply adhesive:
In a well-ventilated area, shake your spray adhesive vigorously. Apply an even, generous coat to the surface of the wooden panel, extending slightly over the edges. -
Position the print:
Carefully align the top edge of your print with the top of the panel (or your bleed marks). Slowly lower the paper onto the adhesive surface. -
Smooth out bubbles:
Immediately use a brayer or a soft cloth to press the print down. Start from the center and firmly push outward toward the edges to eliminate any trapped air bubbles. -
Wrap the edges (Optional):
If you accounted for bleed and want a wrapped look, apply adhesive to the sides of the panel. Fold the paper tightly over the edge, creating neat hospital corners at the top and bottom. -
Trim the excess (Alternative):
If you prefer a flush mount without wrapped edges like the example image, flip the panel face down on your cutting mat. Use a sharp utility knife to trim the excess paper flush with the wood edge. -
Repeat the process:
Continue mounting the remaining three strips to their respective panels. I usually do one panel at a time to ensure the glue doesn’t dry out before I can position the paper.
Edge Perfection Tip
Use fine-grit sandpaper (220 grit) to lightly sand the edges of the paper after trimming. This creates a seamless transition between the print and the wood block.
Step 3: Finishing and Installation
-
Seal the surface:
To protect the photo from UV light and dust, apply a thin layer of acrylic matte medium or varnish using a wide foam brush. Use long, smooth strokes to avoid brush marks. -
Paint the sides:
If you trimmed the paper flush rather than wrapping it, paint the exposed wooden edges of the panels a neutral color like black, white, or dark grey to give it a finished look. -
Install hanging hardware:
Attach sawtooth hangers or French cleats to the back of each panel. Measure carefully so the hardware is at the exact same height on every piece. -
Draft the layout on the wall:
Use painter’s tape to mark the placement of the panels on your wall. Ensure you leave a consistent gap (about 1 to 2 inches) between each panel to create the ‘window’ effect. -
Hang the panels:
Using a level, hang the first panel. Use this as your anchor point to measure and hang the subsequent three panels, checking the level frequently.
Sepia Tone Twist
Before printing, apply a sepia or black-and-white filter to your photo. This unifies the tones and makes the architectural details pop against the mounting panels.
Step 4: Refining the Edges
-
Check alignment:
Step back and view the image as a whole. The horizon lines and bridge structures should visually connect across the gaps. -
Secure the corners:
If using lightweight foam core instead of wood, use small removeable adhesive strips at the bottom corners to keep the panels perfectly straight.
Enjoy the sweeping view of your new custom gallery wall installation
Negative-Space Gaps as a Designed Element

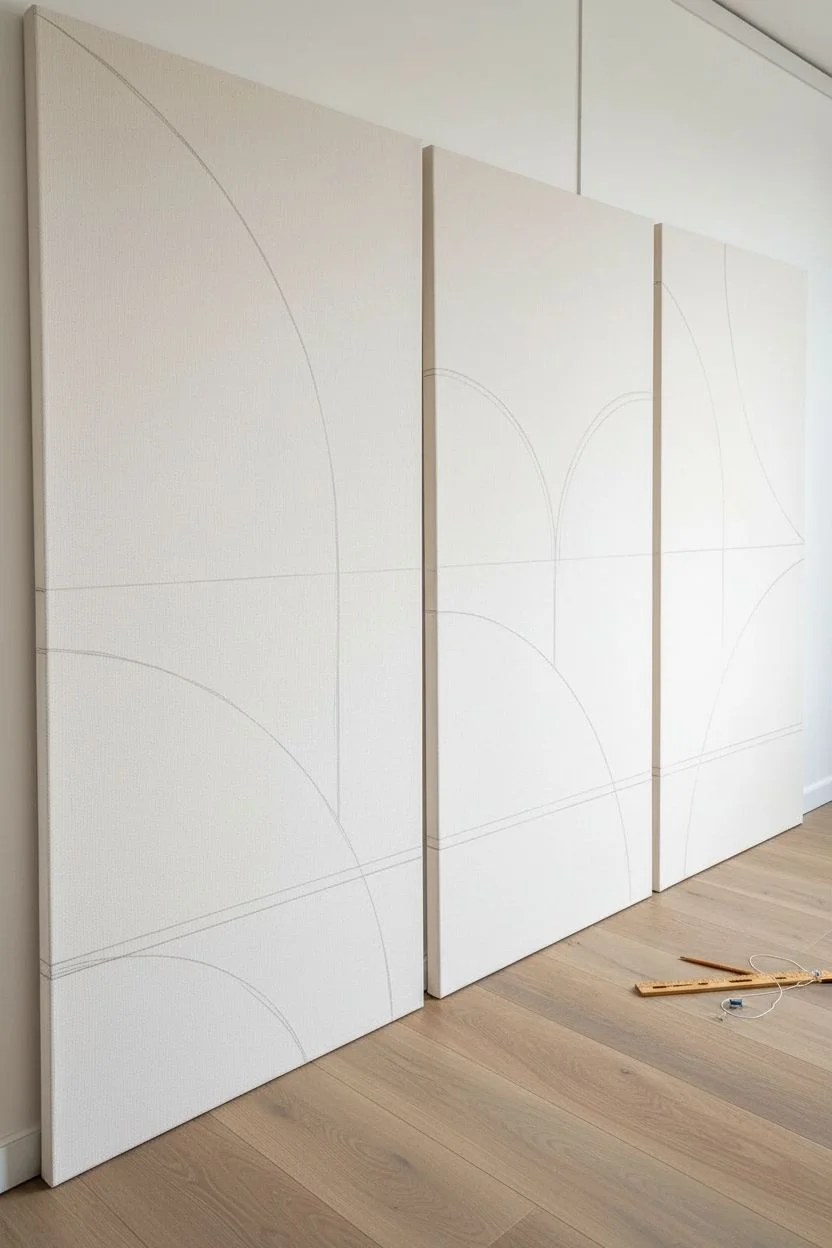
Embrace the beauty of expansive geometry with this stunning three-panel wall art featuring sweeping arches and bold color blocking. The composition cleverly spans across three canvases, using the negative space between them to interrupt and abstract the shapes for a modern, architectural feel.
Detailed Instructions
Materials
- 3 large stretched canvases (e.g., 24×48 inches)
- Acrylic paints (burnt orange, terracotta, deep teal, beige/cream)
- Painter’s tape (various widths)
- Large flat paintbrush (2-3 inch)
- Medium angled sash brush
- Pencil
- Long straightedge or yardstick
- String and pushpin (for drawing circles)
- Gesso (optional, for priming)
- Matte varnish
- Drop cloth
Step 1: Preparation and Mapping
-
Prime the surface:
Begin by applying a coat of gesso to your three canvases if they aren’t pre-primed. This ensures a smooth texture and helps the paint colors pop vibrantly. -
Arrange the layout:
Lay the three canvases side-by-side on the floor, leaving the exact gap between them (about 1-2 inches) that you intend to have on the wall. This is crucial for the design to flow correctly across the gap. -
Find the horizon:
Using your straightedge, lightly draw a horizontal line across all three canvases, positioned slightly below the vertical center. This creates the foundational shelf for your geometric shapes. -
Determine the focal point:
Decide where the largest arch will originate. In this design, the massive teal arch on the left panel actually crests somewhere off the canvas, so you’ll only be drawing a partial curve. -
Draft the arches:
Create a makeshift compass using a string tied to a pencil and anchored with a pushpin. Place the pin at the bottom center of where an arch should start, extend the string, and swing the pencil to draw perfect semi-circles across the panels. Do this for the large terracotta arch and the smaller inner arches.
Bleeding Lines?
If paint bleeds under the tape, wait for it to dry completely. Then, re-tape the line slightly over the mistake and paint over it with the correct color for a razor-sharp edge.
Step 2: Blocking and Color Application
-
Tape the straight lines:
Apply painter’s tape along the horizontal horizon line you drew earlier. Press the edges down firmly with a credit card or your fingernail to prevent paint bleed. -
Paint the background:
Start with the lightest color, the beige or cream tone. Apply this to the areas intended for negative space or the ‘sky’ portions of the design, brushing smoothly to minimize texture. -
Outline curves:
Since you can’t easily tape curves, use a steady hand and your angled sash brush to carefully cut in the edges of your arched shapes. I like to hold my breath slightly on the long curves for stability. -
Fill the large Left Arch:
Mix your burnt orange paint. Fill in the top section of the first panel, ensuring the paint goes all the way to the wrapped edges on the sides and top. -
Paint the Deep Teal:
Using a clean large brush, apply the deep teal color. This color appears in the top of the middle panel and the bottom corner of the first panel. Two coats are usually needed for this dark hue to be fully opaque. -
Apply the Terracotta:
Fill in the secondary arch shapes on the middle and right panels with the terracotta shade. This slightly redder tone adds depth and separates these shapes from the burnt orange sections. -
Address the edges:
Don’t forget the sides of the canvas. Carry the design over the edge so the painting looks finished when viewed from an angle.
Step 3: Refining and Sealing
-
Remove tape:
Peel off the painter’s tape while the paint is still slightly tacky, pulling at a 45-degree angle away from the painted area to ensure crisp lines. -
Touch up lines:
Check for any uneven edges or paint bleed. Use a small detail brush and the background color to clean up any mistakes along the geometric boundaries. -
Add texture (optional):
If you want the textured look seen in the inspiration photo, lightly dry-brush a slightly lighter shade over the colored sections to create a worn, fabric-like appearance. -
Let it cure:
Allow the paintings to dry completely overnight in a dust-free area. -
Varnish:
Apply a coat of matte varnish over the entire surface. This unifies the sheen of the different paint colors and protects the artwork from dust and UV light. -
Install:
Hang the canvases with the same 1-2 inch gap you accounted for during the sketching phase to maintain the illusion of continuous geometry.
Add Fabric Texture
Mix a handful of baking soda or plaster into your acrylic paint before applying. This creates a gritty, stone-like texture that mimics the organic feel of the original image.
Step back and admire how the negative space becomes an active part of your sophisticated new focal point

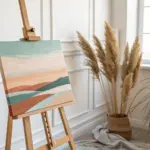


Have a question or want to share your own experience? I'd love to hear from you in the comments below!