When I’m craving a quick burst of spring color, St. Patrick’s Day painting projects are my go-to—bold greens, punchy rainbows, and all the lucky symbols you can play with. Here are a bunch of ideas you can make totally your own, whether you’re keeping it simple and cute or going full folklore fantasy.
Simple Shamrock Cluster
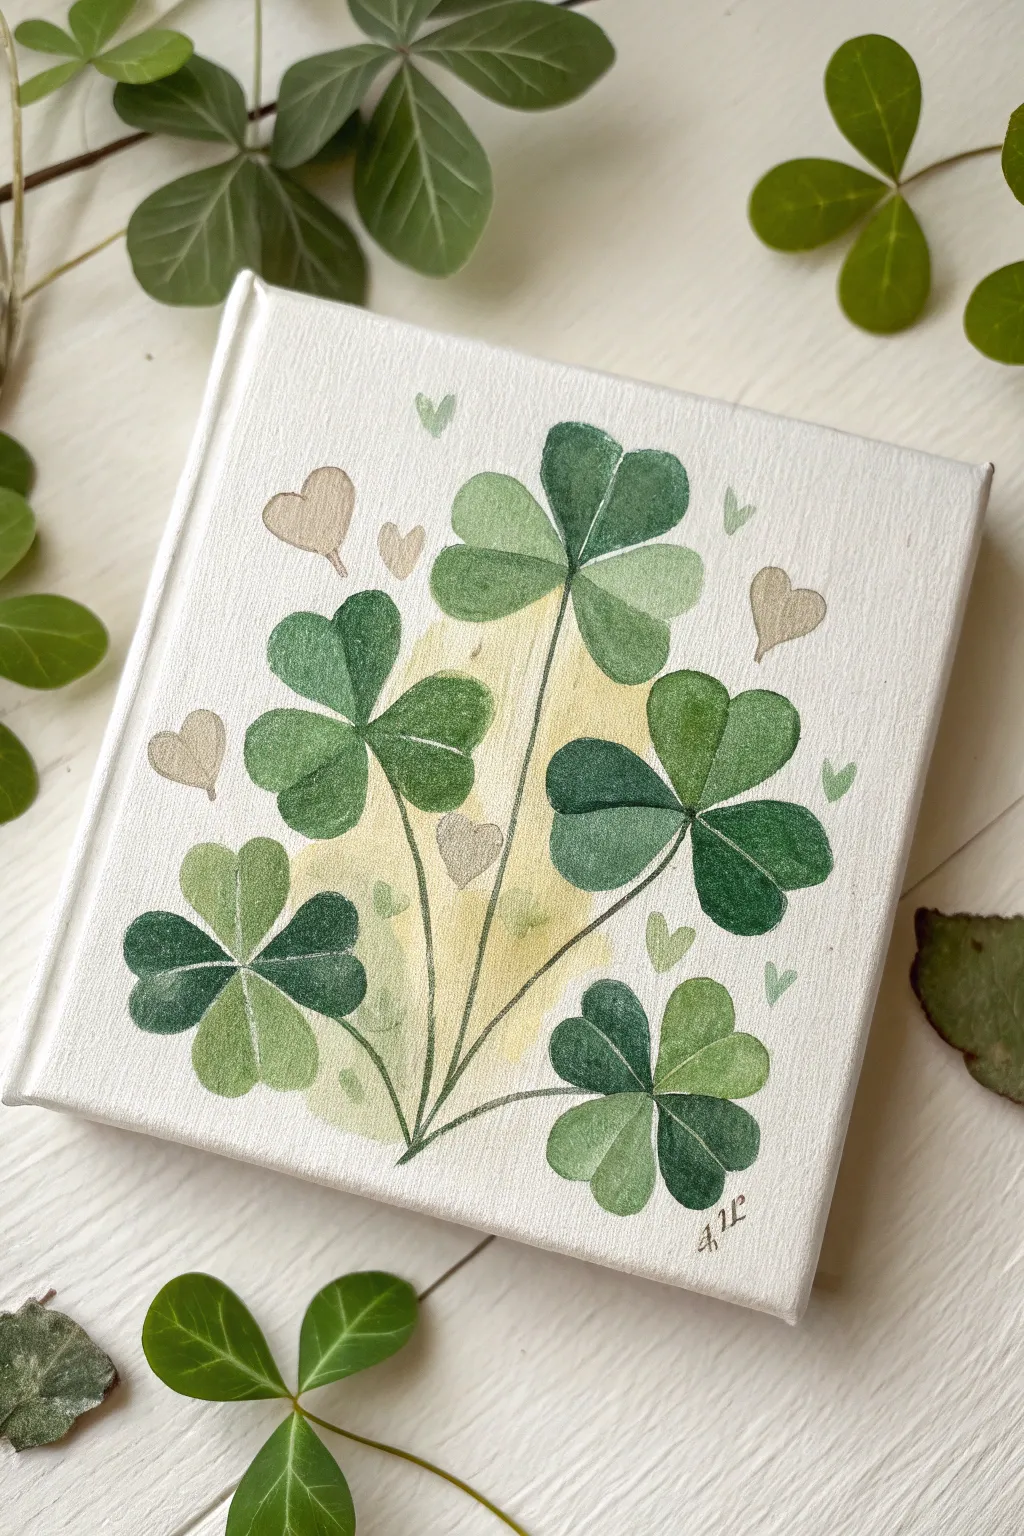
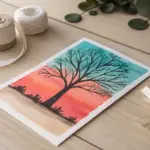
Capture the luck of the Irish with this charming, stylized painting featuring a bouquet of heart-shaped shamrocks. Soft washes of green and yellow create a gentle, illustrative feel that transforms a simple clover motif into lovely wall art.
Step-by-Step Tutorial
Materials
- Small square stretched canvas (approx. 6×6 inches)
- Watercolor paints or fluid acrylics
- Synthetic round brushes (size 4 and 6)
- Fine liner brush (size 0 or 1)
- Pencil (HB or lighter)
- Palette for mixing
- Water cup and paper towels
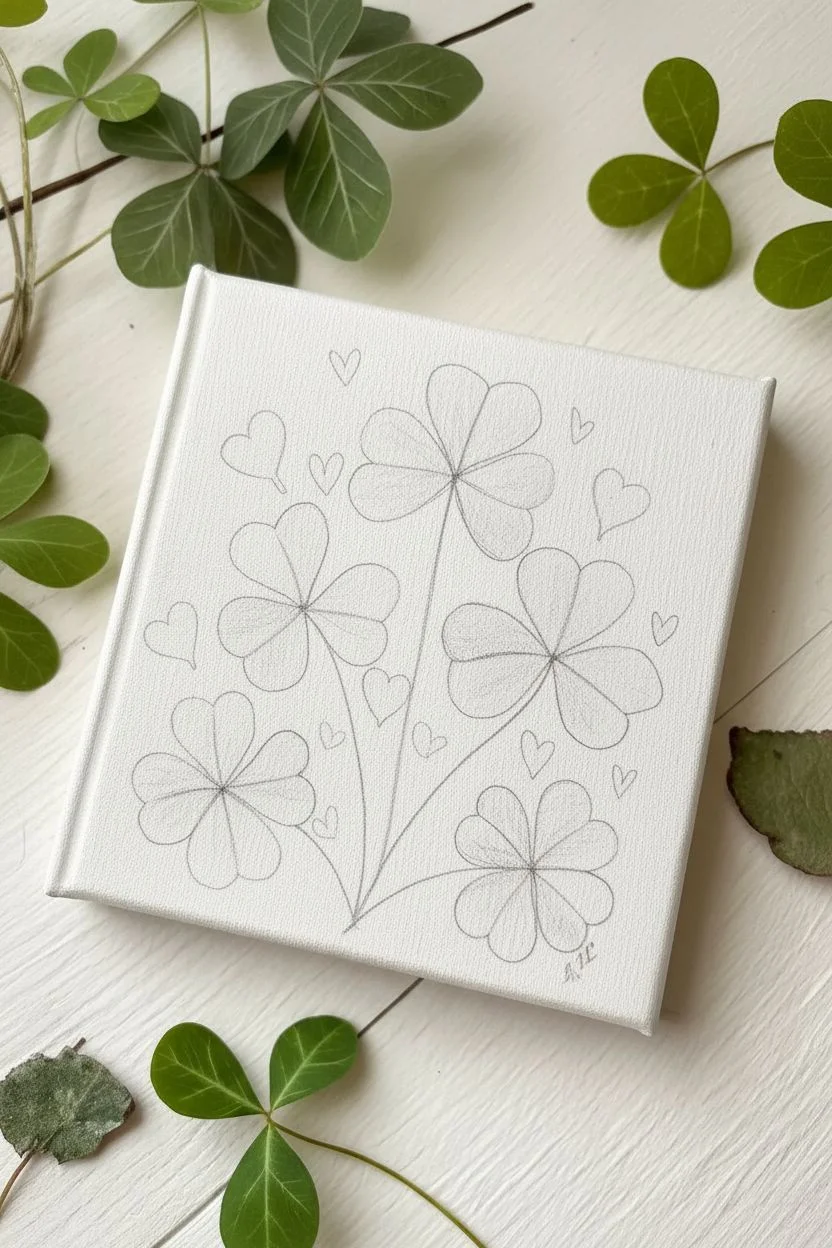
Step 1: Sketching the Layout
-
Plan the composition:
Visualize a central bouquet shape growing upward from the bottom center of the canvas. You will want roughly five main clover stems fanning out slightly. -
Draw the stems:
Lightly sketch five thin, slightly curved lines converging at a single point near the bottom edge. Make the center stem the tallest, with the side stems getting progressively shorter. -
Sketch the heart-shaped leaves:
At the top of each stem, draw three hearts that meet at their points to form the shamrock shape. Keep the hearts plump and rounded for a cute, illustrative style. -
Add floating details:
Sketch a few loose, tiny single hearts floating in the empty spaces around the main cluster to act as filler elements.
Step 2: Painting the Background
-
Mix a pale yellow wash:
Dilute a lemon yellow or ochre paint with plenty of water. You want this to be very sheer and transparent. -
Apply the central glow:
Paint a loose, organic shape behind the central stems, focusing the yellow color in the middle of the bouquet area. Don’t worry about painting inside the lines perfectly; let the color fade out into the white canvas edges. -
Soften edges:
While the yellow is still damp, use a clean, wet brush to drag the edges outward slightly, ensuring there are no harsh lines where the background color stops. -
Dry completely:
Wait for this background layer to be bone dry before moving on to the greens to prevent muddy bleeding.
Watercolor on Canvas Tip
Standard canvas repels watercolor. Coat your canvas with ‘Watercolor Ground’ first, or simply mix a tiny drop of dish soap into your paint water to help it adhere.
Step 3: Painting the Shamrocks
-
Prepare your green palette:
Mix three distinct shades of green: a deep forest green, a medium grass green, and a lighter sap green. This variety gives the cluster depth. -
Paint the first leaf set:
Starting with the top center shamrock, fill in one of its heart-shaped leaves with the dark forest green. Paint the adjacent leaf with the medium green. -
Vary the values:
Paint the third leaf of that same shamrock with the lightest green. The goal is to have each individual clover made up of 2-3 different shades of green to define the separate petals. -
Continue the pattern:
Move to the other four shamrocks, repeating this process. Mix and match which leaf gets the dark or light shade so no two flowers look exactly identical. -
Add texture while wet:
I like to drop a tiny dot of water into a drying leaf occasionally; this pushes the pigment to the edges and creates that characteristic watercolor ‘bloom’ texture seen in the reference.
Add Some Sparkle
Once the painting is dry, use a gold gel pen or gold metallic paint to outline just the floating beige hearts for a subtle, magical shimmer.
Step 4: Adding Details and Stems
-
Paint the stems:
Switch to your fine liner brush. Using a dark, brownish-green mix, carefully trace over your pencil lines for the stems, tapering them to be thinnest near the leaves. -
Define the center veins:
Once the leaves are dry, use the liner brush to paint a very thin, straight line down the center of each heart leaf. This mimics the fold of a clover. -
Paint the filler hearts:
Using a diluted light brown or taupe color, fill in the tiny floating hearts sketching earlier. Keep these very subtle and muted. -
Add tiny green accents:
Paint a few microscopic green hearts or mini-leaves scattered near the floating beige hearts to balance the colors. -
Sign and seal:
Add your initials in the corner using the fine liner brush. If using watercolors on canvas, apply a spray fixative once fully dry to protect the artwork.
Hang your new masterpiece to bring a touch of eternal spring and good fortune to your home


Bold Four-Leaf Clover Close-Up
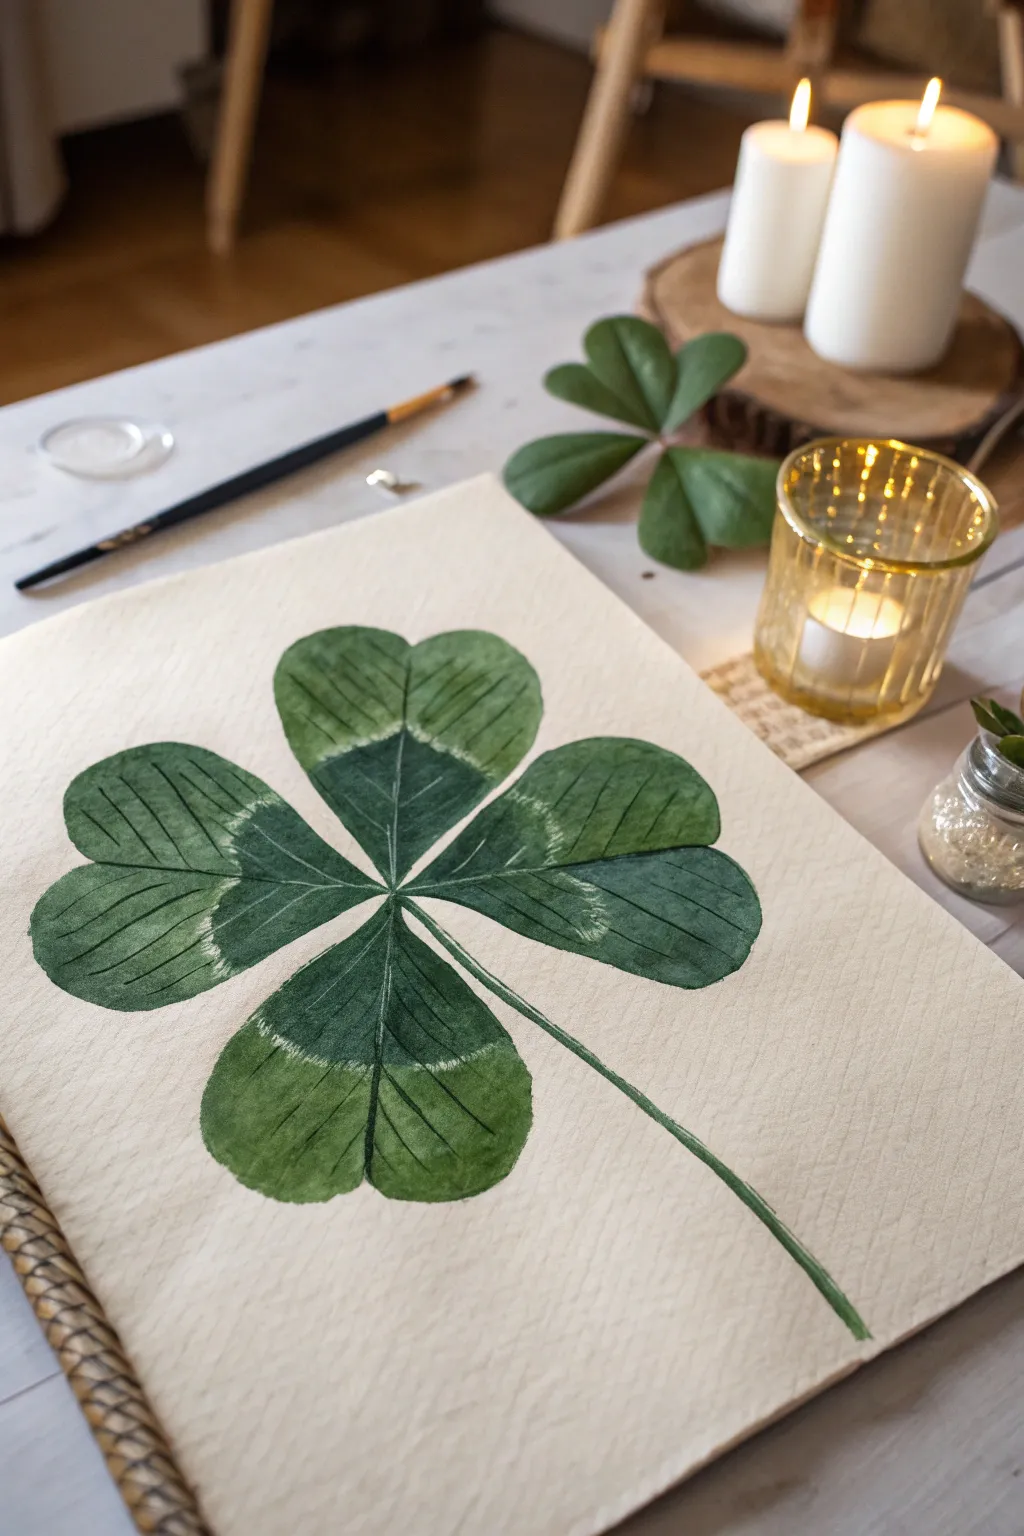
Capture the luck of the Irish with this elegant botanical study featuring a single, oversized four-leaf clover. The painting uses wet-on-wet techniques to blend deep emeralds with soft sage greens, creating a realistic texture that pops against the textured paper.
Step-by-Step Guide
Materials
- Cold press watercolor paper (300 gsm)
- Watercolor paints (Sap Green, Hooker’s Green, Emerald Green, Indigo)
- Round watercolor brushes (size 4 and 8)
- Fine liner brush (size 0 or 1)
- Pencil (HB or 2H)
- Kneadable eraser
- Clean water jar
- Paper towels
- Mixing palette
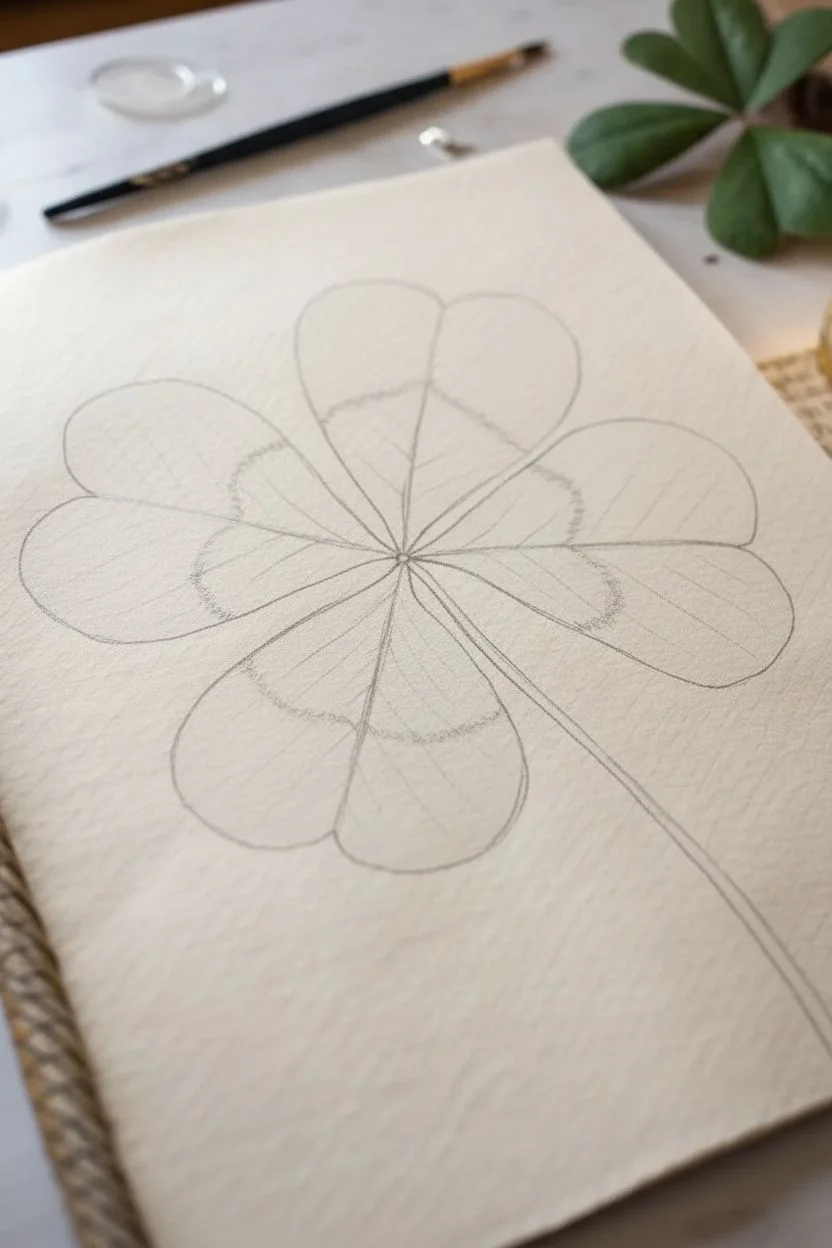
Step 1: Sketching the Structure
-
Center Point:
Begin by lightly marking a small dot in the center of your paper. This will be the meeting point for all four leaves and the stem. -
Leaf Outline:
Draw four heart shapes radiating from the center point. Make them large and spacious, almost touching at the sides. Keep your pencil pressure very light so graphite doesn’t show through the paint later. -
Stem Line:
Add a gently curved single line extending from the bottom center point down towards the right corner for the stem. -
Defining the Chevron:
Lightly sketch a curved V-shape or chevron pattern across the middle of each leaf. This area will remain lighter to create the clover’s signature variegated look.
Step 2: Painting the Base Layers
-
First Wash – Top Left:
Start with the top-left leaf. Wet the entire heart shape with clean water, avoiding the chevron area if you want that to stay pure white, or wetting it slightly for a soft transition. -
Dropping in Color:
Load your size 8 brush with a watery mix of Sap Green. Touch the brush to the wet paper at the outer edges and the very center point, letting the color bleed inward. -
Creating the Gradient:
While the paint is wet, dab a darker mix of Hooker’s Green at the very center junction where the leaves meet. Tilt the paper slightly to help it flow outward but stop before the middle band. -
Repeat for All Leaves:
Work your way around the clover, painting one leaf at a time. I find it helpful to rotate the paper so my hand doesn’t smudge the wet paint. -
Lifting Highlights:
If the paint creeps too much into the lighter chevron area, use a clean, damp brush (a ‘thirsty’ brush) to lift the pigment away, restoring the pale band. -
Stem Base:
Paint the stem with a medium green mix, using a single confident stroke. Let everything dry completely before moving to details.
Natural Variation Pro-Tip
Don’t make every leaf identical. Vary the amount of water and pigment slightly for each one to mimic nature’s organic imperfections.
Step 3: Building Detail & Texture
-
Deepening Shadows:
Mix a dark green using Emerald Green and a touch of Indigo. Apply this to the center where the leaves converge to create depth. -
Outer Edges:
Use the same dark mix to carefully outline the outer rim of each leaf, blending it inward with a damp brush so there isn’t a harsh line. -
Painting Veins:
Switch to your fine liner brush. With a concentrated dark green, paint thin, delicate veins radiating from the center of each leaf outward. -
Feathering:
Add very fine, feathery strokes along the veins to simulate the texture of the leaf surface. Keep these strokes directional, following the curve of the heart shape. -
Refining the Halo:
Enhance the contrast around the pale chevron band. Darken the green immediately above and below this pale strip to make the white/light green pop.
Troubleshooting Blooms
If cauliflower-like ‘blooms’ appear where wet paint met dry, wait for it to fully dry, then gently scrub the edge with a damp stiff brush to soften it.
Step 4: Final Touches
-
Stem Details:
Add a shadow line down one side of the stem with your dark green mix to give it roundness. -
Cleanup:
Once fully dry, gently erase any visible pencil marks, specifically around the outer edges. -
Assessment:
Step back and check the balance. If the center feels too flat, add one more glaze of dark Indigo-green to the very middle point.
Frame your botanical artwork in a simple wood frame to bring a touch of natural serenity to your space


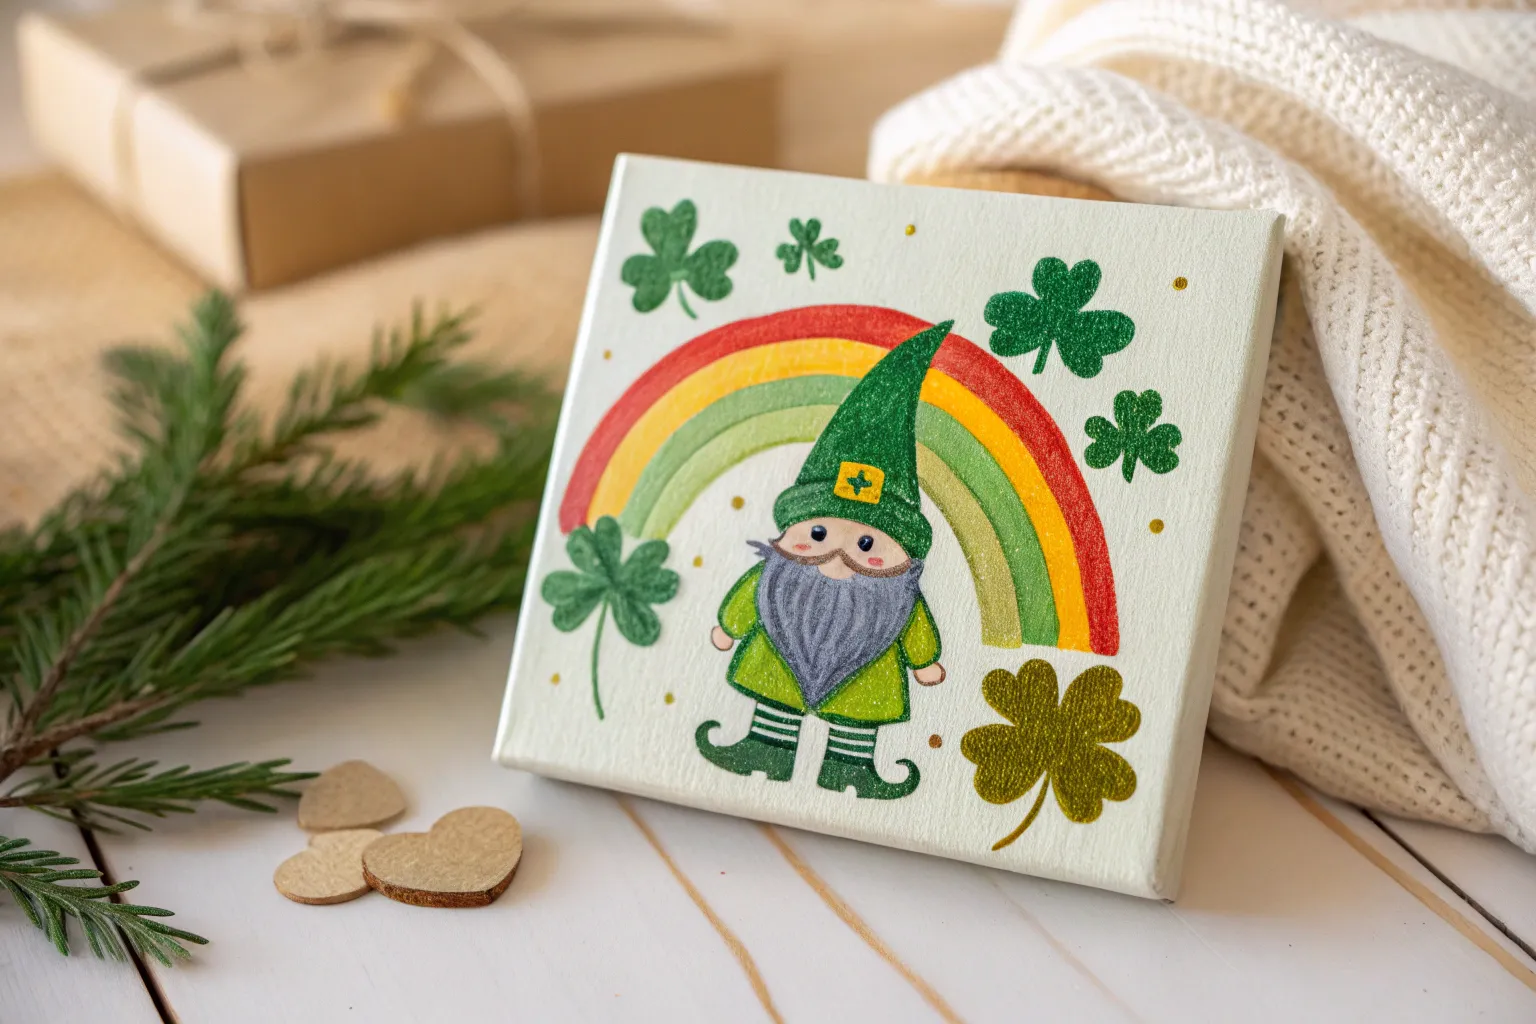
Cute Leprechaun Gnome Character
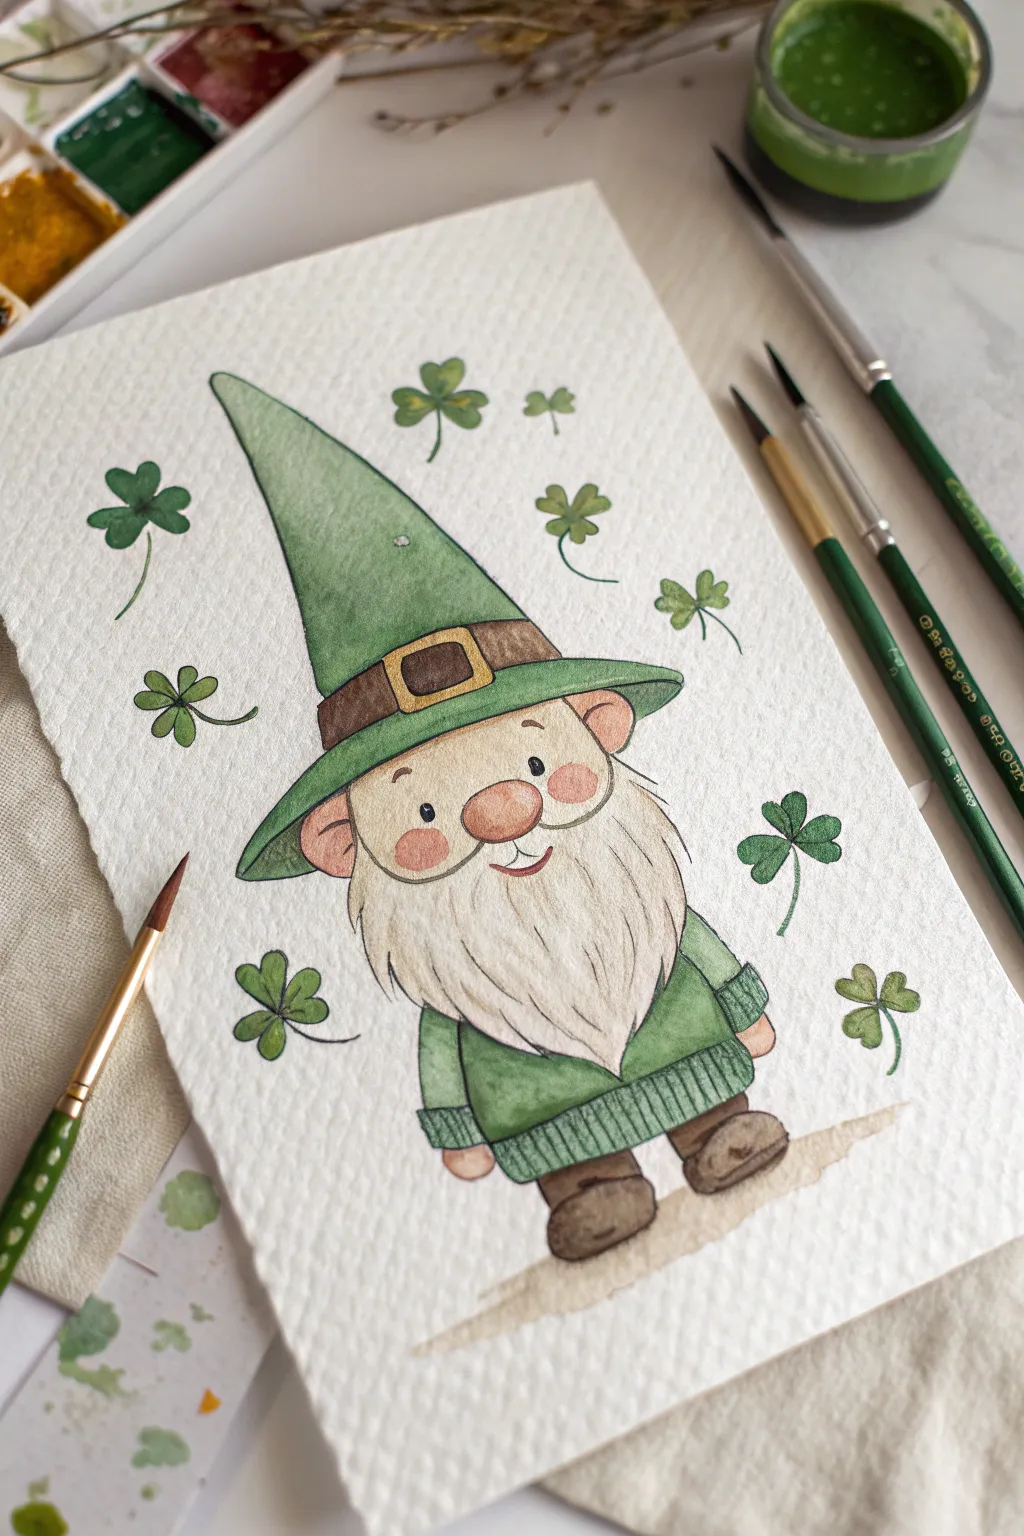
Celebrate St. Patrick’s Day with this charming watercolor illustration of a friendly leprechaun gnome wearing his holiday finest. This project uses soft washes and ink outlines to capture a sweet expression and fuzzy beard texture that pops against the textured paper.
Step-by-Step Tutorial
Materials
- Cold press watercolor paper (approx. 300gsm for texture)
- Watercolor paint set (shades of sap green, hooker’s green, burnt sienna, yellow ochre, and flesh tint)
- Small round brushes (size 2 and 4)
- Fine liner brush or rigger brush for details
- Waterproof fine liner pen (brown or sepia, 0.1mm or 0.3mm)
- HB pencil and eraser
- Palette for mixing
- Two jars of water
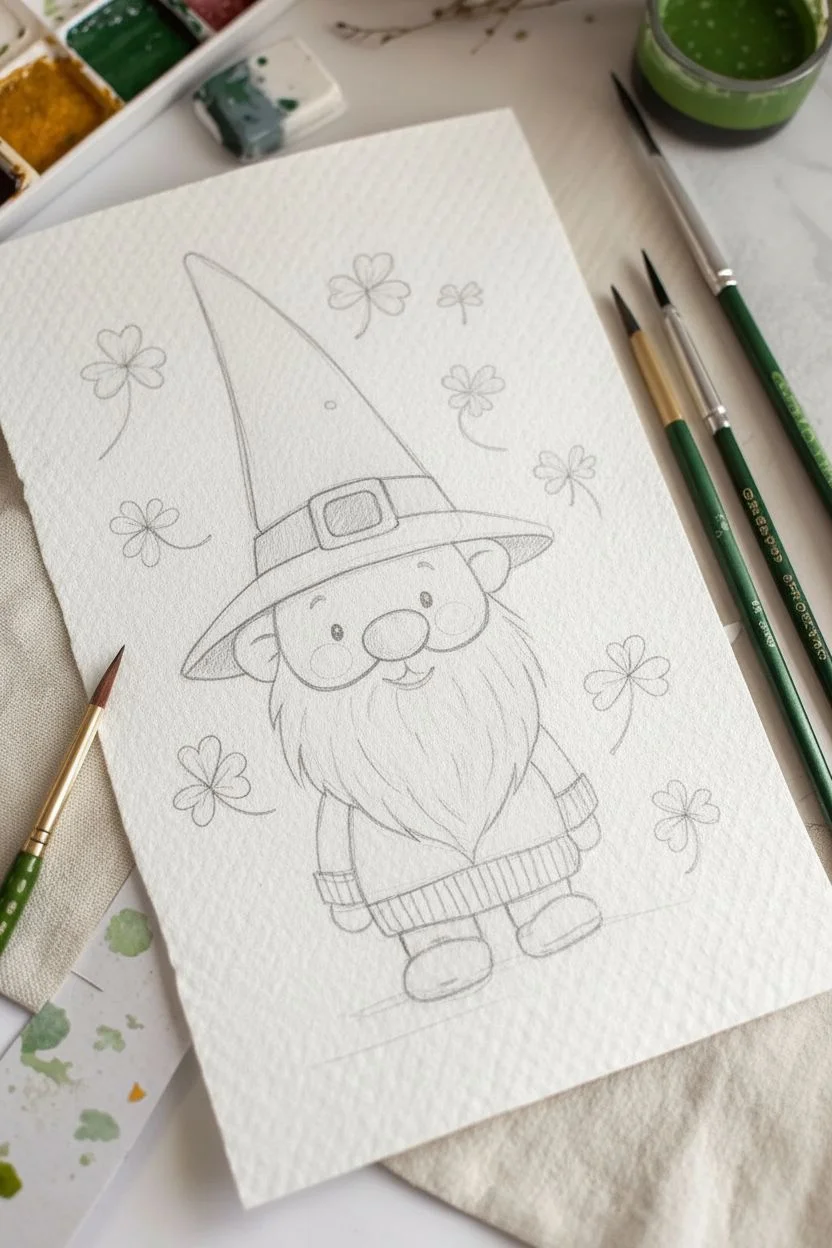
Step 1: Sketching the Character
-
Draft the basic shapes:
Begin by lightly sketching a large oval for the body and a slightly flattened circle on top for the head. Add a tall, elongated triangle shape pointing slightly to the left for the hat. -
Define the face and beard:
Draw a large, round nose in the center of the face area. From the sides of the nose, sketch a wide, flowing beard shape that tapers down to a point over the body. Add two semi-circles for ears peeking out from the sides. -
Add character details:
Sketch a simple curved line for the mouth just under the nose and two small, darkened eyes. Add rosy cheek circles. Draw a brim on the hat and a belt with a square buckle just above the brim. -
Clothing and limbs:
Refine the body shape into a chunky sweater, adding cuffs at the bottom. Draw short, sturdy legs and rounded boots at the base. I like to keep the feet slightly splayed for a cute stance. -
Surrounding elements:
Lightly sketch several shamrocks of varying sizes floating around the gnome to frame the composition.
Pro Tip: Beard Texture
Don’t paint the whole beard! Use ‘negative painting’ by darkening the sweater behind the beard tips, making the white beard pop without needing white paint.
Step 2: Inking the Outline
-
Trace the pencil lines:
Using your waterproof fine liner pen, carefully trace over your pencil sketch. Use a confident, slightly broken line for the beard to suggest hair texture. -
Erase guidelines:
Allow the ink to dry completely—wait at least 5 minutes to prevent smearing. Gently erase all visible pencil marks.
Troubleshooting: Bloems
If you get ‘cauliflower’ blooms in the green hat, let it dry completely, then apply a second glaze of green to even out the texture.
Step 3: Painting the Gnome
-
Skin tones:
Mix a very dilute wash of flesh tint (or a mix of watered-down orange and pink). Paint the nose, ears, and face area. Add a slightly more concentrated drop of red or pink to the nose and cheeks while wet for a blush effect. -
Hat base layer:
Mix a sap green or leaf green. Paint the main cone of the hat using a wet-on-dry technique. Let the color pool slightly at the bottom edge for natural shading. -
Sweater texture:
Using a slightly darker green (like hunter green or hooker’s green), paint the sweater. Once the base layer is dry, use the tip of your size 2 brush to add vertical lines on the cuffs and hem to mimic ribbing. -
Leather accents:
Paint the boots and the hat belt with burnt sienna or a warm brown. Leave tiny slivers of white paper for highlights on the boots if possible, or lift color out with a thirsty brush. -
The buckle:
Use a yellow ochre or gold paint for the belt buckle. Keep this small area fairly dry so the color remains vibrant. -
Beard shading:
Although the beard is white, it needs depth. Mix a very watery grey or beige. Paint broad, sweeping strokes from the nose downward, following the flow of the beard hair, leaving plenty of white paper showing.
Step 4: Final Details
-
Hat shadows:
Once the green hat is fully dry, mix a darker green and paint a thin shadow line underneath the hat belt and along the right edge of the cone to give it volume. -
Painting the shamrocks:
Paint the floating shamrocks with fresh sap green. Vary the intensity of water—make some lighter and some darker to create depth in the background. -
Grounding shadow:
Mix a light, watery brown wash. Paint a loose, horizontal patch under the gnome’s feet so he isn’t floating in space. Soften the edges with clean water. -
Eye highlights:
If you painted over the eyes, use a white gel pen or opaque white gouache to add a tiny sparkle dot to each eye.
Frame this cheerful little character or scan it to create custom St. Patrick’s Day greeting cards for friends


Shamrock Garland Border Design
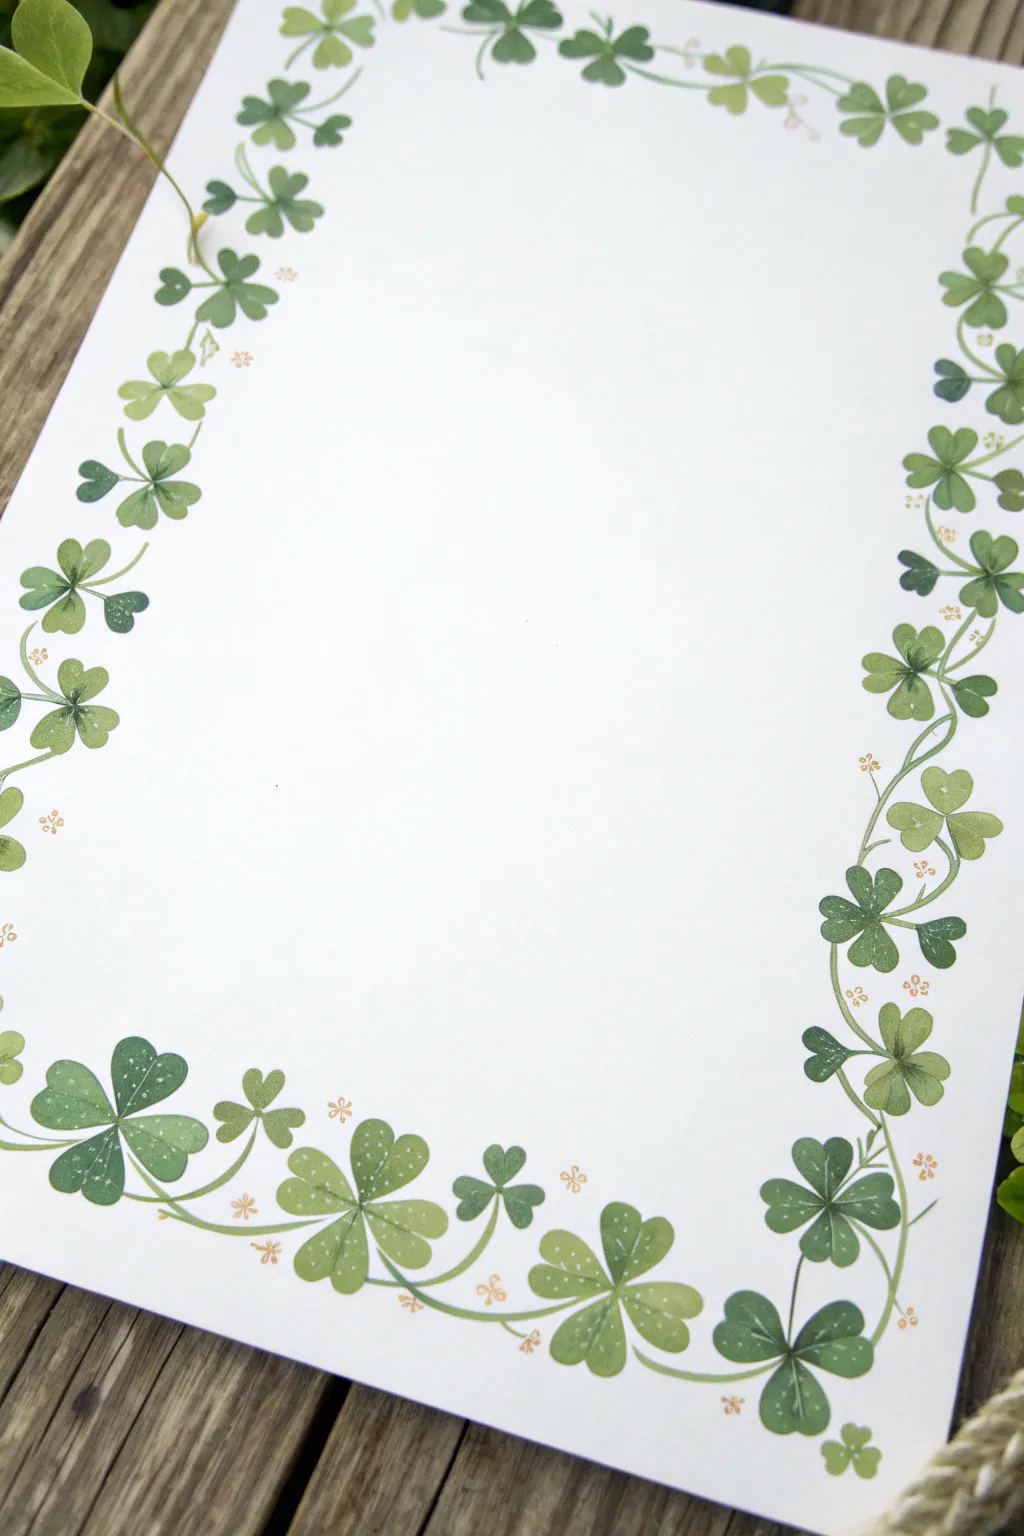
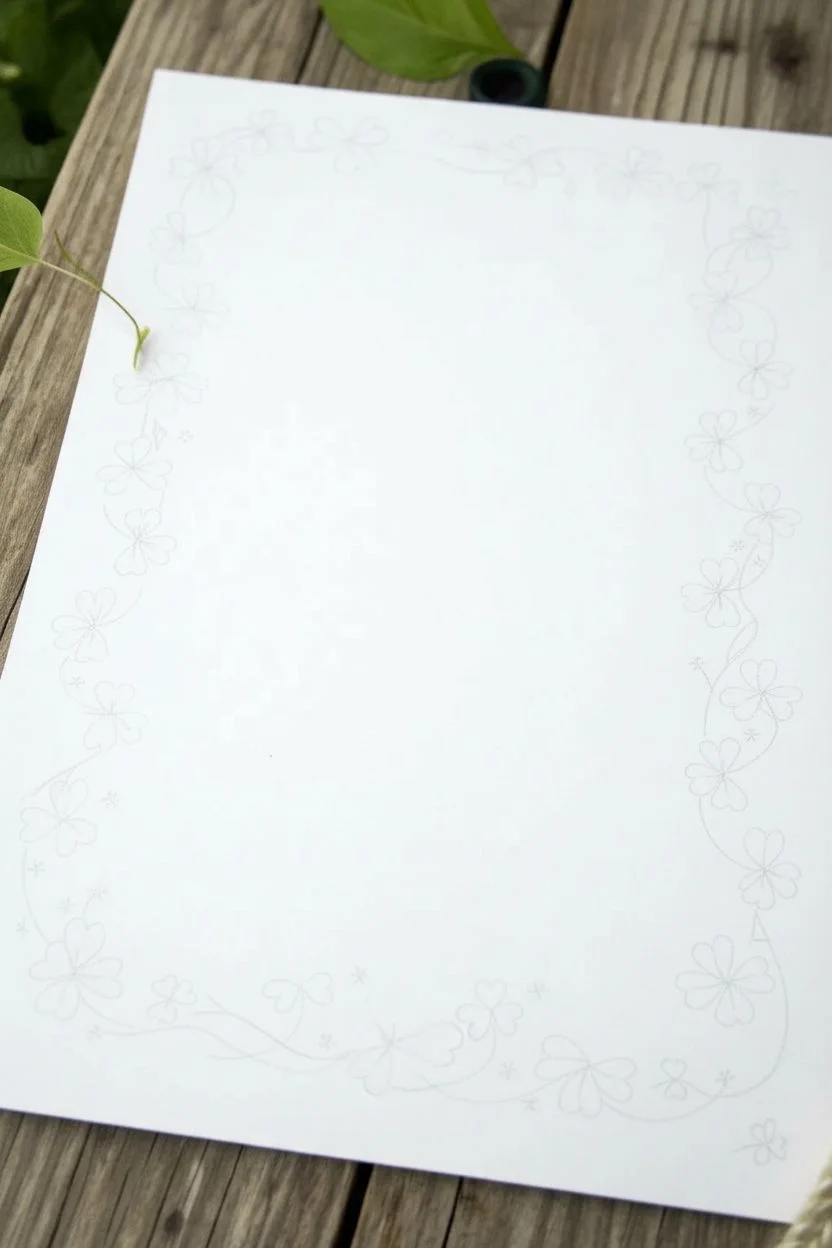
Frame your St. Patrick’s Day greetings with this fresh and airy watercolor border design. Featuring a mix of three-leaf and four-leaf clovers in varying shades of green connected by delicate vines, this piece brings a touch of organic Irish charm to any stationary or card.
How-To Guide
Materials
- Heavyweight watercolor paper or cardstock (bright white)
- Watercolor paints (Sap Green, Hooker’s Green, Olive Green, and a warm Yellow)
- Round paintbrushes (size 2 and size 6)
- Very fine liner brush (size 0 or 00)
- Gold or metallic gel pen (optional)
- Pencil and kneaded eraser
- Paper towels
- Water jar
Step 1: Planning the Flow
-
Lightly sketch the path:
Begin with a sharpened pencil to draw a very faint, wavy line around the perimeter of your paper. This will serve as the ‘spine’ for your vines. Keep the curves gentle and organic rather than perfectly symmetrical to maintain a natural look. -
Mark leaf positions:
Along your wavy line, lightly mark small circles or ‘X’s where you want your main clovers to sit. Group some closer together and leave wider gaps elsewhere for visual interest, alternating between the inner and outer sides of the vine.
Water Control Fix
If petals bleed into each other, your brush is too wet. Dry it on a paper towel before painting, or wait for one petal to dry before painting its neighbor.
Step 2: Painting the Foliage
-
Mix your greens:
Prepare a palette with at least three distinct green shades: a deep forest green, a bright grassy green, and a lighter yellow-green. I find that pre-mixing these puddles helps keep the painting flow uninterrupted. -
Paint the first heart petals:
Using your size 6 round brush, load it with your medium green. Paint a simple heart shape for one petal of a clover. The point of the heart should face inward toward the center of the flower. -
Complete the first clover:
Add two (for a shamrock) or three (for a lucky clover) more heart-shaped petals, all meeting at a central point. Leave a tiny sliver of white space between the petals to define them clearly. -
Vary the shades:
As you move to the next marked spot on your border, switch to a different shade of green. Painting a dark olive clover next to a bright lime one adds depth and mimics the variety found in nature. -
Control the water load:
For some leaves, use more water to create a translucent, soft look. For others, use less water and more pigment for a punchier, opaque finish. -
Add smaller filler leaves:
Switch to your size 2 brush. In the gaps between the large clovers, paint much smaller, simple three-leaf clusters. These should look like little sprouting babies compared to the main flowers. -
Drying time:
Let the leaves dry completely before moving on to the stems. If the paper is cool to the touch, it’s still damp.
Level Up: Hidden Luck
Hide a single four-leaf clover painted in a slightly metallic emerald green somewhere in the border as a hidden ‘lucky charm’ for the recipient to find.
Step 3: Connecting the Vines
-
Draw the main vine:
I prefer using a size 0 liner brush for this step. Load it with a watery mixture of olive green and carefully trace over your initial pencil path, connecting the floating clovers into a single garland. -
Attach the clovers:
Draw tiny, curved stems extending from the center of each clover cluster to meet the main vine line. Vary the curve direction to make the leaves look like they are dancing. -
Add curling tendrils:
For a whimsical touch, add very fine, spiral tendrils branching off the main vine into the empty white spaces. These little curlicues prevent the border from looking too stiff.
Step 4: Details & Finish
-
Add texture:
Once the base green layers are totally dry, take a slightly darker green on your fine brush and add a thin center vein to a few of the larger petals. -
Stipple effect:
Dip an old toothbrush or stiff brush into diluted white gouache or a very light green and gently flick it over the border to create a subtle speckled texture. -
Metallic accents:
Using a gold gel pen or metallic paint, draw tiny clusters of three or four dots (or tiny flowers) near the stems to represent pollen or magical dust. -
Erase guidelines:
Once you are absolutely certain the paint is bone dry, gently erase any visible pencil marks from your initial sketch.
Now your stationery is ready for a heartfelt message written in the center
BRUSH GUIDE
The Right Brush for Every Stroke
From clean lines to bold texture — master brush choice, stroke control, and essential techniques.
Explore the Full Guide
Pastel Shamrocks on Black
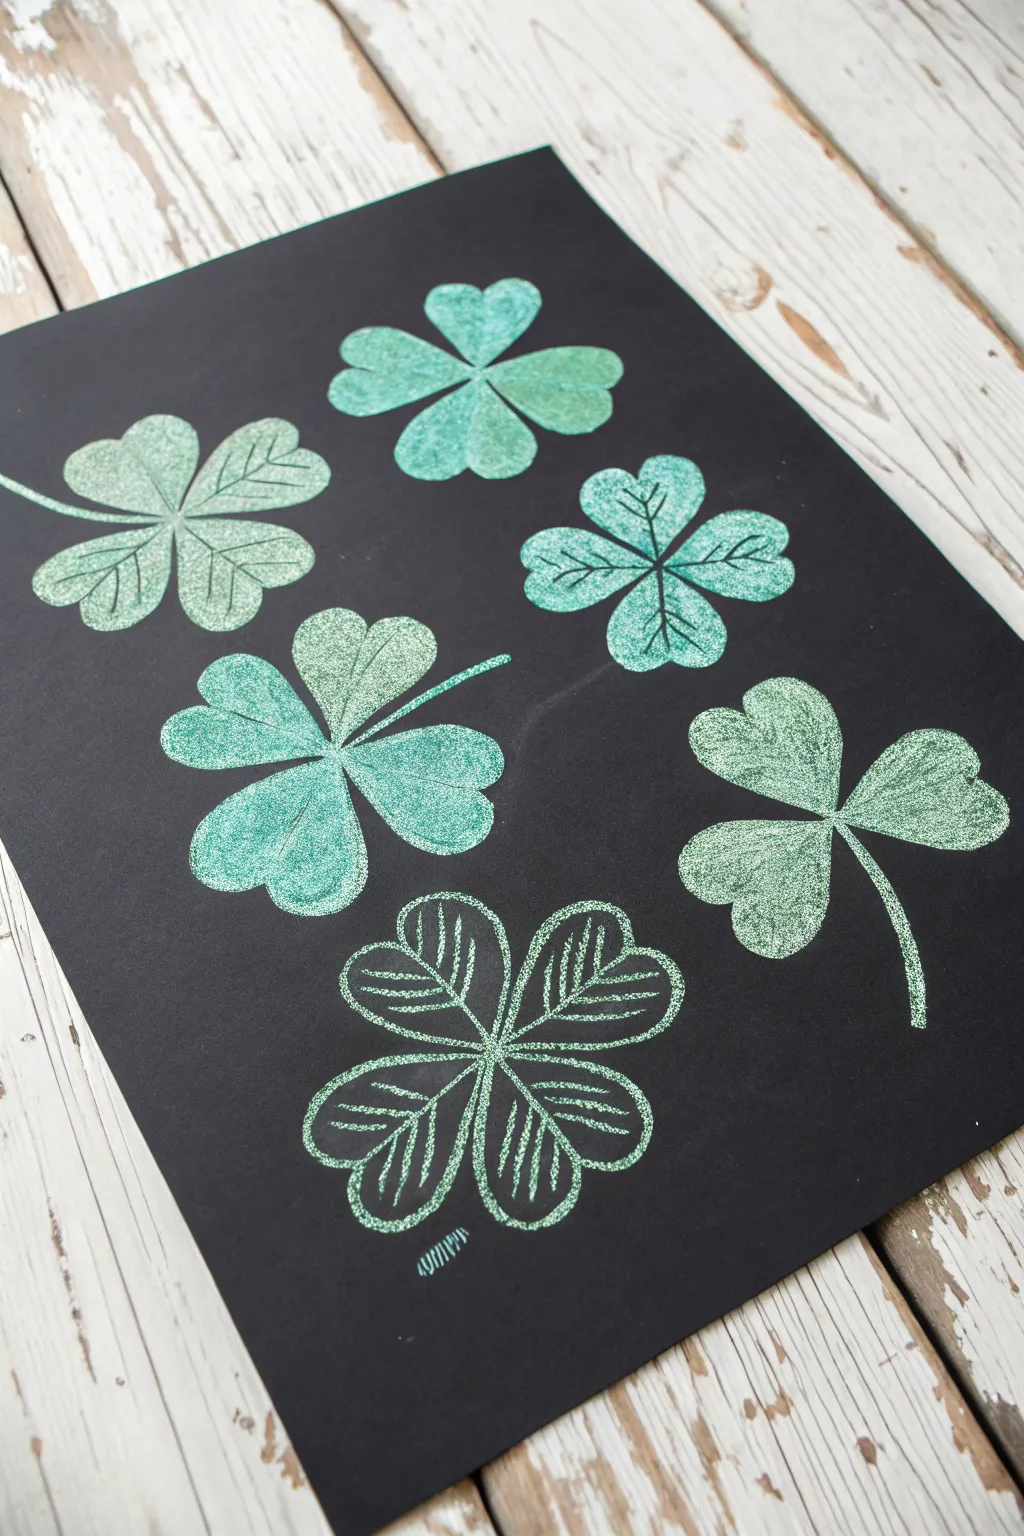
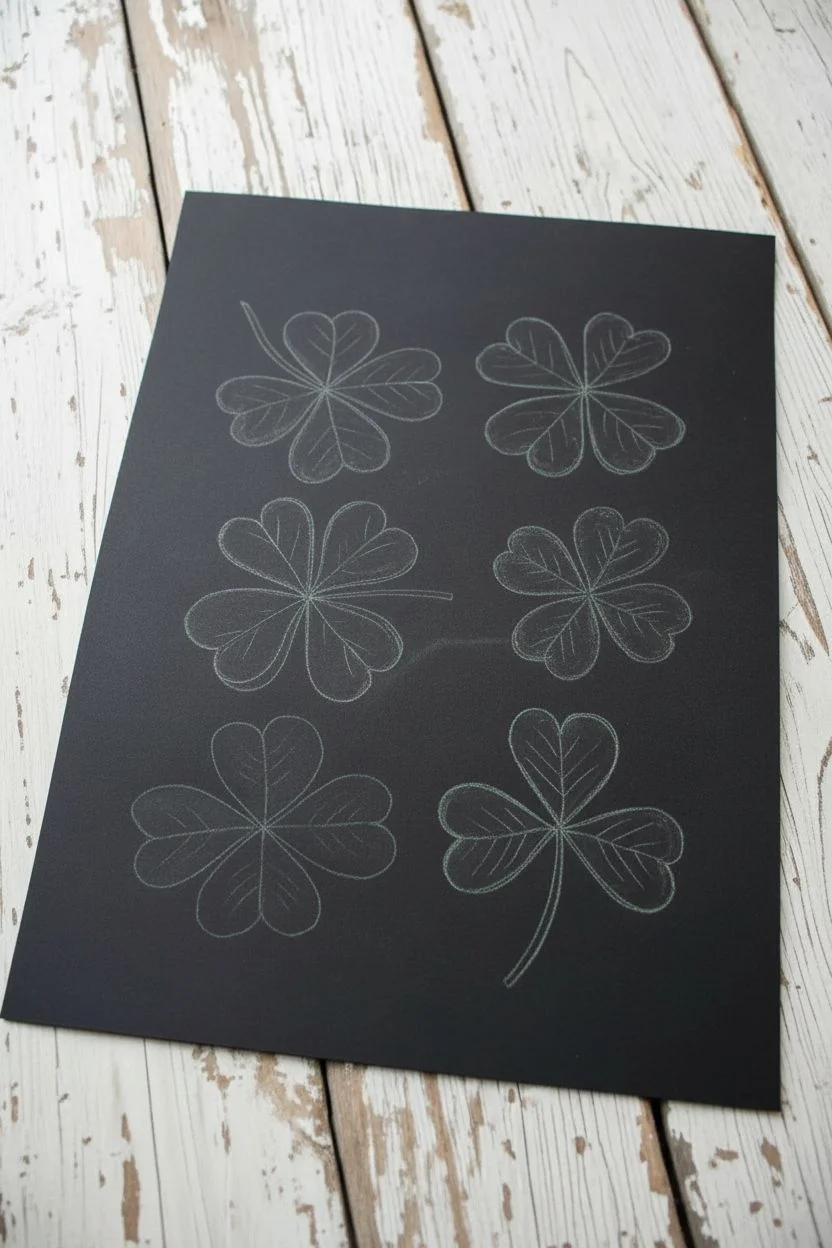
Contrast is the star of this simple yet striking art project, where vibrant metallic or glitter pastels pop against a deep black background. You’ll create a variety of clover shapes, from filled-in silhouettes to outlined sketches, perfect for a modern St. Patrick’s Day display.
How-To Guide
Materials
- Black construction paper or cardstock
- Metallic or glitter oil pastels (shades of green and teal)
- White or light green chalk pastel or colored pencil (for initial sketching)
- Toothpick or skewer (for etching details)
- Paper towels
- Fixative spray (optional)
Step 1: Preparation & Layout
-
Choose your canvas:
Start with a clean sheet of black construction paper or cardstock. The black background is essential for making the pastel colors appear luminous. -
Plan the composition:
Visualize where you want your six shamrocks to go. Aim for a mix of three-leaf and four-leaf clovers, angling them differently to create a sense of movement across the page. -
Lightly sketch shapes:
Using a very light touch with a white or pale green pencil, sketch the basic heart shapes that make up the clover leaves. These should be faint guides that will be covered later.
Keep it Sharp
Work from the top left of the paper down to the bottom right (if right-handed). This prevents your hand from resting on completed areas, keeping your shamrocks crisp and smudge-free.
Step 2: Creating Solid Shamrocks
-
Select your greens:
Pick out a few different shades of green pastels. Using a mix of mint, emerald, and teal keeps the artwork interesting rather than monotone. -
Fill the first leaf:
Starting with one of the heart-shaped leaves, color it in completely with your pastel. Press firmly to get a solid, opaque layer of pigment. -
Vary the pressure:
For a textured look, apply slightly more pressure in the center of the leaf and fade out gently toward the edges, or vice-versa. -
Complete the clover head:
Continue filling in the remaining three (or four) leaves of your first shamrock. Ensure the points of the hearts meet in the center. -
Add a stem:
Draw a simple curved line extending from the center point for the stem. Taper it slightly at the end for a natural look. -
Repeat with variations:
Move to the next spot on your paper and repeat the filling process. I like to switch pastel shades here to differentiate it from its neighbor. -
Etch the veins:
Take a toothpick or a clean skewer. Gently scratch lines into the thick layer of pastel you just applied to reveal the black paper underneath, creating vein patterns.
Fixing Smudges
Accidentally dragged your hand through the green? Don’t panic. Use a clean kneaded eraser to lift the stray pigment off the black paper—rubbing it will only grind the color in deeper.
Step 3: Creating Linear Styles
-
Outline a new shape:
For visual variety, choose a spot for a new shamrock but don’t fill it in completely. Instead, just draw a thick outline of the heart-shaped leaves. -
Draw inner veins:
Using the same pastel color, draw the veins inside the open leaf shapes. This creates a ‘negative space’ effect compared to the solid ones. -
Create a scratched style:
For another variation, fill a clover shape lightly, then use the side of the pastel to scuff pigment over it roughly. -
Define with etching:
Use your toothpick again on this rougher shape to scratch distinct outlines and veins, sharpening up the fuzzy edges.
Step 4: Finishing Touches
-
Check balance:
Step back and look at your composition. If there is an empty gap, add a small partial leaf or a loose stem to fill the space. -
Brighten highlights:
If any leaves look too dull, layer a lighter mint or metallic white pastel over the top to catch the light. -
Clean up dust:
blow away any loose crumbly bits of pastel. Don’t wipe them with your hand, or you will smear the vibrant pigment across the black paper. -
Set the art:
If you want to prevent smudging later, take the artwork outside and give it a very light misting of spray fixative.
Display your shimmering collection of clovers in a bright spot where the light can catch the pastel texture
Watercolor Clover Wash With Ink Details
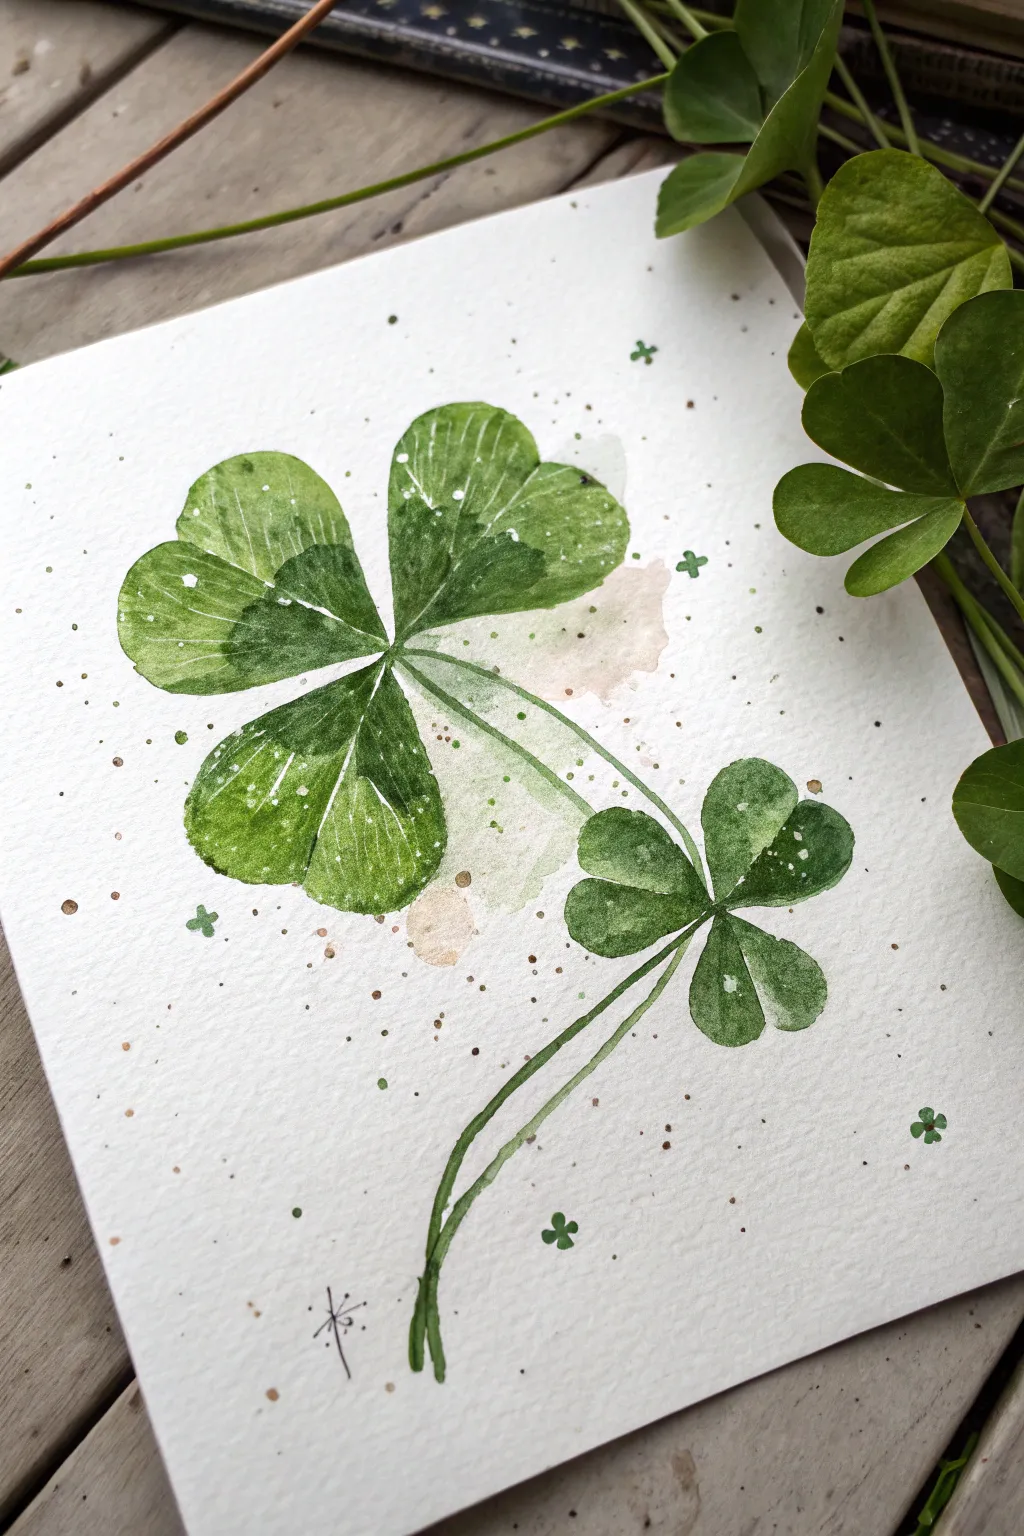
Capture the delicate luck of the Irish with this fresh and airy watercolor study. Featuring a loosely painted four-leaf clover alongside a smaller companion, this project balances vibrant greens with subtle splatter textures for a modern botanical look.
Step-by-Step Guide
Materials
- Cold press watercolor paper (300 gsm)
- Watercolor paints (Sap Green, darker Hooker’s Green, and a warm yellow/ochre)
- Round watercolor brushes (Size 6 and Size 2)
- Clean water jar
- Paper towels
- Fine liner brush or rigger brush (optional)
- Mixing palette
- Pencil (HB) and kneaded eraser
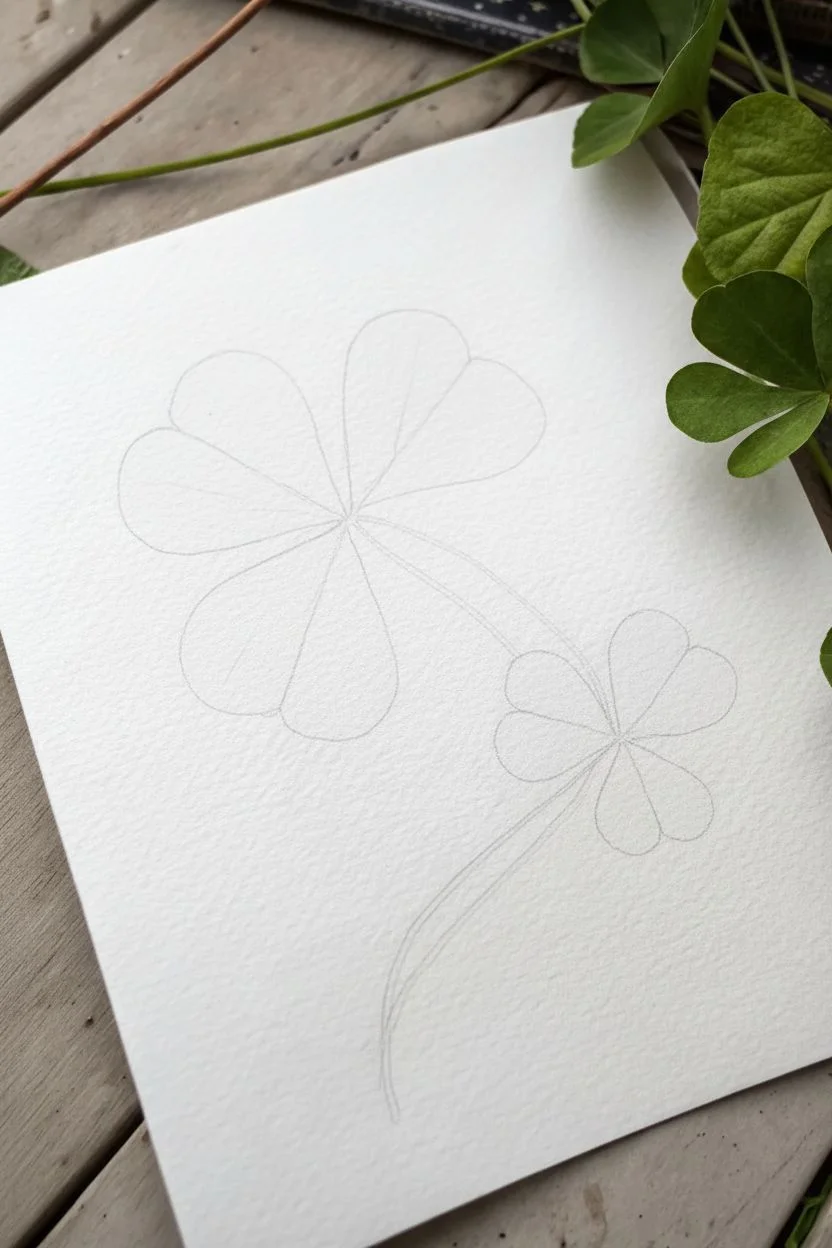
Step 1: Sketching & Preparation
-
Lightly sketch shapes:
Begin with a very faint pencil sketch. Draw a large four-leaf clover in the upper-left quadrant and a smaller three-leaf clover below it to the right. Use gentle, heart-shaped outlines for the leaves. -
Map the stems:
Draw slender, curving stems connecting the two clovers. Notice how the stems naturally curve and overlap slightly near the bottom; keep these lines fluid rather than rigid. -
Soften the lines:
Take a kneaded eraser and dab over your sketch until the graphite is barely visible. We want the paint to define the shapes, not the pencil lines.
Bloom Control
To get those beautiful watermarks (cauliflowers) inside the leaves, drop clean water into the drying paint just as the shine starts to disappear from the paper.
Step 2: Painting the Leaves
-
Mix your greens:
Prepare two puddles of green: a lighter, yellowish Sap Green and a deeper, cooler forest green. Simplicity is key here; you want the colors to feel fresh. -
Paint the first leaf:
Starting with the large clover, wet one leaf petal with clean water first. Drop in the lighter green around the edges and let it bleed inward. -
Add depth:
While the petal is still damp, touch your brush loaded with the darker green to the center vein area or the base of the leaf. Watch the colors bloom and blend naturally. -
Create separation:
Repeat this for all four leaves, but try to leave a tiny sliver of dry white paper between the petals. This white space prevents the wet leaves from bleeding into a single blob and defines the structure. -
Paint the smaller clover:
Move to the three-leaf clover using the same wet-on-wet technique. I sometimes use a slightly darker mix here to show it’s further back or in shadow. -
Lift highlights:
Before the paint dries completely, use a clean, thirsty brush (damp but not dripping) to lift a little pigment from the top curves of the leaves. This creates a soft, rounded highlight.
Step 3: Stems & Background Washes
-
Draw the stems:
Switch to your smaller brush (Size 2). Load it with a medium-strength green and paint the long stems with a single, confident stroke. Variation in line thickness adds character. -
Add background washes:
Mix a very watery, pale ochre or muddy pink. Add a loose, abstract wash patch behind the stems where the leaves connect, letting it soften the stark white background without overpowering the greens. -
Let it dry:
Allow the main elements to dry completely. If the paper is cold to the touch, it’s still wet.
Go Metallic
Swap the brown splatter paint for gold watercolor or metallic ink. It adds a festive St. Patrick’s Day shimmer that catches the light beautifully.
Step 4: Details & Texture
-
Paint leaf veins:
Using your finest brush and a concentrated dark green mixture, paint very delicate veins radiating from the center of each leaf. Keep these lines broken and wispy rather than solid. -
Splatter texture:
Load a brush with a mix of brown and green paint. Tap the handle against another brush over the paper to create fine speckles. Focus some heavier splatters near the bottom stems. -
Add white accents:
Once everything is bone dry, mix a little white gouache or opaque white watercolor. Splatter tiny white dots over the leaves to mimic morning dew or pollen. -
Miniature motifs:
For a playful touch, use the tip of your small brush to paint tiny, solid green ‘plus signs’ or mini-clover shapes floating in the background space. -
Final whimsical mark:
At the very bottom of the stems, add a small, scribbly starburst or signature mark with a fine liner brush to ground the composition.
Step back and admire your fresh botanical art, ready to be framed or gifted for a bit of luck

PENCIL GUIDE
Understanding Pencil Grades from H to B
From first sketch to finished drawing — learn pencil grades, line control, and shading techniques.
Explore the Full Guide
Tissue Collage Shamrock on Painted Sky
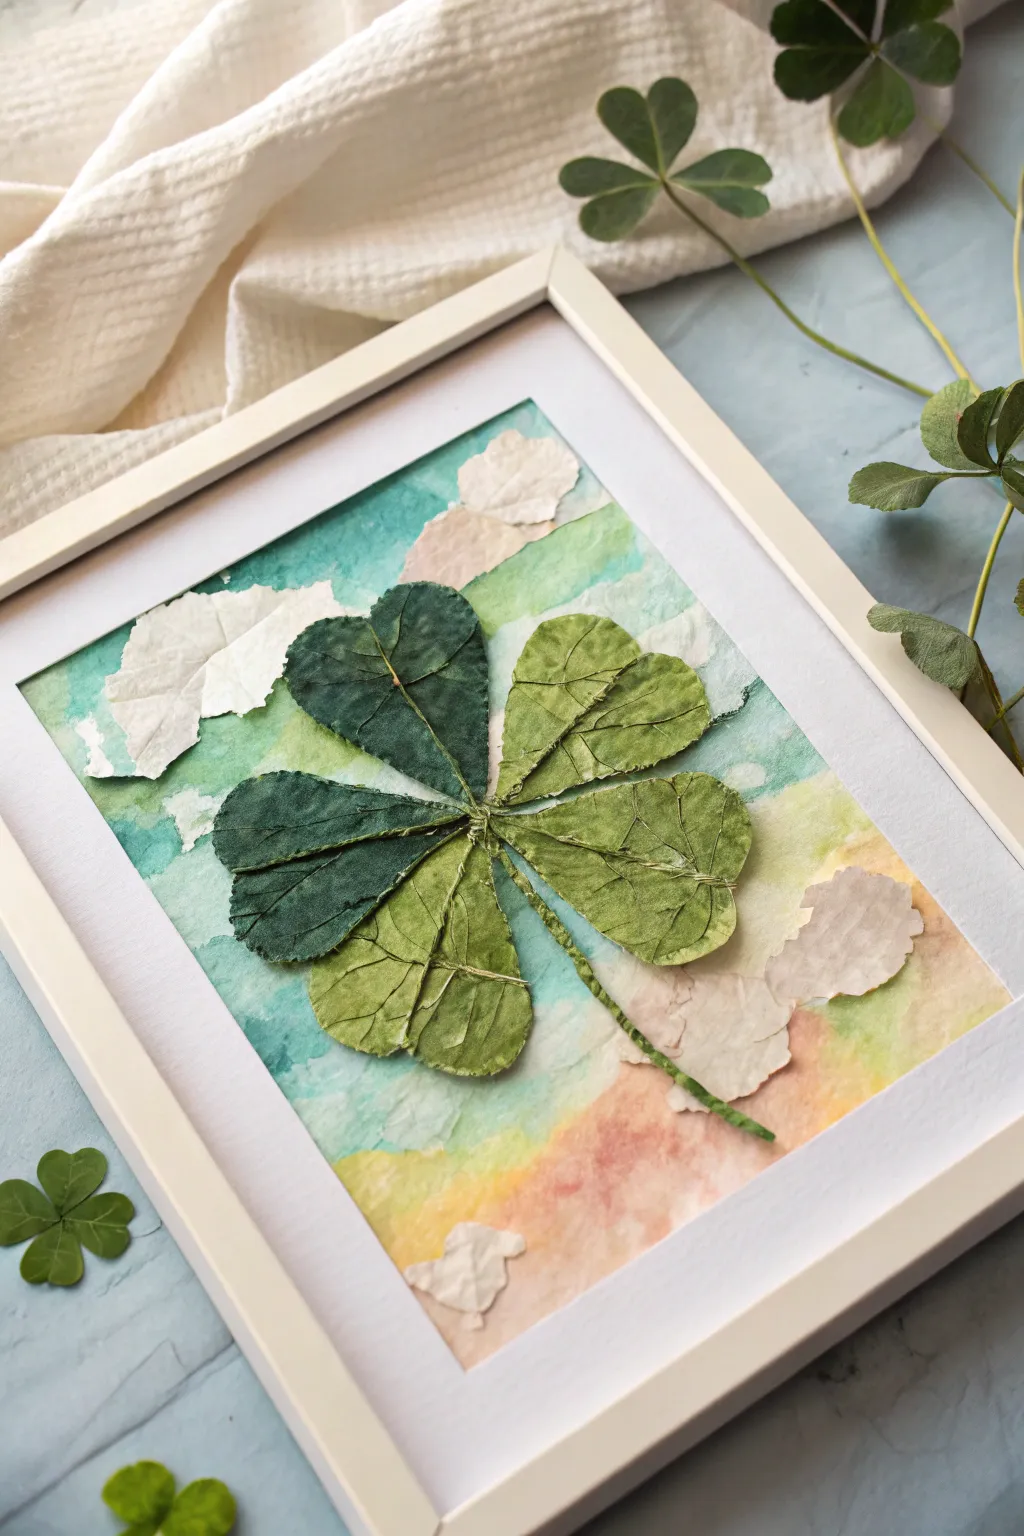
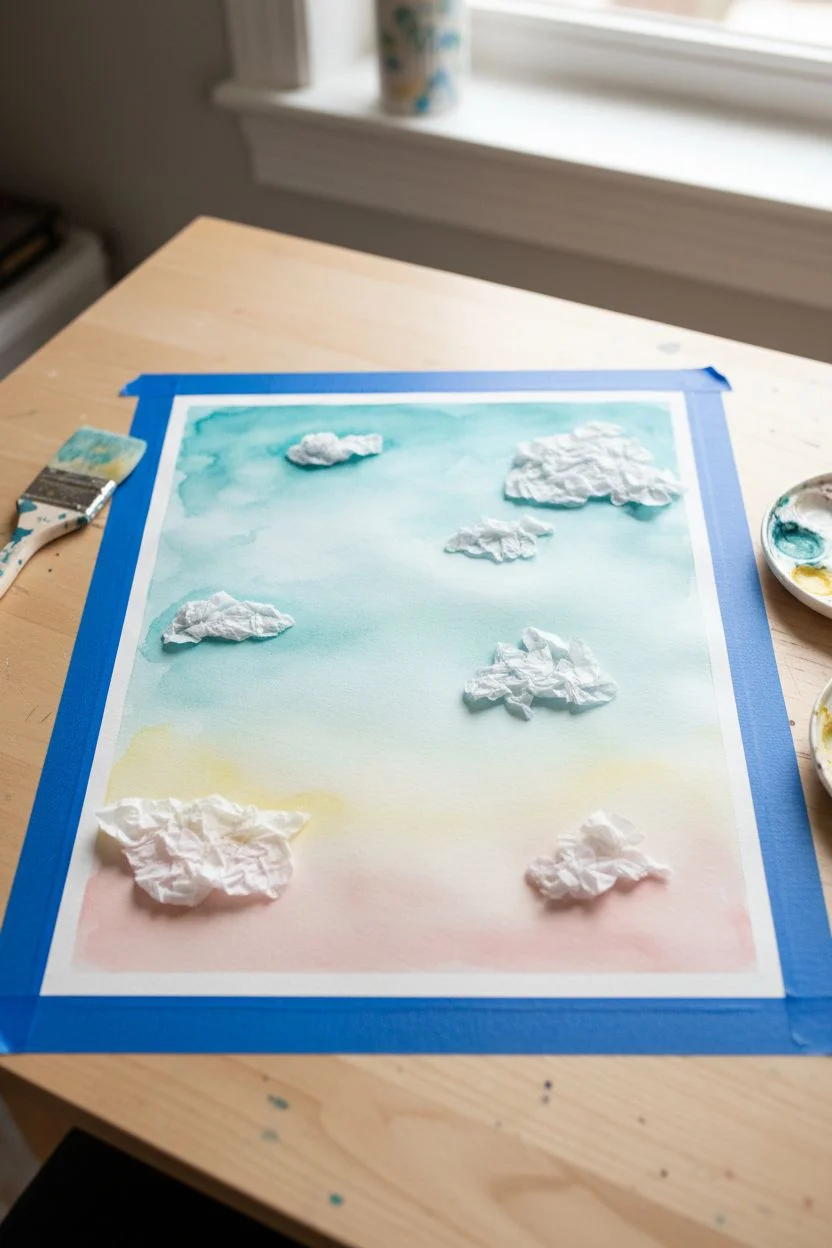
Blend the softness of watercolor with the texture of layered tissue paper in this dimensional art piece. The result is a stunningly textured four-leaf clover floating against a dreamy, pastel-washed sky, perfect for framing.
How-To Guide
Materials
- Heavyweight watercolor paper or mixed media cardstock
- Watercolor paints (teal, soft yellow, blush pink)
- Tissue paper in various shades of green, plus white
- Mod Podge or white PVA glue
- Thin crafting wire or floral wire
- Green floral tape or thin strips of green tissue paper
- Soft paintbrushes (wide flat brush for background, small round brush for details)
- Scissors
Step 1: Painting the Backdrop
-
Prepare your paper:
Cut your watercolor paper to fit your intended frame size, leaving a small margin if you plan to use a mat. Tape down the edges to your work surface to prevent buckling. -
Paint the sky:
Using a wide, wet brush, apply a wash of teal or sky blue paint to the upper two-thirds of the paper. Keep the application loose and uneven to mimic natural clouds. -
Add warm horizon tones:
While the blue is still slightly damp but not soaking, blend in soft yellow and blush pink near the bottom third. Let these colors bleed gently into the blue for a sunset effect. -
Create cloud textures:
While the paint is wet, tear small, irregular pieces of white tissue paper. Scrunch them slightly and press them onto the wet blue areas to create textured, 3D clouds. Dab a little extra water over them if they don’t stick immediately. -
Let it dry completely:
Allow the background to dry fully before moving on to the main element.
Wrinkled Tissue?
Don’t panic if your tissue paper wrinkles excessively when glued. This crinkled texture actually mimics leaf veins perfectly, adding realism to your botanical art.
Step 2: Crafting the Shamrock Leaves
-
Form wire armatures:
Cut four pieces of thin wire, each about 3-4 inches long. Bend the top of each wire into a heart shape to form the skeleton of a clover leaf, leaving a straight stem at the bottom. -
Prepare green tissue:
Cut your green tissue paper into rough squares slightly larger than your wire heart frames. I like to use two different shades of green for visual interest—perhaps dark green for the top two leaves and lighter green for the bottom. -
Attach paper to wire:
Brush glue over a piece of tissue paper. Place a wire heart frame on top, then layer another piece of varying green tissue over it, sandwiching the wire. Gently press them together. -
Trim the leaves:
Once the glue is tacky but nearly dry, use sharp scissors to trim the excess tissue paper around the wire edge, leaving a tiny overlap to seal the shape. -
Add vein details:
To mimic the veins seen in the reference, gently scrunch the damp tissue paper inside the wire frame or use a dull tool to press subtle creases into the leaves before they dry completely.
Gilded Edges
For a magical touch, lightly brush the edges of your wire clover leaves with gold metallic paint or a gold leaf pen to catch the light.
Step 3: Assembly & Stem
-
Create the stem:
Gather the four straight wire ends of your finished leaves together. Twist them tightly to form a single sturdy stem. -
Wrap the stem:
Cover the twisted wire stem by wrapping it tightly with green floral tape. Alternatively, coat thin strips of green tissue paper in glue and wrap them spirally down the wire. -
Arrange the composition:
Position your assembled shamrock on the dried background paper. Decide on the angle—a slight tilt often looks more natural. -
Glue the shamrock down:
Where the center knot and the stem touch the paper, apply a strong dab of glue. You can leave the edges of the leaves unglued so they lift slightly off the page, enhancing the 3D effect. -
Final touches:
Inspect the artwork for any loose edges on the clouds or stem. Add a tiny dab of glue where necessary to secure everything before framing.
Place your finished piece in a white shadow box frame to protect the delicate dimensional leaves
Pour-Paint Rainbow With Clover Silhouette
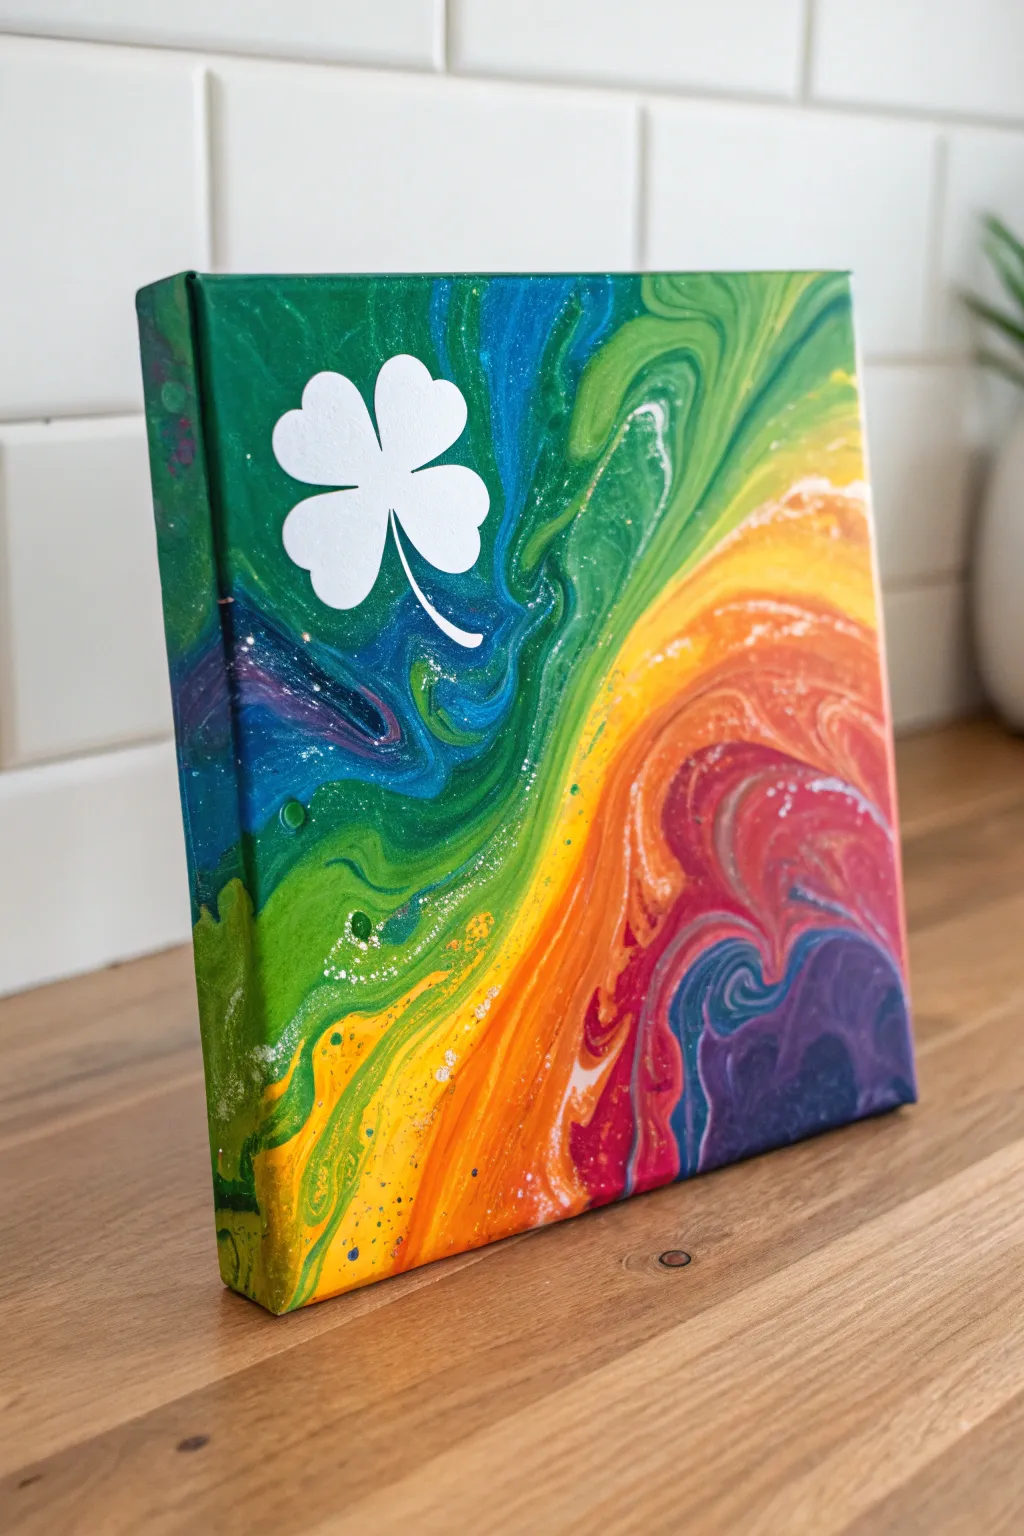
Celebrate Irish luck with this mesmerizing acrylic pour painting that captures a vibrant rainbow swirl. The clean, white silhouette of a four-leaf clover pops beautifully against the fluid, marbled background, making it a perfect piece of St. Patrick’s Day decor.
Step-by-Step Tutorial
Materials
- Small square canvas (e.g., 6×6 or 8×8)
- Acrylic craft paints (rainbow colors: red, orange, yellow, green, blue, purple)
- White acrylic paint
- Pouring medium (like Floetrol or designated medium)
- Adhesive vinyl or contact paper (for the stencil)
- Four-leaf clover template or die-cutting machine (Cricut/Silhouette)
- Plastic cups (one for each color)
- Stir sticks
- Glitter (optional, fine iridescent)
- Plastic drop cloth or garbage bag to protect surface
- Gloves
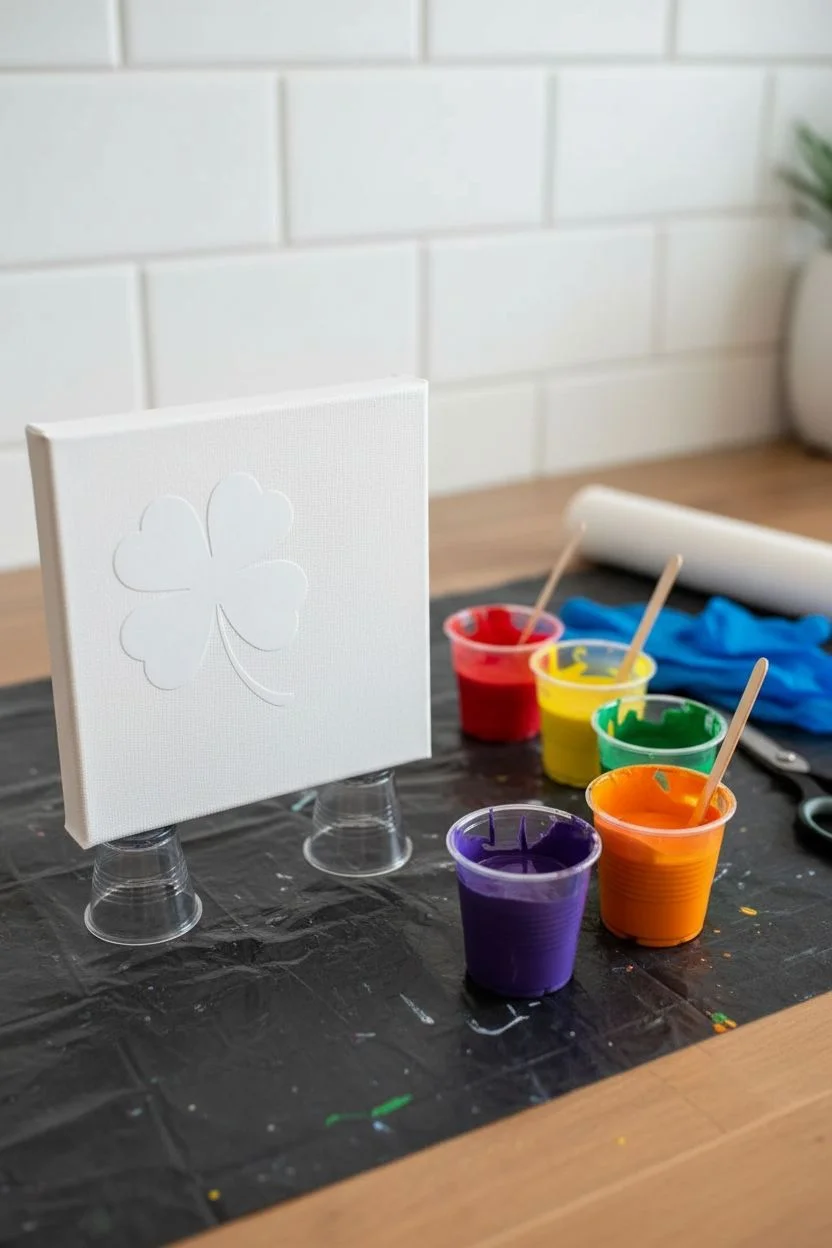
Step 1: Preparation & Stencil
-
Create the stencil:
Using a die-cutting machine or by tracing a printed template onto adhesive vinyl, cut out a four-leaf clover shape. You want the solid shape itself, acting as a mask. -
Apply the vinyl mask:
Peel the backing off your vinyl clover and press it firmly onto the upper left quadrant of the white canvas. Burnish the edges well with your fingernail or a scraper to prevent paint from seeping underneath later. -
Prepare the workspace:
Cover your table completely with a plastic drop cloth. Acrylic pouring is messy but fun, and you’ll want to elevate your canvas on four upside-down cups to let the paint drip freely off the edges.
Muddy Colors?
Avoid over-tilting or mixing too much. If colors look brown, layer contrasting colors (like red/green) with a buffer of white or yellow in the cup.
Step 2: Mixing the Paints
-
Mix paint with medium:
In separate small plastic cups, mix each acrylic paint color with your pouring medium. A common ratio is 1 part paint to 2 parts medium, but check your medium’s bottle for specific instructions. -
Check consistency:
Stir each cup thoroughly. The consistency should be like warm honey—fluid enough to pour but thick enough to hold its color. If it’s too thick, add a tiny drop of water. -
Add shimmer (optional):
If you want that extra sparkle seen in the example, sprinkle a pinch of fine iridescent glitter into the blue and green cups and stir well.
Make it Shine
Mix a drop of silicone oil into your paints before pouring creates ‘cells’ or bubbles in the paint for a cool, organic texture.
Step 3: The Pour
-
Layer the dirty pour cup:
Take a clean, empty cup. Pour small amounts of your colors into this single cup, layering them one by one. Don’t stir! Start with cool colors (blues/greens) and layer warm colors (reds/yellows) on top to mimic the rainbow transition. -
Pour onto the canvas:
Starting near the center or diagonally across the canvas, slowly pour the contents of your dirty cup. Move the cup securely in a gentle zigzag or circular motion to distribute the paint. -
Tilt the canvas:
Pick up the canvas (wear gloves!) and gently tilt it in different directions. Guide the paint to flow over the vinyl clover and all the way off the edges and corners. -
Ensure full coverage:
Make sure the sides of the canvas are coated. You can use a gloved finger to dab paint onto any dry spots on the edges.
Step 4: Reveal & Finish
-
Let it settle:
Set the canvas back down on the elevation cups. Let the paint sit for about 20–30 minutes until it stops actively moving and dripping heavily. -
Remove the stencil:
Very carefully use a craft knife or pin to lift the edge of the vinyl clover. Slowly peel it away while the paint is still wet to semi-wet. If you wait until it’s fully dry, you risk peeling up the paint skin. -
Clean up edges:
If any paint bled under the sticker, use a wet cotton swab or a flat brush with a tiny bit of water to wipe away the excess while it’s still workable. -
Dry completely:
Allow the painting to dry in a dust-free area for at least 24 to 48 hours. Acrylic pours take longer to cure than standard paintings. -
Seal the artwork:
Once fully cured, apply a coat of gloss varnish or clear resin to enhance the colors and give it a professional shine.
Display your shimmering rainbow canvas on a shelf or mantel for a lucky pop of color


Tape-Resist Shamrock Burst
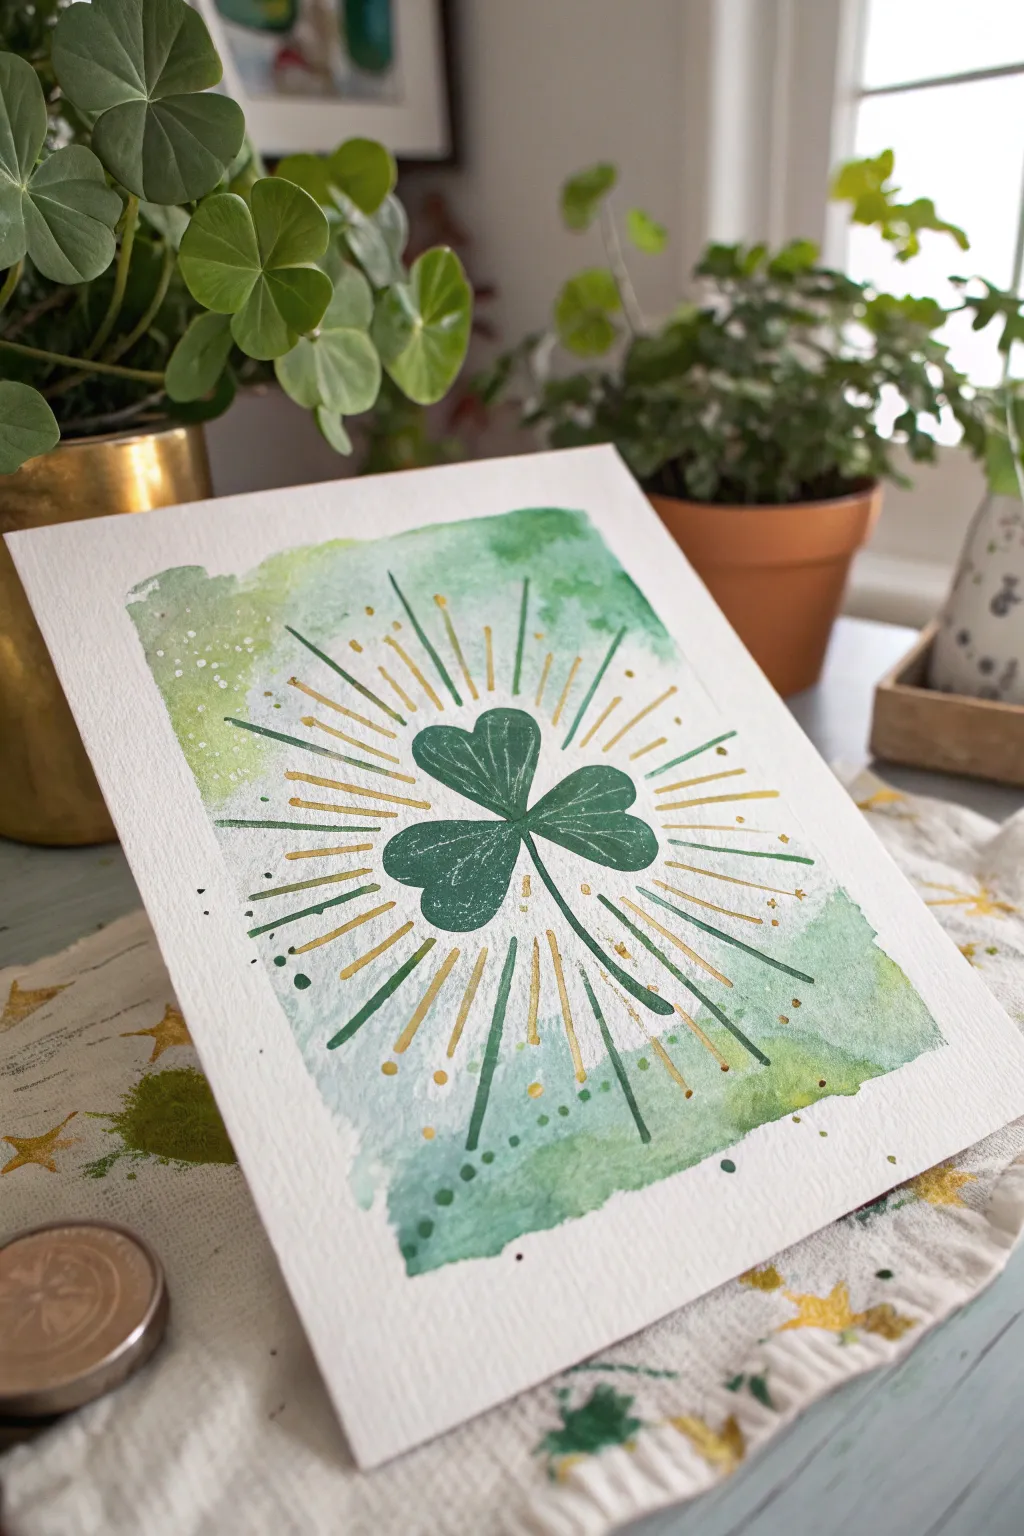
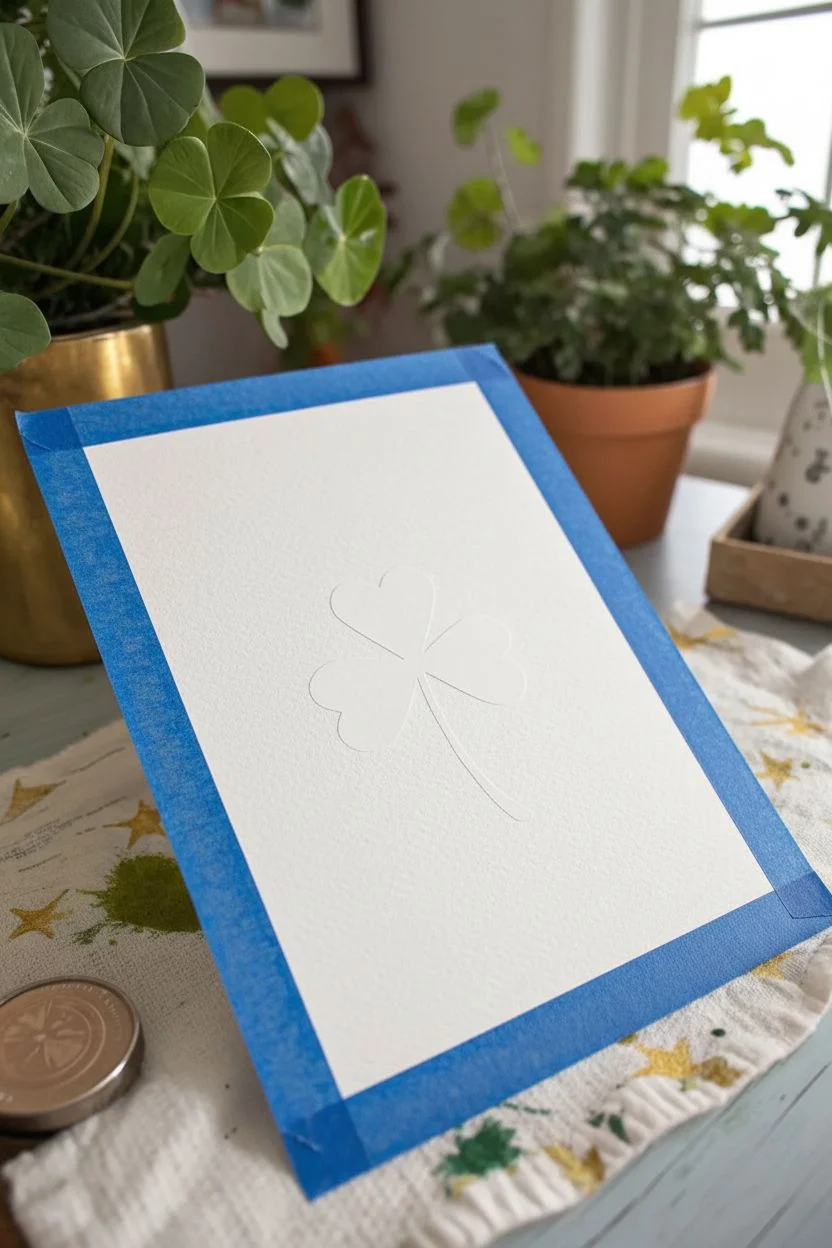
Capture the radiant energy of St. Patrick’s Day with this simple yet striking watercolor resist project. By masking off a central shamrock shape, you’ll create a crisp, clean focal point surrounded by an explosion of green hues and metallic gold rays.
Detailed Instructions
Materials
- Cold press watercolor paper (140lb/300gsm)
- Painter’s tape or low-tack masking tape
- Pencil and eraser
- Watercolor paints (various greens: sap green, hooker’s green, yellow-green)
- Gold metallic paint, ink, or gel pen
- Round watercolor brushes (size 6 and size 2)
- Small flat brush or old toothbrush (optional for splatter)
- Palette for mixing
- Jar of clean water
- Paper towels
- Contact paper or clear adhesive acetate (optional alternative for masking)
Step 1: Preparing the Mask
-
Paper selection:
Begin with a sturdy piece of cold press watercolor paper. The texture adds lovely character to the final wash, but it needs to be heavy enough to handle the tape removal later. -
Cut the shamrock:
Draw three heart shapes meeting at a central point and a thin stem on a piece of painter’s tape or contact paper. Carefully cut out this shamrock shape. -
Apply the resist:
Peel the backing and firmly press your shamrock sticker into the center of your watercolor paper. Burnish the edges well with your fingernail or a spoon to prevent paint from seeping underneath. -
Tape the border:
If you want a clean white border around the entire painting, apply strips of painter’s tape to the four edges of your paper.
Step 2: Painting the Background
-
Wet the paper:
Using a clean brush and water, lightly wet the area around the shamrock mask. You want the paper damp but not soaking wet to encourage soft blending. -
First wash of color:
Load your brush with a light yellow-green and wash it loosely over the damp paper. I like to keep the brushstrokes somewhat jagged and uneven, rather than filling a perfect square, to create that organic ‘burst’ effect. -
Deepen the greens:
While the first layer is still slightly damp, drop in darker shades like sap green or hooker’s green. Concentrate these darker pigments closer to the taped shamrock to create contrast. -
Create texture:
Dab a paper towel lightly on random spots of the wet paint to lift some color. This creates a cloud-like, mottled texture in the background wash. -
Add subtle splatters:
Load a small brush with dark green paint and tap it against your finger to flick tiny speckles onto the background. Keep these concentrated near the edges of the painted area. -
Dry completely:
Allow the background to dry fully. The paper must be bone-dry and warm to the touch before you proceed to the next step, or the tape might tear the surface.
Clean Edges Only
To ensure crisp lines when removing tape, heat it briefly with a hair dryer first. This softens the adhesive and prevents the paper surface from ripping.
Step 3: Revealing and Refining
-
Remove the mask:
Very gently peel up the shamrock sticker. Pull the tape away from the paper at a sharp angle to minimize the risk of tearing. -
Paint the shamrock:
Now, fill in the white shamrock shape with a dark, solid green. This reverses the usual resist look—here we masked it to keep the background clean, but we paint the subject dark to make it pop against the lighter wash. Add faint white veins with a gel pen or fine brush if desired. -
Draw the main rays:
Using your darker green paint and a fine liner brush (size 2), paint thin lines radiating outward from the center of the shamrock. Vary the lengths; some should extend far out, while others stay short. -
Add gold accents:
Switch to your metallic gold paint or marker. Draw gold rays interspersed between the green ones. The shimmer adds a festive magical quality to the piece. -
Dot details:
Add small dots of gold and green at the tips of some rays or floating in the empty spaces. This ‘confetti’ effect softens the rigid lines of the burst. -
Final splatters:
Finish with a very controlled splatter of gold paint. Protect the central shamrock with a scrap of paper if you want to keep the dark green solid and clean.
Try Embossing
Instead of gold paint, use a gold embossing pen and embossing powder for the metallic rays. Heat set it for a raised, glossy 3D texture.
Frame your sparkling shamrock art to bring a touch of luck to your wall


Have a question or want to share your own experience? I'd love to hear from you in the comments below!