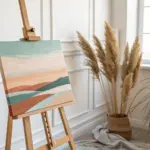
There’s something so satisfying about a small square canvas—it’s just enough space to play without getting overwhelmed. I love using these tiny squares for quick wins, bold experiments, and little mini-series that look amazing together.
Sunset Gradient With a Simple Horizon
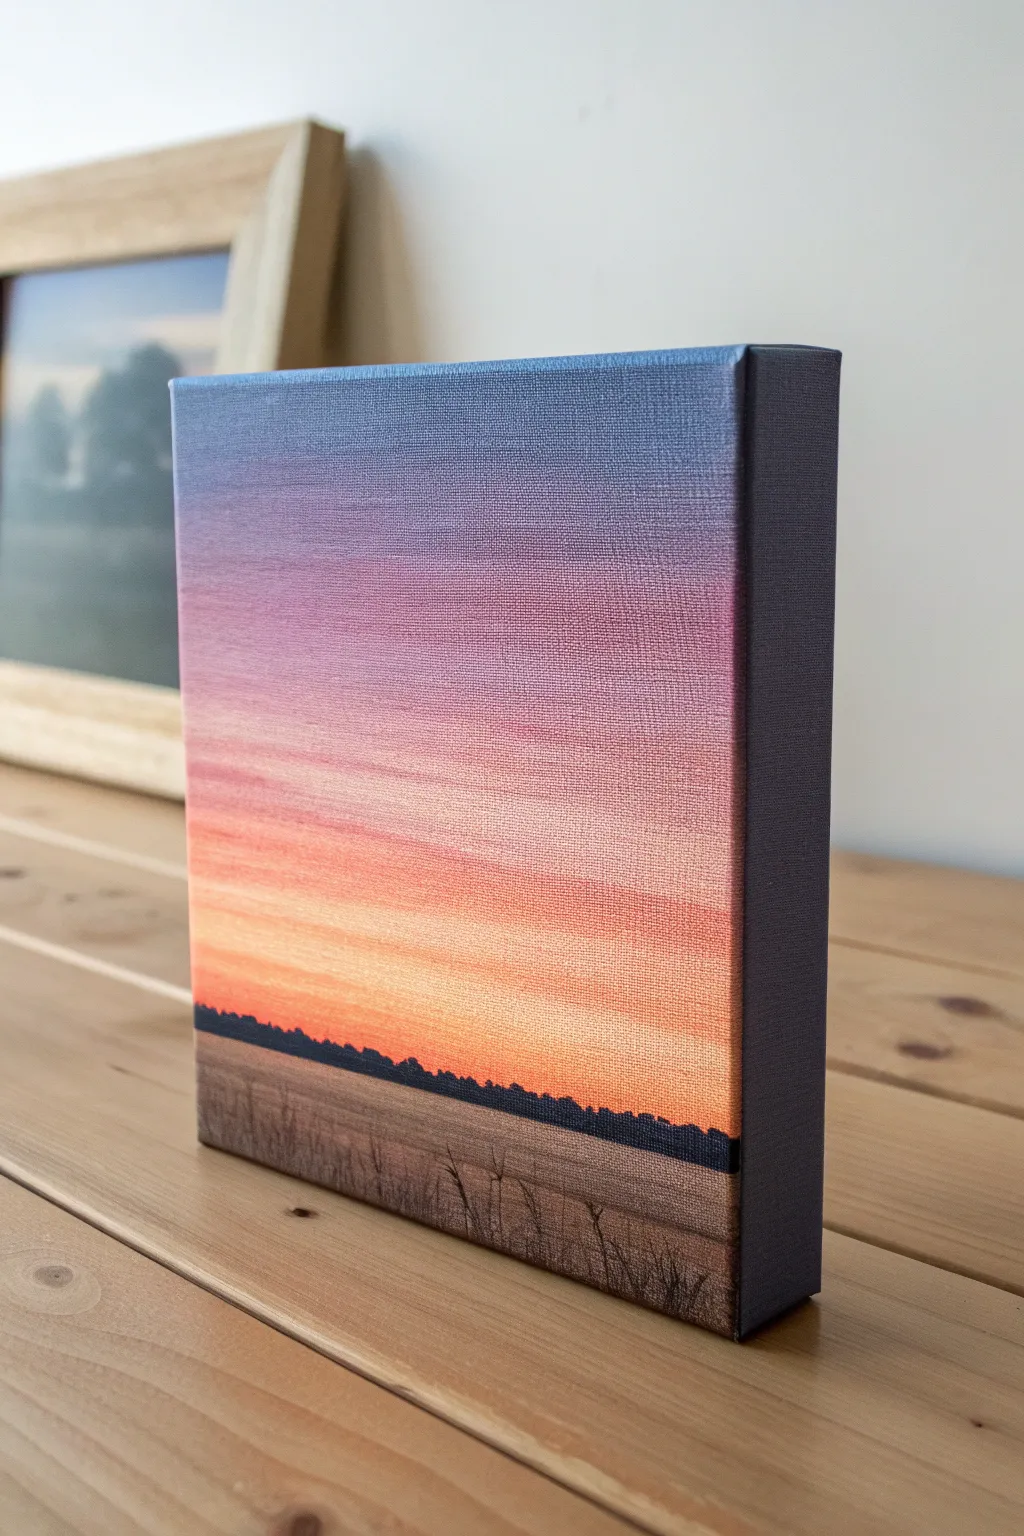
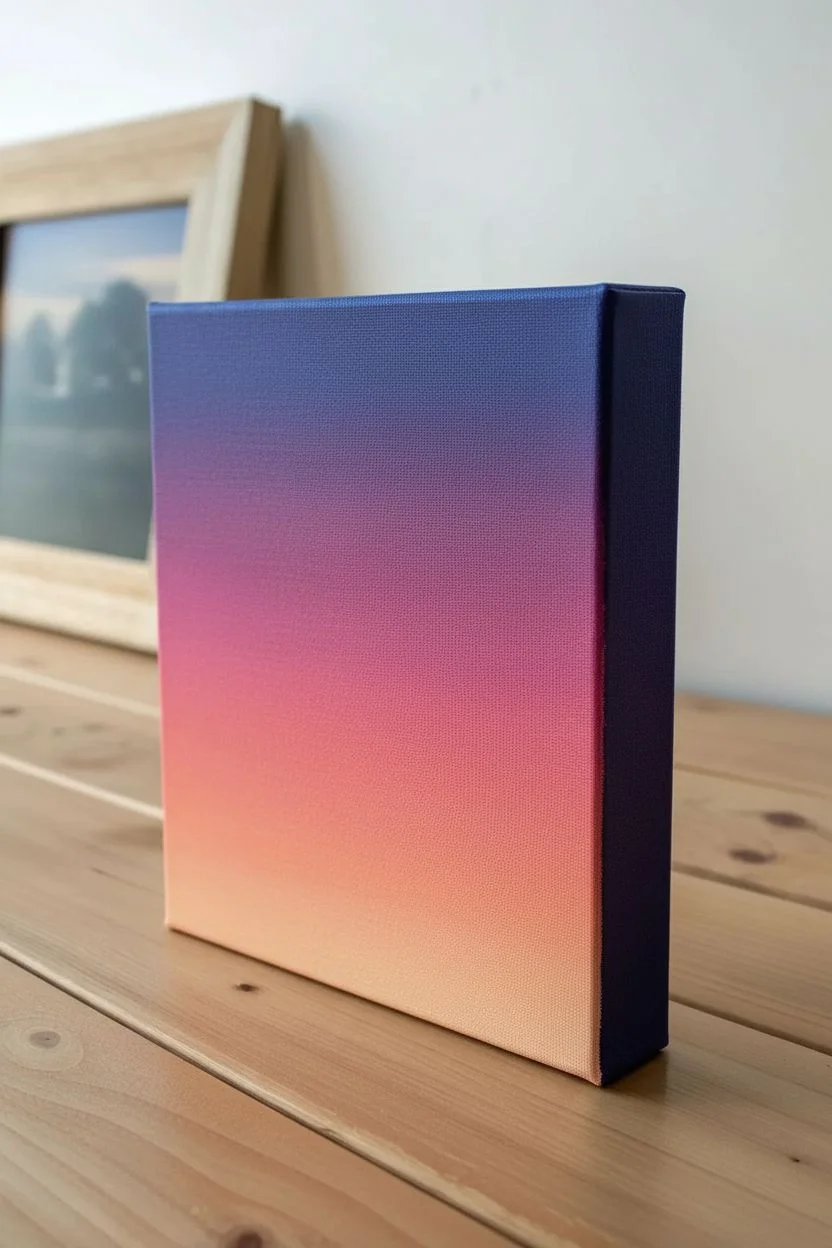
Capture the serene beauty of twilight with this small square canvas project, featuring a seamless gradient sky melting from indigo to orange. The stark silhouette of a treeline and a textural foreground field add depth without requiring advanced painting skills.
How-To Guide
Materials
- Small square wrapped canvas (e.g., 6×6 or 8×8 inches)
- Acrylic paints: Indigo/Navy Blue, Violet, Magenta, Peach/Light Orange, Titanium White, Black, Burnt Umber
- Wide flat brush (for blending)
- Small round detail brush (size 0 or 1)
- Fan brush or old bristle brush (optional for grass)
- Palette for mixing
- Water cup and paper towels
Step 1: Creating the Gradient Sky
-
Prepare the canvas:
Start with a clean, dry canvas. If your canvas isn’t pre-primed, apply a coat of gesso and let it dry completely to ensure a smooth surface for blending. -
Mix your sky palette:
Squeeze out your sky colors in a row on your palette: Indigo, Violet, Magenta, Peach, and White. Having them ready before you start painting is crucial because acrylics dry fast. -
Paint the top band:
Load your wide flat brush with the Indigo paint. Apply a horizontal band across the top quarter of the canvas, ensuring you paint around the edges to the sides of the canvas frame for a finished look. -
Introduce the violet:
Without washing your brush (wipe it slightly if it’s too overloaded), pick up some Violet paint. Apply this directly below the indigo band, overlapping slightly. -
Blend the upper transition:
Using long, horizontal back-and-forth strokes, blend the line where the Indigo and Violet meet. The goal is to make the seam disappear into a soft transition. -
Move to warm tones:
Wipe your brush clean on a paper towel. Pick up the Magenta paint and add a band below the violet, again overlapping slightly to prepare for blending. -
Blend the middle section:
Blend the Magenta into the Violet using horizontal strokes. If the paint feels too dry to move, I sometimes dip just the very corner of my brush in water to help it glide. -
Apply the horizon glow:
Clean your brush thoroughly. Mix Peach with a tiny bit of White to create a glowing horizon color. Paint the bottom section of the sky area, stopping about a quarter of the way up from the bottom of the canvas. -
Final sky blend:
Blend the Peach upward into the Magenta. Work quickly here to ensure a smooth fade from the cool top to the warm bottom. -
Dry the background:
Let the entire sky layer dry completely. This is essential so you don’t muddy your crisp horizon line in the next phase.
Smooth Blends
Work wet-on-wet for the sky. If the acrylics drag, use a glazing liquid or mist the canvas lightly with water to keep paint workable longer.
Step 2: Painting the Foreground
-
Establish the ground base:
Mix Burnt Umber with a touch of White and Peach to create a muted, earthy tan color. Paint the bottom quarter of the canvas solid with this color. -
Add field texture:
While the base is still slightly wet, streak in very thin horizontal lines of darker brown and lighter tan to suggest the texture of a flat field. -
Paint the treeline silhouette:
Switch to your small round detail brush. Load it with pure Black paint. Evenly paint a bumpy, irregular line right where the sky meets the ground. -
Detail the trees:
Dab the tip of your brush along the top of the black line to create tiny varying heights, mimicking the tops of distant trees and bushes. -
Anchor the foreground:
Mix Black with a little Burnt Umber. Using the very tip of your detail brush (or an old, dry brush), flick tiny vertical strokes upward from the very bottom edge of the canvas. -
Refine the grass:
Add a few taller, distinct stalks of grass or wheat in the immediate foreground using the darker brown-black mix. Keep these strokes decisive and thin. -
Finish the edges:
Check the sides of your canvas again. Carry the ground color and black silhouette line around the sides to match the front, creating a gallery-wrap effect. -
Varnish (Optional):
Once the painting is 100% dry (give it at least 24 hours), apply a satin or matte varnish to protect the surface and unify the sheen of the colors.
Choppy Gradients?
If you see distinct bands of color, wait for it to dry, then apply a second thin layer. Use a clean, dry brush to feather out the seams immediately.
Place your finished canvas on a shelf or hang it in a group to add a peaceful window to your wall

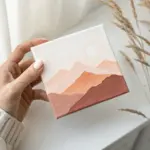
Mountain Silhouette Against an Ombre Sky
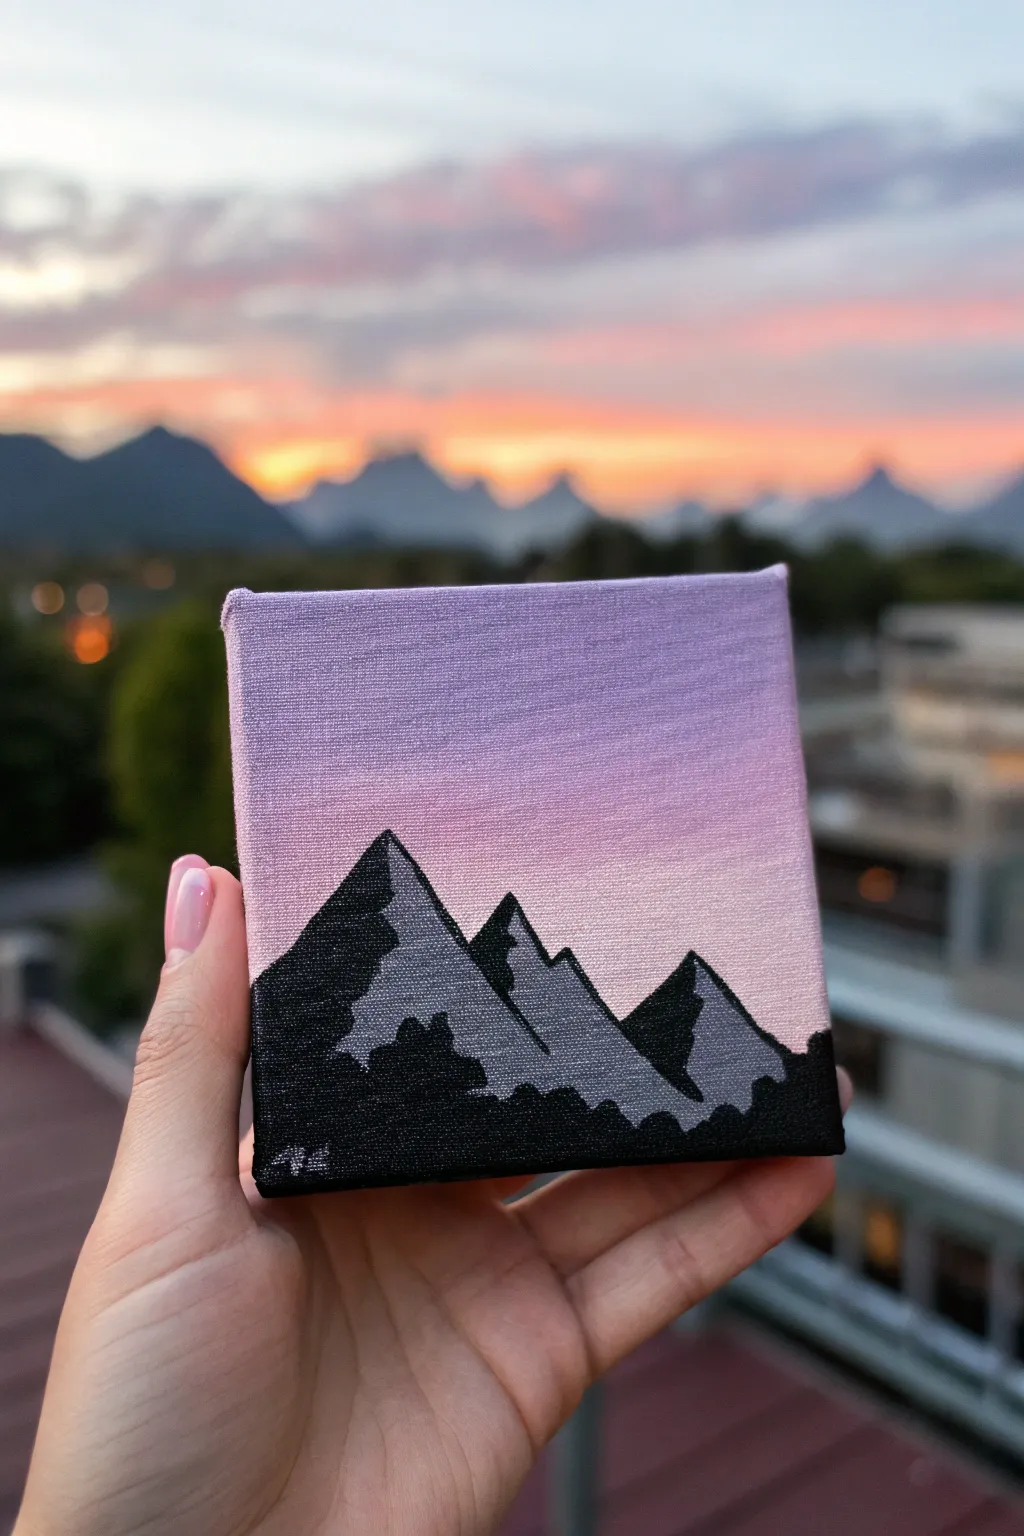
Capture the serene beauty of twilight in this bite-sized painting project. Small enough to fit in the palm of your hand, this mini canvas features sharp, striking mountain silhouettes against a dreamy lavender-to-pink ombre sky.
Step-by-Step Tutorial
Materials
- Small square canvas (e.g., 4×4 or 5×5 inches)
- Acrylic paints: Titanium White, Lavender, Light Pink, Black, Dark Grey
- Flat shader brush (size 6 or 8)
- Small round detail brush (size 0 or 1)
- Palette or paper plate
- Cup of water and paper towels
- Masking tape (optional for edges)
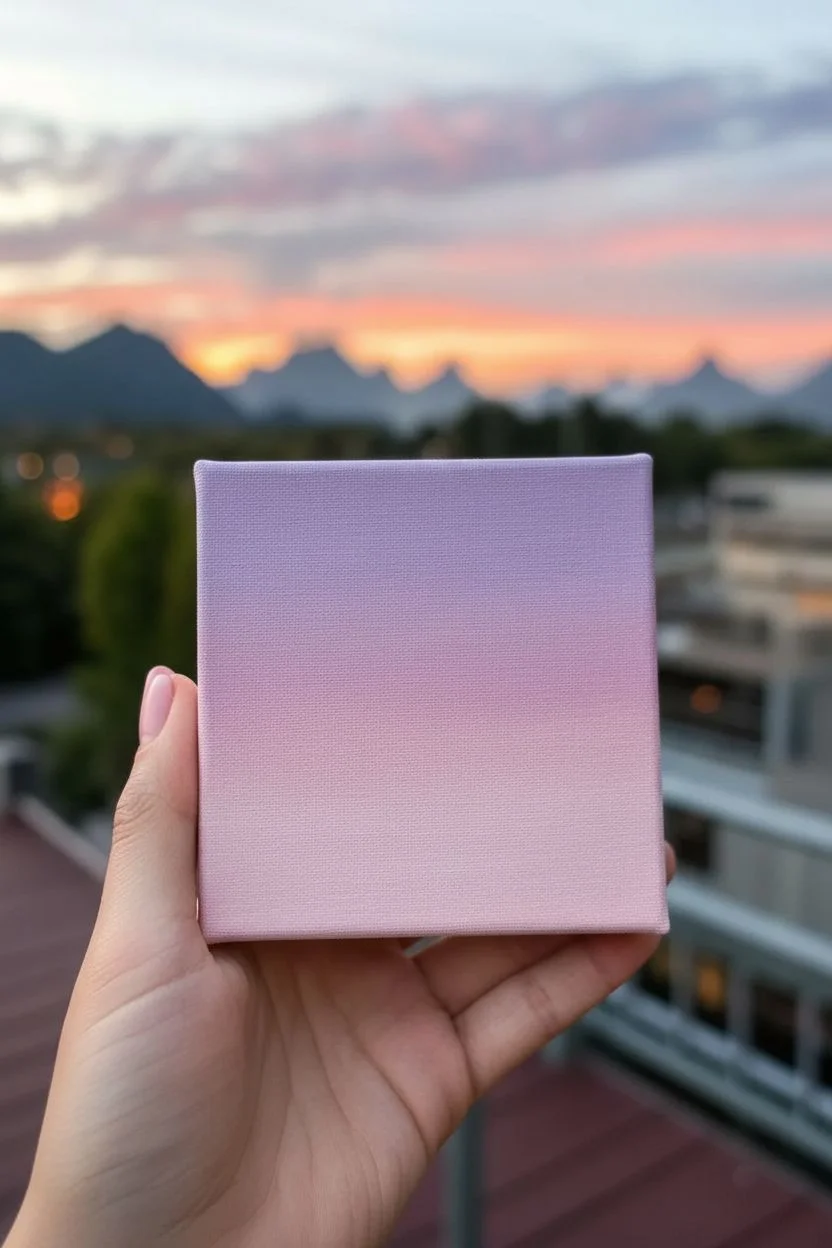
Step 1: Painting the Sky Gradient
-
Prepare your palette:
Squeeze out generous dollops of Lavender, Light Pink, and Titanium White onto your palette. You’ll want plenty of paint to ensure a smooth blend without the canvas texture showing through too much. -
Start at the top:
Using your flat shader brush, load up the Lavender paint and apply a horizontal strip across the top third of the canvas. Don’t worry about being perfectly neat yet; we just need colour on the canvas. -
Add the middle tone:
Clean your brush slightly, then pick up a mix of Lavender and Light Pink. Apply this directly below the pure Lavender strip, slightly overlapping the wet edge of the colour above. -
Blend downwards:
While the paint is still wet, use back-and-forth horizontal strokes to meld the Lavender section into the middle pinkish-purple section. The goal is a soft transition with no hard lines. -
Complete the horizon:
Clean your brush thoroughly. Load it with Light Pink mixed with a tiny touch of Titanium White for brightness. Paint the bottom third of the canvas, blending it upwards into the middle section. -
Final smooth:
With a clean, slightly damp brush, run light horizontal strokes across the entire sky one last time to soften the gradient. I like to do this quickly before the acrylics tack up to get that really dreamy look. -
Dry completely:
Let the background sky dry fully. Since we need sharp lines for the mountains, the canvas must be bone dry to touch before proceeding.
Step 2: Creating the Mountains
-
Outline the peaks:
Switch to your small round detail brush and Black paint. Draw the triangular outlines of your three main mountain peaks. Vary their heights, making the central or left ones slightly taller for interest. -
Fill the silhouette:
Fill in the entire shape below your outlines with solid Black paint. Ensure the coverage is opaque; you may need a second coat if the pink sky shows through. -
Add the foothills:
Along the very bottom edge, dab irregular shapes of black to represent a tree line or smaller foothills in the extreme foreground, covering any remaining pink canvas at the bottom. -
Dry the silhouette:
Allow the black layer to dry completely. This step is crucial because we will be painting light, crisp angles on top of this dark base.
Smooth Blends
If your acrylics are drying too fast to blend the sky properly, add a single drop of ‘slow-drying medium’ or water to your paint mix.
Step 3: Adding Highlights and Dimension
-
Mix a shadow grey:
Create a mid-tone grey on your palette. It should be light enough to stand out against the black but dark enough to look like a shadowy rock face. -
Define the light source:
Decide that your light is coming from the right side. This means the right faces of the mountains will be highlighted. -
Paint the grey facets:
Using the detail brush or the sharp edge of a small flat brush, paint grey triangles on the right-hand slope of each mountain peak. Leave the left slope jagged and black. -
Texture the edges:
Don’t make the line between the black and grey perfectly straight. Wiggle your brush slightly to create a jagged, rocky ridge line down the center of the peaks. -
Paint secondary highlights:
Add smaller, disconnected grey shapes near the base of the mountains to suggest lower rocky distinct formations pulling out of the shadows.
Starry Night
Once the sky is dry, use an old toothbrush to flick tiny speckles of white paint onto the upper lavender section for a starry effect.
Step 4: Finishing Touches
-
Clean up edges:
Check the sides of your canvas (the depth). You can either wrap the painting around the edges or paint them a solid black for a framed look. -
Sign your work:
Using your finest brush and a bit of watered-down white or light grey paint, add your tiny initials in the bottom corner.
Set your mini masterpiece on a small easel or shelf to enjoy your personal sunset view.


Pine Trees in Bold Black Silhouette
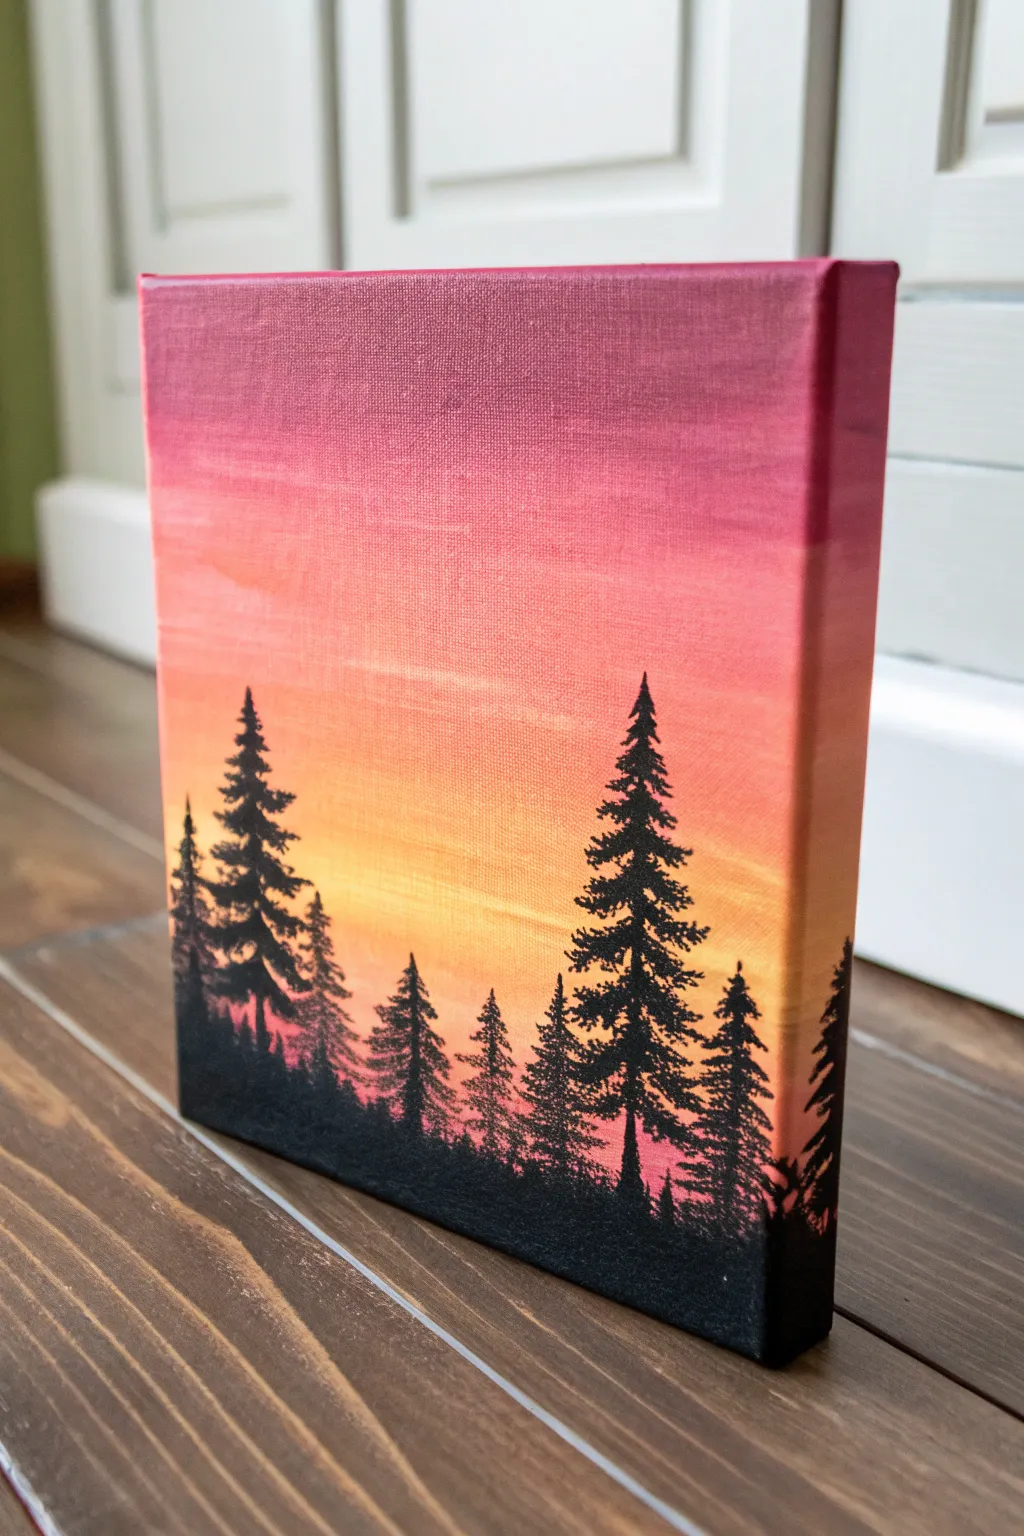

Capture the serene beauty of twilight in the forest with this vibrant gradient painting. The striking contrast between the glowing sunset sky and the stark black pine trees creates a dramatic effect on a small square canvas.
Step-by-Step
Materials
- Small square stretched canvas (e.g., 6×6 or 8×8 inch)
- Acrylic paints: Magenta/Dark Pink, Red, Orange, Yellow, Black
- Wide flat brush (for the background)
- Small round detail brush (size 0 or 1)
- Fan brush (optional, for tree texture)
- Cup of water
- Paper towels
- About 5 small cups for mixing
- Palette
Step 1: Painting the Gradient Sky
-
Prepare your colors:
Squeeze out your magenta, red, orange, and yellow acrylic paints onto your palette. It helps to have them lined up in order from darkest to lightest to visualize the transition. -
Start at the top:
Using your wide flat brush, pick up the magenta or deep pink paint. Apply broad, horizontal strokes across the top third of the canvas. -
Paint the edges:
Don’t forget the sides! As you paint the front, extend that same magenta color around to the top and upper side edges of the canvas so the artwork looks finished from every angle. -
Blend in the red:
While the magenta is still wet, pick up some red paint without washing your brush completely. Paint the section immediately below the magenta, overlapping slightly to encourage blending. -
Transition to orange:
Clean your brush gently, then pick up the orange paint. Apply this below the red section where the sky begins to brighten, roughly at the midpoint of your canvas. -
Finish with yellow:
Clean your brush thoroughly. Paint the bottom section of the sky with pure yellow, blending it upward into the orange while everything is still damp to create a seamless glow. -
Smooth the gradient:
With a slightly damp, clean brush, run long horizontal strokes across the transition zones (where pink meets red, red meets orange) to soften any harsh lines. I find doing this quickly before the acrylics dry is key. -
Let it dry completely:
Allow the background to dry fully. Depending on your paint thickness, this might take 15-30 minutes. The surface must be dry before adding the black trees to prevent muddy colors.
Muddy Sky Fix
If colors confuse into brown, stop! Let the first layer dry completely, then simply repaint the gradient on top. Acrylics are opaque and forgiving.
Step 2: Adding the Silhouette Trees
-
Establish the ground:
Using black paint, fill in a small, uneven strip at the very bottom of the canvas to create the forest floor. Ensure you paint the bottom edge of the canvas black as well. -
Paint the trunk lines:
Switch to your small detail brush. Paint vertical black lines where you want your trees to stand. Vary the heights—make some tall and some short for a natural look. -
Start the treetops:
At the very top of a trunk line, paint a tiny triangular point. This is the tip of your pine tree. -
Create the branches:
Work your way down the trunk using a tapping or small dashing motion. Make the branches narrow at the top and gradually wider as you descend. -
Texture technique:
Instead of straight lines for branches, use zig-zag motions or overlapping dots. This mimics pine needles and gives the tree volume. -
Wrap the trees:
If a tree is positioned near the edge of the canvas, continue painting its branches onto the side edge. This 3D effect makes the canvas look professional. -
Fill the gaps:
Add smaller, triangular shapes between the larger trees to suggest distant saplings or dense undergrowth. These don’t need much detail, just solid black shapes. -
Connect to the ground:
Ensure the bottom branches merge seamlessly into the black ground strip you painted earlier, thickening the base where the tree meets the earth.
Add Some Stars
Once the sky is dry, dip a toothbrush in white paint and flick it over the upper red/pink section to create a subtle starry night effect.
Hang this warm little landscape on your wall to bring a permanent sunset into your room


Birds on a Wire Minimal Scene
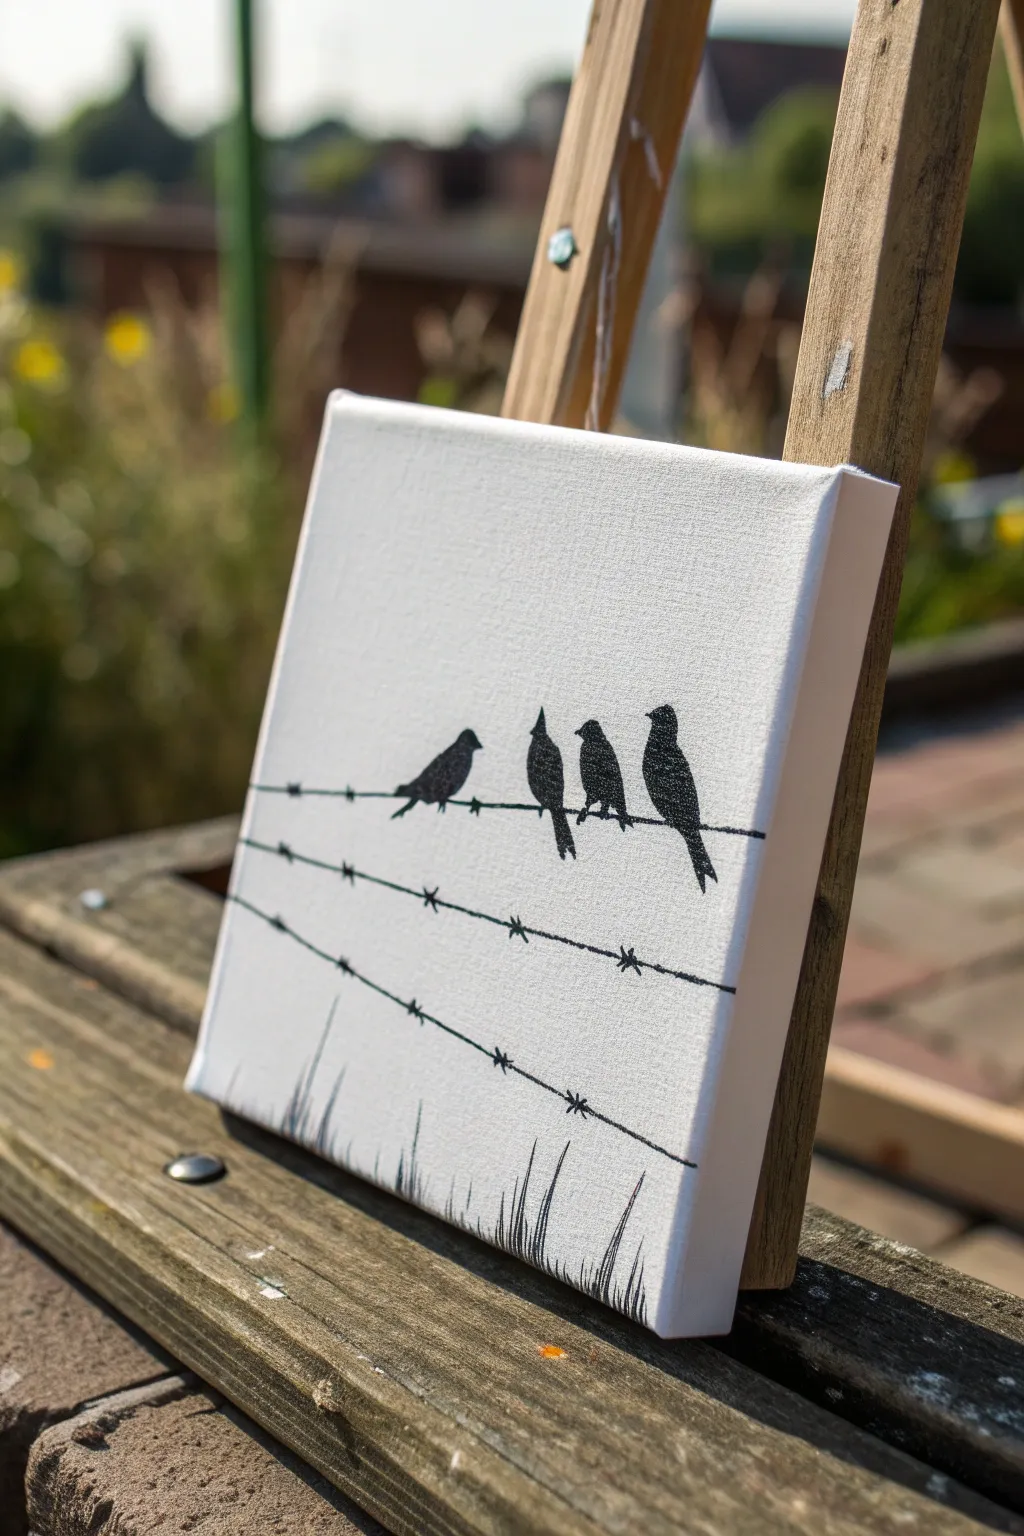
This striking high-contrast piece captures the delicate silhouette of four birds resting on a barbed wire fence. Its stark black-on-white composition makes it a perfect introductory project for mastering fine lines and steady brushwork.
Detailed Instructions
Materials
- Small square canvas (e.g., 6×6 or 8×8 inches)
- White acrylic paint (Titanium White)
- Black acrylic paint (Mars Black or Carbon Black)
- Large flat brush (for background)
- Fine liner brush (size 0 or 00)
- Small round brush (size 2)
- Pencil (HB or H)
- Ruler
- Eraser
- Water cup and paper towels
Step 1: Preparing the Background
-
Prime the canvas:
Even if your canvas is pre-primed, apply an even coat of Titanium White acrylic paint over the entire surface. This ensures a bright, crisp background that makes the black silhouette pop. -
Paint the edges:
Don’t forget to extend the white paint around the sides of the canvas for a professional, finished look that doesn’t require a frame. -
Let it dry completely:
Allow the white base coat to dry fully. If you can see the weave of the canvas too clearly, apply a second coat and let it dry again. A smooth surface is easier to paint fine lines on.
Fixing Wobbly Lines
If your wire lines get too thick or shaky, let the black paint dry completely. Then, use a small flat brush with white paint to ‘cut in’ and tidy up the edges.
Step 2: Drafting the Layout
-
Mark the wire positions:
Using a ruler and a pencil with a very light touch, draw three horizontal lines across the canvas. Space them unevenly for a natural look; place the top wire just below the halfway point of the canvas. -
Add a slight slope:
Avoid making the lines perfectly straight. Angle them slightly or add a tiny dip to suggest the weight of the wire. -
Sketch the birds:
Draw the outlines of four birds sitting on the top wire. Vary their sizes and poses—have one facing left and three facing right to create visual interest. Keep the shapes simple; focus on the round bodies and pointed tails. -
Indicate the grass:
Lightly sketch a few vertical, jagged lines at the very bottom edge of the canvas to represent the tops of tall grass blades.
Add a Pop of Mood
Swap the plain white background for a blended gradient sunset using yellow, orange, and red for a warm evening silhouette look.
Step 3: Painting the Silhouette
-
Paint the main wires:
Load your fine liner brush with black paint. I find distinct, confident strokes work best here. Carefully trace over your pencil lines for the three main wires. -
Create the barbs:
along each wire, paint small ‘X’ shapes every inch or so. These represent the barbs on the wire. Keep them jagged and irregular rather than uniform. -
Fill the bird bodies:
Switch to the small round brush (size 2) to fill in the main bodies of the birds with solid black paint. Ensure the coverage is opaque; you may need two coats. -
Refine bird details:
Return to the fine liner brush to sharpen the beaks and the tips of the tails. Small details like the crest on the second bird’s head add a lot of character. -
Paint the bird feet:
Use the very tip of your liner brush to paint tiny distinct lines gripping the wire beneath each bird. -
Paint the grass:
Using upward flicking motions with the liner brush, paint the grass blades at the bottom. Vary the pressure: press down at the base and lift off quickly at the top to create sharp, tapered points. -
Check opacity:
Hold the canvas up to a light source. If any ‘pinholes’ of light show through the black paint, touch them up with a little more black. -
Clean up:
Once the black paint is 100% dry, gently erase any visible pencil marks. Be careful not to scrub too hard over the painted areas. -
Optional varnish:
To protect your work, apply a layer of matte or satin varnish over the entire piece once it has cured for at least 24 hours.
Now step back and admire the stark beauty of your monochromatic nature scene
BRUSH GUIDE
The Right Brush for Every Stroke
From clean lines to bold texture — master brush choice, stroke control, and essential techniques.
Explore the Full Guide
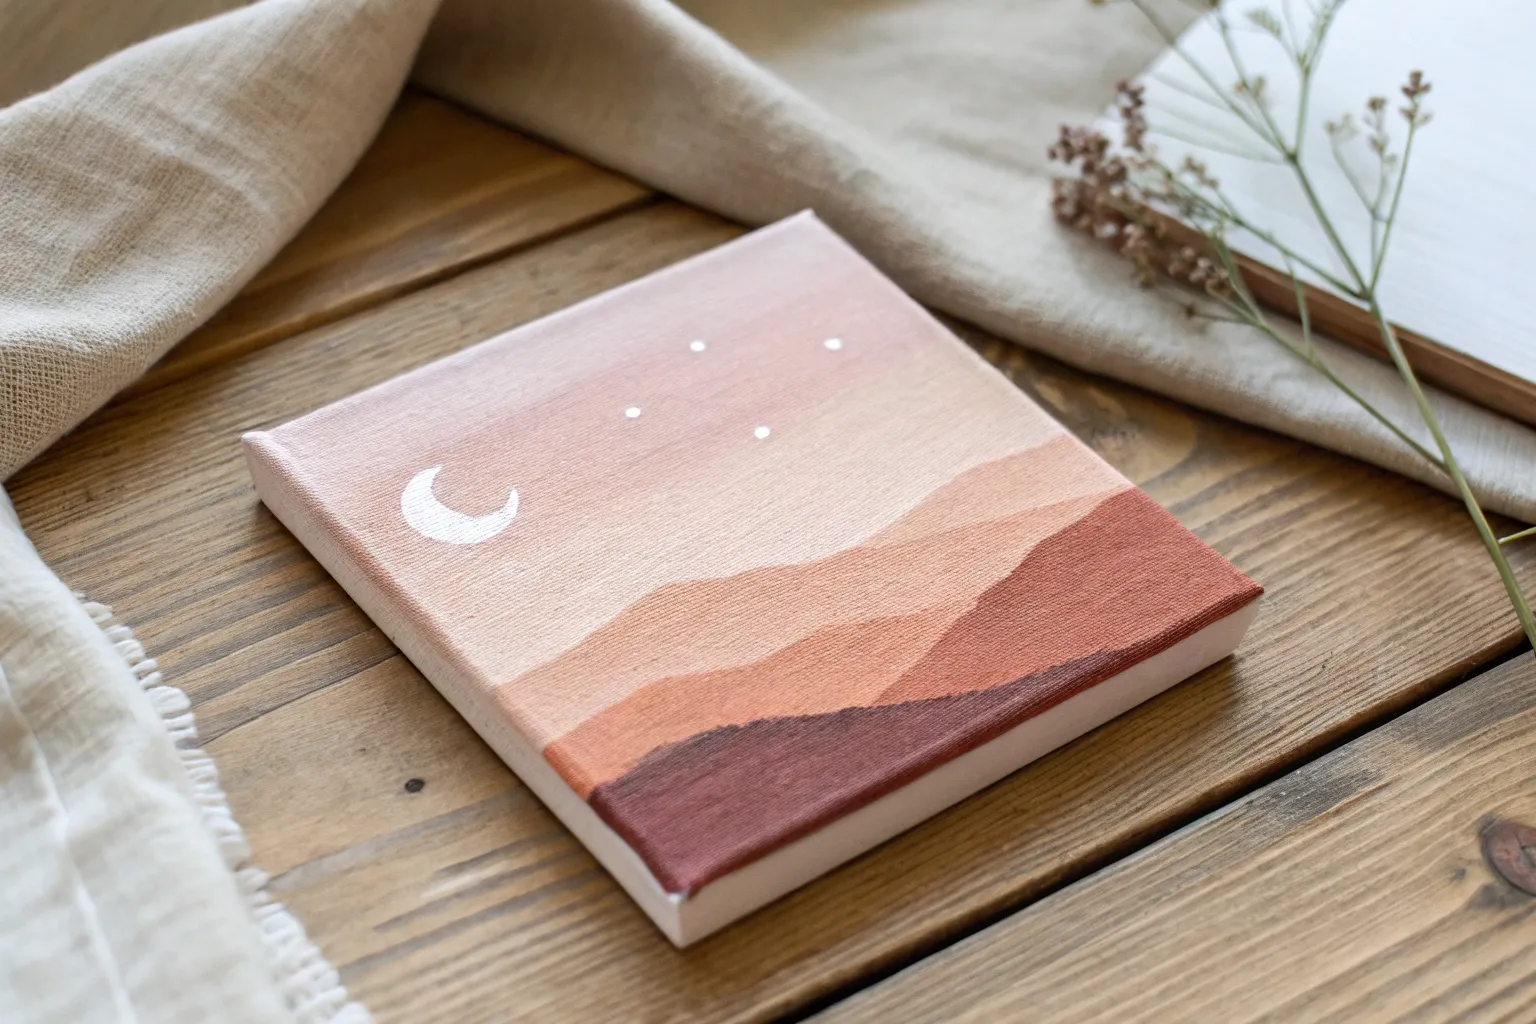
Little Moon and Stars Night Sky
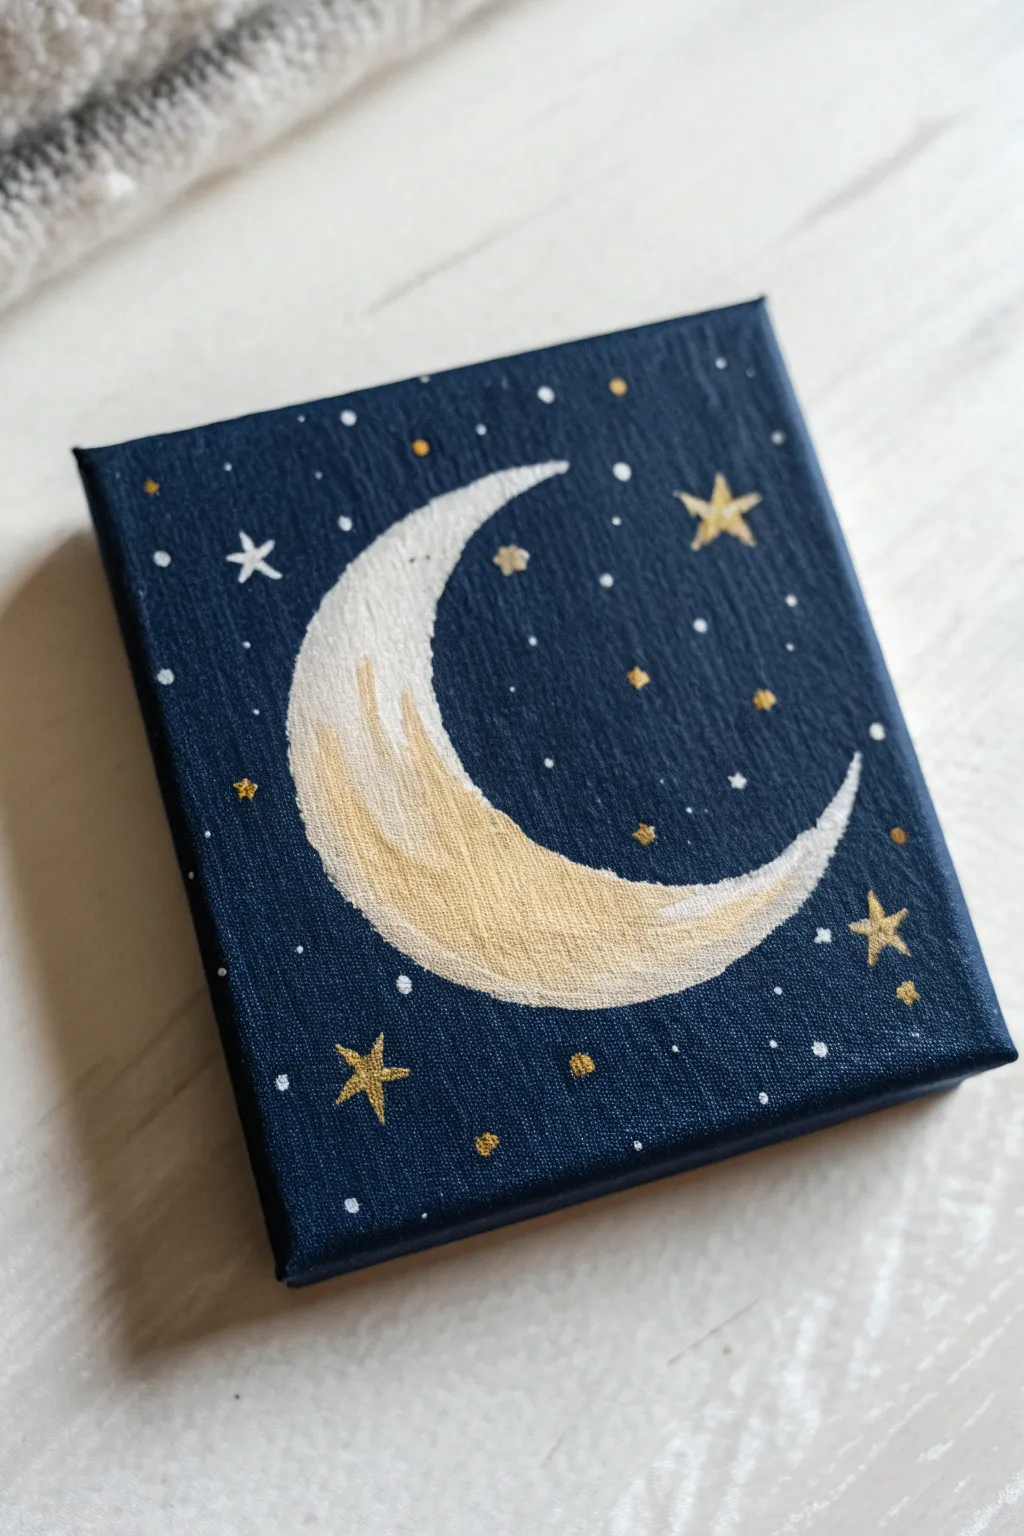
This charming little canvas features a classic crescent moon glowing softly against a deep navy sky, accented by sparkling gold and white stars. It is the perfect beginner-friendly project that captures a magical celestial vibe in just a few simple steps.
Step-by-Step Tutorial
Materials
- Small square canvas (e.g., 4×4 or 6×6 inches)
- Acrylic paints: Navy Blue, Titanium White, Metallic Gold, Black (optional for darkening blue)
- Flat shader brush (medium size)
- Small round detail brush (size 0 or 1)
- Fine liner brush (optional for tiny dots)
- Pencil
- Palette or paper plate
- Cup of water and paper towels
Step 1: Setting the Scene
-
Prepare the background color:
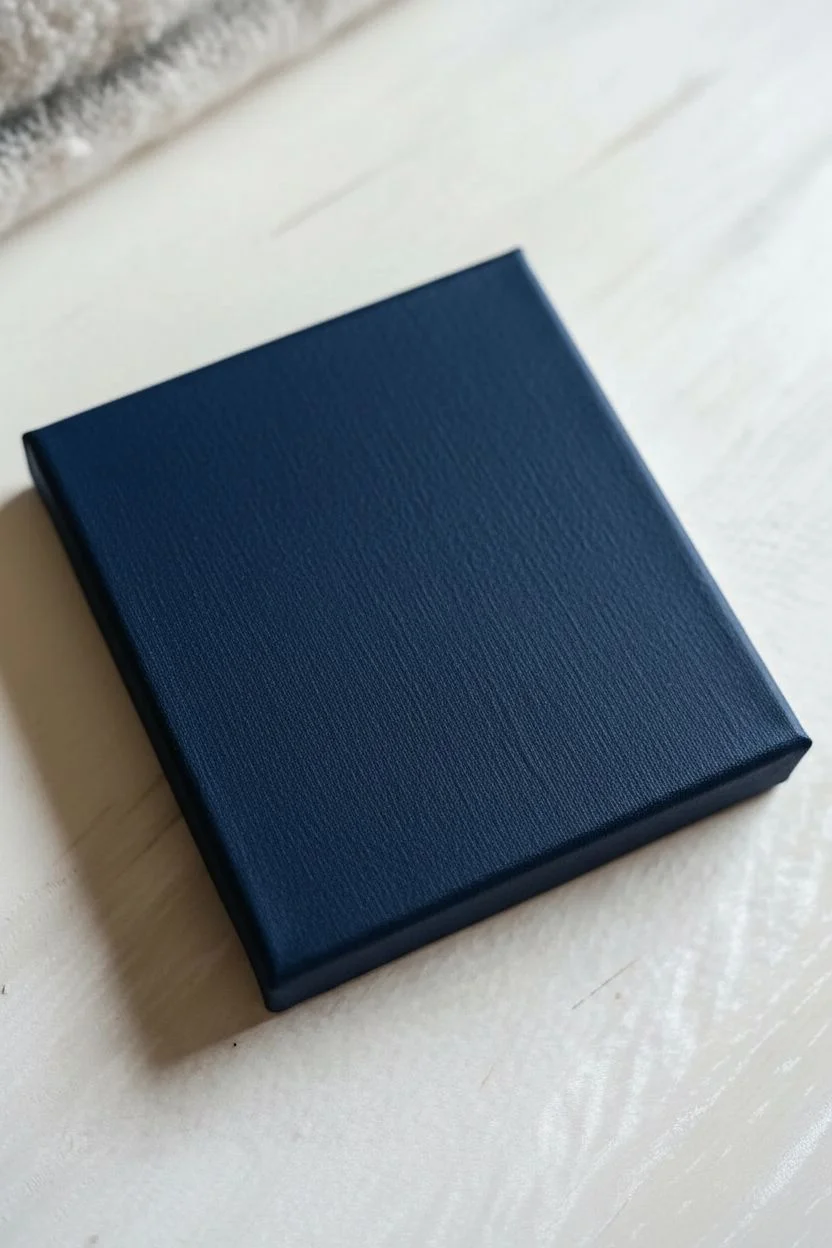
Squeeze out a generous amount of Navy Blue acrylic paint onto your palette. If you want a deeper, midnight look like the photo, mix in a tiny drop of Black paint to darken the blue slightly. -
Paint the base coat:
Using your flat shader brush, apply the navy blue paint to the entire front surface of the canvas. Use smooth horizontal strokes to ensure even coverage. -
Cover the edges:
Don’t forget to paint the four sides of the canvas as well. This gives the finished piece a professional, gallery-wrapped look without needing a frame. -
Allow to dry:
Let the background dry completely. Acrylics dry fast, but you can speed this up with a hair dryer or by waving the canvas in the air. The surface must be dry so the next colors don’t mix and become muddy.
Step 2: Designing the Celestial Body
-
Sketch the moon shape:
Using a pencil very lightly, draw a large ‘C’ shape in the center of the canvas. Make the middle thick and the two tips tapered and sharp. -
Refine the curve:
Connect the tips with an inner curve to form the crescent. Keep your pencil pressure light so graphite doesn’t smudge into your white paint later. -
Base coat the moon:
Take your small round brush and fill in the moon shape with Titanium White paint. This acts as a primer to make the gold pop later. -
Smooth the edges:
Carefully trace the outer edges of the moon with the white paint to get crisp, sharp lines. You may need a second coat of white if the blue shows through. -
Dry the white base:
Allow the white paint to dry fully to the touch.
Uneven Moon Curve?
If your crescent looks wobbly, wait for the paint to dry completely. Then, use the navy background color to ‘cut in’ and reshape the edges of the moon from the outside.
Step 3: Bringing in the Glow
-
Apply the gold layer:
Load your small round brush with Metallic Gold paint. Paint over the bottom two-thirds of the white moon, letting the brush strokes follow the curve of the crescent. -
Blend upward:
While the gold is still wet, clean your brush slightly or pick up a tiny bit of white. Gently blend the gold upward into the white tip so there is a soft transition rather than a hard line. -
Add texture:
I like to dab a little extra gold in the thickest part of the moon to create a slight texture that mimics craters or surface depth. -
Add white highlights:
Once the gold is tacky or dry, use a very small amount of fresh white paint to highlight the upper tip and the inner curve, reinforcing that glowing effect.
Pro Tip: Metallic Pop
Metallic paints tend to be translucent. Apply two to three thin layers of gold rather than one thick globs to achieve a smooth, shiny foil-like finish on your moon.
Step 4: A Galaxy of Stars
-
Paint the prominent stars:
Using your finest detail brush and the Metallic Gold paint, paint 3 or 4 larger five-pointed stars scattered around the moon. Think of drawing an ‘A’ without the crossbar, then crossing it. -
Add secondary stars:
Paint a few smaller, four-pointed ‘diamond’ shape stars in white. I suggest placing these near the edges to balance the composition. -
Create distant stardust:
Dip the tip of a toothpick or the very end of a liner brush handle into white paint. Dot the canvas randomly to create tiny, distant stars. -
Add gold speckles:
Repeat the previous dotting step with gold paint to add warmth and variation to the star field. -
Final touches:
Review your painting. If any blue background shows through your moon or stars, carefuly apply a second coat to those specific areas for opacity.
Let your little masterpiece dry completely before displaying it on a mini easel or hanging it on your wall
Easy Mandala Dots in the Center
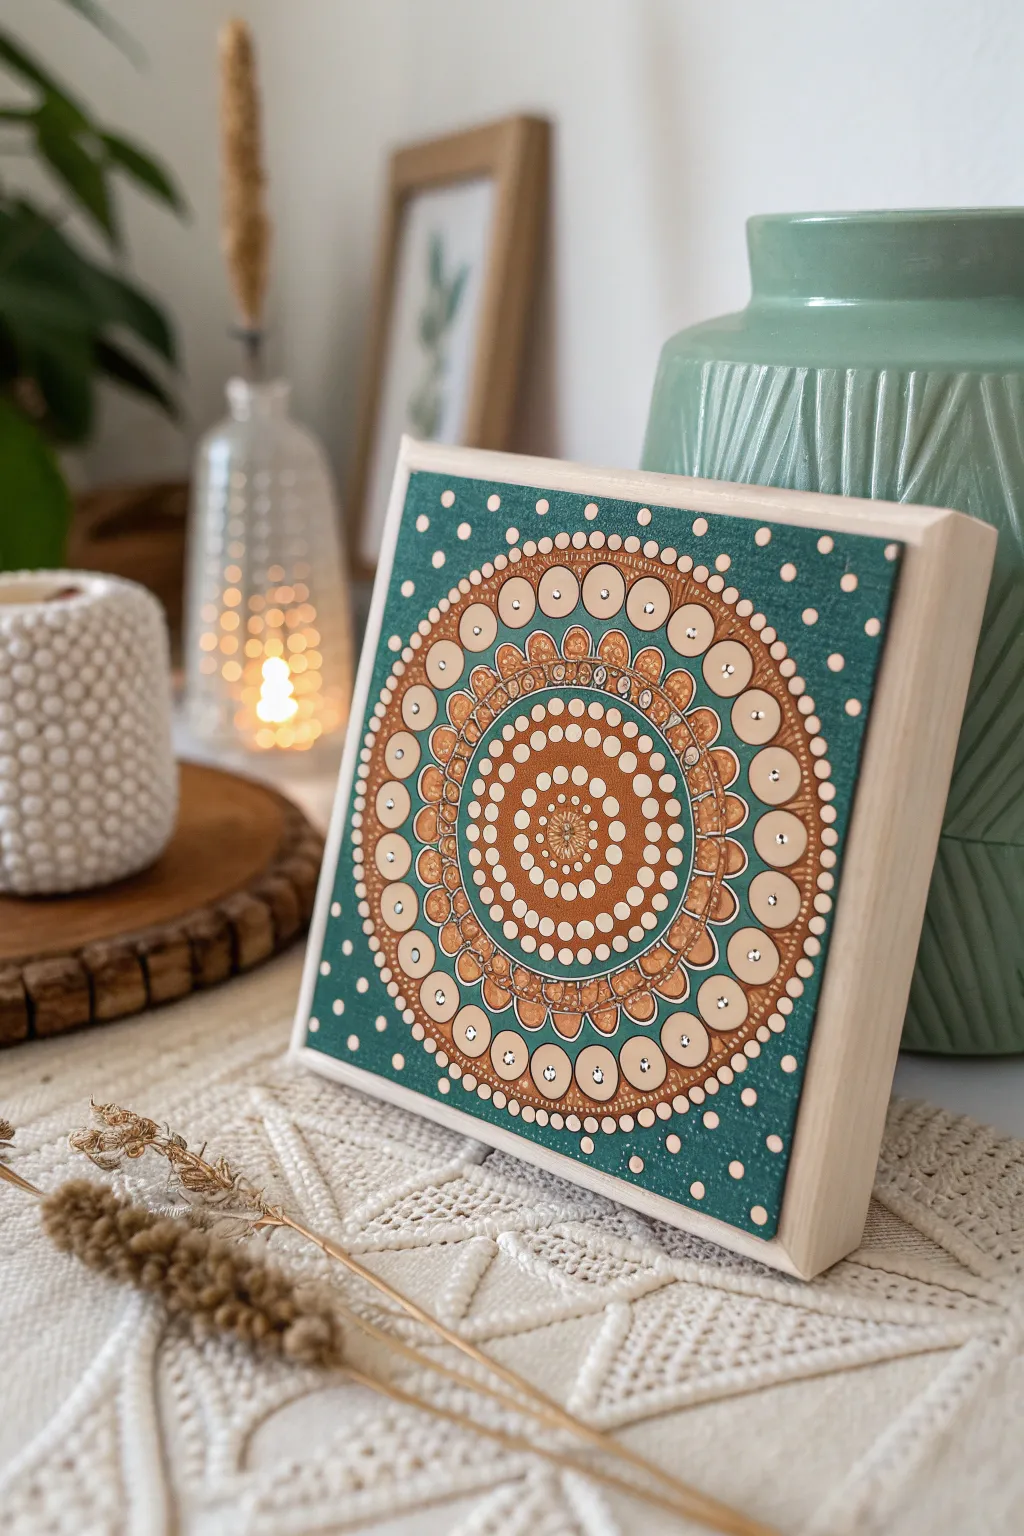
This small square canvas features extensive dotting work creating a warm, radiating mandala pattern against a lovely deep teal background. The interplay of matte copper tones, bright white highlights, and metallic accents gives the piece a textured, almost jeweled appearance.
Step-by-Step Tutorial
Materials
- Small square canvas (approx. 4×4 or 6×6 inches)
- Deep teal or emerald green acrylic paint
- Copper or bronze acrylic paint
- White or cream acrylic paint
- Metallic gold acrylic paint
- Dotting tool set (various sizes, from fine stylus to large rods)
- Small flat brush (for base coat)
- Ruler and pencil
- Compass (optional)
- Clear varnish (optional)
- Palette or small tray for paints
Step 1: Preparation & Base Coat
-
Base the canvas:
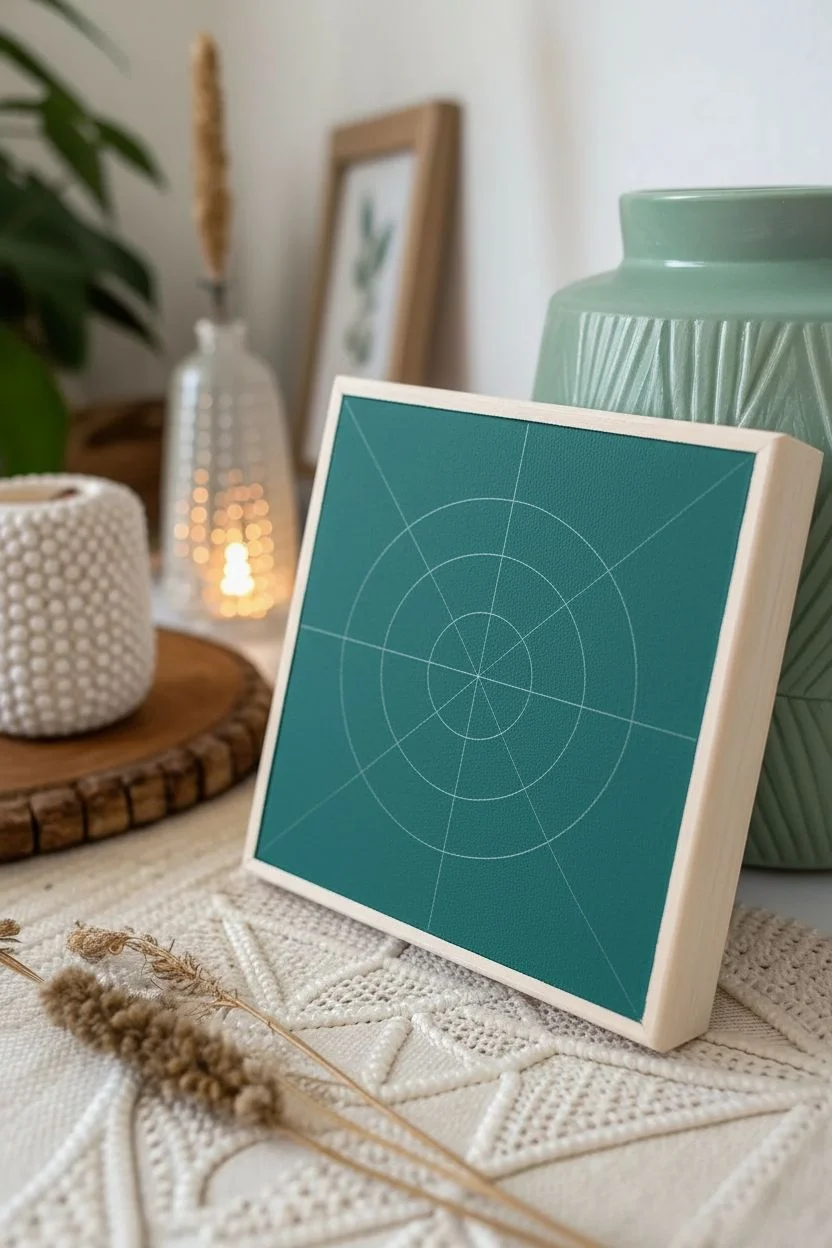
Paint the entire front surface of your square canvas with the deep teal acrylic paint. I like to apply two thin coats rather than one thick one to ensure a smooth, opaque finish. Let it dry completely. -
Find the center:
Use a ruler to lightly mark an ‘X’ from corner to corner with a pencil. The intersection point is your exact center. -
Map guidelines:
Using a compass or by measuring equidistant points from the center, lightly draw faint concentric circles. These will serve as guides to keep your dot layers perfectly round.
Consistency is Key
Mix a tiny drop of pouring medium or water into your paint. It should be the consistency of heavy cream to form perfect, peaks-free rounded domes.
Step 2: Core Mandala Structure
-
Start the center:
Using a medium-sized dotting tool, place a central copper dot right over your intersection mark. -
First ring of dots:
Dip a smaller tool in white or cream paint. Place small dots closely around the central copper dot, creating a tight flower-like cluster. -
Copper expansion:
Switch to a slightly larger tool and copper paint. Create a ring of dots around the white cluster. Try to place these dots in the gaps between the white dots of the previous row. -
Graduated sizing:
For the next few rings, alternate between cream and copper, gradually increasing the size of your dotting tool. This creates the radiating effect. -
Create the defining border:
Paint a solid, thin copper ring or larger contiguous dots to create a distinct boundary for the inner core section.
Step 3: Intricate Layers & Petals
-
Paint the large petals:
Surrounding your core, use a brush or large tool to paint teardrop or petal shapes in copper. The pointed end should face outward. -
Fill the background:
While the copper petals dry, use your finest stylus to add tiny teal or gold micro-dots inside the copper area to add texture. -
Outer large dots:
Use your largest dotting tool to place prominent cream-colored circles around the outer edge of the mandala design. -
Layering dots (Top-dots):
Once the large cream base dots are dry, place a smaller copper dot in the center of each one. This ‘top-dot’ technique adds dimension. -
Tiny highlights:
Wait for the copper top-dots to dry, then add a tiny speck of white or metallic silver right in the center of each copper dot for a jeweled shine.
Oops, a smudge!
Don’t panic if a dot smudges. Wait for it to dry completely, paint over it with the teal background color, let that dry, and re-dot.
Step 4: Final Details & Background
-
Walking the dots:
around the large outer circles, perform ‘walking the dots’ with copper paint. Place one central dot, then use the remaining paint on the tool to make progressively smaller dots down each side. -
Corner details:
Move to the negative space resulting in the corners of the square canvas. Use your smallest tool to create tiny white or light teal filler dots. -
Random scatter:
Scatter medium and small cream dots loosely in the remaining teal background space to break up the emptiness without overwhelming the main design. -
Erase guidelines:
Once you are absolutely certain all paint is 100% dry (give it a few hours), gently erase any visible pencil lines. -
Seal the work:
Apply a coat of clear gloss or satin varnish to protect the dots and make the metallic colors pop.
This meditative process results in a stunning piece of decor that looks far more complex than it actually is to create

PENCIL GUIDE
Understanding Pencil Grades from H to B
From first sketch to finished drawing — learn pencil grades, line control, and shading techniques.
Explore the Full Guide
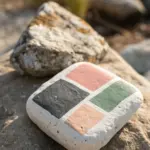
Geometric Color Blocks With Clean Tape Edges

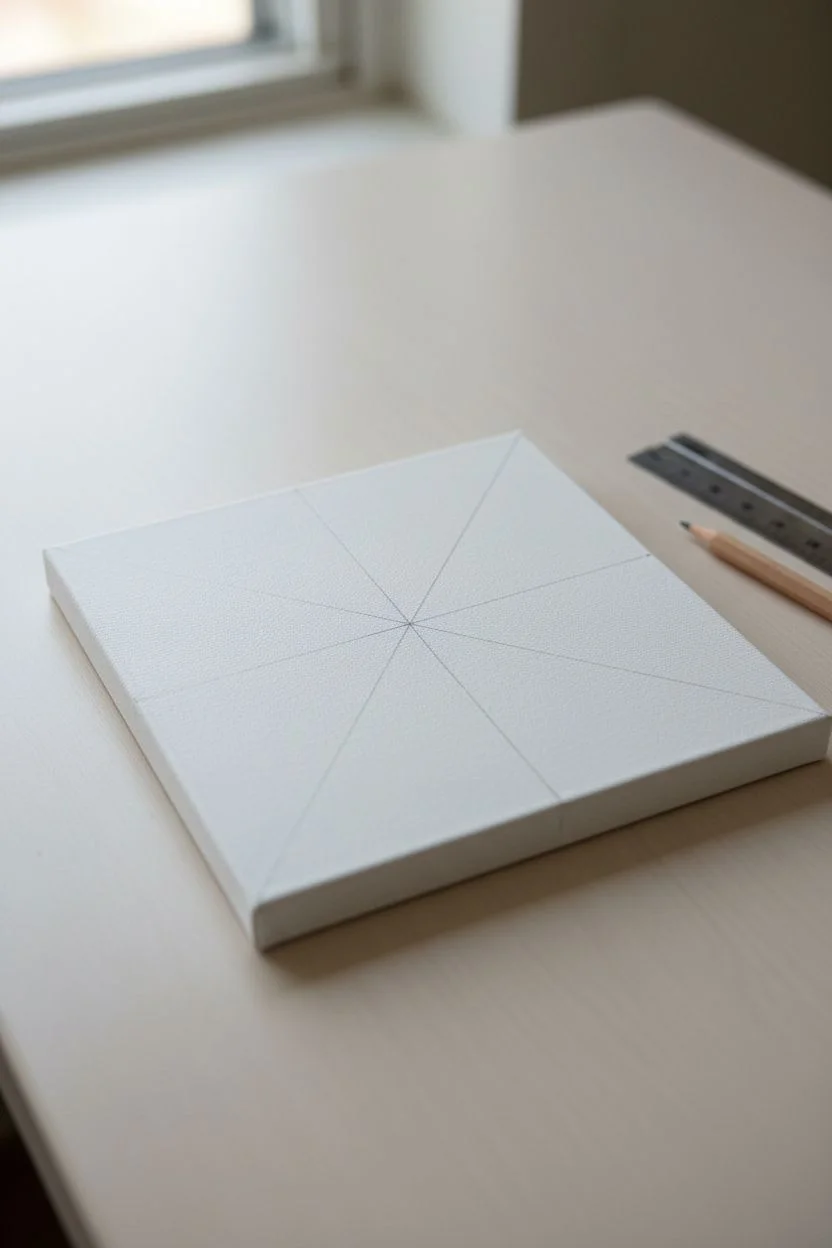
This small square canvas features a radiating pinwheel design in a muted, earthy palette that feels both modern and grounding. By using a clever taping technique, you can achieve crisp, razor-sharp lines where the triangles meet perfectly in the center.
Step-by-Step Guide
Materials
- Small square canvas (e.g., 6×6 or 8×8 inch)
- Acrylic paints (Dark hunter green, sage green, terracotta, light peach, cream-white, burnt sienna)
- Painter’s tape or masking tape (approx. 1 inch width)
- Flat shader brushes (medium size)
- Ruler
- Pencil
- Palette for mixing
- Cup of water and paper towels
Step 1: Preparation & Mapping
-
Prime the Surface:
Since the canvas weave can be prominent, start by applying a base coat of white gesso or your lightest cream color to the entire canvas. This seals the fabric and ensures your subsequent colors glide on smoothly. -
Find the Center:
Using your ruler, measure diagonal lines from corner to corner lightly with a pencil. Where they cross is your exact center point. -
Mark the Rays:
This design consists of eight triangles radiating from the center. You already have the diagonal X shape. Now, use your ruler to draw a vertical line and a horizontal line crossing through that same center point, creating eight equal ‘pie slices.’
Bleeding Lines?
If paint bleeds under the tape, wait for it to dry fully. Then, line the tape up again slightly over the mistake and repaint the edge with the correct original color to cover the bleeds.
Step 2: Taping Strategy
-
Tape the First Set:
You cannot paint adjacent triangles at the same time without them bleeding into each other. Mask off four non-touching triangles. Place your tape firmly along the pencil lines, pressing down hard on the edges to seal them. -
Seal the Edges:
To get perfectly crisp lines, paint a very thin layer of your base cream color over the edge of the tape. This trick fills any tiny gaps under the tape with the background color so the final color won’t bleed underneath. -
Select Your Palette:
Prepare four distinct colors for this first round. Based on the reference, you might choose the dark hunter green, the light peach, the dark terracotta, and the sage green.
Step 3: Painting Round One
-
Apply the Paint:
Using a flat shader brush, fill in the exposed triangles. Apply the paint somewhat thickly to get solid, opaque coverage without streaks. I find multiple thin coats often look smoother than one thick glob. -
Don’t Forget the Sides:
Extend your painting over the edge of the canvas. This gallery-wrap effect gives the finished piece a polished, professional look without needing a frame. -
Remove Tape While Damp:
Carefully peel back the tape while the paint is still slightly tacky, not bone dry. Pull the tape away from the wet paint area at a 45-degree angle to avoid lifting any skin of paint. -
Let it Cure:
Allow these four sections to dry completely. Since you will be taping over them in the next step, they must be absolutely dry to the touch, or the tape will ruin your work.
Texture Twist
Mix a small amount of baking soda or modeling paste into your acrylics for a tactile, plaster-like texture that makes the geometric shapes pop off the canvas.
Step 4: Painting Round Two
-
Tape the Remaining Sections:
Once the first set is cured, mask off the already-painted triangles. Apply tape carefully along the dry paint edges to expose the remaining four white triangles. -
Choosing Contrast Colors:
Select colors that contrast with their neighbors. For the remaining spaces, mix up a creamy off-white, a muted orange, a deeper beige, and perhaps a variation of the green or rust. -
Paint the Second Set:
Fill in these new sections just as before. Painting outward from the center helps keep the point sharp. Remember to wrap these colors around the sides of the canvas as well. -
The Final Reveal:
Peel off the second round of tape carefully. You should now have eight distinct, sharp triangles meeting at the center point.
Step 5: Finishing Touches
-
Touch Ups:
Inspect the center point where all eight colors meet. If there are tiny gaps or slight overlaps, use a very fine liner brush and a steady hand to correct them. -
Erase Guidelines:
If any pencil marks are visible between the color blocks or on the edges, gently erase them with a clean white eraser. -
Varnish (Optional):
To protect the subtle matte finish and unify the sheen of the different paint colors, apply a coat of matte spray varnish once the piece has dried overnight.
Enjoy the satisfaction of those obsessively clean lines and the warm, calming effect of your new geometric art piece
Single Flower Close-Up, Big Petals
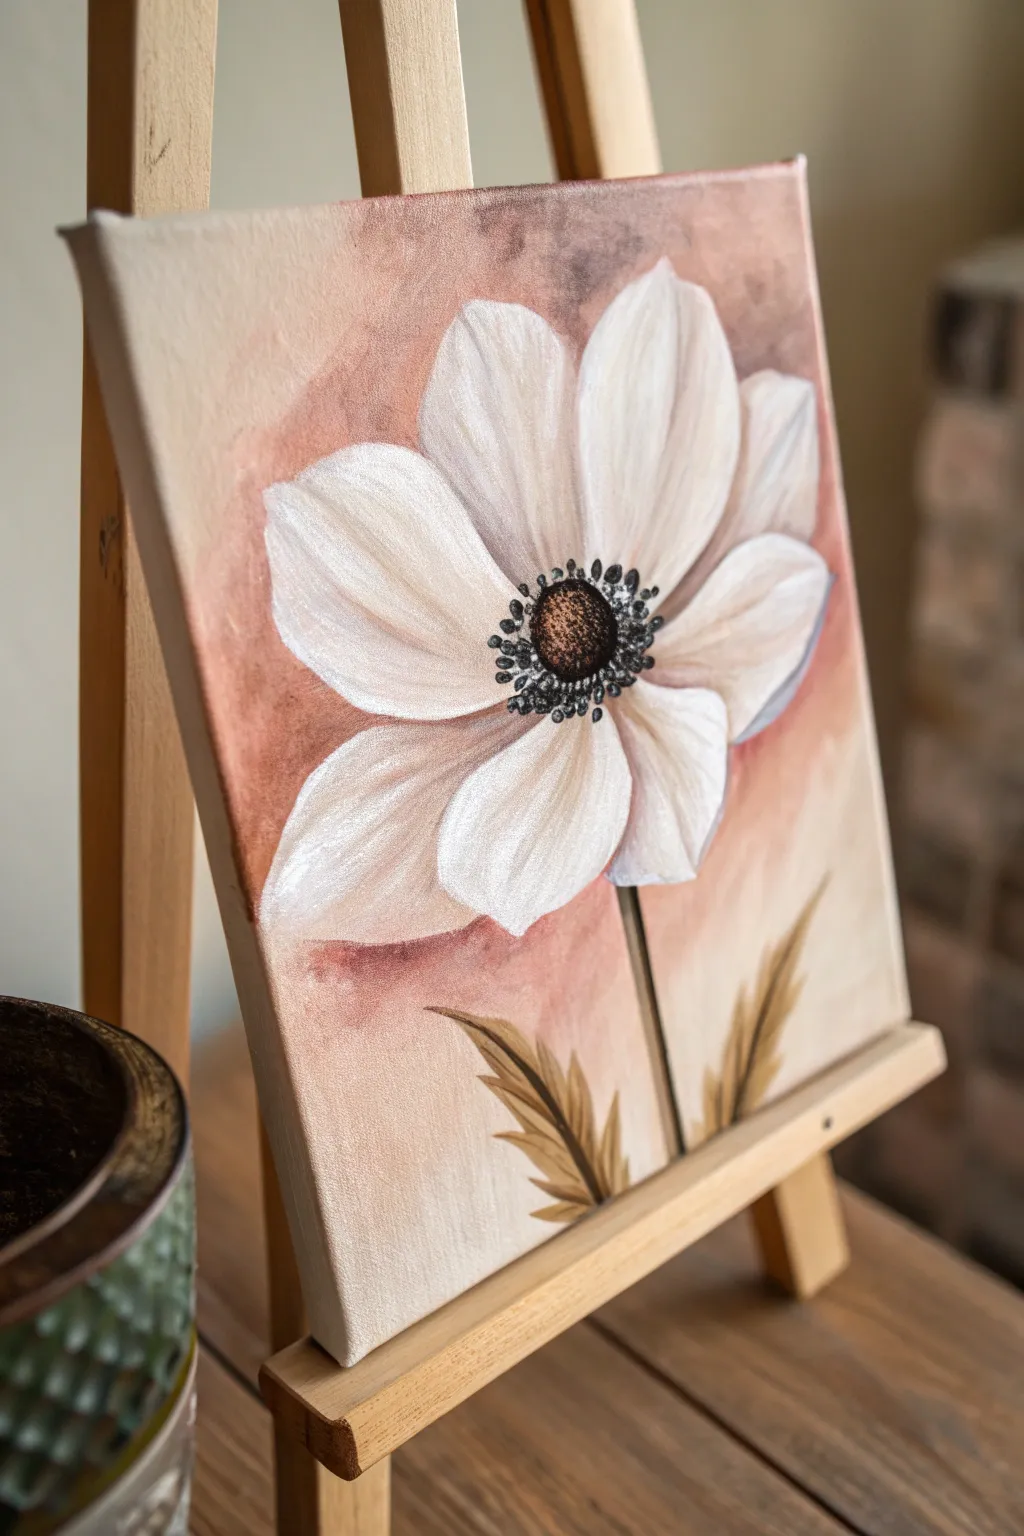
This elegant painting features a large, single white bloom set against a soft, mottled peach background giving it a gentle, vintage feel. The focus is on the oversized petals and the contrasting dark, textured center, making it a perfect project for mastering wet-on-wet blending.
Step-by-Step
Materials
- Small square stretched canvas (e.g., 8×8 or 10×10 inches)
- Acrylic paints: Titanium White, Unbleached Titanium (or Cream), Burnt Umber, Mars Black, Raw Sienna, Pale pink or Peach
- Flat shader brush (size 10 or 12)
- Small round brush (size 2 or 3)
- Very fine liner brush (size 0 or 00)
- Palette for mixing
- Cup of water and paper towels
- Pencil for sketching
- Dotting tool or toothpick (optional)
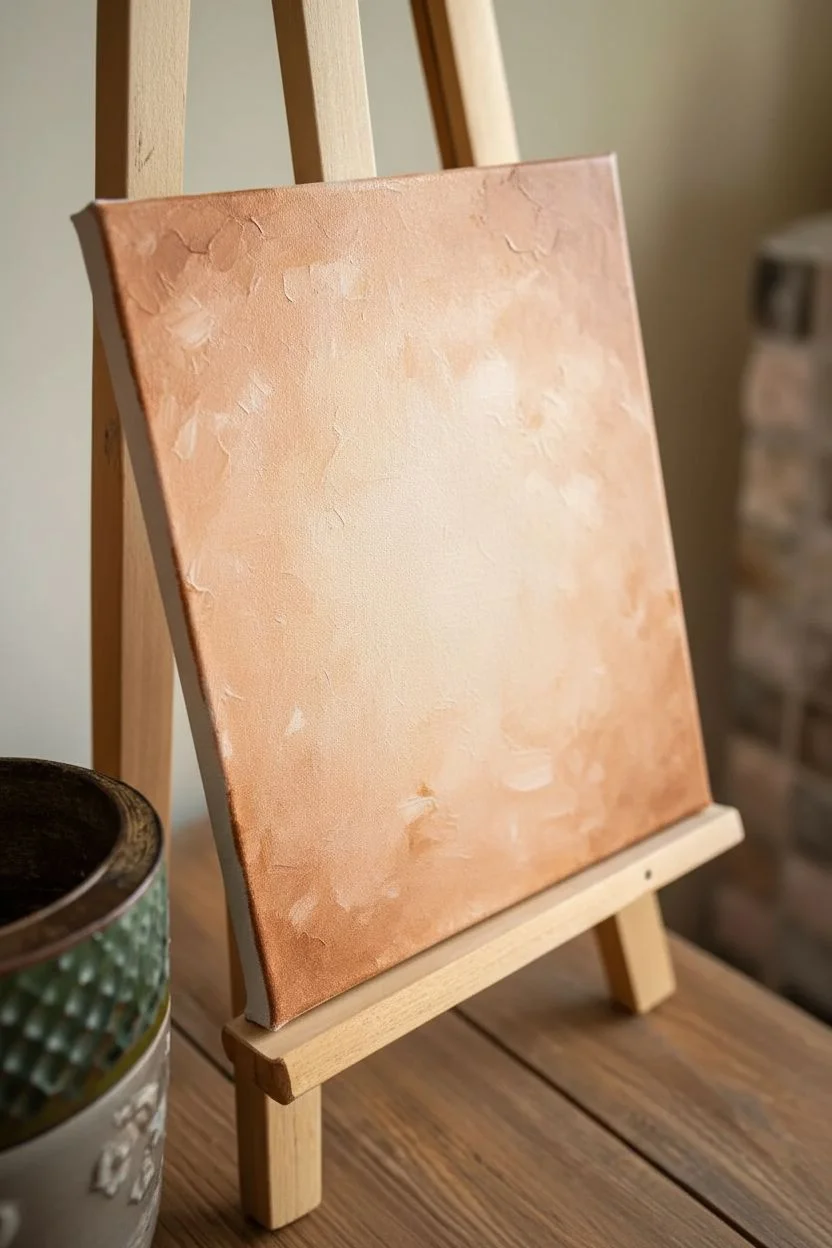
Step 1: Preparing the Background
-
Mix the base tones:
Start by squeezing out Titanium White, Unbleached Titanium, and a touch of the Peach or Pale Pink onto your palette. You want a very soft, warm palette for the background. -
Create a mottled wash:
Using the large flat shader brush, pick up white and a tiny bit of peach. Apply this to the canvas in loose x-strokes. Don’t overblend; you want to see some texture. -
Deepen the corners:
While the paint is still wet, add a small touch of Raw Sienna or Burnt Umber to your brush without cleaning it. Gently blend this into the corners and edges of the canvas to create a vignette effect. -
Dry completely:
Let this background layer dry fully before moving on. This prevents muddying the crisp white of the flower later.
Step 2: Blocking in the Flower
-
Sketch the flower shape:
Lightly draw a large oval shape in the center of the canvas. Inside, draw a smaller circle for the center, positioned slightly off-center to give it a natural tilt. -
Outline the petals:
Sketch roughly 7-8 large, wide petals radiating from that center circle. Make them overlap slightly; anemone petals are distinct and rounded. -
Base coat the petals:
Using a clean flat brush, fill in the petals with pure Titanium White. It’s okay if this layer is a bit translucent for now; we just need to block out the background color. -
Paint the center:
Fill the center circle with Burnt Umber. While it’s wet, dab in a tiny bit of black right in the very center to give it depth.
Muddy Petals?
If your white petals turn pink or brown while painting, stop instantly. Let the background layer dry 100% completely, then apply a fresh coat of white paint on top.
Step 3: Adding Depth and Texture
-
Shade the petals:
Mix a light beige using White and a tiny dot of Raw Sienna. With a damp brush, sweep this color from the flower center outwards along the bottom of the petals where they overlap. -
Highlight the edges:
Reload your brush with thick Titanium White. Paint the outer tips and edges of the petals to make them pop against the background. -
Create petal texture:
Use a dry brush technique with the white paint to streak gently from the tip of the petal toward the center, creating the look of ribbed floral veins. -
Add the stem:
Mix Raw Sienna with a little Burnt Umber. Using the small round brush, paint a straight, slender stem extending from the bottom of the flower off the canvas edge. -
Paint the leaves:
Using the same stem color, add two jagged, fern-like leaves near the bottom. Keep the strokes loose and feathery rather than solid blocks of color.
Pop Those Stamens
For perfectly round stamen dots, dip the handle end of your paintbrush into the black paint and stamp it onto the canvas instead of using the bristles.
Step 4: Detailing the Center
-
Stipple the texture:
Dip an old, splayed brush or a scruffy round brush into Burnt Umber. Tap it repeatedly over dried center area to create a fuzzy, pollen-like texture. -
Add the stamen ring:
Switch to your fine liner brush and thin down some Mars Black paint with water. Paint a ring of tiny dots closely packed around the brown center. -
Extend the stamens:
Paint very fine, short black lines radiating slightly outward from the brown center into the white petals. Top each line with a slightly larger black dot. -
Highlight the stamens:
Here I like to wait for the black to dry completely. Once dry, take a toothpick or the very tip of your liner brush with pure white paint and add a tiny speck of light to some of the black dots. -
Final touches:
Step back and look at your painting. If the background looks too flat near the petals, add a very watery glaze of Burnt Umber around the flower outline to increase contrast.
Allow your painting to dry fully before displaying on a mini easel to brighten up your shelf


Mini Fruit Slice With Bright Pop Colors
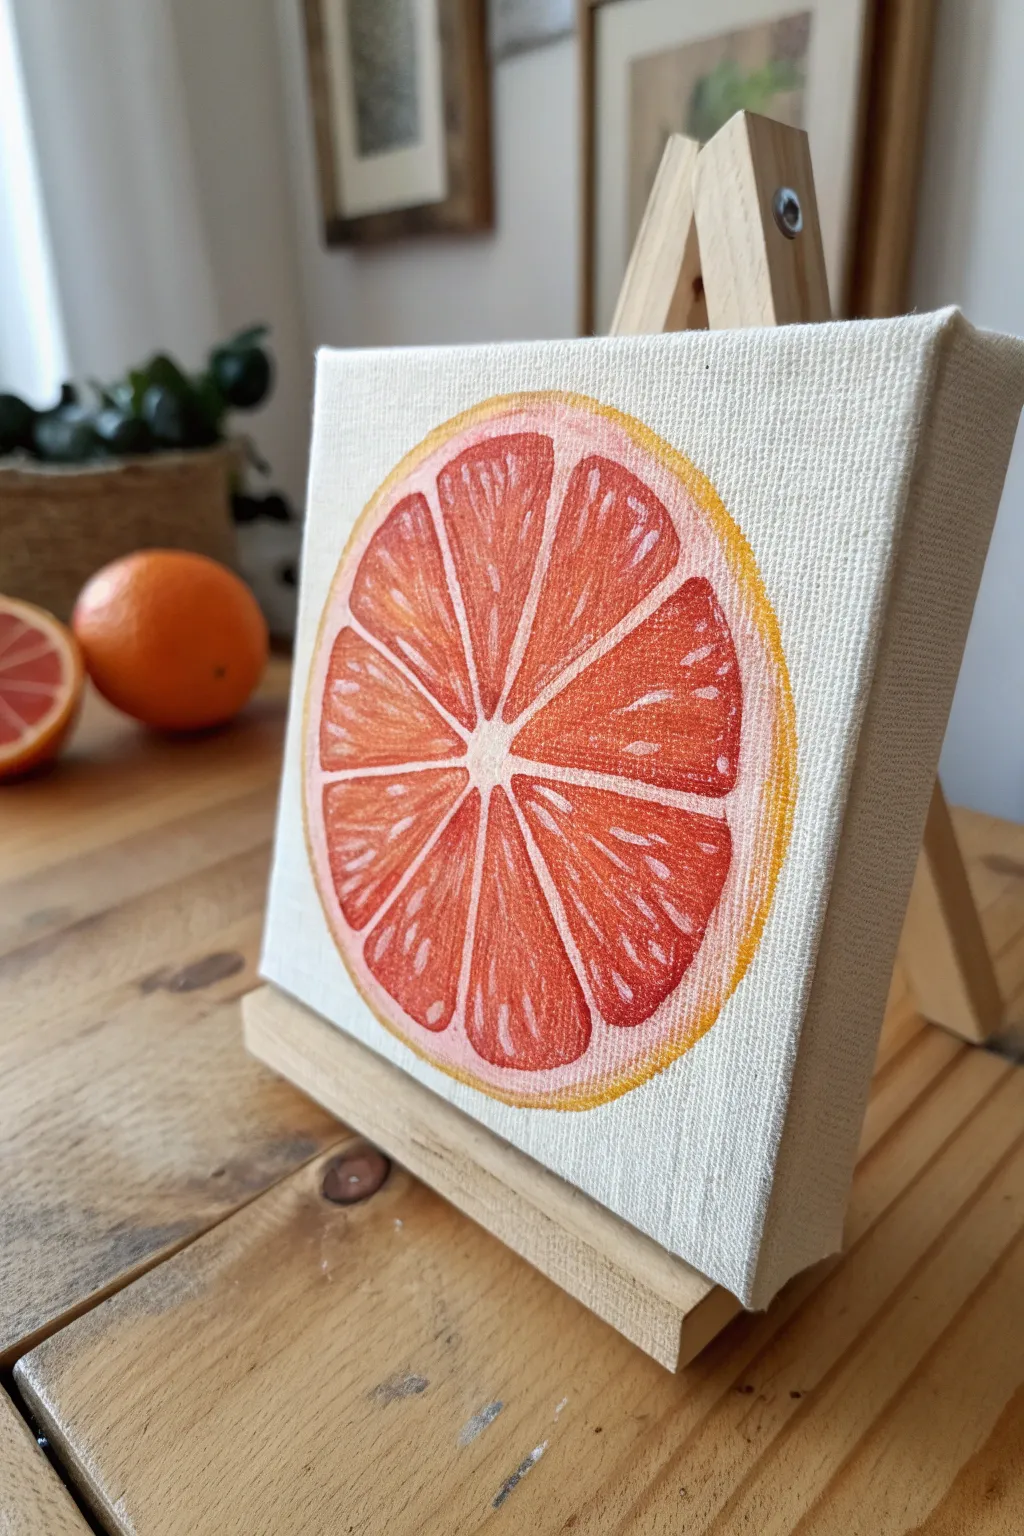
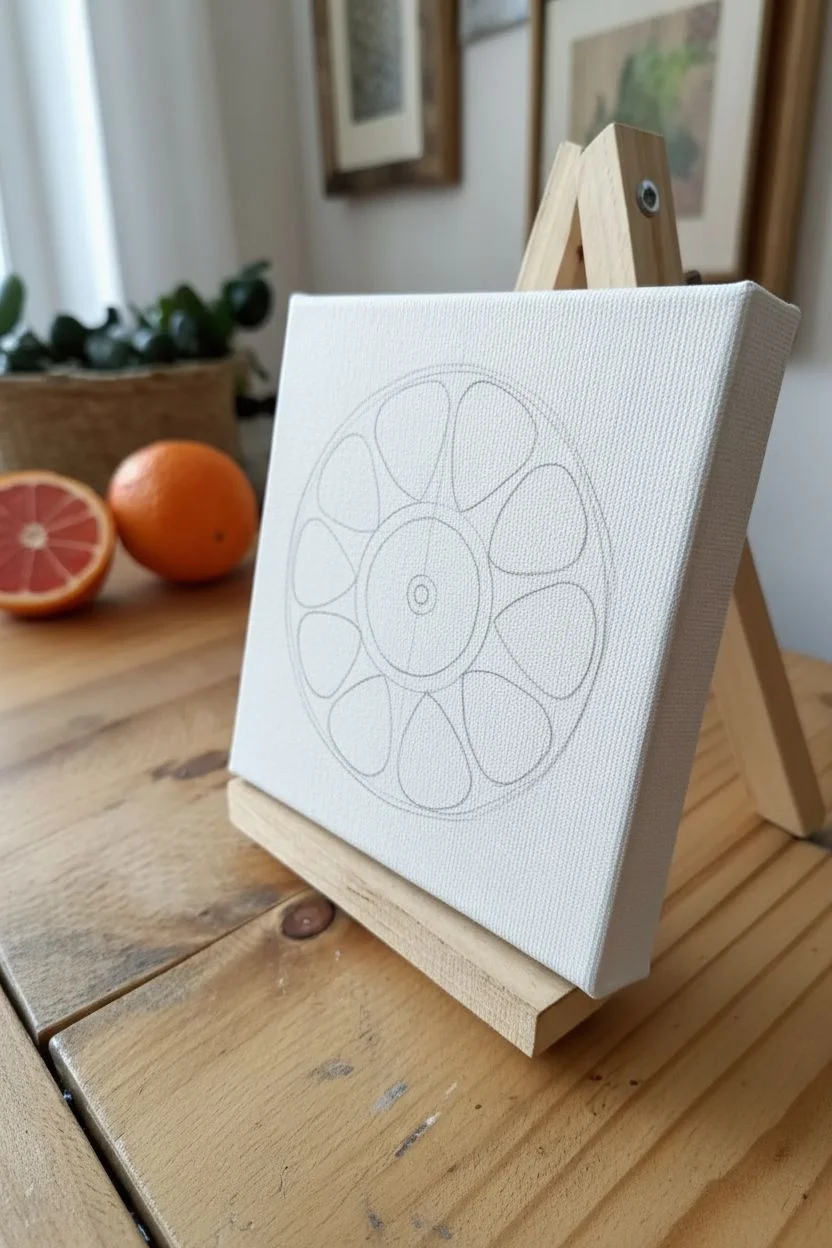
Brighten up your desk or shelf with this vibrant citrus slice painting. Using bold reds, pinks, and oranges on a small canvas creates a refreshing pop of color that looks good enough to eat.
Step-by-Step Tutorial
Materials
- Small square canvas (e.g., 4×4 or 5×5 inches)
- Acrylic paints: Cadmium Red, Titanium White, Orange, Deep Fellow
- Small synthetic round brush (size 2 or 4)
- Fine liner brush (size 0 or 00)
- Compass or a circular object for tracing (like a jar lid)
- Pencil and eraser
- Palette for mixing
- Cup of water and paper towels
Step 1: Sketching the Layout
-
Prepare the canvas:
Ensure your small canvas is clean and dust-free. If the canvas texture is very rough, you might want to apply a layer of gesso, but for this rustic look, the raw texture works fine. -
Trace the outer circle:
Find a circular object or use a compass to draw a large circle centered on your canvas. Leave about half an inch of white space around the edges to frame the fruit. -
Define the rind:
Draw a slightly smaller circle inside the first one to create the thickness of the peel. It shouldn’t be too thick—just enough to hold color. -
Mark the center:
Place a small dot in the exact center of the inner circle. Lightly sketch a tiny circle around this dot to represent the central pith where the segments meet. -
Draw the segments:
Lightly sketch lines radiating from the center like wheel spokes. Aim for about 9 or 10 segments. Don’t worry about perfect symmetry; slight variations make it look more organic. -
Round the corners:
Inside each triangular ‘spoke’ section, round off the corners slightly so the fruit segments look like teardrops rather than sharp geometric triangles.
Step 2: Base Colors
-
Paint the background pith:
Mix a tiny touch of orange or pink with a lot of Titanium White to create a very pale, warm cream color. Paint the ‘spokes’ between the segments and the central circle. -
Paint the inner rind:
Use a slightly more saturated version of your pale cream color to fill in the ring between the fruit segments and the outer skin. -
Mix your fruit red:
Combine Cadmium Red with a little orange to get a vibrant grapefruit pink-red. You want a color that is punchy but not too dark. -
Fill the segments:
Using your small round brush, fill in the fruit segments with your red-orange mix. Keep the paint relatively thin so the canvas texture shows through slightly.
Juicy Texture Tip
Don’t blend the highlights too smoothly. Leaving the small dashes of light pink and white distinct creates the illusion of juicy pulp texture.
Step 3: Adding Depth and Detail
-
Add the outer skin:
Mix a bright yellow-orange. Using a steady hand, paint the outermost rim of the circle. I like to let the brush skip slightly over the canvas texture to give it a porous look. -
Define the segment edges:
Take a darker shade of red (add a tiny touch of blue or brown to your red mix) and outline the very interior edge of each fruit segment to create depth. -
Create juice sac highlights:
Mix a light pink (red plus white). Using your fine liner brush, paint small broken lines and dashes inside the red segments. These mimic the individual juice sacs. -
Refine the pith lines:
If your red paint went over the lines, use your pale cream color and the liner brush to crisp up the white dividing lines between the segments. -
Add bright reflections:
Finally, use pure white or extremely pale pink to add tiny, sharp highlights on the juiciest parts of the segments. This makes the fruit look wet and fresh. -
Final touches:
Review your outer yellow rind. If needed, blend a little of the pale pith color into the inner edge of the yellow rind for a smoother transition.
Make a Citrus Trio
Paint two more canvases using different palettes: lime green for a lime slice and bright yellow for a lemon to create a complete kitchen wall set.
Once dry, display your mini artwork on a tiny easel to add a fresh squeeze of creativity to your room
Cute Cactus in a Tiny Pot
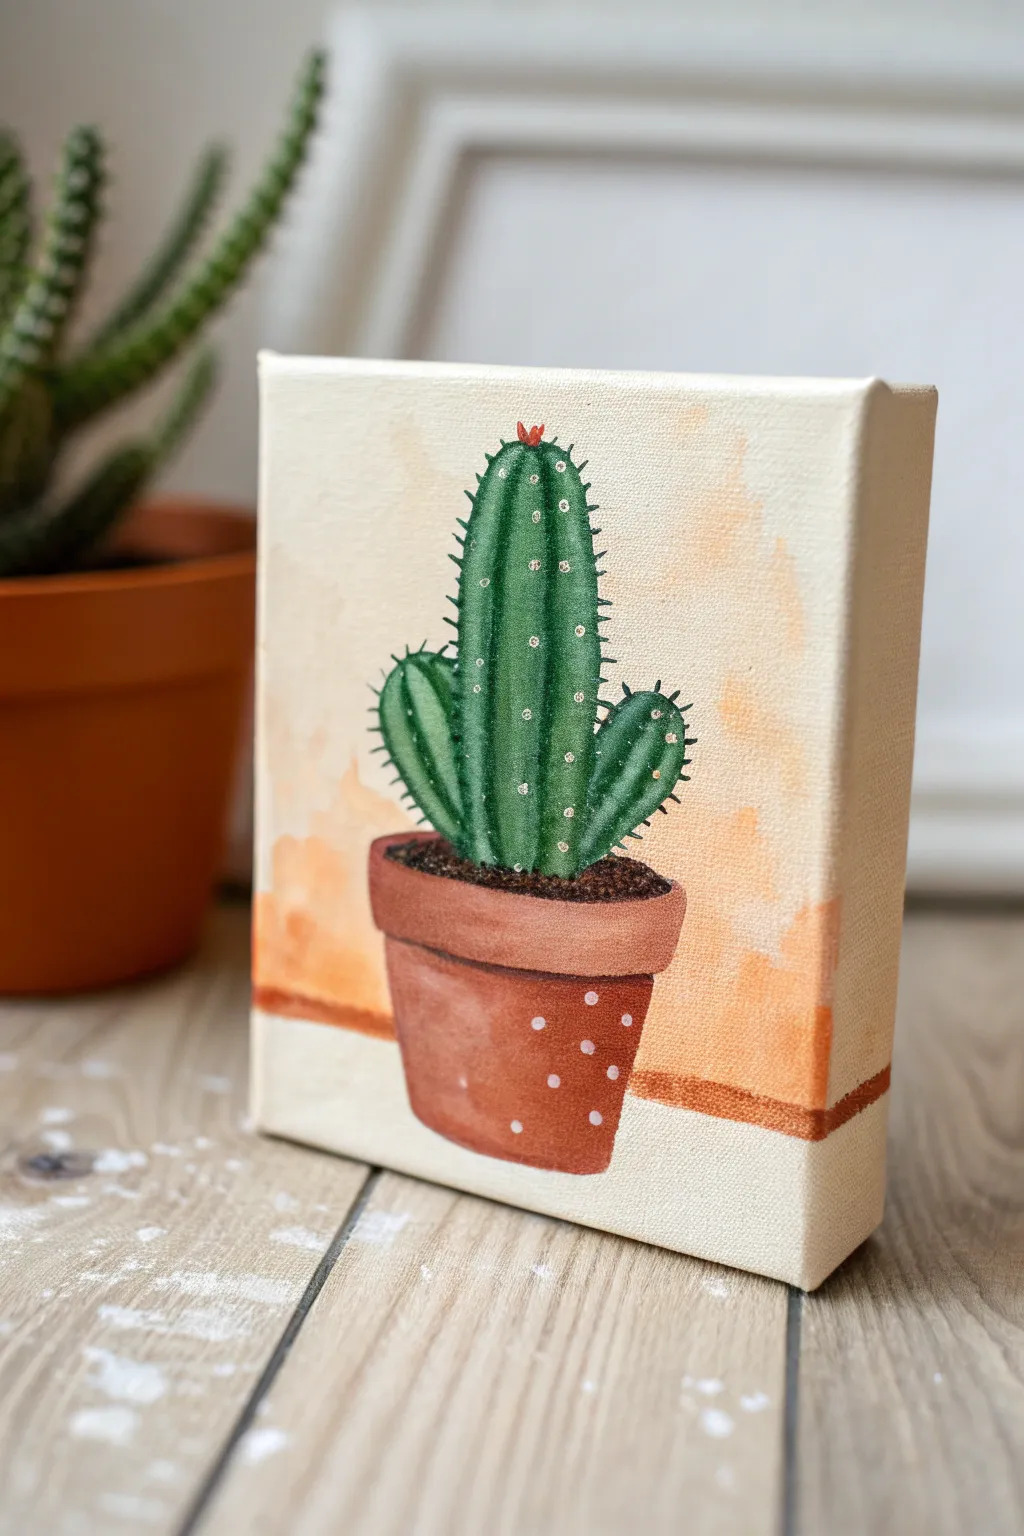
This delightful mini canvas project brings desert vibes indoors with a vibrant green cactus in a playful polka-dot pot. The soft watercolor-like background wash creates a warm, inviting atmosphere perfect for adding a pop of color to small nooks.
Detailed Instructions
Materials
- Small square stretched canvas (4×4 or 6×6 inches)
- Acrylic paints: Sap Green, Dark Green, Phthalo Green, Burnt Sienna, Yellow Ochre, Titanium White, and Black
- Brush set: Small flat brush, round brush (size 4), and a fine liner brush (0 or 00)
- Cup of water and paper towels
- Palette or mixing plate
- Pencil and eraser
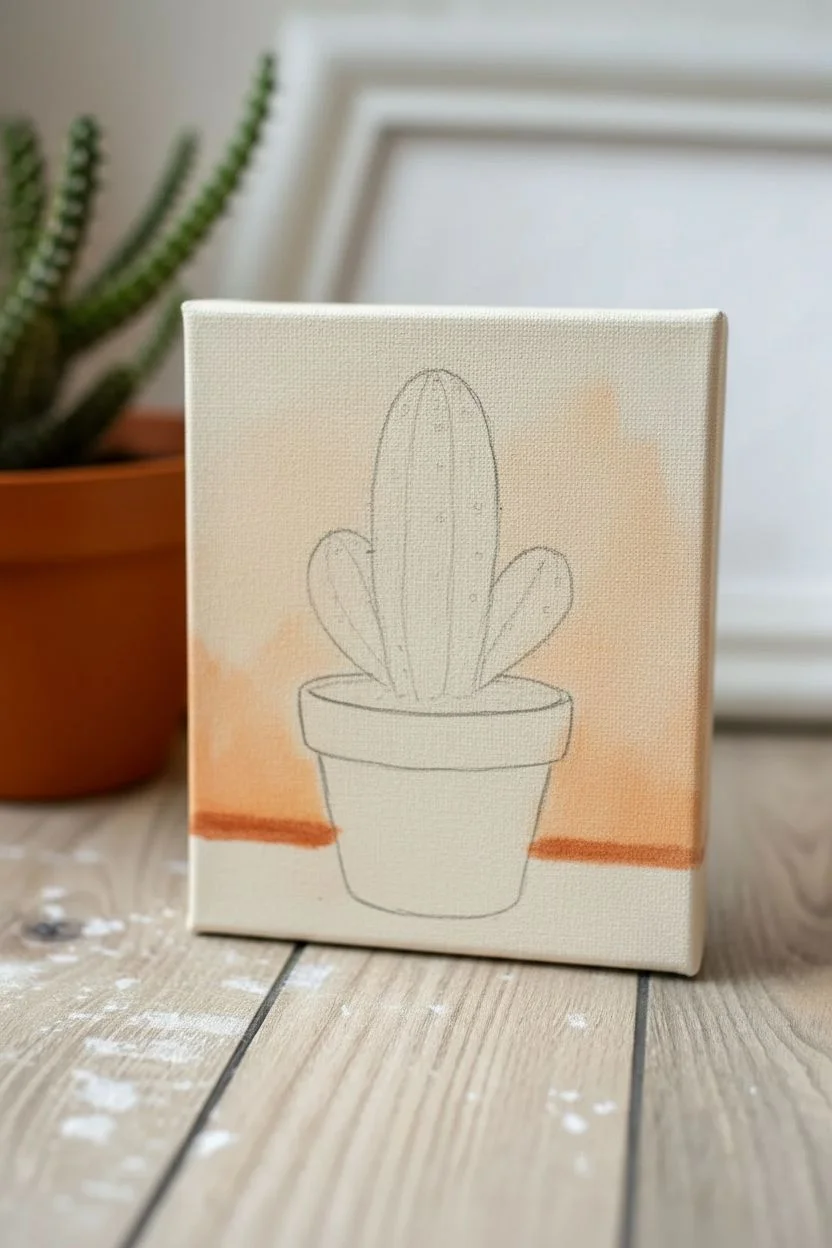
Step 1: Prepping the Scene
-
Sketch the outline:
Begin by lightly sketching the pot and cactus directly onto the canvas with a pencil. Draw a simple tapered cylinder for the pot and a central tall oval for the main cactus body, overlapping it with two smaller ‘arms’ on either side. -
Define the rim:
Add a slightly wider band at the top of your pot shape to create the terracotta rim. Ensure the cactus sits nestled within this rim, not hovering above it. -
Mix the background wash:
On your palette, mix a small amount of Yellow Ochre with a dot of Burnt Sienna and plenty of Titanium White. Add water to this mixture until it becomes very fluid and translucent, almost like a watercolor wash. -
Apply the wash:
Using a flat brush, loosely paint the background around your sketch. Let the strokes be uneven and organic, concentrating a slightly darker orange tone near the bottom horizon line and fading it out as you move upward. Don’t worry about perfect coverage; the texture of the canvas showing through adds charm.
Pro Tip: Steady Hand
For the tiny cactus spines, rest your pinky finger on a dry part of the canvas or the table to stabilize your hand while painting the fine details.
Step 2: Painting the Pot
-
Base coat the terracotta:
Mix Burnt Sienna with a touch of White to create a medium terracotta color. Paint the entire pot shape with this solid opaque layer, using a round brush for the edges and filling in the rest. -
Add shadows:
While the base is still slightly tacky or dry, mix a darker version of your terracotta by adding a tiny bit of Black or Dark Brown. Apply this shadow along the left side of the pot and just under the rim to give the object dimension and weight. -
Highlight the rim:
Mix a lighter peach tone using more White. Paint the top edge of the rim and the right side of the pot to simulate a light source coming from the right. -
Create the soil:
Mix Dark Brown with Black. Use the tip of your round brush to dab textured spots inside the rim where the cactus meets the pot, simulating rough potting soil.
Step 3: Bringing the Cactus to Life
-
Base green layer:
Mix Sap Green with a little Phthalo Green for a rich, vibrant base. Paint the main body and the two arms of the cactus. Ensure the edges are smooth and clean. -
create the ribs:
To make the cactus look 3D, mix a darker green shade. Paint vertical stripes down the length of the main body and the arms. These dark lines represent the shadowed valleys between the cactus ribs. -
Highlighting the ridges:
Mix your base green with a little White or Yellow. Carefully paint lighter vertical stripes next to the dark ones. I find this contrast is what really makes the cactus pop off the canvas. -
Adding texture:
Use a nearly dry brush to feather the edges between your light and dark stripes slightly, so the transition isn’t too harsh, giving the cactus a rounded appearance.
Level Up: Metallic Pop
Use gold metallic paint instead of white for the polka dots on the pot. It catches the light beautifuly and adds a trendy, modern chic vibe to the artwork.
Step 4: Details & Finishing Touches
-
Painting the spines:
Switch to your finest liner brush. Use pure White or a very pale yellow to dot small clusters of spines along the vertical ridges. Group them in twos or threes for a realistic look. -
Add sharp edges:
Paint tiny, thin spikes extending outward from the silhouette of the cactus using the same fine brush and pale color. -
The flowering top:
If you want a bloom, dab a tiny spot of bright red or orange at the very top of the central cactus stem. -
Polka dots:
Dip the handle end of a paintbrush into Titanium White paint. Gently press it onto the dry terracotta pot area to create perfect, uniform polka dots. -
Grounding line:
Mix a watery Burnt Sienna wash and paint a horizontal line behind the pot to represent the table surface, extending off the edges of the canvas. -
Wrap the sides:
Don’t forget to continue your background wash and table line around the sides of the canvas for a gallery-quality finish.
Give your tiny masterpiece a varnish coat once fully dry to protect those vibrant greens and display it proudly on a shelf or desk
Simple Pet Portrait With Bold Shapes
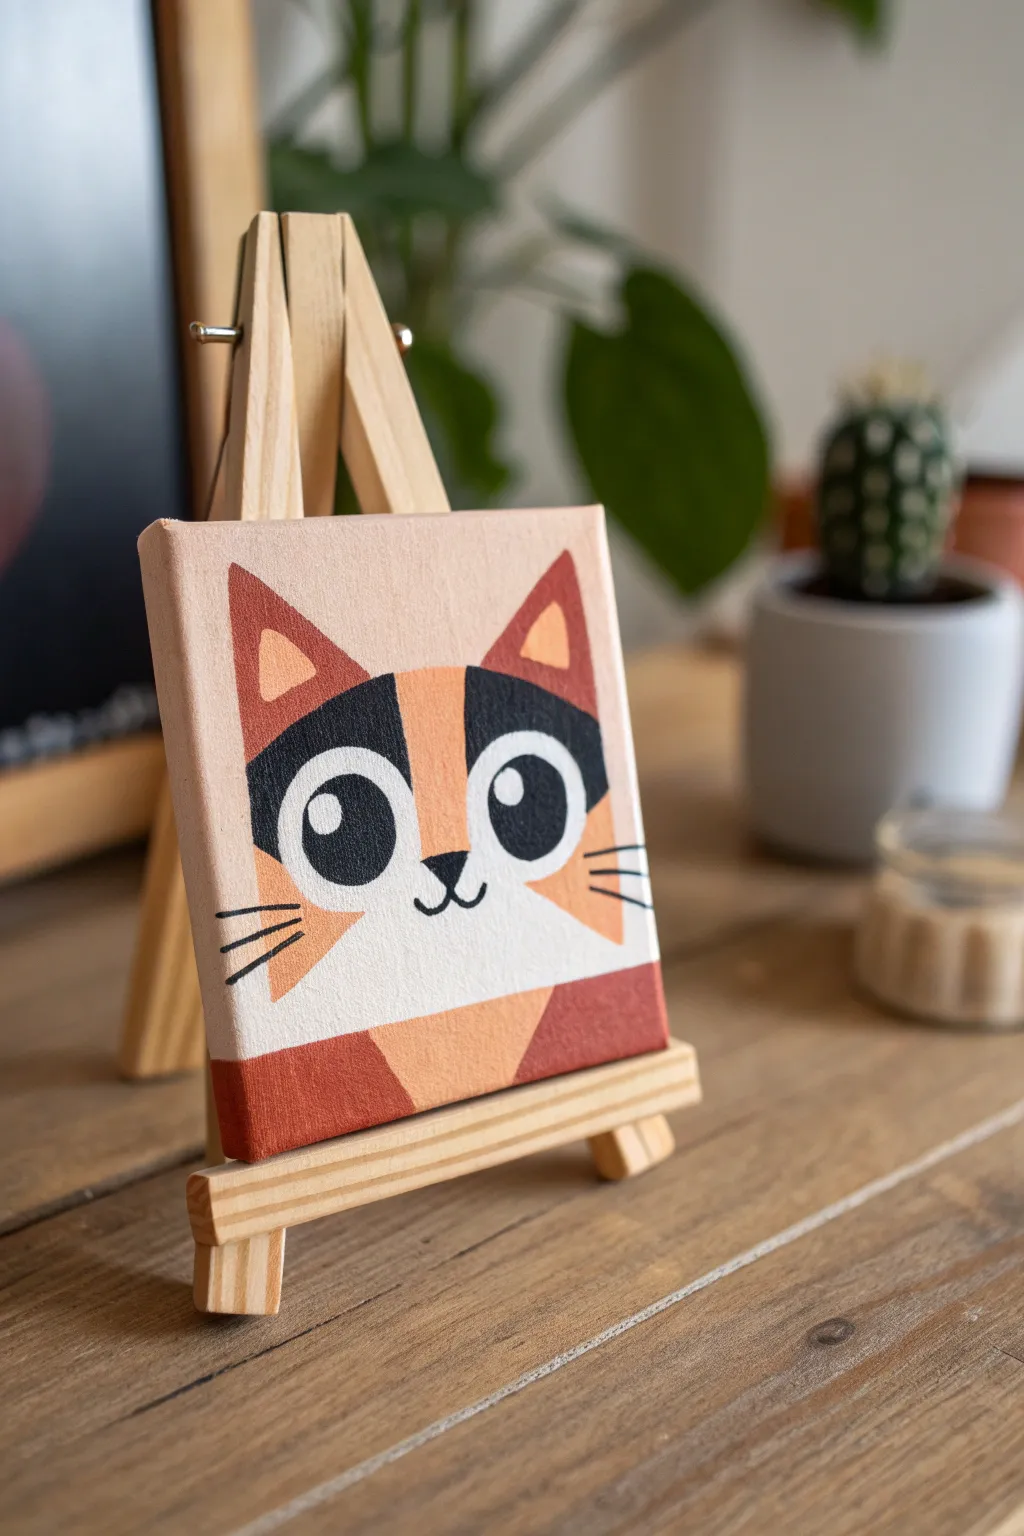
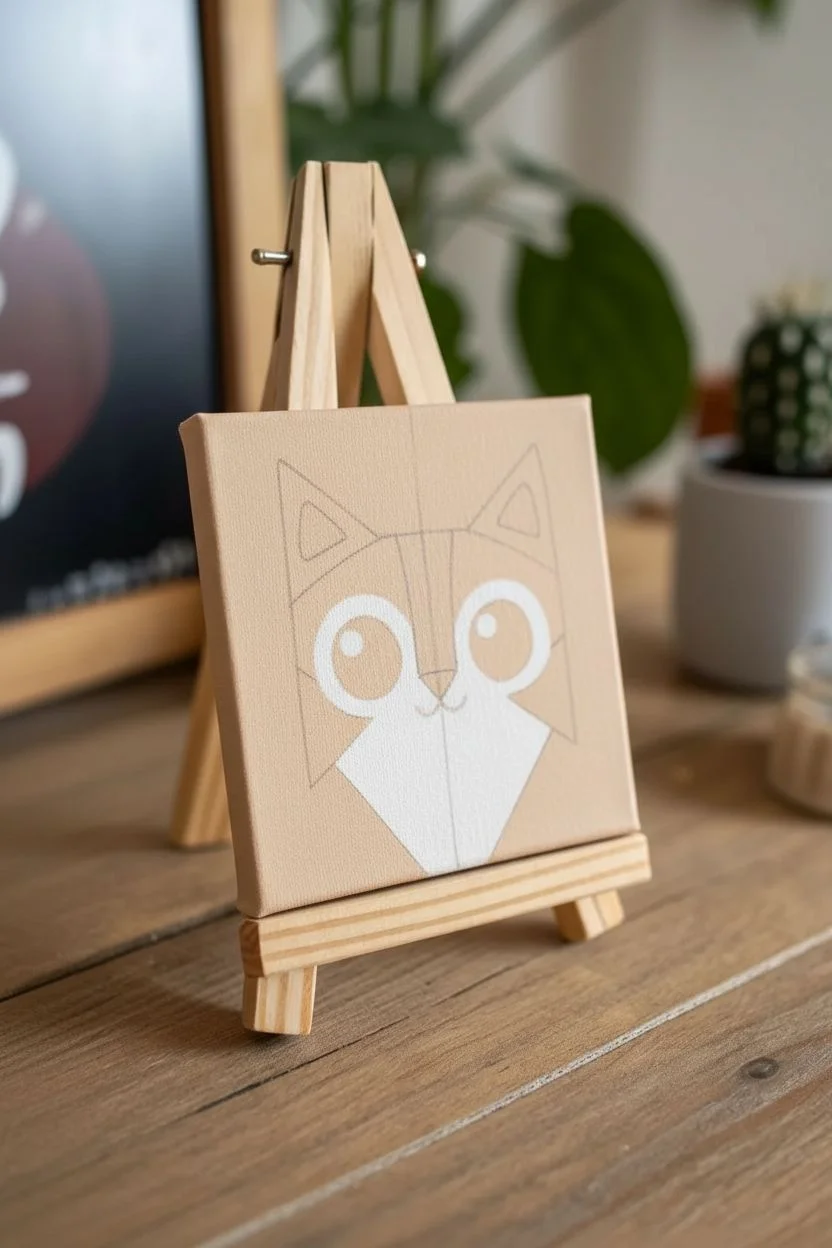
This charming mini-canvas project breaks a cute pet portrait down into simple, manageable shapes, creating a modern and stylized look. With its warm, earthy color palette and bold graphical elements, it’s the perfect way to practice crisp lines and flat color application.
How-To Guide
Materials
- Small square canvas (4×4 or 6×6 inch)
- Acrylic paints: Titanium White, Mars Black, Burnt Sienna (red-brown), Yellow Ochre, and a Beige/Flesh tone
- Flat synthetic brushes (small and medium sizes)
- Fine liner brush (size 0 or 00)
- Pencil and eraser
- Ruler
- Mini wooden easel (optional for display)
Step 1: Sketching the Layout
-
Prepare the background:
Start by painting the entire canvas surface with a solid coat of beige or light peach paint. Ensure you paint the sides of the canvas as well for a polished finish. Let this base coat dry completely. -
Mark the center:
Find the vertical center of your canvas and lightly mark a guide line with your pencil. This will help keep the cat’s face symmetrical. -
Draw the main face shape:
Sketch a large ‘V’ shape starting from the middle sides of the canvas down to the bottom center to define the cat’s white face area. Above this, draw a horizontal line connecting the top of the ‘V’ to create the forehead zone. -
Add ears and eyes:
Draw two large triangles at the top corners for ears. Inside the forehead zone, sketch two large circles for eyes, ensuring they are evenly spaced from the center line. -
Detail the features:
Sketch the geometric patch patterns around the eyes—think of them as angled shapes that mask the eyes. Add a small triangle nose between the eyes and a simple ‘w’ shape for the mouth. Finish with two triangles inside the ears.
Crisp Lines Secret
For ultra-sharp geometric edges, apply a strip of washi tape or painter’s tape along your pencil lines before painting the color blocks.
Step 2: Blocking in Color
-
Paint the white muzzle:
Using a clean flat brush, fill in the lower ‘V’ section of the face with Titanium White. You may need two coats here to ensure the beige background doesn’t show through. -
Apply the reddish-brown:
Mix Burnt Sienna with a tiny touch of Yellow Ochre to get a warm rust color. Paint the outer ear triangles, the bottom left face stripe, and the bottom right corner of the canvas. -
Fill the lighter orange zones:
Mix a lighter orange using Yellow Ochre and a bit of white. Fill in the inner ear triangles, the central forehead stripe between the eyes, and any remaining accents on the cheeks. -
Add the dark patches:
Use Mars Black or a very dark brown to paint the bold patches surrounding the eyes. Be very careful around the circular eye outlines to keep them round.
Step 3: Details & Determining Lines
-
Paint the eyes:
Fill the circular eye shapes with solid black. Let this dry completely before moving to the next step. -
Add eye highlights:
Dip the handle end of a paintbrush into white paint. Dot a large highlight near the top left of each pupil and a smaller dot directly opposite it to bring the cat to life. -
Define the nose and mouth:
Switch to your fine liner brush and black paint. Carefully fill in the nose triangle and trace the delicate ‘w’ curve for the smile. -
Whiskers and final touches:
Using the liner brush with slightly thinned black paint, pull three short, quick horizontal strokes on each cheek for whiskers. I find that holding my breath for a second helps steady my hand for these thin lines. -
Clean up edges:
Inspect your color blocks. If any lines look shaky, use the background beige or specific color to touch up and straighten the edges for that crisp, geometric look.
Make It Yours
Customize the fur patterns to match your own pet! Simply sketch the specific patches of your cat using this same simplified geometric style.
Place your finished masterpiece on a mini easel and enjoy the adorable personality it brings to your space.
Day vs. Night Pair in Two Small Squares
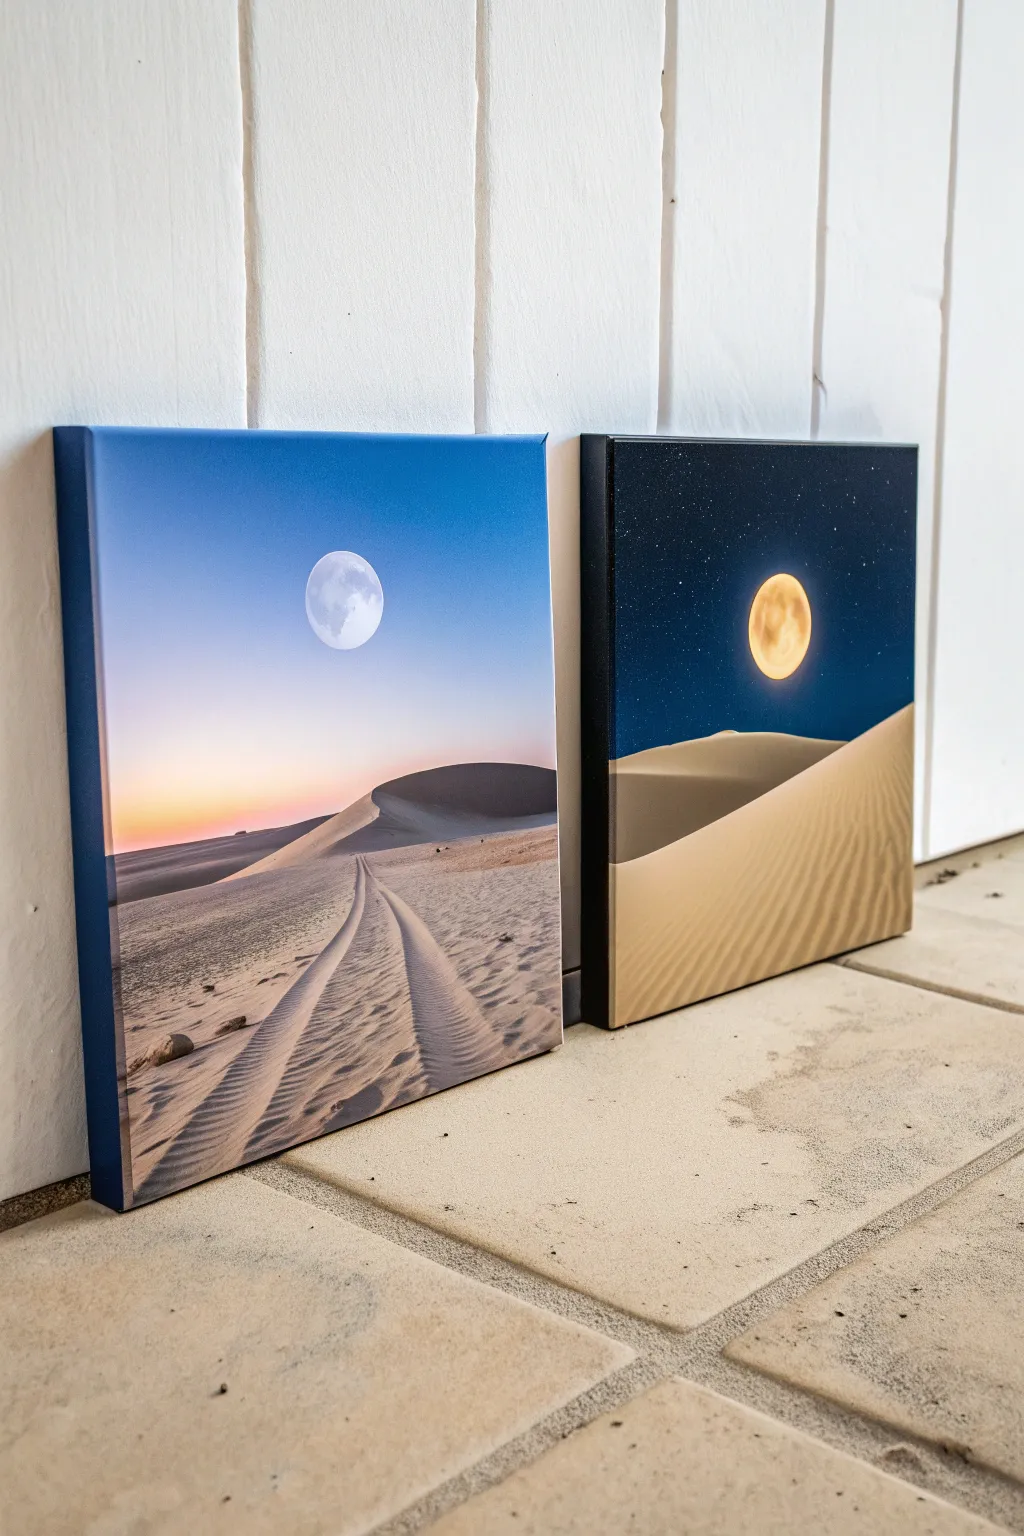
Capture the ethereal beauty of the desert in two distinct moods with this striking pair of day and night paintings. By cleverly mirroring the composition while dramatically shifting the color palette, you’ll create a conversation piece where soft dawn pastels contrast beautifully against deep nocturnal blues.
Step-by-Step Tutorial
Materials
- Two 8×8 or 10×10 inch square stretched canvases
- Acrylic paints (primary blue, ultramarine, bright yellow, titanium white, mars black, burnt sienna, magenta, yellow ochre)
- Wide flat brush (1 inch)
- Medium filbert brush
- Small round detail brush
- Sponge or old toothbrush (for stars)
- Palette knife and mixing plate
- Chalk or pencil for sketching
- Masking tape
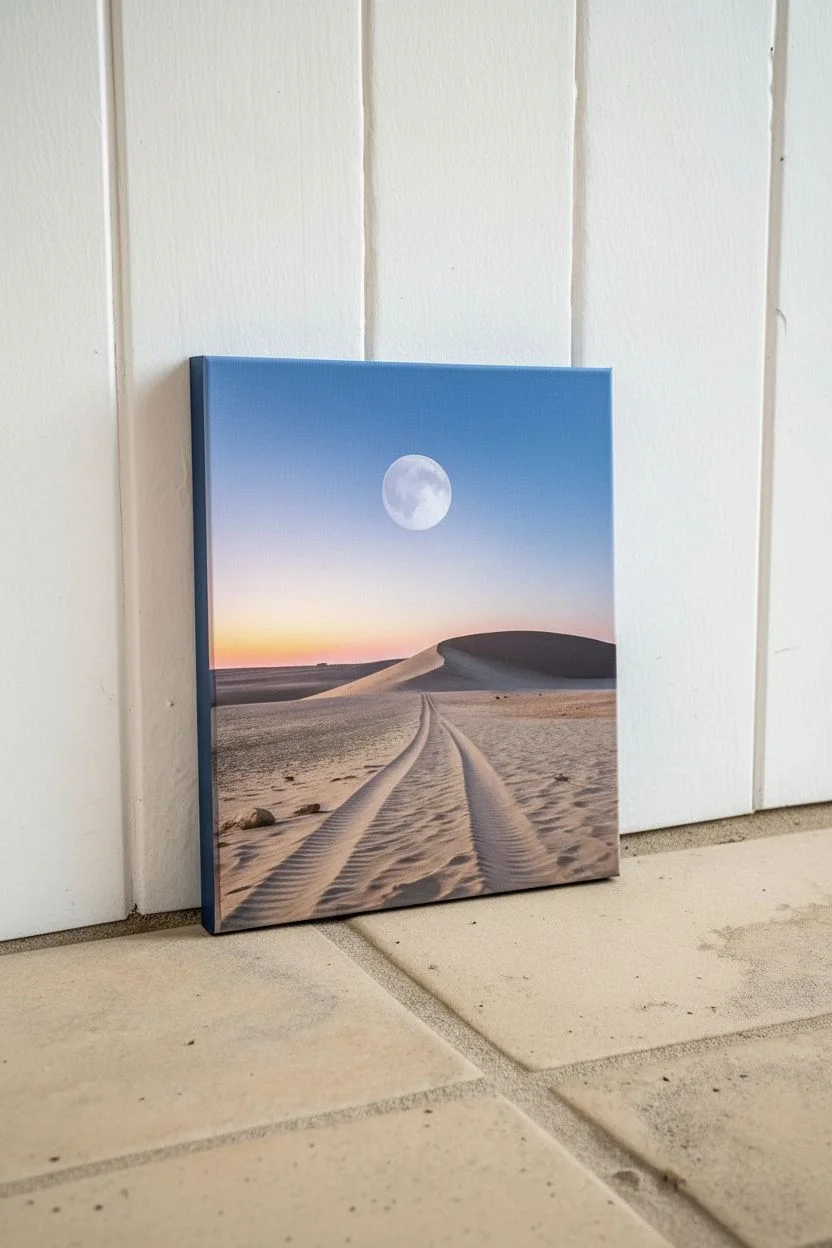
Step 1: Painting the Day Scene (Left Canvas)
-
Sketch the Horizon:
Lightly sketch a sloping horizon line about one-third up from the bottom of your first canvas. Add a second, lower dune line in the foreground where the tire tracks will go. -
Create the Sky Gradient:
Mix titanium white with a tiny touch of primary blue. Start at the top edge and paint downward, gradually mixing in a touch of magenta and yellow near the horizon to mimic a soft dawn glow. -
Paint the Distant Dune:
Mix burnt sienna with white and a dot of blue to create a muted, shadowy purple-grey. Fill in the distant dune shape, keeping the top edge sharp against the sky. -
Establish the Sandy Foreground:
Mix white, yellow ochre, and a speck of burnt sienna for a pale sand color. Paint the entire bottom section with horizontal strokes to establish the flat desert floor. -
Add Texture and Tracks:
Using a slightly darker sand mix, paint two curving lines leading from the bottom left toward the center to simulate tire tracks. Use the detailed brush to add small ridges and shadows inside the tracks for depth. -
Paint the Day Moon:
Mix a very pale grey-white. Near the center, paint a circle. Keep the edges slightly soft so it looks atmospheric, adding faint grey blotches for craters. -
Final Day Details:
Add tiny rocks or pebbles in the foreground using brown and black dots, adding a tiny highlight on top of each for realism.
Step 2: Painting the Night Scene (Right Canvas)
-
Establish the Night Composition:
On the second canvas, sketch a similar but simpler dune line. This one should be a single, dramatic slope sweeping across the canvas. -
Paint the Deep Sky:
Mix ultramarine blue with a touch of black. Paint the top two-thirds of the canvas, ensuring a solid, opaque coverage. I sometimes do two coats here for extra depth. -
Create the Glowing Moon:
Mix white with bright yellow and a touch of orange. Paint a crisp circle in the sky, exactly the same size as the moon on the first canvas to link them visually. -
Add Moon Glow:
Dry brush a very faint, translucent yellow haze around the moon to make it appear luminous against the dark sky. -
Block in the Dune:
Mix yellow ochre with burnt sienna. Paint the main dune shape. The light is coming from the moon, so keep the top edge of the dune brightest. -
Refine Dune Shadows:
On the side of the dune facing away from the moon (the bottom right), blend in a darker brown-black mix to create a steep shadow gradient. -
Create Ripples:
Using a small round brush with a lighter sand color, paint repetitive, rhythmic curved lines down the face of the dune to represent wind ripples. -
Add the Stars:
Dilute white paint with a little water. Dip an old toothbrush or stiff brush in it and flick the bristles to spray tiny white specks across the upper blue section. -
Paint the Edges:
Don’t forget to paint the sides of your canvases! Paint the day canvas edges blue/grey and the night canvas edges black for a finished, frameless look.
Gradient Troubles?
If acrylic paint dries too fast while blending the sky, mix in a retarder medium or keep your brush slightly damp to extend working time.
Pro Tip: Perfect Circles
Trace a coin or bottle cap lightly with chalk to get perfectly round moons on both canvases before you start painting.
Display these side-by-side on a shelf or wall to enjoy the full contrast of your desert cycle masterpiece
Mini Gallery Grid Series With One Palette
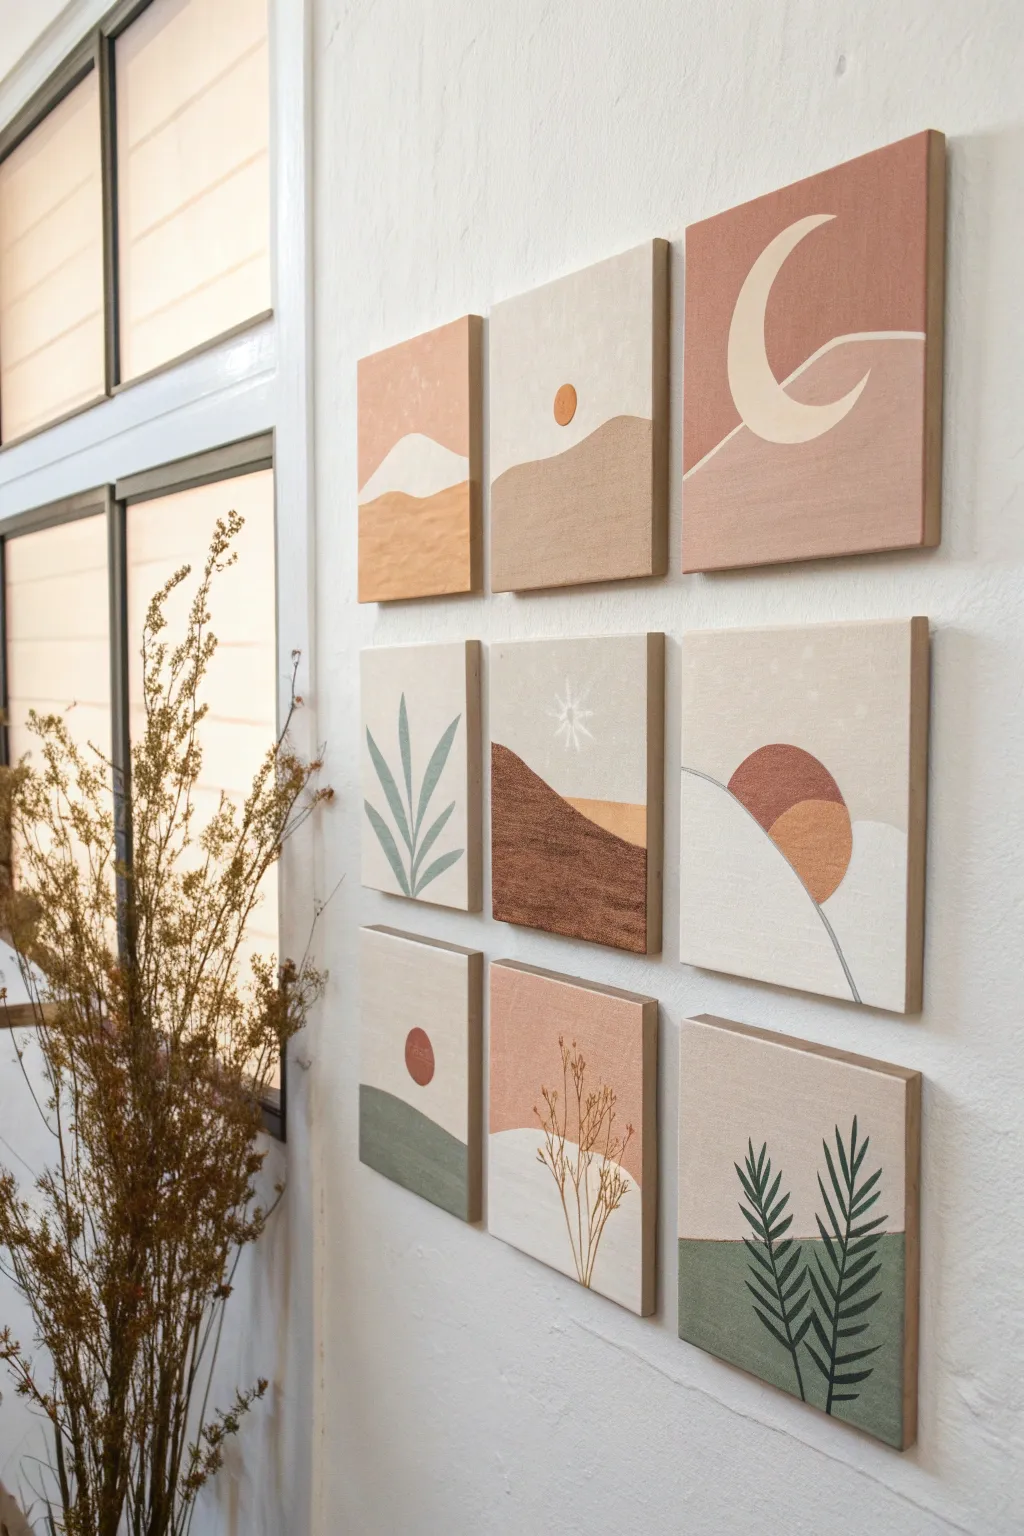
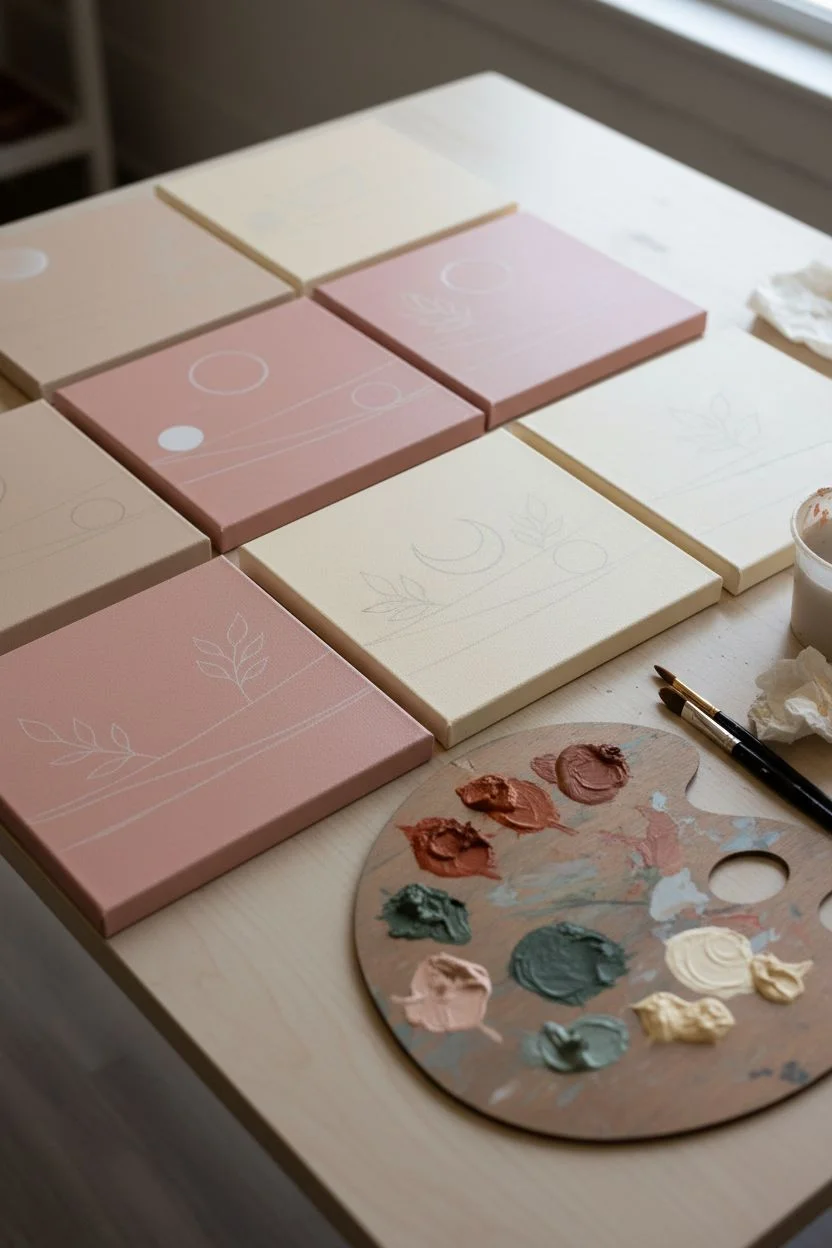
Create a stunning focal point with this nine-piece mini gallery wall featuring abstract boho landscapes and botanical motifs. Using a unified palette of terracotta, sage, and cream, each individual canvas tells a small story that contributes to a serene, cohesive larger picture.
Detailed Instructions
Materials
- 9 small square canvases (e.g., 6×6 or 8×8 inch)
- Acrylic paints (terracotta, burnt sienna, sage green, cream/off-white, beige, metallic gold optional)
- Set of acrylic brushes (flat wash, small round, and fine liner)
- Pencil and eraser
- Painter’s tape or masking tape
- Palette or paper plate for mixing
- Cup of water and paper towels
- Ruler
- Wall mounting strips or small nails
Step 1: Planning and Priming
-
Prepare the palette:
Before touching the canvas, mix your core colors. You want a harmonious limited palette. Create a few shades of terracotta (mix red with a touch of brown and white), a soft beige-pink, a deep sage green, and a warm cream. Having these pre-mixed ensures consistency across all nine squares. -
Base coat application:
Paint a solid base color on each canvas to establish the background tone. Alternate the background colors: paint three canvases in soft beige, three in dusty pink, and three in cream. Let these dry completely. A second coat might be needed for full opacity.
Clean Lines Hack
If you struggle with steady hands for the curved hills, try cutting the shape out of a sticky note or masking tape to use as a stencil. This ensures crisp, clean edges for your landscape layers.
Step 2: Drafting the Designs
-
Map out the grid:
Lay your nine dry canvases on a table in a 3×3 grid arrangement. Decide which design goes where. Aim for balance—don’t put all the green paintings in one corner. Distribute the heavy shapes (like the dark brown hill) and light shapes (like the moon) evenly. -
Sketch the horizon lines:
Using a pencil, lightly sketch the rolling hills and horizon lines on the canvases that feature landscapes. Keep the lines fluid and organic rather than perfectly straight, as this mimics natural terrain. -
Outline celestial elements:
On the top right canvas, sketch a large crescent moon shape. For the others, lightly mark where the sun circles or starbursts will go. I find using a small bottle cap or coin helps trace perfect circles for the suns. -
Draft botanical motifs:
Lightly sketch the plant shapes. For the bottom middle canvas, draw thin, branching twigs. For the left and bottom right canvases, outline the broader, leafy fronds.
Add Dimension
Mix a teaspoon of baking soda into your acrylic paint for the ground elements. This creates a grainy, stone-like texture that physically lifts off the canvas, adding tactile depth to the art.
Step 3: Painting the Landscapes
-
Fill the major shapes:
Using a medium flat brush, paint the large hill shapes first. Use your darker burnt sienna and terracotta shades for the ground elements to give them visual weight. For the moon and lighter hills, use your cream paint. -
Layering the hills:
Some squares, like the top-middle and center-right, have overlapping hills. Paint the background hill first, let it dry, and then paint the foreground hill over it. This creates clean, sharp edges between the shapes. -
Refine the edges:
Go back in with a smaller flat brush to tidy up the curves of your hills and moons. If your hand is shaky, you can use small pieces of painter’s tape to mask off areas, though a freehand edge looks more organic for this style. -
Adding texture (optional):
For the darker brown hill in the center canvas, try dabbing the paint on with a dry, stiff brush or a sponge to create a slightly rough, earthy texture that contrasts with the smooth cream sky.
Step 4: Adding Details and Botanicals
-
Paint the suns:
Fill in your circle sketches with a solid terracotta or dusty orange color. Ensure the paint is opaque; you don’t want the background color showing through the sun. -
Create the starburst:
On the center canvas, use a fine liner brush and thinned-down white or cream paint to create the delicate starburst. Paint a small cross first, then add smaller diagonals in between. -
Paint leaf stems:
Switch to your fine liner brush for the botanical panels. Mix a dark sage green. Start at the bottom of the canvas and pull the brush upward to create the main central stems of the leaves. -
Add the leaves:
Using a small round brush, press down and lift up to create the leaf shapes branching off the stems. For the bottom right panel, keep the leaves dense and dark. For the middle left panel, use a lighter sage tone for a softer look. -
Detail the dry twigs:
For the bottom center panel, use a very fine brush with a brown-gold mix to paint wispy, thin branches. These should look delicate compared to the bold green leaves on the neighboring canvases.
Step 5: Finishing and Mounting
-
Clean uph:
Use your background colors to touch up any accidental smudges or uneven lines. Check the edges of the canvases—painting the sides creates a professional, finished look without needing frames. -
Final arrangement:
Once fully dry, lay them out on the floor again to confirm your layout. Measure your wall space carefully, leaving about 1 to 2 inches of space between each canvas to let the grid breathe. -
Mount designs:
Apply mounting strips to the back of each canvas and adhere them to the wall, starting with the center canvas and working outward to ensure perfect symmetry.
Step back and admire how these simple individual paintings come together to form a sophisticated modern gallery wall


Have a question or want to share your own experience? I'd love to hear from you in the comments below!