
Winter is basically a built-in mood board: soft light, crisp shadows, and all those cozy details that beg to be sketched. Grab whatever you like to draw with, and let’s turn snowy scenes and cold-weather textures into ideas you can actually finish.
A Classic Snowman With a Big Personality
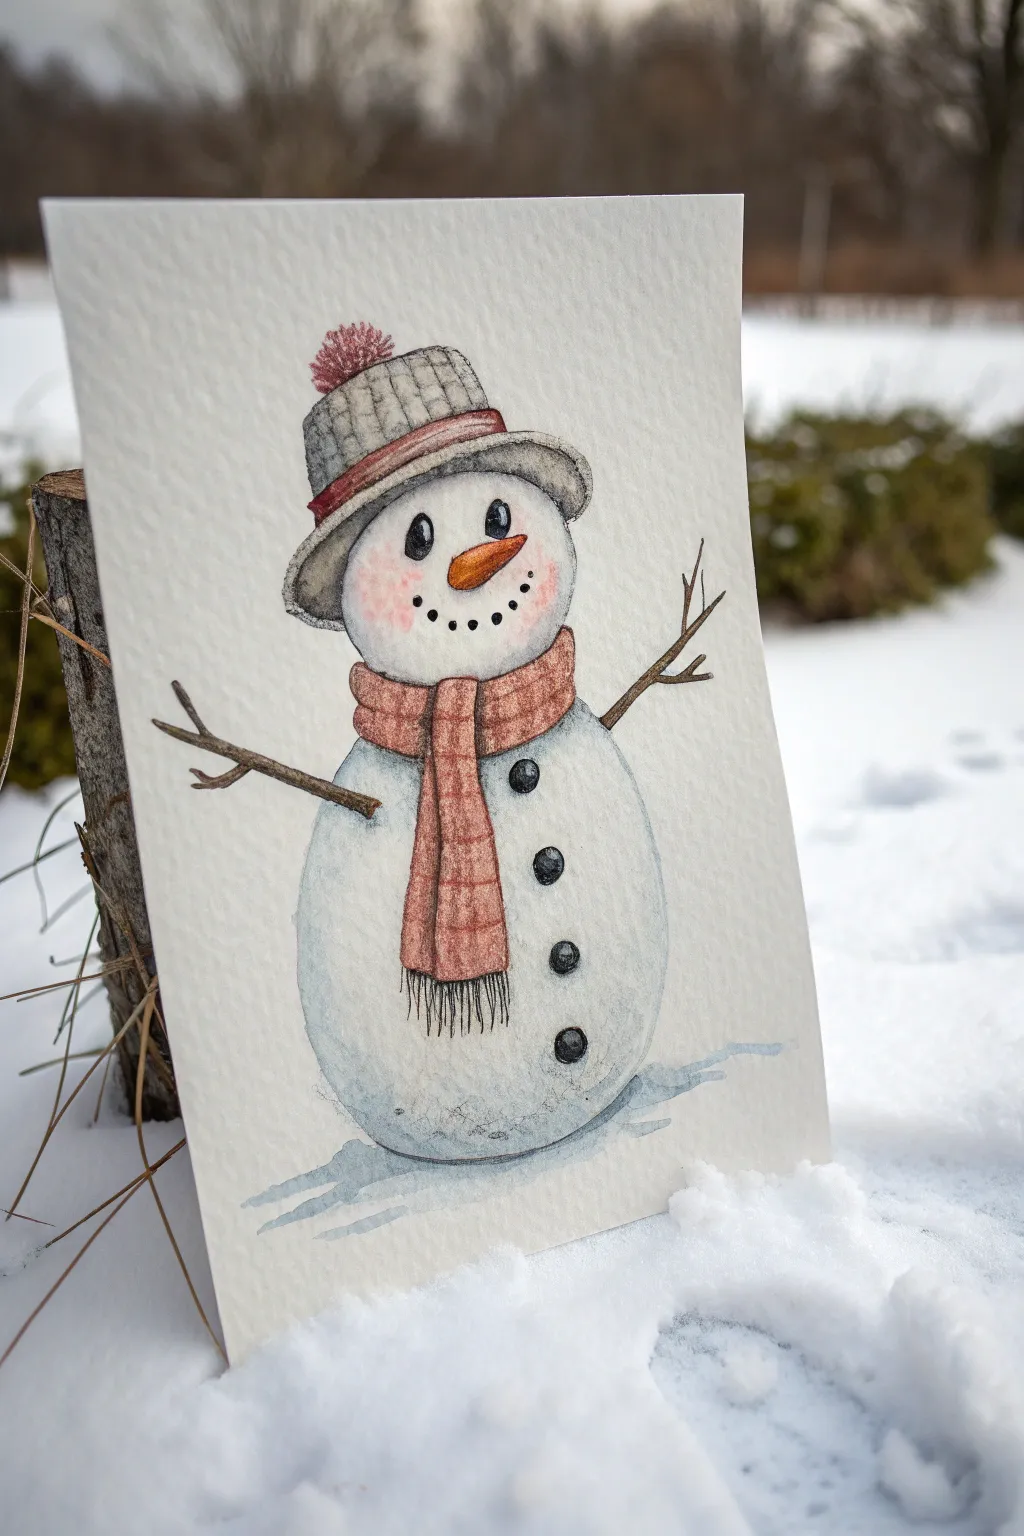
Capture the charm of winter with this delightful snowman illustration, perfect for holiday cards or seasonal decor. This project combines delicate ink linework with soft watercolor washes to create a character full of warmth and personality.
Step-by-Step Tutorial
Materials
- Cold press watercolor paper (A5 size)
- HB pencil and eraser
- Fine liner pen (waterproof, black, size 0.1 or 0.3)
- Watercolors (Cobalt Blue, Burnt Sienna, Alizarin Crimson, Cadmium Orange, Lamp Black)
- Small round watercolor brush (size 2 or 4)
- White gel pen (optional)
- Clean water and paper towel
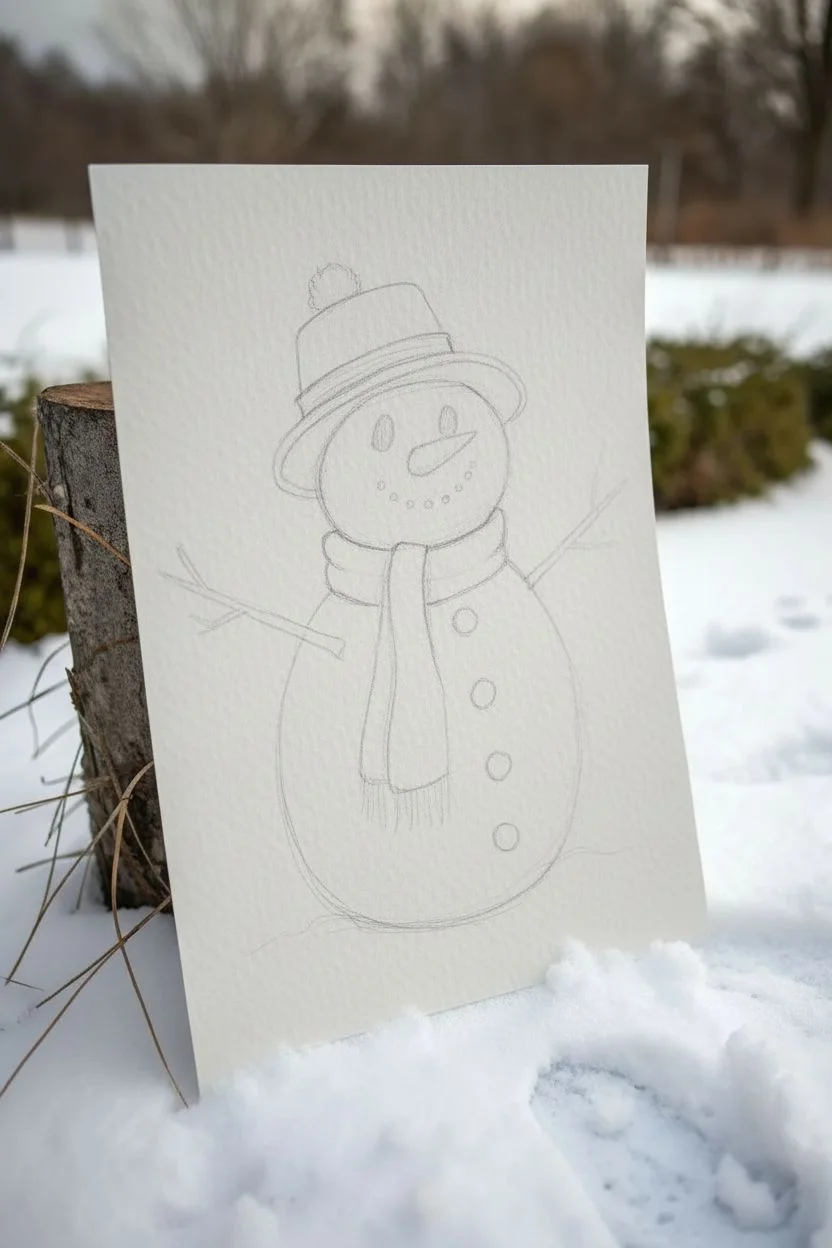
Step 1: Drawing the Base Structure
-
Outline the head:
Start by lightly sketching a slightly flattened circle for the head in the upper center of your paper. Don’t make it perfectly round; a little irregularity adds character. -
Add the body:
Draw a larger, tall oval shape directly beneath the head for the snowman’s body. The bottom should be fuller than the top, creating a pear-like silhouette. -
Position the hat:
Sit a hat on the snowman’s head. Sketch a curved brim that dips down on the left side, and add a cylindrical top part, slightly tapered. Top it off with a fluffy pom-pom circle. -
Wrap the scarf:
Draw the scarf wrapped snugly around the neck area. Create two sections: the loop around the neck and the long tail hanging down the front center of the body. -
Sketch features and arms:
Add facial buttons for eyes and a smile, a carrot nose, and four buttons down the body’s side. Finally, sketch two stick arms reaching outward like branches.
Loose Lines Look Best
Don’t try to make your ink lines perfect. A slightly shaky or broken line makes the snow look fluffy and natural, rather than like a hard plastic ball.
Step 2: Inking and Details
-
Ink the main outlines:
Using your waterproof fine liner, carefully trace over your pencil lines. For the snowman’s body, use a broken, sketchy line rather than a solid one to suggest a fluffy snow texture. -
Detail the knitwear:
Draw vertical ribbing lines on the hat and a checkered or cross-hatch pattern on the scarf to mimic fabric texture. Add fringe lines at the bottom of the scarf. -
Texturize the accessories:
Ink the stick arms with jagged, organic lines to look like wood. Draw small loops or stippling on the pom-pom to make it look fuzzy. -
Erase pencil marks:
Wait specifically for the ink to dry completely to avoid smudging. Once dry, gently erase all underlying pencil sketches.
Muddy Colors?
If your red scarf bleeds into the white snow body, you didn’t wait long enough. Ensure the blue snow shadows are bone dry before painting reddish accessories nearby.
Step 3: Watercolor Application
-
Create snowy shadows:
Dilute a tiny amount of Cobalt Blue with water to make a very pale wash. Paint a crescent shape along the left and bottom curves of the head and body to create dimension. -
Paint the hat base:
Mix a watery grey using a touch of Lamp Black. Fill in the hat, keeping the wash light so the texture lines show through. -
Add warmth to the scarf:
Paint the scarf using a rusty red mix (Alizarin Crimson with a touch of Burnt Sienna). Let the color pool slightly at the bottom of the strokes for natural shading. -
Color hat details:
Use the same rusty red mix to paint the hat band and the pom-pom. I find dabbing the color onto the pom-pom creates a nicer texture than smooth strokes. -
Brighten the nose:
Fill in the carrot nose with Cadmium Orange, adding a tiny dot of darker orange on the underside for shadow. -
Rosy cheeks:
While the face area is dry, take very watery pink or diluted red and gentle dab two circles on the cheeks for a blushing effect. -
Paint the arms and buttons:
Use a concentrated Burnt Sienna or dark brown for the stick arms. Fill the button eyes, mouth dots, and body buttons with solid Lamp Black. -
Ground the figure:
Mix a pale blue-grey wash. Paint horizontal, loose strokes under the snowman to represent cast shadows on the snow.
Step 4: Final Touches
-
Deepen fabric shadows:
Once the first layer is dry, add a second, slightly darker layer of red to the folds of the scarf and the shadowed side of the hat band. -
Add highlights:
If your buttons look too flat, add a tiny dot of white gel pen to the black buttons and eyes to bring them to life. -
Enhance texture:
Use very faint grey stippling or tiny dots on the white parts of the snowman’s body to suggest packed snow texture.
Now your charming snowman is ready to bring a little frosty cheer to anyone who sees him


Winter Night Sky With a Full Moon
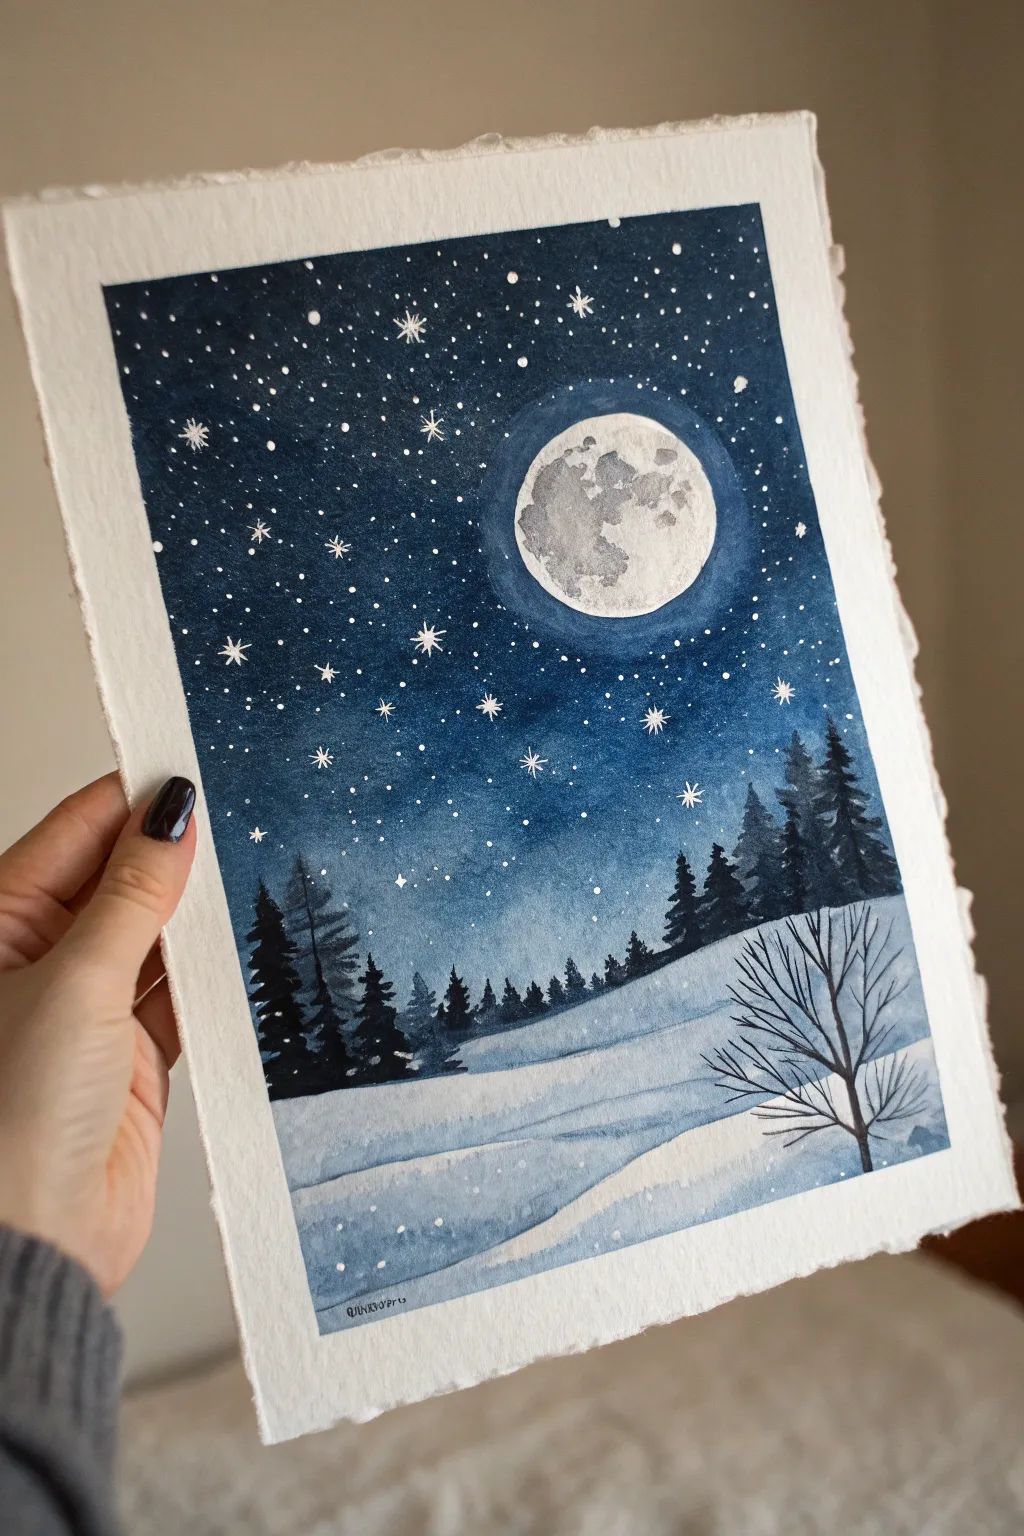
Capture the serene beauty of a crisp winter evening with this watercolor project, featuring a glowing moon and snow-covered hills. The contrast between the deep indigo sky and the bright white snow creates a magical atmosphere perfect for holiday cards or seasonal decor.
Detailed Instructions
Materials
- Cold press watercolor paper (deckled edge optional)
- Watercolor paints (Indigo, Prussian Blue, Payne’s Gray, Black)
- White lush gouache or opaque white watercolor
- Pencil and round object for tracing (or compass)
- Masking fluid (drawing gum) and old brush
- Round brushes (sizes 2, 6, and 10)
- Fine detail brush or rigger brush
- White gel pen (optional)
- Paper towels and two water jars
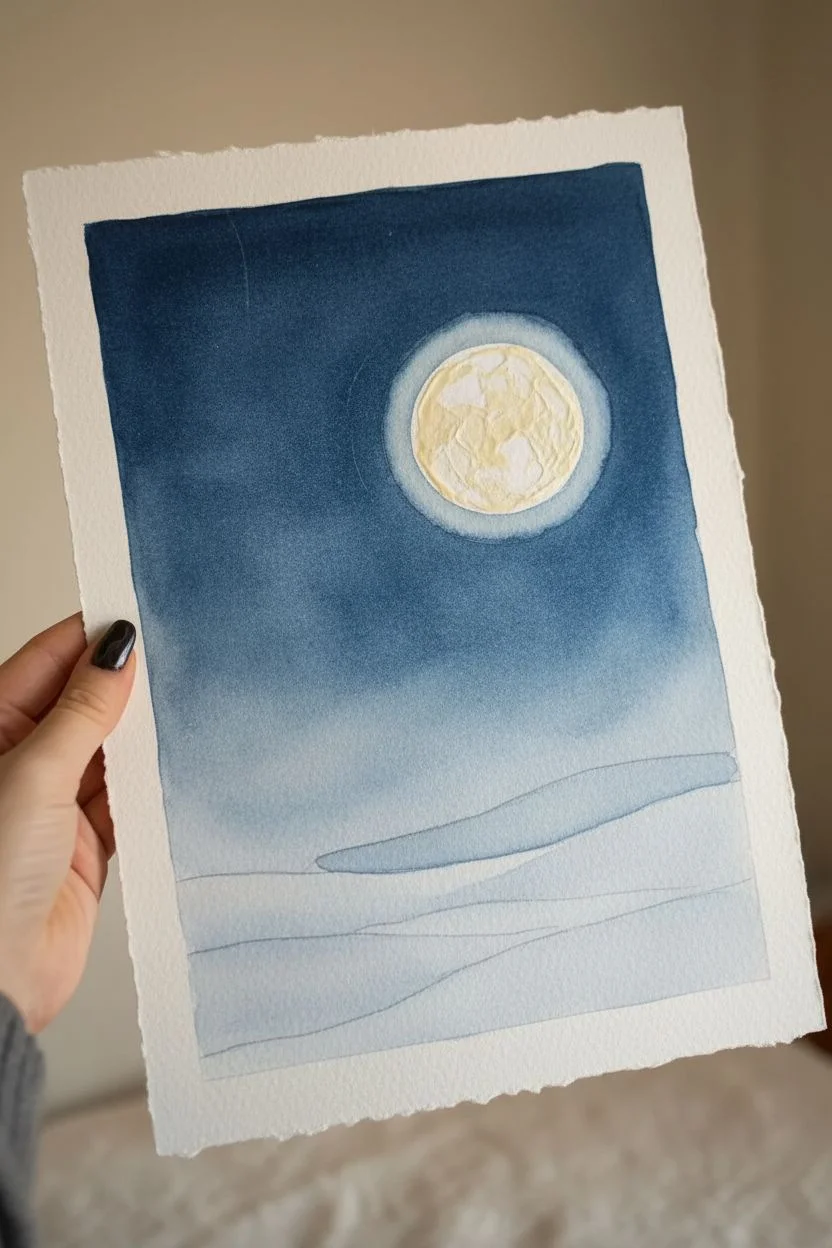
Step 1: Preparation and Masking
-
Outline the Composition:
Begin by lightly sketching your horizon line about one-third of the way up the paper. It doesn’t need to be straight; a gentle slope adds interest. Above this, trace a perfect circle for your moon using a round object or compass. -
Mask the Moon:
Carefully apply masking fluid to fill in the entire circle of the moon. This preserves the white of the paper while you paint the dark sky later. Let this dry completely before moving on. -
Sketch Foreground Hills:
Lightly pencil in a few rolling lines in the foreground to represent snowy drifts. Keep these lines faint as watercolor is transparent and you don’t want graphite showing through the snow.
Starry Splatter Trick
Cover the bottom snowy section with a scrap piece of paper before splattering your white gouache stars. This keeps your pristine white snow drifts clean and free of accidental white blobs.
Step 2: Painting the Sky
-
Prepare the Sky Wash:
Mix a generous amount of dark blue paint. I like to use a blend of Indigo and Prussian Blue to get that deep, midnight look. Ensure you have enough mixed to cover the upper two-thirds of the paper. -
Wet-on-Dry Application:
Starting at the very top edge, apply your darkest blue mixture on dry paper. As you move down toward the horizon line, gradually dip your brush in water to dilute the pigment, creating a seamless gradient from dark to light. -
Deepen the Edges:
While the paint is still wet, drop more concentrated Indigo or even a touch of Black into the top corners and edges to create a vignette effect, drawing the eye toward the center. -
Create the Moon Glow:
Paint carefully around the masked moon. Just around the masking fluid, lift a tiny bit of color with a clean, damp brush or use a much lighter wash to suggest a soft halo of light emanating from the moon. -
Add Starry Texture:
While the sky is drying but still slightly damp, splatter clean water droplets onto the dark blue areas. This blooms the pigment and creates natural-looking distant stars.
Level Up: Salt Texture
While the dark blue sky wash is still wet, sprinkle a pinch of table salt on the paper. Let it dry completely, then brush it off. This creates beautiful, frost-like crystal textures.
Step 3: Fore-and-Background Details
-
Paint the Snow Shadows:
Using a very dilute mix of blue and purple (or watered-down Indigo), paint the shadowed sides of the snow drifts. Keep the tops of the hills white to represent hit by moonlight. -
Remove Masking:
Once the sky is bone dry—touch it with the back of your hand to check—gently verify the masking fluid is dry and rub it away with your finger or a rubber cement pickup. -
Detail the Moon:
Mix a very watery grey. Dab this onto the moon to create craters, leaving plenty of white space. Soften hard edges with a clean wet brush for a realistic, textured look. -
Silhouette Trees:
Switch to a size 2 or 6 brush and load it with thick Black or Payne’s Gray. Paint varied shapes of pine trees along the horizon line. Start with a vertical line for the trunk and use dabbing motions for the branches. -
Layering Trees:
For depth, paint some smaller, lighter grey trees slightly behind the black ones. This makes the forest look dense and receding into the distance.
Step 4: Final Touches
-
Foreground Tree:
Using your finest brush or a rigger brush, paint a bare, deciduous tree in the foreground on the right side. Use quick, confident strokes for the branches to keep them looking organic. -
Bright Stars:
Dip a brush into opaque white gouache (consistency of heavy cream). Tap the brush handle against another brush to splatter crisp white stars over the dry sky. -
specific Stars:
Use a white gel pen or a fine brush with white gouache to manually draw a few larger, detailed 8-point stars for a whimsical touch. -
Snowy Details:
Add tiny dots of white gouache over the dark trees and foreground snow to suggest a gentle snowfall is beginning.
Peel off the tape or display your deckled edge proudly to enjoy your winter masterpiece

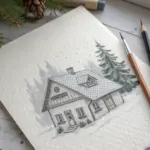

Holiday Lights on a Winter House Exterior
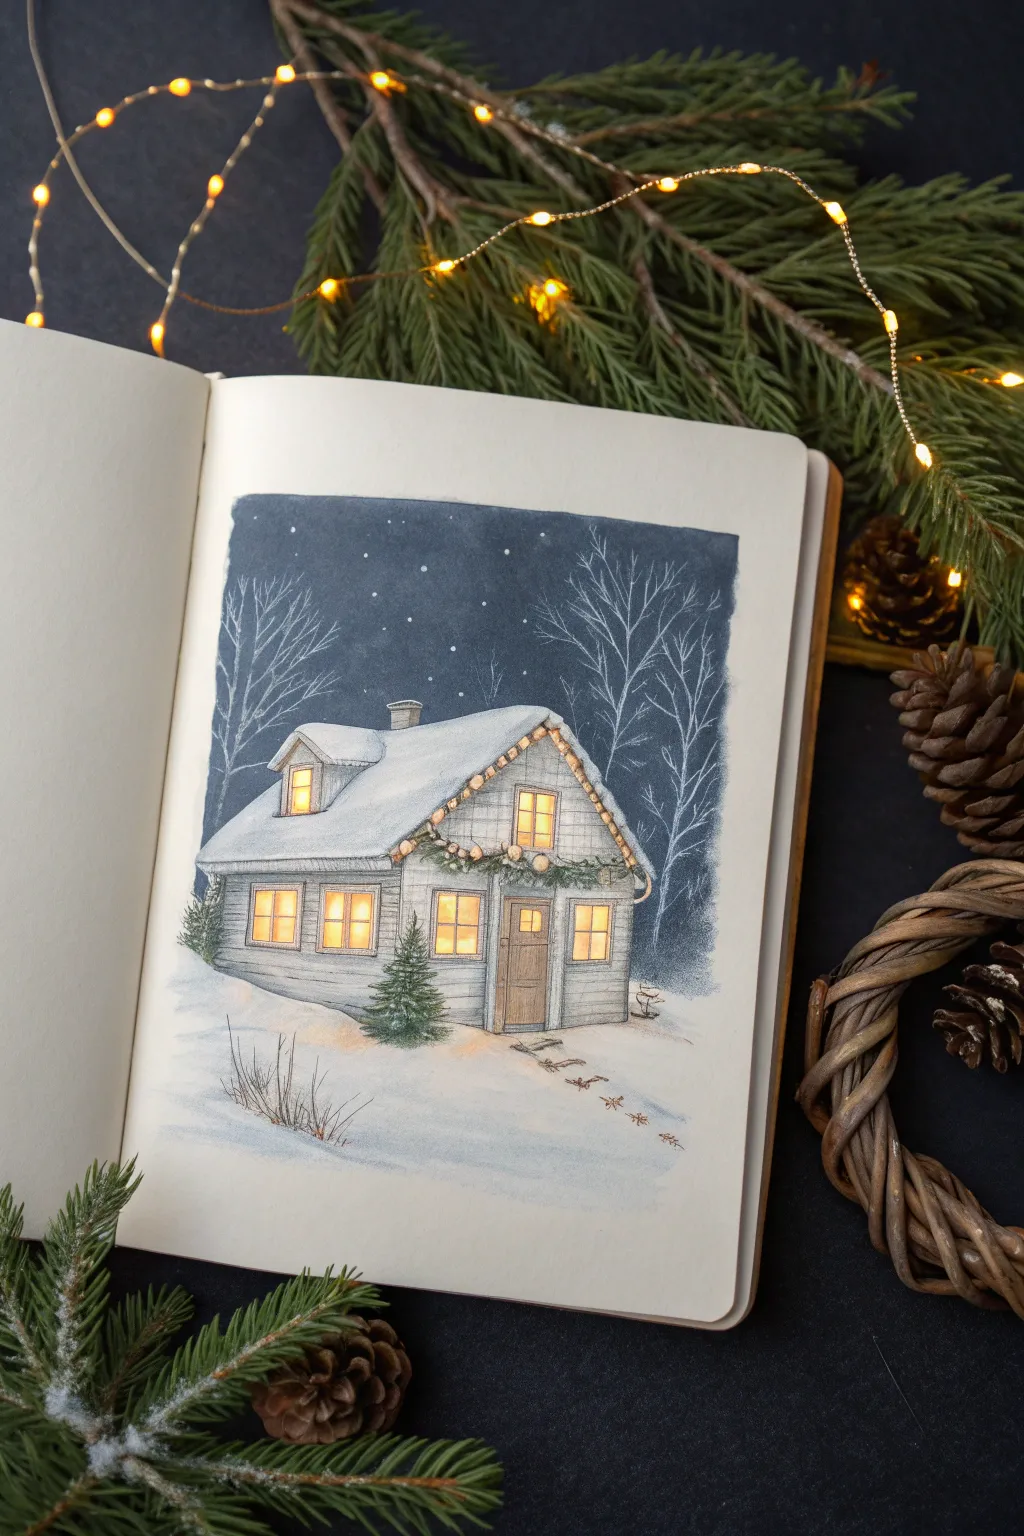
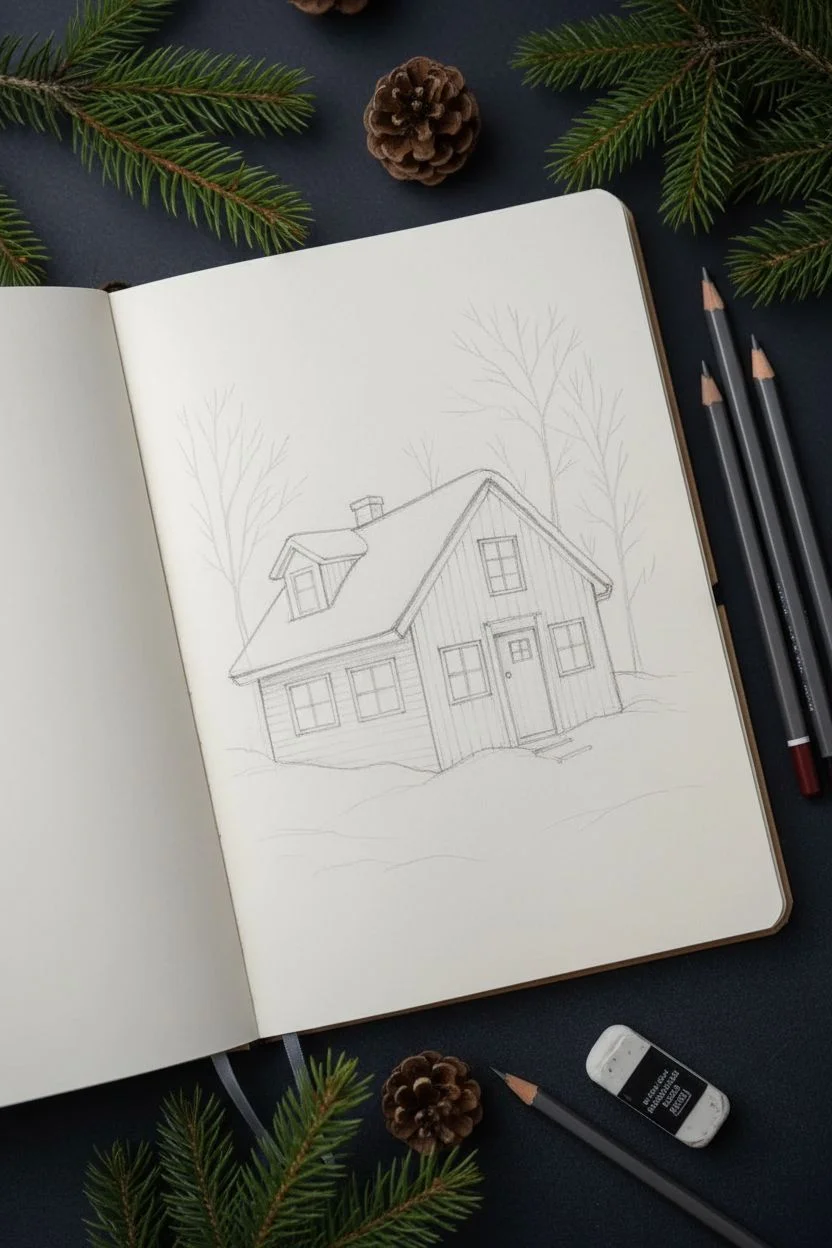
Capture the warmth of a snowy evening with this charming cottage illustration. Using a mix of soft colored pencils and opaque white gouache, you’ll learn to create glowing windows that seem to radiate light against a deep blue winter sky.
Detailed Instructions
Materials
- Heavyweight sketchbook or mixed media paper
- HB or 2H graphite pencil for sketching
- Kneaded eraser
- Colored pencils (dark blues, grays, warm yellows, oranges, browns, greens)
- White gouache or white gel pen
- Fine liner pen (light gray or sepia)
- Small fine-point paintbrush
Step 1: Sketching the Structure
-
Lay the Foundation:
Begin with a light graphite sketch to establish the house’s layout. Draw a main rectangular body with a sloped roof. Add a smaller extension on the left side with its own roofline. -
Define Architectural Details:
Pencil within vertical siding lines on the exterior walls. Sketch the placement of the four lower windows, the front door, and the two upper dormter windows. Keep your lines faint so they don’t show through later. -
Add Environmental Elements:
Roughly outline the snowdrifts piling up against the foundation. Sketch the bare tree silhouettes in the background, ensuring their branches reach high into the sky area.
Uneven Sky?
If your pencil strokes in the sky look streaky, dip a Q-tip in a tiny amount of baby oil or odorless mineral spirits and gently rub the area to blend the pigment smooth.
Step 2: Coloring the House
-
Base Gray Layer:
Using a cool light gray pencil, shade the siding of the house. Apply horizontal strokes to mimic the wood texture. -
Deepening Shadows:
Layer a slightly darker gray under the roof eaves and beneath the windowsills to add dimension. Leave the window panes completely white for now. -
Warm Wood Tones:
Color the front door with a medium brown. Add vertical grain lines with a darker brown pencil to give it a wooden texture. -
Snowy Roof:
Leave the roof mostly white paper. Taking a very pale blue or gray, add subtle shading just along the edges and underneath the snow clumps to show thickness.
Make It Sparkle
Mix a tiny pinch of silver mica powder into your white gouache for the snow highlights. The glistening effect will make the winter scene feel magically frosty.
Step 3: Creating the Illumination
-
Golden Glow Base:
Fill the window panes with a bright lemon yellow pencil. This acts as the source of your light. -
Radiant Warmth:
Layer orange pencil around the edges of the window panes and in the corners. Press harder at the perimeter to make the center look brightest. -
Casting Light:
Lightly dust some yellow pencil on the snow directly beneath the windows and near the front door to show the light spilling out onto the ground. -
Fairy Lights:
Draw a thin garland line along the roof’s edge. Add tiny yellow circles for bulbs, pressing firmly to make them pop.
Step 4: The Night Sky & Background
-
Sky Base Color:
Start coloring the sky block behind the house. Use a medium blue pencil, working carefully around the bare tree branches you sketched earlier. -
Deepening the Night:
Layer a dark indigo or navy blue over the medium blue, especially near the top of the page, to create a gradient effect that suggests vastness. -
Enhancing Trees:
Define the bare white trees using a white colored pencil or by negatively painting around them with the dark sky blue. Add faint gray lines for shadow on the trunks. -
Snowy Stars:
Dip a small brush into white gouache (or use a gel pen) to dot stars into the dark sky. Vary the sizes for a realistic starry night.
Step 5: Final Details
-
Foreground Vegetation:
Draw small pine trees near the house foundation using dark green strokes. Add texture by using short, flicking marks. -
Dry Weeds:
Sketch delicate, dry grass stalks poking out of the snow in the bottom left corner using a fine brown or gray pencil. -
Footsteps:
With a light brown or gray pencil, draw a trail of small footstep depressions leading away from the door into the snow. -
White Highlights:
Use your white gouache or gel pen to add bright highlights to the garland bulbs and the tops of the pine trees.
Step back and enjoy the inviting warmth of your little winter sanctuary


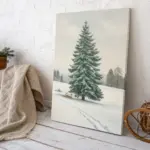
Make Snow With Splatter and Negative Space
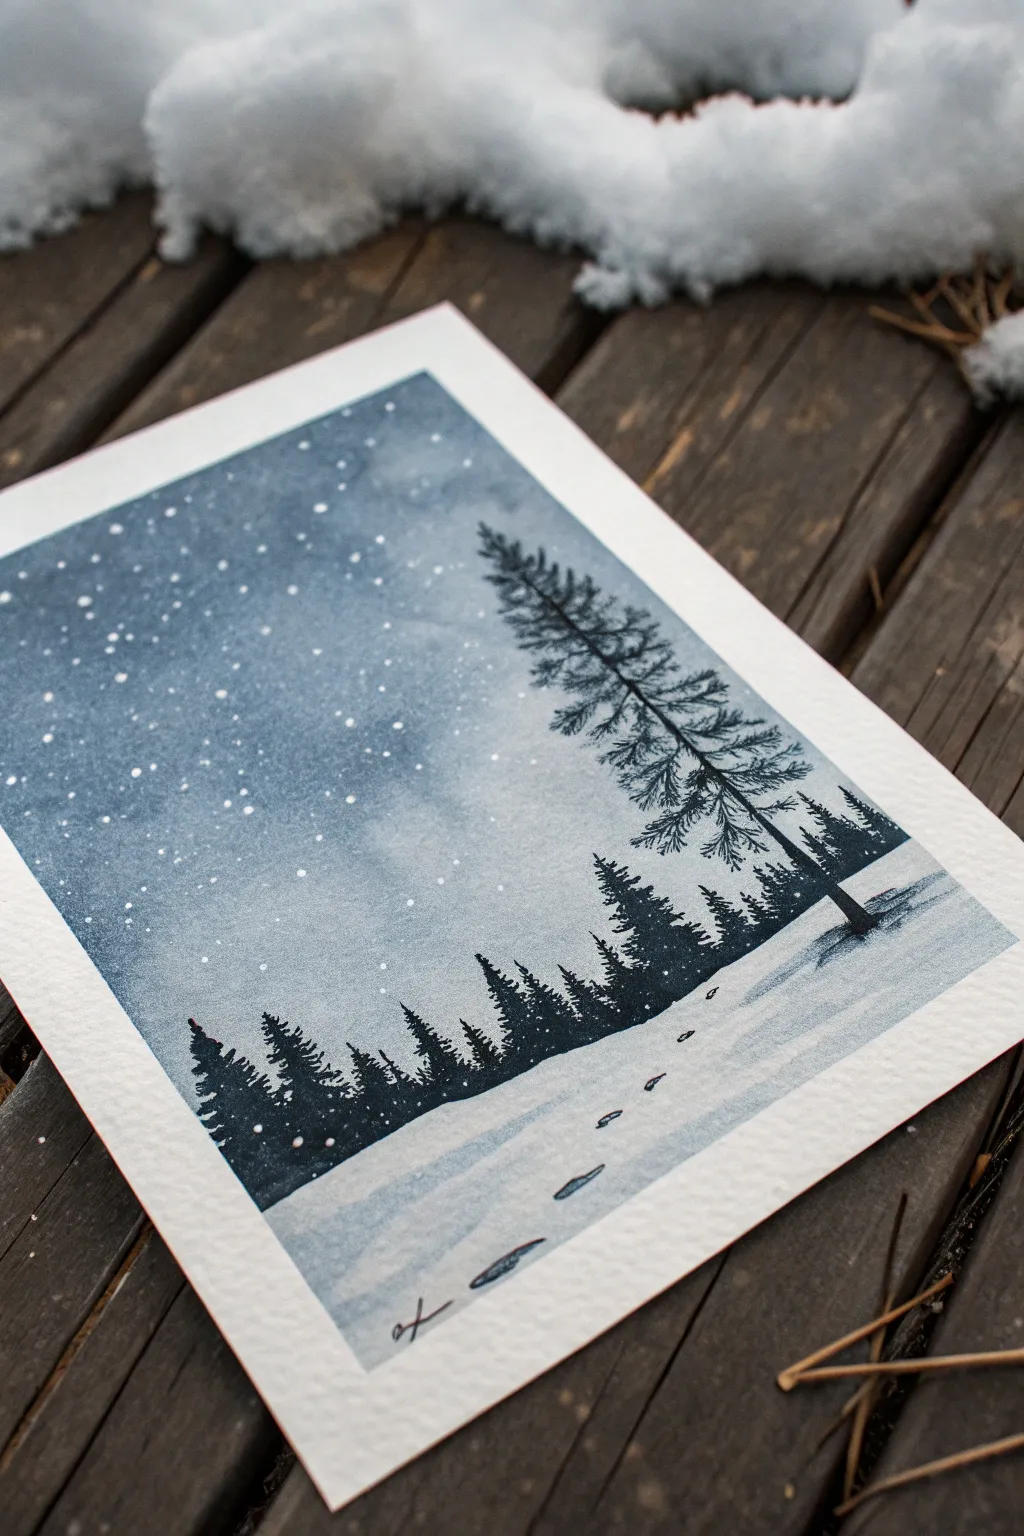
Capture the serene silence of a winter night with this watercolor landscape featuring a towering pine and a delicate snowfall. Using a mix of wet-on-wet blending for the sky and precise brushwork for the silhouettes creates a beautiful depth against the crisp white paper.
Step-by-Step
Materials
- Cold press watercolor paper (300gsm)
- Watercolor paints (Indigo, Payne’s Gray, Lamp Black)
- White opacity medium (white gouache, white ink, or white acrylic)
- Flat wash brush (3/4 inch)
- Round brushes (sizes 2 and 6)
- Masking fluid (optional)
- Artist tape
- Clean water jar
- Paper towels
- Old toothbrush or fan brush
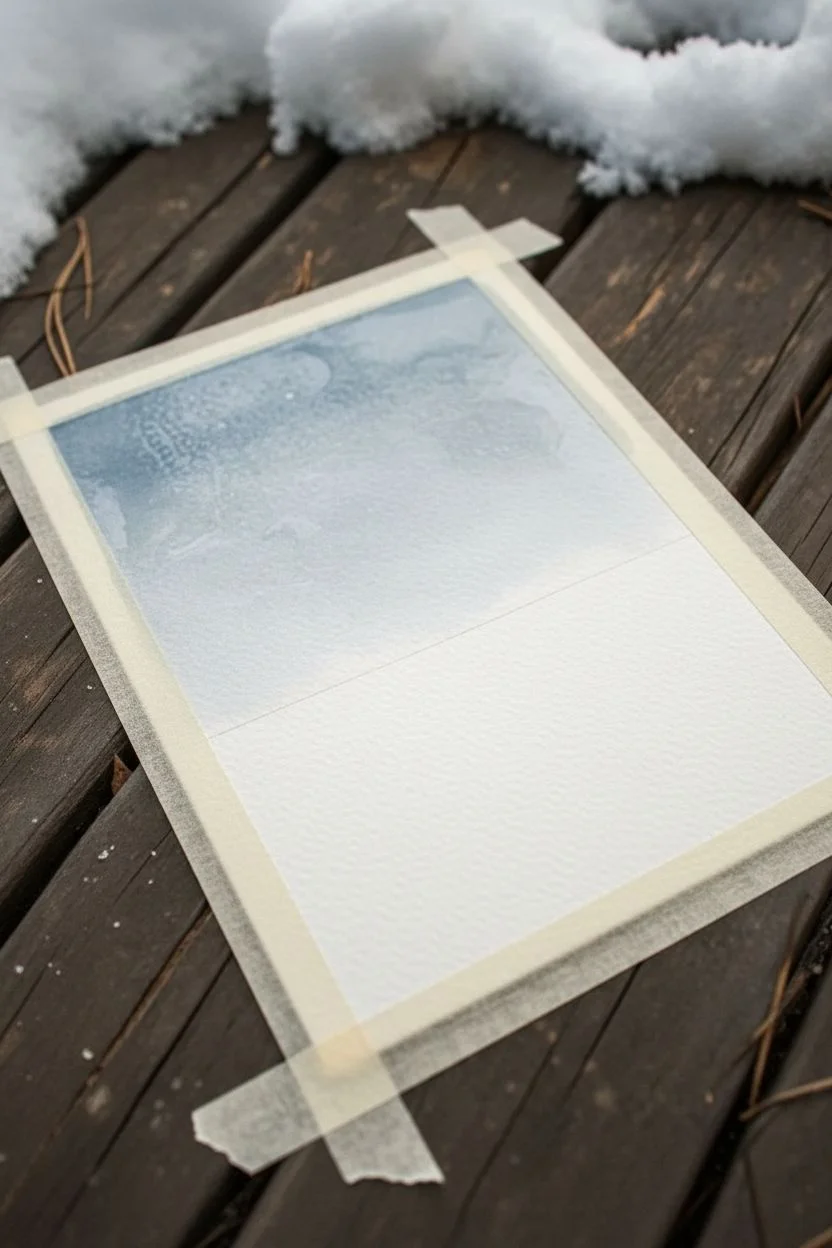
Step 1: Setting the Scene
-
Secure the borders:
Begin by taping down all four edges of your watercolor paper to a rigid board. This creates the crisp white border seen in the reference and prevents buckling when the paper gets wet. -
Plan the horizon:
Lightly sketch a very faint pencil line about one-third of the way up from the bottom. This will be your snow line. The area below this line should remain mostly white to represent the snowy ground. -
Prepare the sky gradient:
Mix a watery puddle of Indigo and a touch of Payne’s Gray. Wet the sky area (above your pencil line) with clean water using your flat brush until it glistens evenly but isn’t pooling.
Step 2: Painting the Sky
-
Apply the wash:
Load your flat brush with the Indigo mix. Start at the very top of the paper and paint horizontal strokes, moving downwards. Let the paint naturally fade as you approach the horizon line for an ombré effect. -
Deepen the night:
While the paper is still damp, drop in more concentrated Indigo or Payne’s Gray at the top corners and upper edge to create a moody, night-sky vignette. -
Dry completely:
Allow the sky wash to dry fully. The paper must be bone dry before adding the trees, or the sharp silhouettes will bleed into the background.
Paint won’t spatter?
If your white paint sticks to the brush, add a drop of water. If it creates big blobs, it’s too thin—add more pigment. Test on scrap paper first!
Step 3: Creating the Forest
-
Mix the silhouette color:
Create a thick, dark mixture using Lamp Black with a tiny hint of Indigo. It should be the consistency of heavy cream—opaque and rich. -
Paint the background treeline:
Using a size 6 round brush, paint the distant tree line just above your horizon. Use vertical dabbing motions to create jagged, tree-like textures. Vary the heights to make it look natural. -
Anchor the main tree:
Switch to your smaller size 2 brush. On the right side of the composition, draw a thin vertical line for the trunk of the large foreground pine. It should extend almost to the top of the sky. -
Detail the pine branches:
Starting from the top of the trunk, paint branches extending outward. Use quick, flicking strokes that start thick near the trunk and taper out. Leave small gaps between branches so the sky peeks through. -
Thicken the foliage:
As you move down the tree, make the branches wider and heavier. Add ‘clumps’ of needles by stippling with the tip of the brush on the undersides of the branches. -
Ground the tree:
Where the trunk meets the snow, add a small shadow extending to the right using a watered-down gray wash. This anchors the tree to the ground.
Make it shimmer
Mix a pinch of iridescent medium or silver watercolor into your white splatter mix. The snow will sparkle subtly when it catches the light.
Step 4: Snow & Shadows
-
Add footprints:
Mix a very dilute, watery grey-blue. Using the tip of your round brush, paint small oval shapes in a winding path leading from the foreground toward the trees. These are your footprints. -
Define the footsteps:
Add a tiny, darker accent of paint on one side of each footprint oval to show depth and shadow inside the impression. -
Create soft snow shadows:
With the same pale grey-blue wash, add broad, sweeping strokes across the white foreground to suggest undulating drifts of snow. Keep this subtle; you want mostly white paper.
Step 5: The Magical Snowfall
-
Prepare the splatter:
Squeeze out some white gouache or white ink. Dilute it slightly with water so it is flickable but still opaque. -
Protect the foreground:
I prefer to loosely cover the bottom snow area with a scrap piece of paper to keep the footprints clean, though a few stray flakes there are fine. -
Splatter the stars:
Load an old toothbrush or a stiff brush with the white mix. Run your thumb across the bristles to flick fine droplets over the sky area. -
Vary the flakes:
Tap the handle of a loaded brush against another brush handle over the paper to create larger, chunkier snowflakes among the fine mist. -
Manual touch-ups:
Use your smallest brush to manually dot a few specific bright white stars or flakes in areas that feel empty. -
Final reveal:
Once all paint and splatter is 100% dry, carefully peel away the tape at a 45-degree angle to reveal your clean edges.
Sign your new winter masterpiece in the bottom corner and enjoy the chill vibes


Have a question or want to share your own experience? I'd love to hear from you in the comments below!