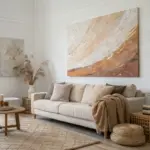
There’s something instantly dramatic about black and gold—it feels bold, modern, and a little bit luxurious all at once. Here are my favorite black and gold painting ideas to help you create statement art that glows in the right light and still feels totally doable.
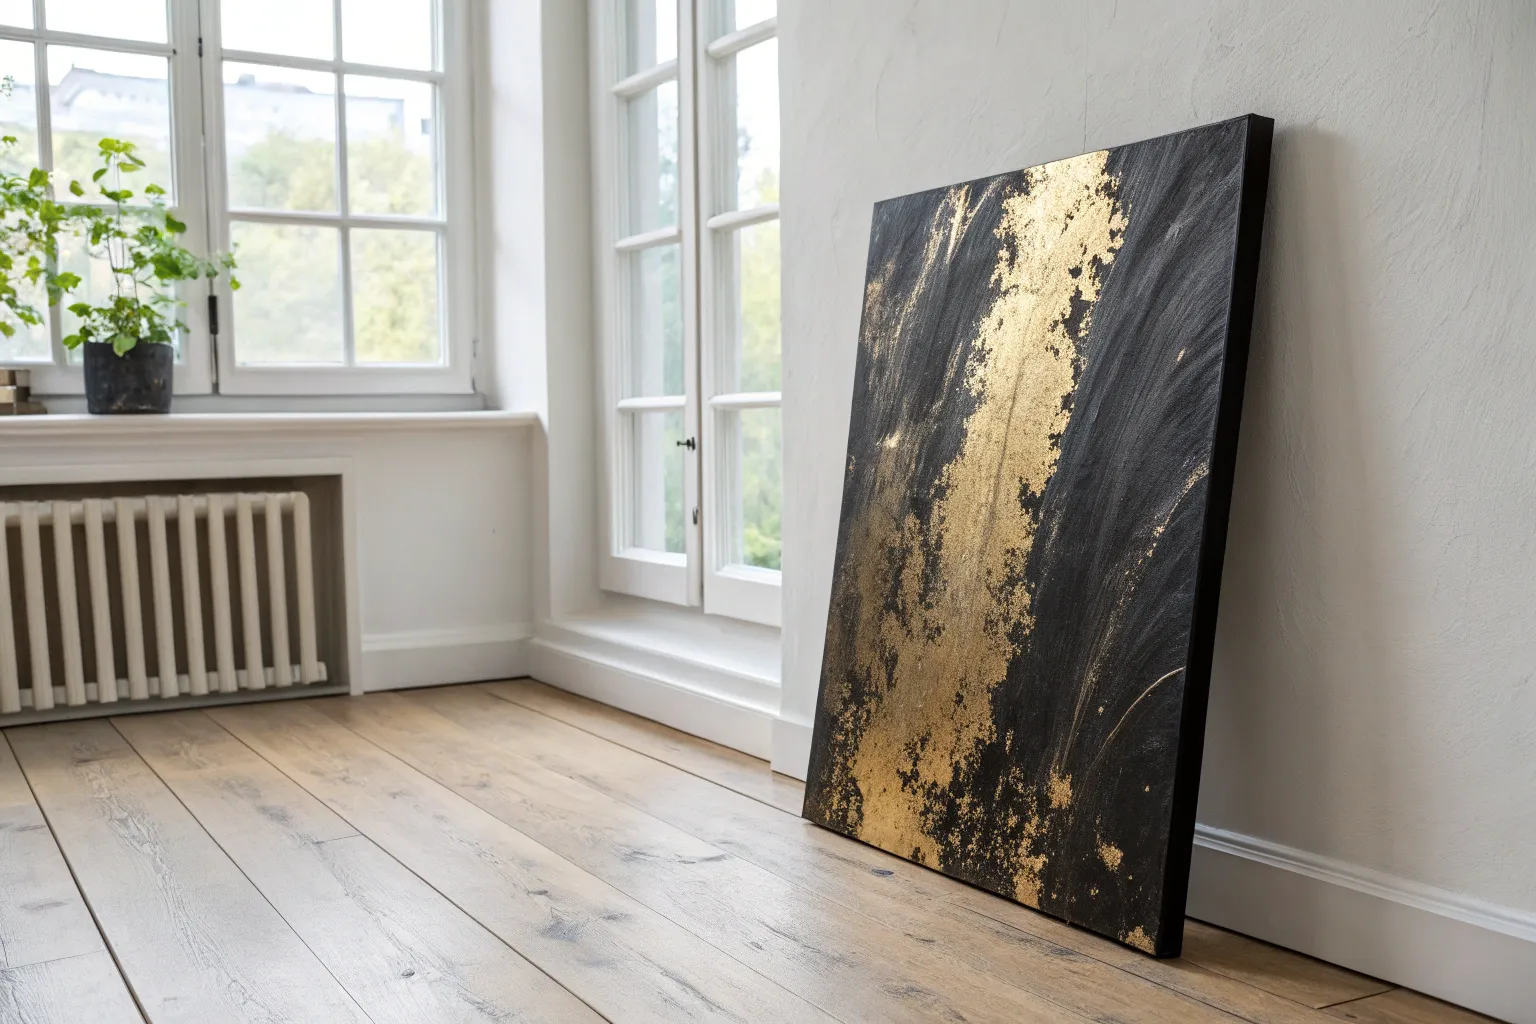
Gold Drips Over Matte Black

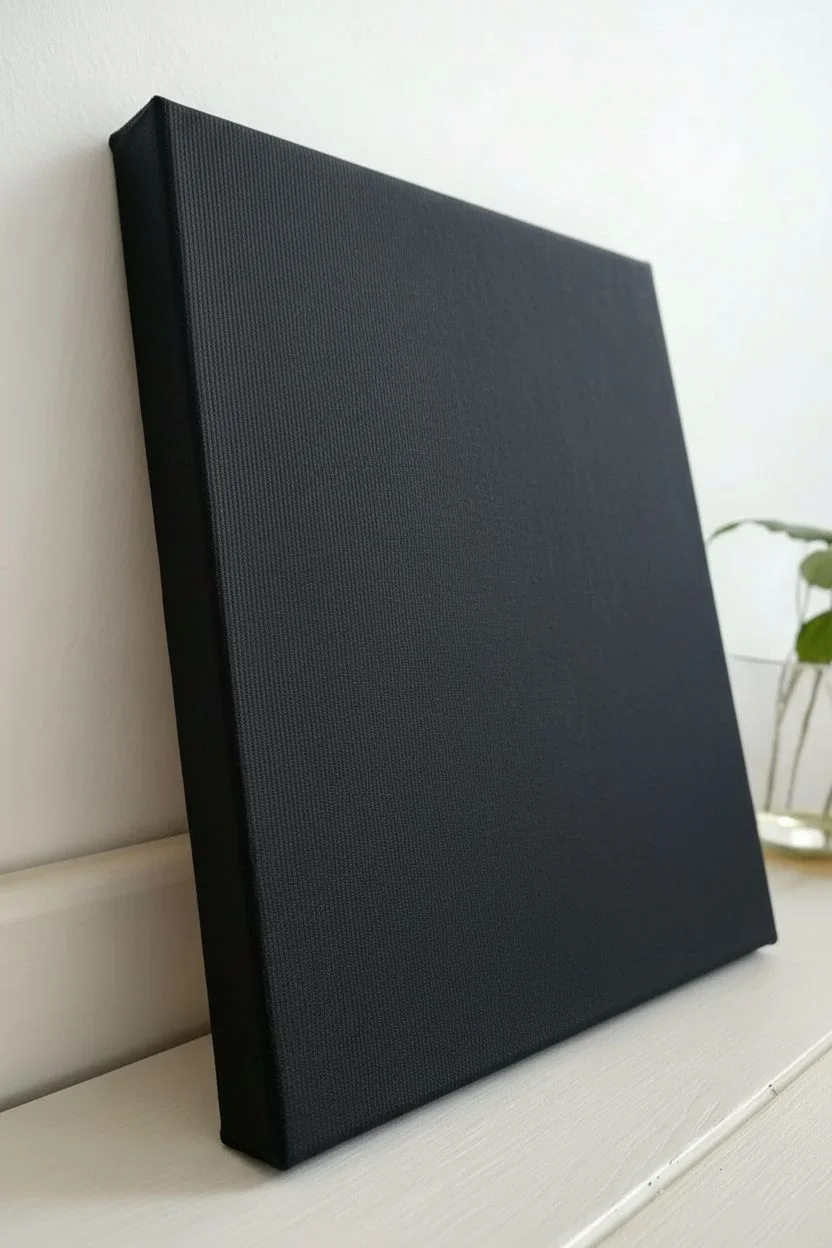
This striking statement piece relies on the powerful contrast between deep, velvety matte black and shimmering metallic gold. By combining controlled drips with loose splatters, you’ll create a modern abstract work that feels expensive and creates immediate drama in any room.
Step-by-Step Tutorial
Materials
- Large stretched canvas (24×36 inches or larger)
- Matte black acrylic paint (heavy body preferred)
- Metallic gold acrylic paint (fluid or high-flow)
- Gold leaf sheets (optional, for extra texture)
- Gold leaf adhesive/size (if using leaf)
- Large flat paintbrush (2-3 inches)
- Small round paintbrush
- Spray bottle with water
- Pipette or plastic syringe
- Old toothbrush or stiff bristle brush
- Drop cloth or newspapers
- Varnish (matte finish)
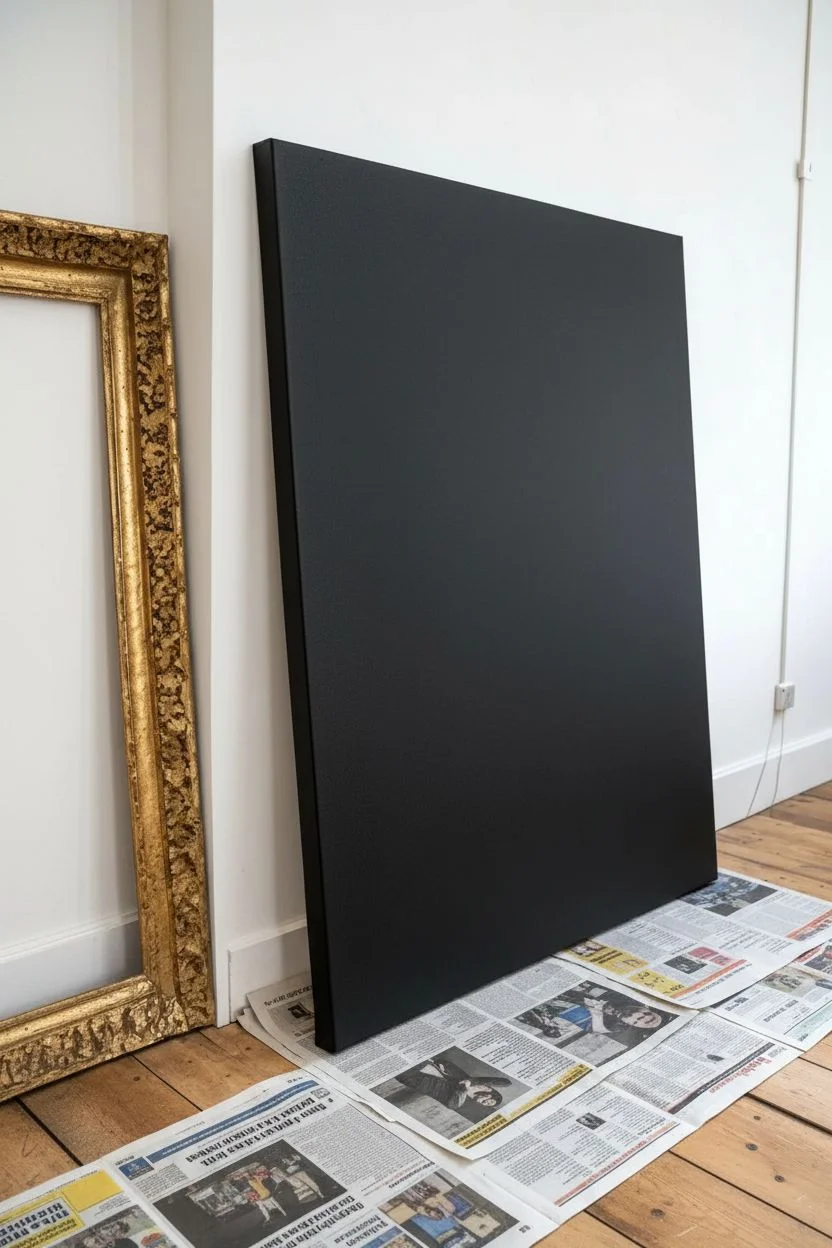
Step 1: Setting the Stage
-
Prepare the workspace:
This project can get messy, especially during the splatter phase. Lay down a generous amount of drop cloths or newspaper to protect your floor and surrounding furniture. -
Prime the canvas:
Even if your canvas is pre-primed, apply a coat of matte black gesso or paint as a base layer. This ensures no white speckles show through later. -
Apply the black base:
Using your large flat brush, apply a thick, even layer of matte black acrylic paint. Use long, horizontal strokes to minimize visible brush marks. -
Build opacity:
Allow the first black layer to dry completely, which usually takes about 30-60 minutes. Apply a second coat to ensure a dense, void-like finish that absorbs light. -
Check the finish:
Hold the canvas up to a light source to check for any translucent spots. Touch up these areas with a little more black paint and let the entire canvas cure until bone dry.
Drips Too Thin?
If the gold paint looks translucent or greyish against the black as it runs, let the first layer dry completely, then carefully trace over the existing drip lines with fresh gold paint.
Step 2: The Golden Crown
-
Paint the top band:
Paint a strip of metallic gold along the very top edge of the canvas, extending about 2-3 inches down. The bottom edge of this strip doesn’t need to be perfect; in fact, a slightly rough edge looks more organic. -
Layering for shine:
Metallic paints can be sheer, so you may need 2-3 coats to get a solid gold block. Let each coat dry briefly in between applications. -
Optional gold leaf:
For a texture that catches the light like the reference photo, apply gold leaf adhesive over your painted gold strip. Wait for it to get tacky, then press gold leaf sheets onto the surface, brushing away the excess with a soft dry brush.
Step 3: Creating the Drips
-
Prepare the fluid gold:
Mix your metallic gold paint with a pouring medium or a small amount of water. You want a consistency similar to heavy cream or warm honey—runny enough to flow, but thick enough to hold its color. -
Position the canvas:
Prop the canvas vertically against a wall covered with plastic. Gravity is your main tool here so ensure the angle is steep. -
Initiate the drips:
Load a pipette or syringe with your thinned gold paint. Starting at the bottom edge of your painted gold band, squeeze gently to release paint and let it run down the black surface. -
Vary the lengths:
I like to vary the amount of paint I use for each drip; more paint creates a longer, thicker line that reaches further down, while less paint creates a shorter streak. -
Control the flow:
If a drip is moving too fast, tilt the canvas horizontally to stop it. If it’s stuck, mist it lightly with a spray bottle of water to encourage movement, but be careful not to dilute it too much. -
Dry vertical:
Once you are happy with the arrangement of the drip lines, leave the canvas standing vertically to dry. If you lay it flat too soon, the drips might pool sideways or flatten out.
Add Starry Depth
Mix a tiny drop of iridescent pearl medium into your black base coat. It won’t sparkle overtly, but it gives the dark background a subtle, deep-space shimmer when viewed from different angles.
Step 4: Splatter and Finish
-
Mix splatter paint:
Dilute a small amount of gold paint slightly more than you did for the drips. It needs to flick off a brush easily. -
Create fine mist:
Dip an old toothbrush into the paint. Aiming at the bottom third of the canvas, run your thumb over the bristles to create a spray of fine gold specks. -
Add larger droplets:
Load a round brush with wet gold paint. Hold it over the canvas and tap the handle firmly with another brush or stick to dislodge larger, distinctive droplets near the bottom edge. -
Balance the composition:
Step back and assess the distribution. You want the heaviest concentration of specks at the bottom, fading upward into the black void to create a sense of rising energy. -
Seal the work:
Because the contrast is key, seal the painting with a clear matte varnish. Avoid gloss varnish on the black areas, as the reflection will ruin the depth effect, but you can carefully hand-brush gloss varnish over just the gold drips if you want them to pop.
Hang your masterpiece in a spot with good lighting to catch those metallic glints and enjoy the modern elegance


Black and Gold Abstract Marble Veins
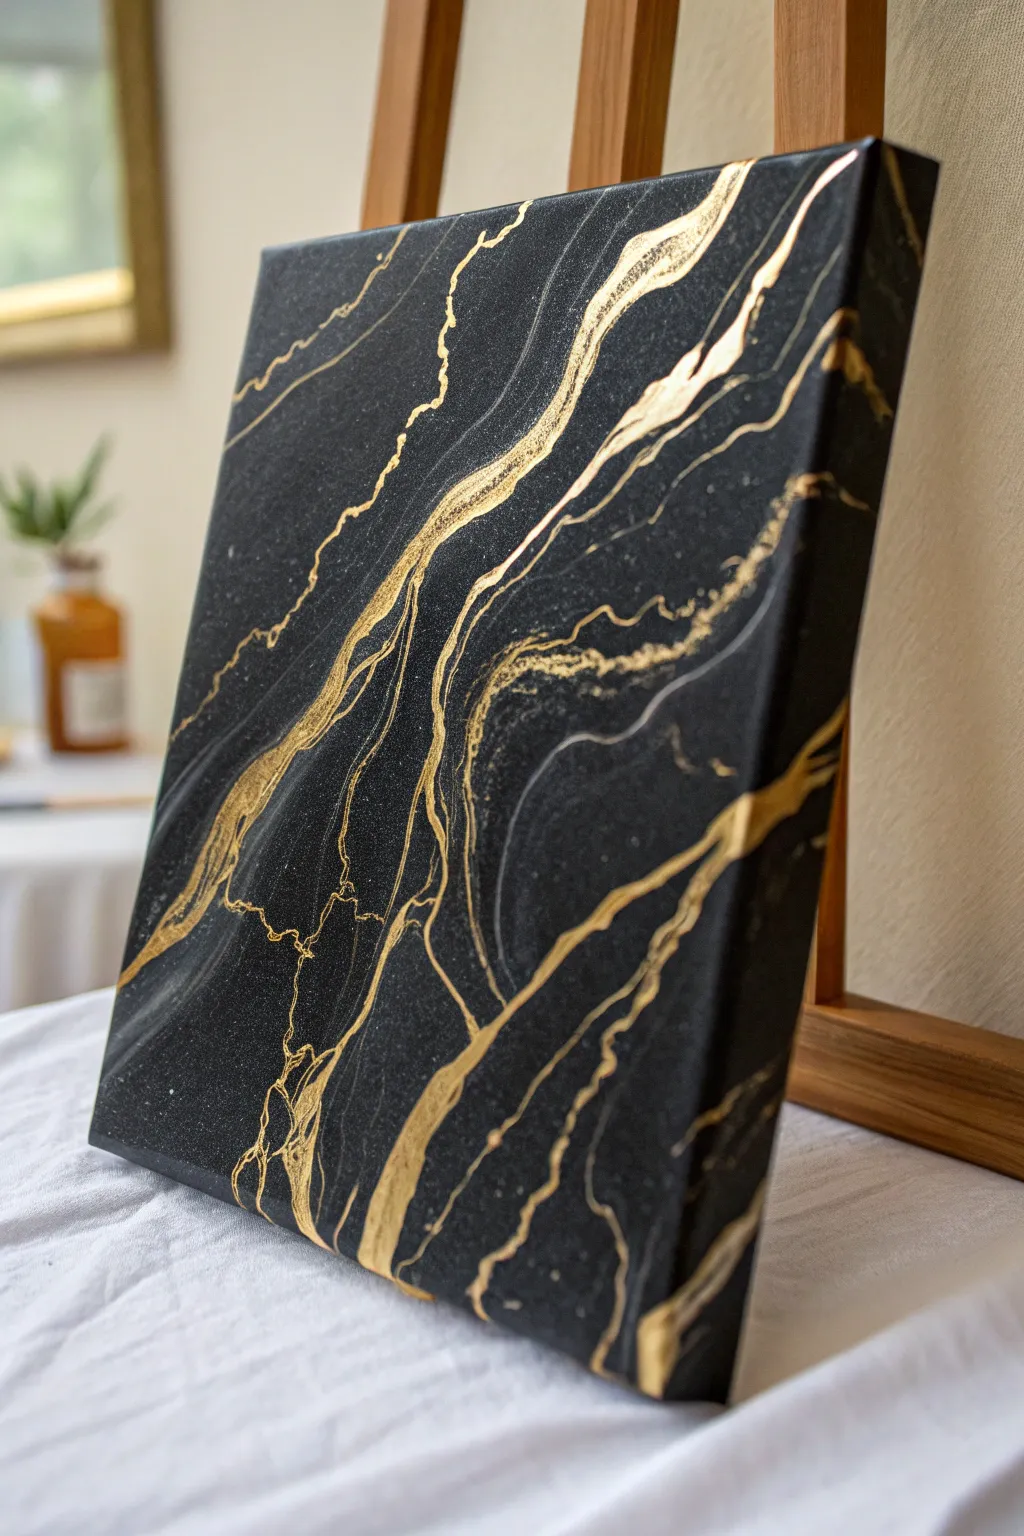
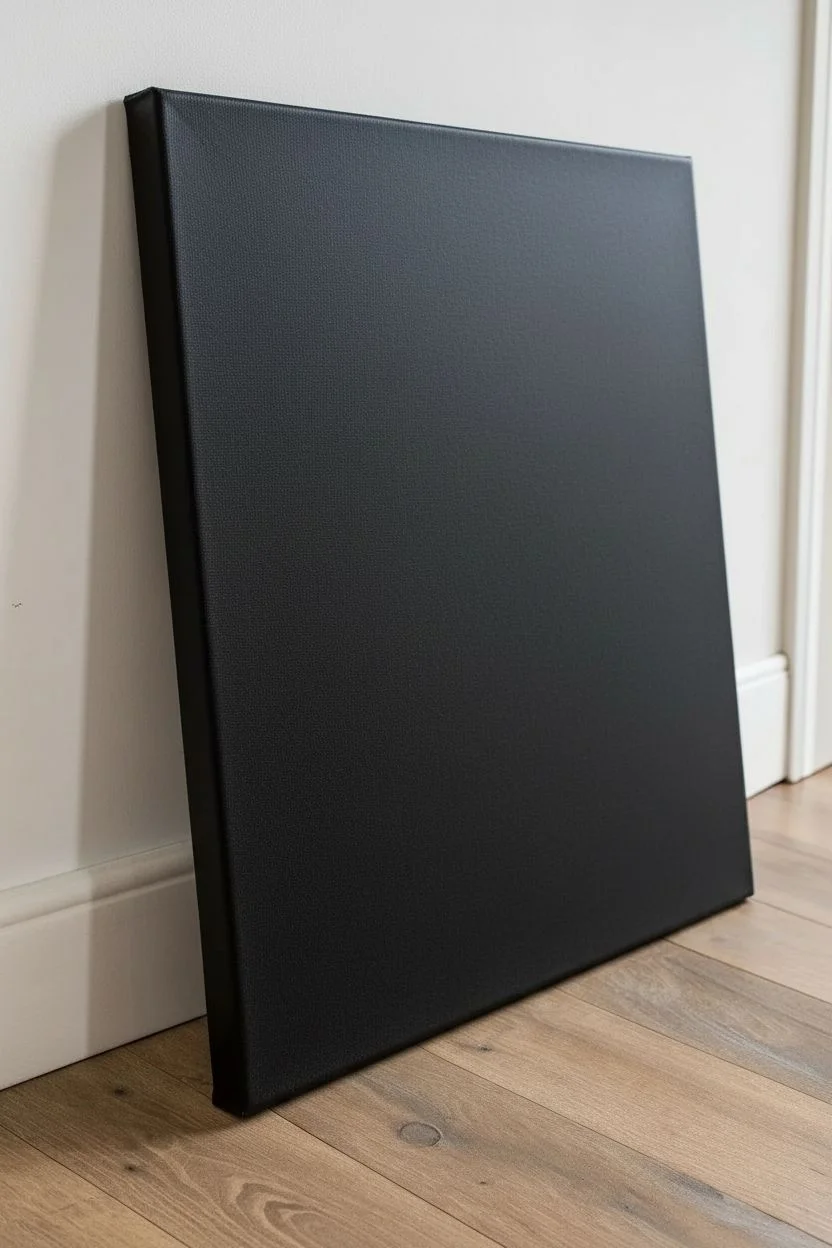
Transform a simple black canvas into a sophisticated piece of art that mimics the elegance of dark marble with striking gold veins. This project relies on fluid motion and careful layering to achieve a natural, organic flow that looks incredibly high-end.
Step-by-Step
Materials
- Stretched canvas (square format recommended)
- Black acrylic paint (heavy body is best)
- Metallic gold acrylic paint (liquid gold or high-flow)
- Small round brushes (size 0, 1, and 2)
- Fan brush (optional)
- Fine glitter or shimmer medium (optional)
- Palette knife
- Water cup and paper towels
- Gloss varnish or resin (for finish)
Step 1: Preparation & Base Coat
-
Prime the canvas:
Begin by ensuring your canvas surface is clean and dust-free. If the canvas came pre-primed with white gesso, you don’t need to do anything extra yet. -
Apply the first black layer:
Squeeze a generous amount of black acrylic paint directly onto the canvas. Use a wide flat brush or a palette knife to spread it evenly, ensuring you cover the white edges completely for a gallery-wrapped look. -
Create depth (optional):
While the first coat is still wet, you can mix a tiny drop of white or dark blue into a separate blob of black to create extremely subtle variations in the darkness, though a flat matte black works beautifully too. Let this base layer dry completely. -
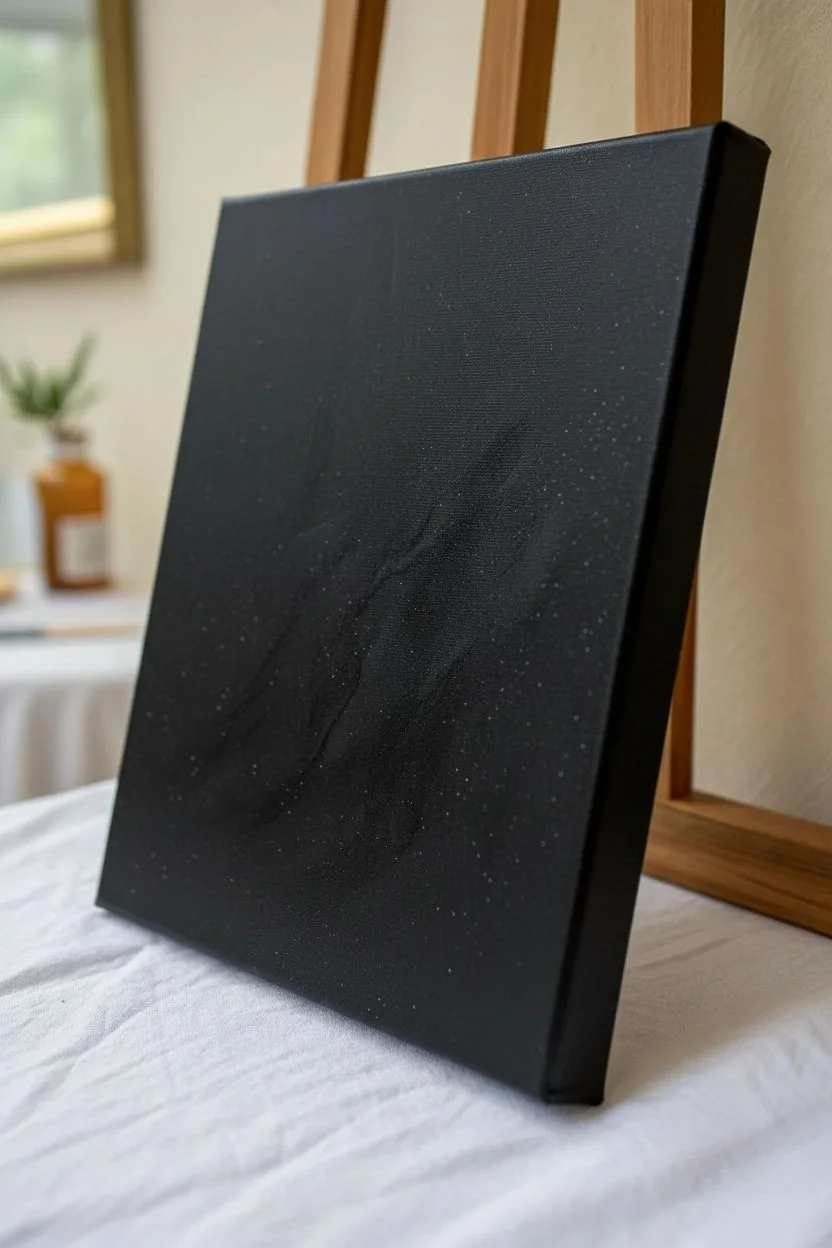
Add subtle shimmer:
For that stone-like glimmer seen in the photo, mix a very small pinch of fine silver or gold glitter into a thin glaze of black paint or clear medium. Brush this sparsely over the dried black base to create texture without overpowering the dark background.
Shaky Hands Help
Don’t try to be steady! Trembling hands actually create more realistic marble veins. A ruler-straight line looks artificial, while a jittery hand creates natural geological patterns.
Step 2: Painting the Gold Veins
-
Plan your flow:
Visualize a diagonal flow across the canvas similar to a river or lightning bolt. You don’t need to sketch it, but having a direction in mind prevents the design from looking chaotic. -
Mix fluid gold:
Prepare your metallic gold paint. If it’s too thick, add a few drops of water or flow improver until it has the consistency of heavy cream; this ensures smooth, long strokes without breaks. -
Establish the primary vein:
Using a size 2 round brush, paint the thickest main vein running diagonally across the canvas. Don’t make a straight line; let your hand wobble intentionally to create organic curves and varying widths. -
Use the rolling technique:
To get natural-looking edges on the main vein, slightly roll the brush between your fingers as you drag it, allowing the bristles to flare out and thin down randomly. -
Branch out secondary lines:
Switch to a smaller size 1 brush. Paint smaller veins branching off the main artery. These should follow the general direction of the main flow but can wander more. -
Create fine fractures:
Using your smallest detail brush (size 0), add tiny, jittery lines that act as ‘fractures’ in the stone. These should connect to the larger veins or float near them parallel to the main flow. -
Feather the edges:
I find that dry-brushing slightly at the edges of the thickest gold sections helps integrate them. Wipe most paint off your brush and gently flick outward from the gold line into the black to soften the transition.
Step 3: Refining & Finishing
-
Add high-contrast highlights:
Once the gold is dry, go back over just the centers of the thickest veins with a fresh layer of unthinned gold paint. This heightens the reflective quality and makes the ‘metal’ look dimensional. -
Correct with black:
If a line became too thick or you don’t like a specific curve, use your black base paint to cut back into the gold. This negative painting technique is excellent for sharpening the edges of your veins. -
Clean the edges:
Check the sides of the canvas again. Wrap any gold veins that run off the edge around to the side for a professional, continuous finish. -
Apply varnish:
Wait 24 hours for all paint to cure fully. Apply a coat of gloss varnish or a layer of art resin. This step is crucial as it deepens the black to a rich jet-color and makes the gold pop brilliantly.
Gold Intensity Hack
If your gold paint looks dull against the black, paint the vein in white first. Let it dry, then layer the metallic gold on top. The white base creates a bright backlight for the metallic pigments.
Hang your stunning faux-marble masterpiece in a spot with good lighting to catch all the metallic shimmer


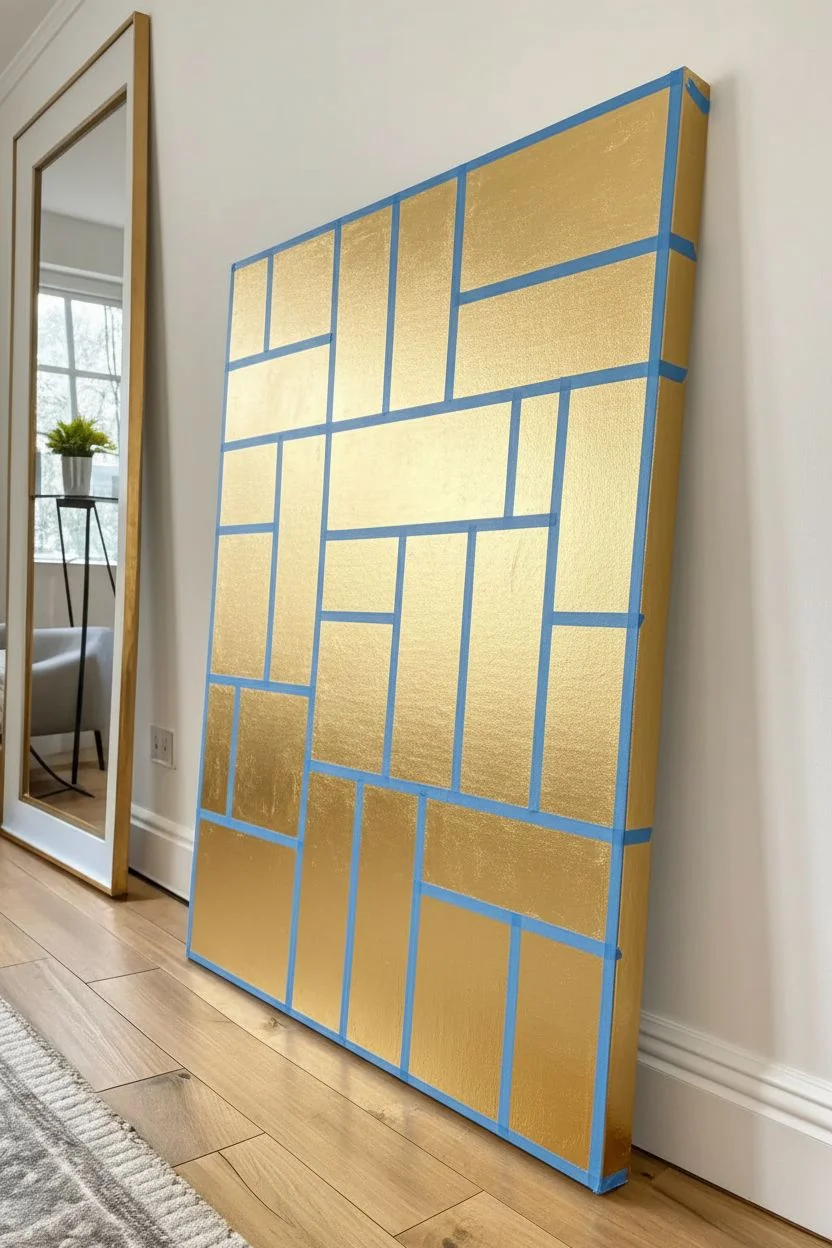
Bold Diagonal Split: Gold Meets Black
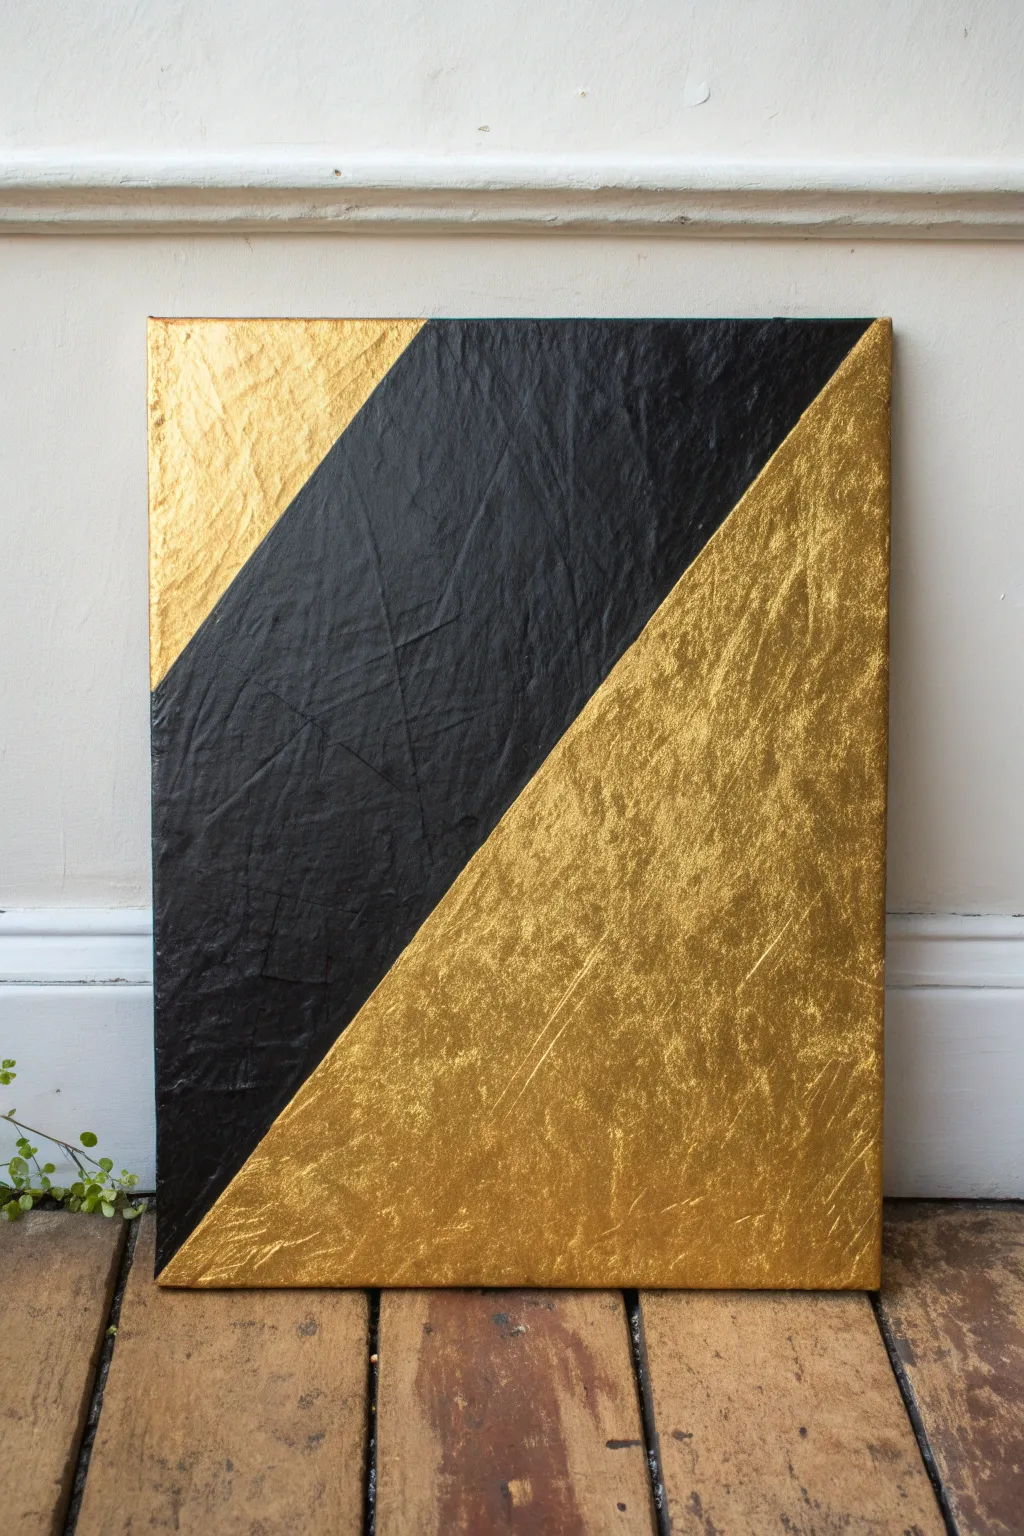
This striking abstract piece combines the rich luxury of metallic gold with the deep boldness of matte black in a modern geometric composition. The real secret to its moody, sophisticated look is the underlying crinkled texture that catches the light from every angle.
Detailed Instructions
Materials
- Stretched canvas (rectangular)
- Black acrylic paint (matte finish)
- Gold metallic acrylic paint (heavily pigmented)
- Tissue paper (white or unbleached)
- Mod Podge or PVA glue
- Wide flat paintbrush (synthetic)
- Masking tape or painter’s tape
- Scissors
- Pencil
- Ruler
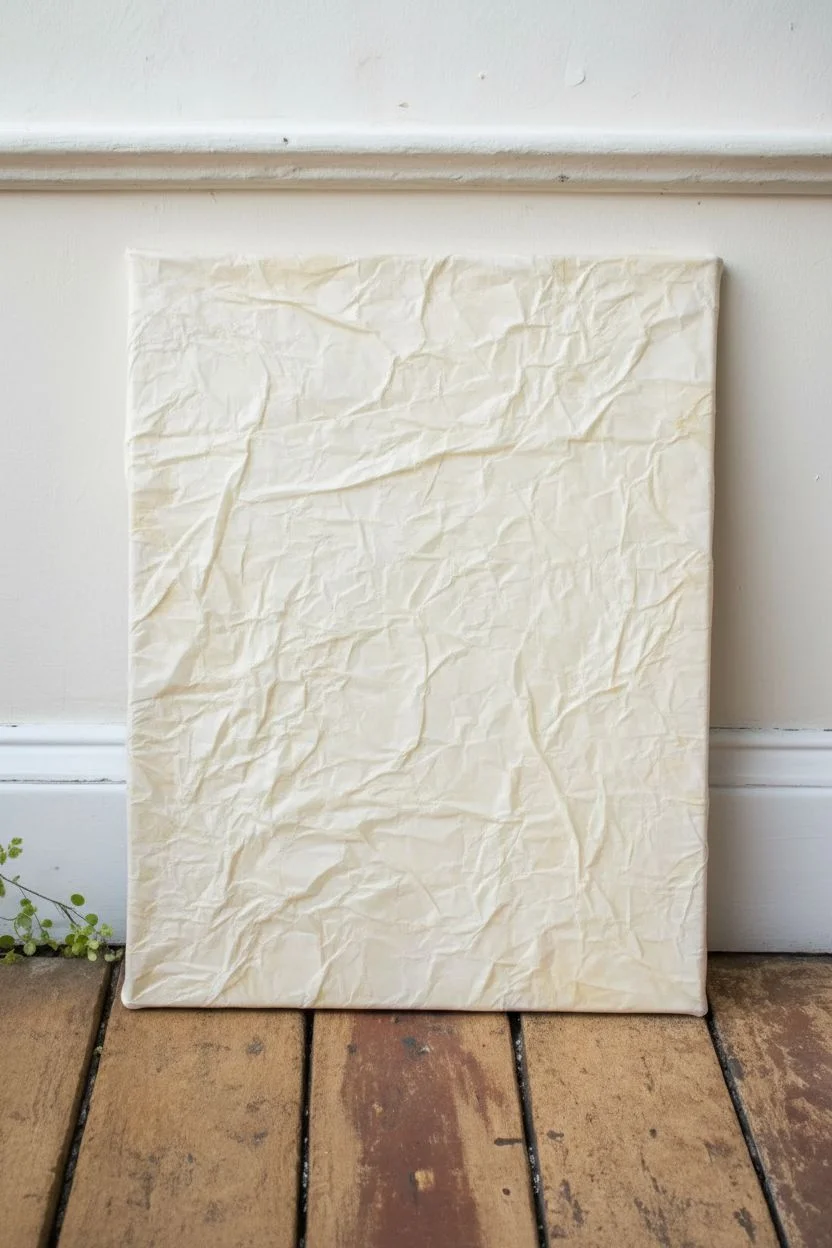
Step 1: Texturing the Canvas
-
Prepare the Tissue:
Begin by taking sheets of tissue paper and gently crumbling them into balls in your hands. Then, carefully flatten them back out leaving plenty of wrinkles and creases intact. -
Apply Base Glue:
Pour a generous amount of Mod Podge or PVA glue onto the surface of your canvas. Use your wide brush to spread it into an even, wet layer across the entire face. -
Attach Texture Layer:
Press the wrinkled tissue paper sheets onto the wet glue. Don’t smooth it out completely; you want those folds to remain visible to create the surface drama. -
Seal the Texture:
Immediately apply a second coat of glue over the top of the tissue paper. Use a gentle dabbing motion with your brush to ensure the paper adheres to the canvas without tearing the delicate wet fibers. -
Let it Cure:
Allow the textured canvas to dry completely. This is crucial—if the paper is damp, the tape in the next phase will rip it. I usually wait overnight just to be safe.
Bleed-Through Fix
Due to the crinkled texture, paint might seep under the tape. To prevent this, paint a layer of clear matte medium over the tape edge first, sealing gaps before applying color.
Step 2: Drafting the Design
-
Mark the Corners:
Decide on the width of your central black stripe. Using a ruler, make a small mark on the top edge of the canvas (about 1/3 in from the left) and another on the right edge (about 1/3 down from the top). These will guide the first line. -
Draft the Lines:
Use your ruler to draw faint pencil lines connecting your marks to create the diagonal boundaries. You should have a large diagonal band creating two triangular corners. -
Apply Tape:
Apply masking tape along your pencil lines. Important: Place the tape *outside* the area you plan to paint first. For this project, we will mask off the gold triangles first to paint the black stripe, so put the tape over the areas that will eventually be gold. -
Seal the Edges:
Run a fingernail or a clean credit card firmly along the edge of the tape to prevent paint bleed-under, especially since the surface is now bumpy.
Step 3: Painting the Gold & Black
-
Paint the Black Band:
Fill in the exposed central diagonal stripe with matte black acrylic paint. Work the paint into the heavy texture of the tissue paper, ensuring no white specks remain in the crevices. -
Second Black Coat:
Once the first coat is dry to the touch, apply a second coat of black to ensure an opaque, solid finish. -
Remove Tape:
Carefully peel away the masking tape while the second coat is still slightly damp to get a crisp edge. -
Re-Tape for Gold:
Allow the black paint to dry completely (at least 2-3 hours). Now, apply fresh tape over the dried black edges to protect your sharp lines while you paint the gold sections. -
Apply Gold Base:
Paint the upper-left and bottom-right triangles with your metallic gold paint. Use multidirectional brushstrokes to enhance the reflective quality of the texture. -
Dry Brushing:
For the second gold layer, I like to use a slightly drier brush. Skim over the tops of the textured ridges to make the metallic pigment catch the light even more. -
Final Reveal:
Peel off the final strips of tape gently. If any paint bled under the tape due to the rough texture, use a small detail brush to touch up the lines.
Double Texture
Swap the tissue paper for aluminum foil before painting. Crinkle the foil, glue it down, and paint over it. The gold sections will shine even brighter with a metal core.
Hang your new textured masterpiece in a spot with good lighting to really show off those metallic ridges


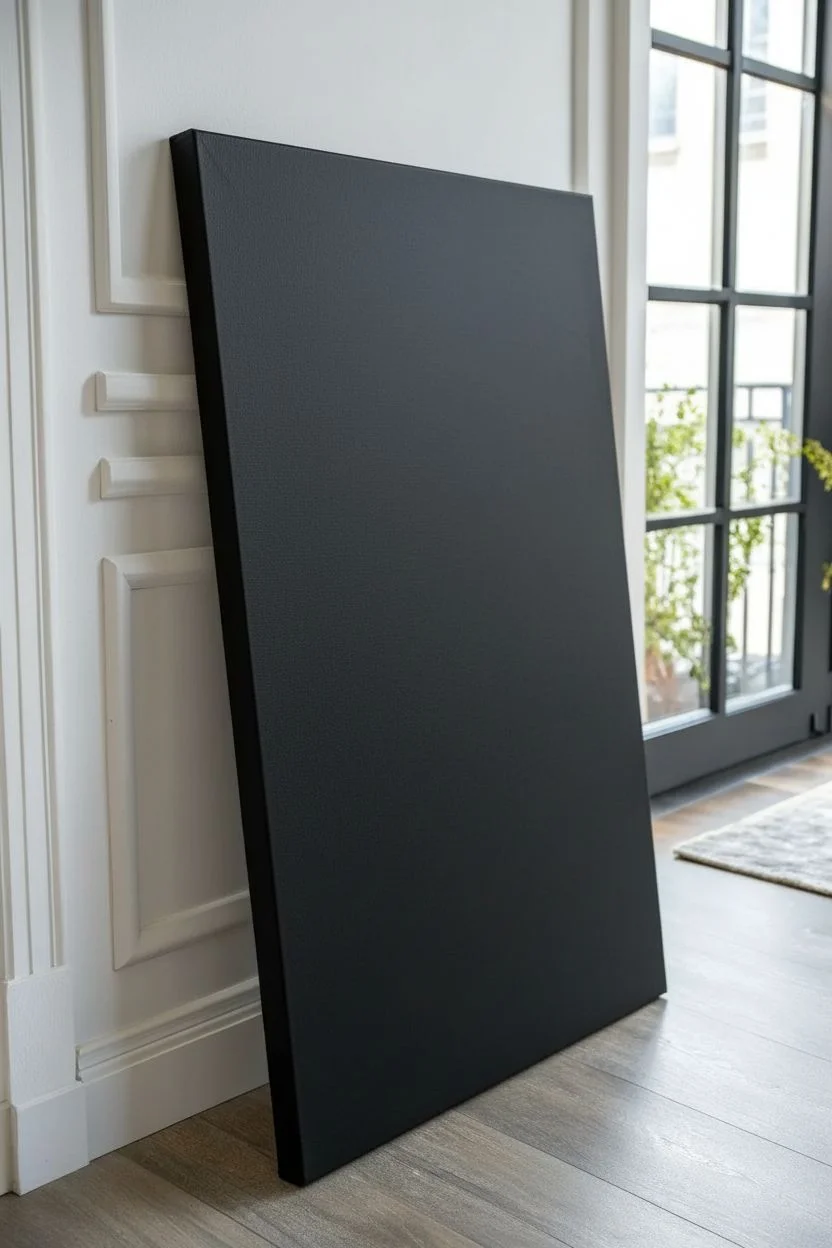
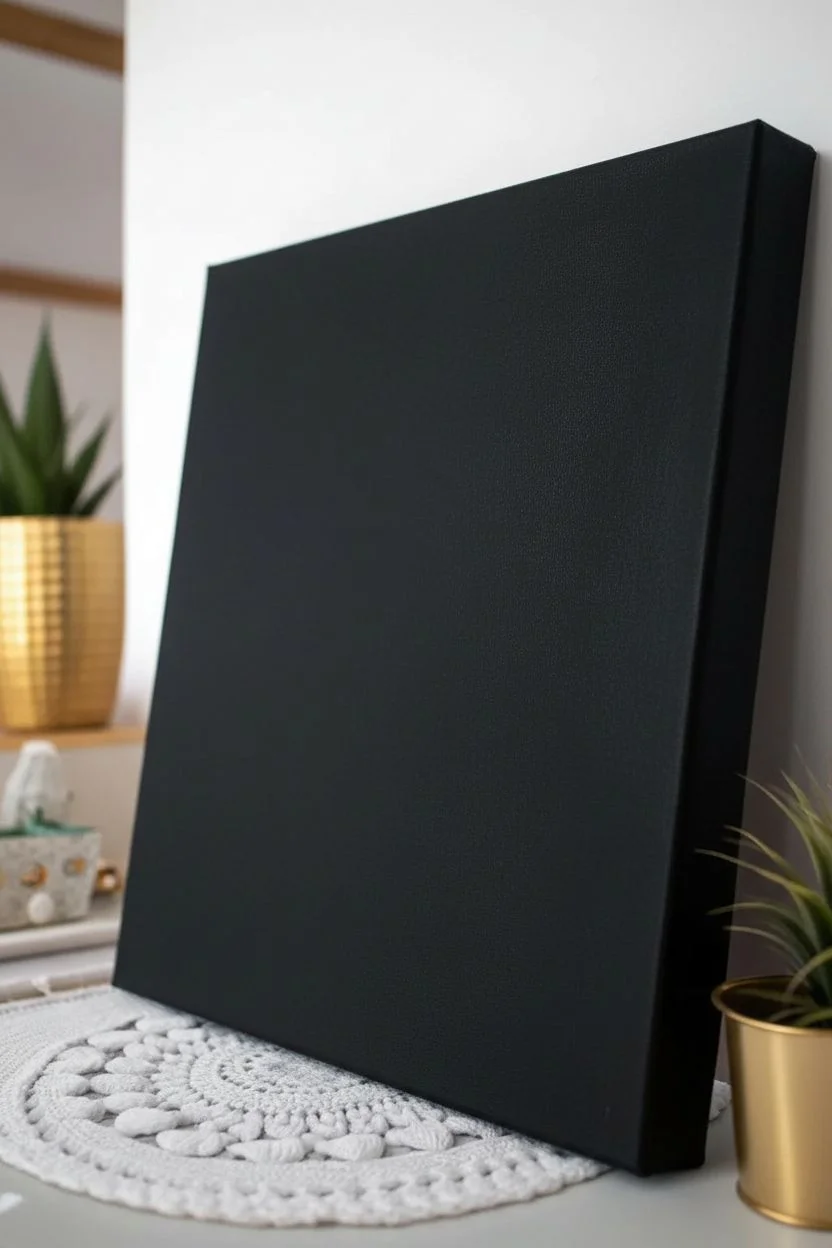
Minimal Black Field With Gold Line Art
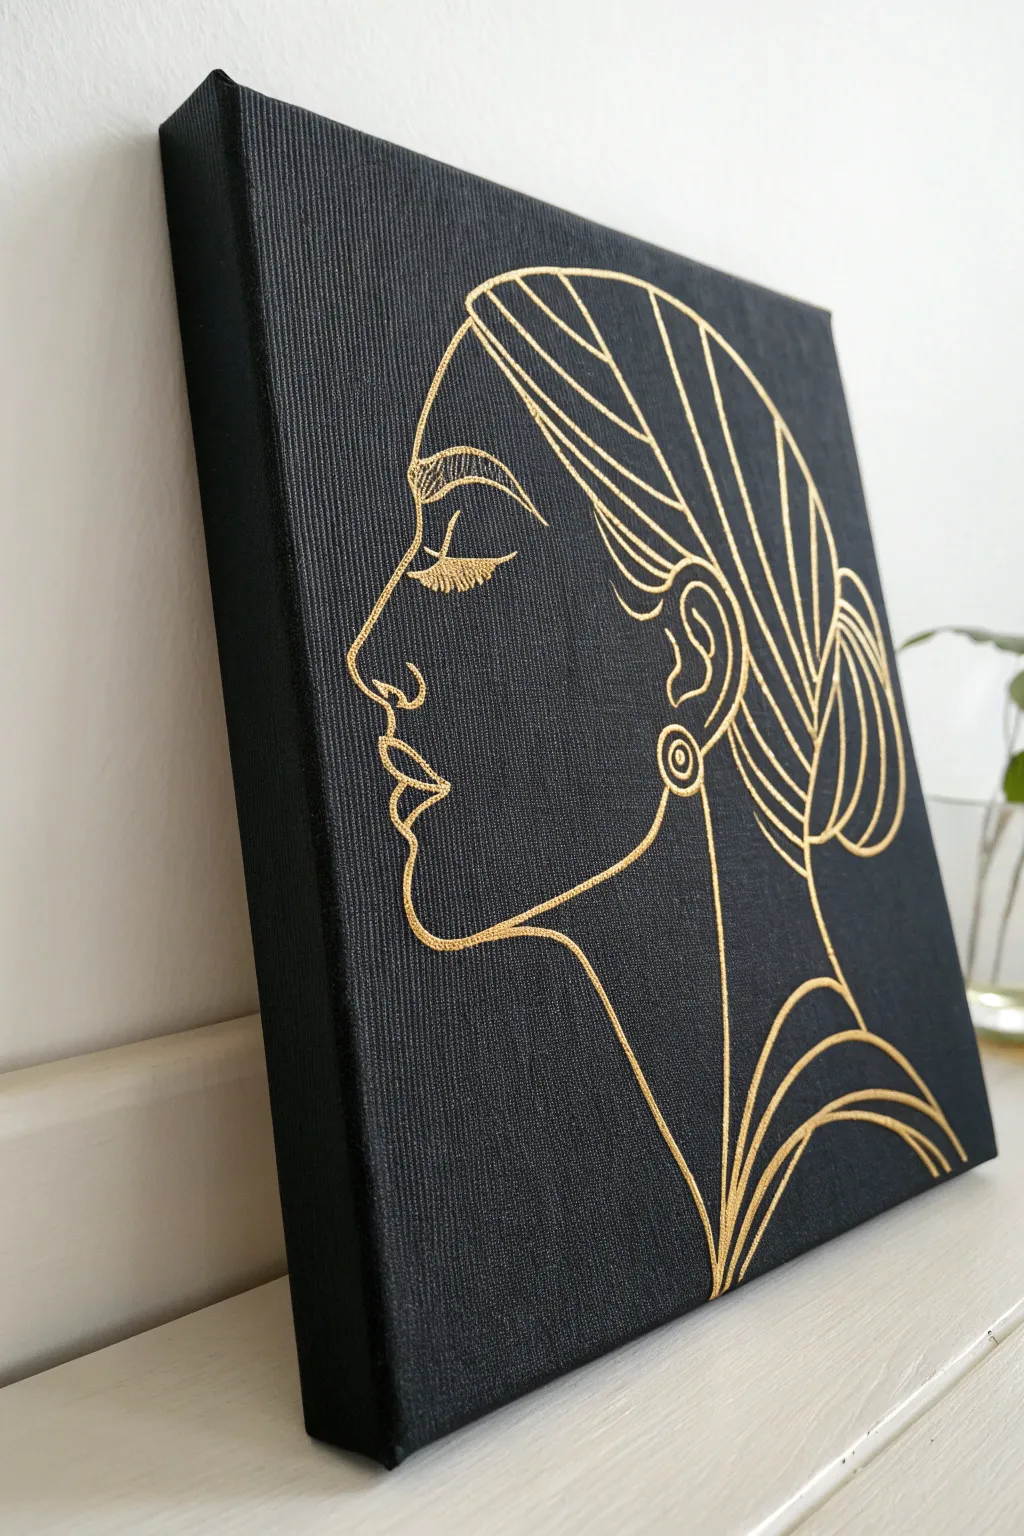
This elegant artwork features a striking contrast between a deep, matte black background and a shimmering gold profile. The minimalist line art captures the essence of a serene figure, adding a sophisticated and modern touch to any wall.
Step-by-Step Tutorial
Materials
- Stretched canvas (square format, approx. 12×12 inches)
- Black acrylic gesso or matte black acrylic paint
- Wide flat paintbrush (2-inch)
- Gold paint marker (fine point, oil-based) OR Liquid gold leaf pen
- Pencil (white charcoal or chalk pencil works best on black)
- Tracing paper (optional)
- Ruler
- Reference image of a line art profile
- Matte varnish spray (optional)
Step 1: Preparing the Dark Canvas
-
Prime the surface:
Begin by applying a generous coat of black acrylic gesso or matte black paint to your canvas. Ensure you cover the sides as well for a gallery-wrapped look. -
Ensure opacity:
Once the first coat is dry, check for any white canvas showing through. I usually find that a second coat is necessary to achieve that deep, velvety black finish. -
Smooth the texture:
If you prefer a super-smooth background for your lines, lightly sand the dried black paint with fine-grit sandpaper, then wipe away the dust with a damp cloth. -
Let it cure:
Allow the black base to dry completely. This is crucial because any moisture will clog your gold marker later.
Marker Flow Pro-Tip
Store your gold paint pen horizontally when not in use. Before starting on the canvas, always test the flow on paper to prevent sudden blobs of ink.
Step 2: Sketching the Design
-
Choose your subject:
Find a simple line drawing of a face profile. You can draw this freehand or print one out to use as a template. -
Transfer or sketch:
Using a white charcoal pencil or chalk pencil, sketch the outline onto the black canvas. Keep your pressure extremely light so the white lines don’t show through the gold later. -
Refine the lines:
Step back and look at your sketch. Adjust the proportions of the nose, lips, and hair bun until you are happy with the composition. -
Detail the features:
Add the smaller details like the eyebrow arch, eyelashes, and the swirl of the ear earring. The hair should be represented by long, sweeping curves.
Level Up: Texture
Instead of a paint pen, use a fine liner brush and copper or gold embroidery floss glued directly onto the canvas for a tactile, 3D stitched effect.
Step 3: Applying the Gold
-
Prime the marker:
Shake your gold paint marker well and press the tip on a scrap piece of paper until the gold ink flows smoothly. -
Start the major lines:
Begin tracing over your white pencil sketch with the gold marker. Start at the top of the head and work your way down to avoid smudging wet ink with your hand. -
Maintain consistent pressure:
Keep a steady pressure on the marker to ensure the line width remains consistent. Glide firmly but slowly. -
Connect the profile:
Trace the forehead, nose, lips, and chin in one fluid motion if possible, or break it into segments where natural pauses occur, like at the lips. -
Fill in the hair:
Draw the sweeping curves for the hair. Focus on smooth, elongated strokes that mimic the flow of strands pulled back into a bun. -
Add the delicate details:
Carefully draw the fine lines for the eyelashes and the small circle for the earring. These small touches bring the portrait to life. -
Thicken selected areas:
For a bolder look, go over the main profile line a second time to make it slightly thicker than the interior detail lines.
Step 4: Finishing Touches
-
Clean up sketches:
Once the gold ink is 100% dry (give it at least an hour), use a slightly damp Q-tip or a soft eraser to gently remove any visible white charcoal lines. -
Fix mistakes:
If you made a mistake with the gold, you can carefully paint over it with a tiny bit of black paint, let it dry, and redraw the line. -
Seal the work:
To protect the gold sheen from tarnishing, you can mist the canvas with a light coat of matte varnish spray.
Hang your new metallic masterpiece in a well-lit area where the light can catch the gold lines
BRUSH GUIDE
The Right Brush for Every Stroke
From clean lines to bold texture — master brush choice, stroke control, and essential techniques.
Explore the Full Guide
Gold Leaf Patchwork on Black
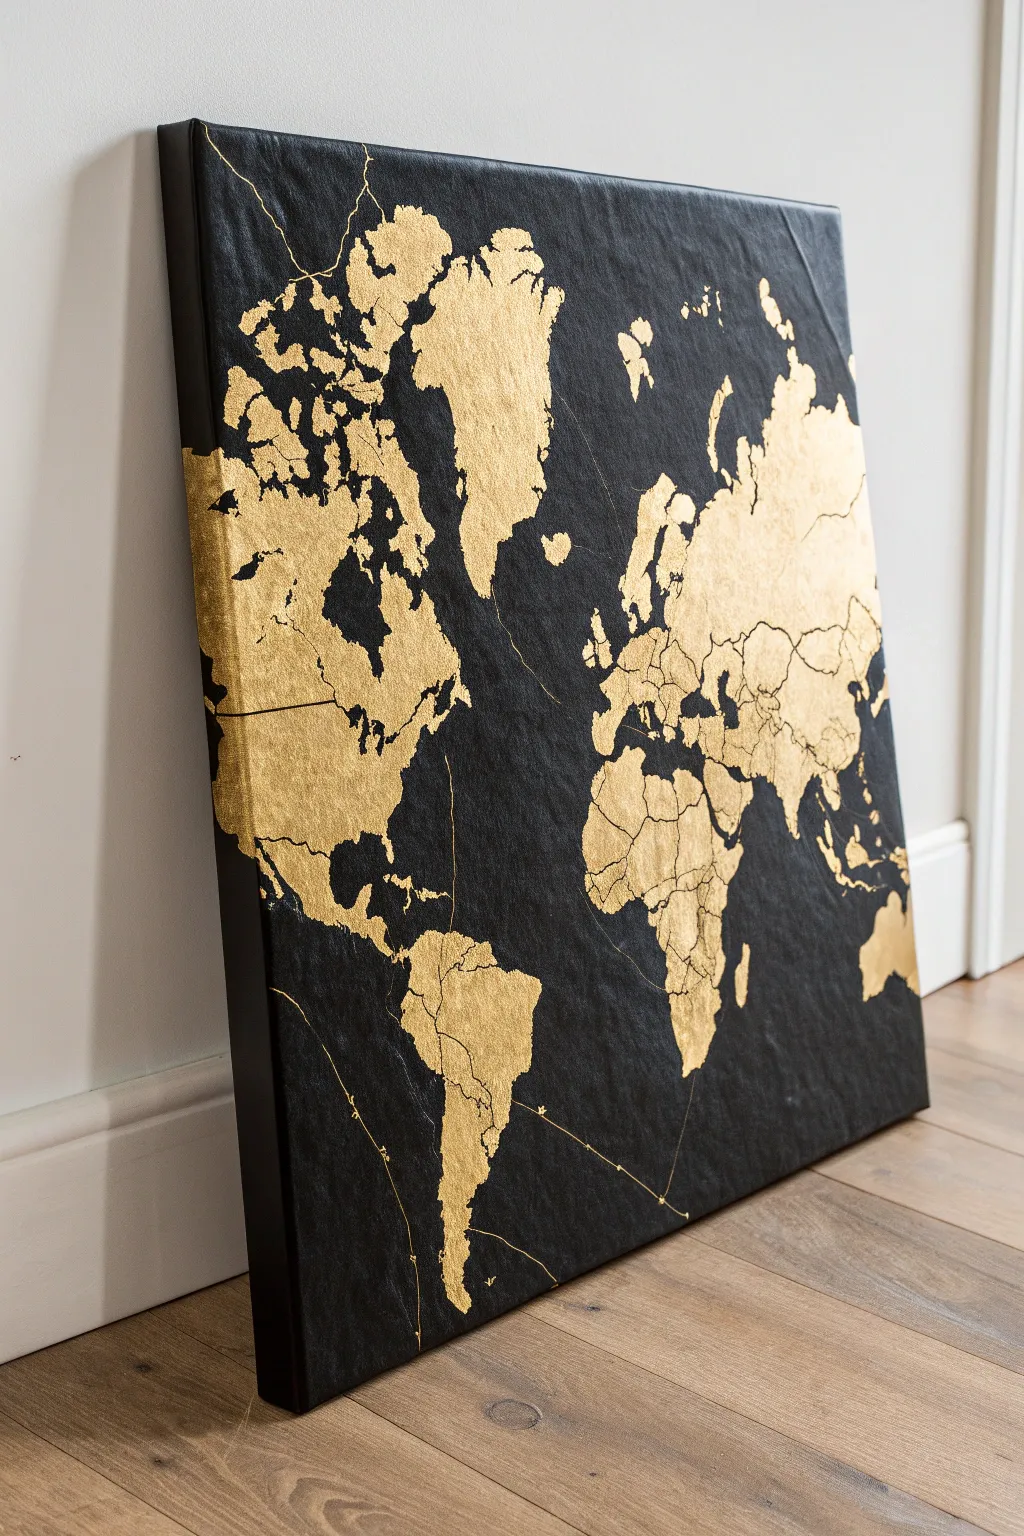
Transform a plain canvas into a sophisticated statement piece featuring a shimmering world map against a deep, dramatic background. The contrast between the matte black acrylic and the luminous gold leaf creates a luxurious texture that catches the light beautifully.
Step-by-Step
Materials
- Large stretched canvas (square or rectangular)
- Black acrylic paint (matte finish)
- Gold leaf sheets (imitation or real)
- Gold leaf adhesive size (water-based)
- Foam paintbrushes
- Soft bristle brushes (for leaf application)
- World map stencil or printed template
- White chalk or transfer paper
- Fine-grit sandpaper
- Gold paint pen (fine tip)
- UV-resistant clear sealant spray (matte)
Step 1: Preparing the Base
-
Prime the Surface:
Even if your canvas is pre-gessoed, apply a coat of white gesso to ensure a smooth, uniform texture. -
Apply the Base Coat:
Using a foam brush, paint the entire canvas with matte black acrylic paint. I like to apply two thin coats rather than one thick one to avoid visible brushstrokes. -
Paint the Edges:
Don’t forget to paint the sides of the canvas black for a finished, gallery-wrapped look. -
Let it Dry Thoroughly:
Allow the black base to dry completely, preferably overnight, to prevent any tackiness when you begin outlining.
Step 2: Mapping the World
-
Position the Template:
Tape your world map stencil or paper template securely onto the dry canvas. Ensure it is centered. -
Trace the Outline:
If using a stencil, lightly trace the continents with white chalk. If using a paper printout, slip transfer paper underneath and trace the outlines with a pencil. -
Refine the Shapes:
Remove the template. Gently wipe away excess chalk dust or heavy transfer lines, leaving just a faint guide for where the gold will go.
Sticky Situation?
If gold leaf sticks where it shouldn’t, wait for the glue to dry fully, then paint over the mistake with black acrylic. It’s easier than trying to scrape it off.
Step 3: Applying the Gold Leaf
-
Apply Adhesive Size:
Work in sections. Apply a thin, even layer of gold leaf adhesive size inside the continent outlines using a small brush. Don’t go outside the lines. -
Wait for Tac:
Wait for the adhesive to turn from milky to clear and become tacky. This usually takes 15-30 minutes depending on your brand. -
Lay the Gold Leaf:
Gently lift a sheet of gold leaf and lay it over the tacky area. Use the backing paper to press it down lightly. -
Brush into Place:
Use a soft, dry brush to smooth the gold leaf against the canvas, ensuring it adheres to all the nooks and crannies of the canvas texture. -
Repeat the Process:
continue applying size and leaf until all continents are filled. Overlap the gold sheets slightly to avoid gaps. -
Buff and Remove Excess:
Once all gold is applied, vigorously brush over the gilded areas with a stiff, dry brush to remove loose flakes. This creates that lovely, slightly distressed edge.
Level Up: 3D Texture
Mix modeling paste with your black base coat before painting to create a rough, stone-like texture on the ‘ocean’ areas for deeper contrast.
Step 4: Refining Details
-
Clean Up Edges:
If you have any jagged edges where the size bled, touch them up carefully with a small brush and black paint. -
Add Country Borders:
Referencing a real map, take your fine-tip gold paint pen and sketch in jagged, organic lines to represent borders or geographical divides. This creates the ‘patchwork’ look. -
Extend the Lines:
Allow a few thin gold lines to extend into the black ocean areas, mimicking trade routes or flight paths for artistic effect. -
Texture the Leaf:
For a vintage look, lightly scuff surface of the gold leaf with very fine-grit sandpaper in random spots to reveal hints of texture. -
Seal the Artwork:
Finish by spraying the entire piece with a matte, UV-resistant sealant to prevent the gold leaf from tarnishing over time.
Hang your stunning map in a well-lit area and watch how the gold shifts throughout the day
Gold Splash Galaxy on Black
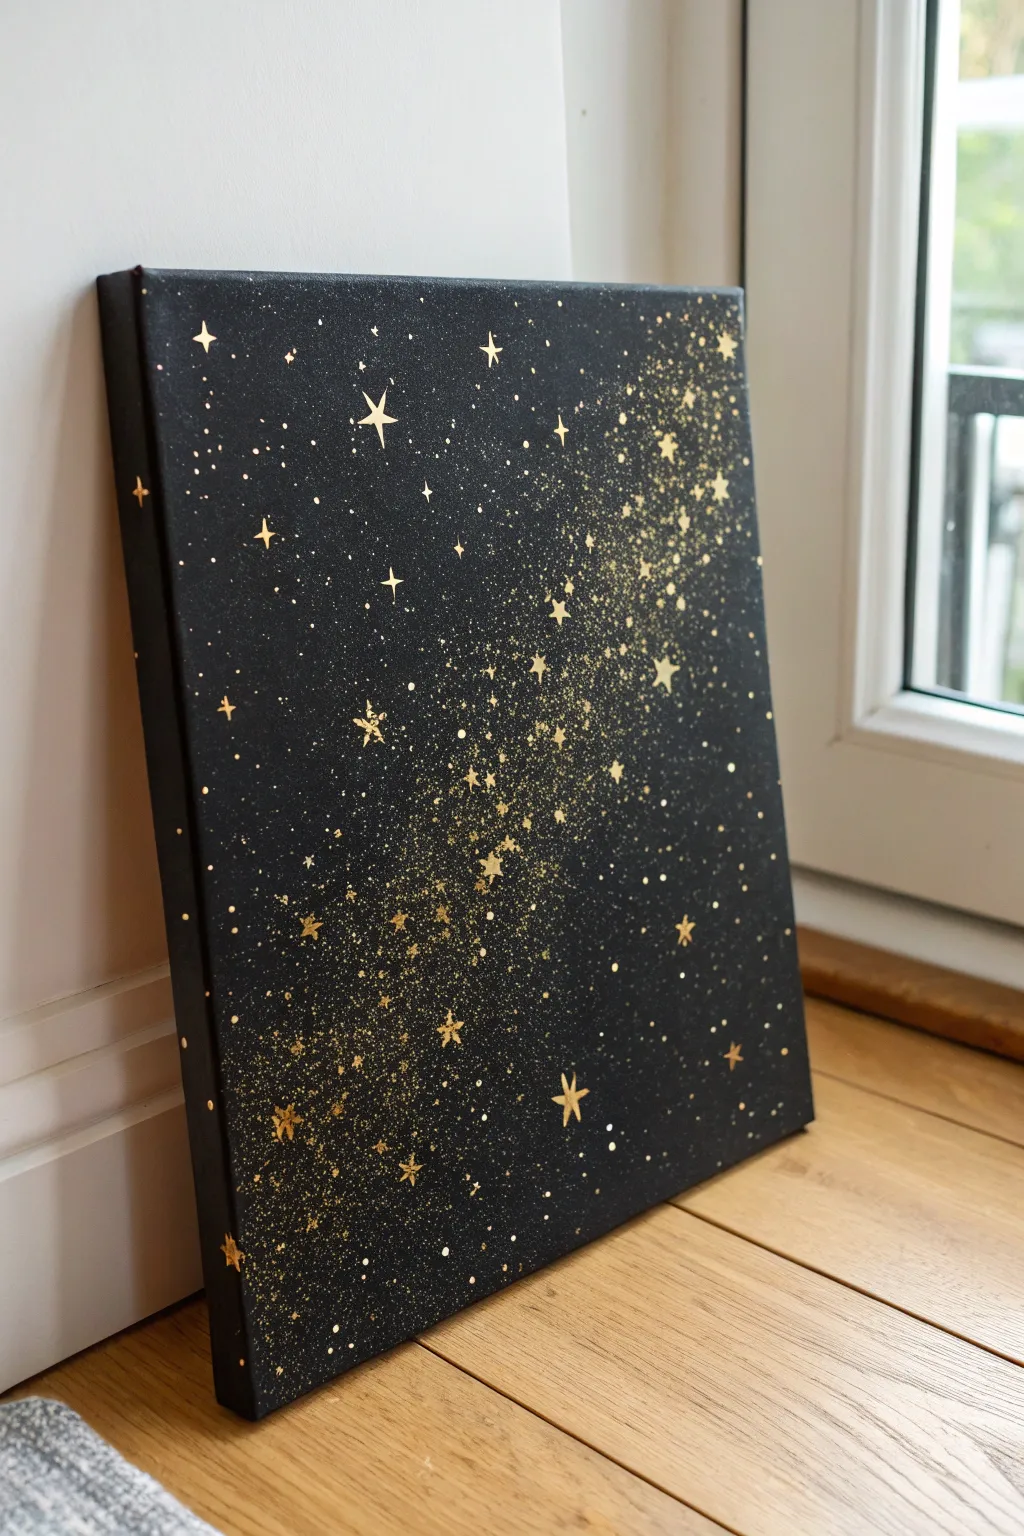
This stunning DIY wall art captures the ethereal beauty of a night sky using just two colors. By combining simple splatter techniques with deliberate star placement, you can create a sophisticated, shimmering galaxy that adds a touch of magic to any room.
Detailed Instructions
Materials
- Rectangular stretched canvas (e.g., 16×20 inches)
- Black acrylic paint (matte or satin finish)
- Metallic gold acrylic paint (bright, high-pigment)
- Gold leaf pen or fine-tip gold paint marker
- Wide flat paintbrush (for base coat)
- Old toothbrush or stiff bristle brush (for splattering)
- Small round detail brush (size 0 or 1)
- Cup of water and paper towels
- Drop cloth or newspaper
Step 1: Preparing the Night Sky
-
Prepare your workspace:
Since this project involves paint splattering, lay down a generous amount of newspaper or a drop cloth to protect your floor and surrounding furniture. -
Base coat application:
Using the wide flat brush, paint the entire front surface of the canvas with black acrylic paint. Ensure you cover the white canvas completely. -
Paint the edges:
Don’t forget the sides of the canvas. Painting the edges black gives the artwork a professional, finished look even without a frame. -
Apply a second coat:
Allow the first layer to dry for about 20-30 minutes. If you can see canvas texture or streaks, apply a second coat of black for a deep, opaque background. -
Dry completely:
Let the black base dry fully before moving on to the gold. This prevents the colors from mixing into a muddy brown.
Pro Tip: Splatter Control
If you accidentally create a giant blob of gold while splattering, don’t panic. Let it dry, paint over it with black, and then try again.
Step 2: Creating the Milky Way
-
Mix your splatter paint:
Squeeze some gold metallic paint onto a palette or plate. Add a tiny drop of water to thin it slightly—it should be the consistency of heavy cream for good splatter. -
Load the tool:
Dip an old toothbrush or a stiff bristle brush into the thinned gold paint. Tap off any huge globs on a paper towel first. -
Test your technique:
I always recommend doing a quick test splatter on a piece of scrap paper to get a feel for how hard to flick the bristles. -
Create the dense band:
Visualize a diagonal band running across the canvas where the stars will be densest. Hold the brush closer to the canvas in this area and run your thumb over the bristles to release a concentrated spray of fine dots. -
Diffuse the edges:
Move the brush further away from the canvas and flick more gently to create a lighter dusting of stars towards the outer corners, leaving some negative black space. -
Variable dot sizes:
For variety, you can dip the handle of a paintbrush into the gold paint and dot a few larger ‘planets’ randomly within the galaxy band.
Level Up: Cosmic Depth
Mix a tiny drop of iridescent blue or purple into the black base coat in the center diagonal for a subtle, deep-space color shift.
Step 3: Adding the Stars
-
Select your star tool:
Switch to your fine-tip gold paint marker or a very small detail brush with un-thinned gold paint. -
Draw primary stars:
Identify 5-7 spots within your splatter band to place your largest ‘hero’ stars. Draw a simple cross shape first, making the vertical line slightly longer. -
Refine the shape:
Curving the lines of the cross slightly inward creates a classic four-point twinkle star shape. Fill in the center where the lines meet to make it shine brighter. -
Add secondary stars:
Scatter smaller four-point stars and tiny distinct dots throughout the composition. Try to vary their sizes and orientation slightly for a natural look. -
Edge details:
Paint a few half-stars hanging off the edges of the canvas to imply the galaxy continues beyond the frame. -
Final highlights:
Review the painting. If some splatter dots dried too dark, lightly touch them up with the marker to make them pop. -
Let it cure:
Allow the gold paint to dry completely overnight before hanging or sealing.
Hang your new masterpiece near a window to catch the light and watch your galaxy shimmer throughout the day

PENCIL GUIDE
Understanding Pencil Grades from H to B
From first sketch to finished drawing — learn pencil grades, line control, and shading techniques.
Explore the Full Guide
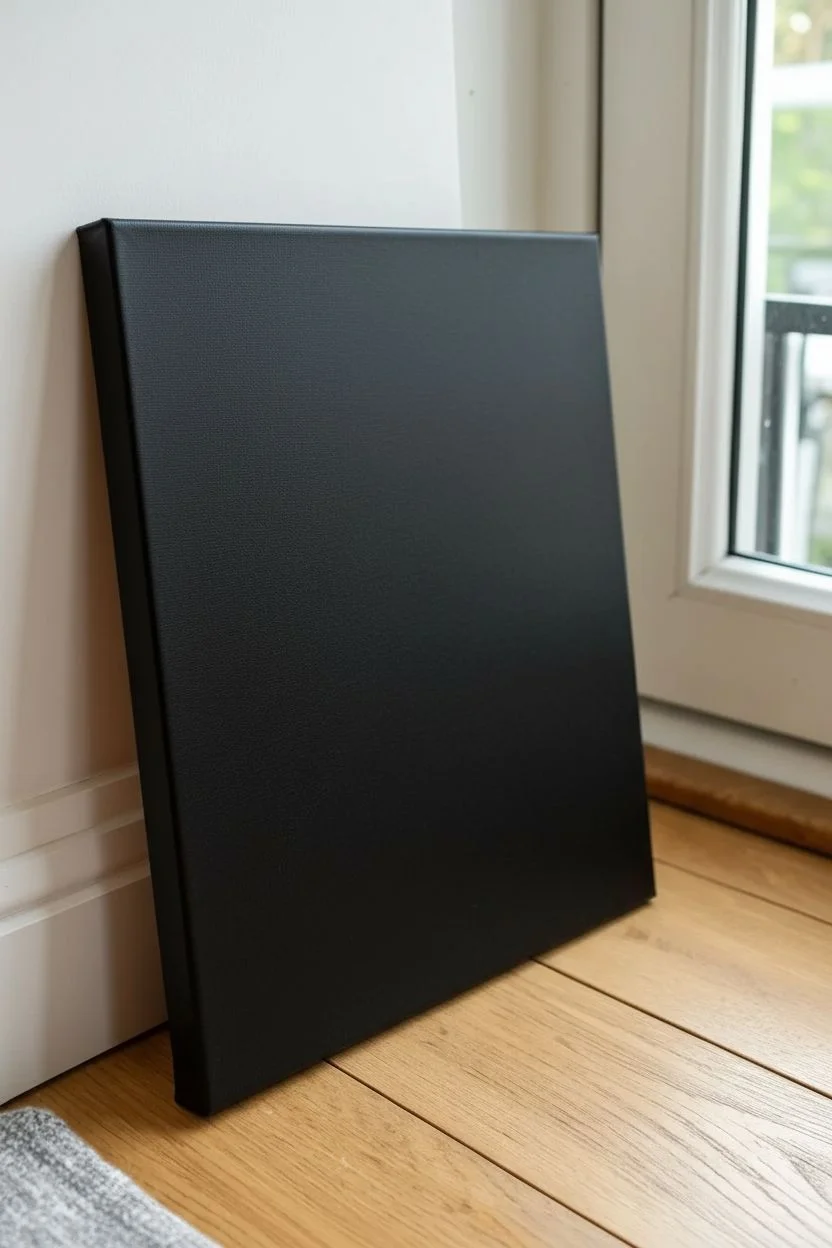
Abstract Circles With Gold Highlights
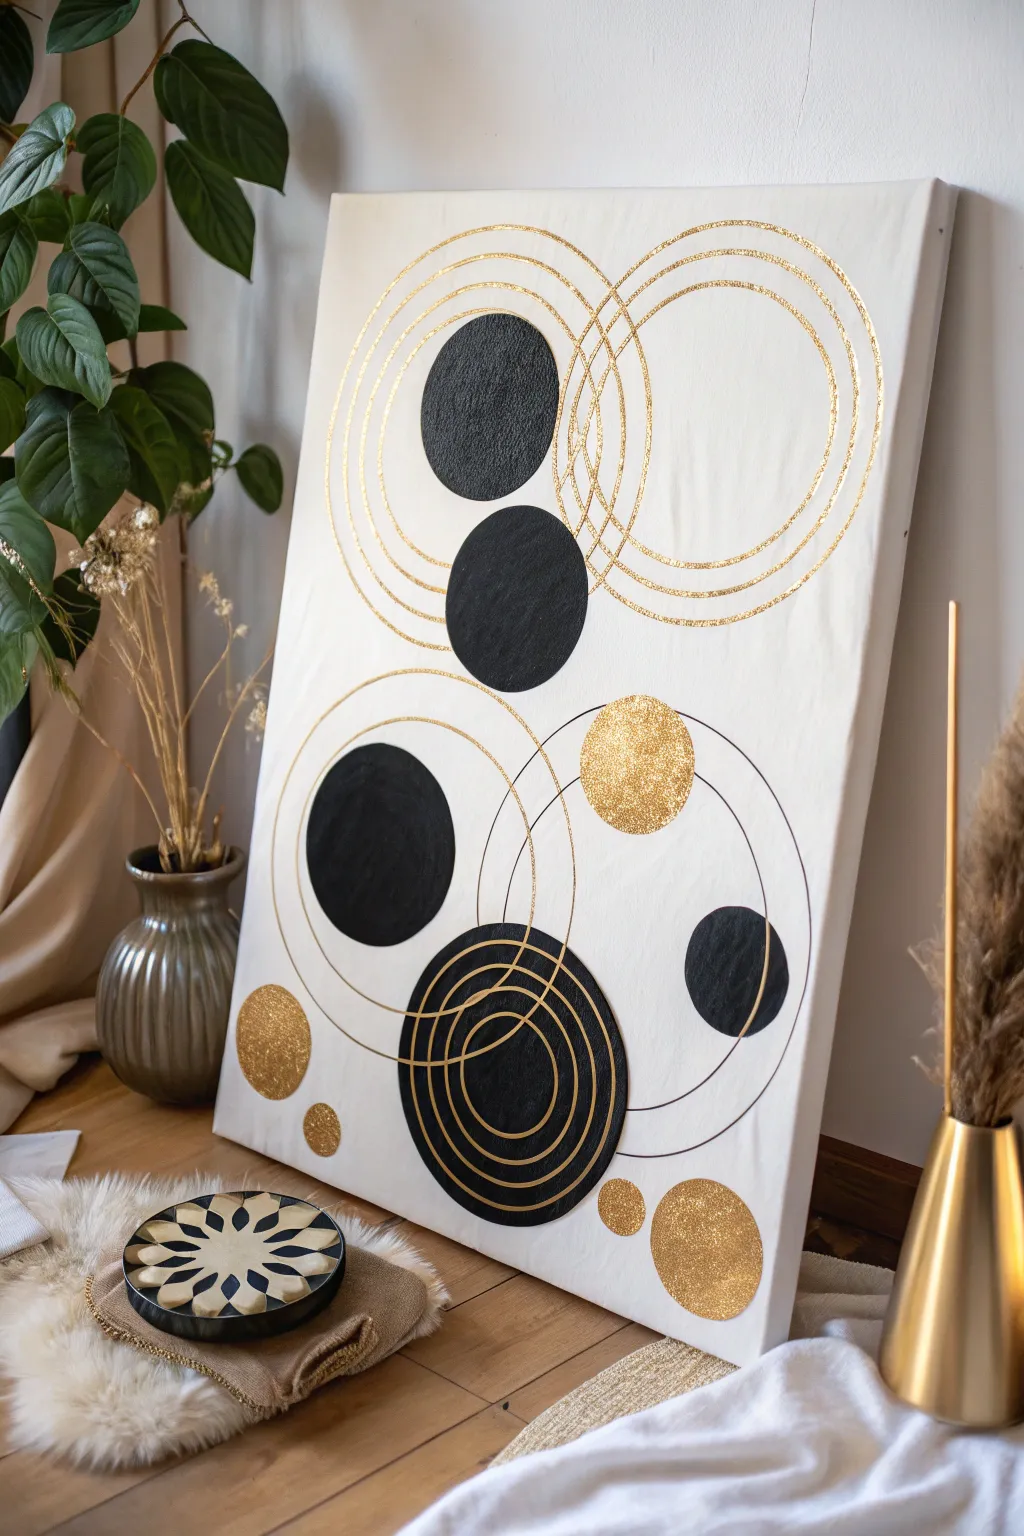
This striking abstract art piece balances the boldness of solid black circles with the delicate shimmer of gold glitter. Using a mix of overlapping elements and textures, it creates a sophisticated, modern focal point perfect for adding a touch of luxury to any room.
Step-by-Step Guide
Materials
- Large stretched canvas (white)
- Black acrylic paint
- Gold glitter (fine)
- Gold glitter finish paint or structure paste
- Gold leaf adhesive pen or precise glue
- Gold paint pen (fine tip)
- Assorted circular objects for tracing (bowls, lids, cups)
- Compass tool (optional but helpful)
- Flat paintbrushes (various sizes)
- Pencil
- Eraser
- Clear sealant or varnish splatter protection
Step 1: Planning the Composition
-
Prepare your canvas:
Start with a clean, white stretched canvas. If needed, give it a quick coat of white gesso to ensure a smooth, uniform background, though the raw canvas texture often works nicely for this style. -
Gather tracing tools:
Collect various circular household objects like bowls, cups, and jar lids. You want a good range of sizes to create visual interest. A compass is also excellent for getting precise concentric lines. -
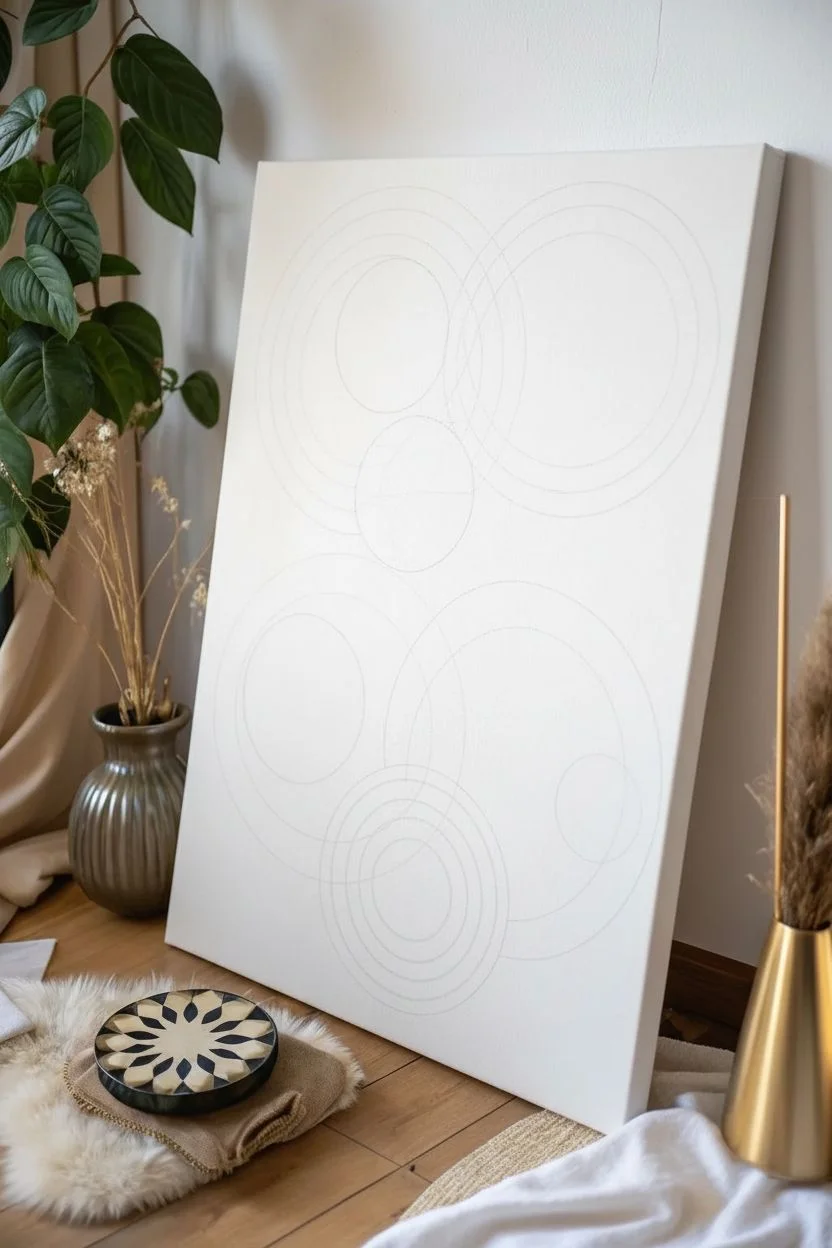
Map out the design:
Lightly trace your circles onto the canvas with a pencil. aim for an asymmetrical layout where circles cluster in two main groups—one near the top left and one near the bottom right—leaving some white space for balance. -
Design the overlaps:
Decide which circles will be solid black, which will be solid gold glitter, and which will be delicate gold outlines. Draw overlapping rings to connect the separated clusters visually.
Step 2: Painting the Solids
-
Start with black:
Using a flat brush, carefully fill in the designated solid black circles. Use smooth, curved strokes to keep the edges crisp. You may need two coats to achieve a deep, opaque matte black. -
Create the concentric focal point:
For the feature circle near the bottom, paint a large black circle first. Once dry, we will add gold rings on top, so ensure this base layer is perfectly solid and dry. -
Apply adhesive for glitter:
For the solid gold circles, apply a thin, even layer of gold leaf adhesive or craft glue inside the traced circle. -
Add the sparkle:
Generously sprinkle gold glitter over the wet adhesive. Gently press it down with the back of a spoon or a clean dry brush to set it into the glue. -
Clean up excess:
Once the glue is tacky or dry, tilt the canvas over a sheet of paper to tap off the excess loose glitter. Use a soft, dry brush to sweep away stray sparkles from the white background.
Uneven Circles?
If freehand painting is tricky, adhere masking tape or stencil film over the canvas, cut out your circles with an X-Acto knife, paint, and peel for perfect edges.
Step 3: Adding Linear Details
-
Draw the wireframe rings:
Using a gold paint pen or a fine liner brush with metallic gold paint, trace the large, open ring clusters at the top. These should look like wireframes or sketches, overlapping repeatedly. -
Vary the line weight:
To make the top cluster interesting, draw multiple concentric circles close together. Some can be slightly thicker than others to mimic the look of spun gold wire. -
Add texture to lines:
I like to go over a few of these gold lines with a tiny bit of glue and fine glitter. This adds a subtle physical texture that catches the light differently than the flat paint pen. -
Detail the black circle:
Return to that large black circle at the bottom. Using your gold paint pen or a compass loaded with gold paint, draw crisp concentric rings directly over the black paint. -
Connect the elements:
Draw thin, black linear circles that intersect with the gold glitter circle in the middle section. This helps integrate the different textures so they don’t look like isolated stickers.
Add Dimension
Mix fine sand or molding paste into your black acrylic paint before applying it. This creates a gritty, stone-like texture that contrasts beautifully with smoothness.
Step 4: Finishing Touches
-
Inspect the edges:
Check the perimeter of your solid circles. If your hand wobbled, use a small brush with white paint to touch up the background and sharpen the curves. -
Erase guidelines:
Gently erase any visible pencil marks that weren’t covered by paint or glitter. Be very careful near the glitter sections so you don’t smudge graphite into the sparkle. -
Seal the glitter:
To prevent glitter from shedding over time, spray a clear fixative or acrylic sealer over the glittered areas. Do this in light bursts to avoid dissolving the glue. -
Final drying:
Let the entire piece dry flat for at least 24 hours to ensure all layers, especially the thick layers of glitter glue, are completely hardened before hanging.
Hang your luminous artwork in a well-lit spot to watch the gold elements shift and sparkle throughout the day
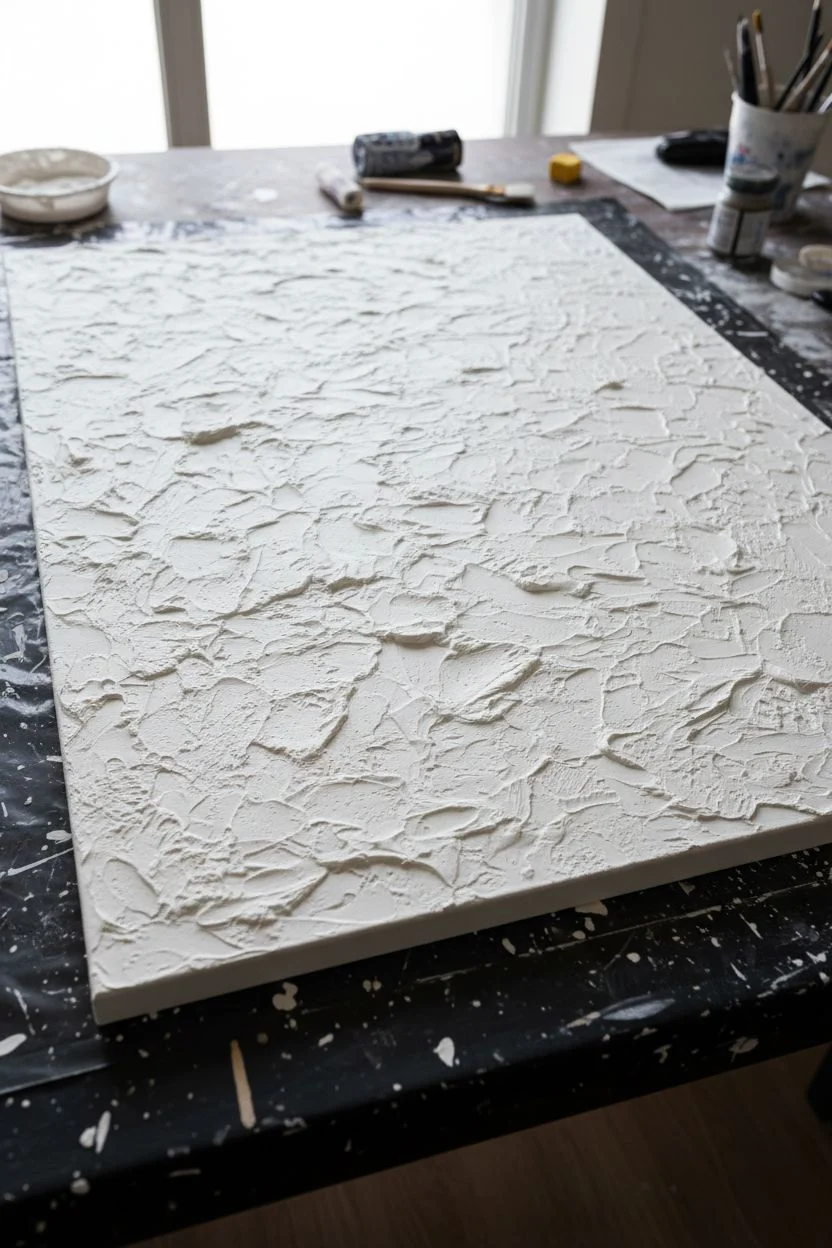
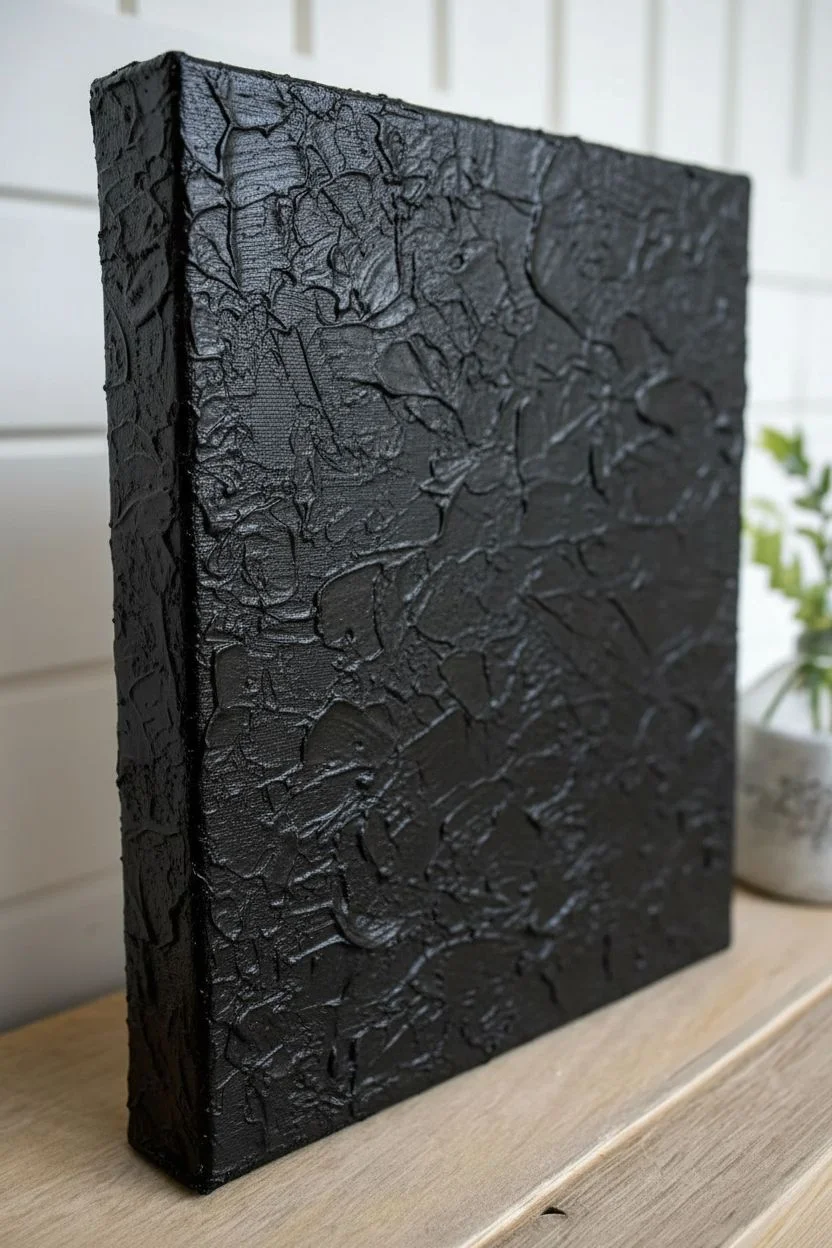
Textured Black With Gold Dry Brush Glow
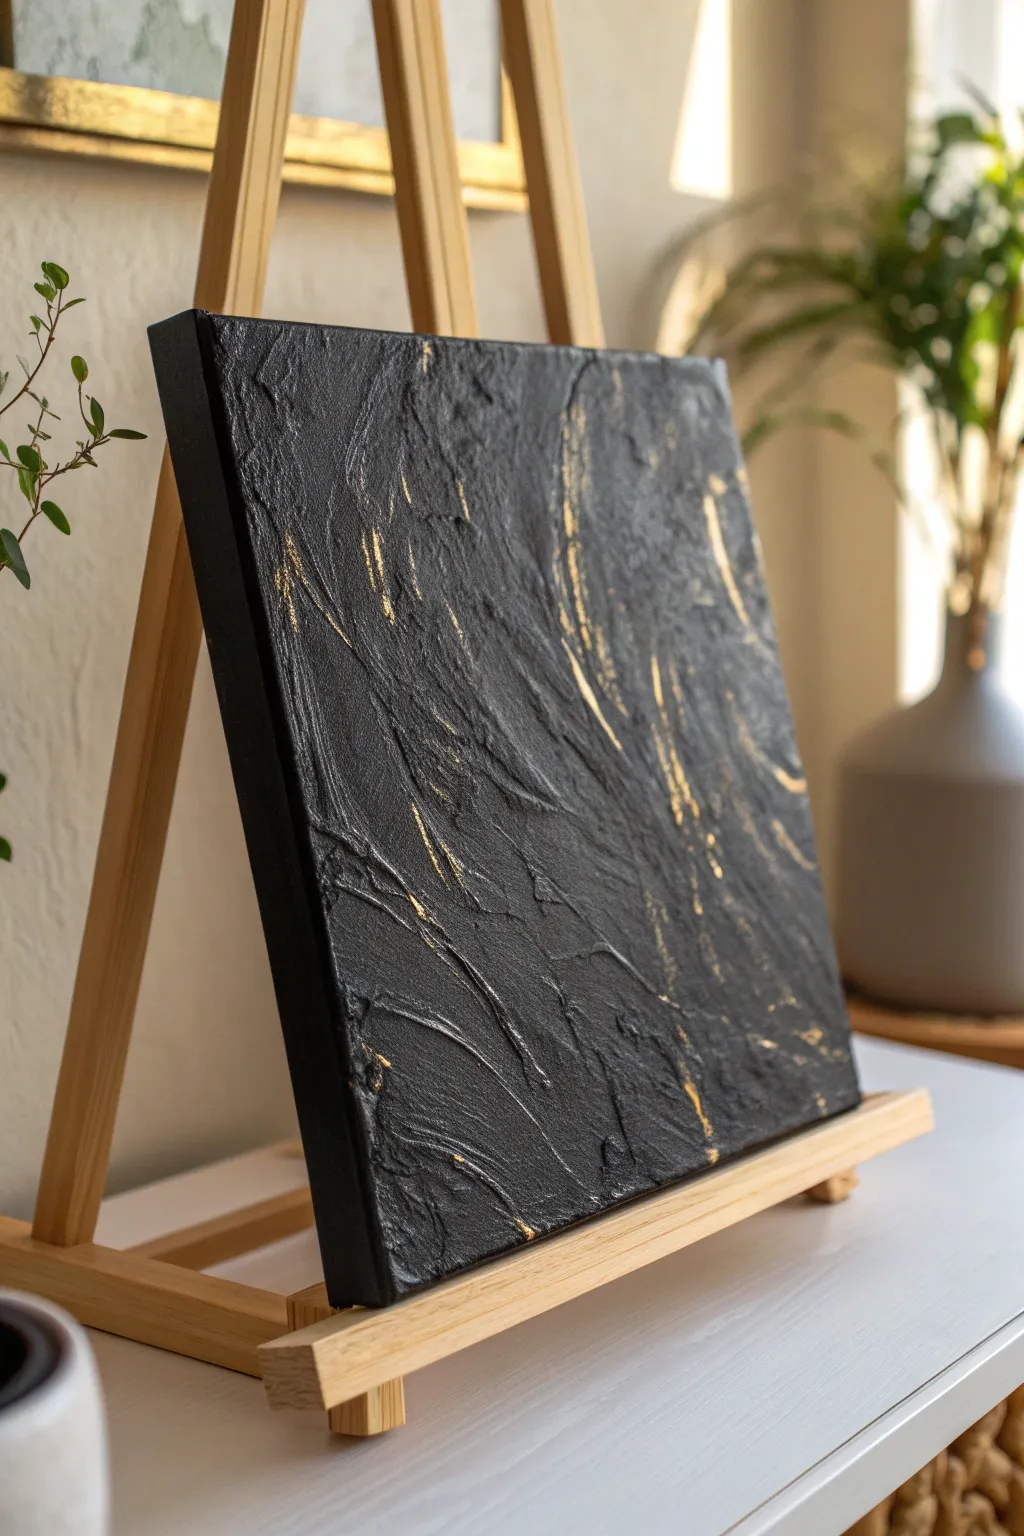
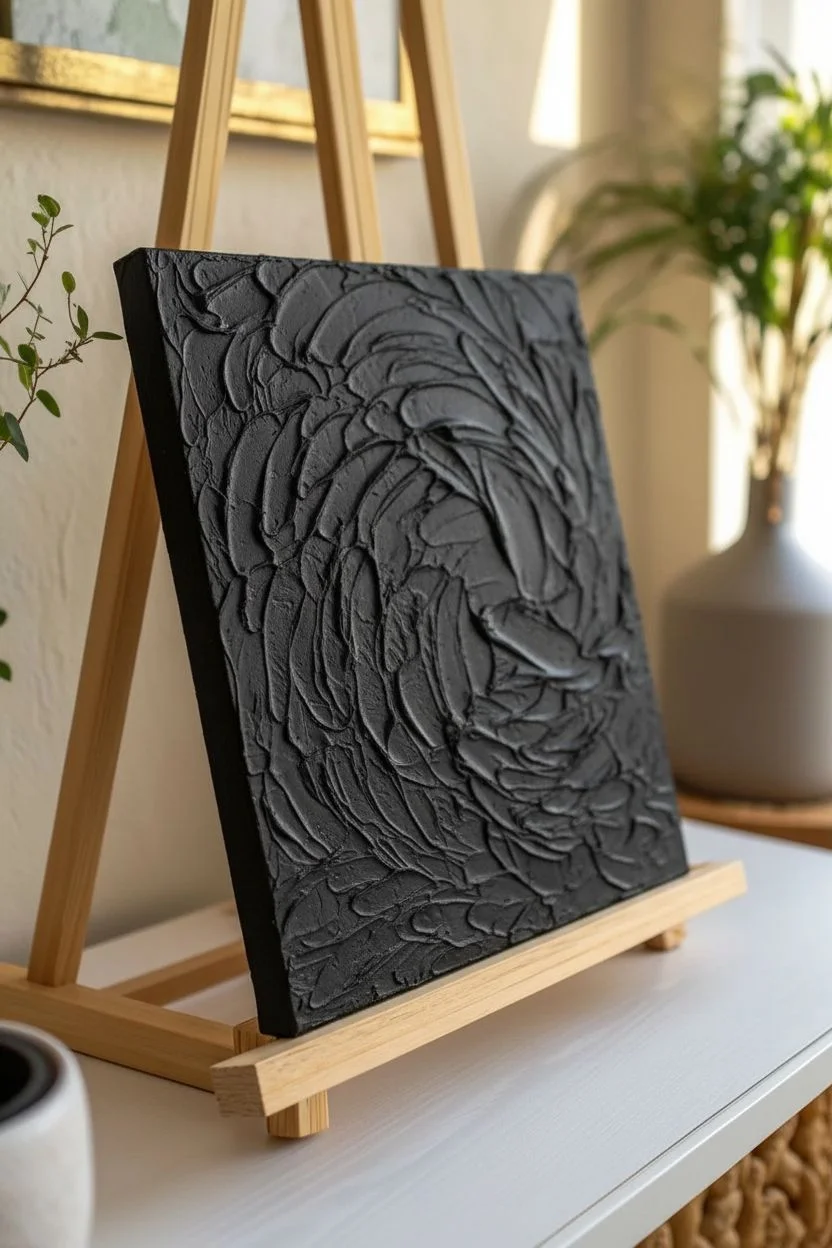
This striking abstract piece relies on the interplay between deep, light-absorbing matte black and the luxurious shimmer of gold leaf or paint. By building up a heavy texture base first, you create a landscape of peaks and valleys that catches the light in dramatic ways.
Detailed Instructions
Materials
- Square stretched canvas (e.g., 12×12 or 16×16 inches)
- Black gesso or black acrylic paint
- Texture paste (modeling paste or heavy structure gel)
- Palette knife (trowel shape is ideal)
- Metallic gold acrylic paint (heavy body preferred)
- Dry stiff-bristled brush or fan brush
- Matte varnish spray (optional)
Step 1: Base Texture
-
Prepare the canvas:
If your canvas is white, you can either prime it with a coat of black gesso first or rely on mixing your texture paste with black paint. Priming it black first ensures no white specks show through later. -
Mix the medium:
Scoop a generous amount of texture paste onto a palette or paper plate. Mix in black acrylic paint until the paste is a uniform, dark grey or black color. Mixing it now saves painting tricky crevices later. -
Apply the bulk:
Using your palette knife, spread the black texture mixture onto the canvas. Don’t worry about being neat; you want a thick layer, about 1/8 to 1/4 inch deep in places. -
Create the movement:
Use the edge and flat side of the palette knife to carve into the wet paste. Create sweeping, vertical, and diagonal motions. Imagine you are sculpting rock formations or waves. -
Add variety:
Twist the knife occasionally to create swirling ridges. Leave some areas smoother and others rough and jagged to create visual interest. -
Refine the edges:
Ensure the texture wraps slightly around the sides of the canvas for a finished look, or simply smooth the edges down so they don’t look messy. -
Let it cure:
This is the patience step. A thick layer of texture paste needs significant drying time. Leave it flat to dry overnight, or for at least 24 hours, until it is hard to the touch and no longer cool.
Enhance the ridges
Use a stiffer paste or add sand to your mix for grittier peaks. Higher peaks catch more gold, increasing the drama.
Step 2: Painting & Dry Brushing
-
Solidify the black:
Once dry, the colored paste might look a bit dull or grey. Paint the entire surface with a coat of high-quality matte black acrylic paint. -
Cover all angles:
Use a soft brush to get the black paint into every single crevice, pit, and valley of your texture. No white or grey should be visible. -
Dry the base coat:
Allow the black paint layer to dry completely. A hair dryer can speed this up, but ensure it is bone dry before moving to the gold step. -
Prepare the gold:
Squeeze a very small amount of metallic gold paint onto a paper towel or dry palette. You need much less than you think. -
Load the dry brush:
Dip just the tips of a stiff, dry bristle brush into the gold paint. I prefer to dab it repeatedly on a paper towel until almost no paint comes off. -
The dry brush technique:
Gently drag the brush across the raised ridges of the texture. Do not press down into the valleys. The goal is to catch only the highest points. -
Build slowly:
Apply the gold in layers. It’s easier to add more sheen than to remove a heavy blob. Focus the gold on the most prominent ridges to enhance the 3D effect. -
Highlight specific flows:
Follow the ‘movement’ you created with the knife. If your texture swipes up and to the right, brush your gold in that same direction to accentuate the flow.
Gilding alternative
Swap gold paint for gold leaf adhesive and foil on just the highest ridges for an intense, mirror-like shine.
Step 3: Finishing Touches
-
Assess the contrast:
Step back and look at the piece from a distance. If the gold looks too patchy, blend it out slightly with a barely-there layer connects the highlights. -
Clean up:
If you accidentally got gold in a deep valley where it should be black, touch it up with a small detail brush and black paint. -
Seal the work:
To protect the texture and keep the black looking deep and velvety, spray the entire piece with a matte varnish. Avoid glossy varnish, as it will compete with the metallic shine.
Display your textured masterpiece in a spot where natural light will dance across the golden ridges throughout the day


Kintsugi-Inspired Cracks in Gold
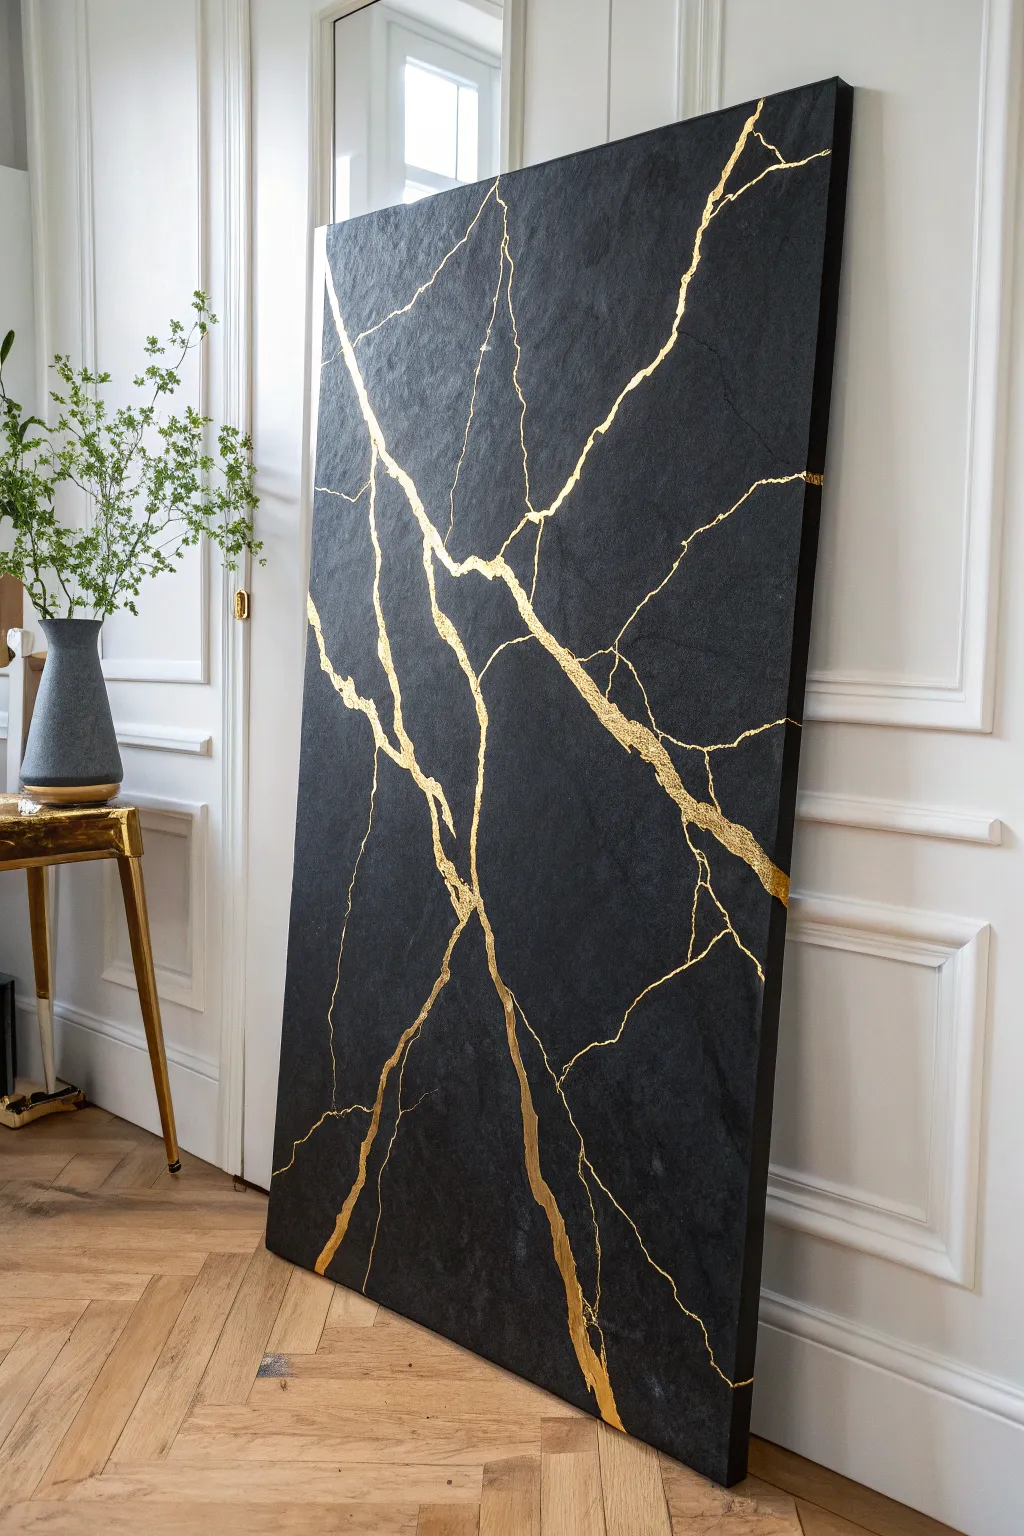
Embrace the beauty of imperfection with this striking artwork inspired by the Japanese art of Kintsugi. This project transforms a simple canvas into a faux-stone masterpiece featuring dramatic, jagged gold veins that celebrate brokenness as a form of art.
Step-by-Step Tutorial
Materials
- Large rectangular stretched canvas (or wood panel)
- Texture paste or modeling paste
- Palette knife (boker blade shape works well)
- Matte black acrylic paint
- Gold leaf sheets
- Gold leaf adhesive size (water-based)
- Soft synthetic brushes (for applying size and brushing away leaf)
- Small round detail brush
- Matte varnish or sealant spray
- Pencil or white charcoal pencil
Step 1: Building the Stone Texture
-
Prepare your surface:
Lay your large canvas flat on a protected work surface. Ensure it is clean of dust. If you are using a raw wood panel, give it a quick coat of gesso first to seal it. -
Apply texture paste:
Scoop out a generous amount of texture paste onto the canvas. Using a palette knife, spread it across the entire surface. -
Create stone-like movement:
Don’t smooth the paste perfectly. Instead, use cross-hatching motions and random swipes with the palette knife to create ridges and valleys that mimic the natural roughness of slate or stone. I like to leave some areas slightly thicker for visual interest. -
Let it cure:
Allow the texture paste to dry completely. This is crucial—if the center is wet, it will crack unintentionally later. Depending on thickness, this could take 12-24 hours.
Pro Tip: Jagged Edges
When painting the adhesive size, twist your brush slightly as you pull it. This creates irregular, organic edges rather than smooth painted lines, making the ‘cracks’ look more realistic.
Step 2: The Dark Foundation
-
Base coat black:
Once the texture is rock hard, load a large brush with matte black acrylic paint. Cover the entire canvas, working the paint into every crevice of the texture paste. -
Check for white spots:
Look at the canvas from different angles. Texture paste loves to hide white spots in deep grooves. Dab extra paint into any remaining white areas. -
Apply a second coat:
For the deepest, richest black that resembles obsidian or slate, apply a second coat of matte black once the first is dry. Let this dry fully before moving on.
Step 3: Designing the Cracks
-
Sketch the veins:
Using a white charcoal pencil or very light pencil pressure, lightly sketch out your ‘cracks.’ Aim for a lightning bolt pattern—jagged, branching lines that start from one edge and fork outwards across the canvas. -
Vary the line width:
Nature isn’t uniform. Make your sketch include some main arteries that are thick and bold, branching off into hairline fractures that are very thin. -
Apply gold size:
Using a small round brush, paint the gold leaf adhesive (size) carefully inside the lines you just sketched. Be precise here—the gold will stick exactly where you place this glue. -
Wait for tackiness:
Allow the adhesive size to dry until it turns clear but remains sticky to the touch. This usually takes 15-30 minutes depending on the brand.
Level Up: 3D Cracks
Before painting black, carve actual shallow channels into your dried texture paste with a pottery tool. Then apply the gold inside these carved grooves for true physical depth.
Step 4: Applying the Gold
-
Lay the gold leaf:
Gently pick up a sheet of gold leaf and lay it over a section of the sticky adhesive. Use the backing paper or a soft dry brush to press it down gently. -
Cover all adhesive:
Continue applying sheets until every bit of your adhesive design is covered in gold. It will look messy at this stage, with lots of excess leaf hanging off. -
Buff away excess:
Take a clean, dry, soft brush and vigorously rub over the gold areas in circular motions. The gold that isn’t on glue will flake away, revealing crisp, sharp edges. -
Clean up details:
If you missed spots, add a tiny dot of size, wait, and re-apply a scrap of gold leaf. If paint chipped, touch it up with a small brush and black paint.
Step 5: Finishing Touches
-
Seal the gold:
Gold leaf can tarnish over time. Apply a thin coat of varnish specifically made for metal leaf over just the gold areas, or use a spray varnish over the whole piece. -
Final matte spray:
To permit the gold to shine against a truly dead-flat background, give the black areas (or the whole piece if using compatible sprays) a coat of matte sealant to knock back any acrylic sheen.
Now you have a stunning, modern statement piece that proves there is elegance in the broken and repaired
Black and Gold Geometric Blocks
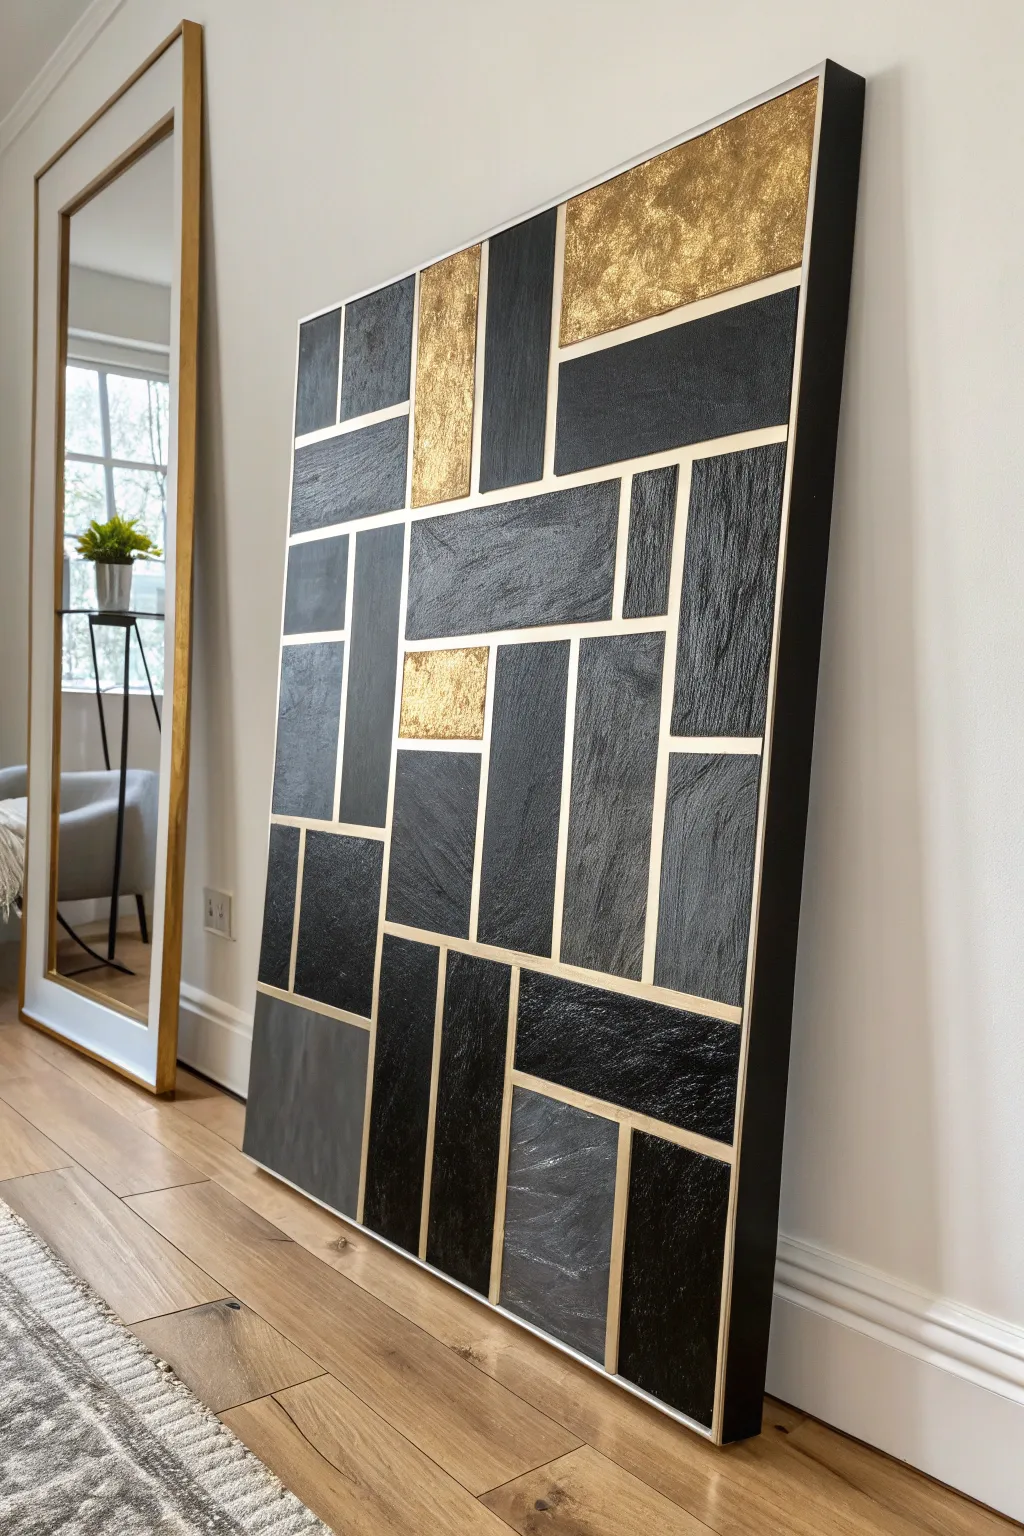
This striking piece combines industrial texture with opulent metallics, featuring raised rectangular blocks in shades of slate, charcoal, and shimmering gold. The crisp gold lines acting as grout create a sophisticated stained-glass effect that instantly modernizes any space.
Step-by-Step Tutorial
Materials
- Large canvas (e.g., 24×36 inches or larger)
- Modeling paste or heavy structure gel
- Palette knives (various sizes)
- Painter’s tape (1/4 inch width is ideal)
- Acrylic paint: Mars Black, Payne’s Gray, Titanium White
- Gold leaf sheets
- Gold leaf adhesive (size)
- Gold metallic acrylic paint
- Soft synthetic brushes
- Ruler or T-square
- Pencil
- Sealer or varnish (gloss or satin)
Step 1: Design & Structure
-
Prime the canvas:
Start by giving your canvas a solid base coat. Since the ‘grout’ lines are gold, paint the entire canvas with two coats of gold metallic acrylic paint. Let this dry completely—I usually wait overnight to ensure the tape won’t peel it up later. -
Map the grid:
Using a pencil and a ruler or T-square, sketch out your geometric block pattern directly onto the gold surface. Aim for a mix of vertical and horizontal rectangles of varying sizes to keep the composition dynamic. -
Mask the lines:
Apply your 1/4 inch painter’s tape over all your pencil lines. These taped areas will preserve the gold base coat and become the crisp dividing lines between your textured blocks. -
Seal the tape edges:
To prevent the dark paint or texture paste from bleeding under the tape, brush a thin layer of the gold paint over the tape edges. This creates a perfect seal.
Tape Removal Trick
Don’t wait until the modeling paste is bone dry to remove tape! It can chip. Remove it when the paste is ‘leather hard’—dry to the touch but still slightly flexible underneath.
Step 2: Building Texture
-
Mix the slate colors:
Prepare three different shades for your black blocks: pure Mars Black, a dark charcoal (Black mixed with a touch of White), and a deep slate (Payne’s Gray mixed with Black). Diversity in tone adds visual depth. -
Create texture paste:
Mix your acrylic colors individually with modeling paste. A ratio of about 70% paste to 30% paint works well to maintain thick, sculptable body without diluting the color too much. -
Apply the dark blocks:
Using a palette knife, frost the rectangular spaces with your tinted modeling pastes. Spread the mixture like icing, leaving the surface rough and textured rather than perfectly smooth. Vary which color goes where, but leave about three or four blocks empty for the gold leaf accents. -
Create slate effects:
For the grey/slate blocks, try essentially ‘buttering’ the surface with the palette knife in a single vertical direction. This mimics the grain of natural slate stone.
Level Up: Stone Effects
Sprinkle a tiny bit of fine sand into your black modeling paste mixture. This gritty texture creates an incredibly realistic faux-asphalt or volcanic stone appearance.
Step 3: Gilding & Finishing
-
Prep gold sections:
For the empty blocks intended for gold leaf, apply a smooth layer of plain modeling paste first to build up the height so it matches the surrounding black blocks. Let it dry completely. -
Apply adhesive:
Once the plain paste is dry, brush a thin, even layer of gold leaf adhesive (often called size) onto these specific raised blocks. Wait for it to become tacky (usually 15-30 minutes). -
Leafing process:
Gently lay the gold leaf sheets over the tacky adhesive. Use a soft, dry brush to press the leaf into the texture of the modeling paste, ensuring it adheres to every crevice. -
Burnish the gold:
Brush away loose flakes of gold leaf using a soft brush. Gentle circular motions will help polish (burnish) the gold for maximum shine. -
The reveal:
This is the most satisfying part. carefully slowly peel away the painter’s tape. Pull at a 45-degree angle while the dark texture paste is firm but not fully cured rock-hard (usually 1-2 hours after application) for the cleanest lines. -
Touch-ups:
If any paint bled under the tape, use a small detail brush and your gold metallic paint to tidy up the grid lines. -
Protective coat:
Allow the painting to cure for several days. Once fully hardened, apply a spray varnish to seal the textures and prevent the gold leaf from tarnishing over time.
Hang your finished masterpiece vertically or horizontally to add instant structural elegance to your wall
Golden Wave Lines Across Black
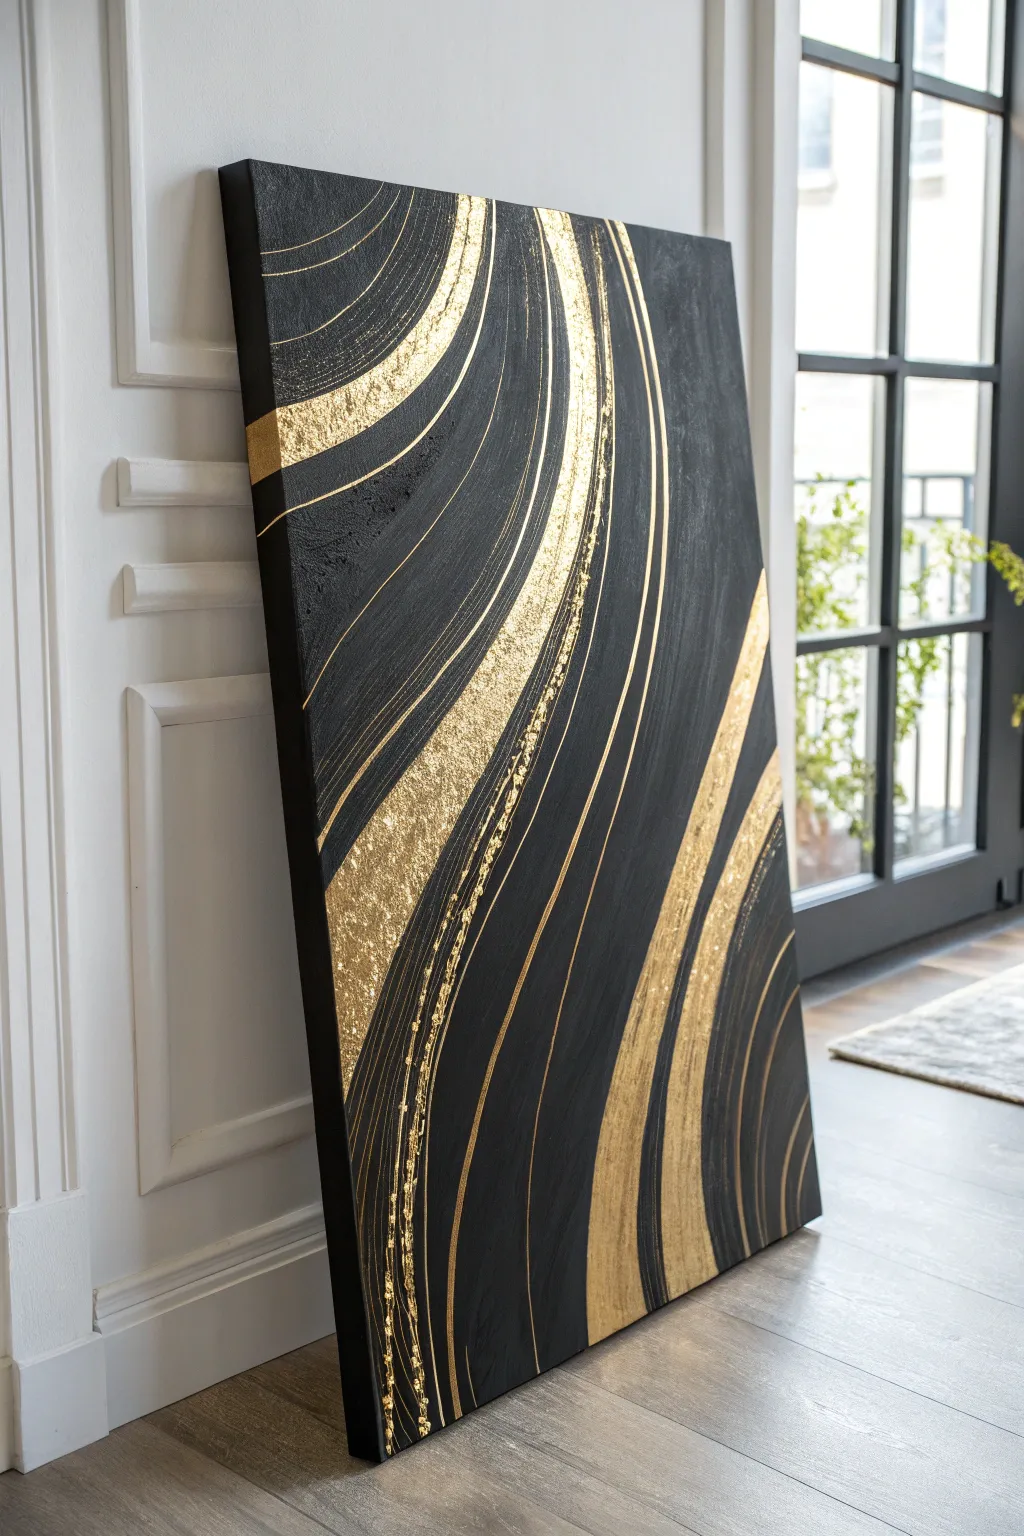
This striking abstract piece combines the profound depth of matte black with the luxury of gold leaf to create a sense of elegant motion. The high-contrast design mimics the organic flow of golden waves cutting through darkness, making it a sophisticated statement piece for modern interiors.
Detailed Instructions
Materials
- Large rectangular canvas (gallery wrapped)
- Black gesso or matte black acrylic paint
- Large flat paintbrush or foam roller
- Gold leaf sheets (imitation or real)
- Gold leaf adhesive size (water-based)
- Gold acrylic paint (metallic)
- Soft gilding brush or fluffy makeup brush
- Fine liner brush
- Medium round brush
- Chalk or pastel pencil (white or grey)
- Clear sealant (varnish or spray)
Step 1: The Dark Canvas
-
Prime the Surface:
Begin by coating your canvas entirely with black gesso. Since the background needs to be deep and consistent, I find using a foam roller helps achieve a smooth, brushless finish. -
Second Coat for Depth:
Once the first layer is dry to the touch, apply a second coat of matte black acrylic paint. Ensure full coverage, especially on the sides of the gallery-wrapped canvas, as these will be visible. -
Dry Completely:
Allow the black base to cure fully for at least 2-3 hours. A completely dry surface is crucial so the gold leaf adhesive sits on top rather than mixing with the paint.
Sticky Situation?
If gold leaf rips or misses spots, just dab a tiny bit more adhesive on the bald patch, wait for tackiness, and press a scrap piece of leaf over it
Step 2: Mapping the Flow
-
Sketch the Curves:
Using a white chalk or gray pastel pencil, lightly sketch large, sweeping S-curves across the canvas. Start from the bottom corner and sweep upward to create dynamic movement. -
Vary the Width:
Designate which curves will be thick bands of gold leaf and which will be thin painted lines. The main focal bands should be wider near the bottom and taper slightly as they rise.
Level Up the Shine
Mix a tiny amount of gold glitter into your metallic acrylic paint for the painted lines. It catches the light differently than the flat leaf
Step 3: Applying the Gold Leaf
-
Apply Adhesive:
Brush the metal leaf adhesive size specifically into the areas mapped out for the thickest gold bands. Be careful to stay inside your chalk lines. -
Wait for Tac:
Let the adhesive sit until it becomes tacky. It should feel sticky but not wet to your finger; usually, this takes about 15-20 minutes depending on the brand. -
Lay the Leaf:
Gently place the gold leaf sheets over the tacky adhesive areas. Don’t worry about wrinkles or overlaps; texture adds to the visual interest here. -
Brush Down:
Use a soft, dry gilding brush to smooth the leaf down. Rub gently in circular motions to ensure it adheres to the canvas texture. -
Remove Excess:
Brush away the loose flakes of gold leaf that aren’t stuck to the adhesive. Keep these flakes; you can use the ‘dust’ for smaller detailed areas later.
Step 4: Painting and Refining
-
Paint the Secondary Lines:
Load a medium round brush with metallic gold acrylic paint. Follow your sketched guides to paint the medium-width curves that accompany the gold leaf bands. -
Create Fine Details:
Switch to a fine liner brush. With a steady hand, paint very thin, delicate gold lines running parallel to the larger waves to create a sense of speed and direction. -
Add Texture Splatter:
For the scattered, sparkly look along the edges of the main wave, dab a nearly dry brush with adhesive randomly along the curve, wait for it to dry, and press small gold leaf crumbs onto it. -
Clean Up:
Once all paint is dry, use a damp cloth to gently wipe away any visible chalk guidelines from the black background. -
Seal the Work:
To prevent the gold leaf from tarnishing over time, apply a clear varnish or sealant spray over the entire piece, or specifically over the gold areas.
Hang your artwork where natural light can catch the reflective textures and bring the composition to life
Gold Mandala Details on Deep Black
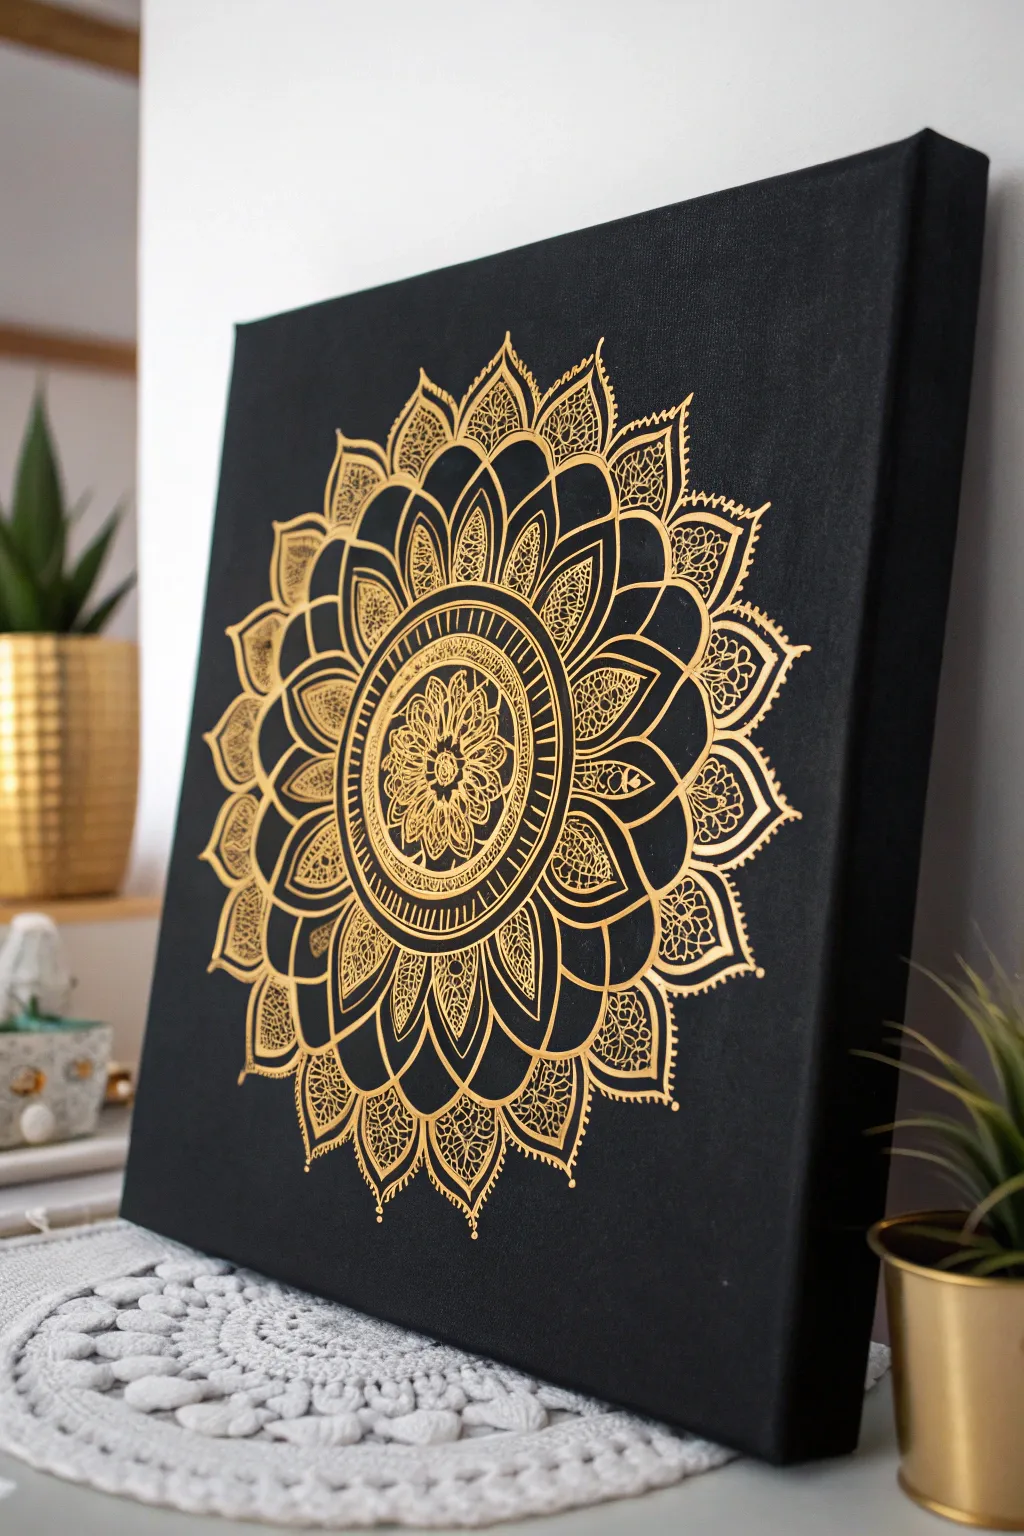
Transform a simple black canvas into a luxurious statement piece with shimmering gold lines. This project combines the meditative process of mandala creation with the striking contrast of metallic ink against a deep matte background.
Step-by-Step Guide
Materials
- Square stretched canvas (12×12 or 16×16 inches recommended)
- Black acrylic paint (matte finish)
- Wide flat paintbrush or foam brush
- Gold paint marker (fine point, roughly 0.7mm to 1mm)
- Gold paint marker (extra fine point, roughly 0.5mm)
- White chalk pencil or pastel pencil
- Compass
- Ruler
- Protractor
- Paper towel
- Spray varnish (gloss or satin finish)
Step 1: Preparation & Base Coat
-
Prime the canvas:
Begin by applying an even coat of black acrylic paint to your canvas. I prefer using a matte black because it makes the metallic gold pop intensely without competing with glossy reflections. -
Paint the edges:
Don’t forget the sides of the canvas. Ensure the black coverage wraps all the way around for a professional, finished look that doesn’t require framing. -
Apply a second coat:
Once the first layer is dry to the touch, apply a second coat of black to ensure full opacity. Hold the canvas up to a light source to check for any pinholes or thin spots. -
Let it cure:
Allow the base to dry completely. This is crucial—if the paint is slightly tacky, your compass and hands will leave marks.
Clean Lines Pro Tip
Rest your pinky finger on a dry part of the canvas while drawing. This anchors your hand, preventing shakes and accidental smudges of wet ink.
Step 2: Drafting the Grid
-
Find the center:
Using your ruler, lightly draw an X from corner to corner with the white chalk pencil. The intersection point is your exact center. -
Draw concentric circles:
Place your compass point on the center mark. Draw a series of light circles expanding outward. Create 5-7 circles of varying distances to serve as guidelines for your petal layers. -
Mark degrees:
Use your protractor to mark intervals around your largest circle. For a symmetrical 8-point or 16-point mandala like this one, marks at every 22.5 or 45 degrees work perfectly. -
Connect the lines:
Use the ruler to draw straight lines through the center connecting your degree marks. You now have a ‘spiderweb’ grid to guide your symmetry.
Step 3: Drawing the Mandala
-
Start at the core:
Shake your gold paint marker well to activate the ink. Begin in the very center circle, drawing small floral shapes or a central rosette. Keep your hand steady and rested. -
first petal layer:
Move to the next concentric ring. Draw petals connecting from the center outward to the line of the ring. Use the radial grid lines to ensure each petal peak hits the exact center of a section. -
Add inner details:
Before moving outward, fill these first large petals with intricate doodles. Small spirals, dots, or cross-hatching inside the petals add that rich texture seen in the photo. -
Create the decorative bands:
Between petal layers, draw a solid double ring using your compass (carefully!) or tracing the chalk line. Fill the space between these rings with simple tick marks or zig-zags. -
Expand outward:
Continue adding layers of petals, getting larger as you move toward the canvas edge. Alternate between rounded petals and pointed, leaf-like shapes for visual interest. -
Texture with fine lines:
Switch to your extra-fine point marker for the delicate mesh-like patterns inside the larger outer petals. This contrast in line weight is the secret to making the artwork look professional. -
Refine the edges:
Go over the main outline strokes of the largest petals a second time with the standard marker. Thickening these primary lines helps define the overall shape against the busy internal patterns. -
Final outer flourishes:
Add small dots or tiny teardrops floating just off the tips of the outermost petals. This softens the transition between the design and the negative black space.
Level Up: Crystal Accents
For a glamorous 3D effect, glue tiny jet-black or gold Swarovski crystals into the very center of the mandala or at the tips of the main petals.
Step 4: Finishing Touches
-
Erase guidelines:
Wait at least an hour to ensure the gold ink is fully cured. Depending on the brand, oil-based markers can smear if rushed. Gently wipe away visible chalk lines with a slightly damp Q-tip or a soft eraser. -
Seal the work:
Take the canvas to a well-ventilated area. Apply a light, even coat of spray varnish to protect the black paint from scuffs and prevent the gold from tarnishing over time.
Now you have a stunning piece of mesmerizing art that brings warmth and elegance to any room
Triptych: Black Void With Gold Movement
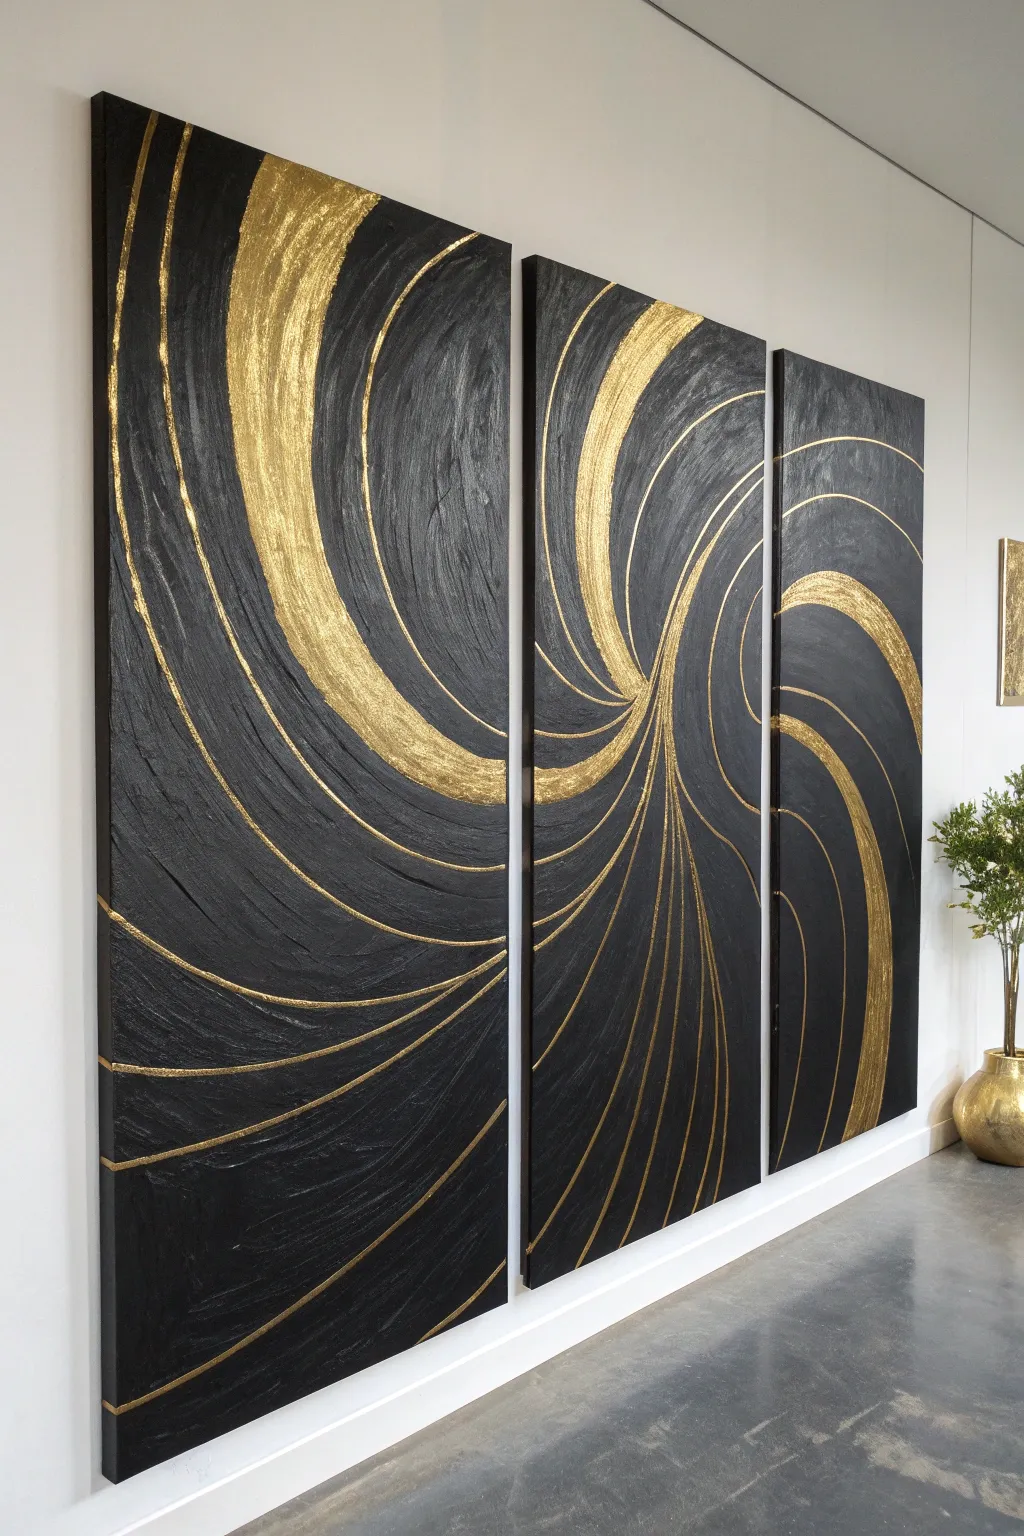
This dramatic three-panel artwork uses heavy texture and metallic contrast to create a sense of swirling motion across a deep black void. By combining thick impasto techniques with carefully applied gold leaf or gilding paint, you can turn blank canvases into a sophisticated statement piece.
Detailed Instructions
Materials
- 3 large vertical canvases (gallery wrapped)
- Heavy body black acrylic paint
- Modeling paste or texture gel (black or white)
- Large palette knife or trowel
- Wide flat paintbrush (2-3 inches)
- Fine detail textured brush or fan brush
- Gold leaf sheets and sizing (adhesive) OR high-pigment liquid gold leaf
- Painter’s tape or chalk (for mapping lines)
- Matte or satin varnish (spray preferred)
- Drop cloth
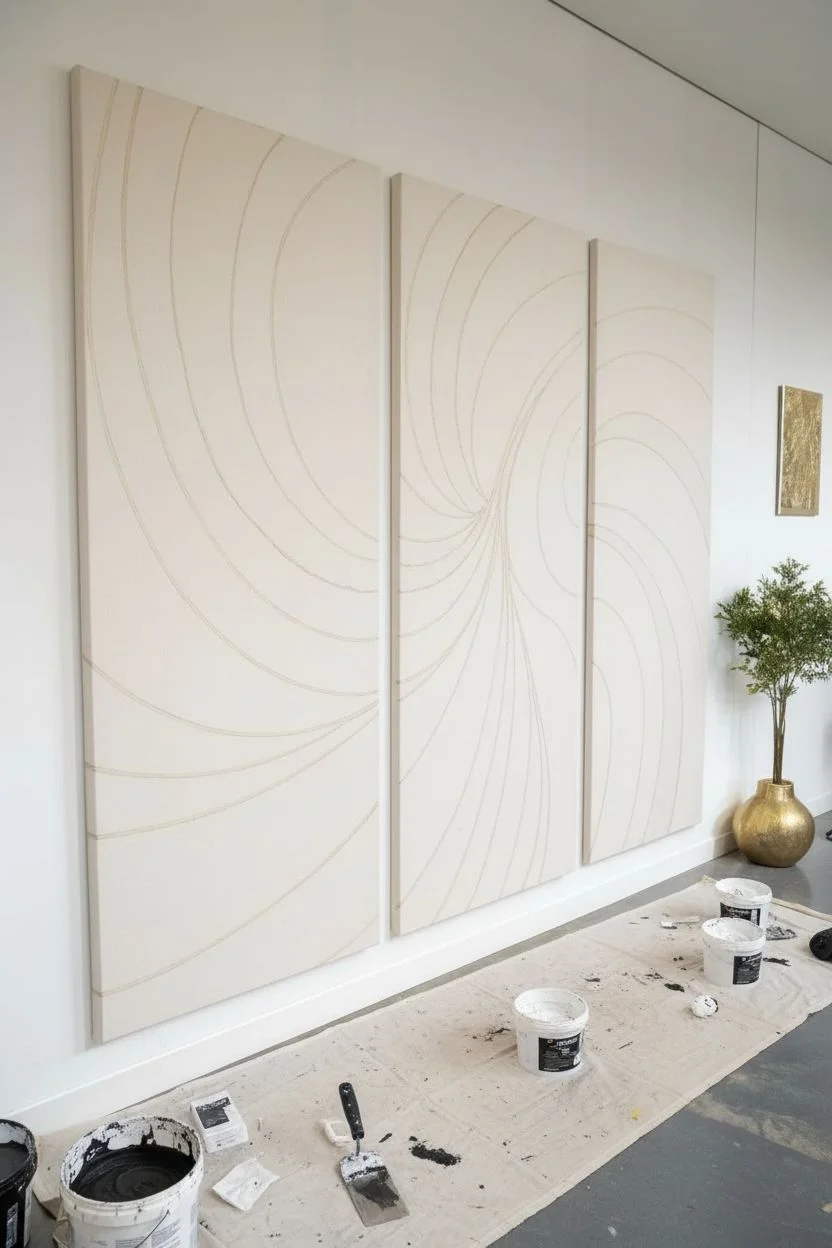
Step 1: Preparation & Mapping
-
Arrange the workspace:
Lay down your drop cloth. Since this is a triptych, it’s crucial to work on all three canvases side-by-side on the floor or a large table. Leave a small gap (about 1 inch) between them to simulate how they will hang on the wall. -
Visualizing the flow:
Study the sweeping curve of the gold design. It starts high on the left panel, dips down and concentrates in the middle panel, and swirls outward on the right panel. -
Sketching the guide:
Using chalk or a very light pencil, loosely map out the primary flow lines of the vortex across all three canvases. This ensures the design connects fluidly from one panel to the next.
Pro Tip: Dry Brushing
For the most organic look, keep your brush almost dry when applying liquid gold. Build up layers slowly rather than applying one thick glob, which can look flat.
Step 2: Building the Black Texture
-
Mixing the base:
If your modeling paste is white, mix it with black acrylic paint in a bucket or large tray until you have a thick, dark grey or black paste. I prefer mixing it thoroughly so no white streaks show through later. -
Applying the paste:
Use a large palette knife or trowel to spread the paste over the entire surface of all three canvases. Don’t worry about smoothness; texture is the goal here. -
Creating the directional grain:
While the paste is wet, drag your palette knife or a coarse stiff-bristled brush through the paste following the curves of your chalk sketch. The texture itself should mimic the swirling motion. -
Refining the ridges:
Add extra texture depth to the areas where the gold will eventually go. The gold looks best when it catches on raised ridges. -
The first dry:
Let this heavy texture layer dry completely. Depending on humidity and thickness, this could take 24-48 hours. It must be rock hard before painting.
Level Up: Texture Variety
Mix a small amount of coarse sand into your black texture paste before applying. This creates a grittier surface that catches the light differently than smooth paste.
Step 3: The Deep Black Finish
-
Base coat painting:
Even if you used black paste, paint the entire textured surface with high-quality heavy body black acrylic. This ensures a uniform, deep sheen. -
Ensuring coverage:
Use a brush to work the paint into every crevice of the dried texture. White spots in the valleys will ruin the illusion of the void. -
Matte finish:
Let the black paint dry. If the finish is too glossy, apply a layer of matte medium or matte varnish now. A matte background makes the gold pop significantly more.
Step 4: Gilding the Movement
-
Selecting the gold path:
Identify the thickest bands of the swirl. We will start with the widest gold sections first. -
Applying size (if using leaf):
Paint the gilding adhesive (size) onto the specific ridges and curves you want highlight. Wait for it to become tacky (usually 15-20 minutes). -
Laying the gold:
If using leaf, press the sheets gently onto the tacky areas. Use a soft, dry brush to rub it into the texture, allowing it to break naturally over the peaks. -
Alternative: Liquid Gold:
If using liquid gold paint, load a flat brush sparingly. Use a dry-brush technique, dragging the brush lightly over the raised texture ridges so the black remains visible in the dips. -
Creating the thin lines:
For the delicate, sweeping pinstripes that radiate from the center swirl, use a fine liner brush with liquid gold. Maintain a steady hand and follow the existing texture grooves. -
Feathering edges:
Where the thick gold bands meet the black void, feather the edges slightly so the transition isn’t a harsh solid line, but rather fades out like stardust. -
Panel continuity check:
Step back and look at the gap between canvases. Ensure your gold lines appear to ‘jump’ across the gap logically.
Step 5: Final Touches
-
Cleanup:
If using gold leaf, take a soft brush and vigorously dust off all loose flakes. Collect them for future projects. -
Touch-ups:
Use a small brush with black paint to clean up any areas where gold may have spilled into the negative space where it doesn’t belong. -
Sealing:
Once fully cured, apply a gentle spray varnish. Be careful brushing varnish over gold leaf as it can sometimes tarnish or smear; a spray is safer. -
Hanging:
Install the canvases with precise measurements to maintain the flow of the design across the wall.
Now step back and admire the sophisticated movement you’ve captured in this stunning focal piece
Gold Stencil Motifs on Black Texture
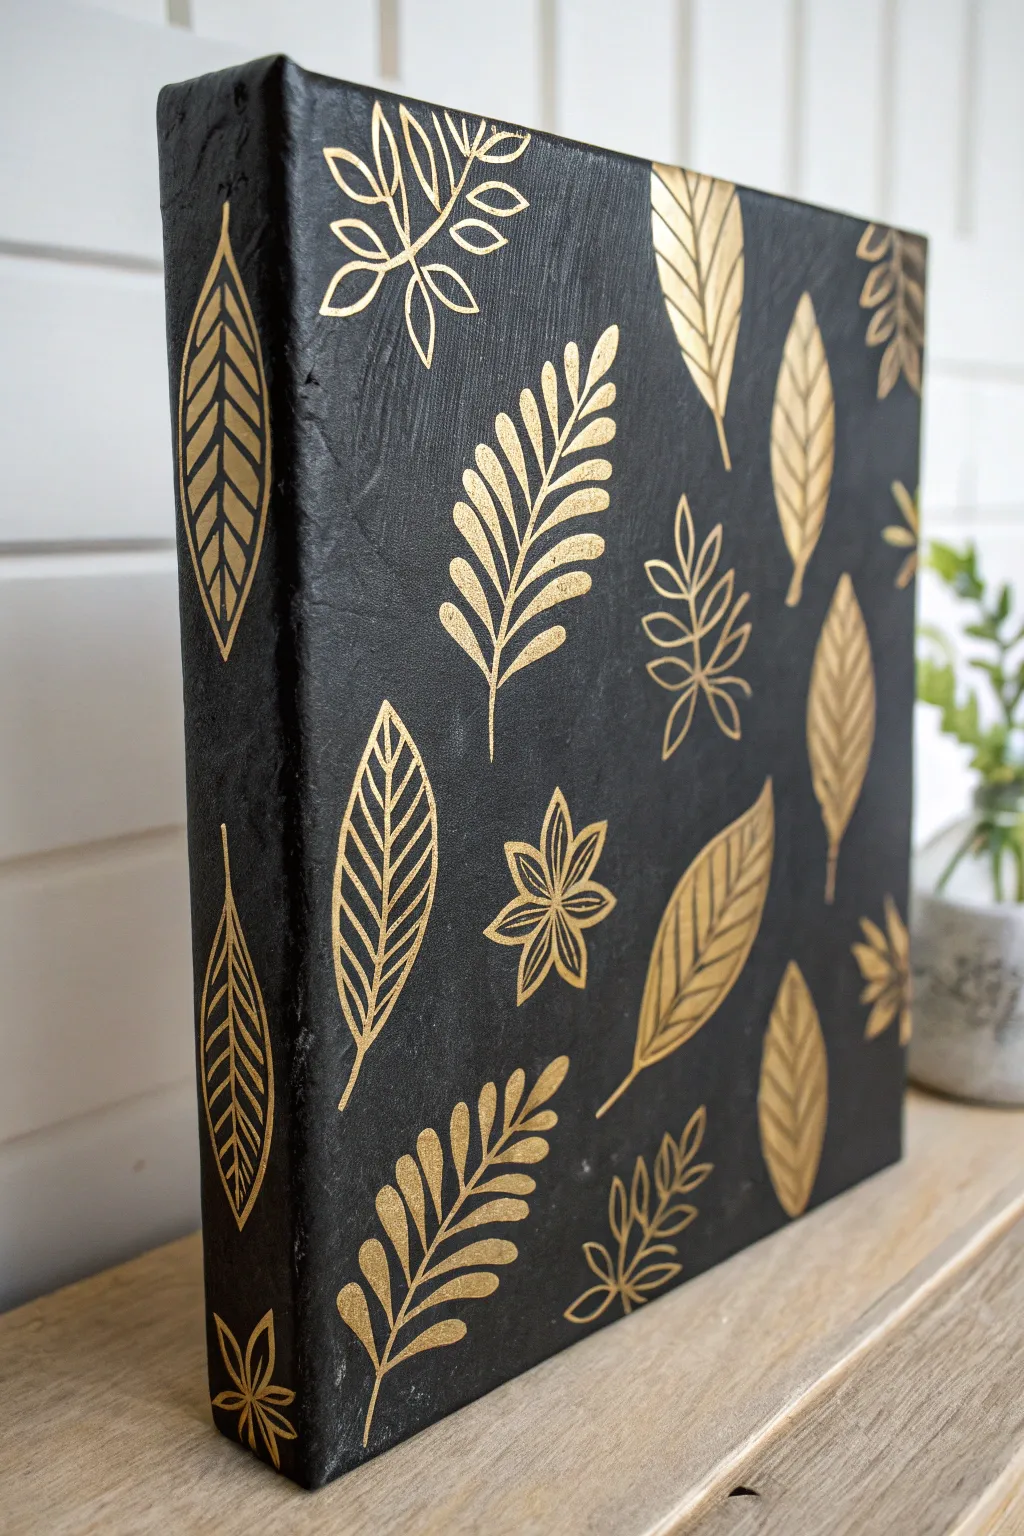
Transform a simple canvas into a striking piece of decor that balances moody elegance with shimmering warmth. This project features a textured matte black background layered with luminous gold botanical motifs, creating a sophisticated look perfect for modern interiors.
How-To Guide
Materials
- Stretched canvas (rectangular or square)
- Black acrylic paint (matte finish)
- Gold metallic acrylic paint (bright gold or brass)
- Texture paste or heavy body acrylic gel
- Wide flat paintbrush
- Stencil set (mixed leaves and botanicals)
- Stencil brush or cosmetic sponge
- Palette or paper plate
- Painters tape (optional)
- Matte spray varnish (optional)
Step 1: Preparing the Textured Base
-
Mix your texture:
Begin by creating a textured base mixture. Combine your matte black acrylic paint with a texture paste. Aim for a ratio of about 2 parts paint to 1 part paste to ensure deep color coverage but significant body. -
Apply the first coat:
Using a wide flat brush, apply this mixture to the entire canvas, including the sides. Don’t try to be too smooth here; use cross-hatch strokes (painting in ‘X’ shapes) to build up gentle ridges and brush marks. -
Check the sides:
Ensure the sides of the canvas are fully coated as they will be visible. The edges should have the same texture as the front face. -
Add extra texture:
While the paint is still wet, you can stipulate or dab the brush vertically in random spots to create more interesting surface variations that will catch the light later. -
Let it dry completely:
Allow this base layer to dry thoroughly. Because of the texture paste, this might take 2-3 hours or even overnight. It needs to be rock hard before stenciling.
Crisp Edges Tip
Use spray adhesive on the back of your stencils instead of just tape. This tight seal prevents paint from seeping into the ridges of your textured black background.
Step 2: Planning the Layout
-
Select your motifs:
Choose a variety of leaf and floral stencils. To match the image, look for ferns, oval leaves with veins, and star-shaped botanicals. -
Dry run arrangement:
If you have individual stencils, lay them on the dry canvas to visualize spacing. Aim for a scattered, organic pattern rather than rigid rows. I like to rotate the leaves in different directions to simulate falling foliage.
Add Dimension
Mix a tiny drop of copper or bronze paint into your gold for specific leaves. This subtle tonal shift adds depth and makes the metallic botanical pattern feel richer.
Step 3: Applying the Gold Motifs
-
Prepare the gold paint:
Squeeze a small amount of gold metallic paint onto your palette. It’s crucial to use very little paint to prevent bleeding under the stencil. -
Load the brush:
Dip your stencil brush or sponge into the gold, then dab it off onto a paper towel until the brush feels almost dry. -
Stencil the first leaf:
Hold your first stencil firmly against the canvas. Using an up-and-down pouncing motion (do not brush side-to-side), apply the gold paint through the design. -
Build opacity:
Apply the gold in light layers. It’s better to do two thin coats than one thick gloopy one. This keeps the edges crisp against the textured black background. -
Work on the edges:
Don’t forget the sides of the canvas! Match the placement of your frontal designs by wrapping a stencil around the corner or placing a leaf vertically on the side profile for a cohesive 3D look. -
Rotate and repeat:
Move around the canvas, switching between different leaf shapes. Rotate the stencils so the leaves point in various directions—up, down, and diagonal. -
Utilize negative space:
Leave varying amounts of black space between the gold forms. The contrast is what makes this design pop, so avoid overcrowding. -
Add small fillers:
Once big leaves are done, use smaller flower or tiny sprig stencils to fill any awkward gaps, balancing the visual weight of the piece.
Step 4: Finishing Touches
-
Inspect the edges:
Check closely for any gold smudges. If you find mistakes, you can touch them up with a small brush and your leftover black texture mix. -
Seal (Optional):
If the artwork will be handled or dusted frequently, apply a light coat of matte spray varnish to protect the surface without diminishing the gold shine.
Hang your new textured masterpiece in a well-lit area to watch the gold leaves catch the light throughout the day
Black and Gold Fluid Bloom Effects
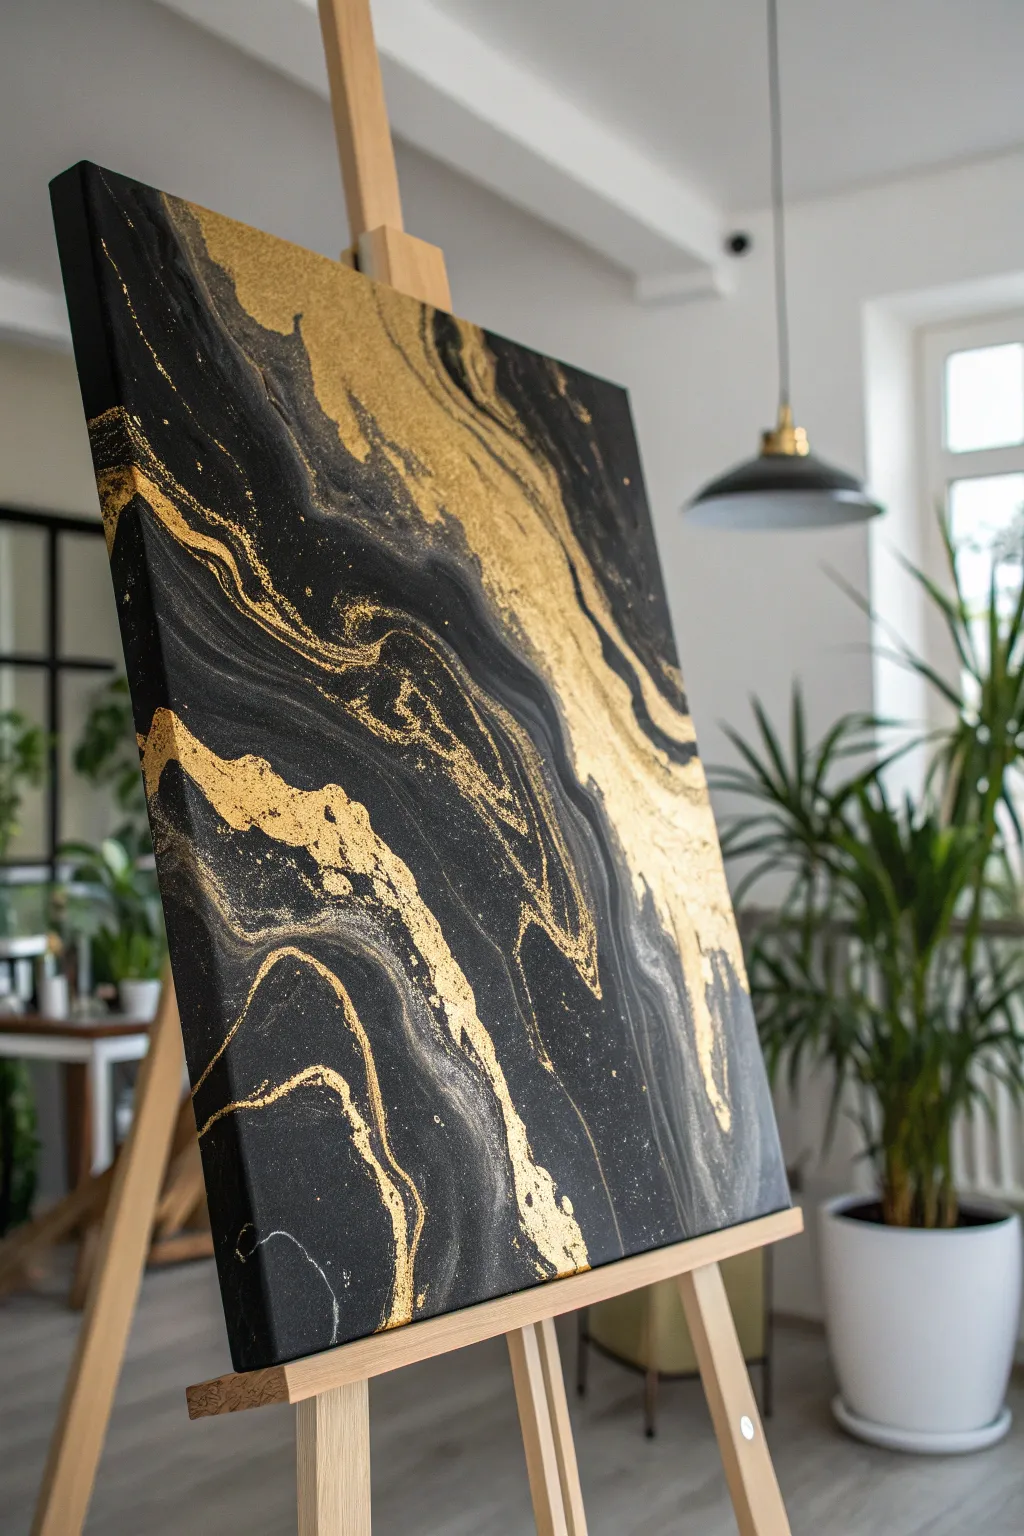

This stunning abstract painting captures the luxurious contrast between deep, velvety black and shimmering metallic gold in a mesmerizing fluid design. The technique creates organic, river-like flows that evoke the feeling of molten metal moving through dark stone, perfect for a sophisticated modern interior.
Step-by-Step Tutorial
Materials
- Large rectangular stretched canvas (approx. 24×36 inches)
- Black acrylic paint (heavy body)
- Metallic gold acrylic paint (high shine)
- Pouring medium (like Floetrol or Liquitex)
- Silicone oil (optional, for cells)
- Large plastic cups for mixing
- Wooden stir sticks
- Hairdryer or heat gun
- Palette knife or large spreader
- Drop cloth or plastic sheeting
- Gloves
- Masking tape (for canvas back)
Step 1: Preparation and Mixing
-
Prepare your workspace:
Cover your entire work surface with a drop cloth or plastic sheeting. This process can get messy, and acrylics are permanent once dry. -
Tape the canvas:
Flip your canvas over and apply masking tape to the back wooden frame and edges. This keeps the back clean and makes for a professional finish later. -
Level the surface:
Ensure your canvas is propped up on cups or cans and is completely level. If it tilts, your design will slide off before it dries. -
Mix the black base:
In a large cup, mix your black acrylic paint with pouring medium. The ratio is typically 1 part paint to 2 parts medium, but I like to aim for a consistency that resembles warm honey. -
Mix the gold accent:
In a separate cup, mix the metallic gold paint with pouring medium. You want this mixture slightly thicker than the black to help it sit on top without sinking immediately. -
Check consistency:
Lift your stir stick from the cup; the paint should flow in a continuous stream and create a small mound that disappears within a second or two.
Muddy Colors?
If your black and gold are turning grey, you are over-mixing or blowing too hard. Stop manipulating the paint immediately and add fresh streams of color on top.
Step 2: Creating the Flow
-
Apply the black base:
Pour a generous amount of the black mixture onto the canvas, covering about two-thirds of the surface. Use a palette knife or spreader to push it nearly to the edges. -
Add the gold rivers:
Pour the gold mixture in diagonal, organic lines across the canvas. Think about creating a main ‘river’ with smaller tributaries branching off. -
Layering specifically:
Don’t cover the entire black surface; leave plenty of negative space. The high contrast is what makes this piece striking. -
The blow technique:
Using a hairdryer on the ‘cool’ and ‘low’ setting, gently push the gold paint into and over the black paint. Direct the air at a shallow angle. -
Refining the edges:
Chase the paint towards the edges of the canvas to ensure full coverage, letting some spill over the sides for a continuous look. -
Creating intricate lace:
For the feathery detailed areas, use a straw to blow smaller sections of gold paint manually. This gives you precise control over the delicate tendrils.
Step 3: Finishing Touches
-
Scanning for bubbles:
Pass a heat gun or torch quickly over the surface to pop any air bubbles trapped in the paint layers. -
Enhancing contrast:
If distinct areas have become too muddy or grey, carefully drizzle a tiny amount of fresh gold or black into the wet paint and manipulate it with the backend of a paintbrush. -
Tilt for composition:
Gently tilt the canvas very slightly in different directions to stretch the composition if the design feels too clustered. -
Check the corners:
Use your gloved finger to dab paint onto any dry corners or sides that the pour didn’t quite cover. -
Initial drying:
Leave the painting to dry undisturbed in a dust-free room for at least 24-48 hours. Do not move it while it is wet. -
Varnishing:
Once fully cured (wait 2-3 weeks for safety), apply a high-gloss varnish to protect the surface and make the metallic gold truly pop.
Gold Sheen Tip
Mix a tiny pinch of mica powder into your gold paint mixture. This increases the reflective quality dramatically compared to tube paint alone.
Hang this elegant piece in a well-lit area where the changing light will catch the shimmering gold rivers throughout the day
Gold Constellation Map on Matte Black
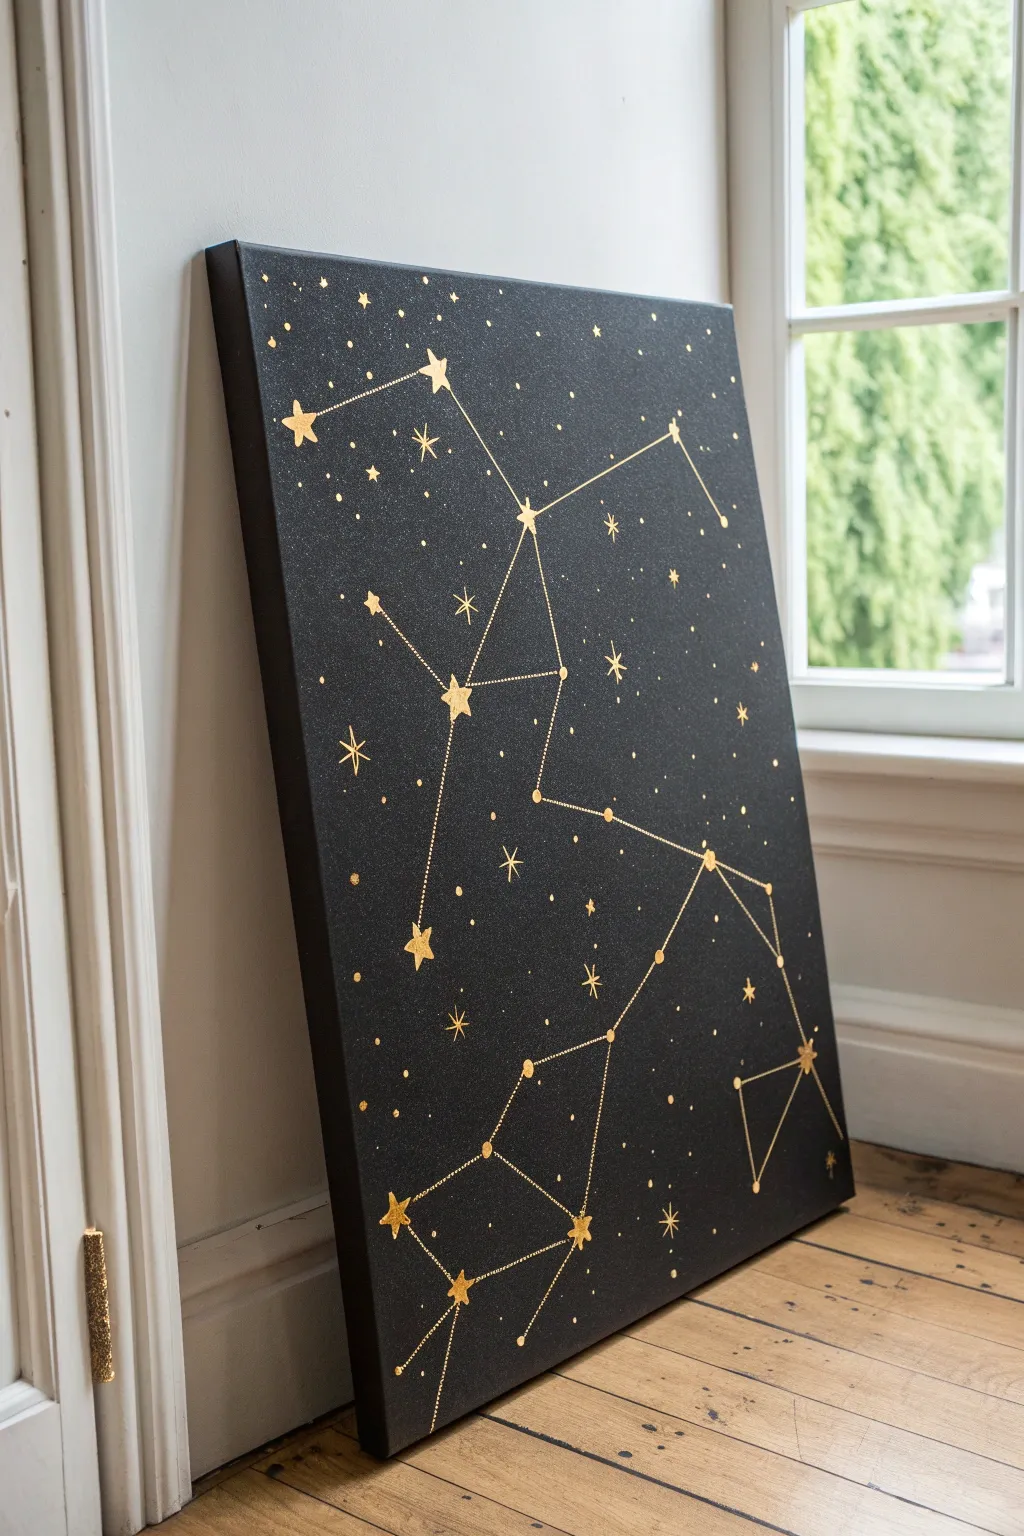
Bring the night sky indoors with this striking constellation map that pairs deep matte black with shimmering metallic gold. The contrast creates a sophisticated, modern piece of art perfect for leaning against a wall or hanging as a focal point.
Step-by-Step Guide
Materials
- Large stretched canvas (24×36 inches or similar)
- Black acrylic paint (matte finish)
- Gold leaf adhesive size
- Gold leaf sheets (imitation or real)
- Gold acrylic paint or gold paint pen (fine tip)
- Wide flat paintbrush (2-3 inch)
- Small round paintbrush (size 0 or 1)
- Ruler or straight edge
- Chalk or white charcoal pencil
- Soft bristle brush (for gold leaf removal)
- Sealer (spray varnish or clear coat)
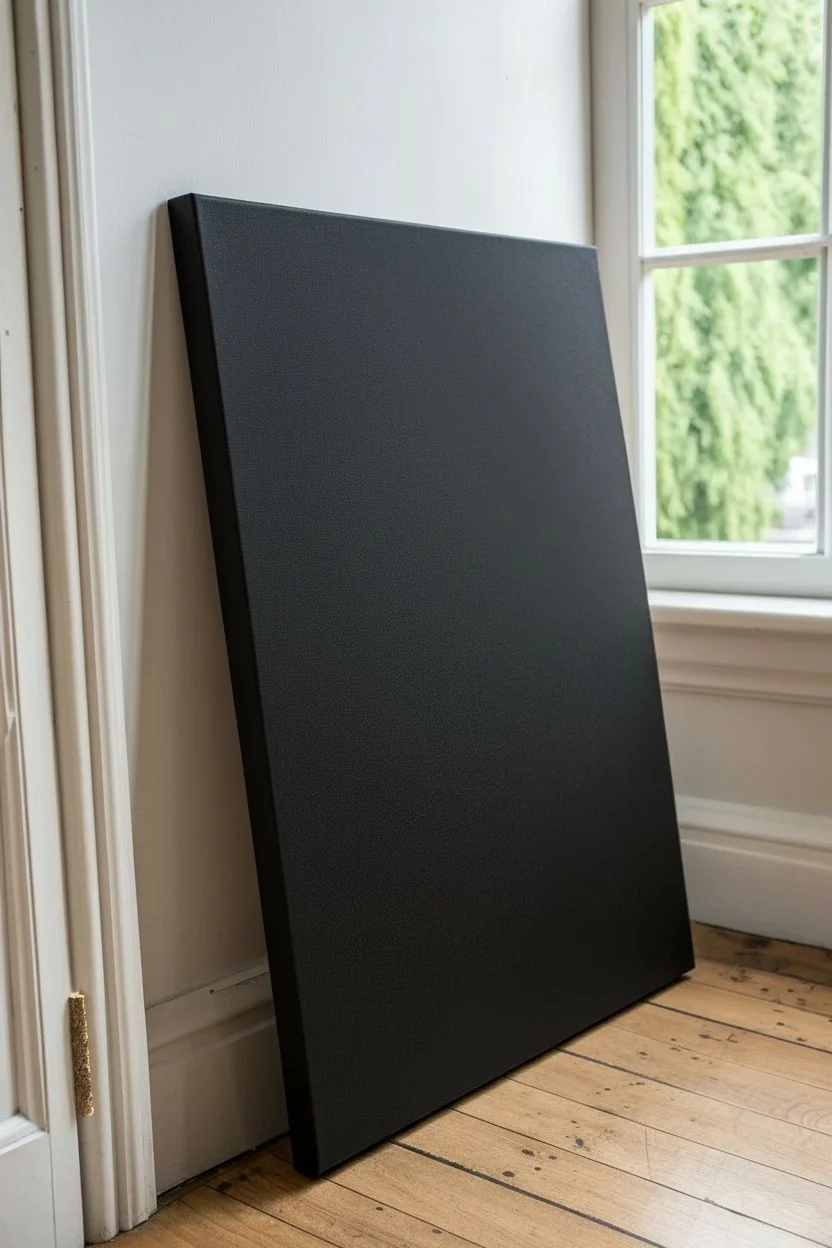
Step 1: Preparing the Void
-
Base coat application:
Begin by painting your entire canvas with the matte black acrylic paint. Use the wide flat brush and long, even strokes to ensure full coverage. -
Observe edges:
Don’t forget to paint the sides of the canvas as well. This gives the piece a professional, finished look even without a frame. -
Second layer:
Allow the first coat to dry completely, usually about an hour. Apply a second coat to ensure the black is deep, opaque, and free of any light patches. -
Texture check:
If you want a smoother surface, lightly sand the canvas with very fine-grit sandpaper between coats, but the natural canvas texture often adds character.
Adhesive Issues
If the gold leaf isn’t sticking well, your adhesive size might have dried too much. Reapply a thin layer and test tackiness with your knuckle before applying leaf.
Step 2: Mapping the Stars
-
Design planning:
Choose a constellation layout. You can print a reference image of a specific constellation like Hercules or Draco, or design a fantastical star map of your own. -
marking major stars:
Using a piece of chalk or a white charcoal pencil, lightly mark the positions of the main stars on your dry black canvas. Keep these marks subtle. -
Connecting the dots:
Use a ruler and your chalk to lightly draw the lines connecting your stars. This guides your final painting and ensures your geometric shapes are crisp. -
Adding background stars:
Randomly dot the empty spaces with tiny chalk marks to represent distant background stars, giving the sky depth.
Crystal Embellishment
Enhance the shine by gluing small flat-back Swarovski crystals or rhinestones into the center of the largest stars for a 3D sparkle effect.
Step 3: Gilding the Constellations
-
Painting the adhesive:
Dip your small round brush into the gold leaf adhesive size. Carefully paint the shapes of the largest, brightest stars over your chalk marks. -
Waiting period:
Let the adhesive sit until it becomes tacky. This usually takes 15-30 minutes depending on the brand, so check the bottle instructions carefully. -
Applying gold leaf:
Gently press a sheet of gold leaf over the tacky adhesive stars. Use a clean, dry brush to smooth the leaf down onto the canvas. -
Removing excess:
Once adhered, use a soft bristle brush to gently sweep away the loose gold leaf that isn’t stuck to the adhesive, revealing your shiny stars. -
Refining edges:
If any star edges look too ragged, you can neaten them later with a tiny bit of black paint.
Step 4: Connecting Lines and Details
-
Drawing lines:
Shake your gold paint pen well. Use the ruler as a guide to trace over your chalk lines, connecting the gold leaf stars with precise, straight strokes. -
Varying line styles:
For visual interest, consider making some connector lines solid and others dotted or dashed, mimicking vintage star charts. -
Adding smaller stars:
Use the paint pen or a small bush with gold acrylic to fill in the medium and small background stars. Vary the size: some just pinpricks, others small cross-shapes. -
Sprinkle effect:
I like to load a stiff brush with gold paint and flick the bristles to create a spray of micro-stars or ‘star dust’ in emptiness.
Step 5: Final Touches
-
Cleaning up:
Once the gold paint is fully dry, take a slightly damp cloth and gently wipe away any visible chalk guidelines. -
Sealing:
Spray the entire canvas with a clear sealer to protect the gold leaf from tarnishing and the black paint from scuffs.
Step back and admire your personal galaxy, ready to add a touch of cosmic wonder to your room


Have a question or want to share your own experience? I'd love to hear from you in the comments below!