When I’m itching to paint something airy and calming, a coastal landscape always hits the sweet spot. Here are my favorite coastal landscape ideas to spark your next sketch or painting—starting with the classics and drifting into some playful twists.
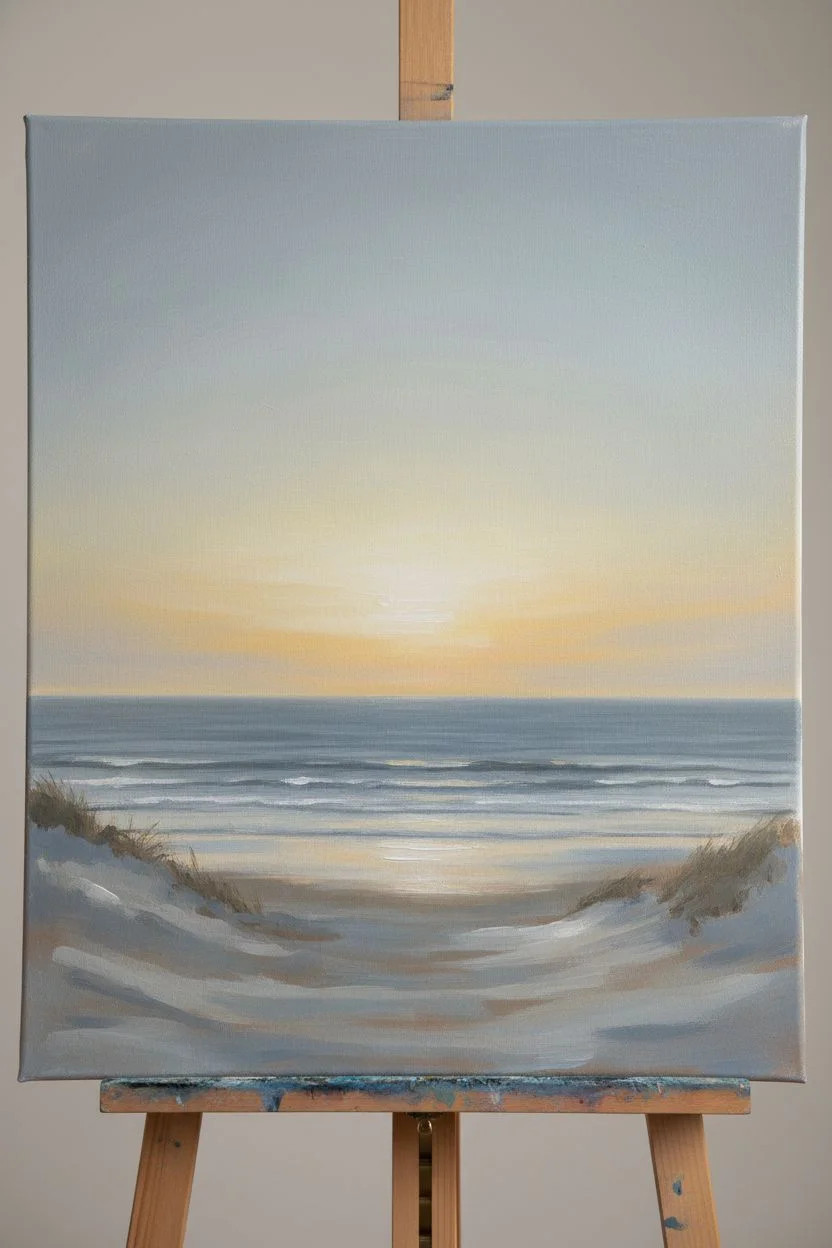
Classic Ocean Horizon
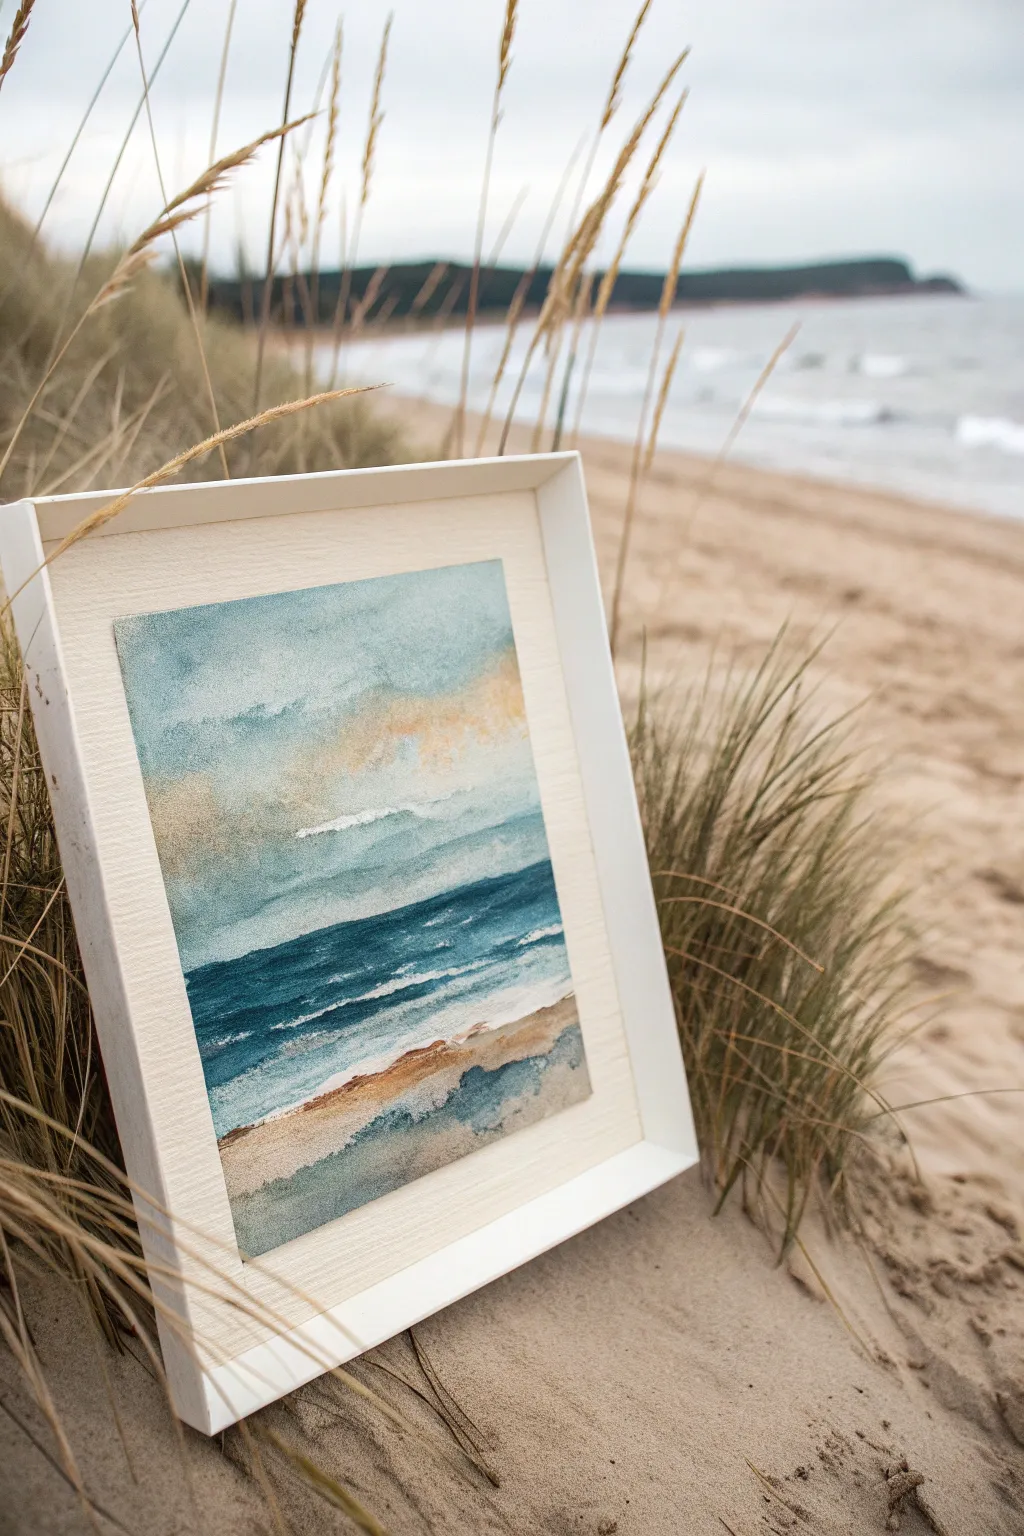
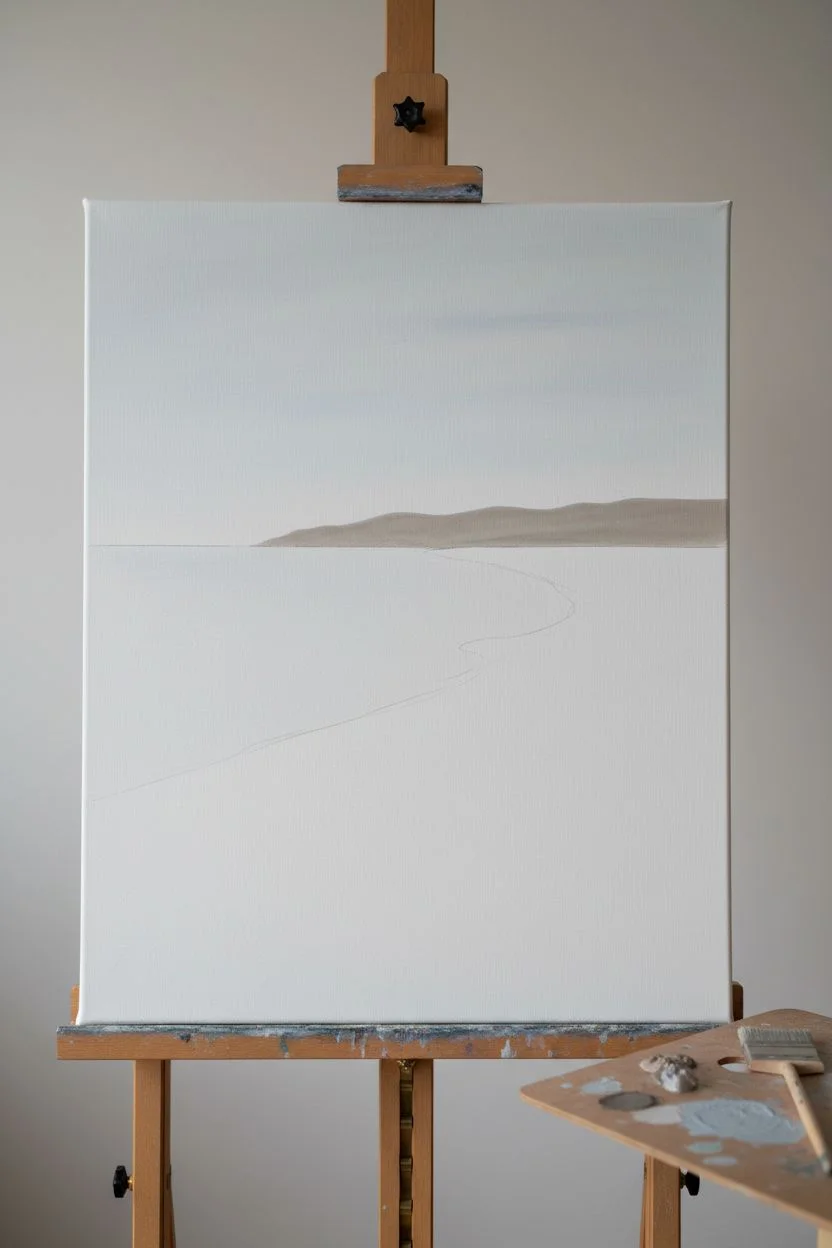
Capture the tranquil beauty of a sunset horizon with this soft, watercolor-style landscape. By layering delicate washes of acrylics mixed with glazing medium, you’ll achieve a dreamy, atmospheric glow perfect for coastal decor.
Step-by-Step
Materials
- High-quality watercolor paper (cold press, at least 140lb)
- Acrylic paints (Titanium White, Phthalo Blue, Rose Madder, Yellow Ochre, Burnt Sienna)
- Acrylic glazing medium or retarder
- Flat wash brushes (1-inch and 1/2-inch)
- Small round detail brush (size 2)
- Painter’s tape
- Mixing palette
- Two jars of water
- Paper towels
- Optional: Sea sponge
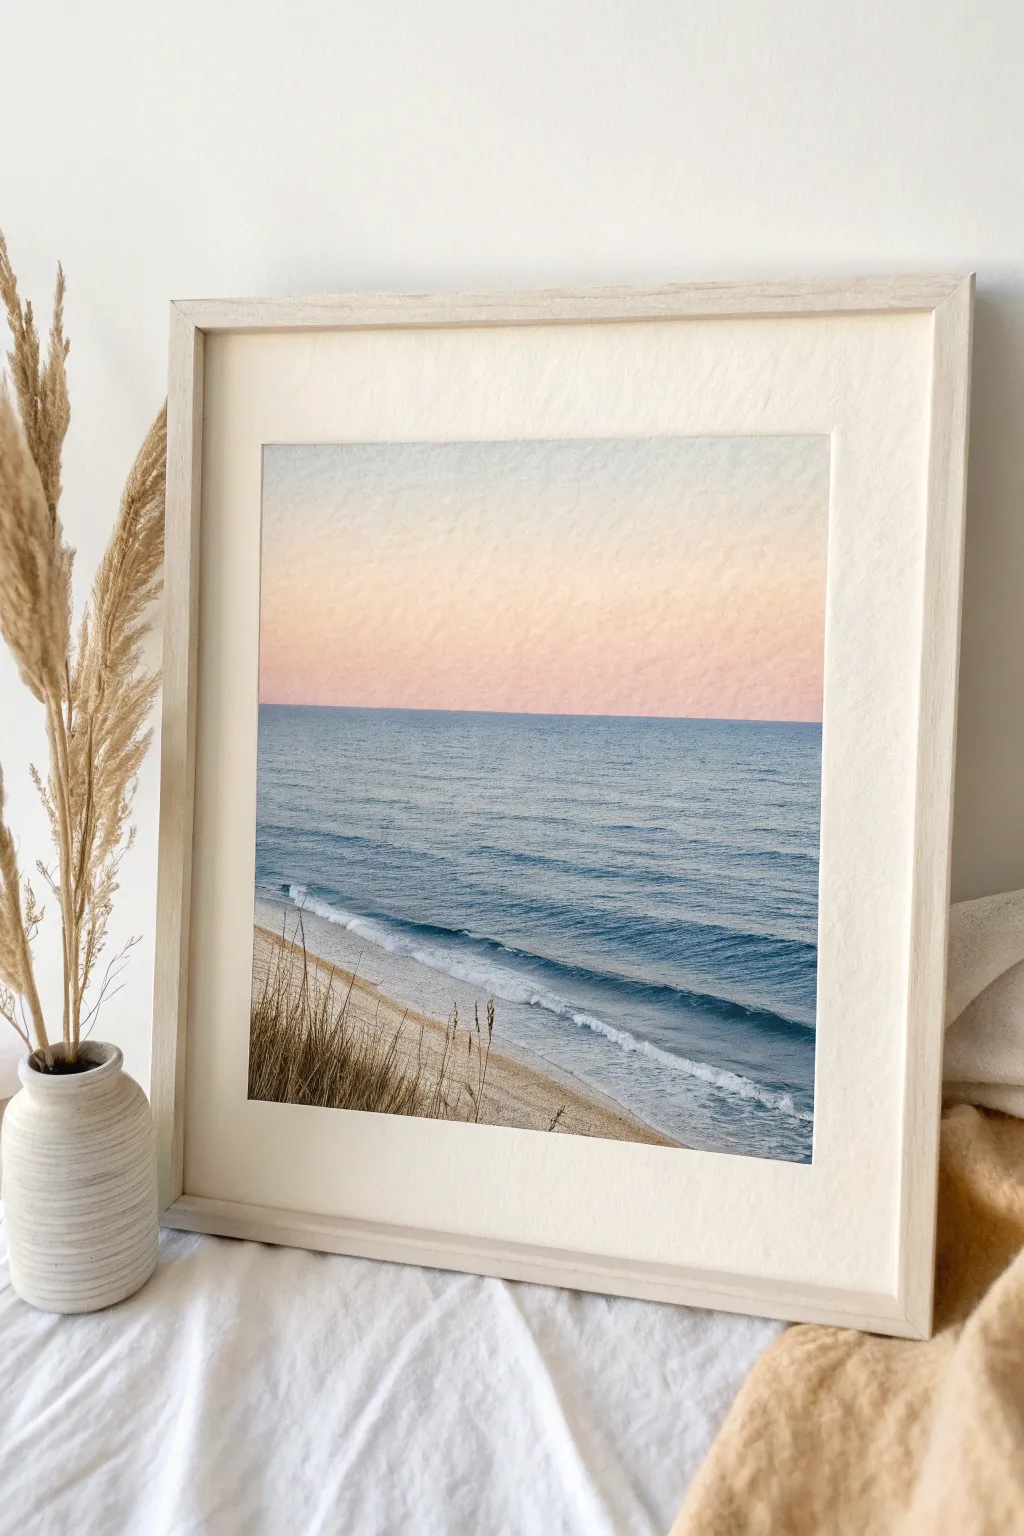
Step 1: Setting the Sky and Horizon
-
Prepare your surface:
Begin by taping down the edges of your watercolor paper to a board using painter’s tape. This creates a clean white border and prevents buckling when the paper gets wet. -
Mark the horizon:
Lightly sketch a horizontal line across the paper, positioning it slightly below the center point. This will divide your sky from the ocean. -
Mix the sky colors:
On your palette, prepare two mixtures with plenty of glazing medium or water: a very pale blue (Titanium White + tiny dot of Phthalo Blue) and a soft peach (Titanium White + Rose Madder + touch of Yellow Ochre). -
Paint the upper sky:
Using the 1-inch flat brush, apply the pale blue mixture to the very top of the paper, using horizontal strokes. -
Blend the sunset gradient:
While the blue is still tacky, wash your brush and pick up the peach mixture. Apply this starting just above the horizon line, blending upward into the blue to create a soft, misty transition. -
Refine the haze:
I like to take a clean, slightly damp brush and run it horizontally across the transition zone to ensure there are no hard lines in the sky.
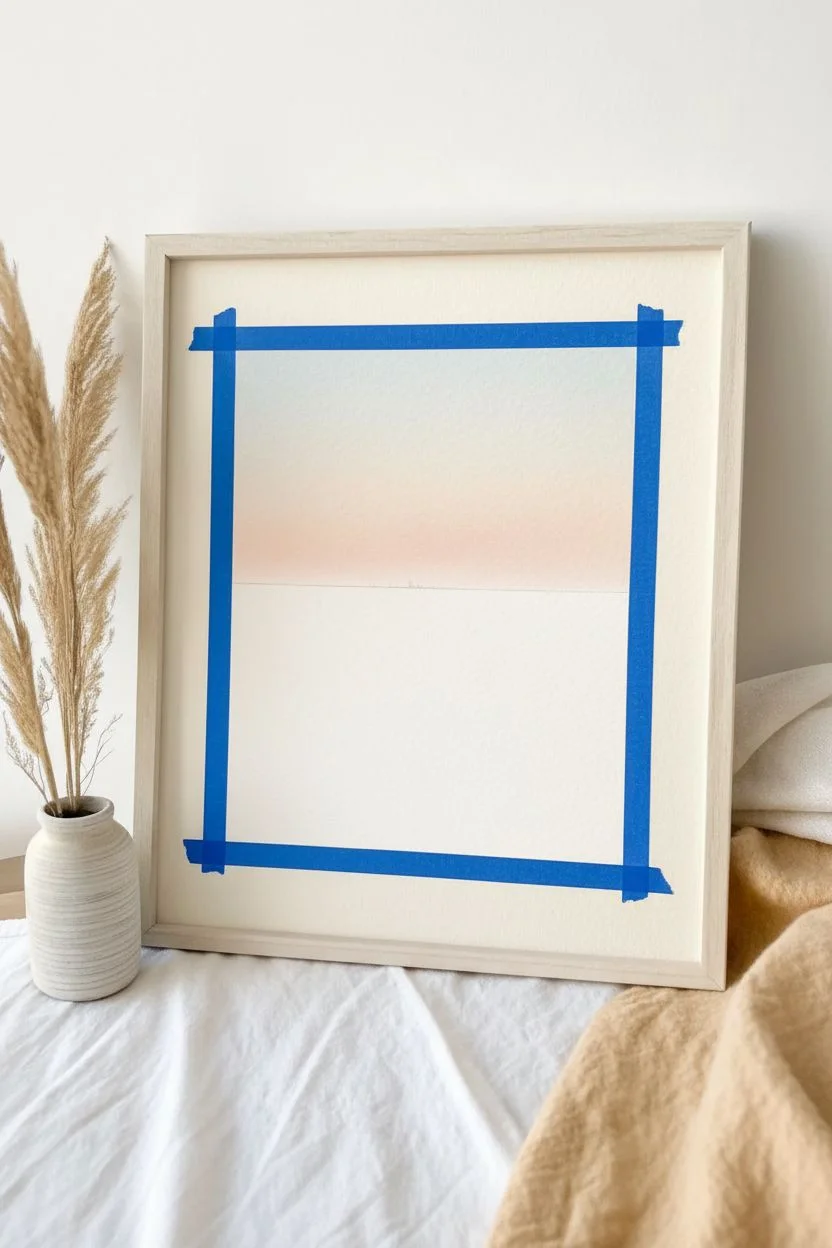
Uneven Horizon?
If your horizon line isn’t perfectly straight, place a strip of painter’s tape across the dry sky section before painting the ocean. This guarantees a razor-sharp water line every time.
Step 2: Painting the Ocean
-
Base ocean color:
Mix a medium blue using Phthalo Blue, a touch of Burnt Sienna to desaturate it, and Titanium White. Paint the ocean area from the horizon line down to where the shoreline will begin. -
Deepen the horizon:
Add a slightly darker, more opaque line of blue right against the horizon to create depth and distance. -
Create distant waves:
Using a smaller flat brush, mix a darker shade of blue-gray. Paint thin, horizontal streaks in the water to suggest gentle wave swells farther out at sea. -
Form the shoreline:
Mix Titanium White with a tiny amount of blue to create the foam color. Paint a jagged, organic line where the water meets the future sand, angling it diagonally from the bottom left. -
Blend the water edge:
Soften the back edge of the white foam with a damp brush so it fades naturally into the darker ocean water.
Step 3: Sand Dunes and Details
-
Paint the sand base:
Mix Yellow Ochre, Burnt Sienna, and plenty of Titanium White for a warm beige. Fill in the bottom triangle of the paper for the beach. -
Add texture to the dune:
While the sand paint is still wet, dab in slightly darker brown spots using the corner of a paper towel or a sponge to simulate the uneven texture of sand. -
Paint the foreground stalks:
Switch to your size 2 round brush. Mix Burnt Sienna with a little black or dark blue for a deep brown. Paint thin, decisive lines flicking upward from the bottom edge to create dune grass stalks. -
Vary the grass:
Add variety by making some grass blades bent or crossing over others. Mix a lighter tan color to add highlights to the tips of the grasses where the sun would hit. -
Final dry and reveal:
Allow the painting to dry strictly for at least one hour. Once completely dry to the touch, slowly peel away the painter’s tape at a 45-degree angle to reveal your crisp white border.
Add Texture
Sprinkle coarse salt onto the wet sand-colored paint before it dries. Once dry, brush the salt away to create realistic, grainy sand textures without extra painting effort.
Frame your finished piece in a light wood or white frame to complete the airy coastal aesthetic


Dune Grasses Up Close
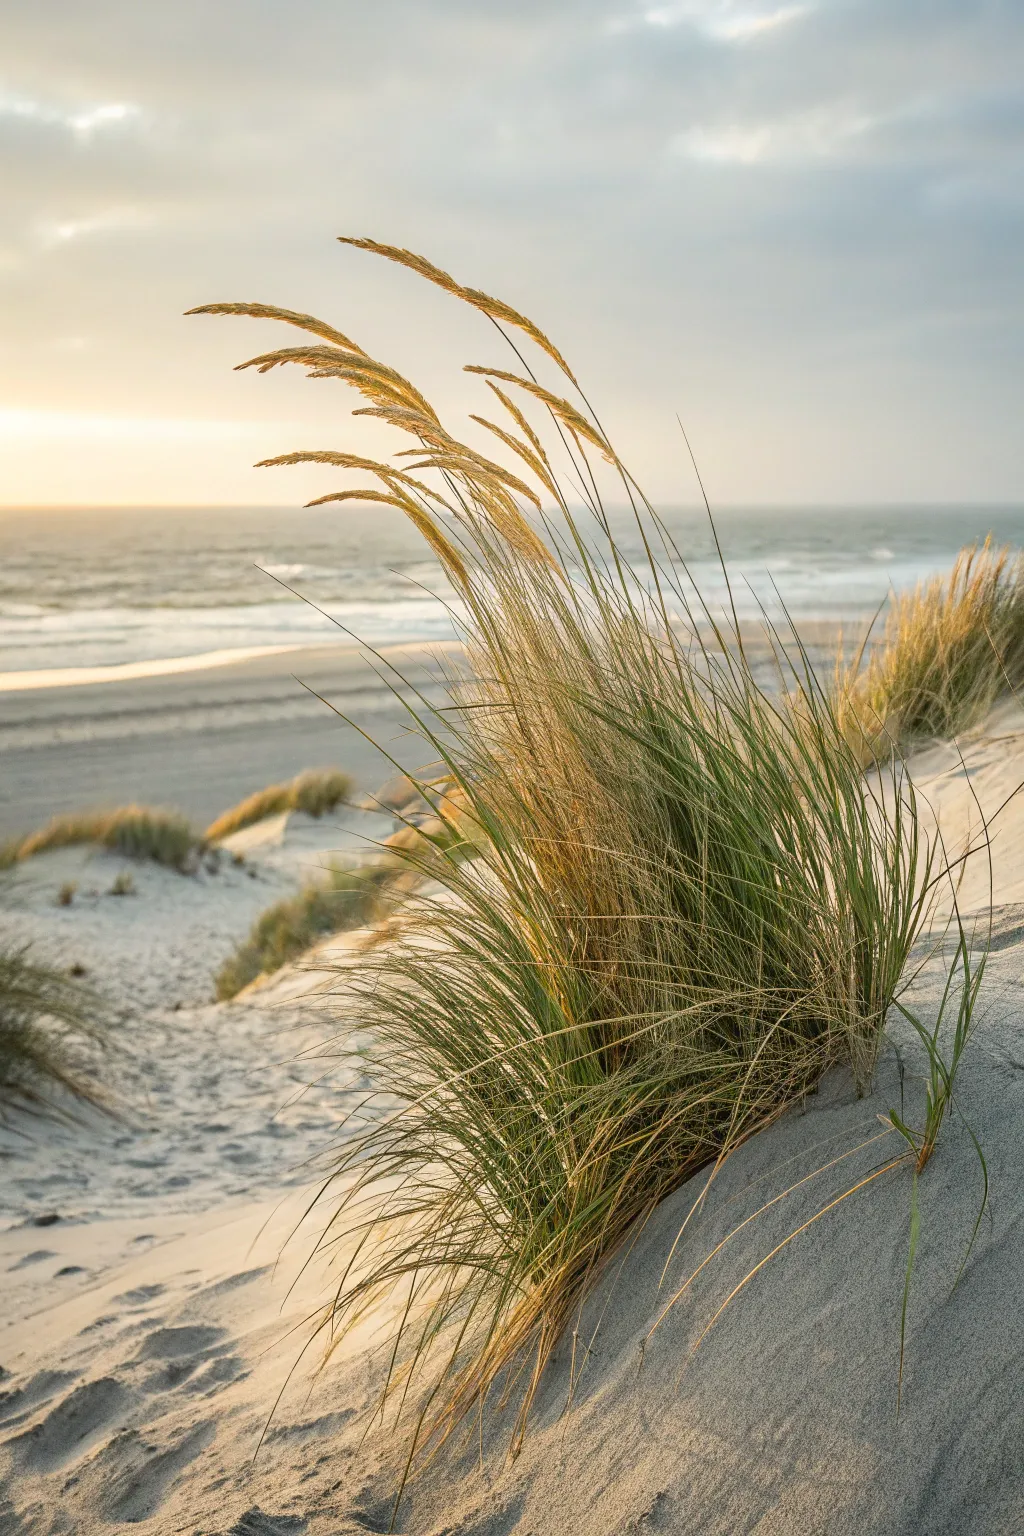
Capture the serene warmth of a coastal sunset with this textural painting tutorial. Using acrylics or oils, you’ll learn to layer soft atmospheric backgrounds against sharp, detailed foreground grasses to create a piece full of depth and tranquility.
Detailed Instructions
Materials
- Canvas panel or stretched canvas (12×18 inches or similar vertical format)
- Acrylic or oil paints (Titanium White, Naples Yellow, Burnt Sienna, Raw Umber, Sap Green, Ultramarine Blue, Yellow Ochre)
- Flat shader brushes (1 inch and ½ inch)
- Fan brush (small)
- Rigger brush or script liner (size 0 or 1)
- Palette knife
- Water cup or solvent
- Paper towels
- Easel or flat working surface
Step 1: Setting the Atmospheric Background
-
Prepare the Horizon:
Lightly sketch a line for the horizon about one-third of the way down from the top. Mark main shapes for the dunes starting from the bottom corners, sloping upwards. -
Paint the Sky Gradient:
Mix Titanium White with a tiny touch of Ultramarine Blue and a hint of Raw Umber for a soft, grey-blue upper sky. As you work downward, blend in Naples Yellow and plain White to create the glowing, hazy light near the horizon. -
Establish the Ocean:
Using a slightly darker grey-blue mix, paint the ocean strip horizontally. Keep the strokes flat and level. Add thin lines of purer White near the shore to suggest breaking waves in the distance. -
Create the Wet Sand Strips:
For the beach area just below the water, mix White, Raw Umber, and a touch of Blue. Paint horizontal strokes that reflect the sky colors slightly, indicating wet, compacted sand.
Step 2: Building the Dune Structure
-
Block in Shadowed Sand:
Using a mix of Titanium White and Raw Umber, block in the general shape of the foreground dune. The side facing away from the light (the right side) should be slightly cooler and greyer. -
Highlight the Sunlit Sand:
On the left side of the dune crests where the sun hits, blend in warm White mixed with a touch of Naples Yellow and Burnt Sienna. Use a stippling motion with a worn brush to create a gritty texture. -
Add Subtle Distant Dunes:
Paint smaller, blurry dune shapes in the mid-ground using muted earth tones. Keep these soft and out-of-focus to enhance the depth of field effect. -
Texture the Foreground:
I like to use a dry brush with very little paint to drag textured lines across the main dune, mimicking wind-blown patterns in the sand.
Grasses look stiff?
Loosen your grip on the brush handle significantly. Hold it near the end and use quick, confident flicking motions rather than slow, deliberate strokes.
Step 3: Painting the Grass Details
-
Base Layer of Grass:
Mix Sap Green with Burnt Sienna for a dark, shadowy olive color. Using your rigger brush, paint the foundational clumps of grass. Start from the root and flick the brush upward to create a natural taper. -
Vary the Direction:
Ensure the grass blades curve and cross over each other. Avoid making them straight up and down; let them sway to the right to suggest a coastal breeze. -
Mid-Tone Grasses:
Mix Yellow Ochre and Sap Green. Add a second layer of grass strands over the dark ones, focusing on the areas that would catch more light. -
Dry Grass Effects:
Switch to a mix of Yellow Ochre and Titanium White. Paint thin, brittle-looking stalks taller than the green base, representing the dried seed heads. -
Add Seed Heads:
At the tips of the tallest stalks, use tiny, dabbing strokes to create the feathery seed heads. Angle them slightly downward as if weighted by the wind.
Add dimensional texture
Mix a texture paste or gel medium into your acrylics for the foreground sand and the thickest grass roots to physically build up the surface.
Step 4: Final Lighting and Refinements
-
Sunlit Highlights:
Mix pure Naples Yellow with White. Carefully paint highlights on the left side of the grass blades where the sunset light would strike them most intensely. -
Cast Shadows:
Using a transparent glaze of Raw Umber, paint soft shadows extending from the base of the grass clumps onto the sand to the right. -
Refine Edges:
Check the contrast between the grass tips and the sky. If needed, darken the sky slightly behind the lightest grass heads to make them pop. -
Final Glaze:
If using oils, you can apply a very thin, warm glaze of Yellow Ochre over the entire sunlit side of the painting to unify the colors with a golden glow.
Step back and enjoy the warming, peaceful atmosphere you’ve captured on canvas


Rocky Coast Texture Study
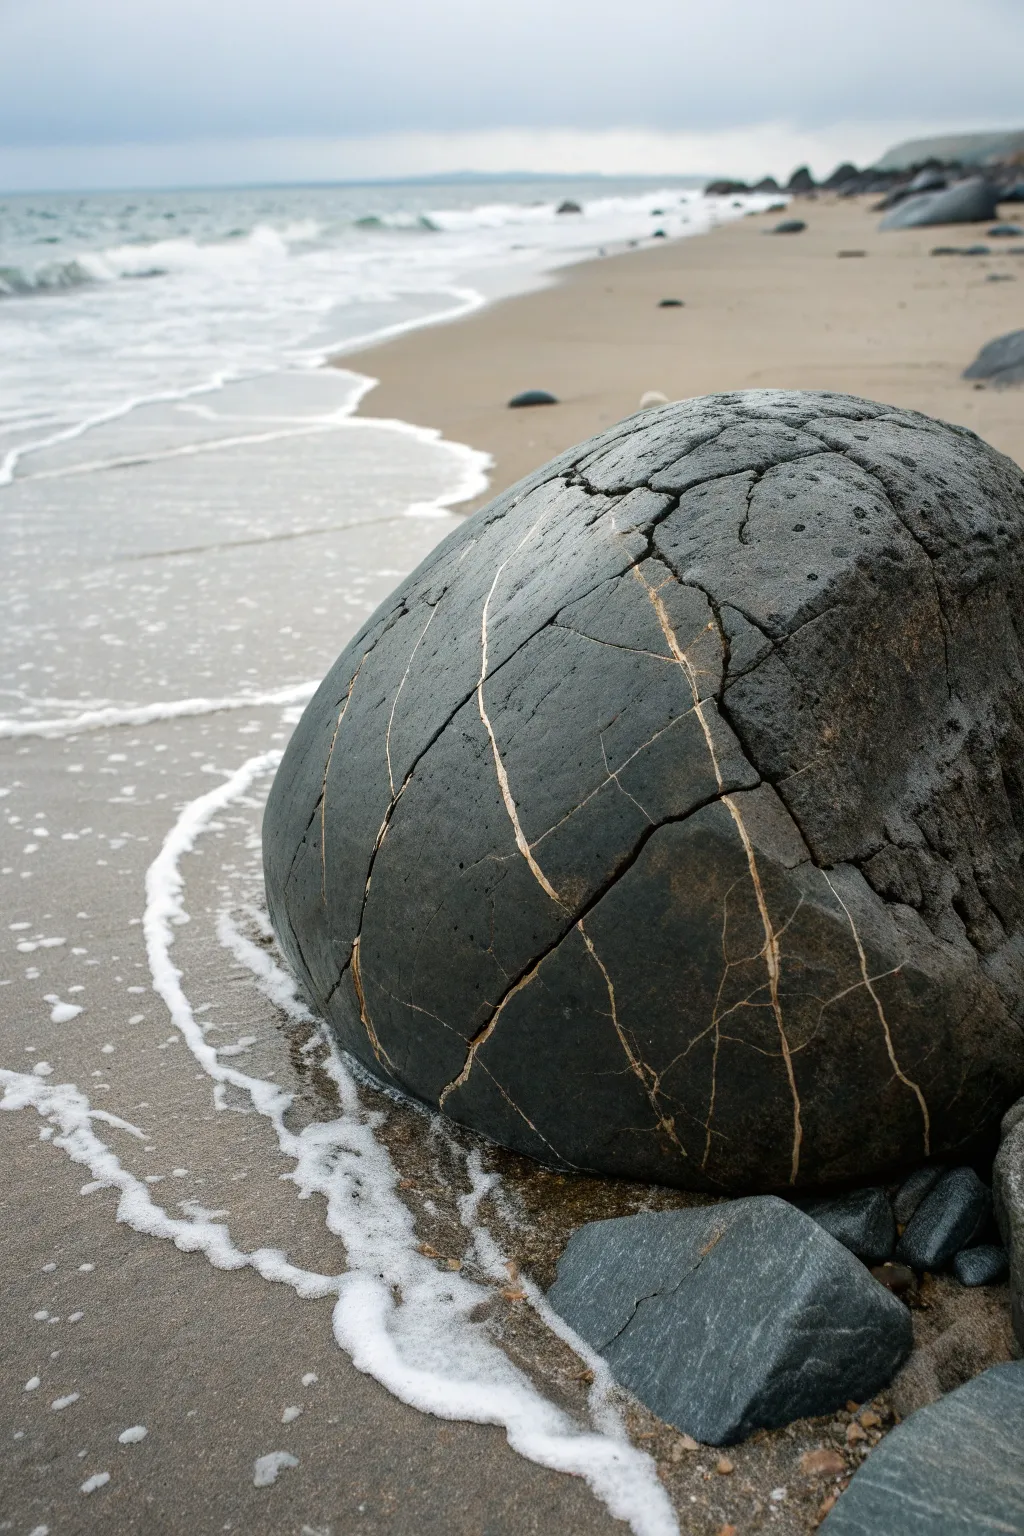
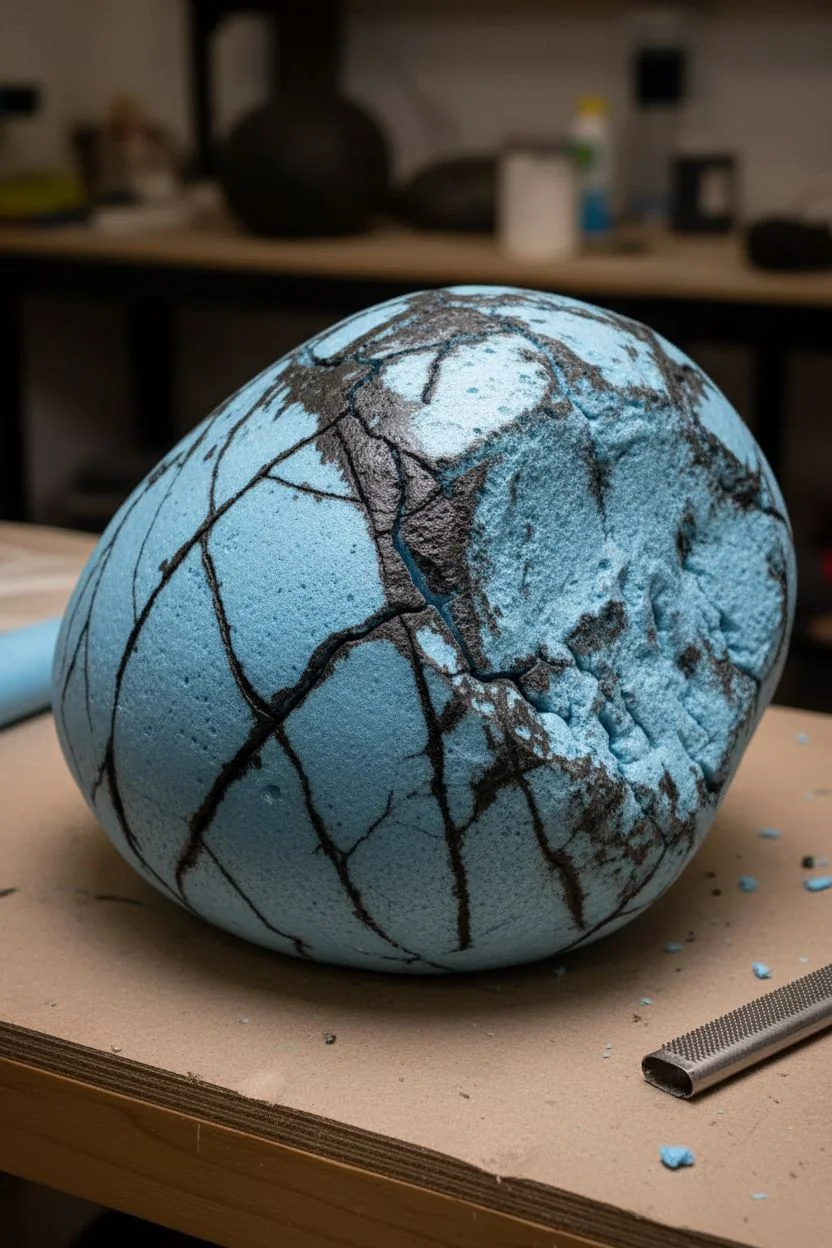
Capture the raw, geological beauty of a coastal concretion with this intricate texture study. You’ll layer foam, plaster, and acrylics to replicate the weathered cracks and white mineral veins of a massive spherical boulder resting on wet sand.
Step-by-Step Guide
Materials
- High-density polystyrene foam (XPS)
- Sculpting knife and rasps
- Mod Podge or PVA glue
- Fine sand and scenic texture paste
- Acrylic paints (Dark Grey, Black, Raw Umber, White, Teal)
- Modeling plaster (Hydrocal or similar)
- Gloss varnish or clear resin
- Sea sponge and fine liner brushes
- Wooden base board
Step 1: Shaping the Boulder
-
Create the core:
Cut a rough sphere from high-density polystyrene foam, aiming for a slightly flattened, organic shape rather than a perfect geometric ball. The size depends on your base, but a 4-inch diameter works well for detail. -
Texture the surface:
Use a rasp or coarse sandpaper to smooth out the angular cuts. Roll a crumpled ball of aluminum foil firmly over the entire surface to imprint natural, stone-like micropores. -
Carve the fissures:
Using a sharp detail knife, carve deep, irregular cracks across the surface. These are the signature stress fractures of the concretion. Vary the depth and width—some should be hairline fractures, others deep crevices. -
Seal the form:
Apply a coat of Mod Podge mixed with a tiny amount of black paint to seal the foam and create a dark undercoat. Let this dry completely before moving on.
Cracks look fake?
If your carved cracks look too clean, pick at the edges with a needle to create jagged chips. Fissures in stone are rarely smooth cuts.
Step 2: Base and Environment
-
Prepare the terrain:
Spread texture paste over your wooden base board. While wet, sprinkle fine sand over the area where the boulder will sit and the surrounding ‘beach’ zone. -
Position the stone:
Press the foam boulder firmly into the wet texture paste so it looks embedded in the sand, not just resting on top. Add smaller foam scraps or pebbles around the base to simulate loose rocks. -
Sculpt the wave line:
Use a palette knife to smooth out the texture paste further away from the rock to represent the wet tidal zone vs. the dry sand.
Atmospheric Mist
Use an airbrush to lightly mist the distant edge of the base with pale grey-blue, blurring the horizon like coastal fog.
Step 3: Painting the Stone
-
Base coat application:
Paint the boulder with a dark charcoal grey. I find mixing a drop of blue into the grey gives it that cold, sea-rock feel. -
Dry brushing:
Once the base is dry, heavily dry brush a lighter grey over the raised areas to catch the texture created by the foil earlier. -
Adding mineral variations:
Stipple very thin washes of diluted Raw Umber and dark green in patches to simulate algae growth and oxidation. -
The white veins:
This is crucial: mix titanium white with a flow improver. Use your finest liner brush to paint inside the carved cracks. Allow the paint to ‘spill’ slightly out of the cracks in jagged lines to mimic calcite veins. -
Sanding the veins:
Gently lightly sand the painted veins with very fine grit paper to distress them so they look like part of the rock, not paint sitting on top.
Step 4: Water and Sand Effects
-
Painting the sand:
Paint the sandy base with a graduated mix of beige and grey. The sand closer to the water (and the rock) should be darker to appear wet. -
Creating wetness:
Apply gloss varnish generously over the rock (especially the lower half) and the ‘wet’ sand area. It needs to look slick and tide-swept. -
The foam line:
Mix baking soda with white acrylic and gloss gel media. Stipple this mixture in a curved line around the rock to create the bubbling sea foam. -
Detailing the wash:
Drag small trails of the white foam mixture backwards from the main wave line to show the receding water’s movement. -
Final heavy gloss:
Pour a small amount of clear resin or heavy body gloss gel over the sand near the rock’s edge to create actual depth for the shallow water.
Now stepping back, you can almost hear the lapping waves against your miniature geological marvel


Sandy Path to the Water
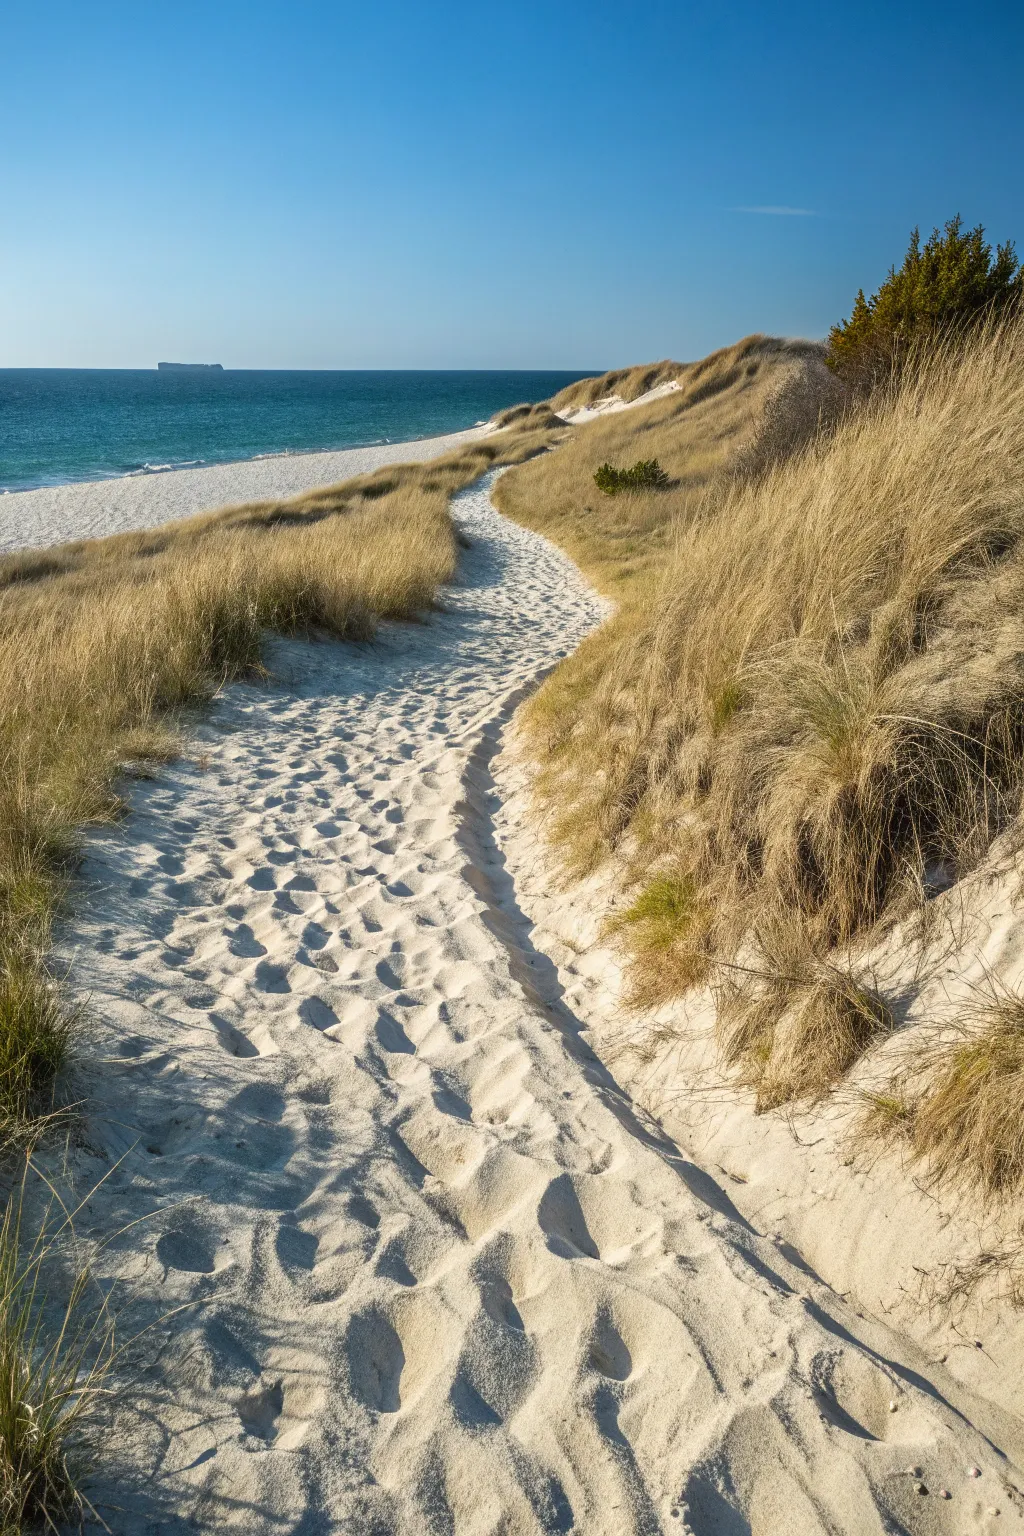
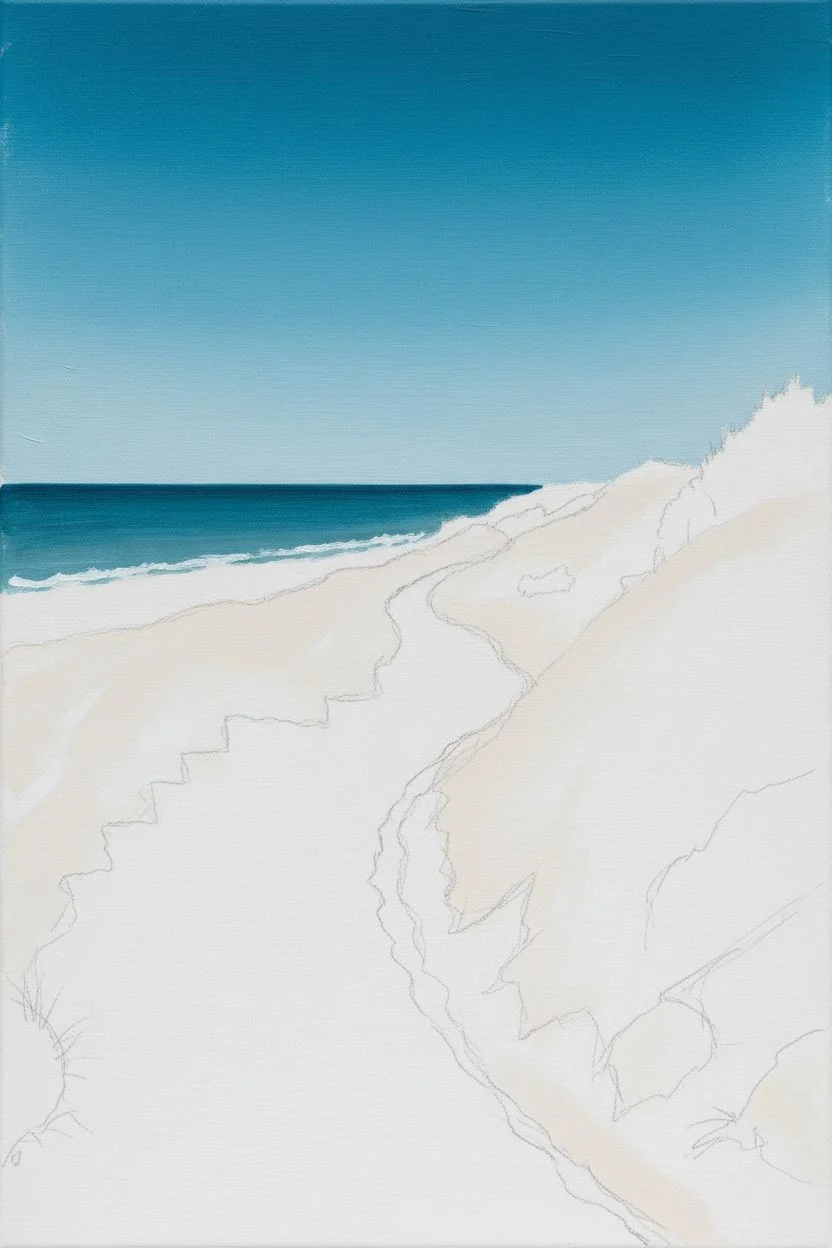
Capture the serene beauty of a sandy path winding through coastal dunes in this detailed acrylic painting tutorial. You will learn to build depth with texture and create the illusion of soft, wind-blown grasses leading to the sea.
How-To Guide
Materials
- Canvas board or stretched canvas (11×14 inches recommended)
- Acrylic paints: Titanium White, Ultramarine Blue, Phthalo Blue, Yellow Ochre, Burnt Umber, Burnt Sienna, Sap Green
- Brushes: Large flat brush (1-inch), medium filbert (size 6), small round brush (size 2), liner brush or rigger
- Palette knife (optional for texture)
- Cup of water and paper towels
- Palette or paper plate
Step 1: Sky and Sea Foundation
-
Establish the horizon:
Begin by lightly sketching a horizontal line about one-third down from the top of the canvas to mark where the ocean meets the sky. Sketch a gentle S-curve starting from the bottom center, narrowing as it reaches the beach, to define your sandy path. -
Paint the sky gradient:
Mix Titanium White with a tiny touch of Phthalo Blue. Start painting at the very top of the canvas. As you work your way down toward the horizon, add more White to the mix to create a natural gradient where the sky is lighter near the water. -
Block in the ocean:
Mix Phthalo Blue, a touch of Ultramarine Blue, and White to create a deep teal. Paint the water area, keeping the color darker near the horizon line and slightly lighter as it approaches the shore. -
Create the shoreline:
Where the water meets the sand, brush in a thin, erratic line of pure Titanium White to represent the crashing waves. Blend this slightly into the water for a misty effect.
Use a Rigger Brush
For the most realistic long grass, invest in a rigger brush. Its long bristles hold more paint and allow for fluid, uninterrupted sweeping lines.
Step 2: Dunes and Sand Base
-
Underpaint the dunes:
Mix Yellow Ochre, Burnt Sienna, and a lot of White to get a warm sand color. Fill in the dune areas on the left and right sides of your path sketch. Don’t worry about grass texture yet; just get the solid shapes down. -
Fill the path:
Using a lighter version of the sand mixture (more White), paint the winding path. I like to use horizontal strokes here to suggest the flatness of the ground compared to the rising dunes. -
Add deep shadows:
Mix Burnt Umber with a touch of Ultramarine Blue. Apply this dark mixture along the edges of the path and the bottom of the dunes to create the deep recesses where the thickest grass will grow. -
Texture the sand:
While the path paint is still slightly tacky, dab in distinct footprints and uneven pockets using a small round brush and a mix of White and light grey (White + tiny dot of Black or Blue). Focus these shadows on the left side of the path indentations.
Step 3: Grasses and Details
-
Layer base grasses:
Using a beaten-up filbert brush or a fan brush, mix Sap Green with Burnt Sienna. Flick the brush upward along the dune slopes to create the dark under-layer of the beach grass. -
Mid-tone grasses:
Lighten your muddy green mix with Yellow Ochre. Using a liner brush, paint long, sweeping strokes over the dark base, following the curve of the dunes. Ensure the grass leans generally to the left or right to mimic wind direction. -
Distant vegetation:
On the far right dune near the horizon, stipple in a darker green bush using your round brush to break up the texture. -
Sunlight highlights:
Mix Titanium White with a little Yellow Ochre. Using the very tip of your liner brush or rigger, paint fine, crisp blades of grass catching the sunlight on the tops of the dunes. -
Blend the path edges:
Take your sand color and dry-brush specifically where the grass meets the path. This softens the transition so the grass looks like it is growing out of the sand, not floating on top. -
Final sand highlights:
Use pure Titanium White to add bright highlights on the top ridges of the sand path divots to emphasize the uneven, walked-on texture. -
Distant ship detail:
Using a tiny amount of grey-blue paint, add a small rectangular shape on the horizon line for the distant ship. Keep it faint to push it into the distance.
Muddy Grass Colors?
If your grass layers are looking muddy, let the dark base layer dry completely before painting the lighter yellow highlights on top.
Step back and admire the warm, sunny atmosphere you have created with just paint and patience
BRUSH GUIDE
The Right Brush for Every Stroke
From clean lines to bold texture — master brush choice, stroke control, and essential techniques.
Explore the Full Guide
Boardwalk Over the Dunes
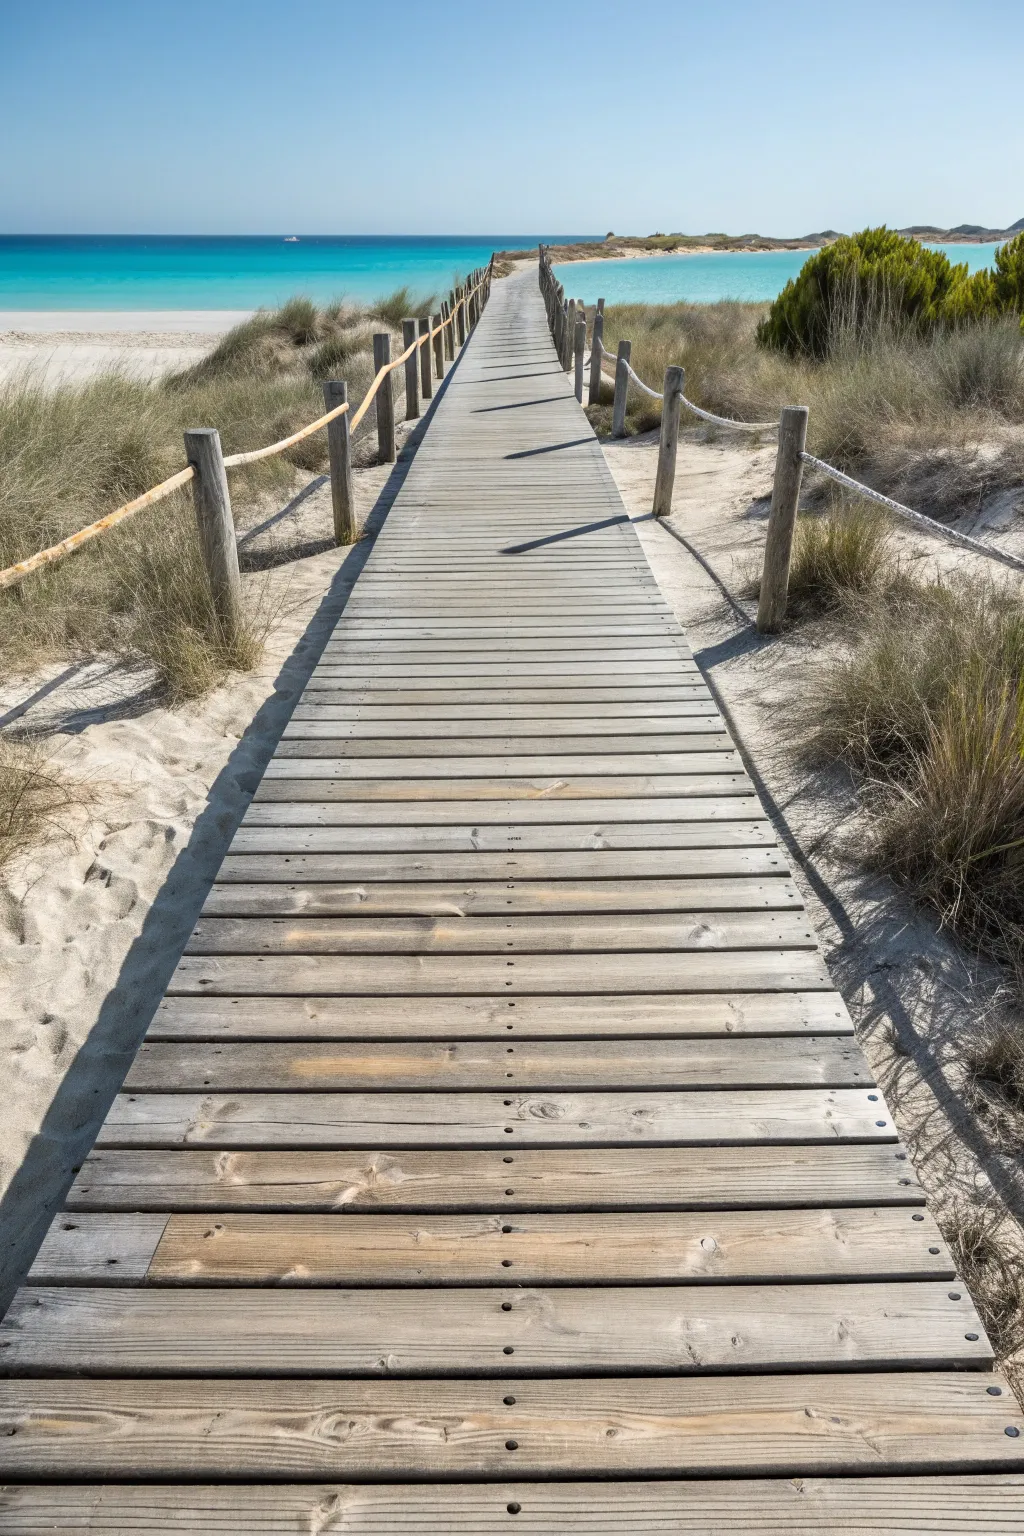

Transform your garden path or backyard into a serene beach getaway with this rustic wooden boardwalk project. This raised walkway not only protects delicate dune vegetation but also creates a stunning visual leading directly to your view.
Step-by-Step Tutorial
Materials
- Pressure-treated lumber (2×6 planks for decking)
- Pressure-treated lumber (4×4 posts)
- Pressure-treated lumber (2×8 beams)
- Galvanized carriage bolts, nuts, and washers
- Stainless steel deck screws (3 inch)
- Post hole digger or auger
- Quick-setting concrete mix
- String line and stakes
- Circular saw or miter saw
- Drill with driver bits
- Level and measuring tape
- Thick natural fiber rope (manila or hemp)
- Paddle bit for drilling rope holes
Step 1: Planning and Layout
-
Map your path:
Visualize the flow of your boardwalk. It should meander slightly to feel natural, rather than running in a perfectly straight line. -
Set the string lines:
Use stakes and string to outline the two parallel sides of your walkway. A width of 4 to 5 feet is comfortable for two people walking side-by-side. -
Determine post spacing:
Mark spots for your support posts every 6 to 8 feet along the string lines. Ensure the spacing is consistent for structural integrity.
Wobbly Boards?
If a deck board rocks, the joists underneath might be uneven. Shim the low spot with a piece of asphalt shingle or treated wood scrap before screwing the deck board down.
Step 2: Setting the Foundation
-
Dig post holes:
Using a post hole digger, excavate holes at your marked locations. Aim for a depth below the frost line in your area, typically at least 24-30 inches deep. -
Set the posts:
Place your 4×4 posts into the holes. Use braces to hold them plumb (perfectly vertical) while you prepare the concrete. -
Pour the concrete:
Fill the holes with quick-setting concrete mix and water according to the bag instructions. I find it helpful to re-check the level as the concrete begins to set to ensure nothing shifted. -
Level and cut posts:
Once the concrete cures, determine your desired deck height. Mark a level line across all posts and trim the tops of the support posts, but leave the railing posts (side posts) uncut for now.
Natural Weathering
To get that silvery-gray driftwood look shown in the photo, leave the pressure-treated wood unsealed for a season. The sun and rain will naturally bleach the color.
Step 3: Framing the Structure
-
Install the beams:
Attach the 2×8 beams to the sides of your support posts using carriage bolts. These beams will support the weight of the decking. -
Check for square:
Before tightening everything fully, measure diagonally between corner posts. If the measurements match, your frame is square. -
Install joists (if needed):
For wider spans, install joists perpendicular to the beams every 16 inches on center using joist hangers.
Step 4: Laying the Decking
-
Position the first plank:
Start at one end of the boardwalk. Lay your first 2×6 plank perpendicular to the direction of travel, overhanging the frame slightly if desired. -
Secure the planks:
Drive two stainless steel screws through the plank into each underlying support beam. Pre-drilling near the ends prevents the wood from splitting. -
Maintain spacing:
Use a 16-penny nail or a specialized spacer tool between boards to create a consistent gap for drainage and wood expansion. -
Continue laying planks:
Work your way down the path, checking periodically that the boards remain parallel to your starting point. -
Trim the edges:
Once all planks are fastened, snap a chalk line along the outer edges and run a circular saw down the line for a crisp, unified edge.
Step 5: Adding the Railing
-
Prepare the rope posts:
The taller posts on the sides will hold the rope railing. Determine a comfortable handrail height, usually around 36 inches above the deck. -
Drill rope holes:
Using a paddle bit slightly larger than your rope’s diameter, drill holes horizontally through the center of each railing post at your marked height. -
Sand the post tops:
Cut the tops of the railing posts at a slight angle to shed water, then sand any rough edges to prevent splinters. -
Thread the rope:
Feed your heavy rope through the holes. Allow for a gentle, natural swag between posts—don’t pull it too tight. -
Secure the ends:
Knot the rope securely on the outer sides of the start and end posts, or use specialized rope hardware for a cleaner look.
Enjoy the gentle sound of the breeze as you walk along your new coastal path
Coastal Cottage and Garden
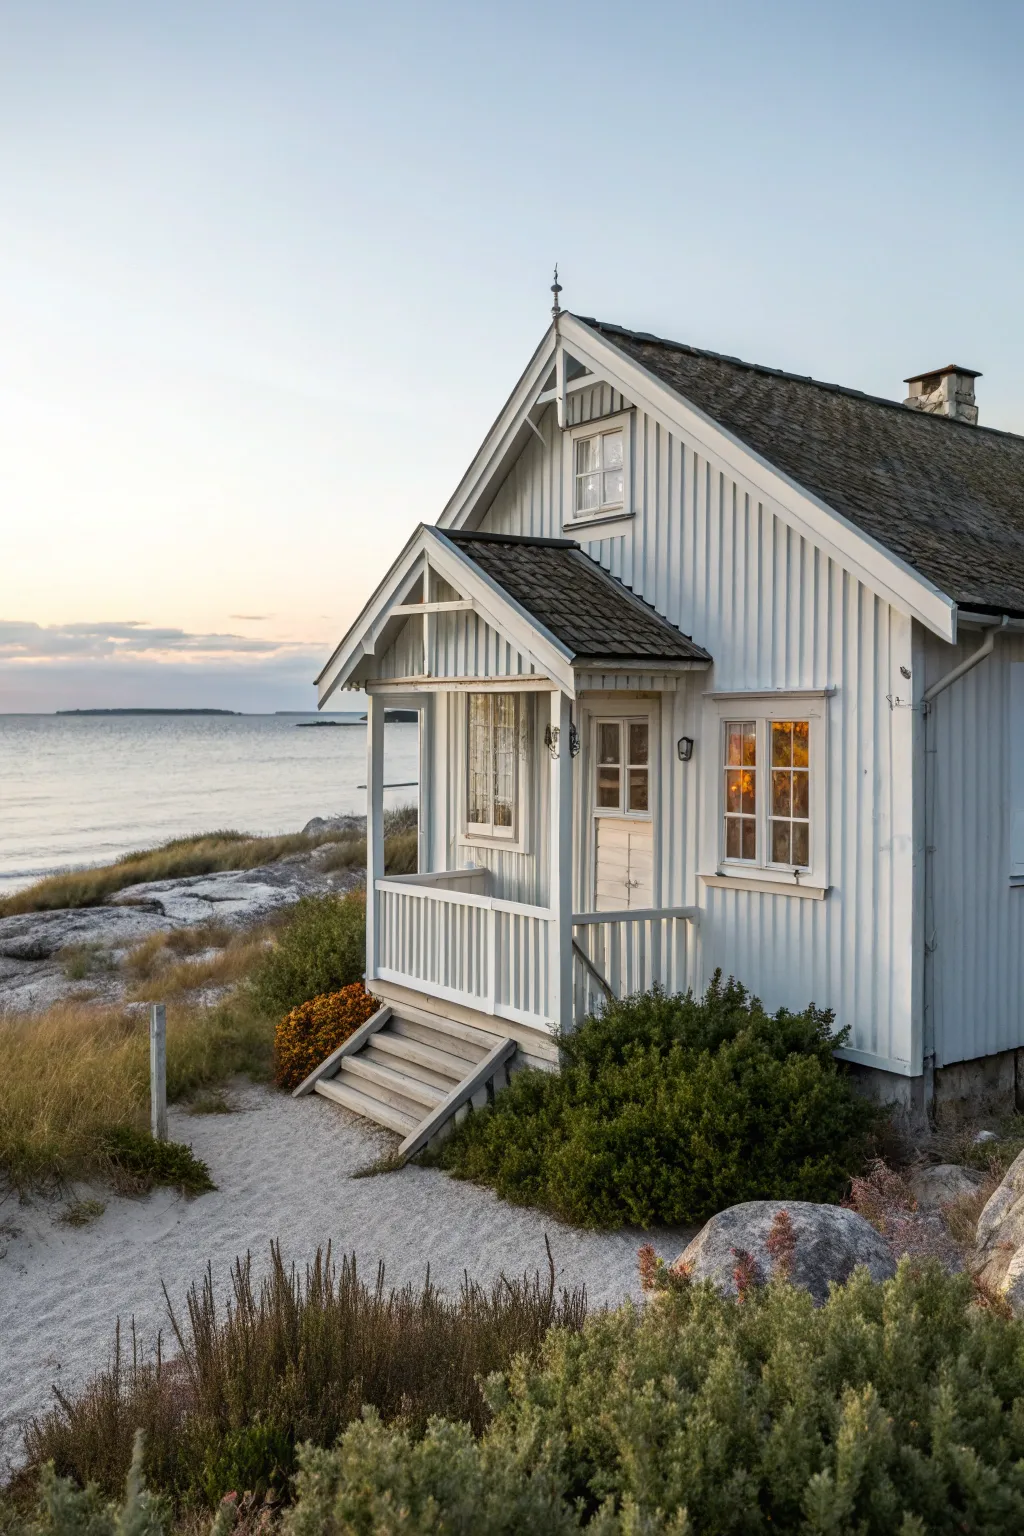
Capture the serene beauty of a Scandinavian-style beach house with this acrylic landscape painting guide. You’ll learn to balance the soft, warm glow of a sunset against cool, weathered wood textures.
Detailed Instructions
Materials
- Canvas board or stretched canvas (11×14 inches recommended)
- Acrylic paints: Titanium White, Ultramarine Blue, Burnt Umber, Yellow Ochre, Cadmium Red, Payne’s Grey
- Set of brushes: 1 inch flat (for sky/sea), size 6 round, size 2 fine liner
- Palette knife (optional for texture)
- Jar of water
- Paper towels
- Pencil and eraser
Step 1: Planning and Sky
-
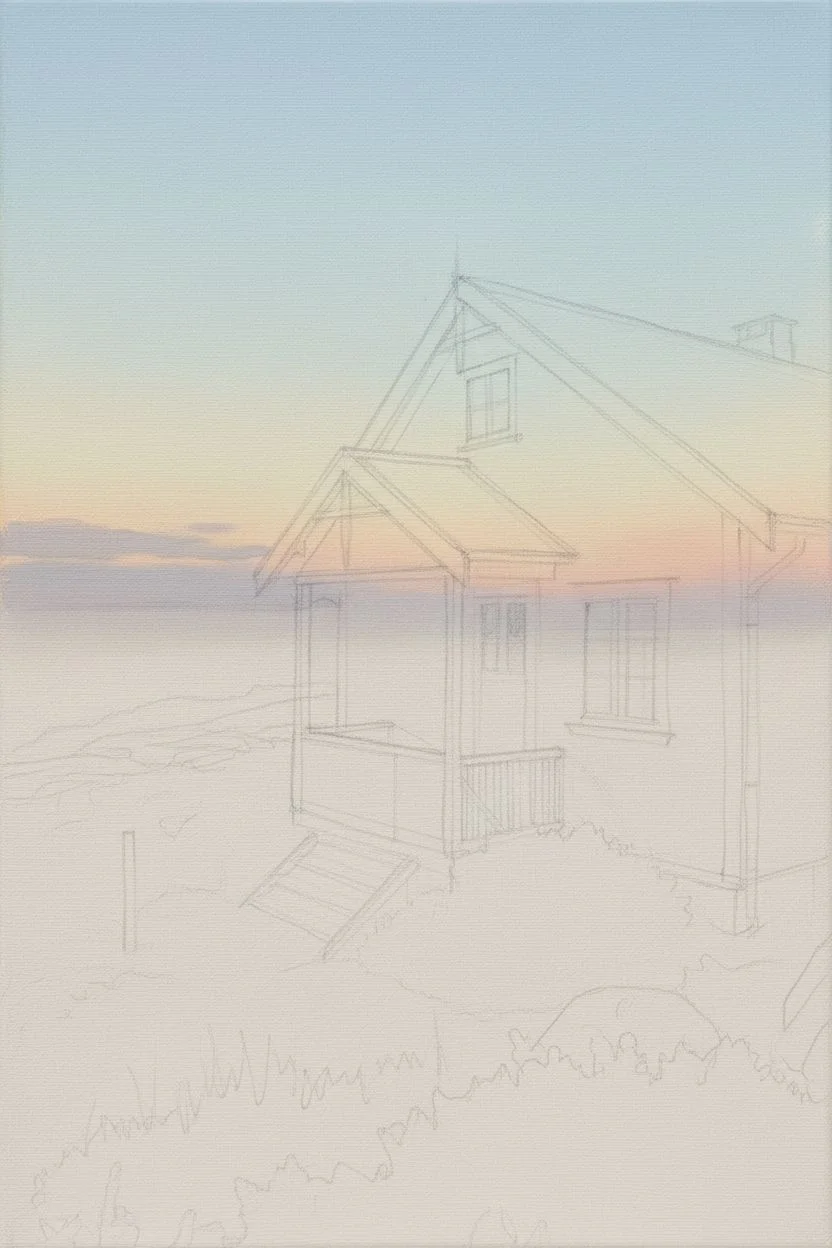
Light sketch:
Begin by sketching the horizon line just below the middle of the canvas. Outline the cottage shape on the right, focusing on the steep roof angles and the prominent porch structure. Keep pencil lines faint so they don’t show through later. -
Sky gradient:
Mix Titanium White with a tiny touch of Ultramarine Blue for the upper sky. As you paint downward, blend in a hint of Cadmium Red and Yellow Ochre to create a soft, warm sunset glow near the horizon. -
Cloud wisps:
Before the sky dries completely, use a dry brush to drag faint streaks of grey-purple (mix Blue, Red, and White) across the horizon to mimic the distant cloud banks.
Straight Lines Made Easy
For the siding and porch railings, use the edge of a piece of cardstock or a ruler as a guide for your brush to keep lines perfectly straight.
Step 2: Ocean and Sand
-
Distant water:
Paint the ocean using horizontal strokes with a mix of Ultramarine Blue, White, and a dot of Burnt Umber to desaturate it. The water should be lighter near the horizon and slightly darker as it approaches the shore. -
Shoreline texture:
For the sandy path and foreground, mix White, Yellow Ochre, and a little Burnt Umber. Apply this with a stabbing or stippling motion to suggest grainy sand texture rather than a smooth surface. -
Rocky elements:
Block in the large foreground rocks with grey (White and Payne’s Grey). Add shadows on the right side of the rocks to indicate the directional light coming from the setting sun.
Step 3: The Cottage Structure
-
Base coat:
Paint the entire cottage silhouette with a cool, off-white shade (White mixed with a tiny bit of Blue). This acts as the shadow tone because the house is backlit. -
Roof details:
Mix Payne’s Grey and Burnt Umber for the roof shingles. Apply this dark mix in small, overlapping strokes to suggest texture. Don’t make it a solid block of color; let some variation show. -
Siding lines:
Using your fine liner brush and a watered-down grey mix, carefully paint vertical lines to represent the wooden siding. These lines should be subtle, not bold stripes. -
Porch and Trim:
Highlight the porch railings and window trim with pure Titanium White. This makes the architectural details pop against the slightly shadowed walls.
Adding Life
Paint a tiny silhouette of a seagull in the sky or a lantern on the porch to add a narrative element to your peaceful scene.
Step 4: Atmosphere and Details
-
Window reflections:
Paint the window panes with a dark grey. Then, add crucial warm orange reflections (Yellow Ochre + Cadmium Red) in the side window to capture the sunset reflecting off the glass. -
Foliage base:
Mix Sap Green (or mix Yellow and Blue) with Burnt Umber for the dark bushes around the house foundation. Stipple this on loosely. -
Grassy textures:
Switch to your liner brush. Mix a lighter, yellowish-green and flick upward strokes to create tall grasses leaning in the wind along the dunes. -
Shadow integration:
Glaze a thin, watery layer of blue-grey over the left side of the house and the sand directly in front of it to deepen the evening shadows.
Step back and admire how the warm sunset light brings your coastal retreat to life

PENCIL GUIDE
Understanding Pencil Grades from H to B
From first sketch to finished drawing — learn pencil grades, line control, and shading techniques.
Explore the Full Guide
Hydrangeas by the Shore
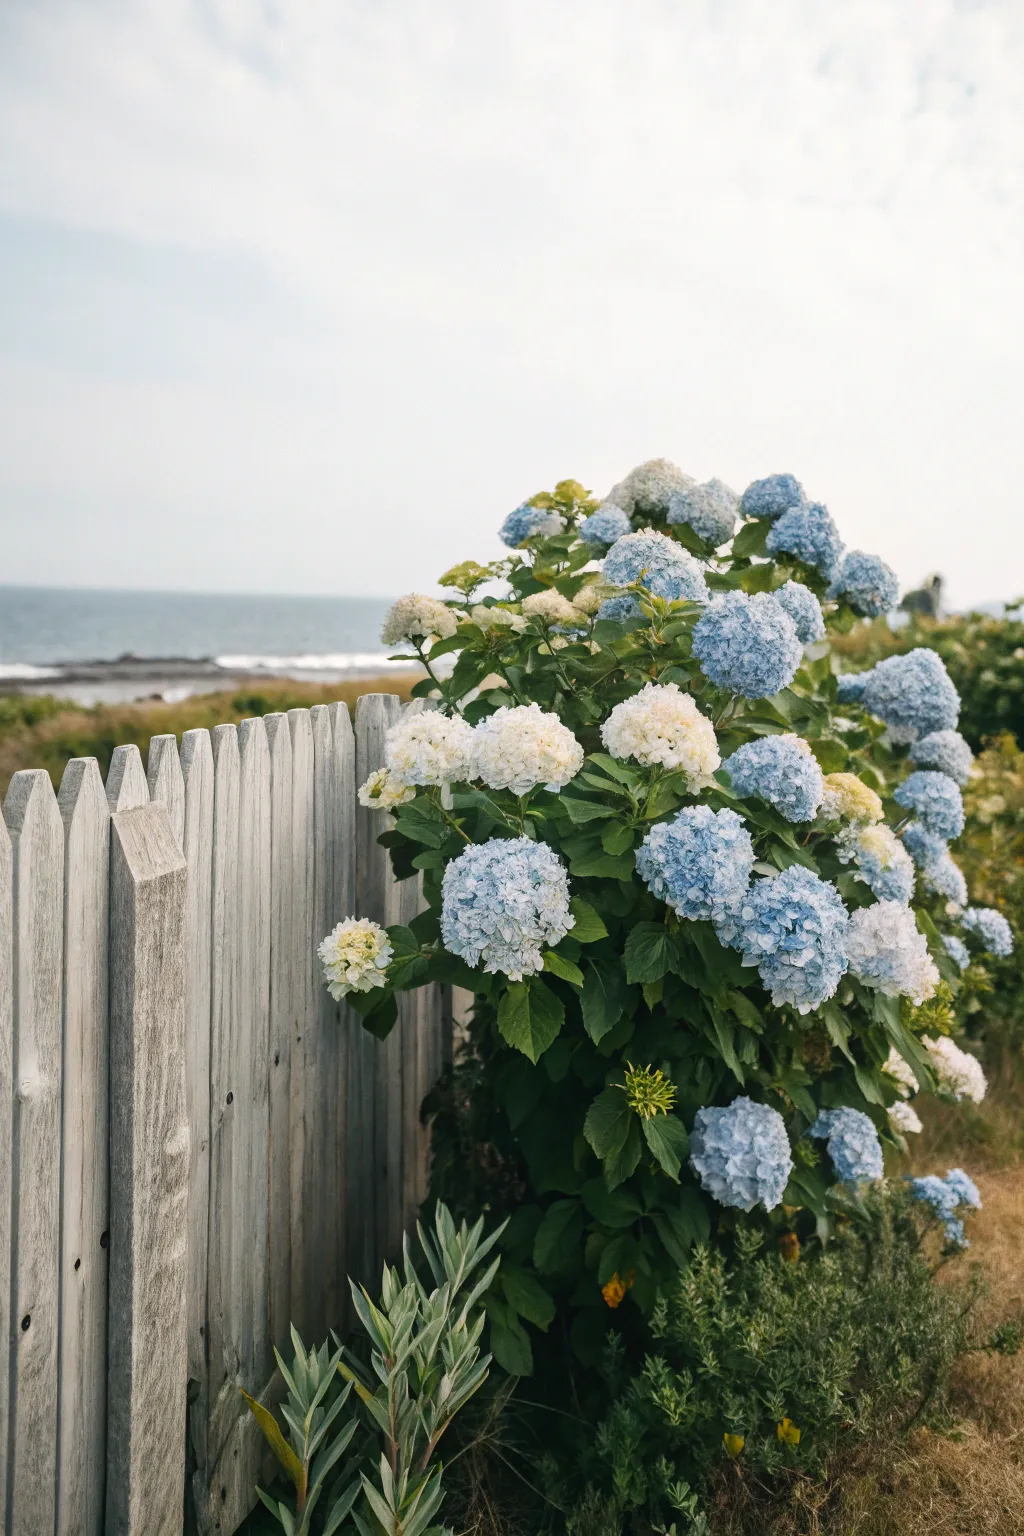
Recreating this serene coastal scene involves building a realistic, mixed-media garden display. By combining a weathered wood fence backdrop with lush, handcrafted paper hydrangeas, you’ll capture the essence of a tranquil shoreline in a permanent, maintenance-free installation.
Step-by-Step
Materials
- Reclaimed wood pickets or weathered picket fence section
- Heavyweight crepe paper (light blue, periwinkle, white, cream)
- Green crepe paper (forest green, olive)
- Floral wire (18-gauge for stems, 24-gauge for petals)
- Floral tape (green)
- Styrofoam block or wooden base for mounting
- Acrylic paints (white, grey, light blue, soft yellow)
- Hot glue gun and glue sticks
- Wire cutters and scissors
- Preserved moss or faux grass mat
- Sand and small seashells (optional for base)
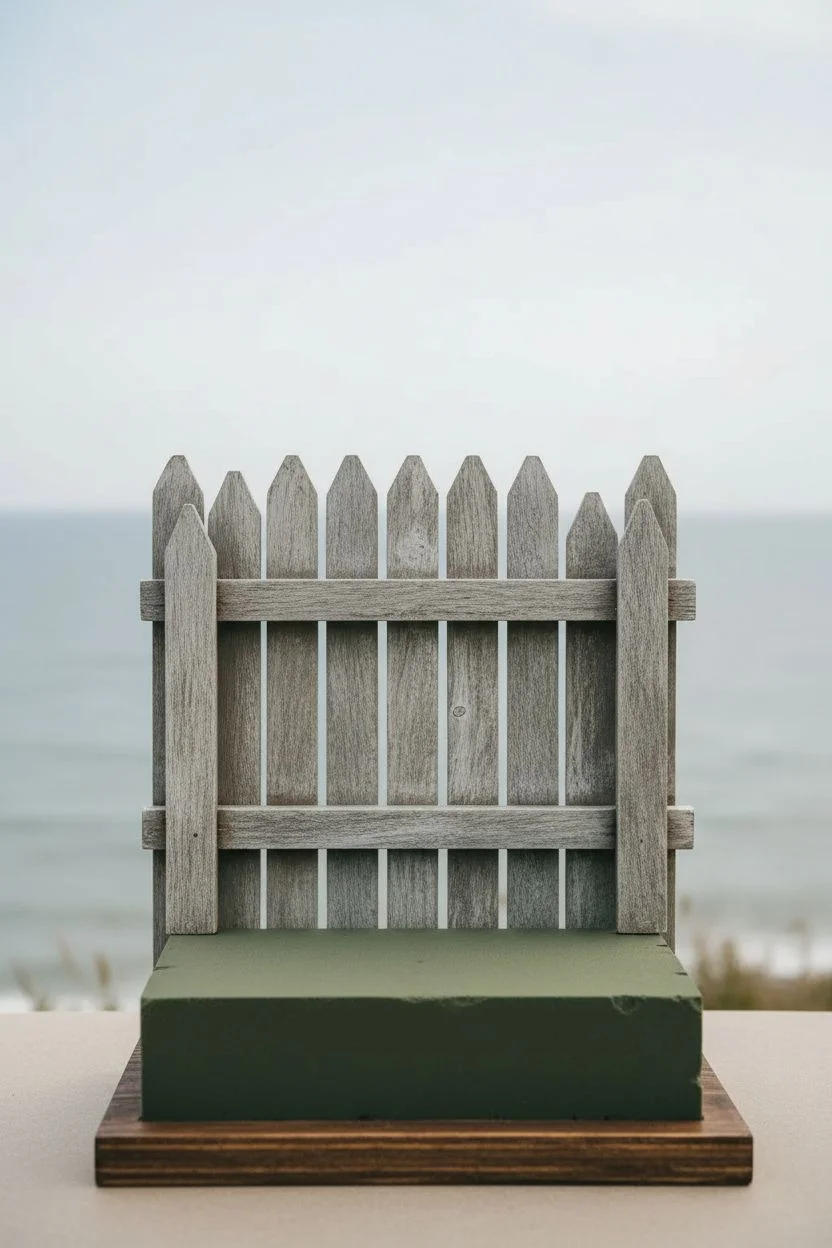
Step 1: Building the Backdrop
-
Prepare the Fence:
If using new wood, cut pickets to varying heights (around 3-4 feet) with pointed tops. Sand rough edges slightly but leave some texture for character. -
Weather the Wood:
Mix a wash of grey and white acrylic paint with water (1:1 ratio). Brush this liberally onto the wood, wiping away excess with a rag to let the grain show through, imitating the salt-bleached look. -
Assemble the Panel:
Attach your pickets to two horizontal support rails using screws or nails. Ensure the spacing is slightly irregular to mimic an old, wind-battered fence. -
Mount the Base:
Secure your fence panel vertically to a sturdy wooden base plate. This base will also hold the foam block for your floral arrangement.
Drooping Blooms?
If flower heads feel too heavy for the wire, reinforce the main stem by taping two 18-gauge wires together or using a thin wooden dowel inserted into the foam ball.
Step 2: Crafting the Hydrangea Blooms
-
Cut Petal Shapes:
Cut hundreds of small, four-petal flower shapes from your blue, white, and cream crepe paper. Varying the sizes slightly (0.5 to 1 inch) adds realism. -
Shape the Florets:
Using a small ball tool or the end of a paintbrush, cup the center of each paper floret. Gently curl the petal edges backward to open them up. -
Assemble Clusters:
I like to glue 3-4 florets together onto a small piece of 24-gauge wire to form a mini-cluster. Wrap the base with a tiny bit of floral tape. -
Form the Flower Heads:
Take a 1.5-inch styrofoam ball and begin inserting your mini-clusters. Pack them tightly so no foam shows. Mix blue and white clusters on single heads for a variegated look. -
Add Main Stems:
Insert a thick 18-gauge wire into the bottom of the styrofoam ball. Secure with hot glue. This forms the main stem for planting.
Color Depth
Dip the edges of blue petals in watered-down purple watercolor before assembly. This subtle bleed effect mimics the natural pH variations found in real hydrangea petals.
Step 3: Creating Foliage and Details
-
Cut Leaves:
Cut large, serrated leaf shapes from green crepe paper. Make them various sizes, from 3 to 6 inches long. -
Vein the Leaves:
Score the leaves down the center and glue a thin wire along the back spine. This allows you to bend and shape the leaves naturally. -
Add Spiky Greenery:
Create some pointed, succulent-like leaves for the foreground using stiffer cardstock or double-layered crepe paper to mimic sea grass. -
Paint Details:
Dry brush a tiny amount of yellow paint onto the centers of some white hydrangeas and a little brown on leaf edges to show sun exposure.
Step 4: Final Assembly
-
Position the Foam:
Glue a large block of floral foam onto the base plate, right in front of the fence. -
Plant the Hydrangeas:
Insert your tall hydrangea stems first, positioning them so the blooms peek over and through the fence pickets. -
Fill with Foliage:
Push the wired leaves into the foam, filling the gaps between stems. Bend them outwards to create a full, bushy shrub appearance. -
Ground Cover:
Cover the exposed foam and base plate with preserved moss. Glue down the spiky grass elements near the front for depth. -
Coastal Touches:
Finally, scatter a little sand and a few small seashells into the moss at the very front to complete the shoreline aesthetic.
Step back and enjoy the everlasting bloom of your seaside garden corner.
Succulents in Sandy Soil
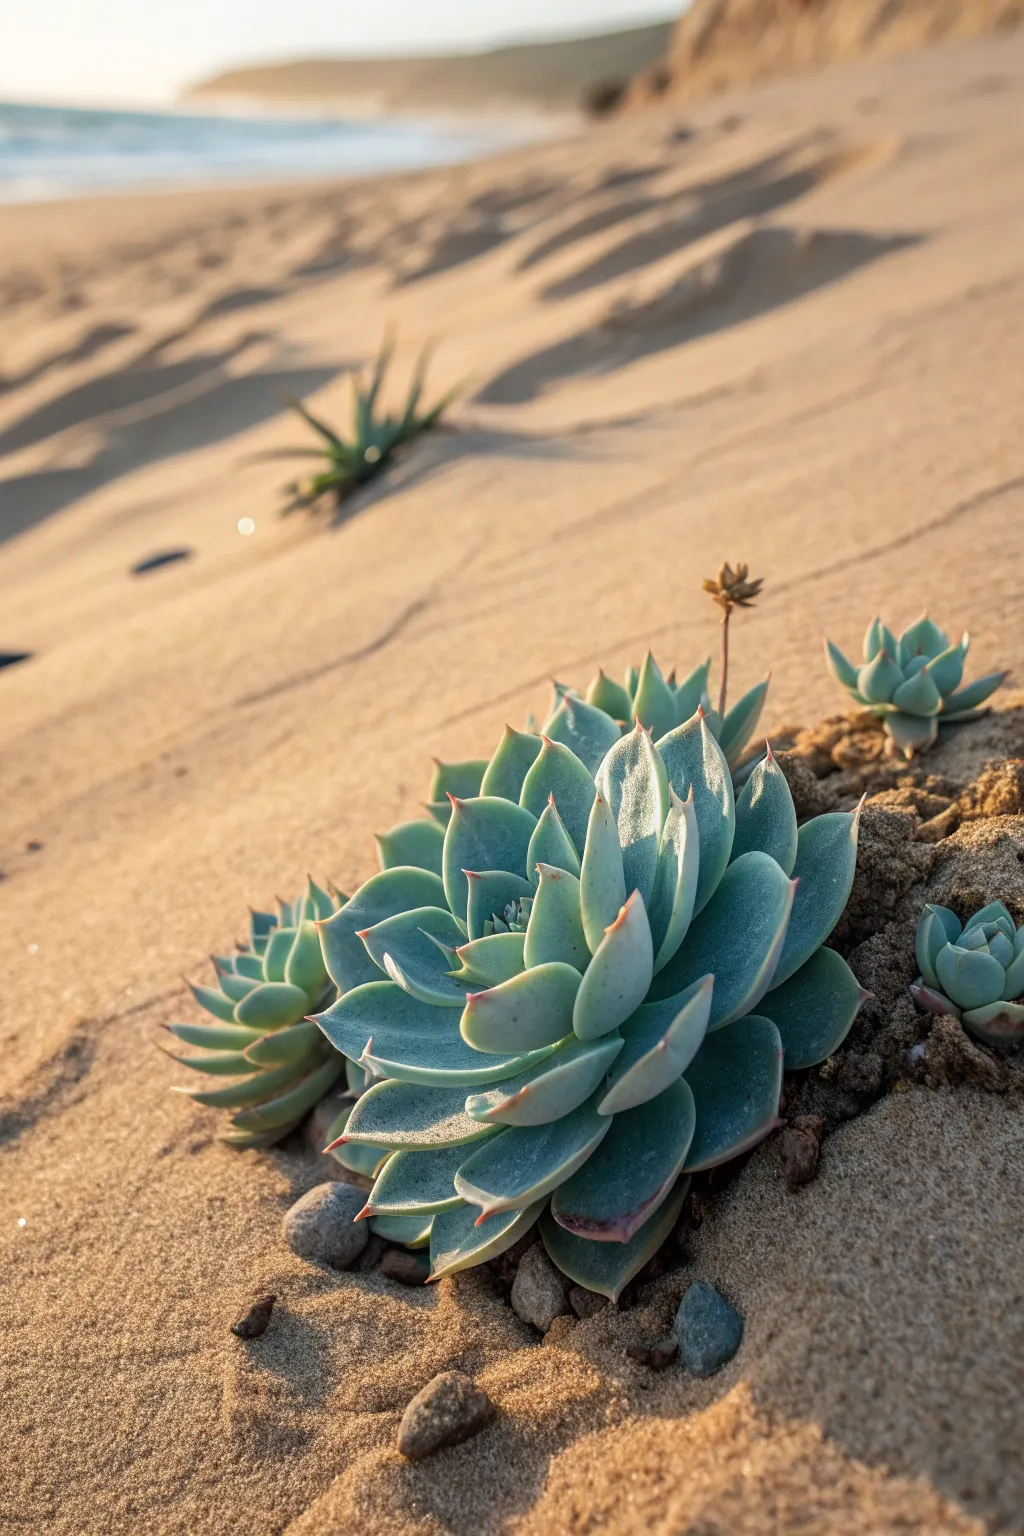
Capture the essence of a tranquil beachside garden by creating this stunning, naturalistic arrangement of succulents nestled directly into sandy soil. This project creates a low-maintenance, high-impact focal point that mimics the raw beauty of coastal dunes bathing in golden hour light.
Detailed Instructions
Materials
- Large Echeveria rosette (blue-green variety)
- Small Echeveria pups (2-3)
- Horticultural sand or coarse river sand
- Succulent/Cactus potting mix
- Small pebbles or crushed rock (tan/grey mix)
- Driftwood stick or dried flower stem (optional accent)
- Landscape fabric (optional for drainage)
- Trowel or small shovel
- Soft bristle brush (for cleaning leaves)
Step 1: Soil Preparation
-
Select the Site:
Choose a spot in your garden that receives partial to full sun, similar to the warm exposure shown in the photo. If potting, select a wide, shallow planter to mimic a dune. -
Mix the Substrate:
While the surface looks like pure sand, succulents need nutrients. Create a blend of 50% cactus potting mix and 50% coarse sand. -
Ensure Drainage:
If planting in the ground, dig a hole about 6-8 inches deep and fill the bottom with gravel to ensure water drains away quickly, preventing root rot. -
Surface Layer:
Top the nutrient mix with a 1-inch layer of pure horticultural sand. This creates the ‘dune’ aesthetic without suffocating the roots below.
Step 2: Planting the Focal Point
-
Prepare the Main Rosette:
Take your large Echeveria and gently loosen the root ball. Remove any old soil that feels compacted or overly wet. -
Dig the Hollow:
Use your trowel to create a depression in your sand bed, slightly larger than the root ball of your main succulent. -
Positioning:
Place the large succulent into the hollow. I suggest tilting it slightly toward the ‘sun’ side of your viewing angle to catch the light on the leaves. -
Bury the Roots:
Backfill carefully with your sandy mix, ensuring the roots are covered but the lower leaves are resting just above the surface to avoid rot. -
Tuck in the Sand:
Gently press the sand around the base of the plant to stabilize it.
Loose Roots?
If the succulent feels wobbly in loose sand, prop it up with small unseen stones under the bottom leaves until the roots establish.
Step 3: Detailing and Accents
-
Add the Pups:
Nestle the smaller Echeveria pups close to the mother plant, slightly behind or to the side, to create a clustered, natural colony look. -
Incorporate Texture:
Place a few small, rough pebbles near the base of the main rosette. Push them partially into the sand so they look uncovered by wind rather than placed. -
Add Height:
Insert a small dried twig or dried flower stalk vertically behind the cluster to break up the round shapes and add a vertical element. -
Create Dunes:
Use your fingers to sculpt the surrounding sand into gentle ripples or mounds, mimicking wind-blown patterns leading up to the plants. -
Clean Up:
Take a soft bristle brush and gently sweep any stray sand grains off the succulent leaves to reveal their waxy, blue-green coating. -
Final Watering:
Water sparingly around the base of the plants, avoiding the rosette centers. This settles the sand and keys the roots into their new home.
Dune Drama
Add a hidden solar spotlight low to the ground. At night, it will cast long shadows across the sand ripples, mimicking sunset drama.
Enjoy your miniature coastal oasis as it glows in the afternoon sun


Gravel and Shell Walkway
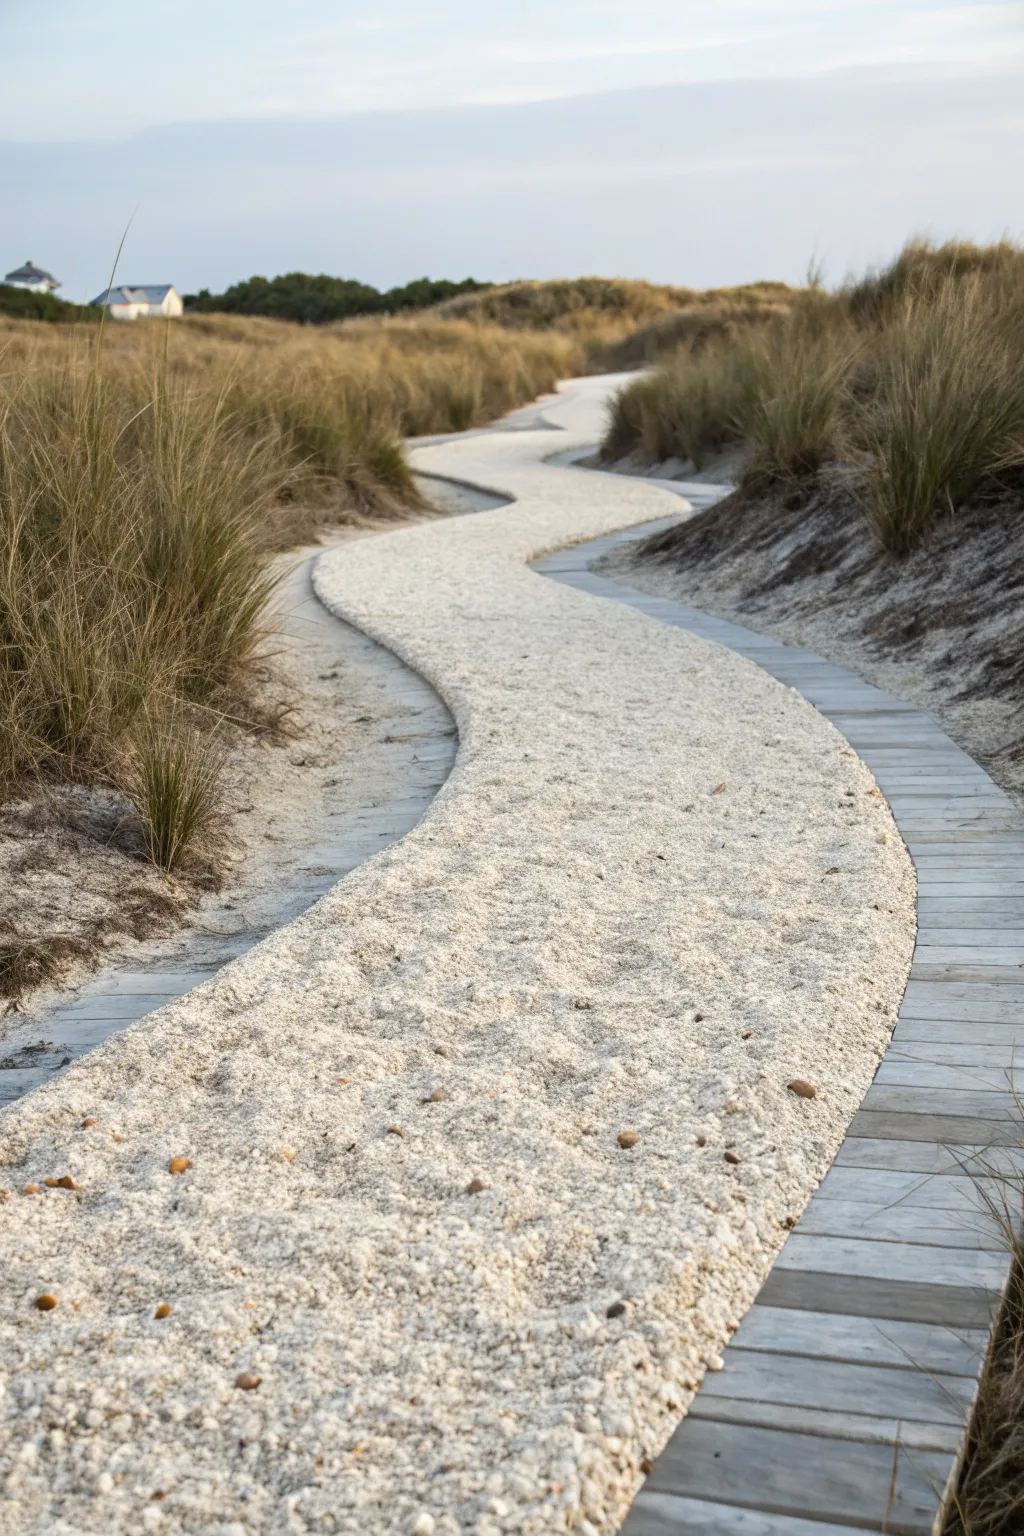

Bring the serene feel of the dunes to your own backyard with this beautifully textured walkway. By combining weathered wooden planks with crushed shells, you create a winding path that feels both structured and delightfully natural.
Step-by-Step Guide
Materials
- Landscape marking paint or rope
- Spade or flat-edged shovel
- Landscape fabric (weed barrier)
- Landscape staples
- Crushed oyster shells or white gravel (bulk)
- Pressure-treated lumber or cedar planks (2×6 or 2×8)
- Circular saw or hand saw
- Drill with long wood screws
- Gravel base (road base or decomposed granite)
- Hand tamper or plate compactor
- Measuring tape
- Rubber mallet
Step 1: Planning and Excavation
-
Mark the Curve:
Begin by laying out the shape of your path using a garden hose or rope to visualize the curves. Once you are happy with the winding ‘S’ shape, trace the edges with landscape marking paint. -
Determine Width:
Measure a consistent width for the path—around 3 to 4 feet is comfortable for walking—making sure the curves remain gentle and flowing. -
Excavate the Path:
Dig out the marked area to a depth of approximately 4 to 6 inches using a spade. Keep the bottom of the trench relatively flat and consistent. -
Compact the Soil:
Use a hand tamper to firmly pack down the native soil at the bottom of your trench to prevent future settling. -
Install Landscape Fabric:
Roll out landscape fabric along the entire length of the trench, overlapping edges by at least 6 inches. Secure it in place with landscape staples.
Shell Saver
Crushed shells can be pricey. Use inexpensive pea gravel for the bulk of the fill and save the premium white shells for just the top 1-inch layer.
Step 2: Installing the Wooden Border
-
Cut Planks to Size:
This design uses wood as a retaining edge that sits flush with the ground. Cut your lumber into manageable lengths; shorter lengths (around 2-3 feet) work best for navigating tight curves. -
Lay the Edging:
Place the wooden planks along both sides of your excavated path right on top of the fabric. I find that angling the ends slightly with a miter cut helps them fit together more smoothly around sharper bends. -
Level the Wood:
Ensure the tops of the planks are level with the surrounding ground or slightly raised. You may need to add or remove a little dirt under specific boards to get them sitting perfectly flat. -
Create Cross-Sections (Optional):
If you want the segmented look shown in some boardwalk designs, you can install sleeper joists underneath, but for a simple gravel retainer, staking the boards from the outside with wooden stakes driven into the ground works well. -
Secure the Edging:
Drive screws through the stakes into your edging boards to lock them in place. The wood creates a ‘trough’ that will hold your shell material.
Step 3: Base and Top Dressing
-
Add the Base Layer:
Fill the bottom 2-3 inches of your path with a coarse gravel base or road base. Rake it out evenly. -
Compact the Base:
Use your tamper again to pack this base layer down hard. This provides a solid foundation so you don’t sink when walking. -
Pour the Shells:
Pour your crushed oyster shells or decorative white gravel into the path, filling it up to the top edge of the wooden borders. -
Spread Evenly:
Use a hard garden rake to spread the shells, creating a slight crown in the center (making it slightly higher than the sides) to help shed rainwater. -
Clean the Edges:
Sweep any stray shells off the wooden borders and surrounding grass to ensure a crisp, clean line where the materials meet. -
Final Tamping:
Give the surface a very light tamp or simply walk over it repeatedly to help the shells settle into a stable, crunchy surface.
Weed Worries
If weeds pop up later, avoid chemical sprays that damage the shells. A simple mixture of vinegar and salt sprayed directly on the weed works wonders.
Now you can enjoy a leisurely stroll along your beautiful, beach-inspired garden path
Spaced Pavers and Ground Cover
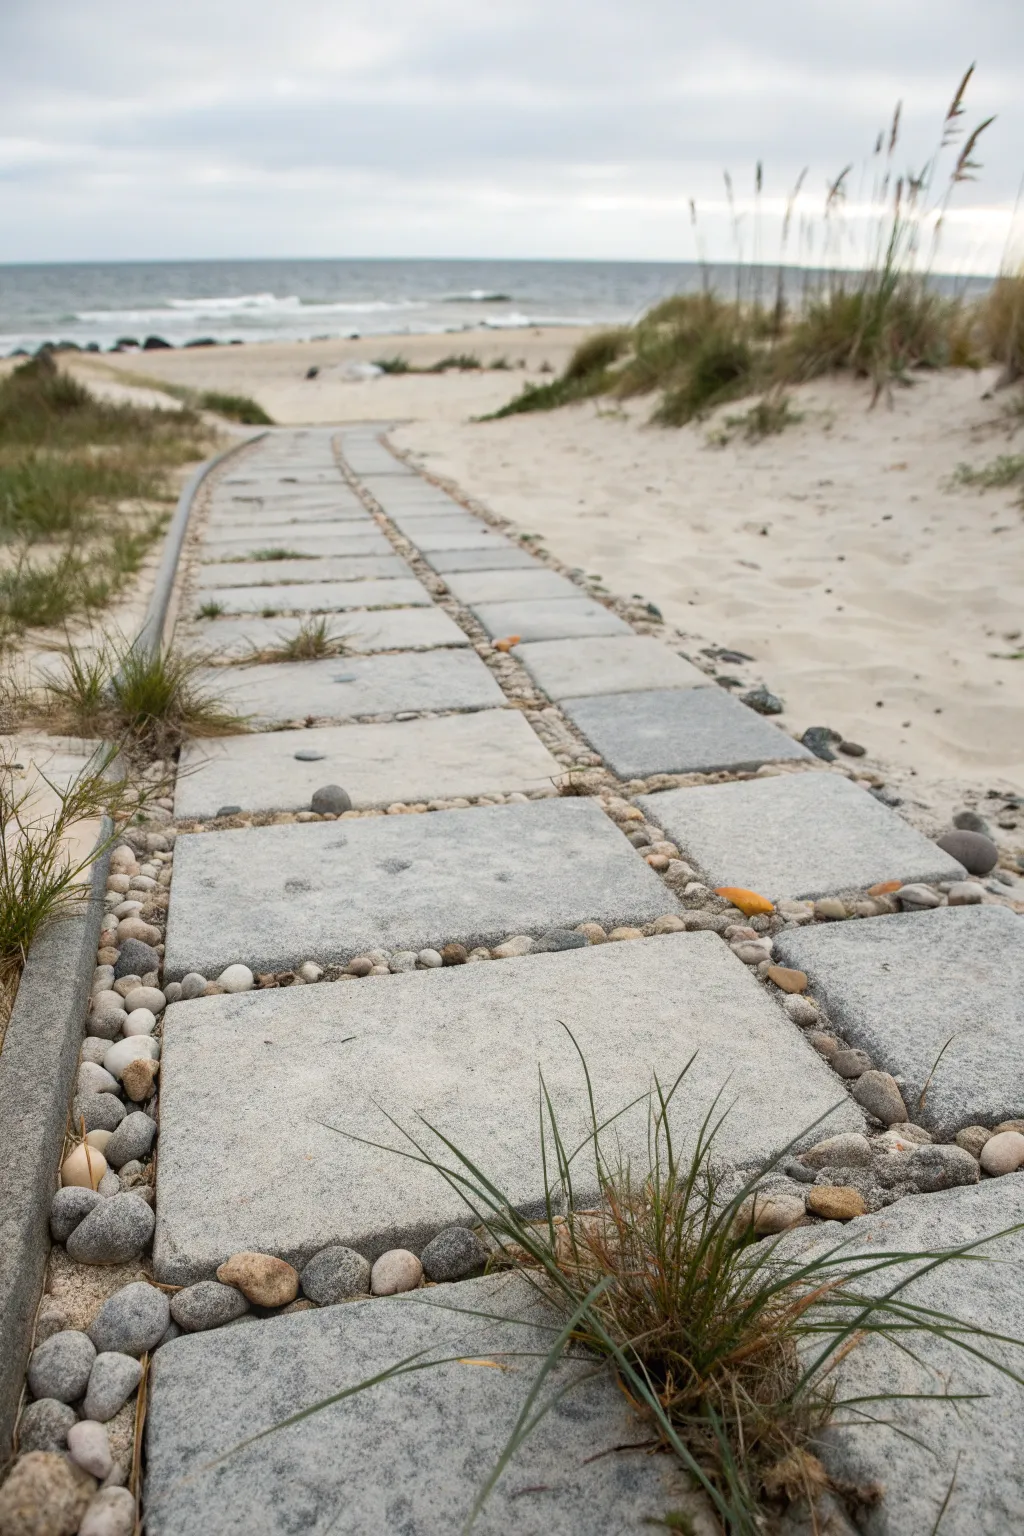
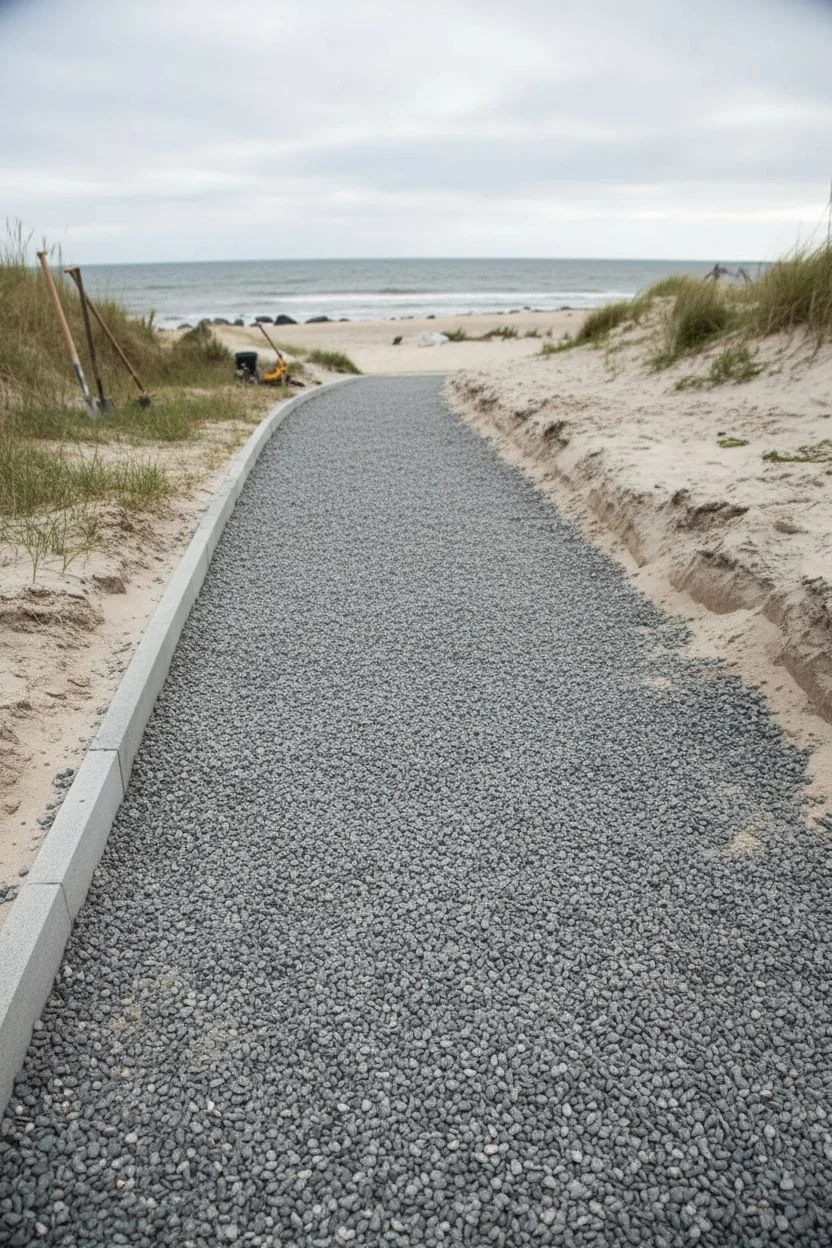
Bring the serene feeling of the coast to your backyard with this structured yet natural pathway design. By combining geometric concrete pavers with smooth river stones and soft sand, you create a durable walkway that feels perfectly integrated into a beach-inspired landscape.
Detailed Instructions
Materials
- Large square concrete pavers (approx. 24×24 inches or similar)
- Concrete edging/curbing or metal landscape edging
- Base material (crushed gravel/stone dust)
- Leveling sand
- Clean beach sand or masonry sand for filling
- Smooth river stones/pebbles (grey and tan mix)
- Native dune grass or ornamental grasses
- Shovel and rake
- Trowel
- Rubber mallet
- Level
- Plate compactor (optional but recommended)
Step 1: Site Prep and Foundation
-
Mark the Path:
Begin by staking out the path’s trajectory using string lines to ensure straight edges. This design features a gentle curve, so adjust your lines to follow the natural flow of your landscape. -
Excavate the Area:
Dig out the marked area to a depth of about 6-8 inches. This allows room for the sub-base, sand, and the thickness of the pavers themselves. -
Compact the Soil:
Ensure the underlying soil is firm. If it’s loose, use a tamper or plate compactor to create a solid foundation that prevents future settling. -
Install the Base Layer:
Spread a 3-4 inch layer of crushed gravel or stone dust. Rake it smooth and compact it thoroughly. A solid base is crucial for keeping pavers level over time.
Loose Stones?
If pebbles keep popping out, try using a polymeric sand designed for wide joints. It hardens when wet, locking the stones in place while still looking like natural sand.
Step 2: Edging and Paver Layout
-
Set the Edging:
Install concrete curbing or heavy-duty landscape edging along the perimeter. In the image, a concrete curb acts as a retainer to keep the sand and stones in place. -
Add Leveling Sand:
Pour a 1-inch layer of leveling sand over the compacted base. Screed this layer perfectly flat using a long straight board or level. -
Place the First Paver:
Starting at one end, carefully place your first square paver. Use a rubber mallet to tap it gently into the sand bed until it is level. -
Create the Grid:
Continue laying pavers in pairs or a double-wide grid pattern. Instead of butting them tightly together, leave uniform gaps of approximately 2-3 inches between each stone. -
Check Consistency:
I like to use a small block of wood cut to the width of the gap as a spacer; this ensures every channel between pavers is identical.
Pro Tip: Height Matters
Set your pavers slightly higher (1/4 inch) than the surrounding grade. This prevents sand and soil from washing over them during heavy rain and keeps the surface clean.
Step 3: Detailing and Planting
-
Fill the Gaps:
Once all pavers are set and leveled, fill the spaces between them. Use decorative beach sand for the wider sections, sweeping it clean off the paver surfaces. -
Insert River Stones:
In the perpendicular gaps and along the edges, hand-place smooth river stones. Press them firmly into the sand so they sit flush or slightly below the paver surface. -
Create Stone Borders:
Pay special attention to the borders where the pavers meet the edging. Create a continuous channel of river stones here to frame the walkway, as seen in the photo. -
Plant Grass Accents:
Before the sand is fully packed, identify spots for greenery. Remove a small pocket of sand and stone, add soil, and plant clumps of dune grass directly near the path’s edge or even in wider gaps. -
Final Clean:
Gently spray the walkway with a garden hose on a mist setting. This helps settle the sand and washes dust off your new stones. -
Stabilize:
If your area is windy, you might consider mixing a polymeric sand binder with the decorative sand to help lock the pebbles in place without losing the natural look.
Step back and enjoy the calming rhythm of your new coastal walkway
Driftwood Fence and Shadows
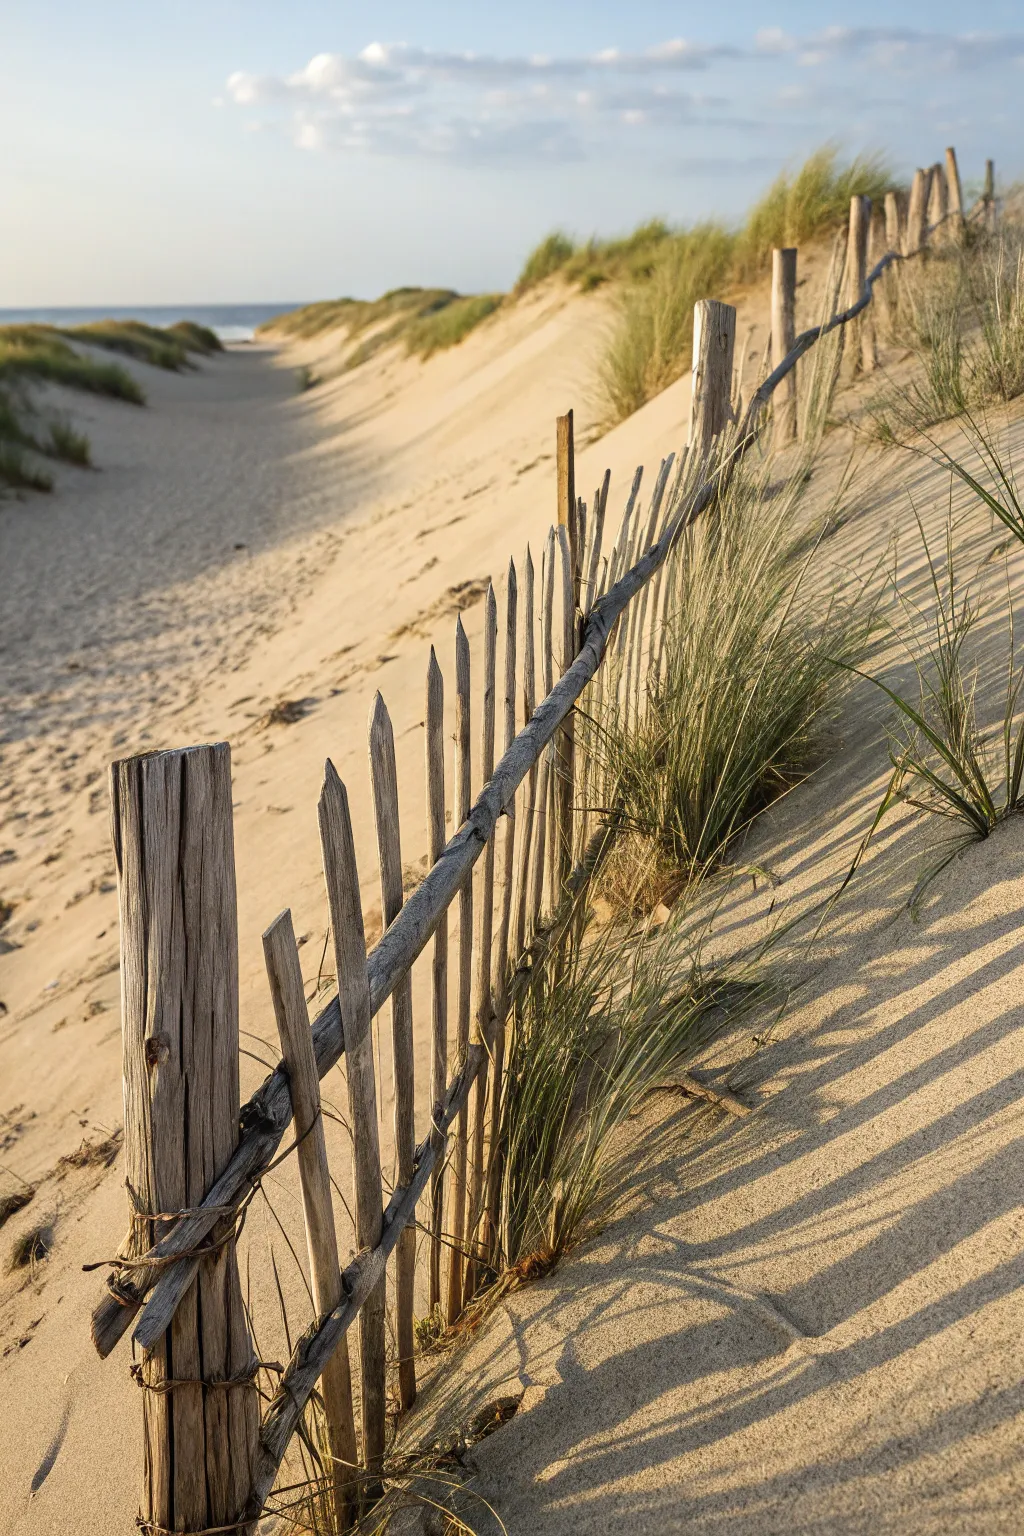
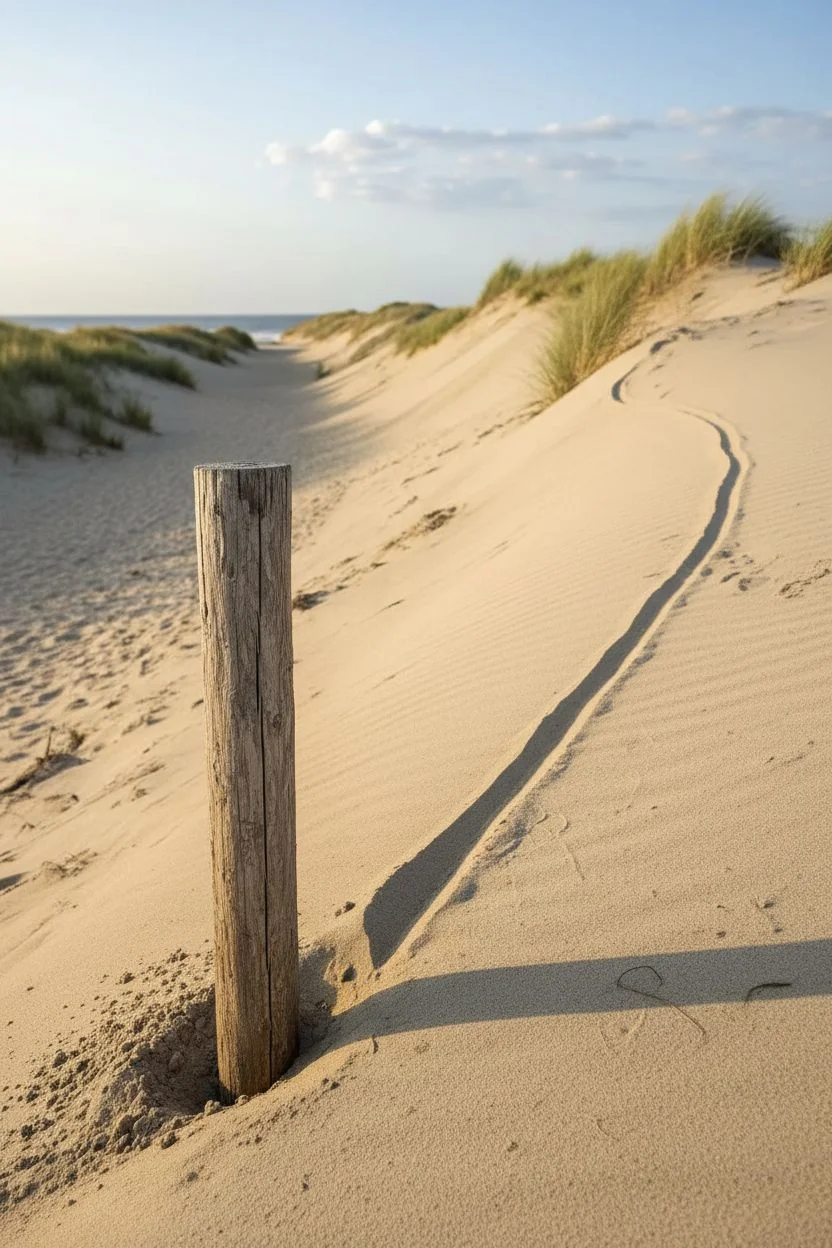
Capture the serene beauty of a windswept coastline with this naturalistic decorative fence project. Whether building a miniature model for a diorama or installing a full-scale garden feature, the interplay of weathered wood and long shadows creates instant coastal charm.
Step-by-Step Guide
Materials
- Weathered chestnut stakes or driftwood pieces (various lengths)
- Thick galvanized wire or strong natural twine
- Sturdy main support posts (4-6 inch diameter)
- Sand (builders sand or play sand)
- Beach grass plugs (like Marram grass)
- Drill with wood bits
- Wire cutters
- Pliers
- Hammer or mallet
- Protective gloves
Step 1: Setting the Scene
-
Prepare the terrain:
Before installing any wood, shape your sandy area. Create a gentle slope that mimics the natural rise of a dune, ensuring the sand is deep enough to hold the posts securely. -
Establish the main anchor:
Identify where your fence line will begin. Dig a deep hole for the primary support post—the thickest log shown in the foreground—burying at least a third of its length for stability. -
Position the main post:
Insert the heavy, weathered log into the hole. Tilt it slightly if you want an older, windswept look, then backfill tightly with sand and tamp it down firmly to lock it in place. -
Map the fence line:
Trace a gently curving line in the sand leading away from your anchor post. This guideline will ensure your fence flows naturally with the dune’s contours rather than looking rigid.
Sunlight Tip
Orient your fence line east-to-west. This ensures the low morning or afternoon sun casts those dramatic, iconic rhythmic shadows across the sand.
Step 2: Preparing the Pickets
-
Select your wood:
Gather your thinner chestnut stakes or driftwood pieces. Look for variety in texture and slight variations in straightness to enhance the organic feel. -
Cut to varied lengths:
Trim your stakes so they are roughly similar in height but not identical. Point the tops into rough, triangular spikes; splitting the wood along the grain gives a more authentic, weathered appearance than sawing. -
Drill wire holes:
Measure about 6-8 inches down from the top of each picket. Drill a small hole through the center of each stake, sized just large enough for your galvanized wire to pass through. -
Drill the anchor post:
Drill a corresponding hole through your main support post where the wire will terminate. I find angling this hole slightly downward helps tension the wire later.
Natural Texture
Don’t use sandpaper on the pickets. Let the wood split naturally or use a wire brush to raise the grain, emphasizing the eroded texture caused by sand and saltwater.
Step 3: Assembling the Barrier
-
Thread the wire:
Feed a long length of galvanized wire through the anchor post first, securing it with a twist or knot on the hidden side. Begin threading your smaller pickets onto the wire one by one. -
Create spacing twists:
Between every picket, use your pliers to twist the wire around itself or create a small loop. This knot acts as a spacer, keeping the wood pieces separated by about 2-3 inches. -
Install the pickets:
As you thread each picket, push its base firmly into the sand along your traced line. The wire holds them upright, while the sand anchors the bottom. -
Add secondary supports:
Every 6 to 8 feet, insert a slightly sturdier post (like the one seen halfway down the dune) to bear the weight of the fence line and prevent sagging. -
Terminate the wire:
Once the fence reaches your desired length, wrap the remaining wire tightly around the final support post and secure it. Clip any excess with wire cutters.
Step 4: Final Landscape Touches
-
Plant grass tufts:
Dig small pockets in the sand alongside the fence line, focusing on the windward side. Plant your beach grass plugs in irregular clusters rather than straight rows. -
Smooth the sand:
Use your hands or a soft brush to sweep away footprints. Create linear striations in the sand that run parallel to the fence to mimic wind patterns. -
Check the shadows:
Observe how the light hits your installation. If possible, orient the fence so sunlight casts those dramatic, long striped shadows across the sand later in the day. -
Weathering simulation:
If your wood looks too new, you can lightly mist it with a solution of vinegar and steel wool (prepared days in advance) to instantly gray the timber.
Now step back and enjoy the peaceful structure and rhythmic shadows of your personal coastal escape
Sunset Dusk Glow
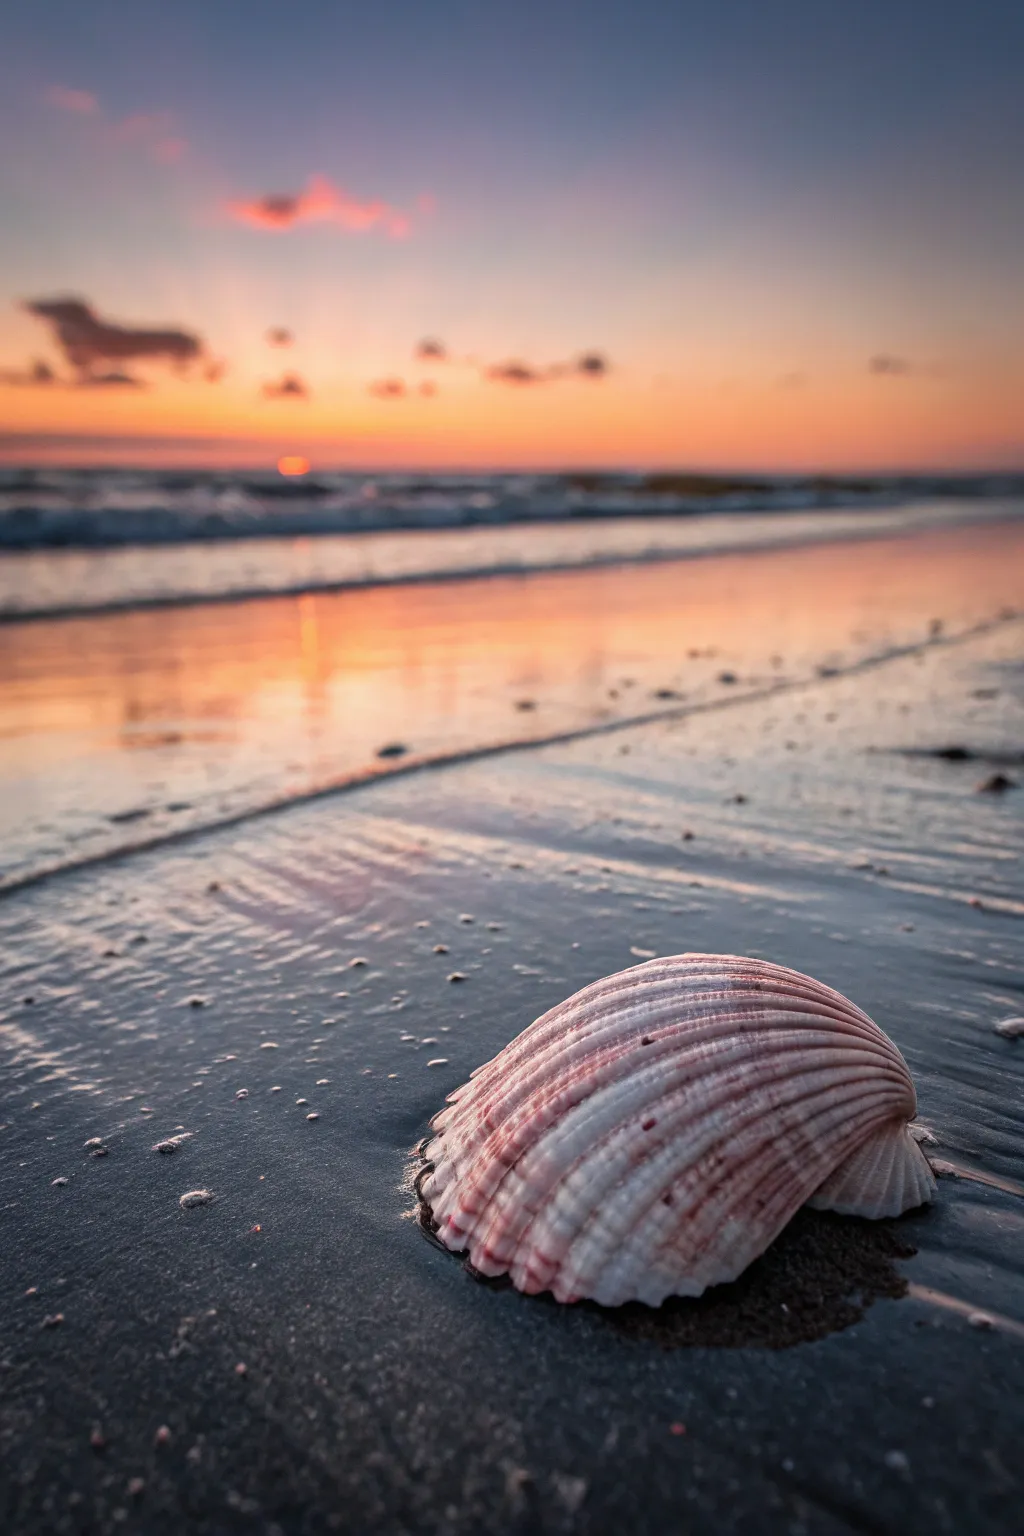
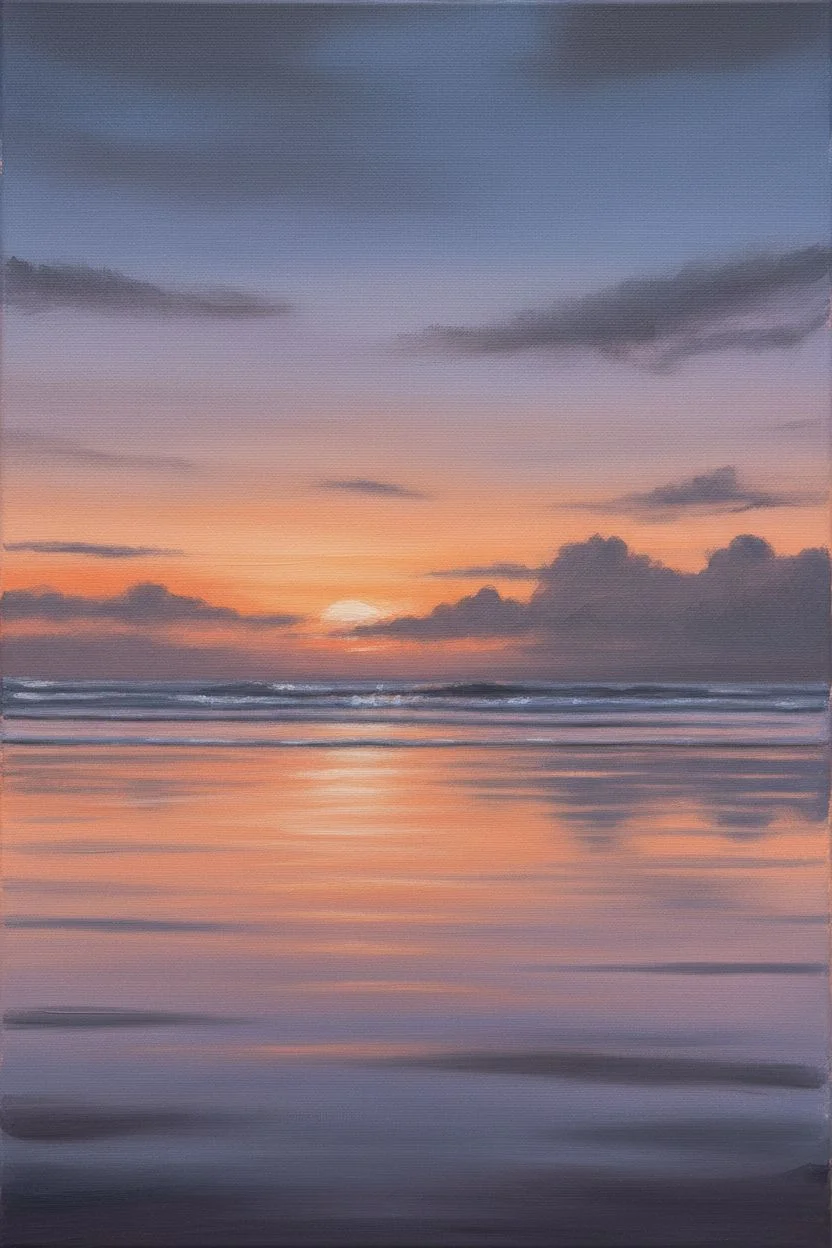
Capture the fleeting magic of a coastal sunset with this acrylic painting tutorial, focusing on the interplay of warm light and wet textures. You’ll learn how to render a realistic scallop shell against a soft, blurred horizon that glows with evening colors.
How-To Guide
Materials
- Primed canvas or canvas board (8×10 or 9×12 inch)
- Acrylic paints: Titanium White, Mars Black, Burnt Umber, Ultramarine Blue, Phthalo Blue, Cadmium Orange, Alizarin Crimson, Yellow Ochre
- Brushes: Large flat wash brush (1 inch), medium filbert (size 6), small round detail brush (size 1 or 0), fan brush
- Palette knife
- Water container and paper towels
- Slow-drying medium or retarder (optional)
Step 1: Setting the Scene: The Background
-
Establish the Horizon:
Mix a soft, dusky purple using Ultramarine Blue, a touch of Alizarin Crimson, and White. Paint a horizontal band across the upper third of your canvas to define the horizon line, keeping the edges soft and slightly blended. -
Paint the Sky Gradient:
Above the purple horizon, blend in a warm mix of Cadmium Orange and White. As you move higher up the canvas, transition into a darker, cooler tone by adding a tiny bit of Phthalo Blue and Alizarin Crimson to the mix, creating the darkening evening sky. -
Add Cloud Hints:
While the sky paint is still wet, use a clean filbert brush to scumble in soft, indistinct cloud shapes near the horizon using a dark grey-purple mix. Soften the edges immediately so they look out of focus. -
Reflect the Sky:
Mirror your sky colors on the bottom two-thirds of the canvas. Start with the warm orange-pink reflection just below the horizon line, dragging the paint horizontally to mimic the wet sand reflecting the light. -
Create Water Movement:
Using a fan brush and Titanium White mixed with a drop of water, lightly drag horizontal streaks across the distant water line to suggest breaking waves, keeping this very blurry to maintain the depth of field effect.
Step 2: The Wet Sand Texture
-
Deepen the Foreground:
Mix Burnt Umber with Ultramarine Blue and a touch of Black to create a deep, cool dark grey. Apply this to the bottom foreground area where the shell will sit, blending it upwards into the warmer reflected colors. -
Create Surface Sheen:
I like to use a glazing technique here: mix a very transparent glaze of Alizarin Crimson and apply it thinly over the transition area between the dark sand and the orange reflection to enhance that wet, glossy look. -
Suggest Ripple Lines:
With a flat brush, paint a diagonal line stretching from the bottom left toward the mid-right using a mix of White and Blue-Grey. This creates the receding water line on the sand.
Muddy colors?
If your sunset gradient turns grey or brown where colors meet, let the first layer dry completely before glazing the second color over it rather than wet-blending.
Step 3: Rendering the Shell
-
Outline the Shape:
Using a small round brush and diluted Burnt Umber, sketch the basic fan shape of the scallop shell in the bottom right corner. Make sure it feels grounded in the sand, not floating. -
Block in Base Colors:
Fill the shell shape with a base coat of Titanium White mixed with a very small amount of Alizarin Crimson and Yellow Ochre to create a pale, warm bone color. -
Paint the Shadow:
Mix a dark, sheer shadow color using purple and brown. Paint a soft shadow directly underneath and to the right of the shell to anchor it to the beach. -
Define the Ridges:
With your smallest detail brush and a mix of Burnt Umber and Alizarin Crimson, paint the grooves of the shell. Start from the hinge and fan outward, curving the lines slightly to follow the shell’s contour. -
Add High Contrast:
Deepen the darkest parts of the ridges near the bottom edge of the shell. Simultaneously, paint the inner recessed curve on the right side of the shell with a darker shadow tone.
Level Up: 3D Elements
Mix a fine texture gel or actual clean sand into your foreground paint before applying it. This physical texture creates realistic grit that catches light.
Step 4: Final Lighting Details
-
Highlight the Ridges:
Mix Titanium White with a tiny dot of Orange. Carefully paint thin highlights on the raised parts of the shell ridges, focusing on the top curve where the sunset light would hit. -
Add Sand Texture:
Spatter a tiny amount of diluted dark brown paint around the base of the shell and immediate foreground to simulate grains of sand and small pebbles. -
Enhance Water Glints:
Place tiny dots of pure Titanium White on the wet sand around the shell and along the diagonal water line to represent sparkling reflections and bubbles. -
Final Glaze:
Once completely dry, apply a very thin, watery wash of Cadmium Orange over the entire shell area to unify the colors and give it that warm ‘golden hour’ glow.
Enjoy the peaceful atmosphere your new seascape brings to the room
Fire Pit by the Sea
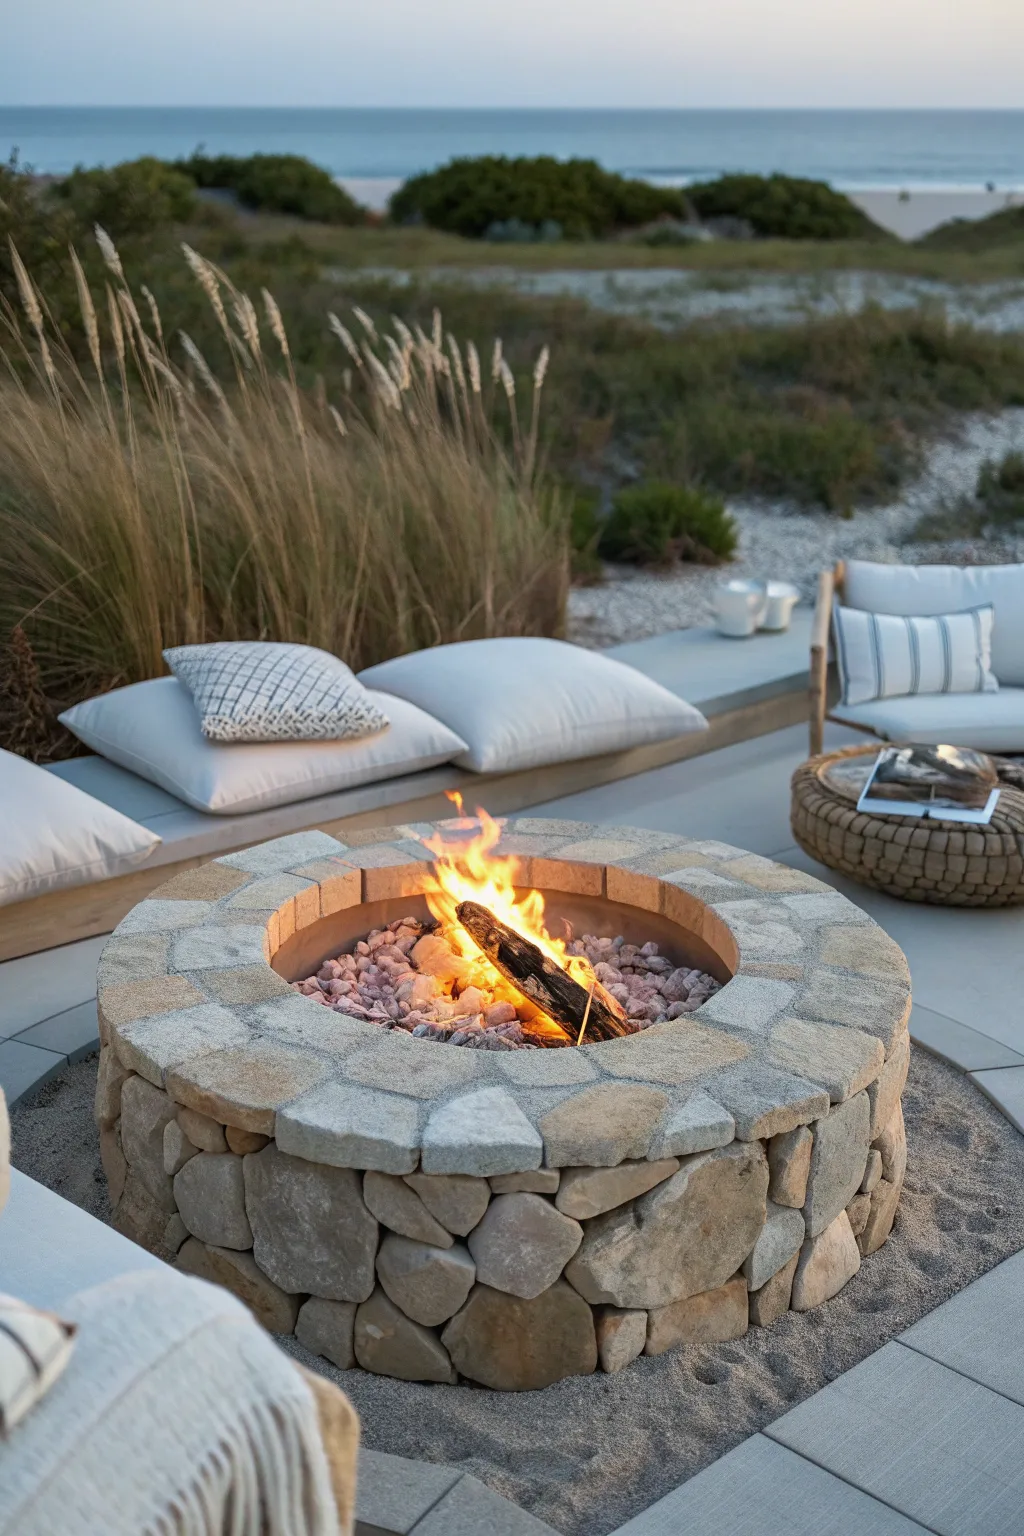
Bring the warmth of a beach bonfire to your own backyard with this stunning, rugged stone fire pit. By mimicking the tones of sand and driftwood, this project creates a cozy, permanent gathering spot that feels perfectly at home in a coastal landscape.
Step-by-Step Tutorial
Materials
- Concrete footing mix
- Rebar (3/8 inch)
- Flagstone or Fieldstone (tan/beige tones)
- Fire brick (for inner lining)
- Heat-resistant mortar
- Standard mortar mix
- Gravel/crushed stone (drainage)
- Decorative pink/grey lava rocks
- Gas burner kit (optional, for gas conversion)
- Masonry trowel
- Chipping hammer
- Sponge and bucket
- Level
- Plywood (for circular template)
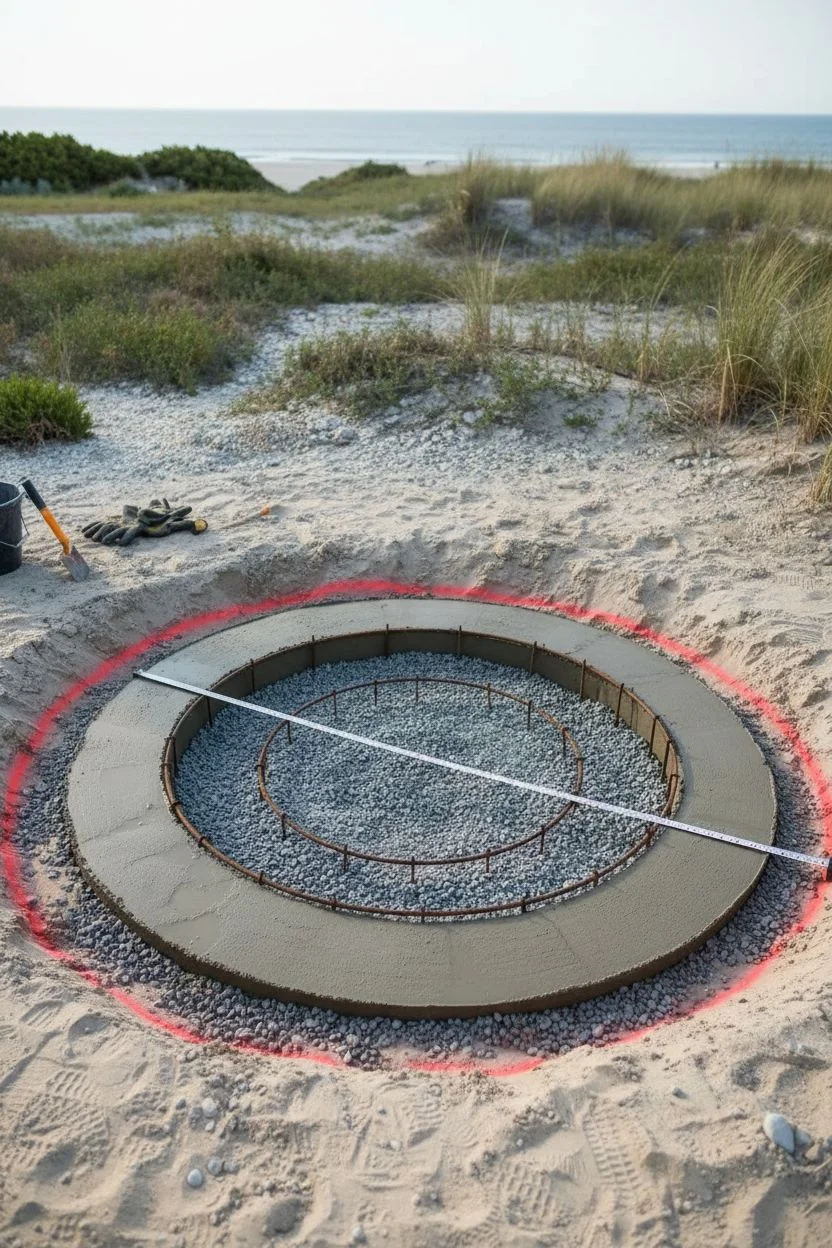
Step 1: Site Prep & Foundation
-
Choose your location:
Select a safe, flat spot away from overhanging trees or structures. Mark the center point and use a string compass to spray paint a circle for your pit diameter (typically 36-44 inches) plus an extra 6 inches for the footing. -
Dig the footing:
Excavate the marked circle to a depth of about 8-12 inches. This depth is crucial for stability, especially in sandy or shifting soils typical of coastal areas. Compact the soil at the bottom firmly. -
Add drainage:
Pour about 4 inches of crushed gravel into the trench and compact it well. Good drainage prevents water from pooling and cracking the foundation during freeze-thaw cycles. -
Pour the concrete ring:
Mix your concrete and pour a 4-6 inch thick ring footing on top of the gravel. Embed two rings of rebar into the wet concrete for reinforcement. Level the surface and let it cure for at least 24 hours.
Stone Slipping?
If vertical stones keep sliding down before the mortar sets, use small wooden wedges or masonry nails as temporary supports between the rocks. Remove them once the bond holds firm.
Step 2: Building the Core
-
Dry fit the inner wall:
If you are using fire bricks for the interior, lay out the first circle to ensure your geometry is correct before mixing mortar. The inner diameter dictates the final size of the fire area. -
Lay the first course:
Apply a bed of heat-resistant mortar to the footing and begin laying your fire bricks. Check for level frequently. This inner wall will handle the extreme heat, so tight joints are best here. -
Build upward:
Continue stacking the fire brick courses until you reach your desired height, usually between 12 and 18 inches. Stagger the vertical joints (running bond) for structural strength. -
Venting considerations:
If you are installing a gas burner, leave the necessary opening or channel for the gas line near the base. If wood-burning, consider leaving small gaps near the bottom for airflow, though top-down burning works too.
Step 3: Stonework & Finishing
-
Select your facing stones:
Sort through your fieldstone or flagstone supply. Look for pieces with relatively flat faces for the exterior and varied sizes to create that natural, puzzled look. -
Apply the stone veneer:
Butter the back of each stone with standard mortar and press it against the outside of your fire brick core. Use small stone chips or shims to hold heavy stones in place while the mortar sets. -
Mind the gaps:
Try to keep the mortar joints recessed or tight. Excessive visible mortar can ruin the dry-stack aesthetic shown in the photo. I often wipe away squeeze-out immediately with a damp sponge. -
Cap it off:
Select wide, flat flagstones for the top cap. These serve as a seat or footrest. Dry fit them first to minimize cutting. You want a consistent overhang on both the inside and outside edges. -
Mortar the cap:
Set the cap stones in a generous bed of mortar. Ensure everything is perfectly level so drinks won’t slide off. Fill the joints between cap stones neatly with mortar and tool them smooth. -
Clean and cure:
Once the mortar is thumbprint-hard, brush off any loose crumbs. Sponge firmly to remove haze from the stone faces. Keep the masonry damp for a couple of days to help it cure slowly and strongly. -
Fill the pit:
If wood-burning, add a layer of lava rock or gravel at the bottom. If gas, install your burner pan and cover it with the decorative pink/grey lava rocks to hide the mechanism while allowing flames to dance through.
Beach Glass Sparkle
For a true coastal upgrade, mix tumbled fire glass in sea hues (teal, blue, clear) with your lava rocks. The reflection of the fire against the glass mimics sunlight on ocean waves.
Now you have a durable, custom centerpiece ready for sunset gatherings and roasting marshmallows by the sound of the waves
Storm Rolling In
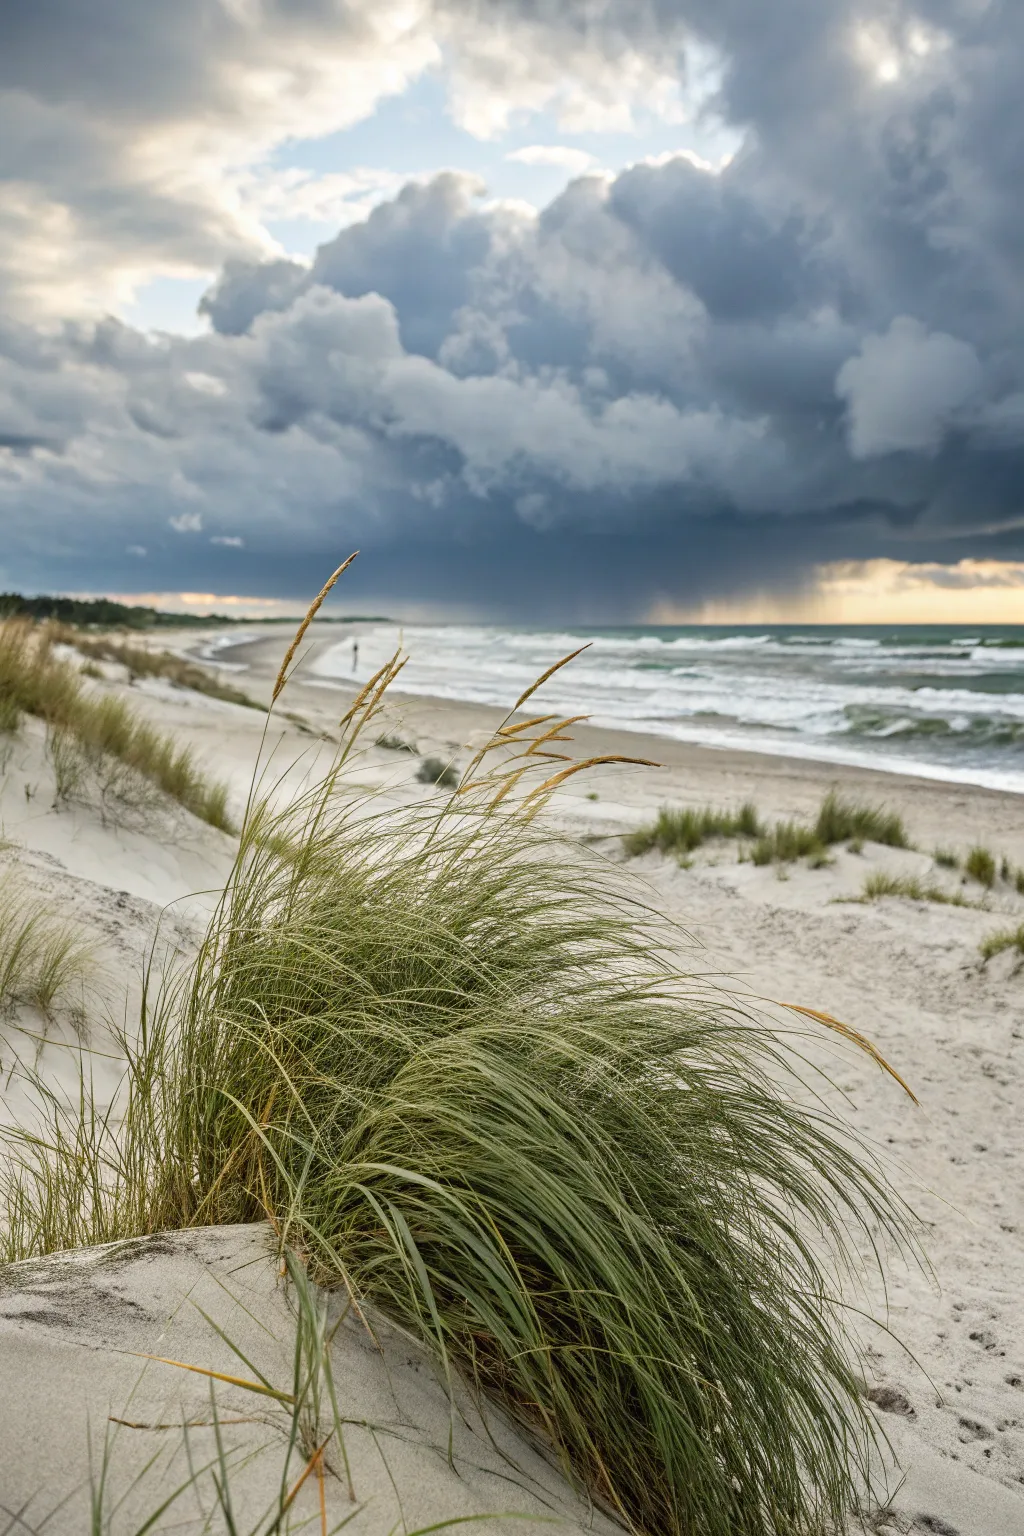
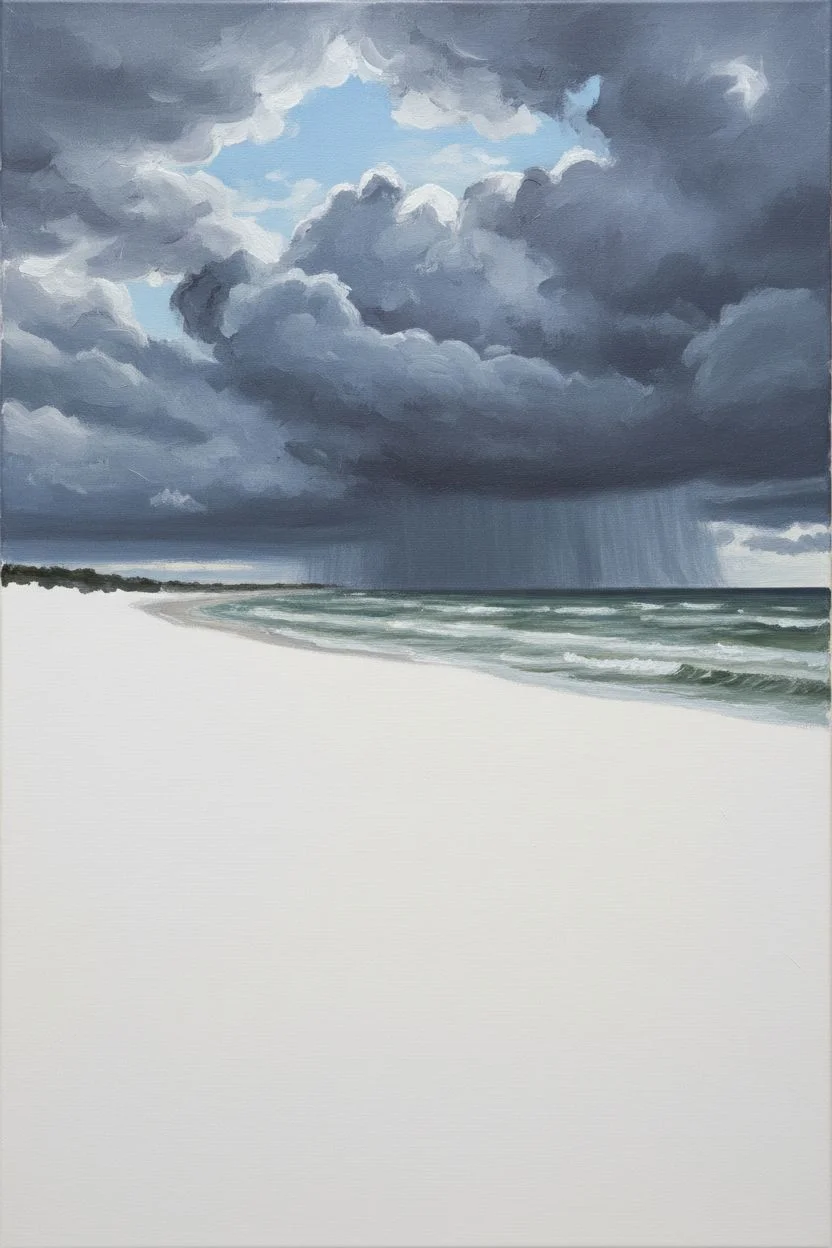
Capture the dramatic beauty of a coastal storm with this atmospheric acrylic painting project. You will focus on building depth through layered clouds and creating realistic, wind-blown textures for the dune grass foreground.
Step-by-Step Guide
Materials
- Stretched canvas (16×24 inches or similar portrait orientation)
- Acrylic paints: Titanium White, Payne’s Grey, Cerulean Blue, Burnt Umber, Yellow Ochre, Sap Green, Deep Violet
- Large flat brush (1 inch)
- Medium filbert brush
- Small round brush
- Fine liner brush or rigger brush
- Palette knife
- Water container and paper towels
- Slow-drying medium (optional)
Step 1: Sky and Sea Foundation
-
Prime the horizon:
Start by drawing a faint pencil line about one-third of the way up the canvas to mark your horizon. This doesn’t need to be perfectly straight, but it anchors the composition. -
Block in the sky colors:
Mix Titanium White with a touch of Cerulean Blue for the upper sky patches. Apply this loosely near the top center, leaving plenty of raw canvas for the darker clouds. -
Create the storm mass:
Combine Payne’s Grey with a tiny bit of Deep Violet and White to create a moody slate color. Using the large flat brush, paint heavy, rolling organic shapes across the middle and top of the sky area. -
Blend the cloud edges:
While the paint is still wet, use a clean, dry medium brush to soften the transition between the bright sky and the dark storm clouds. This creates that fluffy, vaporous look. -
Paint the distant rain:
Mix a very watery wash of Payne’s Grey. Drag your brush vertically downwards from the dark cloud bottom towards the horizon line to simulate distant rain curtains falling over the ocean. -
Establish the ocean:
For the sea, mix Cerulean Blue, Sap Green, and a lot of White. Paint horizontal strokes right below the horizon line, getting slightly lighter as you move closer to the shore. -
Add whitecaps:
Use the tip of a small flat brush with pure Titanium White to dab small, horizontal dashes along the water area, mimicking the choppy waves caused by the storm winds.
Cloud Control
If your storm clouds look too heavy or solid, use a damp sea sponge to dab at the edges while wet. This lifts pigment and creates a softer, mistier effect.
Step 2: Sand and Foreground Structure
-
Lay down the sand base:
Mix Titanium White, a small amount of Yellow Ochre, and a speck of Burnt Umber. Paint the entire bottom third of the canvas in sweeping, curved motions to suggest sloping dunes. -
Contour the dunes:
Add a bit more Burnt Umber to your sand mix. Paint shadows on the left side of the imaginary dune humps to give them volume and indicate a light source coming from the upper right. -
Add texture to the sand:
Load a palette knife with thick white and pale beige paint. Lightly scrape it over the dried sand layer to create a gritty, textured surface that catches the light. -
Darken the grass base:
Where the main clump of grass will sit in the foreground, paint a dark, messy patch using Sap Green mixed with Burnt Umber. This acts as the deep shadow at the roots.
Dynamic Wind
Create motion by bending nearly all grass blades deeply in one direction. Keep the curve consistent to show the force of the incoming gale.
Step 3: Detailing the Grass
-
Start the grass blades:
Switch to your fine liner or rigger brush. Thin down a mix of Sap Green and Yellow Ochre with water until it flows like ink. -
Flick the main shape:
Using quick, confident flicks of the wrist, paint long, curved grass blades originating from your dark root patch. Make them swoop to the right to show the strong wind direction. -
Add color variation:
I like to vary my greens here, so mix a darker olive tone and add another layer of blades in amongst the first ones to create density. -
Highlight the tips:
Mix Yellow Ochre with White to make a straw color. Paint fine highlights on the tips of the grass blades and add a few dry, dead stalks sticking out. -
Paint the seed heads:
At the very ends of the tallest stalks, dab a slightly thicker mixture of the straw color to create the texture of the wheat-like seed heads. -
Add background vegetation:
Use a worn-out fan brush or dry filbert to stipple small, blurry patches of dull green on the distant dunes to the left, suggesting further vegetation without distracting detail. -
Final highlights:
Take a tiny bit of pure white and highlight the top curve of the closest, sharpest grass blades to make them pop against the dark sand shadow.
Step back and admire the energetic contrast between the soft, rolling sky and the sharp, windswept details of your foreground
Tide Pool Close-Up
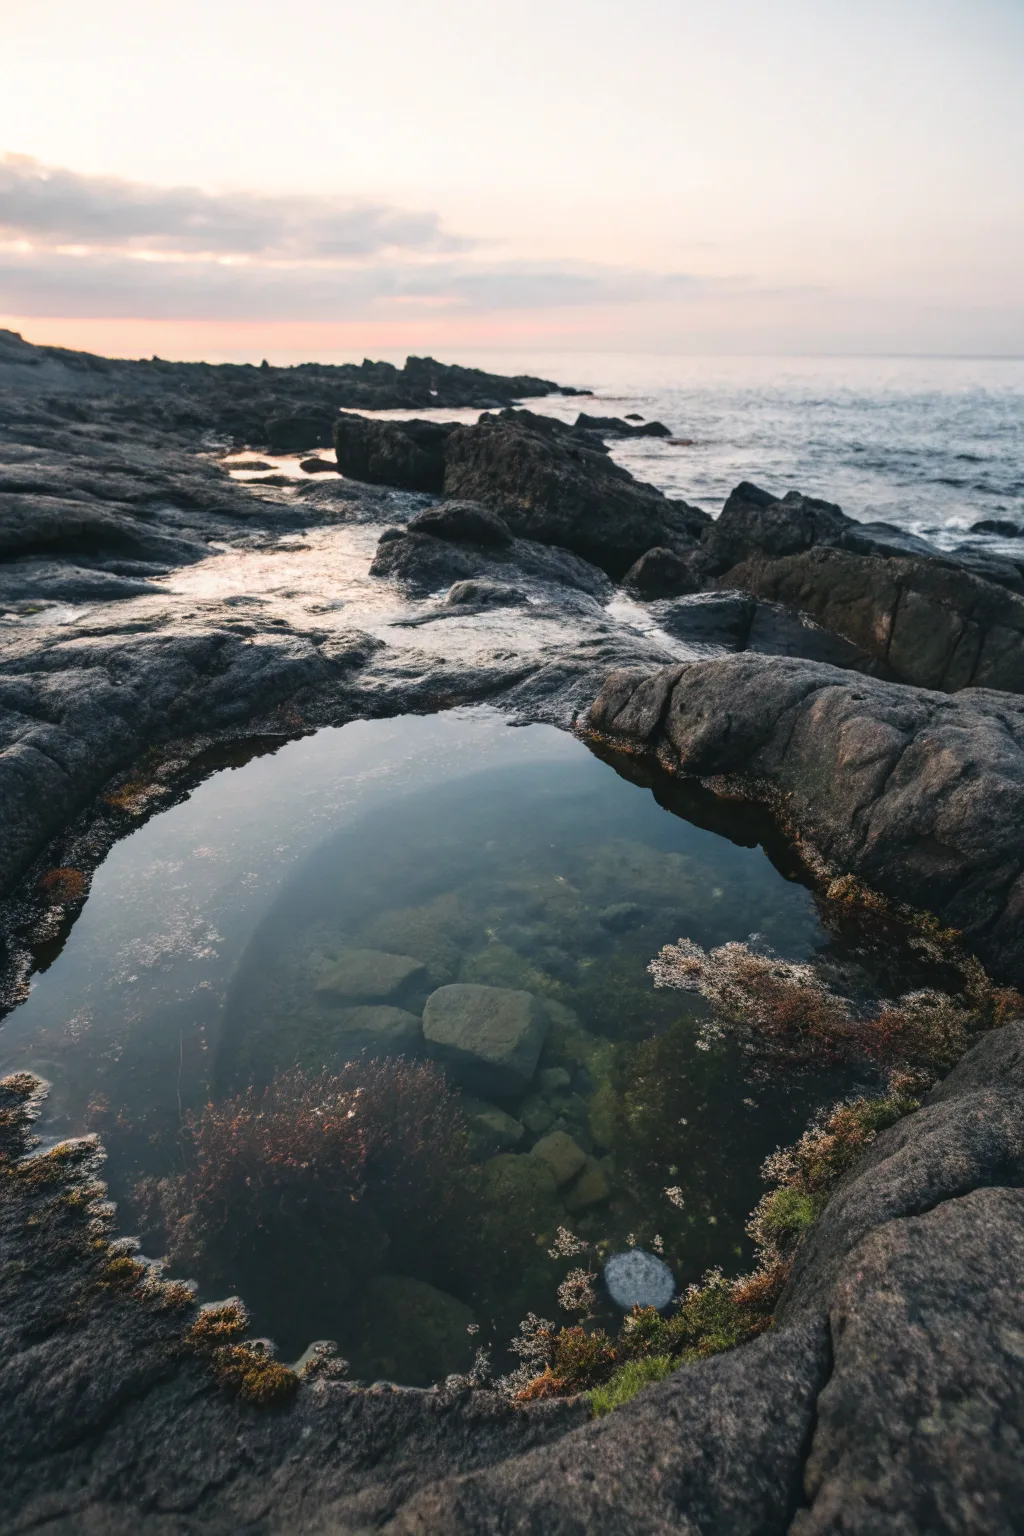
Capture the serene beauty of a twilight coast with this multi-layered resin and clay sculpture. You will build realistic rock textures and a deep, tranquil pool that looks like a slice of the ocean floor right on your table.
Step-by-Step
Materials
- Epoxy resin (deep pour and casting)
- Air-dry clay or epoxy sculpting putty
- Acrylic paints (black, raw umber, burnt sienna, phthalo blue, titanium white, moss green)
- Natural sand and small pebbles
- Dried moss (reindeer or sheet moss)
- Small round wooden base or canvas panel
- UV resin (optional for quick fixes)
- Sculpting tools
- Heat gun or torch
- Gloss varnish
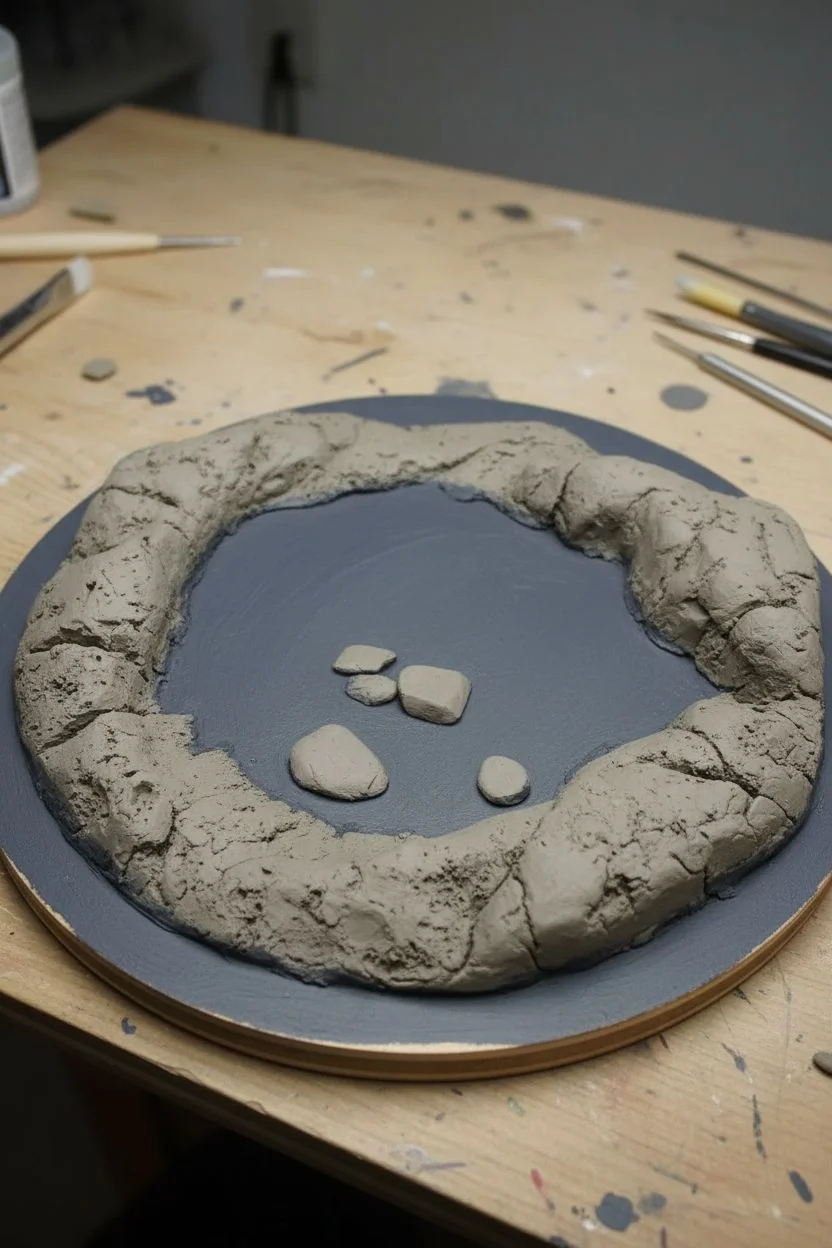
Step 1: Sculpting the Rocky Basin
-
Prepare the base:
Start by priming your wooden base with a dark grey acrylic paint to ensure no wood grain shows through later. -
Form the perimeter rocks:
Using air-dry clay or epoxy putty, build up the outer edges of your base to form a crater-like depression. Create uneven, jagged shapes to mimic weathered volcanic rock. -
Detail the texture:
While the clay is soft, press a real stone or a crumpled ball of aluminum foil into the surface to create organic pitting and rough textures. -
Add submerged elements:
Place a few flattened lumps of clay at the bottom of the ‘pool’ area to represent large stones that will eventually be underwater. -
Let it cure:
Allow the clay to dry completely according to the package instructions—cracks at this stage add character, so don’t worry about perfection.
Cloudy Water Fix
If your resin looks milky, micro-bubbles are trapped. Gently warm the resin bottle before mixing, and always stir slowly to prevent whipping air into the mixture.
Step 2: Painting the Landscape
-
Base coat the rocks:
Paint the entire clay structure with a matte black mixed with a touch of raw umber. Get into every crevice. -
Dry brush highlights:
Lightly load a flat brush with grey mixed with a hint of blue. Drag it horizontally across the raised rock surfaces to accentuate the texture. -
Color the pool floor:
Paint the bottom of the basin with a mix of dark greens and browns. It needs to look muddy and organic, not bright blue. -
Add organic details:
Glue tiny bits of dried moss into the crevices of the submerged rocks and around the waterline to simulate seaweed and algae.
Add Marine Life
Sculpt tiny polymer clay starfish or sea anemones and glue them to the rocks before your first resin pour for a hidden ecosystem detail.
Step 3: Creating the Water
-
Seal the basin:
Before pouring resin, coat the painted clay and organic material with a thin layer of gloss varnish or Mod Podge to prevent bubbles escaping from the porous clay. -
Mix the first resin layer:
Mix a small batch of epoxy resin. Tint it very slightly with a drop of blue-green alcohol ink or transparent dye—it should be nearly clear. -
Pour the base layer:
Pour the resin until it just covers the ‘submerged’ rocks you sculpted earlier. Pop bubbles with a heat gun and let this cure for 24 hours. -
Add floating flora:
Once the first layer is tacky or cured, place tiny wisps of moss or painted fibers to look like floating seaweed suspended in the water. -
Mix the final pour:
Mix a clear batch of resin. If you want a twilight reflection look, add an infinitesimally small amount of grey-purple tint. -
The final fill:
Pour the resin until it reaches the lip of your rock formation. I find waiting a few minutes for the resin to thicken slightly helps it settle with a nice meniscus. -
Create surface tension:
Use a toothpick to carefully drag the resin up against the rock edges so it doesn’t pull away while curing.
Step 4: Final Touches
-
Enhance the wet look:
After the pool has fully cured, use a brush to apply a thin layer of gloss varnish or UV resin to the dry rocks immediately surrounding the water to make them look splashed by the tide. -
Highlight the rim:
Apply a very faint dry brushing of warm white or pale pink on the highest dry rock edges to simulate the reflected sunset light.
Place your finished piece near a window where the natural light can catch the depth of your personal ocean pool
High View Coastline Curve
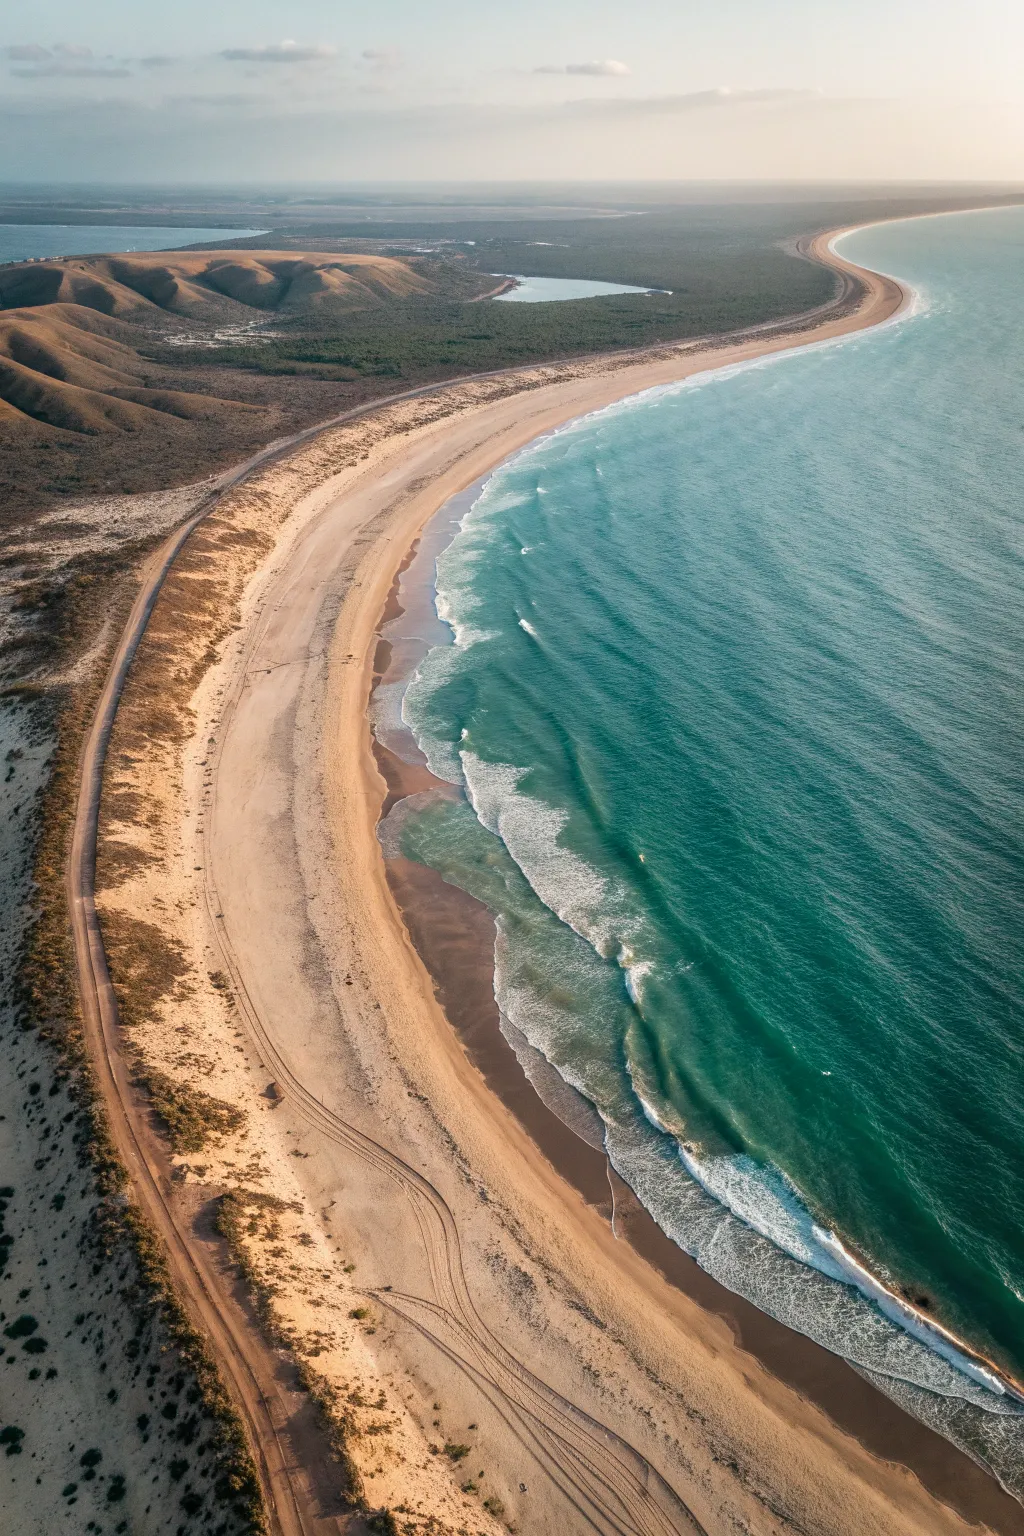
This tutorial guides you through painting a sweeping aerial view of a rugged coastline, focusing on the interplay between turquoise waters and warm, sandy earth tones. By mastering wet-on-wet blending and texture creation, you’ll replicate the stunning depth and movement of waves crashing against a long, curved beach.
Step-by-Step Tutorial
Materials
- Stretched canvas (18×24 inches or similar vertical format)
- Acrylic paints: Phthalo Blue, Turquoise, Titanium White, Burnt Sienna, Yellow Ochre, Raw Umber, Paynes Grey
- Gesso (optional for priming)
- Large flat brush (1-2 inch)
- Medium filbert brush
- Small round detail brush
- Fan brush
- Palette knife
- Water container and paper towels
- Pencil for sketching
- Sea sponge (optional)
Step 1: Planning and Sky
-
Prime the Surface:
Ensure your canvas is clean. If it’s a raw canvas, apply a coat of gesso and let it dry completely to create a smooth painting surface. -
Sketch the Composition:
Lightly sketch the main curve of the coastline using a pencil. Start from the bottom left corner and sweep upwards to the top right, creating a distinct separation between land and sea. Mark the horizon line near the top third of the canvas. -
Paint the Sky:
Mix a very pale grey-blue using Titanium White and a tiny dot of Paynes Grey. Paint the sky area above the horizon line, blending it to be lighter near the horizon to simulate atmospheric perspective. -
Distant Land:
For the distant hills in the background, mix Raw Umber with a little White and Blue to desaturate it. Paint the landmass on the horizon, keeping edges soft to push it into the distance.
Step 2: The Ocean
-
Deep Water Base:
Mix Phthalo Blue with a touch of Paynes Grey for the deepest water on the far right. Apply this vertically, keeping the color richest at the edge of the canvas. -
Mid-Ocean Transition:
Move inward towards the beach using pure Turquoise mixed with a little medium. Blend this into the deep blue while the paint is still wet to create a seamless gradient. -
Shallows Color:
Mix Turquoise with increasing amounts of Titanium White. Paint the area closest to the shore, following the curve you sketched earlier. -
Under-Wave Shadows:
Before adding white foam, paint thin, dark teal lines where the waves will break. This shadow creates the illusion of the wave rising up before it crashes.
Muddy Waters?
If your ocean gradient looks muddy, clean your brush thoroughly between colors. Wait for the blue layer to dry completely before applying white foam to keep the white crisp.
Step 3: The Land and Dunes
-
Base Sand Layer:
Mix Yellow Ochre and Titanium White for a warm, light sand color. Paint the entire beach area, smoothing it out near the water line but leaving it rougher near the dunes. -
Wet Sand Details:
Where the water meets the sand, glaze a thin layer of watered-down Burnt Sienna to assert, creating the darker, reflective look of wet sand. -
Dune Shadows:
Mix Raw Umber and Paynes Grey. On the left side of the canvas, paint the shadowed sides of the dunes and hills. Use broad strokes to suggest the rolling topography. -
Vegetation Texture:
Using a scruffy brush or a sponge, stipple a mix of Raw Umber and deep green onto the tops of the dunes and hills to represent scrubby coastal bushes. -
The Dirt Road:
Mix separate piles of Burnt Sienna and White. With a small flat brush, paint the winding road that runs parallel to the beach. I like to drag the brush intentionally unevenly here to mimic tire tracks.
Add Dimension
Use a palette knife to apply thick white paint on the crashing wave crests. This physical texture will catch the light and make the water look like it’s leaping off the canvas.
Step 4: Details and Highlights
-
Breaking Waves:
Load a fan brush with pure Titanium White. Gently tap and drag along the shoreline to create the crashing waves. Keep the foam irregular—thicker in some spots, thinner in others. -
Sea Foam Trails:
Dilute some white paint with water. Use a thin round brush to paint delicate, lacy patterns in the teal water just behind the breaking waves. -
Texturing the Sand:
Splatter a very tiny amount of watered-down Raw Umber onto the dry sand area (cover the ocean with paper first) to create the texture of rocks and uneven terrain. -
Vehicle Tracks:
Use your finest detail brush with a dark brown mix to paint faint, parallel lines along the beach and the road, indicating tire tracks left by visitors. -
Sunlight Glints:
Add tiny dots of pure white on the crests of the waves and where the wet sand meets the dry sand to simulate glistening sunlight. -
Final Adjustments:
Step back and check your values. Deepen the darks in the hills or brighten the white water foam where needed to ensure high contrast.
Allow your masterpiece to dry fully before framing to preserve those beautiful textures
Minimal Ink Coastal Yard Plan
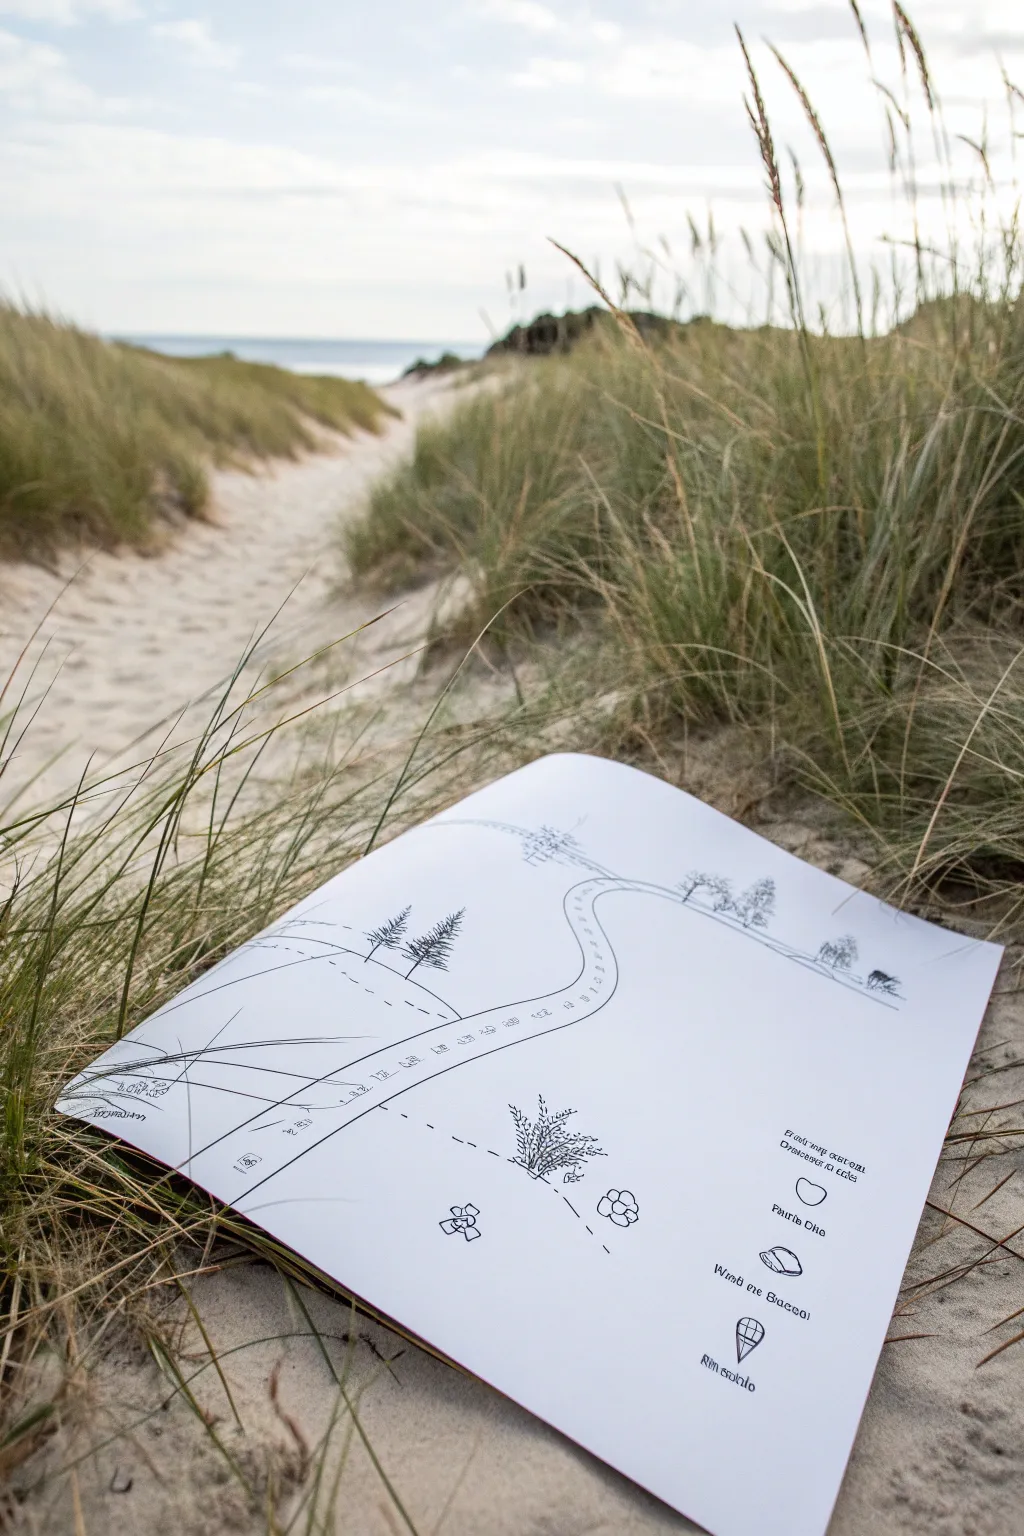
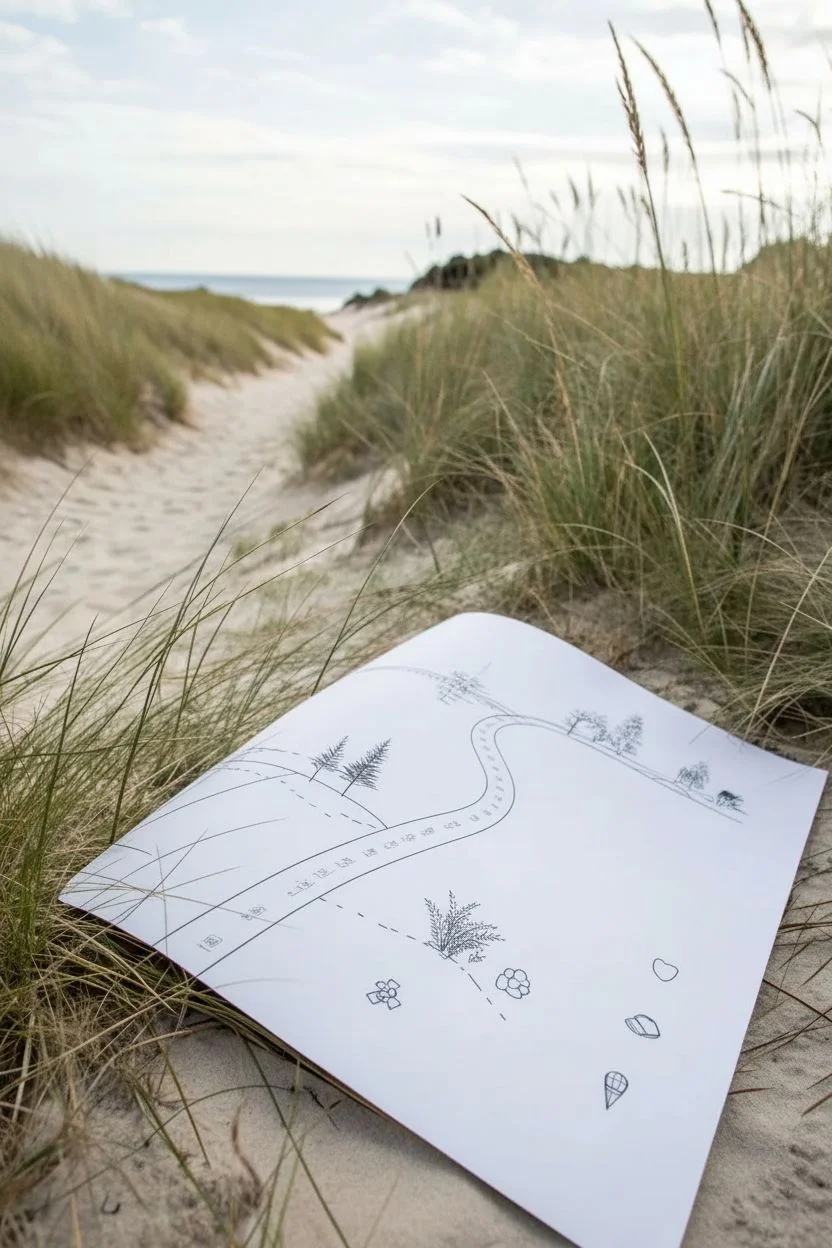
Capture the serene beauty of a coastal walk with this elegant black ink landscape plan. Using simple clean lines and sparse detailing, you can create a charming, stylized map that guides the eye through imaginary dunes.
Detailed Instructions
Materials
- Large sheet of heavyweight white drawing paper (A3 or larger)
- Fine liner pens (sizes 0.1, 0.3, and 0.5)
- Pencil (HB for lighter sketching)
- Eraser
- Flexible curve ruler or French curve
- Long straight ruler
Step 1: Drafting the Landscape
-
Establish the horizon:
Start by lightly sketching a faint horizon line about two-thirds up the page. It doesn’t need to be perfectly straight; a slight undulation suggests natural terrain. -
Sketch the primary path:
Draw a winding S-curve starting from the bottom left corner, snaking upwards toward the center and disappearing slightly to the right. Keep the path wider at the bottom (foreground) and narrower as it recedes to create perspective. -
Outline the dunes:
Sketch rolling hills on either side of your path. Use sweeping, overlapping curves to show how the dunes layer in front of and behind one another. -
Mark focal points:
Lightly pencil in locations for trees along the ridge lines. Place a larger cluster on the left mid-ground hill and a few smaller, distant trees on the right ridge. -
Plan the legend icons:
In the bottom right corner, lightly sketch three or four vertical icons. These can be whimsical symbols like a heart, a stone, or a geometric marker to represent scenic stops.
Ink Smearing?
If you smudge wet ink while drawing, turn it into a shadow or a patch of dark textured scrub. Minimalist art allows for happy accidents.
Step 2: Inking the Lines
-
Inking the path edge:
Switch to your 0.5 pen. Carefully trace the outer edges of your path. Keep your hand steady but allow for tiny imperfections—nature isn’t perfectly straight. -
Adding the center line:
Using a 0.1 pen, draw a dashed line down the center of the path if you want a trail look, or leave it blank for a sandy appearance. The example uses a clean, empty path. -
Defining the ridges:
Trace the major dune curves with the 0.3 pen. Ensure lines that are ‘behind’ stop where they intersect with mounds that are ‘in front’. -
Drawing the trees:
Use the 0.1 pen for the trees. Draw a vertical stick for the trunk, then use quick, scribbly horizontal dashes that get wider at the bottom to create pine-like silhouettes. -
Establishing the foreground:
In the bottom left corner, draw long, sweeping blades of marram grass using the 0.3 pen. Flick your wrist upward at the end of each stroke to taper the grass blade naturally.
Step 3: Refining Details
-
Texturing the dunes:
Add sparse stippling (dots) or tiny dashes along the bottom curves of the hills with the 0.1 pen. This suggests shadow and volume without cluttering the minimalist look. -
Adding mid-ground flora:
Create small, bushy textures in the dip of the curve using tight, irregular loops. This represents scrubby coastal bushes. -
Inking the icons:
Go over your legend icons in the bottom right with the 0.3 pen. Keep them graphic and simple—outline only. -
Adding text labels:
If you wish to include text like the example, write small, neat captions next to your icons. A faux-handwritten serif style looks lovely here. -
Drawing the dotted trail:
If your map implies a journey, use a dashed line (0.3 pen) connecting the path to specific features, like a hidden bush or viewpoint. -
Final clean up:
Wait at least 15 minutes for the ink to fully cure. Then, gently erase all pencil guidelines, being careful near the dense tree areas so you don’t smudge the ink.
Add Watercolor
For a level up, gently wash a pale sandy yellow over the path and a soft sage green over the dunes once the ink is totally waterproof.
Your finished map is a calm, artistic interpretation of the coastal landscape perfectly suited for framing
Abstract Sea-and-Sand Blocks

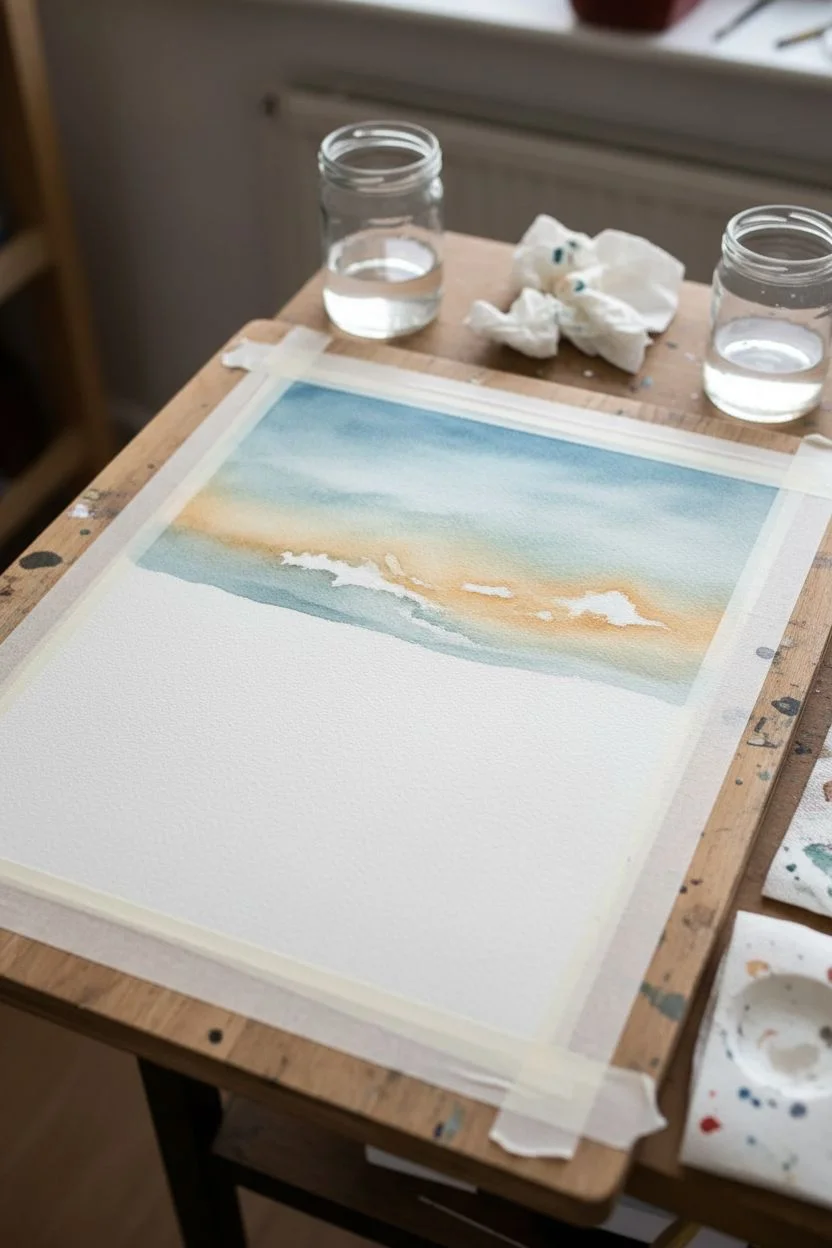
Capture the serene essence of the ocean meeting the shore with this layered watercolor landscape. By blocking out abstract bands of sea, sky, and sand, you’ll create a soothing composition that balances texture with fluid movement.
How-To Guide
Materials
- Cold press watercolor paper (140lb/300gsm)
- Watercolor paints (Indigo, Prussian Blue, Burnt Sienna, Yellow Ochre, Paynes Grey)
- Wide flat wash brush (1 inch)
- Round brush (size 8 or 10)
- Masking tape
- Wooden drawing board
- Jars of clean water
- Paper towels
- White or light wood frame (deep set)
Step 1: Preparation and Sky Layer
-
Secure the paper:
Begin by taping down all four edges of your watercolor paper to your board. This prevents the paper from buckling when wet and creates that crisp, professional white border seen in the final piece. -
Wet the sky area:
Using your large flat brush, apply clean water to the top half of the paper. You want an even sheen, not puddles, to prepare for a wet-on-wet technique. -
Paint the upper atmosphere:
Mix a very dilute wash of Indigo or Paynes Grey. With horizontal strokes, sweep across the top third of the paper, letting the color bloom softly into the wet surface. -
Add warmth to the horizon:
While the paper is still damp but not soaking, pick up a hint of Yellow Ochre mixed with a touch of Burnt Sienna. Gently brush this into the lower sky area just above where your horizon line will be to mimic sunset glow. -
Create cloud textures:
I like to lift a little pigment out while it’s drying to suggest clouds. Use a crumpled paper towel to gently dab the wet sky, creating soft white negative spaces. -
Initial drying phase:
Let this sky section bone dry completely before moving on. If the paper is cool to the touch, it is still wet.
Step 2: The Ocean Layers
-
Define the horizon:
Switch to your round brush. With a mix of Prussian Blue and a touch of Paynes Grey, paint a distinct but slightly uneven line across the middle of the paper to establish the deep ocean. -
Deep water gradient:
Load your brush with more concentrated Prussian Blue. Paint the band directly below the horizon, using horizontal strokes that get slightly lighter as you move down. -
Suggest waves:
While the blue band is damp, use a clean, slightly thirsty brush to drag horizontal lines through the pigment. This lifts the color to suggest rolling wave crests. -
Middle surf zone:
Mix a lighter, watery blue-green by cleaning your brush and using mostly water with the residue of blue. Paint the section below the deep water, leaving small slivers of dry white paper showing through for sea foam.
Pro Tip: Salt Texture
While the sand section is still wet, sprinkle a pinch of table salt on the pigment. Let it dry completely, then brush it off to create incredible granular sand textures.
Step 3: Sand and Shoreline
-
Paint the wet sand:
Mix Burnt Sienna with a tiny dot of blue to dull it down. Paint a strip directly below the surf, allowing the wet edge of the blue to bleed slightly into this brown for a natural transition. -
Dry sand texture:
For the bottom-most section, use a dry-brush technique. Load a brush with Yellow Ochre and very little water, then drag it quickly across the roughness of the paper to create the grainy texture of dunes. -
Deepen the contrast:
Once the ‘wet sand’ layer is dry, add a thin, darker line of Burnt Sienna mixed with Indigo right at the water’s edge to show where the tide has just receded. -
Final atmosphere check:
Step back and look at the balance. If the ocean feels too flat, add a few dry brush strokes of dark Indigo in the deepest water area to emphasize movement.
Troubleshooting: Blooms
If cauliflower-like ‘blooms’ appear in your sky, don’t panic. Gently re-wet the entire area with a clean damp brush and smooth it out, or embrace them as abstract clouds.
Step 4: Finishing Touches
-
Remove the tape:
Wait until the painting feels completely dry and room temperature. Peel the masking tape away slowly at a 45-degree angle, pulling away from the painted area to ensure a sharp edge without tearing. -
Flatten the artwork:
If the paper has curled slightly, place it face down on a clean surface under a heavy book overnight. -
Mount and frame:
Place the artwork into a deep white frame. Using a deeper frame allows the texture of the cold press paper to catch the light, enhancing the organic feel of the piece.
Hang your finished seascape in a bright spot to enjoy calmness of the coast every day


Have a question or want to share your own experience? I'd love to hear from you in the comments below!