Whenever a room starts feeling a little bland, I reach for paint because decorative painting can change the whole mood faster than almost anything else. These ideas are my go-to mix of accent wall statements, easy texture tricks, and artful details that make everyday spaces feel intentional.
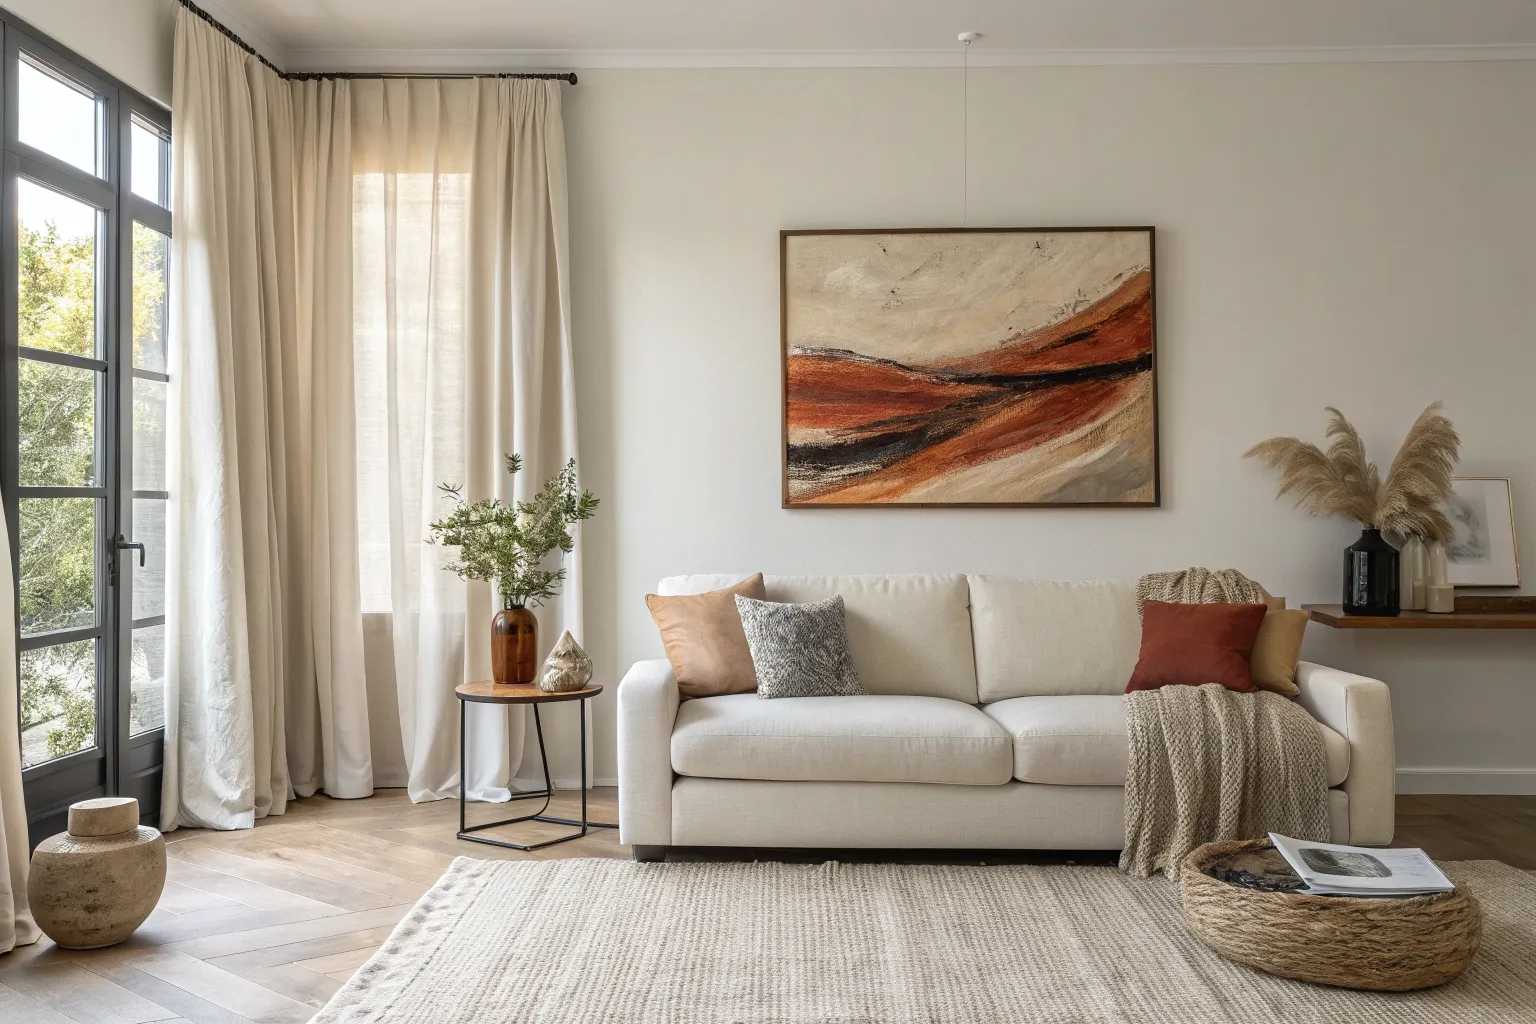
Oversized Abstract Statement Painting
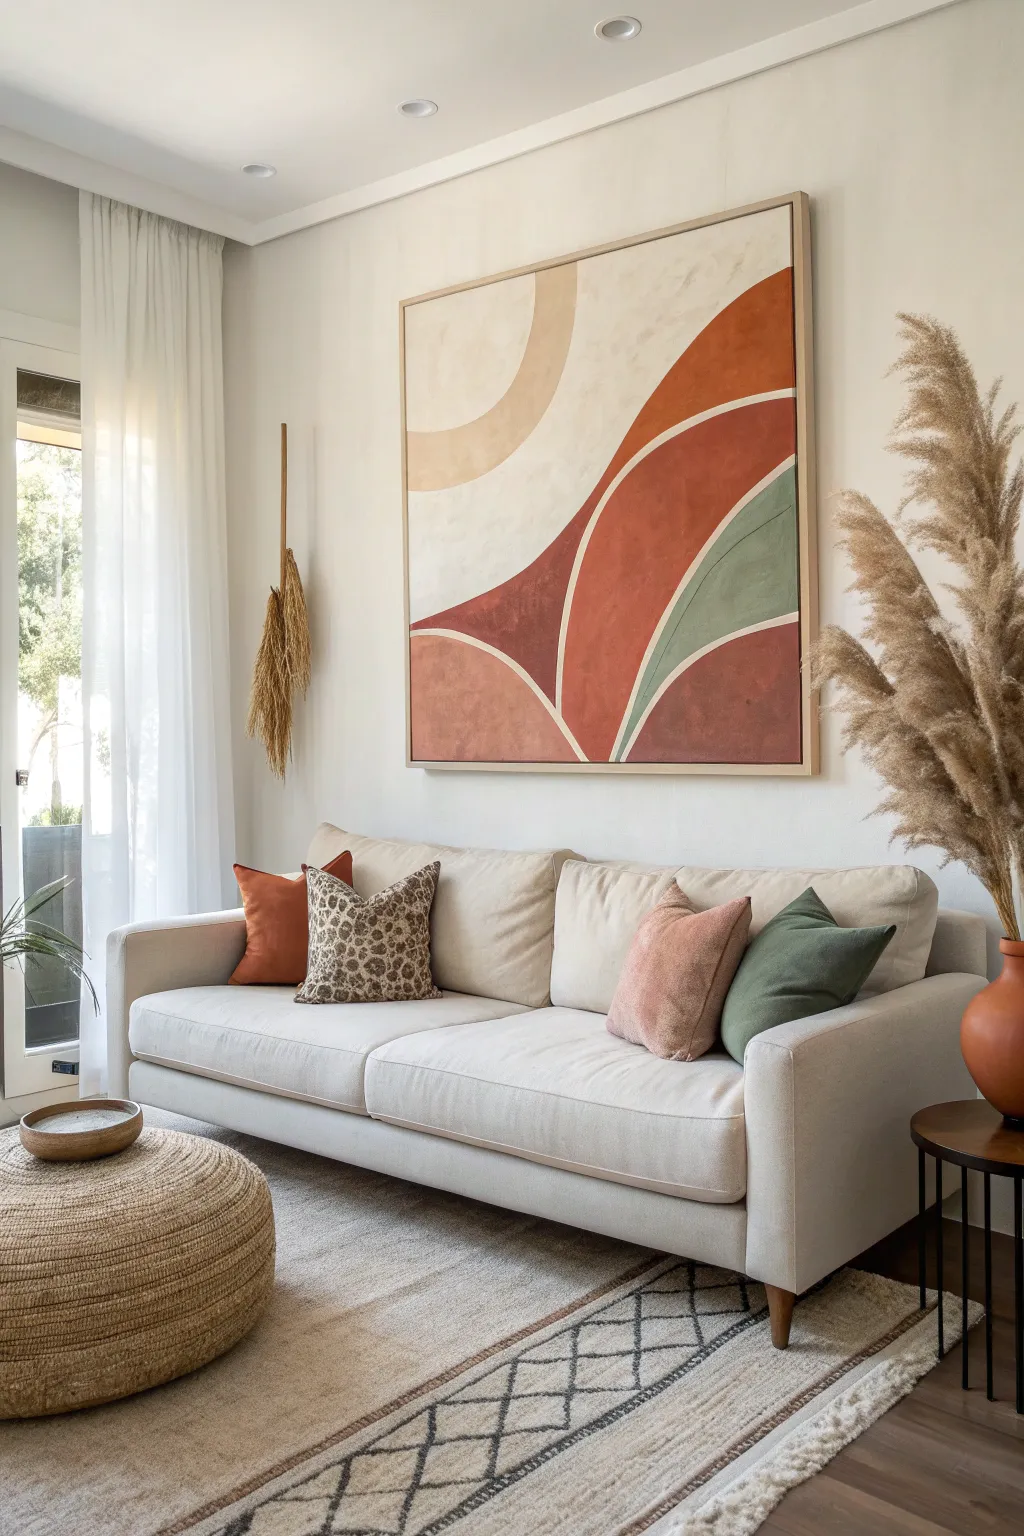

Bring the warmth of a desert landscape into your living room with this monumental abstract canvas. Featuring sweeping curves in terracotta, sage, and cream, this piece balances bold geometry with soft, organic textures for a calming focal point.
Step-by-Step Tutorial
Materials
- Large square canvas (at least 48×48 inches)
- Acrylic paints (Terracotta, Burnt Sienna, Sage Green, Beige, Titanium White)
- Medium and large flat synthetic brushes
- Pencil or charcoal stick
- Painter’s tape or masking tape (optional for guides)
- Texture medium or modeling paste (optional for depth)
- Mixing palette or paper plates
- Water cups and rags
- Easel or drop cloth for floor working
Step 1: Preparation & Sketching
-
Prepare the canvas:
Lay your large canvas on a drop cloth or secure it on a sturdy easel. If you want added texture, mix a little modeling paste with white gesso and apply a thin, uneven base coat over the entire surface, then let it dry completely. -
Map the composition:
Using a pencil or charcoal stick, lightly sketch the large curves. Start from the bottom left corner and sweep upwards to the right to create the first major arc. -
Add secondary curves:
Sketch the intersecting arches. Notice how the shapes overlap like hills; draw a large semi-circle dipping from the top right, and another rising from the bottom right to meet the first curve. -
Define the color zones:
Lightly label each section with ‘R’ for red/terracotta, ‘G’ for green, ‘B’ for beige, and ‘W’ for white/cream to keep track of your palette plan.
Pro Tip: Custom Colors
Use house paint samples instead of tube acrylics for large canvases. It’s cheaper, covers huge areas smoothly, and ensures you have plenty of that specific custom shade.
Step 2: Blocking Colors
-
Mix the terracotta:
Combine Burnt Sienna with a touch of red and white to create a warm, dusty terracotta. You want a color that feels earthy, not bright orange. -
Paint the red sections:
Using a large flat brush, fill in the large swooping section on the right and the bottom left corner shape. Don’t worry about perfect edges yet; focus on solid coverage. -
Create the sage tone:
Mix Sage Green with a bit of Beige or Grey to mute it down. Apply this to the mid-sized curved section on the right side of the canvas. -
Fill the neutrals:
For the largest top-left section, use a creamy off-white. For the curved accents, mix a darker beige or tan color. Paint these remaining negative spaces.
Troubleshooting: Wobbly Lines
If your white separating lines look shaky, don’t stress. Widen the line slightly to smooth it out, or embrace the ‘hand-painted’ aesthetic which adds to the organic charm.
Step 3: Refining & detailing
-
Clean the lines:
Once the initial blocking is dry, use a smaller flat brush to sharpen the boundaries between colors. The white lines between shapes, known as ‘channels,’ should be crisp but organic. -
Establish the white channels:
Mix Titanium White with a tiny drop of beige. Carefully paint the separating lines between your colored shapes. I like to do this freehand to keep the look soft, but you can use tape if you prefer rigid geometry. -
Add tonal variation:
To prevent the colors from looking flat, mix a slightly lighter version of your terracotta. Dry-brush this lighter shade into the center of the red sections to create a subtle highlight. -
Deepen the shadows:
Similarly, mix a slightly darker version of your sage and apply it near the edges of the green shape to add dimension and curve.
Step 4: Finishing Touches
-
Check the edges:
Paint the outer edges of the canvas (the depth) with a neutral beige or continue the design wrapping around the sides for a frameless look. -
Texture check:
Stand back and look for any areas that feel too smooth. Lightly dab paint with a dry brush or a sponge to add visual ‘noise’ and imitate a stone or plaster texture. -
Final dry:
Allow the entire piece to cure for at least 24 hours before hanging or framing. -
Frame it (optional):
For the exact look in the photo, install a simple floating frame in natural light wood. This separates the art from the wall and elevates it significantly.
Step back and admire how these simple intersecting curves transform the energy of your entire room


Cohesive Triptych Wall Set
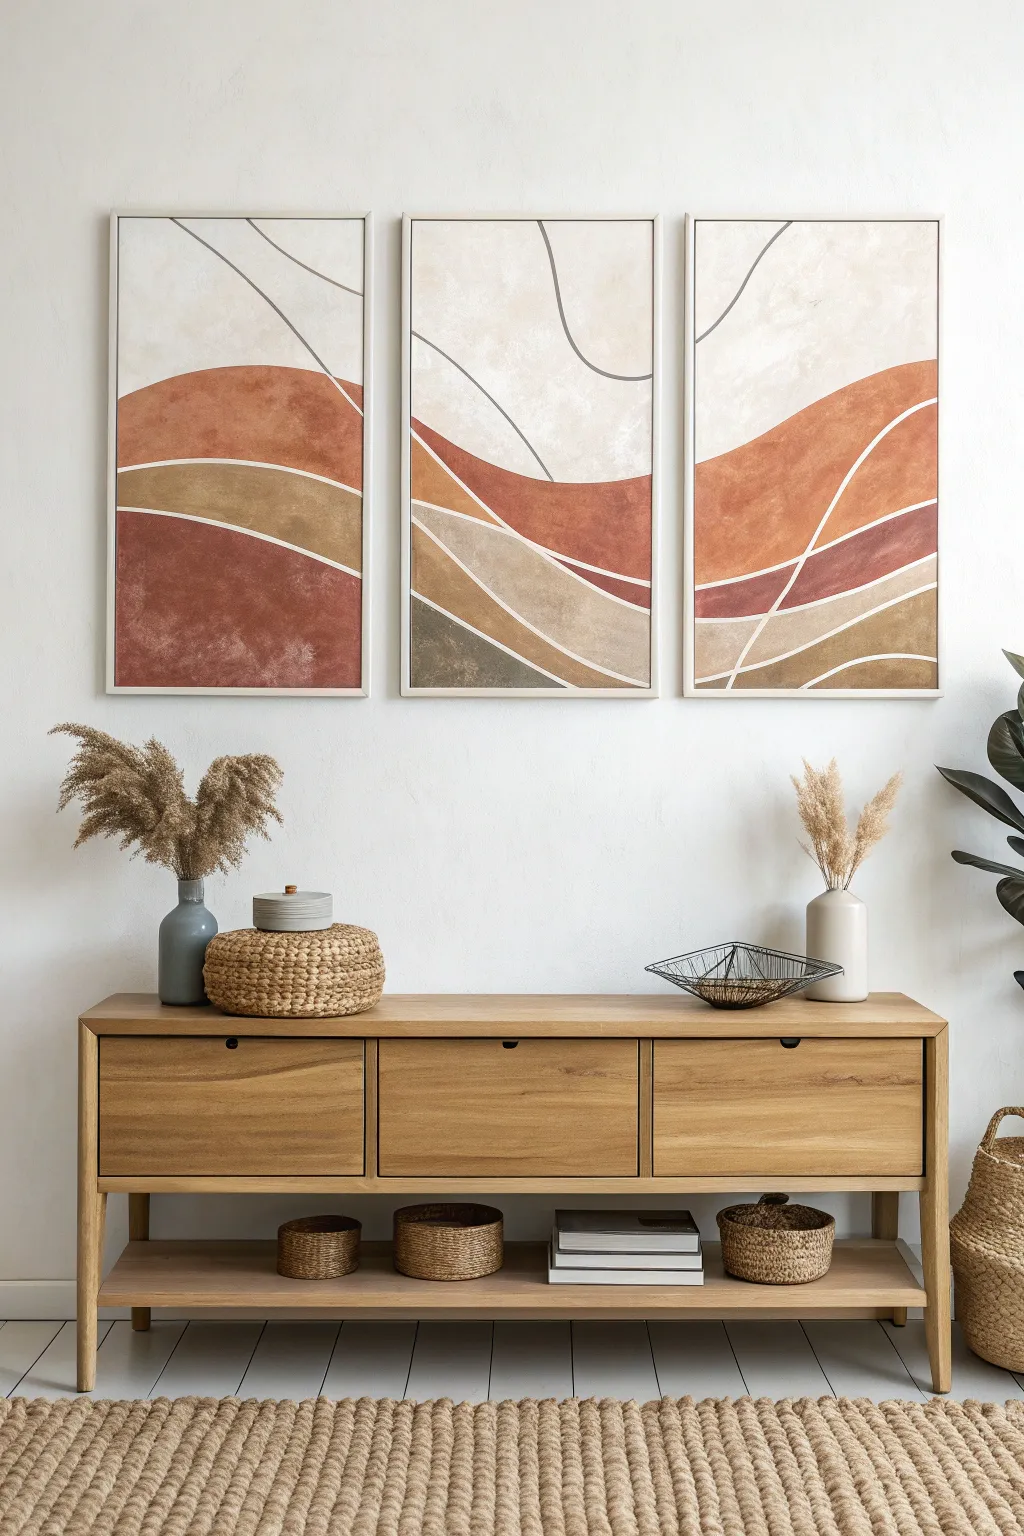
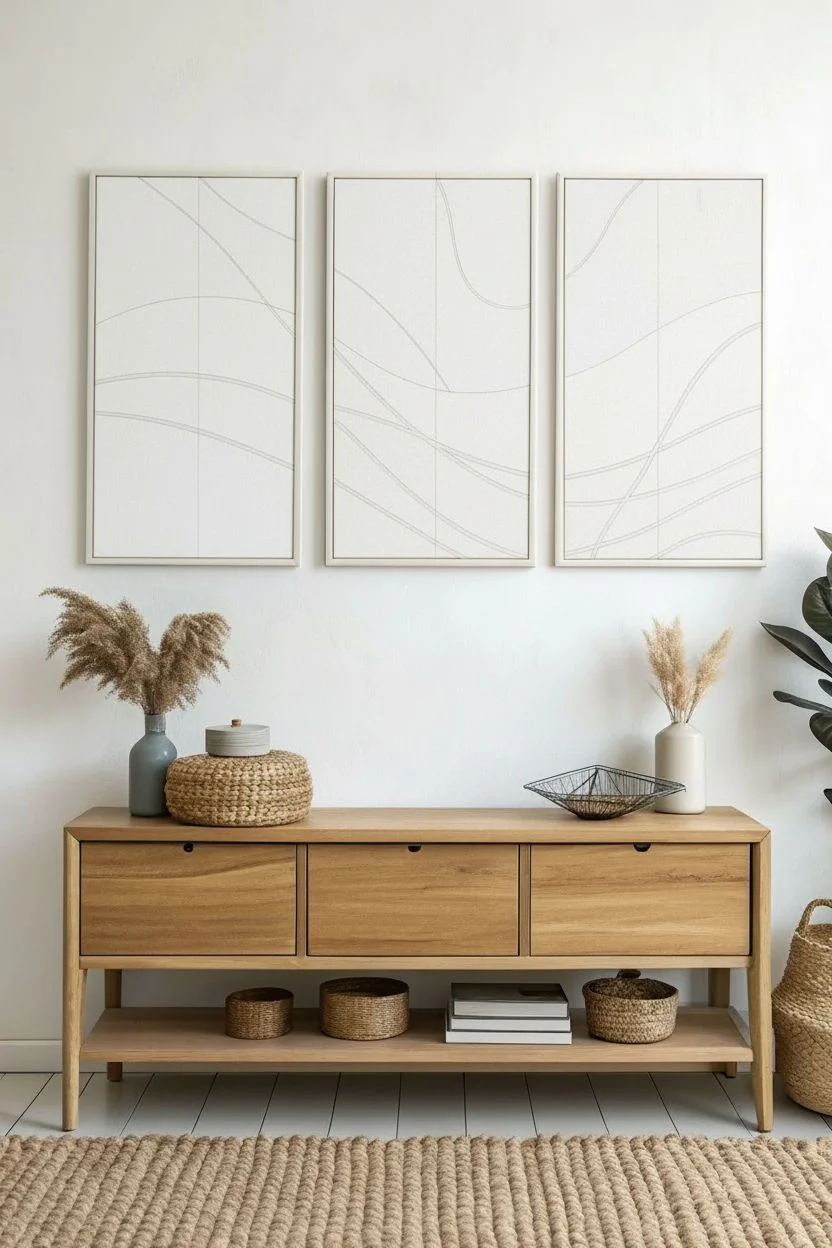
Bring the warmth of desert landscapes into your home with this stunning three-panel abstract wall art. By using a cohesive palette of earthy tones and flowing, organic lines that span across separate canvases, you’ll create a sophisticated gallery look that feels unified and serene.
Step-by-Step Guide
Materials
- 3 large stretched canvases (same size, e.g., 24×36 inches)
- Acrylic paints (terracotta, burnt sienna, ochre, olive green, cream, white, dark grey)
- Large flat paintbrushes (2-3 inch width)
- Medium round paintbrush
- Pencil
- Masking tape or painter’s tape (optional)
- Mixing palette or paper plates
- Water cup and paper towels
- Easel or large drop cloth for floor working
Step 1: Preparation and Sketching
-
Set the Stage:
Arrange all three canvases side-by-side on your easel or floor. Ensure there is a small, even gap (about 1-2 inches) between them, exactly as they will hang on the wall. This spacing is crucial for ensuring your flowing lines connect visually across the gap. -
Map the Horizon:
Lightly sketch your main flow lines with a pencil. Start the lines on the left canvas and carry them continuously across the gaps to the middle and right canvases. Focus on creating rolling, hill-like curves rather than jagged peaks. -
Define Color Zones:
Mark out 4-5 distinct sections vertically on your canvases. The top section should be the largest (for the sky/cream area), followed by layers of terracotta, ochre, and darker browns descending towards the bottom. -
Add Accent Curves:
Sketch a few thin, singular lines that cut across the color blocks, particularly in the top cream section. These will become the dark grey graphic lines later.
Master the Flow
To ensure your lines look continuous across the gap, use a yardstick or long straight edge to guide your pencil sketch from one canvas to the next before you start painting.
Step 2: Blocking in Color
-
Mix the Base Tones:
Prepare your palette by mixing a soft cream (white + tiny touch of ochre), a rich terracotta (burnt sienna + red), a sandy beige (ochre + white), and a deep earthy brown. -
Paint the background:
Start at the top with your cream mixture. Use a large flat brush and painting in loose, multi-directional strokes to create subtle texture rather than a flat wall of color. Bring this color down to your first pencil line. -
Apply the Terracotta Layer:
Moving downward, paint the next section in your terracotta shade. Don’t worry about perfect edges yet; simply get the color on the canvas with smooth, sweeping motions. -
Adding Earthy Depth:
Paint the lower sections with your sandy beige, olive, and deep brown mixtures. I like to keep the brush slightly dry here to let the weave of the canvas show through slightly, enhancing that rustic, organic feel. -
Refining Edges:
Once the main blocks are filled, go back with a smaller brush to neaten the edges where colors meet. Leave a tiny sliver of white canvas between the color blocks if you want a natural guide for your white lines later, or paint them touching if you prefer to layer the lines on top.
Fixing Shaky Lines
If your white separator lines look uneven, don’t stress. Wait for them to dry, then use the adjacent color to cut back into the line, reshaping it from the outside in.
Step 3: Details and Finishing
-
Create Texture:
While the paint is still slightly tacky, use a dry, clean brush to gently scuff the surface of the larger color blocks. This softens the look and mimics the stone-like texture seen in the inspiration image. -
Paint the Separating Lines:
Using a medium round brush and pure white paint (or a very light cream), carefully paint the curved lines that separate your color blocks. Keep your hand steady and maintain a consistent width of about 1/4 inch. -
Add the Graphic Accents:
Mix a dark grey (black + white) or dark brown. Using a thinner brush, paint the singular accent lines that float in the upper cream section. These lines should be thinner than the white separators for visual variety. -
Check Consistency:
Step back and look at the triptych as a whole. Ensure the colors flow logically from one panel to the next. If a line creates a ‘jump’ visually, extend the paint on the edge of the canvas to correct the alignment. -
Final Drying:
Let the paintings dry completely, preferably overnight. Acrylics dry darker, so wait to see the final hues before making final adjustments. -
Paint the Sides:
Decide whether to wrap the painting around the edges (gallery wrap) or paint the sides a solid neutral color like white or beige for a framed look without the frame.
Once hung, these warm, flowing shapes will anchor your room with a modern yet grounded atmosphere
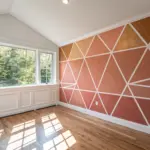


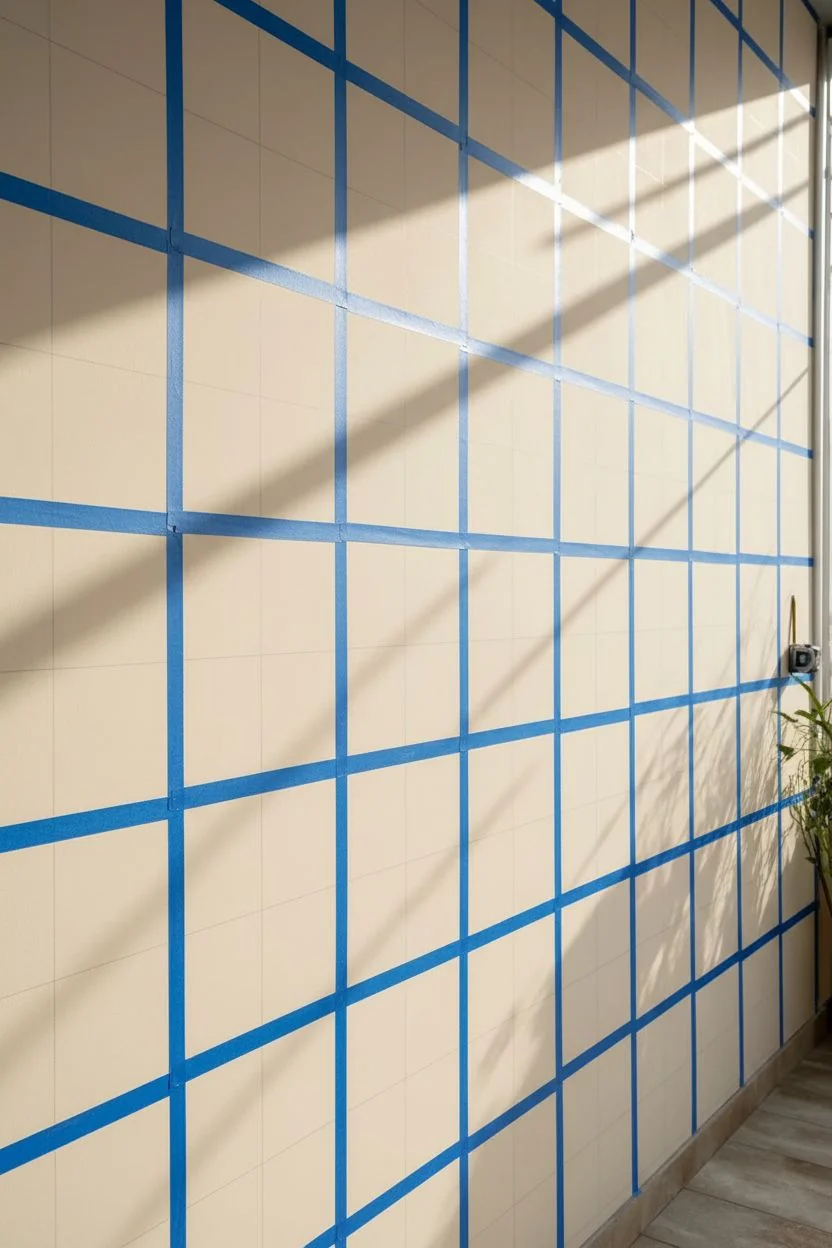
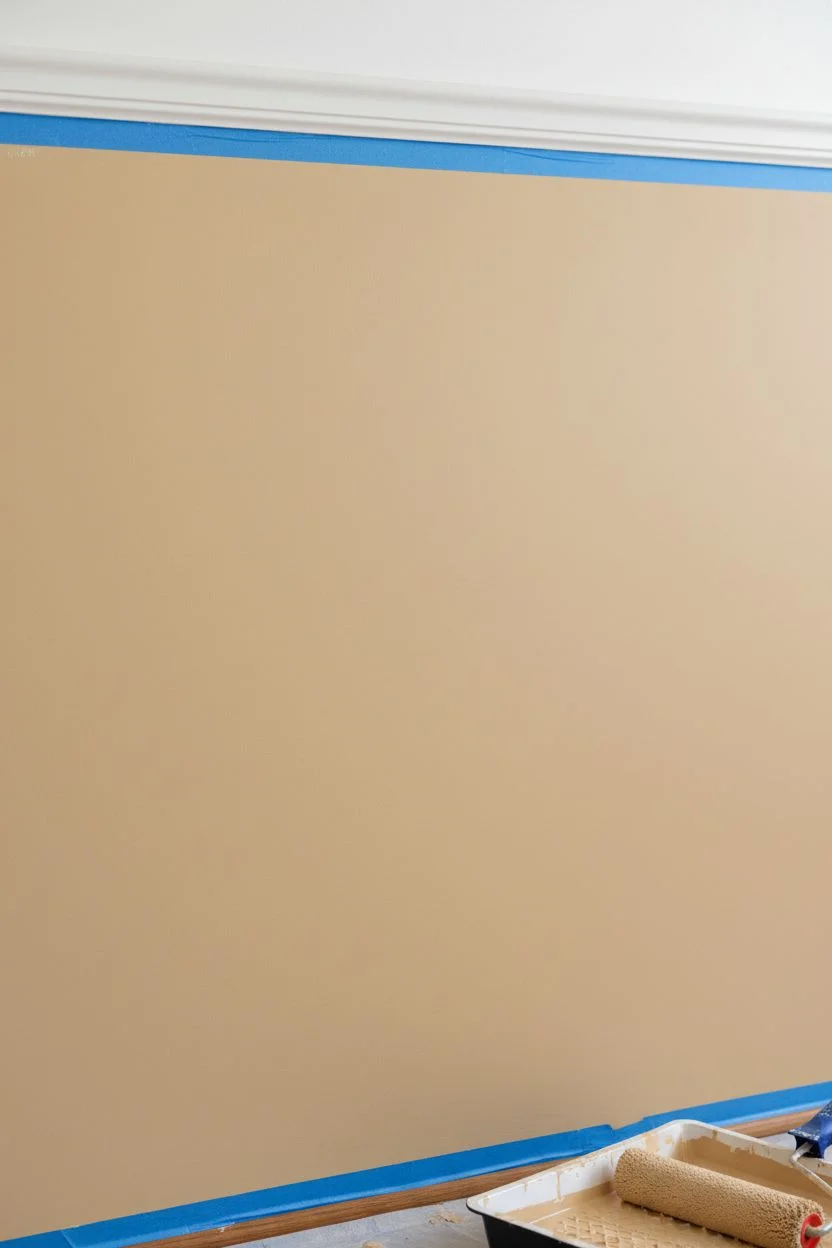
Painter’s Tape Geometric Accent Wall
Transform a plain wall into a modern statement piece using crisp lines and metallic flair. This technique uses painter’s tape to create a striking geometric pattern where the tape lines themselves become the art.
Step-by-Step
Materials
- Interior wall paint (base color)
- Metallic copper or gold paint
- Painter’s tape (1-inch width works well)
- Paint roller and tray
- Small angled paintbrush
- Level or laser level
- Pencil
- Drop cloth
- Damp rag
Step 1: Preparation & Base Coat
-
Clear the area:
Start by moving furniture away from the wall and laying down a drop cloth to protect your flooring. Remove any outlet covers or switch plates. -
Clean the surface:
Wipe down the wall with a damp rag to remove dust and grime, ensuring better tape adhesion later. -
Apply the line color:
Since the geometric lines in this design are metallic, you actually need to paint the entire wall (or just the areas where lines will be) with your chosen copper or metallic gold paint first. -
Let it cure completely:
Allow this metallic base coat to dry thoroughly. I recommend waiting at least 24 hours to ensure the tape won’t peel up the fresh metallic paint in the next phase.
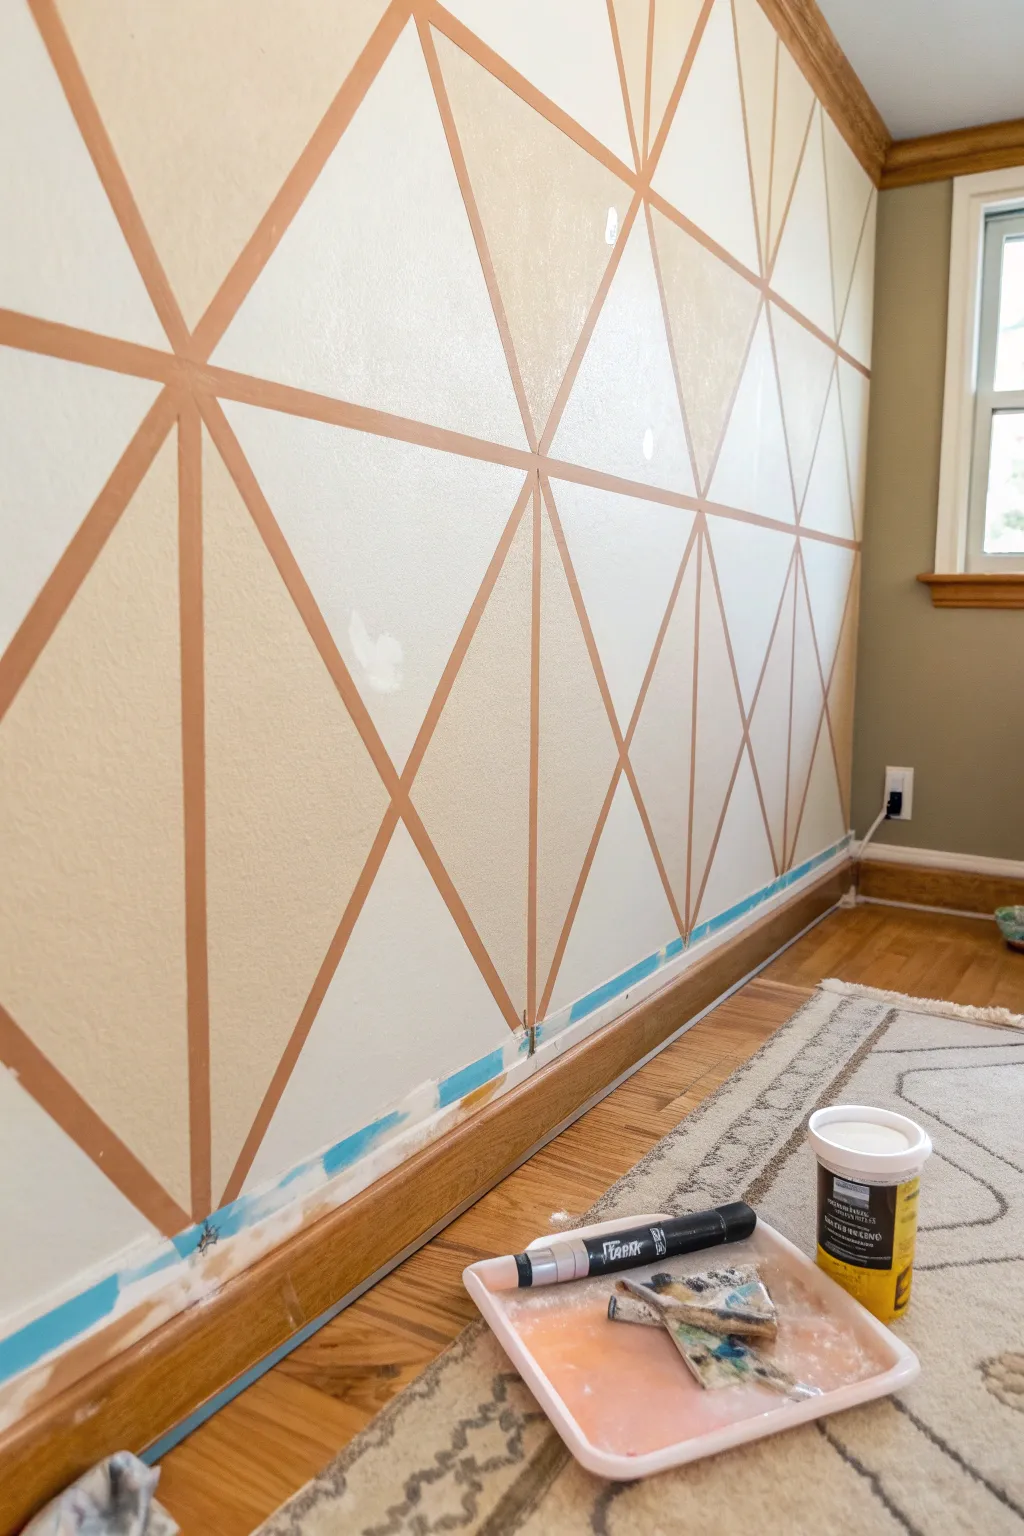
Step 2: Taping the Design
-
Plan your pattern:
Sketch your triangular design on paper first. You can go for a random pattern or a repeating structure like the one shown. -
Apply the first diagonal:
Start by applying long strips of painter’s tape diagonally across the wall. Use a level if you want specific angles, or eyeball it for a more organic feel. -
Create the triangles:
Add intersecting tape lines to form your triangles. Press the edges of the tape down firmly with your finger or a plastic putty knife to prevent bleed-through. -
Protect the trim:
Run a strip of painter’s tape along the baseboards and ceiling line to keep your edges clean.
Bleeding Lines?
If you see jagged lines after peeling, wait for the paint to fully cure, then re-tape along the bad edge and touch up with the correct color.
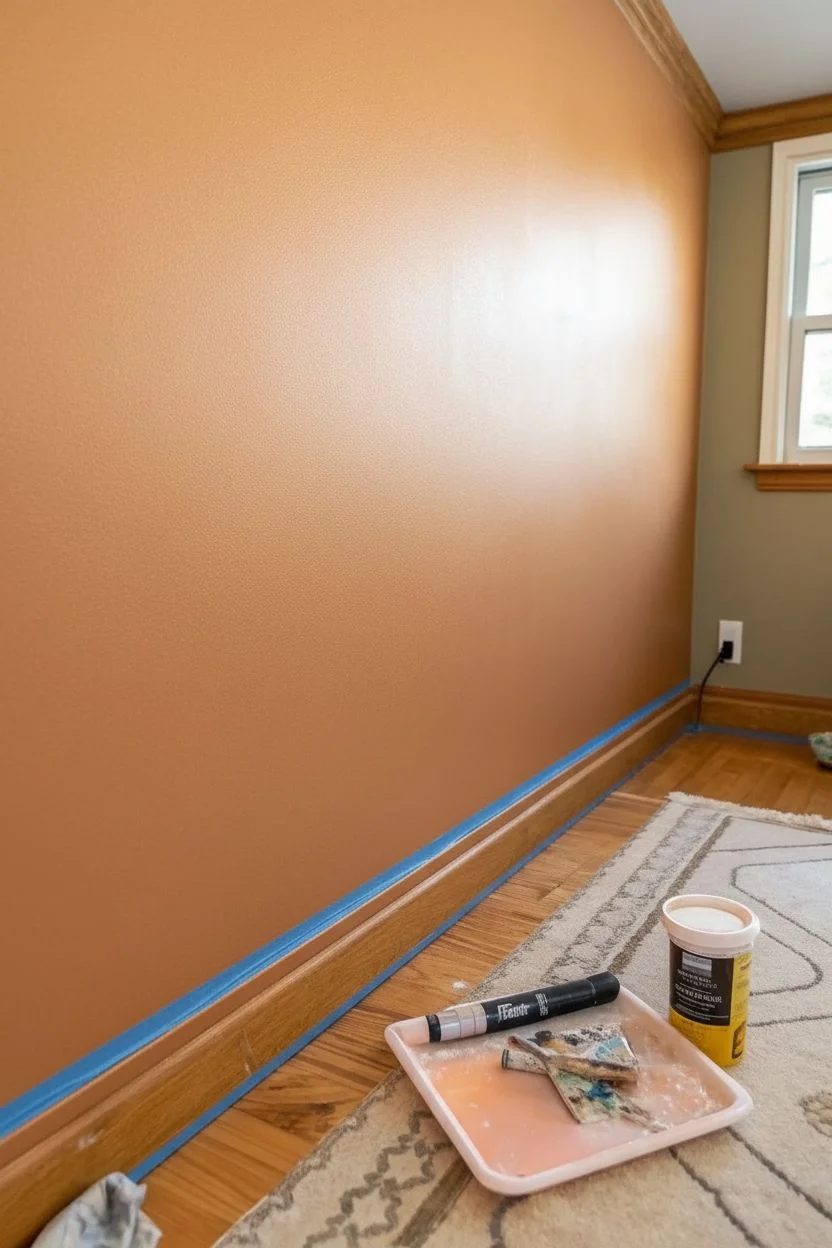
Step 3: Painting & Reveal
-
Seal the tape edges:
Lightly brush a very thin layer of the metallic base color over the edges of the tape. This seals the tape so any bleeding is the same color as the line, making it invisible. -
Apply top coat:
Roll your main wall color (like the creamy beige shown) over the entire wall, covering the metallic paint and tape. -
Second coat:
Once the first coat is dry to the touch, apply a second coat for full, even coverage. -
Peel while damp:
The moment of truth arrives before the paint is fully dry. Slowly peel back the tape at a sharp 45-degree angle to reveal the metallic lines underneath. -
Touch ups:
If any paint bled through, use a tiny artist’s brush and the metallic paint to crisp up the lines.
Add Texture
For a richer look, use a sponge to dab a slightly lighter shade of your top coat inside random triangles for a subtle dimensional effect.
Enjoy the sophisticated glow of your new geometric feature wall every time the light hits it


Soft Color-Block Half Wall
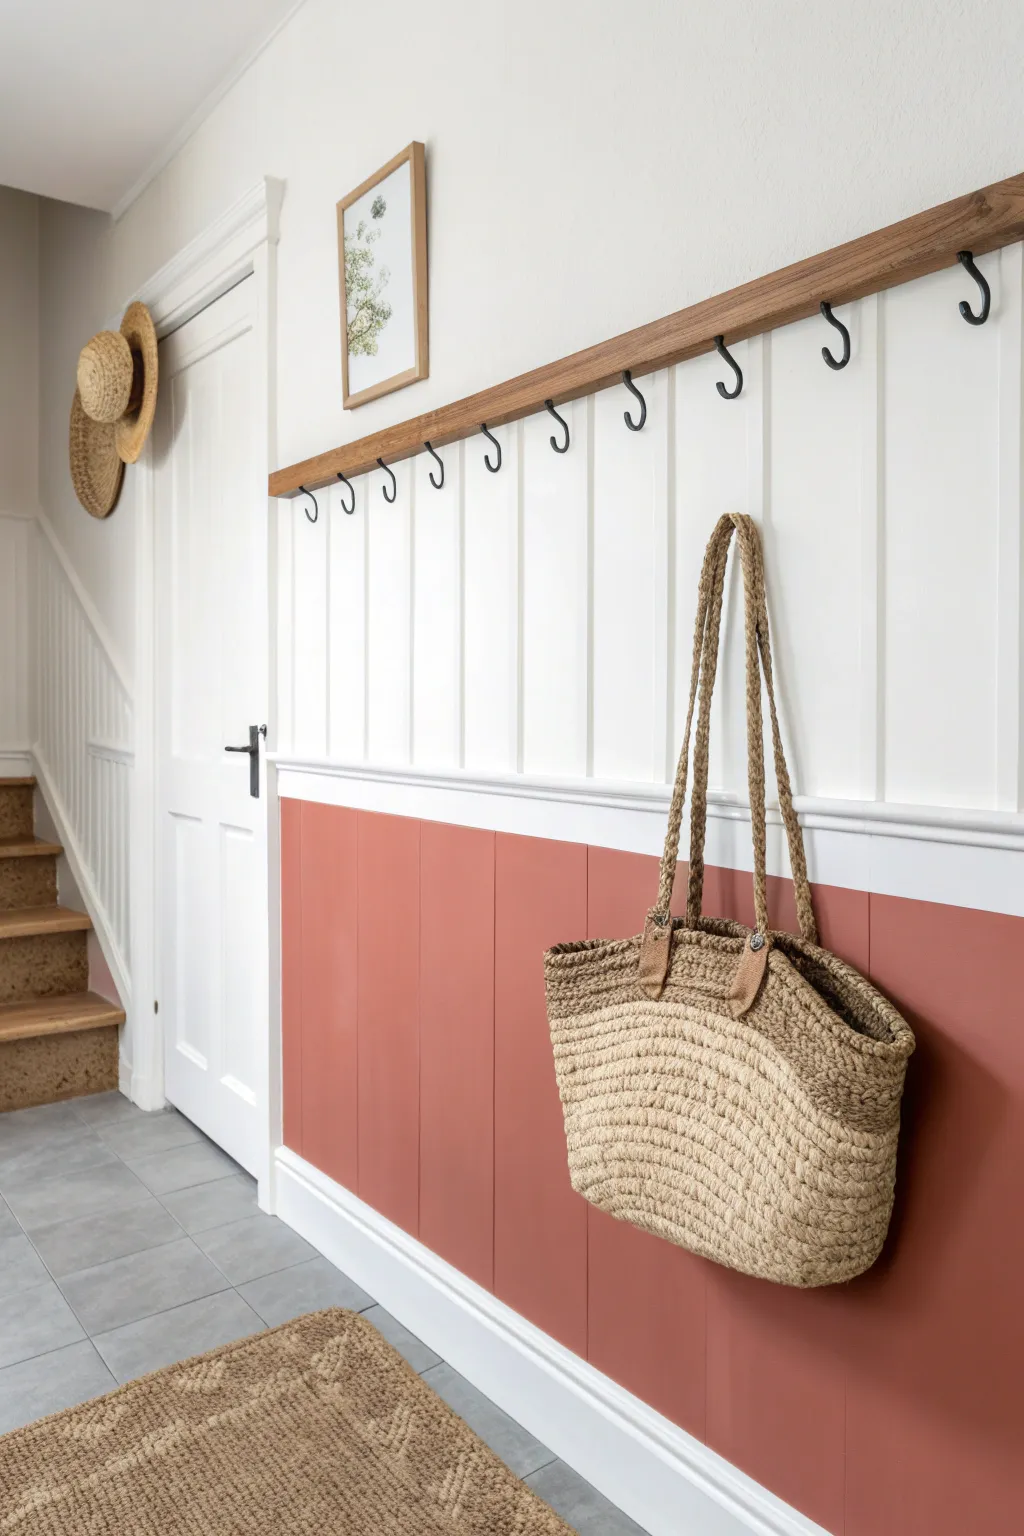
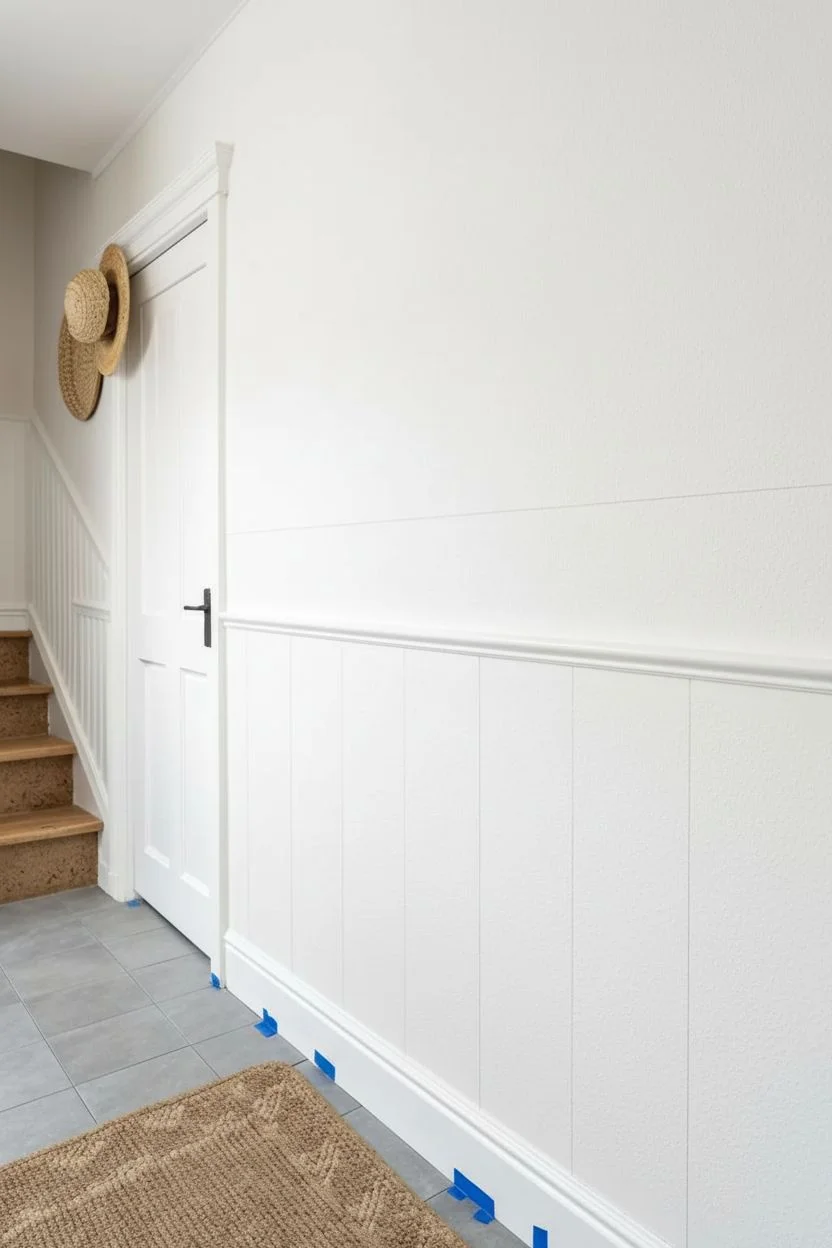
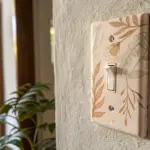
Transform a plain hallway into a functional mudroom masterpiece with this two-tone paneling project. The warm terracotta lower section grounds the space while adding a pop of earthy color, perfectly balanced by a crisp white upper wall and natural wood accents.
Step-by-Step Tutorial
Materials
- MDF panel boards or sheets (cut to size)
- Decorative chair rail molding
- Wooden peg rail board (approximately 1×4 lumber)
- Black metal screw-in hooks
- Construction adhesive (e.g., Liquid Nails)
- Brad nailer and 1-inch brad nails
- Wood filler
- Sandpaper (120 and 220 grit)
- Painter’s tape
- Primer (shellac-based recommended for MDF)
- Interior satin or eggshell paint (Terracotta/Rust color)
- Interior satin or semi-gloss paint (White)
- Wood stain (finish of choice for the rail)
- Level and measuring tape
- Caulk and caulk gun
Step 1: Preparation and Planning
-
Assess your wall:
Measure the total length of your hallway wall to determine how many battens or panels you will need. Decide on a height for your color block; waist-height (around 32-36 inches) is standard, but going a bit higher adds drama. -
Clear and clean:
Remove any existing baseboards if you plan to replace them, or tape them off carefully if keeping. Wipe down the walls with a damp cloth to remove dust and grease, ensuring a clean surface for adhesion. -
Mark the layout:
Using a long level and a pencil, draw a horizontal line across the entire wall where the top of your wainscoting will end. Mark vertical lines for where each vertical batten will go, spacing them evenly (usually 12 to 16 inches apart).
Step 2: Installing the Woodwork
-
Install vertical battens:
Apply construction adhesive to the back of your pre-cut vertical MDF strips. Press them onto the wall over your marked lines. -
Secure the strips:
Use a brad nailer to secure the battens into place. If you don’t hit studs, angles your nails slightly to grip the drywall better, though the adhesive will do most of the heavy lifting once cured. -
Add the top rail:
Install the horizontal top rail or chair rail molding along your level line, capping off the vertical battens. This creates a finished edge and separates the upper and lower wall sections. -
Fill and sand:
Fill all nail holes and seams where the wood meets the wall with non-shrinking wood filler. Once dry, sand everything smooth with 120-grit sandpaper, then finish with 220-grit for a flawless surface. -
Caulk the seams:
Run a thin bead of paintable caulk along every edge where the board meets the wall (sides and top). Smear it smooth with a wet finger to eliminate gaps and make the paneling look built-in.
Clean Lines
When painting the intersection where the paneling meets the wall, run a bead of clear caulk over the tape edge before painting. This seals the tape and prevents any color bleed.
Step 3: The Painting Process
-
Prime the surface:
Apply a coat of primer to the entire lower wall section, covering both the new MDF and the drywall in between. MDF sucks up paint, so I always make sure to prime those cut edges thoroughly. -
Cut in the color:
Using an angled sash brush, cut in your terracotta paint color around the baseboards, corners, and intricate edges of the paneling strips. -
Roll the lower wall:
Use a small foam roller or a short-nap roller to apply the terracotta paint to the flat surfaces between the battens. Apply two coats for rich, opaque coverage, letting it dry completely between layers. -
Paint the upper wall:
Paint the wall section above the rail in a crisp, bright white. You may need to use painter’s tape along the top edge of your new rail to ensure a razor-sharp line between the wood tone and the white wall.
Add a Picture Ledge
Instead of a simple flat board for the peg rail, mount a 1×2 strip horizontally on top of the 1×4 board to create a narrow shelf perfect for displaying framed art or photos.
Step 4: Adding the Peg Rail
-
Prepare the timber rail:
Take your 1×4 lumber board and cut it to the full length of the wall. Sand it smooth and apply your chosen wood stain. Wipe away excess stain and let it dry. -
Mark hook positions:
Measure and mark the placement for your hooks. Spacing them directly above the vertical battens below creates a pleasing, symmetrical visual rhythm. -
Attach the hooks:
Drill pilot holes to prevent splitting, then screw the black metal hooks into the stained board by hand or with pliers if they are tough to turn. -
Mount the rail:
Position the stained peg rail directly above the painted white wainscoting section (about 12-18 inches above the chair rail usually looks best). Screw it securely into the wall studs. -
Cover screw heads:
If you screwed through the face of the board, use small wooden plugs or a matching wax filler stick to hide the screw heads for a seamless finish.
Step back and enjoy the warmth and organization your new entryway brings to the home.
BRUSH GUIDE
The Right Brush for Every Stroke
From clean lines to bold texture — master brush choice, stroke control, and essential techniques.
Explore the Full Guide
Painted Arches for a Built-In Look
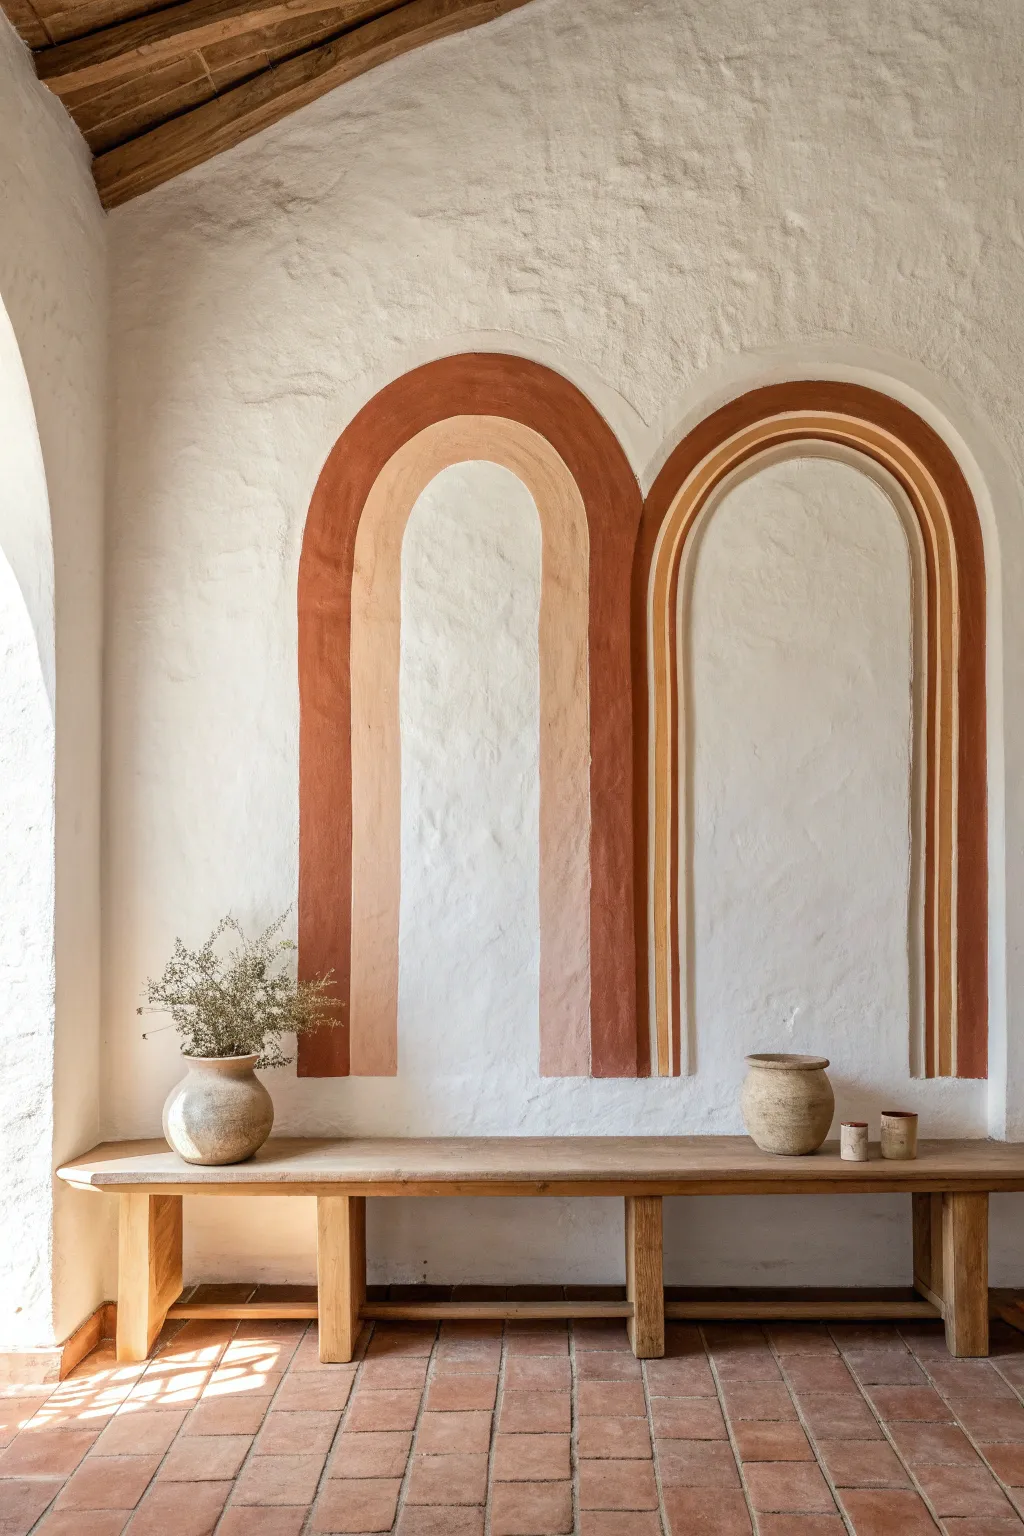
Transform a plain wall into a dimensional feature with these warm, painted arches that mimic architectural niches. The clever use of layered bands creates depth and a cozy, built-in feel without any construction.
Step-by-Step
Materials
- Matte latex wall paint (terracotta/rust)
- Matte latex wall paint (pale peach/sand)
- Matte latex wall paint (golden yellow – optional for second arch)
- Pencil
- String or twine
- Measuring tape
- Painter’s tape or thumb tack
- 1-inch angled sash brush
- 2-inch flat brush or small roller
- Artist’s detail brush (size 4 or 6)
- Clean rag
- Level
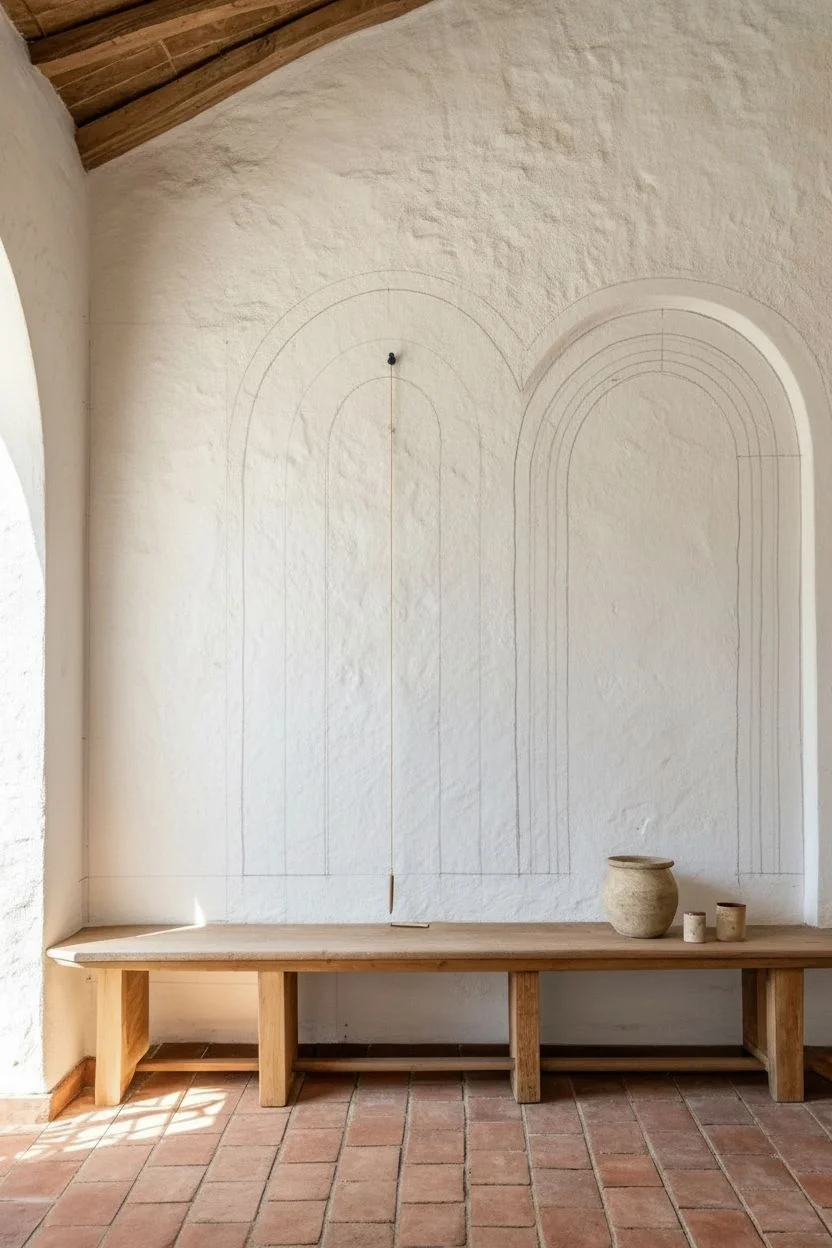
Step 1: Planning & Outline
-
Clean the surface:
Begin by wiping down your wall surface with a clean, slightly damp rag to remove dust. If your wall is heavily textured like the one in the example, ensure no loose debris is hiding in the crevices. -
Determine placement:
Use a measuring tape to decide where the center of each arch should be. For the dual-arch look, ensure there is equal spacing between them if you want symmetry, or overlap them slightly for a different effect. Mark the center point of the base width with a pencil. -
Mark vertical lines:
Use a level and pencil to draw two vertical lines for the sides of your first arch, extending up to where the curve will begin. This determines the width of the entire structure. -
Create a compass:
Tie a piece of string to a pencil. Measure the string length to match the radius of your arch (half the width). Tape or tack the free end of the string to the center point between your vertical lines, right at the height where the curve should start. -
Draw the outer curve:
Keeping the string taut, swing the pencil in a semi-circle to connect the tops of your two vertical lines. This creates the perfect outer arch shape. -
Draft the inner bands:
Shorten your string by about 4-6 inches (depending on how thick you want the outer band to be) and draw a second, smaller arch inside the first. Repeat this again if you are creating multiple bands like the right-hand arch in the photo. -
Connect the lines:
Use your level to extend the straight vertical lines down from each new inner arch curve to the floor or baseboard.
Uneven Texture?
If painting on heavy stucco, don’t drag the brush. Use a varying ‘stippling’ or pouncing motion to push paint into the crevices for a solid edge.
Step 2: Painting the Design
-
Cut in the edges:
Dip your angled sash brush into the darkest terracotta color. Carefully paint the outline of the outermost band first. On a textured wall, you’ll need to work the paint into the bumps with a dabbing motion rather than a smooth stroke. -
Fill the outer band:
Once the edges are defined, fill in the rest of the outer band with the terracotta paint. A small roller can speed this up, but a brush offers more control on uneven plaster. -
Define the inner boundary:
Using the same dark terracotta color, paint a precise line along the inner edge of this first band. This sharp distinction is crucial for the graphic look. -
Apply the lighter tone:
Switch to your pale peach or sand color. Using a fresh angled brush, fill in the inner arch section. Be extremely careful where this lighter color meets the darker terracotta band to keep the line crisp. -
Add detail lines:
If recreating the right-hand arch, use an artist’s detail brush and the golden yellow paint to create the thin accent stripe nestled within the bands. I find resting my hand on a dry part of the wall helps steady the brush for these long lines. -
Refine the texture:
Because of the wall’s texture, double-check for white spots peaking through the paint. Use a stiff brush to stipple paint into any deep pits or recesses. -
Second coat:
Allow the first layer to dry for at least 2 hours. Apply a second coat to all sections to ensure the colors are rich and opaque. -
Touch up edges:
Inspect your vertical lines and curves. If any lines are wobbly, use a small artist’s brush with the wall’s original background color to “erase” and straighten the edges.
Steady Curves
For the crispest curve without a steady hand, create a cardboard template of the arch top and trace it, rather than relying solely on the string method.
Step back and admire how a simple can of paint has added architectural charm to your room
Botanical Leaf Mural Focal Wall
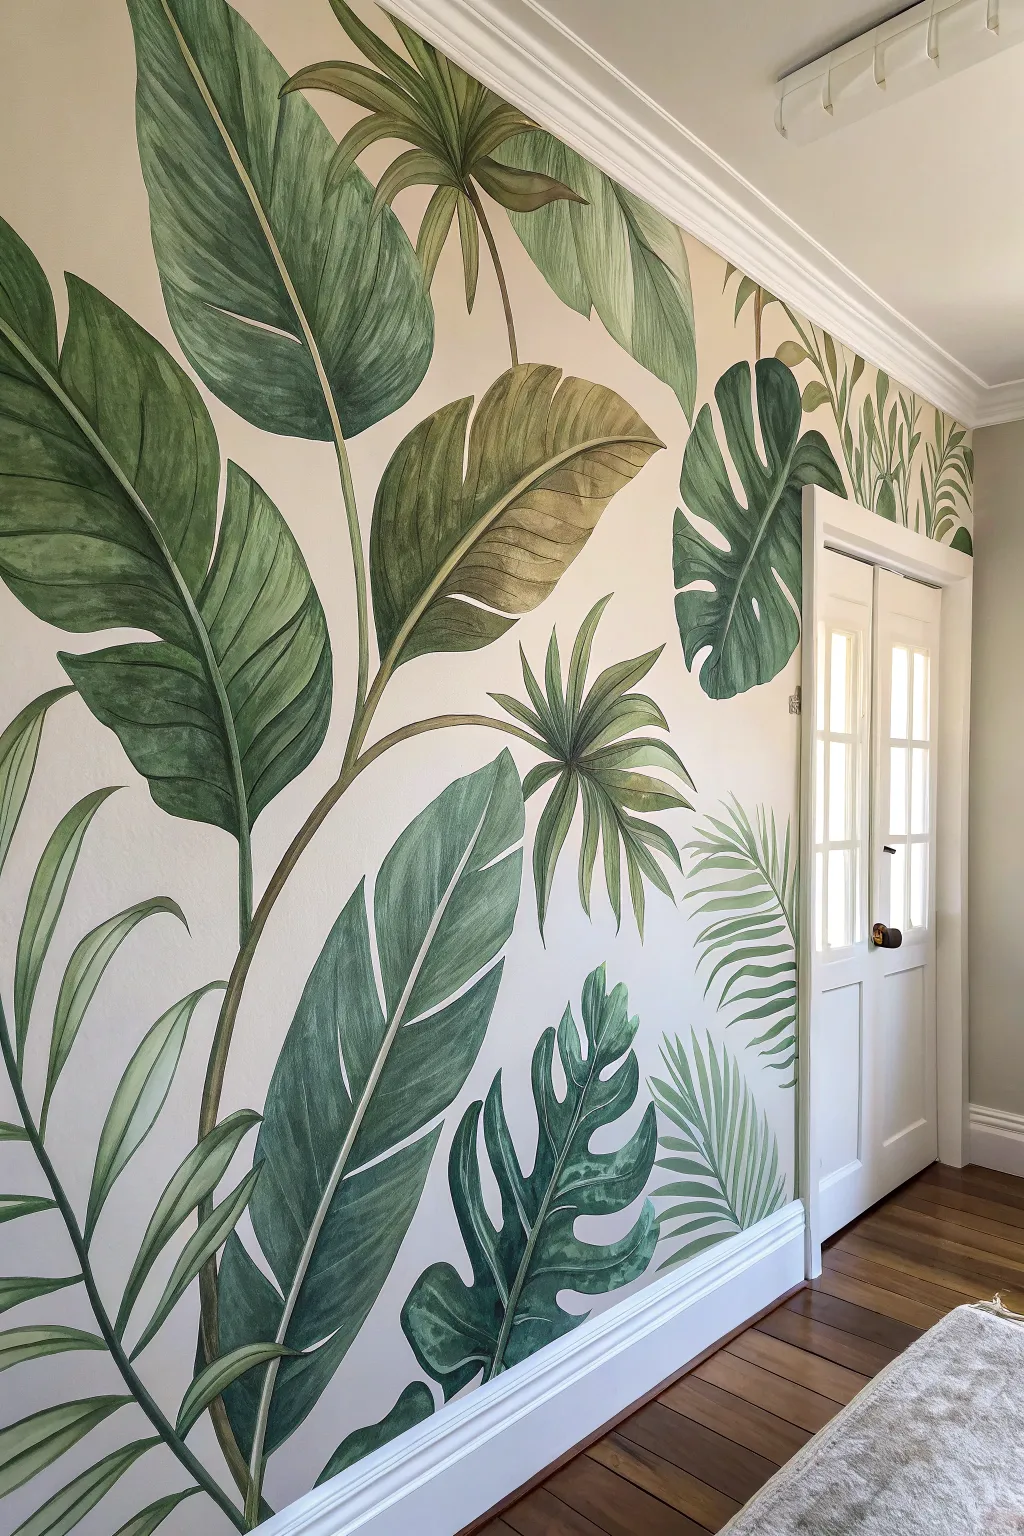
Transform a plain wall into an indoor jungle with this oversized botanical mural. Featuring a mix of banana leaves, monstera, and palms in soothing greens and earthy tans, this hand-painted feature wall brings sophisticated nature vibes to any room.
Step-by-Step Tutorial
Materials
- Latex interior wall paint (base coat color)
- Acrylic paints (various shades of green: sap green, olive, emerald, pine)
- Acrylic paints (accent colors: raw sienna, yellow ochre, raw umber, white)
- Pencil and large eraser
- Overhead projector or printed reference images
- Chalk (optional, for sketching)
- Assorted paintbrushes (2-inch sash brush, 1-inch flat brush, round liner brushes)
- Painter’s tape
- Drop cloth
- Mixing palettes or plastic plates
- Water cups and paper towels
- Clear matte acrylic sealer (optional)
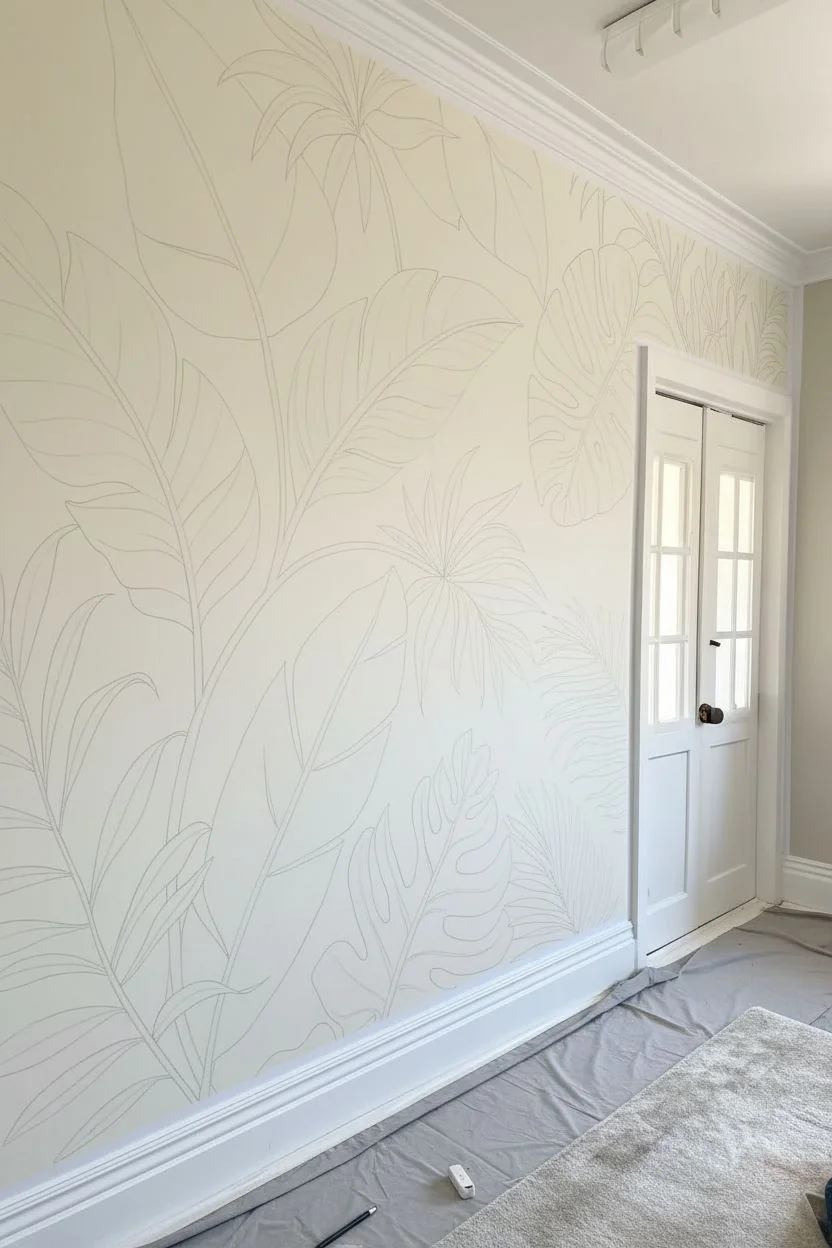
Step 1: Preparation and Planning
-
Prep the canvas:
Begin by ensuring your wall is clean, dry, and painted with your desired background color. A soft cream or off-white works best to make the greens pop. Tape off trim, baseboards, and any adjacent walls with painter’s tape and lay down drop cloths. -
Design your layout:
Sketch your composition on paper first. Aim for a mix of leaf types—large banana leaves for height, monstera for visual weight at the bottom, and palms for airy filler. Plan for the stems to originate from a lower central area or sweep up from the corners. -
Transfer the outline:
Use an overhead projector to cast your design onto the wall for tracing. If you don’t have one, lightly freehand the large shapes using a pencil or white chalk. Focus only on the outer perimeters of the leaves and the main central stems; don’t worry about tiny veins yet.
Transparency Trick
Mix a glazing medium or water into your dark green paint. Apply this translucent mix where leaves overlap to create realistic, shadowy depth without looking heavy.
Step 2: Blocking in Color
-
Mix your base greens:
Prepare three main puddles of green: a dark shadow green (mixed with a touch of raw umber), a mid-tone grass green, and a light yellow-green. Having these ready prevents stopping constantly to remix. -
Paint the background leaves:
Start with the leaves that appear ‘behind’ others. Fill these in with slightly lighter or muted tones to create depth. Use a 2-inch brush to block in the shape, keeping the paint application thin and smooth. -
Fill the foreground shapes:
Move to the prominent foreground leaves. Apply your mid-tone green to the majority of the leaf surface. Don’t worry about perfection; subtle streakiness actually adds to the organic texture of the plant matter. -
Add color variation:
While the paint is still slightly wet, blend in some raw sienna or yellow ochre towards the edges of some leaves, particularly the large banana leaves, to simulate sun-fading or aging.
Go metallic
For a luxe twist, trace the very outer edges of the large banana leaves with a thin line of gold leaf paint to catch the light.
Step 3: Detailing and Shading
-
Define the stems:
Using a smaller flat brush, paint the long, curving stems. Use a dark brownish-green on the shadowed side of the stem and a lighter green on the side catching the imaginary light source to make them look cylindrical. -
Create the center veins:
Paint the central spine (midrib) of each leaf. For the large leaves, this line should be fairly thick at the base and taper off towards the tip. Use a light green mixed with white for high contrast against the darker leaf body. -
Paint lateral veins:
Switch to a thin liner brush. From the central spine, pull thinned darker paint outward towards the leaf edges to create the ribbing. Keep your wrist loose to ensure the lines curve naturally rather than looking like stiff rulers. -
Deepen the shadows:
Identify where one leaf overlaps another. I like to glaze a thin layer of dark emerald or pine green right under the overlap line to create a strong shadow, which instantly separates the layers visually. -
Highlighting edges:
Mix a pale mint or yellow-white shade. Carefully drag this color along the upper ridges of the leaves and the tips of the palms where light would naturally hit.
Step 4: Refining the Mural
-
Texture the banana leaves:
The large banana leaves need a specific texture. Use a dry-brush technique with a little dark green to create faint, vertical striations running from the center vein to the edge, mimicking the plant’s natural fibers. -
Refine the monstera:
Ensure the characteristic holes (fenestrations) in the monstera leaves are clearly defined. If you accidentally painted over them, use your background wall color to cut those shapes back in cleanly. -
Clean up outlines:
Step back to view the mural as a whole. Use a small angled brush and your background wall color to tidy up any ragged edges or stray splatters, ensuring the silhouettes are crisp. -
Erase guidelines:
Once the paint is completely dry (wait at least 4-6 hours), gently erase any visible pencil marks. Be gentle to avoid burnishing the paint. -
Seal the work (optional):
If this is in a high-traffic area, apply a clear matte acrylic sealer over the painted leaves to protect them from scuffs and allow for easy cleaning.
Enjoy the calming atmosphere of your new, maintenance-free indoor garden.

PENCIL GUIDE
Understanding Pencil Grades from H to B
From first sketch to finished drawing — learn pencil grades, line control, and shading techniques.
Explore the Full Guide
Oversized Floral Outline Pattern
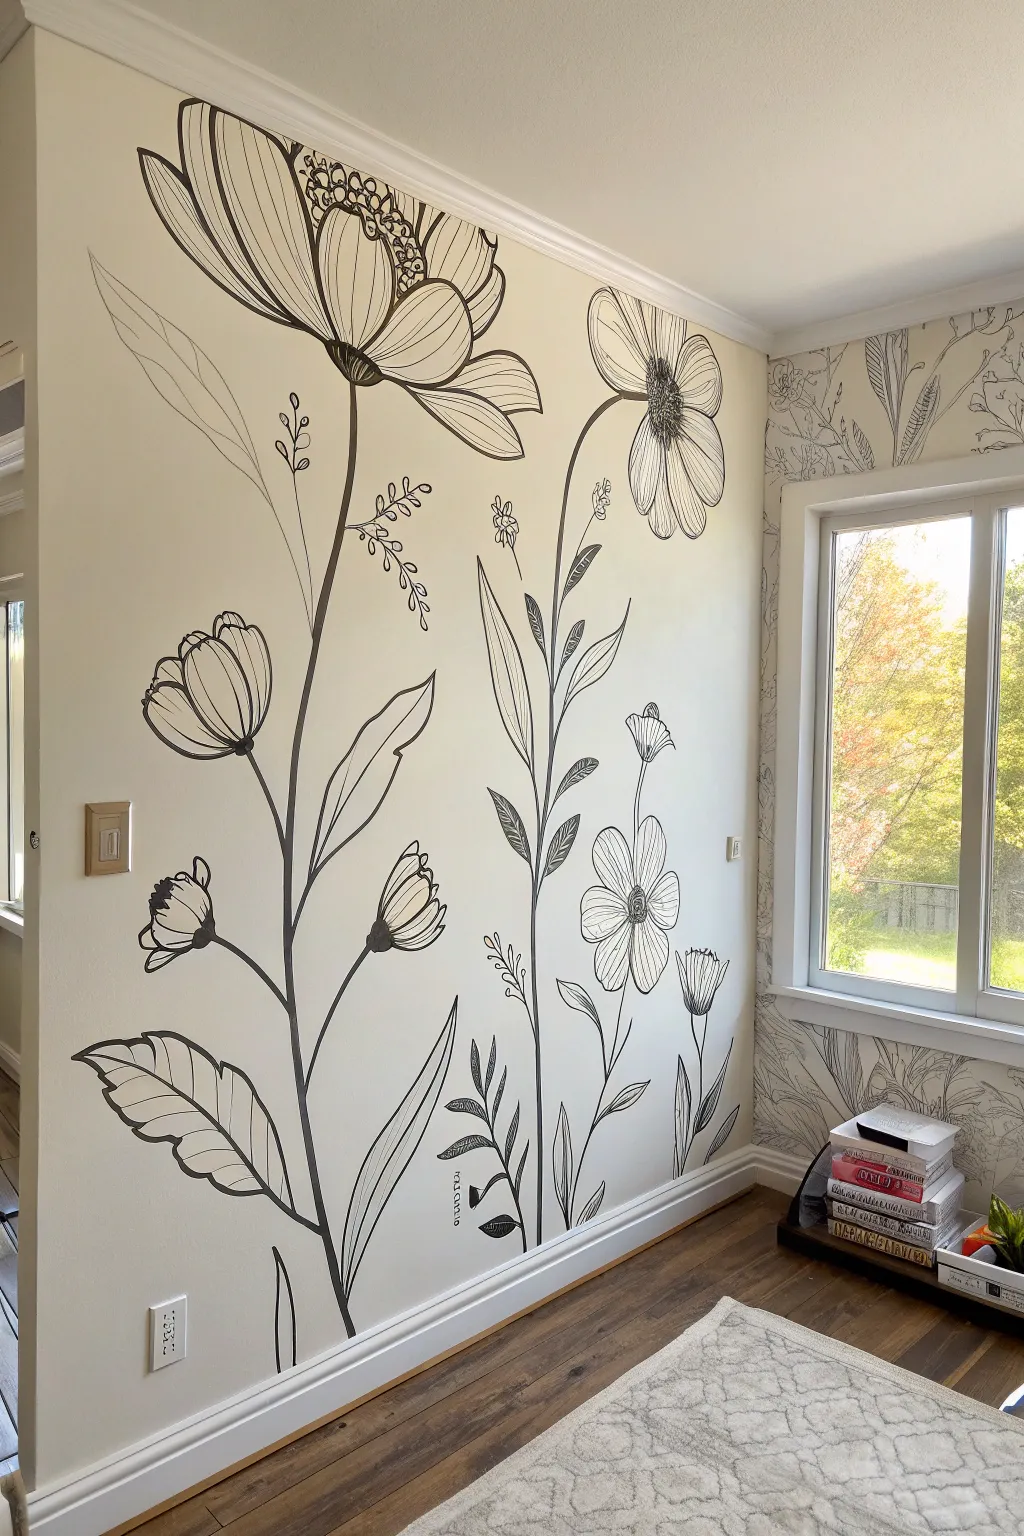
Transform a blank wall into a botanical sketchbook with this striking, large-scale mural. Using simple black lines on a neutral background creates a modern, sophisticated look that feels both artistic and airy.
Detailed Instructions
Materials
- Interior latex paint (cream or beige for base)
- Black acrylic paint or high-quality black wall paint
- Pencil (HB or 2B)
- Large eraser
- Projector (optional but recommended)
- Round paintbrush (size 6 or 8 for thick lines)
- Liner brush (size 1 or 2 for details)
- Painter’s tape
- Drop cloth
- Artist’s palette or plastic plate
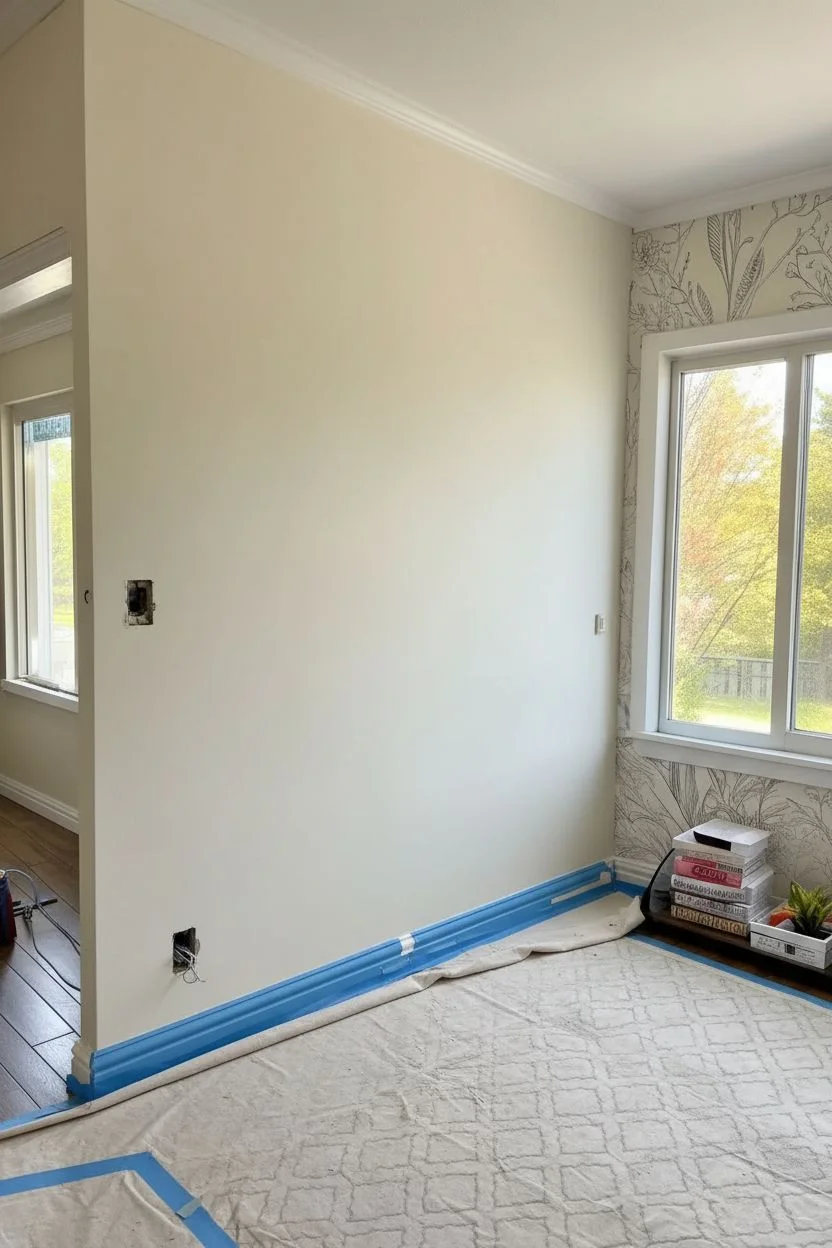
Step 1: Preparation and Base
-
Clear and clean:
Remove any outlet covers, switch plates, and existing wall decor. Wipe the wall down with a damp cloth to remove dust and grease, ensuring a clean surface for adhesion. -
Protect the area:
Lay down a drop cloth to protect your flooring and apply painter’s tape to the baseboards, ceiling line, and adjoining walls to ensure crisp edges. -
Apply base color:
Roll on two coats of your chosen cream or beige background paint. Allow the first coat to dry completely before applying the second to ensure solid, opaque coverage.
Clean Up Mistakes
Keep a damp rag and a small brush with your base wall color nearby. If a line goes rogue, wipe it instantly or let it dry and paint over it to ‘erase’ the error.
Step 2: Drafting the Design
-
Plan your composition:
Sketch your design on paper first. Aim for variety in height, placing the tallest flowers off-center and filling gaps with smaller buds or leaves. In this project, balance is key. -
Project or grid:
Use a projector to cast your sketch onto the wall for perfect proportions. If you don’t have one, lightly draw a simple grid on the wall and use it to scale up your drawing from paper. -
Lightly sketch outlines:
Trace the projected image or freehand your design onto the wall using a pencil. Keep your pressure very light so the graphite doesn’t smudge later. -
Refine the shapes:
Step back to review the flow. I often find I need to elongate a stem or tilt a flower head slightly to better fit the wall space before committing to paint.
Step 3: Painting the Artwork
-
Prepare your paint:
Pour a small amount of black paint onto your palette. If using heavy-body acrylics, dilute it slightly with a few drops of water to improve flow for long, continuous strokes. -
Paint the heavy stems:
Start with the main stems using your larger round brush (size 6-8). Create long, fluid lines from the bottom up. Don’t worry about shakiness; slight variation mimics organic growth. -
Outline the main blooms:
Using the same brush, outline the perimeter of the large flower petals. Press down to thicken the line on the curves and lift up for a thinner line at the tips. -
Switch to the liner brush:
For the delicate interior details of the petals and the smaller leaves, switch to a thin liner brush. These lines should be noticeably lighter than the stems. -
Add hatching details:
Create texture within the leaves and petals using fine hatching lines. Quick, confident flicks of the wrist work best here to create the look of veins and shadows. -
Fill the centers:
For the flower centers (like the large daisy-style bloom), use a stippling motion or draw small, tight circles to create a dense, pollen-heavy texture. -
Add floating elements:
Paint the smaller sprigs, floating buds, or tiny leaves that fill the negative space. These should be delicate and can effectively balance any empty areas. -
Review and touch up:
Erase any visible pencil marks once the paint is fully dry. If you smudged any black paint, touch it up carefully with a small brush and your original wall color.
Add Dimension
Mix a dark grey (black + white) and add transparent ‘shadow’ lines next to some black outlines. This creates a subtle 3D effect without losing the sketch style.
Enjoy your bold new botanical feature wall which brings the garden indoors year-round
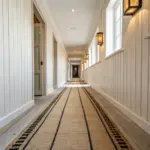
Wide Horizontal Stripes That Stretch Space
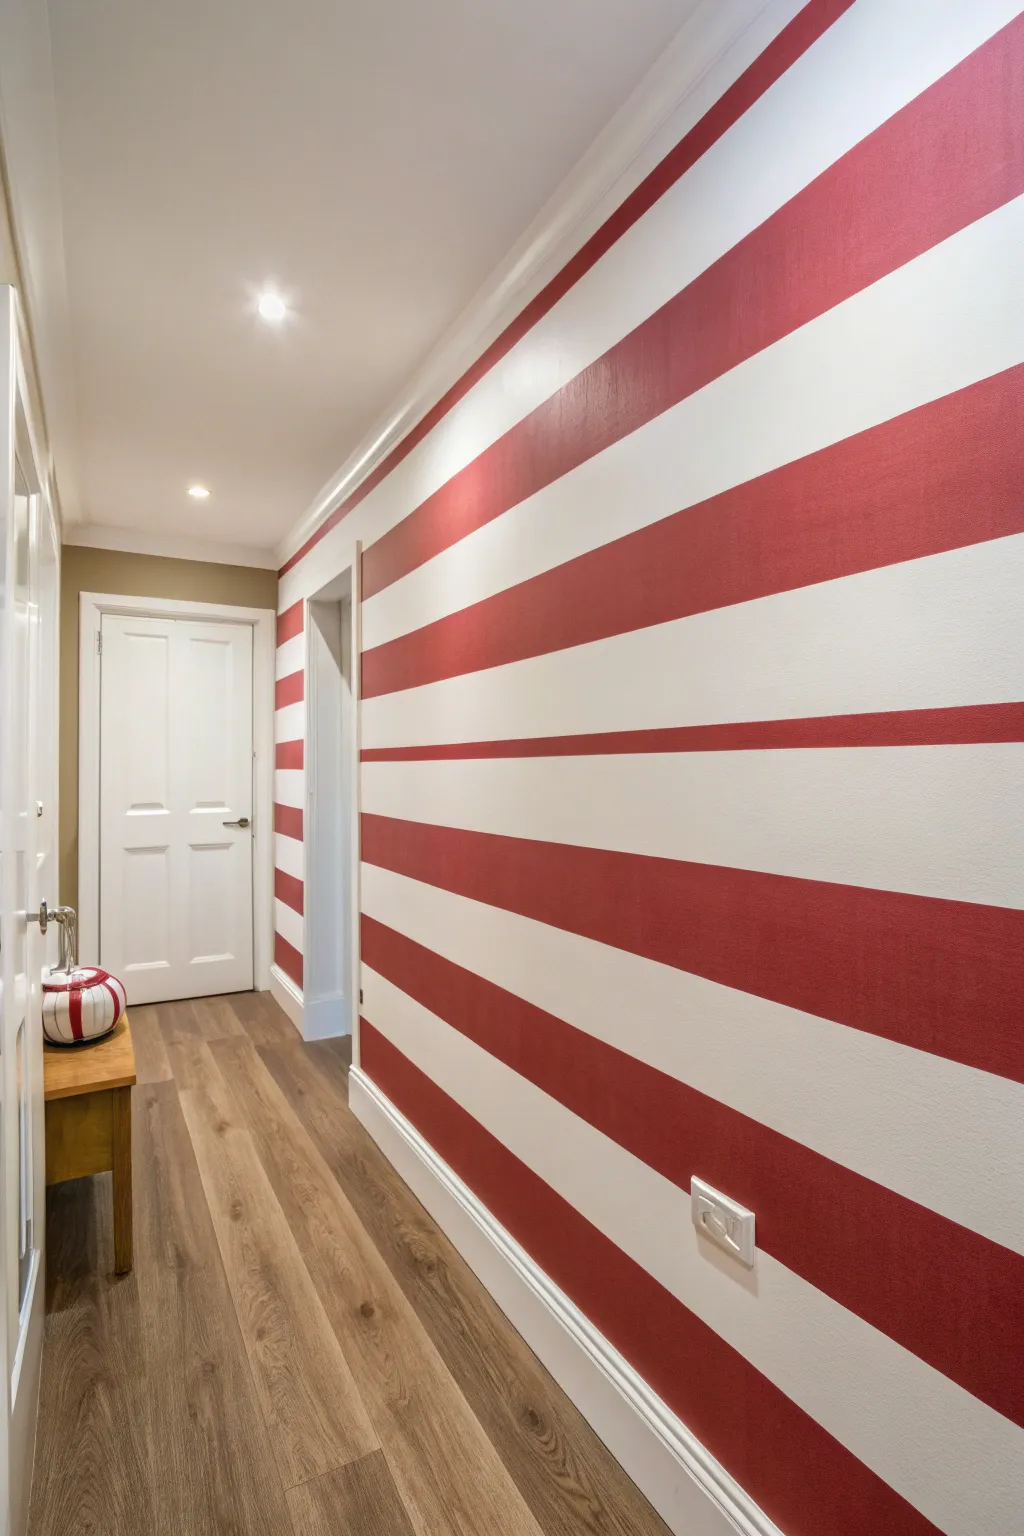
Transform a narrow hallway into a dynamic, elongated space using the power of bold, horizontal stripes. This classic red and white combination adds instant character and a touch of whimsical, coastal charm that draws the eye down the length of the hall.
Step-by-Step
Materials
- White or off-white interior latex paint (satin or eggshell)
- Deep red interior latex paint (satin or eggshell)
- Painter’s tape (frog tape or high-quality blue tape)
- Laser level or carpenter’s level
- Pencil
- Tape measure
- Paint rollers (medium nap)
- Roller covers (one for each color)
- Paint brushes (2-inch angled sash brush)
- Drop cloths
- Paint tray and liners
- Putty knife or credit card
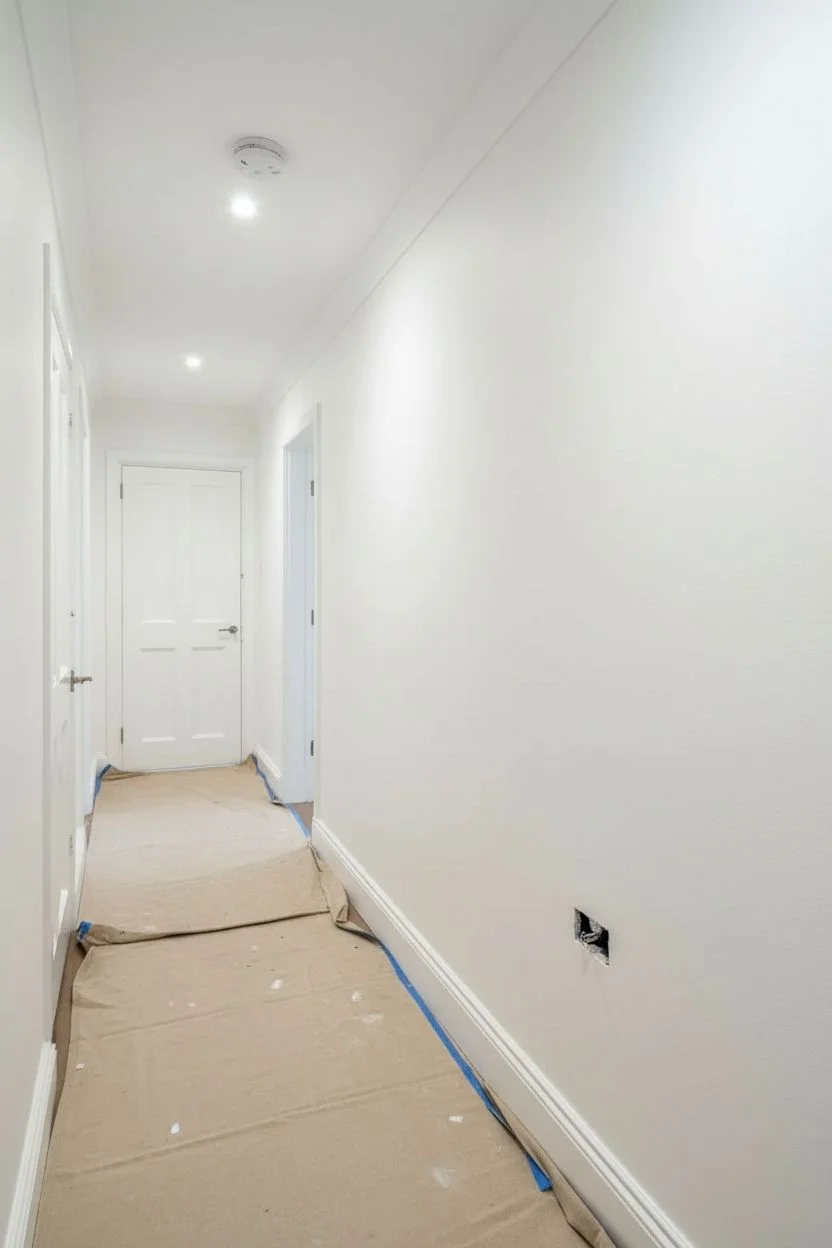
Step 1: Preparation & Base Coat
-
Clear and clean:
Remove all outlet covers, switch plates, and artwork from the hallway walls. Wipe down the walls with a damp cloth to remove dust and let them dry completely, ensuring a clean surface for adhesion. -
Protect the floors:
Lay down drop cloths along the entire length of the hallway, securing them near the baseboards to prevent any accidental drips on your hardwood or carpet. -
Apply the base color:
Paint the entire wall with your chosen white or off-white shade. This will serve as the lighter stripe color, which is much easier than trying to paint white over red later. -
Let it cure:
Allow the base coat to dry thoroughly. Ideally, wait at least 24 hours before applying tape; if the paint is even slightly tacky, the tape might peel it off later.
Bleed-Through Blues?
If you see jagged lines after removing tape, wait for the paint to fully cure. Re-tape the line slightly over the mistake and touch up with the correct color using a small artist’s brush.
Step 2: Measuring & Taping
-
Calculate stripe width:
Measure the total height of the wall between the baseboard and ceiling molding. Divide this number by an odd number (like 7 or 9) to ensure you start and end with a full stripe of the same color for symmetry. -
Mark vertical points:
Starting from the baseboard, use your tape measure and pencil to make small tick marks up the wall at your calculated intervals. Do this in a discrete corner first to check the spacing. -
Set the laser level:
Position your laser level to align with your first pencil mark. A laser is invaluable for long hallways to ensure the line stays perfectly straight over a long distance. -
Apply the first tape line:
Carefully run your painter’s tape along the laser line. Press the tape down firmly as you go. -
Place tape correctly:
This is crucial: place the tape on the *outside* of the area you intend to paint red. You want the tape to cover the white stripe area to protect it. -
Mark the ‘paint’ zones:
To avoid confusion, place a small piece of tape or a light pencil ‘X’ inside the stripes that will be painted red. I always do this because it gets surprisingly confusing once you start working. -
Seal the tape edges:
Run a putty knife or an old credit card firmly along the edge of the tape to ensure a tight seal. This prevents paint bleed. -
The bleed-proof trick:
Lightly brush a small amount of the *base* white paint over the edge of the tape that faces the future red stripe. This seals the edge so any paint that bleeds under helps form a crisp line.
Go Vertical
Want to make low ceilings feel higher? Use this same technique but orient the stripes vertically. Alternating finishes (like matte and high-gloss) in the same color adds subtle luxury.
Step 3: Painting the Stripes
-
Cut in the edges:
Using your angled sash brush and the deep red paint, carefully cut in along the corners, door frames, and baseboards inside the designated red stripe zones. -
Roll the first coat:
Using a roller, fill in the red stripes. Use a ‘W’ motion to distribute paint evenly, but be gentle near the tape lines to avoid forcing paint underneath. -
Wait and repeat:
Allow the first coat of red to dry according to the can’s instructions (usually 2-4 hours). Apply a second coat for a rich, opaque finish free of streaks. -
Remove tape promptly:
While the second coat is still slightly damp (not wet, but not fully cured), slowly peel off the painter’s tape at a 45-degree angle. Pulling while slightly pliable helps prevent the paint from chipping.
Step back and admire how your new vivid lines guide the eye and expand your hallway’s potential


Tone-on-Tone Checker Glaze Wall

Transform a plain wall into a dimensional masterpiece that mimics the look of textured terra cotta or limestone tiles. This tone-on-tone checkerboard technique uses glazing medium to create depth and warmth without the heavy labor of setting actual stone.
How-To Guide
Materials
- Base coat paint (satin finish, light cream/beige)
- Latex glaze liquid
- Latex paint in two accent colors (tan and deep ochre/terracotta)
- Painter’s tape (1-inch width)
- Level and pencil
- Measuring tape
- Sea sponge or ragging cloth
- Clean, lint-free rags
- Small artist brush
- Clear matte or satin polyurethane (optional)
Step 1: Preparation and Layout
-
Base coat application:
Begin by rolling two solid coats of your lightest cream or beige satin paint over the entire wall. Allow this to dry for at least 24 hours to ensure the tape won’t peel it up later. -
Measure the grid:
Decide on your tile size—12×12 inches works well for a standard look. Start measuring from the center of the wall to ensure equal-sized partial tiles on the edges. -
Mark the lines:
Using a long level and a pencil, lightly mark your horizontal and vertical grid lines across the wall. Keep these lines faint so they are easier to cover later. -
First taping stage:
Apply painter’s tape along the OUTSIDE of the pencil lines for every other square, creating a checkerboard pattern where you work on isolated squares first. This prevents the wet glaze from bleeding into adjacent ’tiles’.
Step 2: Creating the Glaze Effect
-
Mix the glazes:
In two separate containers, mix one part paint with four parts glaze liquid. Create one mixture with your tan paint and another with the deeper ochre color. I prefer a slightly thinner mix for more translucency. -
Apply the light glaze:
Working on a single taped-off square, dampen a sea sponge and dip it into the tan glaze mixture. Dab the glaze onto the wall, covering most of the square but leaving small random spots of the base coat showing through. -
Add texture:
Immediately use a crumpled, clean lint-free rag to blot the wet glaze. Twist your wrist as you blot to create a non-directional, stone-like texture. Soften any hard edges created by the sponge. -
Introduce the accent color:
While the first glaze is still tacky, lightly dip a small corner of your sponge into the darker ochre glaze. Dab this sparingly into different areas of the same square to create color variation, mimicking natural stone. -
Soften the blend:
Use a clean, dry softening brush or a fresh rag to gently feather the two glaze colors together. You want them to look like sediment layers or natural discoloration, not distinct spots. -
Complete the first set:
Repeat this glazing and texture process for all the exposed squares in your currently taped grid. Vary the intensity slightly from square to square so the ’tiles’ don’t look identical. -
Remove tape and dry:
Once the first set of squares is glazed, carefully remove the painter’s tape immediately—pulling it away at a 45-degree angle. Let these squares dry completely, preferably overnight.
Glaze Drying Too Fast?
Add a tablespoon of water or a specialized paint extender to your glaze mix. This keeps the edge wet longer, giving you more time to manipulate the texture.
Step 3: Finishing the Pattern
-
Second taping stage:
Once dry, tape off the squares you just painted. This protects your finished work while you glaze the remaining blank squares. -
Glaze remaining squares:
Repeat the sponge-and-rag technique on the empty squares. Try to maintain the same general color balance, but allow for natural variation. -
Remove final tape:
Remove all remaining tape to reveal the grid of faux tiles separated by the original base coat lines, which now act as your ‘grout’ lines. -
Refine grout lines:
If any glaze bled under the tape, use a small artist brush and your original base coat paint to touch up the grout lines, keeping them crisp and uniform. -
Optional sealing:
For high-traffic areas, roll a coat of clear matte polyurethane over the entire wall once the paint has cured for 48 hours to protect your faux stone finish.
Grout Line Trick
Before applying glaze, seal your tape edges with a quick swipe of the base coat color. This blocks glaze bleed and creates razor-sharp grout lines every time.
Step back and admire how the light plays across your new wall, adding instant architectural interest and warmth to the room
Color Washing for a Dreamy Glow
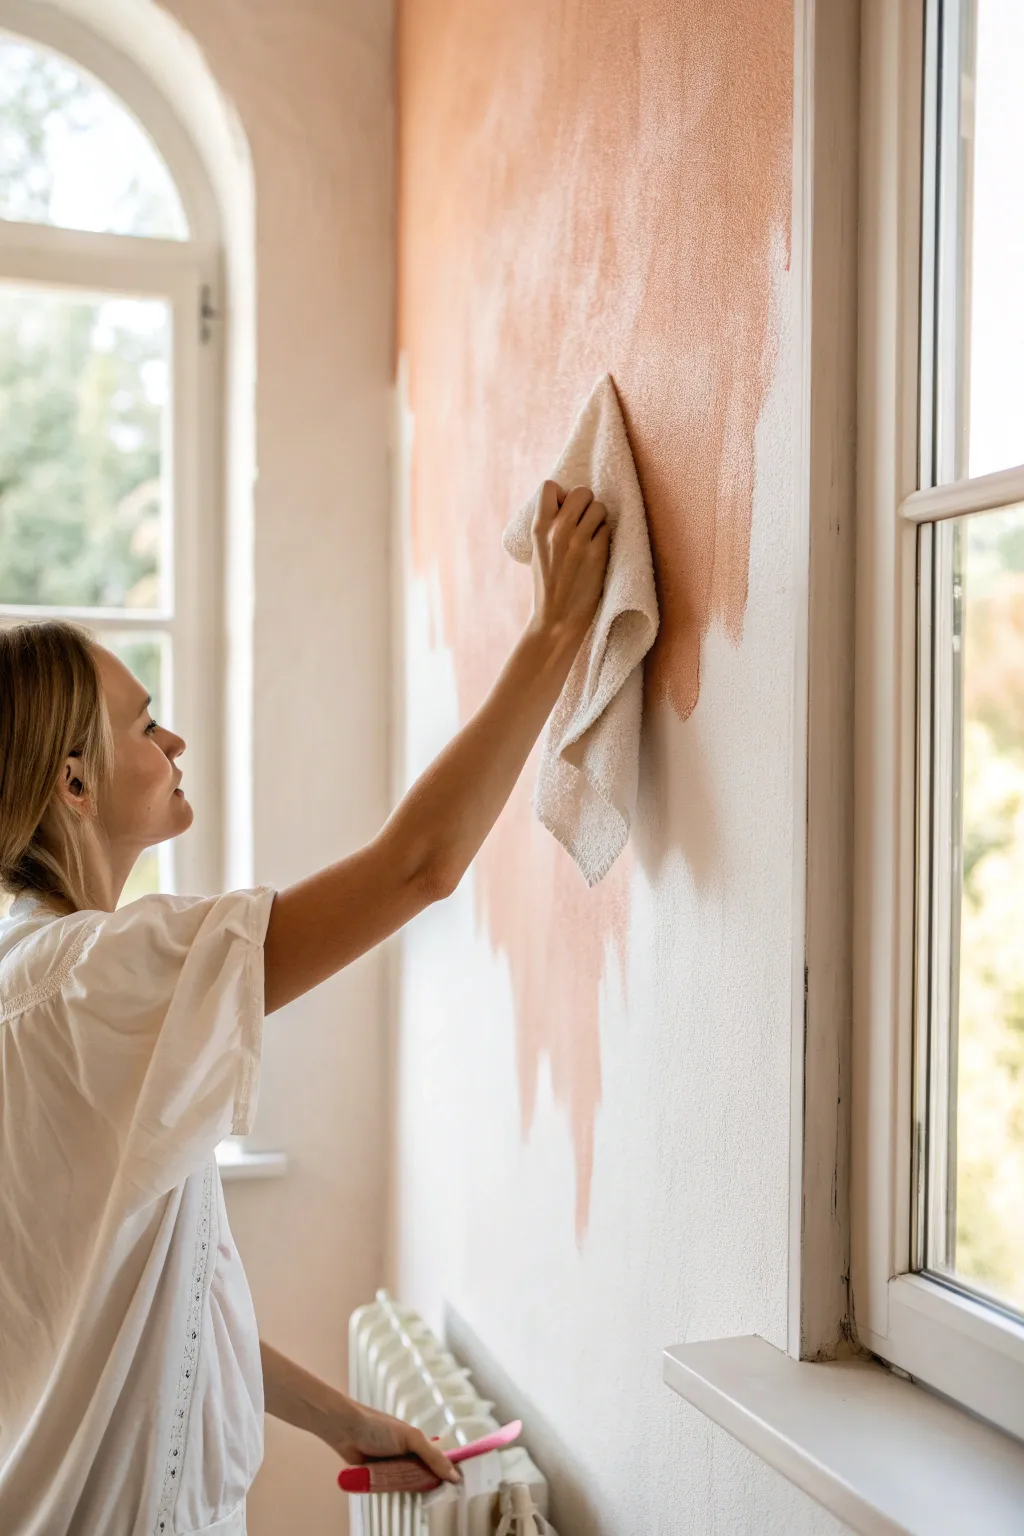
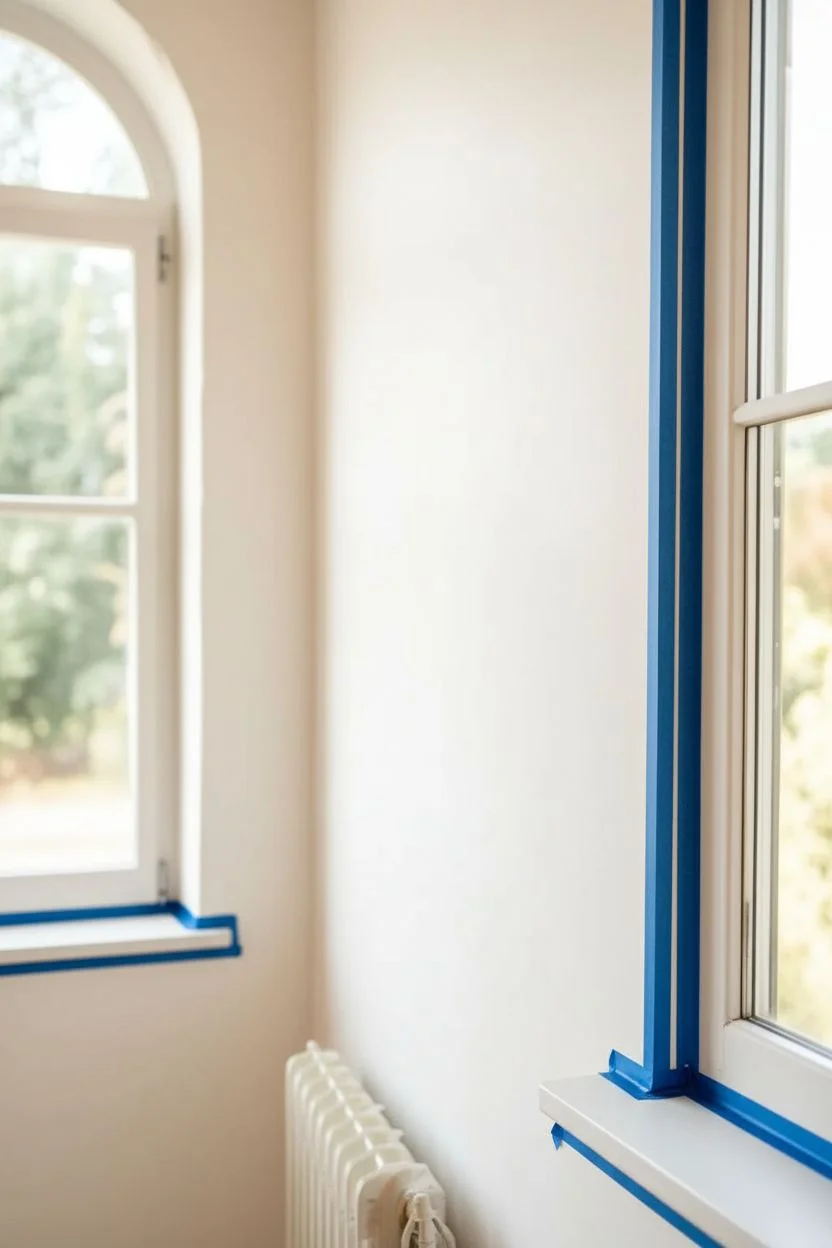
Achieve a hazy, romantic atmosphere with this color washing technique that mimics the aged patina of Tuscan villas. By layering diluted paint over a light base and softening it with rags, you create a finish that feels warm, organic, and beautifully imperfect.
Step-by-Step Tutorial
Materials
- Semi-gloss or satin interior paint (base coat, creamy white)
- Latex glaze medium
- Matte finish interior paint (top coat, terracotta/soft peach)
- Painter’s tape
- Drop cloths
- Paint roller and tray (for base coat)
- Wide paintbrush (4-inch)
- Clean, lint-free cotton rags (cheesecloth or old t-shirts act best)
- Bucket for mixing glaze
- Stir sticks
- Rubber gloves
Step 1: Preparation and Base
-
Clear and Protect:
Move furniture away from the walls and lay down drop cloths to protect your flooring. This technique can be a bit drip-prone, so thorough coverage is essential. -
Tape Trim:
Apply painter’s tape carefully along door frames, window sills (like the one in the photo), baseboards, and the ceiling line to ensure crisp edges. -
Clean Walls:
Wipe down the wall surface with a damp cloth to remove dust or grease, ensuring the base coat adheres properly. -
Apply Base Coat:
Roll on two coats of your creamy white base color. A satin or semi-gloss finish is crucial here because it allows the glaze to slide around; the technique won’t work well on a flat matte base. -
Dry Completely:
Allow the base coat to cure for at least 24 hours. The surface must be rock hard before you start rubbing glaze over it.
Wet Edge Maintenance
Work steadily and don’t take breaks mid-wall. If the glaze dries along a hard line, re-wetting slightly with a spray bottle can help reactivate and blend it.
Step 2: Mixing the Glaze
-
Prepare Glaze Mixture:
In your mixing bucket, combine your matte terracotta paint with the latex glaze medium. A standard starting ratio is 1 part paint to 4 parts glaze. -
Dilute with Water:
Add a splash of water to thin the mixture slightly. You want a consistency similar to heavy cream or a thin pancake batter. -
Test the Color:
Brush a small amount onto a piece of cardboard or a hidden corner. If the color is too opaque, add more glaze; if it’s too sheer, add a touch more paint.
Step 3: Applying the Finish
-
Work in Sections:
Plan to work in small patches, roughly 3 feet by 3 feet. You need just enough time to manipulate the paint while it’s still wet. -
Dampen Tools:
Before dipping, lightly dampen your rag with water and wring it out fully. A damp rag absorbs the glaze more evenly than a dry one. -
Brush on Glaze:
Using the wide paintbrush, apply the glaze mixture to the wall in random, crisscross strokes (X-pattern). Don’t aim for full coverage; leave plenty of the white base peeking through. -
Soften with Rags:
Immediately bunch up your damp rag and begin dabbing and rubbing the wet glaze. Use a circular motion to blur the brushstrokes into soft clouds. -
Vary Pressure:
Press harder in some areas to lift off more glaze, revealing more white base, and use a lighter touch elsewhere to keep the color dense. -
Check Edges:
Keep the edges of your working section wet and irregular. Never finish a section with a straight line, or you’ll see a seam when you start the next patch. -
Blend Sections:
Apply glaze to the adjacent section and work back into the wet edge of your previous patch, blending the two areas seamlessly. -
Refine the Texture:
Step back frequently to assess the pattern. If an area looks too heavy, blot it with a clean rag. If it’s too light, dab a tiny bit more glaze onto the cloth and rub it in. -
Corner Detail:
Use a smaller piece of rag or even your gloved finger to push the glaze gently into corners and along trim tape for a finished look. -
Final Dry:
Once the entire wall is complete, carefully remove the painter’s tape while the glaze is still slightly tacky, then let the wall dry completely.
Dual-Tone Depth
Once dry, apply a second layer using a slightly darker or lighter glaze shade. This adds richness and creates a true plaster-like 3D effect.
Step back and enjoy the warm, enveloping glow your new color-washed walls bring to the space
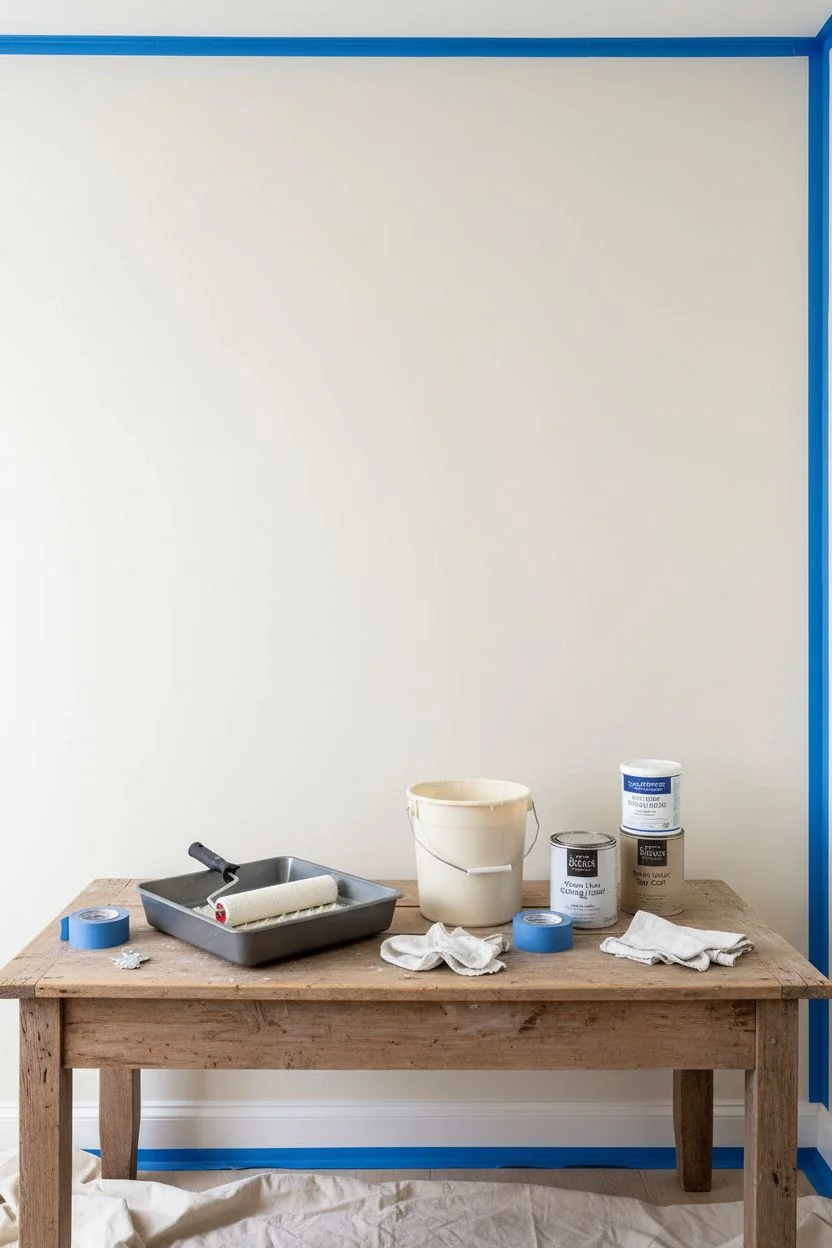
Modern Sponge Texture Finish
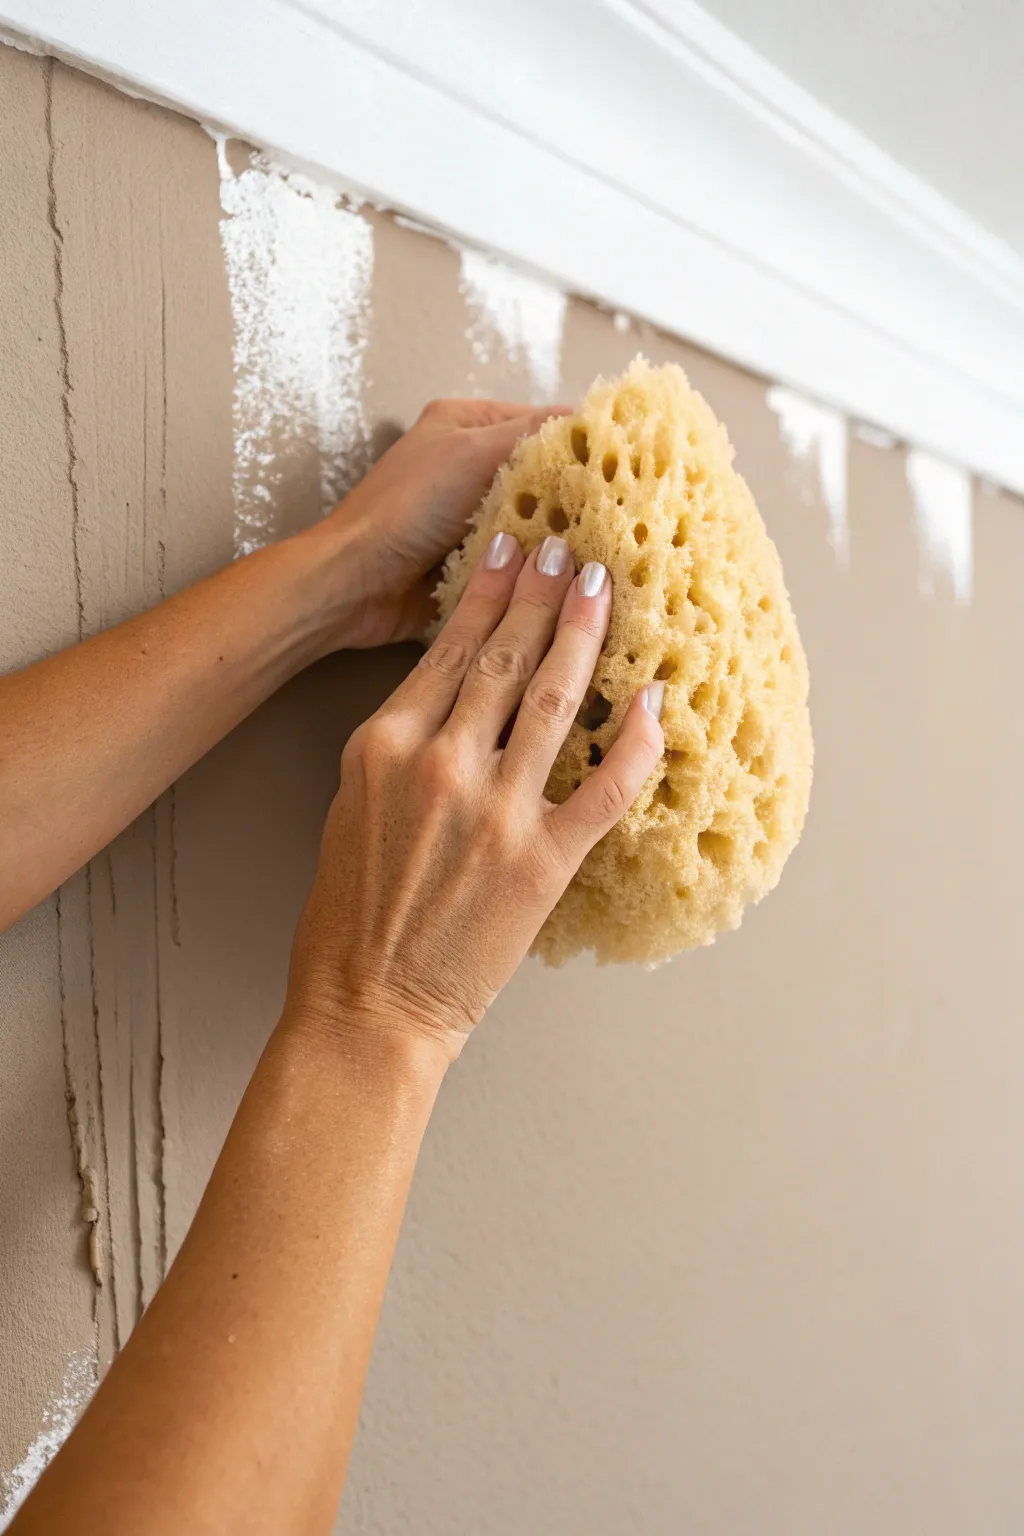
Transform flat walls into a surface rich with depth and tactile appeal using this modern take on sponge painting. This technique layers a soft, sandy beige over a muted base to create a sophisticated, cloud-like finish that feels organic rather than dated.
Detailed Instructions
Materials
- Latex interior paint (base coat color)
- Latex interior paint (top coat color, slightly lighter)
- Clear acrylic glazing liquid
- Natural sea sponge (large size)
- Painter’s tape
- Paint roller and tray
- Plastic bucket for mixing
- Lint-free rags
- Drop cloths
- Small angled sash brush
Step 1: Base Preparation
-
Clear and clean:
Remove any artwork, nails, or switch covers from the wall. Wipe the surface down with a damp cloth to remove dust, ensuring a clean bond for the new paint. -
Protect the edges:
Apply painter’s tape along the ceiling molding, baseboards, and any adjacent walls you aren’t painting. Press the tape edges down firmly to prevent bleed-through. -
Roll the base coat:
Using your roller, apply the darker of your two colors as the base coat. Coverage needs to be solid here, so apply two coats if necessary, letting it dry completely according to the can’s instructions.
Step 2: Mixing the Glaze
-
Prepare the mixture:
In your plastic bucket, mix one part of your top coat paint with four parts of the acrylic glazing liquid. The glaze makes the paint translucent and keeps it wet longer, giving you time to work. -
Adjust consistency:
Stir the mixture thoroughly. It should have a consistency similar to heavy cream. If it feels too thick, you can add a tiny splash of water, but don’t over-thin it. -
Prep the sponge:
Soak your natural sea sponge in water until it is fully expanded and soft. Wring it out extremely well; it should be damp, not dripping.
Sponge Selection Secret
Always use a natural sea sponge, not a synthetic cellulose kitchen sponge. Synthetic sponges create uniform, square patterns that look artificial.
Step 3: Application Technique
-
Cut in initially:
Working in a small section (about 3 feet wide), use the sash brush to apply the glaze mixture into the corners and along the ceiling line. -
Load the sponge:
Dip the face of your damp sponge into the glaze mixture. Blot the excess onto a piece of cardboard or the dry side of your paint tray—you want the sponge coated, but not sodden. -
Apply to the wall:
Press the sponge gently against the wall in your brush-painted section. Use a random patting motion, lifting straight off the wall to create texture without smearing. -
Rotate constantly:
Rotate your wrist slightly with every dab. This ensures you don’t repeat the exact same sponge pattern, keeping the look organic and random. -
Work wet-to-dry:
Move from the wet edge of your previous section into the dry area. I find overlapping the edges while the glaze is still wet is crucial for avoiding hard seam lines. -
Vary the pressure:
Use light pressure for a faint, misty look and slightly firm pressure for more defined texture spots. A mix of both creates the best depth. -
Soften the look:
Once a section is covered but still wet, you can go back over it with a clean, slightly damp sponge to lift off excess glaze if an area looks too heavy or opaque.
Add Metallic Warmth
Mix a small amount of metallic pearl or gold paint into your glaze mixture. It adds a subtle shimmer that catches the sunlight beautifully.
Step 4: Finishing and Refining
-
Check for patterns:
Step back frequently to look for accidental grid patterns or heavy blotches. Fix these while the glaze is wet by lightly dabbing around them to break up the uniformity. -
Clean the sponge:
Wash your sponge out every 15 minutes or so. As it fills with paint, the texture becomes less defined. Squeeze it out thoroughly before continuing. -
Detail the edges:
Use a smaller piece torn from a spare sponge to get tight texture right up against the tape line where the large sponge can’t reach. -
Remove tape:
Carefully peel off the painter’s tape while the final section is still slightly tacky, pulling it away from the fresh paint at a 45-degree angle. -
Full cure:
Allow the wall to dry for at least 24 hours. The glaze takes longer to cure than standard latex paint, so avoid hanging pictures or touching it too soon.
Enjoy the nuanced, plaster-like warmth this finish adds to your updated space
Rag Rolling for Linen-Like Dimension
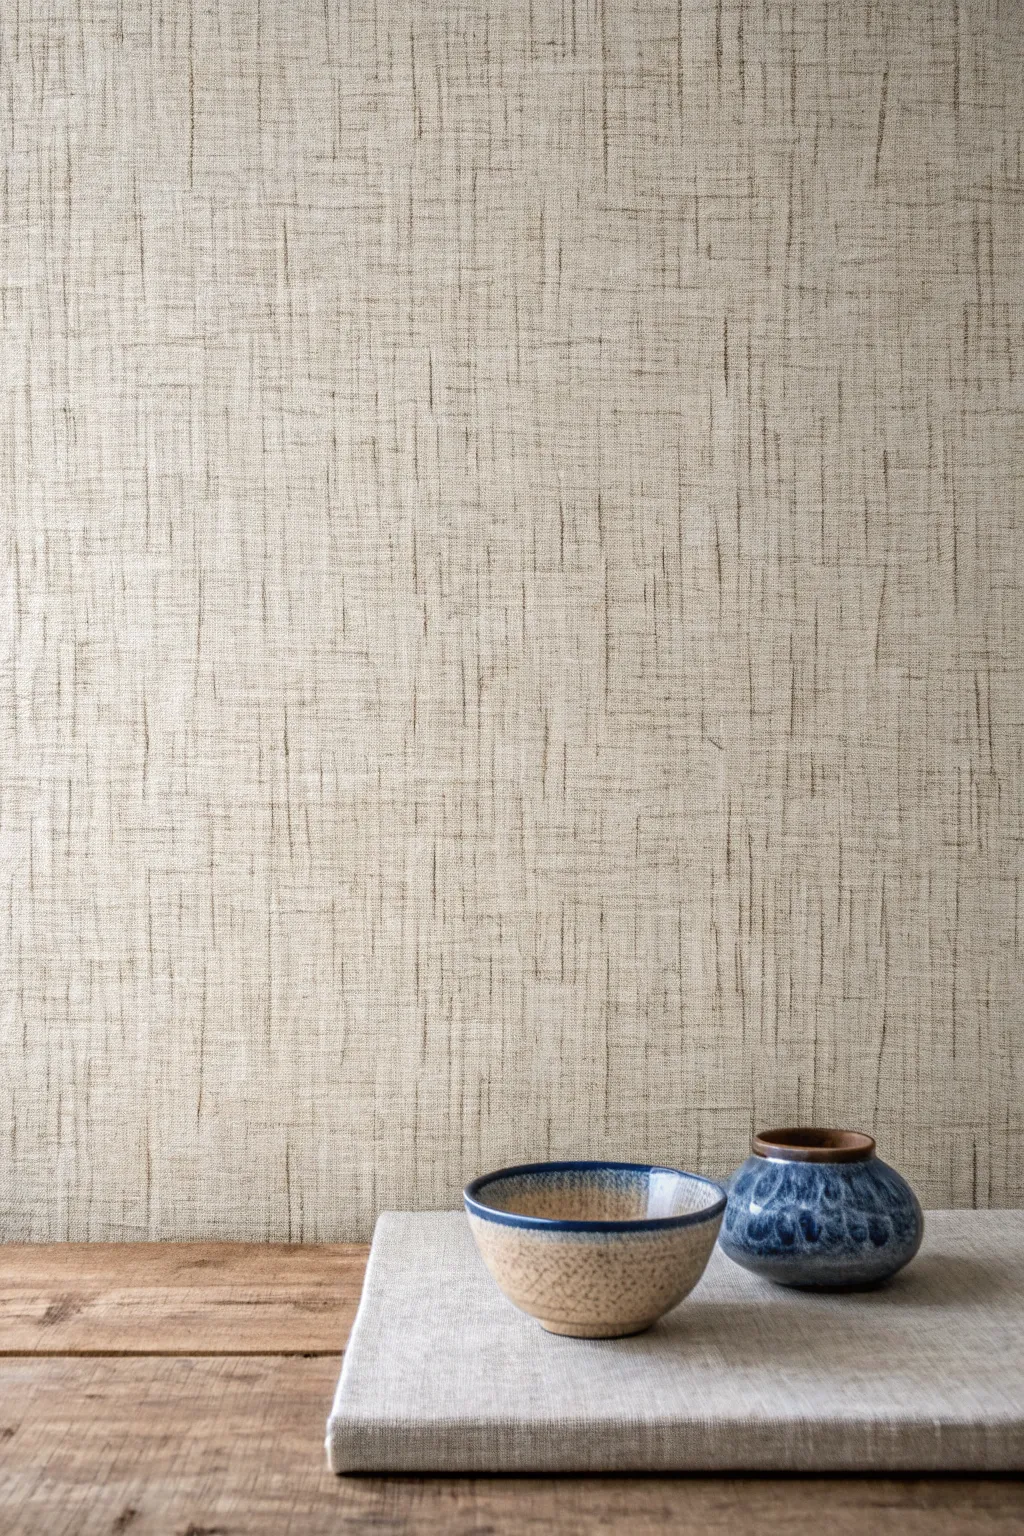
Transform a plain wall into a sophisticated, textured masterpiece that mimics the organic weave of linen fabric. This technique uses simple glaze layers and a dragging tool to achieve a soft, dimensional backdrop perfect for calming spaces.
Step-by-Step
Materials
- Satin latex base coat paint (creamy off-white)
- Satin latex top coat paint (taupe or light beige)
- Clear acrylic glazing liquid
- Painter’s tape
- Paint tray and liners
- Roller frame and covers (3/8 inch nap)
- 2 large dragging brushes (or wallpaper paste brushes)
- Lint-free rags
- Mixing bucket
- Drop cloths
Step 1: Preparation and Base Coat
-
Clear the area:
Remove all furniture, outlet covers, and decorations from the wall. Lay down drop cloths to protect your flooring from drips. -
Tape the edges:
Apply painter’s tape carefully along the ceiling line, baseboards, and any adjoining walls to ensure clean edges. -
Apply the base color:
Roll on the creamy off-white base coat. Use a satin finish as it allows the glaze to slide better than flat paint. -
Double check coverage:
If the original wall color shows through, apply a second coat of the base color once the first is dry. Let this cure for at least 24 hours.
Sticky Situation?
If the glaze dries too fast, the drag lines will look clumpy. Add a splash of water or a glaze extender to your mix to buy yourself more working time.
Step 2: Creating the Glaze Mixture
-
Mix the glaze:
In your mixing bucket, combine one part of your taupe top coat paint with four parts clear glazing liquid. -
Stir thoroughly:
Blend the mixture well. You want a translucent solution that stays wet longer than standard paint, allowing you time to work the texture. -
Test the consistency:
Brush a small amount onto a piece of cardboard or scrap drywall. It should feel slippery and look semi-transparent.
Double the Texture
For a coarser linen look, let the first vertical pass dry completely. Then, apply a second glaze layer and only drag horizontally.
Step 3: Weaving the Texture
-
Work in sections:
Plan to work in vertical sections about 3 to 4 feet wide. This ensures you maintain a wet edge. -
Roll on the glaze:
Apply the glaze mixture generously to the first section using a roller, covering from floor to ceiling. -
Initial vertical dragging:
Immediately take your clean dragging brush. Starting at the very top, drag the bristles straight down through the wet glaze in one continuous motion to the bottom. -
Repeat vertically:
Continue this vertical dragging across the wet section, overlapping each stroke slightly to prevent distinct stripes. -
Wipe the brush:
I find it crucial to wipe the brush bristles on a lint-free rag after every pass to prevent glaze buildup. -
Horizontal weaving:
Once the vertical lines are set but the glaze is still tacky, drag the clean brush horizontally across the section. -
Refine the weave:
Keep your hand steady and move from left to right. This cross-hatch motion creates the fabric ‘weave’ appearance. -
Move to the next section:
Roll glaze onto the adjacent section, overlapping the wet edge of the previous section slightly. -
Blend the seams:
Carefully drag through the overlapped area first to blend the two sections seamlessly before detailing the rest of the new patch. -
Complete the wall:
Continue this process—roll, drag vertical, drag horizontal—until the entire wall is covered.
Step 4: Finishing Details
-
Check for pools:
Inspect corners and baseboards for any glaze that may have pooled and dab it gently with a dry brush if necessary. -
Remove tape:
Carefully peel off the painter’s tape while the glaze is still slightly tacky to avoid pulling up any dried film. -
Full cure:
Allow the wall to dry completely for a full day before moving furniture back against it.
Step back and enjoy the warmth and sophisticated depth your new textured wall brings to the room
Speckled Spatter Accent Panel
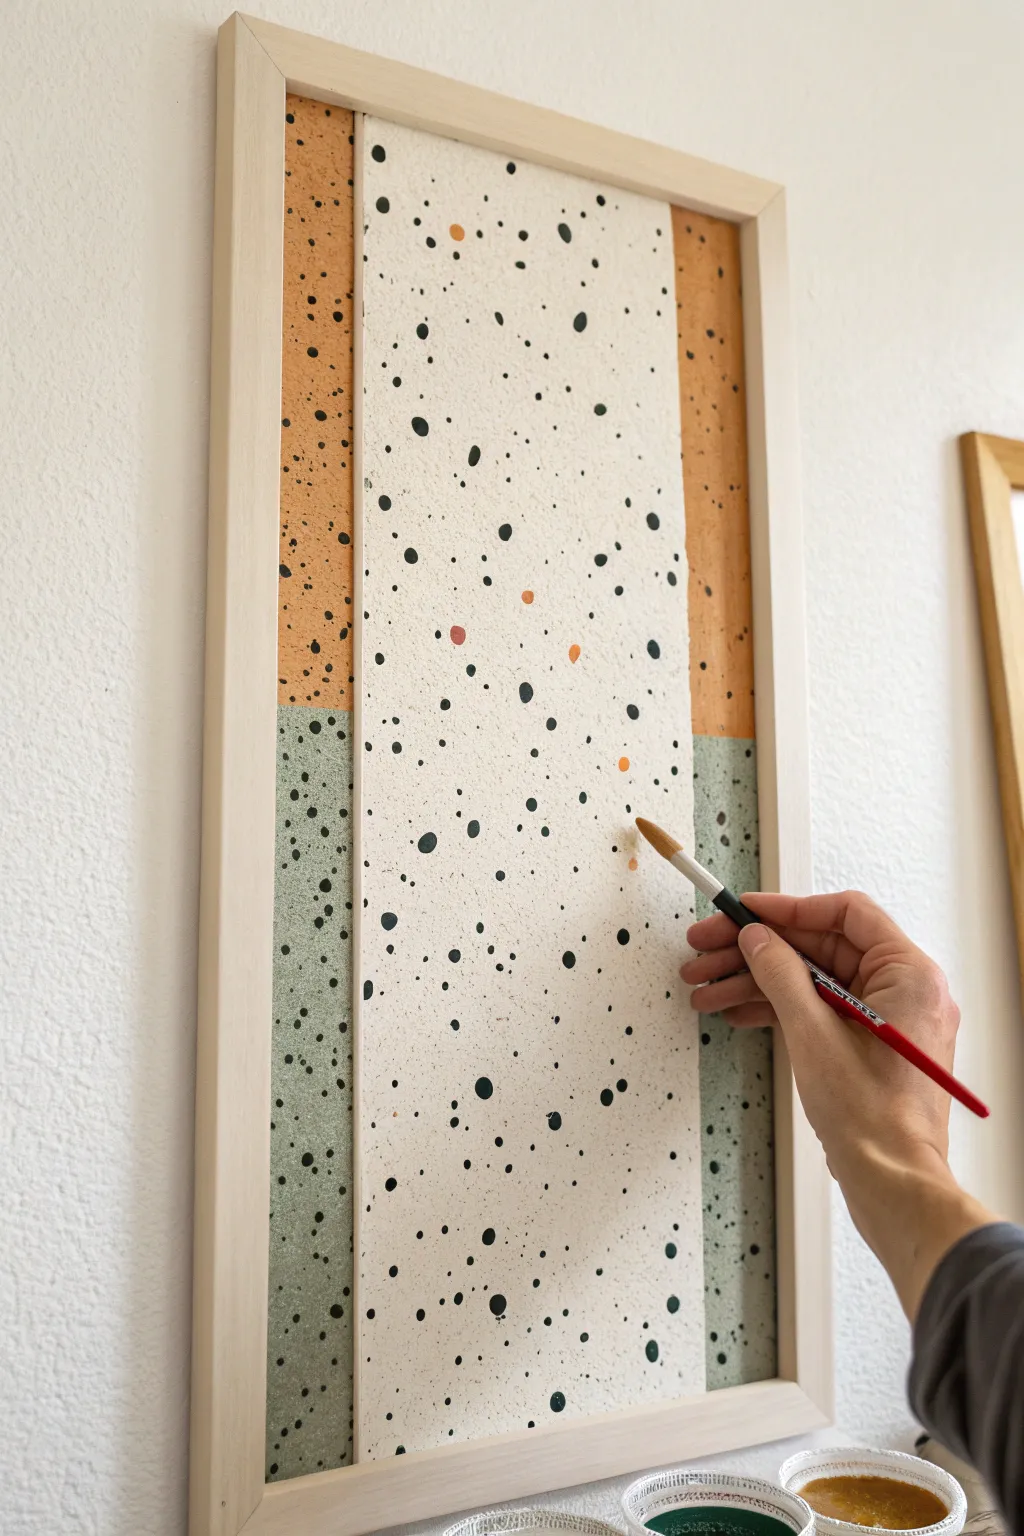
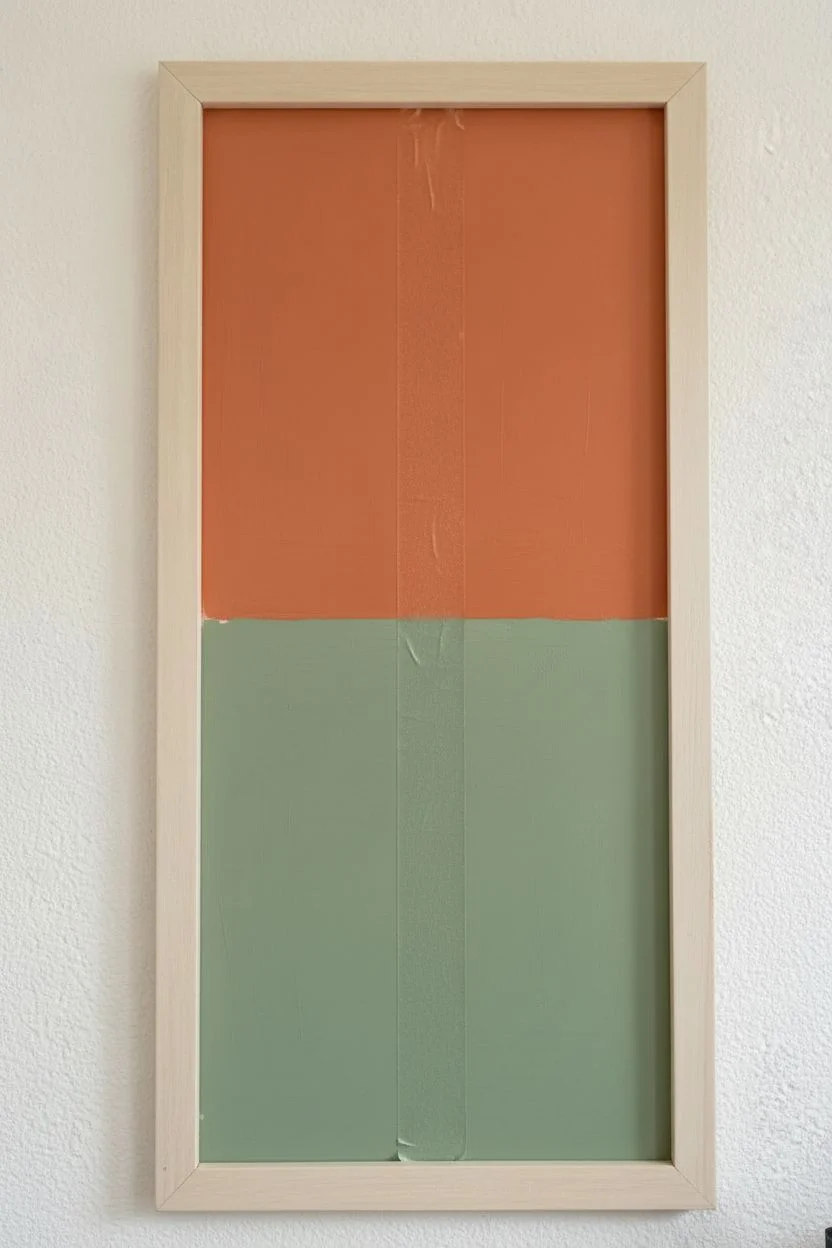
Bring the trendy look of terrazzo into your home with this striking, abstract wall panel. By layering simple geometric color blocks with controlled splatter techniques, you can achieve a sophisticated, stony texture that looks far more expensive than it is to make.
Step-by-Step Tutorial
Materials
- Tall rectangular wooden frame (unfinished pine or similar light wood)
- Rigid canvas board or plywood panel to fit the frame
- Heavyweight cream or off-white cardstock (width should match the center panel)
- Acrylic paints: Sage green, terracotta orange, cream/off-white, and black
- Flat shader brushes (medium and large)
- Small round detail brush (size 2 or 4)
- Old toothbrush or stiffness bristle brush for spattering
- Painter’s tape or masking tape
- Craft glue or spray adhesive
- Ruler and pencil
- Palette or small dishes for mixing
Step 1: Preparing the Base
-
Measure and Mark:
Begin by removing the backing board from your frame if applicable. If painting directly on a backing board, measure and mark a horizontal line across the center with a pencil and ruler to divide the top and bottom sections. -
Mask the Center:
To keep the painting neat, apply a vertical strip of painter’s tape down the exact center where the cream panel will eventually go, or simply mark boundaries so you don’t waste paint on the covered area. -
Paint the Top Section:
Load a large flat brush with terracotta orange acrylic paint. Apply an even coat to the top section of your backing board. Use smooth, vertical strokes to minimize texture. Let this layer dry completely. -
Paint the Bottom Section:
Clean your brush thoroughly. Paint the bottom section of the board with your sage green acrylic paint. Ensure the meeting line between the green and orange is relatively straight, though it will be covered later. -
Second Coats:
Acrylics can be translucent, so apply a second coat to both color blocks for a rich, opaque finish. Allow the backing board to dry fully, preferably overnight to prevent tackiness.
Step 2: Creating the Center Panel
-
Cut the Center Strip:
Cut a strip of heavyweight cream cardstock that is slightly narrower than your frame width but runs the full height. This creates a subtle dimension difference. Alternatively, paint a center strip of cream directly on the board if you prefer a flat look. -
Paint the Base Color:
If using cardstock, give it a coat of cream or off-white acrylic paint to ensure the texture matches the rest of the artwork. I like to add a tiny drop of brown to warm up the white so it isn’t too stark. -
Initial Spattering:
Before assembling, it’s safer to spatter the pieces separately. Lay the cream strip and the painted backing board on a drop cloth. Dilute a small amount of black paint with water until it’s inky. -
Flicking Technique:
Dip an old toothbrush or stiff bristle brush into the watery black paint. Run your thumb across the bristles to flick tiny speckles across the cream paper and the colored board sections. Vary your distance for different dot sizes. -
Adding Larger Dots:
Spattering creates fine mist, but terrazzo has chunks. Use a small round brush dipped in undiluted black paint to manually dot larger, irregular spots randomly across the surface. -
Adding Color Accents:
Clean your detailed brush and mix a little terracotta paint. Add a few sparse orange dots to the cream strip to tie the color palette together. -
Dry Time:
Allow all paint spatters and dots to dry completely. Black paint can smudge easily if handled too soon.
Paint splatter control
Practice your flicking technique on scrap paper first. If a blob is too big, quickly dab it with a paper towel to create a textured smear instead.
Step 3: Assembly
-
Mount the Center Strip:
Once dry, apply spray adhesive or a thin layer of craft glue to the back of your cream cardstock strip. -
Positioning:
Carefully center the strip vertically on your painted backing board, covering the seam between the orange and green sections. Press down firmly to adhere. -
Final Touch-ups:
Look at the composition as a whole. Use your detail brush to add a few final black or orange dots where the center strip meets the background to make the pattern feel continuous. -
Framing:
Place the artwork into the wooden frame. Secure the back, and it is ready to hang.
Metallic modern twist
Mix in gold leaf flakes or metallic copper paint for some of the larger ‘stones’ to catch the light and add a glamorous finish.
Hang your new terrazzo masterpiece in a well-lit spot to show off those intricate details.
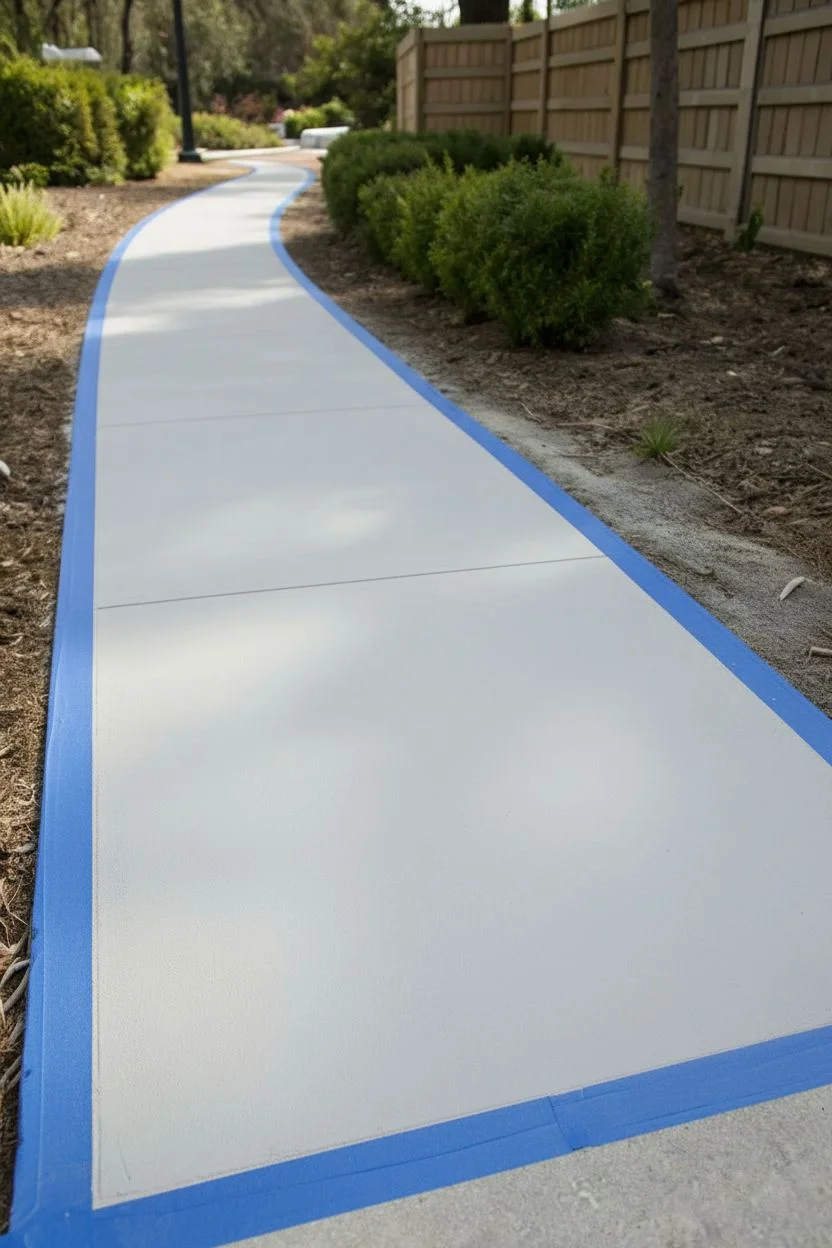
Faux Brick or Block Painted Path
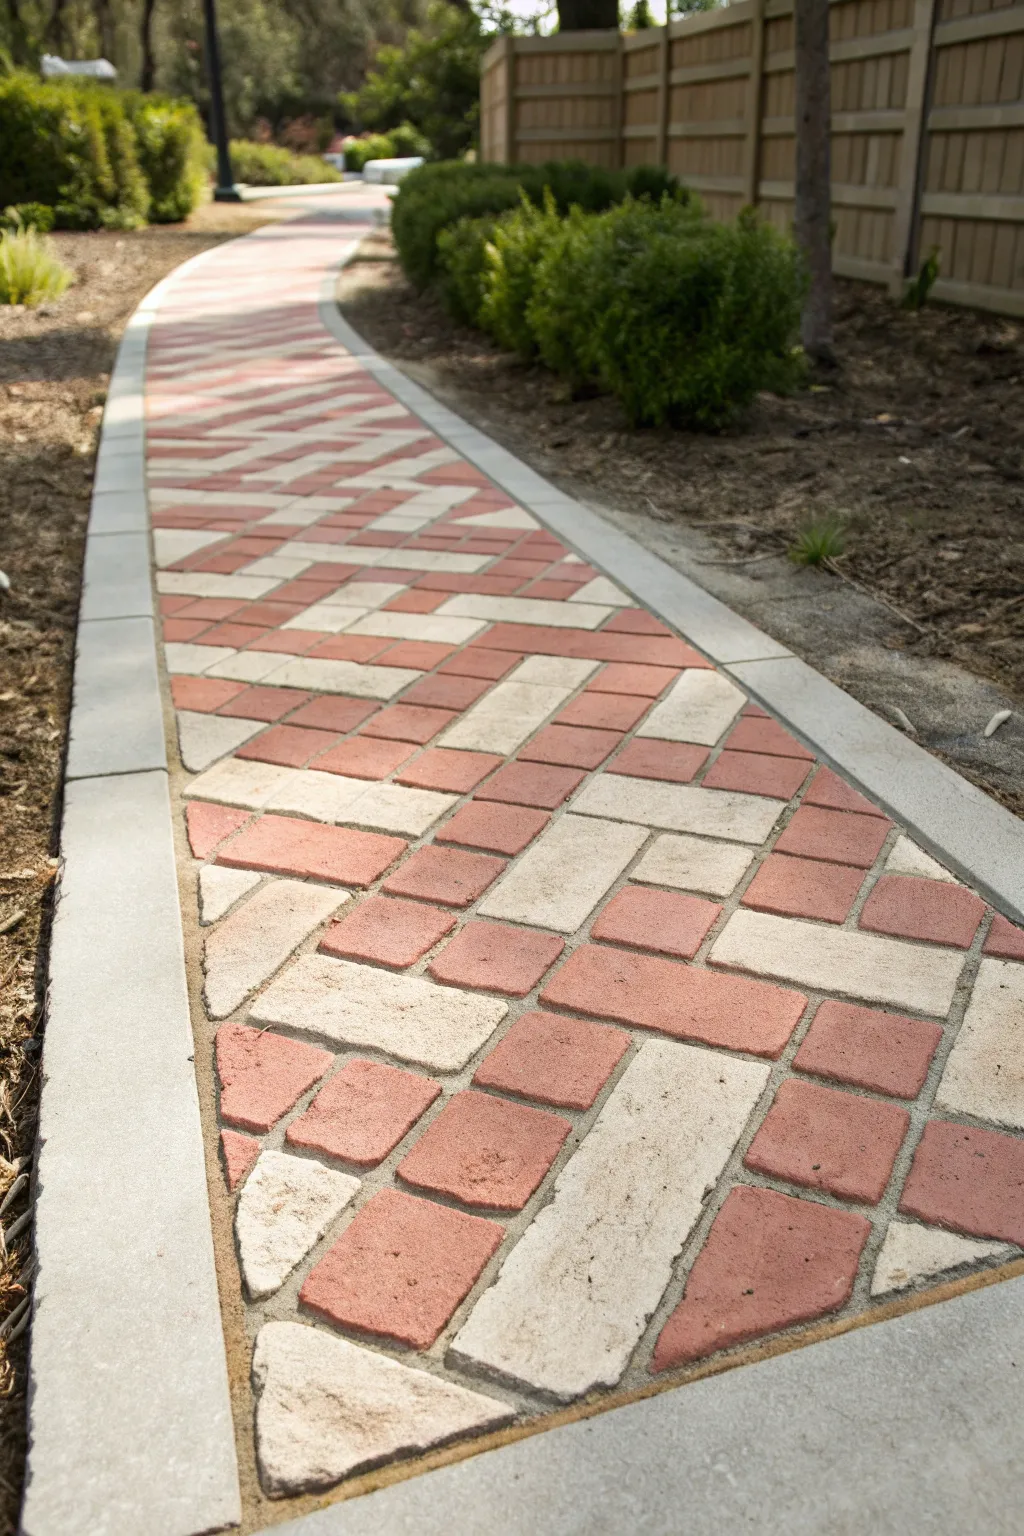
Transform a plain concrete slab or walkway into a charming, rustic brick path using entirely paint-based techniques. This project replicates the texture and color variation of weathered clay and limestone pavers for a completely believable trompe l’oeil finish.
Step-by-Step Guide
Materials
- Exterior concrete paint or porch & floor enamel (base coat: light gray/mortar color)
- Exterior acrylic latex paints (Brick Red, Terracotta, Beige, Cream)
- Painters tape (1/4 inch width for grout lines)
- Painters tape (2 inch width for borders)
- Chalk line reel
- Measuring tape
- Pencil
- Sea sponge or specialized faux finish sponge
- Small block of wood or cardboard (template)
- 3-inch roller and tray
- Detail brush
- Clear matte exterior concrete sealer
Step 1: Preparation and Base Coat
-
Clean the surface:
Begin by thoroughly pressure washing your concrete walkway. Remove all dirt, moss, and loose debris. Allow the concrete to dry completely for at least 24 hours to ensure proper paint adhesion. -
Apply the mortar color:
Roll on two coats of your light gray exterior floor enamel. This color will eventually become your ‘grout’ lines, so ensure solid, opaque coverage. Let this base cure according to the manufacturer’s instructions. -
Mark the borders:
Measure a consistent width from the edge of your path on both sides to create the concrete curbing effect shown in the photo. Use a chalk line to snap straight guides, then mask off these outer borders with 2-inch painter’s tape to protect them while you paint the bricks.
Bleed-Through Blues?
If paint bleeds under the tape, wait for it to dry completely. Then, use a small artist’s brush and your base gray ‘grout’ color to carefully paint over the mistake and crisp up the line.
Step 2: Taping the Pattern
-
Create a spacing guide:
Cut a piece of cardboard or wood to the size of your desired bricks (e.g., 4×8 inches). This will help you visualize the layout before taping. -
Tape the main grid:
Using the 1/4 inch tape, create a large grid pattern first. This helps maintain straight lines. I find it easiest to snap chalk lines diagonally across the path first to guide the tape placement. -
Form the herringbone design:
Continue taping out the intricate herringbone pattern. Look closely at the reference image: notice how the beige ‘blocks’ interlock with the red ones. Tape off every individual brick shape, pressing the tape down firmly to prevent bleed-under. -
Add irregular edge pieces:
Where the central brick pattern meets the smooth border, use tape to create triangular or trapezoidal shapes, simulating cut bricks that fit against the edge.
Add Shadow Depth
Mix a tiny amount of black into your red paint. Paint a thin, translucent line along the bottom and right edge of each brick to create a faux drop-shadow effect.
Step 3: Painting the Bricks
-
Sponge the lighter bricks:
Identify which rectangles will be your beige stones. pour some beige and cream paint onto a paper plate. Dip a damp sea sponge into the beige, dab off the excess, and press it onto the designated brick spaces to create texture. -
Add dimension to light bricks:
While the beige is wet, lightly sponge a bit of the cream or off-white color into the centers of those bricks. This subtle highlight makes them look rounded and dimensional. -
Sponge the red bricks:
Move on to the red bricks using a fresh sponge. Use a mix of Brick Red and Terracotta. Don’t aim for solid coverage; the textured sponging mimics the porous surface of real clay. -
Stipple for variety:
Vary the pressure of your sponge. Some bricks should be darker and denser, while others can be lighter, simulating natural weathering differences between individual pavers. -
Touch up edges:
Use a small detail brush to gently dab paint near the tape edges if the sponge missed any corners. Be careful not to bridge over the tape too thickly. -
Remove the tape:
This is the crucial moment. Carefully peel up all the 1/4 inch tape while the paint is still slightly tacky—do not wait for it to fully cure, or it might chip. Pull the tape at a 45-degree angle.
Step 4: Finishing Details
-
Clean up the border:
Remove the 2-inch tape protecting the side borders. If any red paint managed to bleed onto your gray border, touch it up now with the original base coat color. -
Distress the grout (optional):
If the gray grout lines look too clean and uniform, you can lightly dust them with a little diluted brown paint or dirt to age them instantly. -
Seal the surface:
Once everything has dried for at least 48 hours, apply two coats of a high-quality clear matte exterior concrete sealer. This protects your artwork from UV rays and foot traffic.
Enjoy the classic look of your new custom walkway without the heavy lifting of real masonry
Painted Checkered or Patchwork Floor
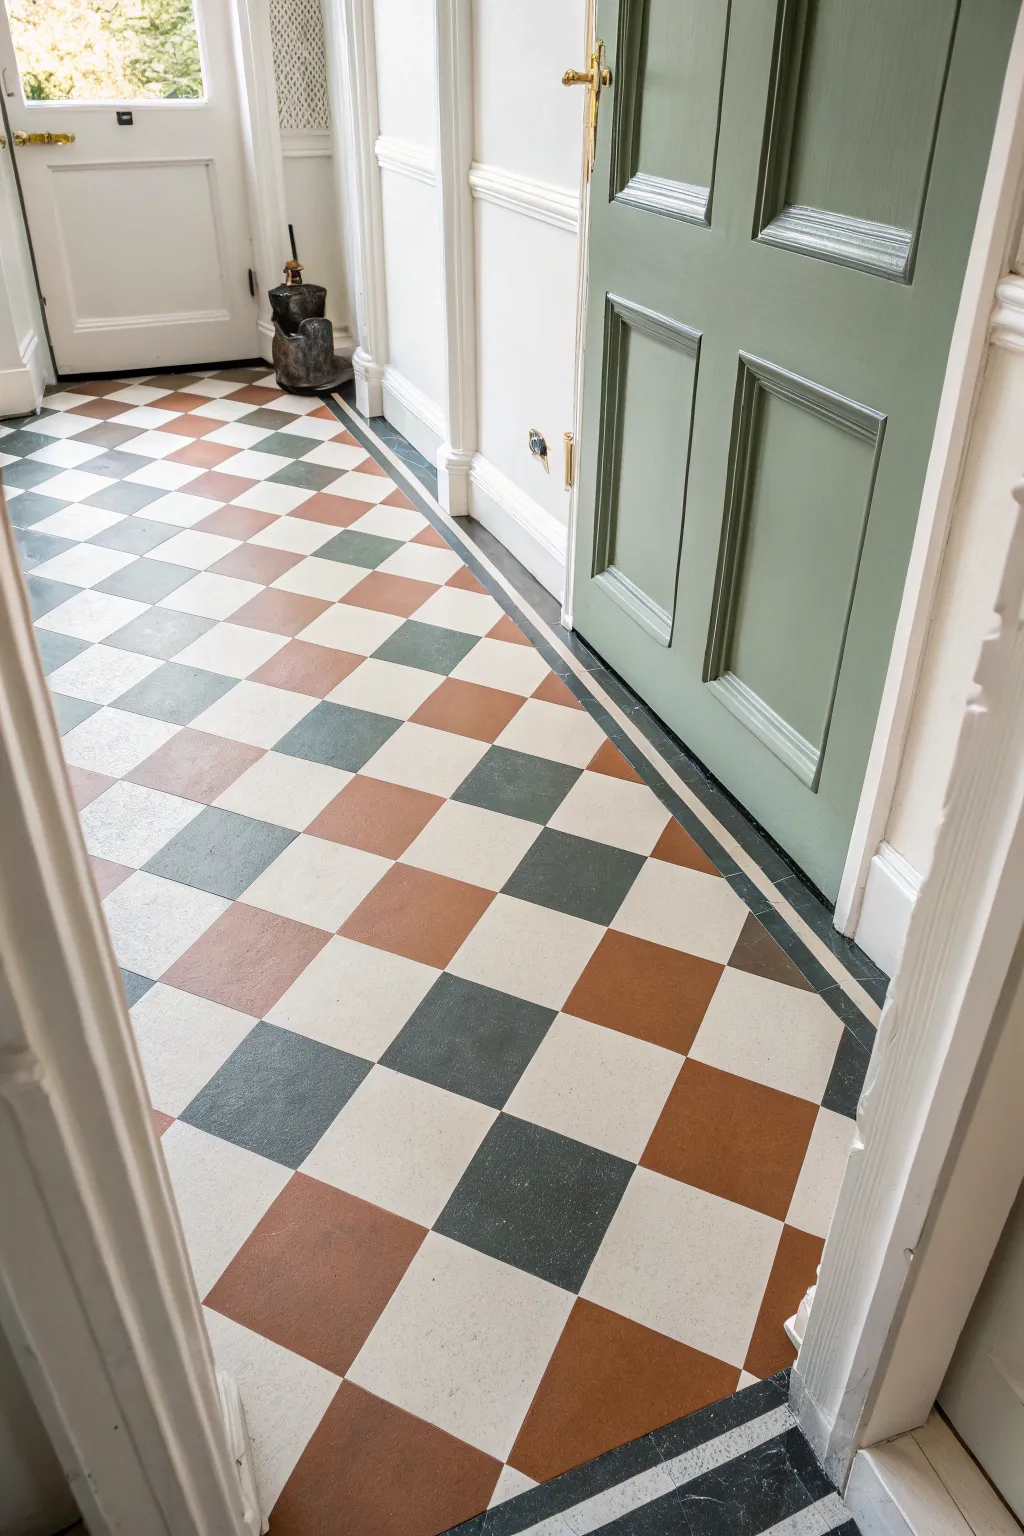
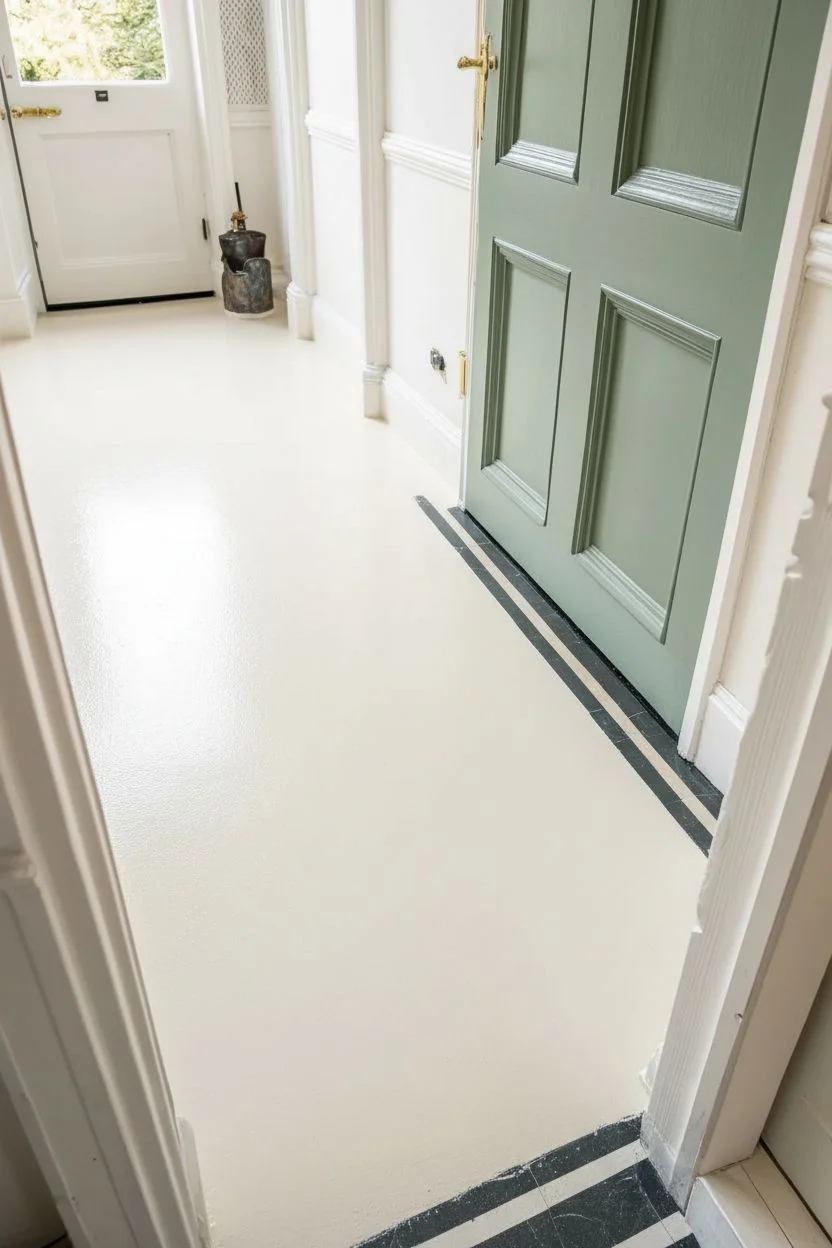
Transform a plain entryway or hallway into a stunning feature with this classic faux-tile painted floor. Using a sophisticated palette of cream, terracotta, and slate blue, this diagonal checkerboard pattern mimics the look of historic Victorian tiles at a fraction of the cost.
Detailed Instructions
Materials
- Heavy-duty floor degreaser
- Medium and fine grit sandpaper (120 and 220 grit)
- Primer suitable for floors (oil-based or high-adhesion latex)
- Porch and Floor Enamel in three colors: Cream/Off-White (base), Terracotta/Rust-Brown, and Slate Blue-Grey
- Painter’s tape (high quality, specific for delicate surfaces recommended for later stages)
- Measuring tape and long straight edge or laser level
- Pencil for marking
- 4-inch foam rollers and paint tray
- Angled sash brush suitable for cutting in
- Clear matte or satin floor polyurethane (water-based is non-yellowing)
Step 1: Preparation & Base Coat
-
Clean thoroughly:
Begin by scrubbing the existing floor with a heavy-duty degreaser. It is crucial to remove every trace of wax, oil, or dirt, otherwise, the paint will lift later on. Rinse well and let it dry completely. -
Sand the surface:
Scuff sand the entire floor area using 120-grit sandpaper. You aren’t trying to strip it bare, just creating a rough ‘tooth’ for the primer to grab onto. Vacuum up the dust and wipe with a damp tack cloth. -
Prime the floor:
Apply an even coat of high-adhesion primer across the entire floor. Work from the furthest corner towards the door so you don’t paint yourself into a trap. Allow this to cure according to the manufacturer’s maximum dry time. -
Apply base color:
Roll on two coats of your lightest color—the Cream/Off-White. This will serve as the ‘white’ tiles in the pattern. I find that applying thin coats helps it cure harder than one thick gloppy coat. Let this dry for at least 24-48 hours before walking on it to tape.
Laser Precision Pro Tip
Draw your pattern on paper first! When taping, mark the intended color inside each square with a small piece of painter’s tape (e.g., ‘R’ for Red) to avoid accidentally painting the wrong tile.
Step 2: Mapping the Pattern
-
Find the center:
Measure the width of your hallway to find the exact center point. Snap a chalk line or use a laser level to mark a straight line down the center of the hallway length. -
Mark the diamonds:
Determine your tile size (e.g., 12×12 inches). Using a large square, mark your first diamond starting from your center line. The points of the diamonds should align with the center line. Continue marking the grid using a pencil and straight edge. -
Define the border:
Decide how wide you want your border to be (the dark grey strip near the walls). Tape off this perimeter first to separate the main field from the border. This border frames the diamonds beautifully. -
Tape the first color set:
Tape off the squares that will become your Terracotta tiles. Remember, you can only paint one ‘color group’ at a time because the tape lines overlap. Ensure you press the tape edges down firmly to prevent bleeding. -
Seal the tape:
Lightly brush a tiny amount of your *base* cream color over the tape edges. This seals the tape line so any seepage is just the base color, keeping your final lines crisp.
Level Up: Aged Patina
For an authentic historic look, lightly sponge a translucent brown glaze unevenly over the dried tiles before sealing. It softens the stark ‘new paint’ look and mimics age.
Step 3: Painting the Colors
-
Paint Terracotta tiles:
Using a small foam roller or brush, fill in the exposed squares with the Terracotta paint. Two coats are usually best for rich opacity. Remove the tape carefully while the second coat is still slightly tacky. -
Let dry fully:
Allow the Terracotta squares to dry completely. This is the hardest part—patience! If you tape too soon over fresh paint, it will peel. -
Tape the second set:
Now, tape off the squares intended for the Slate Blue-Grey color. You will need to tape over the dried cream base and carefully along the edges of your new Terracotta squares. -
Paint Slate tiles:
Fill in these squares with the Slate Blue-Grey paint. Again, two thin coats work best. Don’t forget to paint the perimeter border strip in this same dark slate color at this stage. -
Remove tape and touch up:
Peel back all remaining tape slowly at a 45-degree angle. Use a tiny artist’s brush to fix any small bleeds or mistakes with the appropriate color.
Step 4: Protection
-
Cure time:
Let the entire painted floor cure for at least 3 to 5 days before applying sealer. The paint needs to harden or the sealer might trap moisture and cause bubbling. -
Seal the deal:
Apply 2-3 coats of clear, water-based floor polyurethane. Use a matte or satin finish to keep the look vintage and authentic rather than super glossy. Lightly sand with fine grit paper between coats for a professional smoothness.
Now you can enjoy the sophisticated charm of your new custom entryway every time you walk through the door


Have a question or want to share your own experience? I'd love to hear from you in the comments below!