When you mix science drawing with bold color, everything instantly feels more alive—like your sketchbook is humming with ideas. Here are my favorite colorful, super-drawable concepts that turn classic science symbols into art you’ll actually want to keep on your wall.
Bubbling Beakers in Neon Color
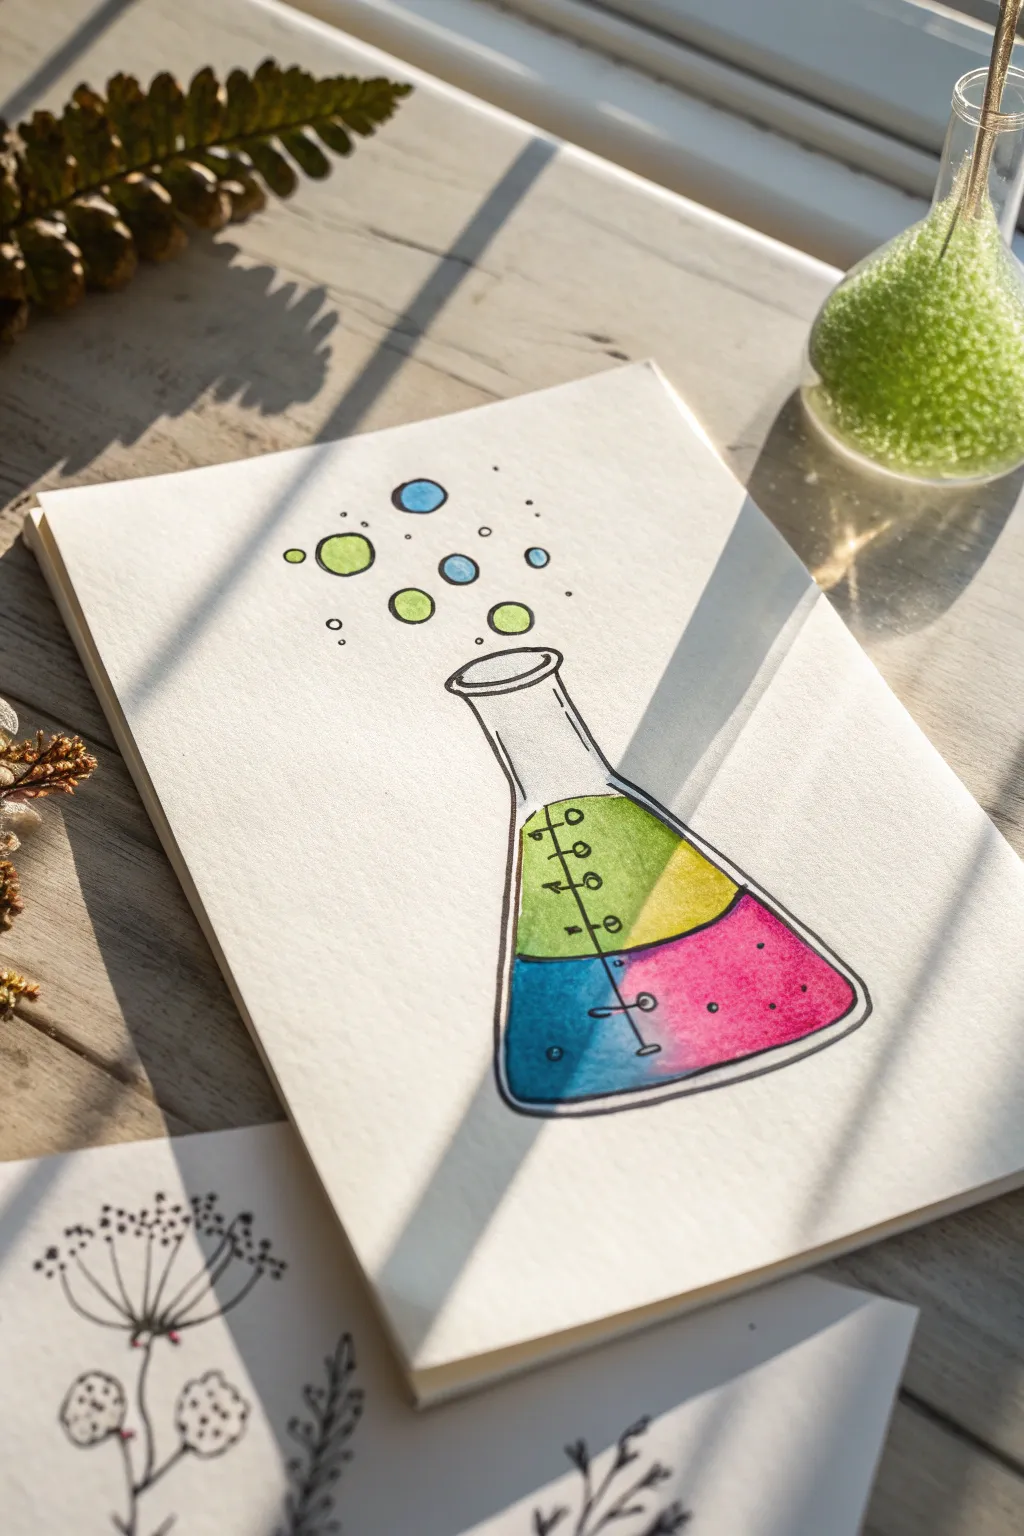
Capture the fizzing excitement of a science experiment with this vibrant watercolor and ink illustration. This project combines simple geometric sketching with bold, blended washes to create a playful beaker that looks ready to bubble over.
Detailed Instructions
Materials
- Heavyweight watercolor paper or mixed media sketchbook
- HB pencil and eraser
- Fine liner pen (waterproof, black, size 0.3 or 0.5)
- Watercolor paint set
- Small round brush (size 4 or 6)
- Clean water cup
- Paper towel
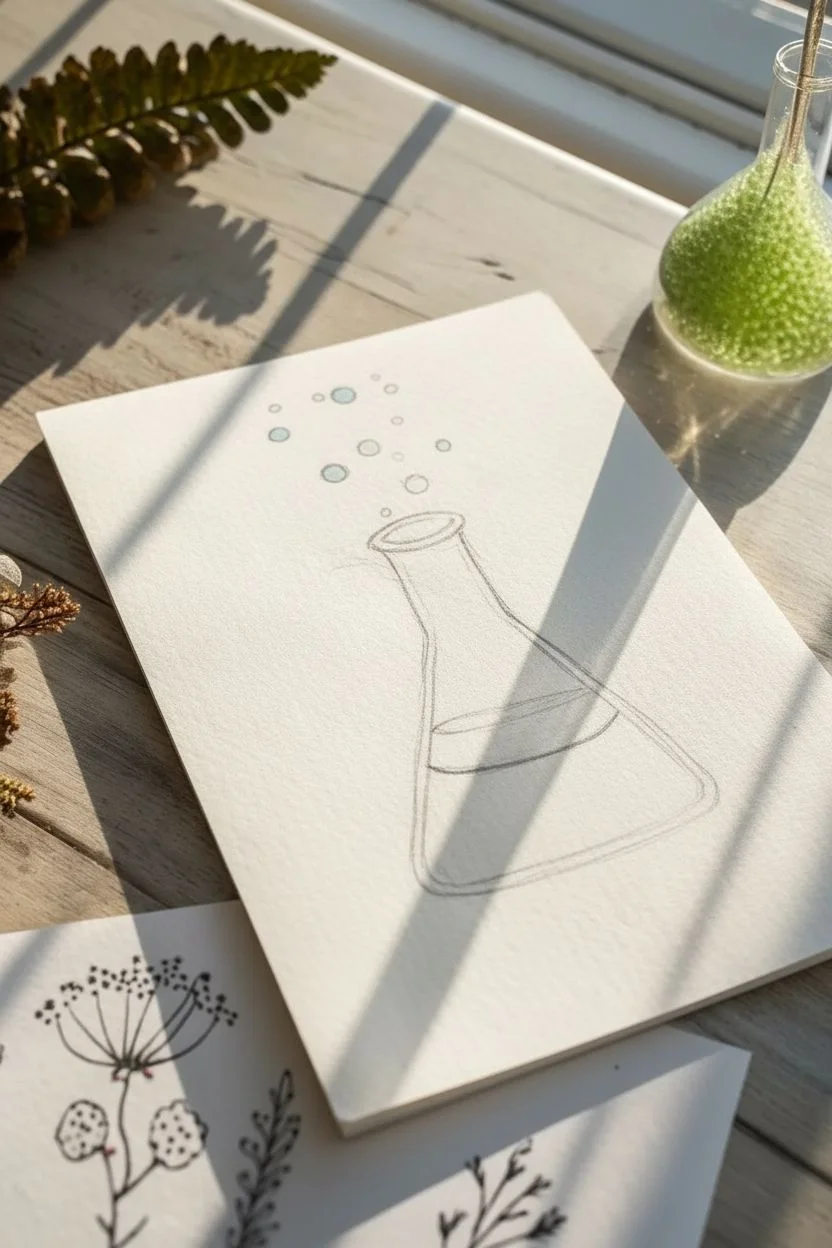
Step 1: Sketching the Glassware
-
Draw the base:
Start by lightly sketching a wide triangle with rounded corners near the bottom center of your page. This forms the body of the Erlenmeyer flask. -
Add the neck:
Extend two lines upwards from the top of the triangle, narrowing slightly as they go up, to create the neck of the flask. -
Create the rim:
Draw a flattened oval at the very top of the neck to represent the opening. Add a second, slightly larger curve just below the front of the rim to give the glass some thickness. -
Add floating bubbles:
Sketch several circles of varying sizes floating above the flask opening. Keep them loose and scattered to show effervescence. -
Mark the liquid level:
Draw a slightly curved horizontal line across the body of the flask, about halfway up, to indicate where the liquid surface sits.
Muddy Colors?
If your pink and green turn brown where they meet, let the first color dry completely before adding the second. You can crisp up the edge later with a damp brush.
Step 2: Adding Ink Details
-
Outline the flask:
Trace over your pencil lines with a waterproof black fine liner. Keep your hand steady but don’t worry if the lines aren’t perfectly straight; a little wobble adds character. -
Draw measurement markings:
Add a vertical line down the center of the flask. Along this line, draw small horizontal notches and tiny circles or ovals to represent volume measurements. -
Refine the bubbles:
Ink the floating circles. I like to add tiny ‘glint’ marks—small incomplete circles or dots—inside the bubbles to make them look shiny. -
Erase pencil guides:
Wait a moment for the ink to fully dry, then gently erase all the underlying pencil sketches so your paper is clean.
Make it Sparkle
Once the paint is totally dry, use a white gel pen to add sharp highlights to the curve of the glass and the center of the biggest bubbles for a glossy, reflective look.
Step 3: Bringing it to Life with Color
-
Paint the first section:
Load your brush with a bright cyan or blue watercolor. Paint the bottom left corner of the liquid, letting the color fade slightly as you move toward the center. -
Blend in the pink:
While the blue is still slightly damp or just after it dries, paint the right side of the liquid with a vibrant pink or magenta. Let the colors repel or mix slightly in the middle for a unique transition. -
Add the top layer:
Above the blue and pink, fill the rest of the liquid area with a lime green or bright yellow. Allow this color to touch the wet edges of the colors below to create soft, blended gradients. -
Color the bubbles:
Use diluted washes of the same blue and green colors to fill in the floating bubbles. Leave small white highlights unpainted to make them look transparent. -
Intensify the color:
Once the first layer is dry, you can go back in with more saturated paint near the bottom edges of the flask to add depth and shadow. -
Add internal bubbles:
Using a very fine pen or a tiny dot of darker paint, add small specks inside the colored liquid area to suggest carbonation rising from the bottom.
Now you have a bubbling concoction that looks striking against the white page


DNA Helix With Complement Colors
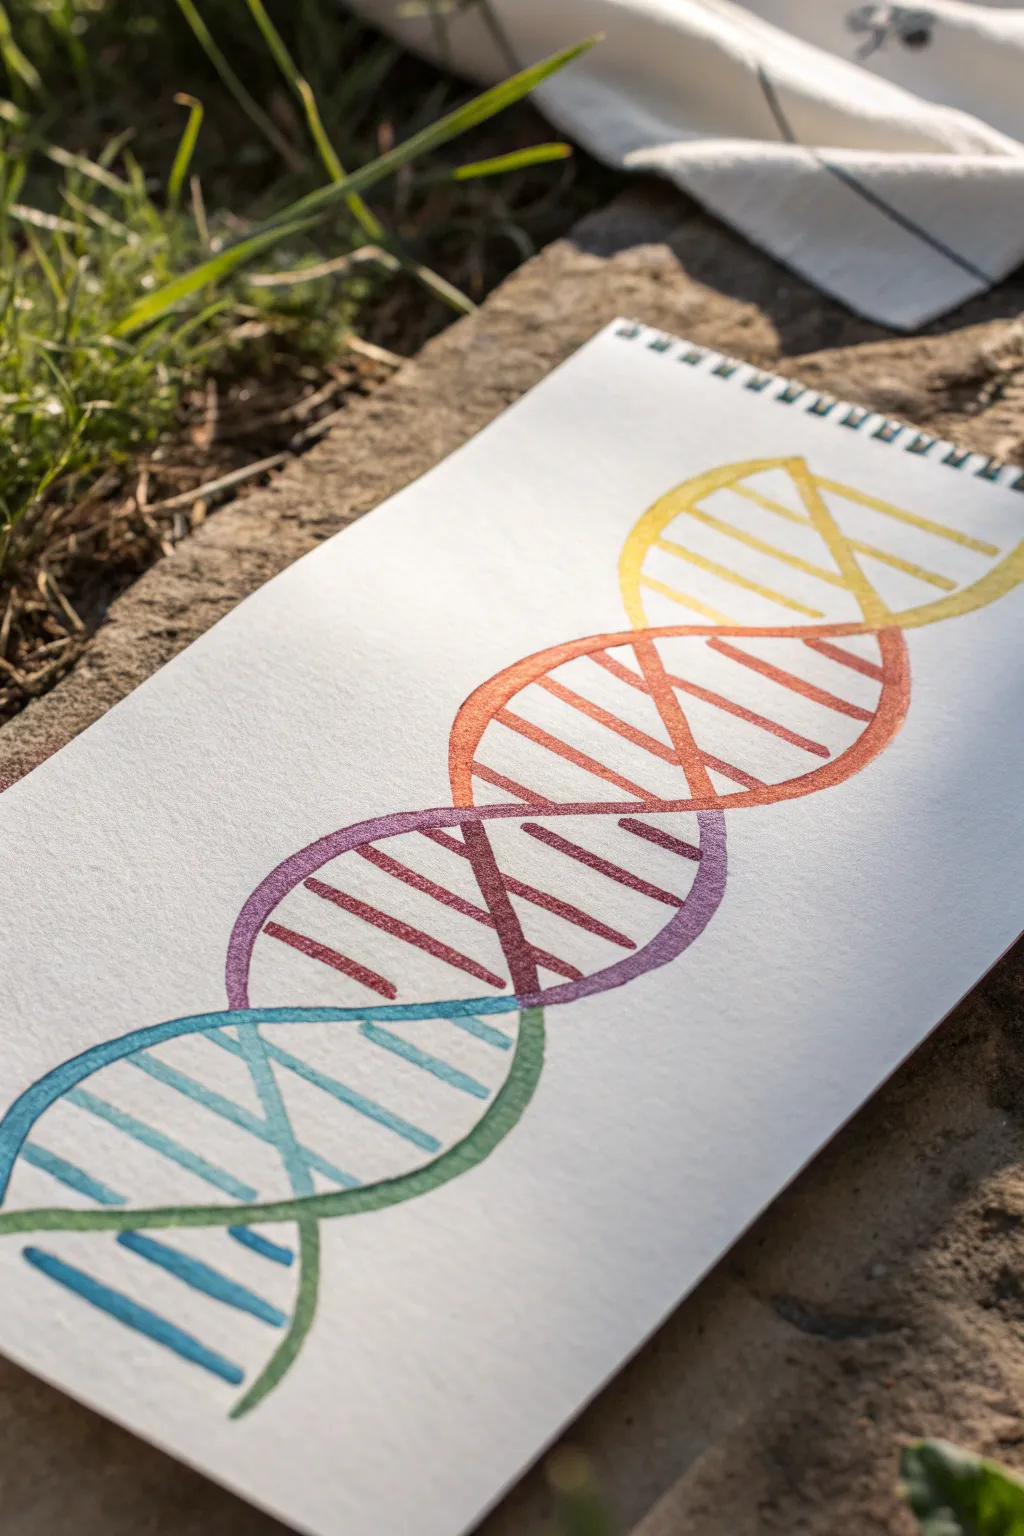
This colorful scientific diagram illustrates the double helix structure of DNA using a vibrant, flowing gradient. The result is a clean, educational, and artistic representation perfect for visual learners or science enthusiasts.
Step-by-Step
Materials
- Spiral-bound watercolor sketchbook or heavy mixed-media paper
- Pencil (HB or 2H for light sketching)
- Eraser
- Watercolor markers or watercolor paints (Yellow, Orange, Purple, Teal, Green)
- Fine-tip water brush or small round brush
- Ruler (optional but helpful)
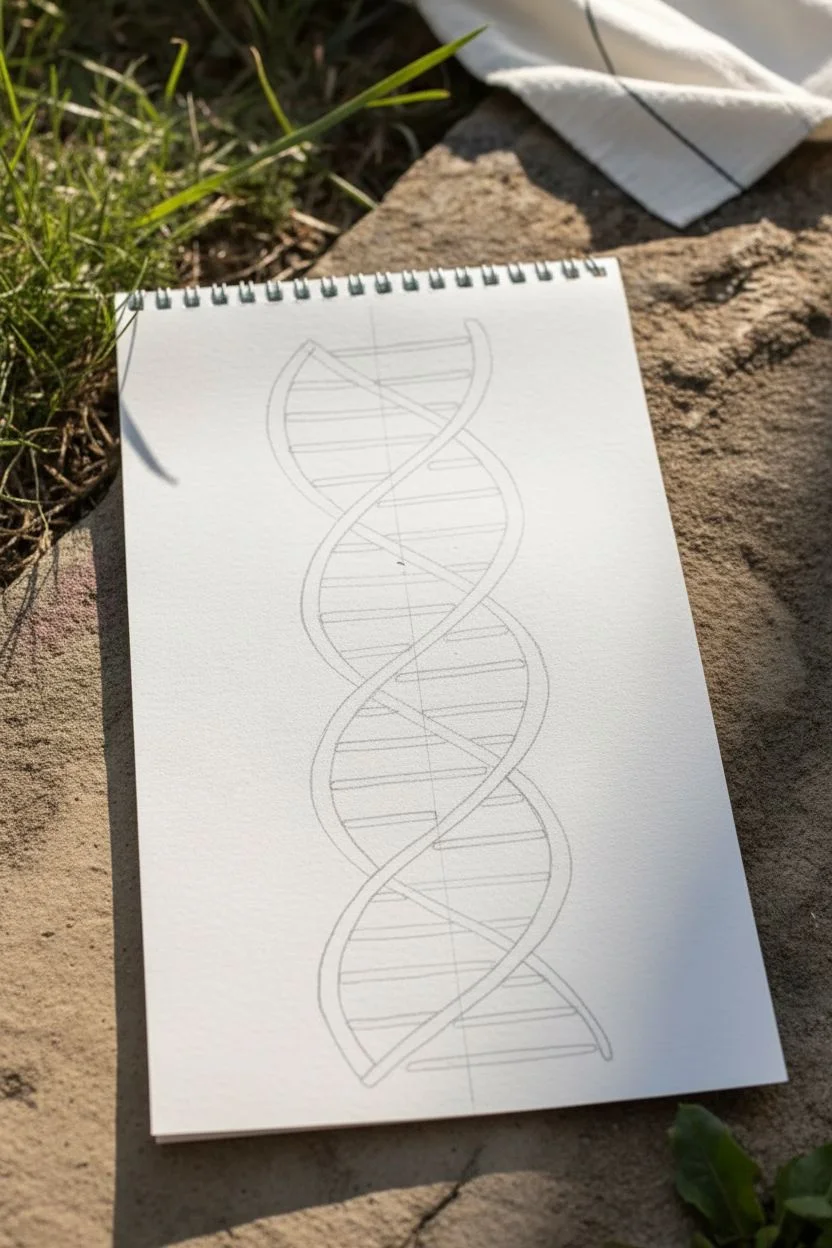
Step 1: Sketching the Helix Structure
-
Draw the central axis:
Start by lightly sketching a straight vertical line down the center of your page. This will act as a guide to keep your DNA strand symmetrical. -
Mark the curvature points:
Along your vertical line, make small tick marks at even intervals (about 1.5 to 2 inches apart). These marks will indicate where the two strands cross over each other. -
Sketch the first strand:
Draw a smooth, sine-wave curve that passes through every second tick mark, looping out to the left and right. Keep your hand loose to ensure fluid curves. -
Sketch the second strand:
Draw the opposing curve. This strand should mirror the first one but cross over it at the tick marks you made, creating a series of repeating oval-like shapes. -
Thicken the ribbons:
Go back over your single lines and add a second parallel line slightly outside the original curves. Connect the ends to form the ‘backbone’ ribbon of the DNA. -
Add the base pairs:
Draw horizontal rungs connecting the two ribbons. Inside the twisted sections, these lines will look like they are angled or shortened due to perspective. Space them evenly.
Step 2: Applying the Gradient Color
-
Prepare your palette:
Select your color order. For this piece, we are moving from warm to cool tones: yellow, orange, purple, teal, and finally green. -
Start with yellow:
Fille the top section of the helix with yellow watercolor marker. Color both the side ribbons and the horizontal rungs. -
Transition to orange:
As you move down to the next twist, switch to orange. Where the yellow meets the orange, blend the colors slightly while wet to create a smooth gradient. -
Move into purple:
For the middle section, apply a deep purple or violet tone. I find that letting the orange dry just a tiny bit before adding purple prevents muddy brown colors, but you still want some blend. -
Shift to blue-green:
Color the next lower loop with a bright teal or aqua blue. Ensure the transition from purple is distinct but harmonious. -
Finish with green:
Complete the bottom tail of the helix with a fresh grass green, blending it up into the teal section.
Wet-on-Dry Tip
For sharper lines on the ‘rungs’, let the side ribbons dry first. This prevents the color from bleeding into the middle where you want clean separation.
Step 3: Final Details
-
Let it dry completely:
Wait for the watercolor ink to settle into the paper. If you touch it too soon, you risk smudging the crisp edges. -
Erase guidelines:
Once the artwork is bone dry, gently erase the initial pencil axis line and any stray sketch marks visible through the lighter yellow sections. -
Reinforce edges (optional):
If any edges look jagged, carefully go over the outline one last time with the tip of your marker to sharpen the silhouette.
Add Chemical Depth
Use a white gel pen to add tiny letters (A, T, C, G) on the horizontal rungs to represent the actual nucleotide base pairs.
Now you have a stunning, scientifically inspired art piece ready to display


Glowing Atom Orbit in Color
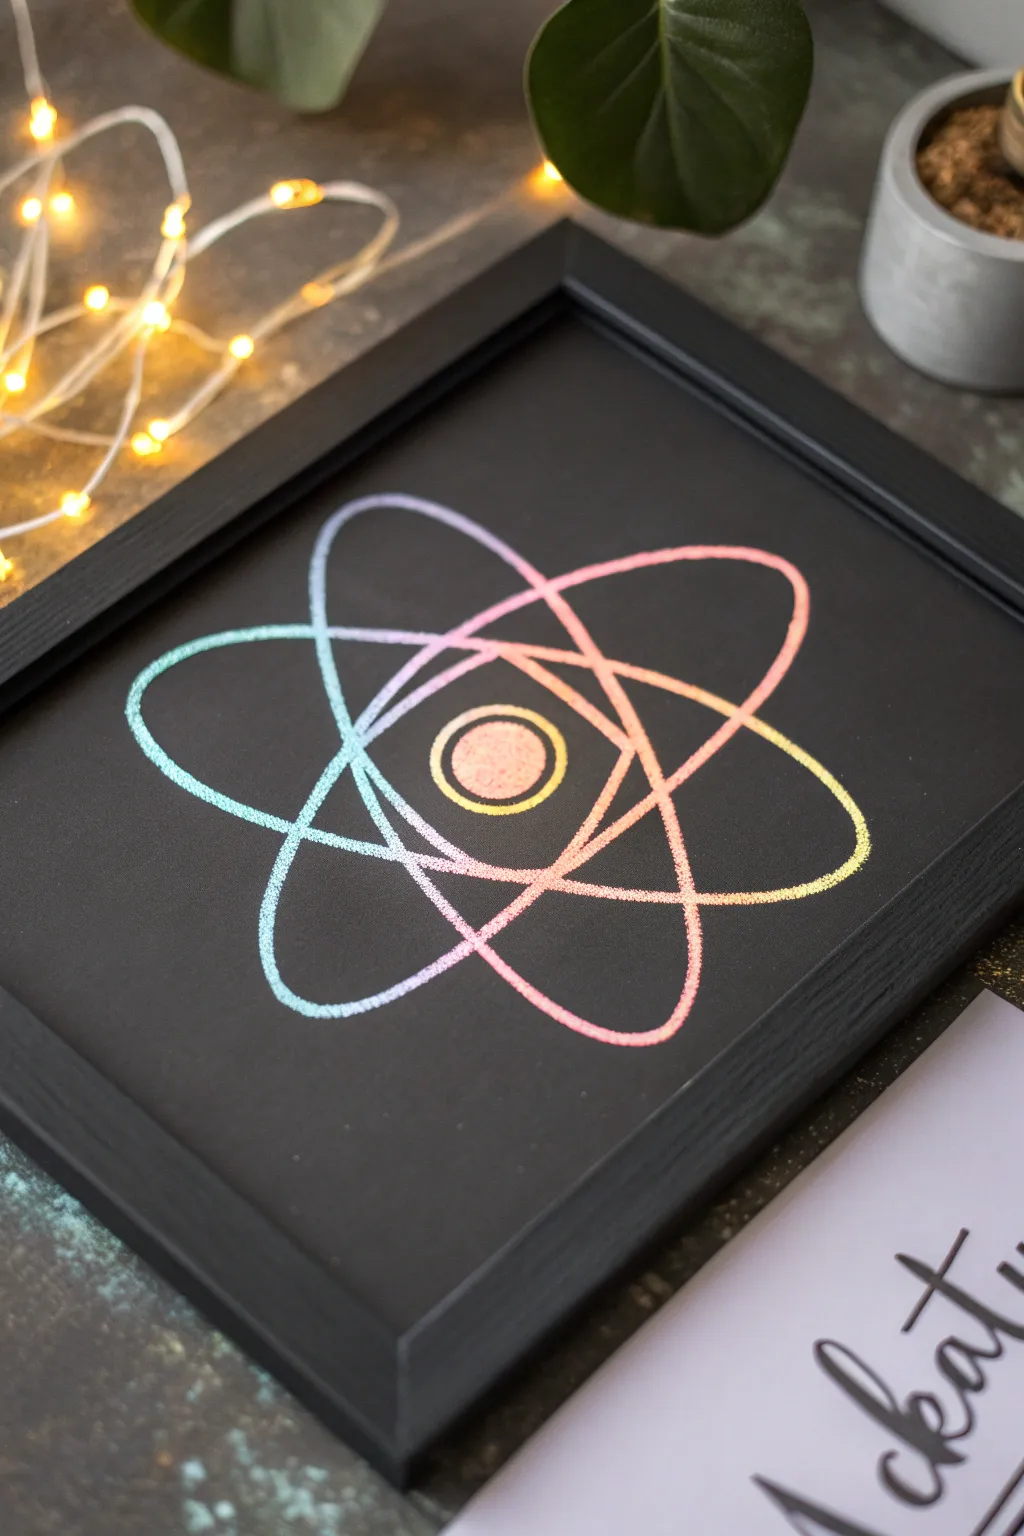
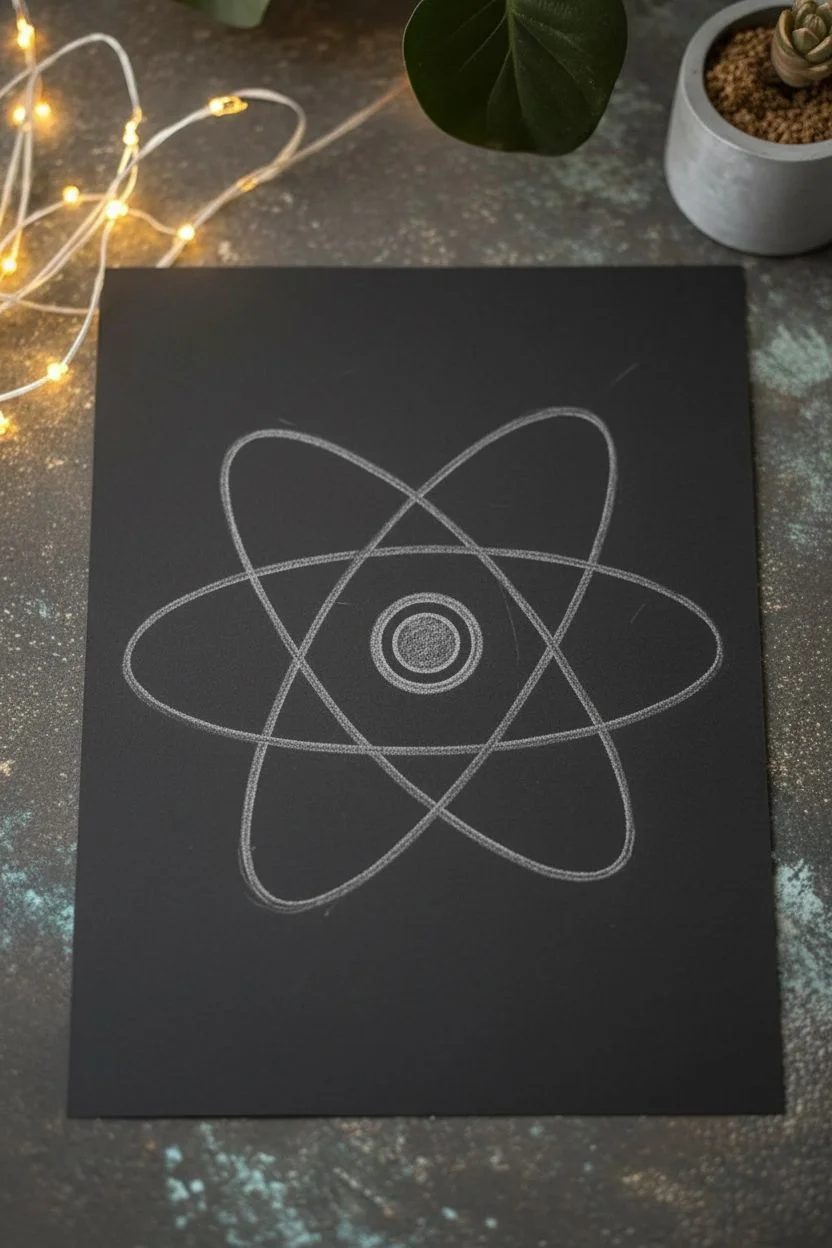
Capture the energy of science with this vibrant, glowing atom illustration on dark paper. The striking contrast between the black background and the shifting rainbow gradient creates a neon-like effect that makes the electron trails pop right off the page.
Step-by-Step Guide
Materials
- Black cardstock or heavyweight black drawing paper
- Pencil (HB or lighter)
- Compass for drawing circles
- Ruler
- White gel pen (for the base sketch)
- Set of metallic or neon gel pens (rainbow colors)
- Black frame (optional, for display)
- Eraser (kneaded eraser works best on black paper)
Step 1: Drafting the Structure
-
Set the center:
Begin by finding the exact center of your black cardstock. You can use a ruler to lightly mark an ‘X’ or simply measure to find the midpoint. -
Draw the nucleus:
Using your compass, draw a small circle in the very center. This will be the atom’s nucleus. Draw a slightly larger circle around it to create a thick outer ring for the nucleus. -
Sketch the first orbit:
The electron orbits are essentially skinny ovals. Freehand sketching these can be tricky, so start lightly with a pencil. Draw a long, thin oval that stretches horizontally across the nucleus. -
Add the diagonal orbits:
Draw two more ovals of the same size, crossing through the center diagonally. Imagine an ‘X’ shape, where one oval tilts left and the other tilts right. Try to keep the spacing even between the loops. -
Refine the lines:
Step back and look at your symmetry. If one loop looks wobbly or lopsided, gently erase and adjust the curve until the atom looks balanced.
Ink skipping?
On black paper, gel pens can sometimes skip. Draw slowly and consistently. If it skips, scrawl on a scrap piece of paper to get the ink ball rolling again.
Step 2: Creating the Gradient Base
-
Apply the white base:
To make the colors truly glow against the dark paper, trace over your final pencil lines with a white gel pen first. This creates a bright primer layer. -
Let the ink settle:
Allow the white ink to dry completely. Gel pen ink sits on top of the paper, so smudging is a real risk if you rush. -
Plan your gradient:
Decide on your color flow. A classic rainbow order (red, orange, yellow, green, blue, purple) works beautifully as it moves around the loops.
Step 3: Adding Colorful Luminescence
-
Start with the nucleus:
Color the central circle with a warm tone, like gold or orange. Stipple (dab) the ink gently to give it a textured, glowing appearance rather than a flat fill. -
Trace the left loop:
Begin tracing over the white line of the left-most loop section with a cool color, like teal or blue. I like to use a light hand here so the ink flows smoothly without pooling. -
Transitioning colors:
As you follow the line toward the bottom curve, switch to a purple pen. Overlap the blue and purple slightly while the ink is wet to blend them directly on the page. -
Continue the spectrum:
Move to the next loop section. Transition from purple to pink, then pink to orange. Keep the color shifts gradual as you move around the entire atomic structure. -
Complete the rainbow:
Finish the remaining loops with yellow and green, connecting back to your starting teal color. Ensure every part of the white base line is covered with metallic or neon ink. -
Thicken the lines:
Go over the lines a second time to build opacity. Widen the lines slightly in the middle of the curves and taper them where they overlap near the nucleus to simulate movement.
Starry Background
Flick a stiff brush dipped in diluted white paint or ink across the background to create a subtle galaxy of stars behind your atom.
Step 4: Finishing Touches
-
Highlights:
If you want extra shine, add tiny dots of white gel pen on top of the colored lines at the highest curves on the loops. This mimics a specular highlight. -
Clean up:
Once the artwork is 100% dry, gently erase any visible pencil marks remaining from your initial sketch. Be careful not to rub over the inked areas. -
Frame it:
Place your finished piece into a simple black frame. Remove the glass if possible, or use a mat, so the glass doesn’t press directly against the delicate gel ink.
Hang your scientific masterpiece where it can catch the light and show off its metallic shimmer


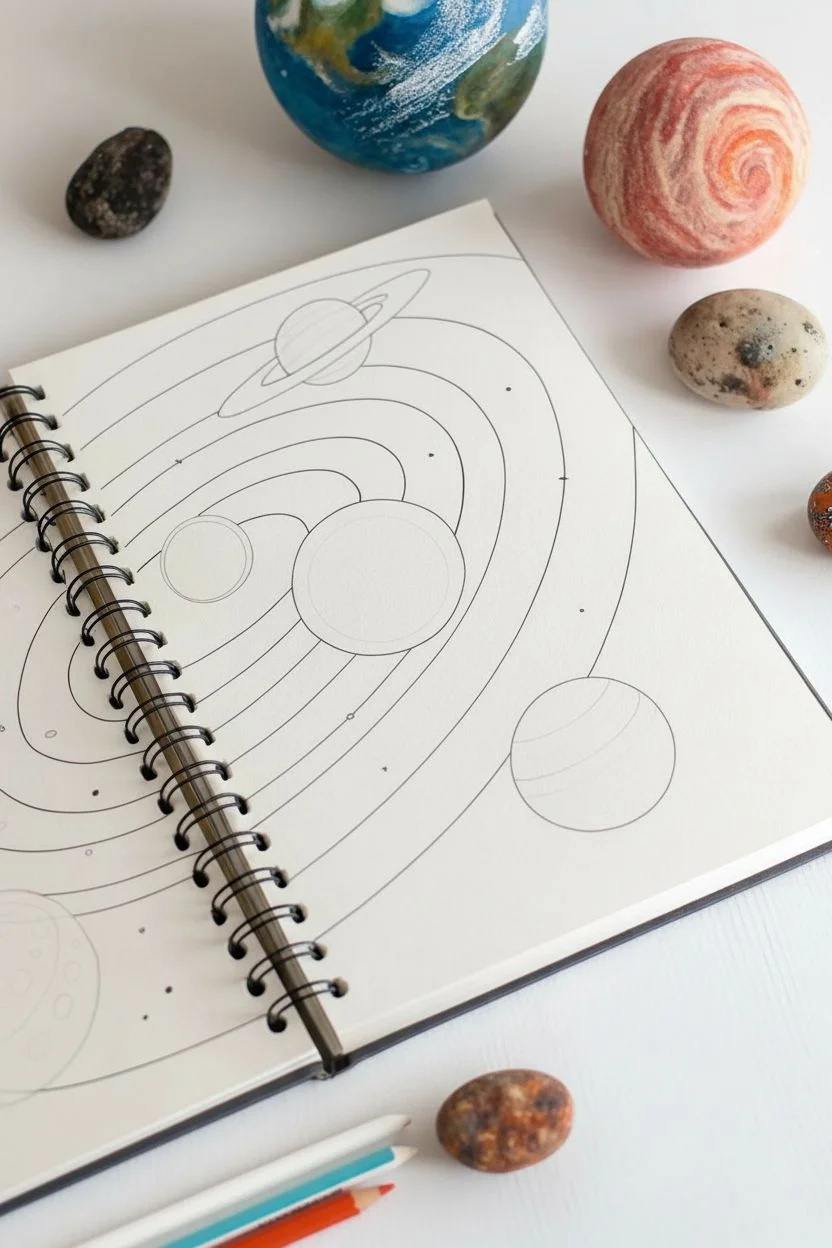
Solar System With Bold Planet Palettes
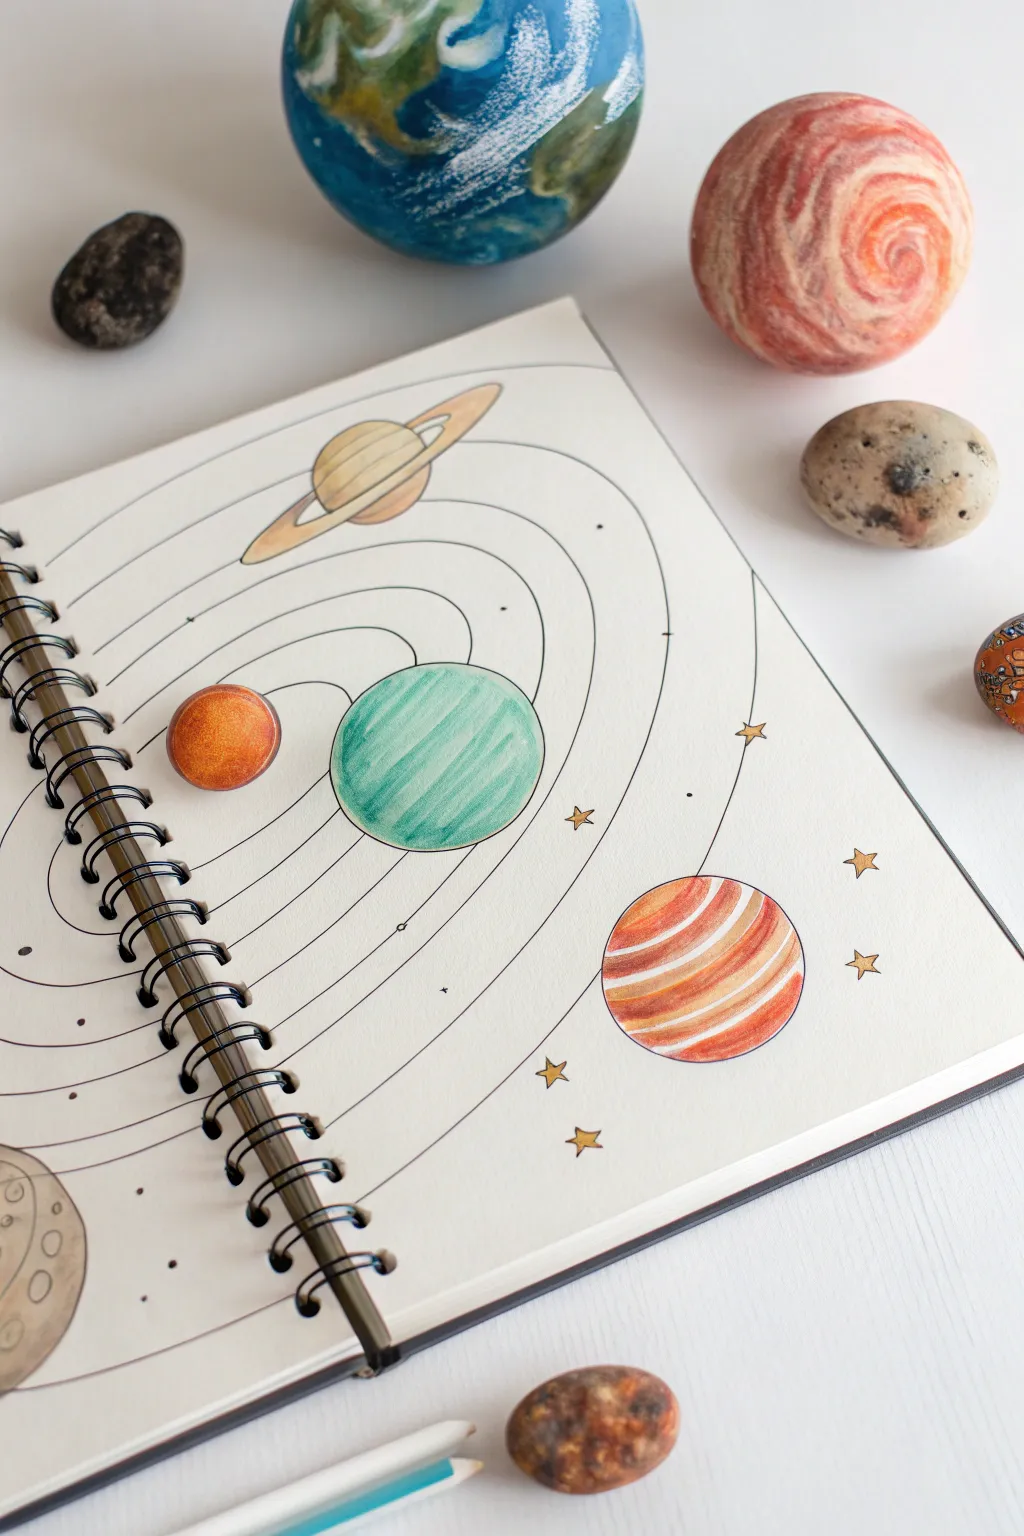
Capture the magic of space with this charming, stylized solar system illustration. The project combines clean linework with soft, textured pencil coloring to create planets that feel both scientific and playfully artistic.
Detailed Instructions
Materials
- Spiral-bound sketchbook (medium weight paper)
- Black fine-liner pen (0.3mm or 0.5mm)
- Pencil and eraser
- Compass or circle variety template
- Colored pencils (teal, orange, rust red, yellow, cream, grey)
- Ruler (optional for orbit lines)
Step 1: Setting the Stage
-
Plan the orbits:
Start lightly with a pencil. Draw a series of concentric, curved lines radiating from the left side of the page to represent orbital paths. Keep the spacing uneven to allow room for different-sized planets later. -
Inking the lines:
Trace over your pencil orbit lines with a black fine-liner pen. Keep your hand relaxed to create smooth, confident sweeps. It’s okay if they aren’t perfectly parallel; slight wavering adds character. -
Sketching the sun:
In the bottom left corner, draw a partial circle peeking out using your pencil. This will clearly anchor the diagram as the sun. -
Positioning the planets:
Using a compass or circle stencils, sketch circles along the various orbit lines. Vary the sizes significantly—make Jupiter and Saturn large, and the inner terrestrial planets smaller.
Step 2: Drawing Details
-
Saturn’s rings:
For the ringed planet at the top, draw a flattened oval around the main sphere. Erase the part of the sphere that is obscured by the front of the ring to make it look three-dimensional. -
Finalizing outlines:
Go over all your planet pencil sketches with the fine-liner pen. Be careful not to smudge the ink before it’s fully dry. -
Adding stars:
Draw small five-pointed stars scattered in the empty white space. Add tiny dots in groups of two or three to represent distant star clusters or dust. -
Clean up:
Once the ink is completely dry, thoroughly erase all underlying pencil marks to prepare the surface for coloring.
Pro Shape Tip
Can’t draw a perfect circle? Trace household items like bottle caps, coins, or the bottom of a glue stick. It’s faster than a compass and gives you instant size variety.
Step 3: Coloring the Planets
-
Texturing the Sun:
Color the partial sun in the corner with a light grey or cream base. Add crater-like details with small, circular marks to give it a rocky moon-like or solid appearance, rather than a traditional burning sun. -
Small planet shading:
For the small planet on the second orbit, use a burnt orange pencil. Press harder on the left side to create a shadow, fading into a lighter orange on the right to simulate roundness. -
Teal giant:
Color the large central planet with a teal or sea-green pencil. Use diagonal hatching strokes to fill it in, leaving the color somewhat textured rather than perfectly smooth. -
Saturn’s palette:
Color Saturn with horizontal bands of yellow and light tan. Use a slightly darker shade where the rings cast a shadow on the planet body. -
Jupiter’s stripes:
For the large striped planet on the right, alternate between rust-red and white bands. Curve your coloring strokes slightly to match the sphere’s contour, making the planet look rounder. -
Star accents:
Fill in the five-pointed stars with a flat gold or yellow color to make them pop against the white page. -
Refining shadows:
Go back over your planets and add a second layer of color just on the shaded side (closest to the orbit spine or away from your light source) to deepen the contrast.
Fixing Smudges
If you accidentally smudge your black ink, turn it into a nebula or asteroid field. Use a white gel pen to draw tiny stars over the smudge once it’s dry to disguise it.
Close your sketchbook knowing you’ve captured a little piece of the universe on paper

PENCIL GUIDE
Understanding Pencil Grades from H to B
From first sketch to finished drawing — learn pencil grades, line control, and shading techniques.
Explore the Full Guide
Rocket Launch Color Burst
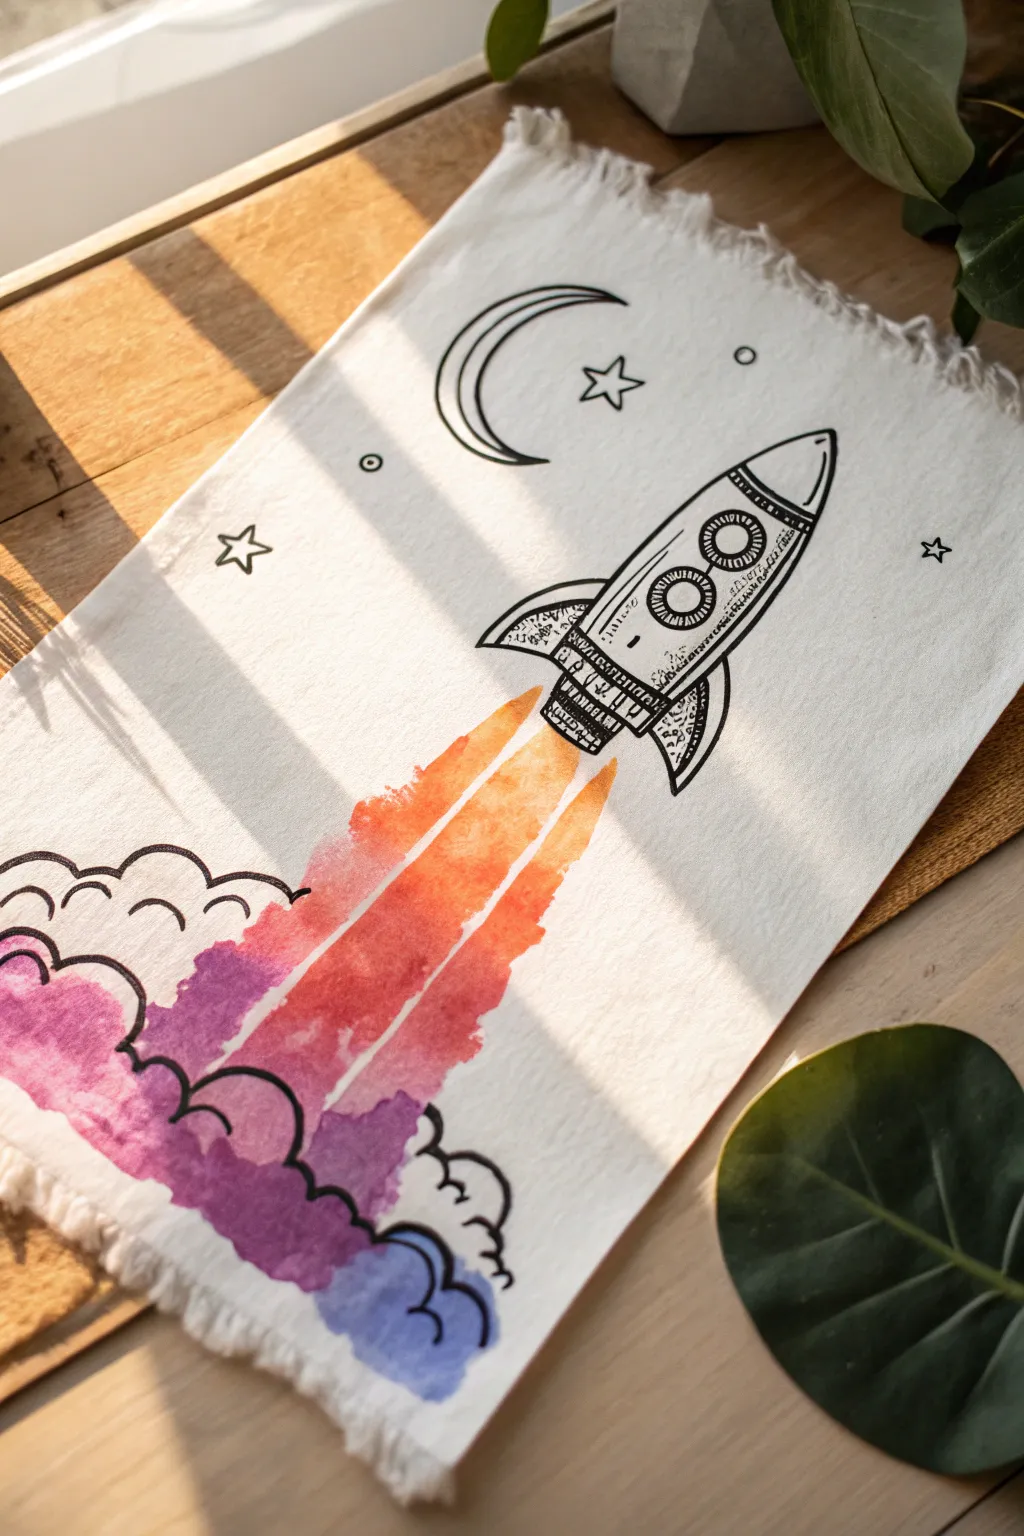
Blast off with this dynamic mixed-media project that combines crisp black line art with vibrant, fluid watercolor washes. The bold contrast between the intricate rocket illustration and the loose, colorful exhaust clouds creates a striking piece perfect for decorating a study space or a child’s room.
How-To Guide
Materials
- Heavyweight cotton canvas or watercolor fabric block
- Fine-point permanent black fineliner (waterproof)
- Thicker graphic marker (black, permanent)
- Watercolor paints (tube or pan)
- Soft round watercolor brushes (sizes 6 and 10)
- Paper towels
- Pencil and eraser
- Masking tape
- Cup of water
Step 1: Sketching the Launchpad
-
Prep the Surface:
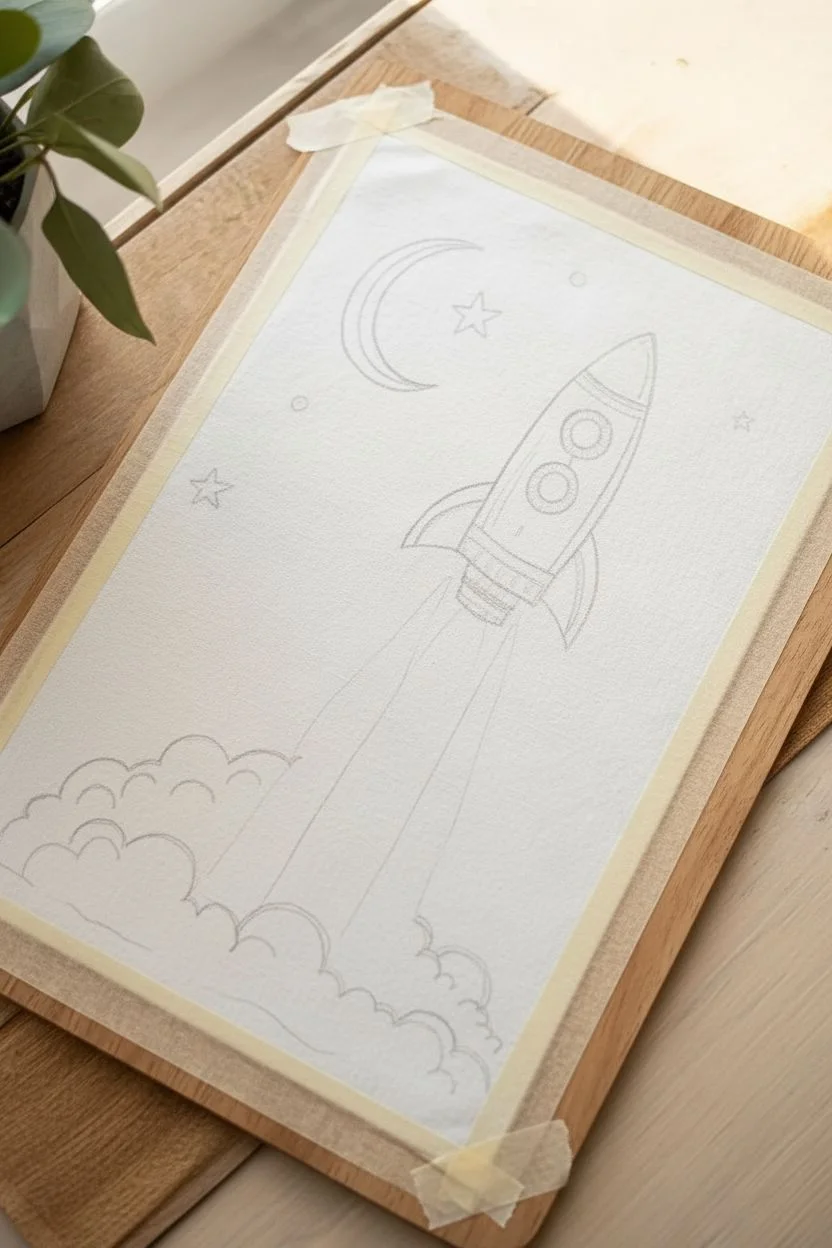
Begin by taping down the corners of your fabric or canvas to a flat board using masking tape. This prevents the fabric from buckling when you add water later. -
Draft the Rocket:
Using a light pencil, sketch a simple oval-shaped rocket ship body in the center-right of the fabric at a 45-degree angle pointing upward. -
Add Fins and Details:
Draw three fins: one on the left side, one on the right, and a smaller one suggesting the back. Sketch two circular portholes on the main body. -
Draft the Blast Zone:
Lightly sketch billowing cloud shapes at the bottom left corner where the exhaust will originate. Avoid drawing the actual flames; just mark the area where the color will fade out. -
Celestial Bodies:
Fill the empty space in the top left with a crescent moon and scattered stars. Ensure the stars are five-pointed outlines rather than solid shapes.
Bleeding Lines?
If the black outlines smear when you add paint, your pen isn’t fully waterproof. Stop painting and let the ink dry for an hour, or seal the ink lines with a spray fixative before continuing.
Step 2: Inking the Details
-
Outline in Ink:
Go over your rocket pencil lines with a waterproof black fineliner. It is crucial the ink is waterproof so it won’t bleed when you paint near it. -
Add Texture:
Use stippling (small dots) or cross-hatching to add shading to the rocket fins and the side of the body opposite the light source. -
Cloud Borders:
Ink the billowy cloud outlines at the very bottom left corner. Keep these lines curvy and organic. Don’t close the top of the cloud shapes; let them stay open where they meet the rocket blast. -
Erase Guidelines:
Wait at least ten minutes for the ink to set completely, then gently erase all visible pencil marks to leave a clean black-and-white drawing.
Step 3: Watercolor Ignition
-
Wet the Blast Path:
Using a clean brush and plain water, paint a straight streak from the rocket’s engine nozzle down toward the clouds. This pre-wetting technique allows the colors to flow. -
Apply the Flames:
Load your brush with bright orange watercolor. Touch the wet paper just below the rocket nozzle and let the pigment bleed downward. -
Transition to Red:
While the orange is still wet, introduce a deep red or magenta color into the middle section of the blast stream, blending it gently into the orange. -
Create the Purple Haze:
Toward the bottom clouds, drop in rich purple paint. Allow it to mix slightly with the red above it to create a seamless gradient. -
Paint the Bottom Clouds:
For the billowy clouds at the base, use a watered-down purple or blue. Dab the color loosely inside the ink lines, letting the white fabric show through in patches for highlights. -
Soften the Edges:
I like to take a damp, clean brush and run it along the outer edges of the colored flame stream to create a soft, diffused look instead of a hard line. -
Dry and Finish:
Let the paint dry completely. Once dry, you can gently fray the edges of the canvas by pulling horizontal threads to create a textured fringe border.
Level Up: Cosmic sparkle
Once the watercolor is dry, splatter small droplets of white acrylic paint or opaque white gouache over the colored exhaust plume to create the effect of distant stars shining through the smoke.
Your rocket is now ready to launch into a universe of color and creativity
Telescope View Galaxy Swirls
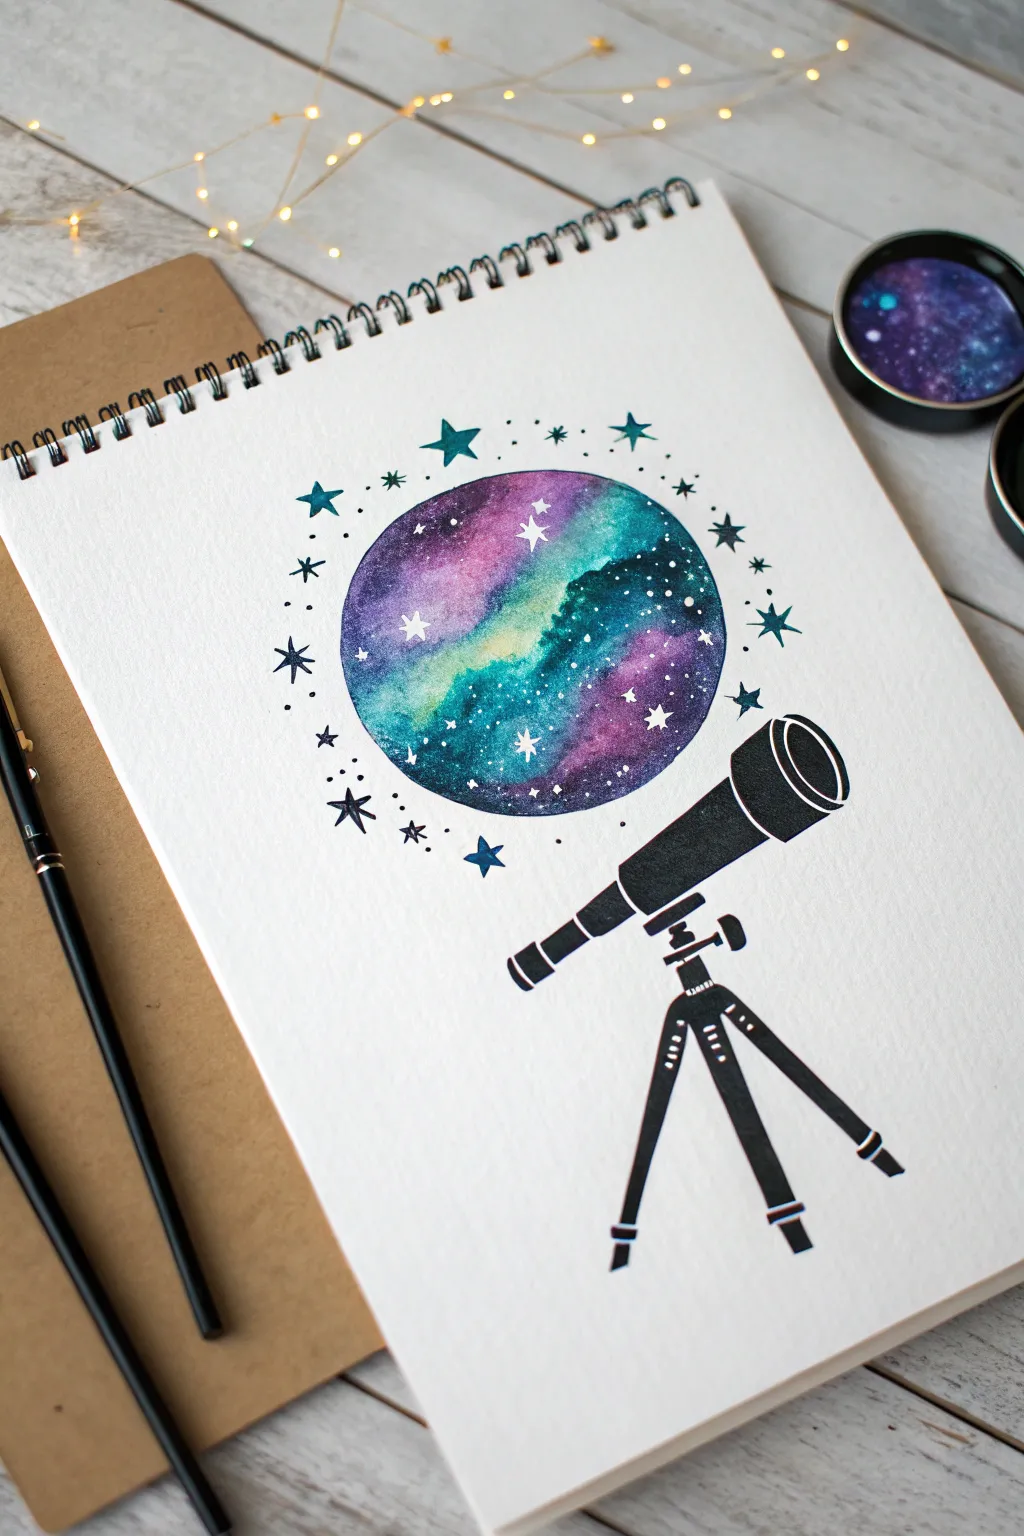
Capture the magic of stargazing with this striking watercolor illustration featuring a vibrant galaxy contained within a perfect circle. The contrast between the soft, swirling nebula colors and the sharp black silhouette of the telescope creates a beautiful sense of depth and wonder.
Step-by-Step Guide
Materials
- Watercolor paper sketchbook (mixed media or cold press)
- Watercolor paints (purple, teal, indigo, magenta)
- Round watercolor brushes (size 4 and size 0 or 00 for details)
- Black fineliner (05 or 08 size)
- White gel pen or white gouache
- Compass or a circular object to trace (approx. 3-4 inches diameter)
- Pencil and eraser
- Masking fluid (optional)
- Two jars of water and paper towels
Step 1: Setting the Scene
-
Trace your circle:
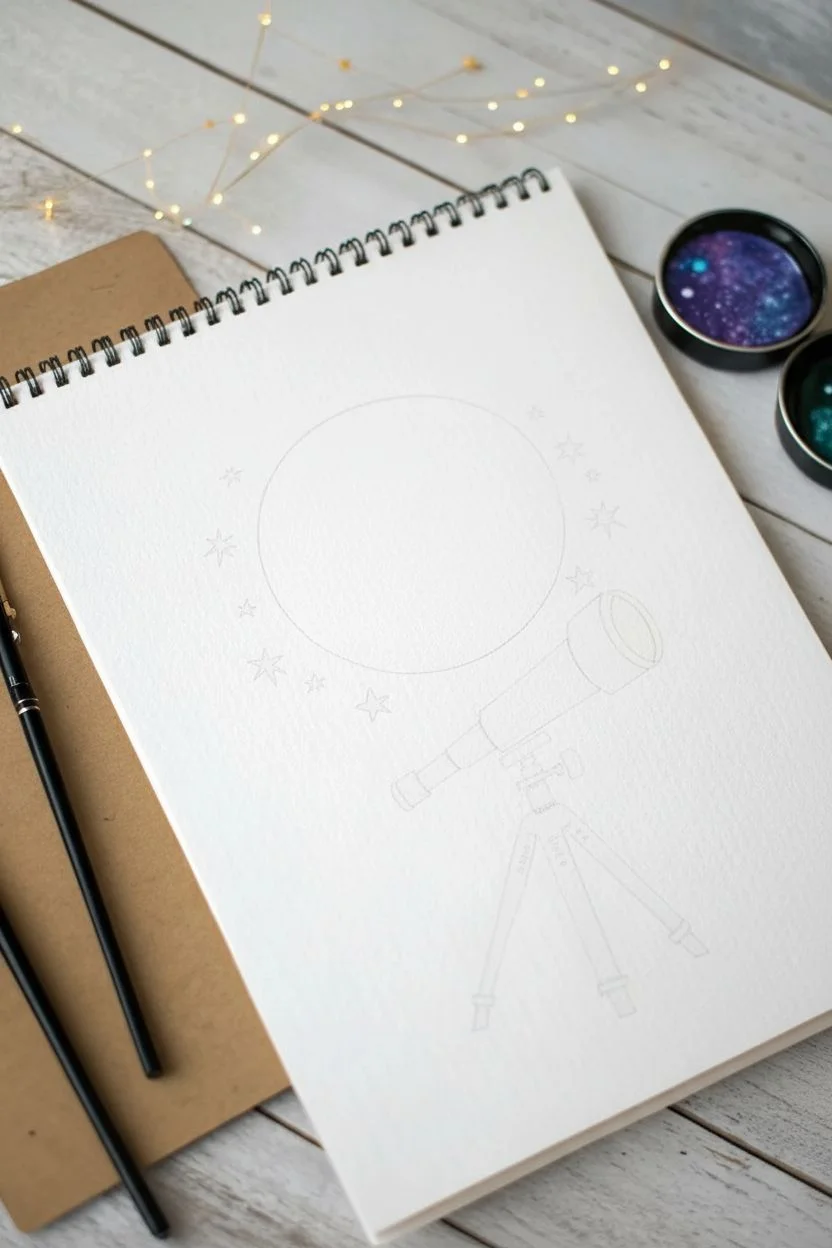
Begin by lightly tracing a perfect circle in the center of your page using a compass or by tracing around a jar lid. This will be the viewport for your galaxy. -
Sketch the telescope:
Below and to the right of the circle, lightly sketch the outline of a telescope on a tripod. Position it so the lens is angled upward, pointing directly at the cosmic circle you just drew. -
Add floating stars:
Lightly sketch a few star shapes and small dots around the outer perimeter of the circle. Keep these irregular and varied in size to create a magical, scattered effect.
Muddy Galaxy?
If colors turn gray, you’re over-mixing on the paper. Let layers dry between applications, or just drop colors next to each other and let the water mix them naturally.
Step 2: Painting the Galaxy
-
Wet-on-wet preparation:
Load a medium-sized round brush with clean water and wet the entire inside of the circle. The paper should be glistering but not swimming in a puddle. -
Drop in color:
While the circle is wet, start dropping in your lightest colors first. Dab spots of teal and magenta into the wet area, letting them bleed naturally. Leave a few small patches of white paper showing for bright nebulae. -
Deepen the cosmos:
While the first layer is still damp, add darker purple and indigo to the edges and the spaces between your brighter colors. This creates the deep space effect. -
Blend gently:
Clean your brush and use it slightly damp to softly nudge the colors together where they meet. Be careful not to over-mix, or you’ll get a muddy gray instead of a vibrant galaxy. -
Let it dry completely:
Wait until the circle is 100% dry. This is crucial because painting the stars or touching the edges too soon will ruin the crisp circular shape.
Metallic Magic
Once the painting is dry, trace the outer stars or add details to the telescope with a metallic gold or silver pen for an extra shimmering, magical effect.
Step 3: Inking the Silhouette
-
Outline the telescope:
Using your black fineliner, carefully trace the pencil outline of the telescope and tripod. Keep your lines steady and confident. -
Fill in the black:
Color in the entire telescope shape with the black pen or marker. You want a solid, opaque silhouette with no white paper showing through. -
Add highlight details:
Once the black ink is dry, you can use a white gel pen to add tiny lines on the tripod legs or telescope body to suggest knobs or reflections, though a pure silhouette works beautifully too.
Step 4: Celestial Details
-
Paint the outer stars:
Using a small detail brush, paint the stars you sketched around the circle’s perimeter. Use a mix of teal and deep blue to coordinate with the galaxy inside. -
Add inner stars:
Using your white gel pen or opaque white gouache, dot tiny stars inside the painted nebula circle. Vary the pressure to create different sized dots. -
Create starbursts:
Select a few of your white dots inside the nebula and draw small crosses over them to turn them into twinkling starbursts. -
Connect the elements:
Add tiny black or dark blue dots around the exterior stars to create a sense of ‘dust’ or debris, visually connecting the floating stars to the main circle. -
Final clean up:
Once absolutely everything is dry, gently erase any visible pencil marks remaining around the telescope or the outer stars.
Now you have a stunning window into the universe that captures the wonder of astronomy
BRUSH GUIDE
The Right Brush for Every Stroke
From clean lines to bold texture — master brush choice, stroke control, and essential techniques.
Explore the Full Guide
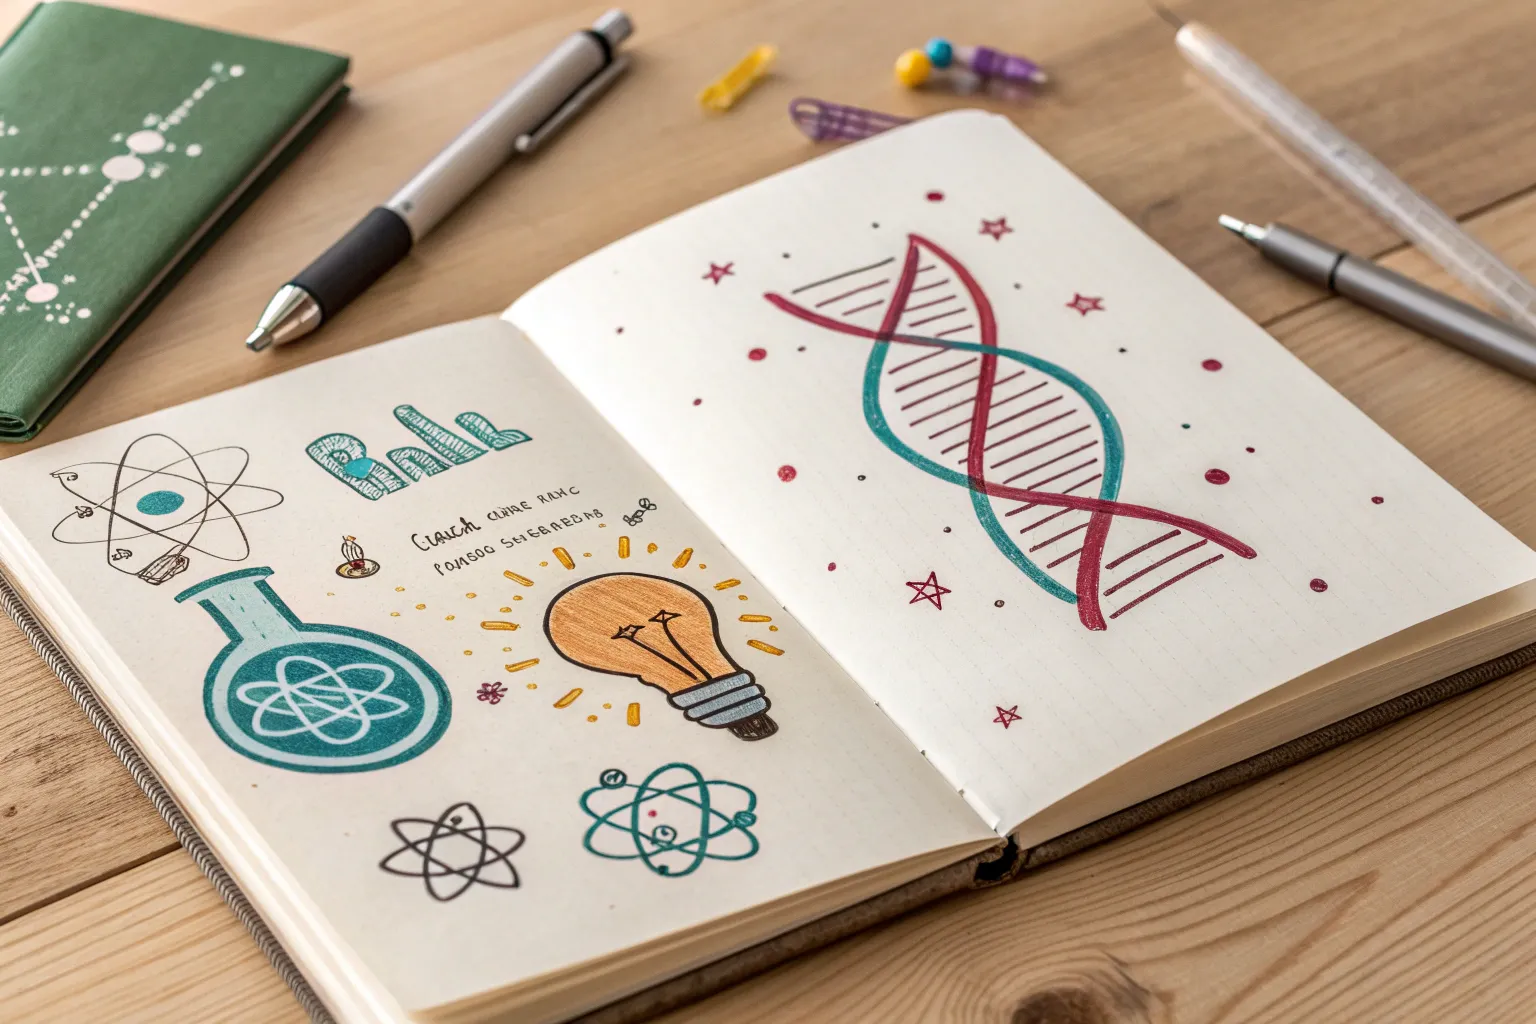
Science Icon Collage Pattern
Transform a plain notebook into a scientific study companion with this custom doodle pattern. Featuring atoms, beakers, and DNA strands in a retro-inspired color palette, this project combines simple line drawing with selective coloring for a professional, printed-fabric look.
Detailed Instructions
Materials
- White or cream cardstock (A5 or size to match notebook)
- Spiral-bound notebook
- Fine-point drawing pen (dark teal or charcoal gray, 0.5mm)
- Alcohol-based markers or colored pencils (terra cotta/rust)
- Alcohol-based markers or colored pencils (sage green/teal)
- Alcohol-based markers or colored pencils (mustard yellow)
- Ruler
- Pencil and eraser
- Scissors or craft knife
- Hole punch (optional, depending on binding method)
- Glue stick or spray adhesive
Step 1: Planning the Layout
-
Measure and Cut:
Begin by measuring the front cover of your spiral notebook. Cut your white cardstock to these exact dimensions so it sits flush with the edges, but don’t adhere it just yet. -
Sketch the Anchors:
Using a light pencil, sketch 5-7 large ‘anchor’ icons evenly spaced across the page. Good choices are the large triangular flask, the microscope, and the Saturn-like planet. Keep them oriented in random directions to create a toss pattern. -
Fill the Gaps:
In the spaces between your large anchors, lightly pencil in medium-sized doodless like the atom models, DNA helixes, and round boiling flasks. Rotate the paper as you draw so the icons don’t all face the same way. -
Add Small Details:
Look for empty white spaces and pencil in tiny filler elements. Use simple stars, small plus signs, tiny circles, and chemical bond lines to make the pattern feel dense and cohesive.
Step 2: Inking the Outlines
-
Trace Main Icons:
Take your dark teal or charcoal fine-point pen. Carefully trace over your pencil lines for the larger equipment like the microscope and beakers. Keep your hand steady for smooth, confident curves. -
Ink the Atoms:
For the atom symbols, draw the center nucleus first, then the looping electron orbits. I find it helps to draw the ovals quickly to keep the lines smooth rather than shaky. -
Detail the Glassware:
When inking test tubes and flasks, add a small horizontal line near the neck to indicate liquid levels inside. This small detail adds realism to the doodle style. -
Finalize Fillers:
Ink all the tiny stars and background elements. Once the ink is completely dry—give it a full five minutes to be safe—gently erase all your pencil guides.
Clean Lines Tip
If you struggle drawing perfect circles for planets or atoms, trace small household items like bottle caps or coins to get a smooth geometric foundation.
Step 3: Adding Color
-
Apply Terra Cotta:
Select your rust or terra cotta marker. Color in specific details like the liquid inside the triangular flask, the base of the microscope, and parts of the DNA strand. aim for an even distribution so the red tones aren’t clumped in one area. -
Add Sage Green tones:
Switch to your sage or teal marker. Fill in the planets, the circular atom nuclei, and alternate sections of the DNA. This cool tone balances the warmth of the rust color. -
Highlight with Yellow:
Use a muted mustard yellow for subtle highlights, such as the liquid in the round boiling flask or the centers of the stars. Keep this color sparse to act as a gentle accent. -
Leave White Space:
Resist the urge to color everything. Leave the glass parts of the beakers, the background, and many small details white to maintain that clean, scientific illustration look.
Make It Glossy
Coat the finished cover with a layer of clear adhesive laminate or Mod Podge. This protects your art from backpack wear and adds a nice sheen.
Step 4: Assembly
-
Prepare for Binding:
If you are recovering an existing notebook, align your drawing with the spiral edge. Mark where the spiral holes are with a pencil. -
Punch Holes:
Use a specialized spiral punch or a single-hole punch to carefully cut out the slots for the binding. Alternatively, you can simply cut the paper short of the spiral and glue it to the flat part of the cover only. -
Adhere the Cover:
Apply a thin, even layer of glue or spray adhesive to the back of your drawing. Press it firmly onto the notebook cover, smoothing from the center outward to prevent air bubbles. -
Trim Edges:
If there is any overhang, flip the notebook over and trim the excess paper with a craft knife for a flush, professional finish.
Now you have a personalized notebook ready to record your next big discovery
Four-Panel Science Grid
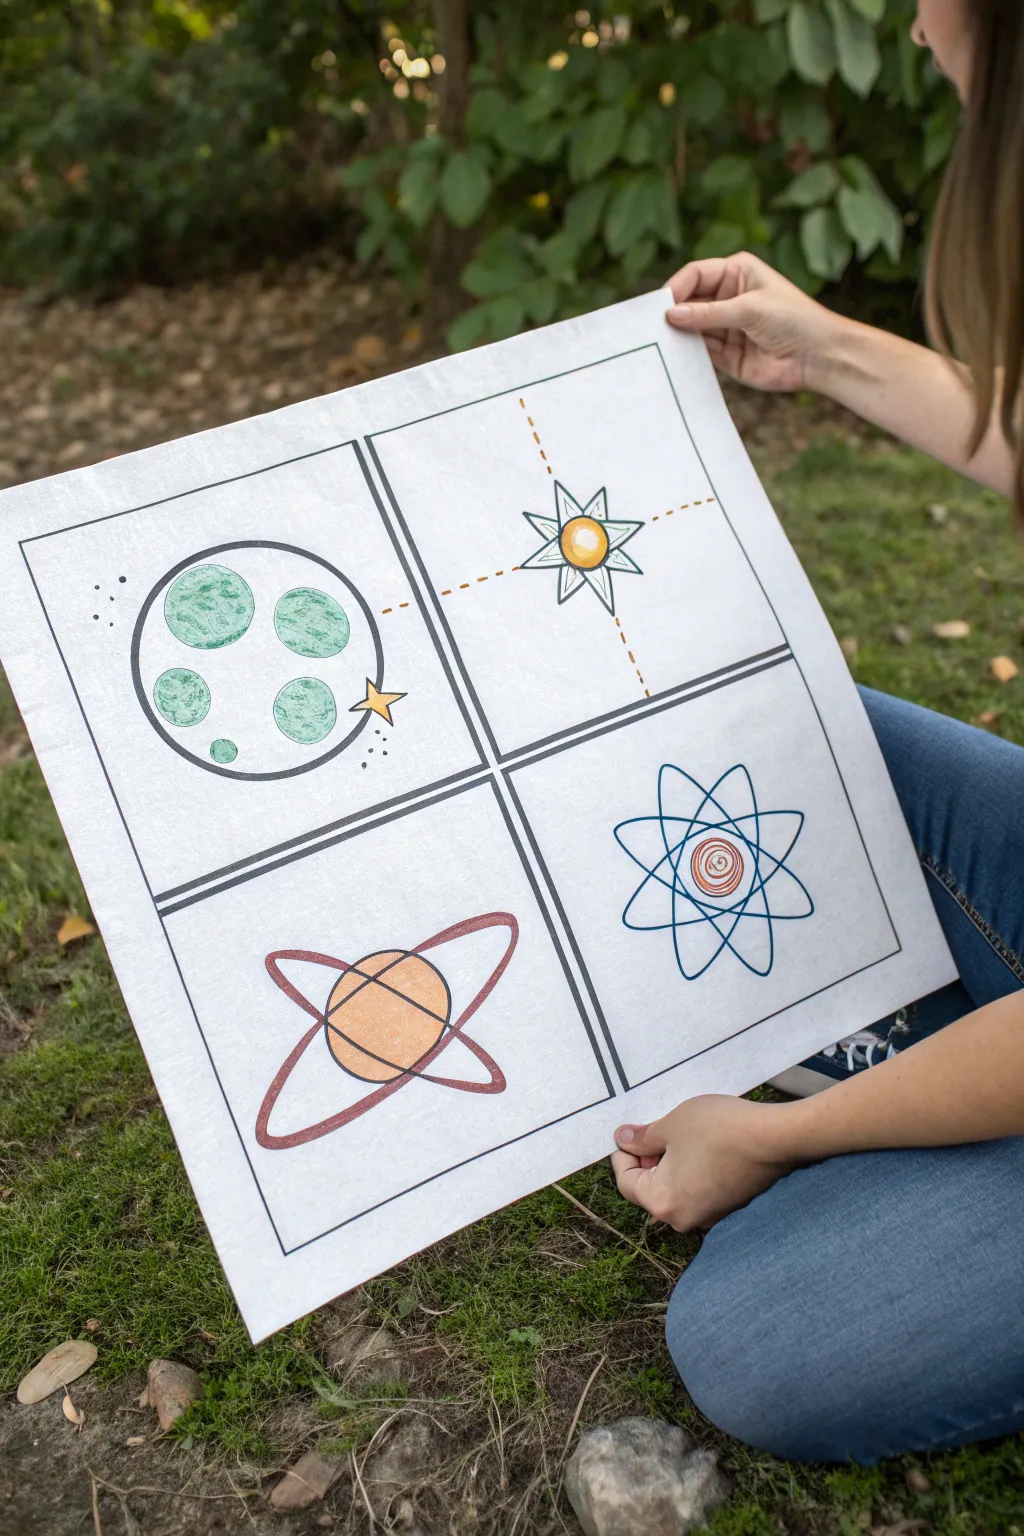
This project creates a bold, four-panel art piece that celebrates the wonders of the universe through simple, geometric illustrations. Using a grid layout, you’ll draw stylized representations of planets, stars, and atomic structures, colored with a soft, textured pencil finish for a vintage textbook feel.
How-To Guide
Materials
- Large square white poster board or thick drawing paper (approx. 18×18 inches)
- Black permanent marker (fine tip)
- Black permanent marker (chisel tip or thick felt tip)
- Ruler or creative T-square
- Compass or various circular objects for tracing
- Colored pencils (Sage Green, Golden Yellow, Orange, Red-Brown, Teal/Navy)
- Pencil and eraser for sketching
Step 1: Setting the Stage
-
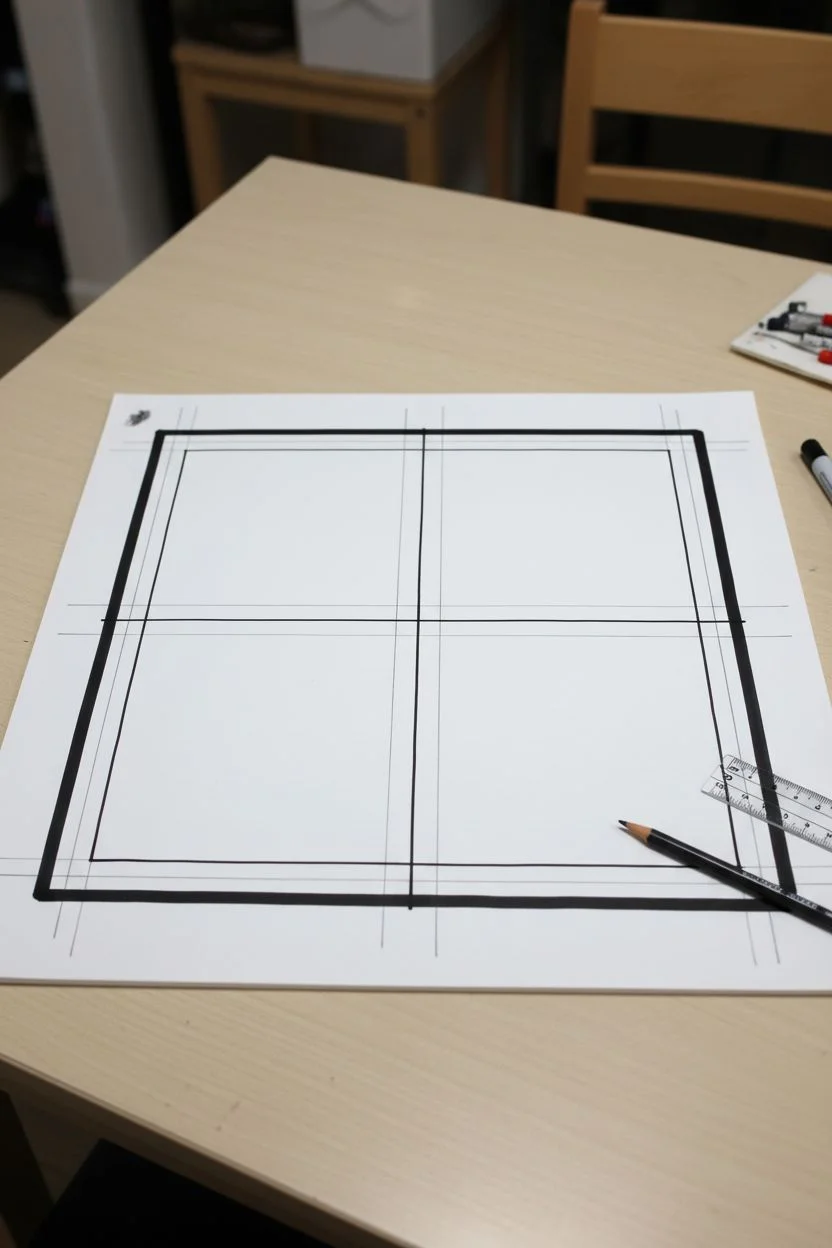
Prepare the grid:
Begin by laying your square poster board on a flat surface. Using your ruler and a pencil, lightly find the exact center of the paper. -
Draw the borders:
Draw a large square frame about 1-2 inches inward from the paper’s edge. Then, draw a vertical line and a horizontal line crossing through the center to divide this inner area into four equal quadrants. -
Ink the structural lines:
Once you are happy with the spacing, trace over your pencil grid lines with the thick black marker. Use the ruler to ensure these lines are perfectly straight and bold, as they anchor the entire artwork. -
Add the inner borders:
For a polished look, add a second, thinner line just inside the thick grid lines you just drew, creating a ‘double frame’ effect around each individual square. Use the fine-tip marker for this delicate detail.
Step 2: Drawing the Celestial Elements
-
Sketch the Green Planet (Top Left):
In the top-left quadrant, use a compass or bowl to sketch a large circle. Inside, draw three smaller circles varying in size to represent craters. Add a small, five-pointed star shape peeking out from behind the planet on the right side. -
Sketch the Geometric Sun (Top Right):
Move to the top-right. Draw a small circle in the very center. Around it, sketch an eight-pointed star shape where the points are long and sharp triangles. Add dashed lines extending from the star’s points horizontally and vertically to the box edges. -
Sketch the Ringed Planet (Bottom Left):
In the bottom-left square, draw a central circle for the planet body. Sketch two long, intersecting ellipses that loop around the planet diagonally, forming an ‘X’ shape with the rings. -
Sketch the Atom (Bottom Right):
For the final quadrant, draw a small central nucleus. Surround it with three overlapping ellipses arranged in a flower-like pattern to represent electron orbitals.
Pro Tip: Consistency
Keep your pencil strokes directional when coloring flat objects, but switch to a small circular ‘scumbling’ motion for planets to create a textured, crater-like appearance.
Step 3: Adding Color and Definition
-
Outline the drawings:
Switch back to your markers. Trace the main circles and primary shapes with the thicker marker to make them pop. Use the fine-tip marker for smaller details like the dashed lines in the sun panel or the star points. -
Color the Green Planet:
Take your sage green colored pencil. Color the crater circles heavily to make them darker. For the main planet surface, use a lighter hand and a circular scribbling motion to create a textured, uneven look that mimics a rocky surface. -
Color the Sun and Star:
Use a golden yellow pencil for the central circle of the sun. Press firmly in the center and fade out slightly toward the edges to suggest a sphere. Briefly shade the surrounding star triangles with a very light touch of teal or grey to give them dimension. -
Color the Ringed Planet:
Color the central planet orange, keeping the shading even. For the rings, I find using a red-brown pencil works best. Outline the rings heavily, then lightly fill the inside of the ring shapes to distinguish them from the white background. -
Color the Atom:
Use the red-brown pencil to create a swirl pattern inside the small central nucleus. For the electron paths, trace over your black lines with a teal or navy colored pencil to add a subtle pop of color without filling the shapes in completely. -
Add decorative details:
Return to the Green Planet quadrant. Use your fine-tip marker to add tiny clusters of dots (stippling) in the empty white space around the planet to represent distant stars or space dust.
Level Up: Aged Effect
Before drawing, lightly stain your paper with tea or coffee and let it dry flat. This gives the background a parchment look, making the science diagrams feel like vintage discoveries.
Hang your finished quadrilateral masterpiece on the wall to inspire curiosity and wonder


Science Typography Made of Icons
Show off your love for all things STEM with this bright woven tote featuring customized lettering and playful scientific doodles. This project mimics the look of hand-drawn textbook illustrations using fabric markers to transform a plain canvas bag into a geek-chic accessory.
Detailed Instructions
Materials
- Blank canvas tote bag or banner (natural color)
- Fabric markers (fine tip and brush tip in red, blue, yellow, green, black)
- Pencil (HB or lighter)
- Eraser
- Ruler
- Cardboard insert (to fit inside the bag)
- Iron (for setting the ink)
Step 1: Planning and Sketching
-
Prep the surface:
Before starting, iron your canvas tote to remove any creases that could distort your drawing. Slide a piece of cardboard inside the bag; this provides a stable drawing surface and prevents ink directly bleeding through to the back layer. -
Mark guidelines:
Using a ruler and a light pencil touch, draw two horizontal parallel lines across the center of the bag. This channel will house your main ‘SCIENCE’ text to keep it perfectly straight. -
Draft the letters:
Lightly sketch the word ‘SCIENCE’ in large, capitalized serif font within your guidelines. Make the letters blocky and thick enough to be colored in later. Leave uniform spacing between each character. -
Sketch the icons:
In the spaces above and below the text, lightly draw your science icons. Add a DNA helix strand, a flask, an atom model, and molecular structures above the text. Below, add details like a petri dish, another flask, a pipette, and an atomic orbit symbol.
Bleeding Lines?
If the ink spreads into the fabric fibers, switch to a finer tip marker and move your hand faster. Pre-washing the tote without softener can also help hold ink better.
Step 2: Inking the Typography
-
Outline the text:
Take your black fine-tip fabric marker and carefully trace over the pencil lines for the word ‘SCIENCE.’ Go slowly to ensure crisp, clean edges on the serif details. -
Detail the ‘S’:
Fill the first ‘S’ with horizontal red stripes. Once the red is dry, add tiny white or uncolored dots, or use a white gel pen later for highlights. -
Pattern the ‘C’:
Draw small grey or black dashed lines centered inside the letter ‘C’ to mimic a road or track, giving it a stitched appearance. -
Color the ‘E’s:
For the first ‘E’, color it solid orange-red, but leave small circular voids to look like bubbles or texture. For the last ‘E’, fill it with a dark scribbled texture using the black marker for contrast. -
Fill remaining letters:
Leave the ‘I’ and ‘N’ simple or lightly shaded. For the second ‘C’, outline the inner edge with blue to create a 3D shadow effect. Be creative with patterns here.
Glow in the Dark
Trace over the ‘chemical’ liquids and atom orbits with glow-in-the-dark fabric paint. It adds a secret surprise element that fits the science theme perfectly.
Step 3: Coloring the Icons
-
Inking the top row:
Outline your top doodles in black ink. For the DNA strand (left), use green for the leaves/structure. Color the flask (center) with yellow bubbles. Use blue for the atom nodes on the right side. -
Inking the bottom row:
Outline the bottom icons. Use green for the petri dish cultures and red for the liquid in the florence flask. The pipette can remain mostly clear with a hint of blue or grey. -
Add accent colors:
Use your colored markers to add small accent dots, circles, and connection points to the molecular structures. A mix of teal, red, and yellow keeps the palette vibrant but cohesive. -
Erase pencil lines:
Wait at least 15 minutes for all ink to be completely dry. Gently erase any visible pencil guidelines, being careful not to smudge the fabric ink. -
Heat set the design:
Once fully dry, follow the manufacturer’s instructions for your fabric markers. Usually, you toss the bag in the dryer on high heat or iron the reverse side of the design to make it permanent and washable.
Now you have a sturdy, personalized bag perfect for carrying library books or lab gear
Lightbulb and Brain Color Split
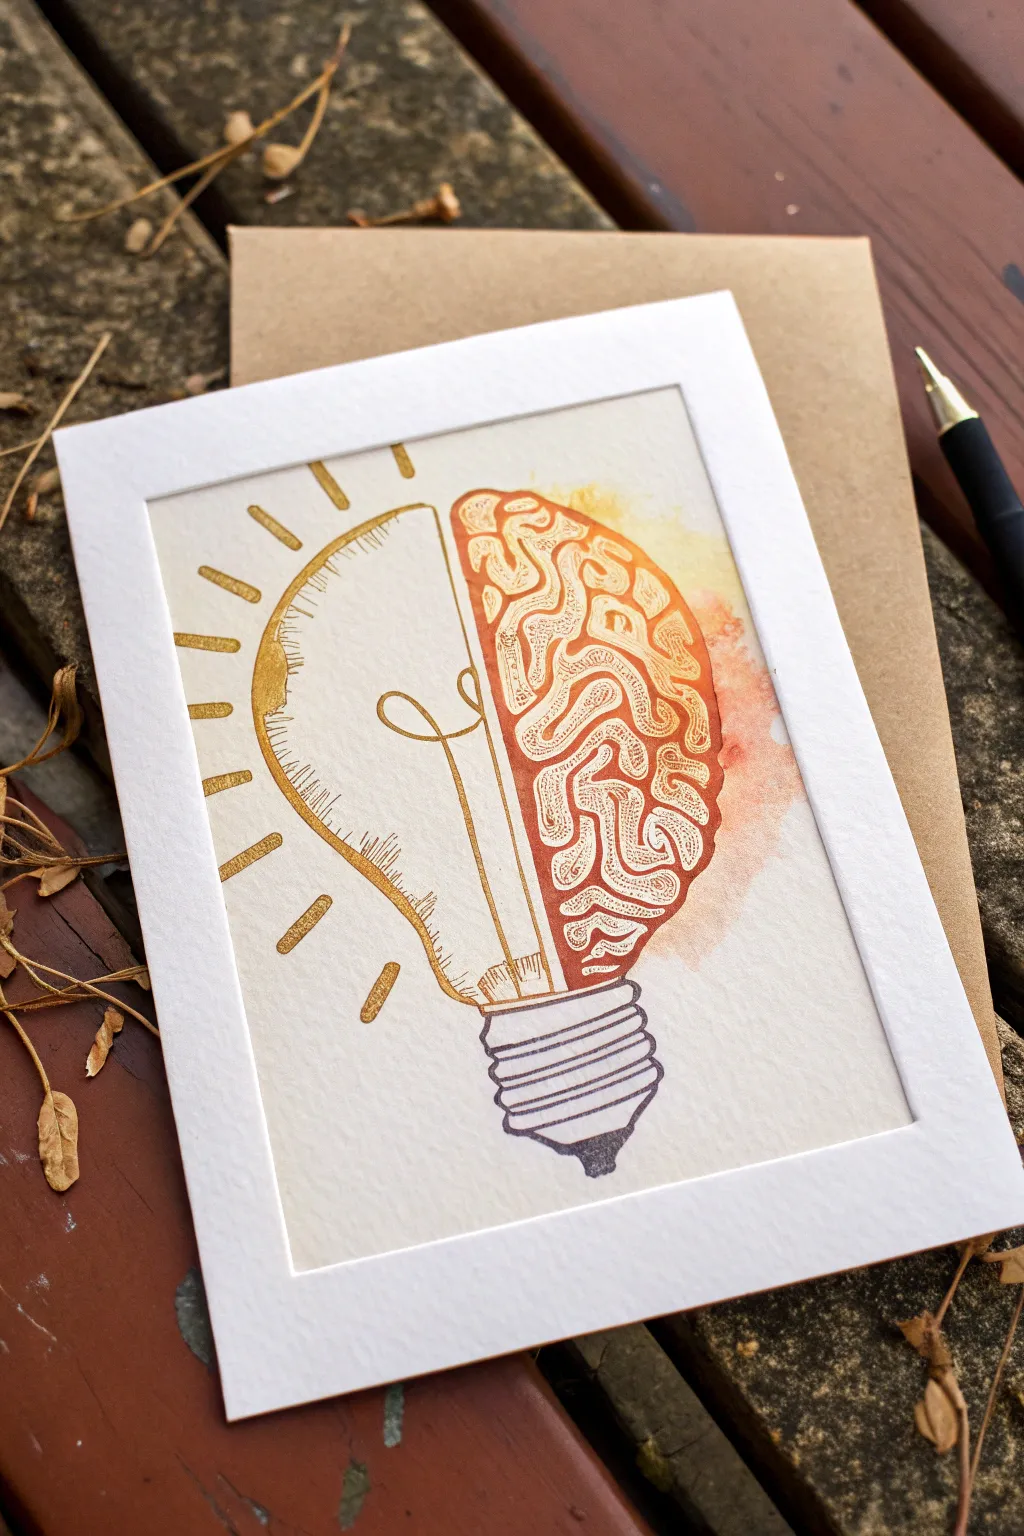
This clever conceptual illustration merges the creative spark of a lightbulb with the anatomical complexity of the human brain. Using a mix of metallic gold ink and warm watercolors features a split design that pops against the crisp white paper.
How-To Guide
Materials
- High-quality watercolor paper or cardstock (cut to card size)
- Pencil (HB or 2H)
- Fine-point waterproof pigment liner (brown or sepia)
- Gold metallic paint pen or gel pen
- Watercolor paints (orange, rust, yellow ochre)
- Small round watercolor brush (size 2 or 4)
- Ruler
- Eraser
Step 1: Drafting the Outline
-
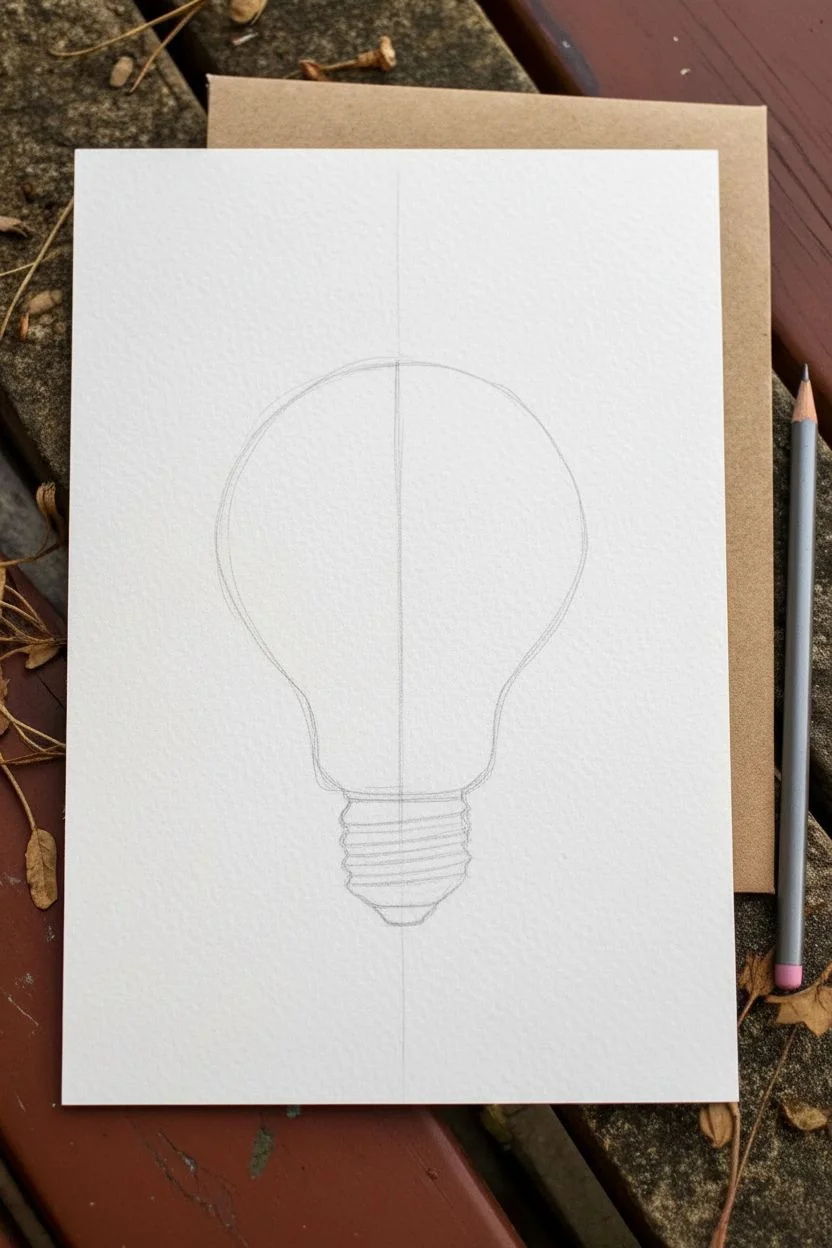
Draw the center line:
Begin by lightly drawing a vertical line down the center of your paper using a ruler. This will act as the divider between the two halves of your design. -
Sketch the bulb shape:
Sketch a classic lightbulb outline, centering it on your vertical line. Focus on getting the overall teardrop shape symmetrical first. -
Divide the halves:
Mentally designate the left side for the ‘bulb’ and the right side for the ‘brain’. Stop your lightbulb outline at the centerline, leaving the right side open for the brain texture later. -
Add the screw cap:
At the bottom, sketch the threaded metal base of the bulb. This part will remain unified across both halves, anchoring the two concepts together.
Clean Lines
For the brain texture, keep your wrist loose and don’t overthink the squiggles. Random, wandering lines look more natural and organic than perfect patterns.
Step 2: Inking the Lightbulb
-
Ink the glass outline:
Using your gold metallic pen, trace the outer curve of the left side (the glass bulb). Use short, sketchy strokes rather than one solid line to give it an artistic, hand-drawn feel. -
Draw the filament:
Inside the left half, draw the internal wire support and filament using the gold pen. The filament should look like a small loop or zigzag near the center. -
Add visual weight:
Thicken the gold line on the far left edge of the glass to suggest reflection and dimensionality. I like to add tiny hatching lines here to create a shadow effect. -
Create the shine:
Draw radiating dash marks extending outward from the gold side of the bulb to represent glowing light.
Make it Pop
Add tiny dots of white gel pen on the tops of the brain folds after the ink dries. It adds a ‘wet’ look that makes the anatomy stand out vividly.
Step 3: Creating the Brain
-
Apply the wash:
Wet your brush and pick up a diluted orange or amber watercolor. Paint a loose, organic shape on the right side that roughly mirrors the bulb’s curve. -
Let colors bleed:
While the wash is still wet, drop in hints of deeper rust or red near the center line to create depth. Allow this background layer to dry completely before inking. -
Outline the lobes:
Switch to your brown waterproof fineliner. Begin drawing the brain’s outer edge, making it bumpy and convoluted to mimic cortical folds, following the original bulb silhouette guide. -
Fill the texture:
Fill the interior of the right side with squiggly, maze-like patterns. Keep the lines close together but distinct to resemble the gyri and sulci of brain tissue. -
Connect to the center:
Ensure your brain texture meets the vertical center line cleanly, creating a sharp contrast with the empty space of the lightbulb side.
Step 4: Finishing Touches
-
Ink the base:
Use a dark purple or grey pen to outline the screw base at the bottom. Draw horizontal ellipses to create the threaded look. -
Add base shading:
Add simple hatching on the sides of the screw base to make it look rounded and metallic. -
Erase pencil marks:
Once you are absolutely certain all ink and paint is dry, gently erase your initial pencil guide line and sketching marks. -
Mount the artwork:
If you painted on loose paper, trim it to size and glue it onto a folded card base using a glue stick or double-sided tape.
Now you have a brilliant piece of art that perfectly balances logic and creativity ready to display
Magnet Field Lines in Two Colors
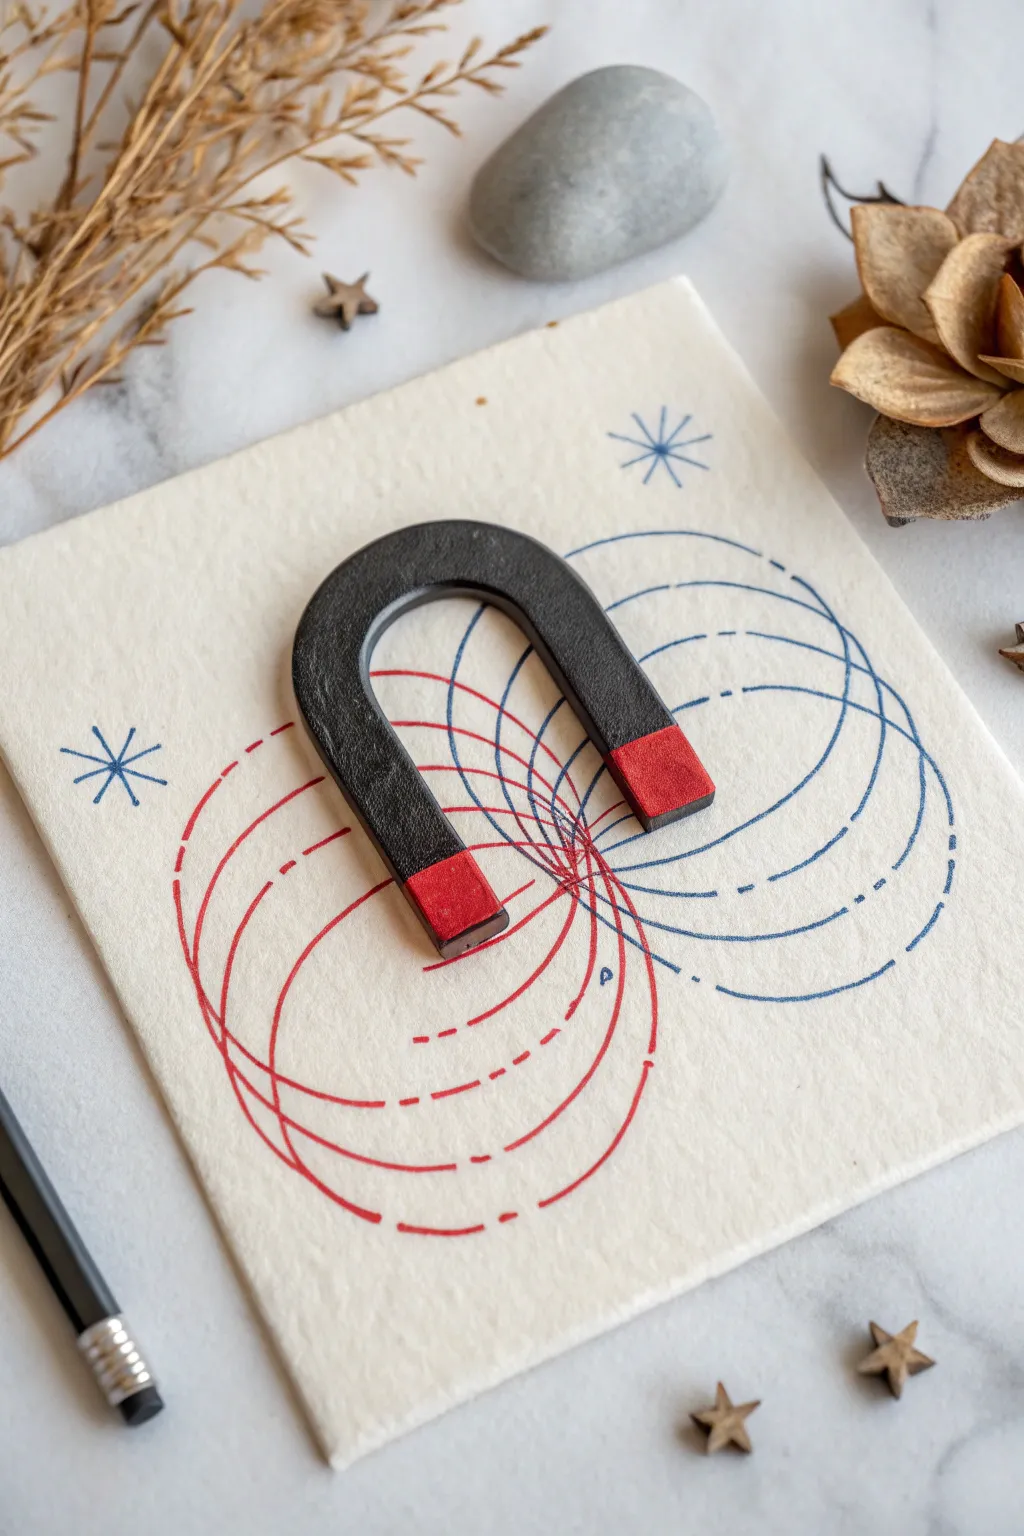
Visualizing invisible forces becomes a beautiful art project with this simple yet striking study of magnetic fields. Using a real horseshoe magnet as your centerpiece, you’ll create a stylized representation of attraction and repulsion using contrasting red and blue inks on textured paper.
Detailed Instructions
Materials
- Textured heavy-weight drawing paper or watercolor paper (cream or off-white)
- Horseshoe magnet (classic black with red tips preferred)
- Fine-liner pens (0.5mm or similar) in Red and Blue
- Pencil (HB)
- Eraser
- Compass (optional, for perfect arcs)
- Ruler
Step 1: Setting the Stage
-
Paper Selection:
Choose a thick, textured paper to give the drawing an academic, vintage feel. A 5×7 inch or square cut works perfectly for this composition. -
Positioning:
Place your horseshoe magnet directly onto the center of the paper. This isn’t just a prop—you will be tracing around it to ensure the field lines emerge from the exact correct points. -
Light Tracing:
Using a pencil, very lightly trace the outline of the magnet’s feet (the poles). You don’t need the whole shape, just the bottom edges where the red poles sit, so you know where your drawn lines should originate. -
Remove Magnet:
Lift the magnet away for now. You should have two rectangular markers on your paper indicating the magnet’s position.
Arc Precision Pro-Tip
If freehand drawing feels too risky, use the rim of a small bowl or a drinking glass to lightly trace your initial pencil curves before inking.
Step 2: Drafting the Fields
-
Planning Arcs:
Visualize the loops connecting the two poles. The lines should flow out from one pole and curve around to enter the other. -
Sketching:
Lightly sketch these concentric loops with your pencil. Ensure the loops get wider and larger as they move away from the magnet center. Don’t worry about perfect symmetry; a hand-drawn look adds character. -
Decorative Elements:
Sketch two simple 8-point starbursts in opposite corners—one near the top right and one near the middle left—to balance the composition.
Uneven Ink Flow?
Textured paper can sometimes interrupt fine-liner flow. If your lines look scratchy, slow down your drawing speed to let the ink saturate the paper fibers.
Step 3: Inking the Blue Lines
-
Start on the Right:
Take your blue fine-liner. We are designating the right pole as our ‘blue’ source. Begin tracing your pencil arcs that originate from the right side. -
Dashed Lines:
Instead of solid lines, use a broken, dashed line technique. This suggests the invisible nature of the force. vary the length of the dashes slightly for an organic feel. -
Crossing Over:
Continue the blue dashed lines as they arc over to the left side. As they approach the ‘red’ territory on the left, let them overlap with where the red lines will soon be. -
The Blue Star:
Trace the starburst in the upper right corner using the blue pen. Make sure the lines cross cleanly at the center.
Step 4: Inking the Red Lines
-
Left Side Focus:
Switch to your red fine-liner. This color corresponds to the left pole of the magnet. -
Intersecting Arcs:
Draw the red dashed arcs mirrored against the blue ones. Where the lines meet in the middle (between the poles), allow them to crisscross, creating a visual mesh of forces. -
Inner Tension:
Pay special attention to the smallest, tightest loops between the poles. I find that making these lines slightly denser helps emphasize the magnetic strength at the core. -
The Red Star:
Ink the second starburst on the left side with the red pen.
Step 5: Final Assembly
-
Erase Sketches:
Wait at least 5-10 minutes for the ink to dry completely. Gently erase all visible pencil marks, being careful not to smudge the ink. -
Placement:
Place the real horseshoe magnet back onto the paper, aligning the feet perfectly with the start of your drawn lines. The physical object completes the artwork. -
Styling:
For a display or photo, scatter a few small wooden stars or dried botanical elements around the edges to frame the scientific subject with natural textures.
Now you have a striking piece of scientific art that blends physical objects with illustration
Animal Cell Cross-Section in Pastels
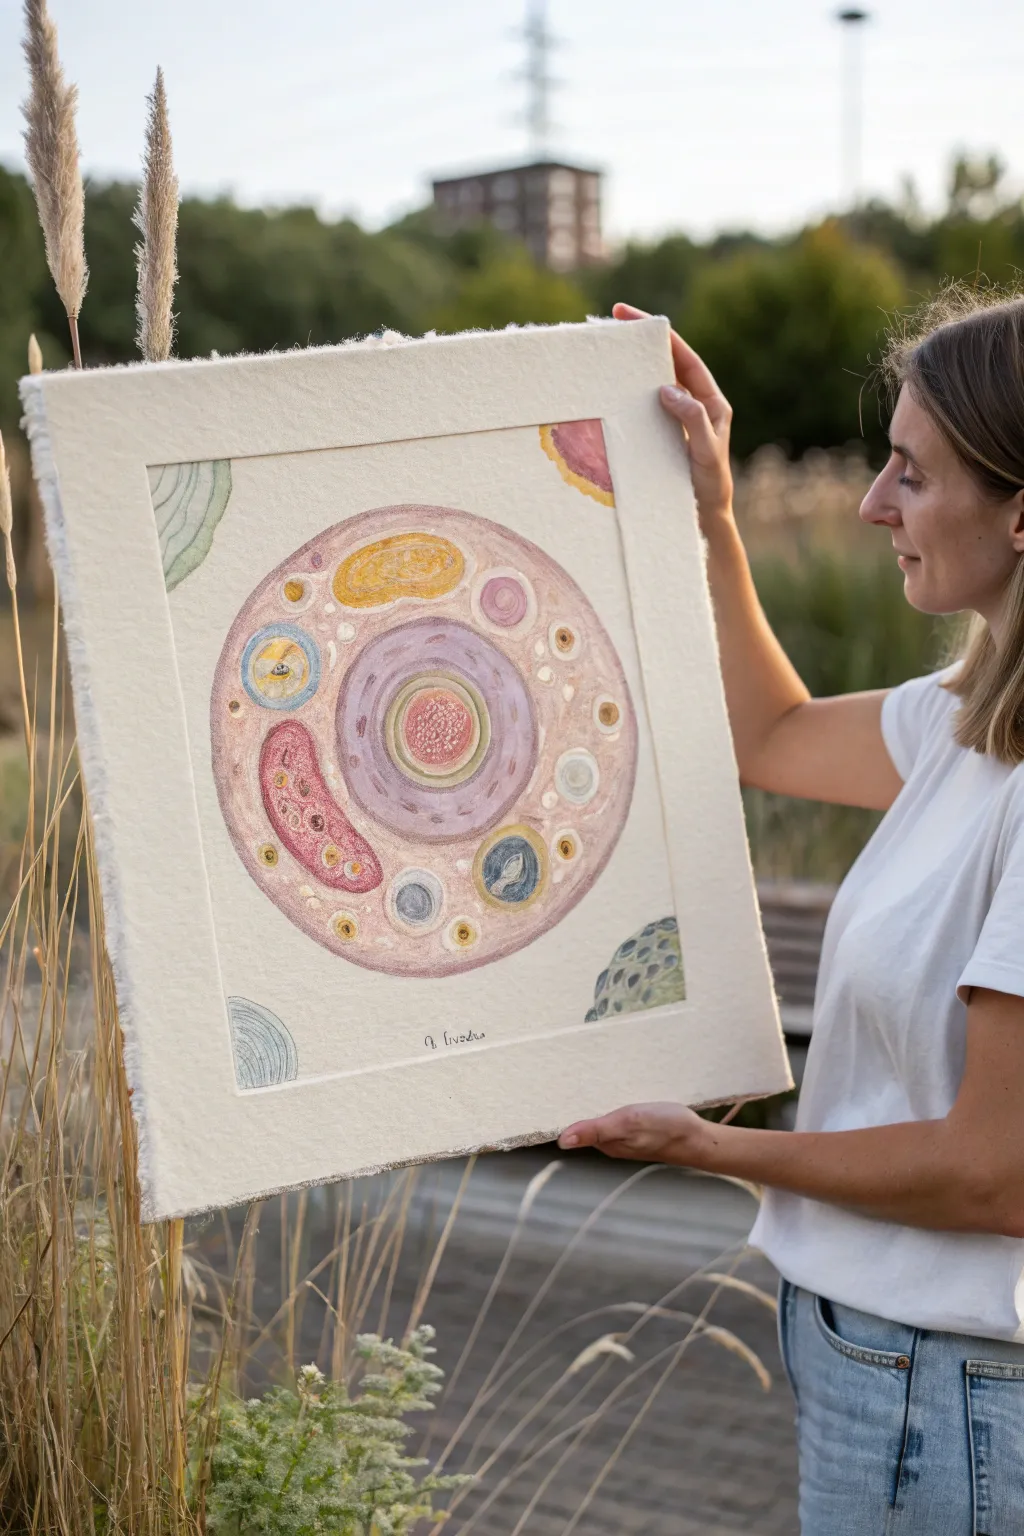
Blend scientific precision with artistic softness in this unique animal cell illustration. Using pastel pencils on highly textured paper creates an organic, almost microscopic feel that transforms a standard biology diagram into a beautiful piece of wall art.
Detailed Instructions
Materials
- Heavyweight textured paper (handmade cotton rag, heavy watercolor paper, or thin felt sheet)
- Pastel pencils or soft pastels (pinks, purples, yellows, blues, teals)
- Hard graphite pencil (HB or H)
- Compass or circular objects for tracing
- Kneaded eraser
- Blending stump or cotton swabs
- Paper tape or drafting tape
- Fixative spray
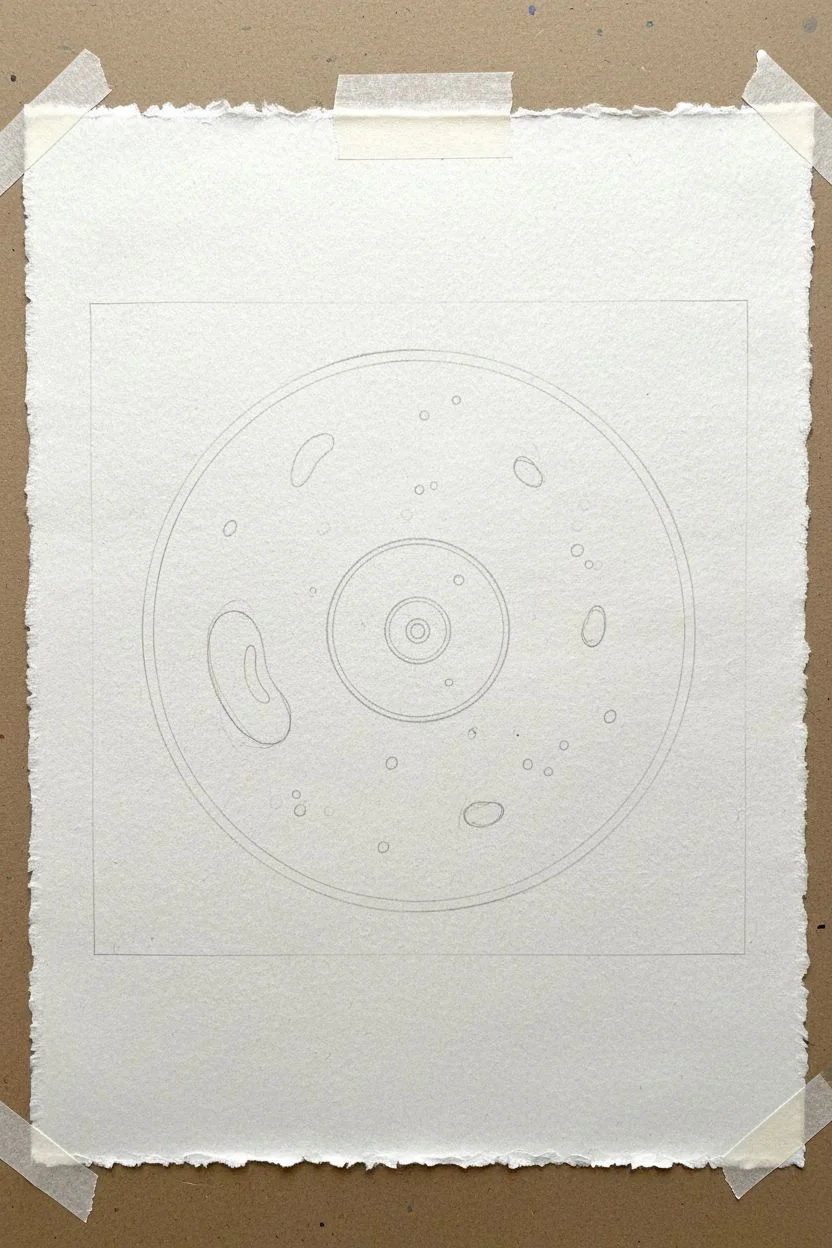
Step 1: Preparation & Layout
-
Prepare your surface:
Begin by selecting a piece of heavy, highly textured paper. If using handmade paper with deckled edges, tape it down lightly from the back or use a drawing board to keep it flat. The texture is crucial for holding the pigment. -
Frame the borders:
Use a straightedge and faint pencil lines to lightly mark out a square border about 2 inches from the paper’s edge. This creates the ‘mat’ look directly on the paper. -
Draw the main circle:
Using a compass or a large round plate, lightly sketch the large central circle that represents the cell membrane. Ensure it’s centered within your drawn square frame. -
Sketch internal structures:
Lightly pencil in the nucleus in the center (a smaller circle) and the nucleolus within that. Then, sketch the bean-shaped mitochondrion on the left, irregular vacuoles, and circular lysosomes scattered around the cytoplasm.
Grain Management
If the paper texture is too rough and creating white gaps, lay a base of white pastel first, then layer color on top to fill the ‘valleys’ of the grain.
Step 2: Coloring the Nucleus
-
Base layer for the nucleus:
Start with a soft lavender or pale purple pastel. Gently fill in the large central nucleus circle, using circular strokes to work the pigment into the paper’s heavy grain. -
Define the nucleolus:
For the inner core (nucleolus), switch to a warm coral or salmon pink. Apply this color more densely to make it stand out against the lavender background. -
Add nuclear rings:
Use a darker purple or mauve pastel pencil to draw concentric rings inside the nucleus. These don’t need to be perfect; a slightly shaky line adds organic realism. I like to smudge these slightly with a stump to keep them soft. -
Highlight the center:
Add a touch of stippling or small dots in a darker red or pink within the very center of the nucleolus to suggest dense genetic material.
Step 3: Fleshing Out Organelles
-
Color the Mitochondrion:
Take a deep rose or reddish-pink pastel for the large bean-shaped organelle on the left. Outline it first, then fill it in lightly. -
Detail the cristae:
Use a sharp yellow or cream pastel pencil to draw the squiggly internal lines (cristae) inside the pink mitochondrion. Add small white or yellow dots for texture. -
Add large vacuoles:
Color the large oblong shapes near the top with a mustard yellow. Outline them with a slightly darker ochre to give them dimension. -
Create lysosomes and vesicles:
Fill in the smaller scattered circles with varying shades of pale blue, cream, and soft grey. Give each a darker rim to make them look spherical.
Pro Tip: Highlight Pop
Use a pure white charcoal pencil for the final highlights on the round vesicles. It sits on top of pastel beautifully and makes them look wet and 3D.
Step 4: The Cytoplasm & Background
-
Fill the cytoplasm:
Use a dusty rose or pale skin-tone pastel to fill the rest of the large main circle. Apply this layer lightly so the paper texture shows through extensively, mimicking the fluid nature of cytoplasm. -
Blend selectively:
Use a paper stump to gently blur the edges where the organelles meet the cytoplasm. You want them to look suspended in fluid, not cut out and pasted on. -
Corner details:
In the four corners of your penciled square frame, draw partial organic shapes. Use teal for the bottom left, yellow/green for bottom right, and reddish tones for the top. These suggest other cells nearby. -
Final outlines:
Go back over your main shapes with a sharpened pastel pencil—darker purple or brown works well—to crisply define the edges of the cell membrane and major organelles. -
Labeling:
Using a very sharp dark pencil or a fine charcoal stick, carefully write a small scientific label (like ‘A. bivalva’ or ‘Cellula’) at the bottom center, just inside the border.
Once you’ve sealed your work with a fixative, you’ll have a striking piece of scientific art ready to display
Weather Tools With Color Accents
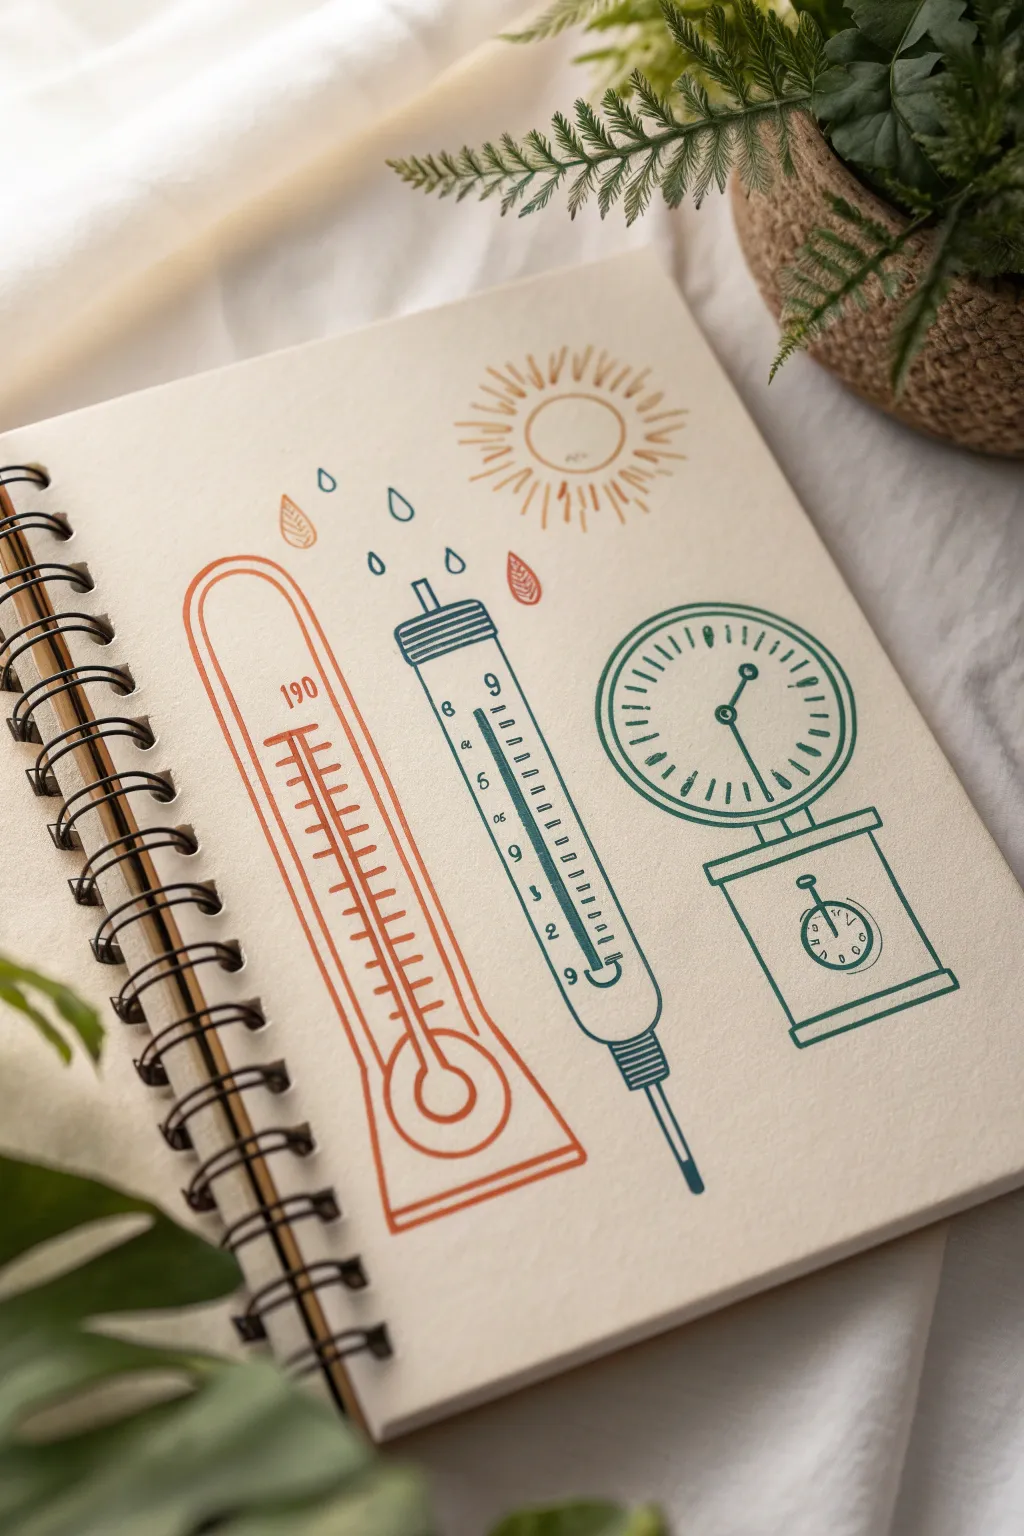
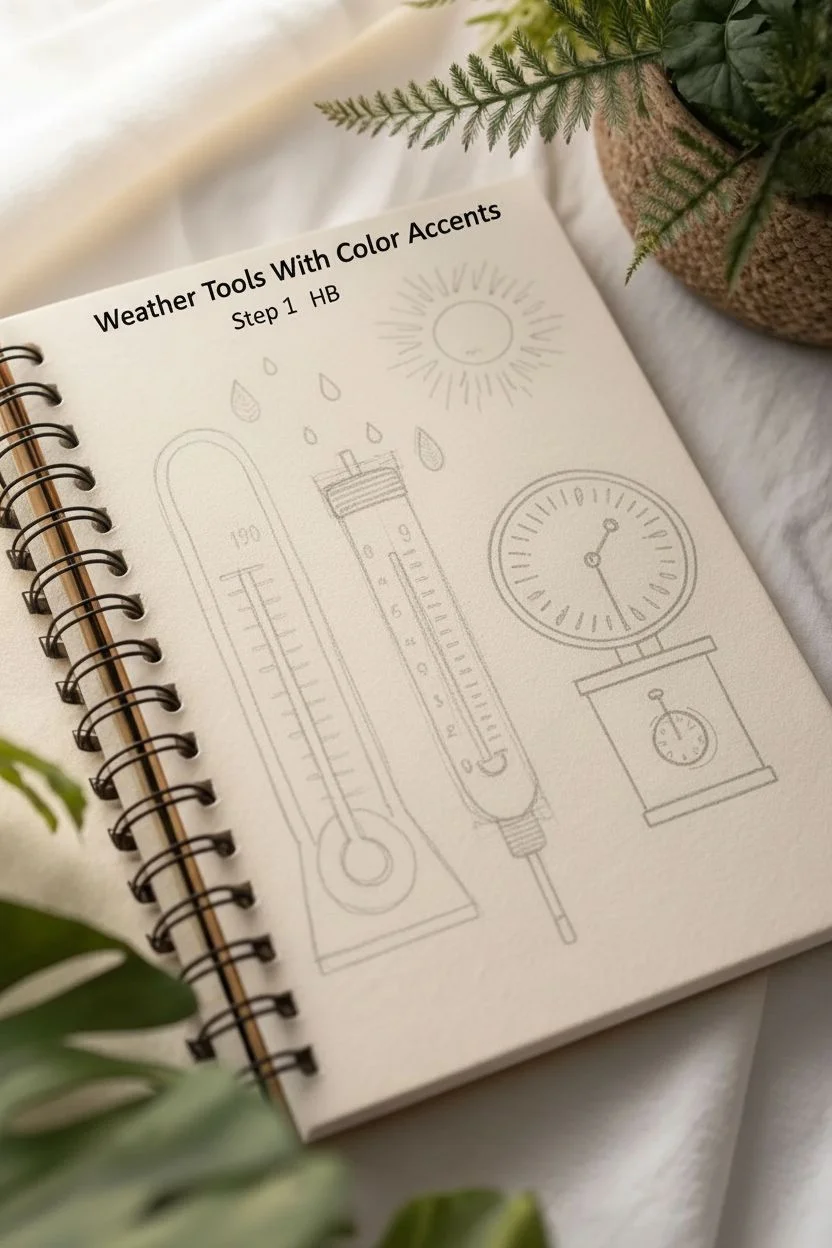
Capture the charm of scientific study with this clean, vintage-inspired sketchbook spread featuring essential weather measurement tools. Using a simplified line-art style with bold color accents creates a diagram that feels both educational and artistically pleasing.
How-To Guide
Materials
- Spiral-bound sketchbook (smooth or mixed media paper)
- Fine liner pens (Black, 0.3mm and 0.5mm)
- Felt-tip markers or colored fineliners (Orange, Teal/Blue, Sage Green)
- Pencil (HB for sketching)
- Eraser
- Ruler
Step 1: Planning and Sketching
-
Layout the composition:
Begin by lightly sketching the positions of your three main tools with a pencil. Place the thermometer on the left, the rain gauge/pipette in the center, and the barometer scale on the right. -
Sketch the thermometer:
Draw a long, vertical rectangle for the thermometer body, widening slightly at the bottom. Inside, sketch a second, thinner tube that ends in a circle at the base. Don’t worry about the ticks just yet. -
Outline the rain gauge:
In the center, sketch a long, thin cylindrical shape. Add a slightly wider, ribbed section at the top and a narrow tip at the bottom, mimicking a laboratory pipette or rain collection tube. -
Draft the scale:
On the right, draw a large circle for the dial face. Below it, sketch a rectangular base with a smaller circle inside, creating a classic weighing scale or barometer silhouette. -
Add atmospheric elements:
Lightly pencil in a sunburst shape at the top right of the page and a few falling raindrops between the thermometer and the central tube to tie the weather theme together.
Uneven Lines?
If your circles aren’t perfect, embrace the ‘wobbly’ look! Go over the line again loosely to make the sketchiness intentional rather than accidental.
Step 2: Inking the Thermometer
-
Draw the main outline:
Switch to your orange marker or colored fineliner. Trace the outer and inner shapes of the thermometer with a steady hand. The boldness of the color acts as the primary line work here. -
Add measurements:
Using the same orange tool, carefully draw horizontal hash marks up the central tube. I find using a ruler helps keep these spacing consistent, though a hand-drawn look adds character. -
Number the scale:
Add a numeric value, like ‘190’, near the top of the scale to suggest a reading.
Step 3: Inking the Rain Gauge
-
Outline in teal:
Using a teal or dark blue marker, trace the central cylindrical tool. Pay special attention to the ribbed cap at the top and the narrow nozzle at the bottom. -
Insert text and ticks:
Draw the measurement increments along the side of the tube. Add small numbers (9, 6, 9, 2) vertically along the tick marks to simulate scientific precision.
Vintage Vibe
Use a light wash of watered-down brown watercolor or tea over the page before drawing to give the paper an aged, antique parchment appearance.
Step 4: Inking the Barometer Scale
-
Outline the dial:
Switch to a sage green marker. specific to this section. Trace the large outer circle and the rectangular base stand. -
Detail the face:
Inside the large circle, draw radial tick marks around the inner edge—longer lines for main increments and shorter ones for details. Add a central pivot point and a needle pointing towards the left. -
Complete the base:
Repeat the process for the smaller dial on the base, adding a tiny needle and simplified tick marks inside the smaller circle.
Step 5: Final Details
-
Ink the weather symbols:
Use a yellow or light orange marker to trace the sun’s rays. For the raindrops, outline them in teal or blue, and add small leaf shapes in reddish-orange if you want extra variety. -
Erase pencil lines:
Allow the ink to dry completely to avoid smudging. Gently run your eraser over the whole page to lift the initial graphite sketches, leaving only the clean colored lines. -
Add texture marks:
If desired, add very small, thin hatching lines inside the sun or raindrops to give them a bit of illustrative volume without fully coloring them in.
Now you have a charming scientific record that captures the essence of weather observation in a unique style
X-Ray Hand in Cool Blues
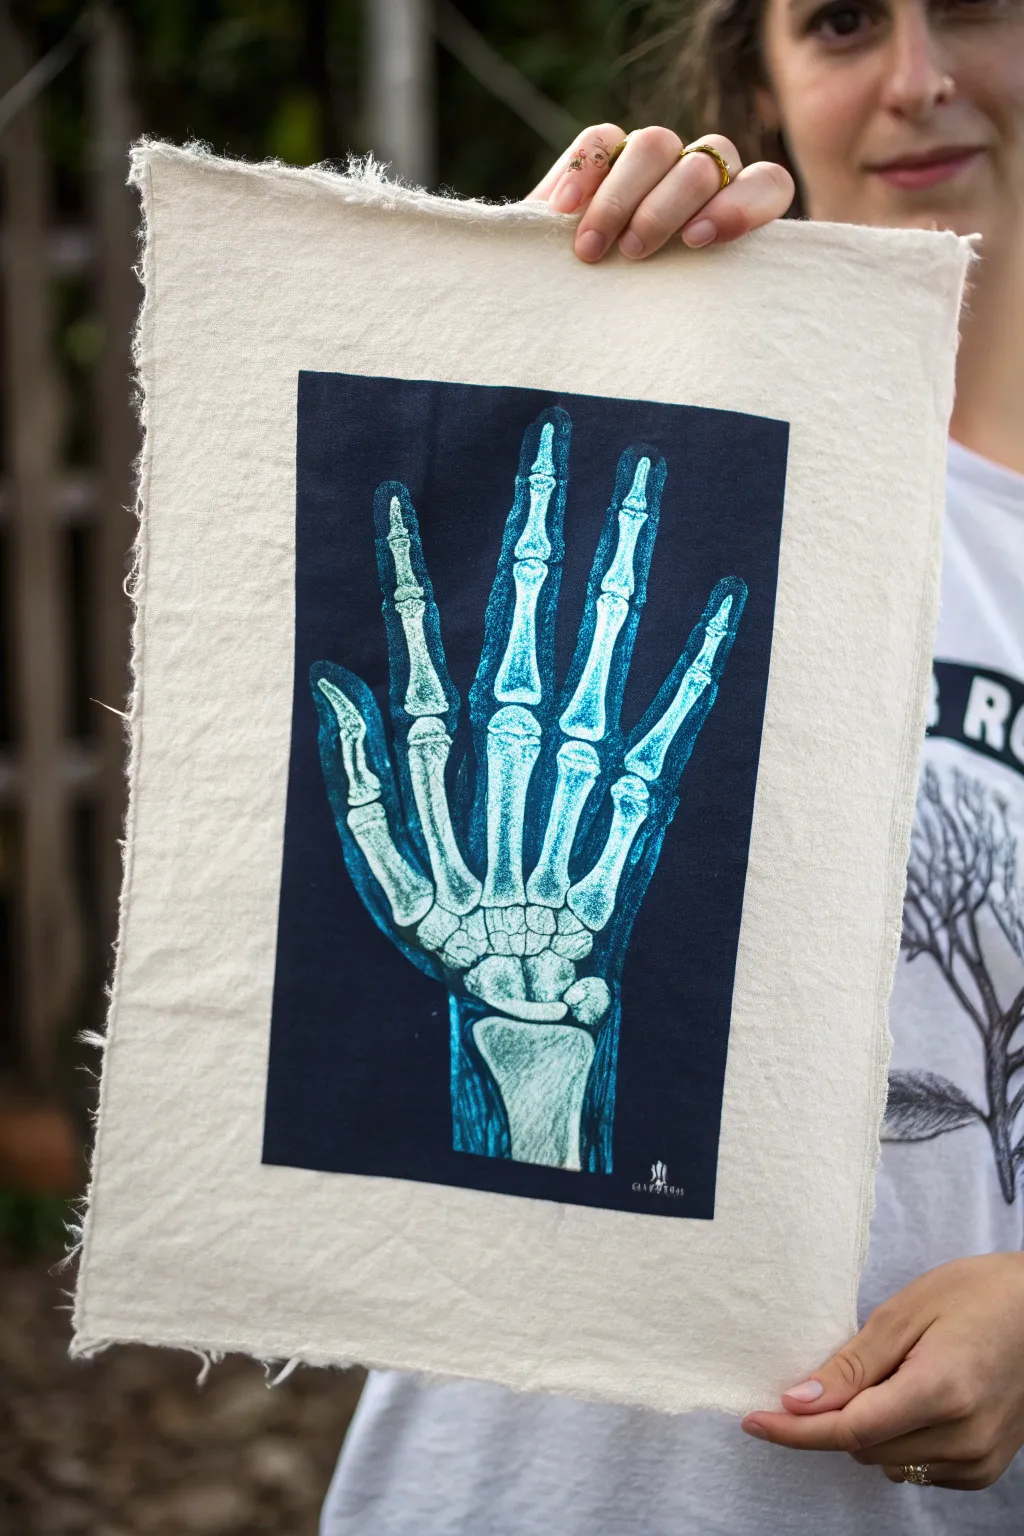
Capture the eerie beauty of anatomical structures with this striking fabric print that mimics the deep indigo and pale turquoise of a classic cyanotype. Using a resist method and fabric paints, you’ll create a skeletal hand that glows against a dark background, perfect for hanging as a scientific tapestry.
Step-by-Step
Materials
- Heavyweight cotton or linen fabric (cream or off-white)
- Deep indigo or navy blue fabric paint
- Turquoise or light cyan fabric paint
- White fabric paint
- Fabric medium (optional, to improve flow)
- Graphite transfer paper
- Anatomy reference image of a hand X-ray
- Fine liner brushes (size 0 and 00)
- Medium flat brush
- Masking tape
- Cardboard or plastic sheet (to protect surface)
- Pencil
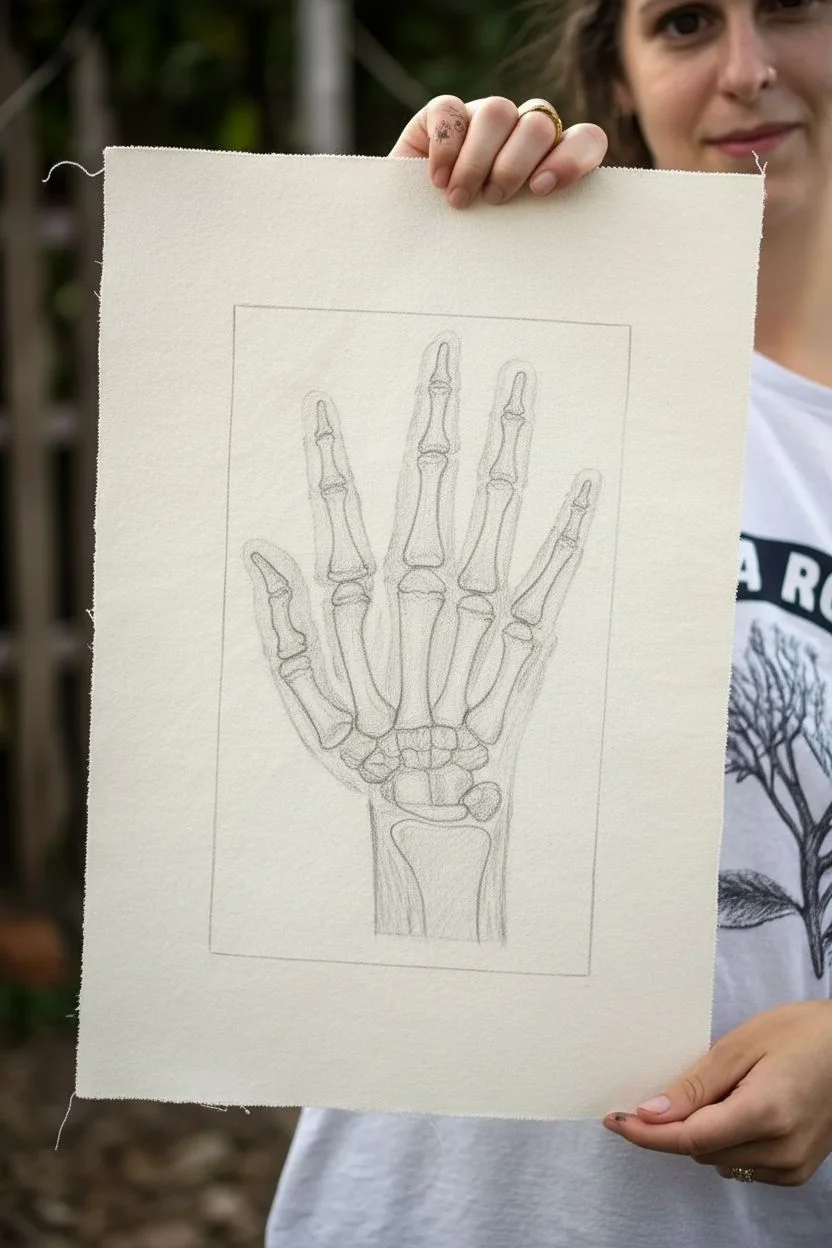
Step 1: Preparation and Sketching
-
Fabric prep:
Begin by cutting your fabric to the desired size, leaving raw, frayed edges for a rustic scientific specimen look. Iron the fabric completely flat to ensure a smooth painting surface. -
Reference setup:
Print out or draw a skeletal hand reference image. The size of your reference should match the size you want the final print to be on the fabric. -
Transfer the design:
Place a sheet of graphite transfer paper face down on the center of your fabric. Lay your reference image on top and secure it with a bit of masking tape. -
Tracing the bones:
Using a pencil, trace the outline of the bones firmly. Don’t worry about the soft tissue halo yet; focus on the hard edges of the phalanges, metacarpals, and wrist bones. -
Define the boundaries:
Lightly sketch a rectangular border around the hand using a ruler. This will define the dark background area, just like an X-ray film slide.
Pro Tip: Ghostly Layering
Water down your white paint heavily for the soft tissue areas. This transparency allows the fabric texture to show through, looking like ghostly flesh.
Step 2: Painting the Bones
-
Mix your base bone color:
On your palette, mix white fabric paint with just a tiny drop of turquoise. You want a very pale, almost clinical blue-white color. -
Fill the bones:
Using a fine liner brush, carefully paint the inside of your tracings. Keep the paint relatively opaque here, as these are the densest parts of the X-ray. -
Add bone details:
While the base layer is still slightly tacky, mix a slightly darker turquoise. Stipple this color into the joints (knuckles) and the spongy ends of the bones to create texture and depth. -
Establish the soft tissue:
Mix a translucent wash by adding water or fabric medium to your turquoise paint. Paint a faint outline around the bones to represent the flesh of the hand, tapering it off at the fingertips. -
Let it dry:
Allow these lighter layers to dry completely. If you paint the background too soon, the dark blue will bleed into your pristine white bones.
Troubleshooting: Bleeding Lines
If paint bleeds into the fabric weave, your mix is too watery. Use less water or switch to painting on primed canvas fabric for crisper lines.
Step 3: The Negative Space
-
Prepare the background color:
Squeeze out a generous amount of deep indigo or navy blue fabric paint. I prefer to mix in a tiny touch of black to get that true radiographic film darkness. -
Cutting in:
Using your smallest brush, carefully paint the dark blue right up to the edges of your painted bones and the soft tissue outline. This step requires patience. -
Fill the background:
Switch to your medium flat brush to fill in the rest of the rectangular background. Ensure the coverage is solid and opaque. -
Create the glow:
Before the dark background dries completely near the hand, you can gently blend the edge where the dark blue meets the soft tissue outline for a slight, hazy transition.
Step 4: Final Touches
-
Reinforce highlights:
Once the background is dry, go back in with pure white paint and a size 00 brush. Add tiny highlights to the brightest points of the bones for high contrast. -
Dry brush texture:
Lightly dry brush some of the pale turquoise over the dark background in random spots if you want to mimic the graininess or noise often found in old X-ray films. -
Heat set:
Follow your fabric paint’s instructions to heat set the design, usually by ironing the reverse side of the fabric for several minutes.
Hang your finished anatomical study using wooden dowels or frame it to add a scientific curiosity vibe to your room
World of Science Globe Collage
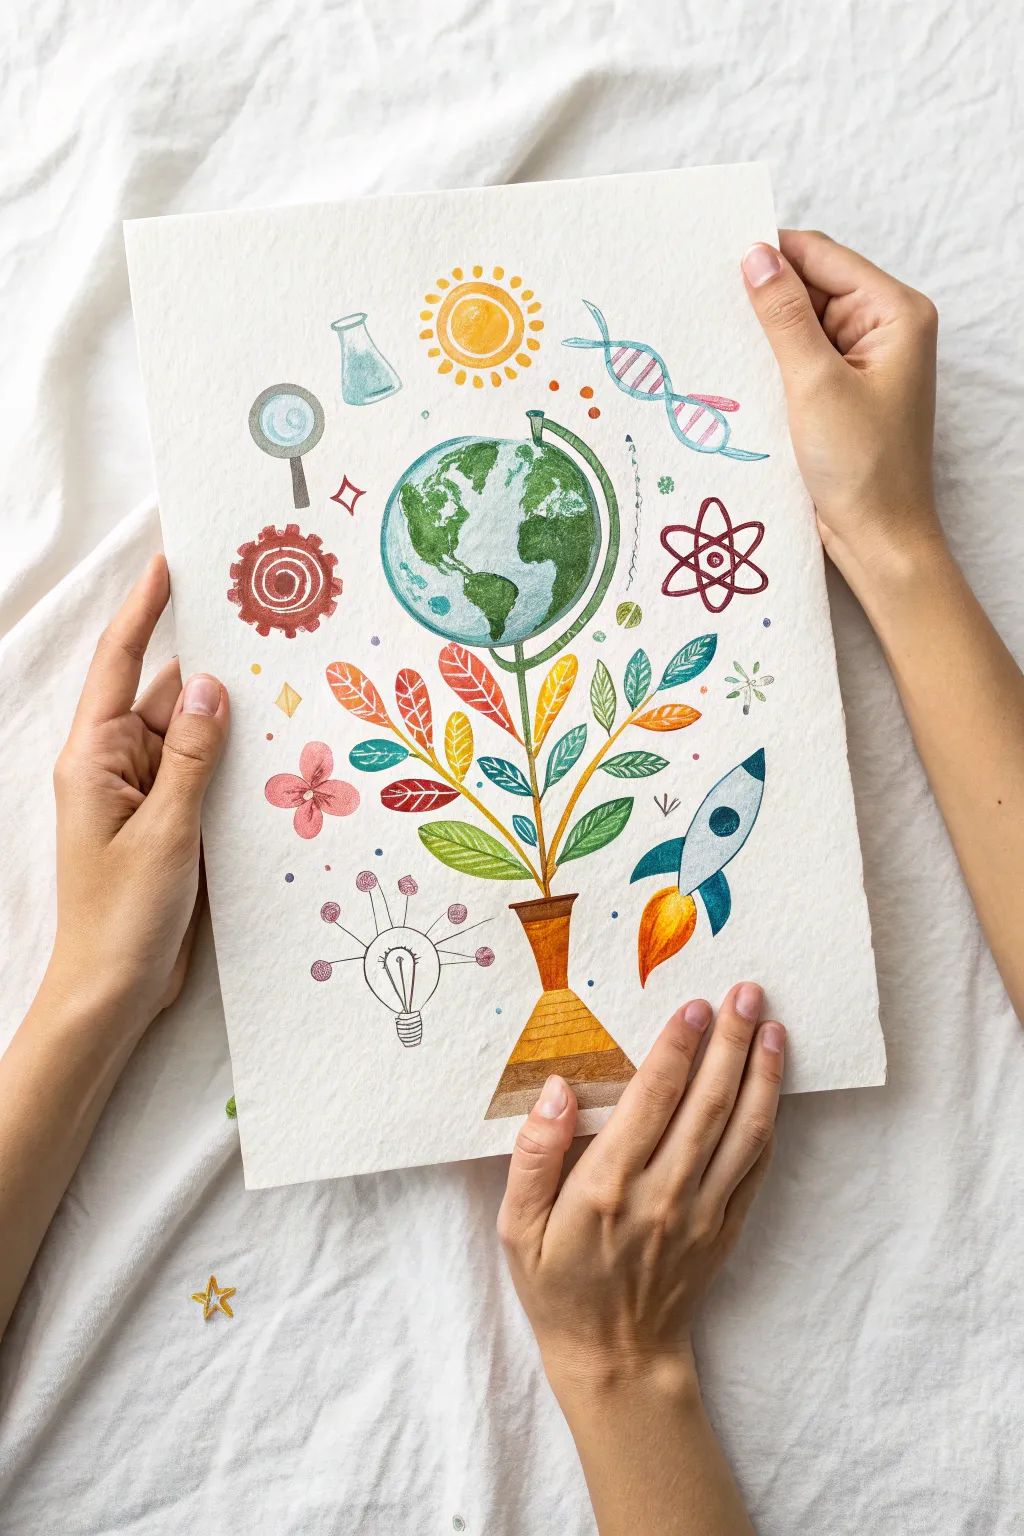
This whimsical illustration combines the organic growth of a tree with key symbols of scientific discovery, centering on a globe nestled in blooming leaves. Using watercolors and colored pencils on textured paper creates a soft, hand-crafted feel perfect for a science fair poster or bedroom art.
Detailed Instructions
Materials
- Heavyweight cold-press watercolor paper (approx. 9×12 inches)
- Watercolor paints (pan or tube set)
- Small round brushes (sizes 2 and 4)
- Colored pencils (wax or oil-based)
- HB Graphite pencil
- Kneaded eraser
- Cup of water and paper towels
- Fine-liner pen (optional, dark grey or black)
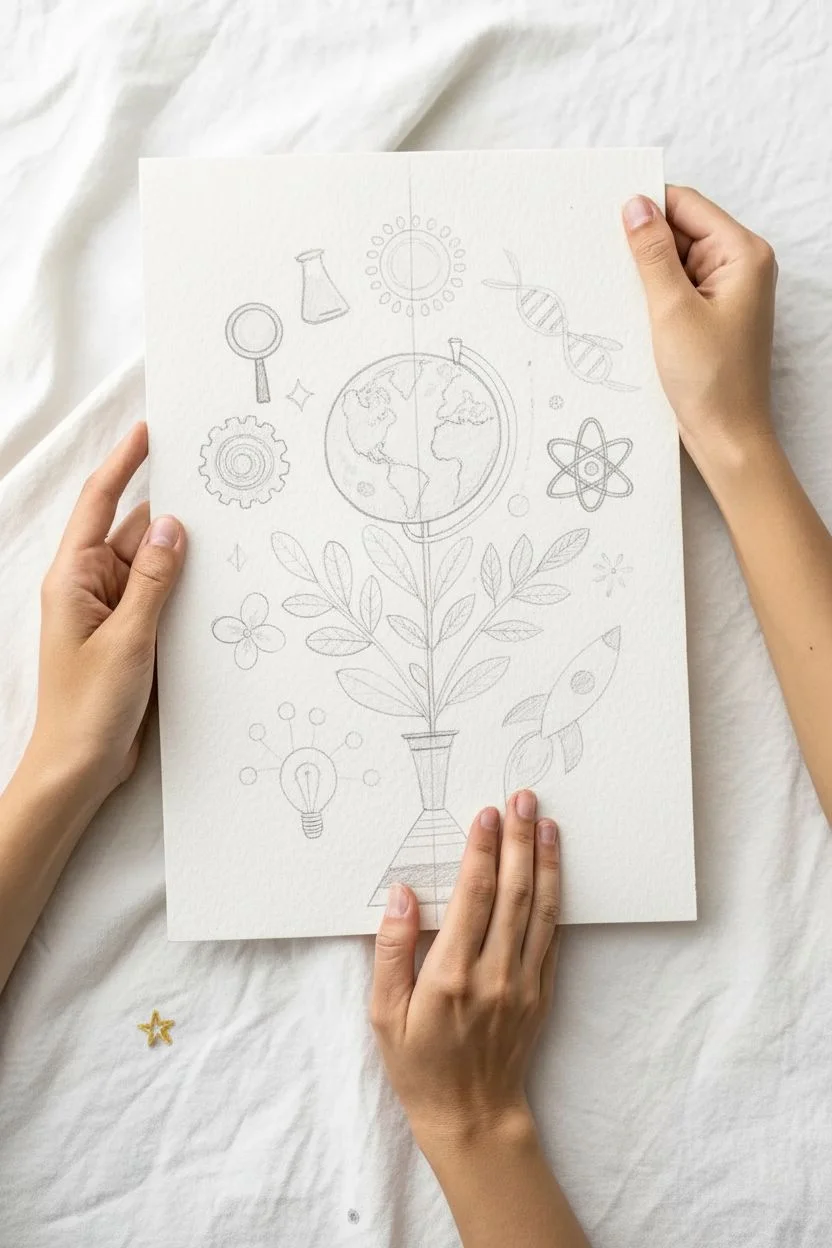
Step 1: Drafting the Composition
-
Establish the centerline:
Begin by lightly sketching a vertical line down the center of your paper to help align the main elements. This will serve as the trunk and guide for the globe. -
Sketch the beaker base:
Near the bottom center, draw a conical flask shape. It should have a flat bottom, tapering up to a narrow neck where the plant stems will emerge. -
Place the globe:
Draw a large circle in the upper middle area of the page. Add the curved ‘C’ shape of the globe stand holder on the right side and the small pin on top. -
Grow the branches:
Connect the flask to the globe with a central stem. Then, sketch varied swooping lines branching out from this center stem to create locations for your leaves. -
Outline the icons:
Lightly sketch the surrounding science motifs: a sun at the top, a beaker and magnifying glass on the left, a gear below them, DNA and an atom on the right, and a rocket ship launching from the lower right.
Step 2: Watercolor Base Layers
-
Paint the globe:
Using a size 4 brush, wet the landmass areas of your globe circle. Drop in varied greens (emerald and olive) for the continents and a very diluted blue for the oceans. Let the colors bleed slightly for an atmospheric look. -
Fill the flask base:
Paint the bottom flask with alternating stripes of warm earth tones—ochre, burnt sienna, and brown—to simulate layers of soil or sediment. -
Color the leaves:
Paint each leaf a different solid color. Use a mix of autumn hues (orange, red) and vibrant greens (teal, lime) to create visual variety. Keep the paint somewhat transparent. -
Wash the icons:
Gently fill in your sketched icons with light washes of color. Use yellow for the sun and lightbulb, red/brown for the gear, reddish-purple for the atom, and teals for the extra beaker and magnifying glass.
Bleeding Lines?
If watercolor bleeds into the paper too much, your brush may be too wet. Blot it on a paper towel before touching the paper, and wait for adjacent sections to dry fully.
Step 3: Refining Details with Pencil
-
Outline the globe:
Once dry, use a dark green or grey colored pencil to trace the continents and the outer circle of the globe. This sharpens the blurry watercolor edges. -
Detail the leaves:
Switch to colored pencils that match or slightly contrast your leaf colors. Draw the central vein and small diagonal veins on each leaf for texture. -
Define the DNA and Atom:
Use a pink and blue pencil to outline the double helix structure, adding little horizontal rungs. For the atom, use a dark maroon pencil to draw the intersecting orbital ellipses. -
Enhance the Gear and Sun:
Outline the gear with a rust-colored pencil, adding concentric circles inside. Use a bright orange pencil to define the sun’s rays and add small dots for texture. -
Illustrate the Lightbulb:
Draw the filament inside the lightbulb using a fine black or grey pencil. Connect the bulb to the main ‘idea’ with thin lines radiating outward. -
Launch the Rocket:
Sharpen the rocket’s shape with dark blue outlines. Use orange and yellow pencils to create a fiery blast coming from the tail, pressing harder to build up intensity.
Make it Sparkle
Use a metallic gold or silver gel pen to outline specific details like the sun rays, the lightbulb filament, or the rocket exhaust for a magical, shining effect.
Step 4: Final Touches
-
Add floating elements:
Scatter small decorative elements like stars, dots, and tiny plus signs around the empty spaces using various colored pencils. This fills the composition without cluttering it. -
Darken the stem:
Go back to the main plant stem and re-trace it with a dark brown or bronze pencil to ensure it looks sturdy enough to hold the globe. -
Check contrast:
Step back and look at your work. If any icon feels too faint, carefully go over its outline one more time with a slightly darker shade of pencil.
Your science-themed art is now complete, celebrating the growth of knowledge in a colorful, creative way.


Have a question or want to share your own experience? I'd love to hear from you in the comments below!