If you’re in the mood to draw something that’s equal parts charming and fun to stylize, frog drawing ideas are the sweetest place to start. I’m sharing a mix of cute frog sketches, realistic frog studies, and playful character prompts you can riff on in your own style.
Simple Frog Face Study
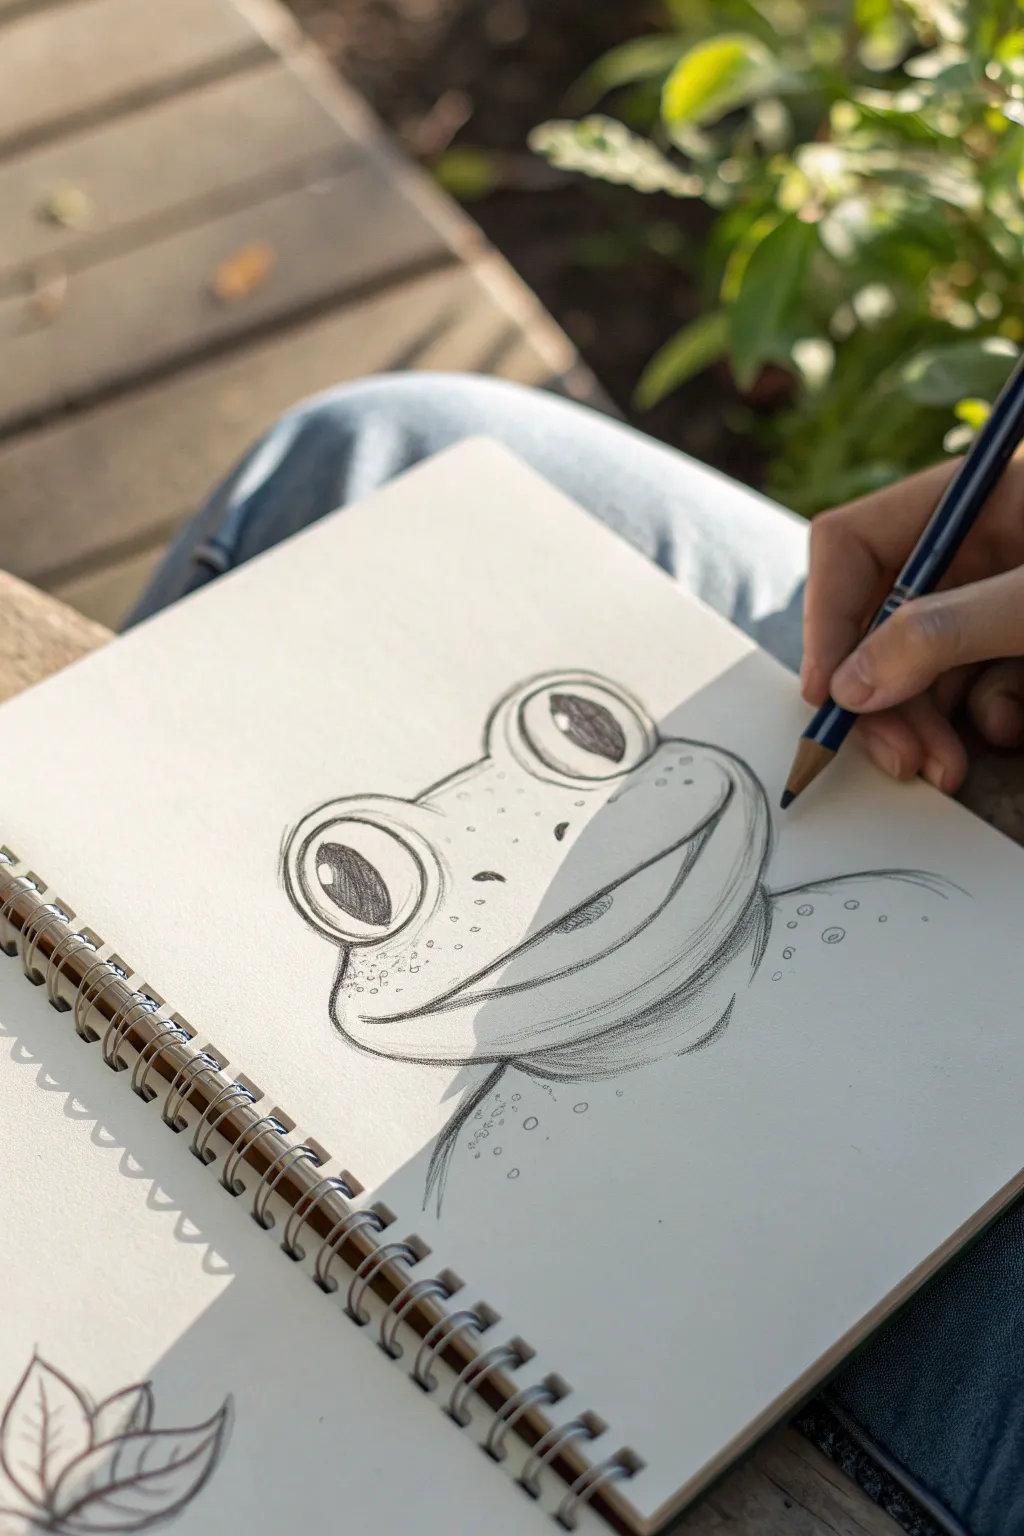

Capture the charming personality of an amphibian friend with this graphite study that focuses on expressive eyes and smooth shading. This tutorial guides you through sketching a frog’s distinctive face, from the initial oval shapes to the final textural details.
Step-by-Step
Materials
- Sketchbook or drawing paper (medium weight)
- Graphite pencil (HB or 2B recommended)
- Eraser (kneaded or vinyl)
- Pencil sharpener
Step 1: Laying the Foundation
-
Start with the eyes:
Begin by drawing two large, rounded oval shapes near the top center of your page. These will be the frog’s prominent eyes. Space them slightly apart, leaving room for the forehead in between. -
Outline the head:
Connect the two eye shapes with a gentle, downward-curving line to form the top of the head. From the outer edges of the eyes, draw lines extending downwards and slightly outwards to define the cheeks. -
Define the mouth:
Draw a wide, sweeping curve that stretches across the entire face, connecting the cheek lines. This line should dip slightly in the middle and curve up at the corners, giving the frog a subtle smile. -
Add the chin/throat:
Underneath the mouth line, draw a second curved line parallel to the first, creating the rounded volume of the lower jaw and throat pouch. This shape should be slightly fuller than the top lip. -
Sketch the body:
Extend two curved lines downward from beneath the head to suggest the shoulders or upper back. Keep these lines loose, as we want the focus to remain on the face.
Highlight Check
If you accidentally filled in the eye highlight, use a small dab of white gel pen or acrylic paint to bring that sparkle back.
Step 2: Adding Details to the Face
-
Draw the pupils:
Inside each eye oval, draw a smaller oval shape for the pupil. Place them slightly off-center towards the nose to make the frog look focused. Leave a tiny white circle inside each pupil for a highlight. -
Refine the eyelids:
Add a second line around the top and bottom of the main eye shapes to create the thickness of the eyelids. This adds dimension and makes the eyes pop. -
Indicate the nostrils:
Place two small, dark dots or tiny comma shapes in the center of the face, right between the eyes and slightly above the mouth line. -
Detail the mouth corner:
Disappear the line of the mouth slightly as it goes back around the curve of the head, and deepen the shading right at the corner where the top and bottom jaws meet.
Step 3: Shading and Texture
-
Fill the pupils:
Use your pencil to color in the pupils solidly dark, being very careful to preserve that white highlight you marked earlier. This contrast is crucial for a lively look. -
Shade the iris:
Lightly shade the rest of the eye (the iris) with vertical strokes, keeping it lighter than the pupil but darker than the white of the page. -
Shadow the throat:
Add shading under the main mouth line and along the bottom curve of the throat pouch. Use curved hatching lines that follow the round shape of the jaw to emphasize the volume. -
Add skin texture:
Scatter small circles and dots across the face, concentrating them on the forehead, cheeks, and back. Vary the sizes—some tiny dots, some small open circles—to mimic warty frog skin. -
Define the body contours:
Add some light shading to the body lines you drew earlier, particularly where the head casts a shadow onto the shoulders. -
Final touches:
Go over your main outlines one last time to darken them, especially the bottom of the eyes and the main mouth line. Clean up any stray sketch marks with your eraser.
Make it a Tree Frog
Extend the drawing by sketching oversized, round finger pads gripping a branch to turn this portrait into a climbing tree frog.
You have now created a charming graphite study full of character and life


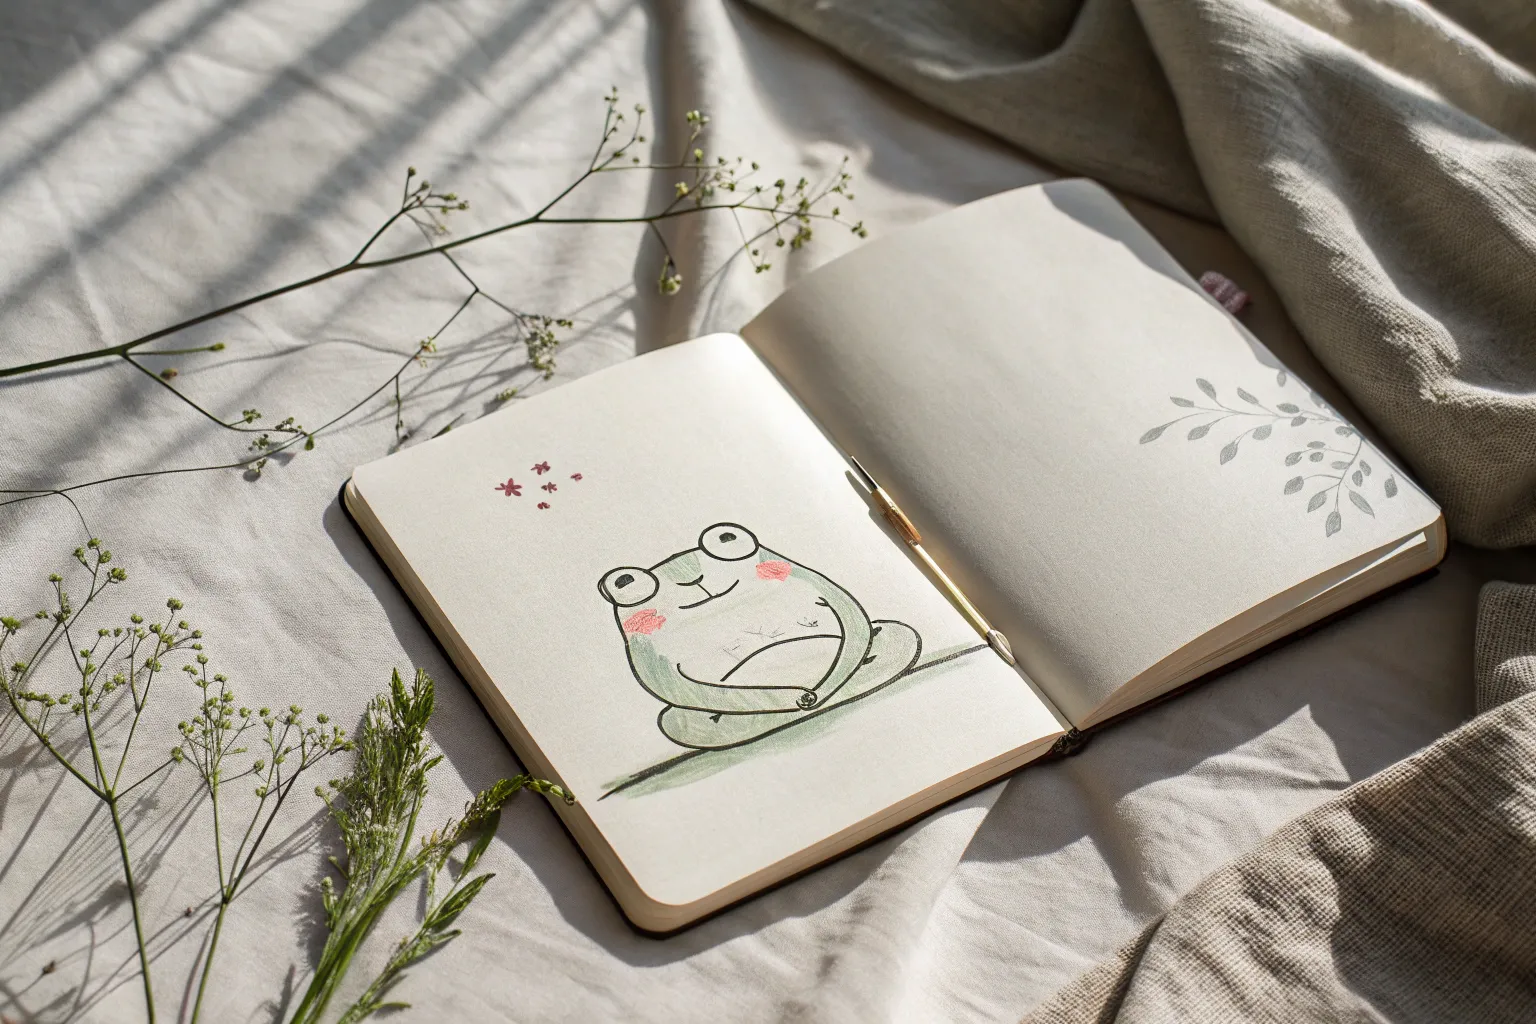
Classic Sitting Frog Pose
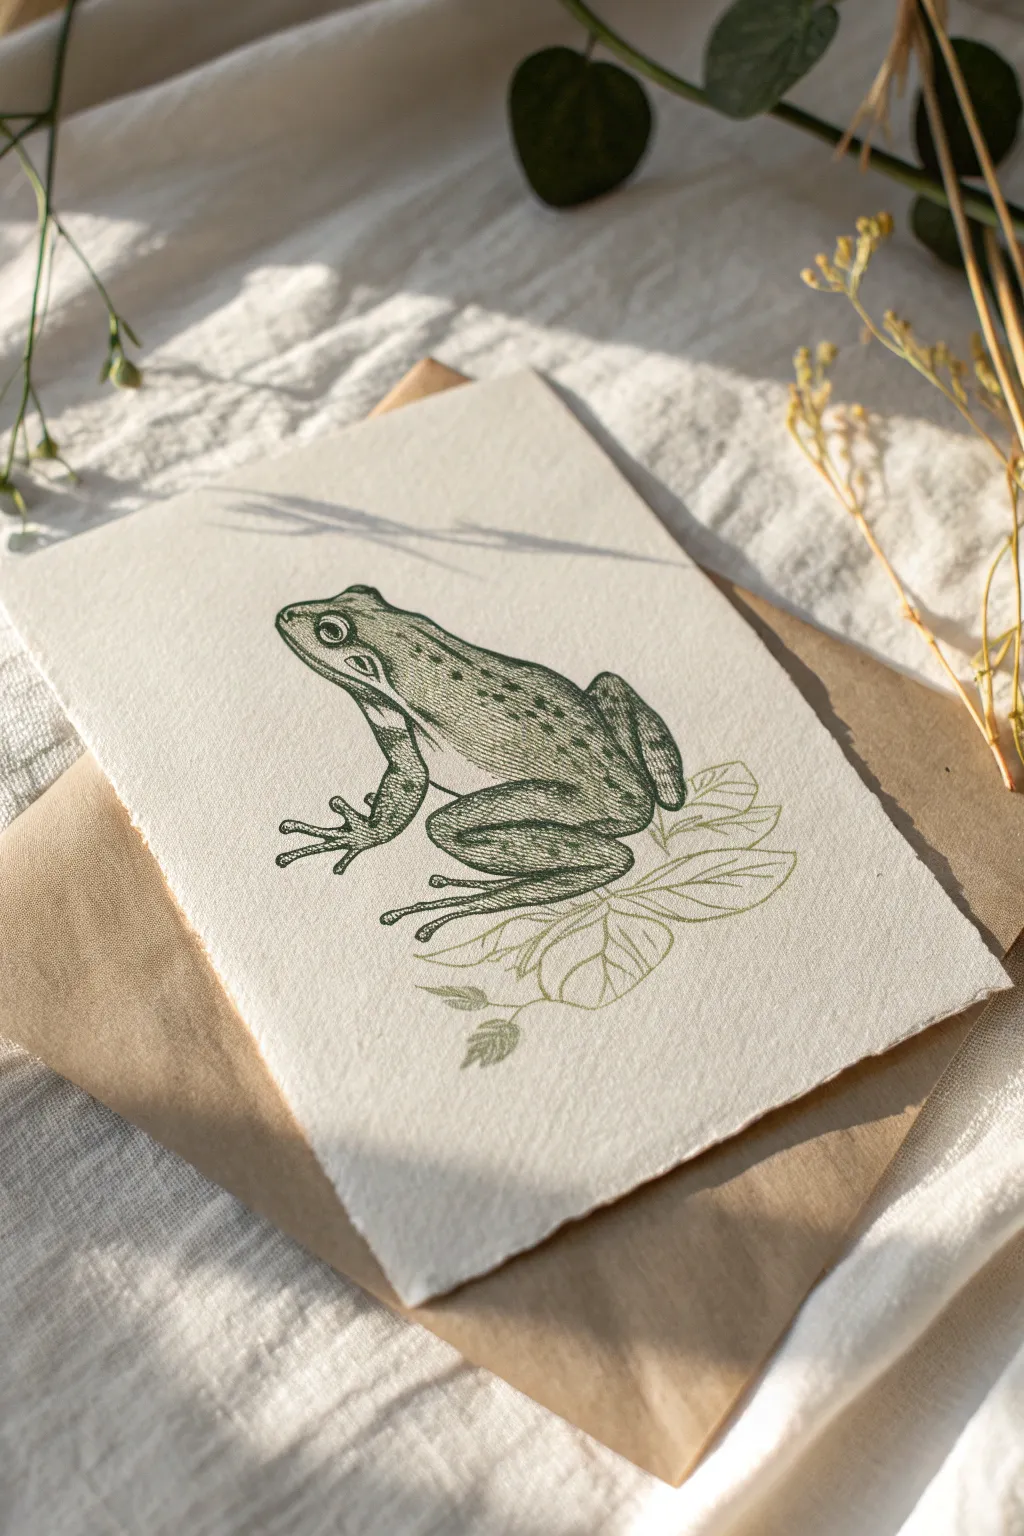


Leaping Frog Action Sketch
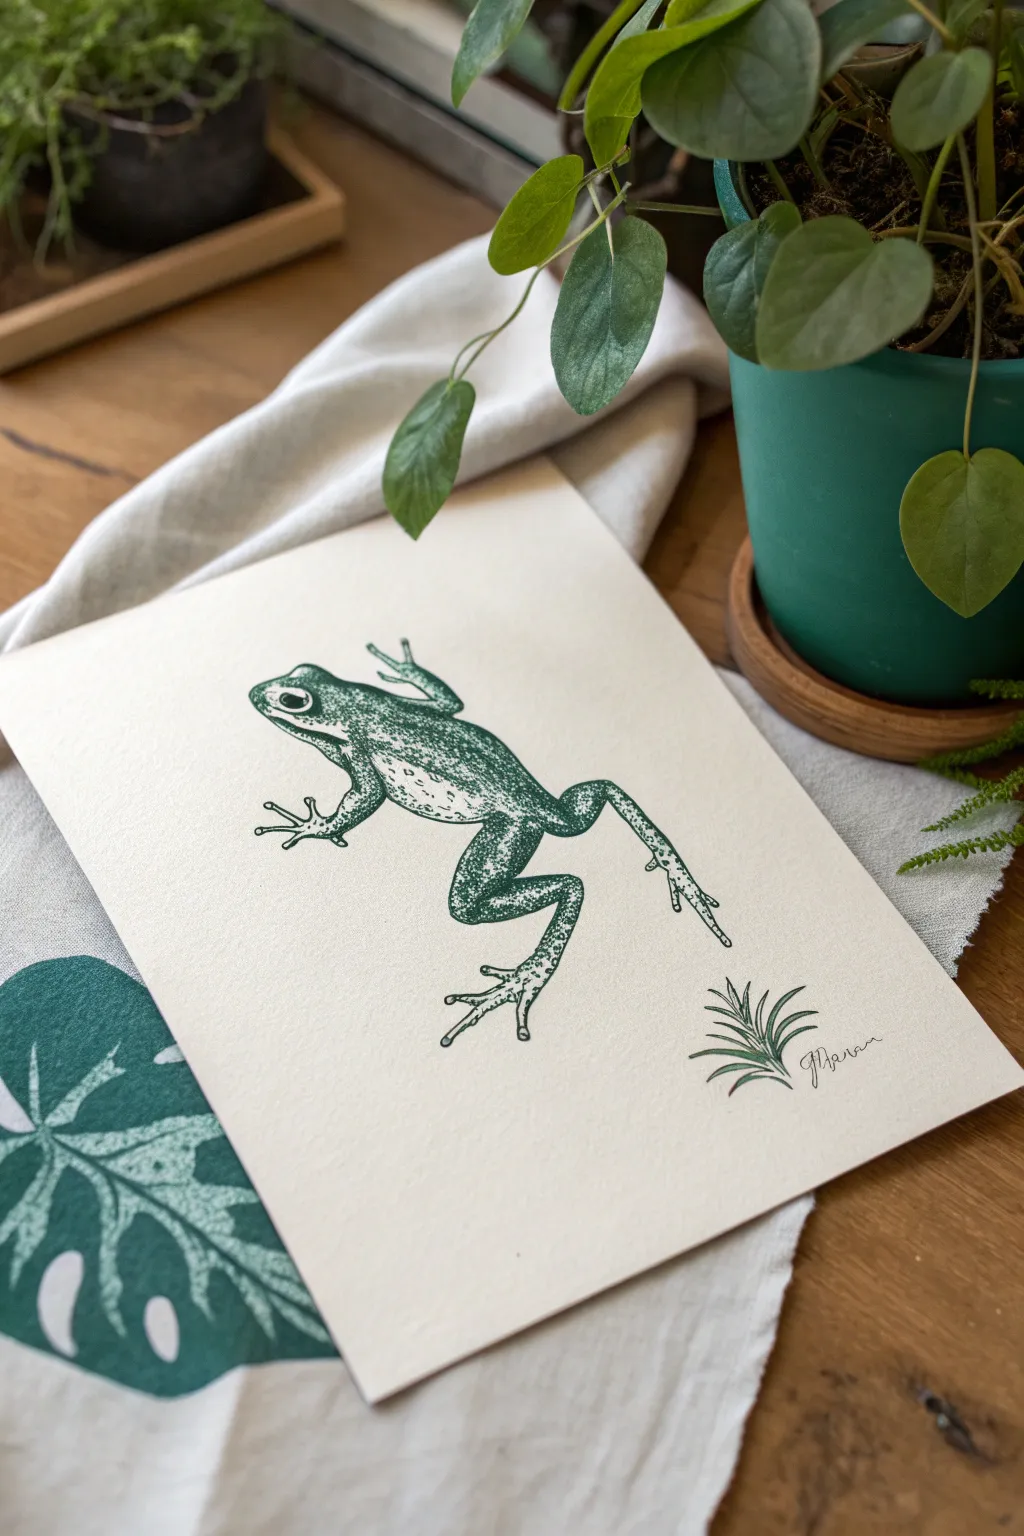
Capture the dynamic energy of a leaping amphibian using a monochromatic stippling technique. This project combines precise line work with controlled dot-shading to create texture and depth in a classic scientific illustration style.
Step-by-Step Guide
Materials
- Heavyweight cream or off-white drawing paper (smooth bristol or hot press watercolor paper)
- Dark forest green fine-liner pen (0.3mm or 0.5mm)
- Dark forest green brush pen or thicker marker (for solid fills)
- Graphite pencil (HB or 2H)
- Kneaded eraser
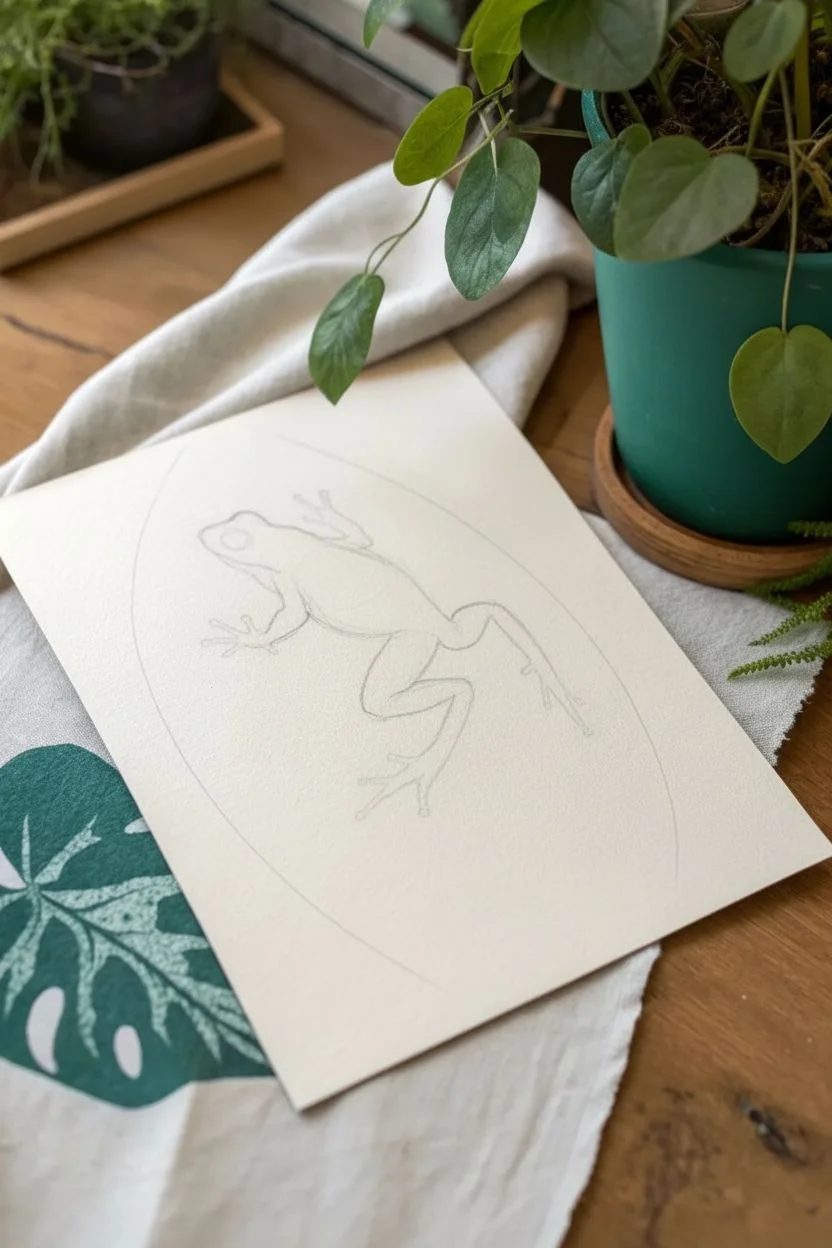
Step 1: Planning the Pose
-
Establish the Action Line:
Begin by lightly drawing a diagonal curve from the top left to the bottom right of your page. This line will guide the frog’s leaping motion and ensure the body flows naturally. -
Block in the Body Shapes:
Along your action line, sketch a tapered oval for the main body. Attach a smaller, slightly rounded triangle shape at the top for the head. -
Define the Legs:
Sketch the hind legs extended backward. The leg closer to the viewer should have a prominent bend at the knee, showing the powerful thigh muscles. Sketch the front legs reaching forward and slightly down, ready for the landing. -
Detail the Extremities:
Refine the hands and feet. Draw long, spindly toes splayed open. Remember that frogs often have slightly bulbous tips on their digits. -
Refine the Outline:
Go over your sketch to harden the final contour. Add the large, protruding eye on the side of the head and the line of the mouth. Once satisfied, use your kneaded eraser to lift most of the graphite, leaving only a faint ghost image.
Stippling Sanity Saver
Don’t rush the dotting process. Tapping the pen too hard or fast creates ‘tails’ or dashes instead of round dots. Take breaks to relax your hand.
Step 2: Inking the Outline
-
Trace Primary Lines:
Using your fine-liner green pen, carefully trace the outer edge of the frog. Keep your line weight relatively consistent but allow slight breaks in areas where the light might hit, like the top of the back. -
Add Internal Details:
Ink the eye, leaving a small white circle for the highlight. Draw the curved line separating the belly from the flank and add the definition lines for the thigh muscles. -
Plant Element:
In the bottom right corner, sketch a small, tufted plant with spiky leaves to ground the composition visually. Ink these lines with quick, tapered strokes.
Step 3: Shading with Stippling
-
Start the Darkest Shadows:
Begin adding texture using dots (stippling). Concentrate a high density of dots along the underside of the belly, the bottom of the legs, and beneath the chin. These dots should nearly touch to create a deep shadow. -
Create the Mid-tones:
Move outward from your dark shadows, spacing the dots further apart. Focus on the frog’s back and the tops of the limbs. The transition from dense dots to sparse dots creates the illusion of a round form. -
Texture the Skin:
Instead of just random dots, group some clusters together on the back and legs to mimic warts and skin texture. I find this creates a more realistic amphibian look than perfectly uniform shading. -
Leave Highlights Clear:
Ensure the very tops of the muscular ridges, the ‘shoulder,’ and the top of the head remain mostly paper-white. This contrast makes the frog look shiny and wet. -
Add Patterning:
Use your thicker brush pen or marker to draw irregular blotches or spots on the legs and flank if desired, then blend the edges of these spots with more stippling so they don’t look like stickers.
Ink Smearing?
If you are right-handed, work from left to right across the frog’s body to avoid dragging your hand through wet ink. For lefties, work right to left.
Step 4: Final Touches
-
Review Contrast:
Step back and squint at your drawing. If the form looks flat, go back into the shadow areas and add more dots to deepen the green values. -
Enhance the Eye:
Darken the pupil area significantly, ensuring it contrasts sharply against the lighter surrounding skin. -
Grounding Shadow:
Add just a few tiny, scattered dots below the plant element to suggest it sits on the ground, without drawing a full horizon line. -
Signature:
Sign your name near the plant element in a loose, cursive style using the fine-liner to balance the composition.
Once the ink is fully dry, you will have a crisp, detailed illustration ready to frame


Frog Under a Big Leaf
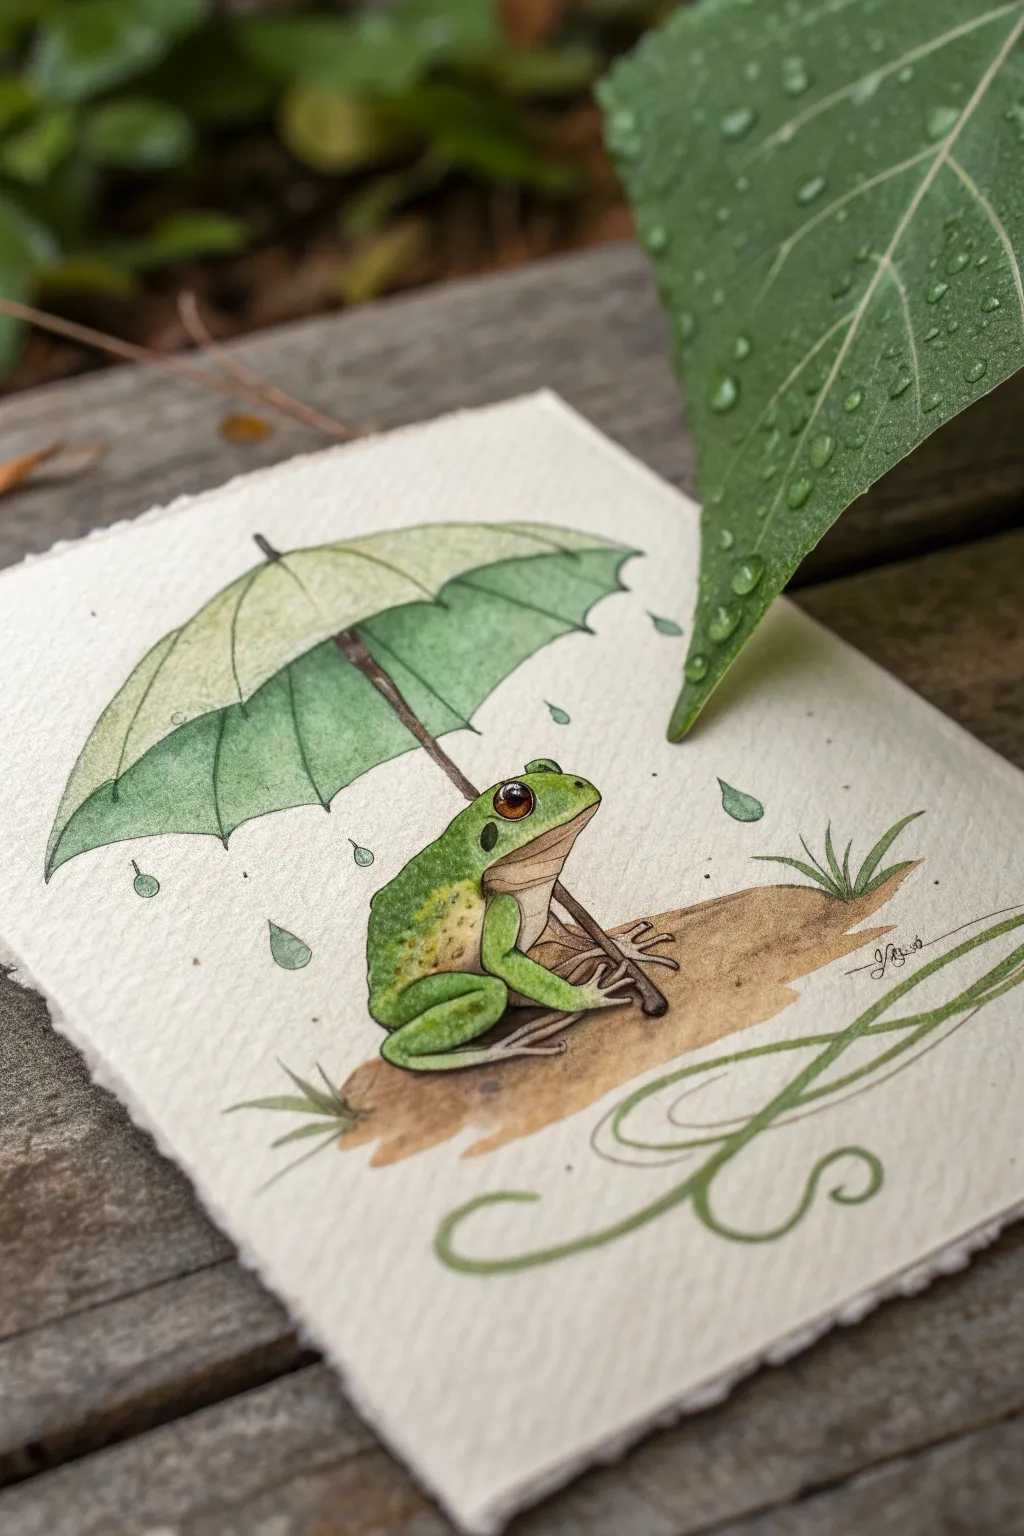
Create a charming storybook scene featuring a small frog seeking shelter from the rain under a leafy umbrella. This watercolor and ink illustration captures a cozy, whimsical moment with soft washes of green and distinct, delicate line work.
How-To Guide
Materials
- Cold press watercolor paper (300 gsm)
- Pencil (HB or 2H)
- Kneaded eraser
- Waterproof fine liner pen (0.1mm and 0.3mm, black or dark sepia)
- Watercolor paints (Sap Green, Olive Green, Yellow Ochre, Burnt Sienna, Burnt Umber)
- Round brushes (size 2 and 4)
- White gel pen or white gouache
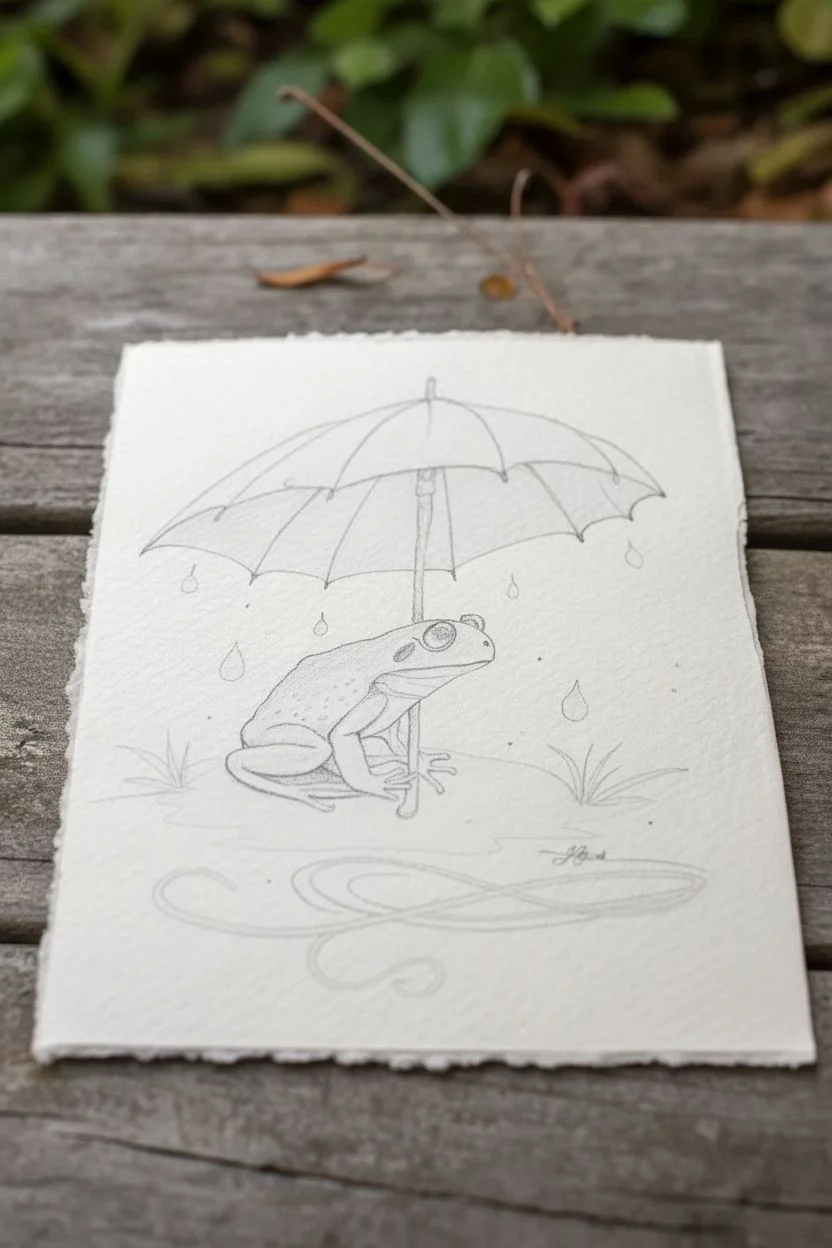
Step 1: Sketching the Composition
-
Outline the frog:
Begin by lightly sketching the frog’s body shape in the lower center of your paper. Draw a rounded, squat oval for the body and add the geometric angles of the folded hind legs. -
Add facial features:
Sketch a prominent, rounded eye socket near the top of the head. Define the mouth line, giving it a slight upward curve for a subtle smile, and mark the throat area. -
Draw the umbrella:
Position the umbrella directly over the frog. Draw a large arc for the top and a scalloped edge for the bottom to mimic organic leaf segments. Sketch the handle shaft going down, tucked under the frog’s front arm. -
Ground and details:
Lightly indicate a small patch of ground beneath the frog. Add a few simple grass blades poking out from the right side and a curling vine flourish at the bottom right corner.
Step 2: Inking the Lines
-
Inking the frog:
Using your 0.1mm waterproof pen, carefully trace over your pencil lines. Use broken or lighter lines on the frog’s back to suggest texture, while keeping the outline of the eye crisp and dark. -
Inking the umbrella:
Outline the umbrella segments. Draw the radiating ribs of the umbrella like veins in a leaf. Ink the handle, making it look like a thin twig. -
Adding rain:
Draw several small teardrop shapes falling around the umbrella to represent raindrops. Keep them simple and outlined. -
Clean up:
Once the ink is completely dry, gently erase all graphite pencil marks with your kneaded eraser to leave a clean black-and-white drawing.
Pro Tip: Organic Edges
Don’t make your umbrella straight! Give the bottom edge a wavy, scalloped line. This makes it look like it was crafted from a real leaf.
Step 3: Painting with Watercolors
-
Frog base coat:
Mix a bright Sap Green with a touch of Yellow Ochre. Apply a light wash over the frog’s upper body. While wet, drop in slightly darker green on the back to create a natural gradient. -
Frog details:
Paint the throat and belly with a very pale wash of Burnt Sienna or cream. Paint the eye a rich reddish-brown, leaving a tiny white spot unpainted for the highlight. -
Umbrella wash:
Use a watery mix of Olive Green for the umbrella canopy. Paint each segment individually, letting some color pool at the bottom edges to simulate shadow and curvature. -
Ground and handle:
Paint the ground patch with Burnt Umber, keeping the edges soft and diffusing them with clear water. Use a concentrated brown for the wooden umbrella handle. -
Raindrops:
Fill the raindrop shapes with a very faint, watery green-blue tint. Keep them transparent so they look like water.
Trouble: Bleeding Ink?
If your black lines smudge when you paint, stop immediately. Your pen might not be waterproof, or the ink wasn’t fully dry. Let it sit for 20 mins before painting.
Step 4: Finishing Touches
-
Deepening shadows:
Once the first layers are dry, mix a darker green (Sap Green + tiny bit of Black or Indigo). Add shadows under the umbrella ribs and beneath the frog’s legs to ground him. -
Texture spots:
Using the tip of your size 2 brush, stipple tiny dots of yellow-green and brown on the frog’s back to give him a bumpy, warty skin texture. -
Decorative flourish:
Paint the scrolling vine design in the bottom right corner with a fluid, continuous stroke of green paint to frame the composition. -
Highlights:
Use a white gel pen or a dot of white gouache to sharpen the highlight in the eye and add tiny reflective glints on the wet umbrella top.
You now have a delightful little amphibian friend ready to weather any storm
BRUSH GUIDE
The Right Brush for Every Stroke
From clean lines to bold texture — master brush choice, stroke control, and essential techniques.
Explore the Full Guide
Frog Holding a Flower
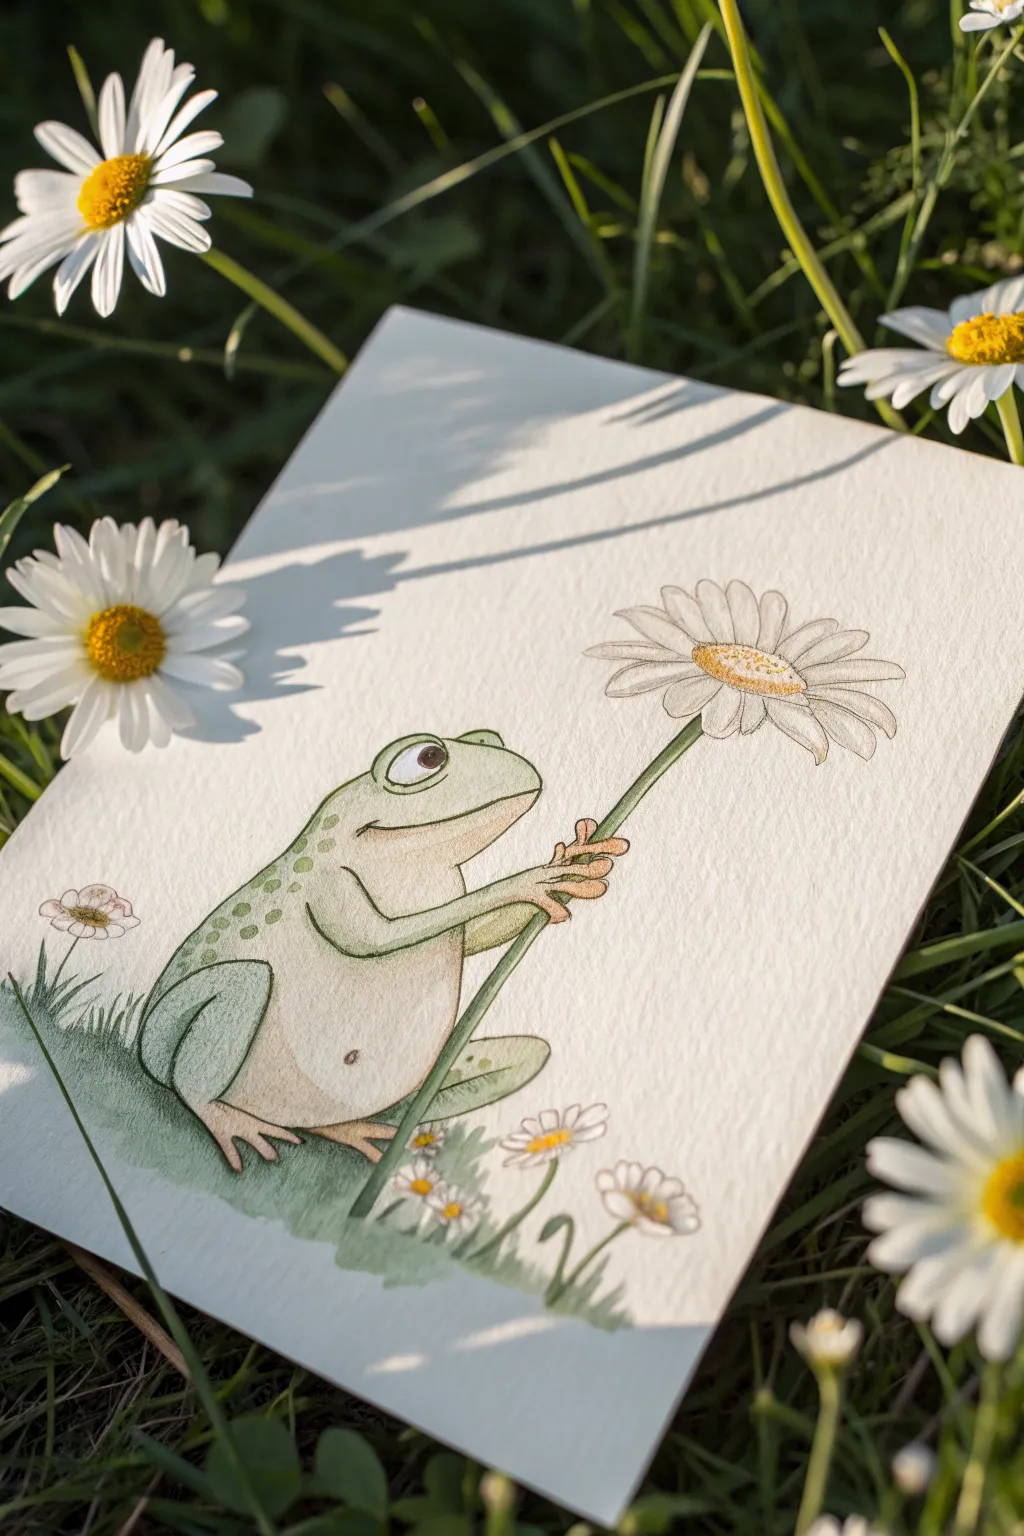
Capture the gentle charm of this nature lover with a soft watercolor and ink illustration. This project combines delicate line work with layered washes to create a friendly frog offering a giant daisy.
Detailed Instructions
Materials
- Cold-pressed watercolor paper (300 gsm)
- H or HB pencil for sketching
- Kneaded eraser
- Fine liner pen (sepia or dark grey, waterproof, size 0.1 or 0.3)
- Watercolor paints (Sap Green, Olive Green, Yellow Ochre, Burnt Sienna, Lemon Yellow)
- Round watercolor brushes (size 4 and 8)
- Cup of water and paper towels
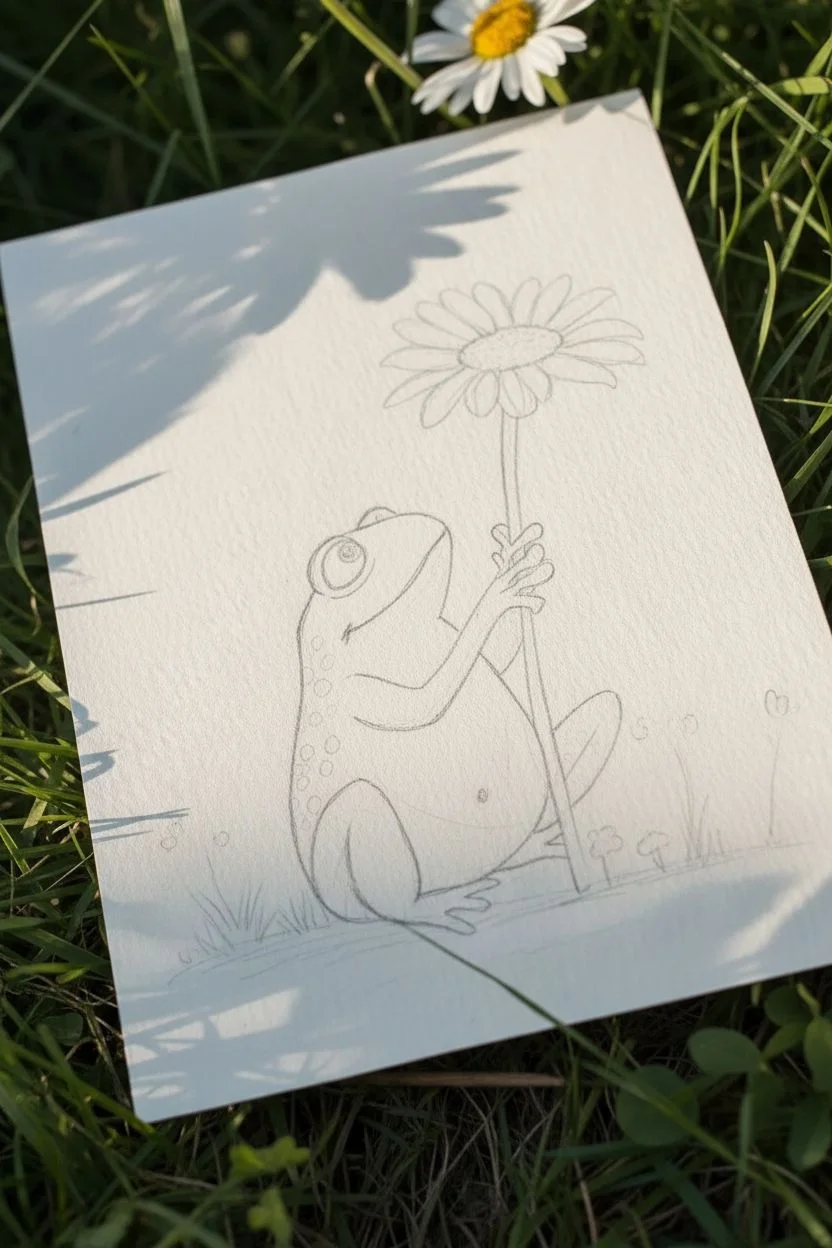
Step 1: Sketching the Composition
-
Map out the shapes:
Begin by lightly sketching a large oval for the frog’s body, leaning slightly to the right. Add a smaller, flattened oval on top for the head. -
Add frog features:
Draw the frog’s protruding eye on the left side of the head curve. Sketch the simple line for the mouth, giving it a gentle upward curve for a smile, and outline the bent arm reaching forward. -
Position the flower:
Draw a long, diagonal stem that the frog is holding. At the top of the stem, sketch a large oval for the flower center and light guidelines for the petals radiating outward. -
Detail the limbs:
Flesh out the frog’s back legs in a crouching position. Draw the front fingers wrapping around the stem and the back toes resting on the ground. Keep the toes slightly rounded for a cute look. -
Refine the sketch:
Add small details like spots on the frog’s back and belly. Draw the individual petals of the daisy and add a few small wildflowers near the frog’s feet.
Bleeding colors?
If your green paint is flowing into the belly too fast, your paper is too wet. Let it dry completely, then apply the next color with a ‘glazing’ technique (layering over dry paint).
Step 2: Inking the Outline
-
Trace the main lines:
Using your waterproof fine liner, carefully trace over your pencil lines. I prefer a sepia pen here rather than black to keep the feeling soft and organic. -
Add textural details:
Use broken or thinner lines for the flower petals to make them look delicate. Add small dots or stippling on the center of the daisy for texture. -
Erase pencil marks:
Wait until the ink is completely dry—give it a few minutes to be safe—then gently erase all visible pencil sketches with your kneaded eraser.
Make it bloom
Instead of a daisy, customize the flower to match the season! Try a red poppy for summer, a tulip for spring, or change the frog’s spots to bright poison-dart frog colors.
Step 3: Watercolor Washes
-
Base layer for the frog:
Dilute a mix of Sap Green and a touch of Yellow Ochre. Paint a pale, watery wash over the frog’s body, leaving the belly area lighter or even unpainted white paper for now. -
Adding depth to the skin:
While the first layer is still slightly damp, drop in concentrated Olive Green along the back, the top of the head, and the knees to create soft shading. -
Painting the belly:
Mix a very dilute wash of Burnt Sienna or a warm beige. Apply this to the belly area and the underside of the chin, blending it gently into the green areas. -
The flower stem:
Use a crisp green to paint the stem. Be careful painting around the frog’s fingers to avoid bleeding color into the hand area. -
Daisy center:
Paint the center of the daisy with Lemon Yellow. Once that dries, add little dabs of Burnt Sienna or orange on the bottom curve of the center to give it a 3D dome shape. -
Petal shadows:
The petals remain mostly white. Mix a very watery grey or pale violent and paint thin shadow lines near where the petals meet the center to separate them visually.
Step 4: Finishing Touches
-
Adding spots:
Using a smaller brush and darker green paint, verify the paper is dry, then dab on the small circular spots along the frog’s back. -
Grounding the scene:
Paint some loose, grassy strokes under the frog using various green shades mixed with plenty of water. Let these fade out at the edges for a vignetted look. -
Highlighting the eye:
Paint the pupil dark brown or black, leaving a tiny speck of white paper for the highlight. This spark of life is crucial for the expression. -
Final ink reinforcement:
If any lines got washed out by the paint, re-trace them lightly with your pen to make the drawing pop again.
Now you have a charming little amphibian friend ready to beam from the page
Chibi Round Frog
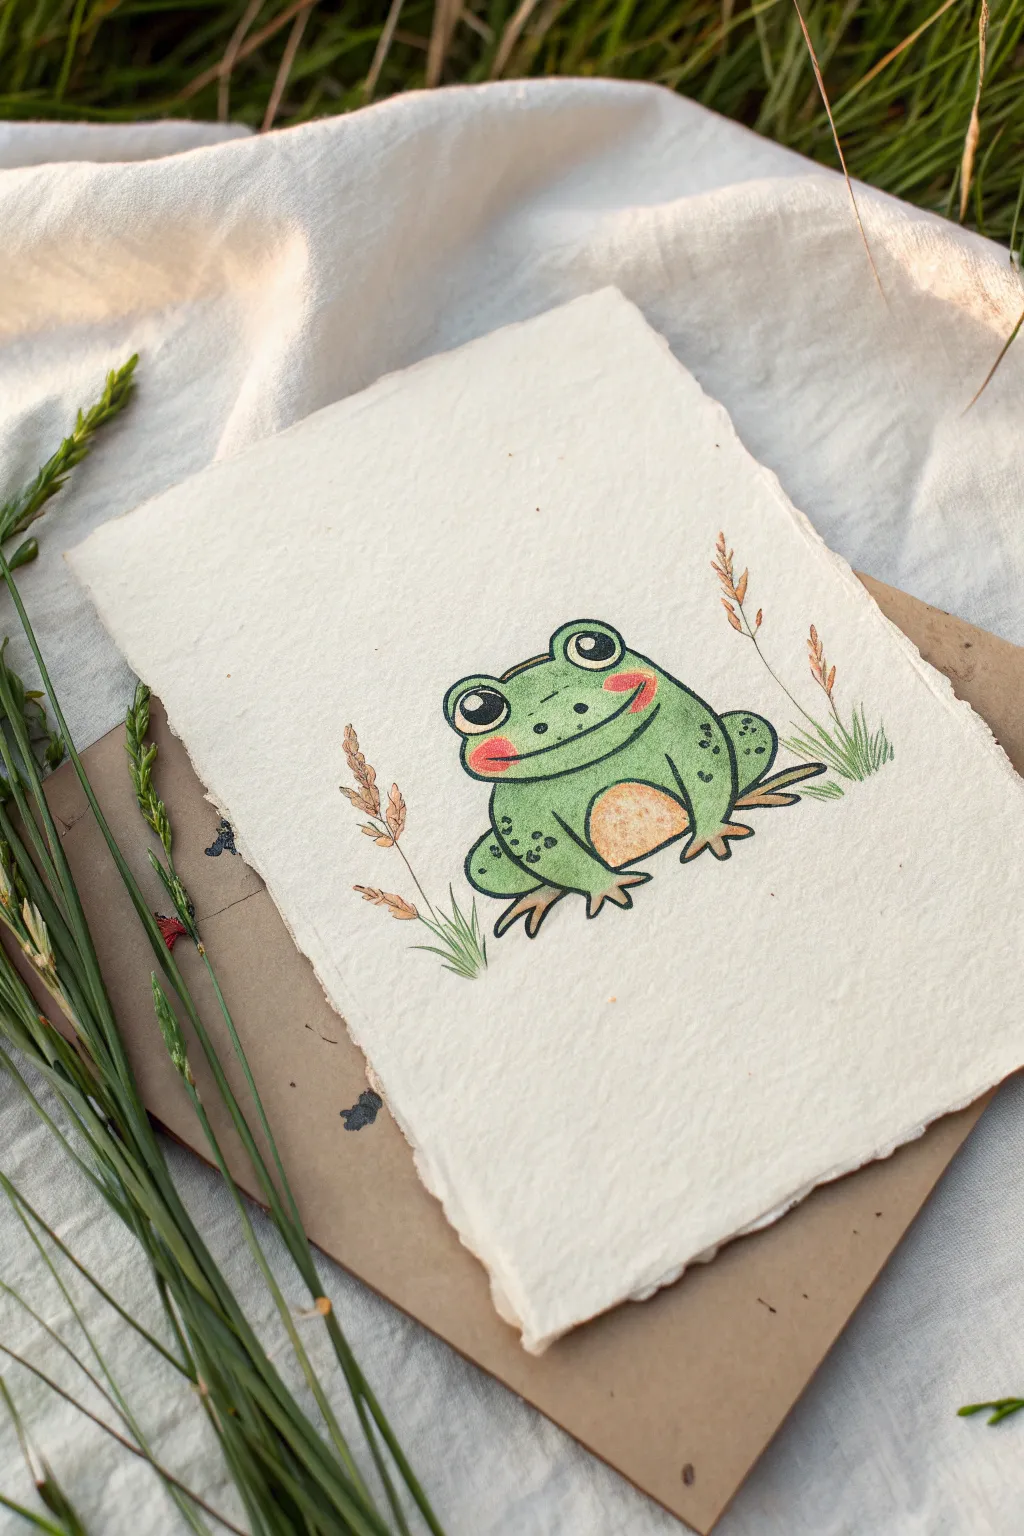
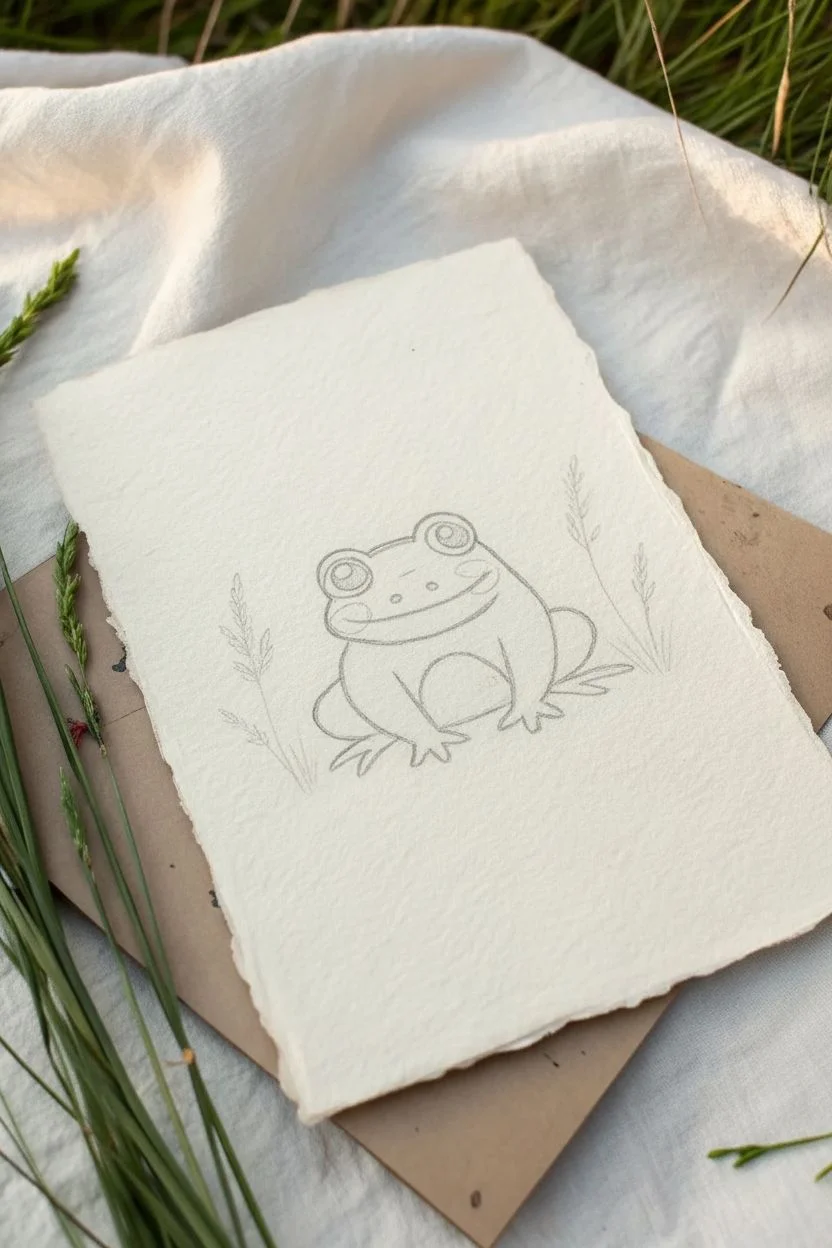
This adorable, round frog sits peacefully among stylized grass, creating a warm cottagecore vibe. Using fine liners and soft washes on textured paper, you’ll capture its cheerful expression and rosy cheeks in a style that looks straight out of a storybook.
How-To Guide
Materials
- Heavyweight textured watercolor paper (deckle edge optional)
- Pencil (HB or similar) and soft eraser
- Waterproof fine liner pen (black, 0.3mm or 0.5mm)
- Watercolor paints (Sap Green, Olive Green, Yellow Ochre, Burnt Sienna, Rose/Pink)
- Small round watercolor brush (size 2 or 4)
- Water cup and paper towel
Step 1: Sketching the Shapes
-
Outline the head:
Start near the center of your paper by drawing a wide, slightly flattened oval for the frog’s head. Keep your pencil lines very light so they are easy to erase later. -
Add the eye bumps:
On top of the oval, sketch two prominent semicircles for the eyes. They should be relatively large to get that classic ‘chibi’ look. -
Draw the body:
Below the head, draw a round, squat body shape. Unlike a realistic frog, this body should feel almost like a soft bean bag settling on the ground. -
Sketch the legs:
Draw the back legs folded against the body on either side—these look like large curvy letter ‘C’ shapes. Then, add the two small front feet resting on the ground, with distinct little toes. -
Add facial details:
Place two large circles inside the eye bumps. Add a wide, contented smile that curves up near the eyes, and mark faint circles for the rosy cheeks. -
Include nature elements:
Sketch a few tall, thin grass stalks on the left and right sides of the frog. Keep them simple and stylized rather than overly detailed.
Check Your Ink
Make absolutely sure your pen is waterproof before painting. Test it on a scrap paper with water first to ensure it won’t bleed.
Step 2: Inking the Lines
-
Trace the main outline:
Using your waterproof fine liner, carefully go over your pencil sketch. Focus on smooth, confident strokes rather than sketchy, broken lines. -
Refine the eyes:
Fill in the pupils solid black but leave a small white circle in the upper corner of each eye for a reflective highlight. This brings the character to life. -
Detail the grass:
Ink the grass stalks with quick, upward flicking motions to keep them looking organic and wispy. -
Erase pencil marks:
Wait at least five minutes for the ink to dry completely to avoid smudging. Then, gently erase all visible pencil lines.
Add a Message
Use a calligraphy pen to write ‘Hoppy Birthday’ or ‘Toadally Awesome’ underneath for a cute handmade greeting card.
Step 3: Adding Color
-
Paint the base green:
Mix a light wash of Sap Green. Paint the entire body and head of the frog, carefully working around the eyes and the belly area. -
Warm up the belly:
While the green is drying, mix a diluted wash of Yellow Ochre or a creamy beige. Fill in the semicircular belly patch. -
Add distinct cheeks:
Load your brush with a bright Rose or Pink. Paint distinct oval patches on the cheeks. I like to let the edges of these patches stay crisp rather than blending them out too much. -
Paint the plants:
Use Burnt Sienna or a reddish-brown for the seed heads of the grass, and a touch of light green for the base of the stalks. -
Layer textures:
Once the base green is fully dry, take a slightly darker Olive Green. Add small stippling dots on the back/shoulders of the frog for texture. -
Shade the legs:
Using that same darker green, add a subtle shadow where the back legs meet the body to create depth. -
Ground the frog:
Add a very faint, watery line of green or brown underneath the frog’s bottom so it doesn’t look like it’s floating in mid-air.
Now you have a charming little amphibian friend ready to brighten up any sketchbook page

PENCIL GUIDE
Understanding Pencil Grades from H to B
From first sketch to finished drawing — learn pencil grades, line control, and shading techniques.
Explore the Full Guide
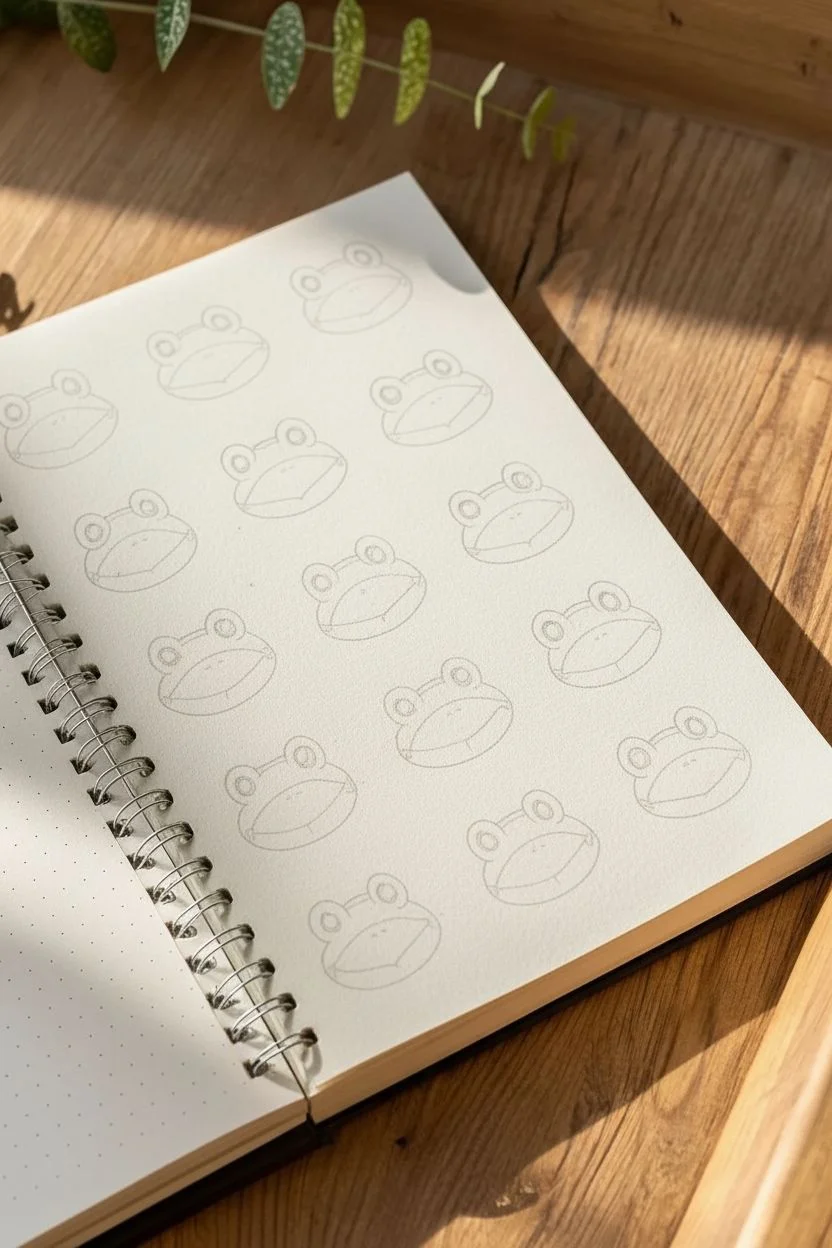
Frog Expressions Sheet
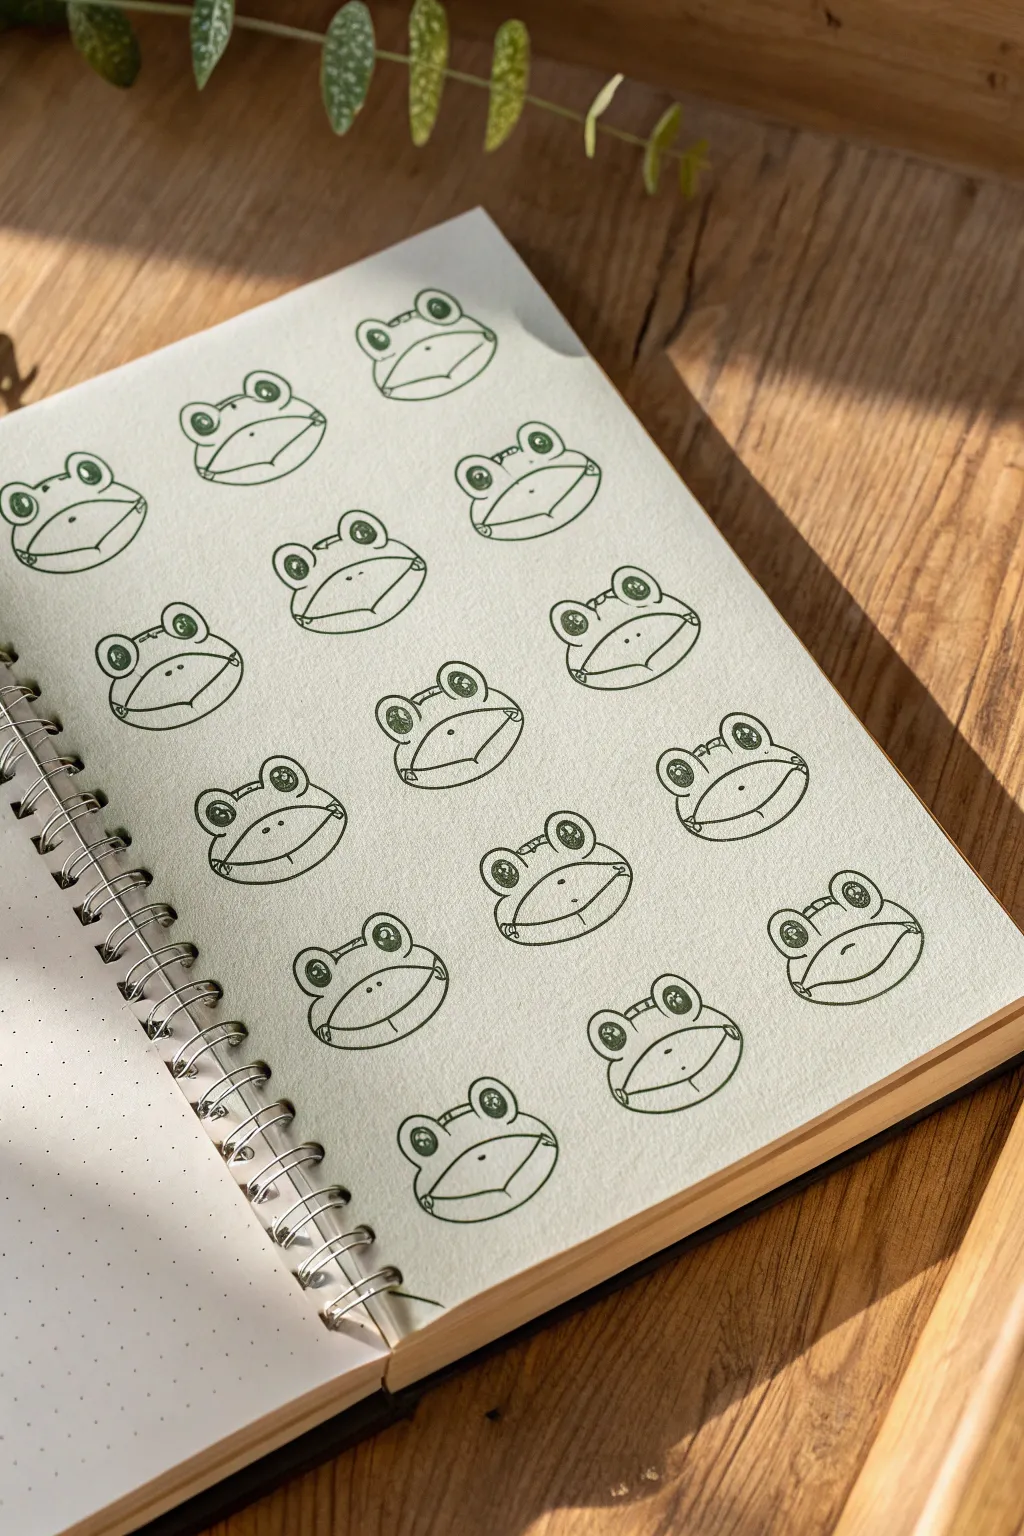
Create a satisfyingly orderly page of slightly goofy frogs with this repetitive pattern exercise. Using the structure of dot grid paper, this project combines simple line work with a consistent motif for a relaxing doodling session.
How-To Guide
Materials
- A5 dotted notebook or sketchbook
- Fine-point drawing pen (dark green or black)
- Pencil (HB or H)
- Eraser
- Ruler (optional)
Step 1: Planning the Layout
-
Assess your grid:
Open your dotted notebook to a fresh page. Look at the grid spacing to determine how large each frog should be; a width of about 4-5 dot spaces usually works well to keep them legible but cute. -
Mark the spacing:
Using a pencil, lightly mark the center point for each frog face. Aim for a staggered pattern where every other row is offset, or a simple grid alignment like the example image. Leave about 2-3 dot spaces of breathing room between each frog. -
Draft the base shapes:
Sketch a wide, slightly flattened oval for the first frog’s head. The shape should remind you of a smooth river stone or a hamburger bun. -
Add the eye guides:
Draw two circles protruding from the top of the head oval. They should sit right on the upper curve, spaced slightly apart but looking connected to the main shape.
Step 2: Drawing the First Frog
-
Outline the head:
Switch to your fine-point pen. Start by tracing the outer shape of the head, incorporating the eye bumps into a single continuous outline if possible for a smoother look. -
Draw the mouth line:
Draw a long, sweeping curve across the middle of the face. This line separates the upper lip from the lower jaw and gives the frog its wide grin. -
Detail the eyes:
Inside the eye bumps, draw two large circles for the pupils. Fill them in solid black or green, leaving a tiny white dot in each for a highlight to make the frog look alert. -
Add the nose:
Place two tiny dots or dashes right in the center of the face, just above the mouth line, for the nostrils. -
Create the chin definition:
Draw a secondary curved line underneath the mouth, essentially mirroring the bottom of the head shape. This creates the illusion of a lower lip or chin. -
Connect the corners:
Connect the ends of the mouth line to the bottom curve of the head with small vertical dashes. This emphasizes the pouch-like nature of a frog’s mouth.
Keep it Consistent
Count the dots! If your first frog is 5 dots wide and 3 dots tall, strictly stick to those counts for every subsequent frog to maintain the pattern’s rhythm.
Step 3: Filling the Page
-
Start the repetition:
Move to the next marked spot in your row. Repeat the exact same face drawing process. Focus on keeping the size consistent with the first one. -
Complete the first row:
Continue drawing frogs until you reach the edge of the page. Don’t worry if they aren’t photocopies of each other; slight variations add character. -
Establish the second row:
Begin the next row below. Align the frog heads directly under the ones above. Use horizontal dot lines as a baseline to ensure your rows don’t drift up or down. -
Manage ink flow:
As you work down the page, be careful not to smudge wet ink with your hand. I sometimes place a scrap piece of paper under my writing hand as a guard. -
Fill the entire sheet:
Methodically work your way down to the bottom of the page until the grid is full of staring faces. -
Erase pencil marks:
Wait at least 5-10 minutes to ensure the ink is bone dry throughout the page. Gently erase any visible pencil guidelines or spacing marks. -
Final check:
Scan the page for any missed details, like a forgotten nostril or an unfilled pupil, and touch them up.
Wobbly Lines?
Don’t stress if your ovals aren’t perfect. Biological shapes are naturally imperfect. Focus on keeping the eye placement consistent, as that defines the expression.
Now you have a whimsical, patterned page ready to serve as a cute background or just a satisfying finished doodle project
Frog With a Crown
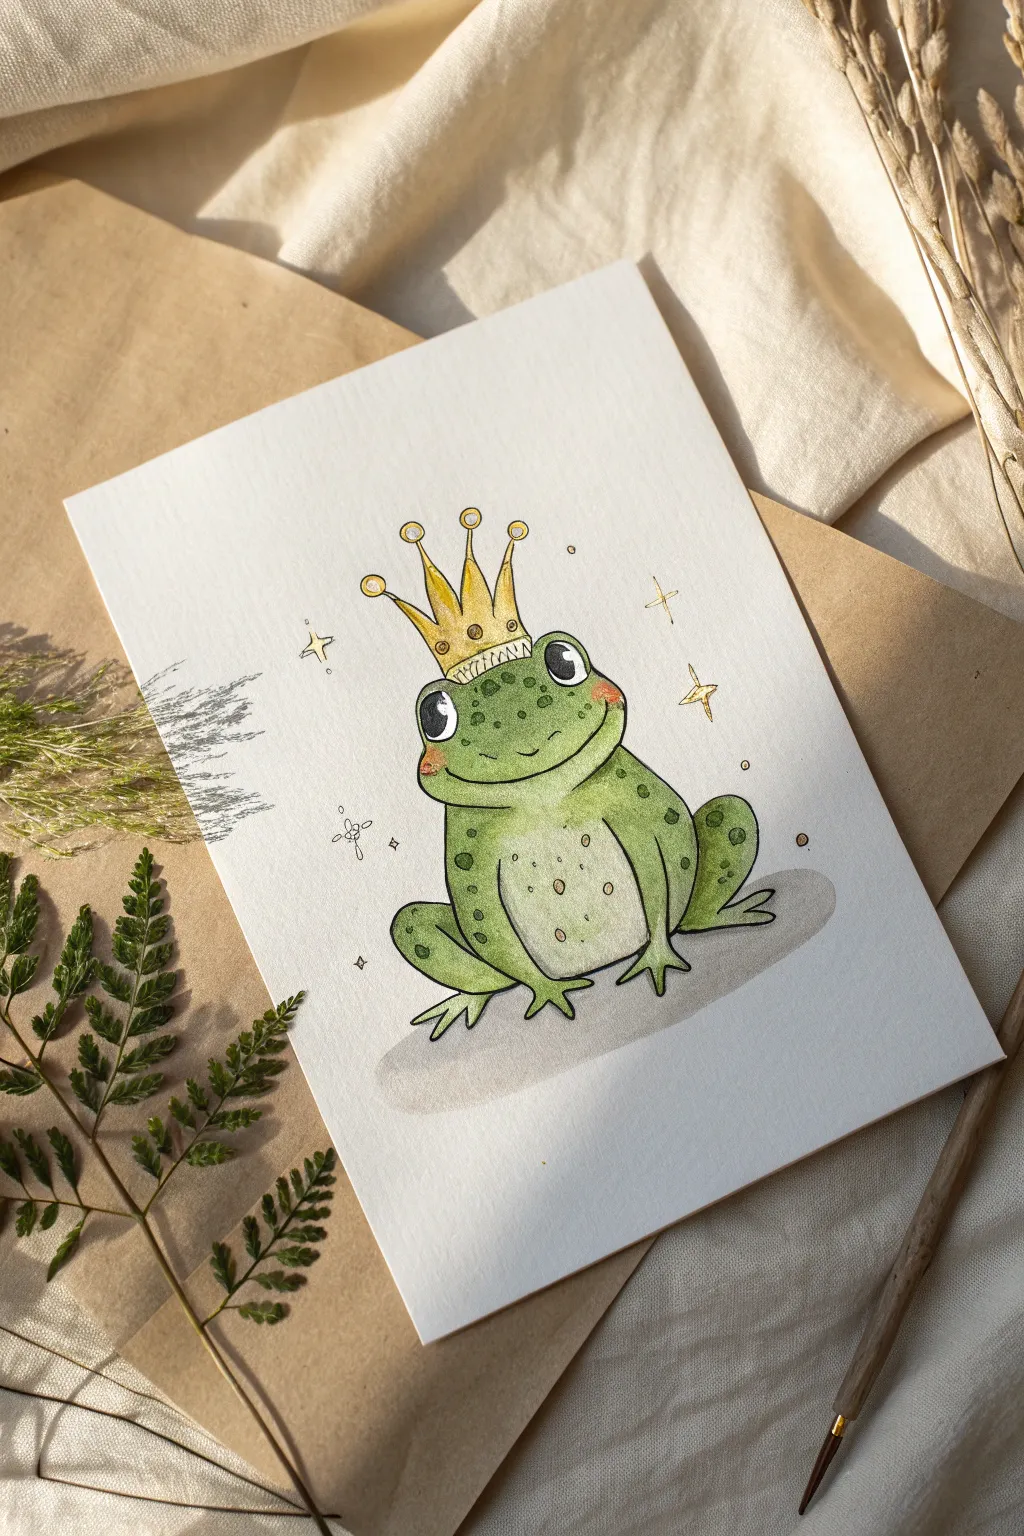
Create your own charming artwork featuring a contented frog wearing a golden crown surrounded by magical sparkles. This project uses a combination of watercolor and fine ink lines to achieve a soft, storybook illustration style.
Step-by-Step Tutorial
Materials
- Cold press watercolor paper (A5 size)
- Pencil (HB or H)
- Kneaded eraser
- Waterproof fine liner pen (0.1mm and 0.3mm, black)
- Watercolor paints (Sap Green, Olive Green, Lemon Yellow, Yellow Ochre, Burnt Sienna, Payne’s Grey using a hint of red)
- Round watercolor brushes (Size 2 and 4)
- White gel pen (optional)
- Cup of water and paper towel
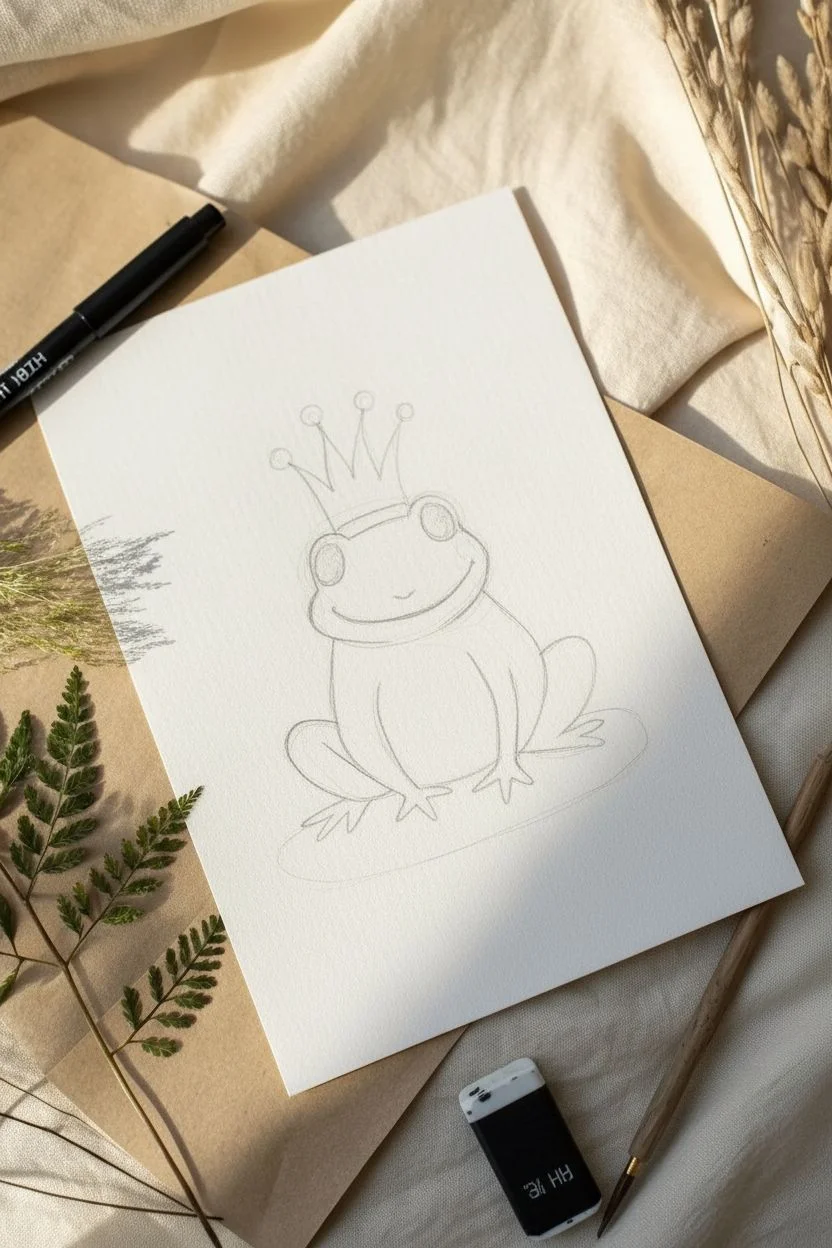
Step 1: Sketching the Royal Frame
-
Draft the head shape:
Begin by lightly sketching a wide, rounded oval for the frog’s head. Keep your pencil pressure very light so you can erase easily later. -
Add the body:
Draw a larger, slightly squatter oval shape directly beneath the head for the body. The head should overlap the top of this body shape slightly. -
Position the eyes:
Sketch two smaller circles popping up from the top curve of the head oval. They should be prominent and spaced slightly apart. -
Outline the legs:
Draw the back legs as large curves on either side of the body, resembling folded knees. Add the front legs as two simple, straight lines dropping down from the chest area, ending in flipper-like feet. -
Crown the frog:
Perch a three-pointed crown on top of the head, nestled between the eyes. Draw small circles at the tip of each point. -
Refine the sketch:
Go over your shapes to create the final outline. Connect the head and body smoothly, define the toes with webbed shapes, and add a wide, simple curve for a smile.
Step 2: Inking the Details
-
Trace the main lines:
Using your 0.3mm waterproof pen, carefully trace over your pencil lines. I prefer to use broken, slightly sketchy lines for the belly to suggest texture rather than a solid hard line. -
Add facial features:
Ink the eyes, leaving a small white circle inside the pupil for a highlight. Fill in the pupils with black ink. -
Detailed inking:
Switch to a 0.1mm pen for delicate details like the decorative dots on the crown, the belly markings, and the magical stars floating around the frog. -
Erase guidelines:
Wait at least 5-10 minutes for the ink to dry completely, then gently use a kneaded eraser to lift away all pencil marks.
Clean Lines Tip
If your hand shakes while inking, commit to the wobble! Slightly jittery lines often add more character and organic charm to illustrations than perfectly straight machine-like ones.
Step 3: Adding Color
-
Paint the base green:
Mix a watery wash of Sap Green. Apply this to the head and legs. While it’s still wet, I like to drop in a tiny bit of darker green near the bottom of the legs for a natural shadow. -
Color the belly:
Dilute your green significantly with water until it is very pale, almost transparent. Wash this over the belly area to distinguish it from the darker back and legs. -
Paint the crown:
Use Lemon Yellow for the main part of the crown. While wet, touch the edges with a bit of Yellow Ochre to give it a metallic, golden dimension. -
Add the spots:
Once the green base layer is dry, use a more concentrated Olive Green mixture to paint small, scattered spots on the frog’s back and legs. -
Give him rosy cheeks:
Dilute a tiny dot of red or pink watercolor and dab it gently onto the cheeks, just under the eyes, for a blushing effect. -
Paint the shadow:
Mix a very watery grey using Payne’s Grey or a mix of blue and brown. Paint a soft, oval-shaped puddle beneath the frog to ground him. -
Final magical touches:
Use Yellow Ochre to carefully fill in the little stars around the frog. If you want extra sparkle, add tiny white gel pen dots to the eyes or cheeks once the paint is bone dry.
Add Sparkle
For a truly magical finish, dissolve a tiny pinch of metallic watercolor or gold gouache into your yellow paint when coloring the crown and the floating stars.
Now you have a charming royal amphibian ready to grace a greeting card or wall art frame.


Frog in Cozy Clothes
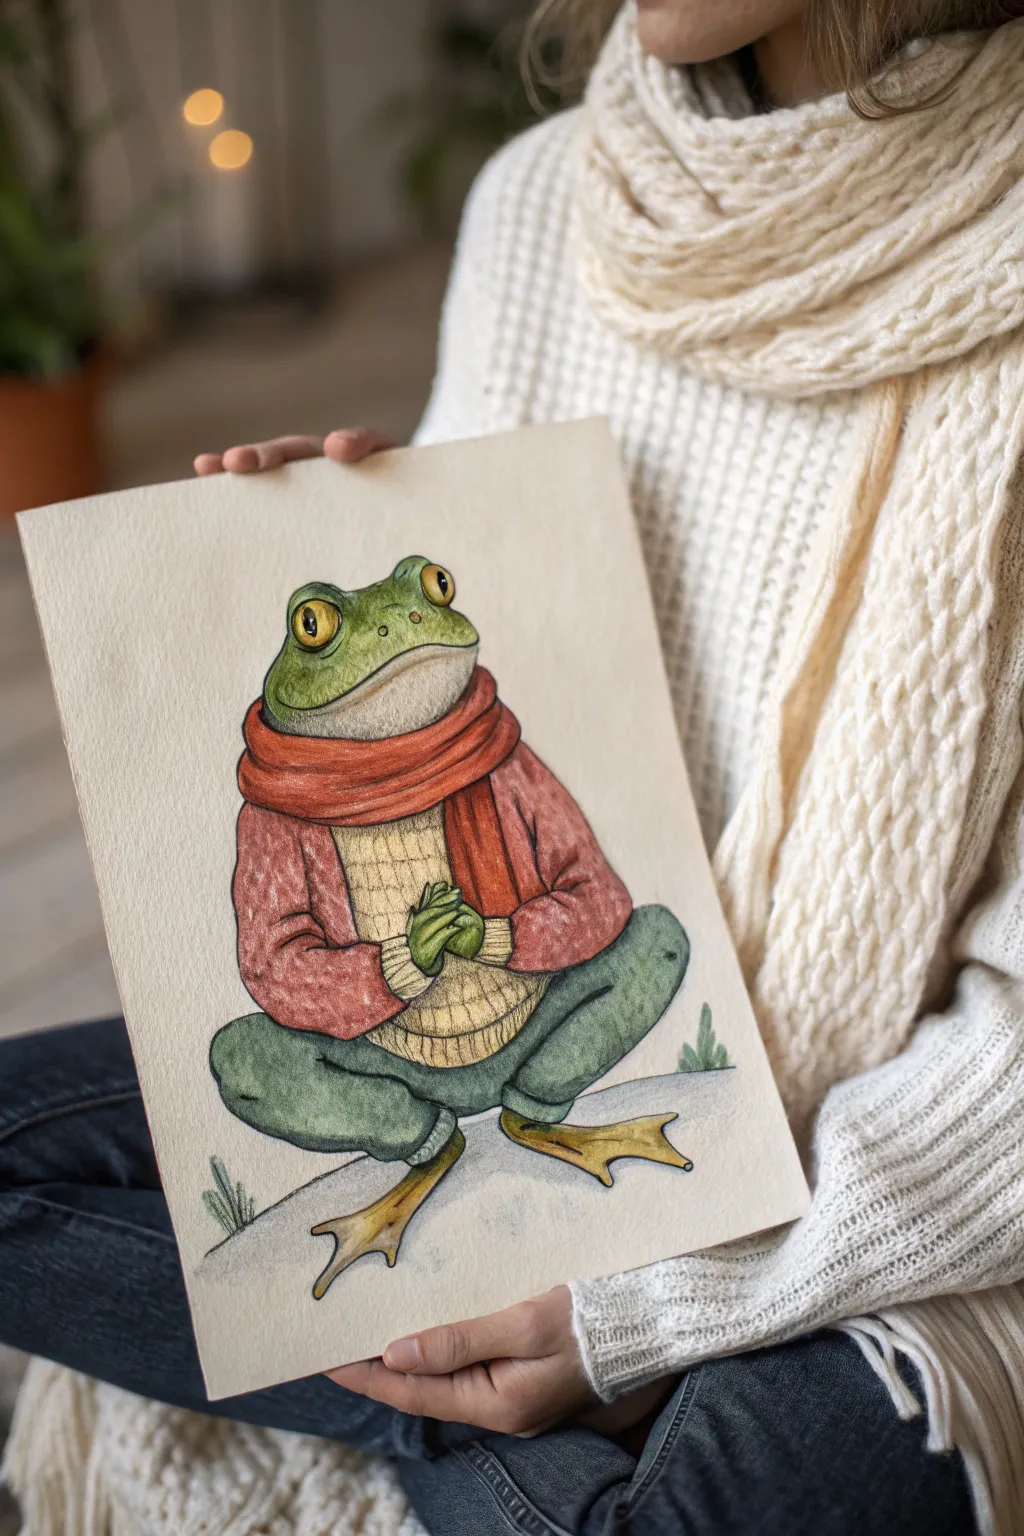
Cozy up with your art supplies to create this charming illustration of a frog bundled against the chill. This project combines delicate line work with warm, textured coloring to bring a sophisticated yet adorable character to life.
How-To Guide
Materials
- High-quality watercolor paper or mixed media paper (at least 140lb/300gsm)
- HB pencil and eraser
- Fine liner pens (black, water-resistant, sizes 01 and 03)
- Watercolor paints or colored pencils (greens, reds, ochre, soft grey)
- Small round brushes (if using paint)
- White gel pen for highlights
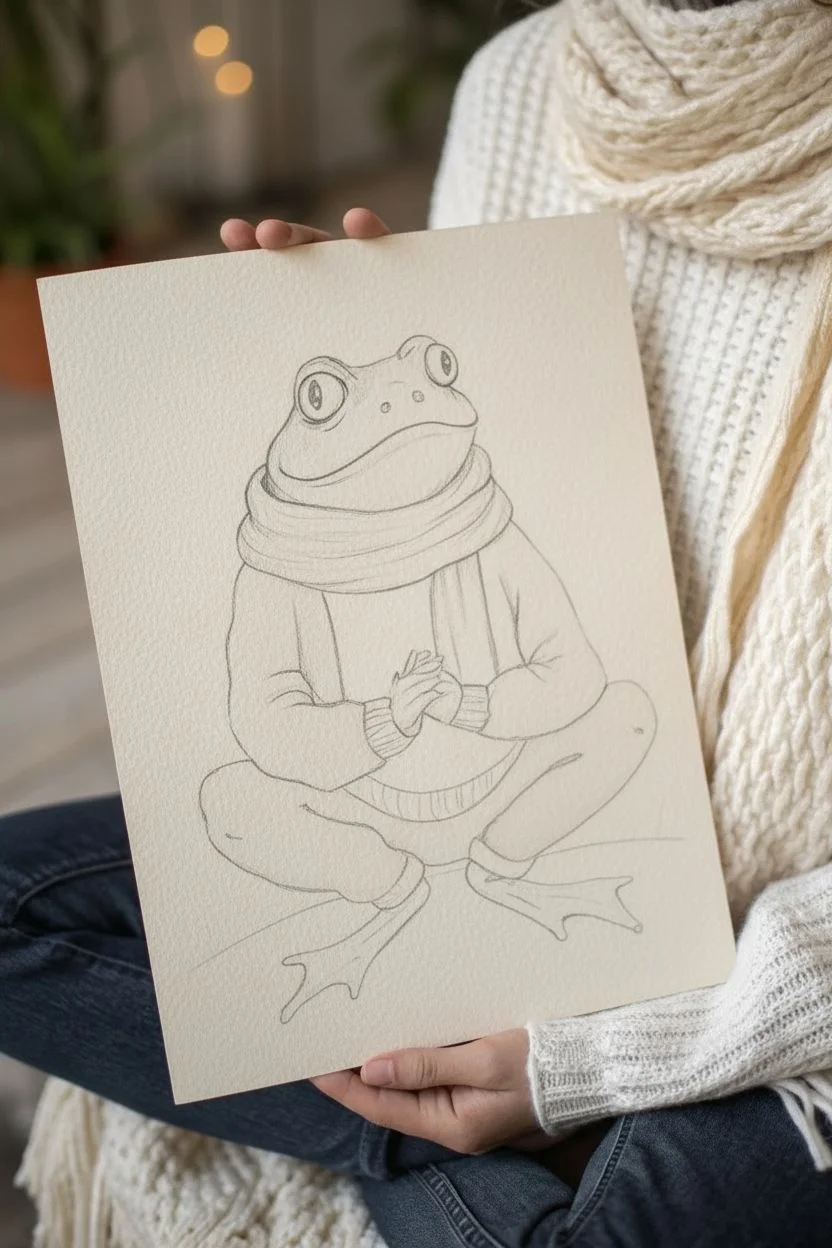
Step 1: Drafting the Character
-
Map the shapes:
Begin with a light pencil sketch to establish the frog’s posture. Draw an oval for the torso and a rounded shape on top for the head. Add guidelines for the crossed legs at the base. -
Define the face:
Sketch the large, protruding eyes near the top of the head. Draw a wide, gently curving line for the mouth, giving him a calm, content expression. -
Add the layers:
Draw the thick, looped scarf directly under the chin. Beneath that, outline the cardigan opening and the ribbed sweater underneath. -
Position the hands:
Sketch the frog’s hands clasped politely over the stomach. Ensure the fingers interlock naturally. -
Complete the outfit:
Draw the baggy trousers covering the legs, bunching slightly at the ankles. Add the large, webbed feet extending outward from the pant cuffs.
Knitwear Secrets
To make the wool look realistic, follow the curve of the body when drawing the knitting lines. Curved lines suggest volume better than straight ones.
Step 2: Inking and Details
-
Outline main features:
Using your 03 fine liner, carefully go over your pencil lines. Focus on the main contours of the body and clothing first. -
Add clothing texture:
Switch to the thinner 01 pen. Draw vertical lines on the scarf to suggest knitting and cross-hatching or small dashes on the inner sweater to create a ribbed texture. -
Texturize the skin:
Use stippling (little dots) on the frog’s forehead and cheeks to mimic skin texture without drawing every bump. -
Clean up:
Once the ink is completely dry—give it a few minutes to be safe—erase all underlying pencil marks to keep the paper clean.
Step 3: Adding Color and Depth
-
Base skin tones:
Apply a wash of sap green or olive to the face and hands. Keep the color lighter on the center of the face and darker towards the edges. -
Color the eyes:
Fill the irises with a golden yellow or ochre. leave a tiny spot white for a highlight, or add it later with a gel pen. Fill the pupils with solid black. -
Warm up the wear:
Paint the scarf and cardigan with a muted terracotta or rust red. I like to layer the color, making the shadows in the scarf folds slightly deeper. -
Sweater and pants:
Use a pale yellow or cream for the inner sweater. Paint the trousers a dusty teal or muted green-blue to complement the upper body. -
Feet and ground:
Color the webbed feet with a mix of yellow-ochre and brown. Add a very light grey wash underneath the frog to ground him, throwing in a few simple grass blades.
Uneven Watercolors?
If your paint dries with hard edges (blooms), try softening the edge with a damp, clean brush while the paint is still slightly moist to blend it out.
Step 4: Finishing Touches
-
Deepen shadows:
Once the base layers are dry, go back in with a slightly darker shade of each color (or a colored pencil) to define shadows under the armpits, beneath the scarf, and where the legs cross. -
Highlighting:
Use a white gel pen or gouache to add tiny highlights to the eyes and the moist skin on the nose to make him look alive. -
Final assessment:
Step back and check your contrast. If the clothing looks flat, add a little more texture with your fine liner or colored pencils.
Now you have a polite amphibian friend ready to keep you company during the cold months
Cool Frog With Sunglasses
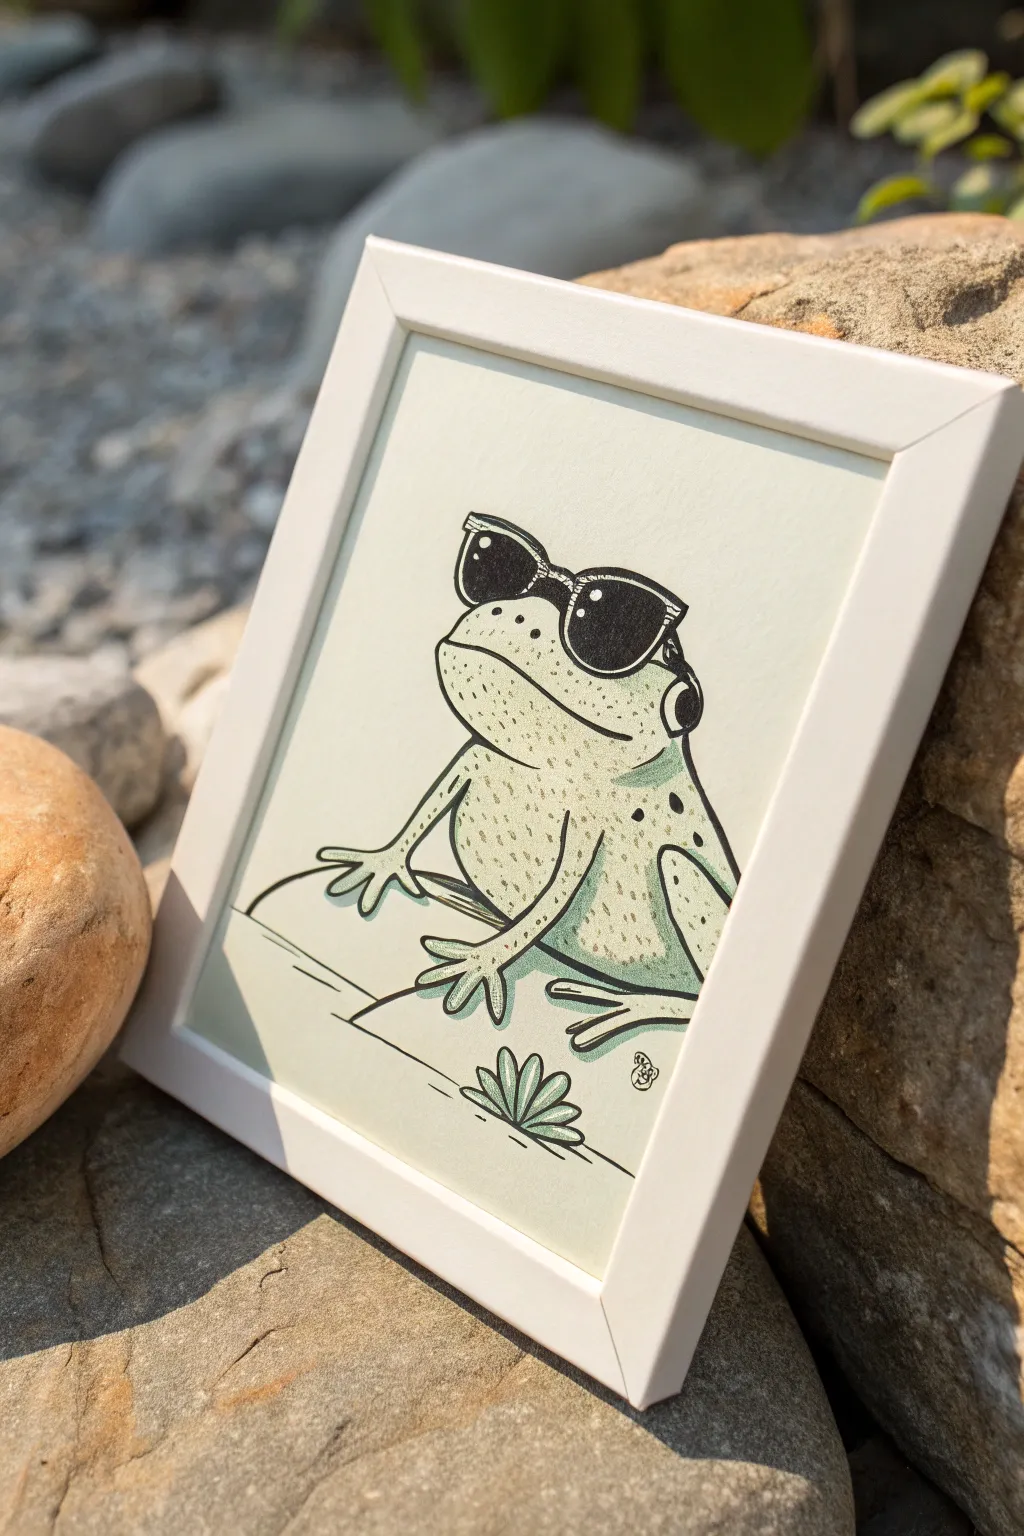
This whimsical illustration captures a laid-back amphibian sporting trendy sunglasses, perfect for adding a touch of personality to any room. With its clean linework and subtle texturing, this project balances cartoon charm with a polished, framed finish.
Step-by-Step
Materials
- Lightweight sketchbook paper or bristol board
- HB pencil for sketching
- Kneaded eraser
- Fine liner pens (0.1mm, 0.3mm, and 0.5mm, black)
- Alcohol-based markers (pale sage green, slightly darker olive green)
- White gel pen (optional)
- White photo frame (approx. 5×7 or 8×10 inches)
- Ruler
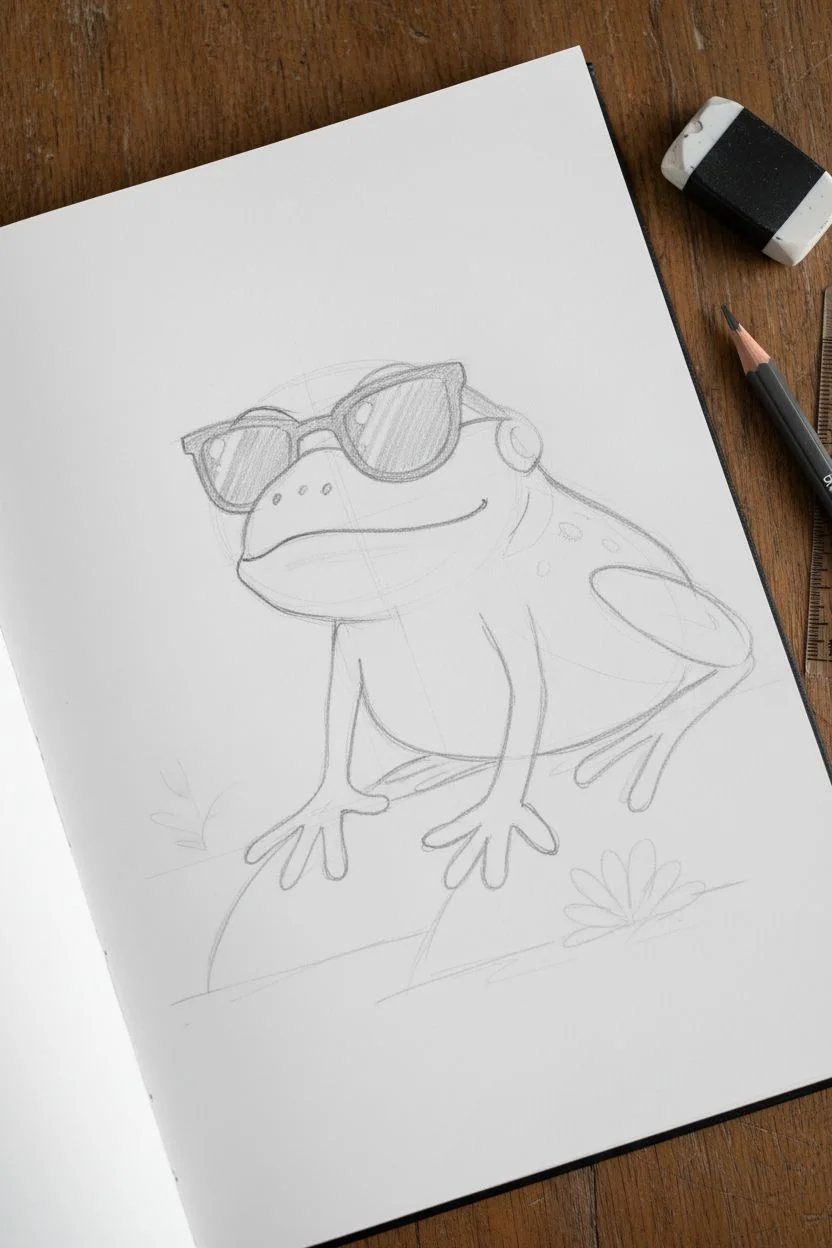
Step 1: Sketching the Cool Character
-
Basic shapes:
Start by lightly sketching a wide, rounded oval for the frog’s body. Let the bottom flatten out slightly where it sits on the ground. -
Adding specific features:
Draw two bumps on top of the head for eyes, but keep them fairly flat since they will be covered by sunglasses later. Sketch a wide, gently curving line for the mouth that extends almost cheek-to-cheek. -
Drafting the limbs:
Sketch the front legs extending downward. The frog’s right arm (viewer’s left) should extend out to the side, while the other tucks closer to the body. Don’t forget the long, slender toes with rounded tips. -
The accessories:
Draw the outline of classic wayfarer-style sunglasses over the eye bumps. Make sure the frames are slightly oversized to give that comical ‘cool guy’ look. -
Refining the sketch:
Clean up your pencil lines with an eraser until only a faint guide remains. Check the proportions now before committing to ink.
Bleeding Lines?
If your ink smudges when using markers, ensure your liner pens are waterproof (like micron pens). You can also do the marker coloring first, then add ink lines on top once dry.
Step 2: Inking the Outlines
-
Bold outlines:
Using a 0.5mm fineliner, trace the main outline of the frog’s body and the sunglasses frames. Use confident, continuous strokes to avoid shaky lines. -
Detail work:
Switch to a 0.3mm pen for the legs, toes, and the mouth line. I find that varying line weight like this helps the main shape pop forward. -
Filling the shades:
Color in the lenses of the sunglasses completely black. Leave a tiny white sliver or dot in the upper corner of each lens to represent a reflection. -
Grounding layout:
Draw a simple horizon line behind the frog and a few scribbled lines underneath its feet to suggest a surface or rock. -
Adding the plant:
Near the bottom center, draw a small, stylized succulent or tuft of grass using simple teardrop shapes fanning out.
Make it Pop
Cut the frog out precisely and mount it on a slightly raised foam tape against a plain background inside the frame for a cool 3D shadowbox effect.
Step 3: Color and Texture
-
Base color application:
Take your pale sage green marker and fill in the frog’s skin. Avoid coloring the sunglasses or the background. Use even strokes to minimize streakiness. -
Adding texture:
Once the base layer is dry, use a 0.1mm pen to add stippling (tiny dots) across the upper lip area and the chest. This mimics the bumpy texture of toad skin. -
Shadows and depth:
Use the slightly darker olive marker to add shadows under the chin, beneath the arms, and along the bottom curve of the belly. -
Defining the spots:
With your 0.3mm pen, add a few scattered, uneven spots on the frog’s back and sides. Keep them loose and organic. -
Highlight splashes:
If you have a white gel pen, add tiny dots to the top of the head or shoulders for a wet, shiny look. A little goes a long way here. -
Final clean up:
Erase any remaining pencil marks completely. Double-check your black blacks on the sunglasses to ensure they are solid and opaque.
Step 4: Framing and Finish
-
Trimming the paper:
Measure your paper against the frame backing. Use a ruler and craft knife or scissors to trim the artwork to fit perfectly inside the frame. -
Cleaning the glass:
Wipe both sides of the frame’s glass to remove fingerprints or dust before assembly. -
Assembly:
Place the artwork face down into the frame, add the backing board, and secure the clips.
Place your framed masterpiece on a shelf or desk to bring a smile to anyone who sees it
Frog Stack Balancing Act
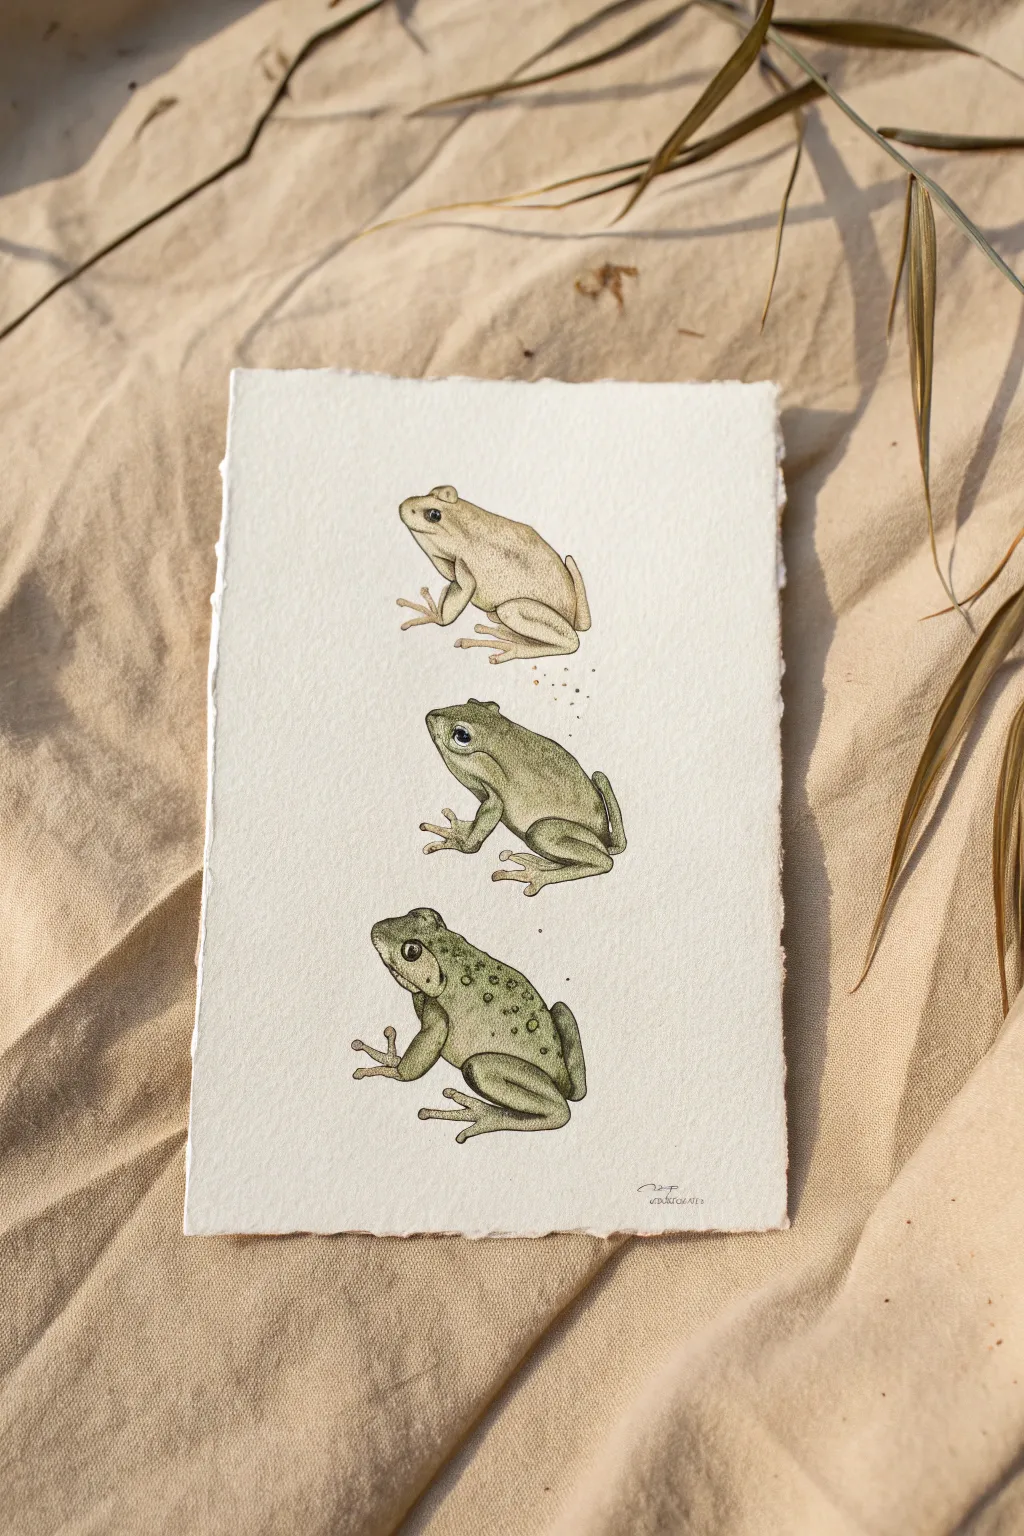
This charming project features a vertical trio of frogs, each with a unique personality and color palette, rendered in watercolor and fine ink. The textured paper adds a lovely organic feel, making the final piece look like a vintage field guide illustration.
Step-by-Step Tutorial
Materials
- Cold press watercolor paper (deckle edge optional)
- Pencil (HB or H)
- Kneadable eraser
- Waterproof fine liner pens (0.05 and 0.1, black or sepia)
- Watercolor paints (Cream, Sap Green, Olive Green, Burnt Umber)
- Small round brushes (Size 0 and 2)
- Palette for mixing
- Water cup and paper towel
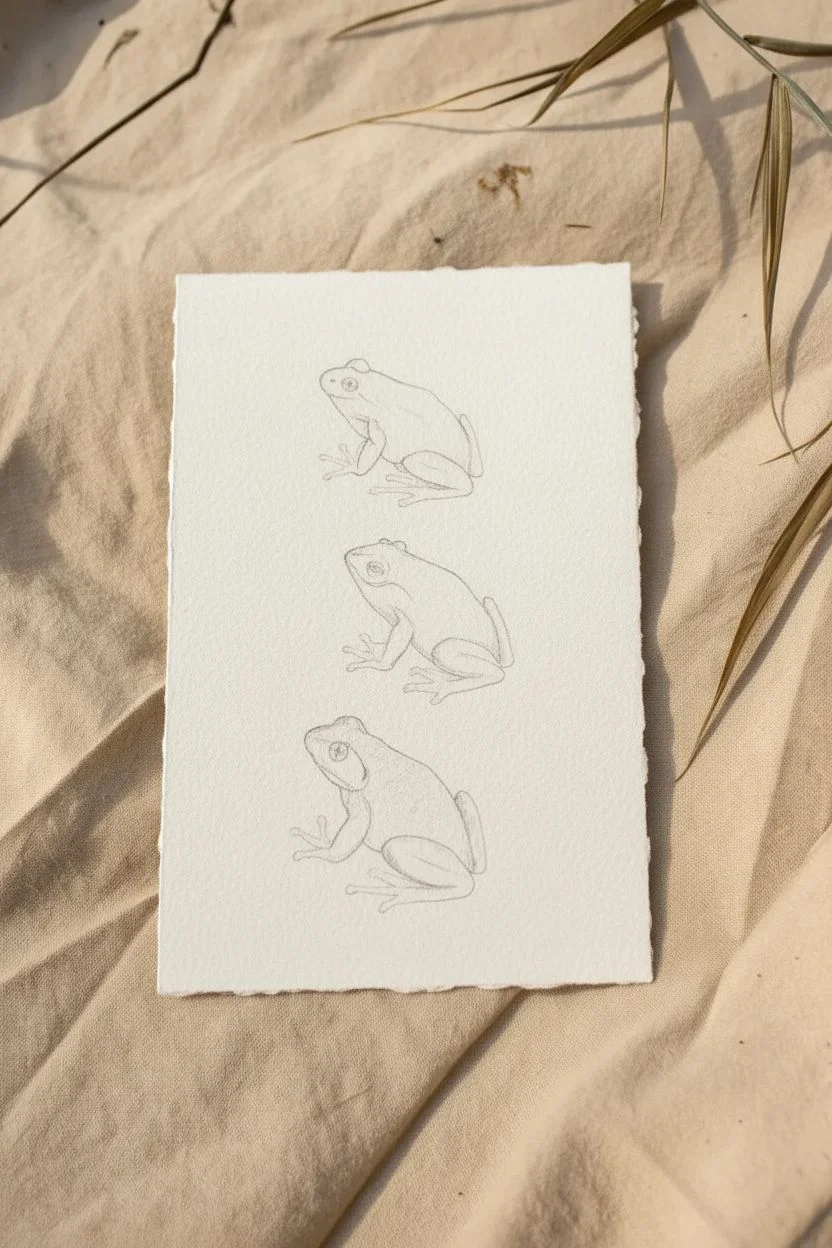
Step 1: Sketching the Stack
-
Placement guidelines:
Begin by lightly marking three positions on your paper to ensure the frogs are evenly spaced vertically. Leave plenty of white space around the edges to frame the stack. -
Top frog outline:
Sketch the top frog first. Draw a compact, rounded body shape sitting in a crouch. Give it a distinct eye ridge and thin, long toes on the front foot. -
Middle frog outline:
Draw the second frog directly below the first. This one should look slightly smoother in texture, with a prominent eye and the back leg tucked tightly against the body. -
Bottom frog outline:
Sketch the final frog at the base. Make this one slightly chunkier with a more textured back, indicating where spots will go later. Ensure all three frogs are facing the same direction (left). -
Refining details:
Go back over your sketches to define the eyes and toes. Keep the pencil lines very light so they won’t show through the pale watercolor washes later.
Stippling Secret
When stippling with ink for shadows, hold your pen vertically. Slanted dots look like dashes. Vertical dots look like skin texture.
Step 2: Inking the Forms
-
Initial outlining:
Using a 0.1 waterproof pen, carefully trace your pencil lines. Use a broken, organic line style rather than a solid heavy outline to keep the drawing delicate. -
Texturing the skin:
Switch to a finer 0.05 pen for the internal details. Add tiny stippling dots under the chin and along the belly of the top frog to suggest shadow. -
Adding creases:
Draw small, curved lines around the leg joints and eyes to show skin folds. Don’t outline every single spot on the bottom frog; we will do that with paint. -
Erase pencil lines:
Wait until the ink is completely dry—I usually give it a full five minutes to be safe—then gently lift away the graphite using a kneadable eraser to avoid damaging the paper surface.
Go Big
Try scaling this up! Replace the frogs with different species like a Red-Eyed Tree Frog or a Poison Dart Frog for a colorful variation.
Step 3: Watercolor Application
-
Top frog base layer:
Mix a very watery cream or pale tan color. Apply a light wash over the top frog, leaving the belly almost white for a highlight. -
Middle frog hue:
Mix a soft sage green. Paint the middle frog, concentrating the pigment along the back and top of the head, blending it out to a paler green towards the legs. -
Bottom frog colors:
For the anchor of the stack, use a deeper olive green. Paint the body but avoid the circular spots on the back if you can, or lift the color out while wet with a thirst brush. -
Shadows and depth:
Once the base layers are dry, mix a slightly darker version of each frog’s color (add a touch of Burnt Umber). Glaze this shadow under the legs and beneath the chin of each frog. -
Spot details:
On the bottom frog, use the tip of your size 0 brush to paint dark olive spots on the back. Add faint brown speckles to the top frog for subtle texture. -
Eye details:
Paint the pupils black or dark brown, leaving a tiny white speck of unpainted paper for the reflection highlights. This brings them to life instantly. -
Final splatters:
Load your smallest brush with watery brown paint and tap it gently against another brush handle to create tiny, controlled splatters between the frogs, connecting them visually.
Place your finished piece in a floating frame to show off those beautiful paper edges
Frog on a Toadstool
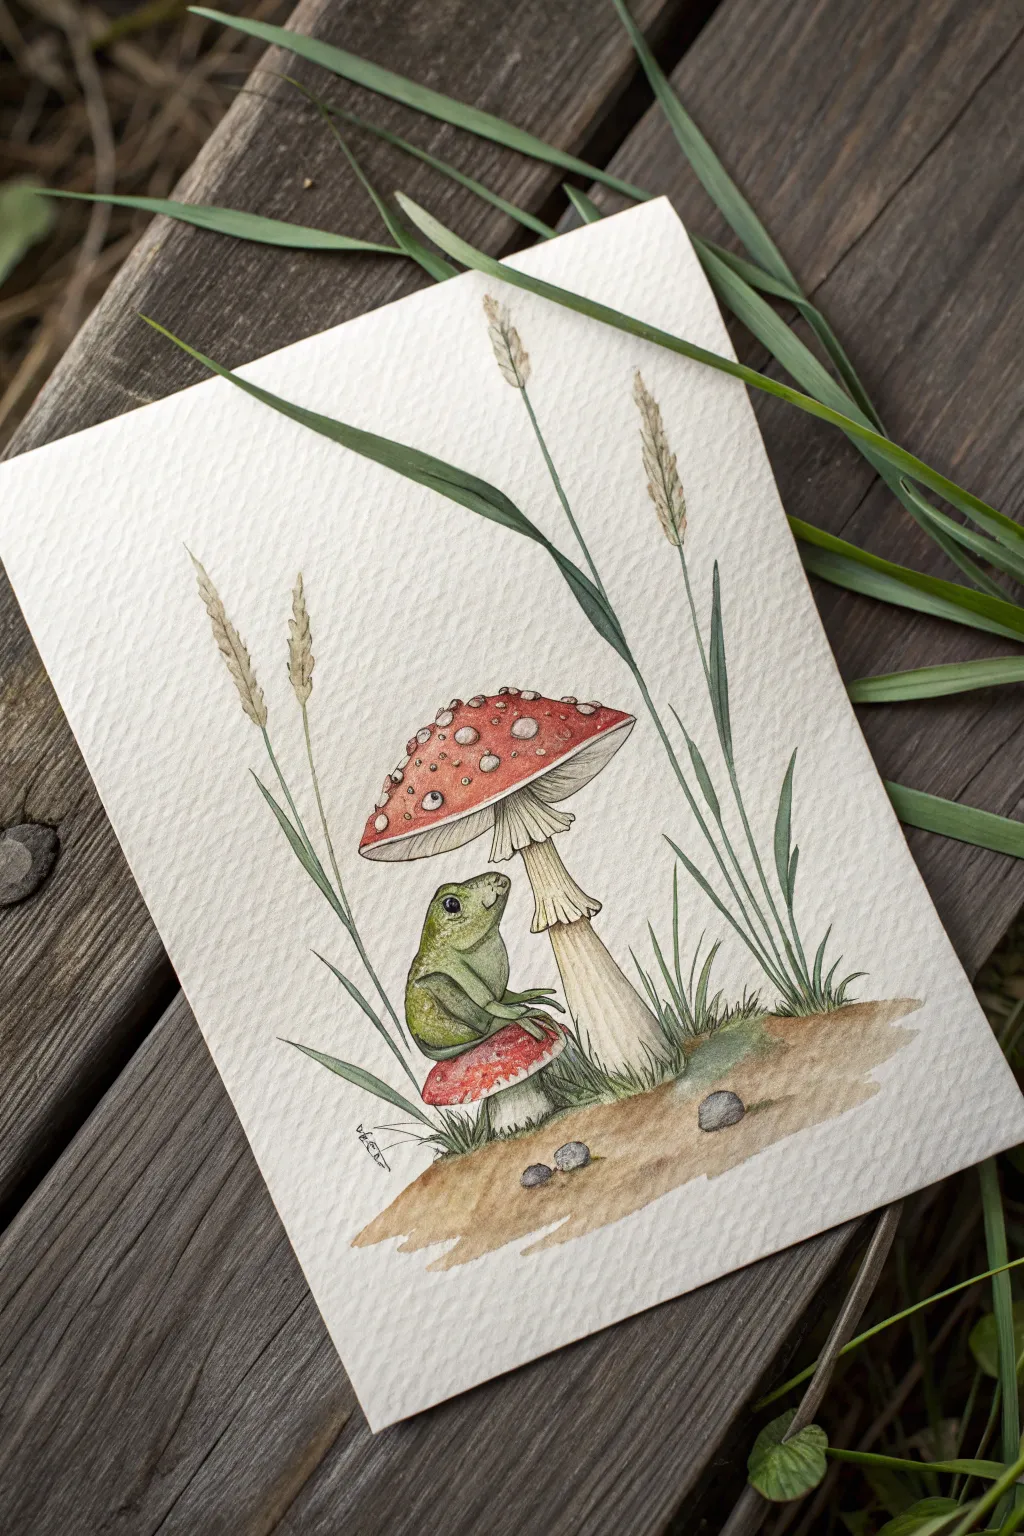
Capture the charm of the forest floor with this delicate watercolor and ink illustration. You’ll create a storybook scene featuring a tiny frog perched beneath a towering Amanita muscaria mushroom, surrounded by gentle grasses.
Step-by-Step Guide
Materials
- Cold press watercolor paper (300 gsm)
- HB or 2H graphite pencil
- Kneaded eraser
- Fine liner pens (0.1, 0.3, and 0.5 sizes, waterproof black ink)
- Watercolor paints (Sap Green, Olive Green, Alizarin Crimson, Cadmium Red, Yellow Ochre, Burnt Sienna, Payne’s Gray)
- Small round brushes (sizes 2 and 4)
- White gel pen or gouache (optional)
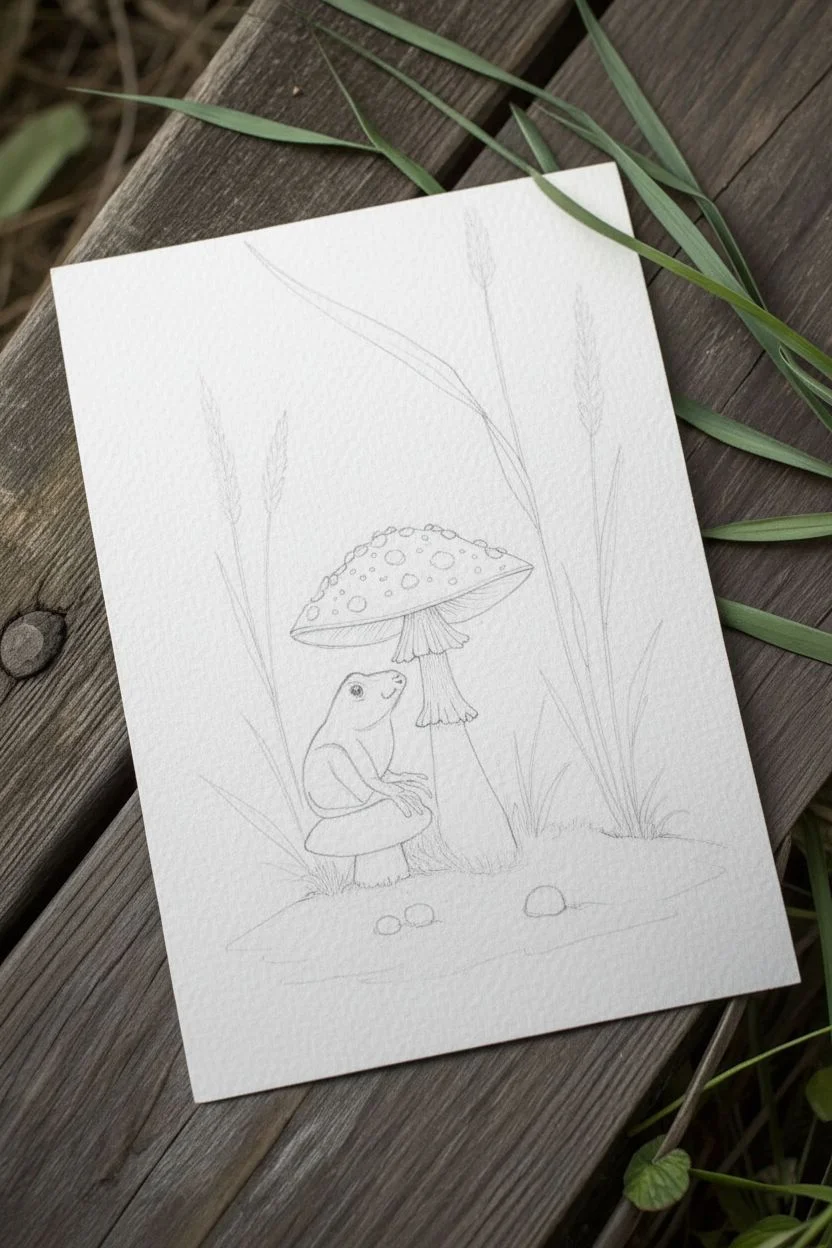
Step 1: Sketching the Composition
-
Establish the ground line:
Begin by lightly drawing a gentle, uneven mound near the bottom third of your paper to represent the dirt patch. -
Place the main mushroom:
Draw a tall, slightly curved stalk rising from the mound. Top it with a wide, cap-like shape for the main toadstool, ensuring the cap tilts slightly to the left. -
Add the tiny perch:
Sketch a smaller, button-like mushroom emerging from the ground just to the left of the main stalk. This will be the frog’s seat. -
Sketch the frog:
Outline the frog sitting on the small mushroom. Use simple ovals for the body and head, positioning its legs tucked underneath and its gaze looking upward toward the large mushroom cap. -
Draw the grasses:
Add vertical interest by sketching tall, thin blades of grass. Place two wheat-like stalks on the left and taller, bending blades on the right that frame the composition.
Preserve the White
For the brightest mushroom spots, use masking fluid before painting the red. Rub it off away after the paint dries for crisp white edges.
Step 2: Inking the Details
-
Refine the outlines:
Using a 0.3 fine liner, go over your pencil lines. Add a jagged edge to the skirt (the ring) on the mushroom stem and define the gills underneath the large cap. -
Texture the frog:
Switch to a 0.1 pen to add tiny stipling dots or short dashes on the frog’s skin to suggest a bumpy texture, focusing on the back and legs. -
Detail the grass:
Use fluid, quick strokes for the grass blades. For the seed heads on the left stalks, use small, repetitive V-shapes to create that grain-like texture. -
Add spots and stones:
Draw the characteristic warts on the mushroom cap as irregular circles. Sketch three small pebbles on the dirt mound for balance. -
Erase pencil lines:
Once the ink is completely dry, gently remove all graphite lines with your kneaded eraser to prepare for painting.
Add a Rain Effect
Use a toothbrush to lightly spatter diluted blue or grey paint over the finished piece to simulate a gentle forest drizzle.
Step 3: Watercolor Application
-
Paint the frog:
Mix a fresh Sap Green. Paint the frog’s body, dropping in a touch of darker Olive Green on the back and shadowed areas while the paint is still wet to create volume. -
Color the mushroom caps:
Blend Cadmium Red with a tiny bit of Alizarin Crimson. Carefully paint around the white spots on the mushroom cap. I prefer to leave the spots unpainted white paper rather than painting over them later. -
Wash the stems:
Use a very diluted Yellow Ochre for the mushroom stems. Add a stripe of concentrated pigment along one side to suggest cylindrical shading. -
Paint the ground:
Mix Burnt Sienna with plenty of water for a soft, earthy wash on the mound. Let the edges fade out naturally into the white of the paper. -
Tint the grass:
Use a mix of Olive Green and Grey for the grass blades. Keep the color transparent and light, darkening only the base where the grass meets the dirt. -
Final touches:
Paint the small pebbles with a wash of Payne’s Grey. If your mushroom spots got covered, add tiny dots of white gel pen or gouache now to make them pop.
Step back and admire your little forest friend as he enjoys his quiet moment under the toadstool
Moonlit Fishing Frog
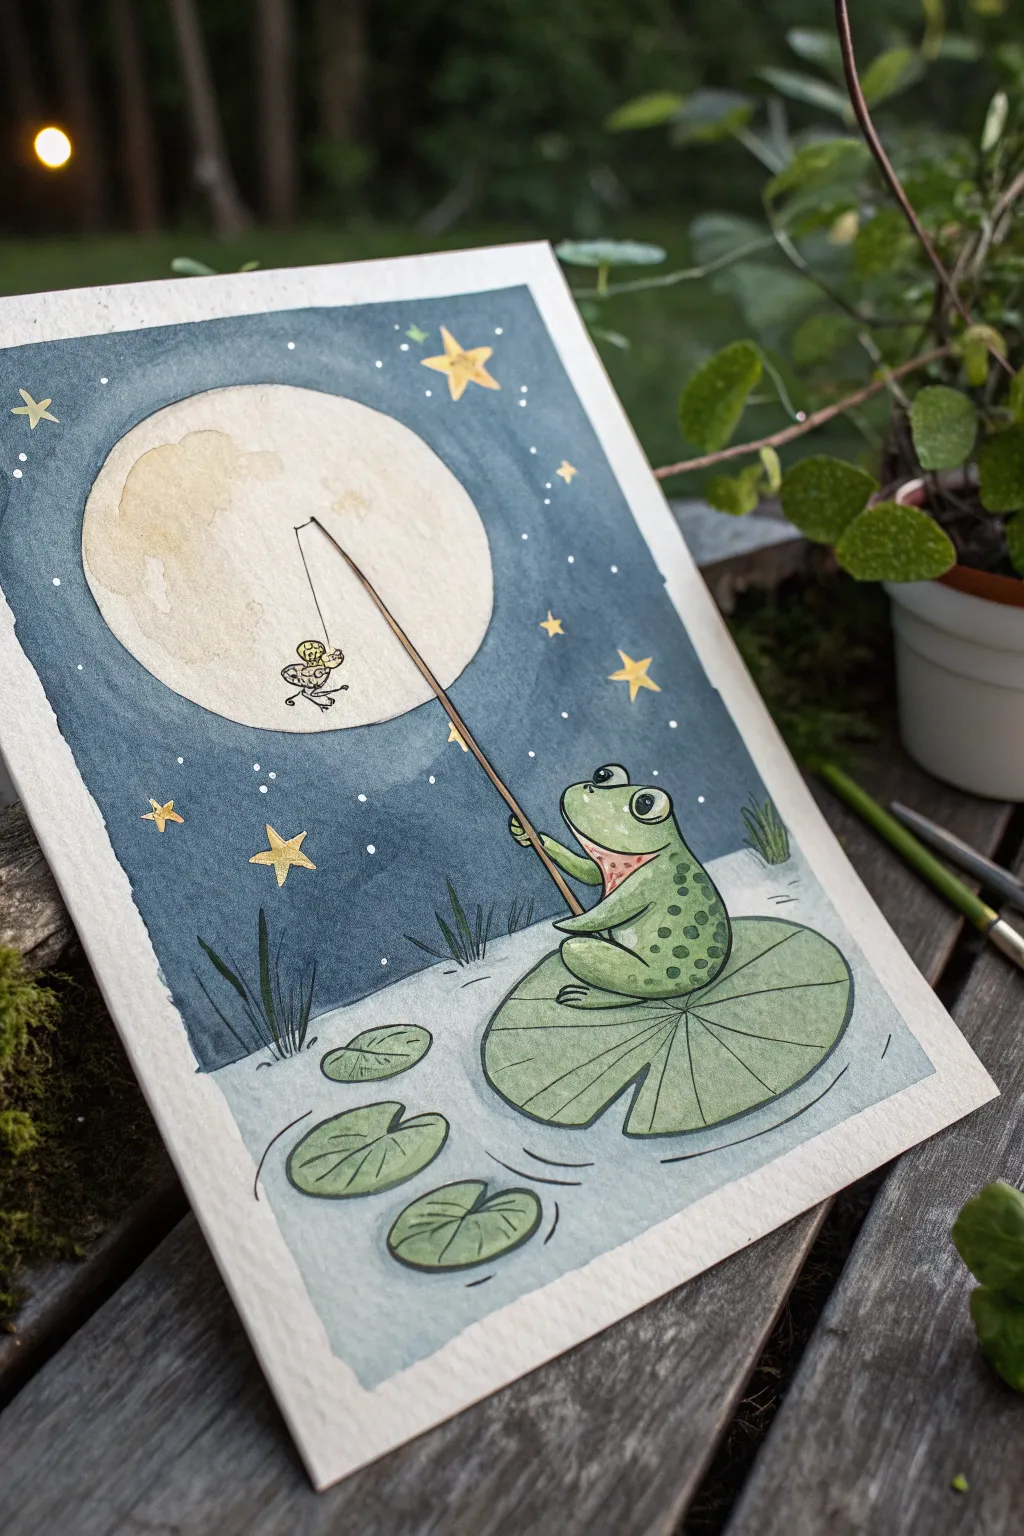
Capture the whimsy of a quiet night on the pond with this charming illustration of a frog fishing by moonlight. The scene combines soft watercolor washes for the background with crisp ink lines and vibrant character details, perfect for a cozy art session.
How-To Guide
Materials
- Heavyweight watercolor paper (300gsm cold press is ideal)
- Watercolor paints (indigo, Payne’s grey, sap green, cadmium yellow, burnt sienna)
- White gouache or white gel pen
- Waterproof fine liner pens (0.1mm and 0.5mm)
- Gold paint or metallic gold pen
- Round brushes (size 2, 6, and 10)
- Masking tape
- Pencil and eraser
- Jar of water and paper towels
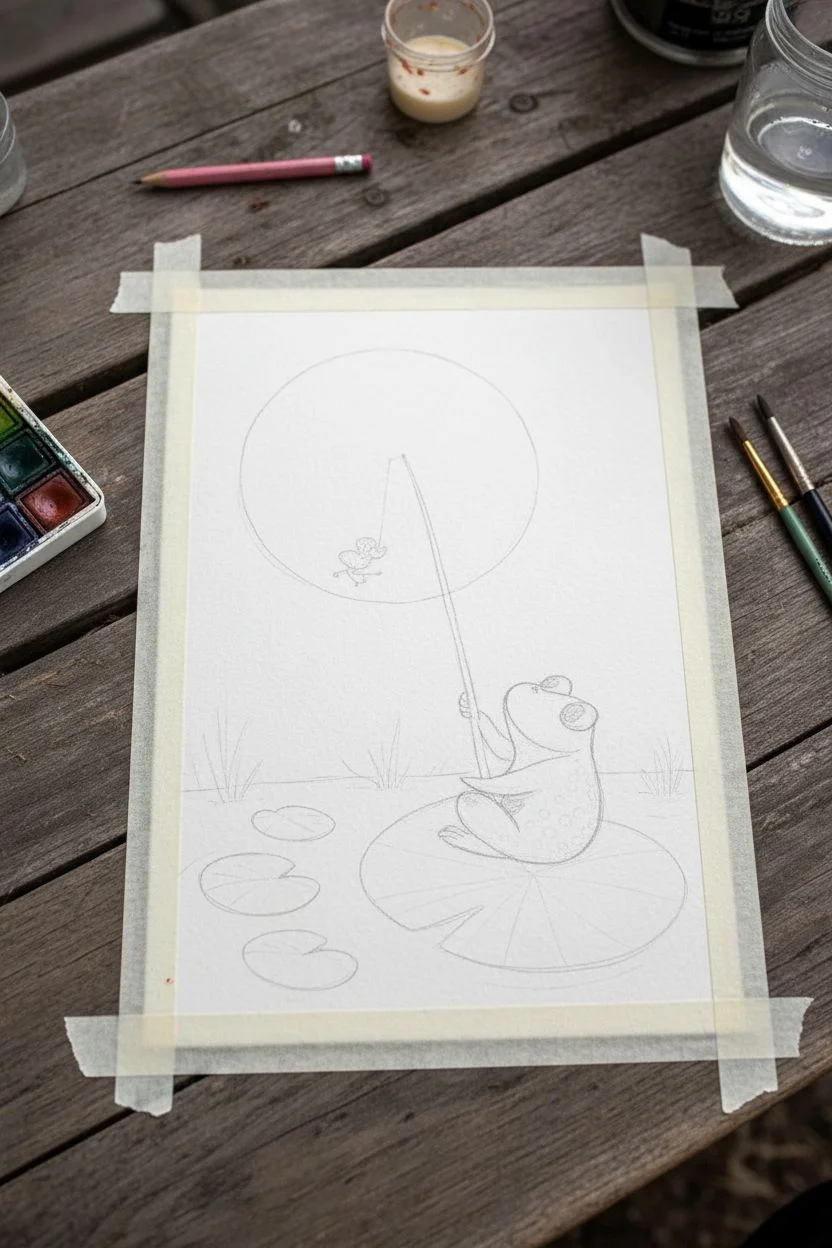
Step 1: Planning and Sketching
-
Frame the canvas:
Begin by taping down the edges of your watercolor paper to a board or table. This creates that clean, crisp white border you see in the final piece and prevents the paper from buckling when wet. -
Sketch the moon placement:
Lightly draw a large circle in the upper-left quadrant of the paper for the moon. Use a compass or trace a bowl rim to get a perfect shape, as this is the focal point of the sky. -
Draft the frog and lily pad:
In the lower right, sketch a large oval lily pad. Ideally, position the frog sitting on top of it, roughly triangular in shape, looking upward toward the moon. -
Add the fishing details:
Draw a long, thin fishing pole held by the frog’s front legs, angling up specifically so the line drops right in front of the moon. Sketch a tiny fly or bug dangling at the end of the line, keeping it silhouetted against the circle. -
Detail the environment:
add a few simple lily pads floating in the water around the main one, and sketch some vertical grass blades near the horizon line.
Step 2: Painting the Background
-
Paint the moon:
Dilute some yellow ochre or a very pale brown. Create a watery wash inside the moon circle, leaving some areas very light or white to suggest craters and texture. Let this layer dry completely. -
Wash the night sky:
Mix a deep indigo or Payne’s grey. Carefully paint around the moon and the stars (if you drew them), or paint the whole sky dark and add stars later. Start darkest at the top and let the color fade slightly as you reach the horizon line. -
Create the water surface:
Using a very diluted mix of blue-grey, paint the water area. It should be significantly lighter than the sky to show reflection, but still cool-toned. Paint around the lily pads. -
Paint the foliage:
Fill in the lily pads with a flat wash of sap green. While the paint is still damp, you can drop in a tiny bit of darker green on one side for a subtle shadow effect.
Moon texture tip
Sprinkle a tiny pinch of salt onto the wet moon paint. Let it dry fully before brushing it off. This creates unique, crater-like textures perfect for lunar surfaces.
Step 3: Bringing the Characters to Life
-
Base coat the frog:
Paint the frog’s body with a vibrant light green. Use a slightly pinkish-red tone for the throat/chest area to give him a friendly appearance. -
Add frog textures:
Once the base green is dry, use a smaller brush to dab darker green spots onto the frog’s back and legs. I like to vary the size of these spots to make them look more organic. -
Paint the fishing rod:
Use a steady hand and a small brush with burnt sienna (brown) to paint the thin fishing pole. Ensure it stands out against the dark sky. -
Define the outlines:
After ensuring all paint is bone-dry, use your waterproof fine liner (0.5mm) to outline the frog, lily pads, and fishing pole. Use the thinner 0.1mm pen for delicate details like the fishing line and the tiny fly.
Uneven washes?
If your night sky looks streaky, re-wet the entire sky area (avoiding the moon) and drop more pigment in while wet. Working “wet-on-wet” helps colors blend smoother.
Step 4: Final Magical Touches
-
Draw the stars:
Use your gold paint or metallic pen to draw five-pointed stars scattered across the dark sky. Place some near the moon and others near the edges for balance. -
Add white highlights:
Using white gouache or a gel pen, add tiny dots to the sky for distant stars. Add a small white highlight to the frog’s eye to make it look alert and shiny. -
Refine the water:
Add simple curved lines in the water around the lily pads using your pen or a dark paint mix to suggest ripples and movement. -
Reveal the border:
The most satisfying part: slowly peel away the masking tape at a 45-degree angle. This reveals the clean white frame that gives the illustration a polished, professional look.
Sign your name in the corner and frame your piece to celebrate a peaceful night of fishing
Celestial Magical Frog
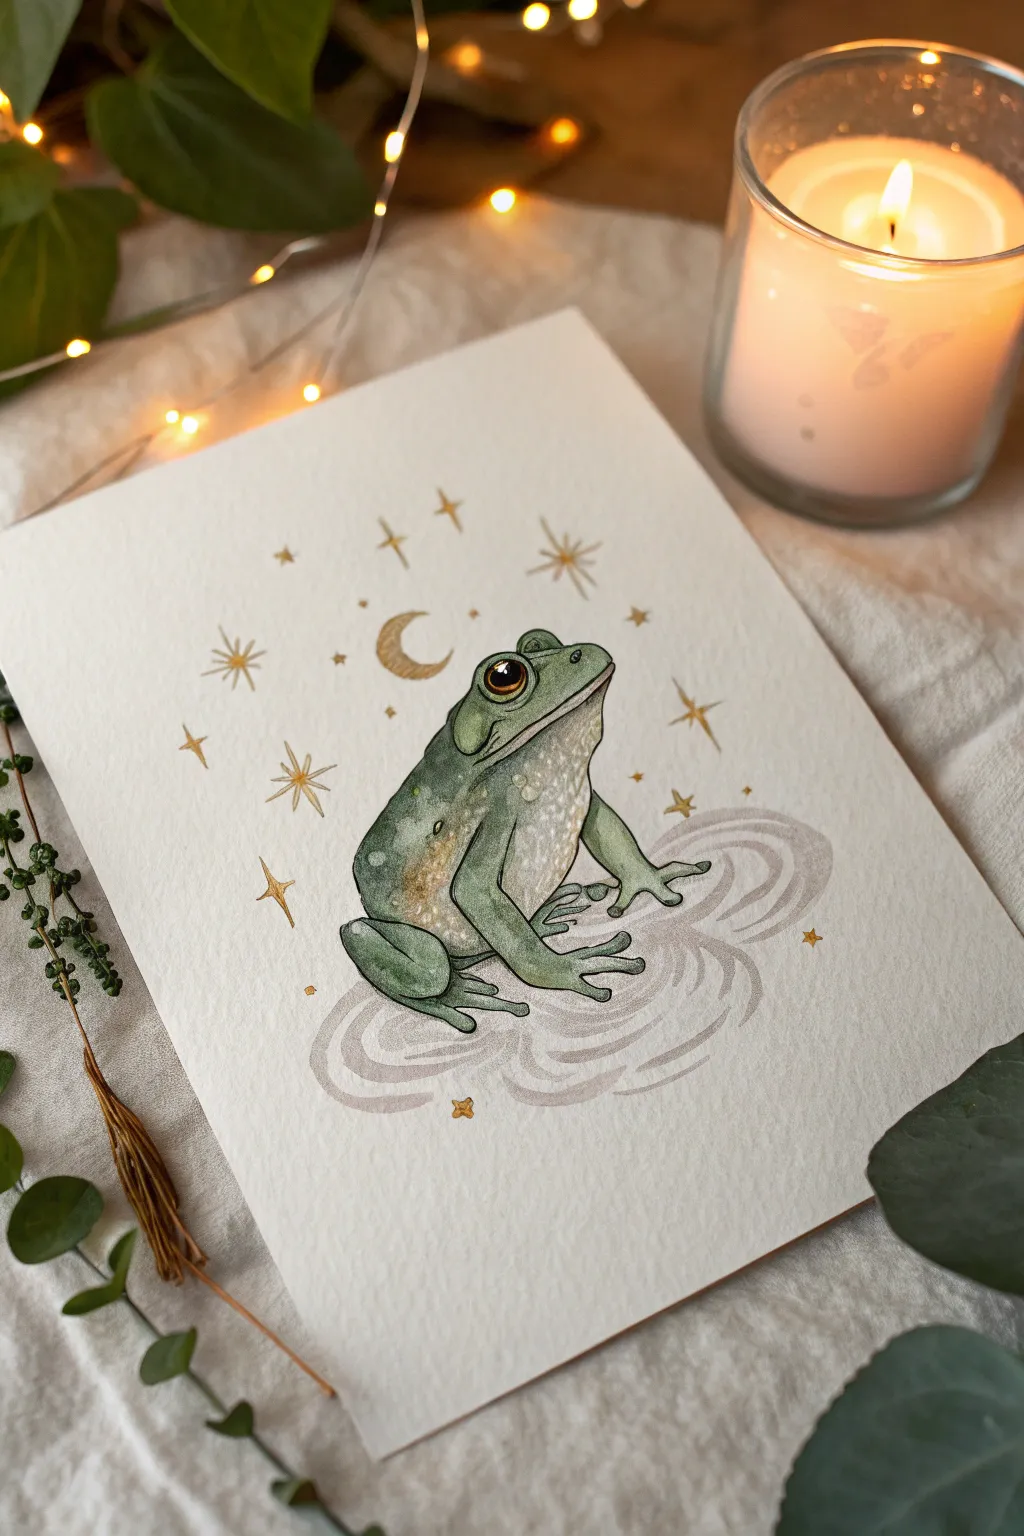

Capture the whimsy of this magical toad sitting amongst the stars with this mixed-media tutorial. Utilizing watercolor for soft textures and metallic gold ink for celestial details, you’ll create an enchanting piece perfect for any sketchbook or gallery wall.
Step-by-Step Tutorial
Materials
- Cold press watercolor paper (300 gsm)
- HB pencil and kneadable eraser
- Waterproof fineliner pens (dark brown or black, sizes 01 and 03)
- Watercolor paints (Sap Green, Olive Green, Burnt Umber, Paynes Gray, Yellow Ochre)
- Metallic gold ink or gold gouache
- Small round watercolor brushes (sizes 2 and 4)
- White gel pen (optional for highlights)
Step 1: Sketching the Composition
-
Basic Shapes:
Start lightly with your HB pencil. Draw a large, tilted oval for the frog’s body and a smaller, rounded triangle shape on top for the head. This frog has a sturdy, grounded posture. -
Defining the Frog:
Refine the outline. Sketch the prominent eye ridge and the large, circular eye. Add the front legs—notice how the toes splay out—and tuck the back leg tightly against the body. -
Adding Celestial Elements:
Above the frog, sketch a crescent moon facing left. Surround the frog with various star shapes: simple four-point stars, small dots, and larger, radiant stars. -
Mapping the Ripples:
Draw loose, concentric organic ovals beneath the frog to represent the ripples in the water/ether where it sits. Keep these lines fluid and relaxed.
Star Shine Pro Tip
For the starburst shapes, paint a simple cross first, then gently pull the wet ink outward at the center points with a damp brush to create tapering, sharp rays.
Step 2: Inking the Outline
-
Main Outline:
Using a 03 waterproof fineliner, trace over your pencil lines for the frog’s main body. Use broken or thinner lines on the belly to suggest texture. -
Detail Work:
Switch to a 01 fineliner for the delicate details like the eye pupil, the frog’s mouth, and the fine ripples beneath it. Don’t ink the stars or moon yet—we want those to be pure gold later. -
Cleanup:
Wait until the ink is completely dry to the touch, then gently erase all visible pencil marks with your kneadable eraser.
Step 3: Watercolor Application
-
Base Green Layer:
Mix a watery wash of Sap Green. Apply this to the top of the head, back, and legs. Leave the throat and underbelly paper-white for now. -
Adding Depth:
While the green is still slightly damp, drop in touches of Olive Green and a tiny bit of Paynes Gray along the back and shadows of the legs to create volume. -
Warming the Tones:
Dilute some Yellow Ochre or a light brown. Gently glaze the frog’s side and the throat area, blending it softly into the white belly to give it a creamy, natural look. -
Painting the Eye:
Use Burnt Umber for the iris of the eye, leaving a tiny white spot unpainted for the reflection. This brings the character to life. -
Shadows and Texture:
I like to use a fairly dry brush with darker green to dab small dots on the back, mimicking warty skin texture. Add a drop shadow under the legs using diluted Paynes Gray. -
The Ripples:
Mix a very pale, watery gray-purple using Paynes Gray and a touch of brown. Paint the ripples with a shaky hand, following the inked lines but staying loose.
Help! My Ink Smudged
If your gold ink smears the black liner, your liner wasn’t waterproof or dry enough. Wait longer between steps, or apply the gold elements first and ink around them.
Step 4: The Golden Touch
-
Mixing the Gold:
Prepare your metallic gold ink or gouache. It should be the consistency of heavy cream to ensure it sits opaque on the paper. -
Painting Stars and Moon:
Carefully paint the crescent moon and every star shape you sketched earlier. The metallic paint catches the light beautifully against the matte watercolor. -
Magical Accents:
Add tiny gold dots randomly around the frog to simulate magic dust. You can also add a thin gold highlight line along the frog’s back or eyelids for extra shimmer. -
Final Highlights:
If your eye reflection got covered, use a white gel pen to add that sharp spark back into the pupil. Ensure all paint is totally dry before framing.
Now you have a charming, starry friend ready to add a touch of magic to your space


Have a question or want to share your own experience? I'd love to hear from you in the comments below!