Whenever I’m teaching beginners, I start with one promise: you can paint a super cute dog without getting tangled up in perfect anatomy. These easy dog painting ideas keep things simple, playful, and totally doable—so you can focus on personality over perfection.
Paw Print Pattern Background
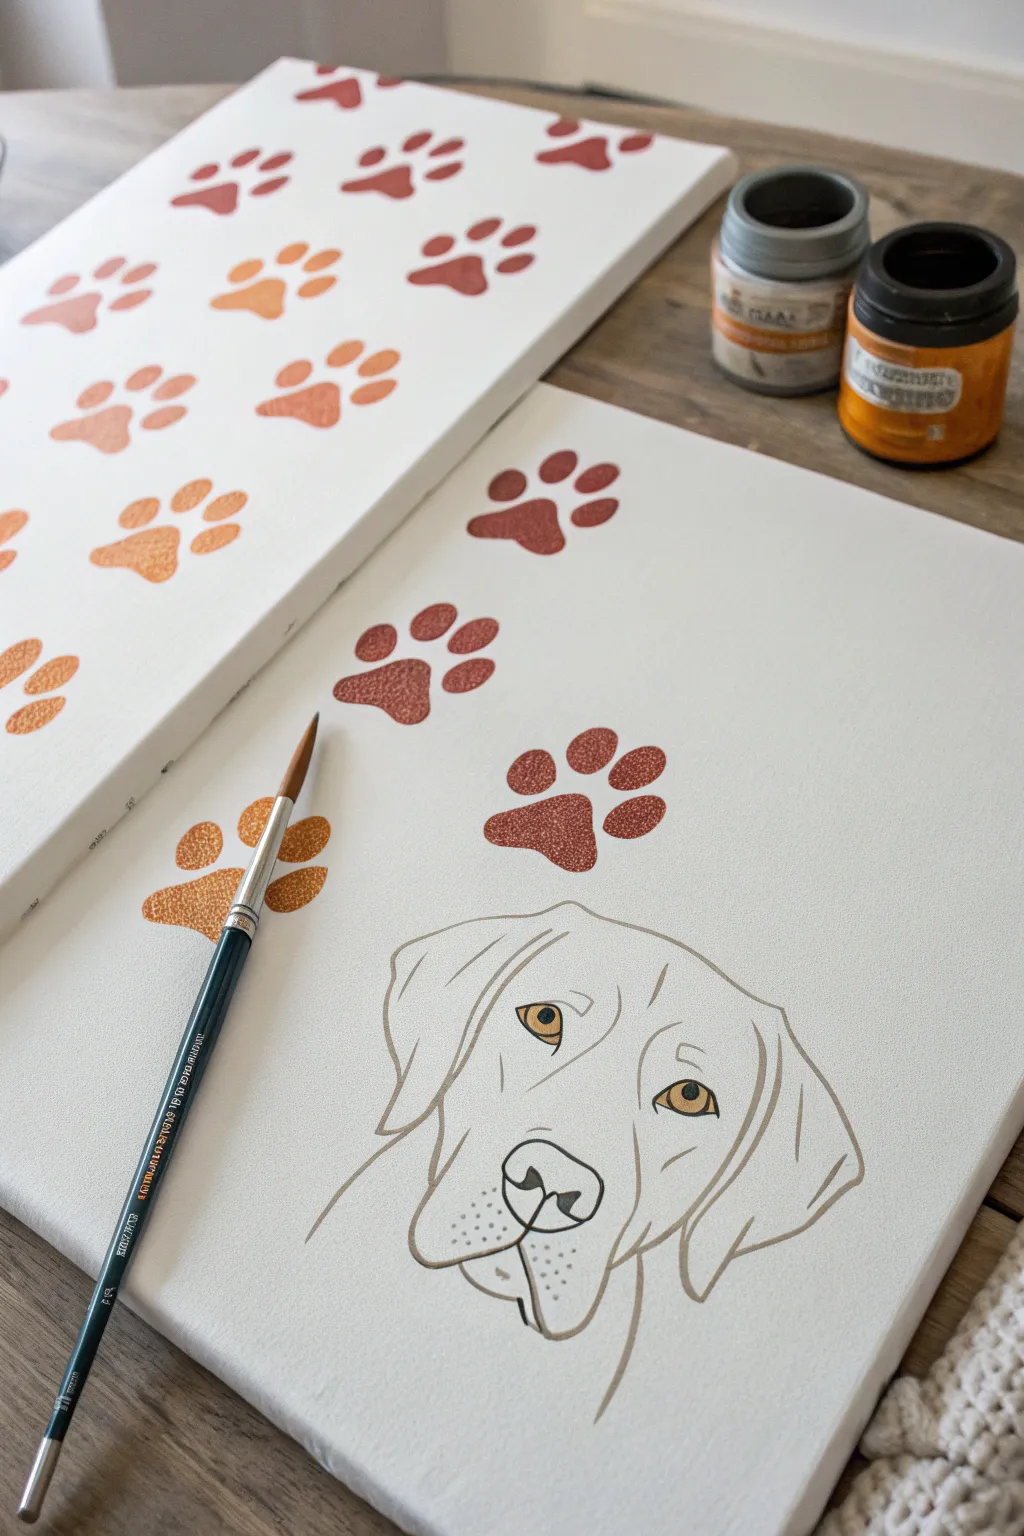
Create a charming two-piece art set featuring a repeating paw print pattern and a minimalist line-art dog portrait. This project combines simple stamping or stenciling techniques with delicate brushwork for a modern, pet-friendly aesthetic.
Step-by-Step Guide
Materials
- Two stretched canvases (white, primed)
- Acrylic paints (terracotta, burnt orange, golden yellow, black)
- Fine liner brush (size 0 or 00)
- Medium round brush
- Paw print stencil or foam stamp (optional)
- Pencil and eraser
- Carbon transfer paper (optional)
- Palette for mixing colors
- Water cup and paper towels
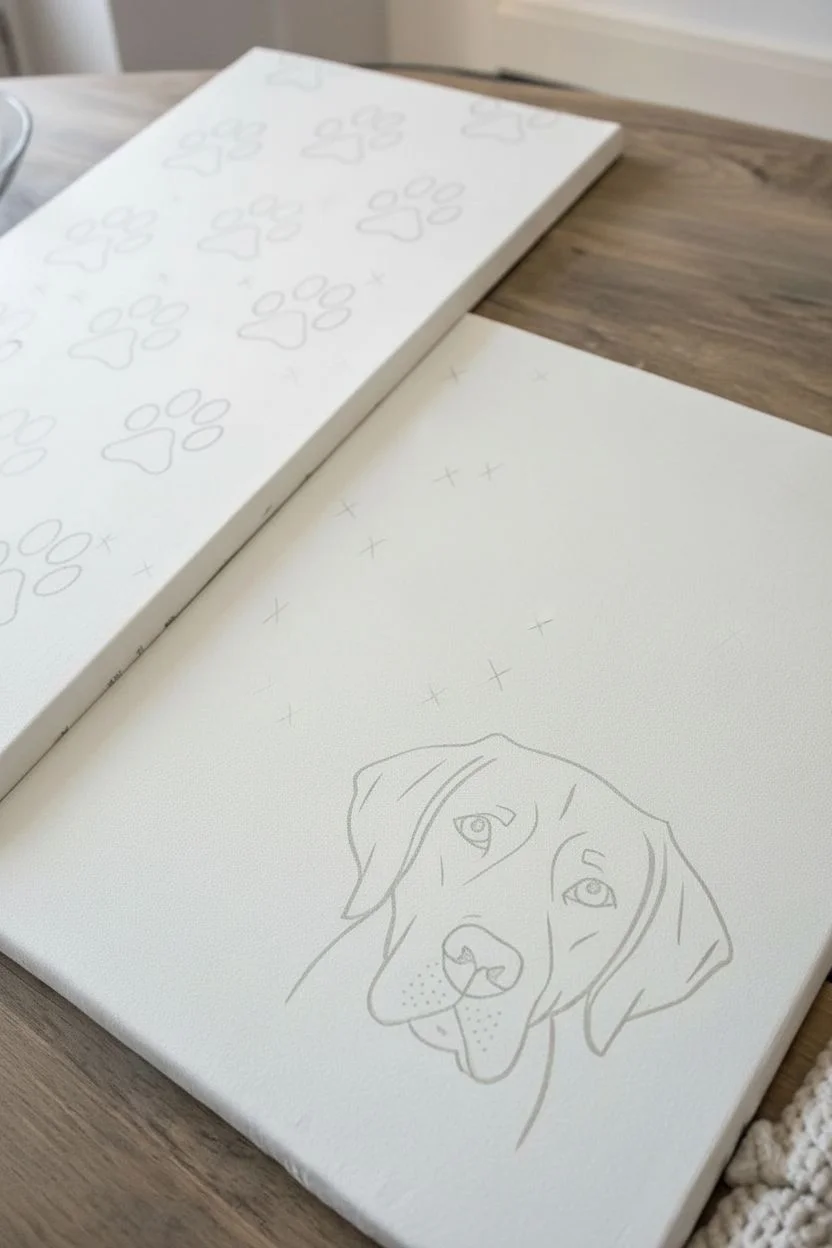
Step 1: Planning the Composition
-
Prepare your workspace:
Set up a clean, flat surface with your two canvases side-by-side. Ensure your lighting is good, as the line work requires steady visibility. -
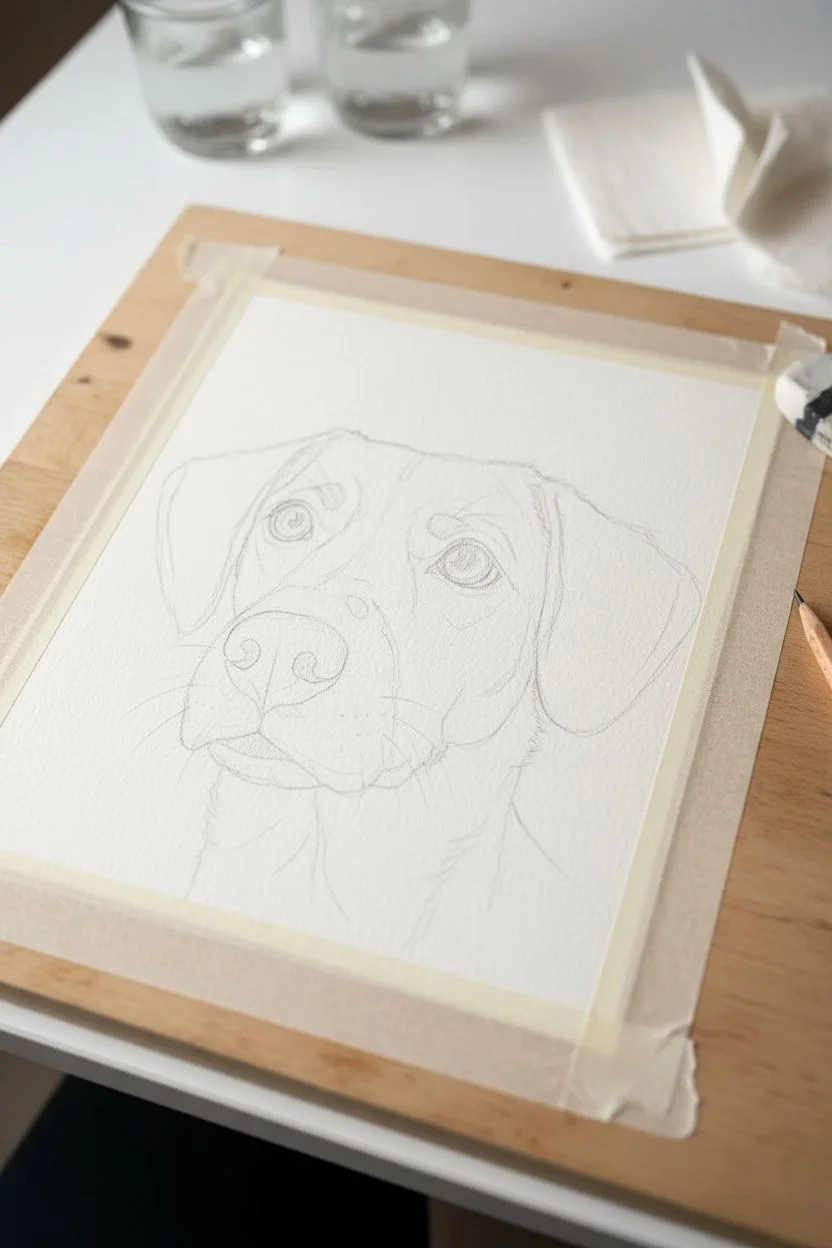
Sketch the dog portrait:
On the first canvas, lightly sketch the outline of a dog’s head using a pencil. Focus on simple, clean lines for the ears, snout, and distinct eyes. If you aren’t confident drawing freehand, print a photo of a dog, place carbon paper underneath, and trace the main contours onto the canvas. -
Refine the sketch:
Go over your pencil lines with an eraser to lighten them until they are barely visible guidelines. This ensures the graphite won’t smear into your paint later. -
Plan the paw placement:
On the second canvas (and the background of the portrait canvas), lightly mark small ‘X’s where you want your paw prints to go. Create a staggered, repeating pattern for the background canvas, and a trailing, scattered path for the portrait canvas.
Uneven Paw Prints?
If brush painting feels too tough, cut a simple paw shape out of a clean kitchen sponge. Dip it in paint and stamp it onto the canvas for uniform shapes.
Step 2: Painting the Paw Prints
-
Mix your palette:
Create a few variations of warm, earthy tones. Mix a terracotta orange, a lighter peach, and a deeper rust color. Having slight variations adds depth to the simple shapes. -
Paint the main pad:
Using a medium round brush, paint the large, triangular pad of the paw print first. Press the brush down and lift it to create a rounded bottom and slightly pointed top. Alternatively, load a foam stamp with paint and press firmly. -
Add the toes:
Paint four smaller oval shapes above the main pad for the toes. Keep the spacing consistent. I like to rotate the canvas slightly to get the angles naturally right for each toe. -
Vary the colors:
As you move across the background canvas, alternate between your mixed paint shades. Some paws can be solid terracotta, others slightly lighter or darker. -
Detail the portrait background:
On the portrait canvas, paint the paw prints starting from the top and trailing down towards the dog’s head. Leave plenty of negative white space around the sketch. -
Let the paws dry:
Allow the paw prints on both canvases to dry completely before moving on to the fine line work. This prevents accidental smudging.
Step 3: Defining the Portrait
-
Load the liner brush:
Thin down a small amount of black or dark grey acrylic paint with a drop of water. The consistency should be like ink so it flows smoothly off the brush. -
Outline the head:
Using your fine liner brush, carefully trace over your pencil sketch. Use varied line weight—press slightly harder for the ears and jawline, and use a feather-light touch for fur details. -
Detail the nose and muzzle:
Paint the nose outline, adding the nostrils. Use tiny dots (stippling) on the muzzle area to suggest whisker follicles without drawing actual whiskers. -
Paint the eyes:
Outline the almond shape of the eyes. This is the focal point, so take your time to get the symmetry right. -
Add the eye color:
Wash your brush thoroughly. Pick up your golden yellow paint and carefully fill in the irises of the dog’s eyes. This pop of color brings the drawing to life. -
Final pupil details:
Once the gold paint is dry, use the black liner again to add the pupil and a thin outline around the iris. Leave a tiny white speck unpainted (or add a white dot later) for a catchlight to make the eyes look wet and realistic. -
Erase guidelines:
Wait at least an hour for the paint to fully cure, then gently erase any visible pencil marks remaining on the canvas.
Level Up: Texture
Mix a tiny pinch of sand or baking soda into the paw print paint before applying. This gives the prints a gritty, realistic texture that pops off the canvas.
Display your new duo together for a cute, customized tribute to your furry friend


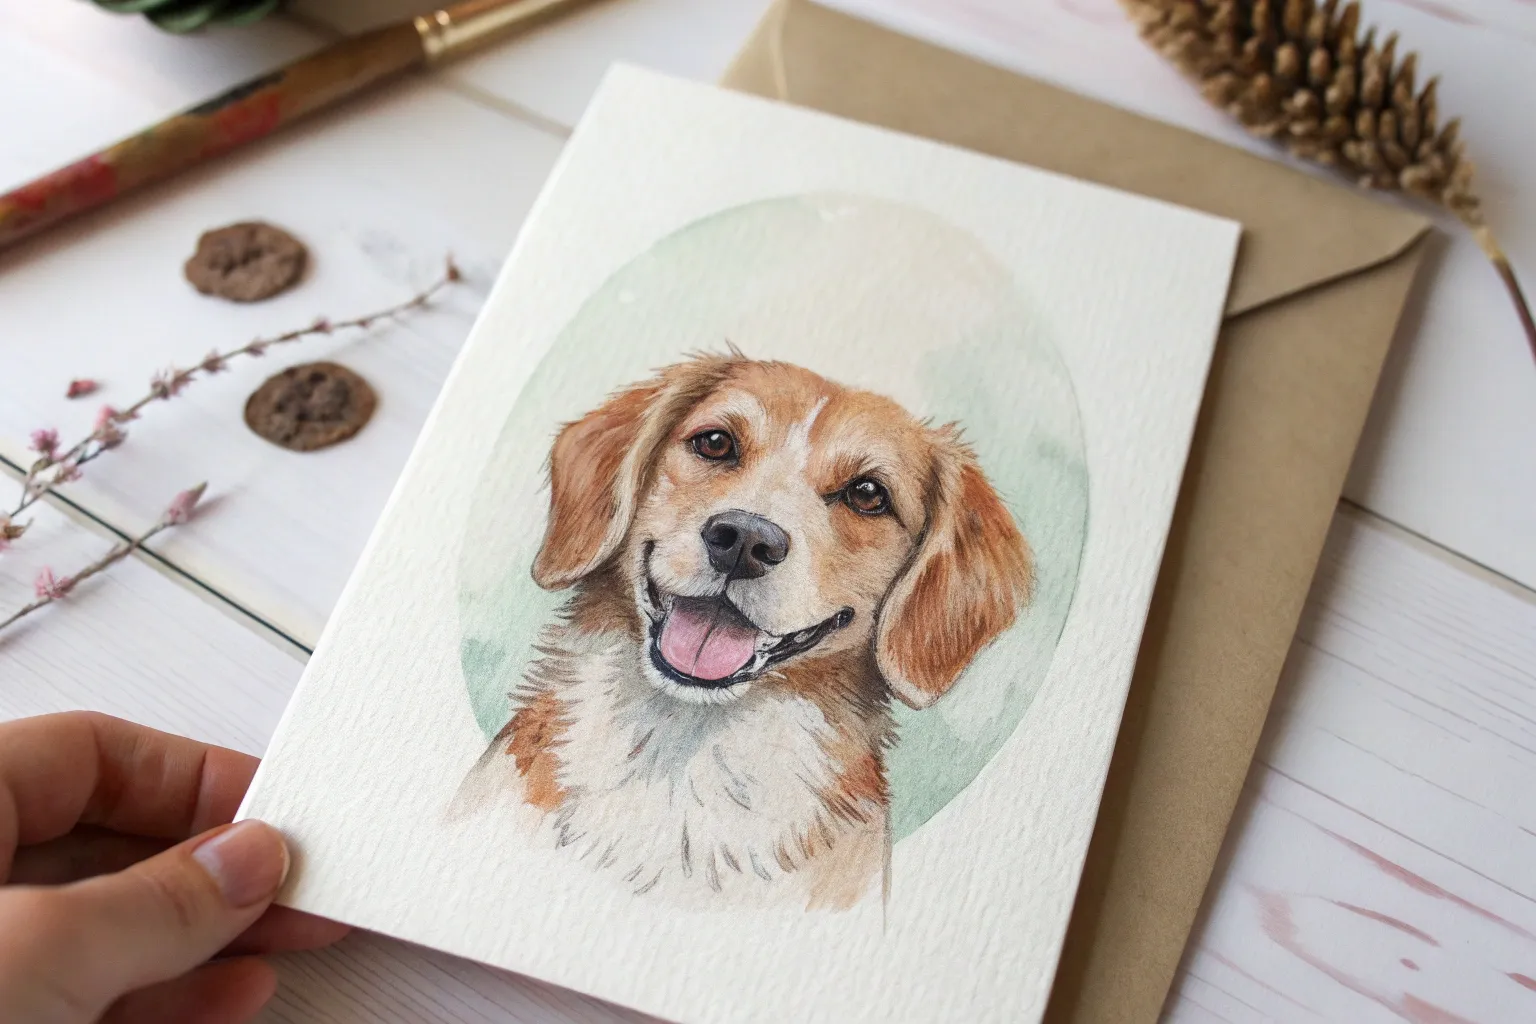
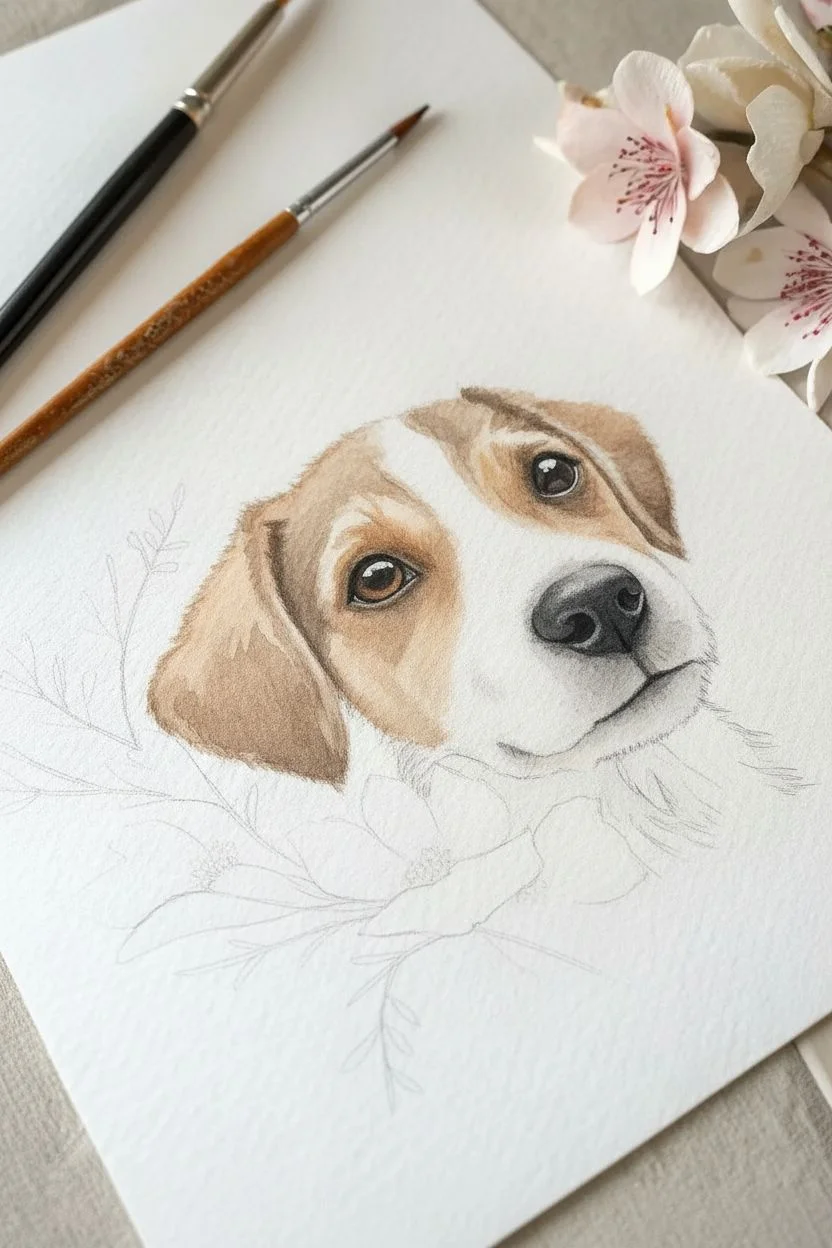
Floppy-Ear Puppy Portrait
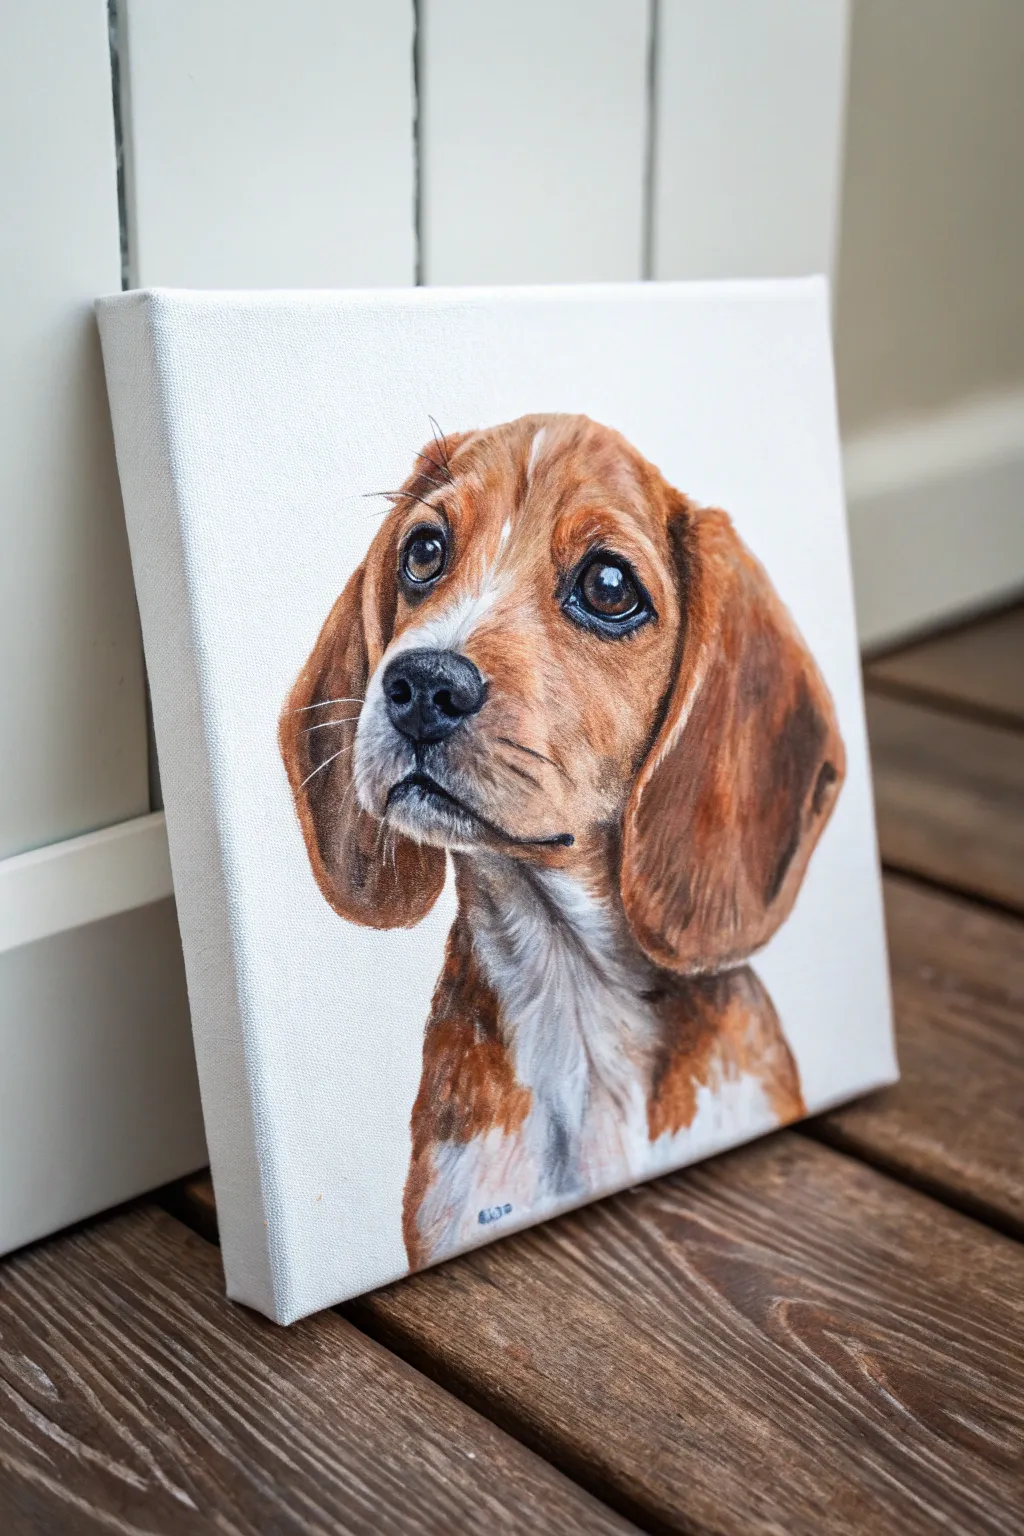
Capture the soulful gaze of man’s best friend with this adorable beagle puppy portrait. Using warm earth tones and careful layering, you’ll create a lifelike painting that emphasizes soft fur textures and expressive eyes.
Step-by-Step Guide
Materials
- Square stretched canvas (approx. 10×10 or 12×12 inch)
- Acrylic paints (Titanium White, Burnt Sienna, Raw Sienna, Yellow Ochre, Burnt Umber, Mars Black)
- Set of synthetic brushes (flat shader, filbert, round size 4, detail liner)
- Palette for mixing
- Water cup and paper towels
- Pencil for sketching
- Reference photo of a beagle puppy
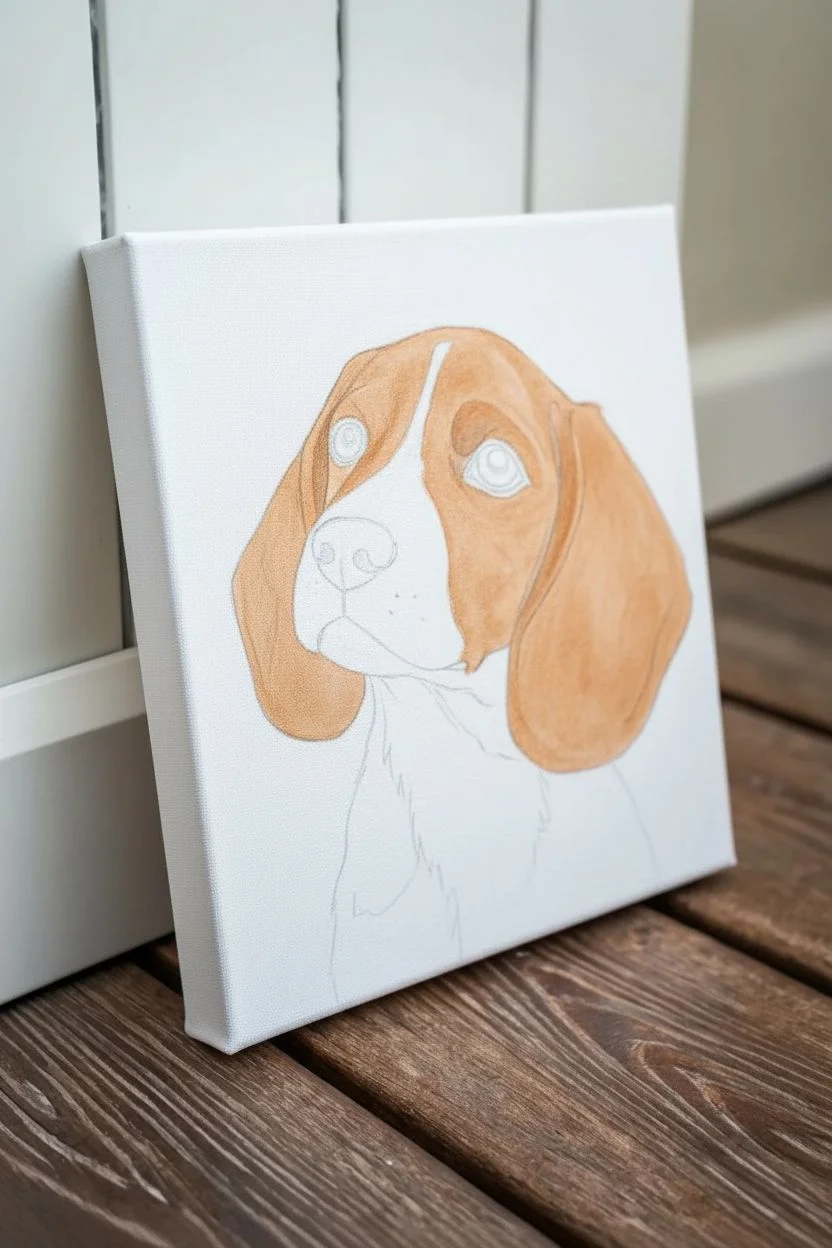
Step 1: Sketching and Underpainting
-
Map the proportions:
Begin by lightly sketching the outline of the puppy’s head on your canvas with a pencil. Focus on the large shapes first: the dome of the head, the long floppy ears, and the muzzle area. -
Refine the features:
Draw in the details of the face, paying special attention to the placement of the eyes and nose. Beagle eyes are typically wide-set and soulful, so take your time getting their shape correct. -
Block in base colors:
Mix a light wash of Burnt Sienna and water. Apply this to the medium-dark areas of the fur, avoiding the white patches on the muzzle and chest. This establishes a warm undertone for the painting.
Paint Viscosity Tip
For fine whiskers, add a drop of water or glazing medium to your paint. It should flow like ink to create long, smooth lines without breaking.
Step 2: Layering the Fur
-
Paint the darks:
Using Burnt Umber, paint the darkest shadow areas under the ears and the neck. Don’t worry about individual hairs yet; just focus on blocking in the values. -
Mid-tone applications:
Mix Raw Sienna with a touch of Burnt Sienna. Apply this to the main areas of the head and ears. Use a filbert brush to mimic the direction of the fur growth. -
Adding the white fur:
Paint the muzzle, the stripe up the forehead, and the chest area with Titanium White. If your underpainting shows through, apply a second coat after the first dries for solid coverage. -
Blending the transitions:
While the paint is still slightly workable, use a clean, dry brush to soften the edges where the brown and white fur meet. This creates a natural gradient rather than a harsh line.
Fur Looks Flat?
Add more contrast. Deepen your shadows with Burnt Umber and brighten highlights. Fur relies on layers of different values to look 3D.
Step 3: Detailing the Face
-
Painting the eyes:
Fill the iris area with a dark brown mix. Use pure black for the pupil. Once dry, add a tiny dot of white for the catchlight reflection—this brings the eyes to life instantly. -
Defining the nose:
Paint the nose with a mixture of Mars Black and a tiny bit of white to make a dark charcoal grey. Use pure black for the nostrils to create depth. -
Nose texture:
Stipple (dot) a slightly lighter grey on the top of the nose to suggest the bumpy, wet texture typical of a dog’s nose. -
Refining the mouth:
Use a liner brush with dark brown/black paint to define the mouth line and the jowls, ensuring a slight curve to give the puppy a gentle expression.
Step 4: Texture and Fur Details
-
Creating fur texture:
Take a small round brush and mix a lighter version of your brown (add Yellow Ochre and White). Paint short, flickering strokes over the brown areas to simulate individual hairs. -
Highlighting the ears:
Add lighter highlights to the top curves of the floppy ears where the light hits. Keep your strokes following the downward curve of the ear flap. -
Shadows in white fur:
Mix a very pale grey-blue. Use this to paint subtle shadows in the white chest hair and on the side of the muzzle to show form and fluffiness. -
Adding whiskers:
Dilute a bit of black or white paint until it’s inky. Using your finest liner brush, confidently pull quick, thin strokes for the whiskers on the muzzle and above the eyes. -
Final touches:
Step back and assess your painting. I like to darken the very deepest shadows one last time, especially under the chin, to make the portrait pop off the white background.
Now you have a charming puppy portrait ready to brighten any room


Pointy-Ear Dog Profile
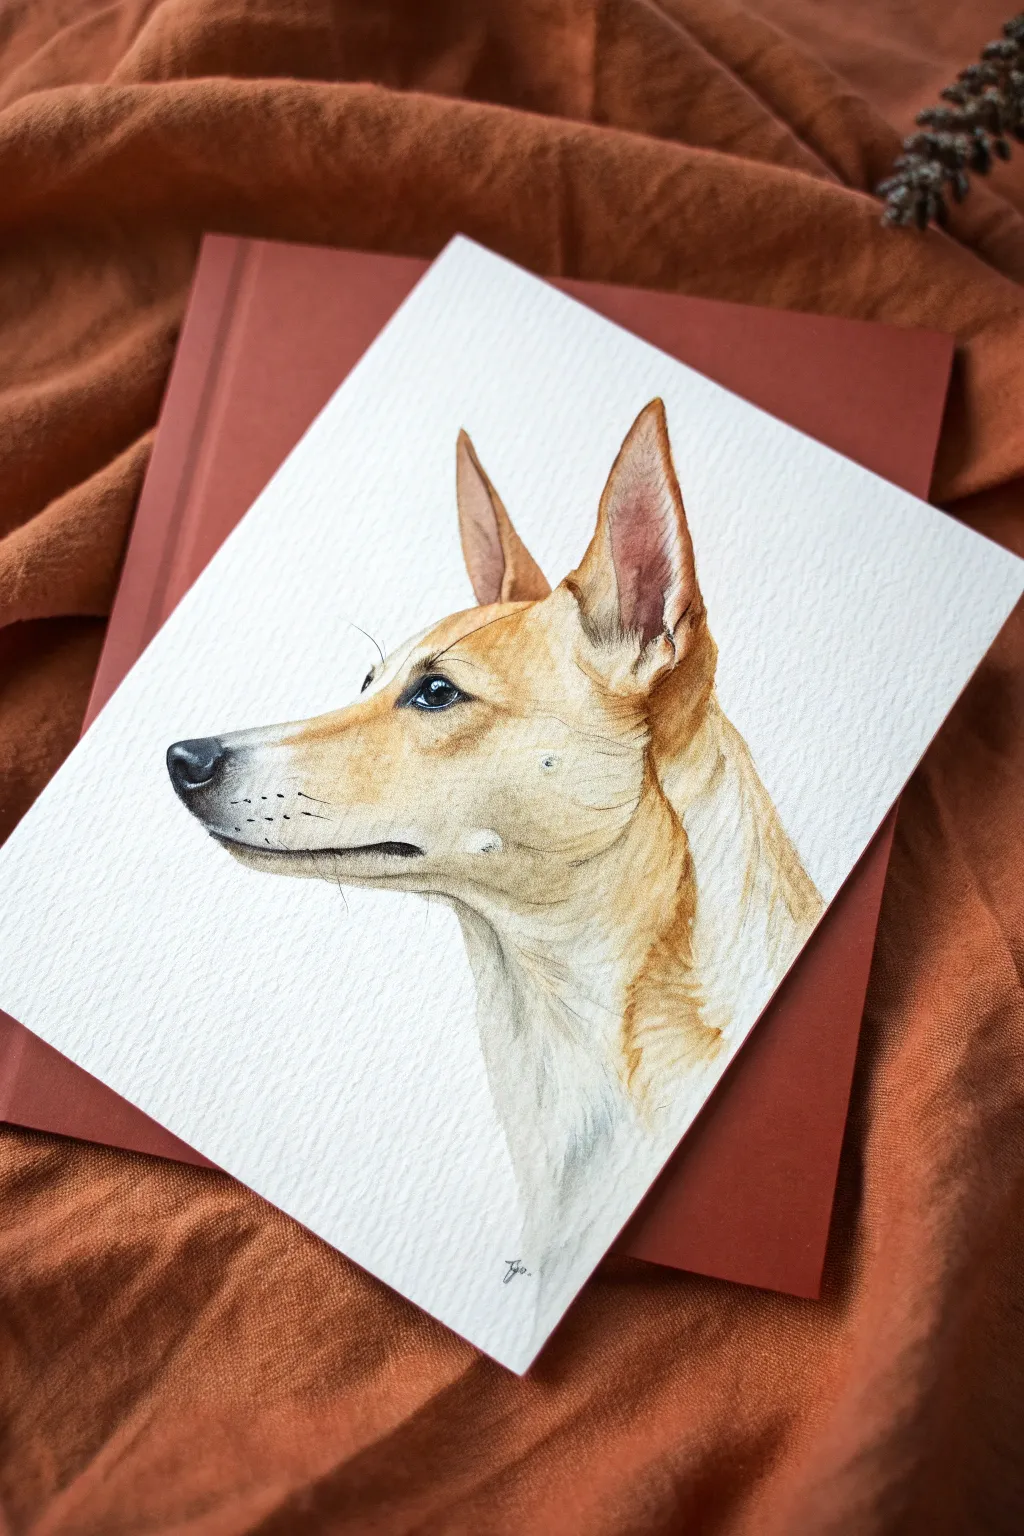
This elegant tutorial captures the noble profile of a dog using layered watercolour washes and precise pencil details. The combination of soft, glowing underlayers and sharp fur textures creates a lifelike portrait that feels both classic and contemporary.
Step-by-Step Tutorial
Materials
- Cold press watercolor paper (300gsm/140lb)
- HB and 2B graphite pencils
- Kneadable eraser
- Watercolor paints (Yellow Ochre, Burnt Sienna, Burnt Umber, Ivory Black, Ultramarine Blue)
- Small round brushes (size 0, 2, and 4)
- Clean water jar
- Paper towels
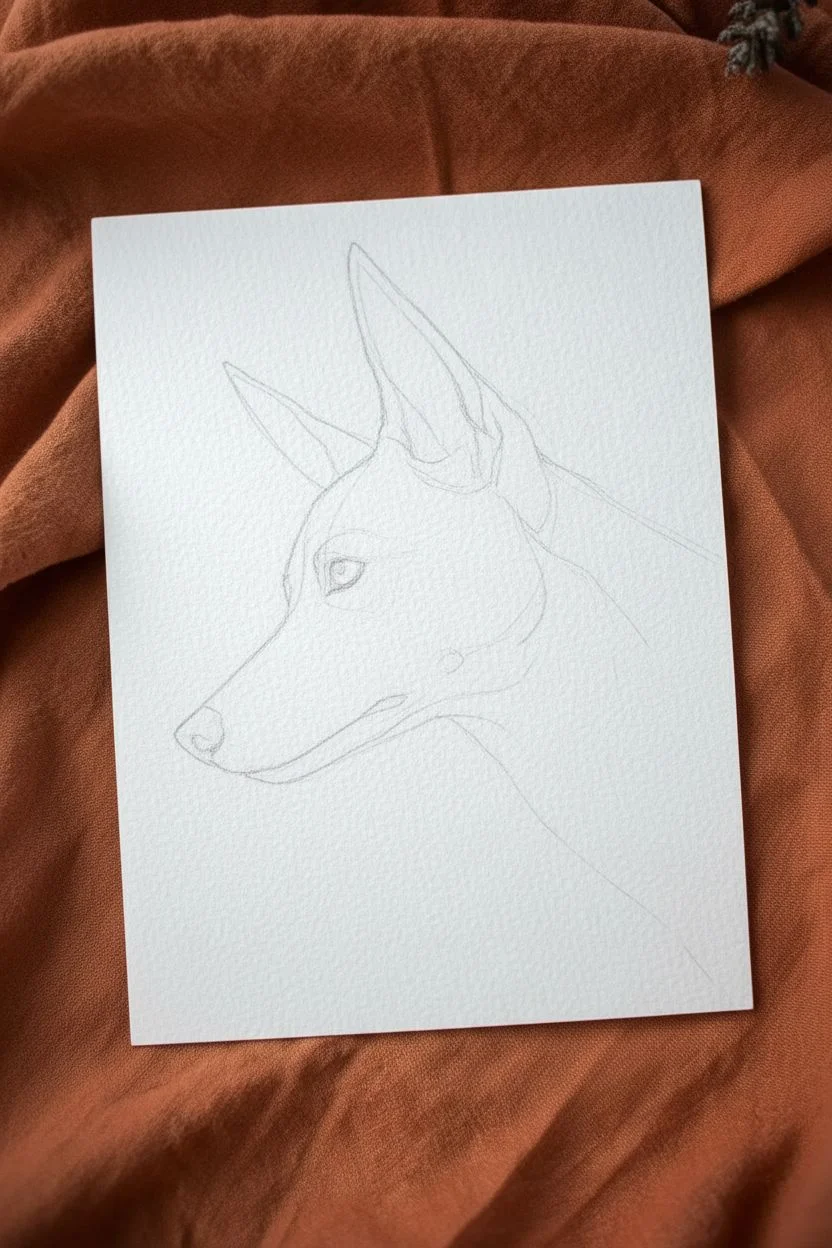
Step 1: Sketching the Framework
-
Establish basic shapes:
Begin with an HB pencil, using very light pressure. Draw a circle for the cranium and a tapered rectangle for the muzzle to establish the head shape. Add two large triangles for those distinctive pointy ears. -
Define the profile:
Refine the outline of the snout, paying close attention to the slope from the forehead to the nose. Mark the position of the eye, placing it roughly halfway between the ear base and the nose stop. -
Add feature details:
Sketch the nose shape, the mouth line, and the inner ear folds. Keep your lines faint so they won’t show through transparent watercolor layers later. -
Clean up the sketch:
Use a kneadable eraser to lift away any structural guidelines or heavy graphite. You want a ‘ghost’ outline that is barely visible.
Wet-on-Wet Magic
For smooth transitions on the neck, pre-wet the paper with clean water before dropping in the darker brown paint. It creates a soft, furry gradient.
Step 2: Layering the Base Coat
-
Mix the base tone:
Create a very watery mix of Yellow Ochre with a tiny touch of Burnt Sienna. You want a pale, warm golden color. -
Apply the first wash:
With a size 4 brush, paint the entire head area, excluding the white of the eye and any bright white highlights on the chest. Let the water carry the pigment for a smooth finish. -
Create soft shadows:
While the paper is still slightly damp, drop in a slightly stronger mix of Burnt Sienna around the eye socket, the side of the muzzle, and inside the ears to build immediate volume. -
Paint the nose and eye:
Mix Ivory Black with a touch of Ultramarine Blue for a cool grey. Carefully fill in the nose and the pupil, leaving a tiny spot of white paper for the highlight in the eye to bring it to life. -
Dry completely:
Allow the paper to dry fully. It should feel cool to the touch if it’s still damp, so wait until it’s room temperature before proceeding.
Step 3: Building Texture and Depth
-
Deepen the ear tones:
Mix a reddish-brown using Burnt Sienna and a hint of red. Paint the inner shadows of the ears, softening the edges with a clean, damp brush to mimic the smooth skin texture there. -
Add facial structure:
Using a size 2 brush and a Burnt Umber mix, glaze over the darker areas behind the jawline and under the cheekbone. This defines the anatomy. -
Paint the fur texture:
Switch to your smallest brush (size 0). Using a ‘dry brush’ technique with minimal water, flick tiny hairs in the direction of growth. Focus on the neck ruff and the bridge of the nose. -
Refine the muzzle:
Add tiny dots for the whisker pores on the snout using a dark grey mix. Be random with their placement for a natural look. -
Whiskers and final details:
With a sharp pencil or a very fine rig of black paint, draw the long whiskers quickly and confidently. Add a final dark glaze to the nose nostril for depth. -
Soft chest fur:
For the white chest area, use a very dilute grey-blue wash to suggest shadow rather than painting individual white hairs. Keep the edges soft and feathery.
Add a Sparkle
If you accidentally painted over the eye highlight, use a white gel pen or a dot of white gouache at the very end to restore that vital spark of life.
Now you have a soulful portrait ready to display or gift to a dog lover


Peeking Dog From the Bottom Edge

Capture the irresistible curiosity of man’s best friend with this realistic watercolor portrait that playfully peeks from the bottom edge of the page. The use of textured cold-press paper adds depth to the fur, while simple layering techniques bring the soulful eyes and wet nose to life.
Step-by-Step
Materials
- Cold press watercolor paper (300 gsm)
- Pencil (HB or H) and kneaded eraser
- Watercolor paints (burnt sienna, yellow ochre, raw umber, burnt umber, lamp black, Payne’s gray)
- White designer gouache (for highlights and whiskers)
- Round watercolor brushes (sizes 2, 6, and 8)
- Fine liner brush (size 0 or 00)
- Two jars of water and paper towels
- Masking tape
Step 1: Sketching and Preparation
-
Secure the paper:
Tape your cold press watercolor paper securely to a board or table surface using masking tape. This prevents buckling when the paper gets wet. -
Establish the composition:
Lightly sketch the dog’s head shape so it originates from the very bottom edge of the paper. The chin should be ‘cut off’ by the bottom border, creating the illusion that the dog is looking up from below. -
Detail the features:
Draw the main features with a light touch. Focus on the large almond eyes, the triangular drop ears, and the prominent snout. Don’t shade with the pencil; just outline the distinct zones where the brown, black, and white fur markings meet.
Muddy Fur?
If fur colors look muddy, you may be reworking wet layers too much. Let each layer of hair texture dry completely before adding the next set of strokes on top.
Step 2: Layering the Base Colors
-
First wash: Golden tones:
Mix a watery wash of yellow ochre and burnt sienna. Apply this to the lighter brown areas of the face—primarily around the forehead, cheeks, and base of the ears—avoiding the white muzzle and the black ear tips. -
Shadows on white fur:
While the brown dries, mix a very faint, diluted grey using Payne’s grey and plenty of water. Paint the shadow areas on the white muzzle and chest, particularly under the chin, to give volume to the white fur without making it look dirty. -
Deepening the browns:
Once the first layer is dry, use burnt umber to add shorter brush strokes over the golden areas, mimicking the direction of hair growth. I like to let the underlayer peek through slightly to create a rich fur texture. -
Dark ear markings:
Mix burnt umber with a touch of drawing black or lamp black. Paint the dark flaps of the ears, blending gently into the brown sections so there isn’t a harsh line between colors.
Step 3: Refining Features and Texture
-
Painting the nose:
Use a dark grey mix (black + water) for the nose leather. Paint it solid, but lift out a little pigment on the top curve with a clean, damp brush while it’s still wet to create a soft highlight on the bumpy texture. -
Nostrils and details:
Once the nose base is dry, use pure black to paint the nostrils and the deep central crease. Add tiny dots of black on the muzzle where the whiskers will eventually go. -
Capturing the eyes:
Paint the irises with a warm brown like burnt sienna. While wet, drop in darker brown around the edges. Leave a tiny speck of dry paper white for the reflection, or add it later with gouache. -
Pupils and eyeliner:
Use your smallest brush and black paint to fill in the pupil and outline the eye rim (the ‘eyeliner’). This contrast instantly makes the painting look realistic.
Realistic Eyes
Paint the eye reflection (catchlight) near the top of the pupil, overlapping both the black pupil and brown iris slightly. This makes the eyes look glassy and convex.
Step 4: Final Fur Details
-
Individual hairs:
Switch to your size 0 or fine liner brush. With a slightly thicker mix of burnt umber and black, flick tiny lines in the direction of fur growth around the eyebrows, snout bridge, and ear edges. -
Softening edges:
If any fur markings look too rigid, take a damp brush and gently scrub the edge to blur it slightly, making the coat look soft rather than geometric. -
Adding whiskers:
Load a fine liner brush with white gouache diluted to a creamy consistency. Using quick, confident flicks, paint the long whiskers protruding from the muzzle and chin. Add a few above the eyes as well. -
Final highlights:
Add tiny touches of white gouache to the wettest part of the nose and strengthen the catchlight in the eyes if needed. Step back and assess the contrast, darkening the deepest shadows under the ears if necessary.
Remove the tape carefully to reveal a crisp border around your charming new canine friend
BRUSH GUIDE
The Right Brush for Every Stroke
From clean lines to bold texture — master brush choice, stroke control, and essential techniques.
Explore the Full Guide
Dog With a Tennis Ball

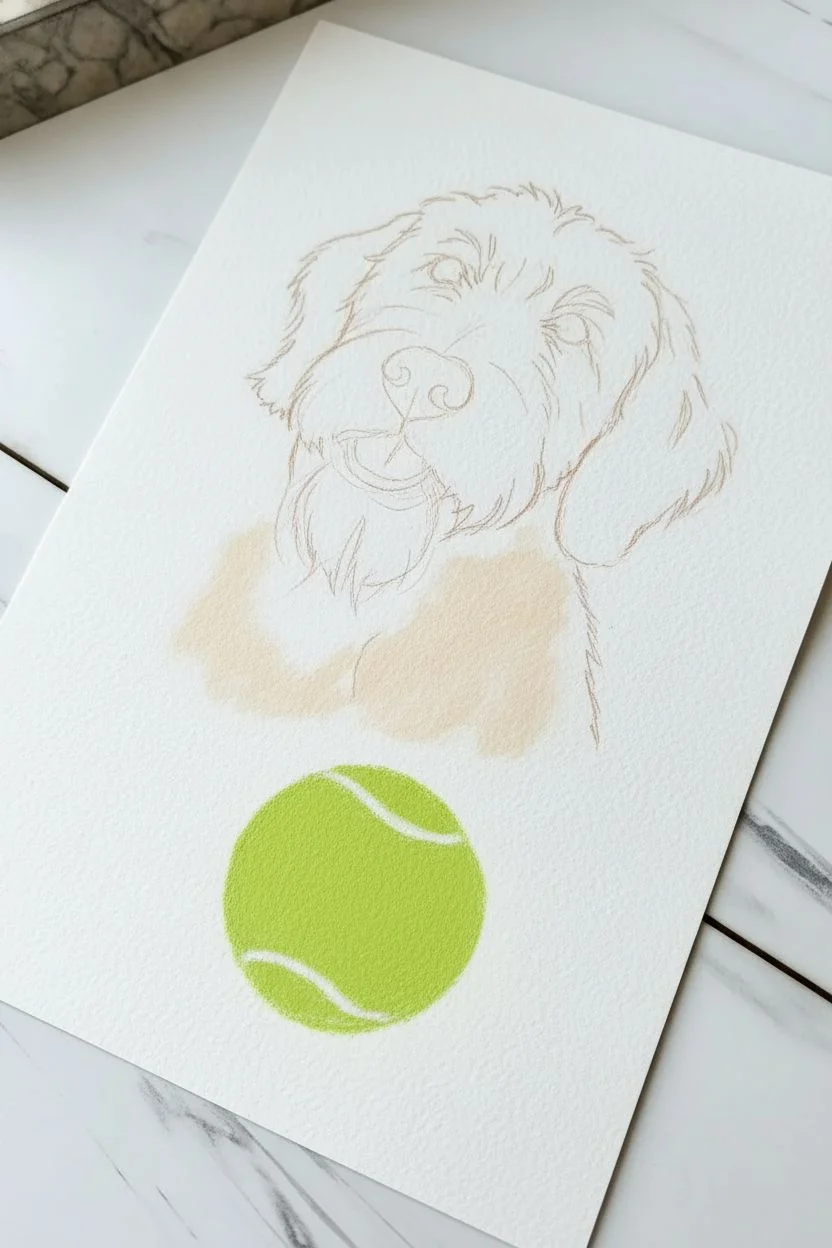
Capture the joyful expression of a furry friend with this detailed pastel and colored pencil portrait. The combination of soft textures for the fur and a vibrant, fuzzy-looking tennis ball creates a realistic yet heartwarming composition.
How-To Guide
Materials
- Pastel paper (sanded or textured surface)
- Pastel pencils (ochre, burnt sienna, dark brown, black, white, pink)
- Soft pastels (cream, beige, white, lime green)
- Colored pencils (dark grey, black for fine details)
- Blending stumps or tortillons
- Kneaded eraser
- Fixative spray
- Reference photo of a dog
- Real tennis ball (for reference)
Step 1: Sketching & Blocking In
-
Outline the basics:
Begin by lightly sketching the outline of the dog’s head and the tennis ball using a light brown pastel pencil. Focus on the big shapes: a circle for the ball in the foreground and the oval shape of the dog’s head just behind it. -
Map facial features:
Mark the position of the eyes, the large nose, and the open mouth. Ensure the eyes are level and the snout projects forward appropriately. -
Block base colors:
Using the side of a cream soft pastel, lay down a base layer for the lighter parts of the fur on the forehead and muzzle. Use a light ochre for the ears and neck area. Don’t worry about texture yet; just get the color down.
Fuzzy Texture Trick
For the tennis ball fuzz, try using a small, stiff bristle brush to tap and stipple the wet paint or pastel dust. It creates that chaotic felt texture instantly.
Step 2: Creating Fur Texture
-
Layer mid-tones:
Switch to pastel pencils. Start adding strokes of burnt sienna and dark goldenrod to define the darker patches of fur around the ears and neck. Follow the direction of hair growth with your strokes. -
Build the snout:
The fur on the muzzle is shorter and lighter. Use a white or cream pastel pencil to make short, flicking strokes radiating outward from the nose bridge. Layer these over your base color to create depth. -
Define the beard:
For the longer ‘beard’ hair on the chin, use longer, sweeping strokes with a mix of cream and light brown pencils. Allow some strokes to overlap the darker neck fur to show layering. -
Add deep shadows:
Use a dark brown pastel pencil to deepen the shadows under the ears, beneath the chin, and inside the open mouth. This contrast is crucial for a 3D effect.
Step 3: Features & Details
-
Paint the nose:
Color the nose with a dark grey or black pastel. Leave a small, uncolored spot or add a touch of white later for a wet highlight. Texture the nose by stippling lightly with a black colored pencil. -
The eyes have it:
Fill the eyes with a warm brown. Add a black pupil and outline the rim. Place a tiny, sharp white dot in each eye—this ‘catchlight’ brings the dog to life instantly. -
Mouth and tongue:
Color the tongue with a soft pink pastel pencil. Shade the back of the tongue slightly darker to show it receding into the mouth. Outline the lips with dark grey to define the smile. -
Refine fur details:
Go back over the fur with your sharpest pencils. Add stray hairs around the edges of the ears and top of the head for a fluffy, realistic look. I like to keep my pencil very sharp here for crisp lines.
Muddy Fur?
If your fur colors look muddy, you’re blending too much. Fur relies on distinct, unblended strokes layered over each other. Stop blending and start layering crisp strokes.
Step 4: The Tennis Ball
-
Base coat:
Fill the circle shape with a lime green soft pastel. Apply it fairly heavily to get a solid, vibrant color base. -
Shadow and form:
To make the ball look round, shade the bottom and right side with a slightly darker olive green pastel. Blend this gently into the lime green using a finger or stump. -
Add the fuzz:
Use a sharp lime green or yellow-green pastel pencil to create the fuzzy texture. Make tiny, excessively scribbled loops or short hatching marks all over the surface, extending slightly past the edge of the circle. -
The white seams:
Draw the curved white lines of the tennis ball pattern. Don’t make them solid lines; use a white pastel pencil and make them look slightly broken and fuzzy, just like felt. -
Cast shadow:
Add a very faint, soft grey shadow underneath the ball on the paper to ground it, so it doesn’t look like it’s floating.
Step back and admire the soulful eyes and playful spirit you’ve captured on paper
Puppy in a Bubble Bath
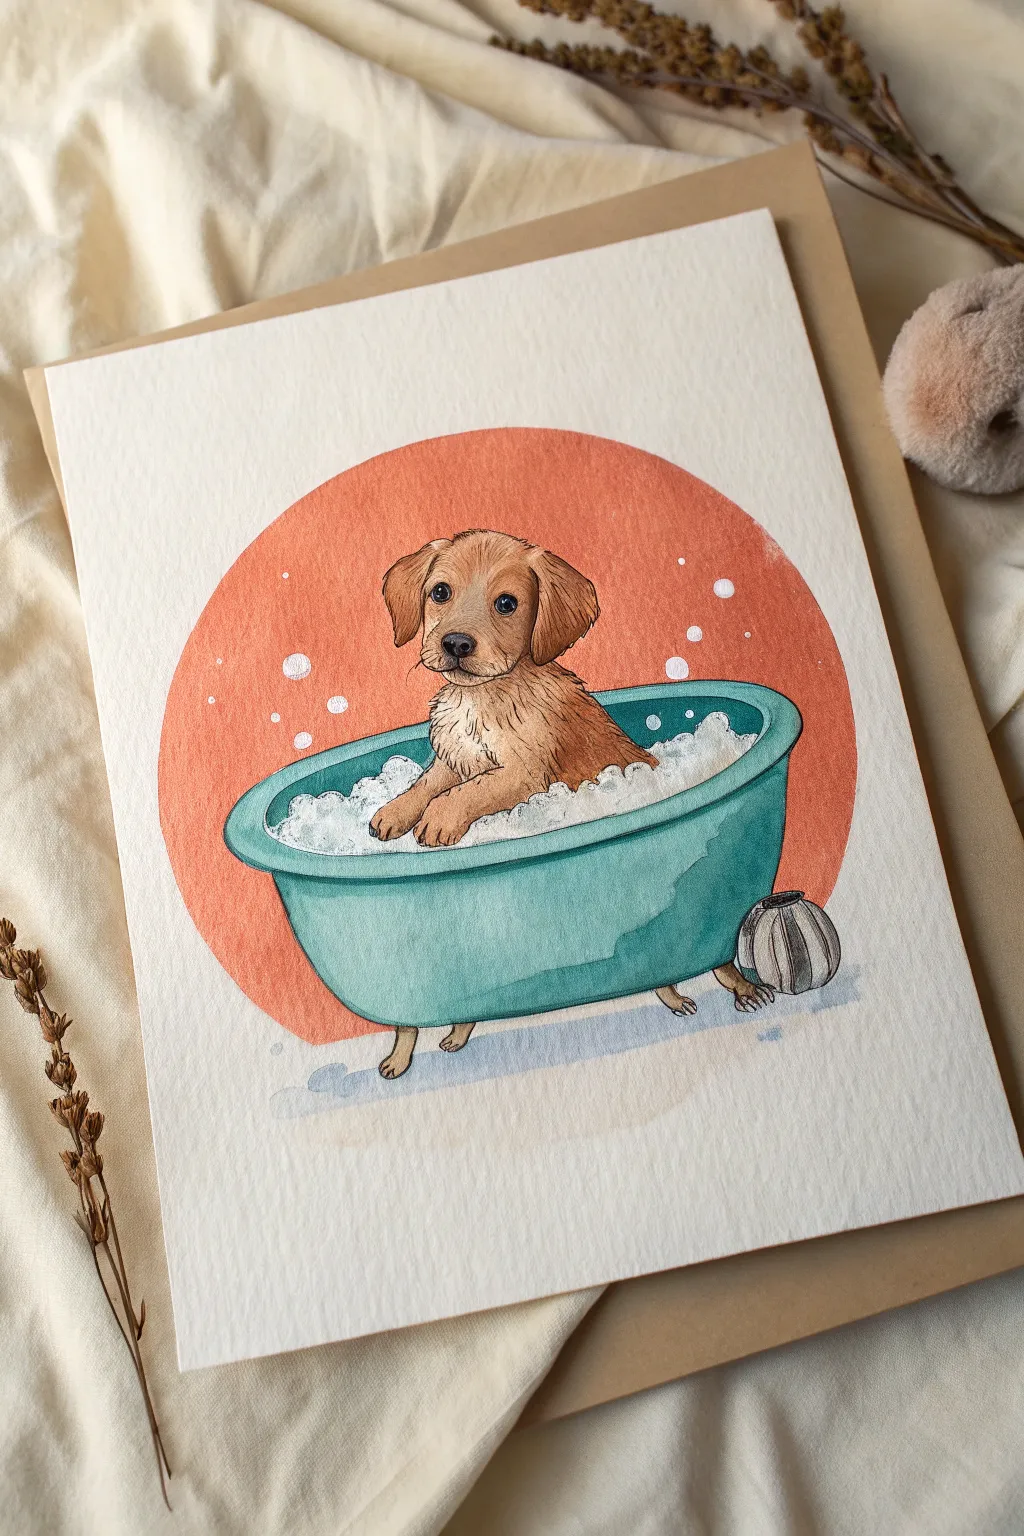
Capture the charm of a bubbly spa day with this adorable watercolor illustration featuring a golden puppy soaking in a vintage tub. The warm orange background perfectly contrasts with the cool teal water, making the subject pop right off the textured paper.
Step-by-Step Guide
Materials
- Cold press watercolor paper (300 gsm)
- Watercolor paints (Burnt Sienna, Yellow Ochre, Turquoise/Teal, Vermilion, Payne’s Grey)
- White gouache or white gel pen
- Fine liner pen (micron 01 or 03 in brown or black)
- Round watercolor brushes (sizes 2, 4, and 8)
- Pencil and eraser
- Masking fluid (optional but helpful)
- Circular stencil or compass
Step 1: Sketching the Layout
-
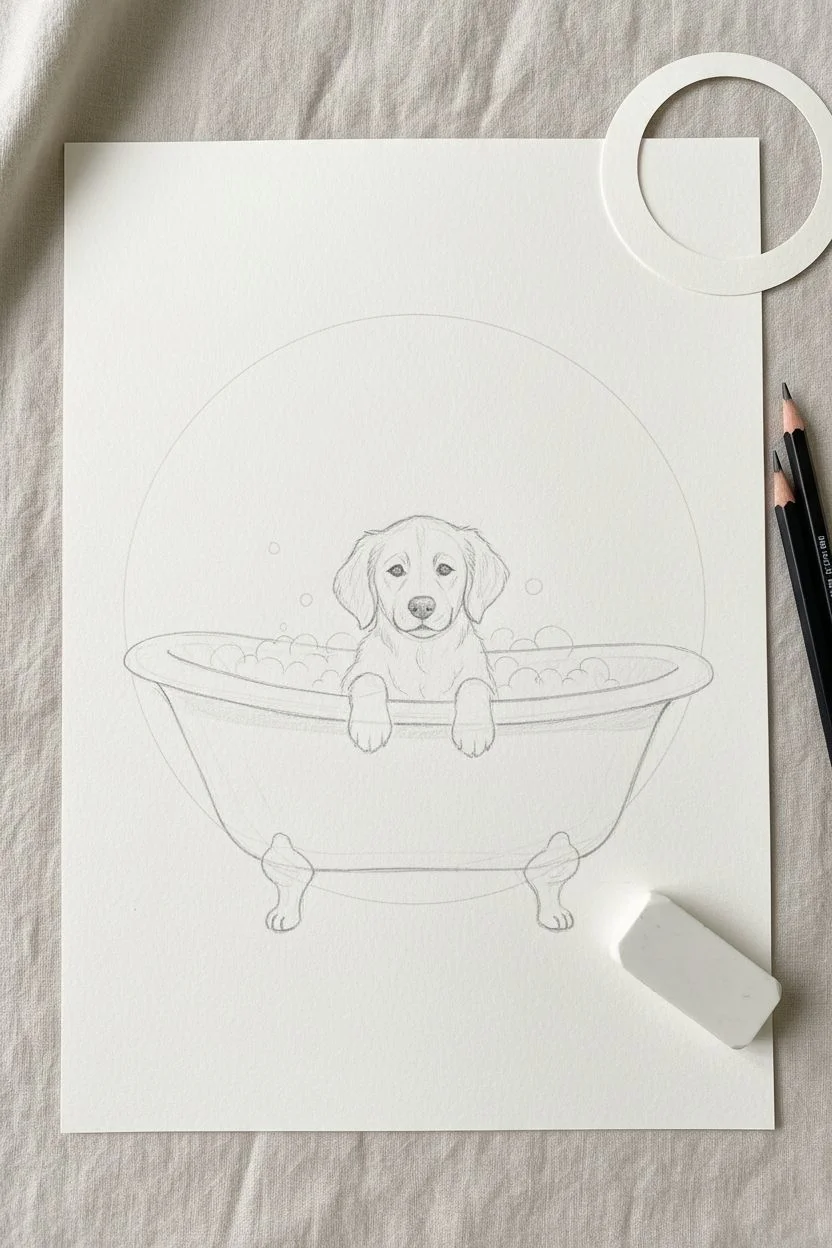
Establish the background:
Begin by lightly drawing a large circle in the center of your paper using a compass or by tracing a bowl. This will serve as the vibrant orange backdrop for your scene. -
Draw the bathtub:
Sketch a clawfoot tub shape that overlaps the bottom third of your circle. The rim should curve gently to show perspective. Let the tub extend slightly outside the circle on the sides for a dynamic composition. -
Add the puppy:
Lightly sketch the puppy sitting in the center of the tub. Focus on big shapes first: a round head, floppy ears, and two front paws resting on the rim or tucked into the bubbles. -
Define the bubbles:
Draw cloud-like clusters of bubbles around the puppy’s waist and paws, obscuring the waterline. Keep these lines very faint so they don’t show through later.
Muddy Fur?
If your fur texture looks muddy, your base layer was likely too wet. Let the paper dry completely between the base wash and the detail strokes.
Step 2: Painting the Puppy
-
Base coat fitting:
Mix a watery wash of Yellow Ochre and Burnt Sienna. Paint the entire puppy, avoiding the eyes and nose. Keep this layer light and airy. -
Adding fur texture:
Once the base is dry, use a size 2 brush with a slightly darker mix of Burnt Sienna to paint small, flicking strokes. Follow the direction of hair growth on the ears and chest. -
Deepening shadows:
Mix a touch of Payne’s Grey into your brown to create a shadow tone. Apply this under the ears, beneath the chin, and along the side of the body that touches the bubbles. -
Facial features:
Use a very concentrated dark brown or black for the eyes and nose. Leave a tiny speck of white paper in each eye for a highlight, or add it later with gouache.
Step 3: Painting the Bath & Background
-
Background wash:
Mix a vibrant Vermilion or orange-red. Carefully paint the circle behind the dog. I find it easiest to work wet-on-dry here to maintain a crisp edge around the puppy’s head. -
Tub base layer:
Dilute your Turquoise paint and fill in the bathtub shape. Let the color pool naturally at the bottom of the tub to suggest weight and shadow. -
Tub dimensions:
While the first teal layer is still slightly damp, drop in darker teal along the bottom curve and under the rim to create a 3D rounded effect. -
Painting the bubbles:
Use a very diluted grey-blue to paint shadows on the bottom of the ‘white’ bubble clumps. This gives them volume without needing to paint them solid white.
Make it Pop
Add a contrasting color, like a bright yellow rubber duck sitting on the rim of the tub, to add a playful focal point.
Step 4: Refining Details
-
Inking the outline:
Once everything is completely bone dry, use a fine liner pen to outline the puppy, tub, and bubbles. Use broken, sketchy lines for the fur to keep it soft. -
Adding highlights:
Using white gouache or a gel pen, add bright white dots to the background circle to represent floating bubbles. Add a few highlights to the puppy’s nose and eyes. -
Grounding shadow:
Mix a watery Payne’s Grey wash. Paint a soft, horizontal shadow underneath the tub’s feet to ground the object so it doesn’t look like it’s floating. -
Final touches:
If the bubbles feel too flat, add tiny semicircles of white ink to the tops of the foam clusters to mimic light reflecting off soap.
Step back and admire your clean, cheerful puppy painting as it dries

PENCIL GUIDE
Understanding Pencil Grades from H to B
From first sketch to finished drawing — learn pencil grades, line control, and shading techniques.
Explore the Full Guide
Dog With a Simple Bandana
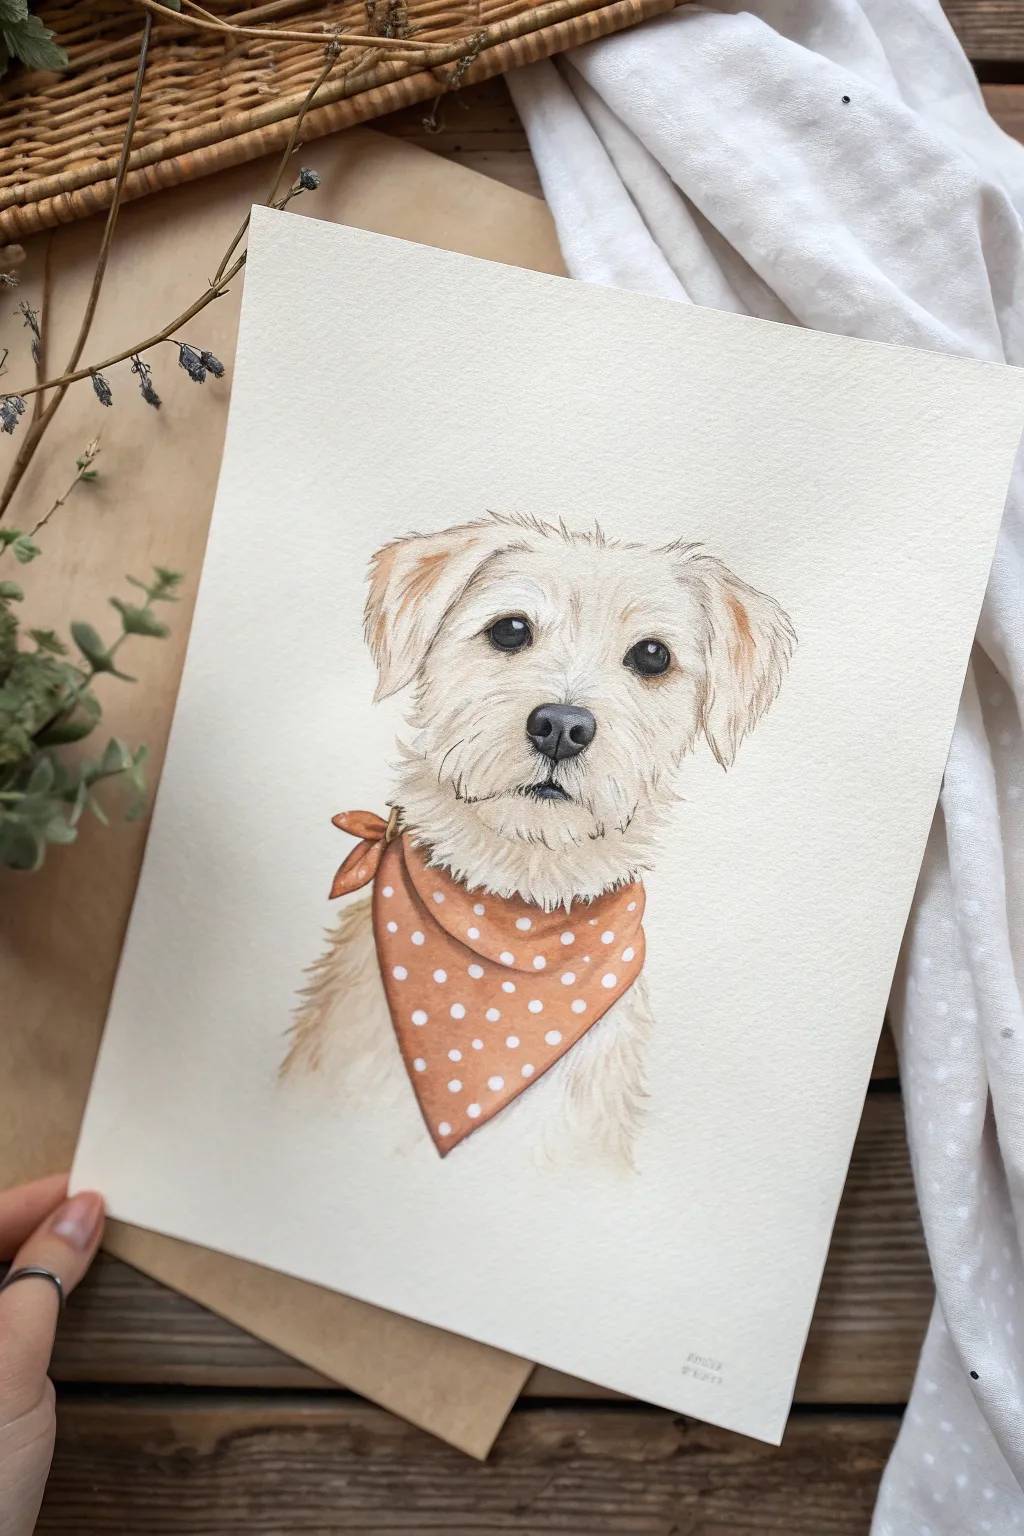
Capture the sweetness of a furry friend with this charming watercolor portrait, focusing on soft fur textures and a pop of color. This project combines delicate line work with warm, earthy tones to create a heartwarming keepsake.
Step-by-Step Tutorial
Materials
- Hot press watercolor paper (smooth texture)
- Pencil (HB or F for light sketching)
- Kneaded eraser
- Watercolor paints (Yellow Ochre, Burnt Sienna, Burnt Umber, Ivory Black, Titanium White)
- Small round brushes (Size 0, 2, and 4)
- Fine liner brush (for details)
- White gouache or white gel pen
- Masking fluid (optional)
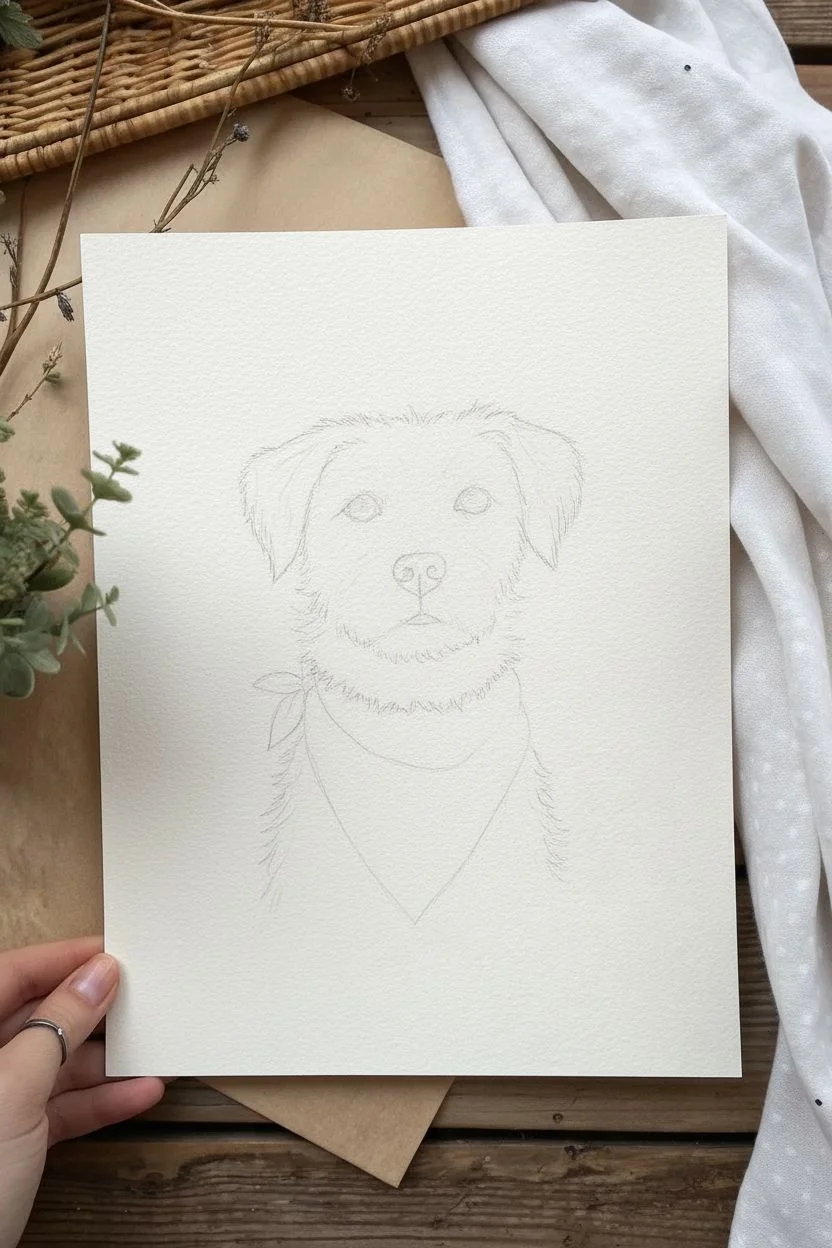
Step 1: Sketching the Foundation
-
Map basic shapes:
Start lightly with your pencil. Draw a rounded oval for the head and add triangular floppy shapes for the ears. Don’t press too hard, as watercolor paper is sensitive to erasing. -
Define the face:
Mark a horizontal line across the center of the face for the eyes and a shorter line below for the nose. Sketch the bandana loosely around the neck, letting it drape naturally. -
Refine the features:
Draw the almond-shaped eyes, the triangular nose, and the mouth hidden slightly beneath the snout fur. Add jagged, fluffy outlines to suggest the scruffy terrier fur rather than smooth lines. -
Lighten the lines:
Roll your kneaded eraser gently over the entire sketch. You want the graphite to be barely visible—just enough to guide you without showing through the paint.
Fur Direction Tip
Always pull your brush strokes in the direction the hair grows. On the snout, strokes fan out; on the ears, they flow downward. This mimics real anatomy.
Step 2: Painting the Eyes and Nose
-
The base layer:
Mix a diluted watery brown using Burnt Umber and fill in the eyes and nose. Leave tiny white specks of paper bare for the catchlights in the eyes, or use masking fluid here. -
Darken the pupils:
Once the initial wash is dry, mix a strong black using Ivory Black and Burnt Umber. Paint the pupils and the darkest nostrils, carefully blending out slightly for a soft transition. -
Add depth:
Use a dark brown to glaze over the iris area, keeping the highlight bright. This contrast gives the dog that soulful, glossy look.
Step 3: Creating Fur Texture
-
Base fur wash:
Mix a very pale wash of Yellow Ochre and a touch of Burnt Sienna. Apply this loosely over the face and ears, following the direction of hair growth. Keep it uneven to simulate light patches. -
Building the ears:
While the base is dry, take a size 2 brush with a slightly darker golden-brown mix. Paint short, flicking strokes on the ears to create layers of hair, focusing on the folded areas. -
Detailing the snout:
Switch to your smallest brush. With a light grey-brown mix, paint tiny, individual hairs radiating out from the nose bridge. Leave the muzzle lighter to make it pop forward. -
Deepening shadows:
Mix a cool grey using a tiny bit of Cobalt Blue or black mixed with brown. Apply this under the chin, beneath the ears, and around the bandana knot to create separation. -
Final fur flourishes:
I like to take a predominantly dry fine liner brush with precise brown paint to add stray ‘flyaway’ hairs on the top of the head and edges of the ears for realism.
Customize the Accessory
Swap the polka dots for a plaid pattern, stripes, or floral design on the bandana to match the personality of the specific dog you are painting.
Step 4: The Bandana & Finishing Touches
-
Base bandana color:
Mix a warm terracotta color using Burnt Sienna and a touch of Red. Carefully paint around the polka dots if you have a steady hand, or paint the whole thing solid and add dots later. -
Adding shadows to fabric:
While the orange paint is still damp, drop slightly darker brown paint into the folds and where the bandana tucks under the chin to suggest fabric weight. -
Adding the dots:
If you painted the bandana solid, use full-strength White Gouache or a white gel pen to add the polka dots once the orange is completely dry. Vary the spacing slightly. -
Whiskers and highlights:
Using your finest brush or the white gel pen, add delicate whiskers on the muzzle. Add a tiny dot of white to the nose for a ‘wet’ look.
Step back and admire the soulful expression you’ve created with just a few colors
Three Easy Dogs in a Row
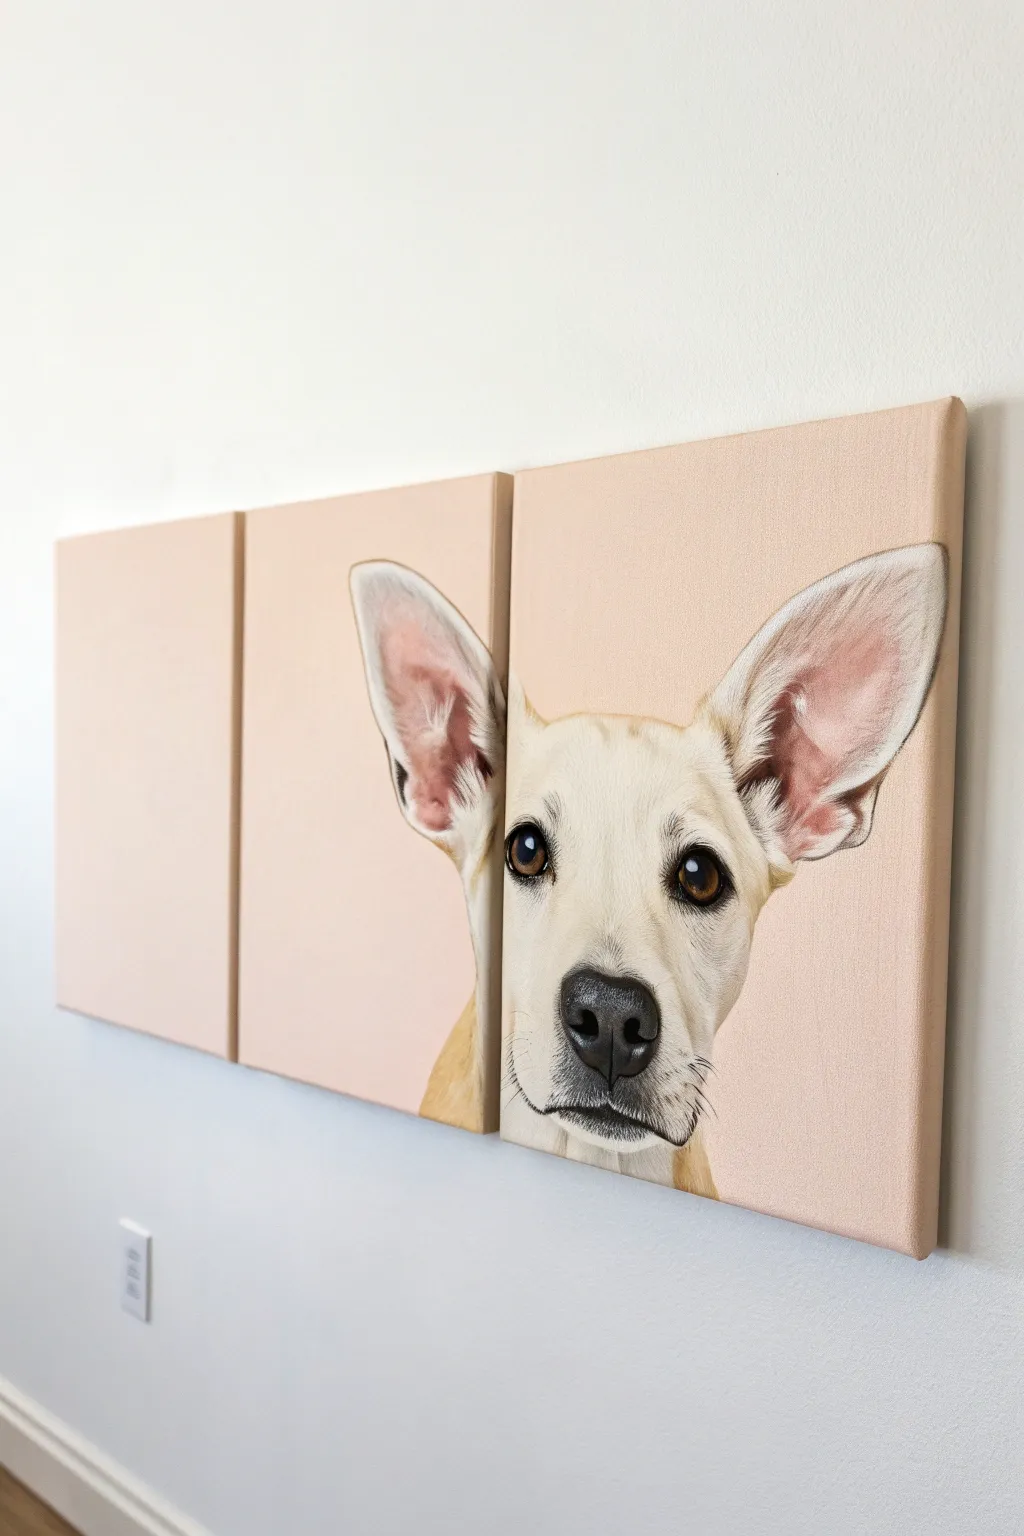
This charming three-panel artwork creates a playful sense of movement by splitting a single dog portrait across separate canvases. The soft peach background keeps the focus on the detailed, sweet expression of the pup as it seems to peek around a corner.
How-To Guide
Materials
- Three square stretched canvases (equal size, e.g., 10×10 or 12×12 inches)
- Acrylic paints: Titanium White, Burnt Umber, Yellow Ochre, Mars Black, Peach/Flesh Tone
- Pencil for sketching
- Large flat brush (for background)
- Medium filbert brush
- Small round detail brush (size 0 or 1)
- Palette and water cup
- Reference photo of your dog
- Ruler or straight edge
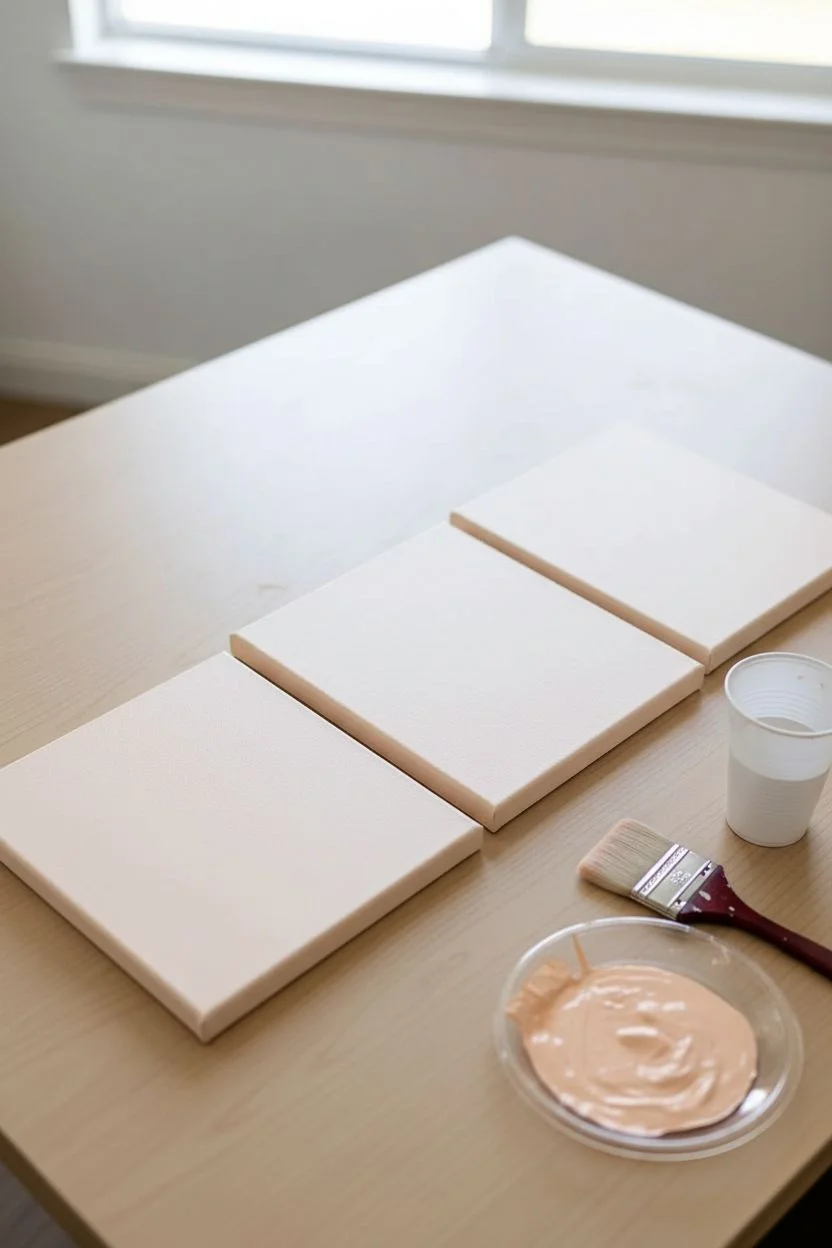
Step 1: Preparation & Background
-
Plan the composition:
Lay your three canvases side-by-side on a flat surface with a small gap (about 1-2 inches) between them to simulate how they will hang on the wall. This spacing is crucial for a natural flow. -
Mix the background color:
Create a large batch of your background shade. Mix White with a touch of Peach and a tiny speck of Yellow Ochre for a warm, creamy beige. Make sure you mix enough to cover all three canvases entirely. -
Paint the base coat:
Using your large flat brush, paint the entire surface and sides of all three canvases with your background mix. Apply long, smooth horizontal strokes. -
Apply a second coat:
Allow the first layer to dry completely (about 20-30 minutes). Apply a second coat to ensure an opaque, matte finish with no canvas texture showing through.
Alignment Issues
If the dog’s head looks disjointed across the gap, place the canvases touching each other to paint the bridge area, then separate them to finish the edges.
Step 2: Sketching the Subject
-
Establish reference points:
Looking at your reference photo, visualize where the split happens. For this design, the first canvas remains empty, the second holds the left ear, and the third holds the face. -
Sketch the outline:
Lightly sketch the dog’s contour across the second and third canvases. Don’t worry about the gap; draw as if the gap isn’t there, or lightly mark the canvas edges to guide your lines. -
Refine features:
Focus on the placement of the eyes and nose. I find it helpful to measure the distance from the bottom edge to the nose to ensure the face sits straight.
Step 3: Painting the Dog
-
Block in base colors:
Mix a light cream color using White and Yellow Ochre. Fill in the shape of the dog’s head and ears. This doesn’t need to be detailed yet; you are just removing the background color. -
Add facial shadows:
Mix a slightly darker beige using Burnt Umber and White. Paint the shadows around the muzzle, under the ears, and around the eye sockets to create 3D form. -
Paint the inner ears:
Mix a soft pinkish-brown tone. Apply this to the inside of the recognizable large ears, feathering the edges where the pink meets the white fur. -
Detail the eyes:
Use the small round brush and dark brown (Burnt Umber mixed with a touch of Black) to paint the irises. Leave a tiny white spot unpainted for the reflection highlights. -
Paint the nose:
Fill in the nose shape with dark charcoal grey (Black mixed with White). Use pure Black for the nostrils and the central dividing line. -
Add nose texture:
Stipple tiny dots of lighter grey on the top of the nose to simulate wet, bumpy texture.
Make It Pop
Paint the wrap-around sides of the canvas! Continue the dog’s body parts around the edges of the canvas depth for a professional, gallery-style finish.
Step 4: Refining Fur Details
-
Create fur texture:
Switch to your smallest detail brush. Load it with thinned white paint. Use quick, short strokes to paint individual hairs overlapping the darker shadow areas. -
Detail the ear fluff:
Paint longer, wispy strokes inside the ears and along the outer edges to make the dog look soft and fuzzy. -
Add whiskers:
Dilute a bit of black paint with water until it is inky. With a confident hand, paint fine whiskers sprouting from the muzzle. -
Final check:
Step back and look at the paintings together. Ensure the lines of the ears and neck connect visually across the gap between the middle and right canvases. -
Varnish:
Once completely dry (wait at least 24 hours), apply a satin varnish to protect the paint and unify the sheen across all three panels.
Hang your new masterpiece with careful spacing to let your painted pup peek perfectly into the room


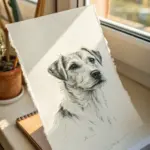
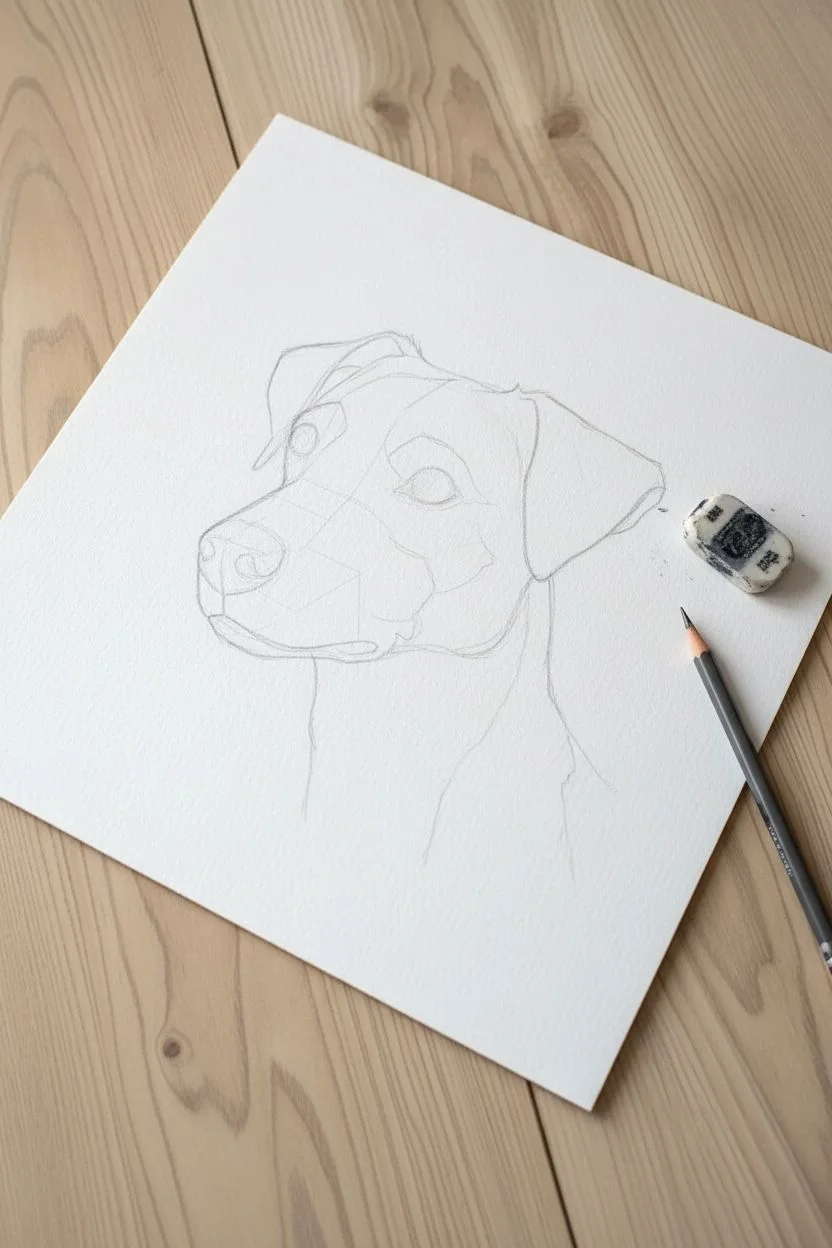
One-Line Dog Painted Over a Wash
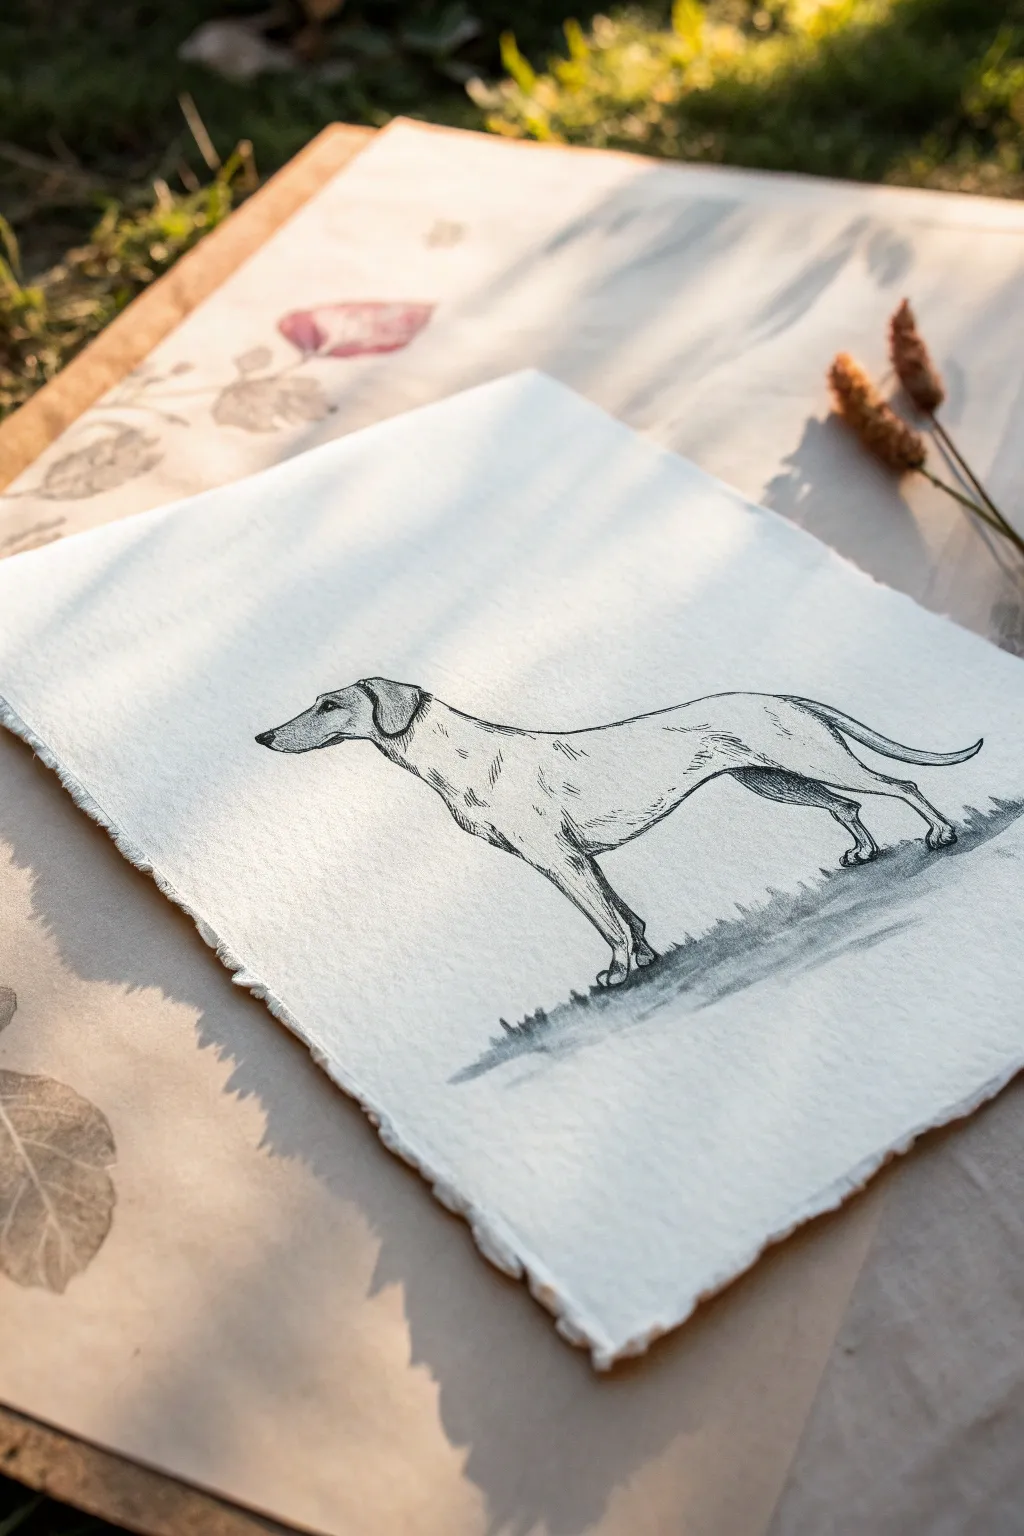

Capture the elegant lines of a greyhound or whippet with this refined pen and ink drawing on textured paper. The minimal shading and crisp contours create a classic, timeless study that looks beautiful simply mounted or framed.
Step-by-Step Guide
Materials
- High-quality textured watercolor paper or handmade cotton paper (deckle edge recommended)
- H or HB graphite pencil for sketching
- Kneaded eraser
- Fine liner pens (sizes 0.1, 0.3, and 0.5)
- Reference photo of a sighthound
- Drawing board or flat surface
- Masking tape (optional)
Step 1: Preparation and Sketching
-
Paper selection:
Choose a heavy, textured paper for this project. The visible grain in the paper adds character to the ink lines later. -
General blocking:
Using your H or HB pencil, lightly map out the general shape of the dog. Focus on the long, horizontal rectangle of the body and the triangular shape of the head. -
Refining the silhouette:
Refine the outline to capture the specific anatomy of a sighthound: the deep chest, the extreme tuck of the stomach, and the long, slender legs. -
Head details:
Sketch the floppy ear and the long snout. Pay attention to the eye placement—it should be set relatively high on the skull. -
Leg placement:
Ensure the feet catch the ‘ground’ properly. Lightly sketch a suggestion of grass or shadow underneath the paws so the dog doesn’t look like it’s floating. -
Clean up:
Use your kneaded eraser to lift off any heavy graphite lines. You want a faint ghost image to guide your pen, not dark pencil marks.
Step 2: Inking the Outline
-
Starting the ink:
Pick up your 0.3 fine liner. Begin at the top of the head and ear, using confident, broken lines rather than one solid, stiff wire. -
The backline:
Trace the curve of the spine. Sighthounds have a distinctive arch over the loin; allow your pen pressure to vary slightly to suggest muscle and bone. -
Underside and tuck:
Draw the deep chest and the tuck-up towards the flank. Keep these lines fairly thin to maintain the elegant feel. -
Legs and paws:
Move down to the legs. Use short, interrupted strokes around the joints (knees and hocks) to suggest bony prominence without drawing a complete circle. -
Tail flow:
Ink the tail with a sweeping motion. It should taper naturally to a point.
Tip: Broken Lines
Don’t connect every single line perfectly. Leaving small gaps acts like a highlight where the light hits the bone or muscle.
Step 3: Shading and Texture
-
Muscle definition:
Switch to your finest 0.1 pen. Add small, curved hatching lines on the shoulder and hip to indicate the strong muscles beneath the thin coat. -
The neck area:
Add vertical hatching on the neck, particularly under the jaw, to create volume and shadow. -
Deepening shadows:
Use the 0.5 pen sparingly for the darkest areas, such as the pupil of the eye, the nose tip, and the deepest crevices of the ear. -
Grounding the subject:
For the grass and shadow beneath the dog, use scribbled, horizontal hatching with the 0.3 or 0.5 pen. This creates a loose, organic texture that contrasts with the clean lines of the dog. -
Texture harmonization:
Look at the drawing as a whole. Add tiny tick marks or broken lines along the ribcage to suggest short fur. -
Final drying:
Let the ink dry completely for at least 15 minutes before touching it. -
Erasing:
Gently erase any remaining pencil guidelines with the kneaded eraser. Be careful not to smudge the ink if it’s still damp or rub too hard on the textured paper.
Fix: Wobbly Lines?
If a line goes crooked, don’t try to erase it. Instead, add a few parallel hatching marks nearby to turn the mistake into a shadow.
This refined drawing captures the quiet grace of a sighthound and looks perfect on a desk or gallery wall
Tape-Resist Dog Shape
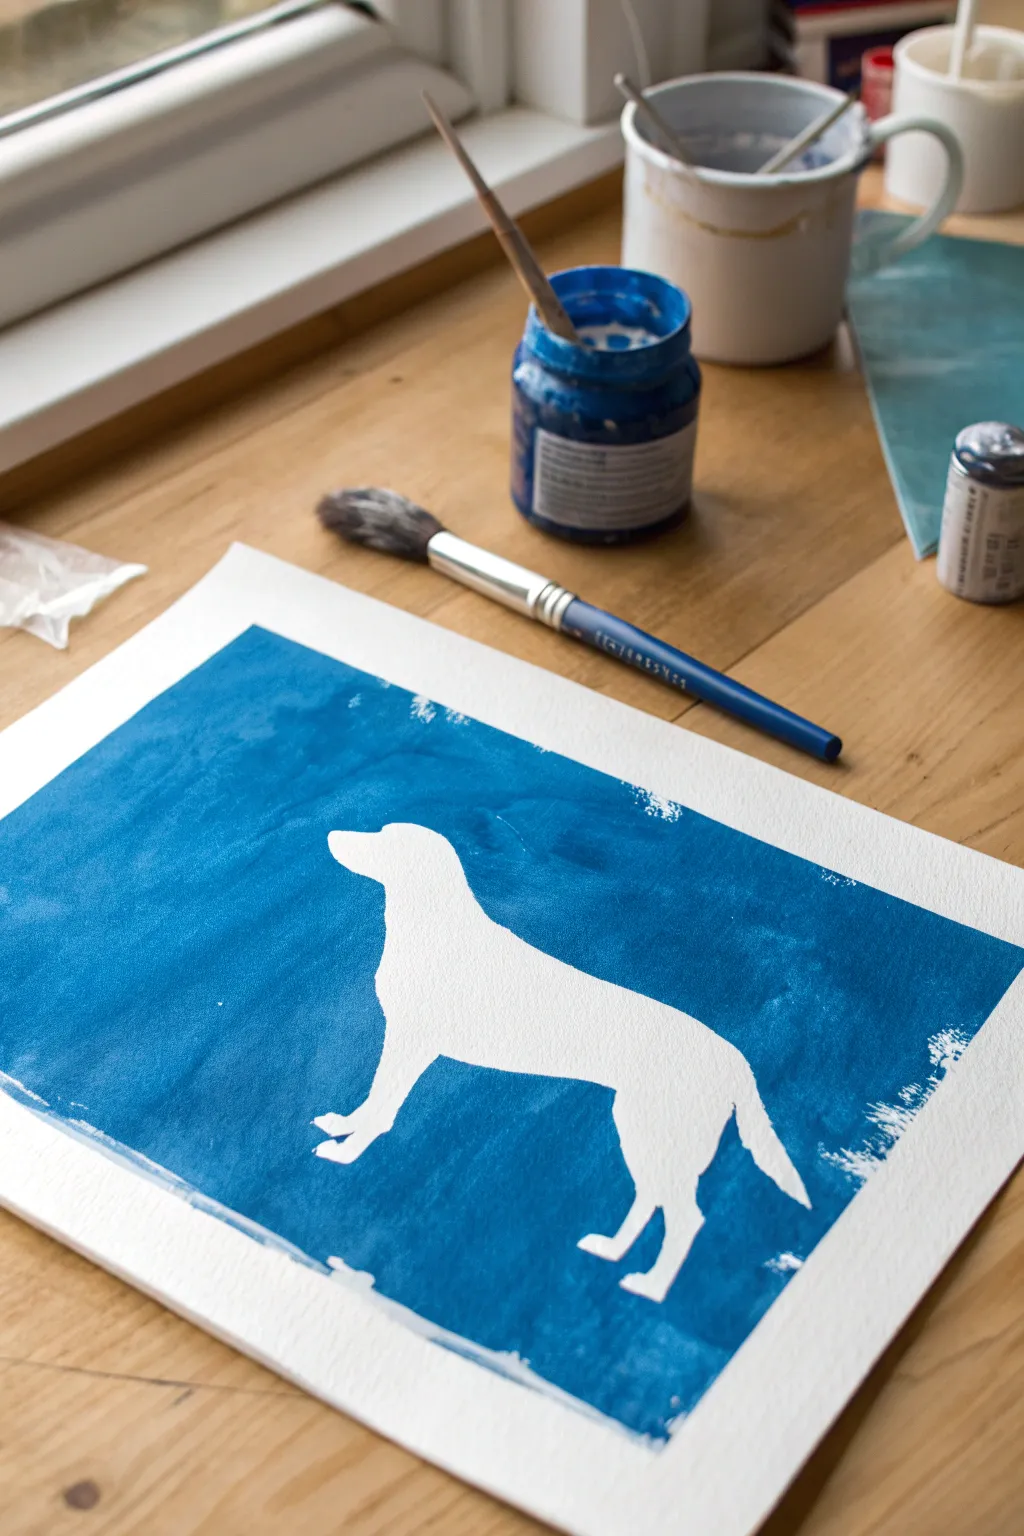
Create a striking negative space portrait of your favorite canine using simple resist techniques. This project results in a bold, crisp dog silhouette surrounded by a textured wash of deep cyan blue, perfect for framing.
Step-by-Step
Materials
- Heavyweight mixed media or watercolor paper
- Cyan or Pthalocyanine Blue acrylic paint (or gouache)
- Wide flat wash brush
- Painter’s tape or masking tape (low tack)
- Lightweight cardstock or sticker paper (for stencil)
- Pencil
- Scissors or hobby knife
- Jar of water
- Mixing palette or old saucer
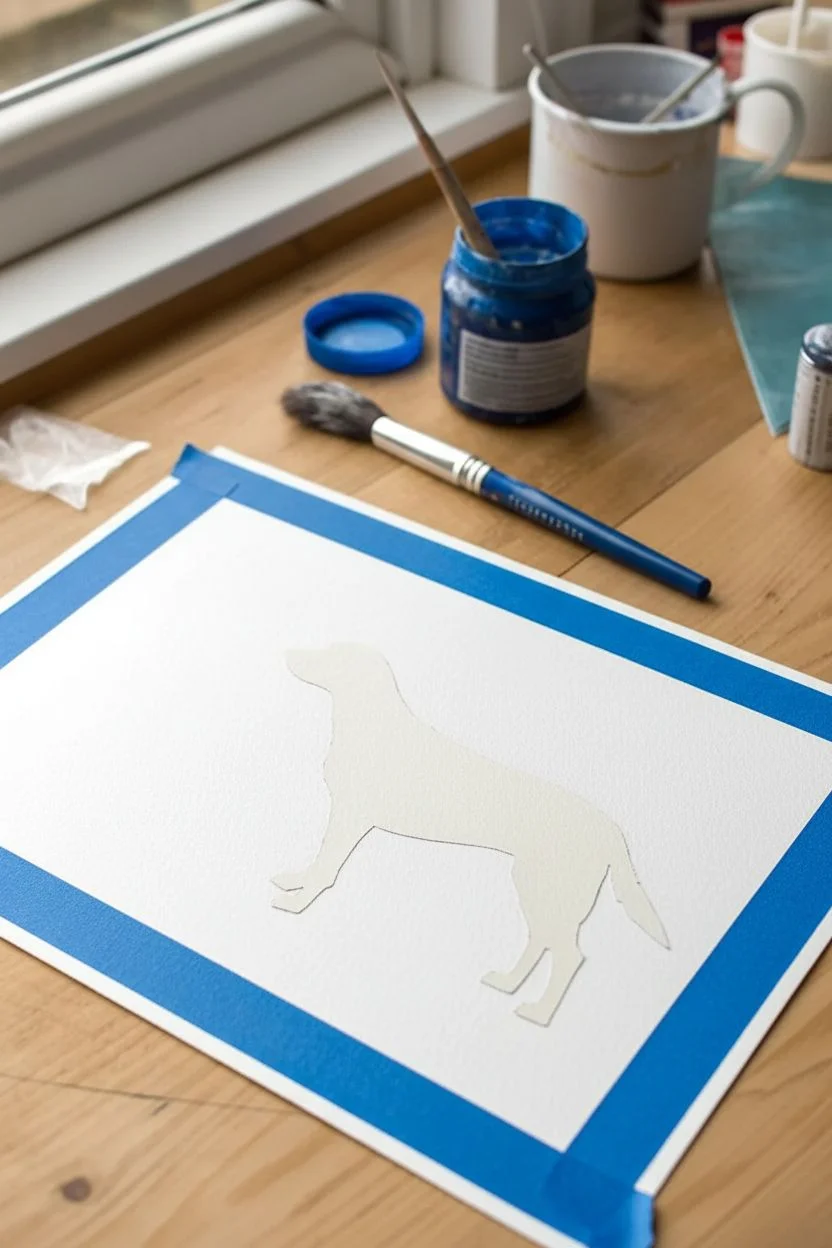
Step 1: Creating the Resist Template
-
Choose your silhouette:
Find a profile photo of a dog to use as a reference. A side profile works best for capturing a recognizable shape. -
Sketch the outline:
Lightly draw the dog’s outline onto your cardstock or sticker paper. Focus on the main contours like the snout, ears, and tail. -
Cut carefully:
Using scissors or a hobby knife, cut out the dog shape very precisely. You want clean, smooth edges. -
Prepare the adhesive:
If using cardstock, roll small loops of masking tape and apply them to the back of your cutout. If you used sticker paper, simply peel off the backing. -
Position the dog:
Place your paper dog silhouette in the center of your heavyweight watercolor paper. Press down firmly, especially along the edges, to ensure paint doesn’t seep underneath later. -
Mask the borders:
Apply strips of painter’s tape along the four outer edges of your paper to create a clean white border frame. I like to press the tape edge with my fingernail to seal it tight.
Bleeding Edges?
If paint seeps under your cutout, your paint was likely too watery. Next time, use thicker ‘heavy body’ acrylics and apply a very thin layer first to seal the edge.
Step 2: Painting the Background
-
Prepare your paint:
Squeeze a generous amount of cyan or pthalocyanine blue paint onto your palette. If using acrylics, you can add a drop of water to improve flow, but keep it fairly thick. -
Load the brush:
Dip your wide flat wash brush into the paint, ensuring the bristles are fully saturated. -
Begin the wash:
Start painting over the entire paper, brushing directly over the masked dog shape and up to the tape borders. -
Create texture:
Don’t aim for a perfectly flat color. Use multidirectional strokes to create a slightly mottled, painterly texture in the blue background. -
Focus on the edges:
Ensure you paint thoroughly around the edges of the dog cutout. Brush *away* from the center of the cutout to avoid forcing paint under the paper. -
Let it dry completely:
Allow the paint to fully harden. If using acrylics, this might take 20-30 minutes; gouache may dry faster. Do not rush this step.
Add a Pattern
Before removing the stencil, use a toothbrush to flick white or lighter blue paint over the background for a snowy or starry night texture.
Step 3: The Reveal
-
Remove the border tape:
Slowly peel away the painter’s tape from the outer edges. Pull the tape away at a 45-degree angle to prevent tearing the paper. -
Lift the silhouette:
Find a loose edge of your dog cutout. Very gently lift it up. -
Peel slowly:
Continue peeling the dog shape off the paper. If you used cardstock and tape loops, be careful not to rip the bottom paper. -
Clean up edges:
If any tiny bit of paint bled under the mask, you can carefully scratch it away with a craft knife or cover it with a tiny dab of white gouache.
Once the tape is removed, you have a beautiful, crisp piece of modern art ready to display
Watercolor Puppy Nose Close-Up
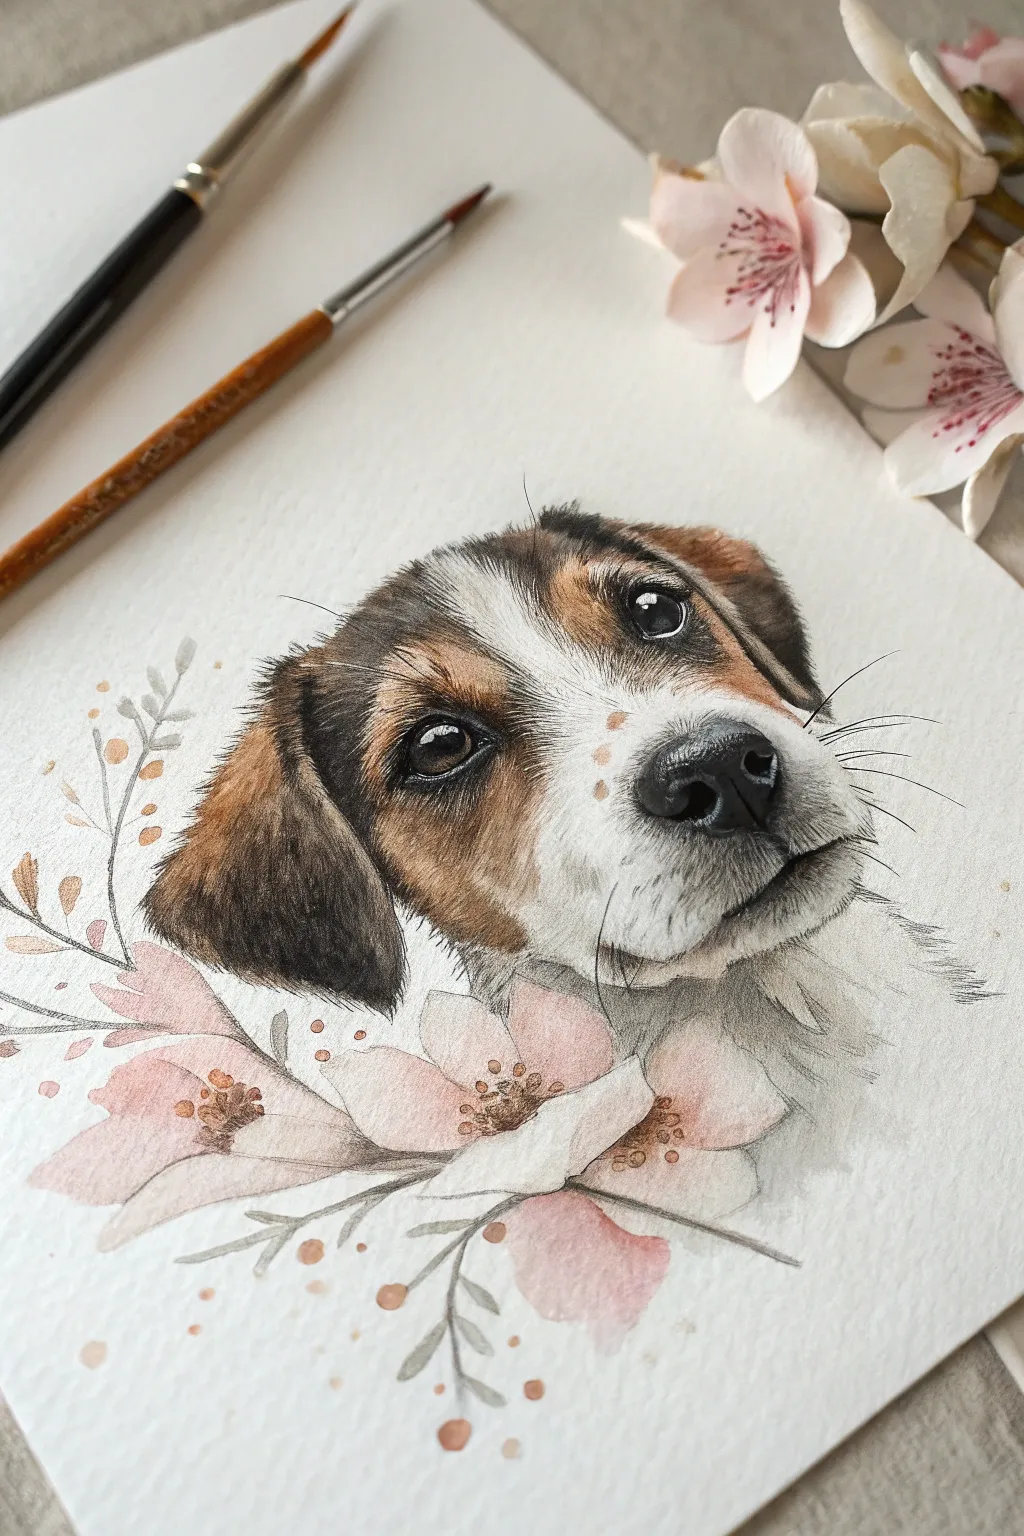
Capture the soulful gaze of a puppy with this delicate watercolor tutorial, which combines detailed realism in the face with soft, loose florals. The contrast between the finely detailed fur textures and the dreamy botanical wreath creates a stunning, heartwarming composition.
Step-by-Step Guide
Materials
- Cold press watercolor paper (300 gsm)
- Watercolor paints (Burnt Umber, Burnt Sienna, Payne’s Grey, Lamp Black, Pink Madder, Sap Green)
- Small round brushes (size 0, 1, and 4)
- Fine liner or rigger brush (size 00 or 000)
- Pencil (HB or H) for sketching
- Kneadable eraser
- White gouache or white gel pen
- Clean water jars and paper towels
Step 1: The Sketch and Initial Wash
-
Outline the puppy:
Begin by lightly sketching the outline of the puppy’s head on your watercolor paper. Pay special attention to the large, expressive eyes and the triangular shape of the nose. Keep your pencil pressure very light so the graphite doesn’t smudge later. -
Map out fur patterns:
Sketch the boundaries where the white fur meets the brown and black patches. This ‘mapping’ will be your guide for color placement. Add the basic shapes of the floral wreath at the neck—keep these shapes loose and not overly detailed. -
Base layer for the eyes:
Using a size 1 brush, dilute Burnt Sienna and fill in the iris of the eyes, avoiding the tiny white highlight circle. While still damp, drop in a darker brown at the top of the iris to create a shadow from the eyelid. -
First fur wash:
Apply a very pale wash of Burnt Sienna to the brown areas of the ears and face. Use a pale grey mix (watered down Payne’s Grey) for the shadowed areas on the white muzzle. Let this layer dry completely.
Muddy Fur Troubles?
If your fur texture looks like a solid blob, you’re layering too fast. Let each layer of tiny strokes dry completely before adding the next set of strokes on top.
Step 2: Building Fur Texture
-
Darkening the ears:
Mix a stronger Burnt Umber. Using a size 1 brush, start painting short, directional strokes on the ears to mimic fur. Follow the direction the hair grows—downward and slightly outward. -
Layering the dark patches:
Switch to Payne’s Grey mixed with a touch of Burnt Umber for the dark patches around the eyes. Use your fine liner brush here. Apply small, flicking strokes, building up density gradually rather than painting a solid block of black. -
Refining the muzzle:
On the white muzzle, deepen the shadows under the chin and near the nose using a slightly darker grey wash. Soften the edges with a clean, damp brush to ensure the white fur looks fluffy, not hard-edged. -
Freckles and spots:
Using Burnt Sienna, gently dab in the small freckles on the white bridge of the nose. Keep these edges soft; you can achieve this by blotting them slightly with a tissue immediately after painting.
Make It Sparkle
Mix a tiny pinch of iridescent medium into the final white gouache highlights on the eyes. It adds a subtle, realistic glimmer when the light hits the artwork.
Step 3: Key Details: Nose and Eyes
-
The realistic nose:
Paint the nose using a mix of Lamp Black and Payne’s Grey. Start with a mid-tone wash, leaving a highlight on the top edge unpainted. Once dry, go back with very concentrated black paint to darken the nostrils and the texture of the nose leather. -
Deepening the eyes:
Outline the eyes carefully with black using your finest brush. Darken the pupil significantly. This high contrast is what brings the puppy to life and gives it that ‘wet eye’ look. -
Adding whiskers:
With a steady hand and a rigger brush loaded with thin black paint, pull out the long whiskers from the muzzle. Quick, confident strokes work best to avoid shaky lines.
Step 4: Floral Wreath and Highlights
-
Painting the petals:
Mix a watery Pink Madder. Paint the flower petals loosely around the neck, allowing the watercolor to bloom naturally. You want these to look soft and slightly out of focus compared to the sharp details of the face. -
Adding flower centers:
While the pink petals are just barely damp, drop in tiny dots of Burnt Sienna or dark brown for the stamens. Allow the color to bleed slightly into the pink for a natural effect. -
Stems and leaves:
Using a desaturated Sap Green (mix in a little brown or grey), paint delicate stems and small leaves weaving through the flowers using the tip of your round brush. -
Splatter texture:
Load a brush with watery pink or brown paint and tap it against another brush handle to create tiny, artistic splatters around the bottom of the painting. -
Final highlights:
Once everything is bone dry, use white gouache or a gel pen to add the brightest highlights: a crisp dot in each eye, a touch on the top of the wet nose, and a few stray white hairs overlapping the dark patches.
Step back and admire the sweet expression you have captured in your puppy portrait
Dry-Brush Fur on Simple Shapes
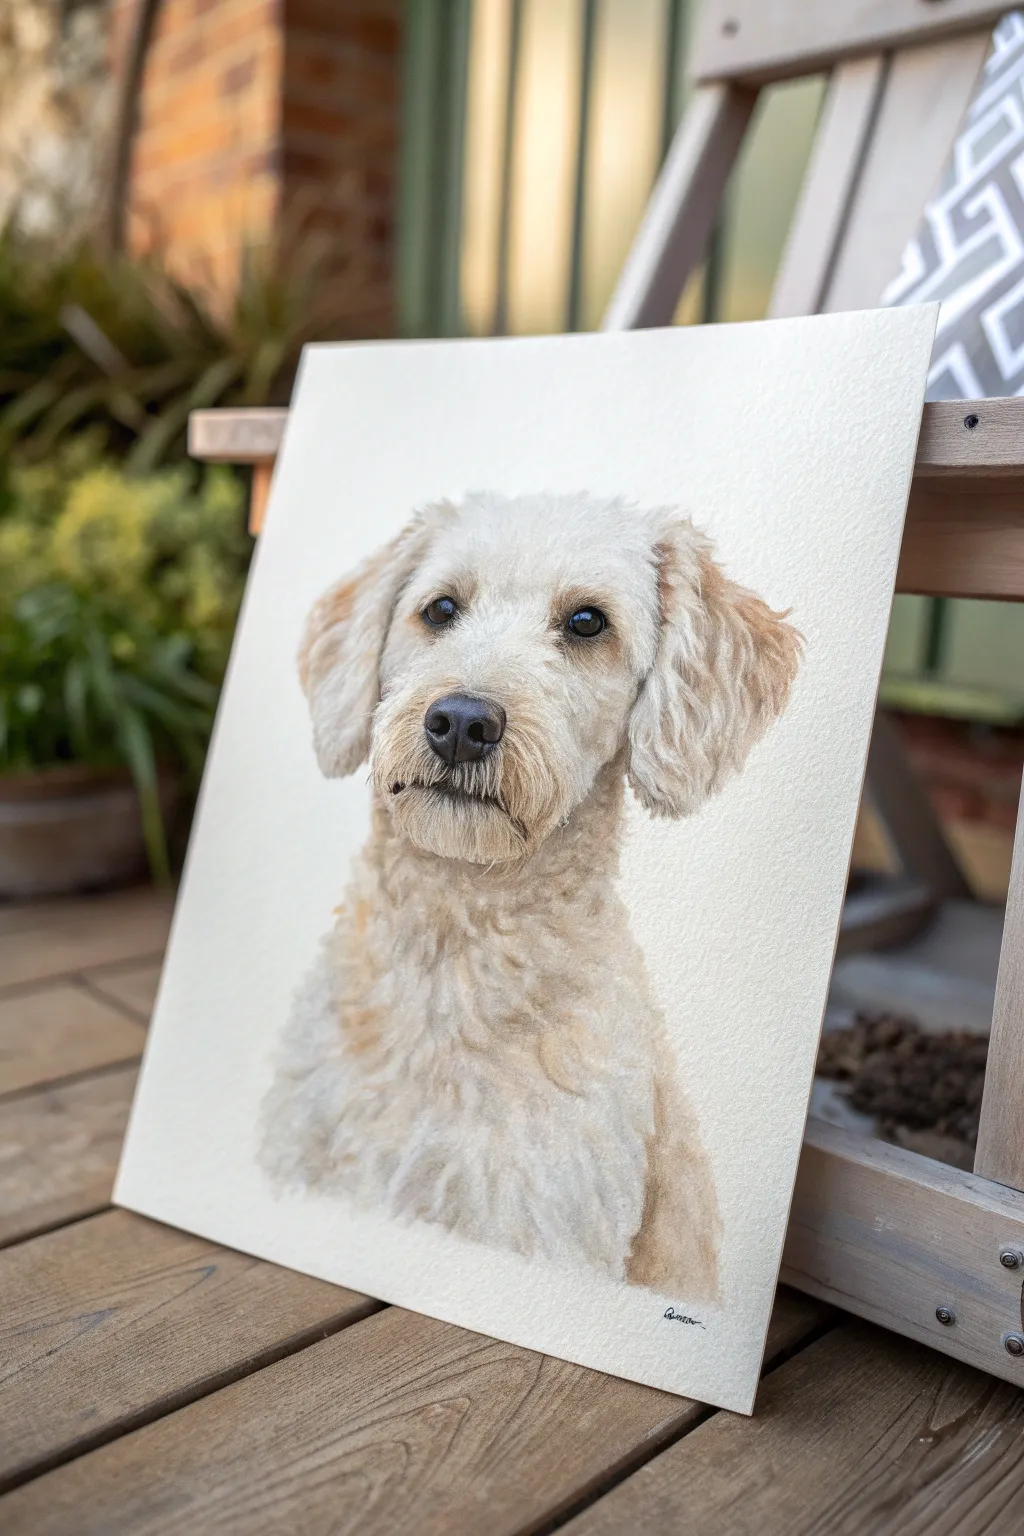
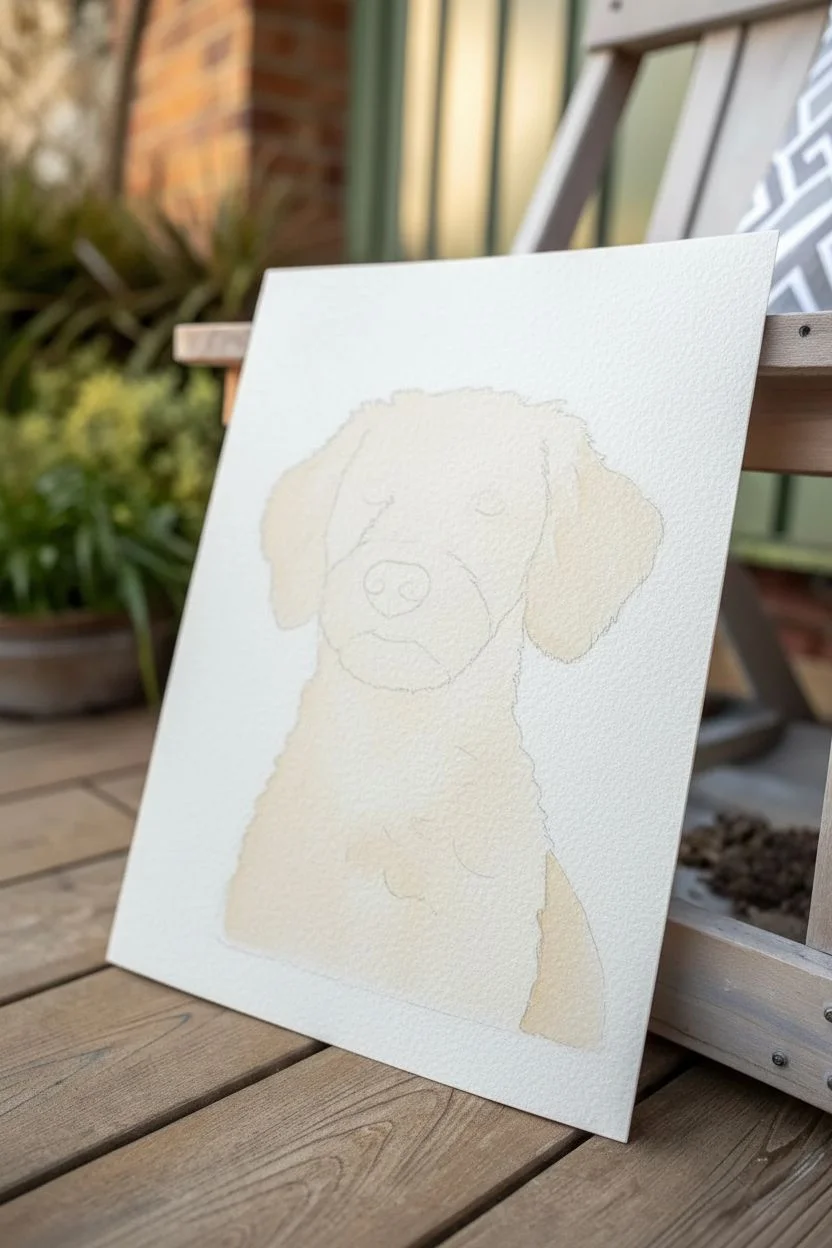
Capture the soft, curly texture of a doodle’s coat using a dry-brush acrylic technique on textured paper. This method builds up layers of fur gradually, resulting in a realistic, fluffy appearance that pops against the stark white background.
Step-by-Step Tutorial
Materials
- Heavyweight watercolor paper or illustration board (cold press)
- Acrylic paints (Titanium White, Yellow Ochre, Burnt Sienna, Raw Umber, Ivory Black)
- Set of filbert brushes (sizes 2, 4, 6)
- Fine liner brush (size 0 or 00) for details
- Old, stiff bristle brush for texture
- Palette and mixing knife
- Pencil and eraser for sketching
- Paper towels
Step 1: Sketch and Base Layer
-
Outline the Shape:
Lightly sketch the dog’s head and upper chest on your paper. Focus on the large shapes first—the oval of the head, the snout’s rectangle, and the triangular drop of the ears—before marking eye and nose placement. -
Mix the Shadow Tone:
Create a watery wash using a mix of Yellow Ochre and a tiny touch of Raw Umber. You want a very pale, warm beige color that is transparent. -
Block in Shadows:
Paint this wash into the areas of the fur that will be darker: under the ears, beneath the chin, and the sides of the neck. Avoid the areas that will remain bright white. -
Establish the Eyes:
While the wash dries, use a small round brush with dark brown (Burnt Sienna mixed with Black) to paint the iris. Leave a tiny speck of white paper for the highlight, or add it back later with pure white paint.
Step 2: Building Fur Texture
-
Prepare the Colors:
Mix three shades of cream: a dark beige (Ochre/Umber), a medium cream (White/Ochre), and a highlight color (mostly White with a dot of Ochre). Do not add water; use the paint straight from the tube for opacity. -
Start the Dry-Brush Technique:
Load a worn filbert brush with the darkest beige mixture. Wipe most of the paint off onto a paper towel until the brush leaves only a scratchy trace. -
Create Depth:
Scrub this dry paint into the shadowed areas you established earlier. Use short, circular scrubbing motions to mimic the curly undercoat, keeping the edges soft and fuzzy. -
Layering the Mid-Tones:
Switch to the medium cream color. Apply this over the dark beige, moving slightly outward into the lighter areas. I like to overlap the previous layer by about 50% to create a seamless transition. -
Directional Strokes:
Pay close attention to hair direction. On the nose bridge, strokes go upward; on the ears, they flow downward. Use the dry brush to drag the paint in these directions.
Save Those Brushes
Don’t throw away old, splayed brushes! Their ruined shape is actually perfect for creating messy, realistic fur textures that a new brush is too neat to achieve.
Step 3: Refining Details
-
Paint the Nose:
Mix a dark charcoal grey using Black and a touch of Burnt Sienna. Paint the nose leather, dappling the paint slightly to suggest a bumpy texture rather than a solid smooth block. -
Add the Nostrils:
Use near-black paint for the comma-shaped nostrils, blending the edges slightly so they don’t look like stickers stuck on the nose. -
Define the Mouth:
Use a liner brush with dark grey to paint the separation of the lips. Add small, dark dots on the muzzle where the whiskers will eventually go. -
Brighten the Eyes:
Glaze a tiny bit of Golden Ochre over the bottom curve of the iris to make the eyes look warm and alive, then reinforce the pupil with pure black.
Tinted Paper Base
Instead of white paper, try using a light grey or tan toned paper. This allows you to paint both the shadows and the white highlights, making the fur look instantly 3D.
Step 4: Final Highlights
-
Highlight the Curls:
Load a clean brush with the lightest highlight mixture (almost pure white). Very lightly scumble this over the tops of the curls on the forehead, the ridge of the nose, and the chest. -
The Ear Crimps:
For the ears, use longer, wavier strokes with the highlight color to show the crimped texture of the longer hair. -
Whiskers and Strays:
Thicken your white paint slightly. Using your finest liner brush, flick in individual stray hairs around the edges of the ears and the top of the head to break the silhouette. -
Final Contrast Check:
Step back and squint at your painting. If the chest looks too flat, dry-brush a little more of the dark beige into the deep recesses of the fur to make the white curls pop forward.
Once the paint is fully dry, sign your name near the bottom edge and frame your new furry friend
Monochrome Dog Value Study
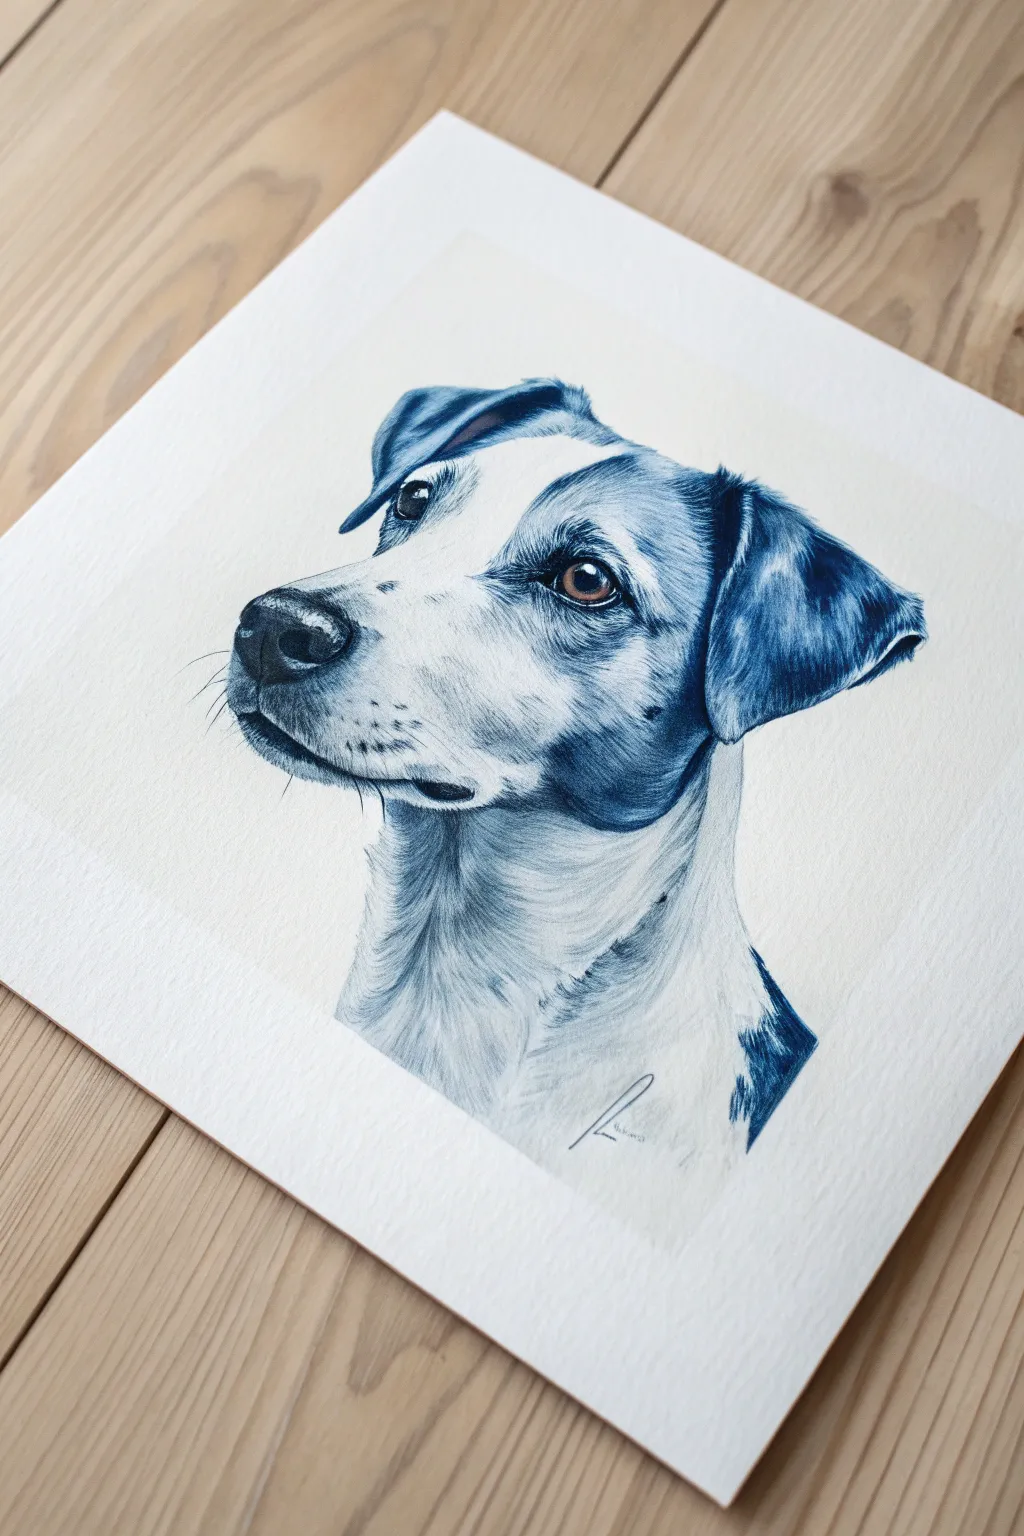
This striking project simplifies color theory by using a single hue—indigo blue—to create a realistic and soulful dog portrait. By focusing purely on values rather than complex mixing, you capture the pet’s expression and texture with elegant simplicity.
Step-by-Step Guide
Materials
- High-quality watercolor paper (cold press, 300gsm)
- Indigo or Payne’s Gray watercolor paint (or gouache)
- HB graphite pencil for sketching
- Kneaded eraser
- Round brushes: Size 6 (for washes) and Size 0 or 1 (for details)
- Mixing palette
- Jar of clean water
- Paper towels
Step 1: Sketching the Framework
-
Analyze the Reference:
Begin by observing your reference photo. Notice where the darkest shadows interpret the eyes and ears, and where the paper white will serve as highlights. -
Basic Shapes:
Lightly sketch the dog’s head using basic geometric forms. Use a circle for the cranial area and a blocky rectangle for the snout. -
Refining Features:
Draw the details of the eyes, nose, and ears. Pay close attention to the direction of the fur around the snout and neck. -
Clean Up:
Use your kneaded eraser to lift almost all the graphite off the paper. You want a ‘ghost image’ that is barely visible so pencil lines won’t show through the final paint.
Uneven Washes?
If your blue washes look patchy or form ‘cauliflowers,’ you likely added water to a drying section. Wait for layers to be 100% bone dry before glazing over them again.
Step 2: Building Values
-
Prepare Your Palette:
Create three puddles of your blue paint: a very watery ‘tea’ consistency (light), a ‘milk’ consistency (medium), and a ‘cream’ consistency (dark). -
Initial Light Wash:
Using the Size 6 brush and your lightest mix, block in the shadow areas of the fur. Leave the white of the paper completely untouched for the brightest highlights on the forehead and nose bridge. -
Defining the Eyes:
Switch to your smaller brush and the darkest paint mix. Carefully paint the pupil and iris, leaving a tiny speck of white paper for the ‘catchlight’ or reflection. -
The Nose:
Paint the nose using the medium strength mix. While it’s still damp, drop in darker pigment into the nostrils and underside adjustments to create volume. -
Ear Depth:
Apply the dark mix to the shadows inside the ear folds. Use strokes that follow the direction of the fur growth to suggest texture immediately.
Go Mixed Media
Once the watercolor base is dry, use a dark blue colored pencil to sharpen details like individual hairs, whiskers, or eye contours for extra precision.
Step 3: fur Texture and Detail
-
Mid-Tone Fur:
With the medium mix and your small brush, use short, flicking strokes to mimic fur texture. Focus on the transition areas between light and shadow on the cheek and neck. -
Darkest Accents:
Reinforce the darkest values around the eye rims, the corner of the mouth, and the deepest shadows under the ears. This contrast is what makes the portrait pop. -
Layering the Neck:
The neck fur is often longer. Use longer, sweeping strokes with a fairly dry brush to create a ‘hair’ texture that fades out at the bottom, creating a vignette effect. -
Adding Whiskers:
Using the very tip of your smallest brush and a steady hand, add the whisker spots on the muzzle. If you feel confident, add a few thin whiskers extending outward. -
Softening Edges:
I like to take a clean, slightly damp brush and gently soften any fur edges that look too harsh or cut-out, particularly around the white markings. -
Warm Accent (Optional):
If you want to replicate the exact look of the example, wash a very faint, diluted brown or sepia glaze over the iris of the eye once the blue is totally dry. -
Sign and Dry:
Add your signature near the bottom edge. Allow the piece to dry completely before erasing any remaining stray pencil marks.
Step back and admire how a single color can capture so much personality and life in your pet portrait
Bold Background With Simple Outline Dog
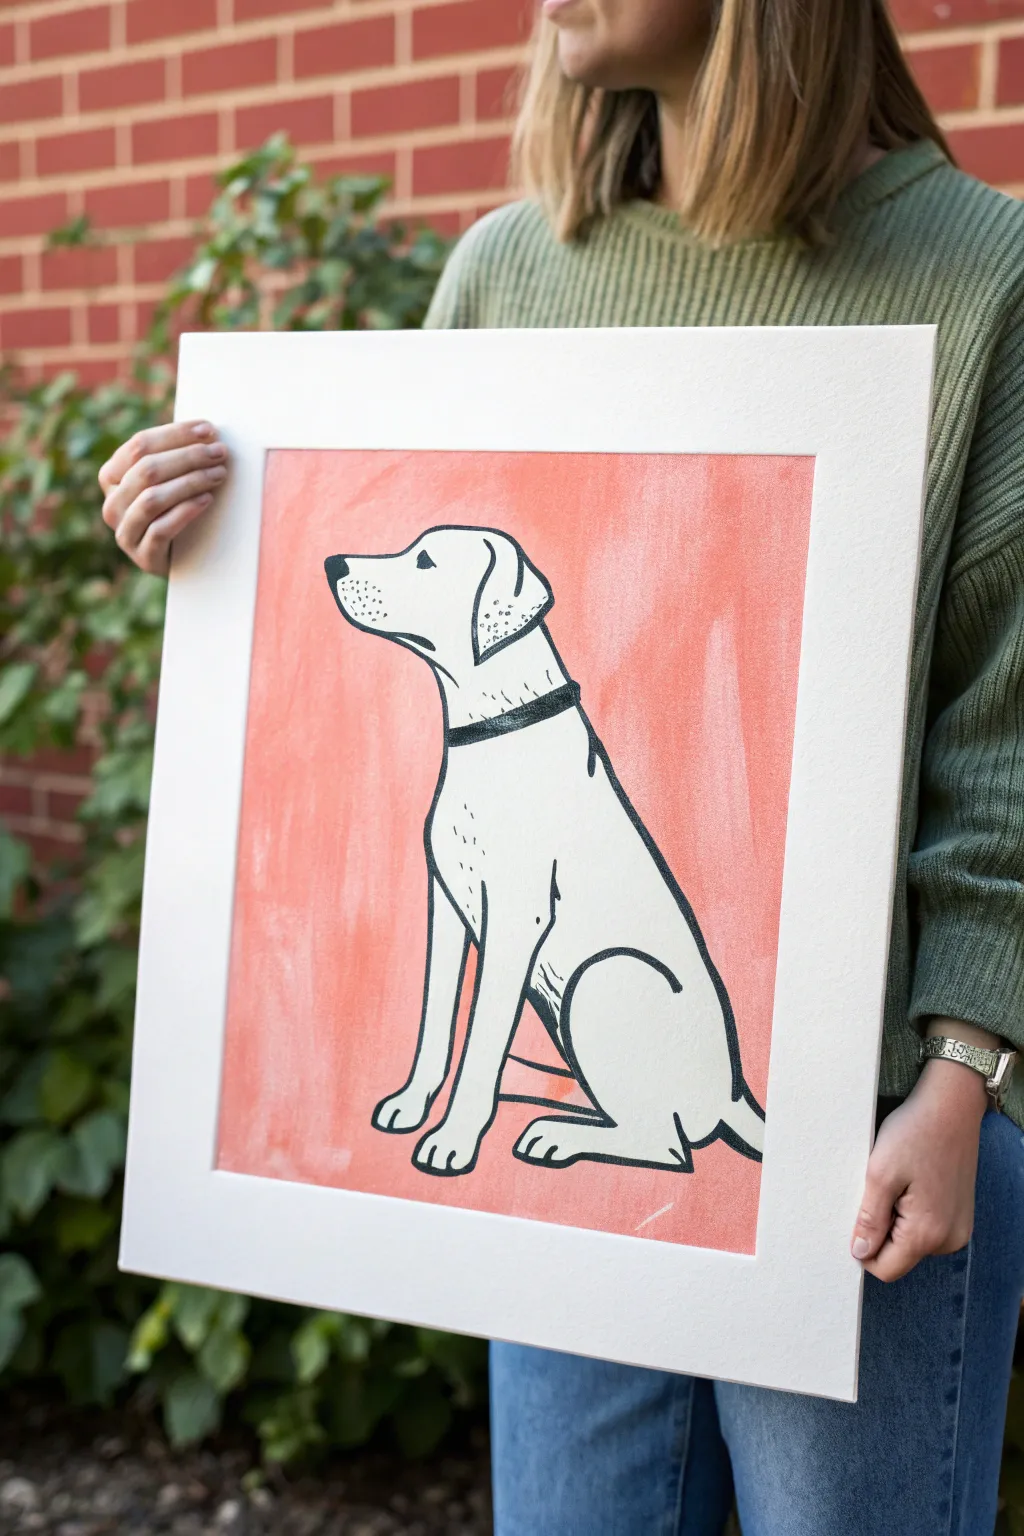

Capture your furry friend’s likeness with this striking combination of flat, graphic design and painterly texture. By pairing a loose, washy background with bold ink lines, you create a modern piece of art that looks professionally printed yet handmade.
Step-by-Step Tutorial
Materials
- Heavyweight watercolor paper or mixed media board (approx. 11×14 inches)
- Acrylic paint (Coral or Salmon Pink)
- Acrylic paint (White)
- Large flat paintbrush (1-2 inch)
- Black paint marker (medium tip and bold tip) or India ink with a brush
- Pencil and eraser
- Ruler
- Painter’s tape or masking tape
Step 1: Setting the Stage
-
Prepare the border:
Begin by deciding on the size of your active painting area. Use a ruler to measure a generous white border around your paper—about 1.5 to 2 inches—and tape it off securely with painter’s tape. This ensures crisp edges later. -
Mix the background color:
Squeeze out your coral or salmon pink acrylic paint. If the color feels too vibrant, mix in a tiny drop of white or a speck of burnt sienna to mute it slightly for that earthy terracotta look. -
Apply the wash:
Dip your large flat brush into water before loading it with paint. Apply the color to the paper using vertical strokes. I like to keep the paint somewhat translucent and streaky here, allowing the brush texture to show through rather than aiming for a solid, opaque wall of color. -
Let it dry:
Allow the background to dry completely. Because we used a watery mix, the paper might buckle slightly; if this happens, flatten it under a heavy book once it is dry to the touch.
Step 2: Drafting the Dog
-
Sketch the basic shapes:
Using a light pencil pressure, break the dog’s posture down into shapes. Draw a rounded rectangle for the chest, an oval for the haunches, and a simple blocky shape for the head. Position the dog so strict profile gaze is looking off to the left. -
Refine the outline:
Connect your shapes to form the final silhouette. Focus on the slope of the back and the line of the neck. Give the dog a collar band and define the floppy ear shape. -
Add facial details:
Lightly sketch the eye, the nose tip, and the mouth line. Don’t worry about fur texture; this style relies on smooth, continuous lines. -
Paint the silhouette:
Use your white acrylic paint to fill in the dog’s entire shape. This might require two coats to be fully opaque against the pink background. Let this dry thoroughly before moving to ink.
Clean Lines
If you are nervous about painting steady lines, use a Posca pen instead of a brush. The firm felt tip offers much more control for beginners.
Step 3: Inking the Details
-
Outline the head:
Take your black paint marker (or a thin brush with black ink). Start at the nose, tracing the upper muzzle and forehead with a confident line. Accuracy is less important than line confidence here. -
Define the ear:
Draw the ear shape. Instead of coloring it solid, add small stippled dots or tiny dashes at the bottom tip of the ear to suggest texture without drawing individual hairs. -
Draw the eye and nose:
Fill in the nose with solid black, leaving a tiny white sliver near the top for a highlight. Draw a simple almond shape for the eye and fill it in black. -
Trace the body:
Continue your bold outline down the dog’s back, tail, and legs. When drawing the legs, stop the lines slightly short where they meet the body to imply muscle definition without closing the shapes entirely. -
Add the collar:
Draw the collar simply as a bold black band around the neck. This provides a nice visual anchor and separates the head from the body. -
Detail the muzzle:
Add a cluster of small dots on the muzzle area near the whiskers. This classic illustration technique adds character instantly. -
Suggest fur texture:
Add a few broken lines or dashes on the chest and near the hind leg bend. These subtle marks prevent the white space from looking too flat.
Personalize It
Instead of a solid black collar, use a bright contrasting paint color like teal or mustard yellow to match your own dog’s real accessories.
Step 4: Final Touches
-
Check line weight:
Step back and look at your drawing. Go over the main outer perimeter lines again to thicken them slightly, making the dog pop against the background. -
Erase pencil marks:
Once you represent absolutely sure the ink is dry, gently erase any visible pencil sketch lines. -
Reveal the border:
Slowly peel away the painter’s tape at a 45-degree angle. This reveals the crisp white border that gives the piece its professional, matted look.
Frame your new masterpiece in a simple white frame or hang it as is for a charming addition to your wall art collection
Galaxy Sky Behind a Dog Silhouette
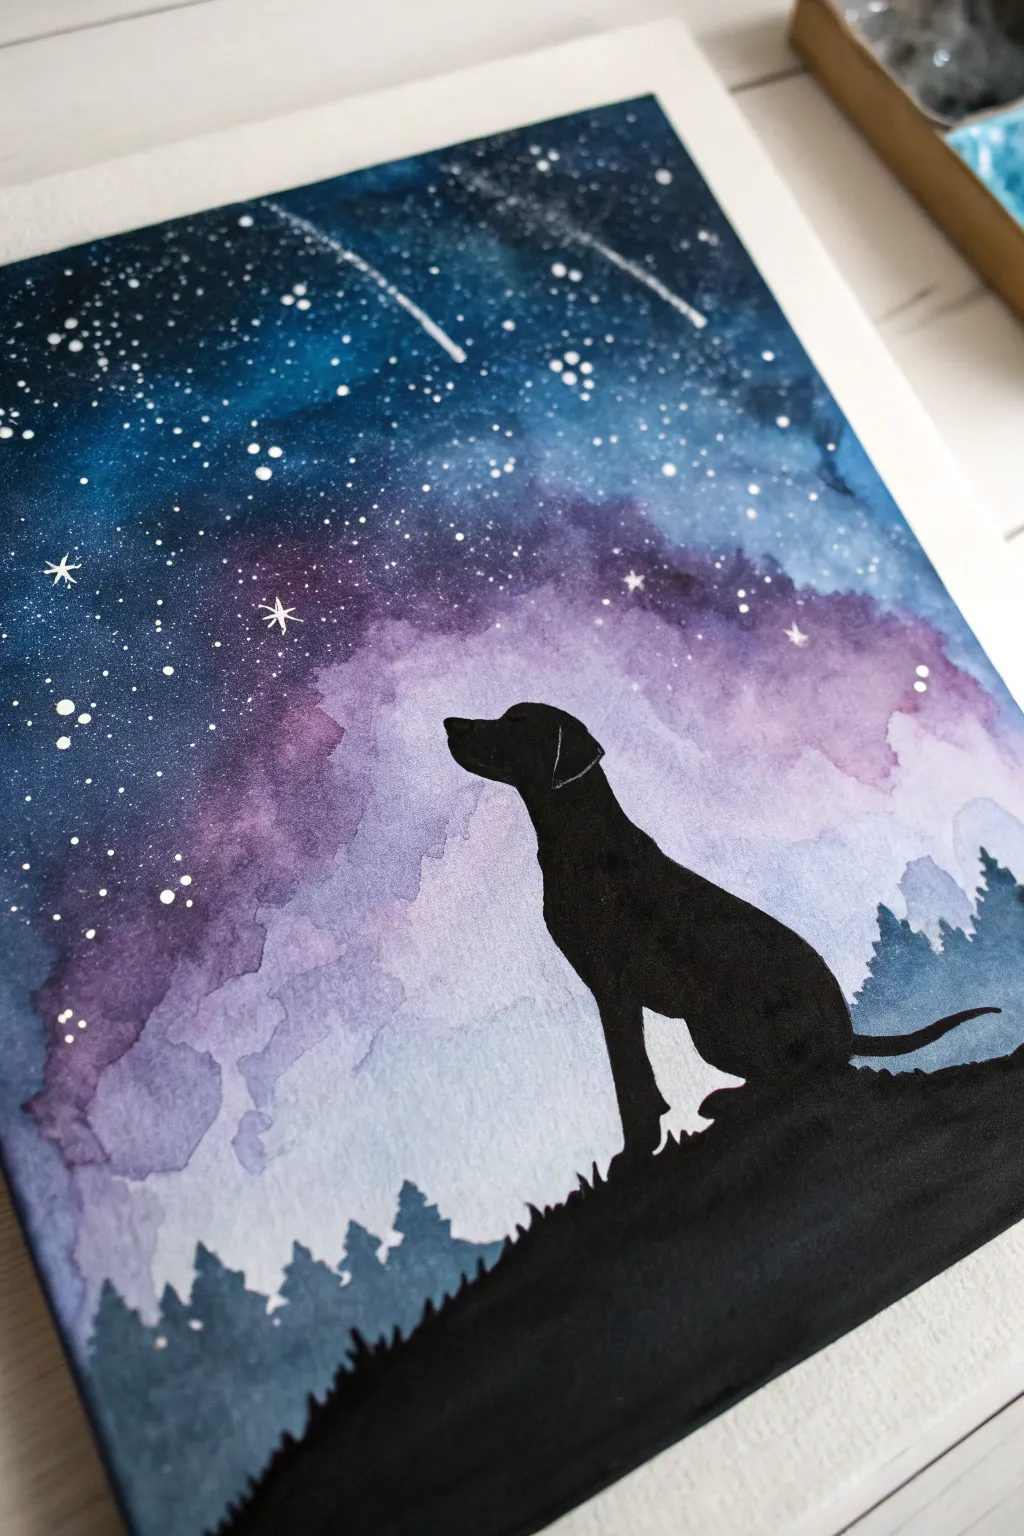
Capture the magic of a starry night with this stunning watercolor galaxy scene featuring a contemplative dog silhouette. The vibrant blend of deep indigos and soft violets creates a dreamy backdrop against the stark black foreground.
Step-by-Step
Materials
- Watercolor paper (cold press, 300 gsm recommended)
- Watercolor paints (Indigo, Prussian Blue, Violet, Purple, Magenta)
- Black acrylic paint or black gouache
- White gouache or white gel pen
- Masking tape
- Large flat wash brush
- Medium round brush
- Fine detail brush (size 0 or 00)
- Old toothbrush (optional for stars)
- Pencil and eraser
- Paper towels and two jars of water
Step 1: Setting the Celestial Stage
-
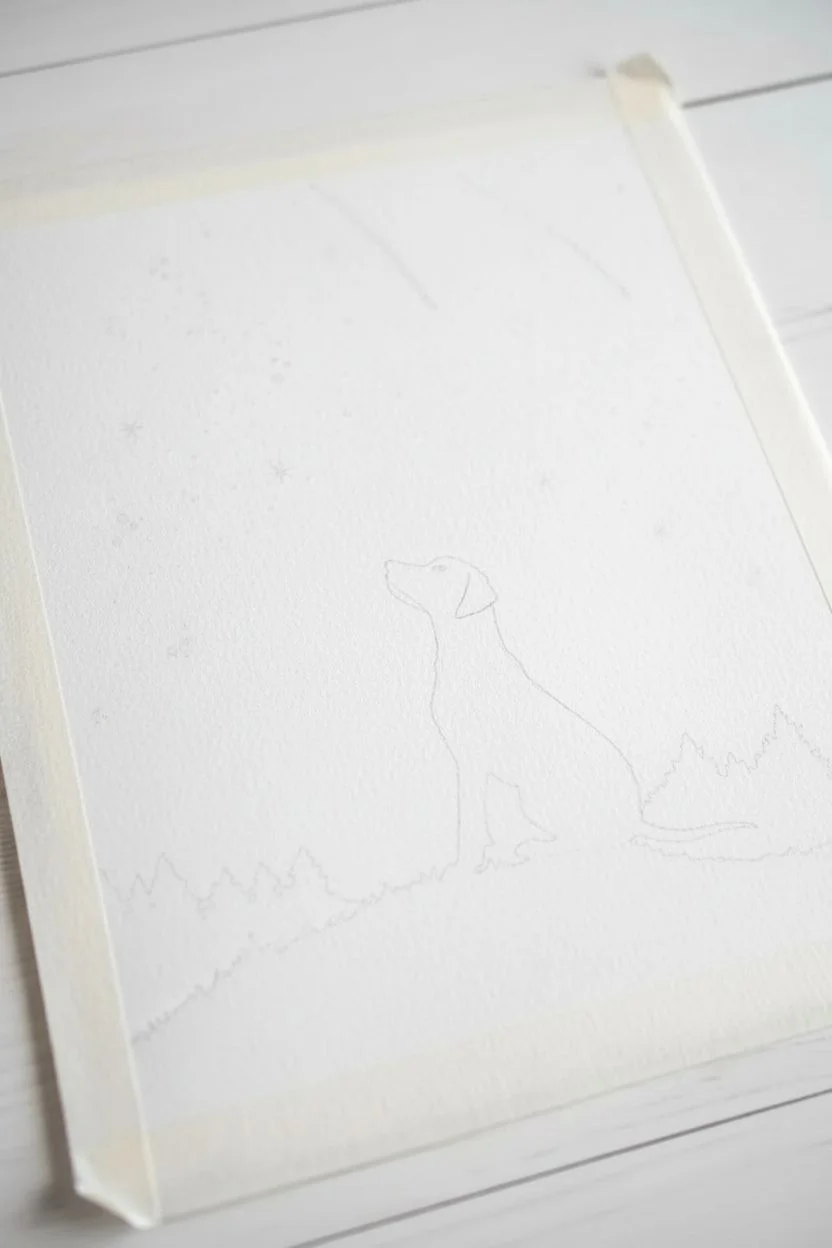
Prepare your canvas:
Begin by taping down all four edges of your watercolor paper to a hard board or table. This creates that crisp white border and prevents the paper from buckling when wet. -
Sketch the silhouette:
Lightly sketch the outline of the hill and the dog sitting on top. Keep lines faint; you just need a guide for where the sky needs to stop. -
Wet the sky area:
Using your large flat brush and clean water, apply an even coat of water to the entire sky area, stopping just above your pencil line for the hill.
Uneven Watermark Fix
If your galaxy dries with hard edges or ‘cauliflowers,’ gently scrub the dry edge with a damp stiff brush to soften it, then glaze over with a thin layer of color.
Step 2: Painting the Galaxy
-
Apply the darkest tones:
While the paper is wet, drop in concentrated Indigo or Prussian Blue at the very top corners. Let the pigment bleed downward naturally. -
Blend in purples:
Load your brush with violet and blend it into the blue as you move down the paper. Allow the colors to mix on the page for a seamless gradient. -
Create the nebula effect:
Add magenta or lighter purple in the middle section to create a glowing, nebula-like cloud. Tilt the paper slightly if needed to encourage the colors to flow together. -
Lighten the horizon:
As you near the hill line, use a very watery wash of pale purple or even just clean water to keep the horizon area light and misty. -
Initial misty trees:
While the bottom sky wash is still damp, dab in faint, watery blue-grey shapes just above the hill line to suggest distant, foggy trees. -
Dry completely:
Wait for the sky to dry fully. It must be bone dry before you add the stars, or they will blur.
Step 3: Adding the Stars
-
Splatter stars:
Dilute a small amount of white gouache with water. Load an old toothbrush or a stiff brush, and flick the bristles to spray fine white specks across the dark blue and purple sections. -
Paint prominent stars:
Using your fine detail brush and thick white gouache, paint a few larger, individual dots for brighter stars. -
Add sparkles:
Choose two or three of the large stars and carefully paint a cross shape through them to create a twinkling ‘starburst’ effect. -
Shooting stars:
With a very steady hand, use the fine brush to drag a thin line appearing to fall from the top corners, fading out at the tail.
Constellation Customization
Look up a real star map and arrange your larger white dots to form actual constellations like the Big Dipper or Orion for a hidden detail.
Step 4: The Silhouette
-
Outline the hill:
Switch to opaque black acrylic or gouache. Use a medium brush to paint the solid black hill at the bottom, covering your initial pencil sketch. -
Paint the dog’s body:
Carefully fill in the main body of the dog with solid black. Ensure the paint is opaque; you may need a second coat after the first dries. -
Refine the edges:
Switch to your smallest detail brush to sharpen the edges of the ears, snout, and tail. Crisp edges are crucial for a recognizable silhouette. -
Add texture:
Along the top of the hill, use quick, short upward strokes to mimic the texture of grass blades and small plants beneath the dog’s paws. -
Foreground trees:
On the far left or right edges of the hill, paint small jagged shapes to represent the tops of pine trees silhouetted against the sky. -
Final reveal:
Once everything is completely dry, slowly peel away the masking tape at a 45-degree angle to reveal your clean border.
Now you have a peaceful celestial scene that celebrates the bond between pet and universe
Mixed-Media Collage Dog Portrait
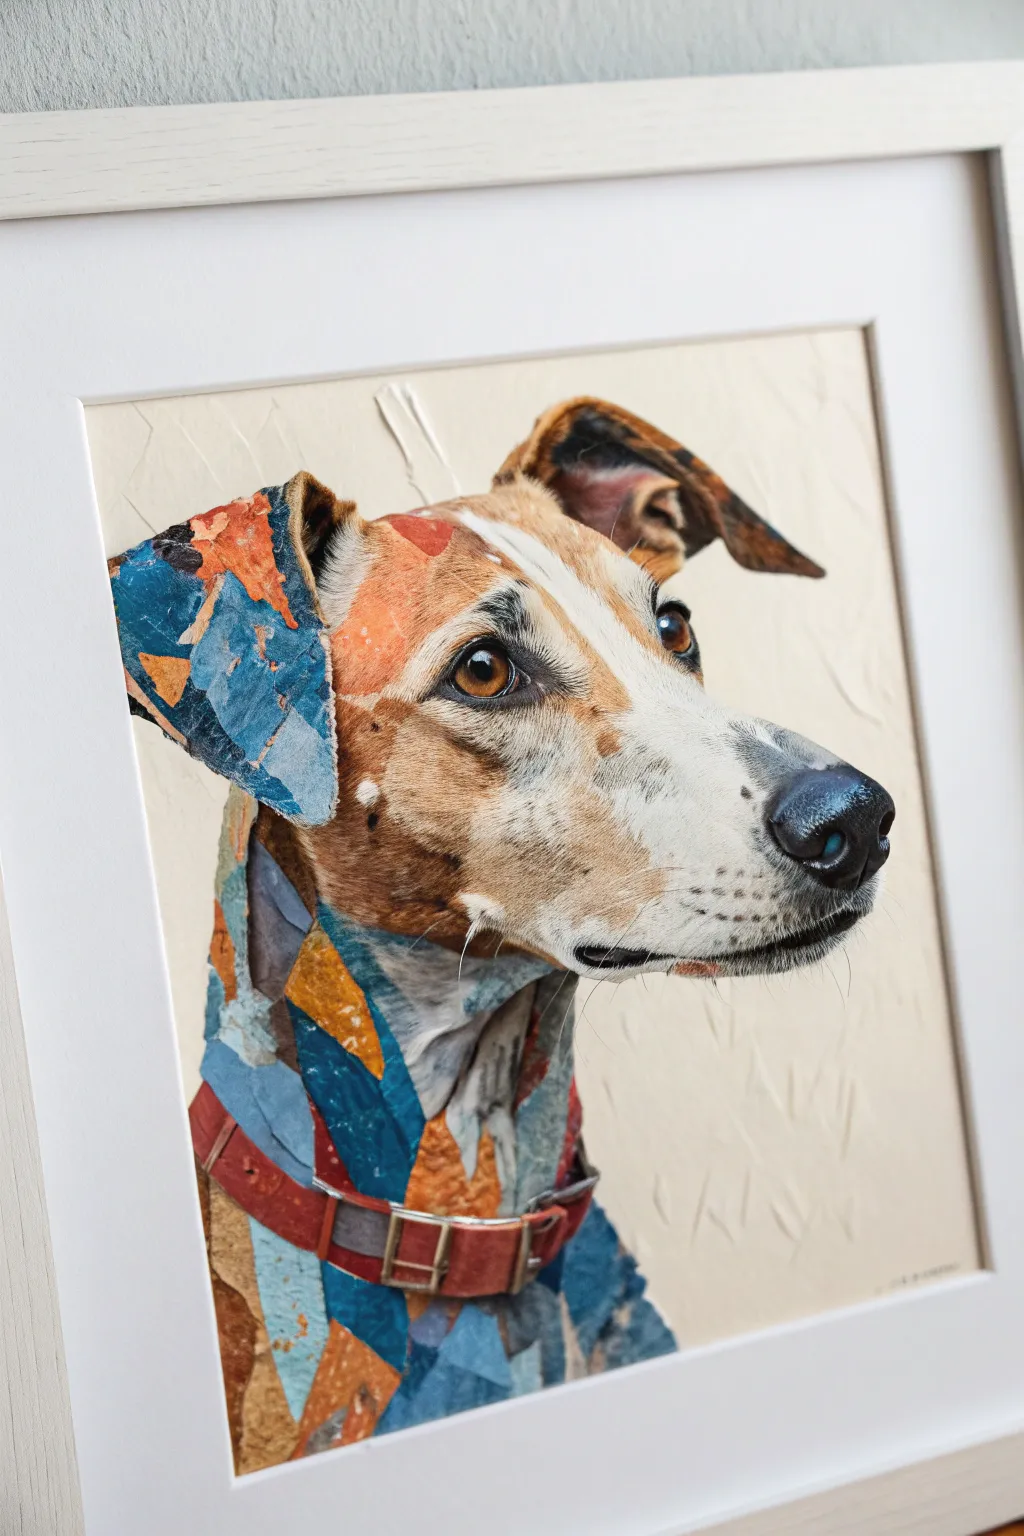
Capture the soulful gaze of your furry friend by combining realistic acrylic painting with the tactile charm of collage. This mixed-media approach uses torn paper layers to build a unique, patterned coat that contrasts beautifully with a finely painted face.
How-To Guide
Materials
- Canvas board or heavy mixed-media paper (11×14 or similar)
- Acrylic paints (Titanium White, Burnt Umber, Burnt Sienna, Yellow Ochre, Mars Black, Phthalo Blue)
- Assorted synthetic brushes (Fine liner, small flat, medium filbert)
- Scrapbooking paper, hand-painted textured paper, or magazine clippings (blues, rusts, browns)
- Matte finish Mod Podge or acrylic gel medium
- Modeling paste (optional, for background texture)
- Palette knife
- Pencil and eraser
- Reference photo of a dog profile
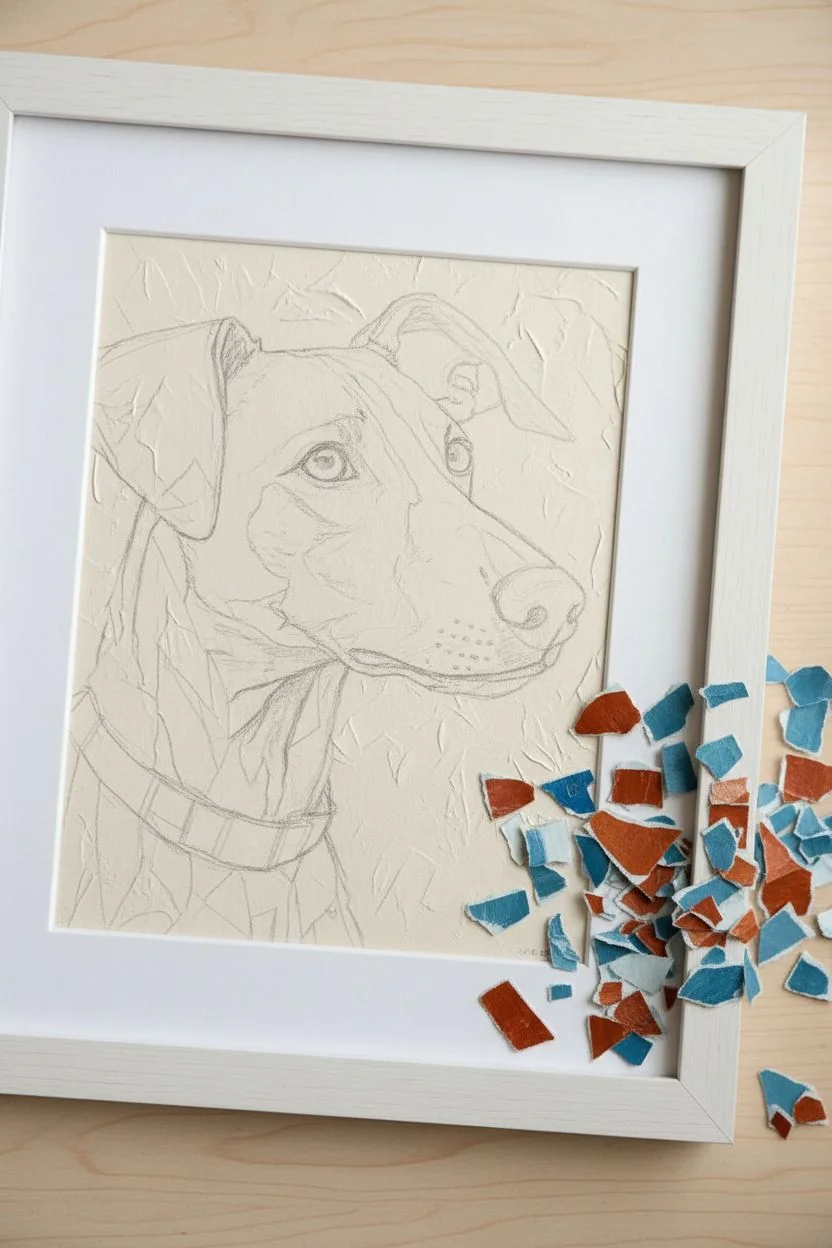
Step 1: Preparation & Drawing
-
Texture the background:
Before sketching, create a subtle texture on your canvas. Use a palette knife to spread a thin, uneven layer of modeling paste or thick white acrylic paint mixed with a little ochre. Create random, short strokes and let this dry completely overnight. -
Sketch the subject:
Lightly draw the dog’s outline onto the textured surface using a pencil. Focus on getting the proportions of the snout and eye placement correct, as these will be painted realistically. Outline the ears and neck loosely, as these areas will be filled with collage. -
Prepare the collage papers:
Gather your papers. If you don’t have patterned paper in the right colors (teal, rust orange, browns), paint some plain sheets with acrylics, letting brushstrokes show for texture. Tear—don’t cut—these papers into small, irregular shards to reveal the fibrous edges.
Tearing Technique
Tear paper towards you to get a white, soft edge; tear away from you for a sharp, clean edge. The white edges act like highlights on the fur.
Step 2: Building the Collage
-
Apply the first layer:
Start with the neck and lower body area. Apply a layer of matte medium to the canvas, place your torn paper bits, and seal them with another coat of medium. I like to overlap the pieces slightly to avoid any gaps. -
Create distinct zones:
Follow your reference photo’s shadows and light. Use darker blue or brown paper pieces for the shadowed areas of the neck and lighter orange or beige pieces for the highlighted areas. This color blocking creates form. -
Detail the ears:
Move up to the ears. For the inner ear, use smaller, warm-toned paper scraps. For the flop of the ear, use cool blues or darker rust tones. Allow the paper edges to define the shape of the ear against the background. -
Add the collar:
If your dog wears a collar, reconstruct it using a long strip of reddish-brown paper. For realism, paint the buckle and holes directly on top later, rather than trying to collage these tiny details. -
Seal everything:
Once the collage portion is fully dry, apply a final thin layer of matte medium over all the paper areas to create a unified, non-porous surface for any final touch-ups.
Metallic Accent
Use gold or copper leaf for the dog’s collar or specific spots on the background to add an elegant shimmer that contrasts with the rustic paper.
Step 3: Painting the Face
-
Base coat the face:
Mix a warm beige using Titanium White, Yellow Ochre, and a touch of Burnt Sienna. Paint the face area (snout, forehead, cheek) with smooth, opaque strokes, blending carefully into the edges where the collage begins. -
Paint the eye:
The eye is the soul of the portrait. Paint the iris with a mix of Burnt Sienna and Amber, adding a black pupil. Add a tiny, crisp white dot for the catchlight to bring it to life. -
Refine the snout:
Use a small flat brush to add shadows along the side of the muzzle and under the jaw using a thinned Burnt Umber. This gives the head volume. -
Detail the nose:
Paint the nose with black mixed with a tiny bit of blue. Use a lighter grey-blue to highlight the top curve of the nostrils, giving them a wet, textured look. -
Add fur texture:
Using your finest liner brush, paint tiny individual hairs around the transition zones where the paint meets the collage. This helps integrate the two mediums seamlessly. -
Whisker details:
With a steady hand, flick thin, white whiskers from the muzzle. Add slight dots on the snout where the whiskers originate.
Step 4: Finishing Touches
-
Shadows and depth:
Check the contrast. If the collage looks too flat, use a very watery glaze of dark brown acrylic to paint shadows directly over the dried paper. -
Highlighting:
Add touches of white or cream paint on the top edges of the collage bits to suggest light catching the ‘planes’ of the paper forms. -
Final varnish:
Once absolutely dry (acrylics dry fast, but collage layers can hold moisture), seal the entire piece with a UV-protective satin varnish.
Step back and admire how the abstract textures of the paper wonderfully complement the realistic gaze of your subject


Have a question or want to share your own experience? I'd love to hear from you in the comments below!