
Elves are the perfect excuse to mix cozy holiday vibes with playful character design. In this list, I’m sharing my favorite elf painting ideas—from classic cute portraits to clever scenes where an elf is clearly up to artistic mischief.
Classic Cheerful Elf Portrait
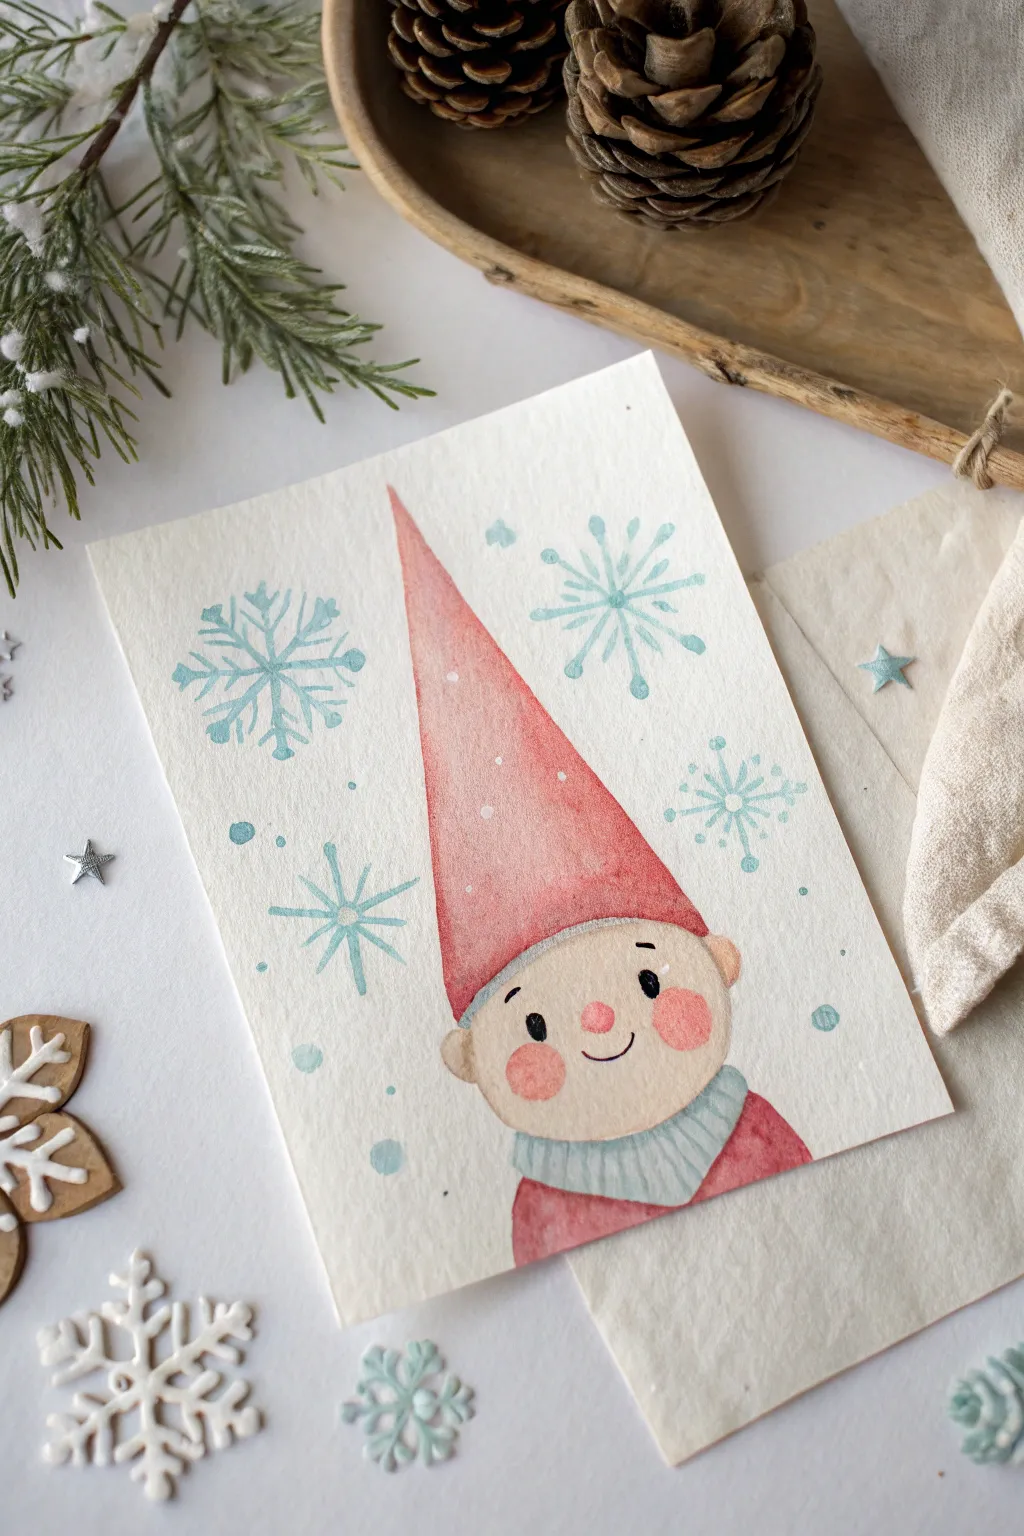
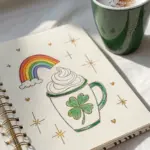
Capture the magic of the season with this sweet and simple watercolor portrait of a rosy-cheeked gnome. With his towering red hat and surrounded by delicate snowflakes, this project uses soft washes and gentle details to create a cozy, wintery feel.
Step-by-Step Guide
Materials
- Cold press watercolor paper (approx. 5×7 inches)
- Watercolor paints (red, peach/skin tone, light blue, grey)
- Round watercolor brushes (size 4 for washes, size 0 or 1 for details)
- White gel pen or white gouache
- Pencil (HB or H) and kneaded eraser
- Paper towel and water cup
- Fine tip black liner pen (waterproof)
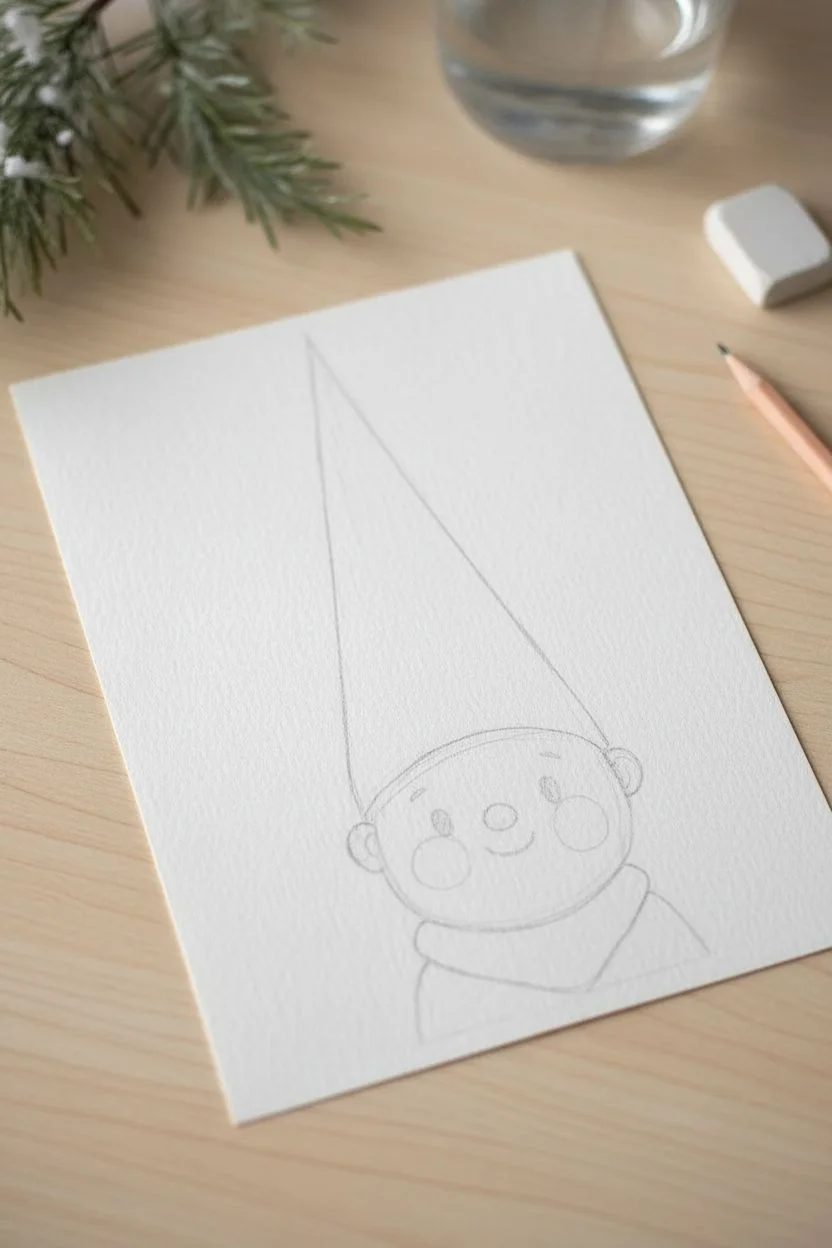
Step 1: Sketching the Character
-
Map out the head:
Start by lightly sketching a wide, rounded U-shape for the gnome’s face in the lower center of your paper. Keep your pencil lines very faint so they don’t show through the paint later. -
Add the ears:
Draw two small, simple C-shapes on either side of the head to form the ears, positioning them roughly in the middle of the facial curve. -
Draft the hat:
From the top corners of the face, extend two long lines upward that meet at a sharp point, creating a very tall, narrow triangle. This whimsical hat should take up about two-thirds of the painting’s height. -
Sketch the collar:
Below the chin, draw a curved band that hugs the neckline to represent a thick, cozy scarf or collar. Add a hint of shoulders sloping downwards below that. -
Place the features:
Mark the position of the eyes and nose lightly. The nose is a simple oval in the center, and the eyes are wide-set dots. Don’t press hard; these are just guides.
Step 2: Painting the Base Layers
-
Wash the skin tone:
Mix a diluted peach or light beige color. Using your size 4 brush, fill in the face and ears with a wet-on-dry technique. Keep the wash even and light. -
Paint the red hat:
While the face dries, mix a watery, soft red. Paint the tall hat triangle, starting from the tip and working down. Let the color pool slightly at the bottom edge for natural shading. -
Add the rosy cheeks:
Before the face wash is completely 100% dry (aim for damp, no sheen), drop two circles of diluted pink or reddish-orange onto the cheek area. This wet-on-damp technique creates those soft, fuzzy edges. -
Color the nose:
Paint the small oval nose with a slightly more saturated pink than the skin tone. If the face is still too wet, wait a moment so the nose doesn’t bleed into the cheeks. -
Paint the clothing:
Fill in the shoulder area with the same red used for the hat. For the collar, use a very pale, watered-down grey or cool blue, letting it stay subtle.
Bleeding Colors?
If your red hat bleeds into the peach face, stop immediately. Use a clean, thirsty brush to lift the unwanted paint. Let both areas dry completely before trying to touch up the edge.
Step 3: Adding Details and Snow
-
Define the collar texture:
Once the grey collar is dry, use the tip of your small brush and a slightly darker grey-blue mix to paint vertical stripes, mimicking the ribbed texture of knitwear. -
Draw the facial features:
Using a fine black waterproof pen (or very concentrated black paint and a size 0 brush), draw two small, solid black ovals for eyes. Add a tiny, curved smile right between the cheeks. -
Give the eyes life:
This is crucial for cuteness: leave a tiny speck of white paper in the eyes if painting, or add a dot of white gel pen afterwards to create a highlight. -
Paint the snowflakes:
Mix a light, watery blue. Paint stylized snowflakes in the background using simple cross shapes with varied ends—some with dots, some with extra lines. Keep them loose and varied in size. -
Add falling snow:
Paint small blue dots of varying sizes scattered around the snowflakes to represent falling snow.
Level Up: Sparkle
Mix a tiny pinch of iridescent watercolor medium or silver metallic paint into your light blue snowflake color. It adds a magical, frosty shimmer visible when the card catches the light.
Step 4: Final Touches
-
Add white highlights:
I love using a white gel pen or opaque white gouache here. Add tiny specs of ‘snow’ on the red hat and shoulders to make it look like he’s been standing outside. -
Refine the hat texture:
If the red hat looks too flat, use a slightly darker red watercolor to dab in a little texture or shadow along the left side while distinct from the white snow specs. -
Clean up:
Once absolutely everything is bone dry, gently erase any visible pencil lines, specifically around the snowflakes or the edge of the hat.
Now you have a charming winter companion perfect for a holiday greeting card or a festive framed miniature


Elf in a Snowy Forest Scene
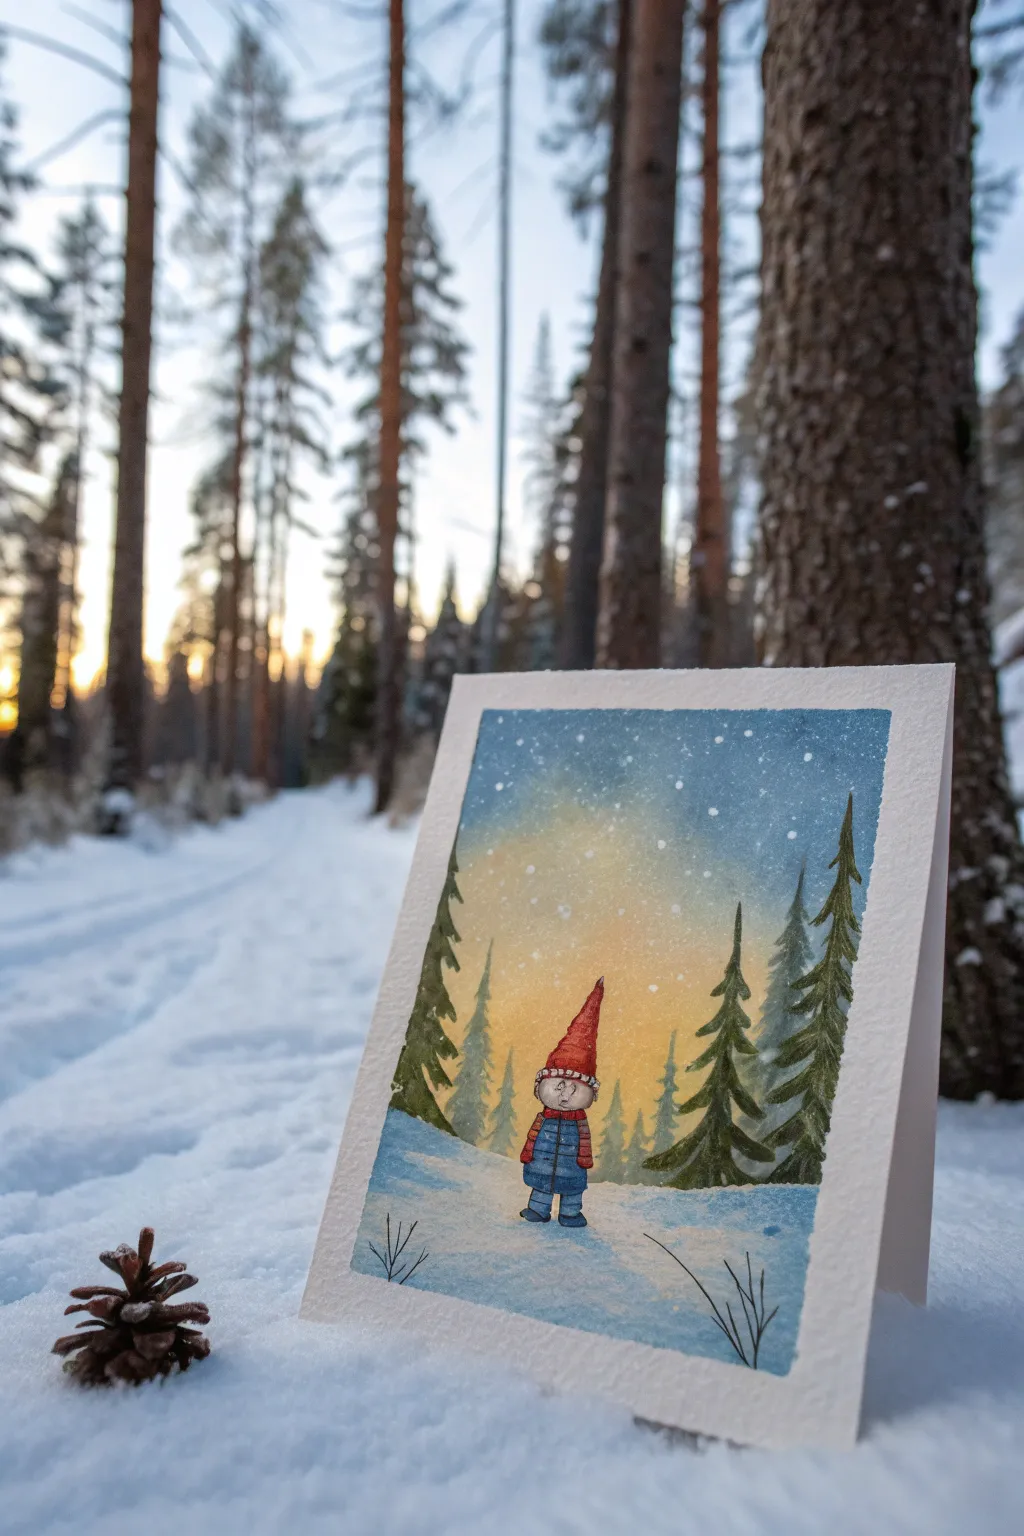
This charming watercolor project captures the quiet magic of a winter evening with a solitary gnome standing amidst towering evergreens. The painting features a glowing sunset backdrop behind snowy pines, creating a cozy and nostalgic atmosphere perfect for holiday cards.
Detailed Instructions
Materials
- Cold press watercolor paper (cut to card size)
- Watercolor paints (Indigo, Burnt Sienna, Payne’s Grey, Carmine Red, Cadmium Yellow, Cobalt Blue)
- White gouache or white gel pen
- Round brushes (size 6 for washes, size 2 and 00 for details)
- Pencil and kneaded eraser
- Painter’s tape or masking fluid (optional)
- Jar of clean water
- Paper towels
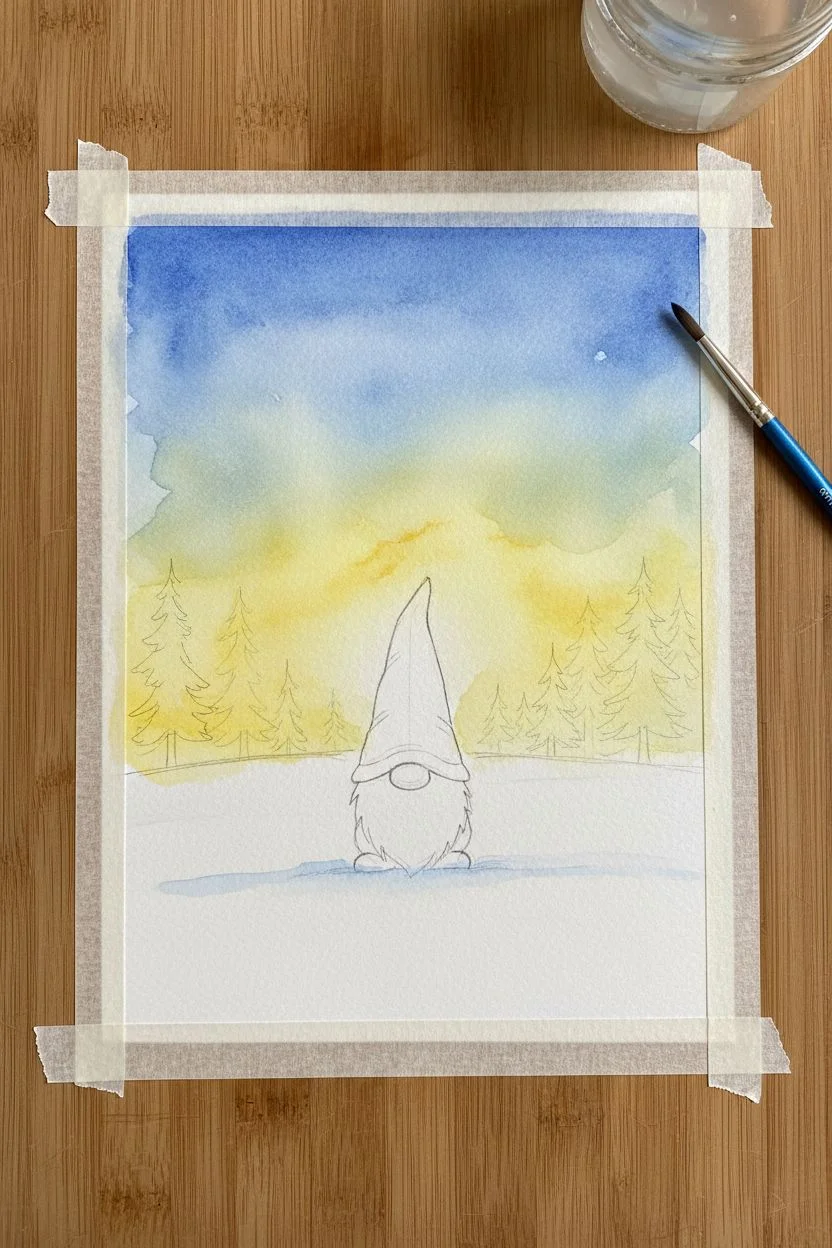
Step 1: Sketching and Sky Wash
-
Lightly sketch the scene:
Begin by lightly sketching the horizon line about one-third up from the bottom of your paper. Draw the simple outline of the gnome in the lower center foreground—focus on his tall pointed hat, round head, and striped coat. Indicate the position of the trees lightly, but don’t draw every branch. -
Prepare the paper for the sky:
Tape your paper down to a board if you haven’t already to prevent buckling. Wet the sky area with clean water using your larger round brush, stopping just at the horizon line and carefully painting around the gnome’s shape. -
Apply the sunset glow:
While the paper is still wet, drop a diluted wash of Cadmium Yellow into the center area just above the horizon. This will be the source of light behind the trees. -
Paint the evening sky:
Load your brush with a mix of Cobalt Blue and a touch of Indigo. Paint the top corners and edges of the sky, blending downward so the blue meets the yellow. Let the colors bleed slightly to create a soft, scenic gradient. -
Let the first layer dry:
Allow this initial wash to dry completely. If the paper feels cool to the touch, it is still wet; wait until it is room temperature.
Keep it Frosty
For a frosty look, sprinkle table salt onto the wet sky wash. Brush it off once totally dry for a unique ice-crystal texture.
Step 2: Painting the Foreground & Trees
-
Paint the snowy ground:
Mix a very watery wash of Cobalt Blue with a tiny hint of Payne’s Grey. Paint the snow area below the horizon, keeping it lighter near the center where the light hits and darker at the edges for shadows. -
Add distant trees:
Using a diluted mix of Indigo and green, paint faint tree silhouettes in the background. Keep these shapes simple and lighter in value to push them into the distance. -
Paint the foreground trees:
Once the sky is dry, mix a stronger, darker green using Chrome Green or mixing Yellow and Indigo. With a size 2 brush, paint the evergreen trees in the mid-ground. Use downward strokes to mimic drooping, snow-laden branches. -
Dry brush texture:
For the darker trees nearest the viewer, use less water on your brush to create a ‘dry brush’ effect, which naturally replicates the texture of pine needles.
Metallic Magic
Mix a bit of iridescent medium into your white gouache for the snow highlights. The snow will shimmer when the card is tilted!
Step 3: The Gnome and Details
-
Gnome’s hat:
Paint the gnome’s tall hat with a vibrant Carmine Red. Leave the paint slightly uneven to suggest the texture of fabric. -
Coat and clothing:
Fill in the gnome’s coat with blue stripes, alternating with red or keeping it simple. I like to add tiny horizontal lines for a padded jacket look. -
Face and skin tones:
Mix a tiny amount of Burnt Sienna with plenty of water for a pale skin tone. Paint the round face shape, letting it dry before adding two tiny dots for eyes with your smallest brush. -
Shading the figure:
Once the base colors are dry, use a slightly darker version of each color to add shadows under the hat brim and along the side of the coat away from the light source. -
Adding the falling snow:
Load a toothbrush or stiff brush with white gouache (consistency of heavy cream). Flick the bristles to spatter tiny white dots across the sky and trees to create a magical snowfall effect. -
Final highlights:
Use white gouache or a gel pen to add highlights to the top of the gnome’s hat, shoulders, and the tips of the evergreen trees to show where snow has settled. -
Foreground tufts:
With your finest brush and black or dark grey paint, add a few quick, thin strokes in the bottom corners to represent tall winter grass poking through the snow.
Once dry, you have a heartwarming winter scene ready to be gifted as a holiday card or framed as seasonal decor.


Whimsical Cartoon Elf Character Sheet
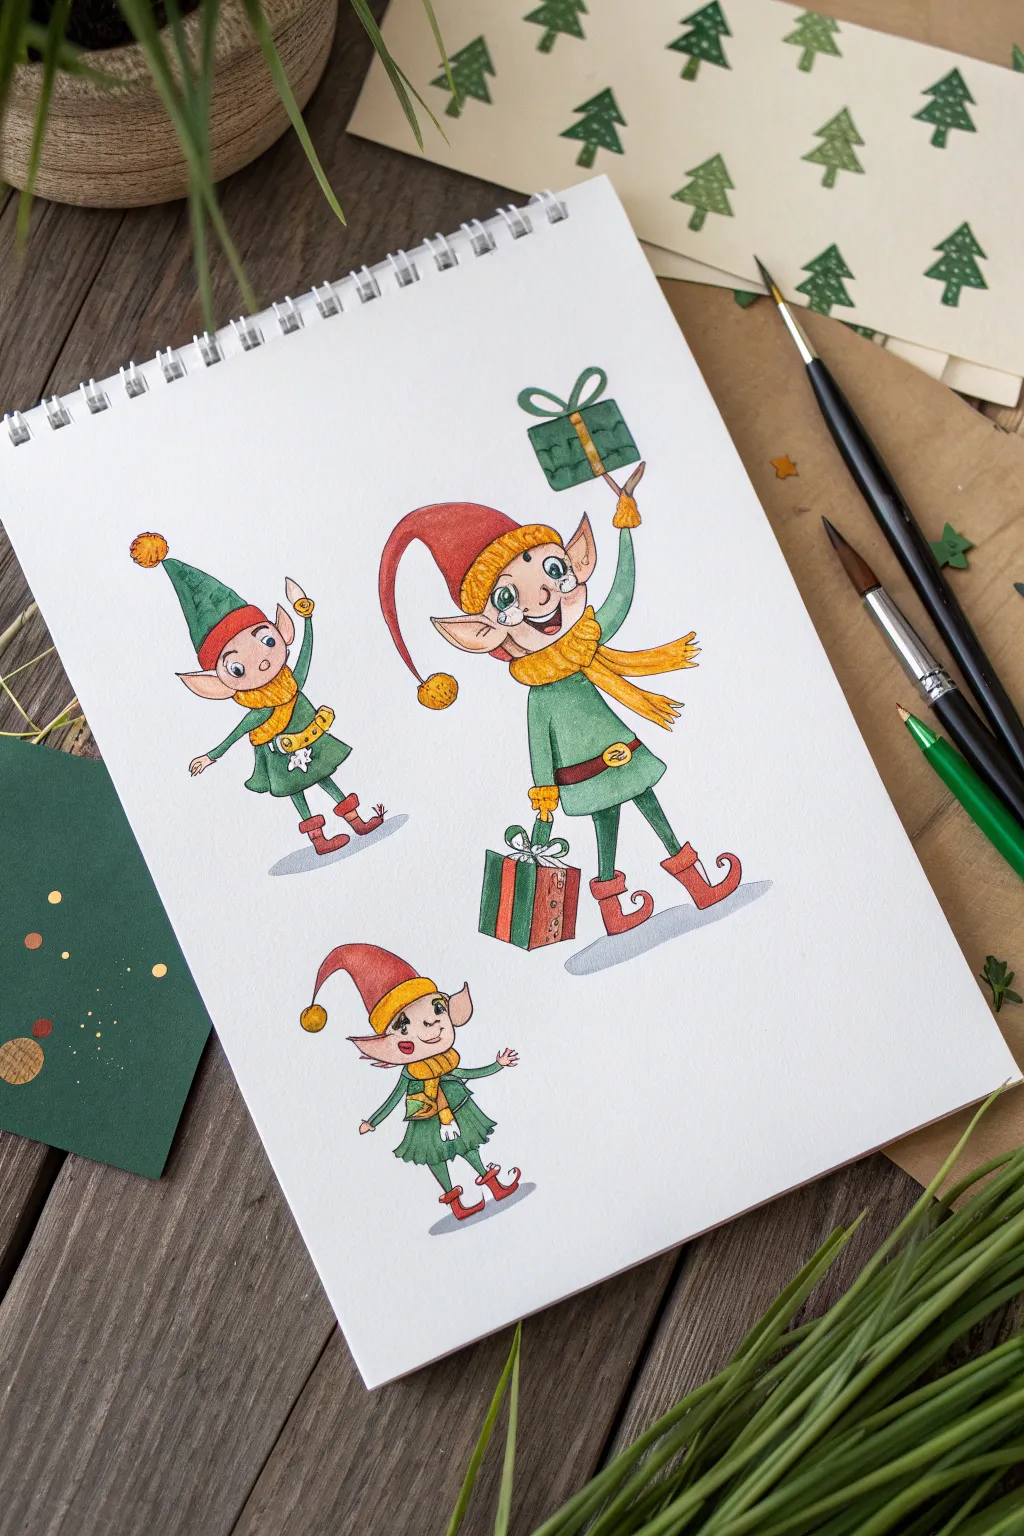
Capture the holiday spirit with this delightful character study featuring three mischievous elves in different poses. Using simplified cartoon shapes and vibrant watercolor washes, you’ll create a lively page that explores personality and movement without getting bogged down in realistic anatomy.
Step-by-Step Tutorial
Materials
- Hot press watercolor paper or mixed media sketchbook
- HB pencil and kneaded eraser
- Waterproof fine liner pen (01 or 03 size, black or sepia)
- Watercolor paints (Sap Green, Alizarin Crimson, Cadmium Yellow, Burnt Sienna)
- Small round watercolor brushes (sizes 2 and 4)
- White gel pen for highlights
- Jar of water and paper towels
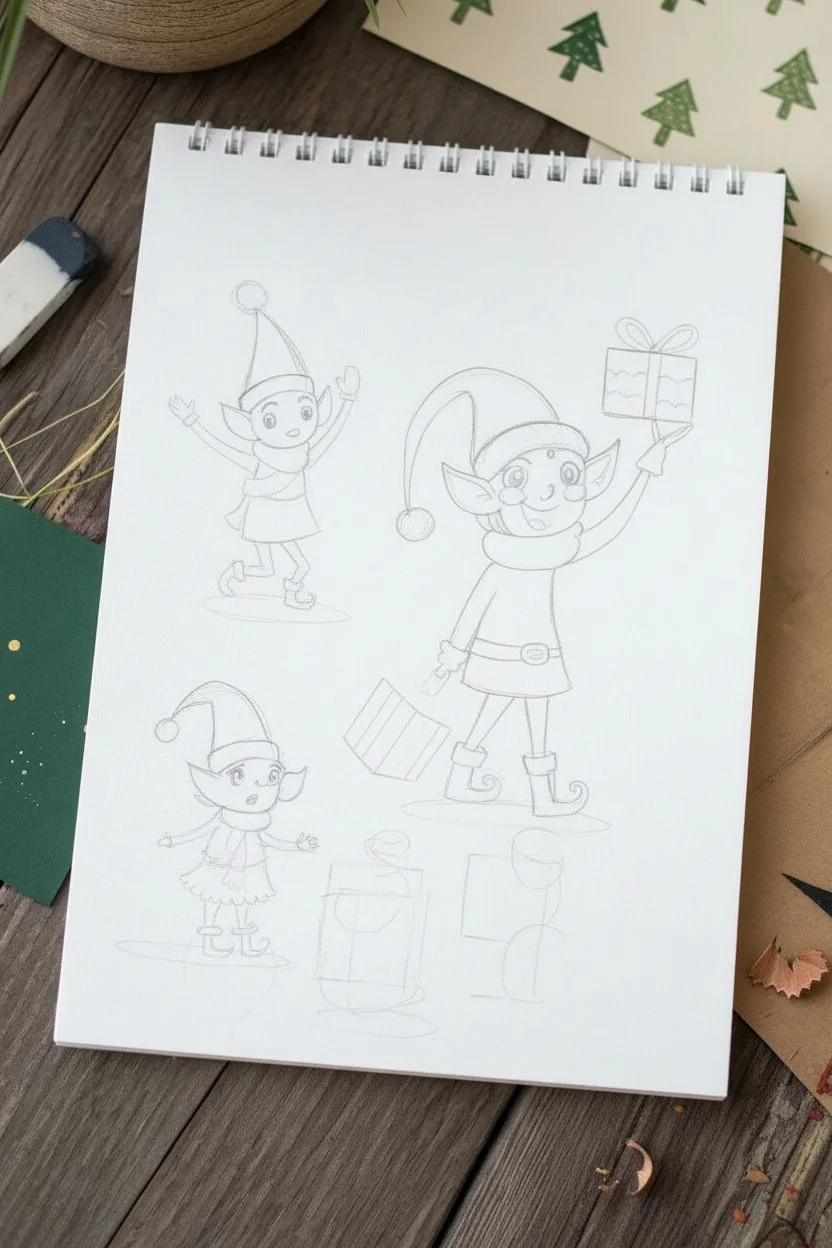
Step 1: Sketching the Characters
-
Map out the composition:
Begin by lightly marking the positions of your three elves on the page. Place the largest elf in the center right, slightly higher up, a smaller jumping elf on the left, and the smallest elf at the bottom center to create a balanced triangle layout. -
Draft the central elf’s head:
Start with the main character. Draw a rounded oval for the head and add large, pointy ears extending outward. Sketch a long, drooping stocking cap that curves down towards the shoulder, ending in a pom-pom. -
Build the central body:
Draw the torso as a simple rectangular shape slightly wider at the bottom. Add stick-figure guidelines for the arms—one reaching up holding a gift, the other down holding another box. Sketch the legs in a walking stance. -
Refine the central outfit:
Flesh out the limbs with thickness. Add details like a thick scarf waving to the right, a belt with a large buckle, and curled-toe boots. Don’t forget the mittens! -
Sketch the left elf:
For the elf on the left, draw an active pose. Sketch the head looking upward and one arm reaching high as if tossing something. Give him a shorter, straighter hat and a simple tunic dress. -
Sketch the bottom elf:
Draw the smallest elf looking shy or sweet. Use a smaller head-to-body ratio to make him look younger. Give him a hat that flops forward slightly and a little skirt-style tunic. -
Add facial features:
Lightly pencil in large, expressive eyes for all three. Give the center elf a wide, confident smile, the left elf a surprised expression, and the bottom elf a gentle grin.
Step 2: Inking and Structuring
-
Outline the forms:
Using your waterproof fine liner, carefully trace over your pencil lines. I prefer using a slightly broken line for the fur trim and pom-poms to suggest texture. -
Add weight to the lines:
Go back over key areas like the bottom of the boots or the underside of the hats to thicken the line weight slightly, giving the drawing more grounding. -
Erase guidelines:
Once the ink is completely dry—wait at least five minutes to be safe—gently erase all pencil marks with your kneaded eraser.
Color Harmony Tip
Limit your palette to just one specific red, green, and yellow for the whole page. Repeating the exact same colors across all three characters makes the sheet feel cohesive and professional.
Step 3: Painting the Elves
-
Paint the skin tones:
Mix a very watery wash of Burnt Sienna with a touch of Cadmium Red. Paint the faces, ears, and hands. While wet, drop a tiny bit more pigment onto the cheeks, nose tips, and ears for a rosy flush. -
Color the outfits green:
Using Sap Green, paint the tunics and the hat of the left elf. For the central elf, paint the shirt green but leave the scarf unpainted. Vary the intensity of the green to show light hitting the fabric. -
Add the red accents:
Switch to Alizarin Crimson. Paint the main elf’s hat, the stripes on the gift boxes, and all the elf boots. Paint carefully around the buckles or pom-poms. -
Fill in the yellow details:
Use Cadmium Yellow for the scarves, pom-poms, belts, and mitten cuffs. For the central elf’s scarf, add a tiny touch of orange to the shadows to give it volume. -
Paint the gifts:
Color the gift boxes using a darker shade of green for contrast against the lighter tunics. Add red ribbons or bows as needed. -
Add shadows:
Mix a light grey or cool purple wash. Paint a simple cast shadow under each elf’s feet to ground them so they don’t look like they are floating in space. -
Final highlights:
Once the paint is bone dry, use a white gel pen to add small dots to the eyes for sparkle, and subtle highlights on the shiny belt buckles.
Muddy Water Trouble?
If your yellow scarves look dirty near the green tunics, your paint was too wet. Let the green areas dry completely before painting adjacent yellow shapes to prevent bleeding.
Now you have a charming set of holiday characters ready to be scanned for cards or kept as a festive sketchbook entry


Elf Couple Painting: Matching Shoes
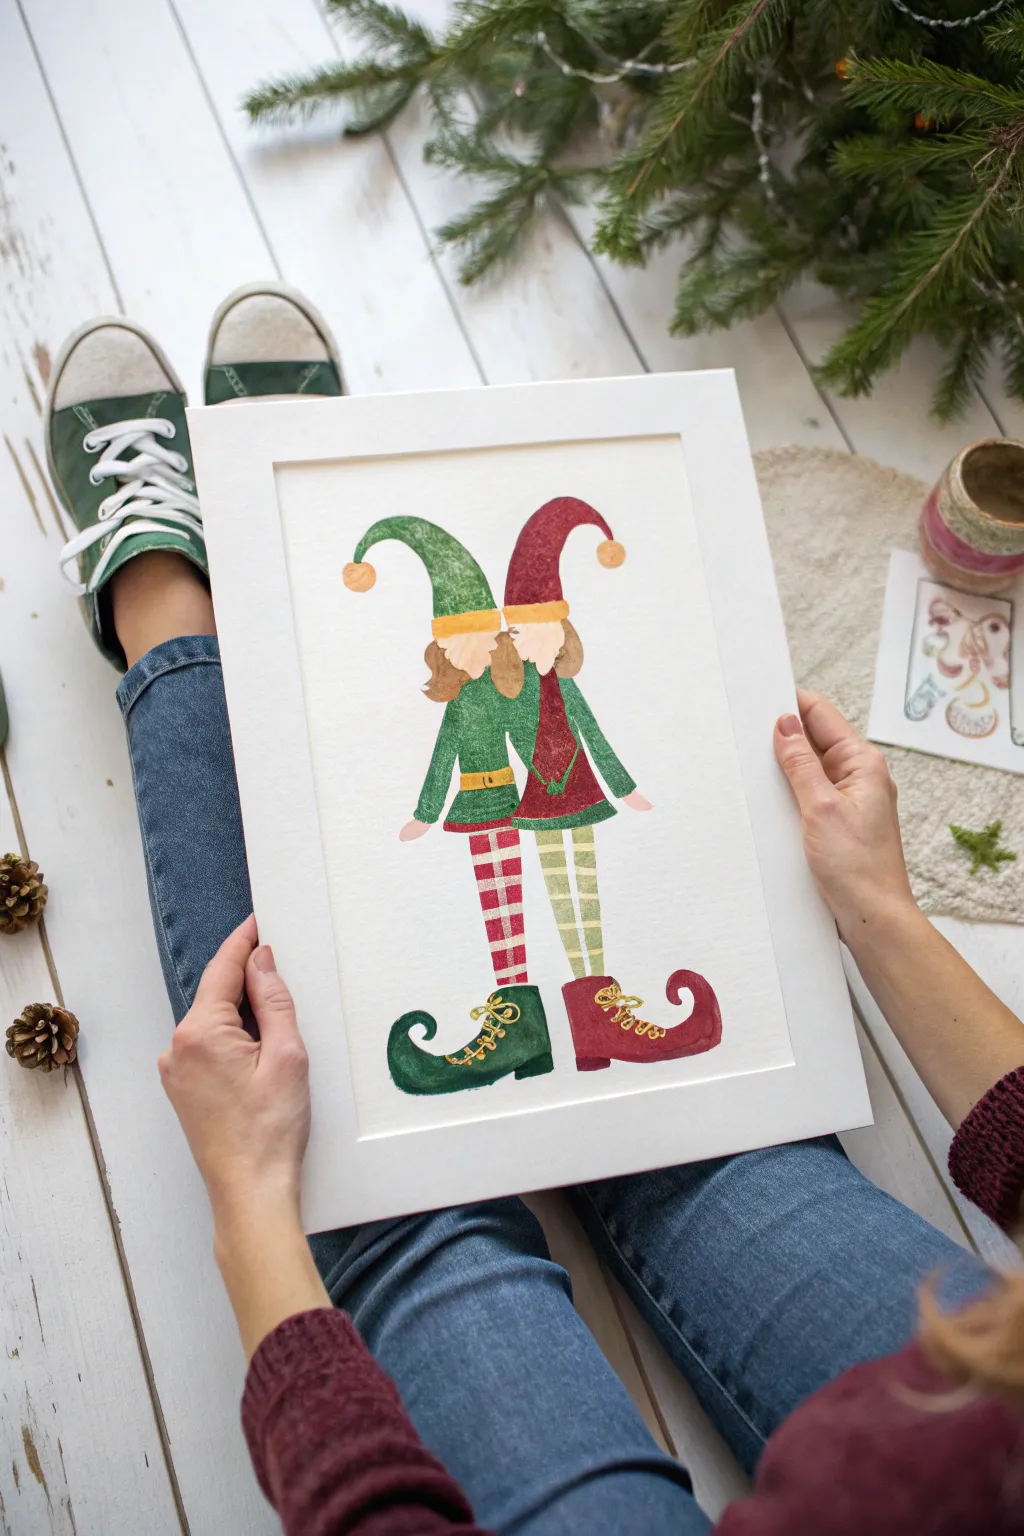
Capture the magic of holiday companionship with this charming watercolor painting featuring two elves sharing a tender moment. The elongated hats, striped stockings, and curled shoes create a distinctive, playful style perfect for seasonal decor.
Step-by-Step Guide
Materials
- Cold press watercolor paper (140lb/300gsm)
- Watercolor paint set (specifically sap green, alizarin crimson, yellow ochre, raw sienna)
- Round watercolor brushes (size 2, 4, and 6)
- Pencil (HB or H)
- Kneaded eraser
- Gold metallic watercolor or gouache
- Jars of water
- Paper towels
- Masking tape (for securing paper)
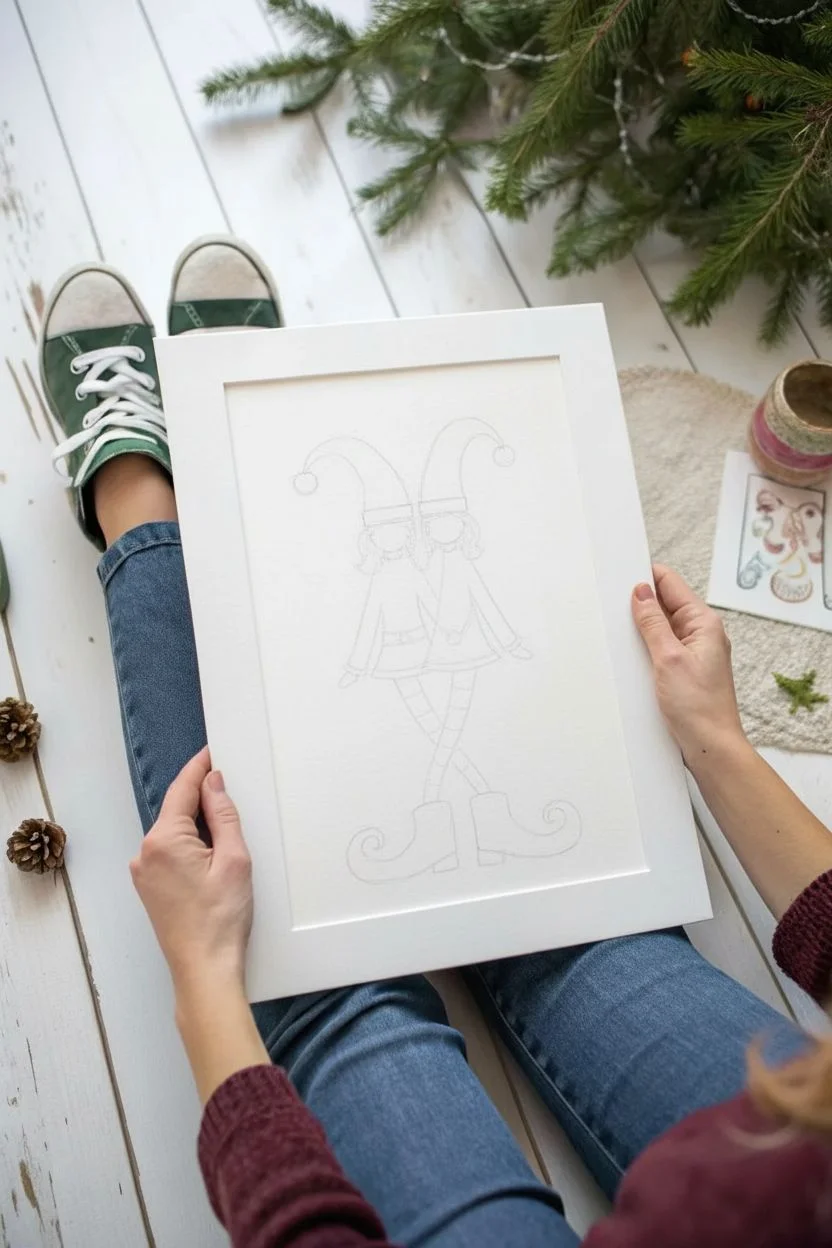
Step 1: Sketching the Figures
-
Map out the shapes:
Begin by lightly sketching the two figures in the center of your paper. Focus on tall, slender triangles for the bodies and elongated curves for the hats that lean toward each other. -
Detail the hats and heads:
Draw the swooping hats, ending them with small circles for pom-poms. Beneath the hats, sketch simple hair shapes and small ovals for the faces, keeping features minimal or non-existent for a stylistic look. -
Legs and shoes:
Sketch the legs extending downward. The left elf’s legs should cross slightly over the right. Draw large, exaggerated shoes with curled toes at the bottom. -
Clean up the lines:
Use your kneaded eraser to gently lift graphite until only faint guidelines remain, preventing the pencil from muddying your translucent watercolors.
Clean Edges Tip
To get crisp stripes on the stockings without waiting, paint every other stripe first, let dry, then fill in the gaps.
Step 2: Painting the Base Colors
-
Left elf’s outfit:
Using a size 6 brush, paint the left elf’s tunic and hat with a vibrant sap green. Keep the wash even but allow for natural watercolor texture. -
Right elf’s outfit:
While the green dries, paint the right elf’s hat in a deep red or burgundy. Apply a wash of sap green to their tunic to create a visual link between the two characters. -
Hair and skin tones:
Mix a diluted raw sienna or yellow ochre for the skin tones and hair. Apply this gently to the face and hair areas, being careful not to let it bleed into the wet hat or tunic paint. -
Wait for drying:
It is crucial to let these main blocks of color dry completely before moving on to details to avoid unwanted bleeding.
Step 3: Adding Patterns and Details
-
Striped stockings:
For the left elf, paint horizontal red stripes on the legs. For the right elf, switch to horizontal green stripes. Using a size 2 brush here gives you better control over the lines. -
Defining the boots:
Paint the left elf’s shoes in deep green and the right elf’s shoes in deep red. Make the color more saturated here to anchor the bottom of the composition. -
Hat details:
Paint the brims of the hats with yellow ochre or a gold tone to simulate fur or trim. Do the same for the pom-poms at the tips. -
Torso details:
Add a belt to the left elf using the gold tone. For the right elf, add a small scalloped collar or necklace detail.
Add Sparkle
Mix a tiny pinch of iridescent medium into your white gouache for the pom-poms to make them shimmer like snow.
Step 4: Metallic Accents and Finishing
-
Shoe laces:
Once the shoe paint is bone dry, use your gold metallic paint and a fine size 2 brush to draw delicate, curling laces on the boots. -
Final highlights:
Touch up the hat brims and pom-poms with a second layer of yellow or gold if they look too transparent. -
Erase and frame:
Check for any stray pencil marks and gently erase them. Remove the masking tape carefully and place your artwork in a clean white mat or frame.
Hang this charming duo on your wall to bring a touch of folkloric cheer to your home
BRUSH GUIDE
The Right Brush for Every Stroke
From clean lines to bold texture — master brush choice, stroke control, and essential techniques.
Explore the Full Guide
Elf Self-Portrait on a Tiny Canvas
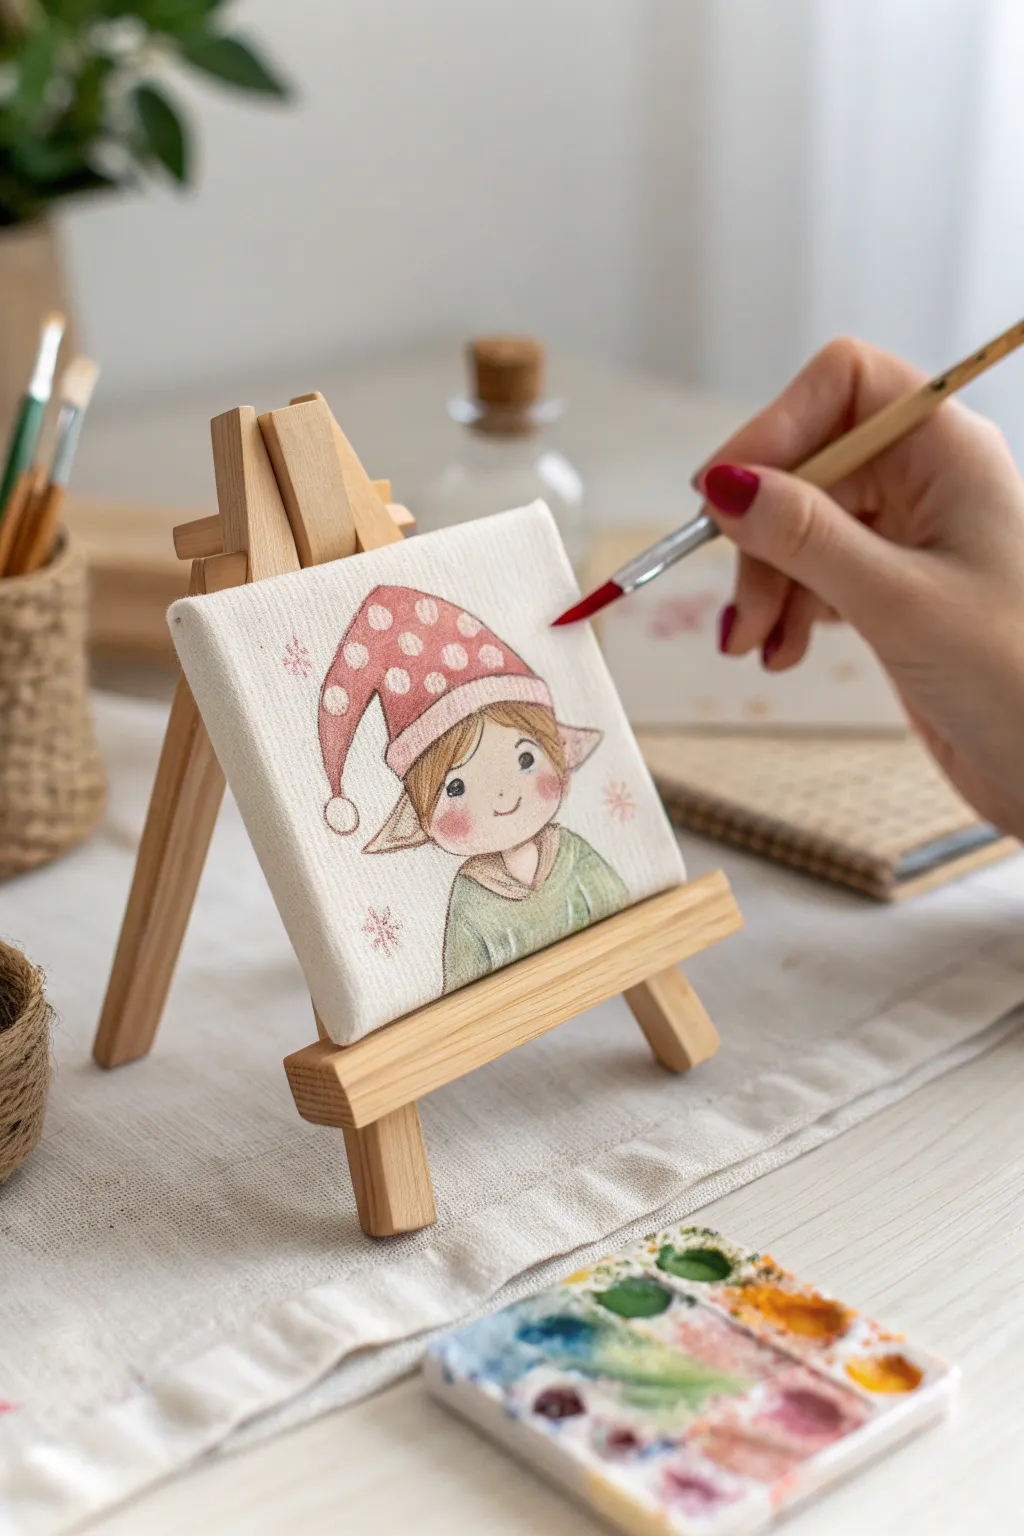
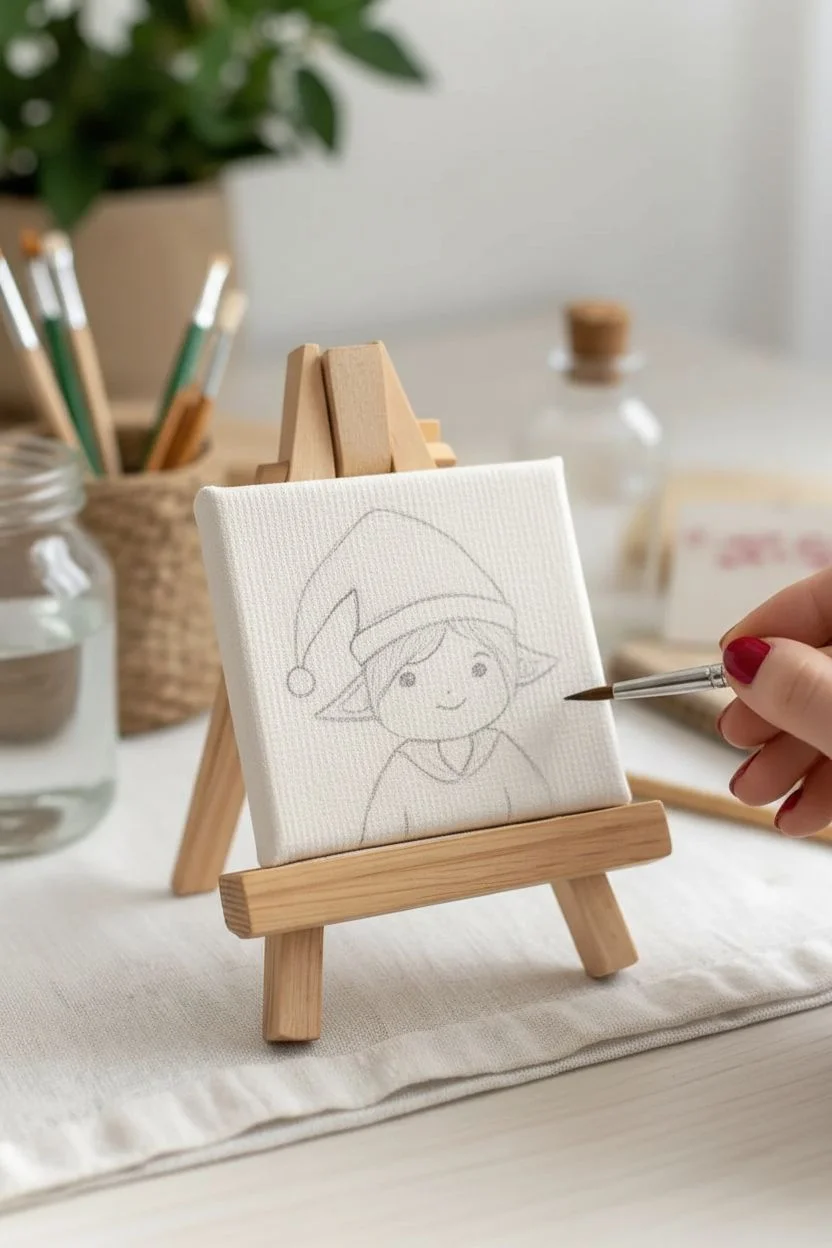
Capture the whimsical charm of the holidays with this darling micro-painting featuring a rosy-cheeked elf in a polka-dot hat. This project transforms a tiny canvas into a festive masterpiece using delicate watercolor techniques and fine line work.
Step-by-Step Guide
Materials
- Miniature canvas (approx. 3×3 or 4×4 inches)
- Miniature wooden easel
- Watercolor paints (pan set preferred)
- Fine detail brushes (size 0, 00, and 2 round)
- Pencil (HB or H)
- Clean water jar
- Paper towel
- Fine liner pen (brown or sepia, waterproof)
- Mixing palette
Step 1: Sketching the Character
-
Canvas Preparation:
Since most store-bought mini canvases are primed for acrylics, apply a thin layer of watercolor ground (absorbent ground) if you want true watercolor effects. Let this dry completely overnight, or proceed directly on the canvas for a stain-like effect with less flow. -
Draft the Head Shape:
Using your HB pencil, lightly sketch a rounded U-shape in the center of the canvas for the elf’s face. Keep your pressure extremely light so the graphite doesn’t smudge later. -
Add Ears and Hair:
Draw swooping bangs across the forehead. On either side of the head, sketch large, pointed elf ears sticking out horizontally. They should look slightly oversized for that cute, illustrative style. -
Sketch the Hat:
Draw the rim of the hat sitting just above the bangs. Extend the hat upwards and curve the point downwards to the left side, finishing with a small circle for the pom-pom. -
Detail the Clothing:
Sketch a simple V-neck collar below the chin and rounded shoulders to suggest a tunic style top. -
Map the Facial Features:
Place two wide-set dots for eyes and a small curved line for a smile. Don’t press hard; these are just guides for your brush.
Brush Control Pro-Tip
For tiny details like eyes, brace your painting hand pinky finger against the easel or the table surface. This anchors your hand and stops shaking mostly instantly.
Step 2: Painting the Base Layers
-
Mix Skin Tone:
Create a pale skin tone using plenty of water, a touch of yellow ochre, and a tiny dot of red. Using your size 2 brush, apply a light wash over the face and ears. Avoid the eyes. -
Paint the Hair:
Mix a light brown shade. While the skin is drying, paint the hair sections carefully. I find that lifting the brush slightly at the ends of strokes creates nice, natural hair texture. -
Color the Tunic:
Mix a muted sage green. Fill in the shoulder area and tunic body, keeping the paint relatively transparent to maintain that soft watercolor look. -
Add Hat Base Color:
Prepare a soft red wash. Paint the main body of the hat, carefully painting around circular shapes if you want white polka dots, or paint the whole hat solid red if you plan to use white gouache for dots later.
Step 3: Adding Details & Depth
-
Deepen the Shadows:
Once the first layers are bone dry, mix slightly darker versions of your base colors. Add shadows under the hat rim, under the chin, and inside the ears to give the portrait dimension. -
Rosy Cheeks:
Load your brush with watery pink or diluted red. Dab soft circles onto the cheeks while the face layer is dry (wet-on-dry) to keep the edges soft but controlled. -
Hat Patterns:
If you left white spaces, refine their edges now. If you painted solid red, use opaque white gouache or acrylic to dab polka dots onto the dry red hat. -
Refine the Eyes:
Using your smallest brush (size 00) and dark brown or black paint, carefully drop in the small round eyes and paint the eyebrows.
Sparkle Level Up
Mix a tiny amount of iridescent medium into your background snowflake paint. The subtle shimmer will make the art feel magical when it catches the light.
Step 4: Finishing Touches
-
Texture the Tunic:
Use a slightly darker green to add vertical striations on the tunic, suggesting a knitted or woven fabric texture. This dry-brush technique works beautifully on canvas. -
Outline Work:
Take your ultra-fine brush or a sepia fine liner pen. Very delicately outline the main shapes—the jawline, hat curve, and ears—to make the character pop against the background. -
Background Elements:
Mix a very diluted pink. Paint simple snowflake shapes or little stars floating in the background space around the elf. -
Highlighting:
Add a tiny speck of white to the eyes for a ‘catchlight’ and a small highlight on the tip of the nose. -
Seal the Work:
Since watercolor on canvas can reactivate if touched, spray the finished piece with a matte fixative once completely dry to protect your miniature art.
Setting your finished canvas on its tiny easel makes for an adorable desk companion or gift.
Candy-Cane Palette Elf Outfit Study
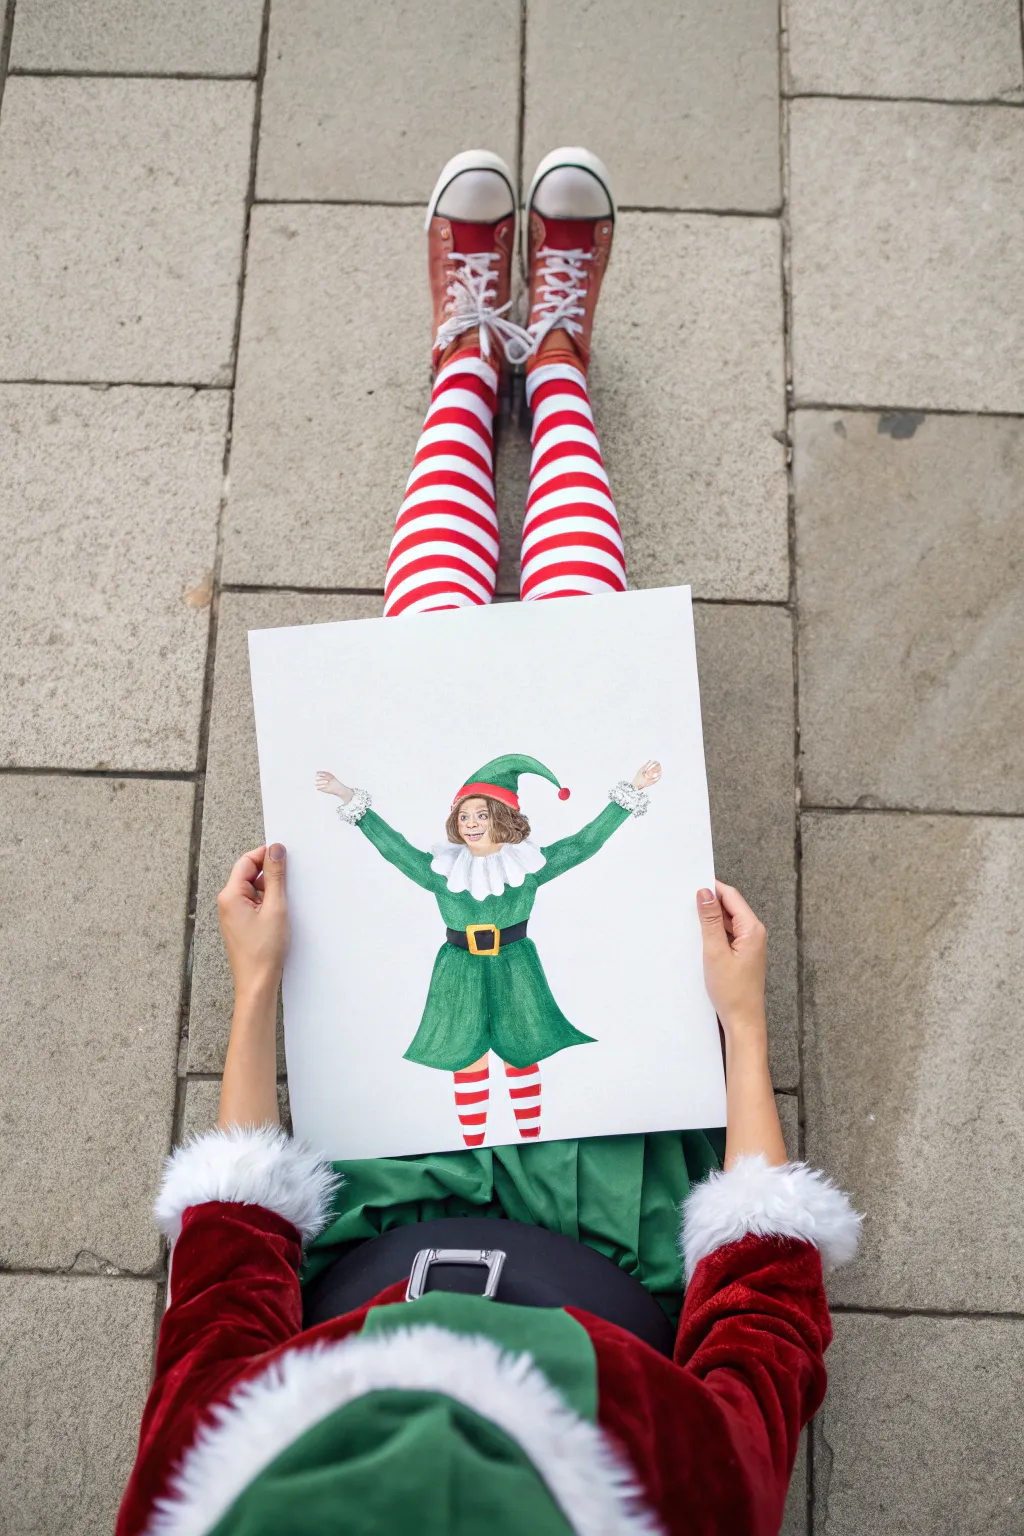
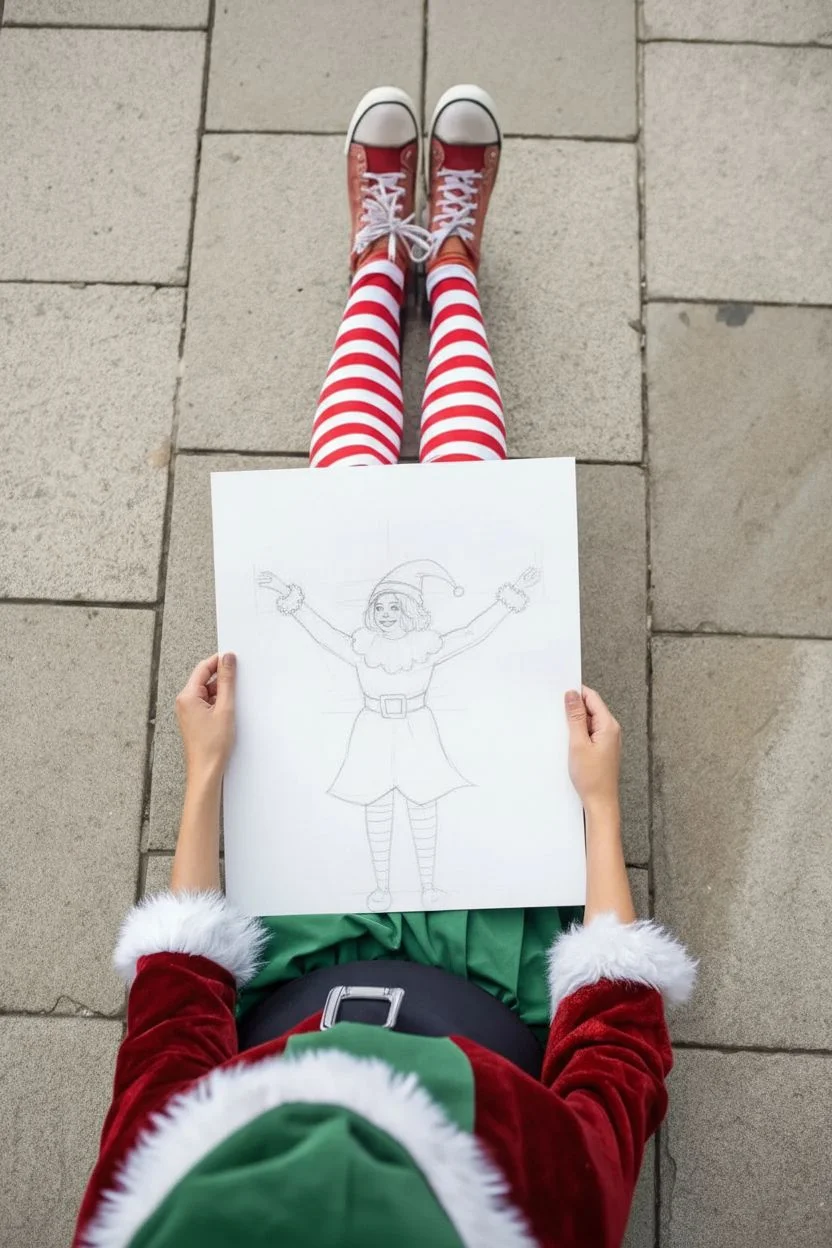
Capture the holiday spirit with this delightful painting of a joyful elf sporting a classic candy-cane striped outfit. Using watercolors and careful layering, you’ll create a vibrant character illustration full of personality and festive charm.
How-To Guide
Materials
- High-quality watercolor paper (cold press, 300gsm)
- Watercolor paints (Emerald Green, Cadmium Red, Yellow Ochre, Burnt Sienna, Payne’s Grey, Black)
- White gouache or white gel pen
- Pencil (HB or 2B) and eraser
- Round watercolor brushes (sizes 2, 4, and 8)
- Palette for mixing
- Two jars of water
- Paper towels
Step 1: Sketching the Character
-
Map out the pose:
Begin by lightly sketching a stick figure to establish the ‘Y’ shape pose. Draw a vertical line for the body and extend two lines diagonally upward for the arms to capture that welcoming gesture. -
Flesh out the forms:
Add volume to the stick figure. Sketch the triangular shape of the tunic dress, the oval for the head, and simple tube shapes for the arms. Don’t worry about details yet; just get the proportions right. -
Add costume details:
Refine the sketch by drawing the pointed hat flopped to one side. Add the fluffy collar around the neck, the cuffs at the wrists, and the wide belt cinching the waist. -
Draw the striped legs:
Sketch the legs extending from the tunic. Mark horizontal lines across them to create the guide for the candy-cane stripes. -
Refine the face:
Lightly draw the facial features. Position the eyes, nose, and smiling mouth. Erase any unnecessary guide lines so you have a clean outline ready for paint.
Step 2: Painting the Greens and Skin
-
Base skin tone:
Mix a watery wash of Yellow Ochre and a tiny touch of Red to create a skin tone. Paint the face and hands, leaving them to dry completely. -
First green layer:
Load your size 8 brush with a watery Emerald Green. Fill in the hat, the arms of the tunic, and the skirt section. Keep this layer fairly light and even. -
Shadowing the greens:
Once the base green is dry or slightly damp, mix a darker green by adding a little Payne’s Grey or Blue to your Emerald Green. Paint the sides of the torso, under the arms, and beneath the belt to create dimension. -
Deepen the folds:
Use a smaller size 4 brush with the darker green mix to add specific fold lines in the fabric, particularly where the skirt flares out and where the elbows bend.
Keep it Clean
Wait for the green tunic to be 100% dry before painting the red stripes or hat trim. Red and green are complementary colors and will turn muddy brown if they bleed into each other.
Step 3: Adding the Festive Red Details
-
Paint the hat trim:
Using Cadmium Red, carefully paint the band of the hat and the small round pom-pom at the tip. -
Stripe the legs:
Switch to your size 2 brush for precision. Paint every other section on the leg stockings with bold red, ensuring crisp edges against the white paper. -
Define the face:
Mix a slightly darker skin tone using Burnt Sienna. I personally like to switch to a very fine brush here to gently add shadows under the hat brim, around the nose, and to define the smile. -
Paint the hair:
Using Burnt Sienna or raw umber, paint the hair framing the face. Use short strokes to suggest texture and curls peeking out from under the hat.
Uneven Stripes?
If your hand shakes while painting the leg stripes, use a small flat brush instead of a round one. The square edge of the flat brush makes creating straight, blocky lines much easier.
Step 4: Final Touches and Details
-
The belt buckle:
Paint the belt strap black or dark grey. Once dry, use a thick mix of yellow or gold paint for the rectangular buckle in the center. -
Enhance the white trims:
The collar and cuffs are white, but they need shadow to look 3D. Use a very watery gray wash to paint subtle shadows in the ruffles. -
Highlight with gouache:
Take your white gouache or a gel pen and add tiny highlights to the eyes for sparkle, and perhaps a few textured dots on the white collar and cuffs to make them look fluffy. -
Final outline check:
If any edges feel too soft, you can lightly reinforce them with a very fine dark paint line or colored pencil to make the character pop against the white background.
Once dry, your cheerful elf is ready to be framed or gifted as a unique holiday card

PENCIL GUIDE
Understanding Pencil Grades from H to B
From first sketch to finished drawing — learn pencil grades, line control, and shading techniques.
Explore the Full Guide
Elegant Fantasy Elf With Winter Florals
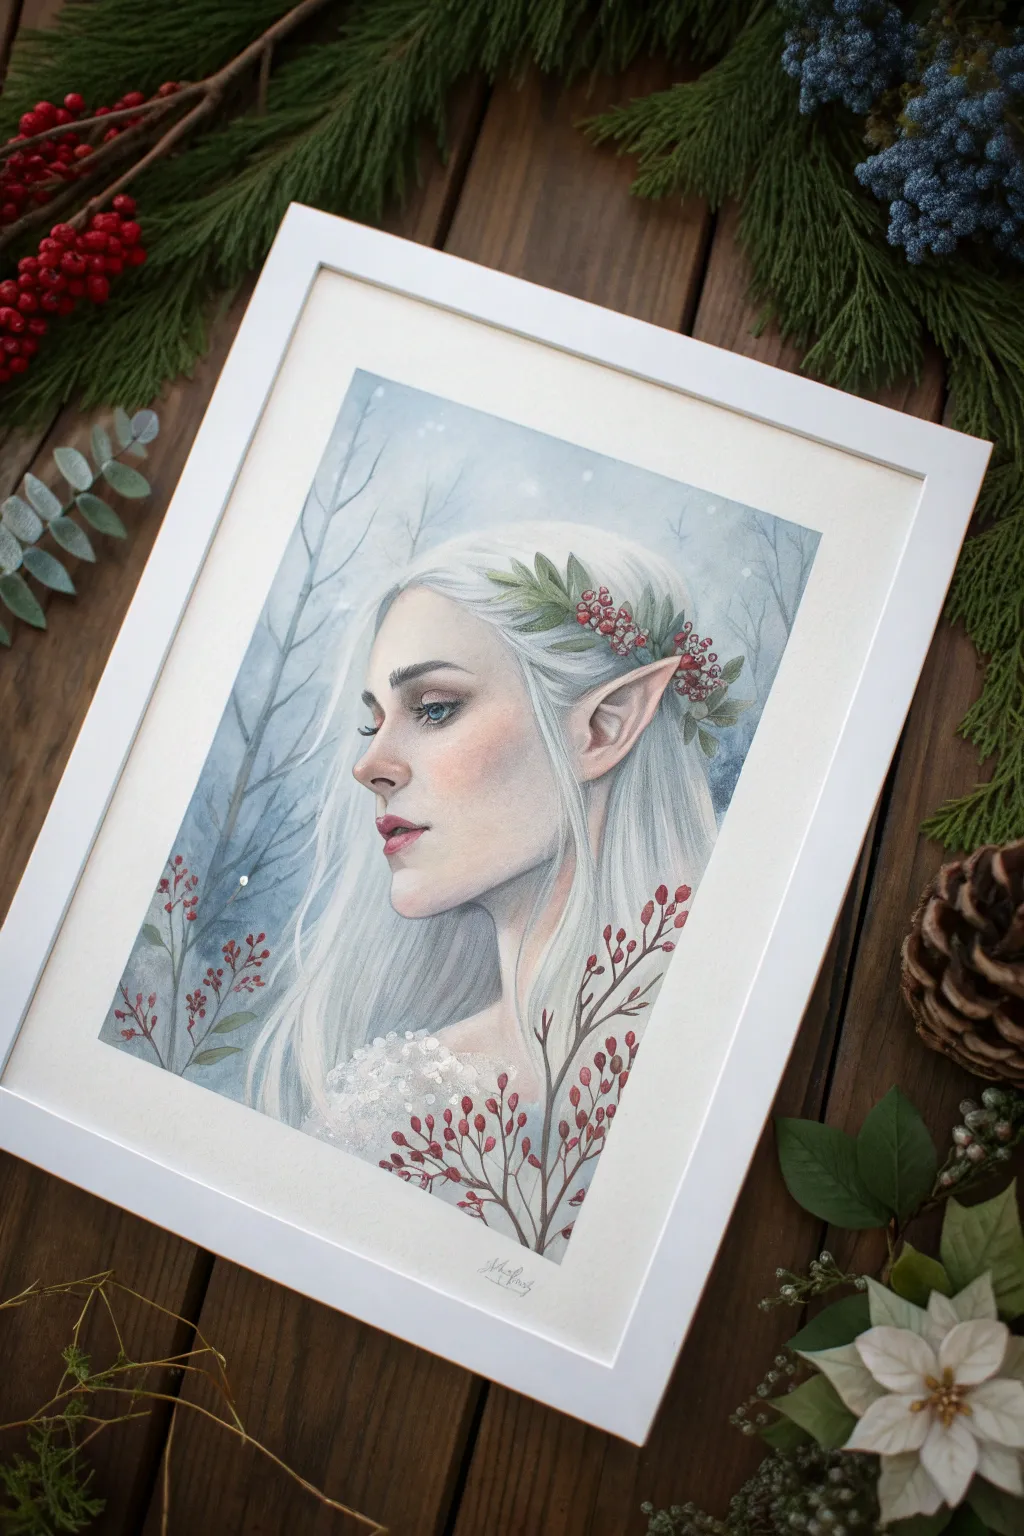
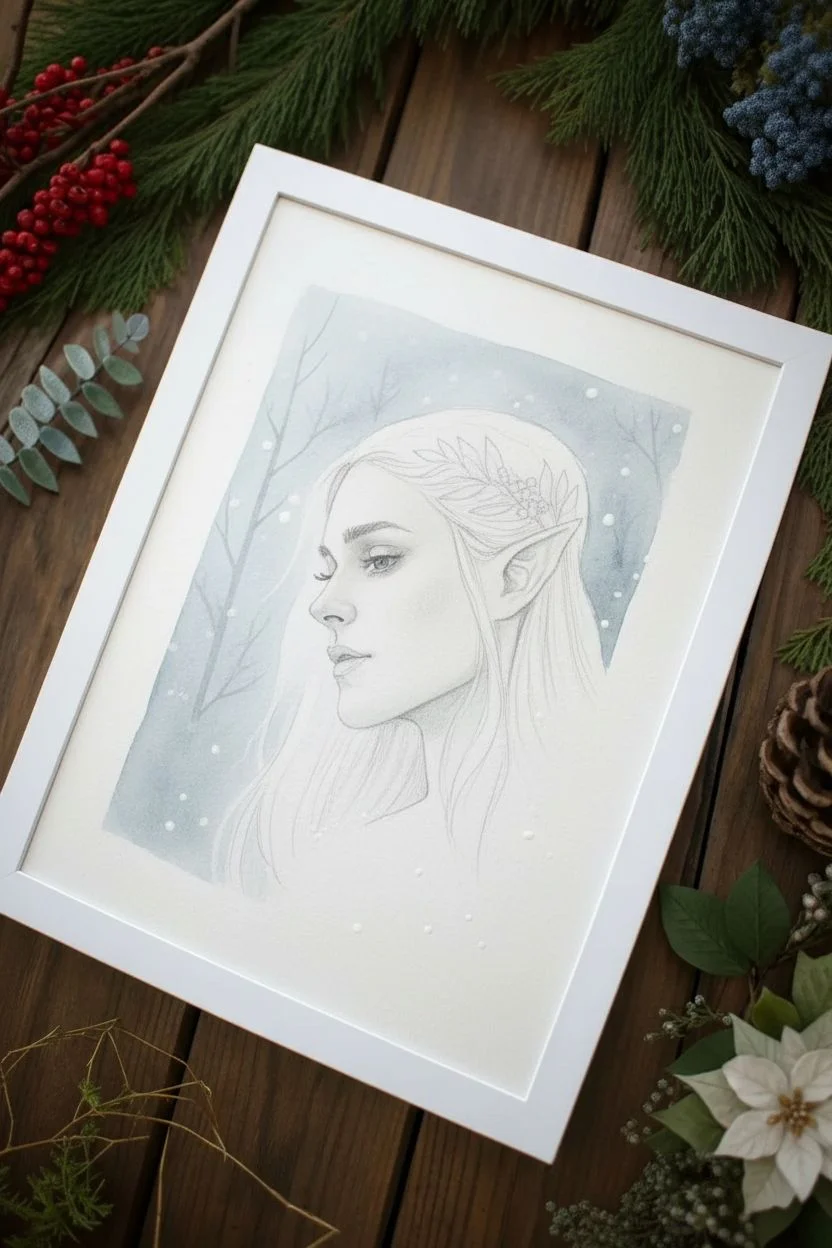
Capture the serene beauty of the season with this watercolor portrait of a pale elf adorned with holly berries. The soft color palette of icy blues and muted reds creates a striking yet gentle composition perfect for winter decor.
Step-by-Step
Materials
- Hot press watercolor paper (minimum 140lb)
- Watercolor paints (Indigo, Payne’s Grey, Alizarin Crimson, Burnt Sienna, Yellow Ochre, Titanium White)
- White Gouache
- Synthetic sable brushes (sizes 0, 2, 6, and a flat wash 3/4 inch)
- Waterproof fine liner pen (grey or sepia)
- Masking fluid
- HB pencil and kneaded eraser
- Palette for mixing
Step 1: Sketch and Background
-
Initial Sketch:
Begin with a light HB pencil sketch. Focus on the profile view, giving careful attention to the pointed ear and the sweeping lines of the hair. Keep the facial features delicate and the jawline soft. -
Masking Details:
Apply masking fluid to the falling snow dots in the background and the brightest highlights on the holly berries in the wreath. Allow this to dry completely before touching it. -
Background Wash:
Mix a very dilute wash of Indigo and Payne’s Grey. Use the flat wash brush to paint the background, keeping it lighter near the face and darker towards the edges to create depth. I find working wet-on-wet helps achieve that misty forest effect. -
Subtle Trees:
While the background is still slightly damp but not soaking, use a size 6 brush to drop in vertical, spindly tree shapes in the distance using a slightly more concentrated grey-blue mix. They should look soft and out of focus.
Blurry Backgrounds
If the background trees dry with hard edges, scrub them gently with a damp, stiff brush to soften the lines. This pushes them into the distance, keeping focus on the portrait.
Step 2: Skin Tones and Features
-
Base Skin Layer:
Mix a pale skin tone using plenty of water, Titanium White, a touch of Yellow Ochre, and a tiny dot of Alizarin Crimson. Apply a smooth wash over the face and neck, avoiding the eye and lips. -
Building Shadows:
Once dry, deepen the color slightly with a bit of Burnt Sienna. Glaze soft shadows under the jawline, inside the ear cartilage, and in the socket of the eye to sculpt the face. -
Blushing Cheeks:
While the skin is dry, wet just the cheek area with clean water. Drop in a dilute Alizarin Crimson to create a soft, natural blush that fades outward without hard edges. -
Refining the Eye:
Pint the iris with a clear blue, leaving a tiny white highlight. Use a size 0 brush and a mix of brown and grey to carefully outline the lash line and add delicate individual lashes. -
Soft Lips:
Paint the lips with a rose-pink mix. Concentrate the darker pigment at the center where the lips meet, fading to a soft pink at the edges. Add a faint highlight on the lower lip.
Pro Tip: Luminous Skin
Leave the paper white for the brightest highlights on the nose tip and cheekbones instead of using white paint. It creates a translucency that paint cannot replicate.
Step 3: Hair and Crown
-
Hair Shadows:
The hair is mostly white, so we are painting the shadows, not the strands. Use a very pale grey-blue wash to paint only the ‘valleys’ and shadowed areas between locks of hair. -
Deepening Values:
Add darker grey streaks behind the ear and neck to push those layers back, bringing the front strands forward. Keep your brush strokes long and fluid to mimic the texture of hair. -
Painting Leaves:
For the floral crown, use a desaturated green (mix green with a touch of red or brown). Paint the leaves carefully, varying the tone so some appear crisp and others more shadowed. -
Adding Berries:
Paint the berries with Alizarin Crimson. Make them vibrant against the pale hair. Don’t forget the sprigs of red berries rising from the bottom of the compostion as well.
Step 4: Final Details
-
Removing Masking:
Gently rub away the masking fluid to reveal the crisp white highlights on the berries and the snow in the background. -
Gouache Highlights:
Use Titanium White watercolor or white gouache to add bright, opaque strands of hair over the wreath and forehead. This creates a realistic layered look. -
Dress Texture:
For the hint of the dress at the bottom, use white gouache to stipple a lace-like or beaded texture. Keep it impressionistic so it doesn’t distract from the face. -
Enhancing Contrast:
Use your finest brush to deepen the very darkest points: the pupil, the corner of the mouth, and the deepest crevices of the berry branches using a dark sepia or Payne’s Grey.
Now complete, frame your ethereal winter elf with a simple white mat to let the delicate colors shine
Modern Abstract Elf: Shapes and Symbols
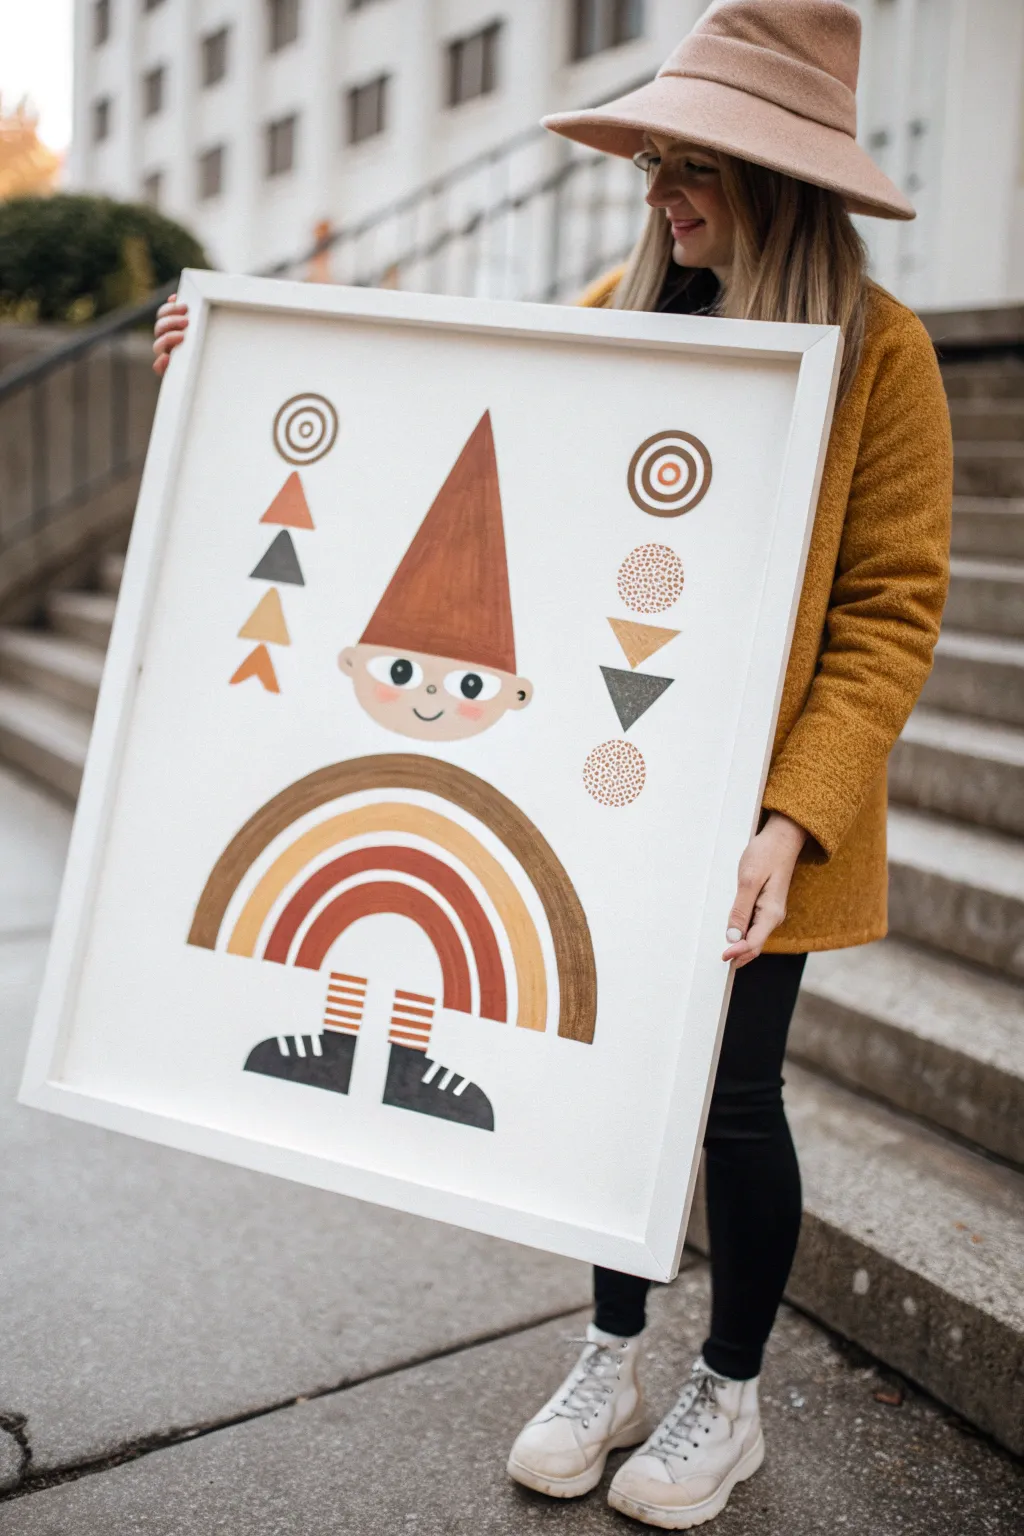
This project transforms the classic holiday elf into a stunning piece of modern abstract art using clean lines and a warm, earthy color palette. The result is a minimalistic design featuring a cone-hatted character with rainbow-arch body and floating geometric symbols.
Detailed Instructions
Materials
- Large white canvas or heavy watercolor paper (poster size)
- Acrylic paints (burnt sienna, ochre, rust orange, dark grey, white, peach/skin tone)
- Wide flat brush (1-inch) for large shapes
- Medium round brush
- Fine liner brush for details
- Painter’s tape or masking tape
- Pencil and eraser
- Compass or round objects for tracing circles
- Ruler
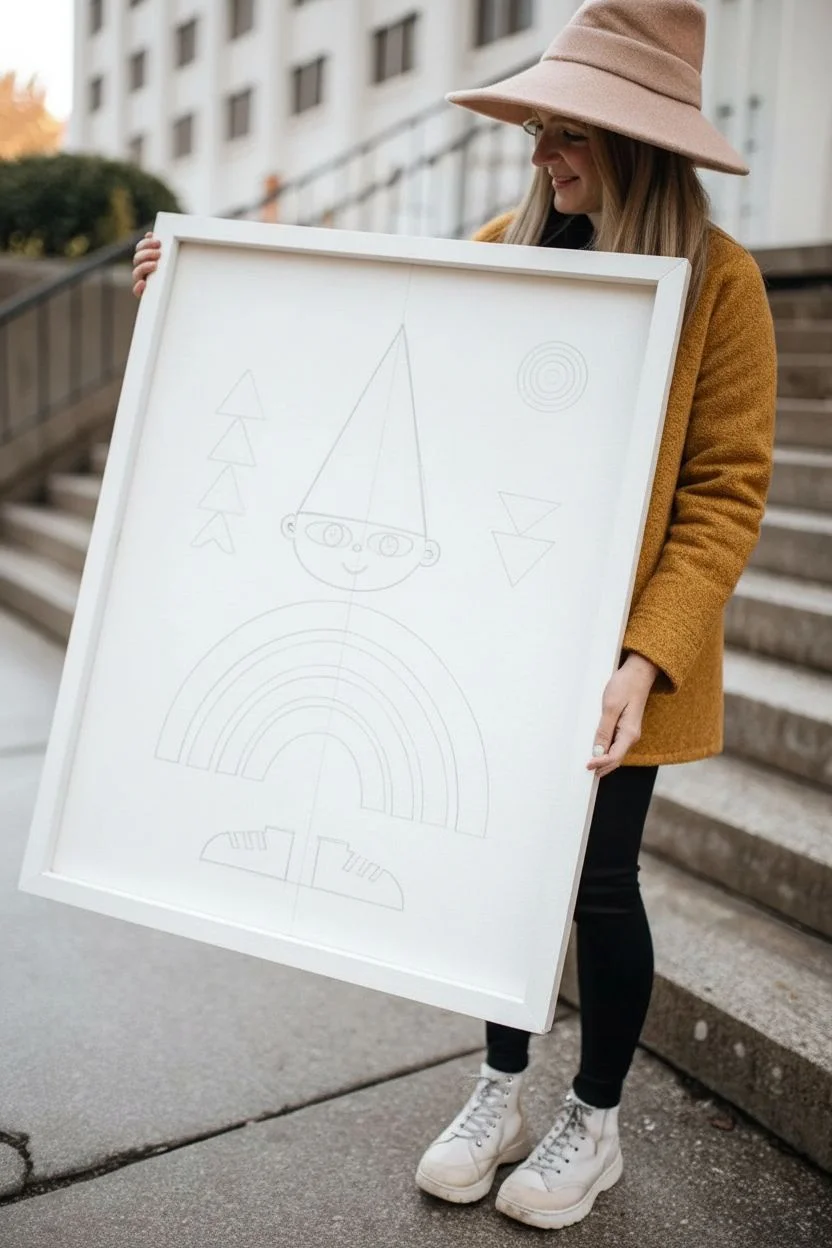
Step 1: Drafting the Design
-
Establish the centerline:
Begin by finding the vertical center of your canvas. Lightly draw a line down the middle with your pencil and ruler; this will help ensure your elf’s hat and body are perfectly symmetrical. -
Sketch the main elf structure:
In the center of the canvas, sketch a simple oval for the face. Above it, draw a tall, sharp triangle for the hat. Below the face, sketch a large semi-circle arch for the body. -
Add floating elements:
On either side of the hat, sketch the vertical columns of shapes. Mixing triangles and circles creates a nice balance, so try drawing three stacked triangles on the left and a mix of circles and inverted triangles on the right. -
Define the legs and feet:
At the bottom of the main arch, draw two straight vertical lines for legs. Add stylized, blocky shoe shapes pointing outwards at the bottom of each leg.
Step 2: Painting the Elf Body
-
Paint the hat:
Mix a deep rust or terracotta acrylic paint. Using your flat brush, fill in the large triangle hat. Keep your strokes vertical for a clean finish. -
Create the rainbow arch:
The body consists of concentric arches. Start with the outermost band in a dark brown or bronze. Paint a smooth, thick curve. -
Layer the inner arches:
Moving inward, paint the next band in a lighter ochre or mustard yellow. Leave a small gap of white space between colors to keep the design crisp. -
Finish the torso:
Paint the innermost arch in the same deep rust color used for the hat. This creates a cohesive look that ties the top and bottom of the character together. -
Paint the face:
Fill in the oval face with a soft peach or beige skin tone. You may need two coats here to ensure it is opaque and smooth.
Crisp Lines Only
For the straight edges on the triangles and the legs, use painter’s tape. Press it down firmly to prevent bleed-under, resulting in perfectly sharp geometric forms.
Step 3: Details and Symbols
-
Fill the geometric columns:
Paint the floating shapes on the sides. Alternate colors between charcoal grey, ochre, and rust. I like to keep the colors random to make the pattern feel more playful. -
Add texture to circles:
For the circular shapes on the right, use a fine brush to stipple small dots instead of painting them solid. This speckled texture adds great visual interest. -
Paint the facial features:
Once the face is fully dry, use the dark charcoal grey and a fine liner brush to paint two large round eyes and a small, simple curved smile. -
Add rosy cheeks:
Dilute a bit of pink or red paint with water to make a glaze, and dab two soft circles on the cheeks for a flushed look. -
Paint the legs and stripes:
Paint the shoes solid charcoal grey with white laces. For the legs, alternate thin horizontal stripes of white and rust orange to mimic classic elf stockings. -
Final touches:
Erase any visible pencil lines, particularly the centerline you drew in step one. Check the edges of your geometric shapes and touch up any wobbly lines with white paint for a sharp look.
Metallic Magic
Swap the ochre yellow paint for gold leaf or metallic gold acrylic. This adds a festive shimmer that catches the light and elevates the piece.
Hang your modern masterpiece in a simple wood frame to complement the earthy tones and enjoy the festive spirit


Have a question or want to share your own experience? I'd love to hear from you in the comments below!