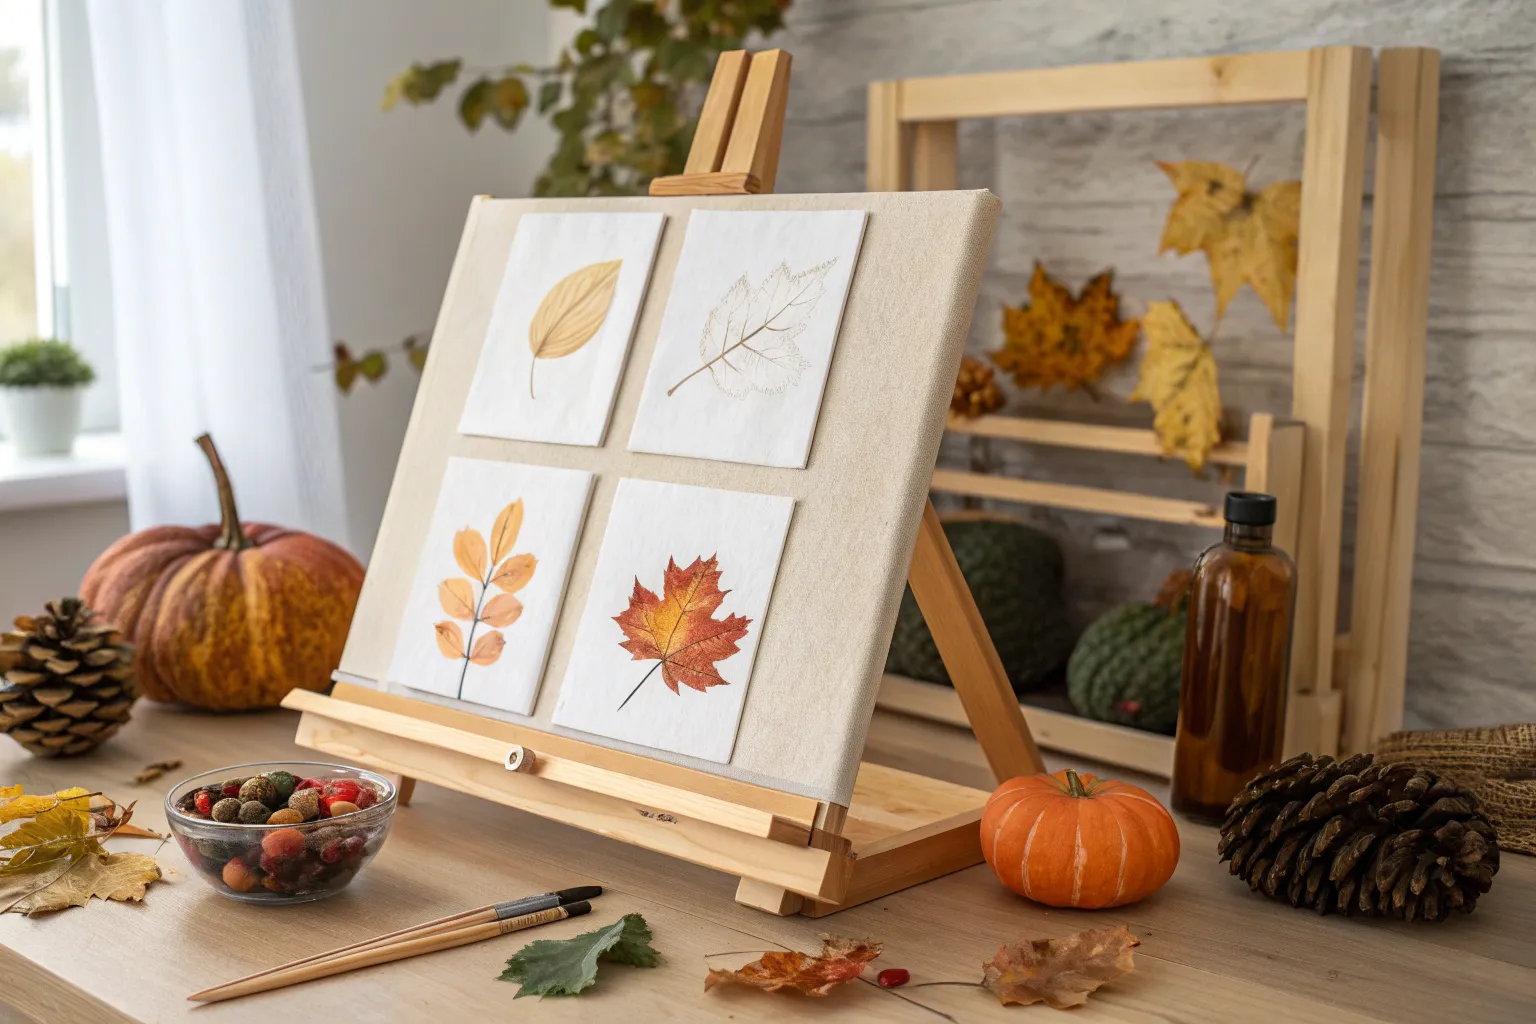
Fall paint nights are my favorite excuse to slow down, put on something cozy, and chase those glowing autumn color palettes across a canvas. Here are a bunch of beginner-friendly fall paint night ideas that feel classic first, then get progressively more playful and unexpected.
Harvest Moon Over Bare Trees
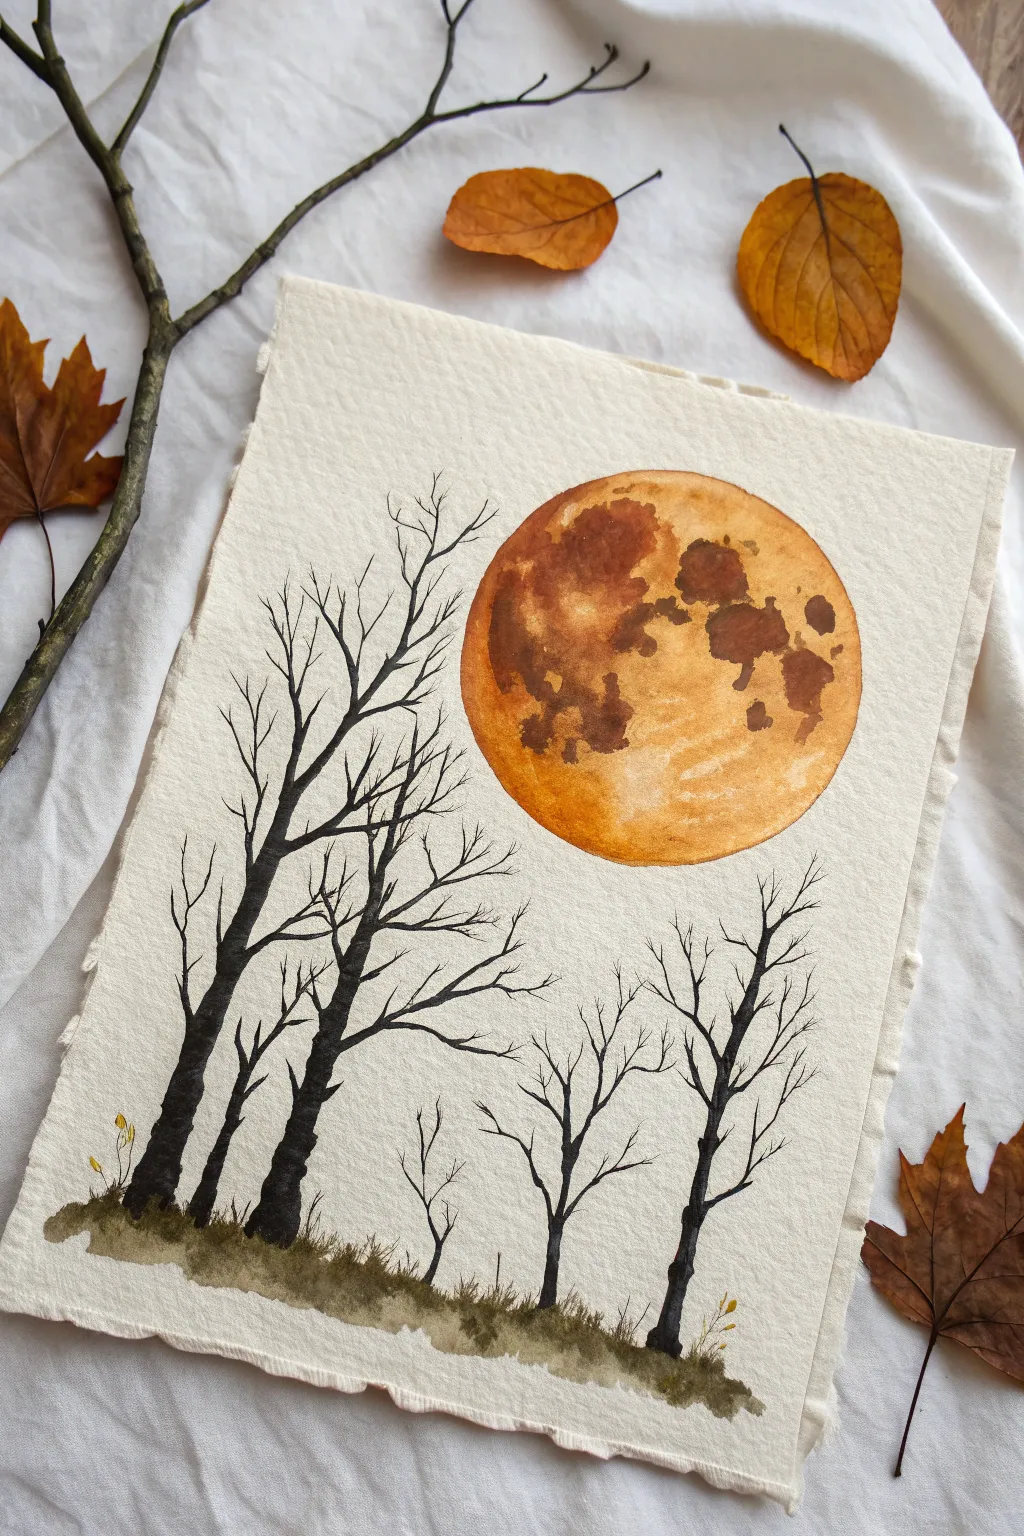
Capture the eerie beauty of a large, glowing harvest moon suspended above a stark, leafless forest in this watercolor study. The warm, cratered texture of the moon contrasts beautifully with the sharp, graphic lines of the silhouette trees.
Detailed Instructions
Materials
- Cold press watercolor paper (rough texture preferred)
- Pencil and large circular object (like a bowl or masking tape roll) for tracing
- Watercolor paints: Orange, Burnt Sienna, Yellow Ochre, and Sepia or Ivory Black
- Round watercolor brushes: Size 8 or 10 for the moon, Size 0 or 1 liner for branches
- Clean water and paper towels
- Painter’s tape or masking fluid (optional)
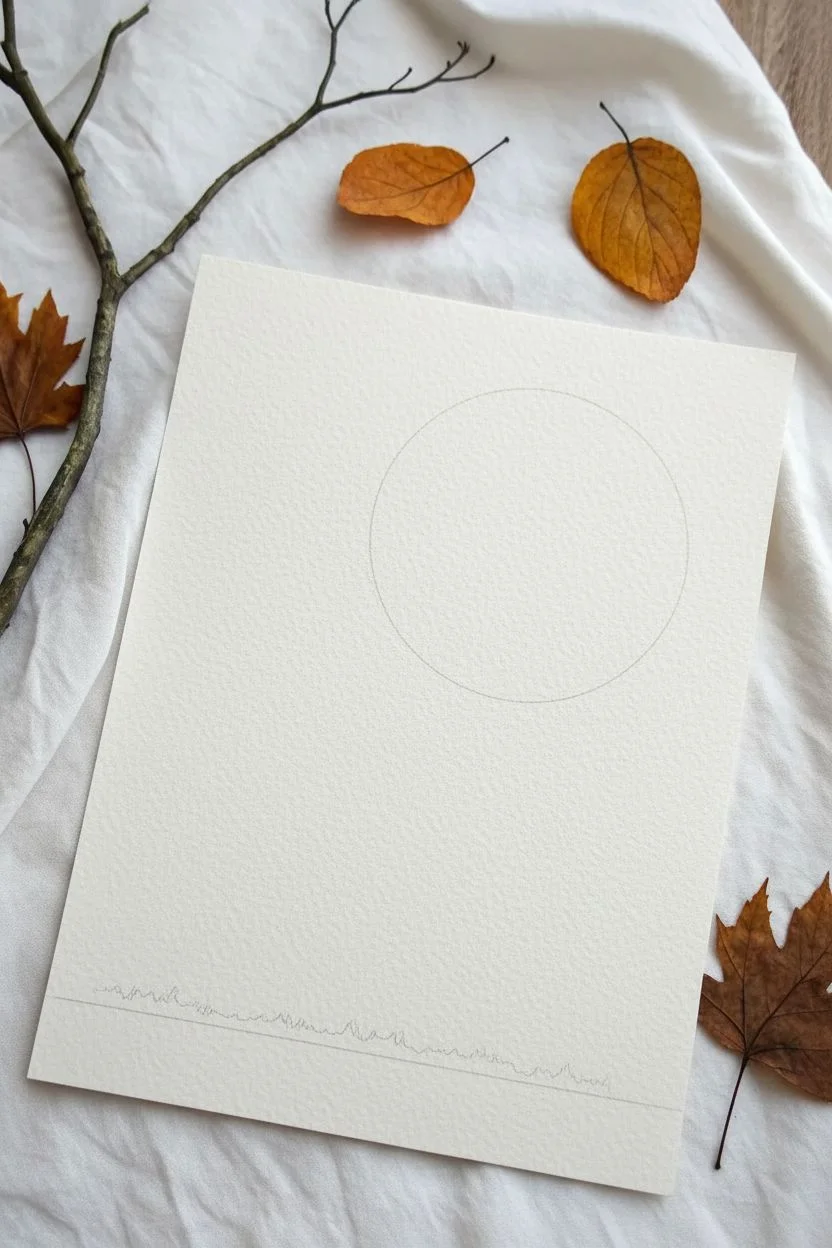
Step 1: Planning the Composition
-
Trace the Moon:
Begin by placing your circular object in the upper right quadrant of the paper. Use a pencil to lightly trace a perfect circle. Keep the line faint so it doesn’t show through the paint later. -
Sketch the Horizon:
Lightly sketch an uneven, low horizon line about an inch or two from the bottom edge of the paper. This will be the ground where your trees are rooted.
Paint Bleeding?
If the black tree paint bleeds into the moon, the orange layer wasn’t dry enough. Let it dry fully, then use white gouache to cleanup the edge before re-painting the black branch.
Step 2: Painting the Harvest Moon
-
Wet-on-Wet Base:
With clean water, carefully wet the inside of your moon circle. Be precise with your edges. Drop in a wash of Yellow Ochre mixed with a touch of Orange while the paper is glistening. -
Adding Warmth:
While the base layer is still wet, load your brush with a richer orange and touch it to the edges of the circle, letting the color bleed inward naturally to create dimension. -
Creating Craters:
Mix a darker Burnt Sienna or reddish-brown. While the moon is damp but not soaking, dab irregular blotches into the center and left side to simulate lunar craters. -
Texturing:
For that mottled moon texture, touch a clean, thirsty paper towel to lift small spots of wet paint, or drop in tiny blooms of clean water. -
Dry Completely:
This is crucial: Let the moon dry completely before moving on. I like to check if the paper feels cool to the touch—if it does, it’s still wet.
Step 3: Painting the Foreground
-
The Ground Layer:
Mix a watery grey-brown wash. Paint the strip of ground at the bottom, using uneven strokes to suggest grass or dirt. Let the top edge be ragged. -
Deepening the Earth:
While the ground wash is wet, drop in darker black or sepia pigment right along the bottom edge and where you plan to place the trees to ground them visually.
Spattered Stars
Cover your moon with a paper circle cutout. Then, flick a toothbrush loaded with white gouache or white ink across the sky area to create a starry, clear night effect.
Step 4: Silhouetting the Trees
-
Mixing the Black:
Prepare a concentrated puddle of Sepia mixed with Ultramarine or straight Ivory Black. You want an opaque, ink-like consistency. -
Main Trunks:
Using a medium round brush, paint the thickest trunks first. Start from the ground and pull upward, lifting pressure as you go higher so the trunk tapers naturally. -
Adding Main Branches:
Switch to your finer brush. Branch out from the main trunk, remembering that branches act like a ‘Y’, splitting and getting thinner as they move away from the center. -
Crossing Lines:
Don’t be afraid to paint branches that cross over the face of the moon. The stark black over the orange creates incredible depth and contrast. -
Fine Twigs:
Use the very tip of your liner brush (size 0) to add delicate twigs at the ends of the branches. A little shakiness in your hand actually helps make them look more organic. -
Saplings:
Add a few very small, thin trees or saplings in the background gaps to fill out the forest composition. -
Grassy Details:
With a mostly dry brush and a tiny amount of black paint, flick upward from the ground line to create the suggestion of tall, dry grass blades. -
Final Touches:
If you want a hint of lingering life, add two or three tiny yellow dabs near the base of the trees to represent fallen leaves, but keep it minimal.
Step back and admire your atmospheric autumn evening scene as the silhouette trees dry into a matte finish


Fall Forest Path With Leaf Carpet
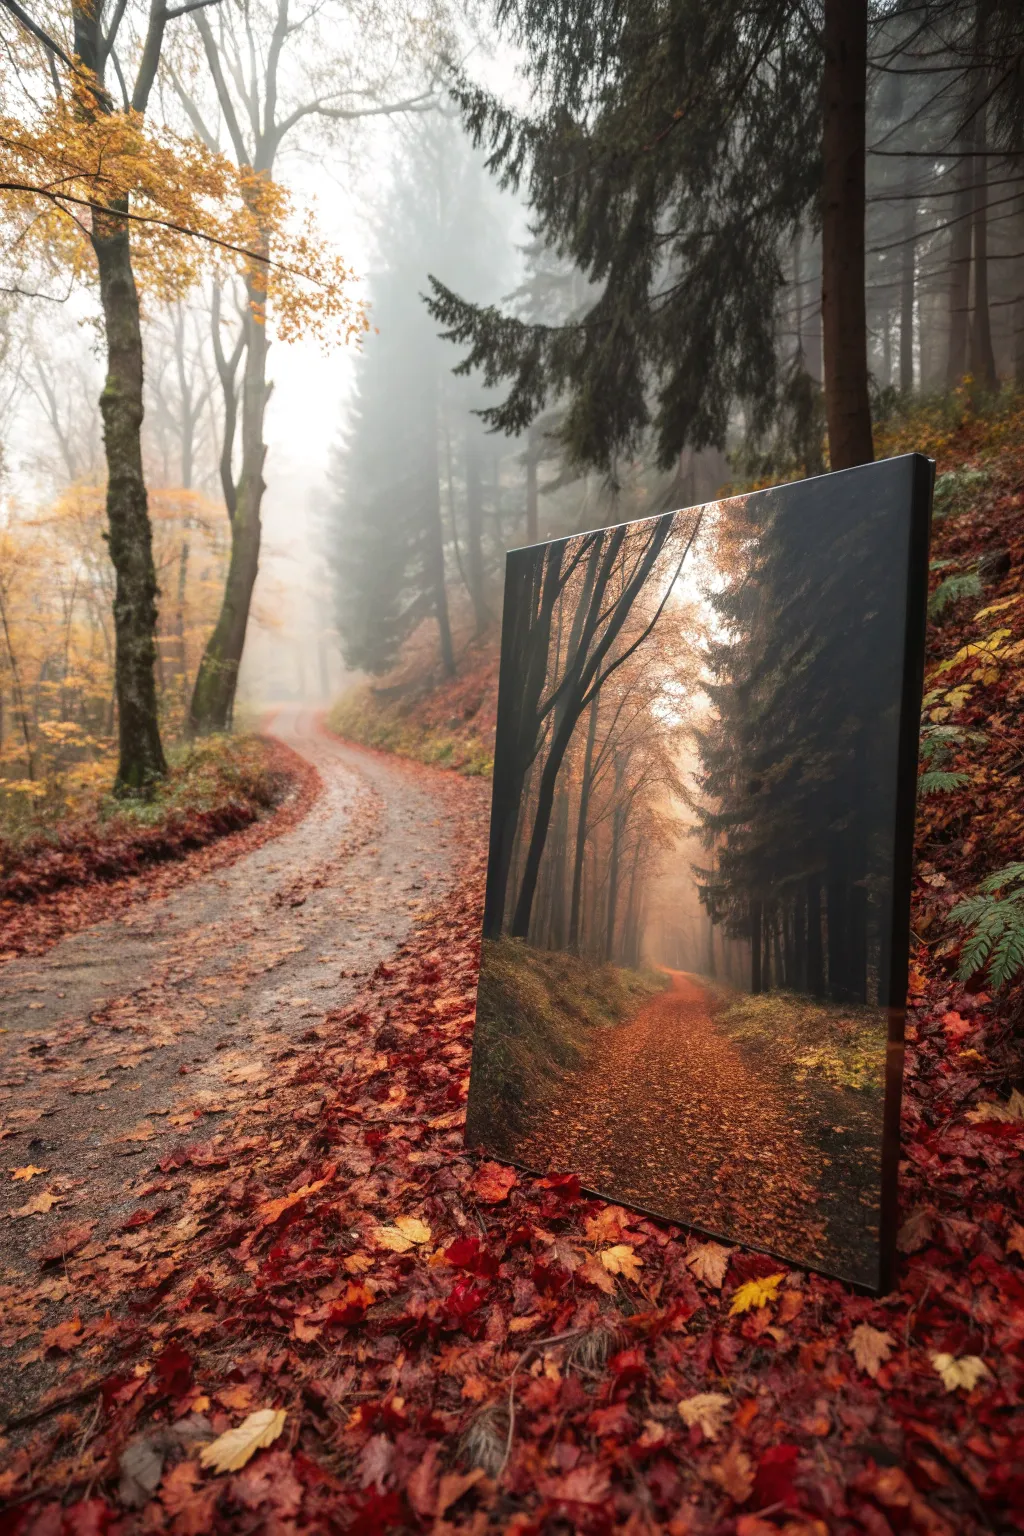
Transport yourself to a serene, leaf-strewn forest with this atmospheric acrylic painting project that captures the depth of foggy woods. You will learn to layer subtle mists and vibrant russet tones to build a scene that feels like you could walk right into it.
Step-by-Step
Materials
- 16×20 inch stretched canvas
- Acrylic paints (Titanium White, Burnt Umber, Burnt Sienna, Yellow Ochre, Cadmium Orange, Mars Black, Sap Green)
- Wide flat brush (2 inch) for blending
- Medium filbert brush
- Small round detail brush
- Palette knife
- Cup of water and paper towels
- Mixing palette
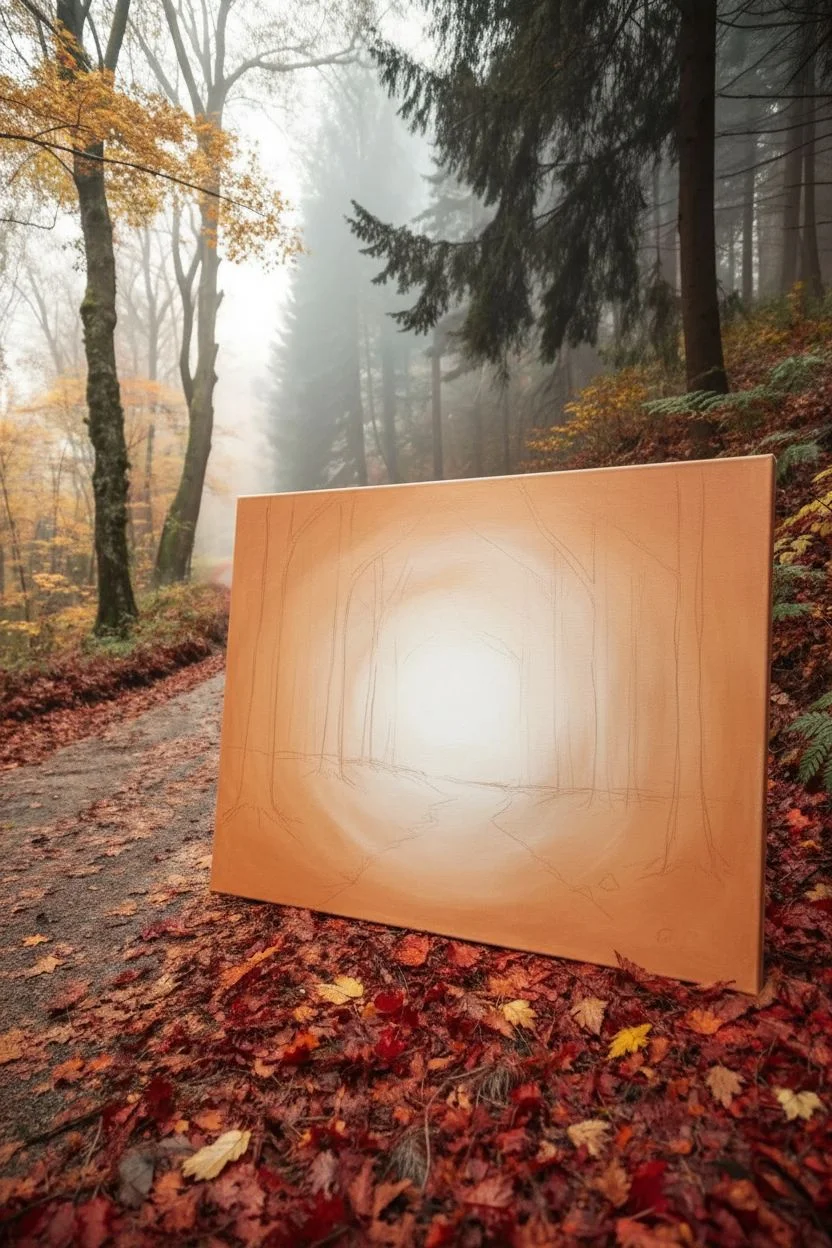
Step 1: Setting the Atmosphere
-
Prime the canvas:
Begin by applying a thin wash of burnt sienna mixed with plenty of water over the entire canvas. This warm undertone will peek through later layers and give the painting an autumnal glow. Let it dry completely. -
Map the composition:
Using a small round brush and watery burnt umber, lightly sketch the horizon line slightly below the middle. Mark the converging lines of the path leading toward a central vanishing point and vertical lines for a few major tree trunks. -
Paint the distant light:
Mix titanium white with a tiny dot of yellow ochre. Using the wide flat brush, paint the center of the canvas where the path disappears, blending outwards in a circular motion to create a soft, glowing light source. -
Build the foggy background:
While the center light is still slightly tacky, mix a pale grey using white, a touch of burnt umber, and a speck of black. Scumble this color around the light source, blending the edges softly to create the illusion of thick mist.
Fog Master Tip
To get realistic fog, use a dry brush technique. Wipe most of the paint off your brush before touching the canvas, applying layers slowly rather than all at once.
Step 2: Creating Dept with Trees
-
Paint distant ghost trees:
Mix a very pale grey-brown shade. Using the filbert brush, paint vertical strokes for the trees furthest in the distance. These should be barely visible against the fog, missing detailed branches to keep them looking far away. -
Add mid-ground trees:
Darken your brown mix with more burnt umber. Paint thicker tree trunks slightly closer to the viewer on the right side. Add a few major branches reaching upward, but keep the edges slightly soft to maintain the misty effect. -
Construct the foreground pine:
For the prominent dark tree on the right, mix sap green, burnt umber, and a little black. Use the corner of your flat brush to dab textured foliage, starting narrow at the top and getting wider at the base. -
Define the silhouette trees:
On the left side, paint slender, dark silhouette trees using a mix of black and burnt umber. Use the round brush to pull long, elegant branches that reach across the light source, creating contrast against the bright center.
Step 3: The Leafy Carpet
-
Block in the path:
Mix burnt sienna and orange. Fill in the path area, using horizontal strokes that get smaller and closer together as they move toward the vanishing point to enhance perspective. -
Add grassy banks:
On either side of the path, apply a mix of sap green and burnt umber. Use upward flicking strokes to suggest grasses climbing up the small embankments. -
Create leaf texture:
I prefer to use a palette knife for this step to get organic texture. Mix cadmium orange, yellow ochre, and burnt sienna without fully blending them. Gently tap and scrape this marbelized paint onto the path. -
Highlight the fallen leaves:
Clean the palette knife and pick up pure yellow ochre mixed with a little white. lightly graze the top of the texture on the path, focusing on the foreground area to make individual leaves pop.
Golden Hour Glow
Glaze the finished painting with a very thin layer of transparent yellow ochre mixed with glazing medium to give the entire scene a warm, cohesive sunset feeling.
Step 4: Final Details
-
Add shadows:
Using a watery wash of burnt umber and black, glaze the edges of the path where it meets the forest floor to create depth and shadow. -
Intensify the glow:
Return to the center light source with a dry brush and a tiny bit of white paint. Gently buff the center area again to make the fog look brighter behind the dark tree trunks. -
Refine branches:
Use your smallest detail brush with thinned black paint to add tiny, twiggy branches to the foreground trees on the left, ensuring they overlap the background mist. -
Final leaf scatter:
Spatter a tiny bit of watered-down orange paint in the immediate foreground corners to look like random scattered leaves.
Step back and admire how your misty forest path invites the viewer to take a walk through the autumn woods


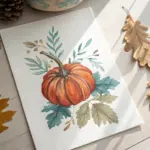
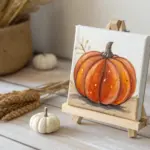
Pumpkin Patch At Sunset
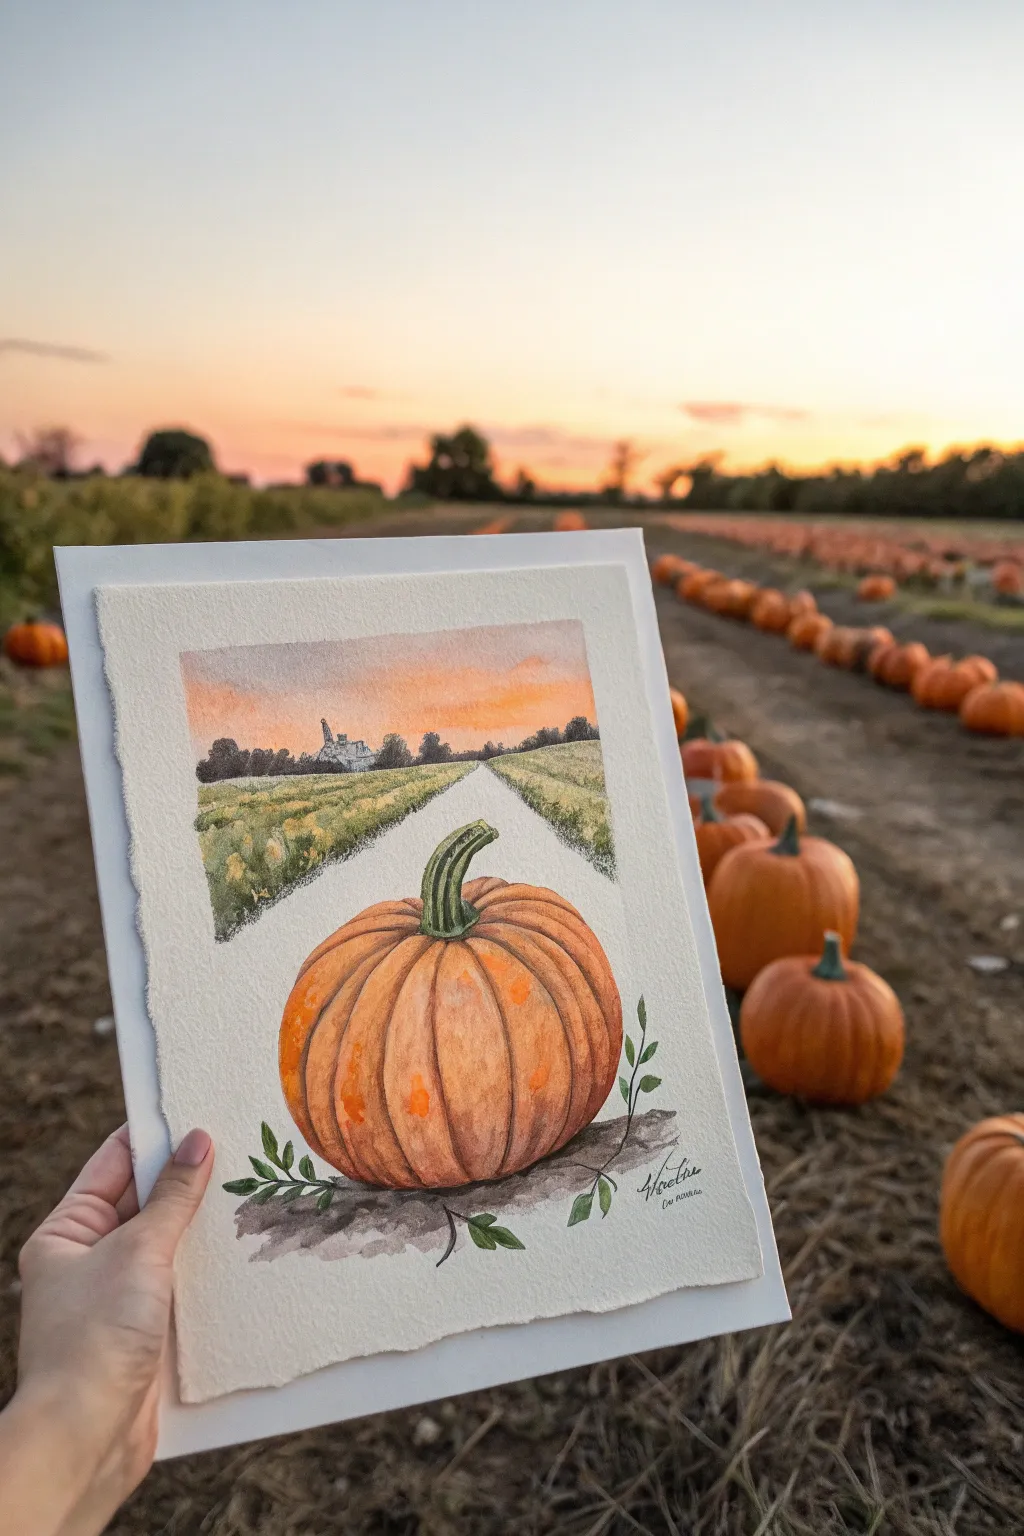
Capture the magic of an October evening with this mixed-perspective watercolor piece, blending a close-up botanical study with a distant, glowing horizon. The unique composition places a detailed pumpkin resting on the paper’s edge while a soft sunset landscape fades into the distance above it.
Step-by-Step Tutorial
Materials
- Cold press watercolor paper (140lb/300gsm)
- Watercolor paints (Cadmium Orange, Burnt Sienna, Yellow Ochre, Sap Green, Payne’s Gray, Alizarin Crimson)
- Round brushes (size 4 and 8)
- Detail brush (size 0 or 1)
- Pencil (HB or 2H)
- Kneaded eraser
- Masking tape (optional for edges)
- Clean water and paper towels
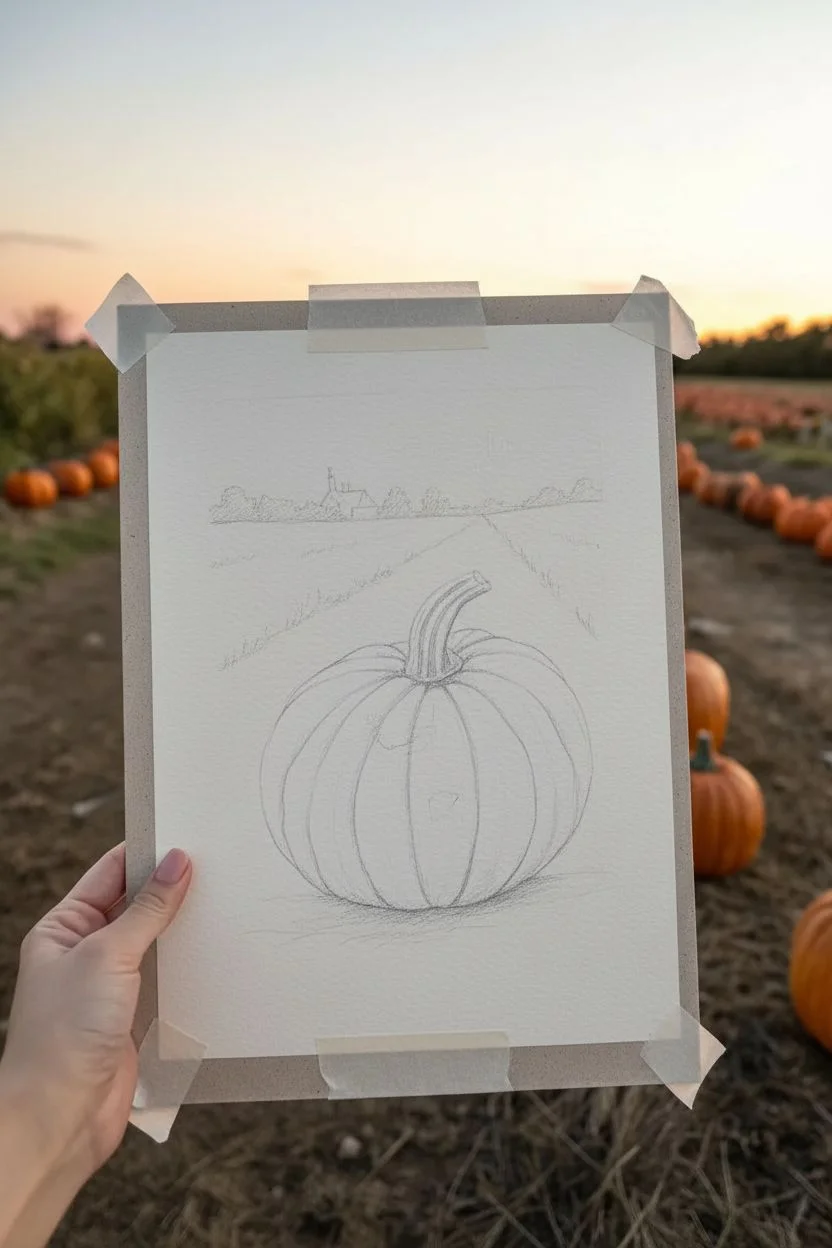
Step 1: Planning the Composition
-
Sketch the horizon:
Begin by lightly drawing a horizon line in the upper third of your paper. Sketch converging diagonal lines to create a path leading from the middle ground toward that horizon, establishing perspective. -
Draw the main pumpkin:
In the lower center, draw a large, prominent pumpkin. Make it round and slightly squat, ensuring the ribs curve around its form to show volume. Give it a sturdy, twisted stem. -
Add landscape details:
Sketch tiny silhouettes of trees and perhaps a farmhouse along the horizon line. Keep these shapes small to emphasize the distance.
Muddy colors?
If your orange pumpkin bleeds into your green stem, you likely didn’t wait long enough. Ensure the orange body is bone-dry before painting the green stem to keep colors distinct.
Step 2: Painting the Sunset Sky
-
Wet-on-wet sky base:
Using your size 8 brush, wet the sky area with clean water. Drop in a pale wash of Yellow Ochre near the horizon, blending upward. -
Infusing sunset colors:
While the paper is still damp, introduce soft streaks of dilute Cadmium Orange and a touch of Alizarin Crimson higher up. Let the colors bleed naturally to create a soft glow. -
Drying phase:
Allow the sky to dry completely before moving on to the landscape elements to prevent muddying the horizon line.
Step 3: The Middle Ground Landscape
-
Painting the fields:
Mix a muted green using Sap Green and a touch of Yellow Ochre. Paint the fields on either side of the path, using short, directional strokes that mimic rows of crops receding into the distance. -
Defining the horizon silhouette:
With a smaller brush and a mix of Payne’s Gray and Sap Green (heavy on the pigment, low on water), carefully paint the tree line and farmhouse silhouette against the sunset sky. -
The path:
Leave the path largely unpainted or use a very watery wash of dirty purple/grey to indicate shadows, leading the eye toward the sunset.
Add some texture
Sprinkle a tiny pinch of salt onto the wet pumpkin paint while it’s drying. Brush it off later to create organic, speckled textures that look just like real pumpkin skin blemishes.
Step 4: The Focal Pumpkin
-
Base layer for the pumpkin:
Apply a light wash of Cadmium Orange over the entire pumpkin body, avoiding the stem. Let the watercolor pool slightly at the bottom for natural weight. -
Building form with shadows:
Once the base is tacky but not soaking, use Burnt Sienna to paint stripes along the ribs of the pumpkin. Soften the edges of these stripes with a damp brush to create roundness rather than hard lines. -
Deepening the crevices:
Mix Burnt Sienna with a tiny dot of Payne’s Gray. Use your detail brush to paint thin lines in the deepest creases between the pumpkin segments. -
Painting the stem:
Paint the stem with Sap Green. while wet, drop in a bit of darker green on the shadowed side to give it a 3D, twisted appearance.
Step 5: Final Details
-
Grounding shadow:
Mix a watery grey-brown. Paint a loose, organic shadow underneath the pumpkin so it feels like it’s sitting on the paper, letting the edges fade out softly. -
Adding vines:
I like to use my rigger or detail brush to add a few delicate green vines and leaves curling out from the base of the pumpkin for movement. -
Texture and pop:
Add tiny speckles of orange or brown onto the pumpkin skin for texture. Check your contrast and darken the horizon silhouette if needed to make the sunset pop.
Sign your name near the shadow and enjoy your lovely autumn scene


Fall Leaves Swirl In The Wind
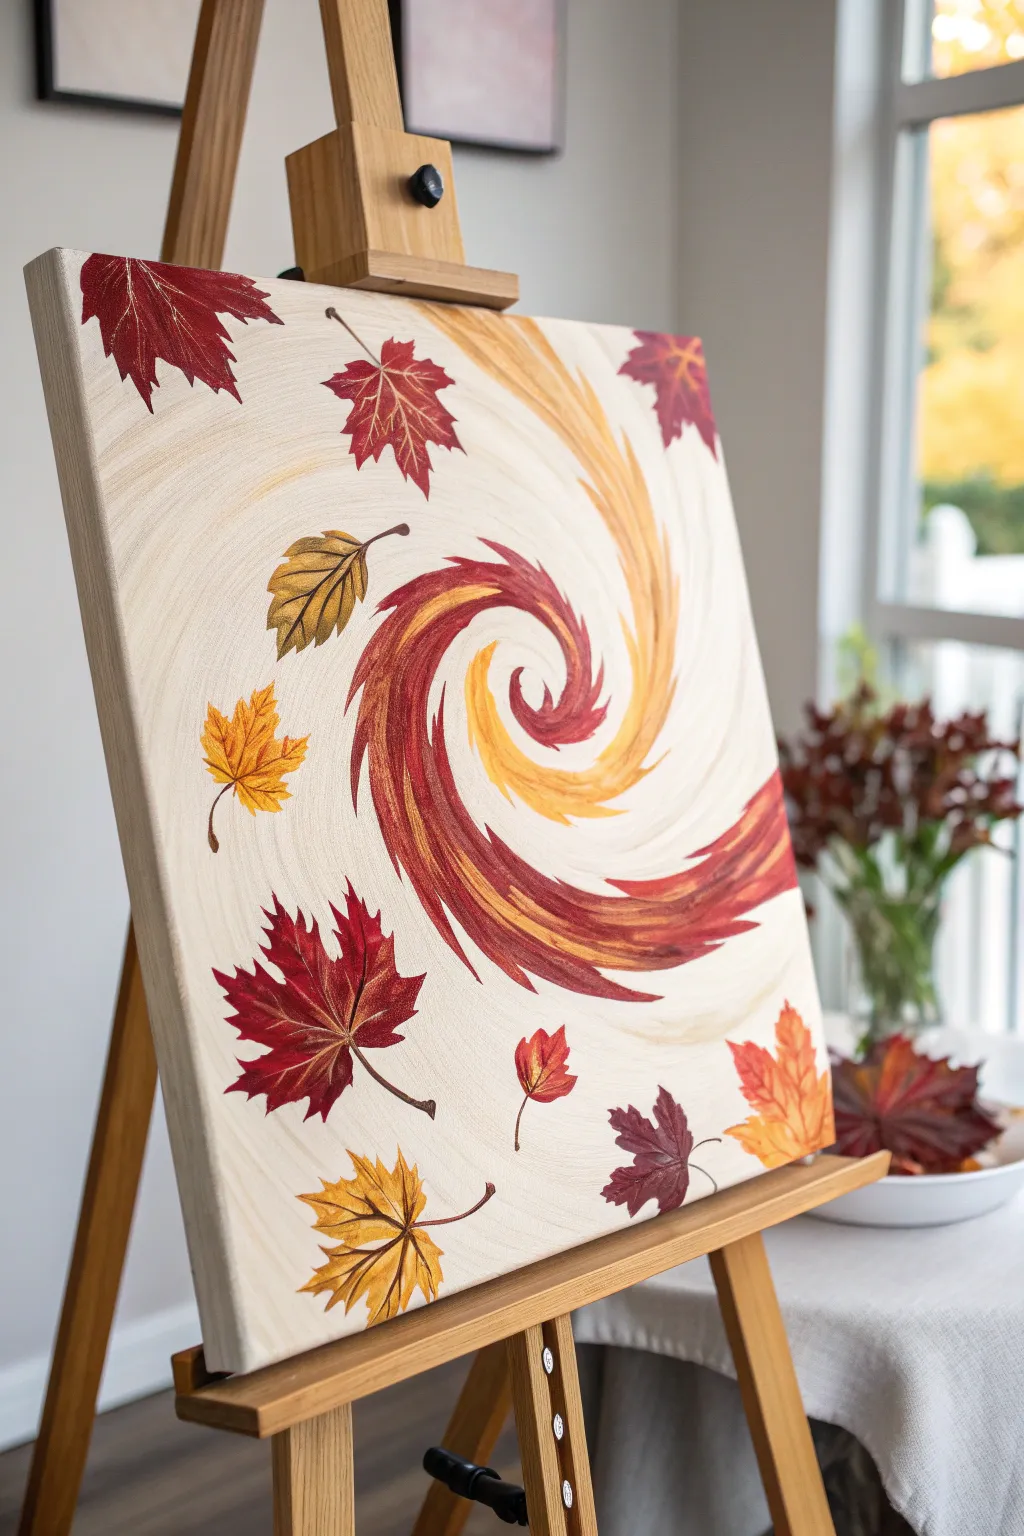
Capture the dynamic movement of fall with this vibrant painting of leaves caught in a gusty spiral. Using simple brushstrokes and a warm palette, you’ll create a sense of motion that brings the crisp autumn air right onto your canvas.
How-To Guide
Materials
- Stretched canvas (11×14 or 16×20 inches recommended)
- Acrylic paints: Titanium White, Unbleached Titanium (or Cream), Cadmium Red, Burnt Sienna, Yellow Ochre, Cadmium Orange, Burnt Umber
- Paintbrushes: Large flat brush (1 inch), medium filbert brush (size 6 or 8), small round brush (size 2), liner brush
- Palette or paper plate
- Cup of water and paper towels
- Pencil for sketching (optional)
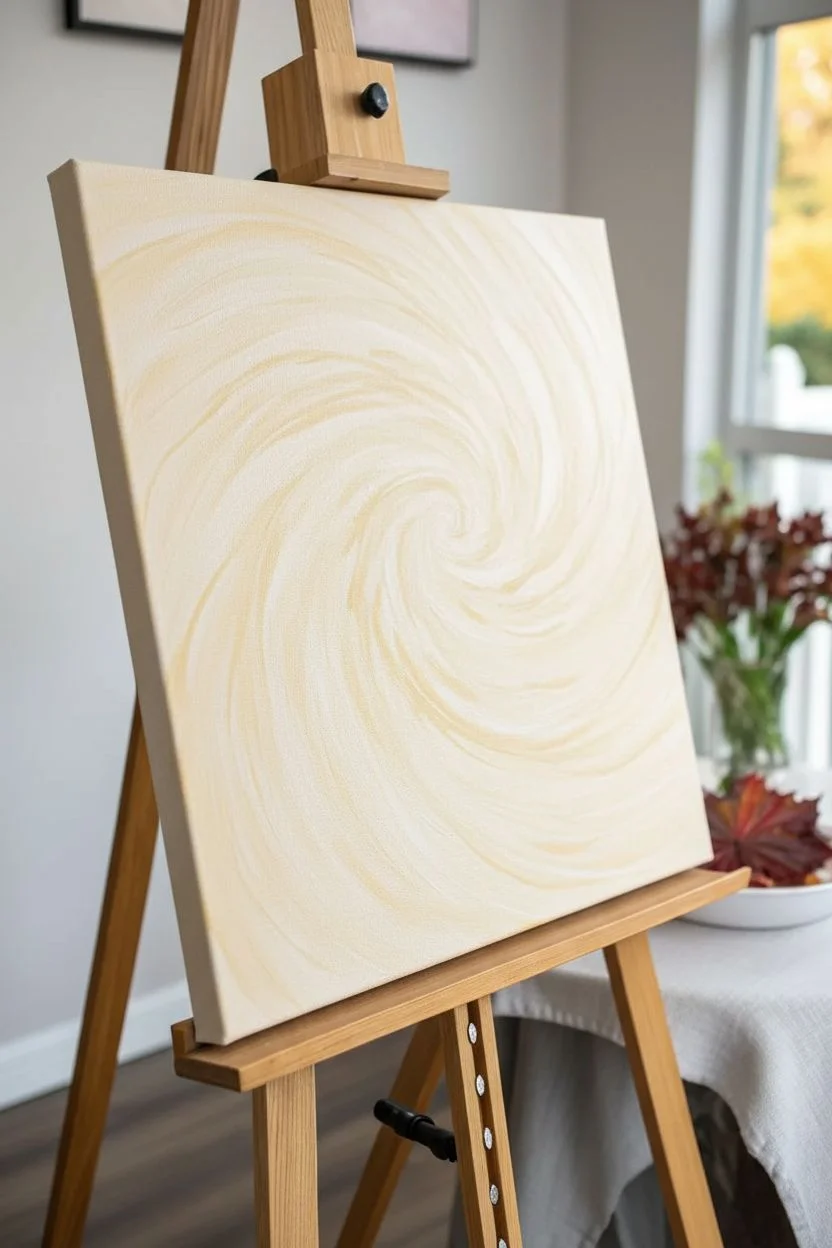
Step 1: Setting the Background
-
Base Color:
Start by mixing Titanium White with a small amount of Unbleached Titanium or Cream. You want an off-white, warm parchment color rather than a stark white. -
Applying the Background:
Use your large flat brush to cover the entire canvas with this mixture. Apply the paint in sweeping, circular motions radiating from the center outwards to subtly suggest the spiral movement right from the start. -
Creating the Wind:
While the base is still slightly wet, pick up a tiny bit of Yellow Ochre on the dirty brush. Lightly streak it into the wet background in loose, large spiral curves. This creates the faint ‘wind’ lines.
Muddy colors?
If your red and green leaves turn brown where they overlap the spiral, let the spiral layer dry completely (about 10 mins) before painting leaves on top.
Step 2: Painting the Spiral
-
Mapping the Swirl:
Once the background is dry to the touch, lightly use a pencil to mark the path of your central spiral. It should start tight in the center and fan out wider towards the edges. -
Starting the Core:
Mix Cadmium Red with a touch of Burnt Sienna. Using the medium filbert brush, paint the darkest part of the spiral swirl. Start from the center and pull the stroke outward, following your pencil line. -
Adding Contrast:
Wipe off your brush and pick up pure Yellow Ochre. Paint a second swoop right next to the red one, letting them slightly overlap while wet to create a soft blend between the hues. -
Feathering Edges:
Use the edge of your brush to flick paint outwards from the main spiral bands. These jagged, feathery edges mimic the look of wind tearing through the air and give the composition energy. -
Highlighting the Wind:
Mix a light orange (Cadmium Orange + White). Add streaks on top of your red and yellow spiral bands to add dimension and highlight.
Bring the Sparkle
Mix a tiny pinch of gold mica powder or gold metallic paint into your yellow ochre for the leaves. It catches the light beautifuly.
Step 3: Adding the Leaves
-
Blocking in Large Leaves:
Identify spots around the spiral where you want your main leaves. I like to place the largest red leaf in the bottom left corner to anchor the painting. -
Painting Red Maples:
Using a small round brush and a mix of Cadmium Red and Burnt Sienna, paint the iconic five-point shape of maple leaves. Don’t worry about veins yet; just get the solid silhouette down. -
Adding Golden Leaves:
Switch to Yellow Ochre mixed with a touch of Burnt Sienna for the brownish-yellow leaves. Paint these shapes slightly more rounded or like birch leaves to add variety. -
Scattering Small Leaves:
Use the tip of your round brush to dab small, single-stroke leaf shapes near the center of the spiral. These smaller leaves enhance the feeling of depth, as if they are further away. -
Layering Colors:
Go back to your red leaves. If the first coat is dry, add a second layer using a brighter red on the edges to make them pop against the cream background.
Step 4: Details and Veins
-
Mixing Vein Color:
Mix a thin, inky consistency of Burnt Umber mixed with a tiny bit of water. This will help the paint flow smoothly from your liner brush. -
Painting Veins:
Carefully draw the central spine and branching veins on each leaf. Keep your hand loose; shaky lines actually look more organic and natural. -
Adding Stems:
Extend the central vein out from the base of each leaf to create a stem. Vary the angles so the leaves look like they are tumbling in different directions. -
highlighting Edges:
Mix a pale yellow or use Titanium White. With a very dry small brush, lightly graze the edges of a few leaves to simulate sunlight hitting them. -
Final Wind Gusts:
Take a clean, dry filbert brush with barely any white paint on it. dry-brush a few faint, ghostly swirls over parts of the leaves and spiral to make everything look cohesive and breezy.
Step back and admire the refreshing movement in your autumnal masterpiece
BRUSH GUIDE
The Right Brush for Every Stroke
From clean lines to bold texture — master brush choice, stroke control, and essential techniques.
Explore the Full Guide
Maple Leaf Close-Up With Veins
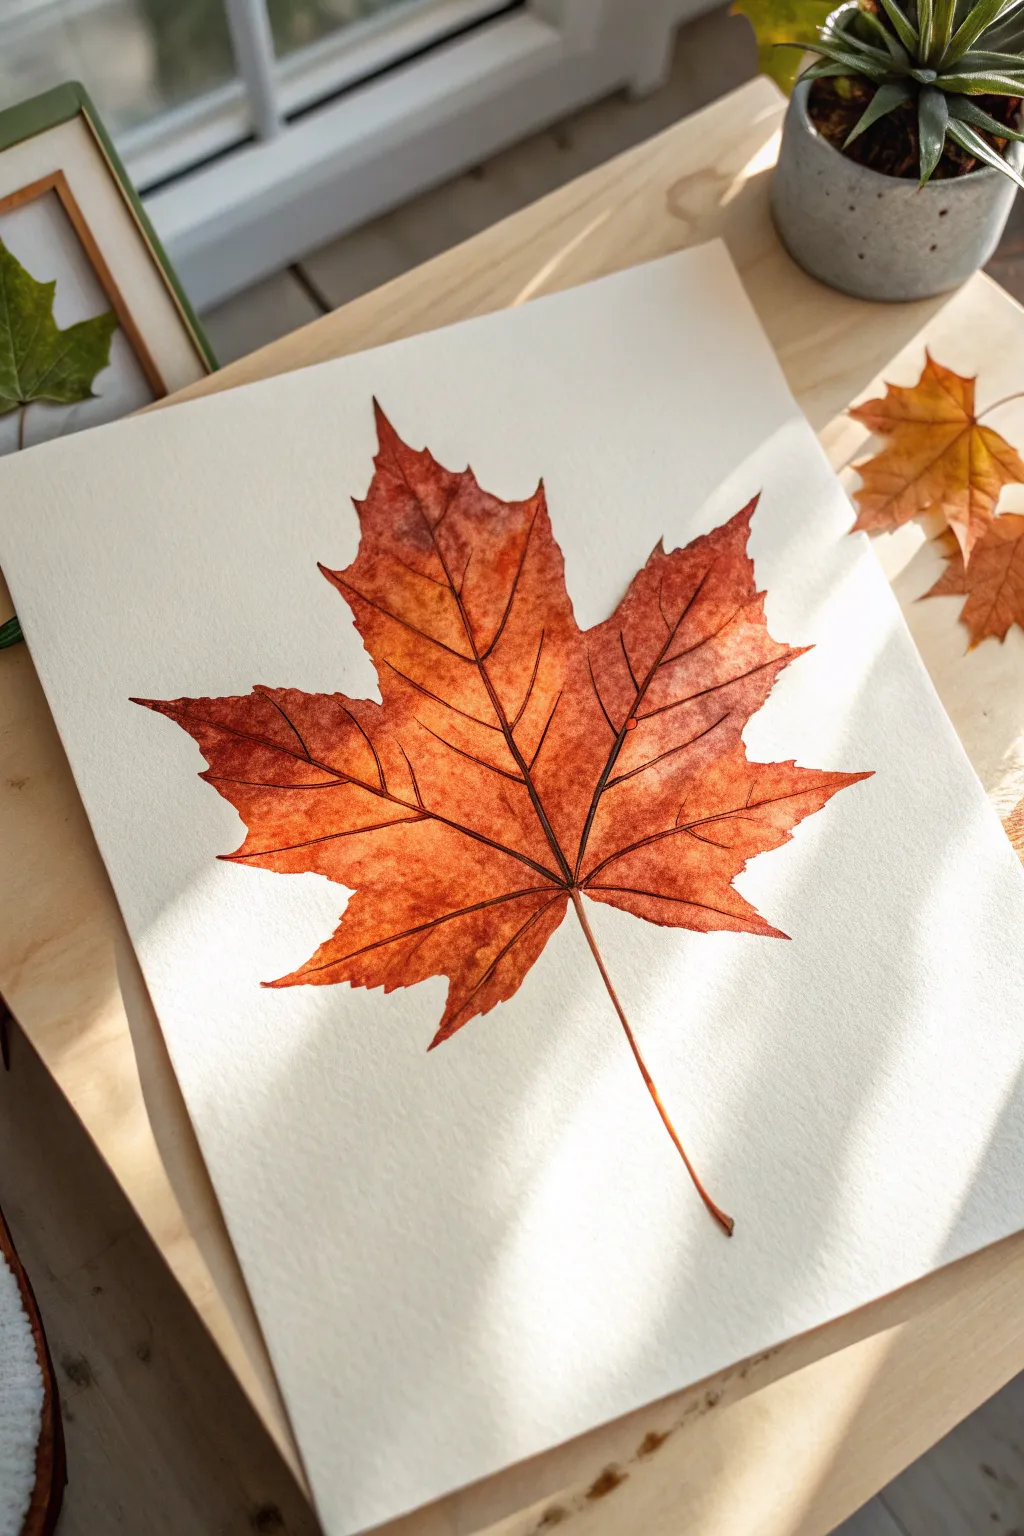
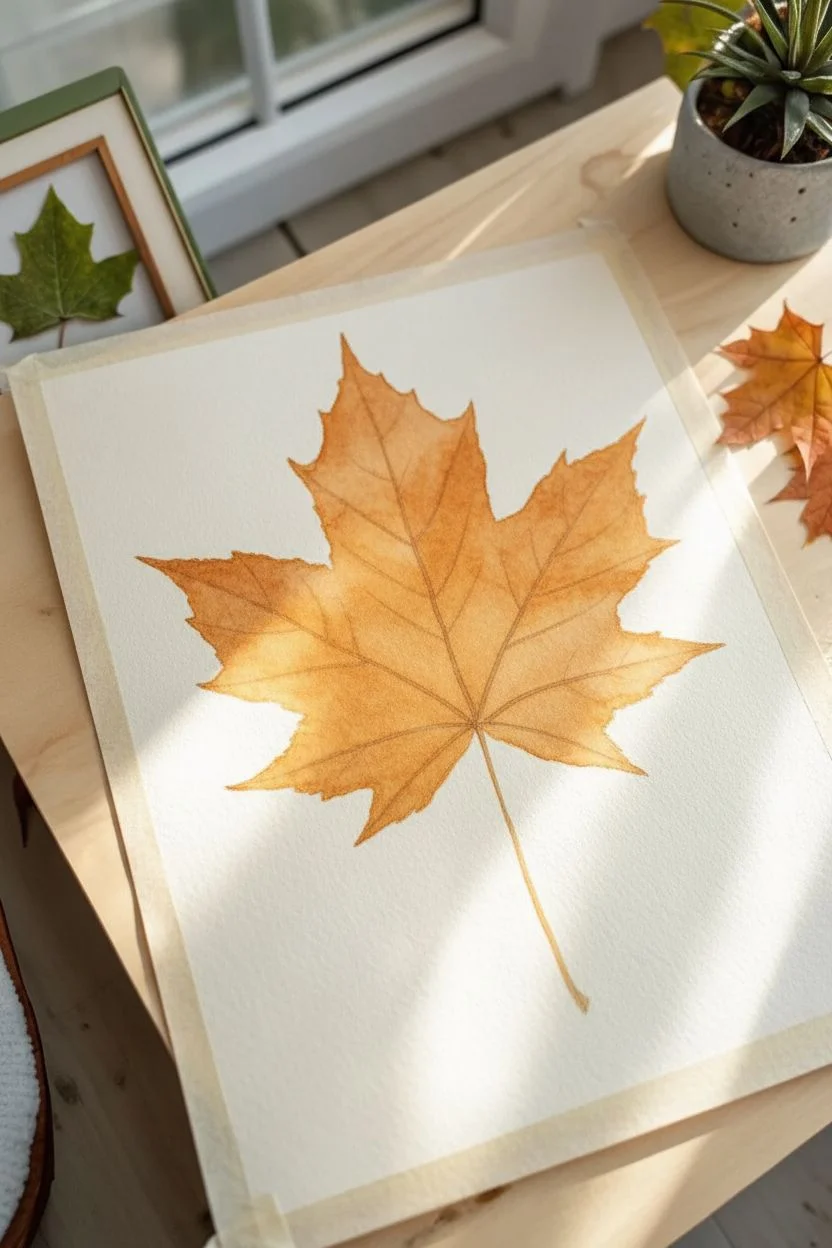
Capture the delicate beauty of autumn with this detailed watercolor study of a single maple leaf. You’ll layer warm oranges and browns to build depth while using fine brushwork to create realistic, intricate veins.
Step-by-Step Tutorial
Materials
- Cold press watercolor paper (140 lb or 300 gsm)
- Watercolor paints (Burnt Sienna, Cadmium Orange, Yellow Ochre, Burnt Umber)
- Round watercolor brushes (Size 6 or 8 for wash, Size 0 or 1 for details)
- Pencil (HB or H)
- Kneaded eraser
- Clean water jar
- Paper towels
- Masking tape (optional, to secure paper)
Step 1: Drawing and Base Layer
-
Sketch the outline:
Begin by lightly sketching the outline of a five-pointed maple leaf on your watercolor paper. Don’t worry about perfect symmetry; natural leaves have unique wobbles and curves. Draw the main central stem extending downwards. -
Map the primary veins:
Lightly draw the main veins radiating from the stem’s convergence point out towards each of the five leaf tips. These will serve as your guide for painting later. -
Prepare your palette:
Mix a watery wash of Yellow Ochre with a touch of Cadmium Orange. You want a very transparent, warm golden tea color for the first layer. -
Apply the initial wash:
Using your larger round brush (size 6 or 8), paint the entire leaf shape with your light golden wash. Keep the edges relatively crisp but allow the color inside to be somewhat uneven for texture. -
Let it dry completely:
Wait for the paper to be bone dry. If you touch it while it’s damp, your next layers might bloom and ruin the crispness.
Step 2: Building Color and Depth
-
Mix mid-tone colors:
Create a richer orange-brown mix using Burnt Sienna and a little Cadmium Orange. It should be more saturated than your base wash. -
Paint around the veins:
This is a negative painting technique. Using the size 6 brush, paint sections of the leaf with the mid-tone mix, but carefully leave narrow gaps where your pencil lines indicated the veins. This makes the veins look highlighted. -
Softening edges:
While the paint is wet in a section, you can drop in tiny amounts of concentrated Burnt Sienna near the center of the leaf to darken it, letting it bleed outward naturally. -
Working in sections:
Move from one lobe of the leaf to another. I prefer working on non-adjacent sections to prevent wet edges from merging accidentally. Let each section dry before doing the one next to it. -
Adding gradients:
For the tips of the leaf, water down your brush slightly as you paint outward. This keeps the leaf edges looking slightly more translucent and glowing. -
Dry the mid-tones:
Allow this second layer to dry fully. The veins should now appear as light lines against the darker orange body of the leaf.
Clean Vein Trick
Use liquid masking fluid with a ruling pen to draw the veins before painting. Rub it off at the end for perfectly crisp white veins.
Step 3: Details and Definition
-
Mix the darkest shadow color:
Combine Burnt Umber with a tiny touch of cool blue or purple (like Ultramarine) to create a dark, near-black brown. This is for the deepest veins and shadows. -
Define the central veins:
Switch to your fine detail brush (size 0 or 1). Carefully paint a very thin dark line right down the center of the light vein gaps you left earlier. This creates a high-contrast, realistic vein structure. -
Paint the secondary veins:
Branching off from the main veins, paint delicate, spindly lines stretching out toward the jagged edges of the leaf pattern. Keep your hand loose to avoid stiff lines. -
Enhance texturing:
Using a slightly diluted brown mix, add gentle mottling or small dots near the center and edges of the leaf to simulate the natural imperfections and aging found on fall foliage. -
Stem work:
Paint the long stem extending from the bottom. Start with Burnt Sienna near the leaf base and transition to a darker Burnt Umber at the very tip. -
Final assessment:
Step back and look at the overall contrast. If some areas look too flat, add a very light glaze of orange over the top to unify the colors, but be careful not to muddy your fine lines.
Dew Drop Drama
Paint 1-2 small, realistic water droplets on the surface using lifting techniques and white gouache highlights for a fresh morning look.
Now you have a vibrant, permanent piece of autumn to enjoy all year round
Misty Autumn Mountains
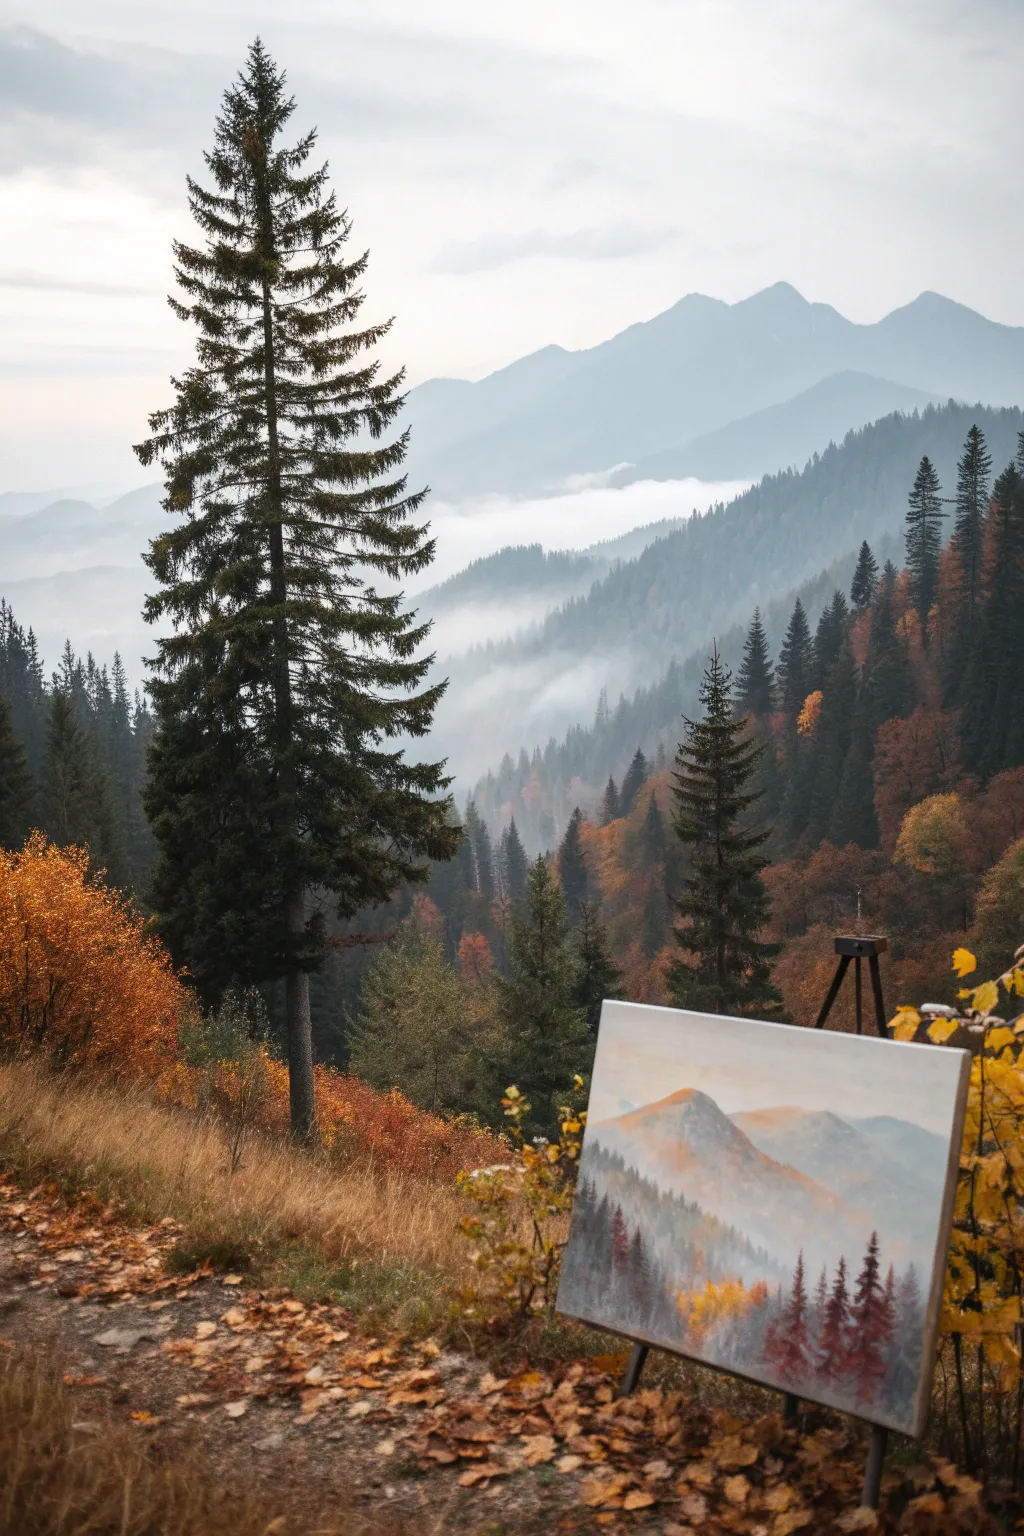
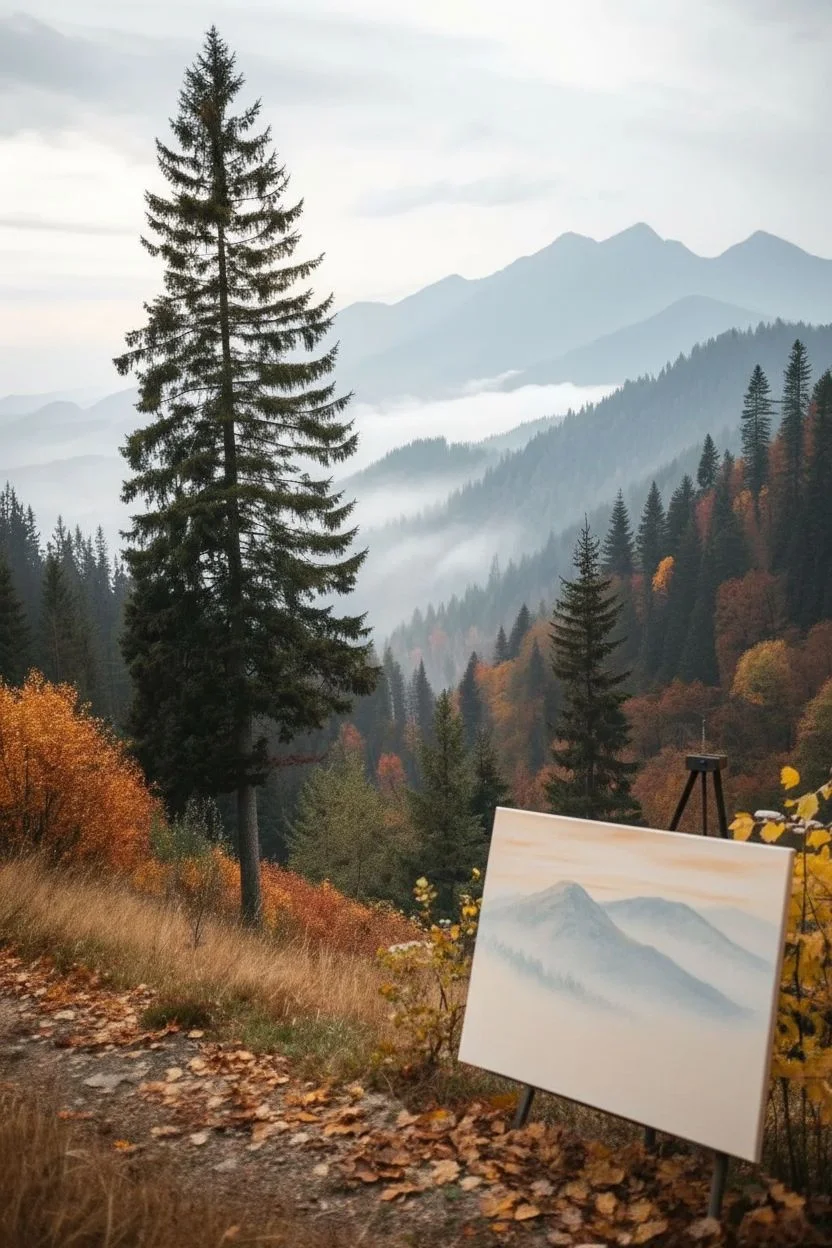
Capture the serene beauty of a foggy mountain landscape with this atmospheric acrylic painting project. You’ll layer soft mountain silhouettes against striking foreground pines to create depth and mood.
How-To Guide
Materials
- Canvas panel or stretched canvas (11×14 or similar)
- Acrylic paints: Titanium White, Payne’s Grey, Burnt Sienna, Yellow Ochre, Alizarin Crimson, Burnt Umber
- Flat brushes (1-inch and 1/2-inch)
- Small round detail brush
- Fan brush (optional)
- Palette knife
- Water cup and paper towels
Step 1: Setting the Scene
-
Prime the Sky:
Start by mixing a large amount of Titanium White with a tiny touch of Burnt Sienna and Payne’s Grey to create a warm, off-white haze. Cover the top two-thirds of your canvas with horizontal strokes, keeping the color very pale and consistent. -
First Mountain Ridge:
While the sky is still slightly tacky, mix Payne’s Grey with a generous amount of White to get a very light ghostly blue-grey. Paint the distant mountain peaks about one-third down from the top, softening the bottom edge with a dry brush so it fades into nothingness. -
Building Layers:
Mix a slightly darker grey-blue, adding a drop of Alizarin Crimson for warmth. Create a second mountain range slightly below and overlapping the first one. Again, keep the tops crisp but blur the bottom edges downwards into white to simulate rising mist. -
Adding Golden Light:
On the sun-facing slopes of this second range, lightly glaze a mix of Yellow Ochre and White. Use a dry brush to scumble this color on, suggesting sunlight hitting the rocky face.
Misty Mess-ups?
If your fog looks too solid or opaque, wait for it to dry completely. Then, mix a zinc white or transparent mixing white glaze and apply thin layers until softness returns.
Step 2: The Misty Valley
-
Create Depth:
Mix Titanium White with a very small amount of the mountain grey color. Paint a band of thick ‘mist’ horizontally across the middle of the canvas, effectively separating the distant peaks from where the foreground will be. -
Mid-Ground Hills:
Using a medium grey mixed with a touch of Burnt Umber, paint a lower, rolling hill shape emerging from the mist. This layer should be darker than the distant mountains but lighter than your final foreground. -
Softening Edges:
Before the paint dries, take a clean, dry 1-inch brush and gently tap along the base of this hill to blur it into the white mist below. This transition is key to the atmospheric effect.
Step 3: Foreground Foliage
-
Base for Trees:
Mix Burnt Umber with a little Payne’s Grey to get a dark, cool brown. Using the 1/2-inch flat brush, tap in vertical textures along the bottom third of the canvas to establish the dense forest floor. -
Autumn Accents:
Mix Yellow Ochre, Burnt Sienna, and a touch of Red. Using the corner of a flat brush or a small round brush, dab clusters of autumn leaves into the dark base, focusing on the center area where the light would hit. -
Painting the Pines:
Switch to your smallest round brush or a fan brush turned vertically. Mix Alizarin Crimson, Burnt Umber, and Payne’s Grey for a deep reddish-black. Paint thin vertical lines for tree trunks in the immediate foreground. -
Adding Pine Needles:
Using a zigzag or tapping motion, add foliage to these foreground trees. Start narrow at the top and widen as you go down. I like to keep these trees slightly semi-transparent in spots to keep the painting feeling airy. -
Varying Colors:
For variety, paint a few smaller trees using a mix of Burnt Sienna and Red. These rusty-red trees break up the dark shapes and emphasize the fall season. -
Final Mist Glaze:
Once the foreground trees are dry, take a very watered-down Titanium White (a glaze consistency). Lightly brush over the ‘feet’ of the trees where they meet the ground to settle them into the landscape.
Add Texture
Use a palette knife to scrape thin lines of very light grey onto the mountain peaks. This mimics snow or jagged rock faces catching the light.
Step back and admire your personal window into a peaceful autumn range

PENCIL GUIDE
Understanding Pencil Grades from H to B
From first sketch to finished drawing — learn pencil grades, line control, and shading techniques.
Explore the Full Guide
Spooky-Cute Ghost In A Pumpkin Patch
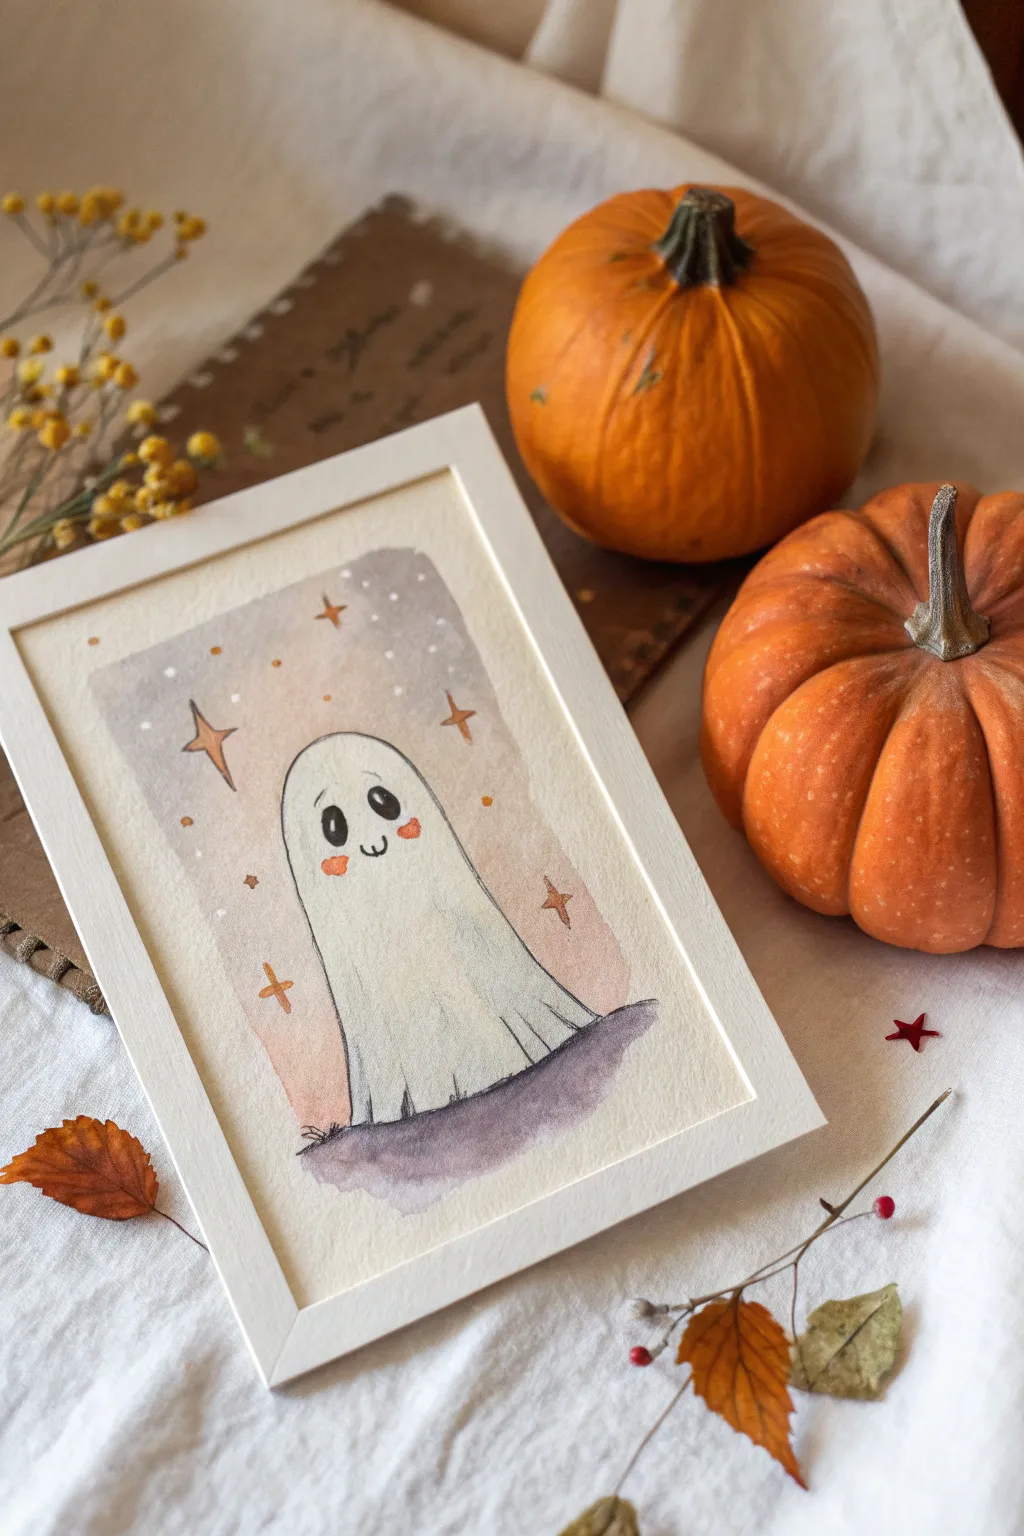
Capture the sweeter side of the spooky season with this charming watercolor illustration. Featuring a blushing, wide-eyed ghost against a soft, starry evening sky, this project is perfect for adding a touch of friendly haunting to your home decor.
Detailed Instructions
Materials
- Cold press watercolor paper (approx. 5×7 inches)
- Watercolor paints (violet, indigo/payne’s gray, warm peach/orange, black)
- Round watercolor brushes (size 4 and size 0 or 00 for details)
- White gel pen or white gouache
- Pencil and kneaded eraser
- Masking tape
- Cup of water and paper towels
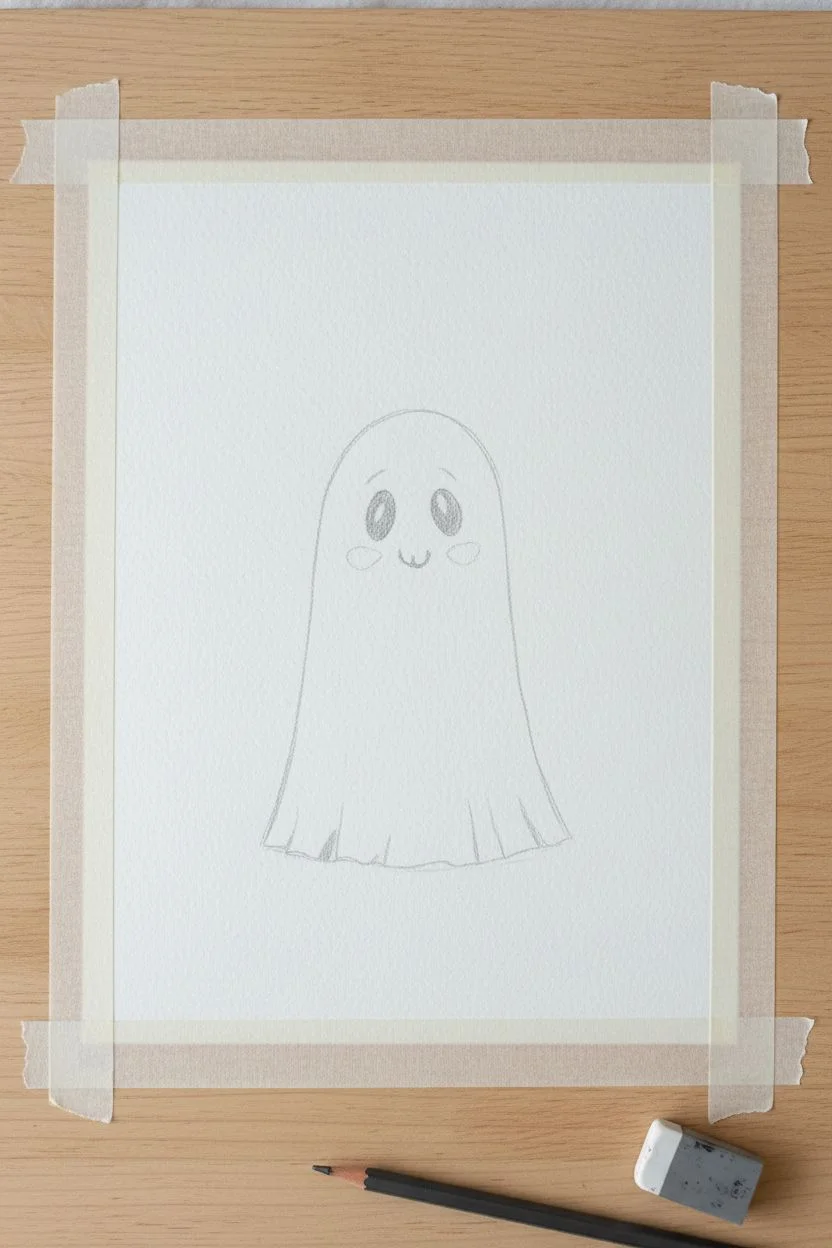
Step 1: Planning and Sketching
-
Prep your surface:
Begin by taping down the edges of your watercolor paper to a sturdy board or table. This creates that crisp white border seen in the final piece and prevents the paper from buckling when wet. -
Outline the ghost:
Using a light pencil, gently sketch a tall, rounded arch shape in the center of the paper. Keep the bottom edge slightly wavy to suggest fabric folds naturally draping on the ground. -
Add facial features:
Sketch two large ovals for eyes near top third of the shape. Add a small ‘w’ shape between them for the mouth and two small circles on the cheeks for blush.
Step 2: Painting the Background
-
Mix your sky wash:
Prepare a watery mix of muted violet and a touch of gray. You want this color to be quite transparent and soft, not opaque. -
Wet-on-dry application:
With your size 4 brush, carefully paint the area outside the ghost. Use vertical strokes to create a rectangular background shape, leaving the edges somewhat loose and organic rather than perfectly straight. -
Create a gradient:
While the violet wash is still wet, drop in a tiny bit of peach or warm orange near the bottom of the background to simulate a sunset glow. Let these colors blend naturally on the paper. -
Deepen the ground:
Mix a stronger, darker purple-gray. Paint a shadow directly beneath the ghost’s wavy hem, extending it slightly outward to anchor the figure to the ground. Let this layer dry completely.
Keep it clean
Use two water cups: one for rinsing dirty brushes and one for clean water. This keeps your white ghost shape from getting accidentally muddied by dirty rinse water.
Step 3: Defining the Ghost
-
Shadowing the body:
The ghost stays mostly white paper, but needs dimension. Mix a very dilute, watery gray. Lightly brush this along the right side and bottom hem of the ghost to create form. -
Fabric folds:
Use the tip of your brush to pull thin gray lines upward from the wavy bottom edge. These simple strokes mimic heavy fabric gathering on the floor. -
Painting the eyes:
Switch to your smallest brush (size 0) and use concentrated black watercolor to fill in the eye ovals. Leave a tiny speck of white paper in each pupil if you can, or add it later. -
Sweet details:
Using the same small brush, paint the ‘w’ mouth in black. Then, wash your brush and dip into a soft coral or orange paint to fill in the round cheek blushes.
Add some sparkle
Once the painting is dry, trace over the orange stars with a metallic gold pen or gold watercolor paint to make the background truly shimmer in the light.
Step 4: Magical Finishes
-
Add the stars:
Once the background is bone dry, use a small brush with orange paint to draw simple four-pointed stars (cross shapes) scattered in the sky. -
Highlight with white:
Take a white gel pen or opaque white gouache. Add tiny dots in the eyes for reflections if you didn’t leave them blank earlier. -
Snowy speckles:
Add small white dots all over the purple background to look like distant stars or magical dust. Keep them randomized for a natural look. -
Final outlines:
If you want the illustrative look shown in the photo, take a fine liner pen or very dry brush with black paint and loosely outline the ghost’s body and the fabric folds. -
The reveal:
Wait until the paper is cool to the touch (meaning completely dry). Slowly peel away the masking tape at a 45-degree angle to reveal your clean, crisp border.
Frame your spooky friend in a simple white frame to complete this adorable seasonal display
Black Cat Silhouette And Autumn Moon
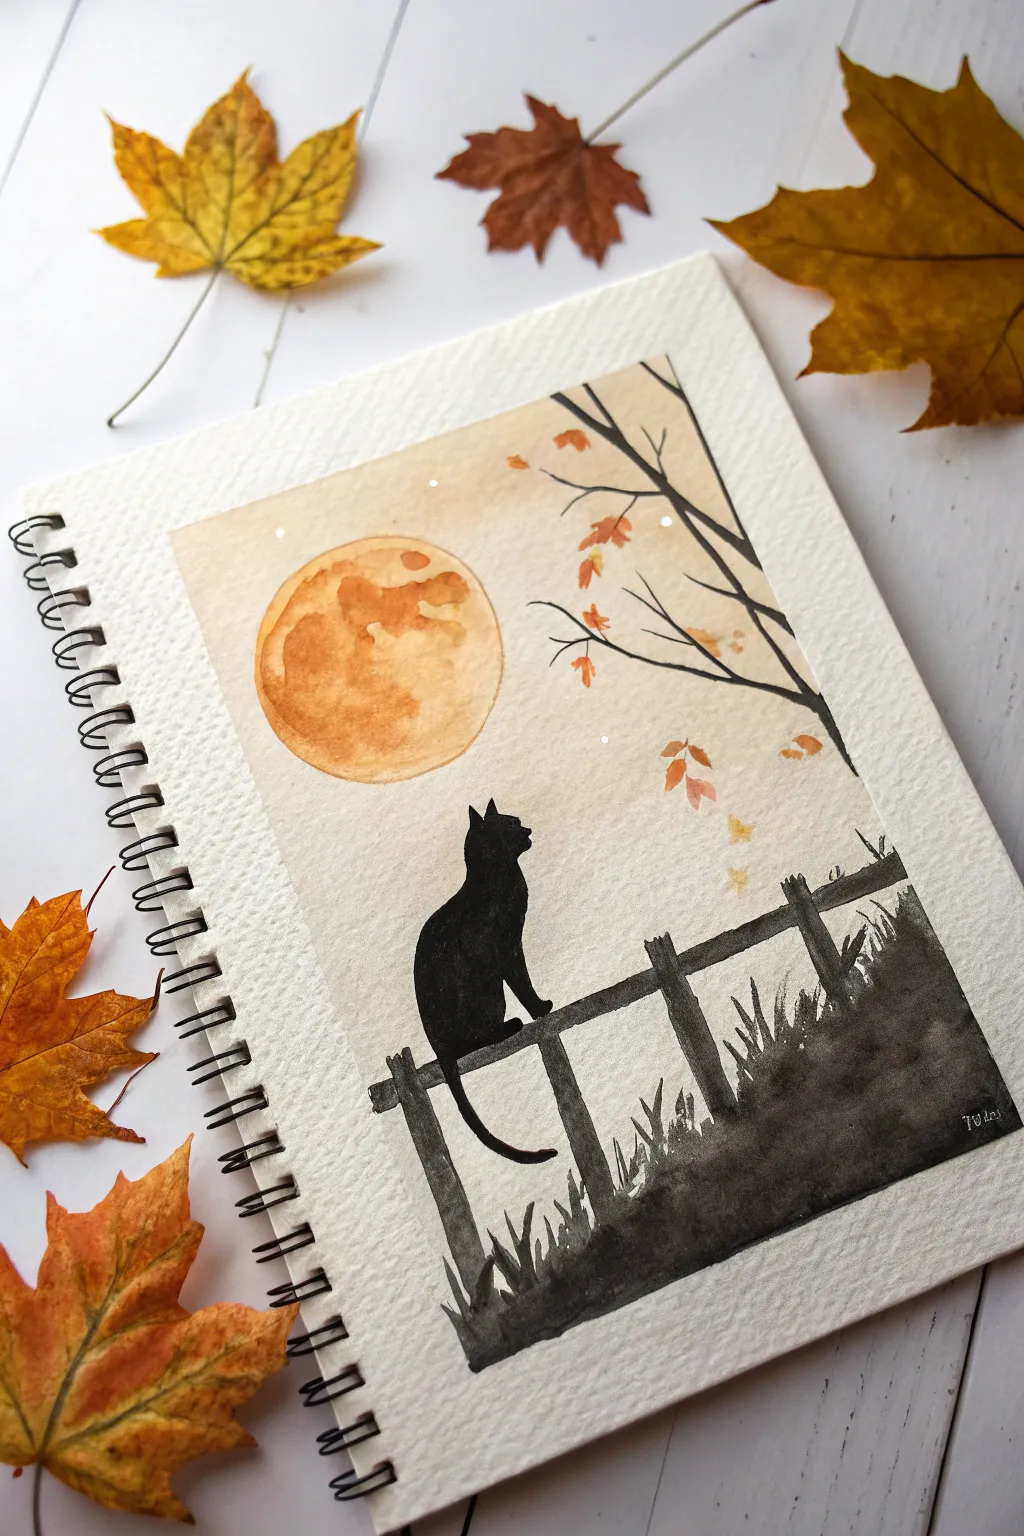
Capture the magic of an autumn evening with this charming watercolor illustration features a sleek black cat silhouette gazing up at a textured harvest moon. The warm orange tones against the stark black ink create a classic fall atmosphere that is perfect for a cozy paint night.
Step-by-Step Tutorial
Materials
- Cold press watercolor paper (sketchbook or sheet)
- Masking tape
- Watercolor paints (Yellow Ochre, Burnt Sienna, Orange, Sepia)
- Black waterproof ink or black gouache
- Pencil and eraser
- Round brush (size 6 or 8) for washes
- Small detail brush (size 0 or 2)
- White gel pen or white gouache
- Circular object for tracing (like a lid or roll of tape)
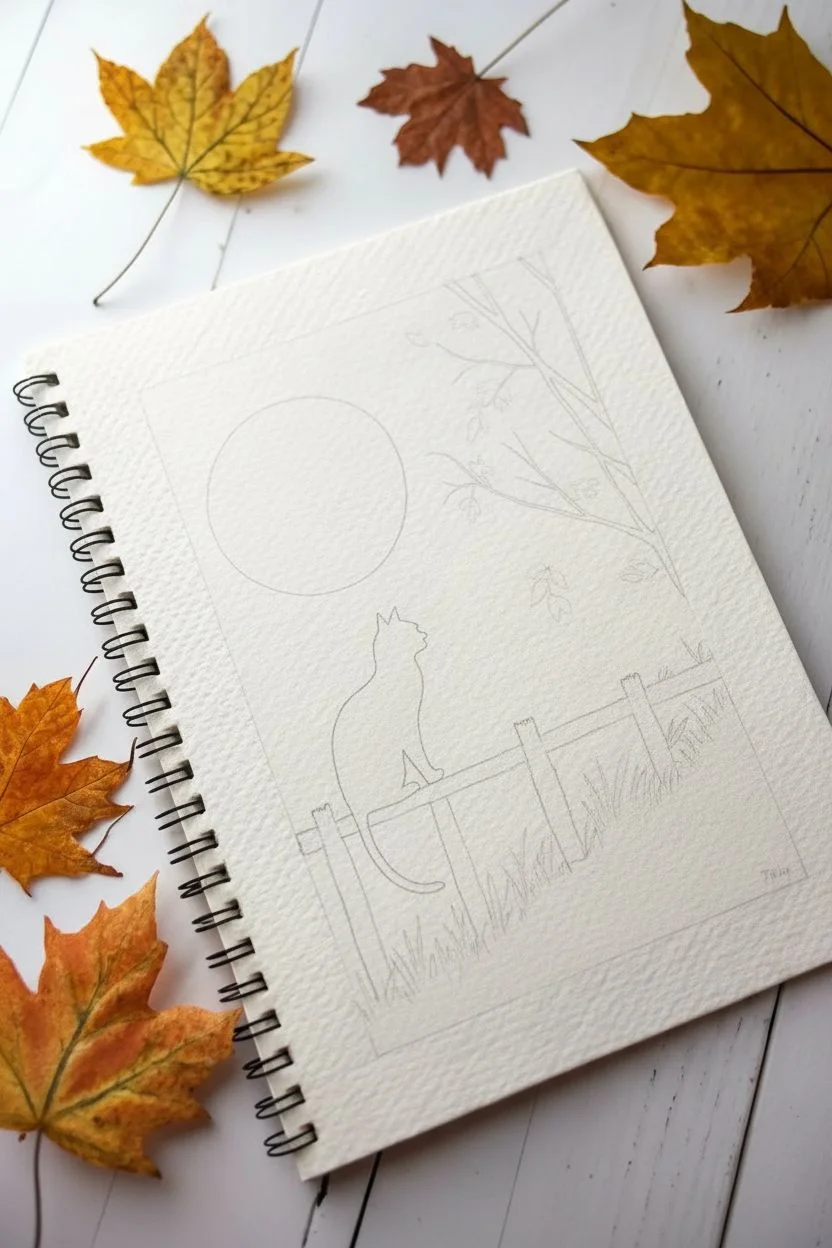
Step 1: Sketching the Scene
-
Trace the moon:
Begin by placing your circular object in the upper left quadrant of your paper. Lightly trace around it with a pencil to create a perfect circle for your harvest moon. -
Map the fence:
Sketch the outline of the wooden fence in the lower third of the page. Draw slightly uneven, rectangular posts and horizontal rails to give it a rustic, weathered look. -
Place the cat:
Draw the silhouette of the cat sitting on the top rail. Use simple shapes: an oval for the body and a smaller circle for the head, adding pointed ears and a tail that hangs down in a gentle curve. -
Add nature elements:
Lightly sketch a tree branch entering from the top right corner, extending towards the moon. Add hints of grass at the bottom of the fence posts, but don’t worry about perfect details yet.
Step 2: Creating the Glow
-
Wash the sky:
Mix a very watery wash of Yellow Ochre. Apply this gently around the moon and fading out towards the edges of the paper to create a soft, glowing atmosphere. Avoid painting inside the moon circle for now. -
Texture the moon:
Load your brush with a mix of Orange and Yellow Ochre. Paint the moon wet-on-dry, dropping in touches of Burnt Sienna while the paint is still wet to create craters and surface texture. -
Preserve the light:
Before the moon dries completely, lift out a few highlights using a clean, damp brush or a paper towel to give it a spherical, dimensional look. -
Paint falling leaves:
Using your small brush and a mix of orange and red, paint small, teardrop-shaped leaves on the branches and a few ‘falling’ in the open space. Let them vary in size for a natural effect.
Clean Lines Tip
If your hand is shaky, try resting your wrist on a bridge ruler or a dry part of the paper while painting the fine details of the cat’s whiskers or tail.
Step 3: Inking the Silhouettes
-
Fill the cat:
Once the background is 100% dry, switch to black ink or gouache. Carefully fill in the cat shape, ensuring the edges are crisp and smooth. -
Paint the fence:
Fill in the fence posts and rails with the same black. Leave the edges slightly rough to mimic the texture of old wood. -
Ground the scene:
At the base of the fence, paint the grassy ground using upward, flicking strokes. I like to vary the height of these strokes to make the grass look wild and overgrown. -
Add depth to the ground:
Dilute your black ink slightly with water to create a dark grey. Add a wash behind the sharp black grass blades to create a sense of depth and shadow at the bottom of the page. -
Detail the branch:
Using your finest brush and black ink, paint the tree branch. Make the lines slightly shaky and tapering as they extend outward to resemble real twigs.
Level Up: Metallic Magic
Swap the standard yellow watercolor for a gold metallic watercolor paint. The moon will shimmer beautifully when the light hits the finished piece.
Step 4: Finishing Touches
-
Add stars:
Once the ink is fully dry, take a white gel pen or white gouache and dot a few tiny stars in the sky, particularly near the moon. -
Highlight the branch:
Add a few white dots specifically on the tree branches or near the leaves to suggest dew or caught starlight. -
Review and refine:
Step back and check your contrast. If the black looks patchy, add a second coat to make the silhouette solid and bold.
Frame your moonlit masterpiece or gift it to a cat-loving friend to celebrate the season


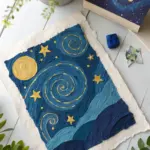
Fall Night Sky With Swirly Clouds
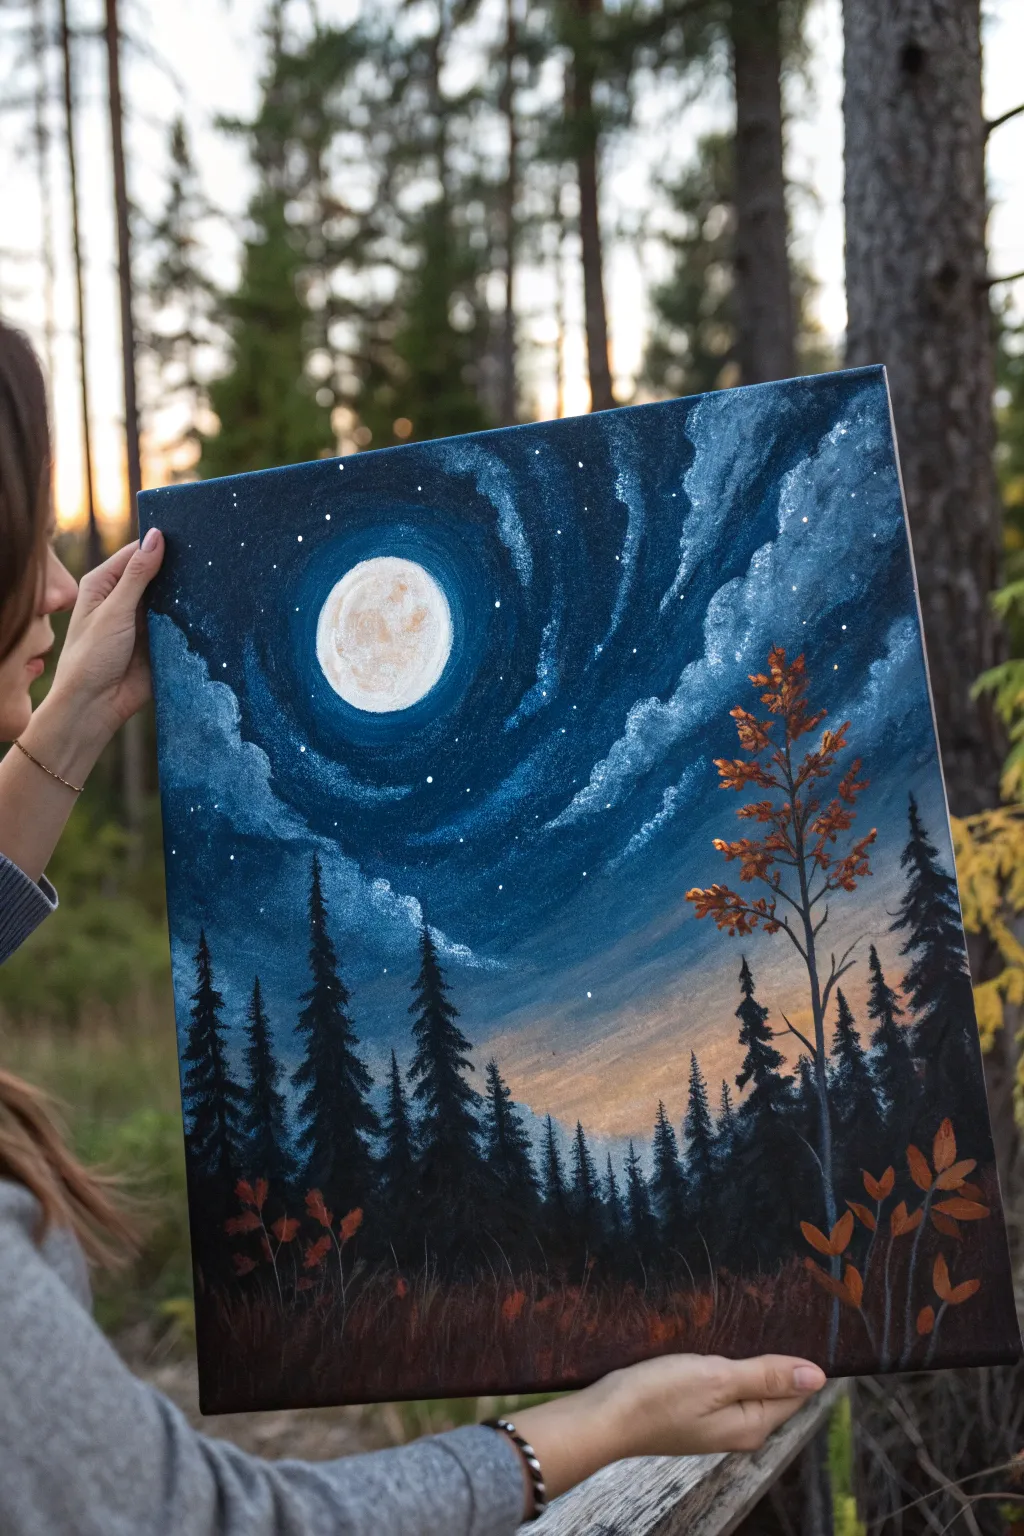
Capture the magic of an autumn evening with this enchanting acrylic painting, featuring a luminous full moon amidst swirling cosmic clouds. The striking contrast between the deep blue celestial sky and the warm, russet tones of the fall foliage creates a cozy yet mysterious atmosphere perfect for the season.
How-To Guide
Materials
- Stretched canvas (e.g., 11×14 or 16×20 inches)
- Acrylic paints: Titanium White, Mars Black, Prussian Blue or Phthalo Blue, Burnt Sienna, Cadmium Orange, Yellow Ochre
- Paintbrushes: Large flat wash brush, medium filbert, lush round brush, small liner brush
- Palette or paper plate
- Cup of water and paper towels
- Sponge (optional for clouds)
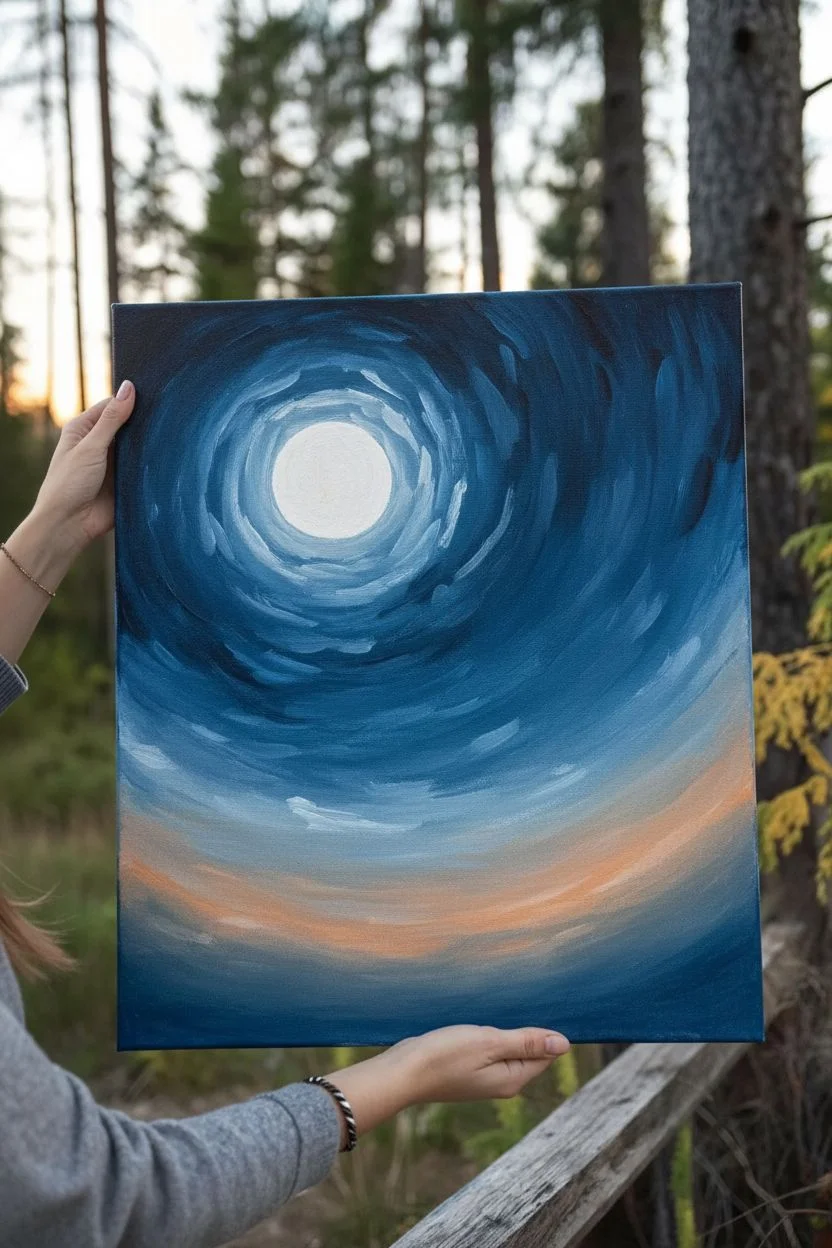
Step 1: Setting the Sky
-
Start the background:
Begin by dampening your large flat brush slightly. Mix a deep Prussian Blue with a touch of Black to create a very dark midnight blue. Apply this to the top corners and edges of the canvas, using smooth, sweeping strokes. -
Create the swirl path:
While the dark blue is still wet, mix a lighter shade using Prussian Blue and a little White. Paint a circular motion around where your moon will be (upper left center), blending outwards into the darker edges to start the swirling effect. -
Add the sunset glow:
Clean your brush thoroughly. Near the bottom right horizon line, blend a soft gradient using White mixed with a tiny dot of Orange and Yellow Ochre. Blend this upwards into the blue sky, allowing the colors to mix slightly for a hazy transition.
Dry Brushing Magic
For the moon’s glow, use a dry brush with very little white paint to lightly circle the moon’s edge. This creates a soft, hazy halo effect without needing water.
Step 2: The Moon & Clouds
-
Paint the moon base:
Switch to a medium filbert brush. Using pure Titanium White, paint a solid circle in the center of your lighter blue swirl. Don’t worry about crater details yet; just get a solid, bright shape. -
Form the swirling clouds:
Mix a light blue-grey using White and a touch of your dark blue mix. Using a round brush or the corner of a sponge, dab and sweep curved cloud shapes that spiral outward from the moon. Keep the strokes loose to mimic movement. -
Highlight the cloud edges:
Take straight White on a smaller brush and highlight the top edges of your cloud swirls closest to the moon. This gives them volume and makes them appear illuminated by the moonlight. -
Add moon details:
Mix a very pale grey-yellow. I like to blot my brush on a paper towel so it’s nearly dry, then gently scumble subtle crater textures onto the white moon surface for a realistic look. -
Sprinkle the stars:
Load a wet toothbrush or a liner brush with watered-down White paint. Flick the bristles to spray tiny stars across the darker parts of the sky, avoiding the trees and moon area.
Metallic Touch
Swap the white star paint for metallic silver or add touches of gold onto the autumn leaves. It adds a shimmering, magical quality when light hits the canvas.
Step 3: Forest & Foreground
-
Block in the tree line:
Mix a dark color using Black and a little Phthalo Blue (pure black can look flat). Using a flat brush turned on its chiseled edge, tap in varied vertical lines along the bottom third of the canvas to establish tree heights. -
Detail the pine trees:
Switch to a small fan brush or utilize the corner of a flat brush. Start at the top of each vertical line and tap downwards in a zigzag motion, getting wider as you go down, to create the pine branches. -
Create depth in the forest:
Paint some smaller, lighter grey-blue trees in the background before adding the sharp, dark black trees in the foreground. This atmospheric perspective adds immense depth to your woods. -
Paint the grassy base:
At the very bottom, use upward flicking strokes with a mix of Burnt Sienna and Black to create tall, shadowed grasses that anchor the trees.
Step 4: Autumn Accents
-
Add the focal tree:
On the right side, paint a thin, branching tree trunk using a liner brush and dark grey-brown paint. Let the branches reach up towards the swirly sky. -
Paint fall leaves:
Mix Cadmium Orange with a touch of Burnt Sienna. Using the tip of a round brush, dab small leaf shapes onto the branches of your focal tree. Group them in clusters rather than spacing them evenly. -
Add foreground foliage:
Use the same orange-brown mix to paint some larger leaves or low bushes in the bottom right corner, overlapping the dark pine silhouettes. -
Final highlights:
Add a final touch of Yellow Ochre or light Orange to the tips of the leaves that would be catching the moonlight, making them pop against the dark background.
Enjoy the peaceful feeling this cosmic landscape brings to your space
Folk-Art Fall Wreath Pattern
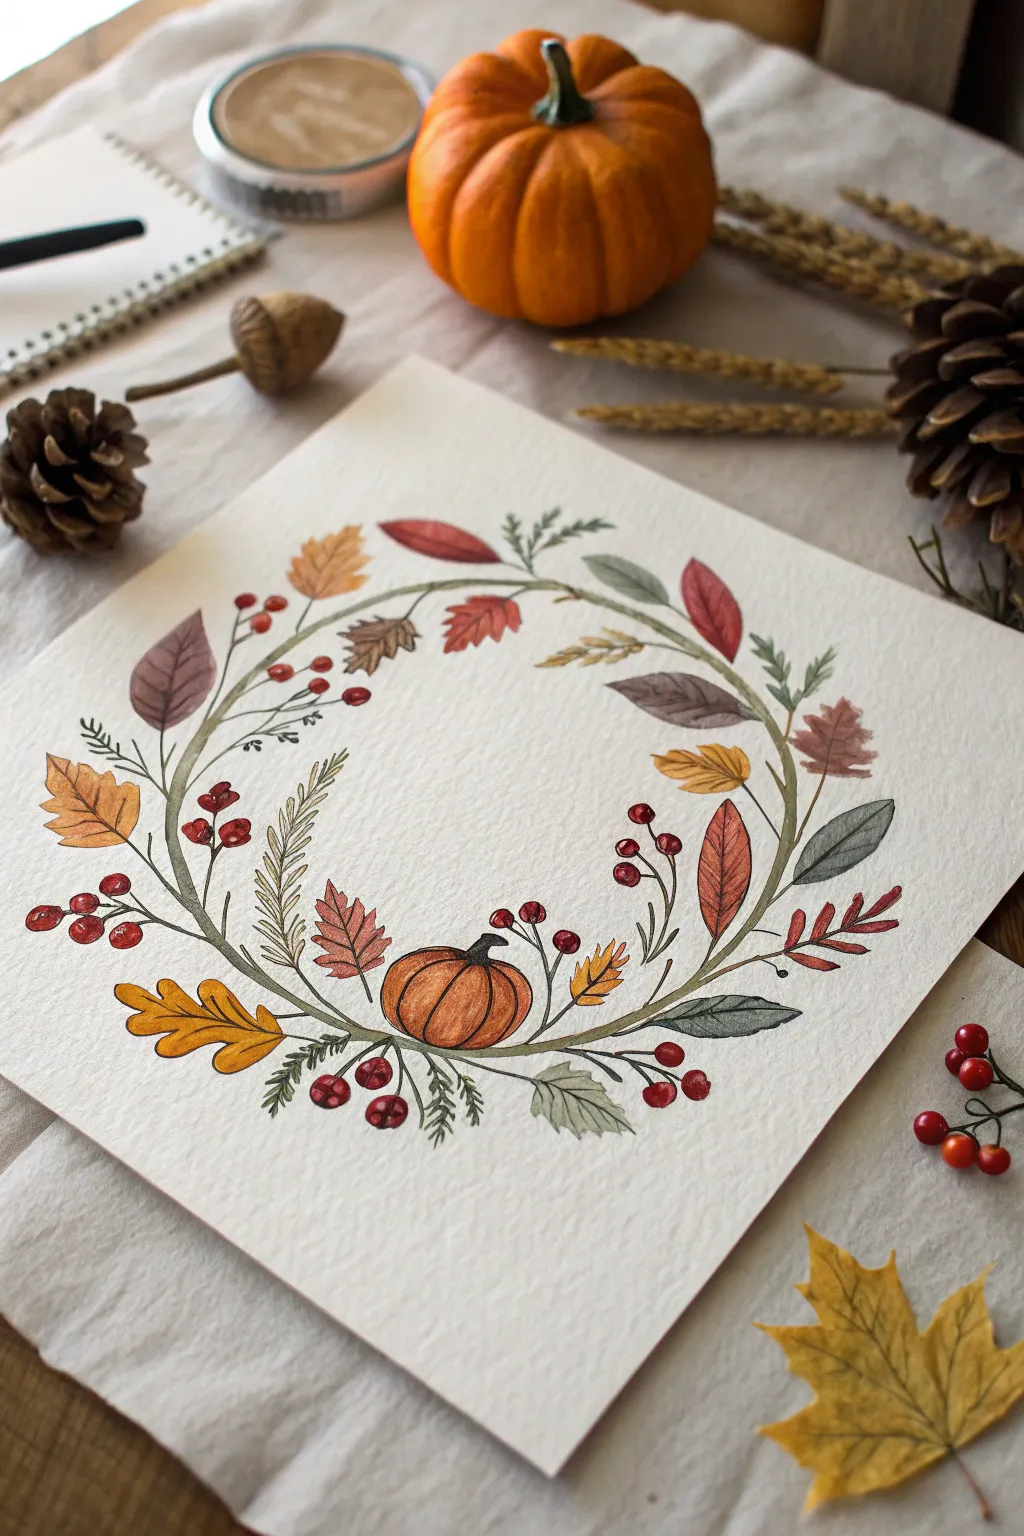
Capture the essence of autumn with this delicate folk-art style wreath featuring warm oak leaves, berries, and a central pumpkin accent. The textured paper and earthy color palette create a cozy, nostalgic feel perfect for seasonal decor.
Detailed Instructions
Materials
- Cold-press watercolor paper (at least 140lb/300gsm)
- Pencil (HB or H) and kneaded eraser
- Watercolor paints (Pan set or tubes)
- Round watercolor brushes (sizes 2, 4, and 6)
- Fine-liner pen (Sepia or Dark Brown, 0.3mm)
- Mixing palette
- Jar of water and paper towels
- Circular object for tracing (like a small plate or compass)
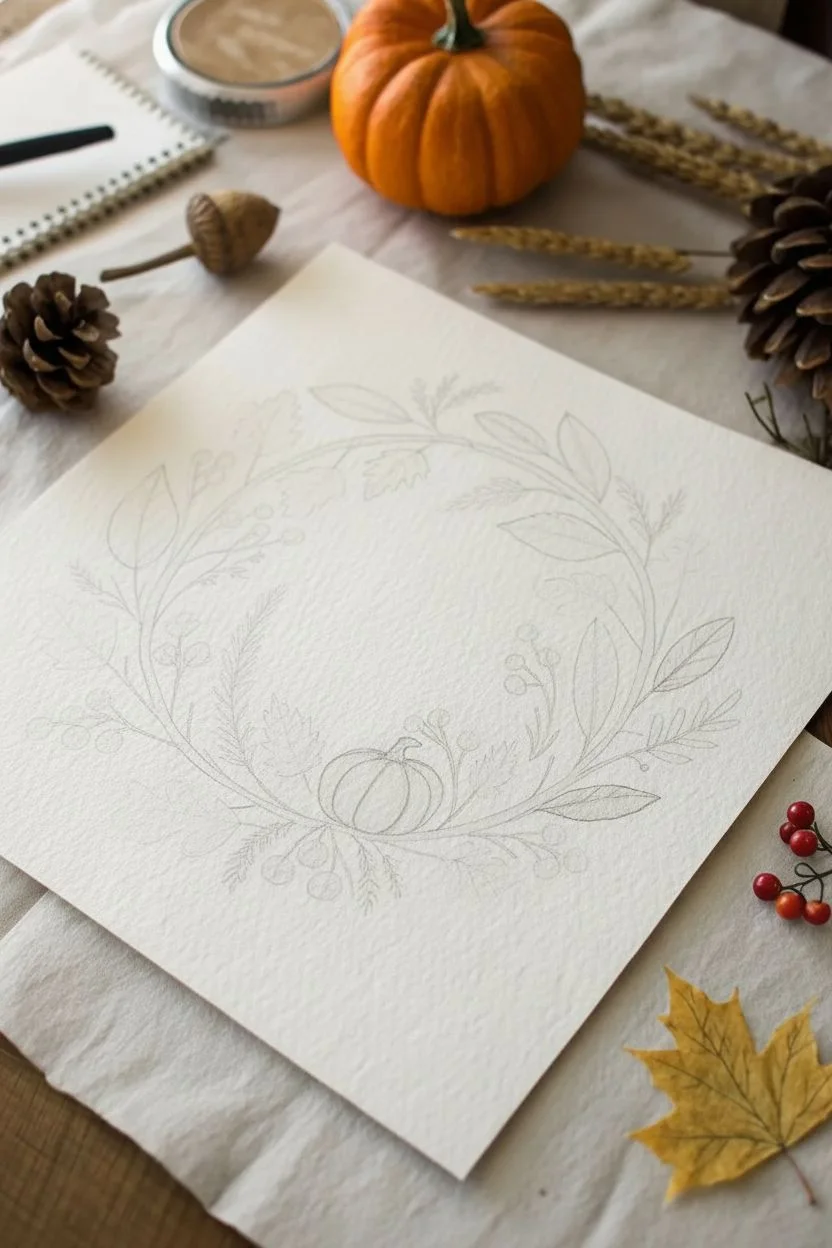
Step 1: Sketching the Layout
-
Create the guide:
Begin by lightly tracing a circle in the center of your paper using a plate or compass. This line won’t be part of the final art, so keep it faint; it simply acts as a spine for your wreath. -
Anchor the pumpkin:
At the bottom center of your circle, sketch a small, squat pumpkin. It should sit directly on the guide line, tilting slightly to the left for a natural look. Add ridges and a small, curved stem. -
Place main foliage:
Sketch three to four large feature leaves evenly spaced around the circle. Draw a large oak leaf on the left, a pointed elm leaf at the top right, and a rounded beech leaf near the top left. Don’t worry about perfection; folk art thrives on organic shapes. -
Fill the gaps:
Between the large leaves, sketch sprigs of berries, pine needles, and smaller filler leaves. Ensure all stems flow in the same circular direction, emerging from the main vine. -
Refine the lines:
Once you are happy with the arrangement, gently erase the original circle guide, leaving only the botanical sketches. Use a kneaded eraser to lighten your pencil marks so they won’t show through the paint.
Fixing Strange Bleeds
If colors bleed into each other, you’re painting adjacent areas too quickly. Let one leaf dry completely before painting its neighbor, or use a hair dryer on low heat to speed up the process.
Step 2: Painting the Elements
-
Pumpkin base:
Mix a warm, muted orange using burnt sienna and yellow ochre. Paint the pumpkin segments, leaving tiny slivers of white paper between the ridges to create natural highlights. -
Warm leaves:
Using a size 4 brush, paint the large oak and beech leaves. Vary your autumnal palette by mixing sap green with a touch of red for brownish hues, and using pure yellow ochre for the golden leaves. -
Cool leaves:
Balance the warmth by painting the pine sprigs and pointed leaves in sage green and muted teal. Adding a drop of gray to your green mix helps achieve that vintage folk-art look. -
Berry clusters:
Switch to your size 2 brush. Dip it into concentrated crimson or alizarin crimson to paint the berry clusters. Keep the paint fairly thick here so the red pops against the lighter background. -
Layering details:
Wait for the first layer of leaves to dry completely. Once dry, create a slightly darker version of each base color and paint half of certain leaves to suggest shadow or depth. -
Connect the vine:
Using a thin mixture of olive green and brown, carefully paint the main circular vine. Use the very tip of your brush to connect all the floating leaves and berries to this central stem.
Add Metallic Magic
Once the piece is dry, use a gold gel pen or metallic watercolor paint to add tiny accents to the berries or leaf veins. It catches the light beautifully on a mantle display.
Step 3: Inking and Definition
-
Outline with pen:
When the painting is bone dry—I usually give it an extra five minutes to be safe—use a sepia or dark brown fine-liner to trace the outlines. Keep your hand loose; broken or sketchy lines add character. -
Add leaf veins:
Draw central veins in the leaves with the pen. For the oak leaves, add branching veins; for the pine sprigs, add quick, short dashes to define the needles. -
Detail the berries:
Add tiny ‘C’ shapes or dots on the berries with your pen to give them a spherical appearance. -
Final pumpkin touches:
Inking the pumpkin stem with dark lines helps ground the image. Add a few vertical contour lines on the pumpkin sides to emphasize its roundness.
Frame this charming piece in a rustic wood frame to complete your harvest celebration


Have a question or want to share your own experience? I'd love to hear from you in the comments below!