Block painting is one of my favorite ways to get bold, graphic results fast—because the block shape does so much of the design work for you. Whether you’re stamping patterns or building crisp color blocks, these ideas will keep your hands busy and your brain happily inspired.
Color Block Landscape With Hard Edges
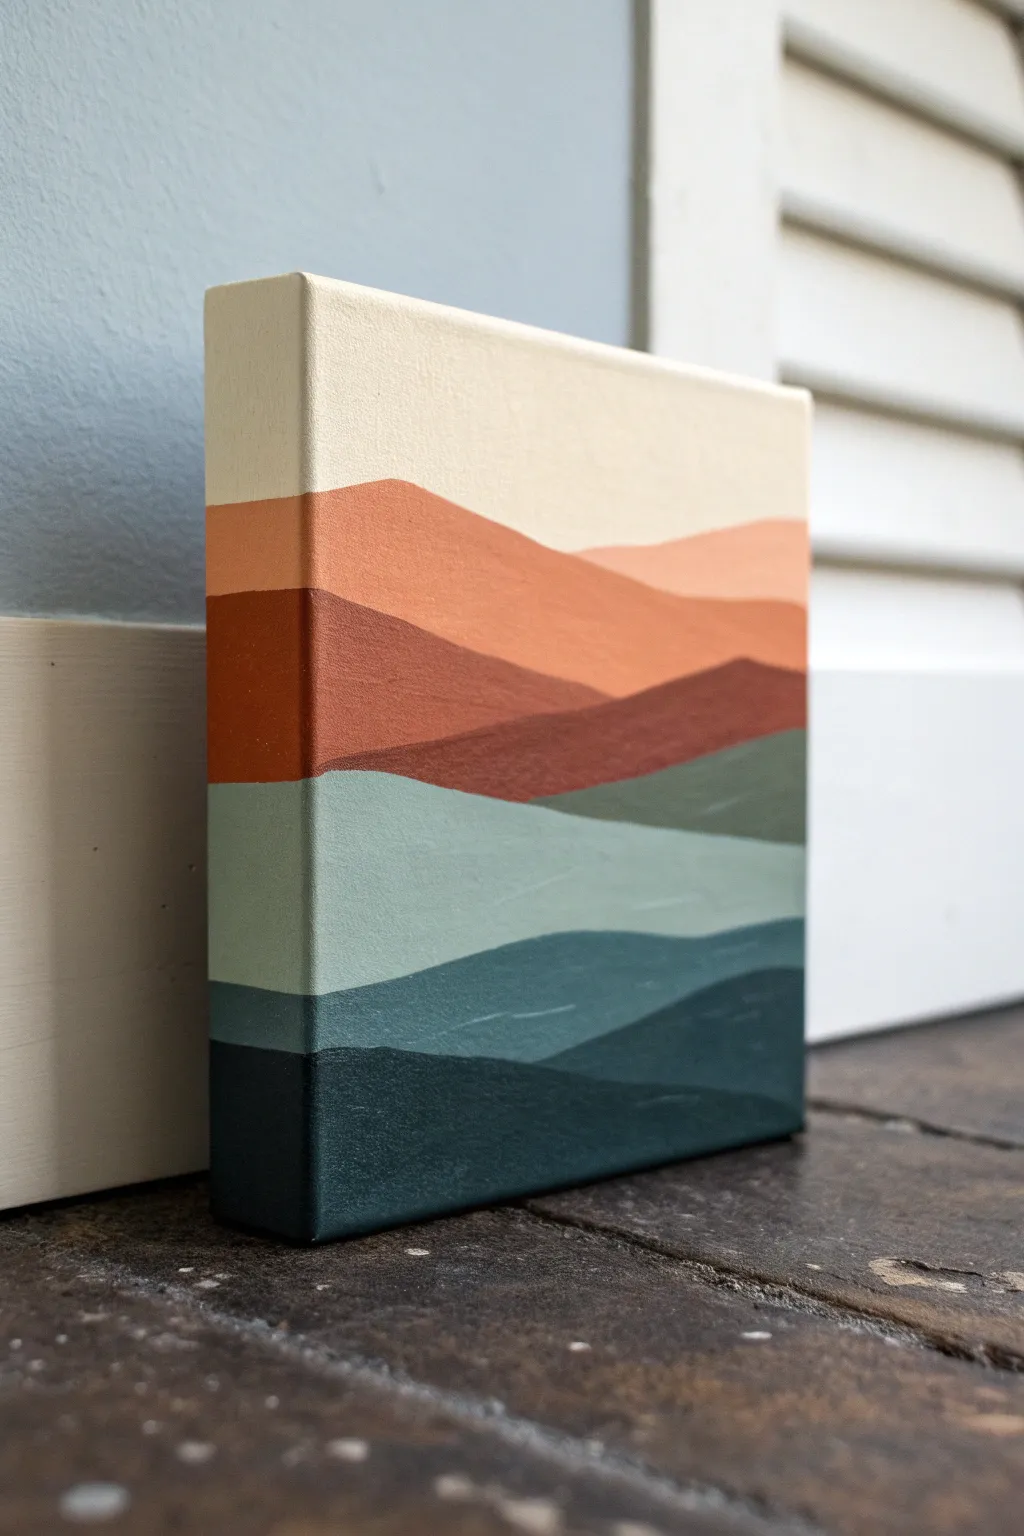
This minimalist landscape painting uses bands of solid color to create the illusion of rolling dunes or hills. By mastering smooth color transitions and crisp edges, you’ll create a serene, modern piece that wraps beautifully around the canvas sides.
Step-by-Step
Materials
- Small square canvas (e.g., 6×6 or 8×8)
- Acrylic paints (Titanium White, Burnt Sienna, Burnt Umber, Phthalo Green, Unbleached Titanium)
- Flat shader brushes (medium and small)
- Palette or mixing plate
- Pencil
- Water cup and paper towels
- Medium-grit sandpaper (optional, for smoothing canvas)
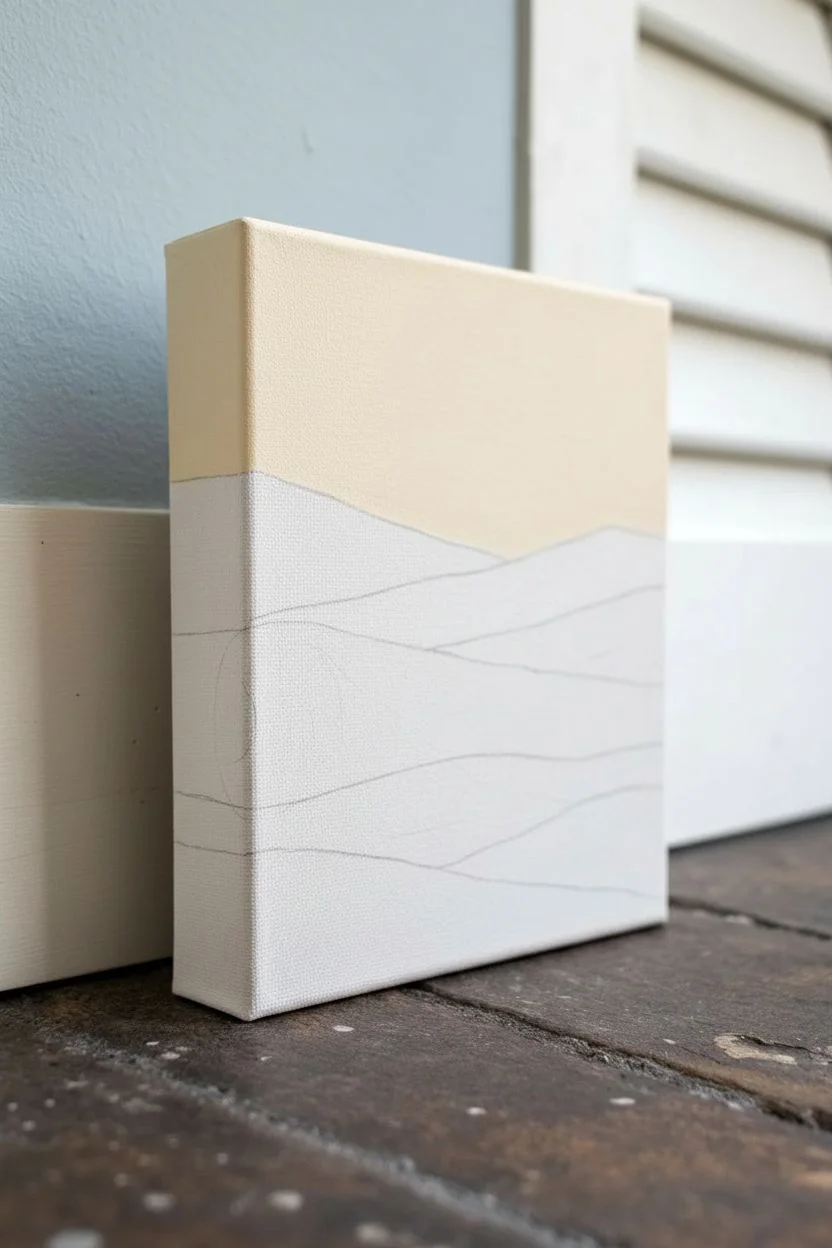
Step 1: Preparation & Sketching
-
Prepare the canvas:
If your canvas texture is very rough, give it a light sanding with medium-grit sandpaper to create a smoother surface for your crisp lines. Wipe away any dust with a damp cloth. -
Base coat the sky:
Mix a large amount of Titanium White with a tiny touch of Unbleached Titanium or yellow oxide to create a warm, creamy off-white. Paint the top third of the canvas, ensuring you wrap the paint around the top and side edges. -
Sketch the layout:
Once the sky is dry, lightly use a pencil to draw rolling, wavy lines across the canvas. Create about 4-5 distinct sections below the sky. Don’t worry about being perfect; these are just guides. I prefer to make the curves interlock slightly to create depth. -
Extend the lines:
Continue your pencil lines around the sides of the canvas. This is crucial for the 3D effect shown in the example photo.
Step 2: Mixing & Painting the Warm Tones
-
Mix the lightest hill color:
Start with your Burnt Sienna and add a significant amount of the creamy white mixture you used for the sky. You want a soft, peachy-terracotta tone. -
Paint the first hill:
Using a flat brush, carefully paint the first hill section directly below the sky. Use the edge of the brush to cut a clean line along your pencil mark. Remember to paint the corresponding stripe on the canvas sides. -
Darken the mixture:
Add a bit more Burnt Sienna and a tiny touch of Burnt Umber to your previous mix. This create a richer, medium terracotta shade. -
Paint the second hill:
Fill in the next section down. The contrast between this layer and the light peach above it is what creates the sense of distance. -
Create the deepest warm tone:
Mix pure Burnt Sienna with Burnt Umber to get a deep rust color. Paint the third section, which serves as the transition point between the warm sky tones and the cool ground tones.
Crisp Line Secret
For razor-sharp edges without a steady hand, lay down thin masking tape along your pencil lines, seal the edge with the base color, then paint your new color.
Step 3: Painting the Cool Tones
-
Mix the light green-blue:
Clean your brush thoroughly. Mix Titanium White, a small amount of Phthalo Green, and a tiny touch of the Burnt Umber to desaturate the green so it doesn’t look too neon. Aim for a soft sage color. -
Paint the middle ground:
Apply this sage color to the section directly below the deep rust layer. The jagged intersection of the rust and sage colors creates a nice visual tension. -
Mix a medium teal:
Add more Phthalo Green and a touch of black or dark blue to your sage mixture. You want a moody, medium-value teal. -
Apply the darker teal:
Paint the next descending layer. Ensure your brushstrokes are horizontal and smooth to minimize texture. -
Mix the deepest shadow color:
For the bottom-most section, mix Phthalo Green with black or a dark grey. This should be very dark, anchoring the composition. -
Paint the foreground:
Fill in the final bottom section and wrap the paint completely under the bottom edge of the canvas.
Metallic Accent
Paint a very thin line of gold leaf or metallic gold paint along just one of the ridge lines to catch the light and add a modern touch.
Step 4: Finishing Touches
-
Check the edges:
Inspect where your color blocks meet. If any lines look shaky, use a small liner brush with the appropriate color to sharpen them up. -
Second coats:
Acrylics can be translucent. If you see canvas texture or streaks showing through, apply a second coat to any colors that look patchy once they are dry to the touch. -
Clean the sides:
Look at the corner edges of the canvas. Ensure the painted lines connect seamlessly from the front face to the side face without gaps.
Display this piece on a shelf where the painted sides can be admired from different angles


Half-and-Half Block Background
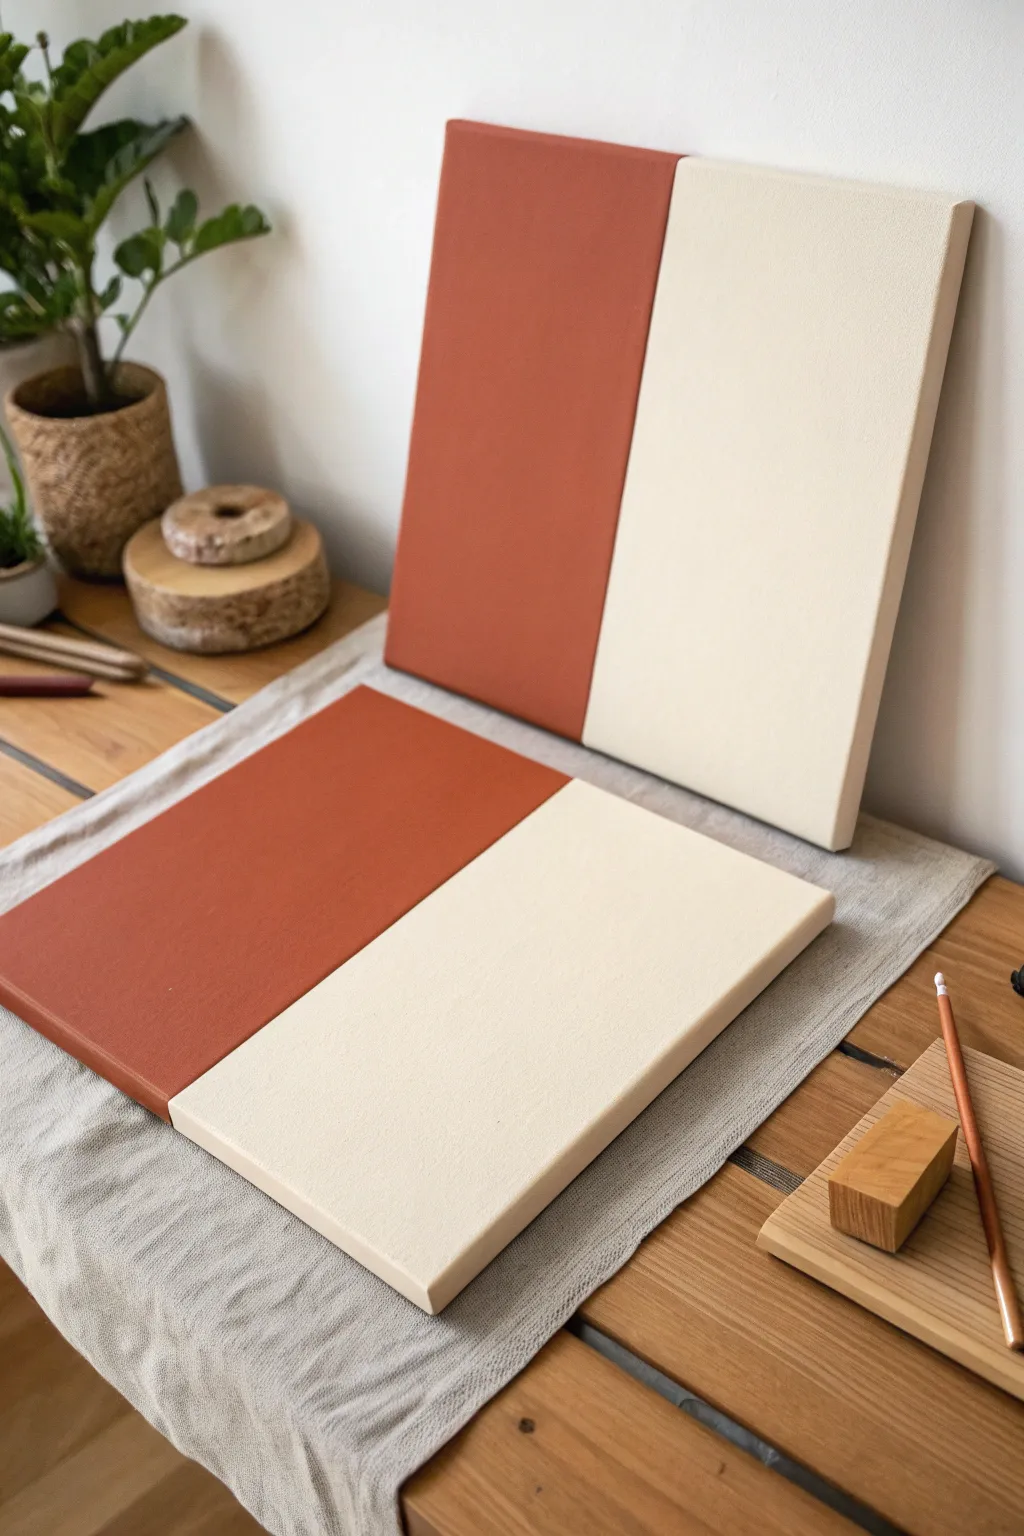
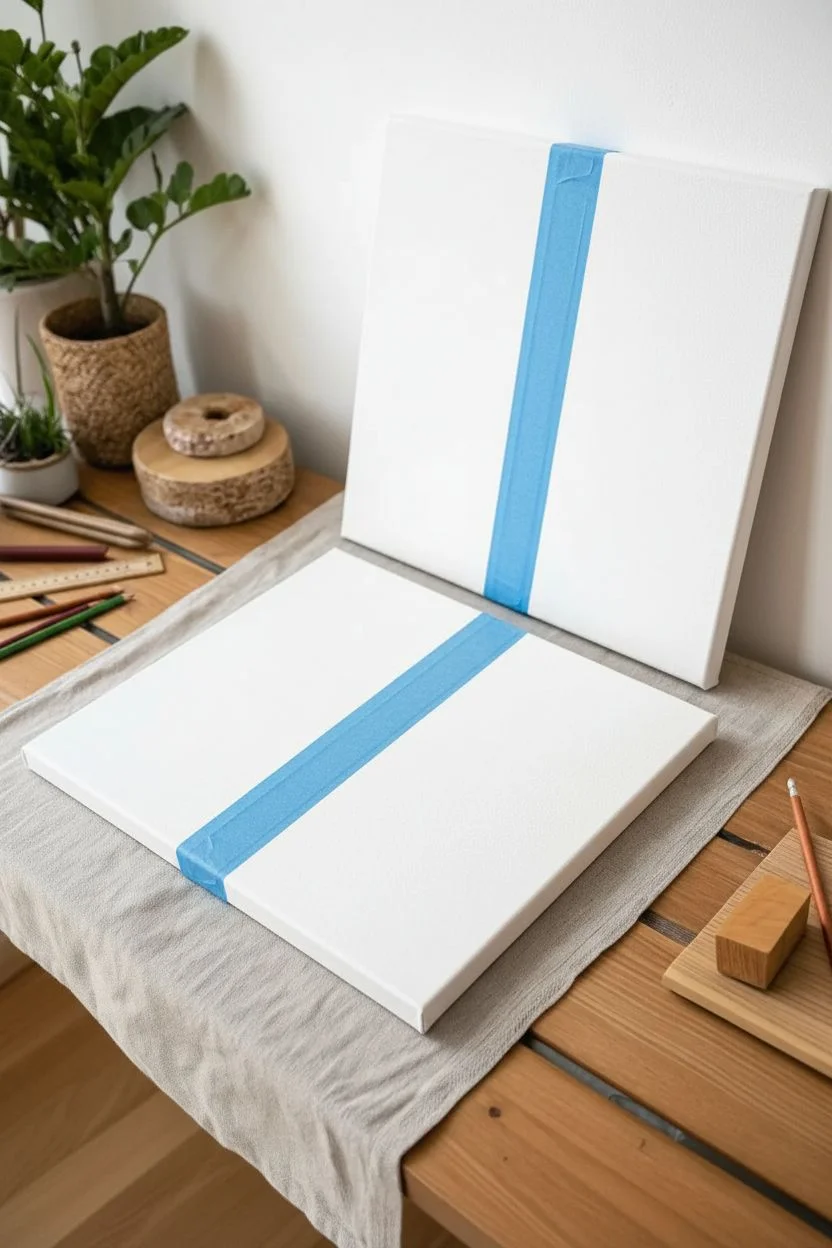
Embrace the minimalism of modern decor with this striking half-and-half block painting project. The warm, earthy terracotta paired with a soft cream creates a balanced and serene visual that looks sophisticated in any space.
How-To Guide
Materials
- Two rectangular stretched canvases (approx. 11×14 inches)
- Acrylic paint: Terracotta or Burnt Sienna
- Acrylic paint: Cream or Titanium White mixed with a drop of Yellow Ochre
- Wide flat synthetic paintbrush (2-inch width)
- Painters tape (low tack)
- Ruler
- Pencil
- Palette or mixing plate
- Drop cloth or newspaper
Step 1: Preparation and Mapping
-
Prepare your workspace:
Lay down your drop cloth or newspaper on a flat, sturdy surface to protect your table from accidental drips. -
Clean the canvases:
Wipe the surface of both canvases gently with a clean, dry cloth to remove any dust or lint that might interfere with the paint adhesion. -
Measure the midpoint:
Using your ruler, measure the exact horizontal width of your first canvas to find the center point. -
Mark the division:
Make a very faint pencil mark at the top and bottom edge of the canvas to guide your tape placement. -
Tape the line:
Apply a strip of painter’s tape vertically across the canvas, connecting your top and bottom marks. Ensure the tape is straight. -
Seal the edge:
Press the edge of the tape down firmly with your fingernail or a credit card. This prevents paint from bleeding underneath and ensures a crisp line.
Step 2: Painting the Terracotta Side
-
Mix your colors:
Squeeze out a generous amount of your terracotta acrylic paint onto the palette. Determine which side of the tape will be the dark side. -
Apply the first coat:
Using the wide flat brush, paint the left section of the canvas with smooth, vertical strokes. Start on the tape and brush outward to avoid forcing paint under the edge. -
Paint the sides:
Don’t forget to paint the outer side edge of the canvas for a professional, gallery-wrapped finish. -
Let it dry:
Allow the first coat to dry to the touch, usually about 20 minutes depending on your room’s humidity. -
Apply a second coat:
Apply a second layer of terracotta paint to ensure solid, opaque coverage without streaks. I usually find two coats act as the sweet spot for this type of acrylic.
Bleeding Lines?
If paint bleeds under the tape, wait for it to dry completely. Then, use a small angled brush and the opposing color to carefully touch up the line
Step 3: Painting the Cream Side
-
Wait for full dryness:
Ensure the terracotta side is completely 100% dry before proceeding. Impatience here can ruin the crisp line. -
Remove and re-tape:
Carefully peel off the initial tape. Now, apply a new strip of tape precisely over the edge of the dry terracotta paint to protect it. -
Mix the cream tone:
Mix your white with a tiny touch of yellow ochre or brown to get a warm cream shade. -
Paint the light section:
Apply the cream paint to the remaining white side of the canvas, using the same vertical stroke technique. -
Cover the edges:
Remember to paint the right-hand side edge of the canvas as well. -
Second coat:
Apply a second coat of cream paint once the first is dry for a smooth, uniform texture. -
The final reveal:
While the paint is still slightly damp, carefully peel back the tape at a 45-degree angle to reveal your perfectly straight line.
Secret Sealer Trick
Before painting the color, paint over the tape edge with clear matte medium or base color. This seals the tape gaps so your colored line stays razor sharp
Once dry, display these leaning on a shelf or mounted on the wall for an instant modern art upgrade


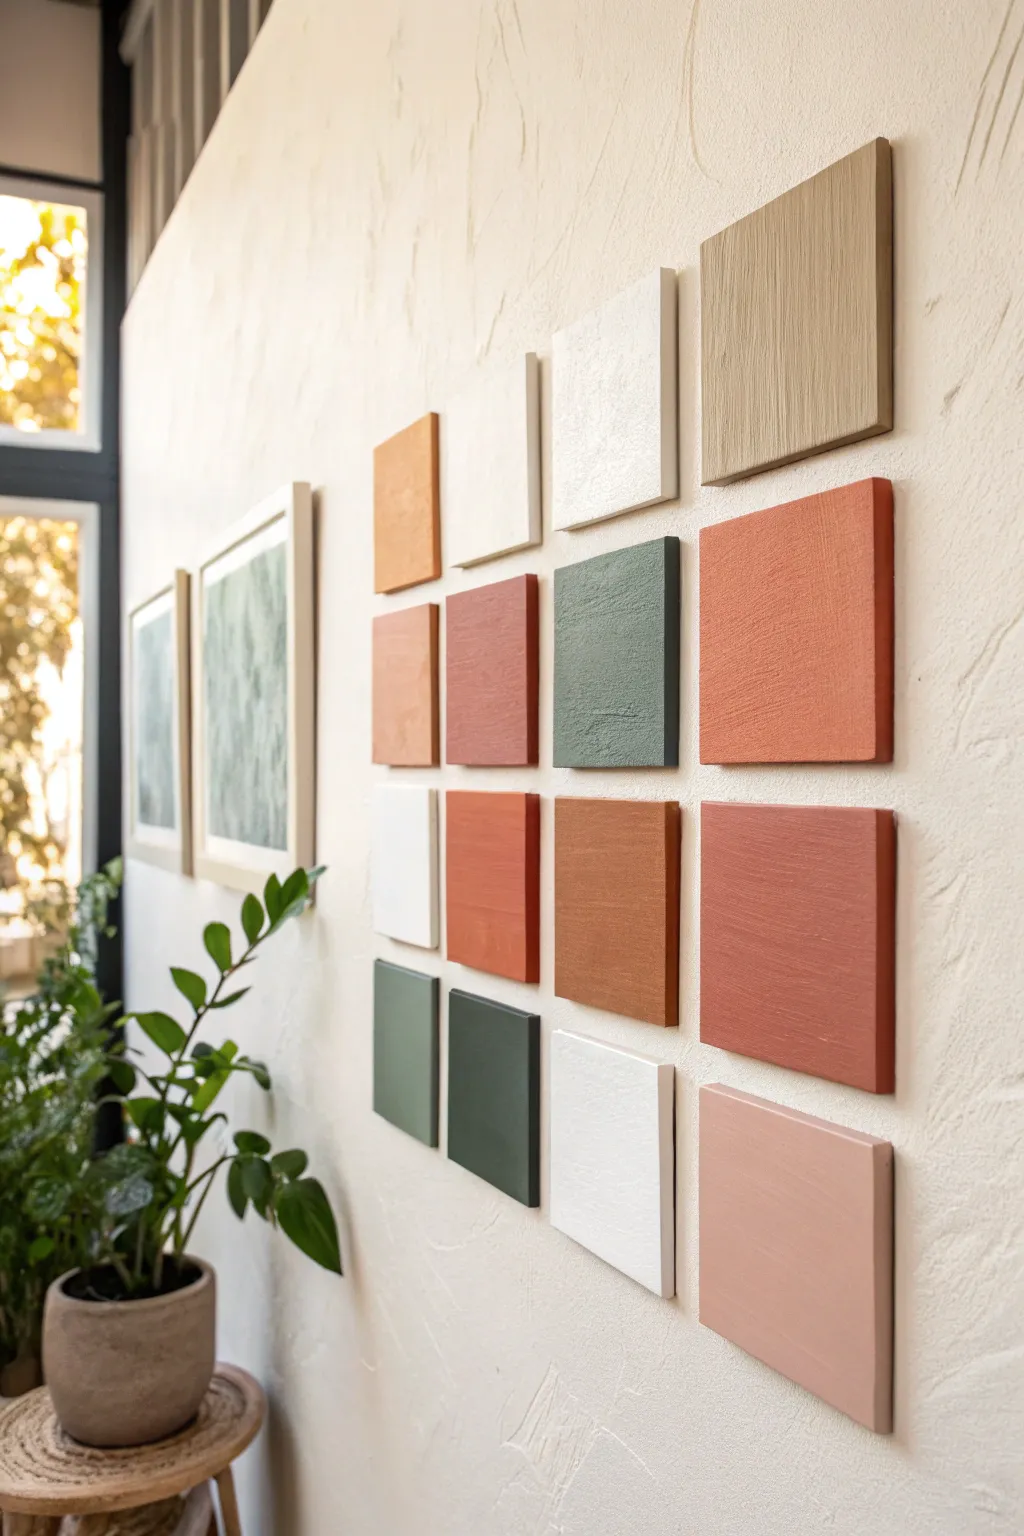
Mini Block Canvas Grid Gallery Set

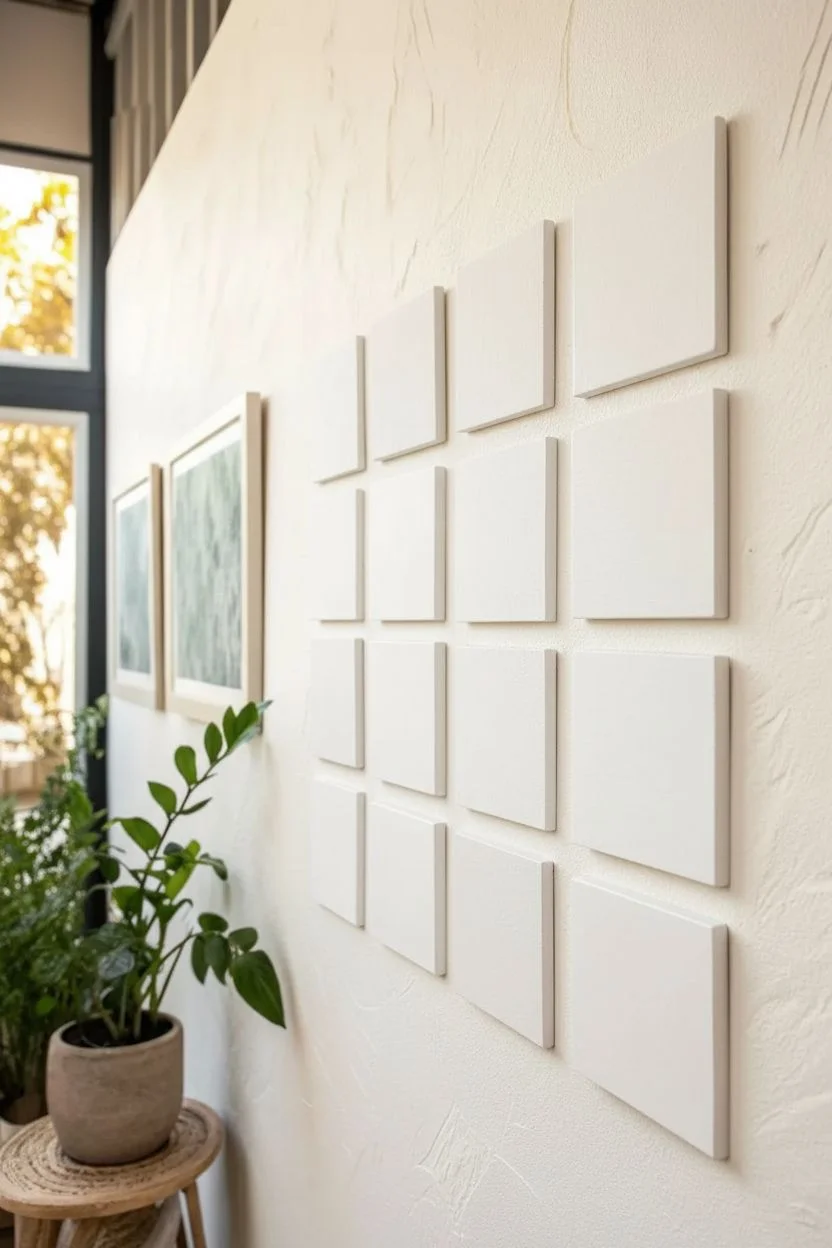
Transform a blank wall into a textured, geometric feature with this minimalist grid gallery. Using small wood blocks or mini canvases painted in a cohesive earthy palette, you can create a modern art installation that feels both structured and organic.
How-To Guide
Materials
- 16 solid wood blocks (approx. 4×4 inches) or mini deep-edge canvases
- Fine-grit sandpaper (220-grit)
- Tack cloth
- Acrylic craft paints in an earth-tone palette (terracotta, sage green, dark olive, beige, cream, mustard, warm brown)
- Flat synthetic paintbrushes (1-inch width)
- White gesso (optional but recommended for raw wood)
- Removable adhesive strips or double-sided mounting tape
- Ruler or tape measure
- Painter’s tape or a spacer jig
- Spirit level
- Pencil
Step 1: Preparation & Planning
-
Surface Prep:
If you are using raw wood blocks, lightly sand all sides and edges with 220-grit sandpaper to remove any rough splinters. -
Clean Dust:
Wipe down each block with a tack cloth to ensure the surface is completely free of dust, which guarantees a smooth paint application. -
Prime the Surface:
Apply a thin coat of white gesso to the face and sides of each block. This seals the wood and ensures your colors pop without soaking into the subtle grain. -
Plan Your Palette:
Lay out your blocks on a table. Experiment with color groupings before painting to ensure a balanced mix of lights, darks, and warm tones.
Step 2: Painting the Blocks
-
Mix Custom Shades:
Use a palette to mix intermediate shades. For example, lighten your terracotta with a drop of cream, or deepen your olive green with a touch of brown for variety. -
Paint the Edges:
Start by painting the four sides of the first block. Painting edges first allows you to hold the block by the unpainted face or back without smudging your work. -
Coat the Face:
Once the sides are tacky or dry, paint the front face of the block. Use long, unidirectional strokes to minimize brush marks, or small multidirectional strokes if you prefer a textured look. -
Repeat Process:
Continue through your remaining 15 blocks, cleaning your brush thoroughly between dramatic color changes. -
Check Coverage:
Inspect the first blocks you painted. If the wood grain or gesso is showing through, apply a second coat for opaque, solid color saturation. -
Texture Option:
For the tactile look seen in the photo, you can dab a nearly-dry brush over the wet paint to create a slight stippled texture. -
Full Cure:
Allow all blocks to dry completely for at least 24 hours. The paint needs to be fully cured so it doesn’t stick to the wall or attract dust.
Pro Tip: Consistent Texture
Mix a tiny amount of baking soda into your acrylic paint. This creates a matte, chalky texture that hides wood grain and mimics expensive ceramic tiles.
Step 3: Installation
-
Map the Grid:
Decide on the layout on your floor first. A 4×4 grid is classic, but arranging colors so that similar tones don’t touch creates the best visual interest. -
Mark the Wall:
Use a pencil and a spirit level to lightly mark the position of the top-left corner block on your wall. -
Apply Adhesive:
Apply removable adhesive strips to the back of each block, following the manufacturer’s weight guidelines. -
Place First Block:
Press the first block firmly onto your marked spot. Use your level on top of the block to ensure it is perfectly straight. -
Create a Spacer:
Cut a piece of cardboard or scrap wood to fit exactly the width of the gap you want between blocks (about 1-1.5 inches). -
Install the Row:
Use your spacer to position the second block next to the first. Check level again, then press firmly. Repeat to complete the top row. -
Complete the Grid:
Work your way down, row by row, using the spacer both vertically and horizontally to maintain a perfectly consistent grid pattern. -
Final Clean Up:
Once all blocks are secure, erase any visible pencil marks on the wall.
Troubleshooting: Uneven Gaps
If your grid starts drifting askew, stop immediately. Use a laser level to project a grid on the wall, rather than relying solely on a handheld spacer.
Step back and admire how a simple collection of squares creates a sophisticated and custom architectural statement in your room


Have a question or want to share your own experience? I'd love to hear from you in the comments below!