
If you’ve ever drawn a head that looked fine straight-on but fell apart the second you turned it, you’re not alone. These head ideas drawing exercises are the exact kind of structure-first practice I use in my studio to make heads feel solid from any angle.
Profile Head With Cut Side Plane
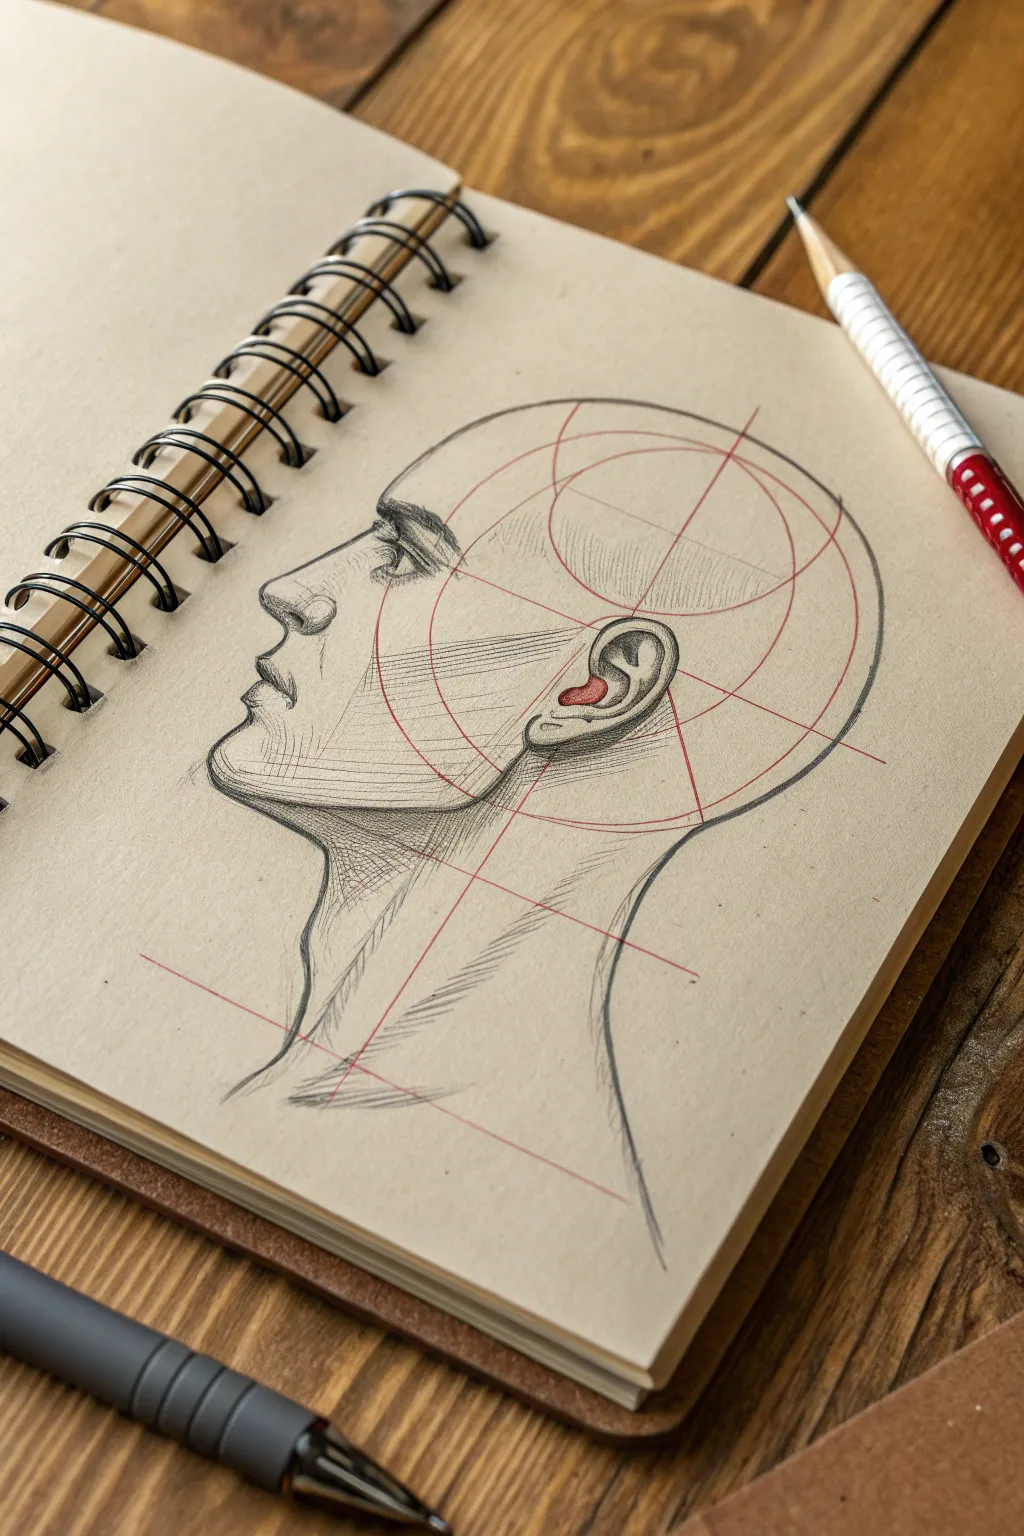
This classic academic study breaks down the human profile into planar geometry before refining it into a realistic portrait. Using toned paper allows for sharp contrast, while the red construction lines add a technical, architectural aesthetic to the finished piece.
Step-by-Step Tutorial
Materials
- Spiral-bound sketchbook with tan or grey toned paper
- Soft graphite pencil (2B or 4B)
- hard graphite pencil (H or HB)
- Red colored pencil or fine liner pen
- White charcoal pencil or gel pen (optional for highlights)
- Eraser
- Ruler (optional)
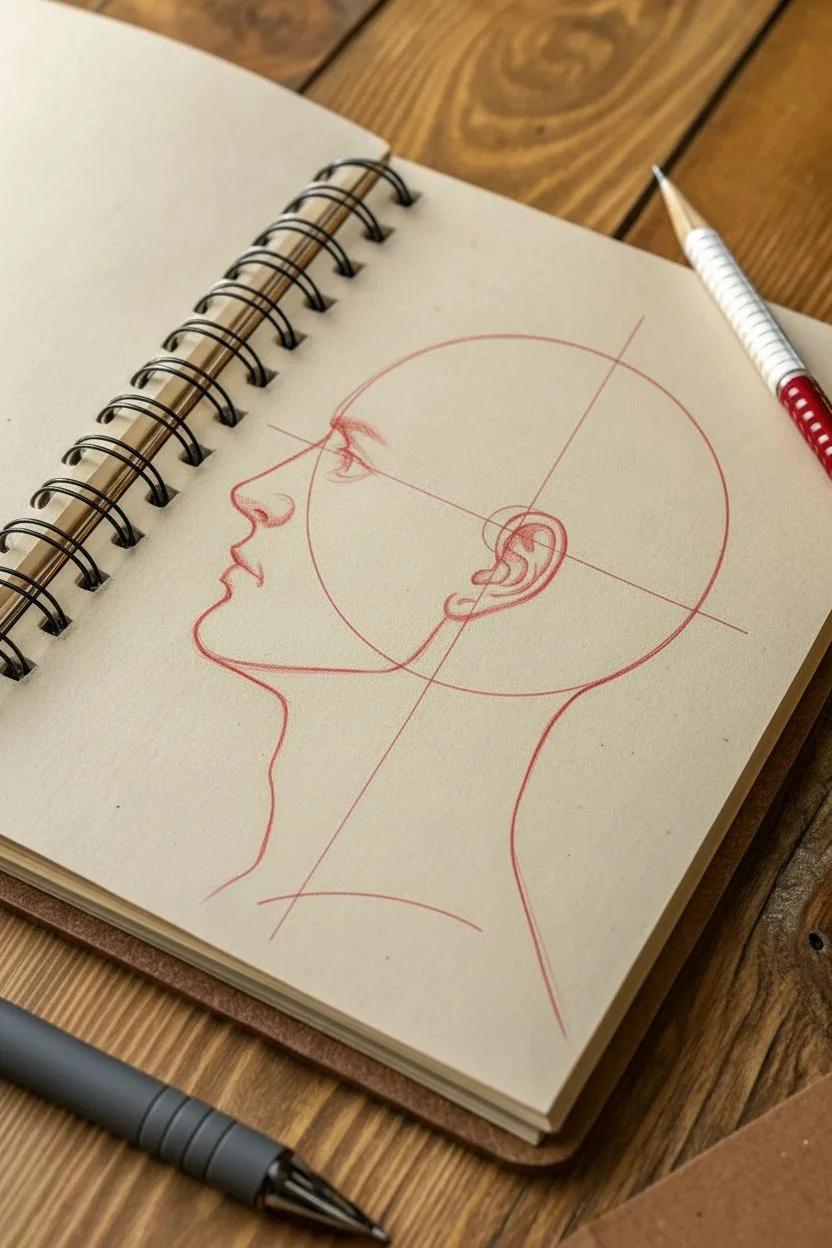
Step 1: The Constructive Framework
-
Establish the Cranium:
Begin with your red pencil. Draw a large, clean circle in the center of the page to represent the main mass of the cranial ball. Keep your grip loose and sketch lightly. -
Define the Jawline:
From the center of your circle, drop a vertical red line downwards. Sketch a curved jawline connecting from the bottom of this drop back up towards the rear of the circle. -
Mark the Face Planes:
Draw vertical and horizontal red lines intersecting through the ear area. These crosshairs help position the ear relative to the brow ridge and nose. -
The Side Plane Ellipse:
Draw a large, wide red oval that encompasses the ear and the side of the head. This represents the flat ‘side plane’ of the skull, distinguishing it from the rounder front and back. -
Rhythmic Guidelines:
Sweep a curved red line from the ear area down through the neck to indicate the sternocleidomastoid muscle flow. Add a few more structural lines radiating from the ear to the chin and forehead.
Proportions Off?
If the face looks scrunched, check the ear placement. The ear attaches to the head much further back than most beginners think—roughly the halfway point of the skull’s depth.
Step 2: Drafting the Profile
-
Brow and Nose Bridge:
Switch to your harder graphite pencil (HB). Lightly sketch the indentation of the nose bridge just below the brow ridge. Pay attention to the angle of the forehead. -
Nose and Lips:
Project the nose outward, keeping the tip distinct. Below it, sketch the upper and lower lips, remembering that the upper lip usually overhangs the lower one slightly in profile. -
Chin and Jaw Definition:
Carve out the chin shape, ensuring it juts out slightly before curving back into the jawline. Connect this firmly to the neck. -
The Ear Outline:
Place the ear within the intersection of your red construction lines. It should sit roughly between the height of the brow and the base of the nose.
Add Highlights
Use a white charcoal pencil or gel pen to add small highlights on the nose tip, lower lip, and ear rim. On toned paper, this instantly creates a 3D effect.
Step 3: Refining and Shading
-
Deepening Values:
Switch to your softer 2B or 4B pencil. Go over the profile outline (forehead, nose, lips, chin) with a confident, darker stroke to finalize the silhouette. -
Detailing the Eye:
Draw the eye in profile. Instead of an almond shape, it should look like a triangular wedge from this angle. Darken the eyebrow with short, hair-like strokes. -
Planar Shading:
Apply hatching strokes to the side of the face, following the direction of the jaw muscle. I find that parallel hatching lines create a cleaner, classical look than smudging. -
Neck Anatomy:
Define the Adam’s apple and the large neck muscle. Shade the hollow of the throat and the area under the jaw to create depth. -
Ear Complexity:
Darken the complex curves of the ear cartilage. For a pop of interest, fill the inner concha (the deep bowl of the ear) with red pencil to echo the construction lines. -
Hair Suggestion:
Don’t draw every strand. Use broad, sweeping strokes to suggest the hairline and the volume of hair at the temple appearing closely cropped. -
Final Integration:
Review the drawing. Strengthen the darkest darks, particularly under the chin and in the corner of the eye, to make the portrait pop off the toned paper.
You now have a striking anatomical study that balances technical precision with artistic flair


Classic 3/4 Turn Construction
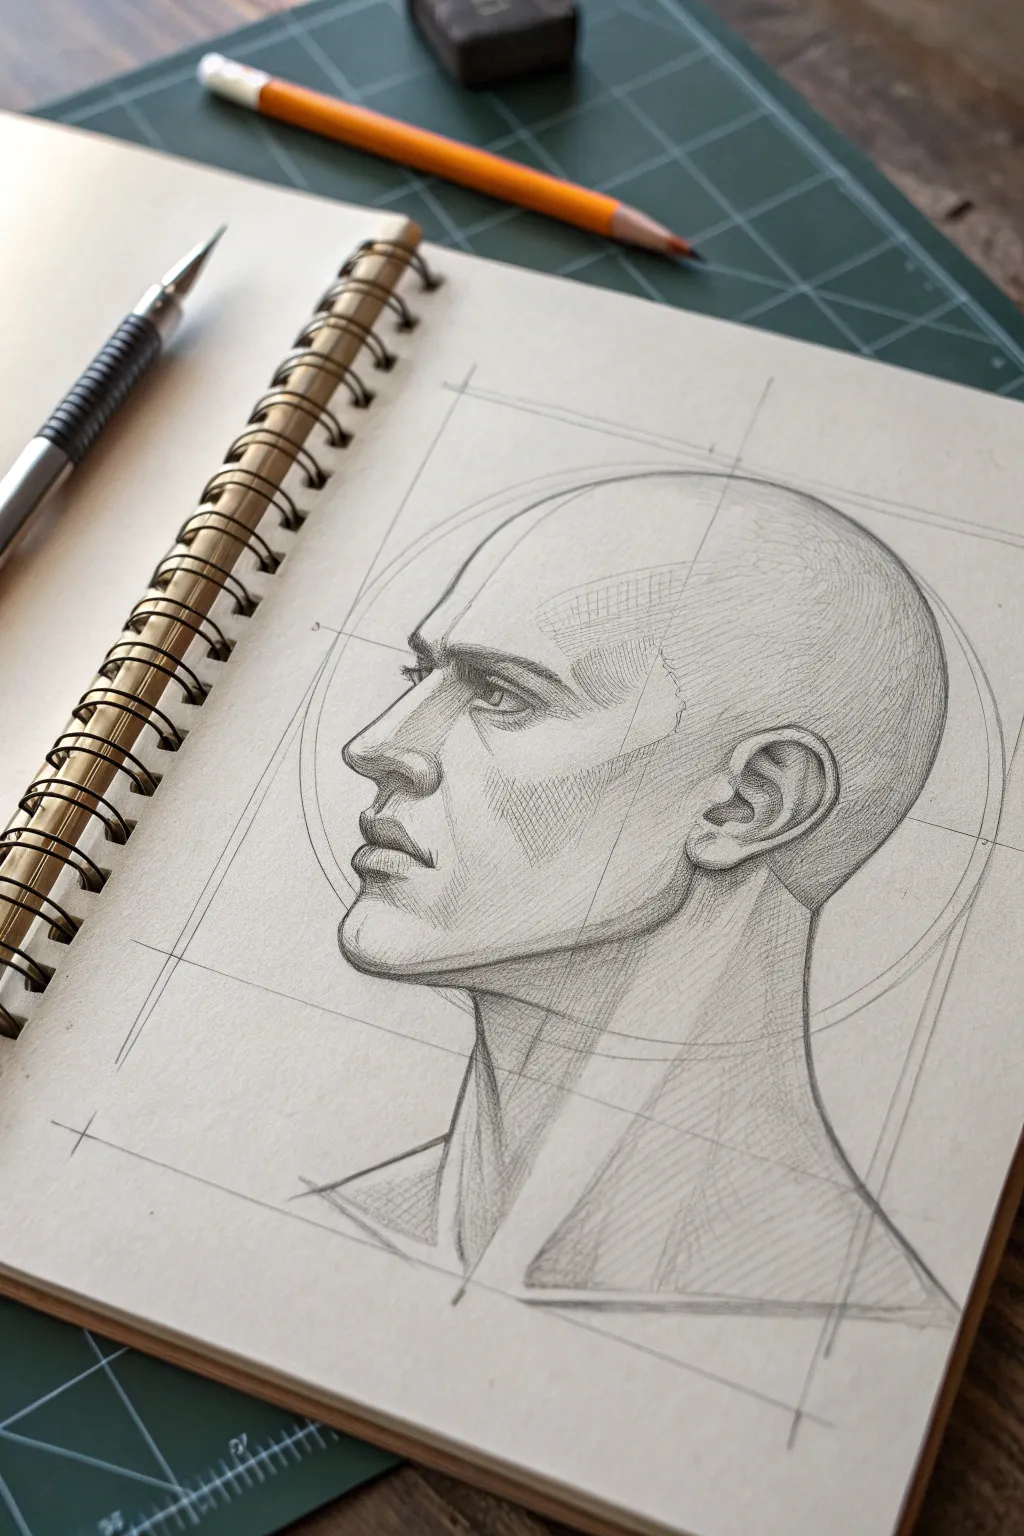

Master the fundamentals of portrait drawing with this structured study of a male profile. By combining geometric guidelines with careful anatomical shading, you will turn a simple circle and square into a realistic, dimensional head.
Step-by-Step
Materials
- Spiral-bound sketchbook (smooth or vellum surface)
- Graphite pencil (HB for lay-in, 2B or 4B for shading)
- Mechanical pencil (optional, for fine details)
- Kneaded eraser
- Ruler
Step 1: Setting the Foundation
-
Establish the bounding box:
Begin by lightly drawing a large square in the center of your page to define the overall height and width of the head. Don’t press too hard; these are guide lines. -
Draw the cranial mass:
Inside the upper portion of your square, sketch a large circle. This represents the cranium. It should fill about two-thirds of the square’s width. -
Mark the center lines:
Draw intersecting vertical and horizontal lines through the center of your circle. The horizontal line will eventually become the brow line. -
Define face planes:
Drop a vertical line down from the front edge of the circle to define the plane of the face. Mark horizontal tick marks for the nose base (halfway between brow and chin) and the chin itself at the bottom of the square. -
Construct the jaw:
Sketch the jawline starting from the center of the circle (where the ear will go), sloping down and forward to meet the chin mark.
Step 2: Adding Features and Anatomy
-
Place the ear:
Position the ear in the lower back quadrant of your initial circle. Align the top of the ear with the brow line and the bottom with the base of the nose. -
Draft the nose profile:
Extend the nose bridge out from the brow divot. Give the nose a strong, angular shape, ensuring the tip protrudes past the vertical face line. -
Sketch the eye socket:
Draw a recessed shape for the eye socket beneath the brow ridge. Place the eyeball inside as a sphere, partially covered by the eyelids, viewed from the side. -
Detail the mouth and lips:
Draw the lips halfway between the nose and chin. Remember that in profile, the upper lip usually projects slightly further forward than the lower lip. -
Outline the neck:
Extend lines downwards for the neck, depicting the sternocleidomastoid muscle flowing from behind the ear toward the pit of the neck.
Keep it Sharp
For those crisp, clean hatching lines, sharpen your pencil often. A dull point creates fuzzy, smudged shading that kills the technical look.
Step 3: Refining and Shading
-
Strengthen contour lines:
Switch to a slightly softer pencil or press firmer to darken the final outline of the profile, separating the figure from the construction grid. -
Map shadow shapes:
Identify the planes that turn away from the light source. lightly outline the shadow areas under the brow, nose, lower lip, and jaw. -
Apply initial hatching:
Using parallel diagonal strokes (hatching), fill in the shadow shapes. Keep the lines consistent and relatively light for this first pass. -
Cross-hatching for depth:
Go back over the darkest areas—like the pupil, nostril, and deep neck shadow—with distinct cross-hatching strokes running perpendicular to your first layer. -
Model the curved forms:
Add curved hatching lines around the skull and cheekbone to suggest roundness. I find following the form with my pencil strokes really helps ‘sculpt’ the surface. -
Add subtle texture:
Use short, sharp strokes near the brow and temple to suggest tiny surface variations or stubble. -
Final clean up:
Do not erase your initial construction lines completely; leaving them visible adds to the academic, sketchbook aesthetic. Just lighten them slightly with a kneaded eraser if they distract from the features.
Add Character
Change the feel by altering the jaw shape or brow ridge. A heavier brow and square jaw create a rugged look; softer curves feel more youthful.
Step back and admire how structured guidelines have transformed into a convincing human likeness


Looking Up Angle (Worm’s-Eye)
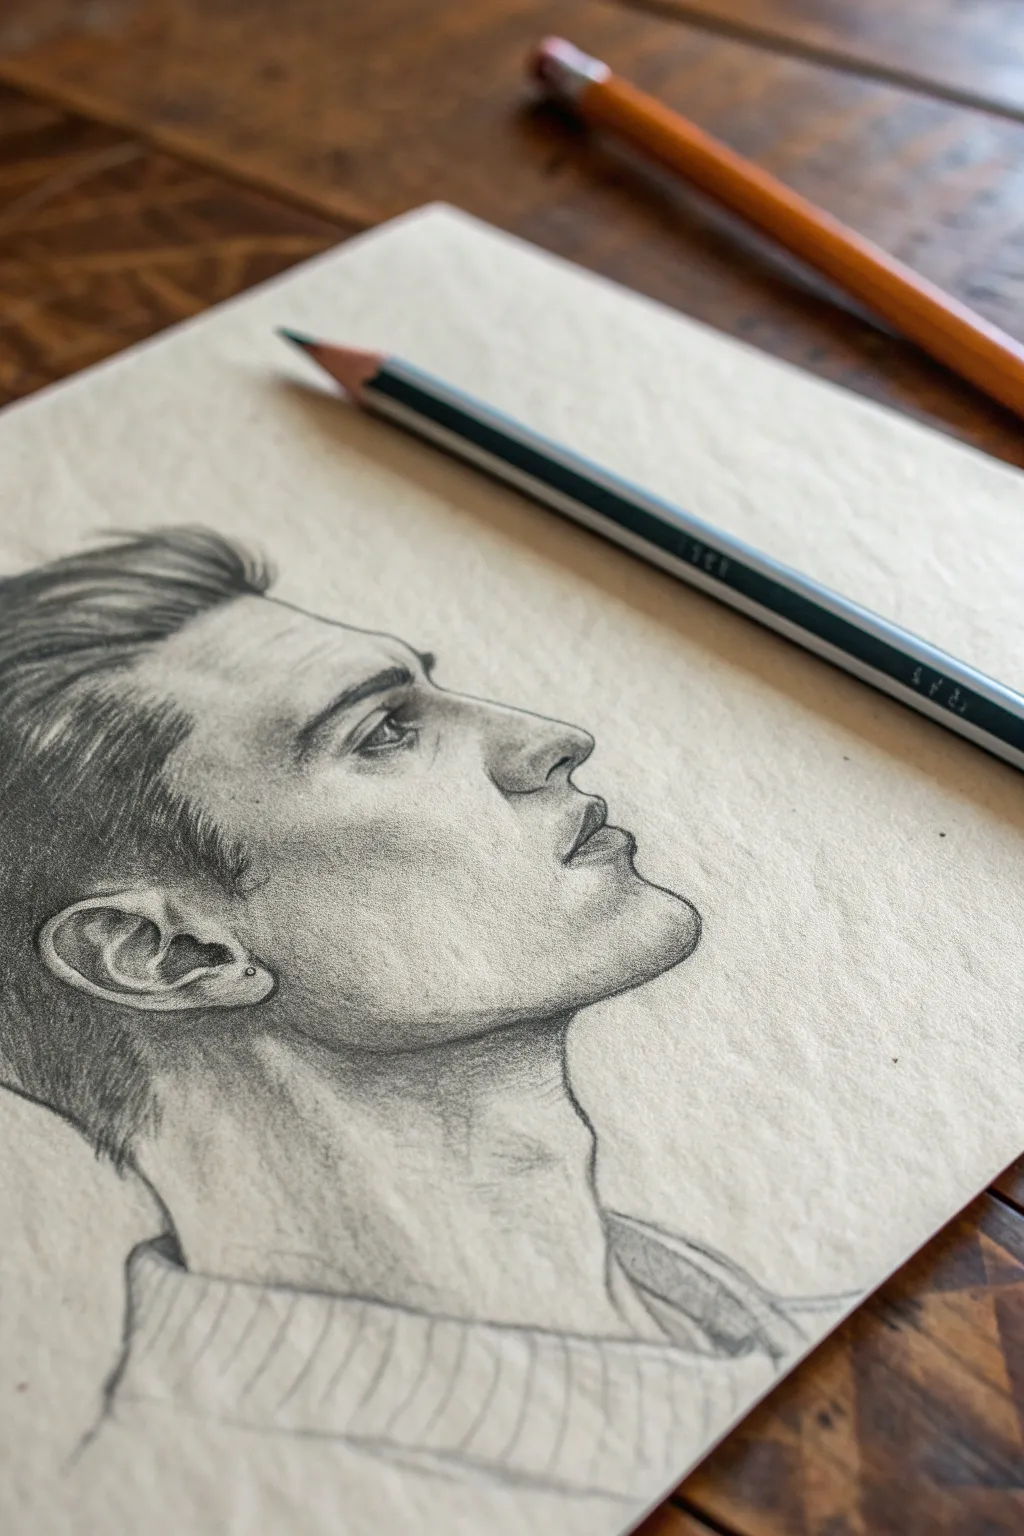
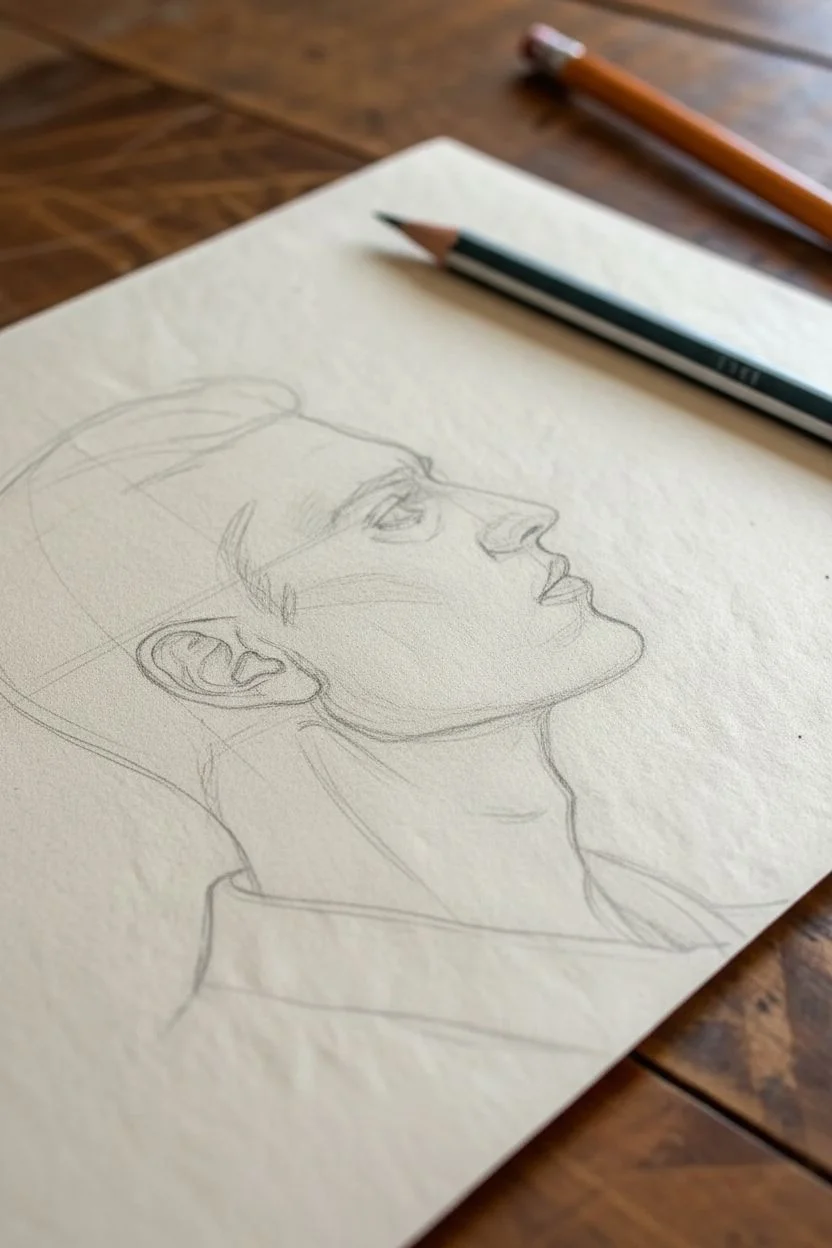
Capture the dramatic perspective of a worm’s-eye view with this detailed pencil portrait. This project focuses on mastering the subtle anatomy of the neck and jawline while creating a realistic sense of depth through shading.
Step-by-Step
Materials
- Quality drawing paper (medium grain/texture)
- Graphite pencils (HB, 2B, 4B, 6B)
- Mechanical pencil (0.5mm, HB) for fine details
- Kneaded eraser
- Blending stump or tortillon
- Standard vinyl eraser for highlights
- Pencil sharpener
Step 1: Establishing the Structure
-
Mark loose boundaries:
Begin with an HB pencil, using very light pressure. Mark the top of the head and the bottom of the neck to establish the overall height of your composition on the page. -
Block in the head shape:
Sketch a large, tilted oval for the cranium. Because the head is tilting back, the oval should feel leaned back, not upright. -
Define the jawline angle:
Draw a strong, diagonal line extending from under the ear position upward towards the chin. This is crucial for the ‘looking up’ perspective; the chin should be higher than the back of the jaw. -
Place the facial features:
Lightly sketch a curved guideline for the eye level and another for the nose. Remember, in this angle, the space between the nose and lip will appear foreshortened.
Fixing Flat Features
If facial features look flat, your foreshortening might be off. Remember that from below, the bottom planes of the nose and chin are more visible than usual.
Step 2: Refining the Profile
-
Draw the forehead and nose bridge:
Outline the forehead, dipping in slightly at the brow bone. Draw the nose bridge extending outward, ensuring the tip points upward to match the angle. -
Detail the nose and lips:
Sketch the nostril shape, which is more visible from this low angle. Draw the lips, noting that the upper lip may slightly obscure the top of the lower lip due to the perspective. -
Carve out the chin and jaw:
Firm up the line under the chin. Connect it smoothly to the throat, emphasizing the Adam’s apple which becomes prominent when the head tilts back. -
Sketch the ear:
Place the ear low on the head, aligning roughly with the nose and eye. Sketch the intricate folds of the cartilage, keeping the lines relatively light for now.
Step 3: Shading and Texture
-
Lay down base tones:
Switch to a 2B pencil. Gently shade the side of the face, neck, and behind the ear. Use the side of the lead for broader, softer strokes. -
Define the hair flow:
Using a sharp 4B pencil, draw the hair in clumps. Start from the roots at the forehead and sweep backwards. Use quick, tapered strokes to mimic individual strands. -
Deepen the shadows:
I like to use a 6B pencil here to punch up the contrast. Darken the area under the jawline, inside the ear, and the darkest parts of the hair to create volume. -
Model the facial structure:
Add shading around the eye socket, the side of the nose, and the cheekbone. This defines the bone structure beneath the skin. -
Blend for smoothness:
Use a blending stump to soften the graphite on the skin, particularly on the neck and cheek. Be careful not to over-blend; you want to keep some texture visible.
Level Up: Dramatic Lighting
Increase the impact by darkening the background behind the illuminated side of the face. This high-contrast technique makes the profile pop forward.
Step 4: Final Details
-
Add the stubble:
With a sharp mechanical pencil or HB, create tiny stippling dots or very short dashes along the jawline and upper lip to suggest light stubble texture. -
Detail the eye:
Sharpen the lines around the eyelid and the pupil. Leave a tiny speck of white paper in the eye for a catchlight, which brings the face to life. -
Sketch the sweater collar:
Draw the ribbed texture of the turtleneck collar. Use curved parallel lines that wrap around the neck form to emphasize the cylindrical shape of the neck. -
Lift highlights:
Take your kneaded eraser and gently dab or stroke areas where the light hits: the bridge of the nose, the cheekbone, and the top of the ear to create a ‘glow’ effect. -
Final clean up:
Erase any stray construction lines and define final edges where needed. Check the contrast balance between the dark hair and the shadowed neck.
Step back and admire how the angle creates a sense of hope and contemplation in your finished drawing


Planes of the Head Map
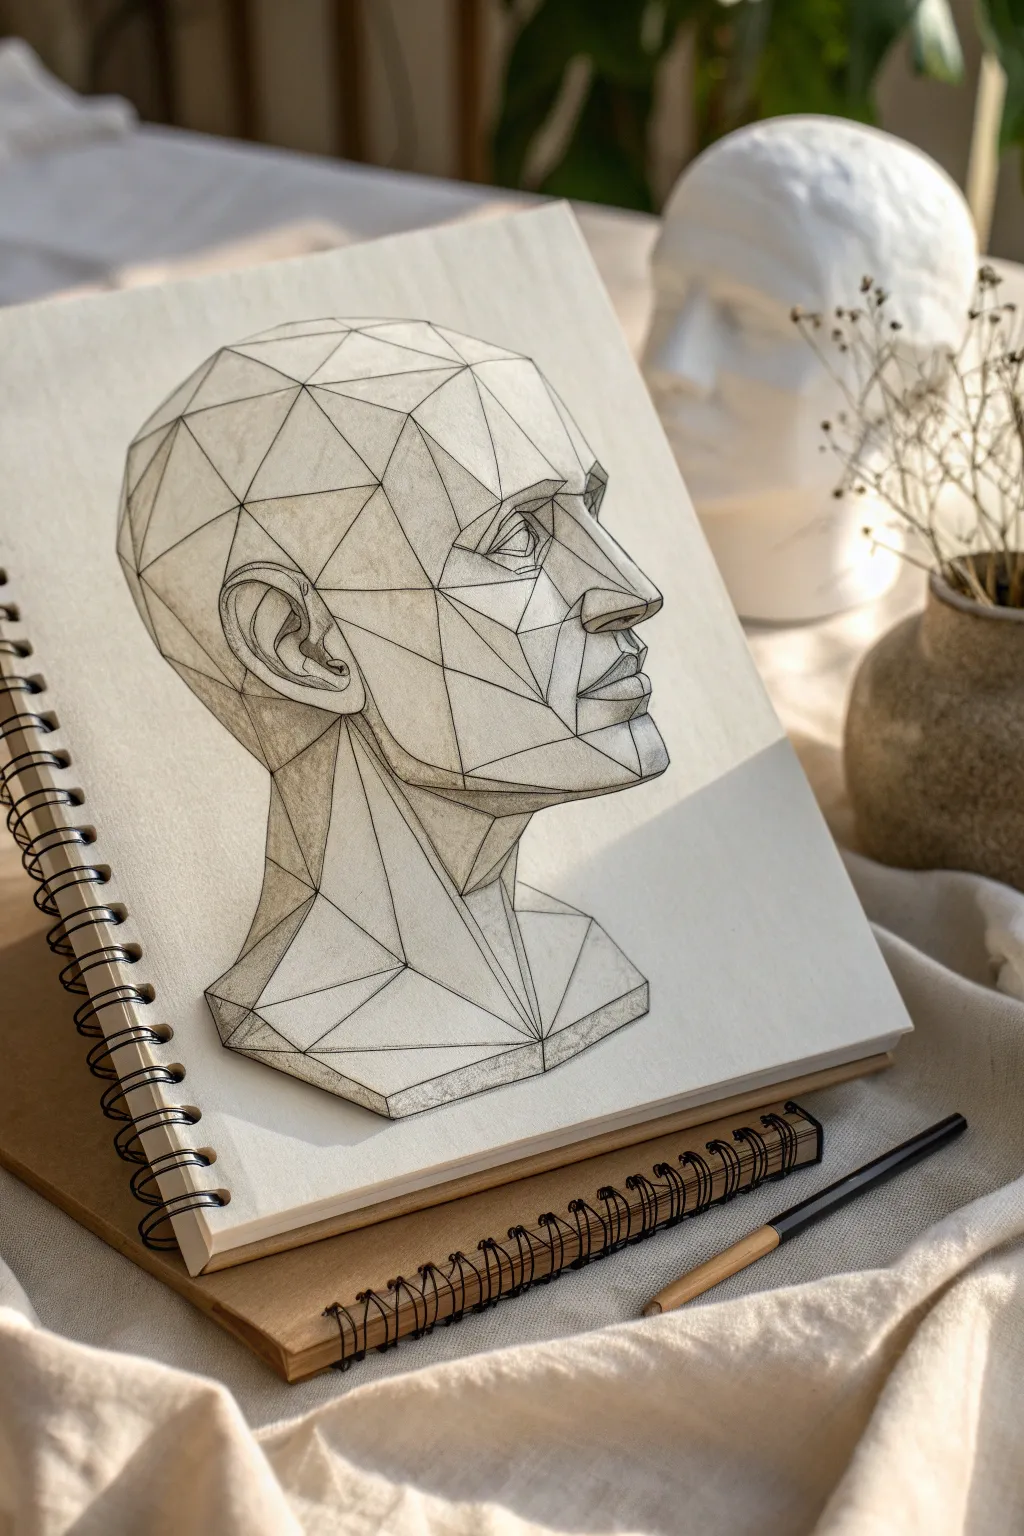
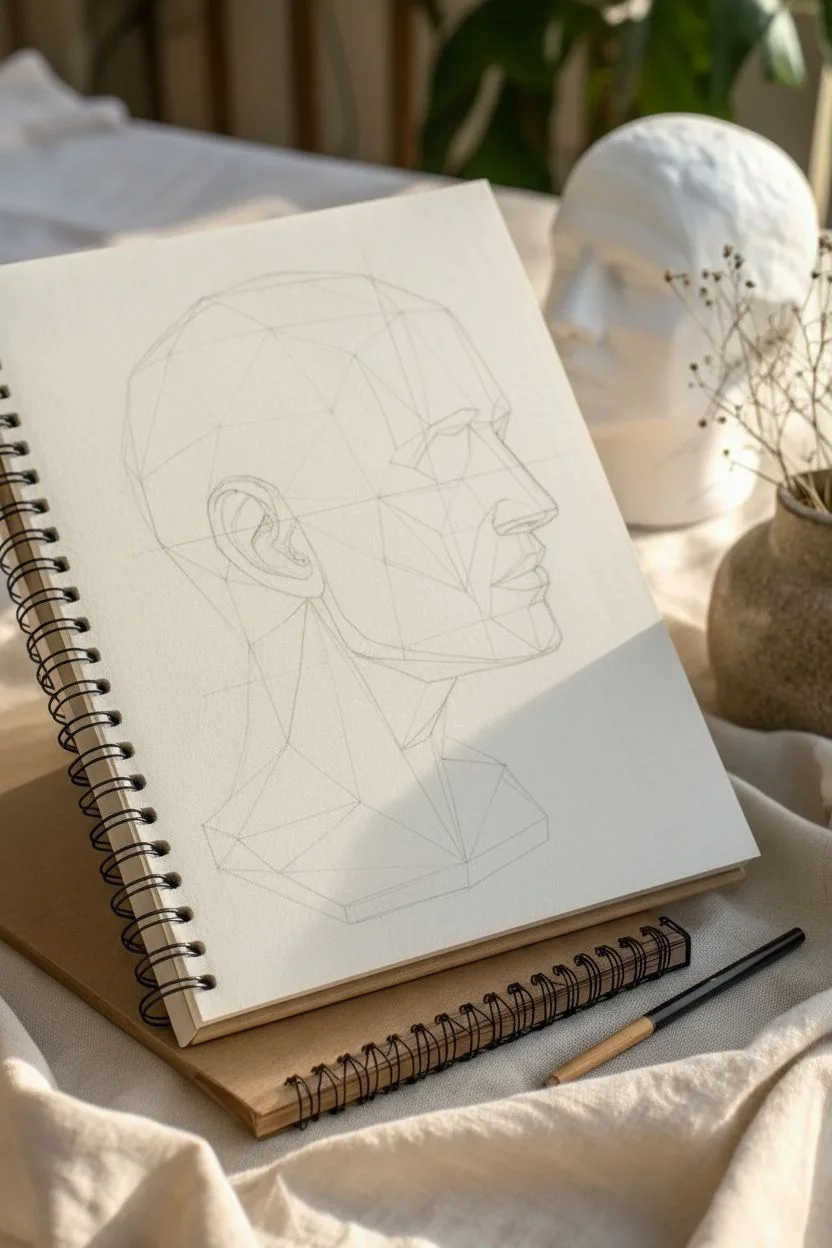
This project tackles the classic artistic exercise of drawing the planar head, inspired by tools like the Asaro head, to understand facial structure through geometry. You will create a crisp, dimensional study that breaks down complex organic forms into simpler, manageable facets and planes.
Step-by-Step Guide
Materials
- Spiral-bound sketchbook (medium tooth paper)
- H or HB graphite pencil (for initial layout)
- 2B or 4B graphite pencil (for shading)
- Kneaded eraser
- Ruler or straight edge (optional)
- Blending stump or tortillon
- Reference image of a planar head model
Step 1: Constructing the Core Forms
-
Establish the envelope:
Begin by lightly sketching the overall shape of the head using an H pencil. Think of a modified egg shape for the cranial mass and a jawline extending downwards. Keep these lines extremely faint as they are merely guides. -
Define the orientation:
Draw a vertical centerline down the front of the face to establish the direction the head is looking. Add a horizontal eye line halfway down the head. This specific study shows a 3/4 profile view, so place your centerline slightly to the right. -
Block in the major masses:
Using straight, angular lines, block in the simplified shape of the cranium, the cheekbones, and the jaw. Avoid curves at this stage; think like a sculptor hacking away at a block of stone.
Step 2: Subdividing the Planes
-
Map the forehead:
Divide the forehead into three primary planes: a central front facing plane and two receding side planes. Connect these points to the hairline and the brow ridge with clean, straight lines. -
Construct the noise bridge:
Draw the nose as a simple prism first. Create the top plane relative to the brow, then the side plane dropping down to the cheek. Keep the edges sharp. -
Build the eye sockets:
Instead of drawing almond-shaped eyes, draw the angular cavities of the eye socket. Visualize the planes that recede into the head under the brow bone and the planes that angle outward for the eyelids. -
Chisel the cheekbones:
Identify the zygomatic arch. Draw a distinct line separating the front face of the cheekbone from the side plane of the head. This is crucial for the 3/4 perspective. -
Form the mouth and chin:
Construct the muzzle area as a protruding volume. Break the lips down into five or six distinct planes rather than soft curves. Block in the chin as a sturdy, geometric box at the bottom. -
Add ear structure:
Place the ear between the brow line and the base of the nose line. Simplify the complex curves of the ear (helix and anti-helix) into a series of smaller, straight lines and folds. -
Define the neck connection:
Draw the sternocleidomastoid muscle as a prominent diagonal band connecting the ear area to the pit of the neck. Add the triangular cylinder of the neck base to support the head.
Geometry Check
If the face looks ‘flat,’ check your center line. It must follow the form of the face (in and out), not just be a straight line drawn over top.
Step 3: Shading and Definition
-
Clean up the linework:
Switch to a slightly sharper pencil or press a bit firmer to darken the final structural lines. Erase any distracting construction guidelines that don’t serve the geometric aesthetic. -
Identify the light source:
Decide on a light direction; in this example, the light comes from the upper left. This means all right-facing and downward-facing planes will be in shadow. -
Apply core shadows:
Using a 2B pencil, lightly hatch the planes that are facing away from the light. Focus on the side of the head, the neck under the jaw, and the eye sockets. -
Deepen the contrast:
I like to go back in and darken the deepest crevices, such as the nostrils, the corner of the mouth, and inside the ear, to make the geometry pop. -
Refine the transitions:
Unlike organic portraiture, keep your shading edges relatively hard. If you use a stump, blend within a specific plane, but stop sharply at the edge where the plane changes direction. -
Texture the drawing:
Add subtle vertical hatching or cross-hatching over the shaded areas to give the drawing a classical, academic texture. This unifies the surface. -
Ground the object:
Add a small cast shadow under the neck base to show the head is resting on a surface, giving it physical weight.
Clean Edges Matters
Keep your pencil sharp! The success of this style relies on crisp intersections between planes. A dull pencil will make the geometry look mushy.
Now you have a structured reference tool that will improve your understanding of anatomy for future portraits

PENCIL GUIDE
Understanding Pencil Grades from H to B
From first sketch to finished drawing — learn pencil grades, line control, and shading techniques.
Explore the Full Guide
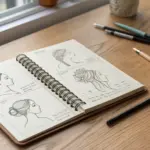
Jaw Shape Variations Sheet

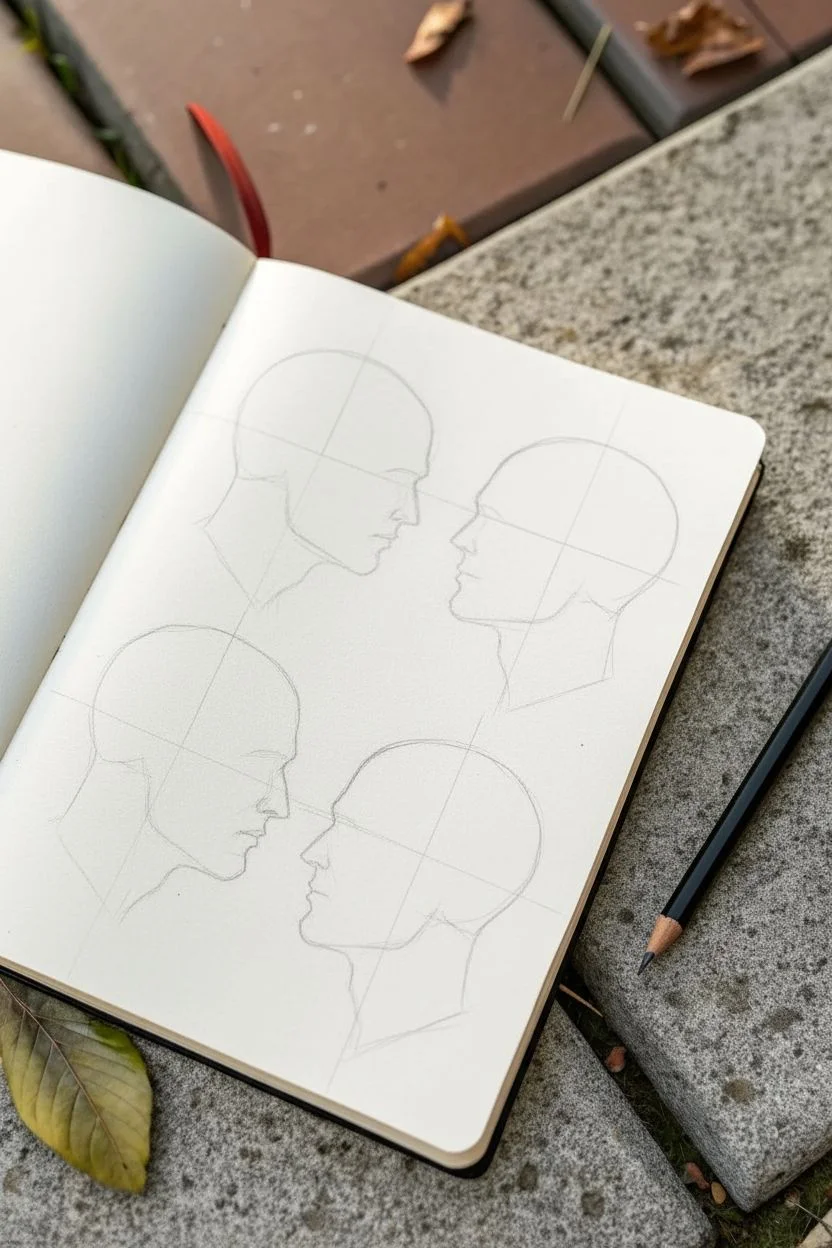
This project involves a focused anatomical study of four male heads, specifically exploring how different jawlines and profiles affect character appearance. Rendered in graphite on sketchbook paper, the style is clean, academic, and emphasizes form through subtle shading.
How-To Guide
Materials
- Sketchbook with cream or off-white paper (medium tooth)
- H or HB pencil for initial layout
- 2B or 4B pencil for shading and defining lines
- Kneadable eraser
- Manual pencil sharpener
Step 1: Planning the Layout
-
Visualizing the composition:
Visualize the page divided into four quadrants. You will be placing two heads facing right in the top and bottom left corners, and two heads facing left in the top and bottom right corners. -
Establishing the craniums:
Using your H pencil very lightly, draw four circles or slight ovals to represent the cranial mass for each head. Keep them roughly equal in size to maintain consistency across the study. -
Marking the face planes:
Sketch a vertical line extending down from the front of each circle to indicate where the face will be attached. Add a horizontal line across the center of the circle to mark the brow line.
Placement Issues?
If your features look misaligned, double-check the ear placement. The ear canal should sit roughly at the intersection of the jawline and the base of the skull.
Step 2: Drawing the Upper Left Profile
-
Defining the features:
This profile features a strong, heavy jaw. Sketch a prominent brow ridge and a nose with a slight hook. The chin should jut forward slightly. -
Structuring the jaw:
Draw the jawline starting from the ear area (placed slightly behind the center of the cranium) down to a square, heavy chin. The angle should be steep and masculine. -
Adding texture:
Switch to a slightly sharper point. Add fine, short strokes along the jaw and cheek area to suggest stubble or skin texture, creating a shadow beneath the cheekbone.
Mastering Hatching
Keep your wrist stiff and move your elbow to create straight, parallel hatching lines. Avoid ‘hooking’ the end of your pencil strokes for cleaner shading.
Step 3: Drawing the Upper Right Profile
-
Creating a softer angle:
For the opposing face, draw a slightly receding chin and a smoother transition from the nose to the brow. This jawline should swoop down at a softer angle than the previous one. -
Refining the neck:
Draw the sternocleidomastoid muscle (the large neck muscle) starting from behind the ear and angling forward toward the pit of the neck. Keep the shading light here. -
Ear placement:
Detail the ear carefully. Notice that the top of the ear typically aligns with the brow, and the bottom aligns with the base of the nose.
Step 4: Drawing the Lower Left Profile
-
Looking upward:
This head is tilted slightly up. Elevate the chin line and angle the nose upward. This changes the perspective on the jaw, making the underside of the jawline more visible. -
Deepening the shadows:
Use your 2B pencil to press harder under the chin and along the back of the neck. This contrast helps define the upward tilt. -
Cheekbone definition:
Draw a sharp line under the eye socket extending back toward the ear to create a hollow, gaunt cheek appearance.
Step 5: Drawing the Lower Right Profile
-
Three-quarter turn:
Unlike the others, this head is turning slightly toward the viewer. Draw the nose ridge so you can see a hint of the far nostril. -
Aging the face:
Add subtle lines around the mouth (nasolabial folds) and under the eyes to suggest a bit more age or weariness on this character. -
Shaping the skull:
Ensure the back of the skull is rounded properly. I find it helpful to look at the negative space behind the head to check if the curve feels natural.
Step 6: Final Refining and Shading
-
Hatching technique:
Apply uniform hatching lines (parallel diagonal strokes) to the side of the head, temples, and neck areas. This unifies the four drawings stylistically. -
Darkest darks:
Go back in with your softest pencil (2B or 4B) and darken the pupils, nostrils, and the deep creases of the ears to make the drawings pop. -
Hairline indication:
Even though the figures are bald, use very faint, short strokes to suggest where the hairline would naturally begin and end, adding realism to the skin texture. -
Cleanup:
Use your kneadable eraser to lift off any stray construction lines or smudges from your hand, leaving the background paper clean.
Take a moment to compare the different character moods created just by altering the jaw angles
Feature Placement on Curved Guides
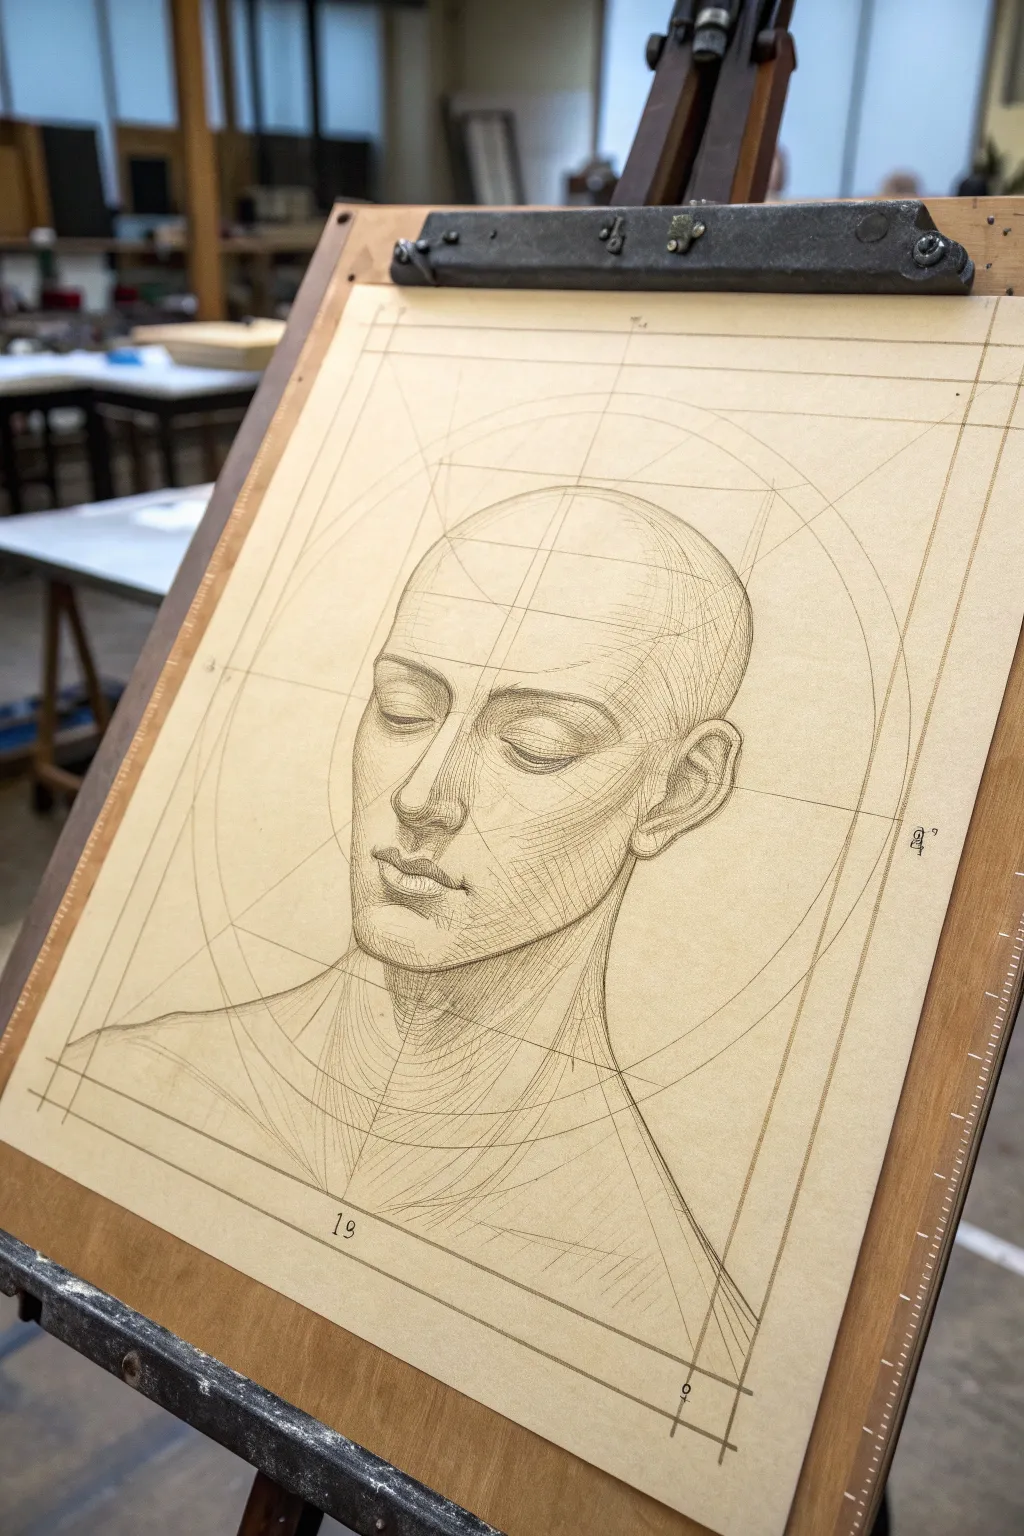
Master the art of structural drawing with this Renaissance-inspired head study on toned paper. By combining geometric guidelines with delicate hatching, you’ll create a portrait that feels both mathematically precise and artistically expressive.
Step-by-Step
Materials
- Smooth toned paper (tan/beige)
- HB and 2B graphite pencils
- Ruler or straight edge
- Compass (optional but helpful)
- Kneaded eraser
- Fine-point mechanical pencil (0.5mm)
Step 1: Setting the Framework
-
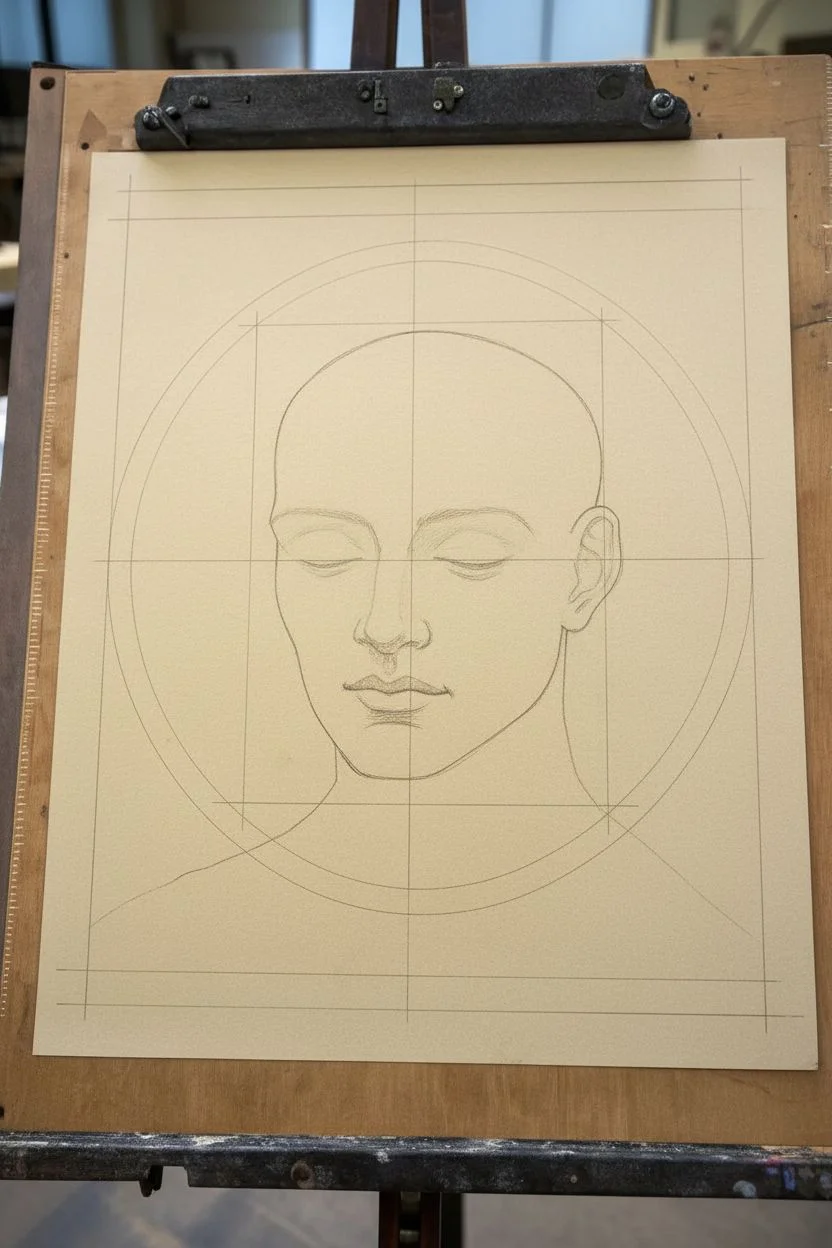
Establish boundaries:
Begin by lightly drawing a large rectangle that will frame your composition, leaving a comfortable margin from the paper’s edge. Use your ruler to ensure these lines are perfectly perpendicular. -
Draw the central axis:
Bisect your frame with a perfectly vertical center line. This line is crucial—it represents the axis of symmetry for the face and neck, and everything will be built around it. -
Construct the cranial circle:
In the upper two-thirds of your frame, lightly draw a large circle to represent the cranium. If you don’t have a compass, sketch a square first and round off the corners until you have a sphere. -
Add the jawline structure:
Drop two lines down from the sides of your circle, narrowing slightly as they descend, and connect them with a curved chin line. This creates the basic egg shape of the head. -
Mark horizontal guides:
Draw horizontal lines to mark key landmarks: the brow line (center of the head mass), the base of the nose (halfway between brow and chin), and the mouth line (one-third down from nose to chin).
Wrap Around Forms
When hatching, never draw flat straight lines. Always curve your hatch marks around the form (like a rubber band on a ball) to enhance the 3D volume.
Step 2: Defining the Planes
-
Sketch the facial centerline:
Draw the curved vertical centerline of the face. Since the head is turned slightly to three-quarter view, curve this line gently to the left, following the spherical form of the head. -
Block in the nose prism:
Construct the nose as a simple 3D wedge or prism first. Don’t worry about nostrils yet; focus on the front plane, side planes, and the bottom plane. -
Place the eye sockets:
Indicate the eye sockets as deep recesses beneath the brow line. Keep the shapes angular to emphasize the bone structure underneath the skin. -
Draft the ear placement:
Locate the ear on the side of the head, aligning the top with the brow line and the bottom with the base of the nose. Sketch a simple C-shape utilizing straight lines. -
Outline the neck cylinder:
Draw the neck as a sturdy cylinder supporting the head. Add the sternocleidomastoid muscles as diagonal lines flowing from behind the ear toward the center of the collarbone area.
Step 3: Refining and Shading
-
Detail the features:
Refine the eyes, drawing the eyelids as distinct bands that wrap around the eyeball. Shape the lips, ensuring the upper lip overhangs the lower lip slightly. -
Erase construction debris:
Take your kneaded eraser and very lightly lift away the darkest parts of your initial geometric guidelines, but leave faint traces visible—part of the charm is showing the ‘math’ underneath. -
Begin hatching contour lines:
Start shading using directional hatching. Instead of random scribbles, draw parallel lines that curve over the surface of the skin, like wireframes on a digital model. -
Deepen the shadows:
Layer cross-hatching in the darker areas: under the brow, beneath the nose, under the lower lip, and on the neck. I like to keep my pencil sharp here to maintain that engraving-like quality. -
Define the cranial planes:
Use lighter, longer curved lines to suggest the roundness of the forehead and the side of the skull. These lines function as both shading and form description. -
Add numbering and technical marks:
To enhance the ‘blueprint’ aesthetic, add small numbers (like ’19’) near the bottom margin or corner marks. Draw small tick marks where your grid lines intersect the frame. -
Final clean up:
Crisp up the outer silhouette of the head with a firm, confident line. Ensure the eyes have a subtle highlight if you have a white pencil, or simply preserve the paper tone.
Level Up: White Heights
Use a white charcoal or pastel pencil to add highlights on the bridge of the nose, forehead, and lower lip for a dramatic, three-dimensional pop on the toned paper.
Step back and admire how the breakdown of complex forms results in a structured, classical masterpiece


Have a question or want to share your own experience? I'd love to hear from you in the comments below!