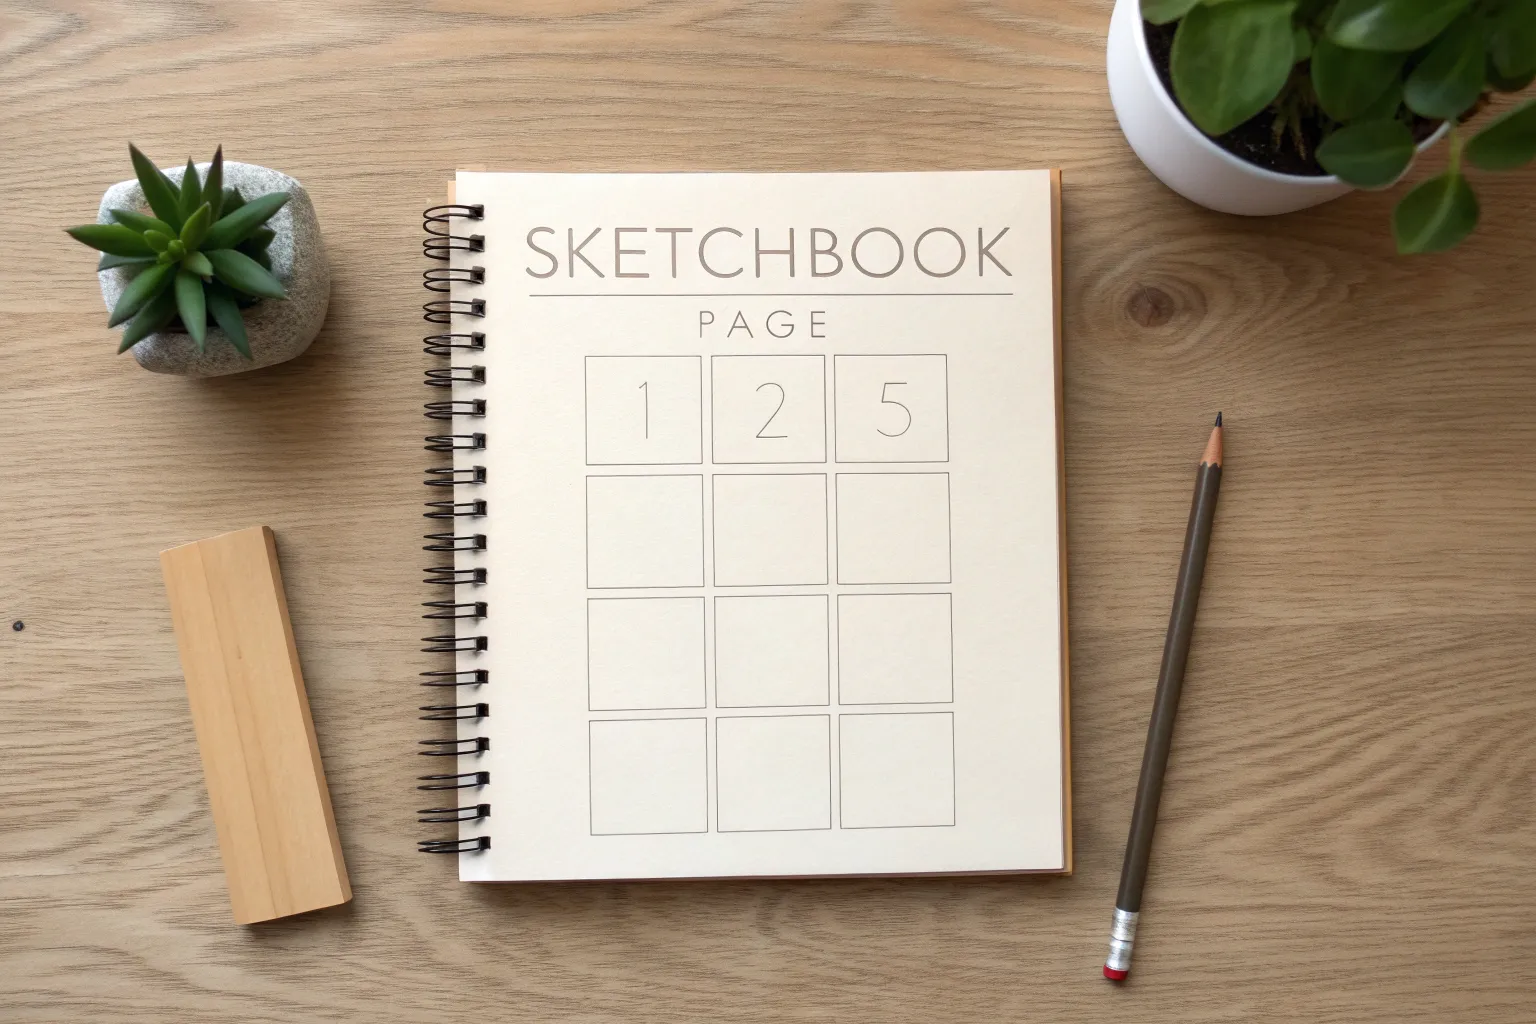
When I’m teaching beginners, I always start by breaking a drawing into basic shapes and building it up in friendly, step-by-step layers. Here are 21 simple ideas you can sketch with a clear “start messy, refine later” rhythm—so you actually finish pages instead of overthinking them.
Fill a Page With Basic Shapes Warm-Ups
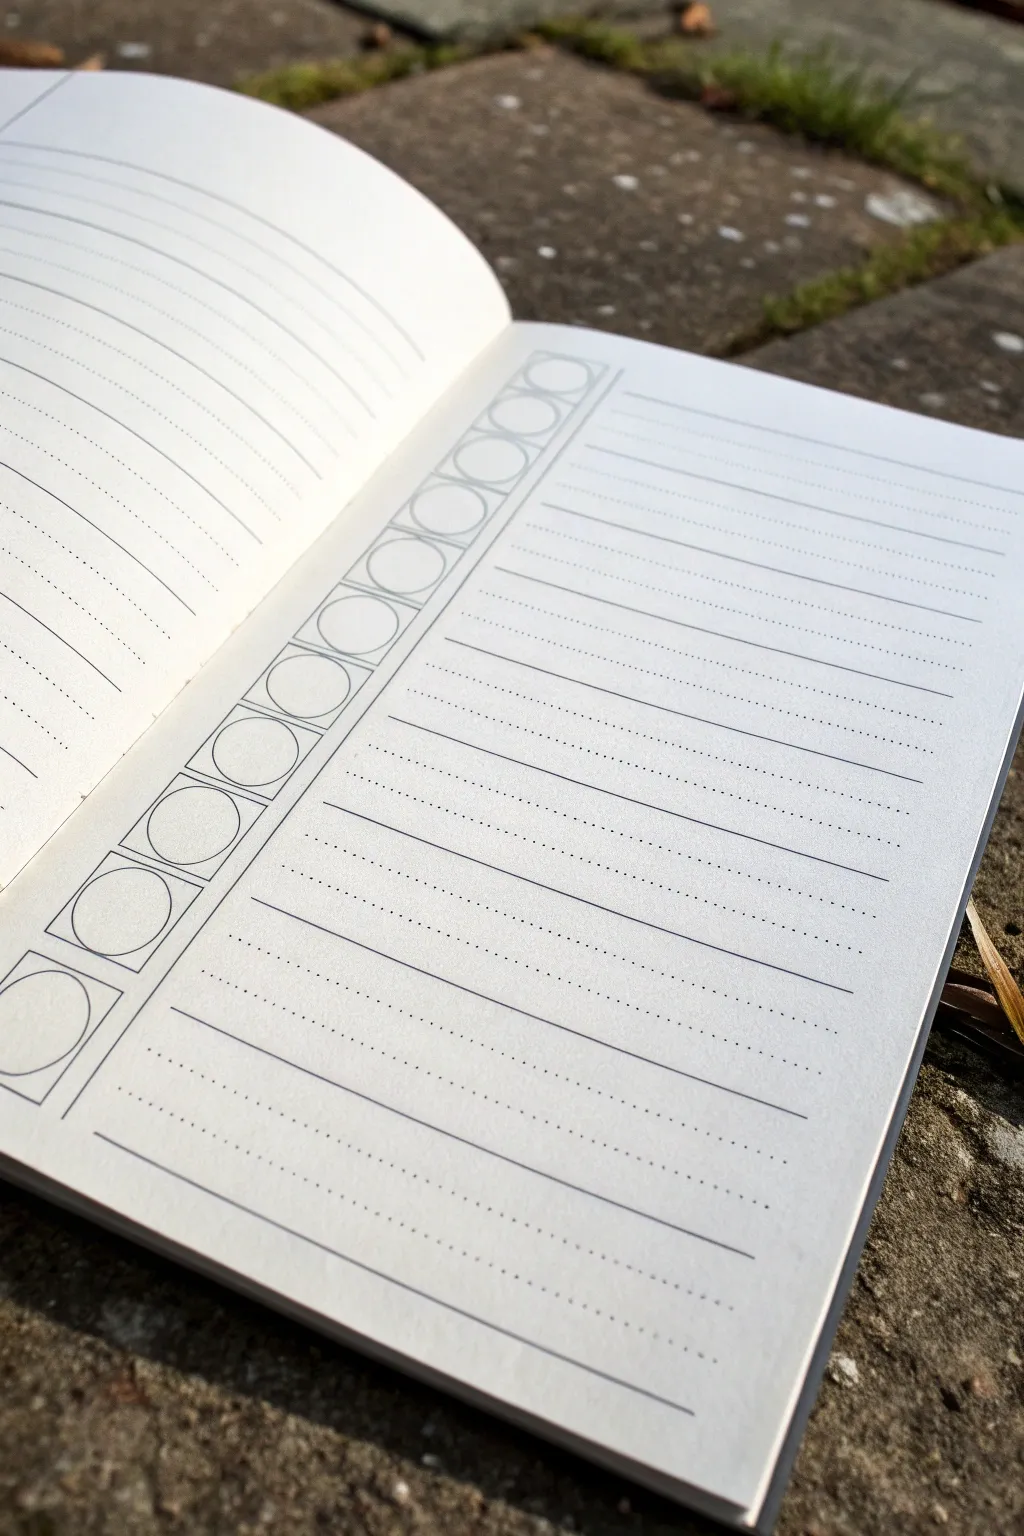
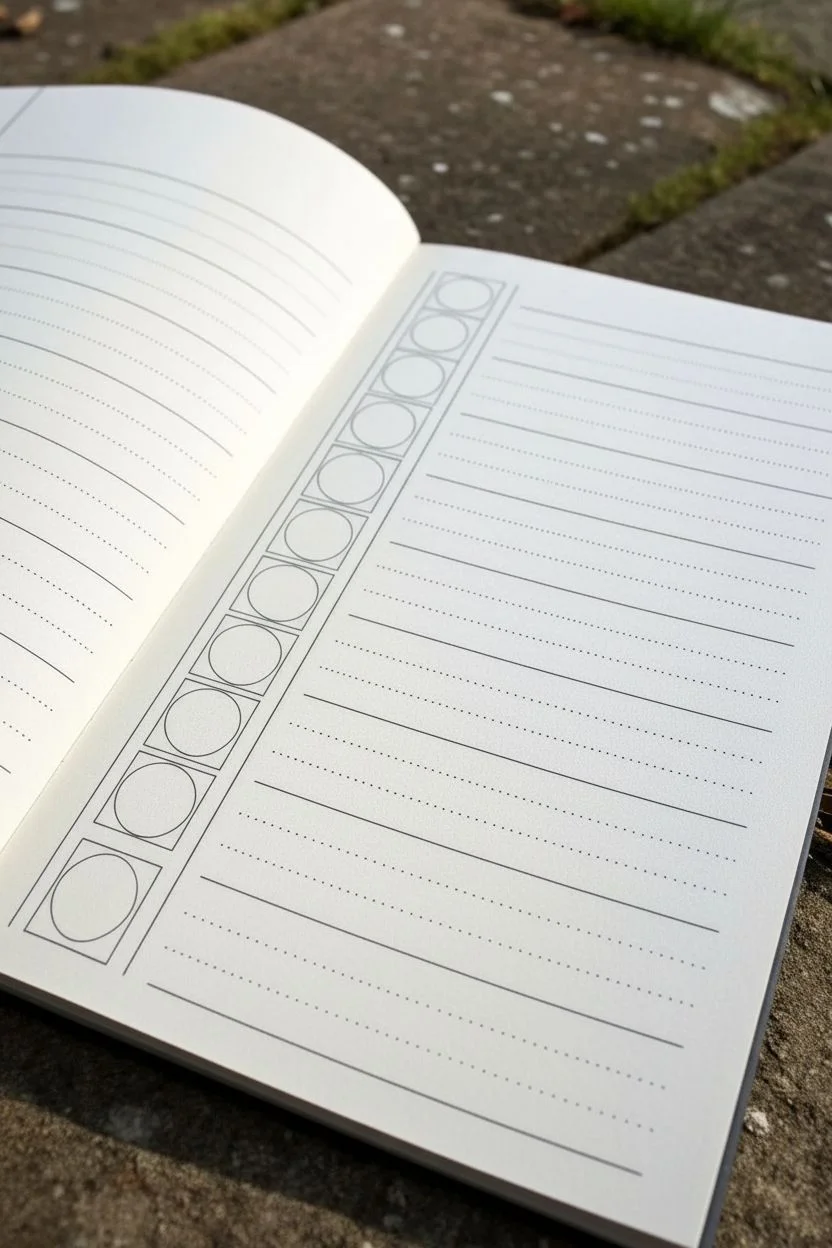
Transform a blank notebook page into a structured practice space for your basic shapes using just a pen and a ruler. This crisp, minimalist layout features a column of enclosed circles alongside dashed writing lines, perfect for daily warm-ups or tracking habits.
Step-by-Step Guide
Materials
- Blank notebook or sketchbook
- Fine-liner pen (black, 0.3mm or 0.5mm)
- Ruler
- Pencil (optional, for guidelines)
- Eraser
Step 1: Setting the Structure
-
Define the left margin:
Start by positioning your ruler vertically on the left side of the page. Draw a single, solid vertical line from the top to the bottom to create the left edge of your shape column. -
Create the column width:
Measure about 1 inch (or 2.5 cm) to the right of your first line. Draw a second parallel vertical line running the full length of the page to close off the column. -
Divide into squares:
Within this vertical column, use your ruler to mark horizontal lines at even intervals, creating a stack of perfect squares. Aim for about 12-14 squares depending on your page height.
Step 2: Drawing the Shapes
-
Draw the circles:
Inside the first square at the top, draw a circle that touches all four sides of the box. Don’t worry if it’s not perfect; the constraint of the box helps guide your hand. -
Continue the pattern:
Repeat this process for every square in the column, trying to keep your circles consistent in size and line weight as you move down the page. -
Start the writing lines:
Moving to the main section of the page, place your ruler horizontally to align with the bottom line of your first square. -
Draw the solid baselines:
Draw a solid horizontal line extending from the shape column to the right edge of the page. Repeat this for every square, so each shape has a corresponding baseline.
Steady Your Hand
For the straightest freehand circles, lock your wrist and create the motion from your elbow and shoulder rather than just your fingers.
Step 3: Adding Details
-
Add the dashed midlines:
Position your ruler roughly halfway between two solid horizontal lines. Draw a light dashed or dotted line across the page. -
Fill the page:
Continue adding these dashed midlines between every set of solid lines. This creates a traditional handwriting guide layout. -
Review vertical alignment:
Here, I like to double-check that my dashed lines start consistently near the vertical column without touching it, keeping the look clean. -
Clean up:
If you used a pencil for initial measuring or sketching, wait for the ink to be completely dry, then gently erase any visible graphite marks. -
Final inspection:
Check for any gaps in your lines or inconsistent ink flow and touch them up carefully with your fine-liner to finish the crisp, graphic look.
Ink Smearing?
If your ruler smudges fresh ink, stick a few layers of masking tape on the underside of the ruler to lift its edge slightly off the paper.
Now you have a structured template ready for your daily drawing drills or calligraphy practice


Create a Butterfly With Simple Symmetry
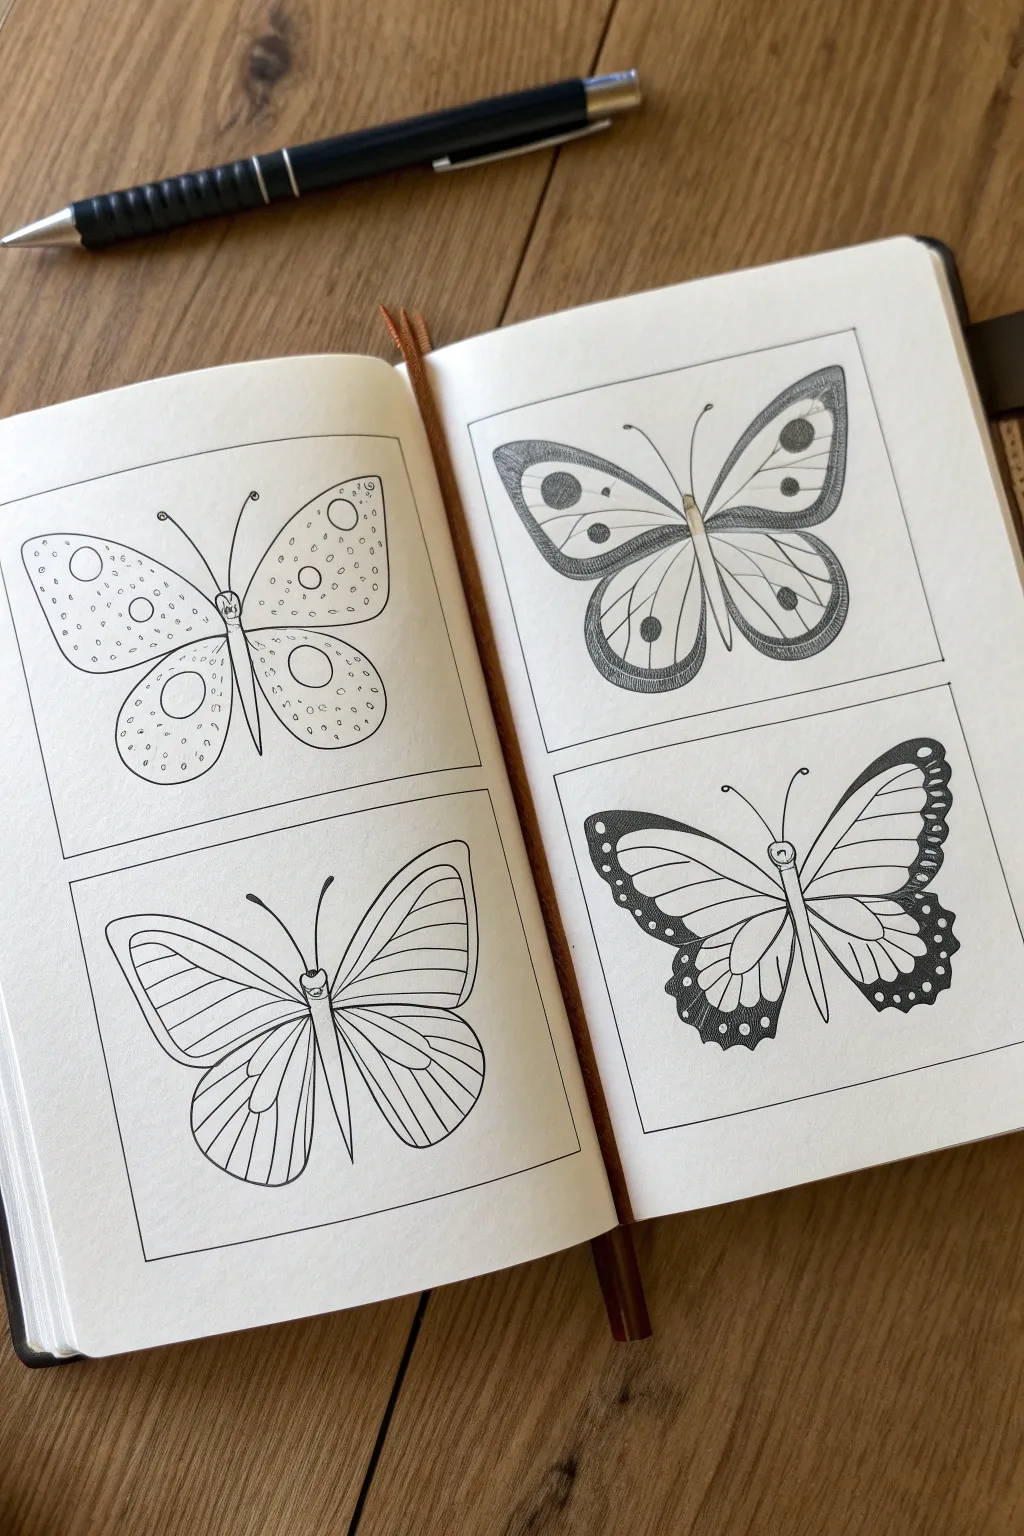
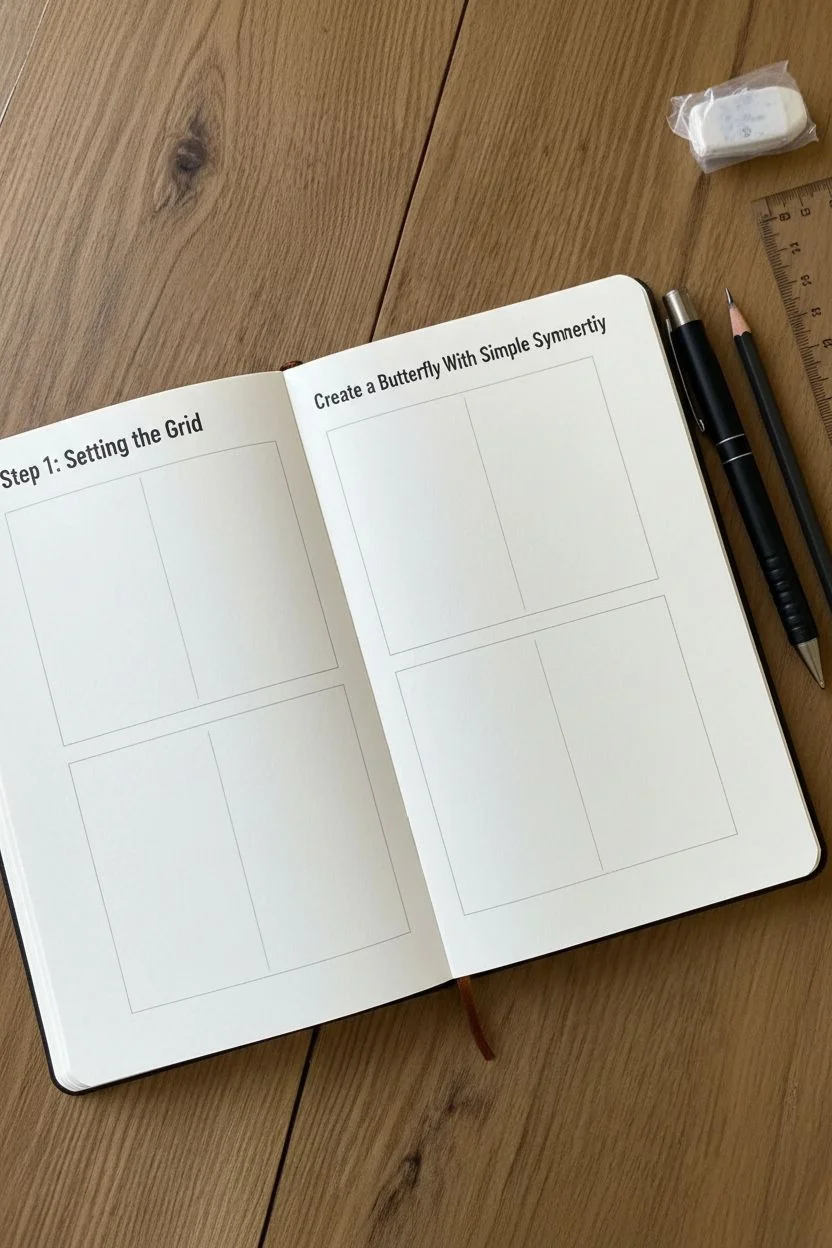
These elegant black-and-white butterfly studies explore symmetry and pattern within a structured grid. By focusing on distinct wing shapes and decorative details like dots, stripes, and scallops, you can create a beautiful entomological collection right in your notebook.
Step-by-Step Guide
Materials
- Sketchbook or drawing paper
- Pencil (HB or H for outlining)
- Fine-liner pen (0.3mm or 0.5mm, black)
- Ruler
- Eraser
Step 1: Setting the Grid
-
Outline the Frames:
Begin by drawing four equal square or rectangular boxes on your page using a ruler. If you are working across a sketchbook spread, place two distinct boxes on each page to give each butterfly its own dedicated space. -
Draw the Central Axes:
Lightly sketch a vertical line down the center of each box with your pencil. This unseen guide is crucial for maintaining symmetry as you construct the bodies and wings.
Uneven Wings?
If one wing looks different from the other, draw horizontal guidelines across both wings at key points (like the widest part) to match the height perfectly.
Step 2: Sketching the Bodies
-
Form the Thorax and Abdomen:
In the center of each guide line, draw a long, slender oval for the body. The top portion (thorax) should be slightly thicker than the bottom tail (abdomen). -
Add Heads and Antennae:
Draw small circles at the top of each body for the head. Add two curving lines extending outward for antennae; vary the curve for each butterfly to give them individual character.
Creative Twist
Instead of black and white, use a single accent color (like orange or blue) for just the spots or wing tips to make the design pop.
Step 3: Drafting Wing Shapes
-
Top Left: Rounded Wings:
For the first butterfly, sketch broad, rounded upper wings that dip slightly before meeting the lower wings. The lower wings should be smaller ovals. -
Bottom Left: Elongated Wings:
Draw the bottom left butterfly with more angular, triangular upper wings. The lower wings should flare out wider, resembling a moth’s silhouette. -
Top Right: Scalloped Edges:
Sketch the top right wings with a slight curve or indent on the outer edges, giving them a more aerodynamic look. -
Bottom Right: Typical Monarch Shape:
For the final butterfly, create a classic shape with wide upper wings and lower wings that have a gently scalloped or wavy bottom edge.
Step 4: Adding Patterns & Details
-
Patterning the Top Left:
Draw large circles near the outer edges of the wings. Fill the remaining space with tiny, scattered dots, keeping the center of the wings relatively clear. -
Striping the Bottom Left:
Draw veins radiating from the body to the wing tips. Add a double border line along the outer edge of the upper wings to frame the stripes. -
Shading the Top Right:
Thicken the outer edges of the wings with your pencil. Draw bold ‘eye spots’ (circles with dark centers) on both upper and lower wings to mimic natural camouflage. -
Detailing the Bottom Right:
Create a thick border along the outer edges of all wings. Inside this border, draw a row of distinct spots (circles). Draw smooth lines for veins inside the main wing sections.
Step 5: Inking and Refining
-
Ink the Outlines:
Go over your pencil sketches with a fine-liner pen. Keep your hand steady to create smooth, continuous lines for the wing shapes. -
Fill the Solids:
Use your pen to fill in the dark areas, particularly on the bottom right butterfly’s border and the top right butterfly’s eye spots. -
Add Texture:
For the top right butterfly, use short, quick hatching strokes along the wing edges to simulate a fuzzy or dusty texture on the wings. -
Erase Guidelines:
Once the ink is completely dry—I usually wait at least five minutes to be safe—gently erase all the pencil grid lines and symmetry guides for a clean finish.
Now you have a stunning page of symmetrical insect studies ready to be admired


Build a Ladybug From an Oval and a Line
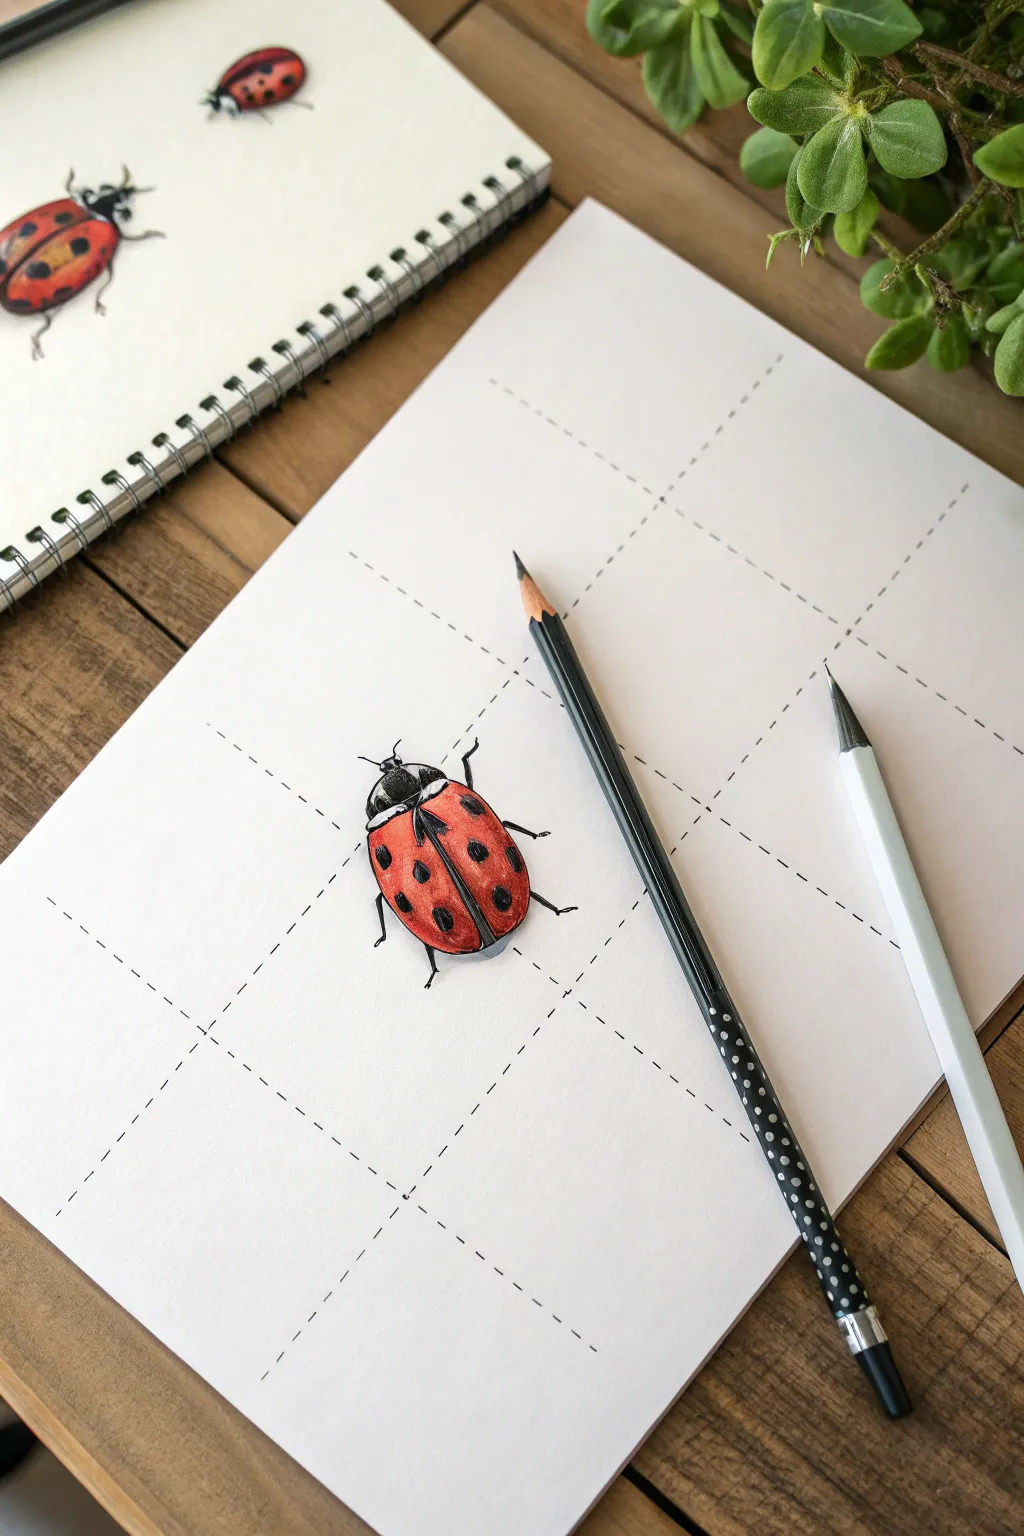
Learn how to transform a basic oval and a center line into a charming, realistic ladybug on paper. This project uses a helpful grid method to guide your proportions, resulting in a vibrant illustration that pops off the page.
Step-by-Step
Materials
- Sketchbook or white drawing paper
- Ruler
- Graphite pencil (HB or 2B)
- Black ink pen or fineliner (0.3mm or 0.5mm)
- Red colored pencil or marker
- Black colored pencil
- White gel pen (optional for highlights)
- Eraser
Step 1: Setting Up and Basic Sketching
-
Create a guide grid:
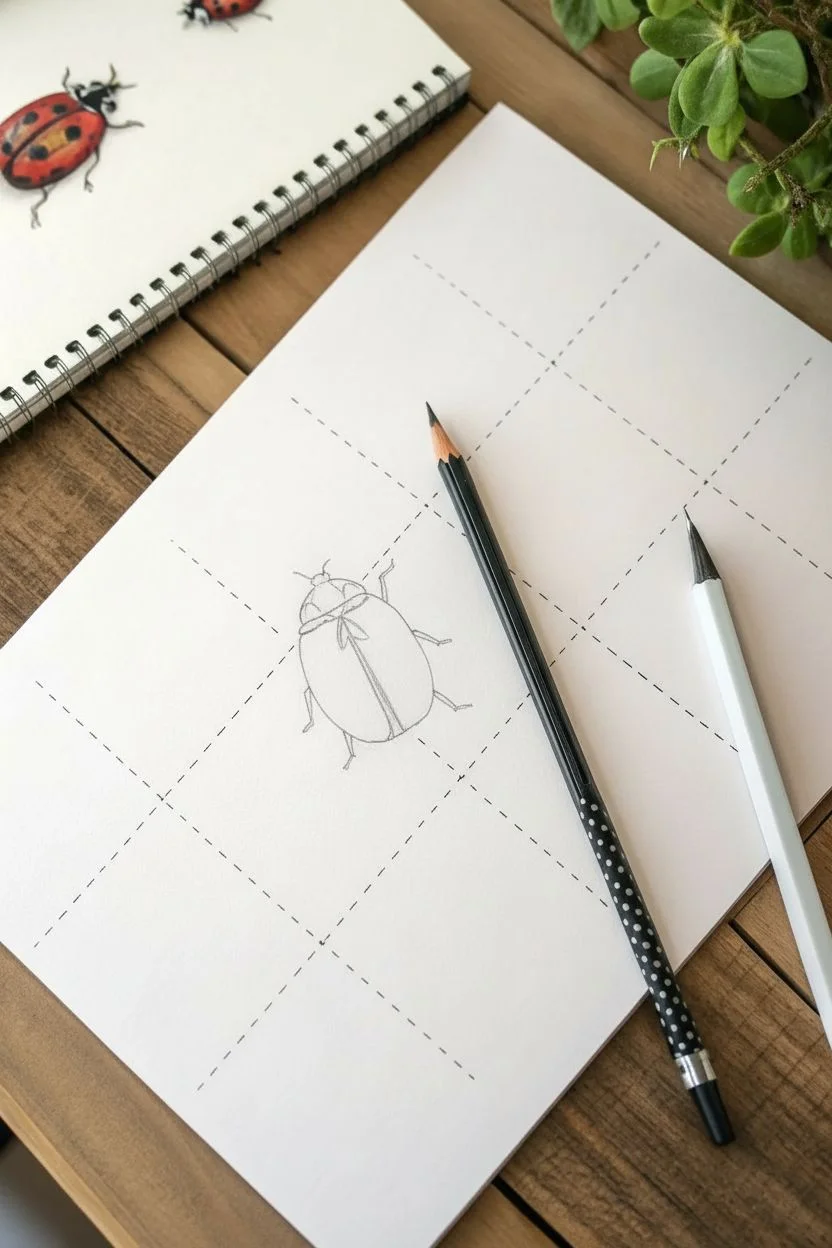
Start by drawing a light 3×3 grid on your paper using your ruler and pencil. The grid lines should be dashed or very faint, as you will erase them later. This structure helps center the insect perfectly. -
Draw the main oval body:
In the center square of your grid, sketch a large vertical oval. This will become the ladybug’s shell (elytra). Don’t worry about perfection; a slightly organic shape works well. -
Add the pronotum:
At the top of your oval, draw a smaller, semi-circular shape overlapping slightly with the main body. This forms the pronotum, the section that connects the head to the body. -
Define the head:
Sketch a tiny, rounded shape emerging from the top of the pronotum for the head. Add two small antennae curving outward from the head. -
Draw the center line:
Using your ruler or a steady hand, draw a straight line down the absolute center of the main oval. At the very top where it meets the pronotum, split the line into a small ‘V’ shape to show where the wings part.
Step 2: Adding Details and Legs
-
Place the spots:
Lightly sketch circles on the main body for the ladybug’s signature spots. I like to arrange them slightly asymmetrically for a more natural look, but keep them balanced on either side of the center line. -
Sketch the legs:
Add six legs total. Draw the front pair reaching forward near the head, the middle pair extending out from the sides, and the back pair reaching slightly backward. Use disjointed, angular lines to mimic insect legs. -
Refine the pronotum pattern:
On the pronotum (the section behind the head), sketch two white curve shapes at the outer edges. Ladybugs often have these distinctive white ‘cheeks’ on this black segment. -
Clean up the sketch:
Take your eraser and gently lift away the grid lines around the drawing. Also, erase the internal oval line that separates the pronotum from the body so the shapes flow together.
Don’t Press Hard
When sketching your initial grid, use very little pressure. Hard pencil marks can leave indentations in the paper that become visible after you color over them.
Step 3: Inking and Coloring
-
Outline with ink:
Trace over your pencil lines with a black ink pen or fineliner. Be sure to outline the spots carefully. Once the ink is completely dry, erase any remaining graphite marks. -
Fill the black areas:
Use your black marker or pencil to fill in the head, the pronotum (avoiding the white patches), and the legs. Fill in the spots on the wings with solid black. -
Apply the base red:
Color the main wing shells with a bright red pencil or marker. Apply an even layer, working around the black spots you just filled in. -
Add shading for volume:
To make the shell look round, add a second layer of red or a darker red pencil along the outer edges and right next to the center division line. This creates a 3D dome effect. -
Deepen shadows:
Use a black colored pencil to lightly shade the very bottom edge of the red shell and under the body where the legs attach. This grounds the drawing. -
Add highlights:
If you have a white gel pen, add tiny dots or lines on the sleekest part of the red shell and the black head. This suggests a shiny, hard texture.
Try Different Colors
Not all ladybugs are red! Try making yours yellow with black spots, or even black with red spots, to depict different real-world species.
Now you have a vibrant little beetle crawling across your page


Sketch a Leaf Branch One Leaf at a Time
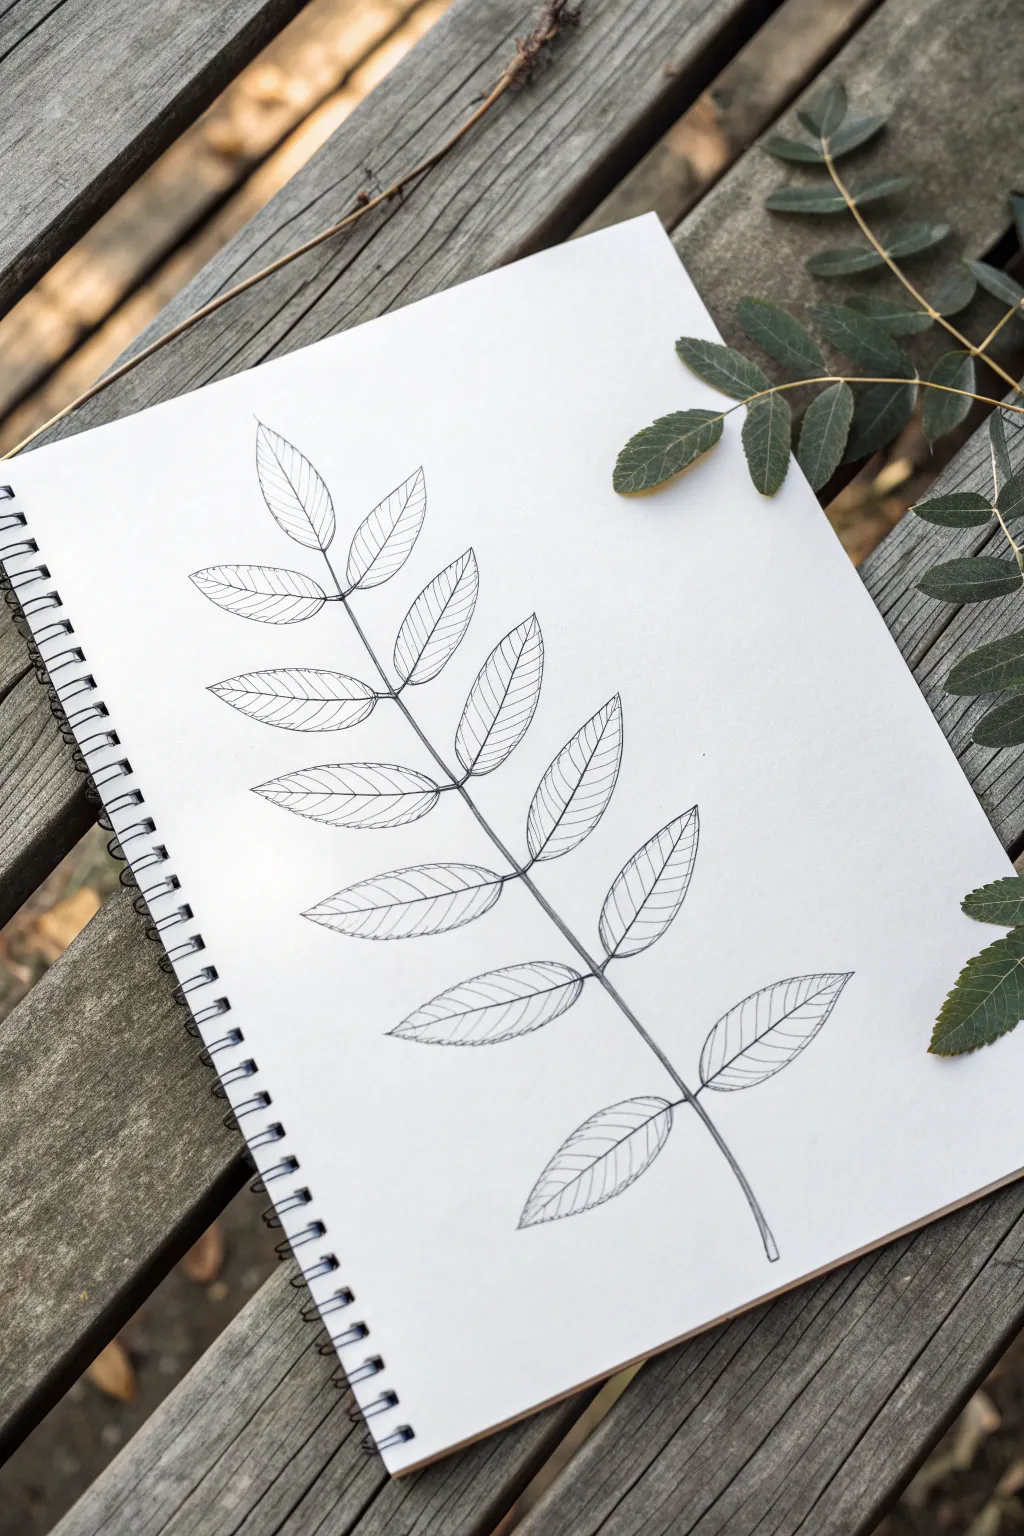
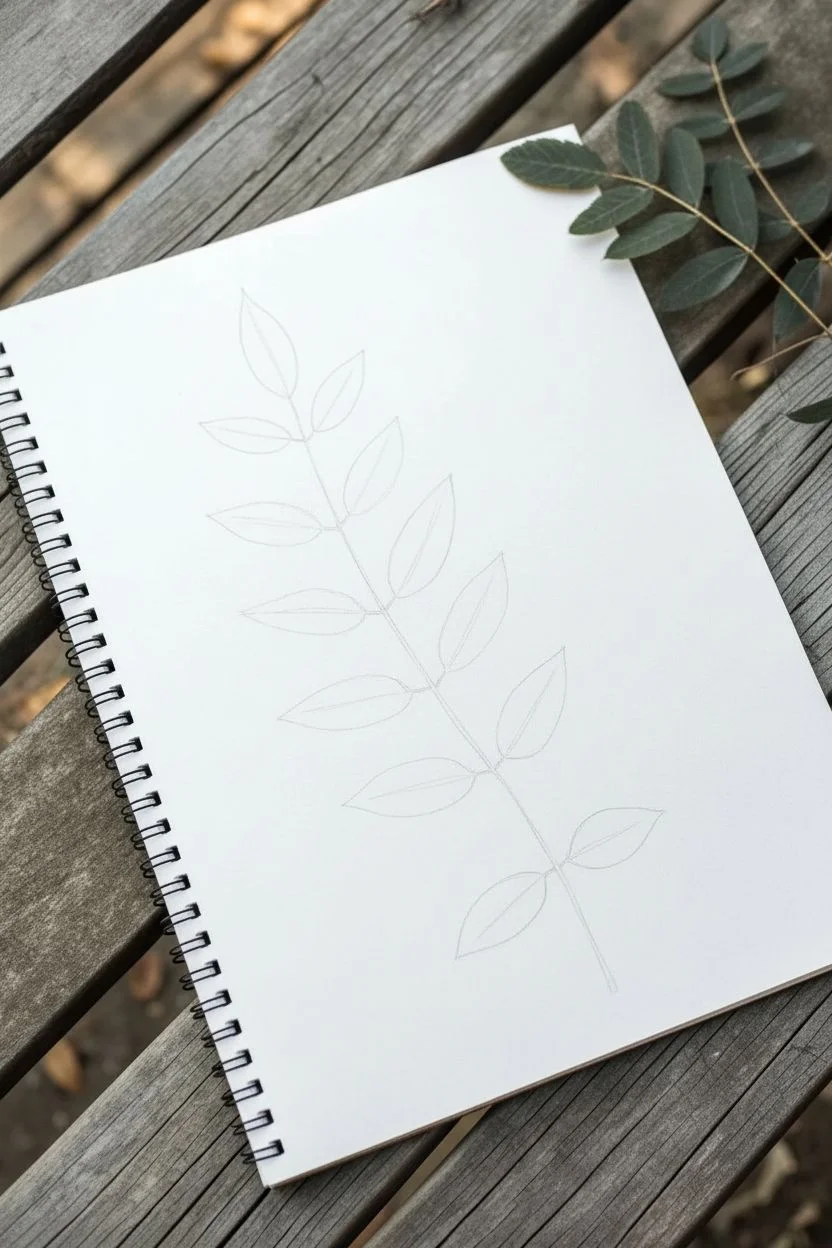
This elegant botanical study captures the delicate structure of a pinnate leaf branch using simple lines and thoughtful detailing. It is a relaxing practice in symmetry and repetition that results in a clean, minimalist piece of art perfect for a sketchbook journal.
Detailed Instructions
Materials
- Spiral-bound sketchbook (smooth white paper recommended)
- HB graphite pencil
- Soft eraser
- Fine-liner pen (0.3mm or 0.5mm, black ink)
- Ruler (optional)
Step 1: Pencil Structure
-
Draw the central spine:
Start by drawing a single, gentle curve down the center of your page to represent the main stem (rachis). Keep this line light, as it acts as your primary guide. -
Mark leaf positions:
Along the stem, lightly tick off pairs of points where the leaflets will attach. Start near the top and work your way down, spacing them slightly further apart as you descend. -
Sketch the terminal leaflet:
Draw the single leaf at the very tip of the stem. Shape it like a narrow teardrop or spearhead, pointing directly upward. -
Outline the side leaflets:
Working in pairs from the top down, sketch the outline of each leaflet. They should angle slightly upward, resembling a fern or feather pattern. -
Refine the shapes:
Go back over your rough outlines to ensure the leaflets are roughly symmetrical but natural looking. Nature isn’t perfect, so slight variations in size add realism.
Step 2: Inking the Outlines
-
Ink the main stem:
Using your fine-liner, trace the central stem. I like to make this line slightly bolder or double it up very narrowly at the bottom to show thickness. -
Trace the leaflets:
Carefully ink the perimeter of each leaf. Use a confident, continuous stroke for each side of the leaf to avoid shaky or feathery lines. -
Connect to the stem:
Ensure each leaflet connects cleanly to the main spine. You can add a tiny stem (petiolule) for each one if you want extra detail, or attach them directly. -
Erase pencil guides:
Wait a moment for the ink to dry completely, then gently erase all your pencil sketches underneath so you have a clean slate for detailing.
Natural Flow Pro-Tip
Don’t make the leaves perfectly symmetrical. Tilt one slightly or make one leaf a bit smaller than its partner to make the drawing feel organic.
Step 3: Adding Veins and Detail
-
Draw center veins:
Inside every leaflet, draw a straight line from the base to the tip. This central vein shouldn’t touch the tip perfectly; stopping just short keeps it looking airy. -
Start the lateral veins:
Beginning with the top leaf, draw small, diagonal lines branching off the center vein. Keep these lines very thin and delicate. -
Create a pattern:
For this specific style, try to make the veins mirror each other on opposite sides of the leaf’s center line, creating a clean herringbone pattern. -
Curved vs. Straight:
Notice how the veins in the reference image curve slightly towards the leaf tip rather than being perfectly straight rulers. This curve gives the leaf volume. -
Vary line weight:
Try to lift your pen slightly at the end of each vein stroke. This makes the line taper off elegantly rather than ending in a blunt dot. -
Consistency is key:
Continue this veining process for every leaflet down the branch. It takes patience, but the repetitive motion is quite meditative. -
Final stem details:
Add a few tiny, short hatching lines at the very bottom of the main stem to suggest shadow and roundness.
Smudge Prevention
If you are right-handed, start inking from the top-left leaf and work your way down and right. This prevents your hand from resting on wet ink.
Now you have a serene botanical sketch that celebrates the simple beauty of nature
BRUSH GUIDE
The Right Brush for Every Stroke
From clean lines to bold texture — master brush choice, stroke control, and essential techniques.
Explore the Full Guide
Draw a Mushroom With a Dome and Cylinder
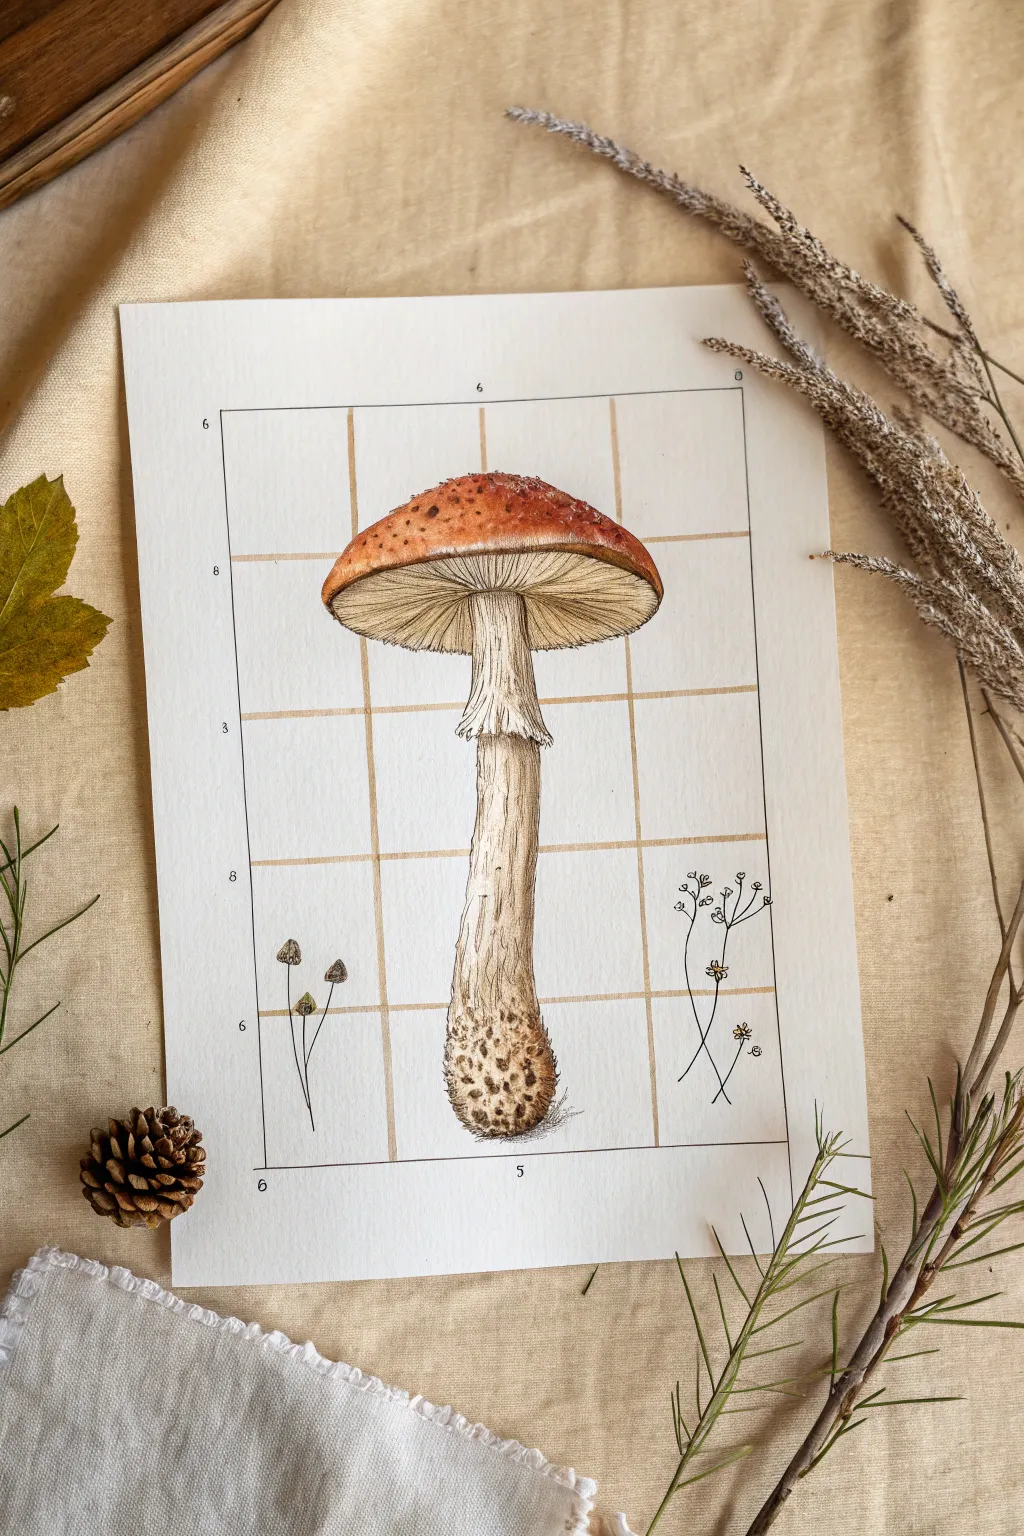
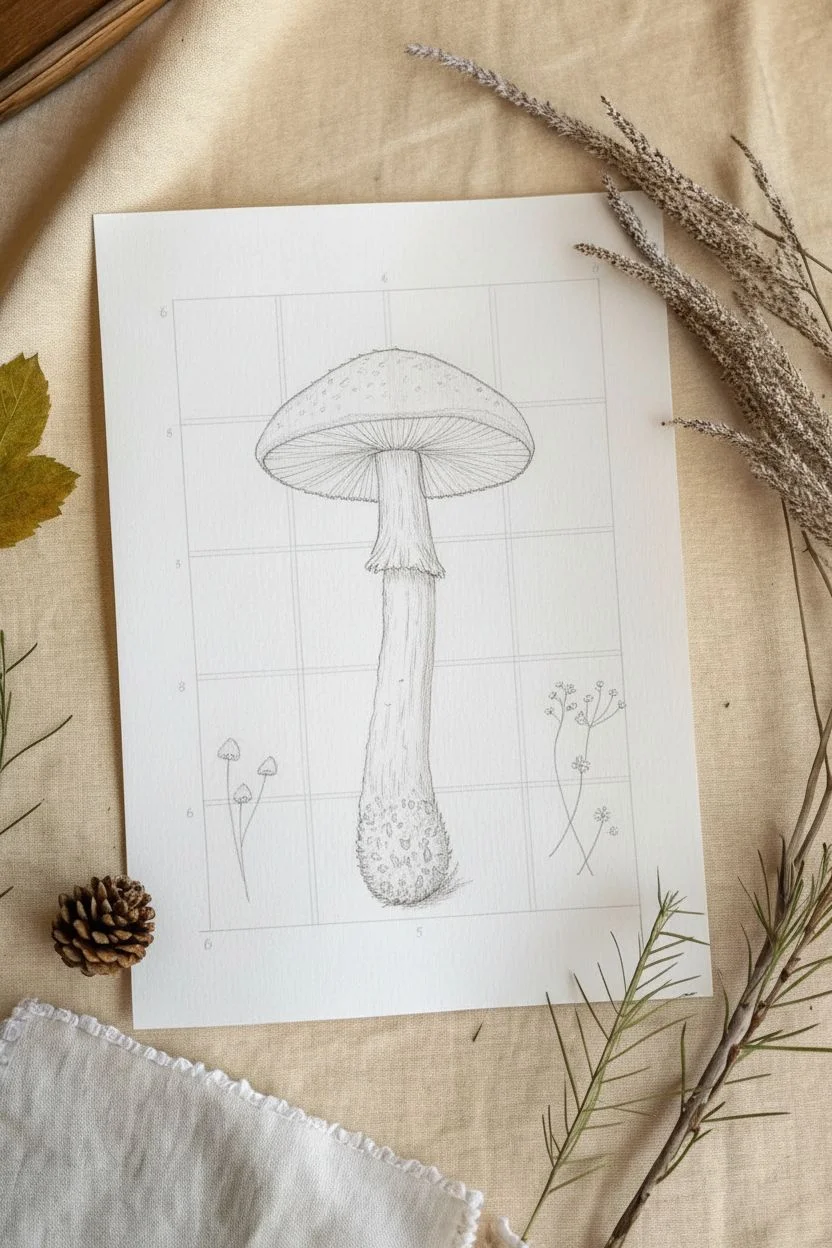
Create a vintage-inspired scientific illustration featuring a tall, textured mushroom centered on a technical grid. This project combines precise pen work with warm watercolor tones to capture the delicate gills and spotting on the cap.
Step-by-Step Guide
Materials
- Heavyweight drawing paper or hot press watercolor paper
- Pencil (HB or 2H for light lines)
- Ruler
- Fine liner pens (sizes 0.05, 0.1, and 0.3, black ink)
- Watercolor paints (Burnt Sienna, Yellow Ochre, Sepia, Raw Umber)
- Small round brushes (size 2 and 4)
- Eraser (kneaded preferred)
Step 1: Setting the Structure
-
Draw the grid:
Begin by lightly drawing a large rectangle on your paper. Inside it, measure and draw a grid of four columns and four rows. The squares don’t have to be perfectly small; aim for about 2-inch squares. Keep your pencil pressure very light so the grid remains subtle. -
Outline the basic shapes:
Sketch the mushroom’s dome cap in the top center grid squares. Draw a slightly flattened oval for the top. Below the cap, sketch a long, slightly curved cylinder for the stem that widens at the very bottom into a bulbous base. -
Refine the cap:
Refine the shape of the cap, making the top curve gentle and the rim slightly uneven. Draw a second, smaller curve inside the bottom of the cap to indicate where the gills will attach to the stem. -
Detail the skirt and stem:
About a third of the way down the stem, sketch a ragged, drooping skirt (annulus). Add texture lines to the stem, making the base look rougher and more bulbous than the smooth upper stem.
Step 2: Inking the Details
-
Outline delicate features:
Switch to your 0.1 fine liner. Carefully trace the outline of the cap and stem. For the skirt, use jagged, broken lines to simulate a torn, delicate texture. -
Draw the gills:
Under the cap, draw very fine, closely spaced lines radiating from the stem outward to the rim of the cap. I find using a 0.05 pen here helps keep these lines crisp without overwhelming the drawing. -
Texture the stem:
Use vertical, slightly wavy hatching lines along the length of the stem to show roundness and fibrous texture. Concentrate more lines on the sides for shadow. -
Detail the base:
At the bulbous bottom, draw small, irregular circular shapes and heavy stippling (dots) to create a rough, dirt-covered look. -
Add flanking vegetation:
In the bottom left grid square, draw two tiny, simplified mushrooms. In the bottom right, sketch a few thin, wispy wildflower stems with tiny blooms using simple line work. -
Reinforce the grid:
Use a ruler and a slightly thicker pen (0.3) or a brown fine liner to trace over your pencil grid lines. Add small numbers (6, 8, 3, etc.) at the grid intersections to mimic a scientific chart.
Ink Confidence
Don’t stress if your ink lines wobble. Organic subjects like mushrooms benefit from imperfections—shaky lines often look like natural textures.
Step 3: Adding Color and Depth
-
Base wash for the cap:
Mix a diluted wash of Burnt Sienna. Paint the top of the cap, keeping the color strongest at the center and fading slightly toward the edges. Let this layer dry completely. -
Adding cap texture:
Once dry, stipple small dots of darker brown (Sepia) or a reddish-brown mix on top of the cap to create the speckled mushroom texture. -
Shading the gills:
Apply a very pale wash of Raw Umber or diluted Yellow Ochre to the gills area. Add a slightly darker shadow right where the gills meet the stem to create depth. -
Painting the stem:
Wash the stem with a very pale beige or dirty water mix. While it’s damp, drop in a little Raw Umber along the sides of the stem to enhance the cylindrical 3D form. -
Darkening the base:
Paint the bulbous base with a mix of Sepia and Raw Umber, dabbing the brush to create a mottled, earthy texture. -
Final touches:
Add tiny touches of green or yellow to the small side sketches. Once everything is bone dry, gently erase any remaining pencil marks that weren’t covered by ink.
Aged Paper Effect
Before starting, lightly stain your paper with tea or coffee creates an authentic vintage botanical look that pairs perfectly with the grid style.
Now you have a charming piece of botanical art that looks like it was clipped from a naturalist’s field journal
Draw an Ice Cream Cone With Triangle Guides
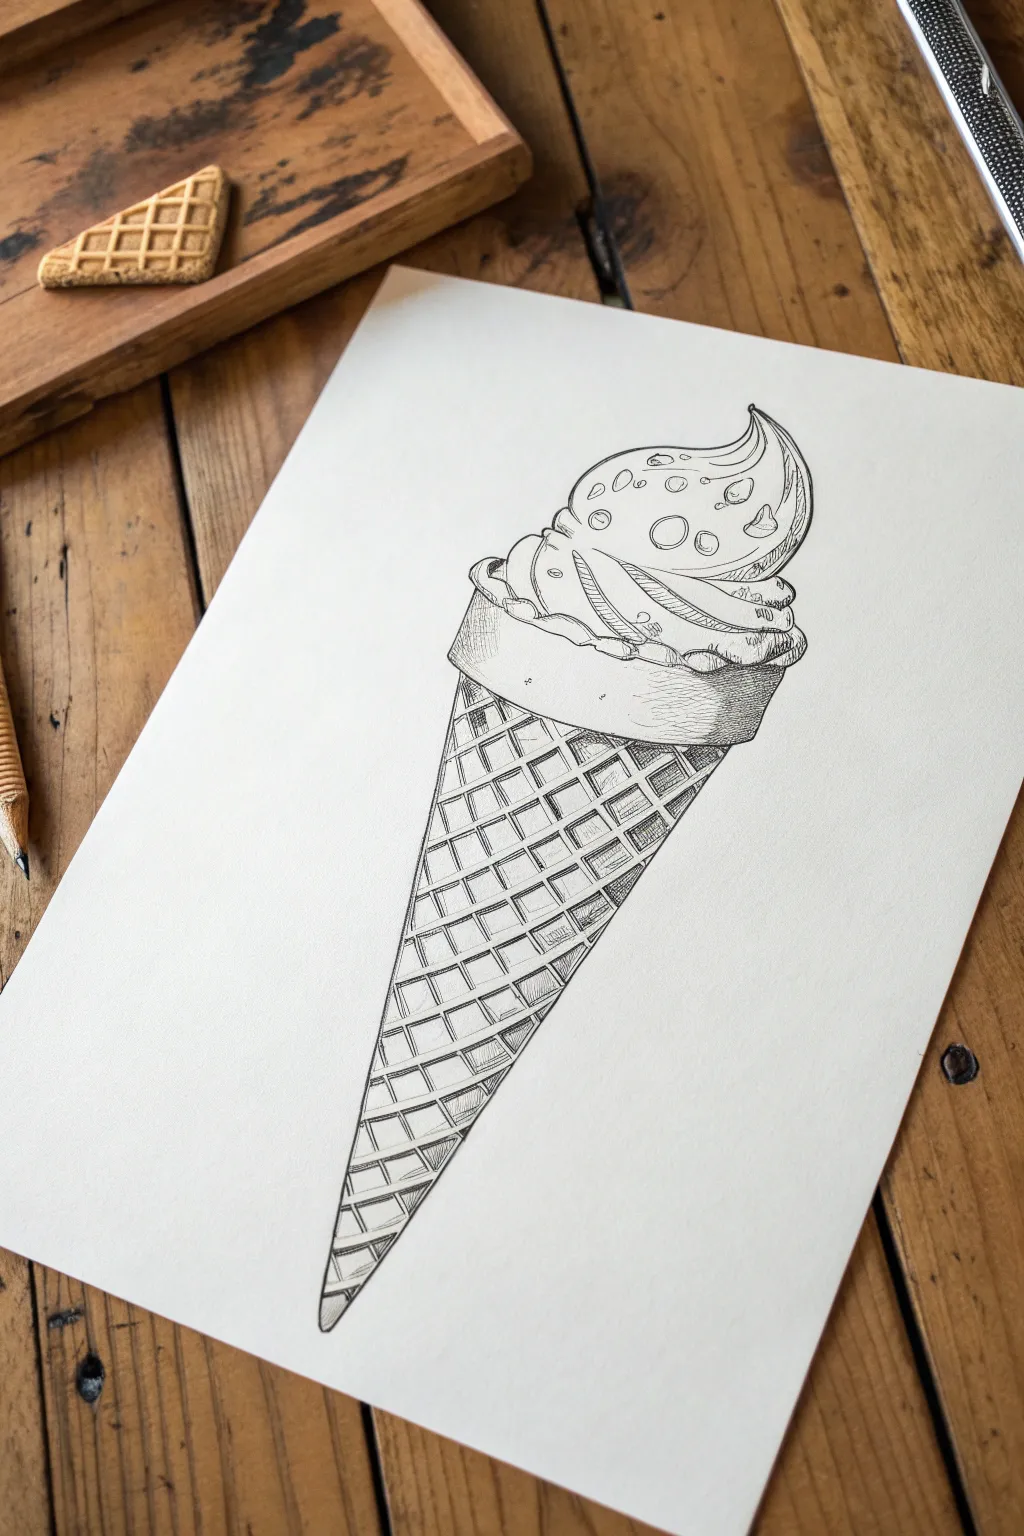
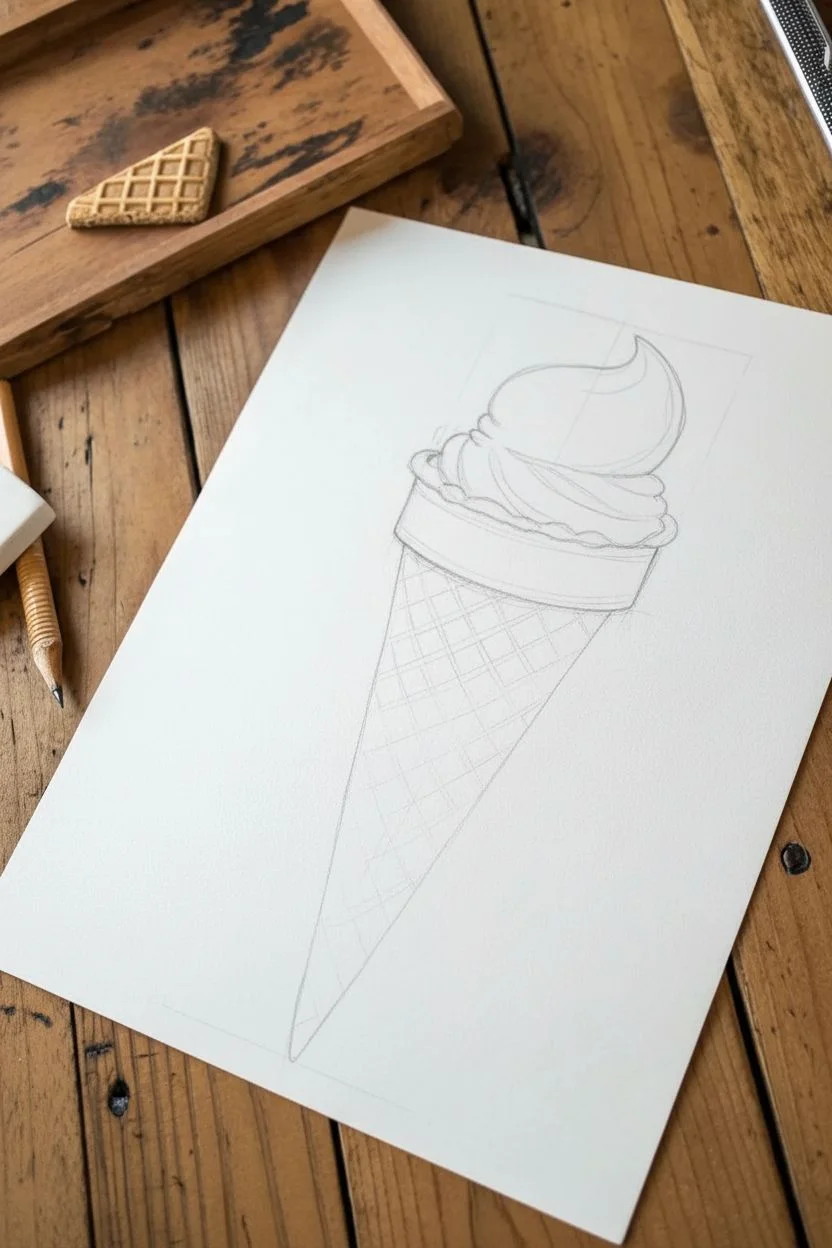
Master the art of texture and shading with this detailed ink drawing of a classic waffle cone. You’ll learn how to build a complex form using simple geometric shapes like triangles and ovals.
Step-by-Step Tutorial
Materials
- White drawing paper or sketchbook
- HB or 2B graphite pencil (for sketchy guidelines)
- Fine liner pens (sizes 0.1mm, 0.3mm, and 0.5mm)
- Eraser
- Ruler (optional)
Step 1: Constructing the Base Shape
-
Lay the Triangle Foundation:
Start by lightly drawing a long, inverted isosceles triangle with your pencil. This will be the main body of the waffle cone. Keep your lines very faint so they can be erased later. -
Round the Top:
At the wide top end of your triangle, sketch a flattened oval that extends slightly beyond the triangle’s corners. This creates the opening of the cone where the ice cream sits. -
Sketch the Ice Cream Mound:
Draw the basic shape of the soft serve. Instead of a perfect circle, stack three loose, cloud-like ovals on top of each other, getting smaller as they go up, ending in a little curved point at the very top. -
Add the Cone Rim:
Draw a thick band just below the ice cream but overlapping the top of the cone triangle. This represents the flat, cookie-like rim often found on waffle cones.
Step 2: Inking the Outlines
-
Refine the Swirls:
Switch to your 0.3mm fine liner. Go over your pencil sketch for the ice cream, adding deep curved lines that sweep inward to show the folding soft-serve texture. Give the edges a slightly wavy, organic feel. -
Define the Cone Rim:
Ink the thick rim of the cone. Draw the top edge with a scalloped, wavy line to show where the ice cream meets the biscuit, and keep the bottom edge of the rim smooth and curved. -
Outline the Cone Body:
Trace the long triangle sides with a steady hand. Make sure the lines connect cleanly to the bottom of the rim you just drew. -
Erase Guidelines:
Once the ink is completely dry (give it a minute!), gently erase all your pencil guides to reveal a clean black and white outline.
Wobbly Lines?
Don’t stress about perfect straight lines on the grid. A little wobble actually makes the waffle texture look more baked and realistic.
Step 3: Detailing the Waffle Texture
-
Draw the Grid Curves:
Using a 0.1mm pen, draw a series of curved lines running horizontally across the cone. They should curve slightly downward to emphasize the roundness of the cone shape. -
Create the Vertical Grid:
Now draw lines running lengthwise down the cone. These should angle slightly inward, converging toward the bottom tip, creating a grid of small trapezoids. -
Double the Lines:
To give the waffle pattern depth, go back over your grid and add a second line right next to each existing one. This creates the thickness of the raised waffle ridges. -
Shade the Waffle Squares:
I like to use basic hatching here. Inside each little grid square, add tiny diagonal hatch marks. Focus the shading on the right side of the cone to suggest a light source coming from the left. -
Darken the Shadows:
Use your 0.5mm pen to darken the right edge of the cone and the area directly beneath the rim for stronger contrast.
Level Up: Saucy!
Draw a drip of melting ice cream running down the side of the cone grid. Let it interrupt the pattern for a dynamic look.
Step 4: Final Touches
-
Add Toppings:
Draw small circles and irregular shapes scattered on the ice cream swirls. These can be chocolate chips, nuts, or sprinkles. -
Texture the Ice Cream:
Use the 0.1mm pen to add very fine, sparse hatching lines on the shadowed side of the ice cream swirls (the right side). Keep these lines delicate so the ice cream looks soft. -
Enhance the Rim Shading:
Add horizontal hatching lines across the flat rim of the cone. Make the shading dense on the right side and fade it out as you move left. -
Final Contrast Check:
Look at the overall drawing. If the cone needs to look more 3D, add a little more cross-hatching to the absolute darkest area at the bottom right tip.
Now you have a delicious-looking drawing ready to be framed or colored

PENCIL GUIDE
Understanding Pencil Grades from H to B
From first sketch to finished drawing — learn pencil grades, line control, and shading techniques.
Explore the Full Guide
Sketch a Simple Turtle Using Shell Sections
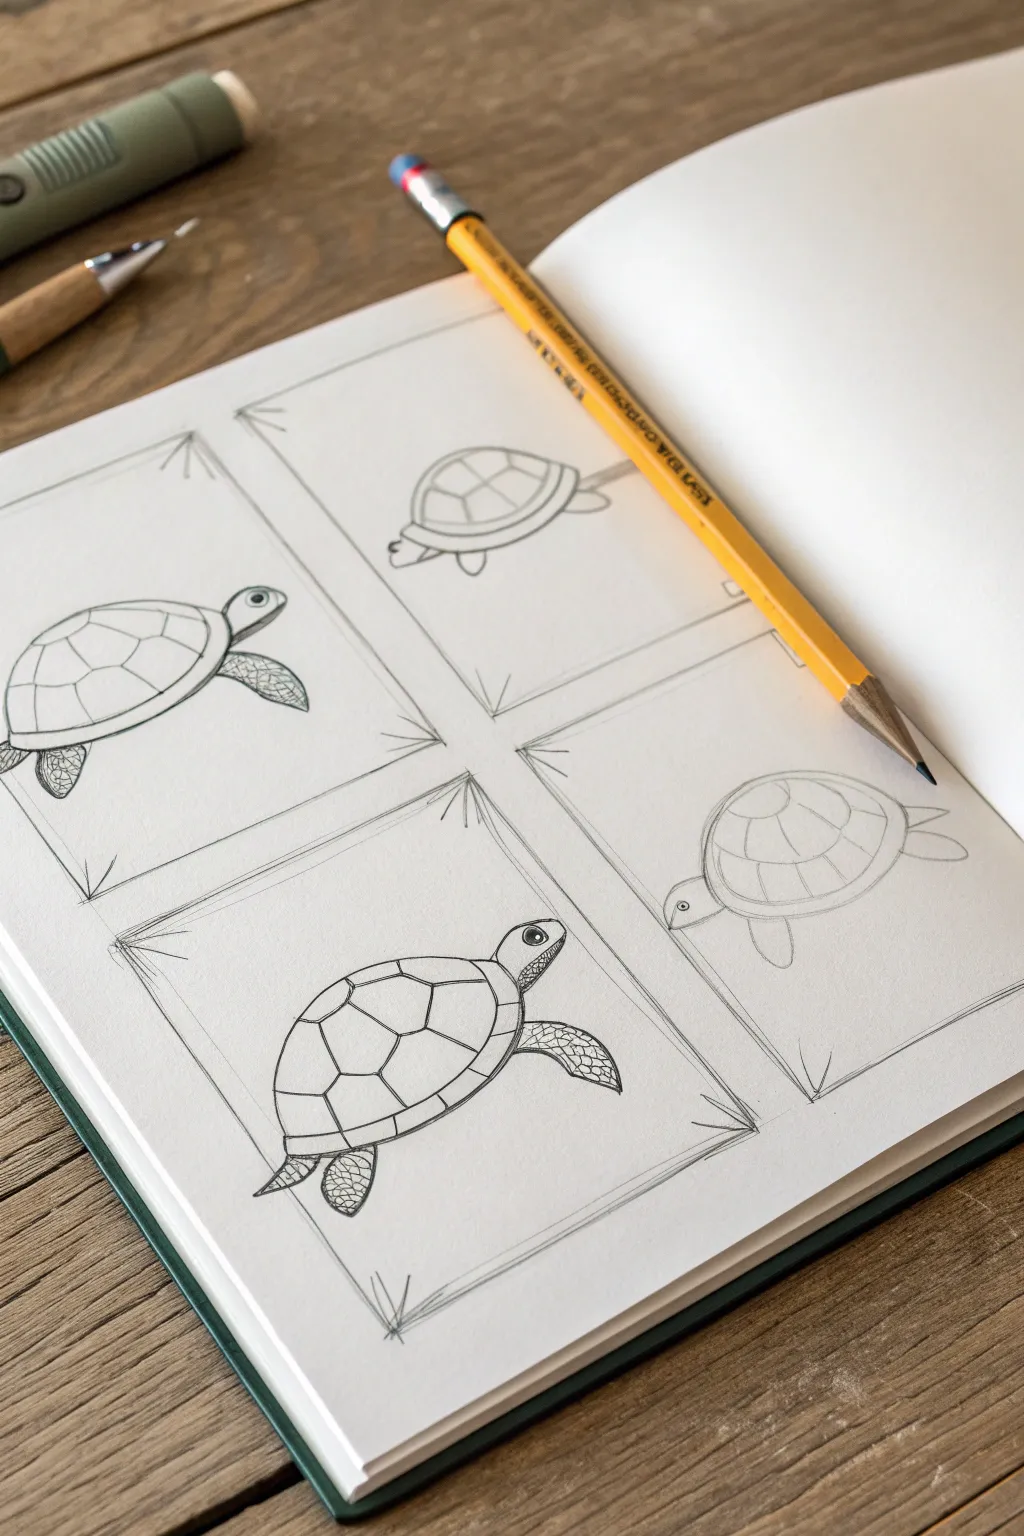
Master the art of drawing a charming sea turtle by breaking down its complex shell into manageable geometric shapes. This tutorial guides you through creating a clean, illustrative sketch that looks great in any sketchbook.
How-To Guide
Materials
- Sketchbook or drawing paper
- HB or 2B graphite pencil
- Fine-liner pen (optional for inking)
- Eraser
- Ruler (optional for framing)
Step 1: Planning and Basic Shapes
-
Define your frame:
Start by drawing a light rectangular frame on your page. This helps center your drawing and gives it a finished composition. You can add small diagonal ticks in the corners for a decorative sketchbook look. -
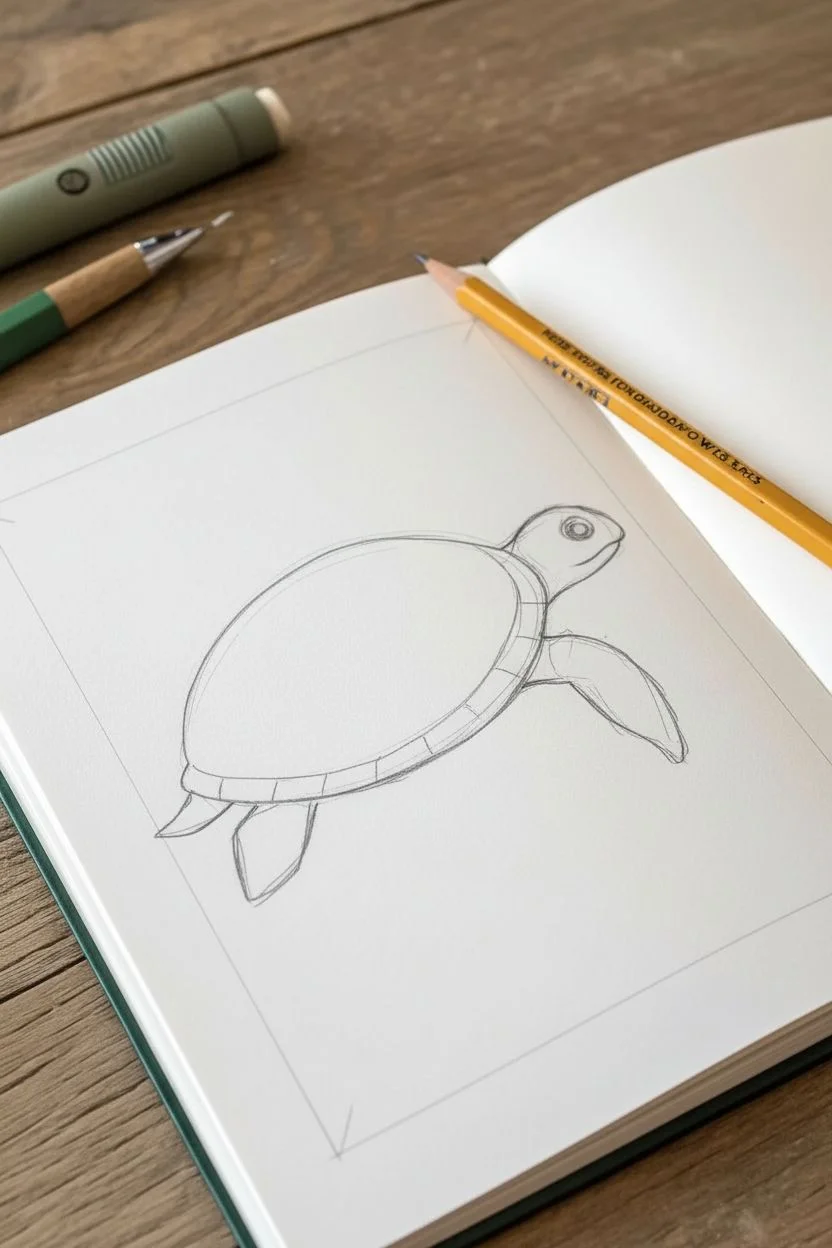
Draw the main body oval:
In the center of your frame, sketch a large, tilted oval. This will become the turtle’s shell. Angle it slightly upward to the right to suggest movement. -
Add the head and neck:
Attached to the upper right side of the shell oval, draw a smaller, rounded shape for the head. Connect it to the shell with a short, curved neck. -
Outline the flippers:
Sketch the front flipper as a long, paddle-like shape extending downwards from the front of the shell. Add a smaller, triangular shape at the back for the rear flipper.
Pro Tip: Shell Symmetry
Don’t stress about perfect symmetry on the shell. Real turtles have organic quirks, so slightly uneven scutes actually make the drawing feel more natural.
Step 2: Structuring the Shell Pattern
-
Create the shell rim:
Draw a second curve parallel to the bottom edge of your main oval. This creates the ‘rim’ or border of the turtle’s shell, separating the top from the belly. -
Mark the center scute:
In the very middle of the shell’s top dome, draw a pentagon (a five-sided shape). This central shape anchors the entire pattern. -
Build the side sections:
From the corners of your central pentagon, draw lines extending outward toward the shell’s edge. Connect these lines to create the surrounding polygon shapes found on a turtle’s back. -
Detail the rim segments:
Along the bottom rim you drew earlier, add small vertical lines to divide it into rectangular segments. I find this instantly adds realism to the shell structure.
Step 3: Refining Features
-
Define the eye:
Place a large circle on the head for the eye. Draw a smaller circle inside it for a highlight, then darken the rest of the pupil to make the character look lively. -
Shape the mouth:
Draw a simple curved line for the mouth, giving the turtle a slight smile. Refine the shape of the beak so it looks slightly pointed. -
Texture the flippers:
Draw a pattern of small, irregular pebbles or scales inside the flipper shapes. Keep them loose and organic looking, rather than perfect circles.
Level Up: Watercolor Wash
Add a translucent layer of green or blue watercolor over the graphite. The pencil lines will show through, creating a lovely mixed-media illustration style.
Step 4: Final Lines and Shading
-
Darken the main outlines:
Go over your final lines with firmer pressure or a fine-liner pen. Ensure the overlapping areas, like where the flipper meets the shell, are clean and distinct. -
Clean up sketch lines:
Use your eraser to gently remove the initial construction lines and the light oval you started with, leaving only the defined shapes. -
Add subtle shading:
Lightly shade the underside of the shell rim and the bottom of the flippers to give the drawing some volume and weight. -
Review the composition:
Check the balance of your drawing within the frame. If needed, darken the corner tick marks to re-emphasize the border.
You have composed a delightful aquatic illustration that captures the turtle’s geometric beauty
Draw a Seahorse From an S-Curve
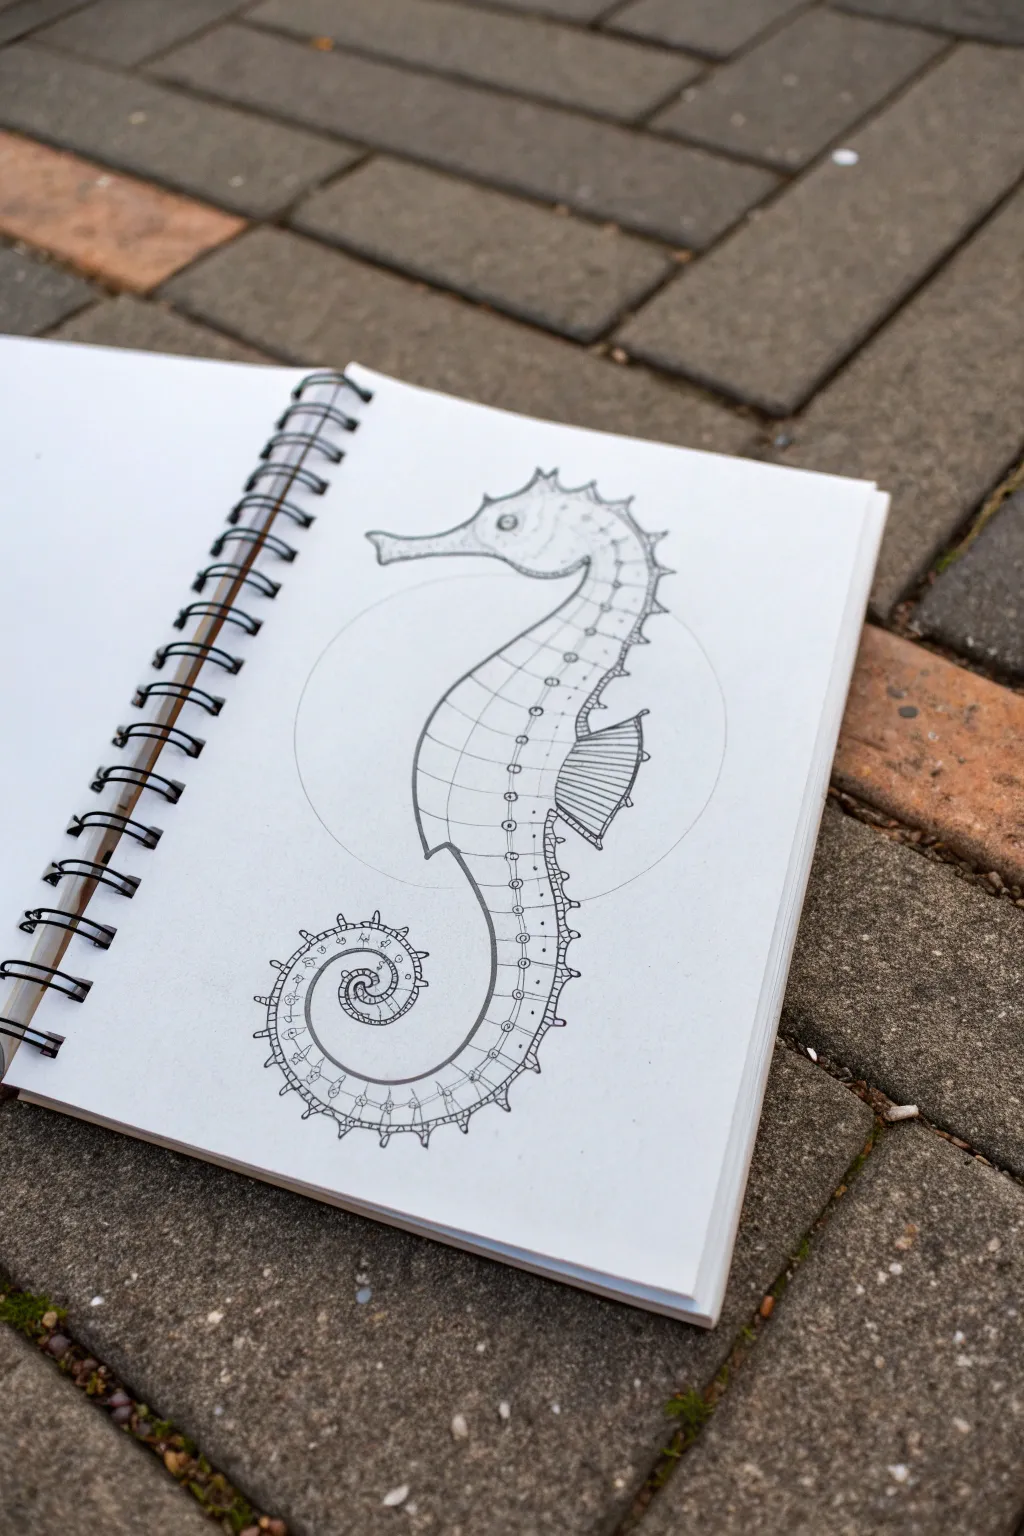
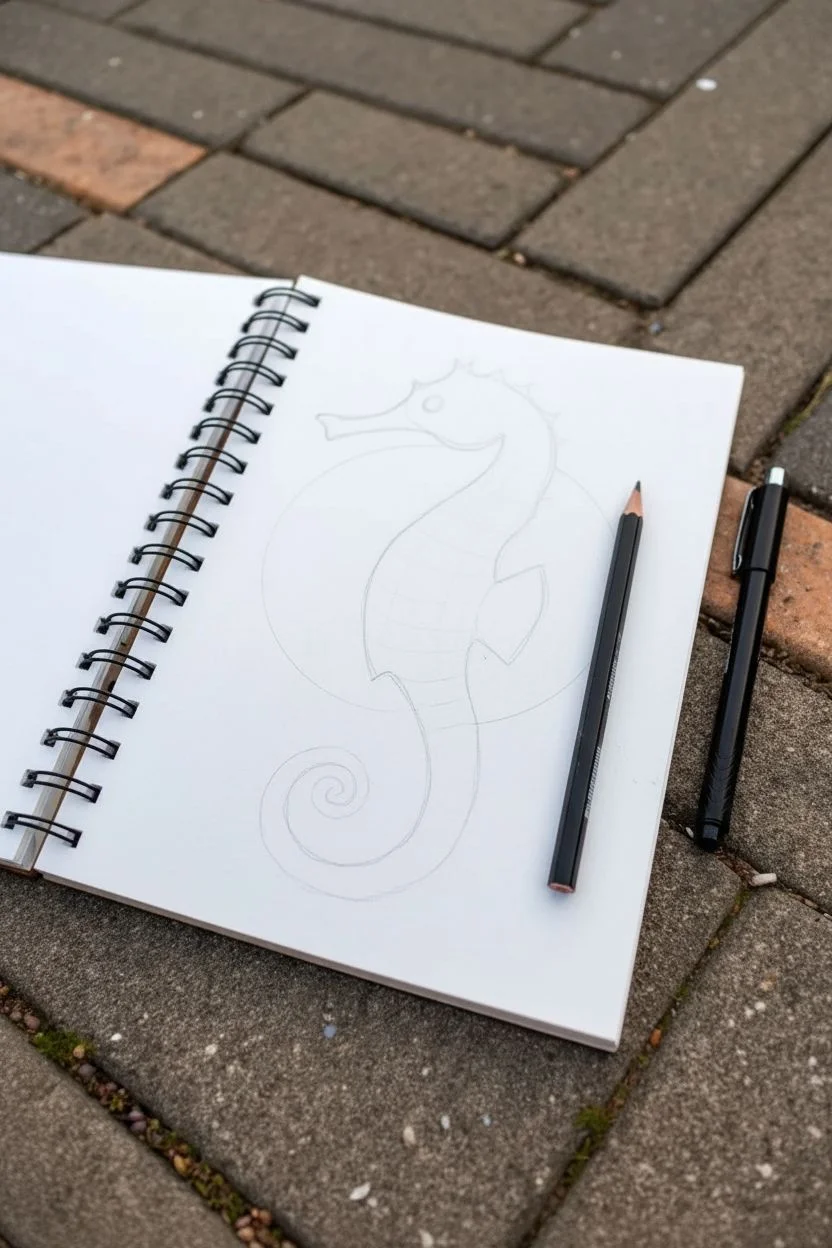
Master the art of drawing a detailed seahorse by starting with simple geometric shapes and guidelines. This tutorial breaks down the intricate segmented body into manageable steps, resulting in a crisp, pen-and-ink illustration worthy of any sketchbook.
Step-by-Step Guide
Materials
- Spiral-bound sketchbook or drawing paper
- HB Graphite pencil (for initial sketch)
- Fine-liner pen (black, 0.3mm or 0.5mm)
- Eraser
- Compass or circular object (optional)
Step 1: Laying the Foundations
-
Draw the main curve:
Begin by lightly sketching a large ‘S’ shape in the center of your page. This will act as the spine of the seahorse. -
Establish the head and tail:
At the top of your ‘S’, draw a small oval for the head. At the bottom, curl the line tightly inward to form the spiral tail. -
Add the central guide circle:
Lightly draw a large, faint circle behind the main body area. You can see this trace in the final drawing; it helps keep the posture balanced and the belly curve consistent. -
Outline the body shape:
Using your ‘S’ curve as a central guide, sketch the outer contours of the body. Make the chest area broad and tapered as it moves down towards the tail. -
Define the snout:
Extend the head oval forward to create a tubular snout, slightly flared at the very tip.
Keep the Flow
When drawing the horizontal body segments, curve them slightly to match the roundness of the belly. Straight lines will make the seahorse look flat rather than 3D.
Step 2: Structuring the Segments
-
Divide the body:
Draw horizontal, slightly curved lines across the width of the body. These should be spaced relatively evenly, acting as the ribs or segments. -
Draw the dorsal line:
Sketch a vertical line running down the length of the body, intersecting your horizontal segments. This creates a grid-like pattern on the seahorse’s torso. -
Add the fin shape:
On the back of the seahorse, just below the neck curve, sketch a fan-like shape for the dorsal fin. -
Detail the fin structure:
Draw lines radiating from the base of the fin to the outer edge to represent the spines. -
Sketch the eye:
Place a small circle on the head for the eye, adding a tiny dot in the center for the pupil.
Smudged Ink?
If your ink smudges when erasing pencil lines, you aren’t waiting long enough. Give the pen at least 5-10 full minutes to set before touching it with an eraser.
Step 3: Inking and Detailing
-
Ink the main outline:
Switch to your fine-liner pen. Carefully trace over the outer contour of the seahorse. Use confident, smooth strokes. -
Ink the vertical spine:
Go over the central vertical line running down the body. At each intersection with a horizontal segment, draw a tiny circle or bolt-head shape. -
Define the segments:
Ink the horizontal segment lines. Notice how they curve with the body’s volume. I find it helpful to ink them slightly lighter than the outline. -
Add the spikes:
Along the back outline (the spine), add small triangular spikes at the detailed segment points. Repeat this for the belly outline and the tail. -
Detail the tail spiral:
As you ink the tail, make the segments smaller and closer together as they wind into the center of the spiral. -
Texturize the head:
Add small stippling dots on the snout and cheek area to give the skin a bumpy texture. -
Erase pencil guides:
Once the ink is completely dry, gently erase the initial pencil ‘S’ curve and the large guide circle, leaving only your crisp ink drawing.
Take a moment to admire the rhythmic pattern of the segments you’ve created


Draw a Succulent With Repeating Leaf Petals
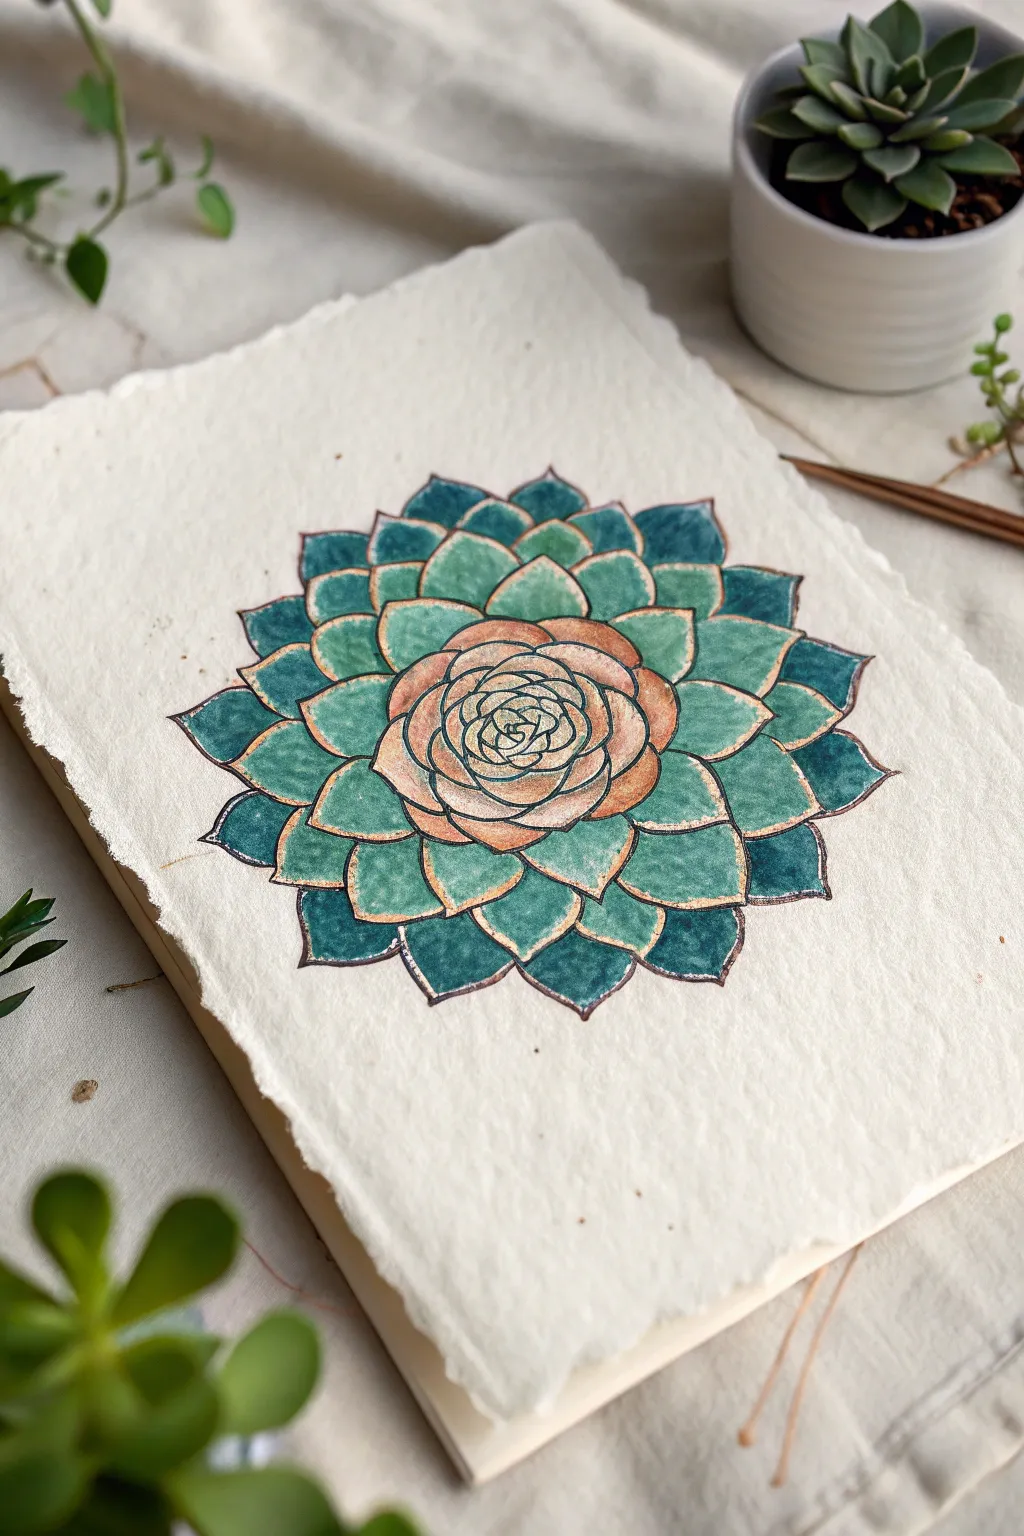
This project captures the mesmerizing geometry of nature by drawing an Echeveria succulent from a top-down perspective. Using layers of watercolor and fine ink lines on textured paper creates a piece that feels organic and beautifully serene.
Detailed Instructions
Materials
- Heavyweight textured watercolor paper (deckled edge optional)
- Pencil (HB or 2H)
- Eraser
- Waterproof fine liner pen (0.3mm or 0.5mm, black or dark brown)
- Watercolor paints (Veridian, Indigo, Burnt Sienna, Yellow Ochre)
- Round watercolor brushes (Size 2 and 4)
- Paper towel
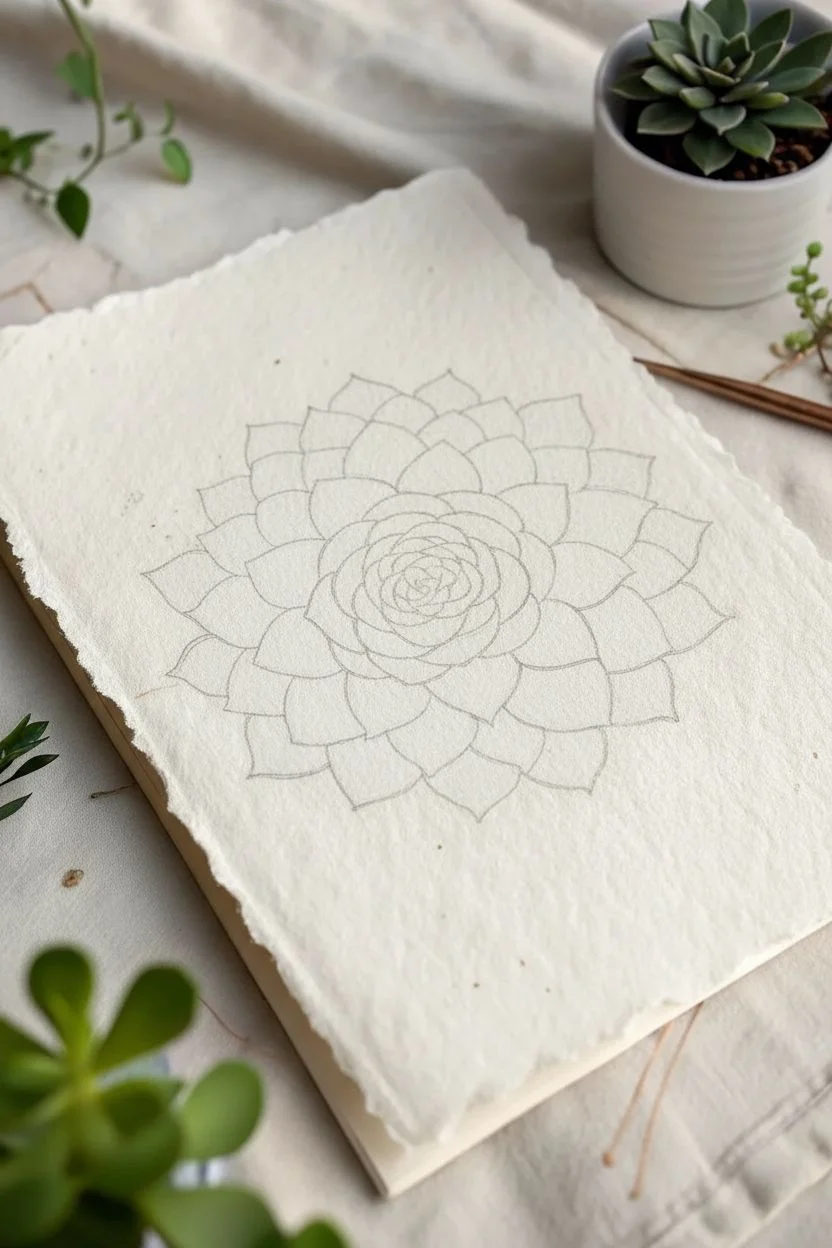
Step 1: Sketching the Structure
-
Find the Center:
Visualize or lightly mark the exact center of your paper. This will be the heart of your succulent where the smallest, tightest leaves cluster. -
Draw the Core Rose:
Start by sketching a small, tight spiral or bud shape in the center, about the size of a dime. Add 3-4 small, overlapping petals hugging this center tightly, resembling a tiny rosebud. -
Add the First Ring:
Move outward creating a new ring of petals. These petals should be slightly larger and flatter than the center ones. Draw them nestled in the gaps between the previous layer’s petals. -
Expand Outward:
Continuing in a circular pattern, sketch the next layer of leaves. Make these petals wider and slightly pointed at the tips. Ensure they overlap the layer beneath them, creating depth. -
Create the Outer Layers:
Draw the final two or three rings of leaves. These should be the largest and flattest, fanning out broadly. I like to make the tips of these outer leaves slightly more pointed to give the rosette a crisp silhouette. -
Refine the Shapes:
Go over your pencil lines. Ensure the spacing looks balanced, though perfect symmetry isn’t required—nature is perfectly imperfect. Lightly erase any heavy sketch lines until they are barely visible guides.
Uneven Petals?
Don’t stress if your layers become uneven. If one side looks empty, simply draw an extra ‘tucked-in’ petal peeking out from underneath to balance the overall circular shape.
Step 2: Inking the Outline
-
Trace with Ink:
Using your waterproof fine liner, carefully trace over your pencil sketch. Use a steady hand, but don’t worry if the line wavers slightly; it adds organic character. -
Add Texture Details:
Add tiny broken lines or dots near the base of the petals where they tuck under each other. This suggests shadow and curve before we even add paint. -
Erase Pencil Marks:
Wait for the ink to dry completely to avoid smudging. Then, gently erase all remaining pencil marks to leave a clean black-and-white framework.
Step 3: Painting with Watercolor
-
Mix the Center Color:
Prepare a warm, peachy-brown mix using Burnt Sienna and a touch of dilute Yellow Ochre. This will represent the sun-stressed center of the succulent. -
Paint the Core:
Paint the innermost ‘rosebud’ section with this warm mix. Keep the wash relatively transparent so the paper texture shows through. -
Mix the Green Gradient:
Create a teal-green shade by mixing Veridian with a tiny bit of Indigo. For the transition zone heavily water this down. -
Paint the Middle Layers:
Paint the middle rings of petals. While the paint is wet, drop in a tiny bit of the peachy-brown color near the tips of these leaves to show a gradient transition from the warm center. -
Darken the Outer Leaves:
Add more Indigo to your green mix to create a deep, cool teal. Paint the largest, outermost leaves with this richer color. -
Leave Highlights:
As you paint each petal, try to leave a very thin sliver of white paper unpainted along the top edge or one side. This acts as a natural highlight and separates the layers visually. -
Enhance the tips:
Once the base wash is damp (not soaking), dab a stronger concentration of the teal color at the very tips of the outer leaves and the base where they meet the layer below. -
Add Final Contrast:
Mix a very dark, watery blue-black. Using your smallest brush, paint thin shadows right in the crevices where petals overlap to make the succulent pop off the page.
Pro Tip: Wet-on-Wet
Drop clear water onto a petal before adding pigment. The color will bloom outward naturally, creating those soft, gradient edges characteristic of fleshy succulent leaves.
Allow the paper to dry completely flat to prevent buckling, revealing a vibrant botanical study ready for display
Sketch a Simple House Using a Box in Perspective
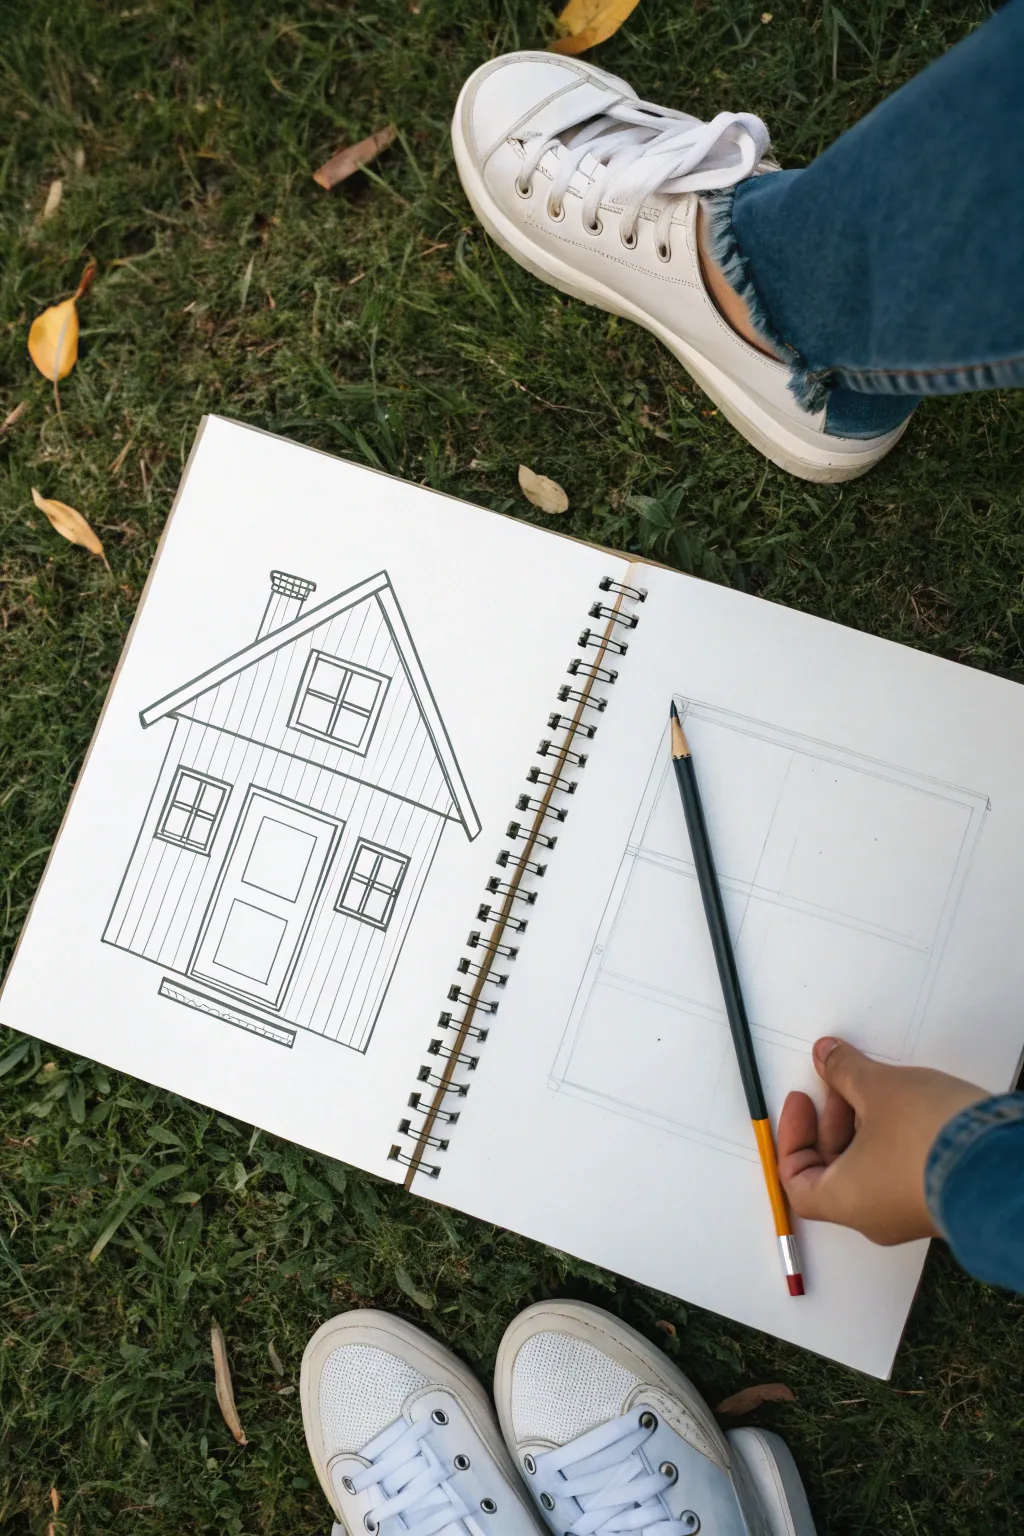
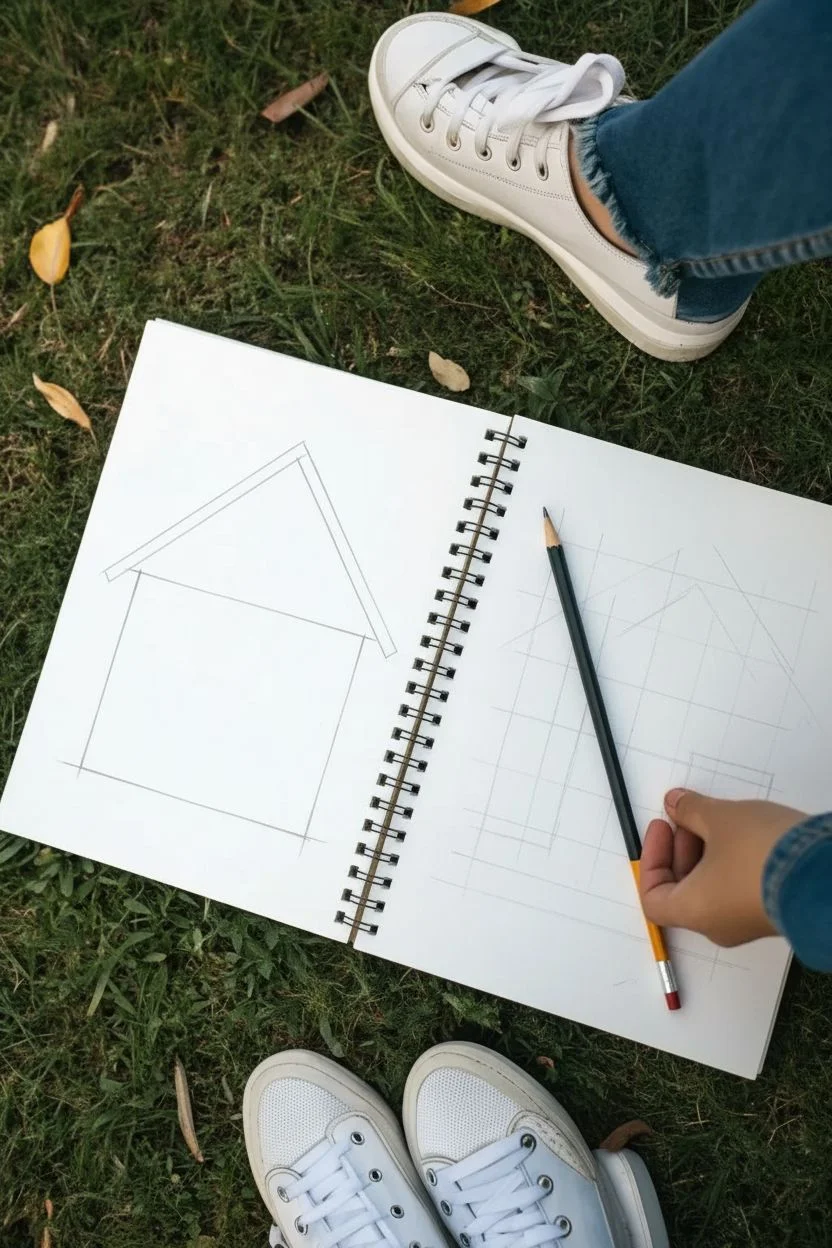
This project guides you through drawing a quaint wooden cabin using clean, precise lines and basic shapes. The result is a charming, illustrative rendering that looks great in any sketchbook.
Step-by-Step Tutorial
Materials
- Spiral-bound sketchbook (heavyweight paper preferred)
- Graphite pencil (HB or 2B)
- Fine liner pen (optional, for inking)
- Ruler or straight edge
- Eraser
Step 1: Constructing the Frame
-
Establish the main body:
Begin by drawing a large rectangle in the center of your page using your ruler. This will form the main facade of the house. Ensure your vertical lines are parallel to the sides of the paper. -
Add the roof peak:
Find the center point of the top horizontal line of your rectangle. Draw a point directly above this center to mark the tip of the roof. -
Connect the triangle:
Draw straight lines connecting that top point down to the upper corners of your rectangle, creating a classic triangle roof shape. -
Create the overhang:
Parallel to the roof lines you just drew, add a second set of lines slightly above them. Extend these lines past the side walls a bit to create the eaves. -
Close the fascia:
Connect the ends of your double roof lines with short, perpendicular strokes to give the roof thickness.
Even Spacing Trick
Make small tick marks along the bottom of the house before drawing vertical siding lines. This ensures your planks serve as a uniform guide.
Step 2: Adding Architectural Details
-
Position the door:
In the lower center of the facade, draw a vertical rectangle for the door frame. Add a smaller rectangle inside it for detail, and a tiny square for the window panel. -
Draw the lower windows:
Flanking the door, draw two square windows. Use your ruler to ensure they are aligned at the same height. Divide them into four panes with a cross shape. -
Add the attic window:
Place a square window in the center of the triangular roof space. Divide this one into four panes as well, keeping the lines crisp. -
Construct the chimney:
On the left slope of the roof, draw a small vertical rectangle emerging from behind the roofline. Add a small cap on top with a horizontal bar. -
Ground the structure:
Draw a thin, long rectangle at the very base of the house to represent a step or foundation slab. Add a little texture inside it.
Wobbly Lines?
If your hand shakes while using a ruler, try planting your pinky finger on the paper as an anchor while you glide the pencil along the edge.
Step 3: Texturing and Refining
-
Start the vertical siding:
To create the wooden plank effect, you’ll need to draw vertical lines across the entire front of the house. -
Navigating features:
Draw these vertical lines from the roofline down to the foundation, but be careful to skip over your windows and door frames. I find it helps to mark the spacing lightly first. -
Detailing the siding:
Continue the siding pattern up into the triangular attic space, maintaining the same spacing as the lower section. -
Refining the windows:
Go back over your window frames to slightly thicken the outer edges, giving them a bit more weight and prominence. -
Final clean up:
Use your eraser to remove any stray guide marks or places where the siding lines accidentally crossed into the window frames. -
Optional inking:
If you want a bolder look, trace over your final pencil lines with a fine liner pen and erase the pencil once the ink is totally dry.
Now you have a structured little home ready for color or shading
Try Negative Space Letters With Simple Florals
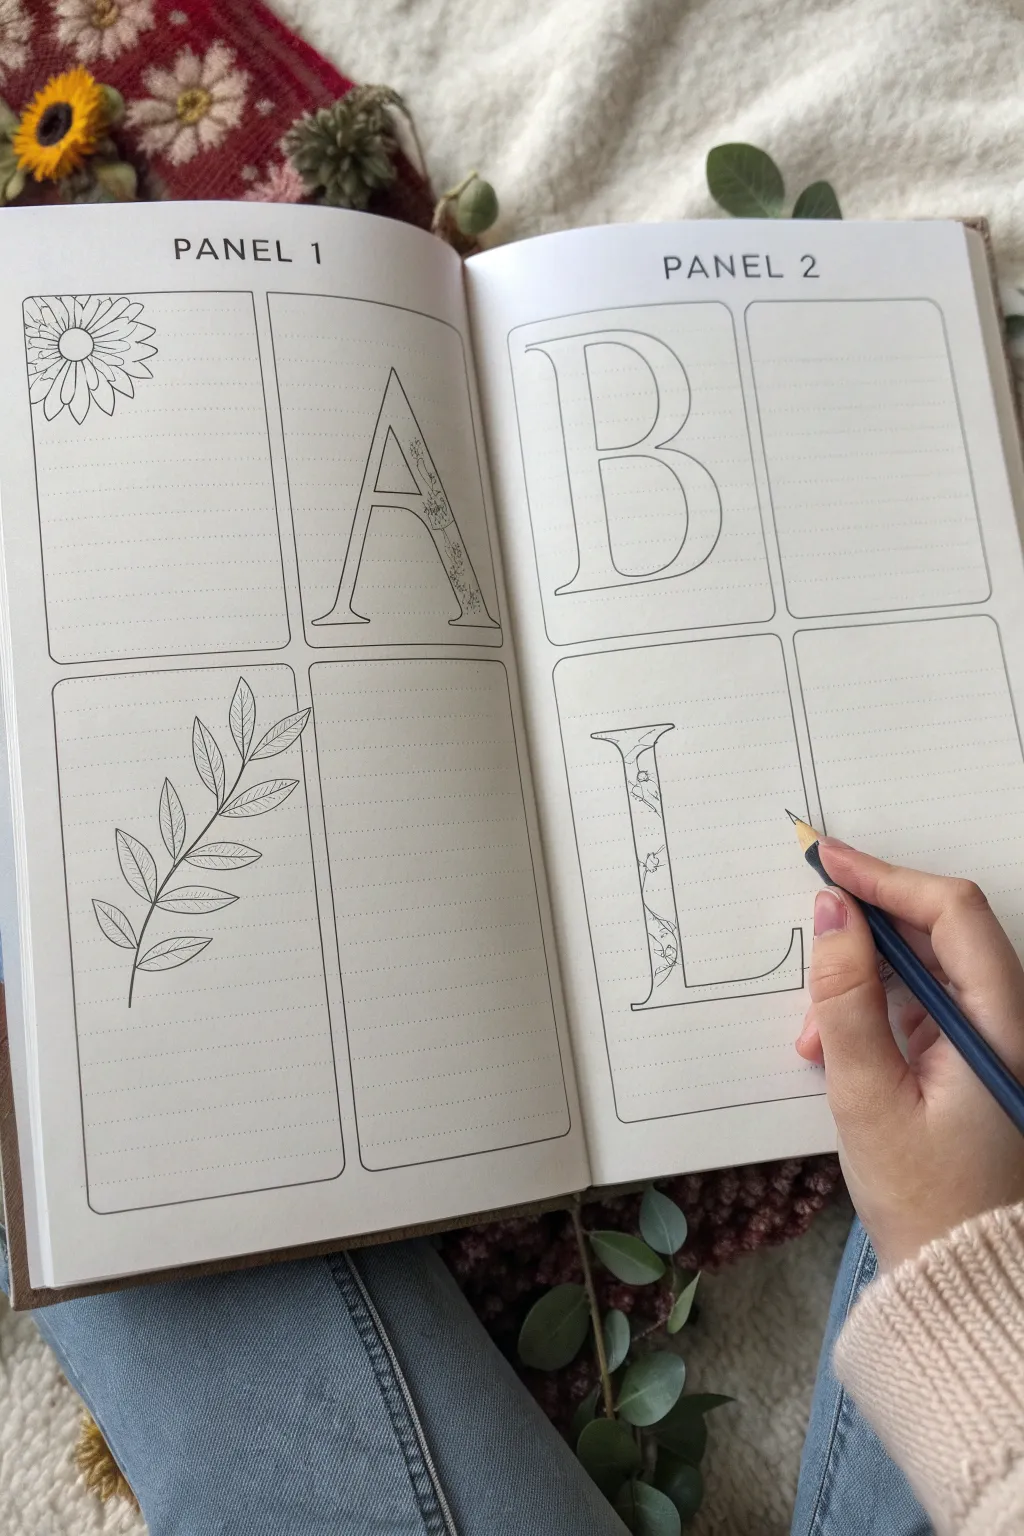
Create a charming, structured spread in your journal using this combination of outlined letters and botanical line art. This project is perfect for practicing negative space drawing, where delicate floral patterns live inside bold letter outlines.
Detailed Instructions
Materials
- A journal or sketchbook
- Ruler
- Pencil (HB or H for sketching)
- Fine-liner pen (0.3 or 0.5mm, black)
- Eraser
Step 1: Planning the Layout
-
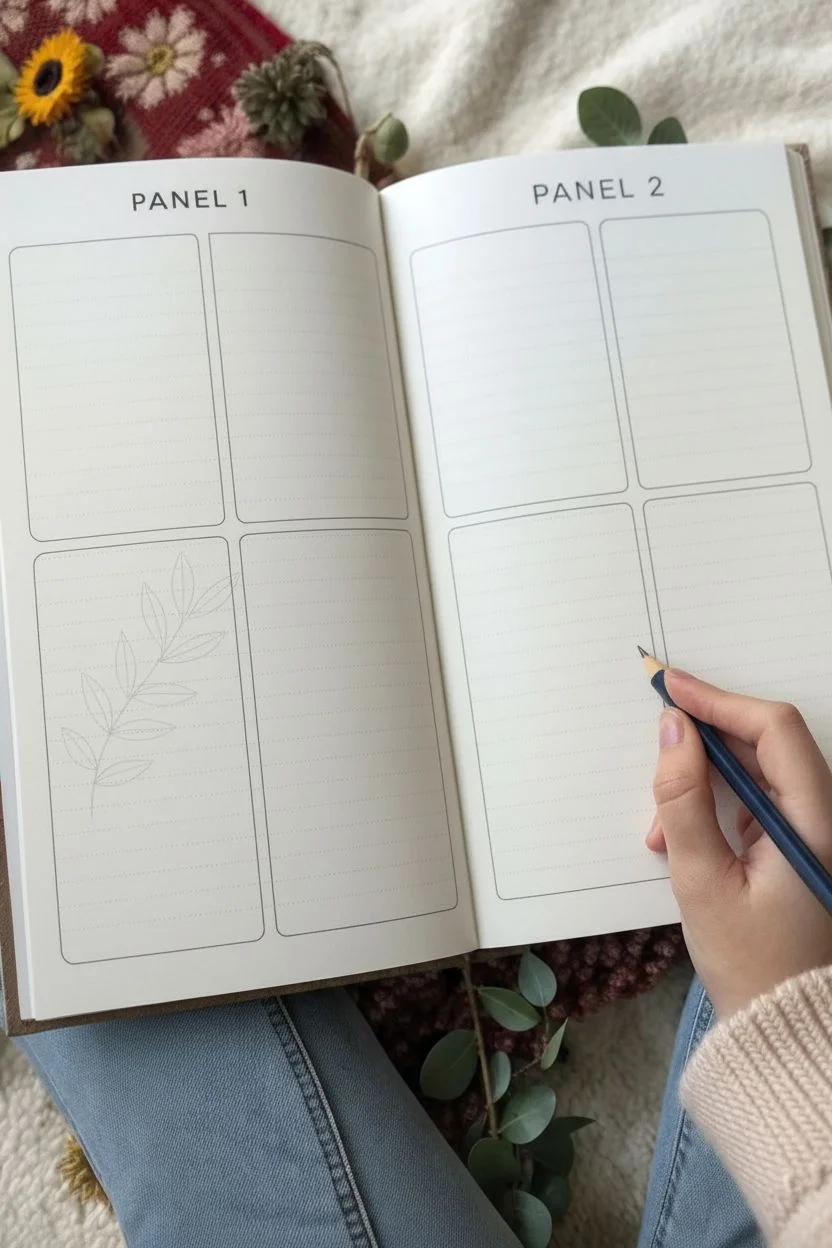
Mark the boundaries:
Begin by lightly marking out your page boundaries. If your journal isn’t pre-printed like this one, use a ruler to draw a large outer rectangle on each page to contain your panels. -
Divide into panels:
Divide each page’s canvas vertically and horizontally to create four equal rectangular sections on the left page and the right page. Leave a small gap between the boxes for a clean, panel-like appearance. -
Add guide lines:
Draw rounded corners on your rectangles for a softer look. Inside each box, draw very faint horizontal lines across the width; these will act as writing guides later or just add texture to the background. -
Label the headers:
At the very top of your pages, center the headers ‘PANEL 1’ and ‘PANEL 2’ in clean, capital letters.
Wobbly Lines?
If your long straight lines for the boxes are shaky, use a ruler even for the inking stage. Just wipe the ruler edge frequently so wet ink doesn’t smear.
Step 2: Sketching the Elements
-
Outline the Letter A:
In the top-right box of Panel 1, sketch a large serif letter ‘A’. Make the letter thick enough that you can draw inside it later. The serifs (the little feet) should be elegant and curved. -
Outline the Letter B:
On the opposite page (Panel 2), in the top-left box, draw a matching large serif letter ‘B’. Ensure the stroke width matches your ‘A’ for consistency. -
Draw the sunflower:
Back on Panel 1, drawings are needed for balance. In the top-left box, sketch a sunflower head peeking out from the top left corner. Draw a central circle and radiate petals outward. -
Sketch the leaf branch:
In the bottom-left box of Panel 1, draw a long, curving stem diagonally. Add pairs of leaves extending from the stem. Leaf veins can be simple single lines. -
Outline the Letter L:
In the bottom-left box of Panel 2 (below the ‘B’), sketch a large serif ‘L’. This letter will be the focus of our floral filling technique.
Step 3: Adding Floral Details
-
Drafting the internal vine:
Inside the ‘L’ shape, lightly sketch a wavy vine that travels up the vertical stroke of the letter. It should weave back and forth within the boundaries of the letter. -
Adding tiny blooms:
Along this internal vine, draw small, simple flowers and tiny leaves. Keep them contained strictly within the outline of the letter ‘L’, using the letter’s edge as a frame. -
Repeat for Letter A:
Return to your ‘A’ on Panel 1. Sketch a similar floral vine climbing up the right leg of the ‘A’. I find it helps to vary the flower sizes slightly to keep it interesting.
Level Up: Color Pop
Use colored pencils to shade ONLY the leaves and flowers inside the letters. Keeping the rest monochrome makes the colored details really stand out.
Step 4: Inking and Refining
-
Ink the layout frames:
Using your fine-liner pen, trace over your four rectangular panels on each page. Use a steady hand to get smooth curves on the corners. -
Ink the background lines:
Carefully draw in the horizontal background lines with a very light touch or a thinner pen nib, making them dashed or very faint so they don’t overpower the drawings. -
Ink the main illustrations:
Go over the sunflower and the large leaf branch with your main pen. Add detail to the petals and leaf veins as you ink. -
Ink the letter outlines:
Trace the outer boundaries of your letters ‘A’, ‘B’, and ‘L’. Keep lines crisp, especially around the sharp serif corners. -
Detail the floral fills:
Ink the tiny vines and flowers inside the ‘A’ and ‘L’. This is the ‘negative space’ effect—filling the letter with art rather than solid ink. -
Erase pencil marks:
Wait for the ink to be completely dry to avoid smudging. Then, gently erase all your pencil sketches and guidelines to reveal the clean design.
Now you have a beautifully organized spread ready for your creative writing or further doodling


Have a question or want to share your own experience? I'd love to hear from you in the comments below!