May is basically the month where everything feels like it’s stretching, blooming, and turning the color up—perfect fuel for a fresh May calendar page. Here are my favorite May calendar drawing ideas you can remix for a bullet journal, sketchbook, or DIY planner without overthinking it.
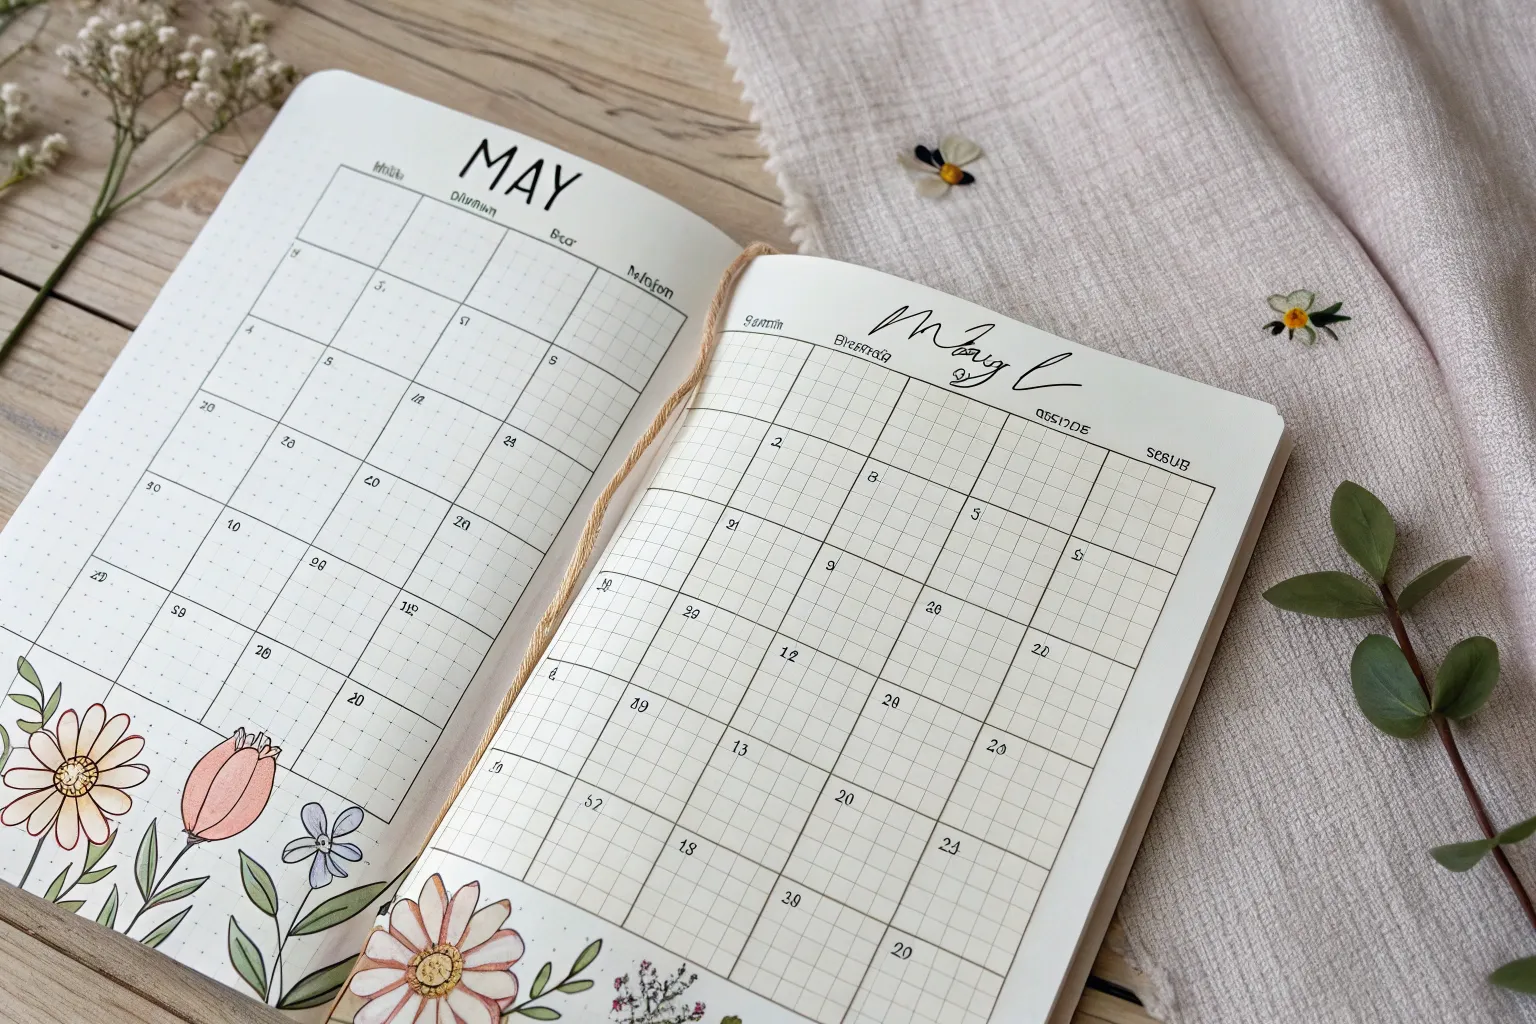
Wildflower Border Monthly Grid

Embrace the fresh energy of spring with this elegant hand-drawn calendar layout featuring delicate wildflower garlands. The design balances a structured monthly grid with organic, flowing floral borders that seem to grow right onto the page.
Detailed Instructions
Materials
- A4 or Letter-sized spiral-bound sketchbook or dot grid journal
- Fine liner pens (sizes 005, 01, and 03)
- Ruler (clear acrylic works best)
- Pencil (HB or 2H)
- Eraser (kneaded or high-quality polymer)
- Light green colored pencil or watercolor marker
- Yellow colored pencil or marker
Step 1: Setting the Structure
-
Mark the margins:
Begin by deciding the size of your calendar grid. Leave generous white space at the top left corner and bottom right corner for the illustrations. A good rule of thumb is to center the grid slightly, ensuring about 2-3 inches of clearance for the artwork. -
Draft the grid:
Using your pencil and ruler, lightly draw a classic 5-row by 7-column grid. Ensure your boxes are large enough to write daily tasks in; 1.5-inch squares usually work well. -
Add dates and headers:
At the top of the grid, letter the month name. You can use a simple serif font or stick to the typewriter style seen in the example. Number the boxes starting from the correct day of the week for the current year. -
Ink the lines:
Trace your grid lines with an 01 fine liner. For a softer look, don’t use the ruler for this ink step; hand-drawing the lines gives it a charming, organic feel.
Ink Smearing?
If using markers, ink lines might bleed. Test your pen on a scrap page first. If it smears, do the coloring step first, let it dry, and then add your black outlines on top.
Step 2: Sketching the Flora
-
Draft the main stems:
With your pencil, draw a long, sweeping curved line starting from the top left corner and draping down towards the grid. Repeat this process in the bottom right corner, curving upwards. -
Add leaf foundations:
Along these stems, sketch small pairs of almond-shaped leaves. Keep them somewhat symmetrical but vary the spacing to make it look natural. -
Position the blooms:
Intersperse the leaves with simple flower shapes. Sketch small daisy-like circles and bell-shaped blossoms. In the bottom right, create a distinct cluster of three daisy heads near the corner. -
Refine the details:
Add tiny details like the centers of the daisies and the veins in the larger leaves. This is the time to check the balance of your composition.
Level Up: Pressed Flowers
Leave a few flower heads undrawn and glue actual small pressed daisies or fern leaves in those spots for a stunning 3D mixed-media effect.
Step 3: Inking and Coloring
-
Outline the vegetation:
Switch to your 005 or 01 fine liner. Carefully trace your floral sketches. Use broken or lighter lines for the delicate petals to keep them feeling airy. -
Add texture:
Use the finest pen tip to add stippling (tiny dots) to the center of the daisies and small hatching lines on the leaves to suggest shadow and depth. -
Erase pencil marks:
Wait until the ink is completely dry—I usually give it at least five minutes to be safe—then gently erase all underlying pencil sketches. -
Apply soft color:
Take your light green pencil or marker and color just the stems and leaves. Apply the color lightly, leaving some white space for highlights. -
Highlight the blooms:
Use a yellow pencil to fill in the centers of the daisies. Leave the petals white for a clean, crisp contrast against the green foliage. -
Final touches:
Review your spread. If the grid lines look too faint compared to the drawings, go over them on more time to darken the frame.
Enjoy filling up your new month with plans amidst your beautiful hand-drawn garden


Big Hand-Lettered May Title Page

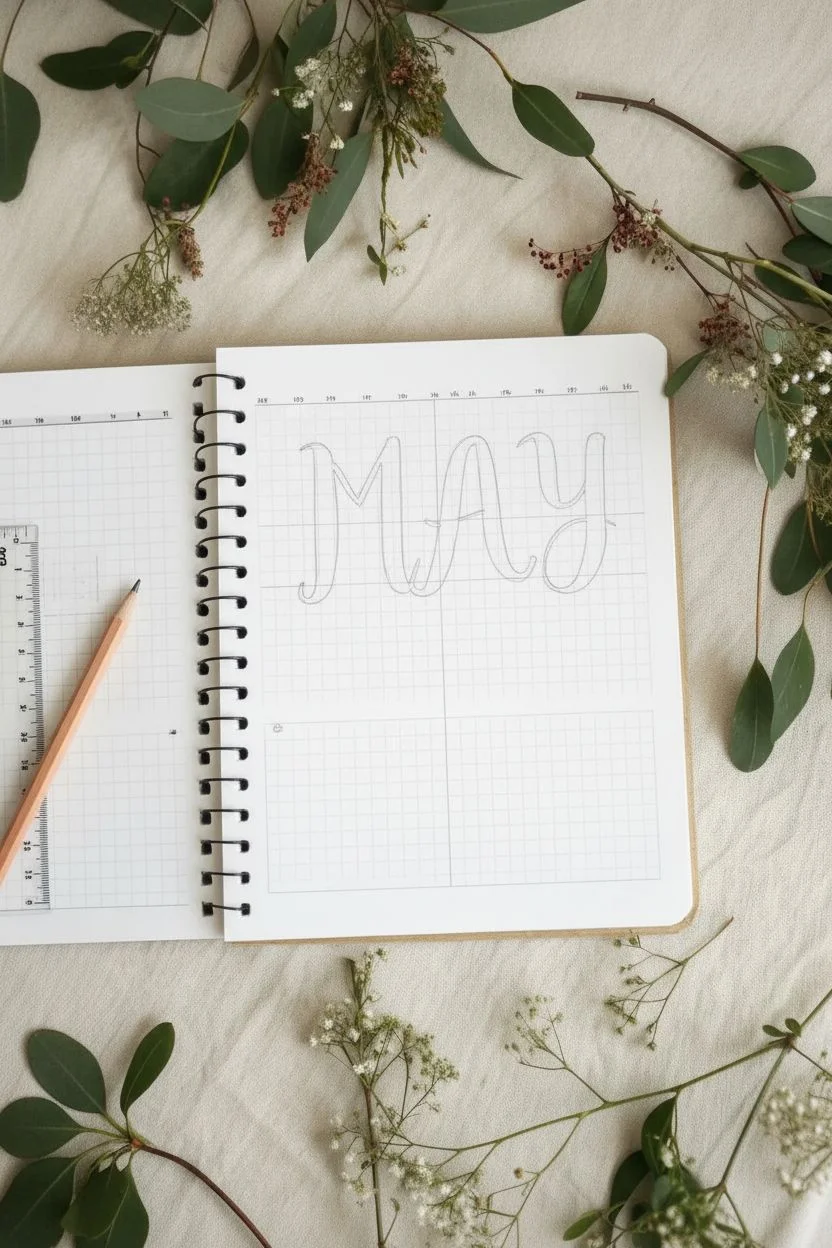
Embrace simplicity with this elegant bullet journal spread featuring bold, rustic lettering and delicate botanical accents. The contrast between the heavy black ink and the fine line drawing creates a balanced, modern look perfect for welcoming late spring.
How-To Guide
Materials
- Spiral-bound notebook with grid paper
- Thick black brush pen or chisel tip marker
- Fine liner pen (0.1mm or 0.3mm)
- Pencil and eraser
- Ruler
Step 1: Planning the Layout
-
Locate the center:
Find the optical center of your grid page. Since ‘MAY’ has three letters, the ‘A’ will act as your centerpiece. Mark the vertical center line lightly with a pencil. -
Define the letter height:
Decide how tall your letters will be. In this design, the letters span roughly 8-10 grid squares tall. Use your ruler to lightly mark the top and bottom baselines to ensure all letters stay aligned. -
Rough sketch:
Lightly sketch the skeleton of the word ‘MAY’ in pencil. Focus on spacing; the ‘M’ and ‘Y’ should be equidistant from the center ‘A’. Don’t worry about thickness yet, just the basic forms.
Step 2: Lettering the Title
-
Start the ‘M’:
Using your thick black marker, draw the left vertical stroke of the ‘M’. Start with a slight decorative serif at the top and bottom if you like a rustic look, or keep it straight. -
Complete the ‘M’ structure:
Draw the remaining strokes of the ‘M’. Notice the ‘M’ in the reference has slightly curved, organic lines rather than rigid geometric ones. The middle point should dip down to the baseline. -
Draw the ‘A’:
Create the ‘A’ with a thick left stroke and a slightly curved right stroke. The crossbar should be placed slightly lower than the visual center to give it a modern weight. -
Finish with ‘Y’:
Draw the ‘Y’. Start with a U-shape for the top part, then bring a thick tail down. Add a gentle curve or loop at the bottom of the descender for flair. -
Add weight and contrast:
Go back over your strokes to thicken the downstrokes. This faux-calligraphy technique mimics a brush pen. The downstrokes (lines where your hand would move down) should be significantly thicker than the upstrokes. -
Refine the edges:
Smooth out any shaky edges with the tip of your marker. Ensure the ends of the strokes look deliberate—either sharply squared off or gently rounded depending on your preference.
Clean Lines
For steadier lines on the leaf sprig, pull the pen toward your body rather than pushing it away. This gives you more control over the curve.
Step 3: Drawing the Botanical Divider
-
Sketch the stem:
About 3-4 grid rows below your lettering, use a pencil to draw a gently curved horizontal line. This will be the main stem of your leaf sprig. -
Ink the stem:
Switch to your fine liner pen. Trace over your pencil stem line with a single, confident stroke. Let the line taper off slightly at the right end. -
Add leaves:
Draw small, almond-shaped leaves along the stem. Alternate them on the top and bottom sides of the stem rather than placing them directly opposite each other. -
Stem connections:
Connect each leaf to the main stem with a very short, thin line. I find that keeping these connectors delicate makes the whole drawing look more elegant. -
Detail the leaves:
Add a single line down the center of each leaf to represent the vein. Keep this line very thin and don’t let it touch the very tip of the leaf for a lighter feel.
Add Color
Use a mild green highlighter or watercolor wash to fill in the leaves for a soft pop of color that maintains the minimalist vibe.
Step 4: Finishing Touches
-
Create the bottom grid:
If you want a dedicated calendar or notes section at the bottom, measure a rectangle that spans the width of your page, starting a few rows below the leaf drawing. -
Box it in:
Use your ruler and fine liner to draw the perimeter of this box. The line weight here should be thin and subtle, much lighter than the title lettering. -
Erase guidelines:
Wait for all ink to be completely dry—test a small spot if you’re unsure. Gently erase all pencil baselines and sketch marks. -
Final assessment:
Check the balance of the page. If the title feels too top-heavy, you can slightly thicken the line of the bottom grid box to anchor the design.
Your page is now ready to be filled with your plans and goals for the month


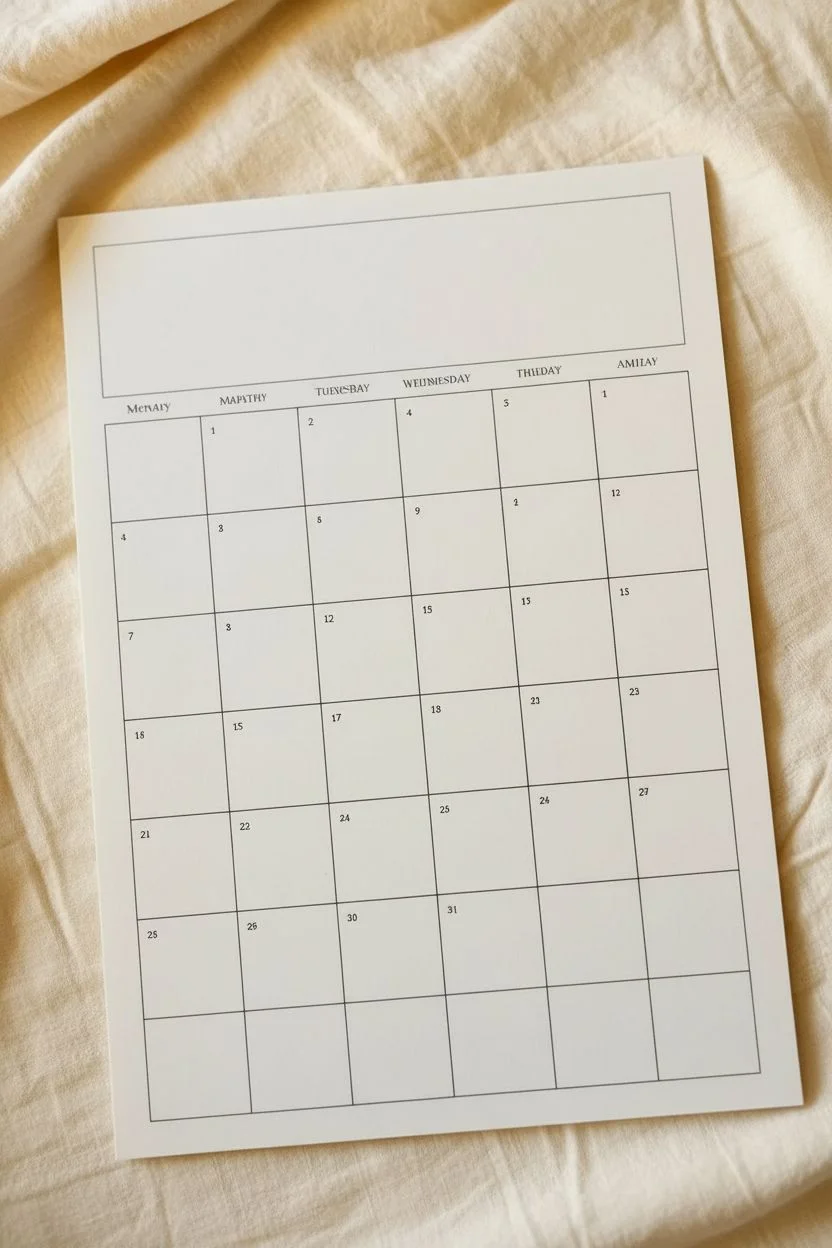
Soft Pastel Wash Background Calendar
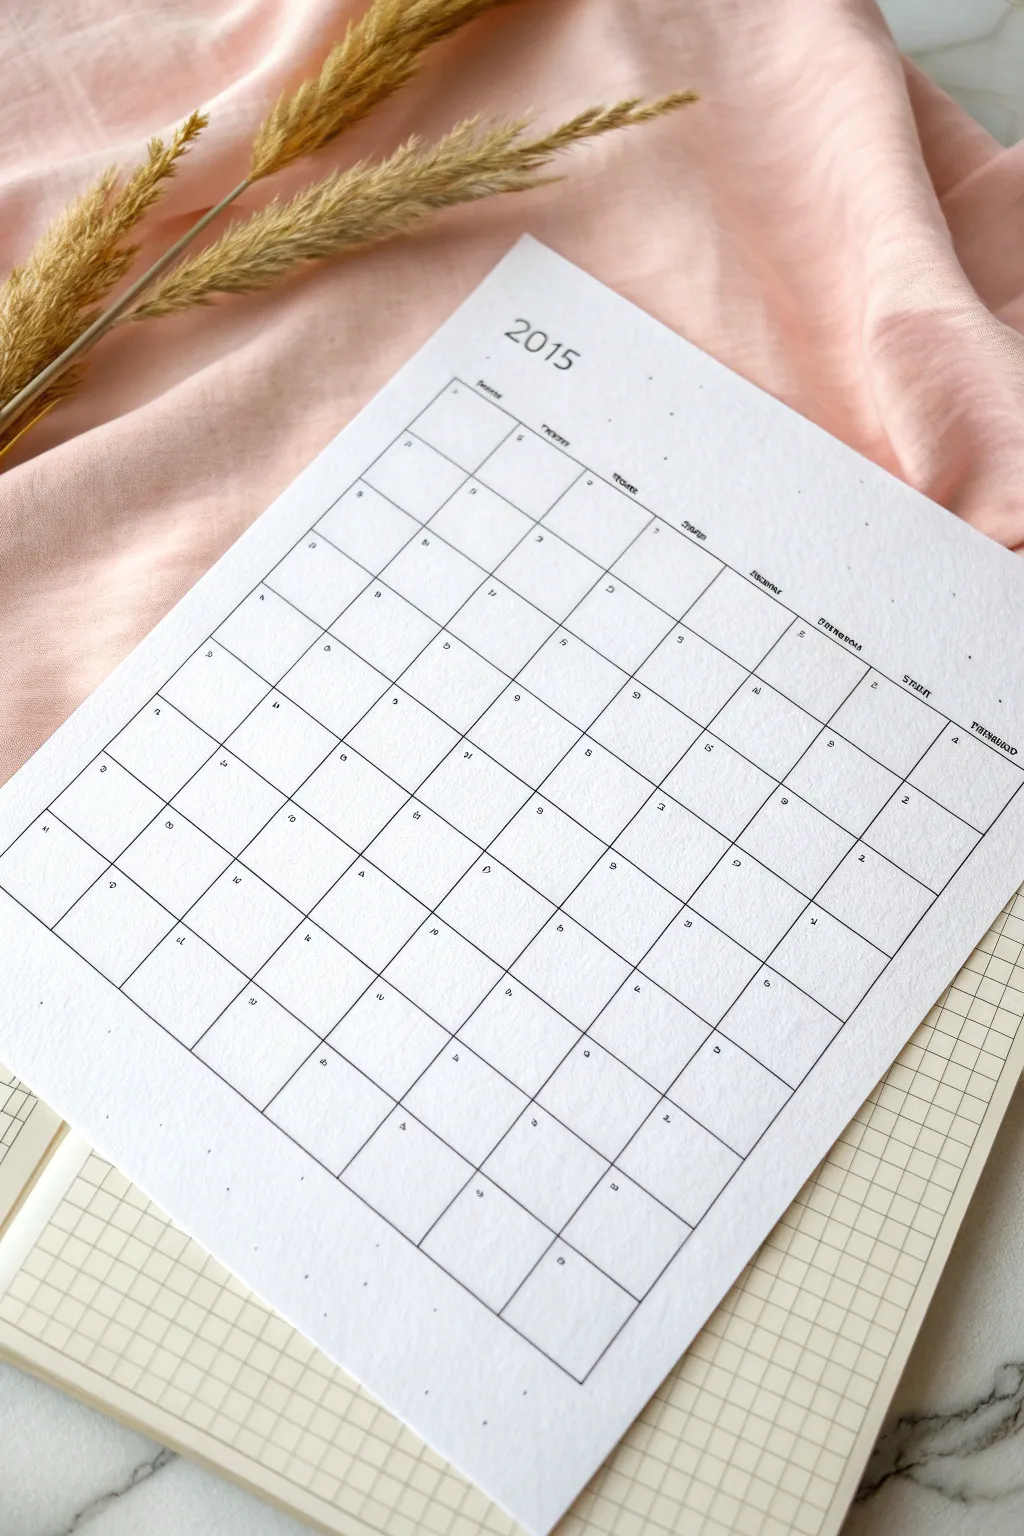
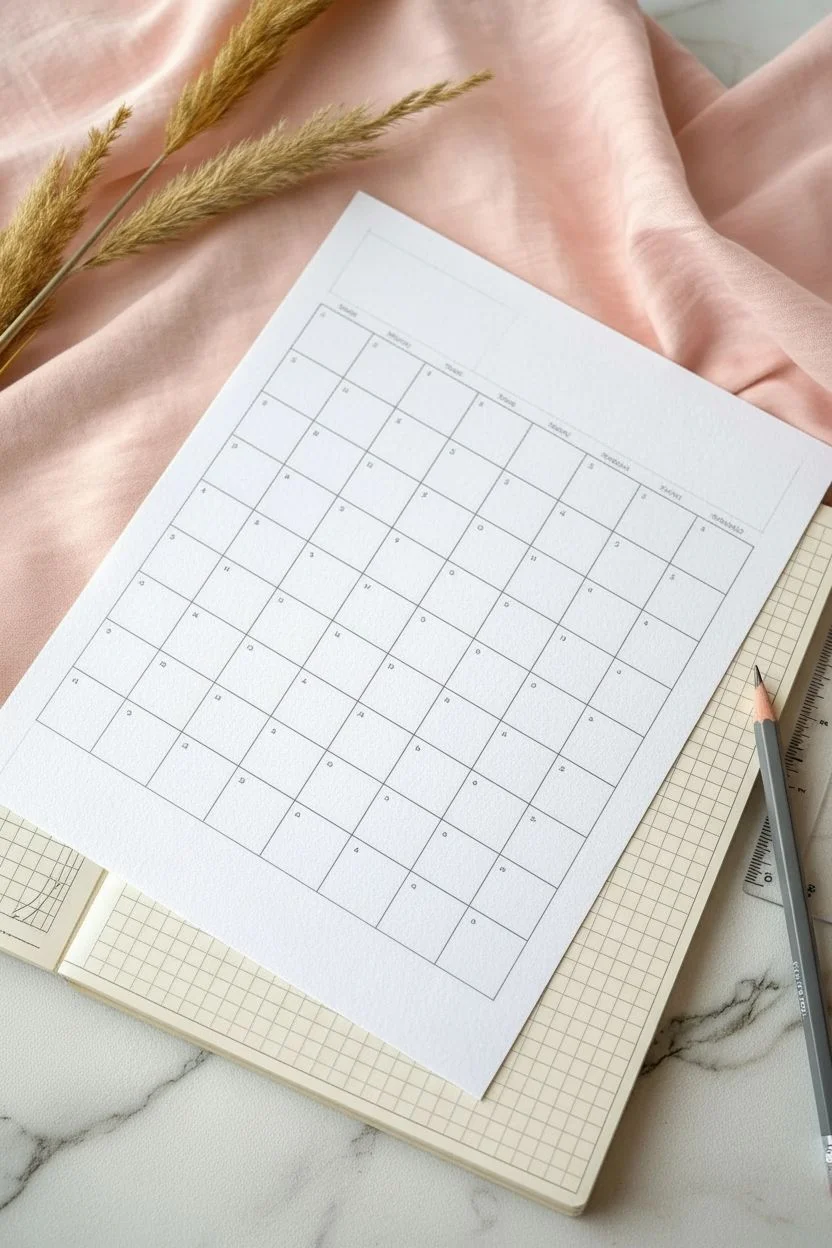
Embrace simplicity with this clean, typographic-style calendar layout that looks professional but is entirely handmade. The design relies on precise lines and a spacious grid, creating a calming canvas for your monthly planning.
Step-by-Step
Materials
- High-quality white drawing paper (A4 or Letter size)
- Fine liner pen (0.3mm or 0.5mm, black)
- Ruler (preferably clear plastic)
- Pencil (HB for sketching)
- Eraser (kneaded or vinyl)
- Grid paper (optional, to use as a guide underneath)
Step 1: Planning the Layout
-
Measure margins:
Start by deciding on the negative space around your calendar. For this airy look, leave a generous margin of about 1.5 to 2 inches on all sides of your paper. -
Calculate grid size:
Measure the remaining active drawing area. Divide the width by 7 (for the days of the week) and the height by 6 (for the maximum number of weeks in a month) to determine the size of your individual daily boxes. -
Mark the corners:
Using your pencil, lightly mark the four main corners of your large rectangle where the grid will live. Double-check your measurements to ensure the box is perfectly centered.
Step 2: Drafting the Grid
-
Draw vertical guides:
Place your ruler horizontally and make small tick marks at the top and bottom of your rectangle for each of the 7 columns based on your calculations. -
Draw horizontal guides:
Repeat the process vertically, marking off the 6 rows. These tick marks will guide your lines. -
Connect the marks:
Lightly draw the full grid using your pencil and ruler. Keep these lines very faint, as you will be tracing over them later. I find it helpful to lift the pencil slightly at intersections to avoid graphite build-up. -
Add the header space:
Above the main grid, measure a small space (about 0.5 inches) for the days of the week headers.
Smudged Lines?
To prevent ruler smudges, tape a penny or small coin to the underside of your ruler. This lifts the edge off the paper just enough to keep ink safe.
Step 3: Inking the Lines
-
Ink the outer border:
Switch to your fine liner pen. Start by tracing the large outer perimeter of the calendar grid. Use steady pressure against the ruler. -
Ink vertical lines:
Draw the interior vertical lines, separating the days of the week. Ensure you stop exactly at the border line for a clean finish. -
Ink horizontal lines:
Draw the interior horizontal lines. Be careful not to smudge the wet ink with your ruler; you might want to wipe the ruler edge occasionally. -
Let ink dry:
Pause for a moment to let the ink set completely before doing any erasing.
Add Subtle Color
Before drawing the grid, apply a very damp, pale watercolor wash to the paper and let it dry fully. This creates a soft, textured background.
Step 4: Adding Typography
-
Title the year:
At the top center, pencil in the year in a clean, sans-serif font. Trace over it with your pen to make it bold and prominent. -
Letter the days:
In the small header row above each column, write the days of the week. Scale your letters small to maintain the minimalist aesthetic. -
Add dates:
Inside each box, write the numerical date in the top-left or top-right corner. Keep these numbers tiny and consistent. -
Erase pencil marks:
Once all ink is totally dry, gently run your eraser over the entire page to remove the initial grid sketches and guides. -
Final inspection:
Check for any uneven lines or missed spots. You can carefully re-ink areas that need a bit more definition.
This clean grid is now ready to help you organize your month with style and clarity


Daisy Doodle Margin Layout
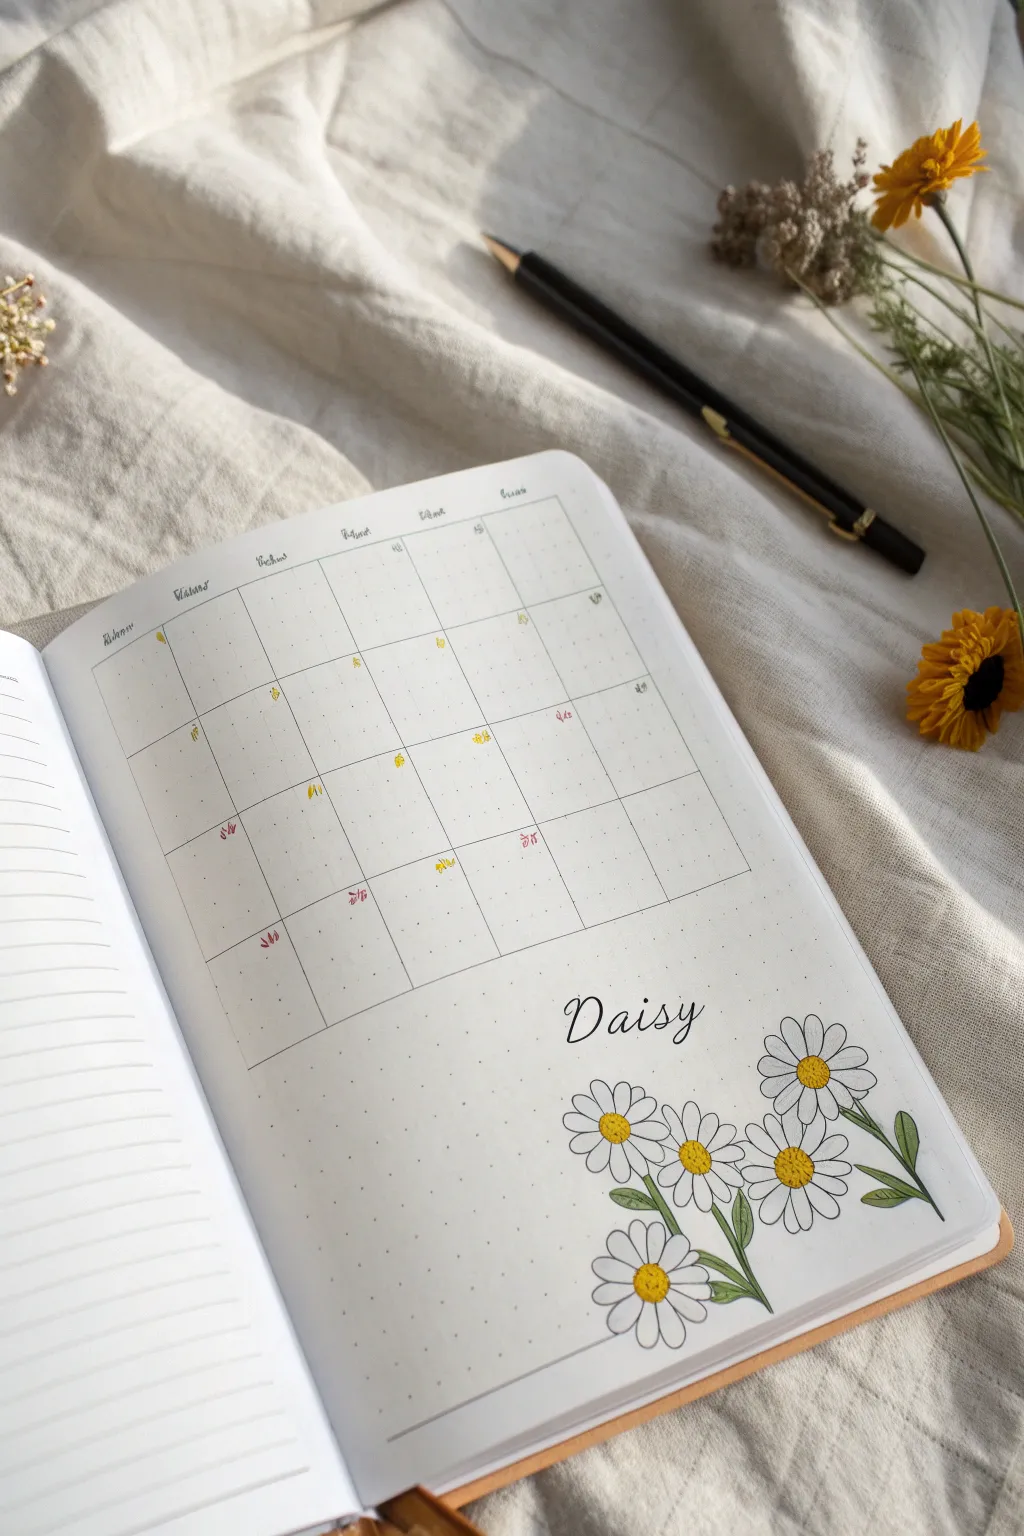

Bring the freshness of spring to your bullet journal with this clean, minimalist monthly spread featuring a charming daisy cluster. This layout combines a functional grid calendar with delicate floral illustrations, perfect for organizing your May appointments in style.
Step-by-Step Tutorial
Materials
- A5 dot grid notebook or bullet journal
- Fine tip black drawing pen (0.1mm and 0.3mm)
- Ruler or straight edge
- Pencil and eraser
- Colored pencils or markers (Yellow, Green, Pink)
- Small brush pen (optional for lettering)
Step 1: Setting up the Grid
-
Plan the spacing:
Begin by counting the dot grid spaces to determine your calendar dimensions. You’ll need a standard 5-row by 7-column grid. Leave a generous margin at the bottom specifically for the daisy illustration. -
Draw vertical lines:
Using your pencil and ruler, lightly sketch the seven vertical columns. Ensure each day box is roughly equal in width, typically 4-5 dot spaces wide depending on your journal size. -
Draw horizontal lines:
Sketch the five horizontal rows to complete the grid structure. Leave space at the top for headers. Don’t press too hard with the pencil, as these will be inked over later. -
Ink the calendar:
Trace over your pencil grid using a 0.1mm fine tip pen. Use a ruler for crisp, clean lines. I prefer leaving the outer border of the entire chart open, but you can box it in if you prefer a contained look. -
Add abbreviations:
At the top of each column, write small, cursive abbreviations for the days of the week (Mon, Tue, Wed, etc.) using your finer pen.
Clean Lines
If your ruler slips while inking the grid, don’t panic. Turn the mistake into a feature by thickening that specific line or adding a decorative washi tape border.
Step 2: Drawing the Daisies
-
Sketch flower centers:
Lightly pencil in four or five small circles in the bottom right corner of the page. Vary their heights and positions to create a natural, clustered look. -
Petal structure:
Around each circle, sketch long, oval-shaped loops for the petals. Daisies often have petals that overlap or curve slightly, so don’t worry about making them perfectly symmetrical. -
Add stems and leaves:
Draw slender, curving lines extending down from the flower heads. Add a few simple, lance-shaped leaves attached to the stems. -
Ink the flower centers:
Switch to your 0.3mm pen. Ink the center circles using small stippling dots rather than a solid line. This texture mimics the fuzzy center of a real daisy. -
Ink the petals:
Outline the petals carefully. Where petals overlap, stop the line of the rear petal so it doesn’t cross through the front one. Add tiny fold lines at the base of some petals for realism. -
Lettering:
In the empty space between the calendar grid and the flowers, write ‘Daisy’ (or the month name) in a whimsical cursive font. Faux calligraphy works well here—thicken the downstrokes of each letter.
Bee Friendly
Add liveliness by drawing a tiny bumblebee hovering over the daisies. Use a small black oval with yellow stripes and delicate loop wings.
Step 3: Coloring and Details
-
Erase guidelines:
Wait until the ink is completely dry to prevent smudging, then gently erase all remaining pencil marks from the grid and the drawing. -
Color the centers:
Fill the stippled centers with a bright yellow colored pencil or marker. Leave a tiny speck of white in the upper corner of the center for a highlight effect. -
Shade the leaves:
Color the stems and leaves with a soft olive green. If using pencils, layer a slightly darker green near the base of the leaves for shadow. -
Shadow the petals:
Use a very light grey marker or pencil to add faint shadows on the white petals, specifically where they overlap. This adds dimension without needing color. -
Highlight important dates:
Looking at your calendar, mark important dates or holidays. You can draw tiny symbols like hearts or dots in pink and yellow within the day boxes. -
Final touches:
Review your spread. If the large grid feels too empty, you can add very tiny, random dots of color around the dates to tie the theme together.
Now you have a refreshing and functional layout ready to help you plan your month
BRUSH GUIDE
The Right Brush for Every Stroke
From clean lines to bold texture — master brush choice, stroke control, and essential techniques.
Explore the Full Guide
Bee and Blossom Header Calendar
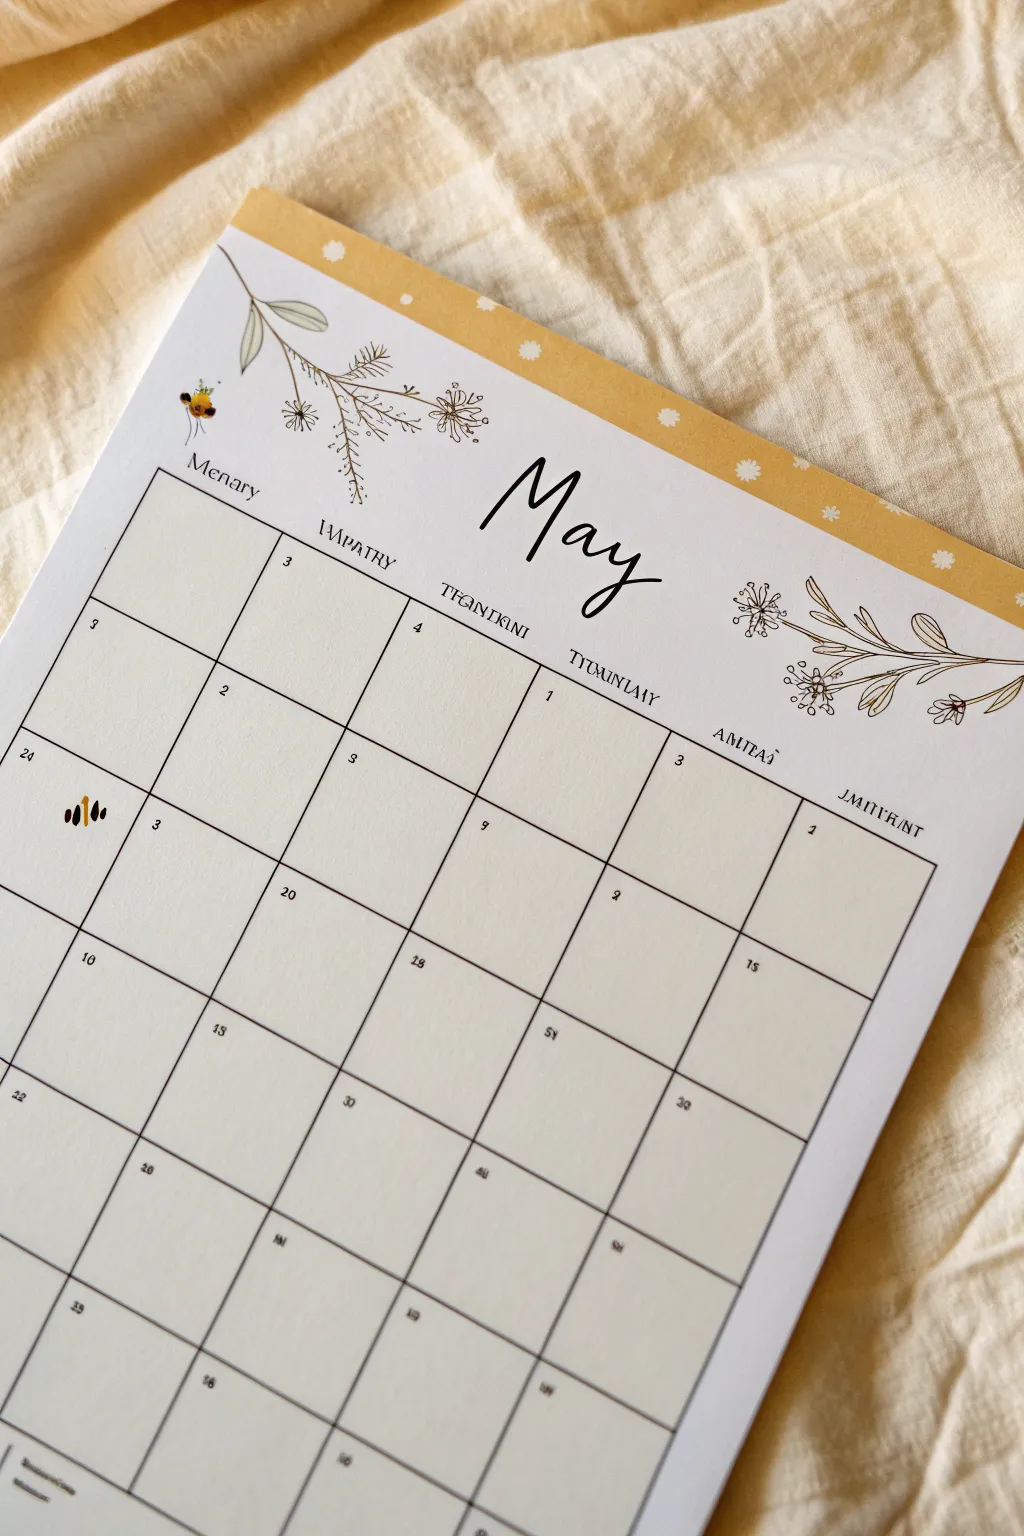
Create a charming and minimalist monthly spread that combines delicate line art with a splash of sunny yellow. This hand-drawn calendar features fine pen illustrations of wildflowers and bees, topped with a cheerful patterned header.
Detailed Instructions
Materials
- A4 or Letter-sized heavy drawing paper or cardstock
- Fine liner pens (0.1mm, 0.3mm, and 0.5mm)
- Black brush pen or calligraphy marker
- Yellow marker or watercolor paint (mustard or golden yellow)
- Ruler (preferably clear)
- Pencil and eraser
- White gel pen or gouache
Step 1: Grid & Layout
-
Map the boundaries:
Start by lightly penciling a 1-inch blank margin at the very top of your page. Below that, measure a large rectangle for your calendar grid, leaving about 2 inches of space between the top margin and the start of the grid for your title and illustrations. -
Pencil the grid:
Divide your main rectangle into 7 vertical columns for the days of the week and 5 horizontal rows. Use your ruler to ensure the lines are perfectly straight and evenly spaced. -
Ink the lines:
Go over your pencil grid with a 0.3mm fine liner. For a clean, modern look, keep the lines thin and consistent. Let the ink dry completely before erasing the pencil guides.
Step 2: Header Design
-
Create the yellow band:
Fill the top 1-inch margin with a golden yellow marker or watercolor. Ensure the color is solid and even. -
Add the playful dots:
Once the yellow block is fully dry, use a white gel pen or a small dot of white gouache to add scattered, uneven polka dots or tiny flower shapes across the yellow strip. -
Letter the title:
In the open space above the grid, use a black brush pen to write ‘May’ in a loose, modern calligraphy style. Position it centrally but slightly towards the right to leave room for vines. -
Add day headers:
Using a 0.5mm pen or a serif stamp set, add the days of the week above each column. You can use standard abbreviations or get creative with stylized text like in the example.
Drawing Steady Lines
If your hand shakes while drawing long grid lines, exhale slowly as you draw each line. Moving your entire arm rather than just your wrist helps keep lines straight.
Step 3: Floral Illustrations
-
Sketch the left vine:
Starting near the top left corner of the grid, pencil a delicate branch extending inward towards the ‘M’. Add small sprigs branching off the main stem. -
Sketch the right bouquet:
On the right side of the header, draw a cluster of stems originating from the page edge and reaching left toward the ‘y’. -
Detail the flowers:
Draw simple, circular geometric flower heads and slender leaves. Keep the style minimal—think botanical line art rather than realistic shading. -
Ink the flora:
Trace your floral sketches with the 0.1mm fine liner. Use a very light touch to keep these lines more delicate than the grid lines. -
Add the bees:
Draw a tiny bee near the left vine. Use a small oval for the body and delicate loops for wings. Color the body with a dab of yellow and add black stripes with your finest pen.
Smudged Ink?
If you accidentally smudge wet ink, turn it into a ‘happy accident’ by drawing a small bumblebee or flower over the mistake to hide it perfectly.
Step 4: Finishing Touches
-
Number the days:
In the top left corner of each box, write the dates using a very small, neat print font. I find a 0.1mm pen works best for these tiny numbers. -
Add a special icon:
Choose a special date (like a birthday or holiday) and draw a tiny icon in that box instead of writing a note. A small abstract bee or flower shape works perfectly here. -
Final erase:
Wait at least 10 minutes to ensure every drop of ink is dry, then aggressively erase the entire page to remove any lingering graphite ghosts.
Hang your new handcrafted calendar on the wall and enjoy the organized month ahead
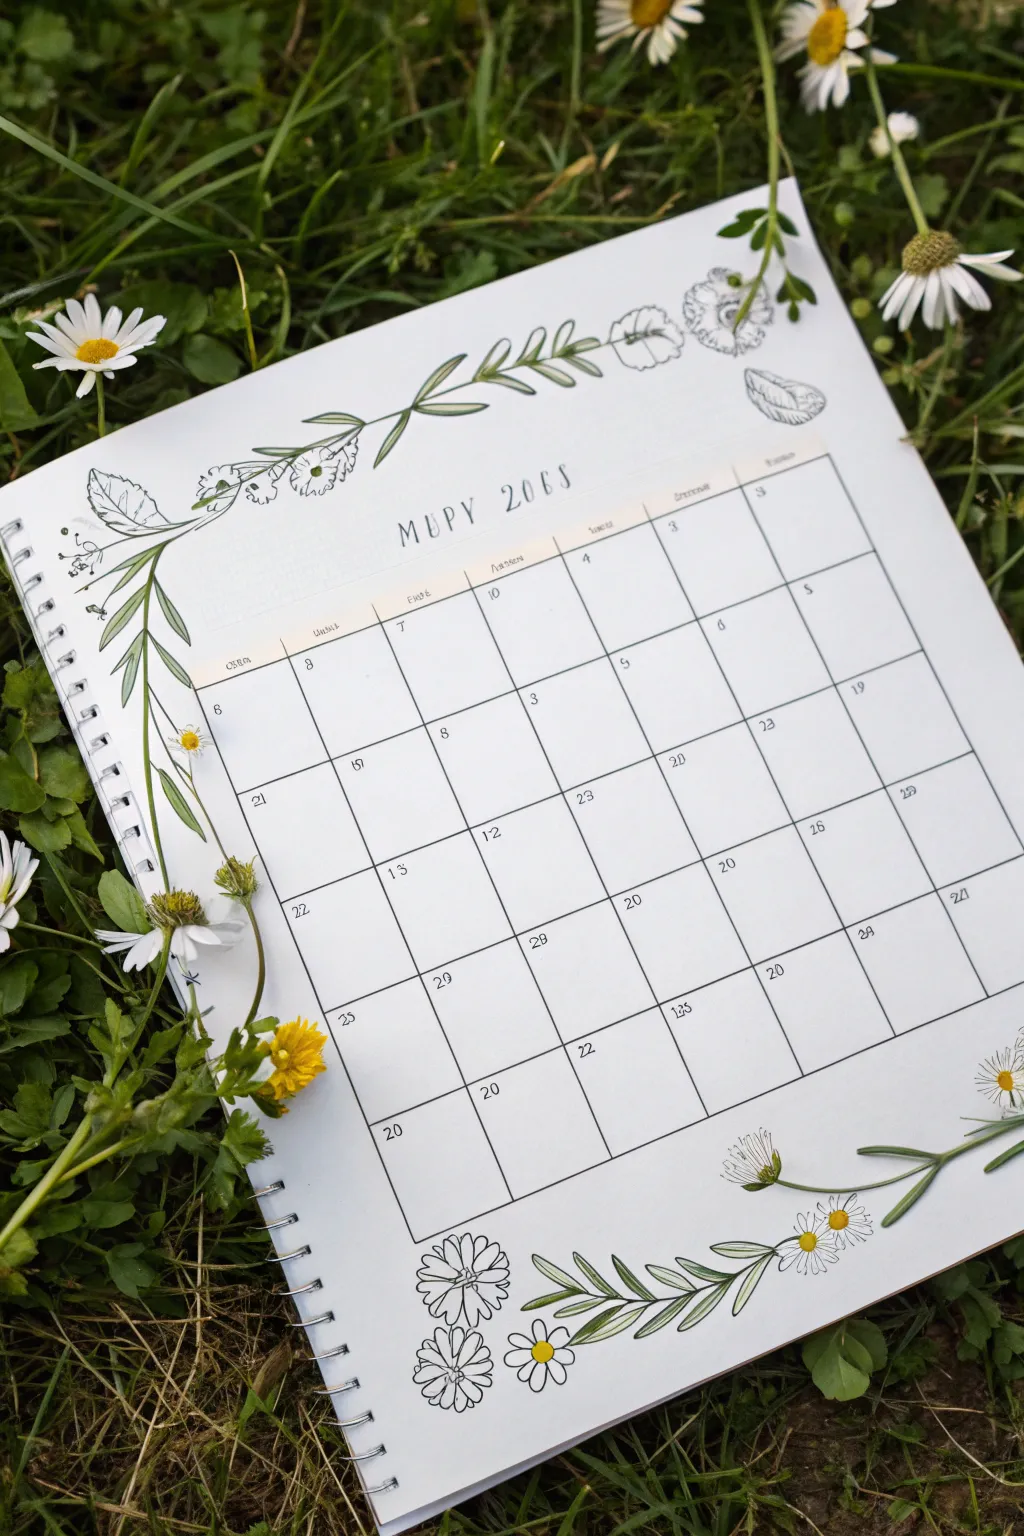
Garden Leaves Minimal Grid
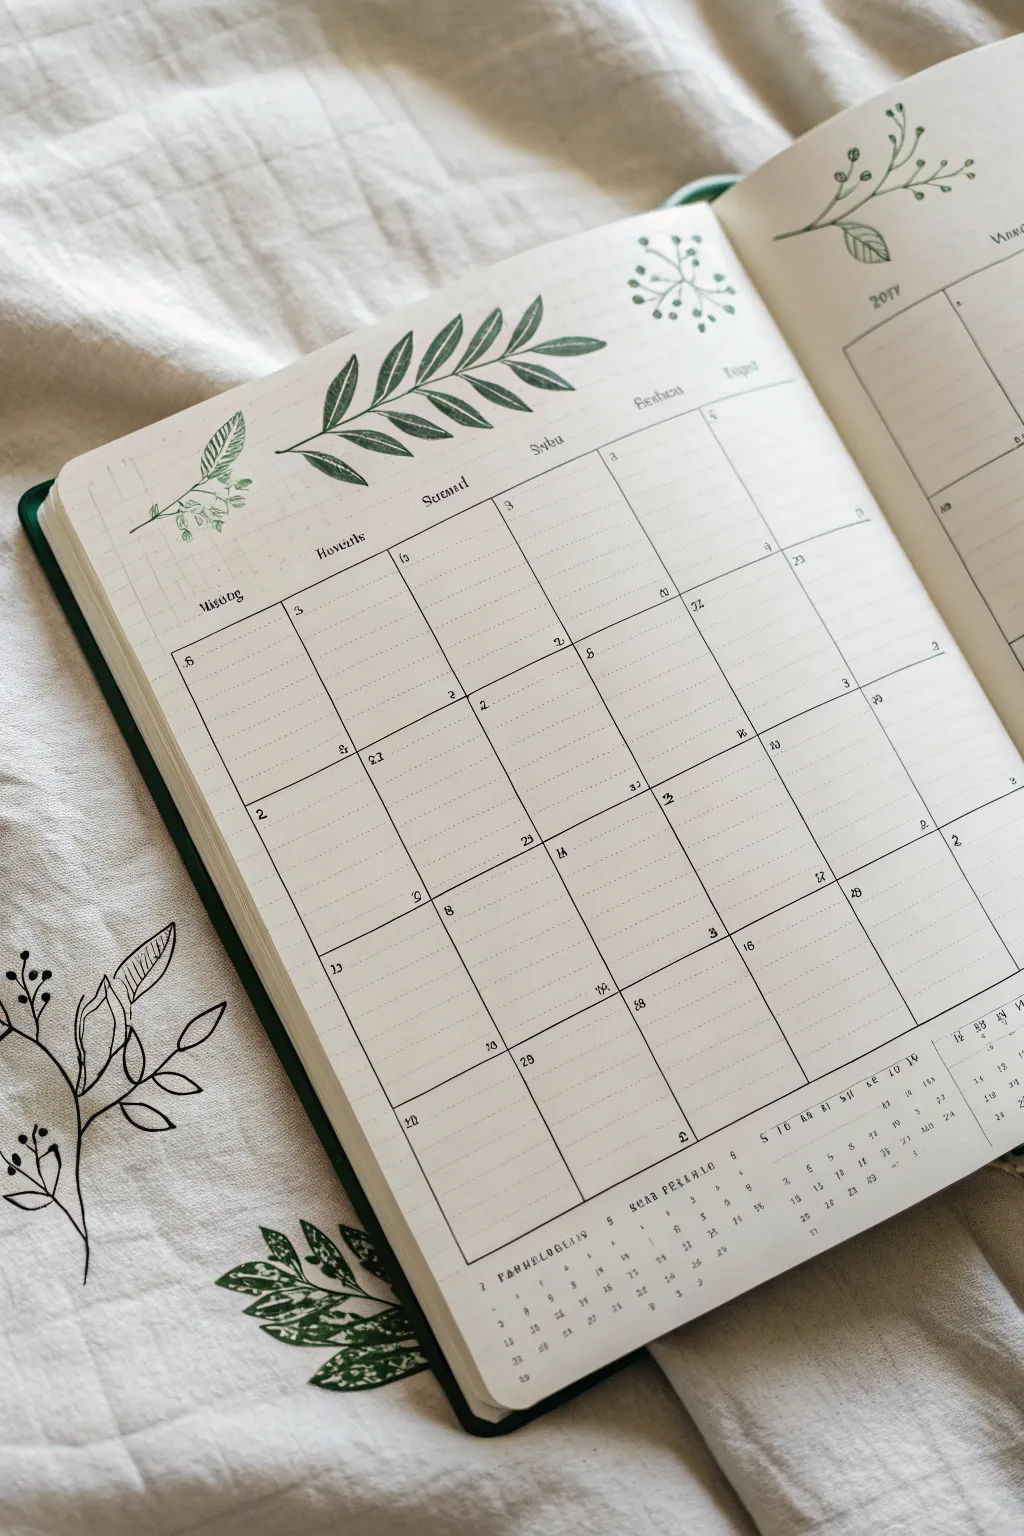

This elegant calendar spread combines a clean, minimal grid with hand-drawn botanical flourishes for a serene planning experience. It captures a distinct garden vibe through the use of organic leaf motifs that frame the structured days of the month.
Step-by-Step Guide
Materials
- A5 dotted or grid notebook
- Fine liner pen (0.3mm or 0.5mm, black)
- Forest green brush pen or marker
- Light pencil and eraser
- Ruler (preferably clear)
- Circle stencil (optional)
Step 1: Planning the Structure
-
Map the Margins:
Begin by counting the grid squares available on your page. You’ll need a large rectangular area for the calendar itself. Leave about 2-3 cm of headspace at the top for the leaf header. -
Draft the Grid:
Using a light pencil and ruler, lightly sketch the outer box of your calendar. Divide this box into five horizontal rows and seven vertical columns. Don’t press too hard, as these lines will be guides. -
Add Date Boxes:
Within each daily rectangle, you want to leave space for planning. Ensure your rows have equal height so the layout looks balanced.
Uneven Grid Lines?
Don’t panic! Thickening the line slightly or adding a second parallel line can turn a mistake into an intentional ‘sketchy’ border style.
Step 2: Inking the Calendar
-
Line Work:
Take your black fine liner and carefully trace over your pencil grid lines. For a hand-drawn feel like the original, you don’t actually need to use a ruler for this step—freehand lines add charm. -
Weekday Headers:
At the top of each column, write the days of the week. Use a small, serif font or a stylized faux-calligraphy style to match the aesthetic. -
Numbering:
Place the dates in the top-left or top-right corner of each box. Keep the numbers small and neat to maximize writing space. -
Dotted Guidelines:
To mimic the notebook’s texture within the boxes, you can draw faint dotted horizontal lines inside each day’s square using your finest pen tip, or simply let the notebook’s natural grid show through.
Pro Tip: Depth effect
Use two shades of green for the leaves. Color fully with a light green, then add a stroke of darker green near the stem for instant 3D depth.
Step 3: Adding the Flora
-
Central Branch Spine:
Switch to your green marker or brush pen. At the top center of the page, draw a long, slightly curved line stretching horizontally. This is the main stem. -
Leaf placement:
Along the stem, draw elongated oval leaves coming off in pairs or alternating patterns. Make the leaves slightly larger toward the center and smaller at the tips. -
Vein Detailing:
Once the green ink is dry, use your black find liner to draw a central vein down each green leaf. Add small diagonal veins branching off for realistic detail. -
Corner Accents:
In the top left corner, sketch a smaller sprig using the same technique—a green stem with smaller, clustered leaves. -
Berry Details:
Add tiny clusters of circles near the stems of your corner accent to represent berries or buds. You can leave them outlined or fill them in lightly.
Step 4: Finishing Touches
-
Miniature Monthly View:
At the very bottom of the page, beneath the main grid, creates a small reference calendar for the next month. Draw the numbers 1-30/31 in a single horizontal line or a tiny grid format. -
Erase Sketches:
Wait until all ink is completely dry—I usually give it at least five minutes to be safe—then gently erase all underlying pencil marks. -
Final Adjustments:
Check for any gaps in your grid lines or faint areas in your green leaves and touch them up as needed to bolden the design.
Now you have a refreshing, nature-inspired layout ready to be filled with your plans

PENCIL GUIDE
Understanding Pencil Grades from H to B
From first sketch to finished drawing — learn pencil grades, line control, and shading techniques.
Explore the Full Guide
Rainy-Then-Sunny May Theme


Capture the unpredictable weather of late spring with this clever “Dutch door” style bullet journal layout. By trimming a central page, you create a layered effect where rain clouds transition into happy sunshine across your May calendar.
How-To Guide
Materials
- A5 Dot Grid Journal
- Pencil and Eraser
- Ruler
- Black Fine Liner Pens (0.3mm and 0.5mm)
- Fudenosuke Brush Pen (Hard Tip)
- Yellow Marker or Watercolor
- Orange Marker or Watercolor
- Blue Marker or Watercolor
- Scissors or Craft Knife
Step 1: Creating the Dutch Door
-
Mark your cutting line:
Since this layout uses a partial page (Dutch door), select a fresh spread in your journal. On the right-hand page, count down about 18-20 grid spaces from the top. Use a ruler to draw a faint horizontal line across the page at this height. -
Trim the page:
Carefully cut along the horizontal line you just drew using scissors or a craft knife. You should be removing the bottom two-thirds of the right-hand page. Keep the top flap attached to the journal binding. -
Check the layering:
When you flip the small top flap, you should see the bottom half of the *next* page underneath. This is where your umbrella drawing will live.
Uneven Edges?
If your Dutch door cut creates a jagged edge, use a distinctive Washi tape along the cut line. It hides imperfections and reinforces the paper edge.
Step 2: Designing the Sunshine Calendar
-
Sketch the May header:
On the full left-hand page, sketch the word ‘May’ in a large, bouncy script font at the top left. I like to leave plenty of negative space around it for a clean look. -
Draw the calendar grid structure:
Use your ruler to map out a standard calendar grid. Start the grid on the left page below the header and extend it across to the small top flap on the right. Ensure the boxes align perfectly across the spine. -
Ink the lines:
Go over your pencil grid with a 0.3mm fine liner. Keep your ruler steady to ensure crisp, straight lines connecting the two pages. -
Add the sun illustration:
On the top flap (right side), draw a circle above the calendar grid. Add small dashes radiating outward for sunrays. Color the sun with a warm yellow marker. -
Lettering:
Use a brush pen to ink the ‘May’ title, varying pressure to get thick downstrokes and thin upstrokes. Add tiny dates into the corner of each calendar box with your finest pen.
Ghosting Prevention
Test your markers on a back page first. If they bleed through, glue two pages together before cutting your Dutch door to create a thicker canvas.
Step 3: Adding the Rainy Elements
-
Prep the bottom layer:
Focus on the page visible *underneath* the cut flap. This section will hold your daily tracker and the umbrella illustration. -
Draw the umbrella:
Sketch a large, open umbrella shape near the bottom center. Divide the canopy into segments with curved lines and draw a J-shaped handle extending downward. -
Color the umbrella:
Fill in the umbrella segments with alternating shades of yellow and light orange. This ties the color scheme back to the sun on the upper flap. -
Add falling rain:
On the right side of the page (next to the umbrella), draw stylized raindrops falling. Use a blue marker to color teardrop shapes. Vary their sizes for visual interest. -
Add the grass:
At the very bottom right corner, sketch some simple grass blades reaching up toward the rain, adding a touch of green if desired. -
Create the daily tracker:
To the right of the umbrella, create two vertical columns of numbers (1-31) for a simple habit or mood tracker. Label the headers with a small sans-serif font. -
Decorative accents:
Add small orange / yellow droplets splashing off the umbrella to show movement. Scatter a few tiny dots around the page to fill empty space without cluttering it.
Now you have a dynamic spread ready to track both the sunny and stormy days ahead
Strawberry Patch Date Boxes
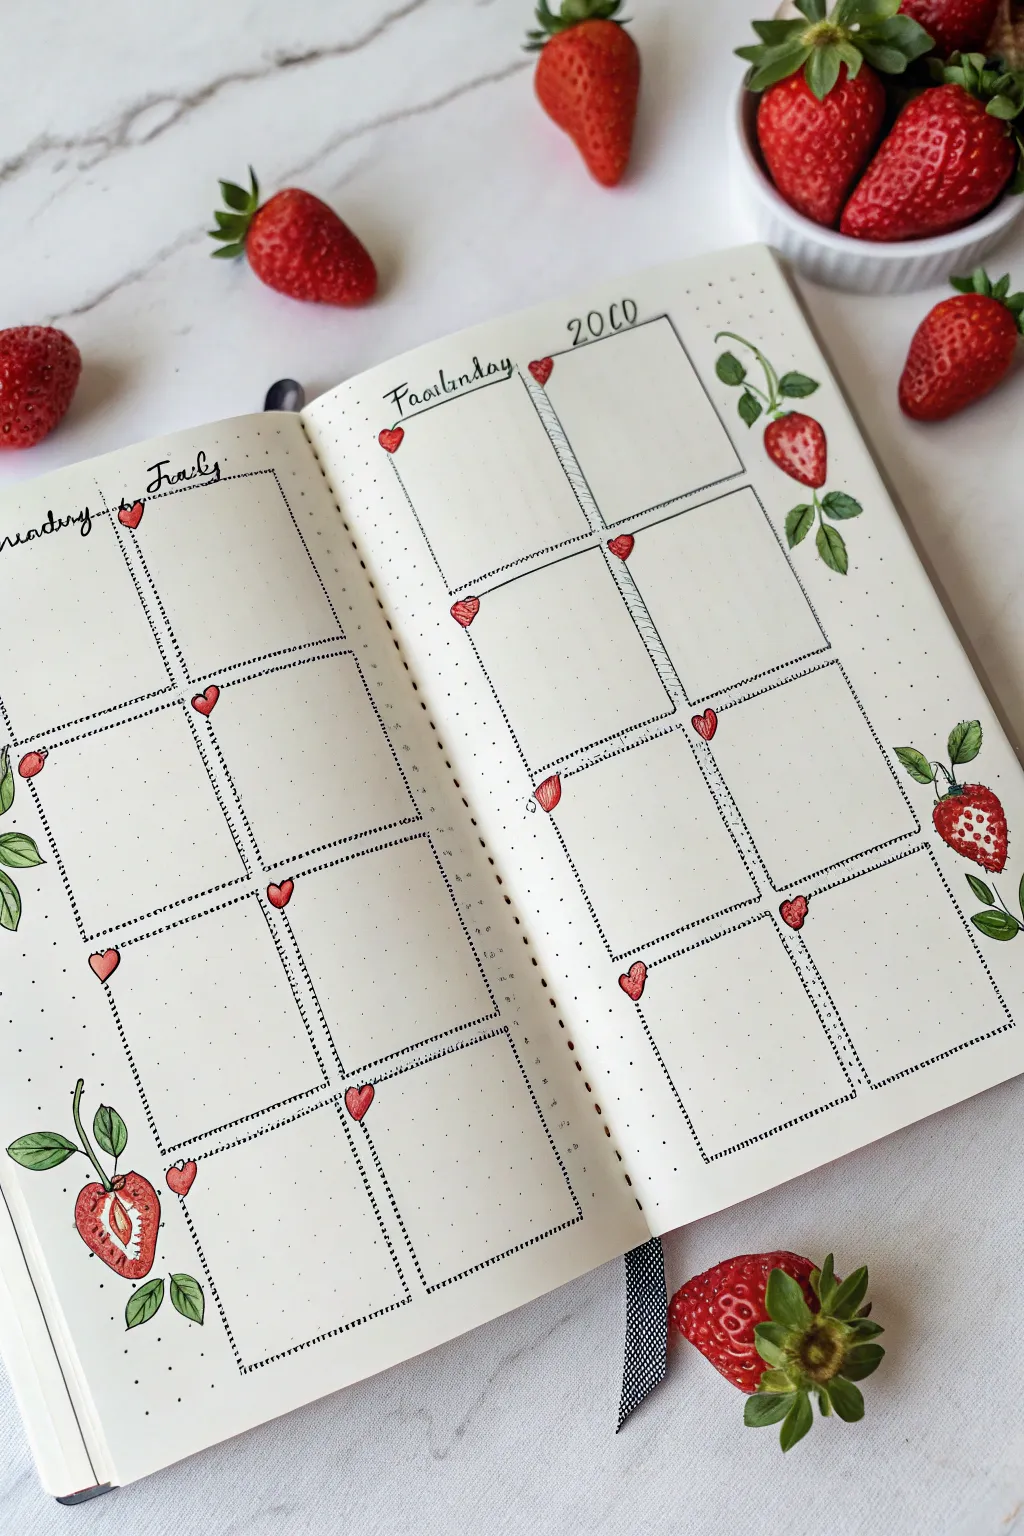
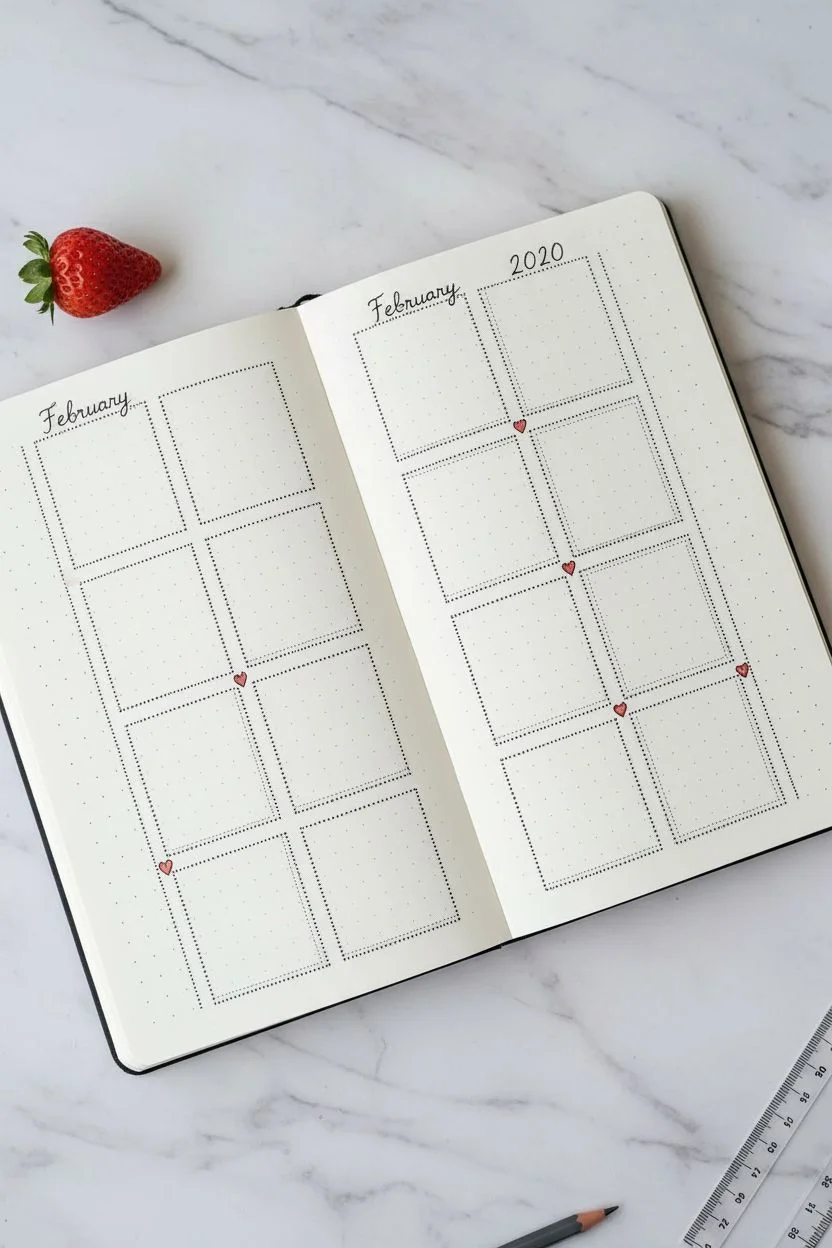
Bring the freshness of spring into your planner with this delightful strawberry patch layout. This project combines practical organization with whimsical fruit illustrations for a spread that feels both structured and organic.
Detailed Instructions
Materials
- A5 dotted notebook or bullet journal
- Fine liner pen (black, 0.3mm or 0.5mm)
- Red marker or brush pen
- Green marker or brush pen (two shades ideally)
- Pencil and eraser
- Ruler
Step 1: Planning and Structure
-
Map out the grid:
Begin by counting the grid dots on your open spread. You’ll need to create two vertical columns of four boxes on each page, totaling eight boxes per page. -
Draft the boxes:
Using your pencil and ruler, lightly sketch out the sixteen rectangular boxes across the two pages leaving a small gap between columns. -
Ink the outlines:
Once you are happy with the spacing, trace over your pencil lines with the black fine liner. Instead of solid lines, use small, evenly spaced dots to create a ‘stitched’ or perforated look for the box borders. -
Double-up the lines:
To add depth, draw a second dotted line very close to the inner vertical edge of each column. This creates a shadow effect that makes the boxes look stickered on. -
Add header space:
Leave the top margin of the right page open for the year ‘2020’ (or current year) and the month ‘February’ or ‘May’ on the left page in a simple script font.
Step 2: Adding the Heart Accents
-
Position the hearts:
At the top left corner of each date box, sketch a tiny heart shape. I like to tilt them slightly so they look like they are pinning the box to the page. -
Color and outline:
Fill these small hearts with your red marker. Once the ink is dry, outline them with your fine liner, giving them a loose, sketchy border rather than a perfect trace. -
Add detail:
Add a tiny white highlight or leave a small speck of white paper showing inside each heart to give it a glossy, dimensional appearance.
Keep it Clean
To prevent smudging your dotted lines, place a clean sheet of scrap paper under your drawing hand as you move across the spread.
Step 3: Illustrating the Strawberries
-
Draft the fruit shapes:
Pencil in the strawberry shapes in the margins around your grid. Place a large whole berry on the top right, a sliced berry on the bottom left, and another hanging berry on the right margin. -
Draw the leaves:
Sketch three to four jagged leaves at the top of each berry, connecting them to long, curving stems that weave slightly behind or around the grid boxes. -
Ink the botanical outlines:
Go over your pencil sketches with the fine liner. Use a slightly shaky or organic line for the leaves to make them look natural, avoiding rigid straight strokes. -
Detail the strawberry slice:
For the sliced berry on the bottom left, draw the inner core—a tear-drop shape in the center—and add tiny radiating lines for the fruit’s texture. -
Add seeds:
On the whole strawberries, draw tiny teardrop shapes scattered across the surface to represent the seeds.
Make it Shine
Use a white gel pen to add tiny dots or lines on top of the dried red marker for ultra-bright, glossy highlights on the fruit.
Step 4: Coloring and Finishing
-
Color the berries:
Fill the strawberries with your red marker. Apply the color lightly at first, perhaps leaving a small white strip on the left side of each berry for a highlight. -
Shade the leaves:
Use your lighter green marker to fill in the leaves and stems. If you have a darker green, add a second layer near the base of the leaves where they meet the stem for shading. -
Erase guidelines:
Wait until all ink is completely dry to prevent smudging, then gently erase all remaining pencil marks from the grid and illustrations. -
Final touches:
Use your fine liner to re-emphasize any faint areas, especially the seeds on the strawberries, making sure they pop against the red background.
Enjoy filling in your dates and tasks surrounded by this sweet harvest theme


Butterfly Trail Calendar Accents
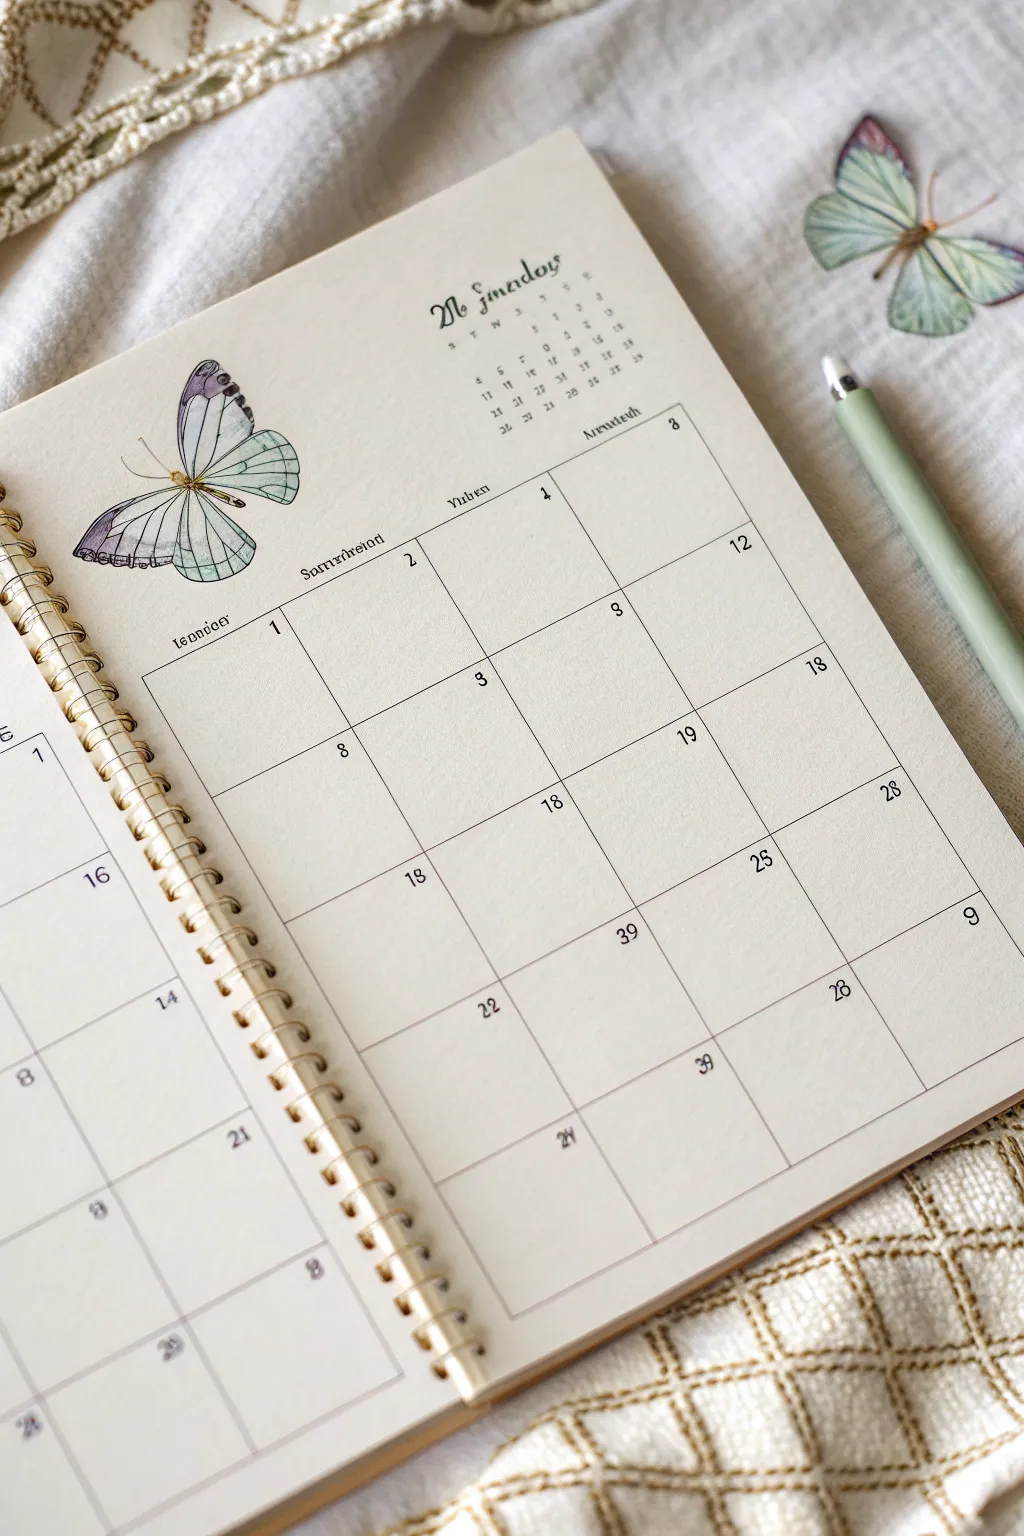

Bring a touch of vintage botanical charm to your bullet journal or planner with this elegant butterfly-themed monthly layout. The combination of delicate watercolor illustrations and clean, minimalist grids creates a serene organization space perfect for the transition into summer.
Step-by-Step
Materials
- A5 dot grid or blank notebook (spiral bound preferred)
- Pigma Micron fineliners (sizes 01, 03, and 05)
- Watercolor paints (sage green, deep purple/lavender, black)
- Small round watercolor brush (size 2 or 4)
- Ruler
- Pencil and eraser
- Light sage green brush pen or highlighter (optional for accents)
Step 1: Setting the Structure
-
Draft the layout:
Begin by lightly sketching your calendar grid in pencil on the right-hand page. Leave a generous margin at the top (about 1/3 of the page) for your header and artwork. Create a standard 7-column grid for the days of the week. -
Ink the grid lines:
Using your 01 fineliner and a ruler, trace over your pencil grid. Keep the lines thin and delicate to maintain the airy feel. Do not box in the outer perimeter if you want an open look, or add a thin border as seen in the reference. -
Add day separators:
Draw the horizontal and vertical lines to separate the weeks and days. Ensure your squares are even. If you’re using dot grid paper, use the dots as guides to keep everything perfectly square without measuring constantly. -
Letter the days:
At the top of each column, write the day names in a small, neat serif font using the 03 fineliner. Keep them centered above each column. -
Number the dates:
In the top right or left corner of each box, write the dates. The reference uses a scattered, somewhat random placement for an artistic touch, but you can keep them uniform. Use the 01 pen for these small numbers.
Wing Transparency
To make wings look translucent, dilute your paint heavily with water. Paint the paper behind the wing first if it overlaps grid lines, so the lines show through.
Step 2: The Botanical Centerpiece
-
Sketch the butterflies:
Lightly sketch a large butterfly in the top left corner of the page, slightly overlapping the header space. Sketch a second, smaller butterfly on the opposite page or near the top right corner to create balance. -
Outline the wings:
With the 01 fineliner, carefully ink the outline of the butterfly wings. Use broken or very thin lines for the inner details to suggest delicacy. -
Ink the veins:
Draw the intricate vein patterns inside the wings. Start from the body and fan out towards the edges. These lines should be extremely fine. -
Watercolor base layer:
Mix a very watery wash of sage green. Lightly paint the upper wings, letting the color fade to white near the center. I find it helps to wet the paper slightly with clean water first for a softer gradient. -
Add purple accents:
While the green is still slightly damp or fully dry (for sharper edges), add a touch of diluted purple or lavender to the tips of the wings and the lower wing sections. -
Deepen the contrast:
Once the first layers are dry, specific areas like the wing edges can be darkened with a more saturated mix of purple/grey to give depth. -
Paint the body:
Use a dark grey or black watercolor mix to paint the butterfly’s thorax and abdomen. Keep it slender. -
Final ink details:
Once the paint is completely dry, go back in with your 005 or 01 pen to re-define any vein lines that got lost and add the antennae.
Step 3: Header and Finishing Touches
-
Create the title:
In the center of the top margin, write the month name. Use a vintage-inspired serif font or a calligraphy style. You can mimic the reference’s ‘olde english’ vibe by adding decorative swirls to the capital letter. -
Add the mini-calendar:
Next to the title or in the top right corner, draw a tiny reference calendar for the previous or next month. Keep this very small and purely functional. -
Erase pencil marks:
Wait until all ink and paint is bone dry to prevent smudging. Gently erase all underlying pencil sketches. -
Optional shadowing:
To make the calendar stand out, add a very faint grey shadow line to the right and bottom of the main grid box.
Golden Touch
Use metallic gold watercolor or a gold gel pen to trace the very edges of the butterfly wings or the antennae for a subtle, magical shimmer.
Now you have a serene, nature-inspired spread ready to fill with your monthly plans.
Memorial Day Poppy Accent
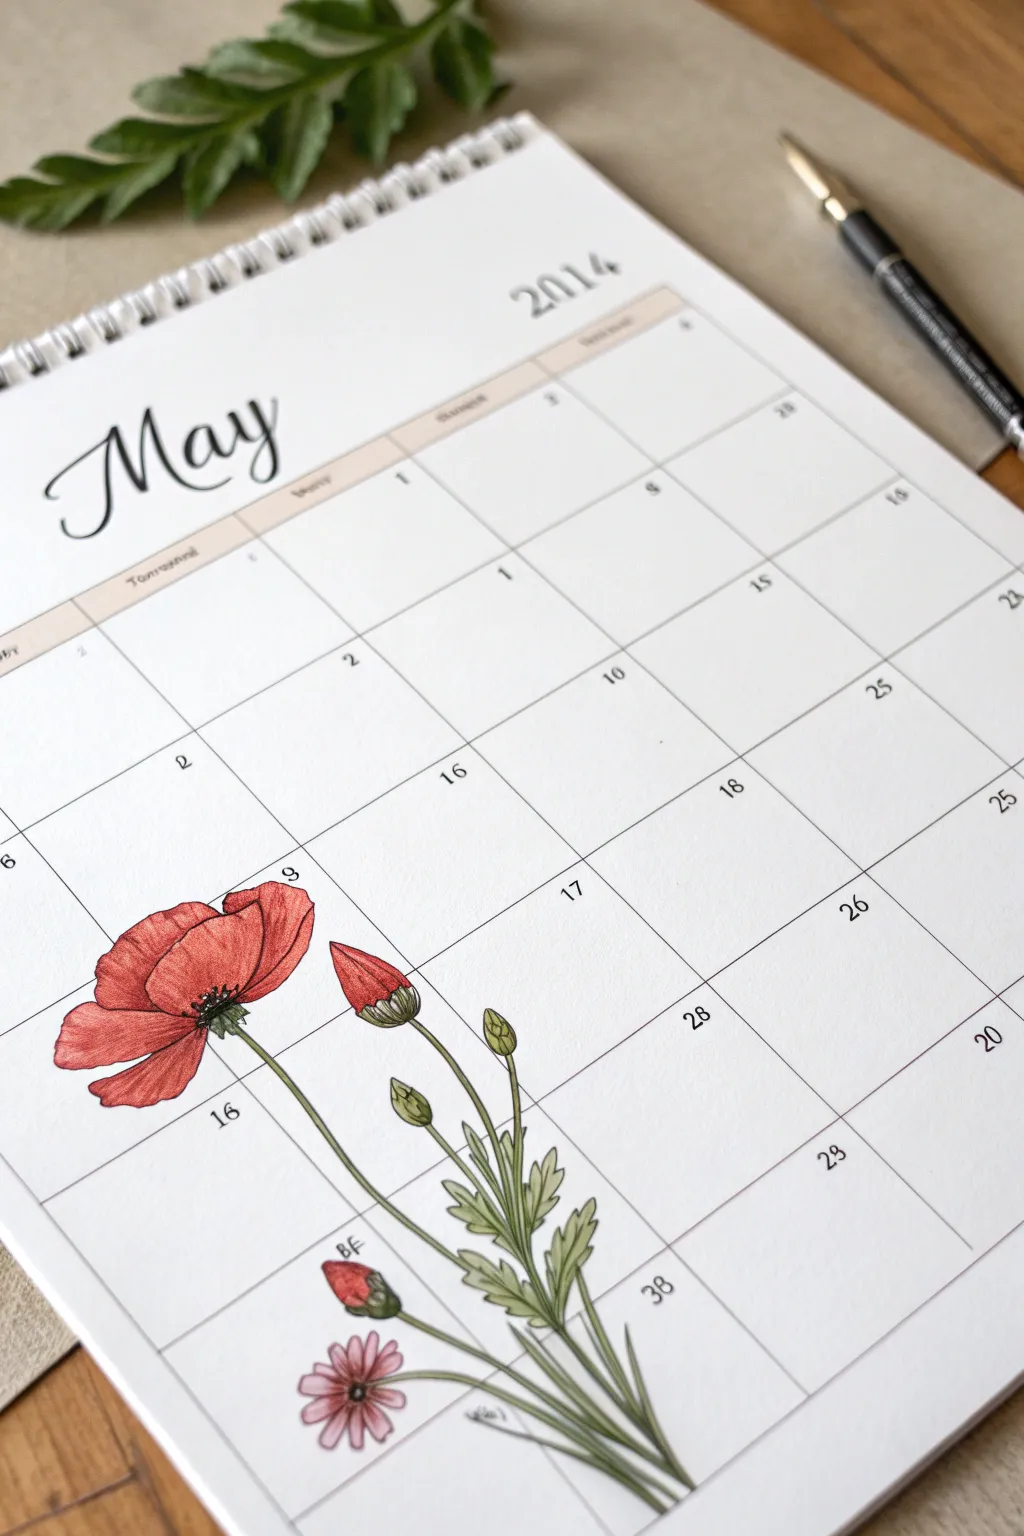
Transform a plain monthly planner page into a botanical art piece with this elegant poppy illustration. Featuring vibrant red petals and delicate green foliage climbing up familiar calendar grids, this design brings fresh spring energy to your scheduling.
Step-by-Step Guide
Materials
- A printed monthly calendar page (May)
- Fine liner pens (0.1mm and 0.3mm, black ink)
- Colored pencils or alcohol markers (Red, Pink, Olive Green, Dark Green)
- Pencil (HB or 2H for sketching)
- Good quality eraser
- Ruler (optional, if drawing grid manually)
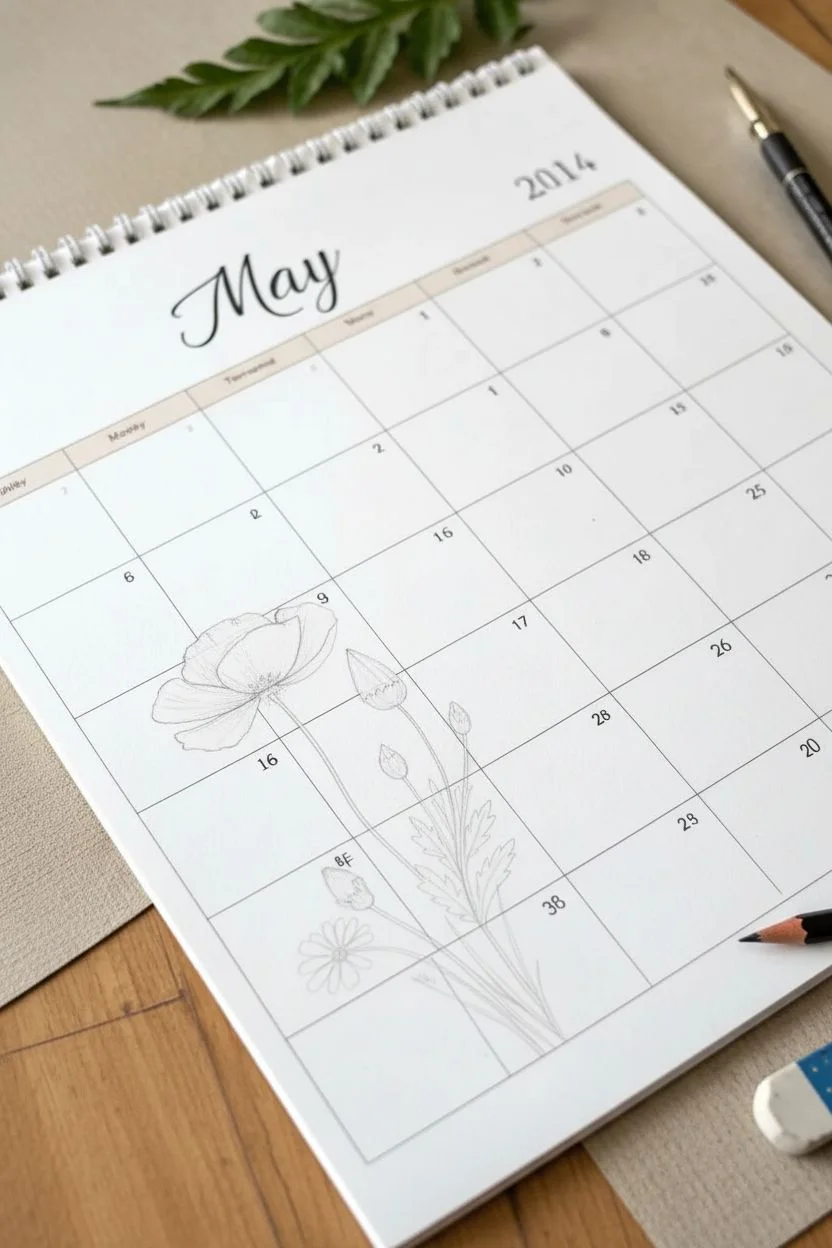
Step 1: Drafting the Layout
-
Position the main stem:
Start by lightly sketching a long, curved line with your pencil beginning near the bottom right corner of the date labeled ’30’ (or the equivalent spot). Curve it gently upwards and to the left, ending in the box for the 9th or 16th. -
Sketch the poppy bloom:
At the top of your main stem, draw a large, flattened oval shape to represent the open poppy flower. It should sit boldly across the grid lines of the second and third week. -
Add secondary stems:
Sketch two or three smaller stems branching out from the base cluster. One should rise straight up towards the 17th box for a bud, and another shorter one near the bottom for the pink flower. -
Outline the buds:
Draw teardrop shapes at the ends of your secondary stems. Place a large, closed bud near the main flower and smaller buds lower down.
Ink Smearing?
If your black ink smears when coloring, switch to waterproof archival ink pens or color the design first before adding the final outlines.
Step 2: Inking the Details
-
Refine petal shapes:
Using your 0.1mm fine liner, carefully trace over your poppy sketch. Poppies have crinkly, delicate petals, so use slightly wavy lines rather than perfect curves to define the edges. -
Detail the flower center:
In the center of the open poppy, draw a dark clustered center with tiny stamina radiating outward. Use quick, short strokes to create texture here. -
Inking the leaves:
Draw fern-like, jagged leaves along the lower stems. Keep the lines organic and flowing, allowing some leaves to overlap the calendar grid lines. -
Include the pink daisy:
Near the bottom date boxes (around the 30th/31st area), ink the smaller pink flower with simple, radiating petals and a small circular center. -
Erase pencil guides:
Wait a moment for the ink to fully set, then gently erase all your pencil sketches to reveal the clean black outlines.
Step 3: Adding Color & Depth
-
Base layer for poppy:
Take a bright red pencil or marker and fill in the poppy petals. Apply the color lightly at first to establish the base tone. -
Shading the petals:
Add depth by layering a darker red or slight touches of brown near the center of the flower and where petals overlap. This creates a three-dimensional cupped effect. -
Coloring the buds:
Color the closed poppy buds. Use green for the sepals at the base and let a sliver of red peek through at the top to show the flower is about to burst open. -
Greens and stems:
Use an olive green for the stems and leaves. I find that leaving tiny slivers of white space along one side of the stem helps suggest a highlight and roundness. -
Darkening foliage:
Go back in with a darker green to shade the underside of the leaves and the bottom of the stems where shadows would naturally fall. -
Finishing the pink flower:
Color the small bottom flower with a soft pink, darkening slightly towards the center, and use a dark brown or black dot for the middle. -
Final texture check:
Use your 0.05mm or 0.1mm pen to add very fine hatching lines on the red petals to emphasize their papery texture.
Depth Perception
Use vertical strokes when coloring the petals to mimic their natural grain. This simple directional change makes the flower look instantly more realistic.
Your calendar is now a functional piece of art ready to greet you all month long
Botanical Diagram May Calendar
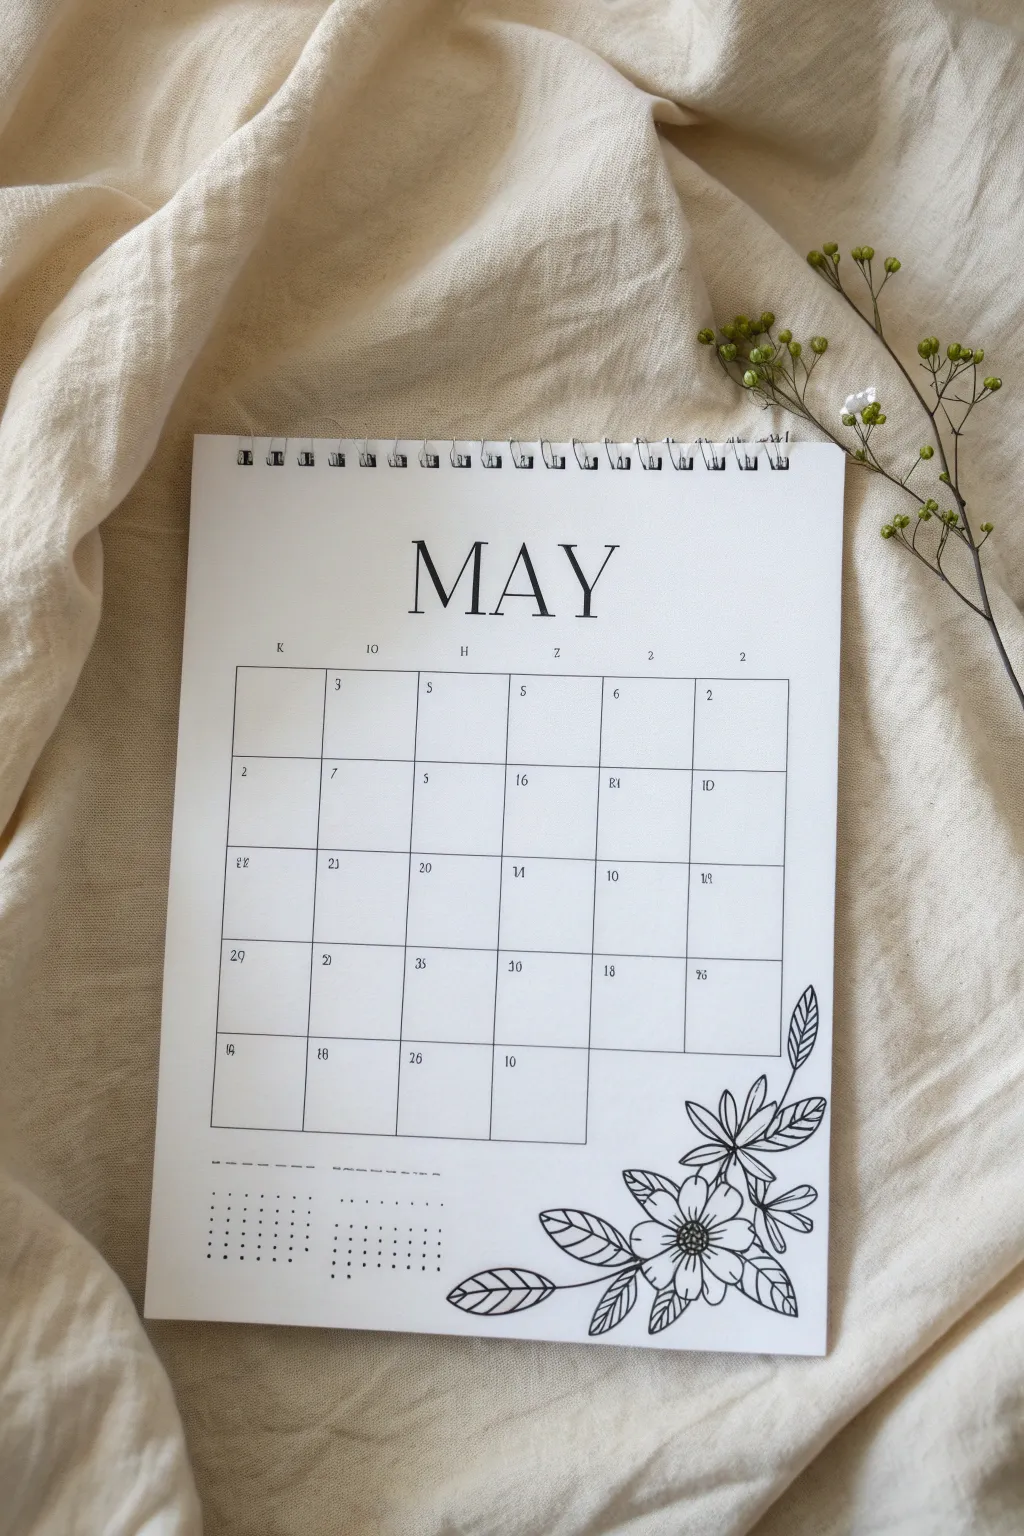
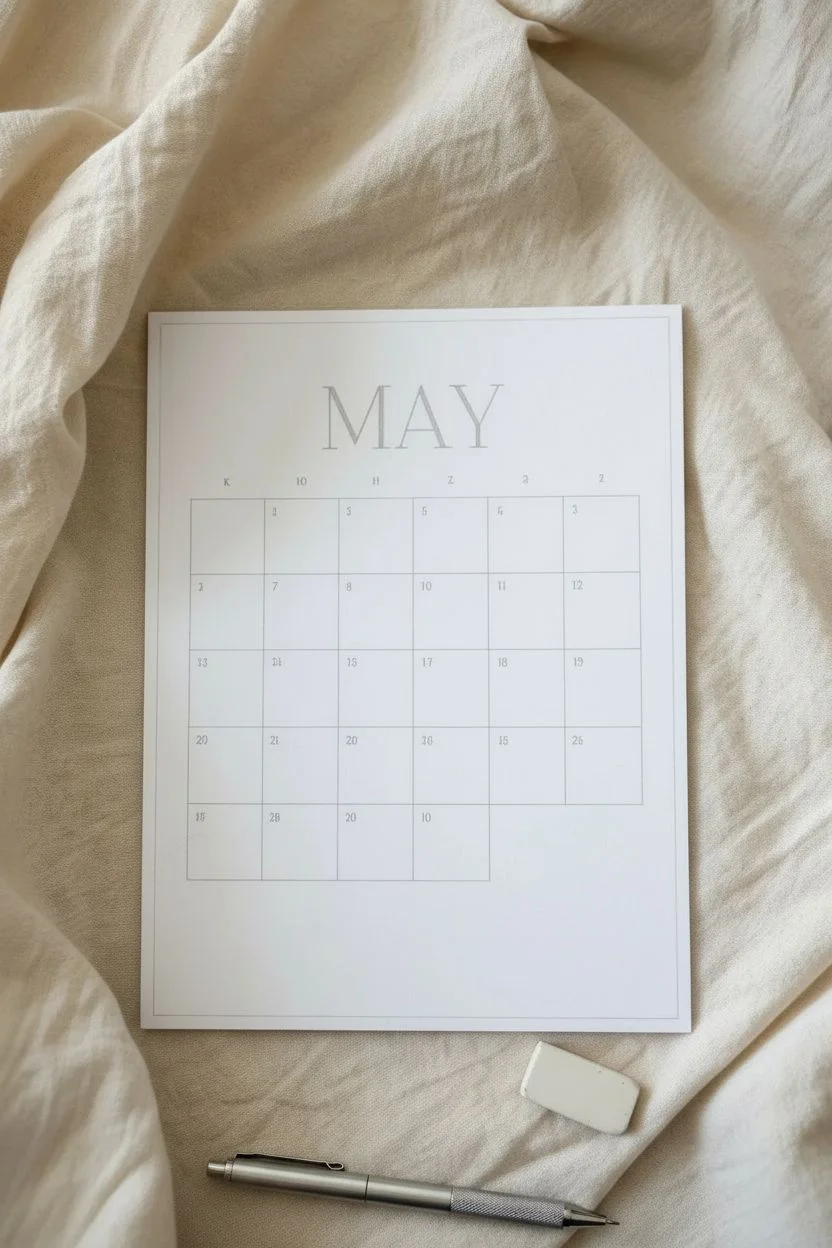
Embrace the simplicity of spring with this elegant, hand-drawn May calendar featuring crisp line art. The design combines a functional grid with delicate black-and-white floral illustrations for a sophisticated planner aesthetic.
Step-by-Step Guide
Materials
- White cardstock or heavy drawing paper (A4 or A5)
- Black fine liner pens (0.1mm, 0.3mm, and 0.5mm)
- Pencil (HB or H)
- Eraser
- Ruler (12-inch clear recommended)
- Wire binding machine and coil (optional, for notebook finish)
- Scrap paper for testing ink
Step 1: Drafting the Layout
-
Measure margins:
Begin by lightly marking a 1-inch margin at the top of your paper for the spiral binding area. Leave a generous 1-inch margin on the left and right sides to keep the design centered. -
Center the title:
Find the horizontal center of your page just below the top margin. Using your pencil, sketch the word ‘MAY’ in large, serif capital letters. Keep the spacing wide and airy. -
Establish the grid:
Below the title, use your ruler to draw a rectangle for the calendar grid. Since May has 31 days and starts on different days each year, create a grid with 7 columns and 5 or 6 rows depending on that year’s layout. -
Refine the boxes:
Divide your main rectangle into even squares. Don’t press too hard with the pencil, as these guide lines will eventually be inked or erased. Ensure the bottom right area has some open space if you want the drawing to overlap slightly.
Ink Confidence
Draw petal lines confidently and quickly. Slow strokes often look shaky, while quick strokes look smooth and organic.
Step 2: Inking the Structure
-
Letter the month:
Switch to a 0.5mm pen to ink the ‘MAY’ header. Add small serifs to the ends of the letters to mimic a classic typeface. I like to double-check my vertical strokes to ensure they remain consistent in thickness. -
Add days of the week:
Instead of full names, letter simple initials (S, M, T, W, T, F, S) above each column using a smaller 0.3mm pen. Keep them tiny and centered for a minimalist look. -
Ink the grid lines:
Carefully trace over your pencil grid lines using a 0.1mm or 0.3mm pen. For a lighter look, you don’t have to connect the corners perfectly; leaving small gaps can add a modern, hand-drawn feel. -
Number the dates:
Write the dates in the top left corner of each box using your finest 0.1mm pen. Keep the numbers small and delicate.
Level Up: Color Wash
Use diluted watercolor to add a faint blush of specific colors to the petals for a soft, vintage botanical look.
Step 3: Drawing the Botanical Art
-
Sketch the floral placement:
In the bottom right corner, lightly sketch the main flower shapes with pencil. Aim for one large open bloom and a few smaller buds or leaves extending upward along the right side of the grid. -
Outline the main bloom:
Using the 0.3mm pen, outline the petals of the largest flower. Start from the center, drawing slightly imperfect, wavy lines to define the petal edges. Overlap them slightly to create depth. -
Detail the center:
Fill the center of the main flower with tiny stippled dots or a small cross-hatch pattern using the 0.1mm pen to suggest pollen and texture. -
Add secondary leaves:
Draw elongated, pointed leaves extending from the flower. Give them central veins, and add diagonal lines or hatching on one side of each leaf to suggest shadow and form. -
Create the upper sprig:
Draw a thin stem reaching up the right side of the calendar grid. Attach small, simple leaves or buds to this stem, keeping the lines flowing in an upward curve. -
Overlap carefully:
If your design overlaps the grid lines, skip inking the grid in those specific spots so the flower appears to be sitting on top of the calendar structure.
Step 4: Finishing Touches
-
Add notes section:
To the left of the floral illustration, create a small ‘Notes’ or ‘goals’ area using dotted lines or a faint dashed border. -
Erase guidelines:
Wait until the ink is completely dry—usually about 5 to 10 minutes to be safe—and then gently erase all remaining pencil marks. -
Bind the calendar:
If you are making this into a spiral notebook like the photo, punch holes along the top edge using a binding machine and insert the wire coil.
Now you have a beautifully organized start to your month with a touch of nature
Cute Animal With Spring Umbrella


Capture the fresh feeling of spring showers with this charming bullet journal spread for May. Featuring a clean grid layout and a sweet illustration of a little bear holding an umbrella, this design balances functionality with minimalist cuteness.
Detailed Instructions
Materials
- Dotted bullet journal notebook
- Fine liner pen (0.3mm or 0.5mm, black)
- Thinner fine liner pen (0.1mm or 0.05mm) for details
- Pencil
- Eraser
- Ruler
Step 1: Setting Up the Grid Structure
-
Map out the month:
Begin by counting the squares in your notebook to center your calendar. For a standard May layout, you will need a grid that is 7 columns wide and 5 or 6 rows high. Use your pencil to lightly mark the corners of the entire rectangle block. -
Draw vertical lines:
Using your ruler and a 0.3mm pen, draw the vertical lines to separate the days of the week. Ensure each column is equal width to keep the look neat. -
Create horizontal dividers:
Draw the horizontal lines to create the weekly rows. You can leave the very top row slightly taller if you want extra space for writing the dates, or keep them uniform like the example.
Grid Perfect
Count the dot grid squares for each day box before drawing any lines. A standard column width of 5 or 6 dots often fits perfectly on A5 journals.
Step 2: Adding Typography & Dates
-
Letter the header:
Above the grid, find the center point. With your pencil, sketch the word ‘MAY’ in tall, slightly uneven capital letters for a playful look. Go over this with your thicker fine liner, adding small serif ticks to the ends of the letters. -
Label the days:
Above each column, write the abbreviations for the days of the week. The example uses a loose, handwritten script style. Start with Monday or Sunday depending on your preference. -
Number the days:
Using a smaller 0.1mm pen, write the date numbers in the top corners of each box. Keep these small and subtle so they don’t clutter the writing space.
Ink Smudge Alert
If you are right-handed, work from the top-left to the bottom-right of the page to prevent your hand from dragging through wet ink as you draw.
Step 3: Illustrating the Character
-
Position the umbrella:
In the bottom left corner, overlapping the grid lines slightly, lightly pencil in a large semicircle for the umbrella canopy. It should span roughly the width of two calendar columns. -
Refine the umbrella shape:
Draw the scalloped bottom edge of the umbrella with curved lines connecting to the ribs. Add a small point at the top center and draw the structural ribs curving down from the top point to the scalloped tips. -
Sketch the bear:
Under the left side of the umbrella, pencil in a small character. Start with a rounded shape for the head and a larger oval for the body. Add two small ears on top. -
Add character details:
Give the bear a striped shirt by drawing horizontal bands across its body. Draw simple stick-like arms, with one hand gripping the umbrella handle. -
Draw the umbrella handle:
Extend a straight line down from the center of the umbrella canopy to the ground level, passing through the bear’s hand. Add a small ‘J’ curve at the bottom for the handle.
Step 4: Final Details & Inking
-
Ink the illustration:
Trace over your pencil sketches with the fine liner. Use the 0.3mm pen for main outlines like the umbrella and bear’s body, and the 0.1mm pen for delicate details like the shirt stripes and facial features. -
Add nature elements:
To the left of the bear, draw two simple leaves rising from the ground. To the right of the umbrella, draw a small cluster of tiny leaves or sprouts to suggest a garden growing. -
Clean up the grid lines:
Where the umbrella overlaps the calendar grid, you have a choice. You can draw the grid lines strictly behind the umbrella (stopping the line when it hits the drawing), or draw the illustration on top. The example shows the umbrella breaking the grid boundary. -
Erase guidelines:
Once the ink is completely dry—I usually wait at least five minutes to be safe—gently erase all remaining pencil marks. Be careful near the darker inked areas to avoid smearing.
Now you have a practical and adorable calendar ready to help you organize your month
Pop-Up Paper Flower Calendar Page

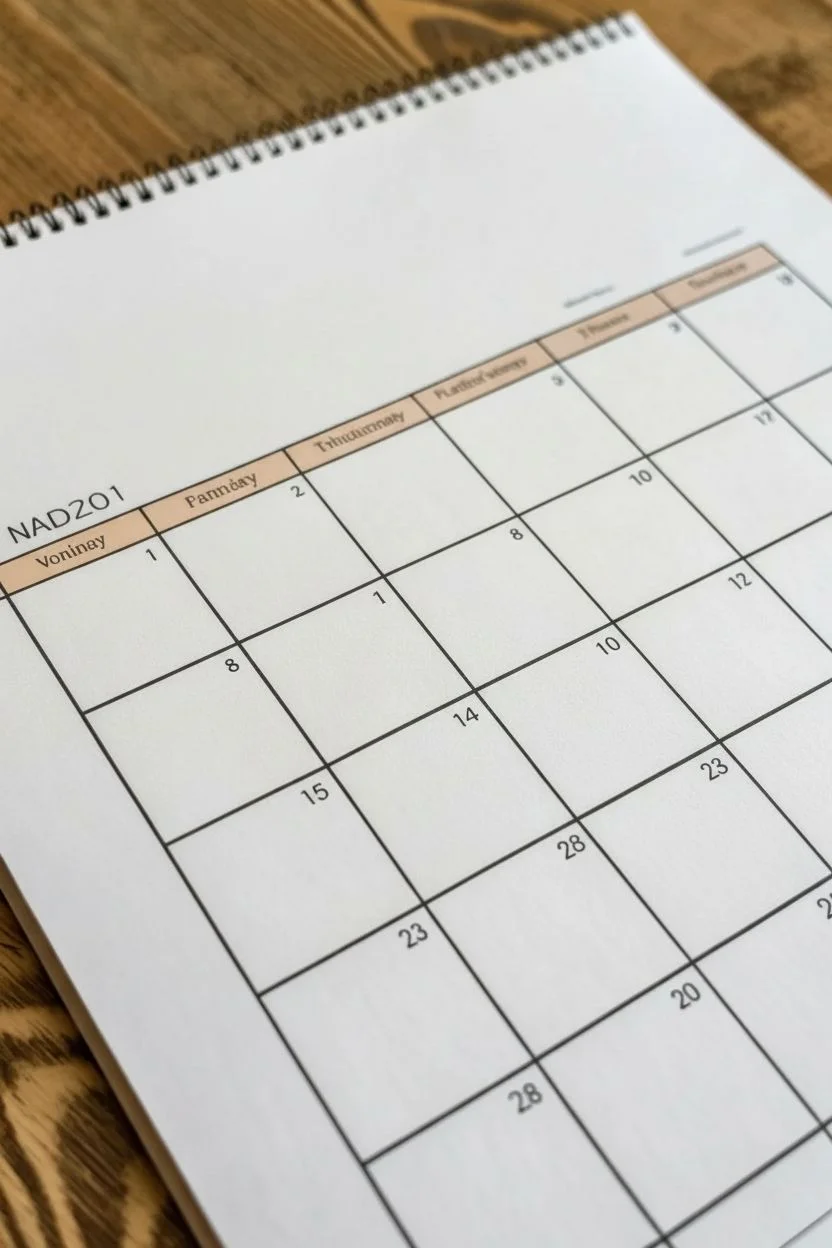
Bring your monthly planning to life with a calendar page that literally pops off the paper. This project combines simple grid drawing with layered paper crafting to create a striking 3D flower embellishment that adds texture and charm to your desk.
Step-by-Step Tutorial
Materials
- High-quality white cardstock (for the calendar base)
- Colored construction paper or cardstock (shades of coral, peach, and orange)
- Small piece of textured green paper or felt (for the center)
- Fine-point black pen or marker
- Ruler
- Pencil
- Scissors
- Strong craft glue or hot glue gun
- Spiral binding machine (optional) or pre-bound blank calendar
- Bone folder (optional for shaping petals)
Step 1: Designing the Grid
-
Measure the layout:
Start with a blank sheet of heavy white cardstock. Use your ruler to measure out a standard monthly grid, leaving roughly 2 inches of white space at the top for your header and flower embellishment. -
Draw the lines:
With a pencil first, lightly sketch a grid of 7 columns and 5 rows. Once you are happy with the spacing, trace over these lines using a fine-point black pen for a crisp, professional look. -
Add the header bar:
Create a rectangular bar across the top of the grid for the days of the week. You can shade this in with a light peach collared pencil or marker to coordinate with the flower you’ll create later. -
Letter the text:
In the shaded header bar, write the days of the week. Add the month name and year (e.g., NAD201 or similar decorative text) in the top left area above the grid, keeping the font modern and clean. -
Number the days:
Fill in the dates for the month in the top right corner of each box. Keep the numbers small and neat to maintain a minimalist aesthetic.
Glue Control
If the paper ripples from wet glue, switch to double-sided foam tape or a hot glue gun. These add height without saturating the paper fibers.
Step 2: Crafting the Flower
-
Cut the outer petals:
From your darkest shade of coral or reddish paper, cut out about 8 to 10 wide, rounded petal shapes. These should be roughly 1 inch long. -
Cut the middle layer:
Switch to a slightly lighter peach or orange paper. Cut a second set of petals, making them slightly smaller and narrower than the first batch. -
Cut the inner accent:
Using a contrasting light yellow or pale peach paper, cut a small circle with a scalloped edge or tiny individual petals to act as the flower’s inner cup. -
Shape the petals:
I find that gently curling the edges of each paper petal around a pencil or bone folder gives them a natural, organic lift so they don’t lie flat. -
Assemble the base layer:
Apply a small dab of glue to the center of your flower position on the calendar. Arrange the largest dark petals in a circle, overlapping them slightly. -
Add the second layer:
Glue the medium-sized peach petals directly on top of the first layer, offsetting them so they sit in the gaps between the larger petals. -
Attach the inner accent:
Glue the small scalloped circle into the center. Use a fine-point pen to draw tiny seeds or lines on this layer for added botanical detail. -
Create the 3D center:
Take a small strip of textured green paper or felt. Roll it tightly into a coil or ‘button’ shape and glue it into the very center of the bloom to mimic the stigma.
Season’s Greetings
Change the flower colors every month to match the season—try pastel blues for winter, bright sunflowers for August, or deep reds for December.
Step 3: Finishing Touches
-
Secure the flower:
Ensure the entire flower assembly is firmly adhered to the page. You might need to press down on the center for a minute while the glue sets. -
Erase guidelines:
Once the black ink on your grid is completely dry, use a soft eraser to gently remove any visible pencil sketches underneath. -
Bind the calendar:
If you are making this from scratch, use a spiral binding machine to punch holes along the top edge and insert a metal coil. Alternatively, simply slide this finished page into a clipboard or frame.
Now you have a functional piece of art that brightens up your daily scheduling


Have a question or want to share your own experience? I'd love to hear from you in the comments below!