Round rocks are basically nature’s perfect little canvases, and I love how their smooth curves make even simple designs look finished and intentional. Here are my favorite round rock painting ideas—starting with the classics everyone reaches for, and ending with a few artsy twists that feel extra satisfying on a circular stone.
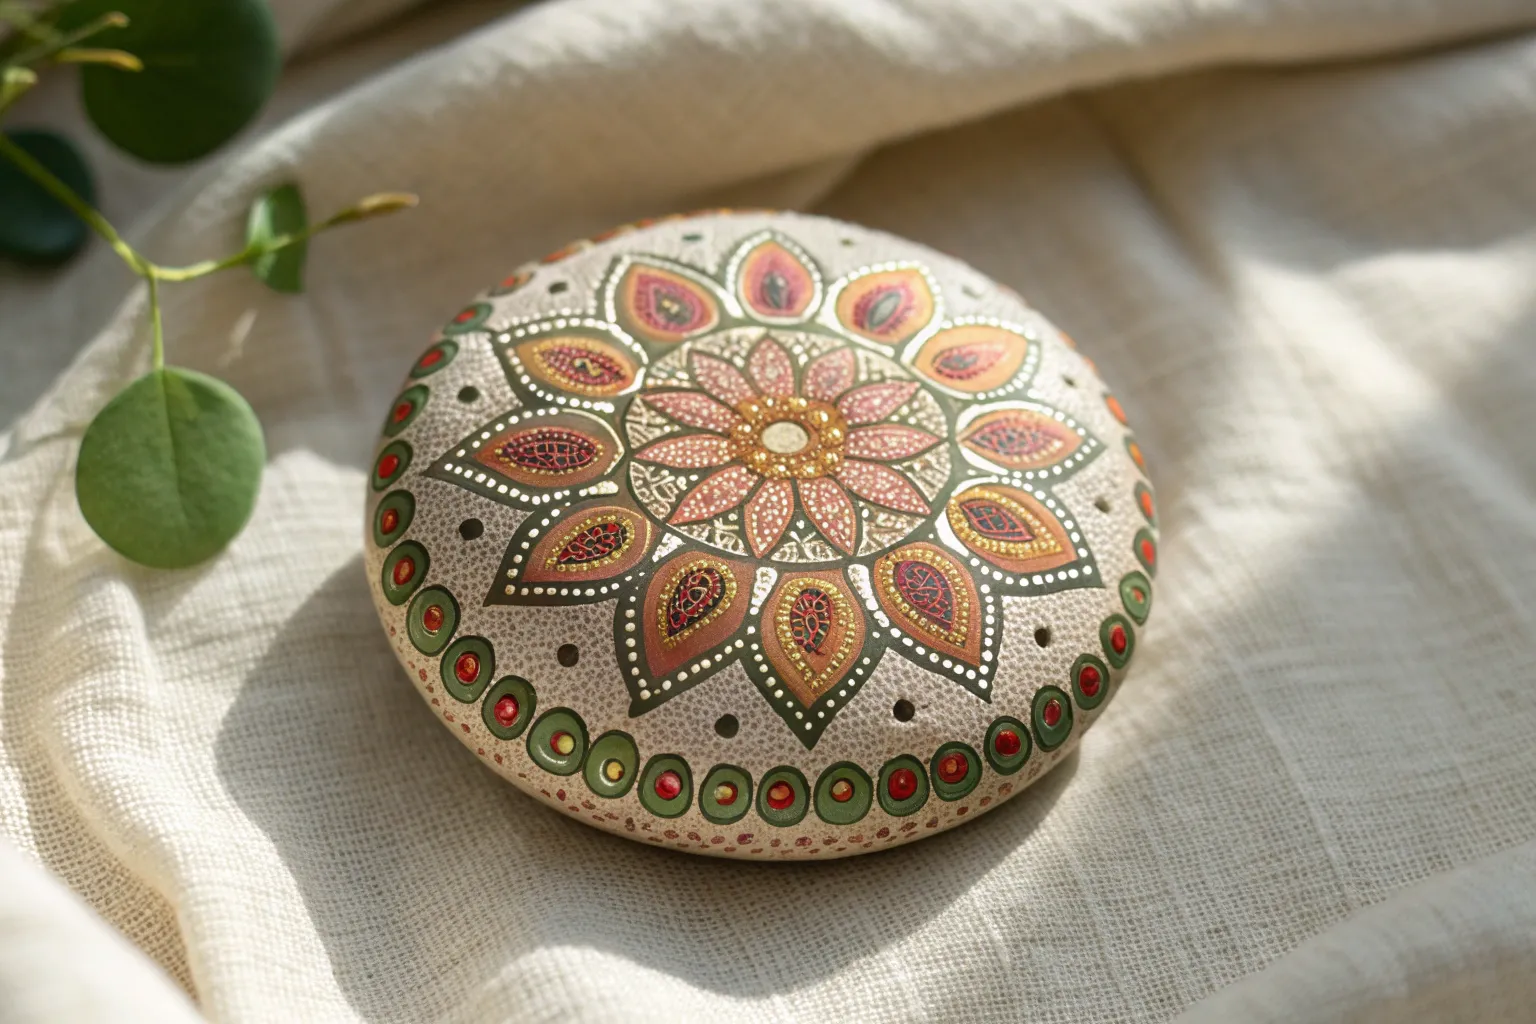
Classic Dot Mandala Burst
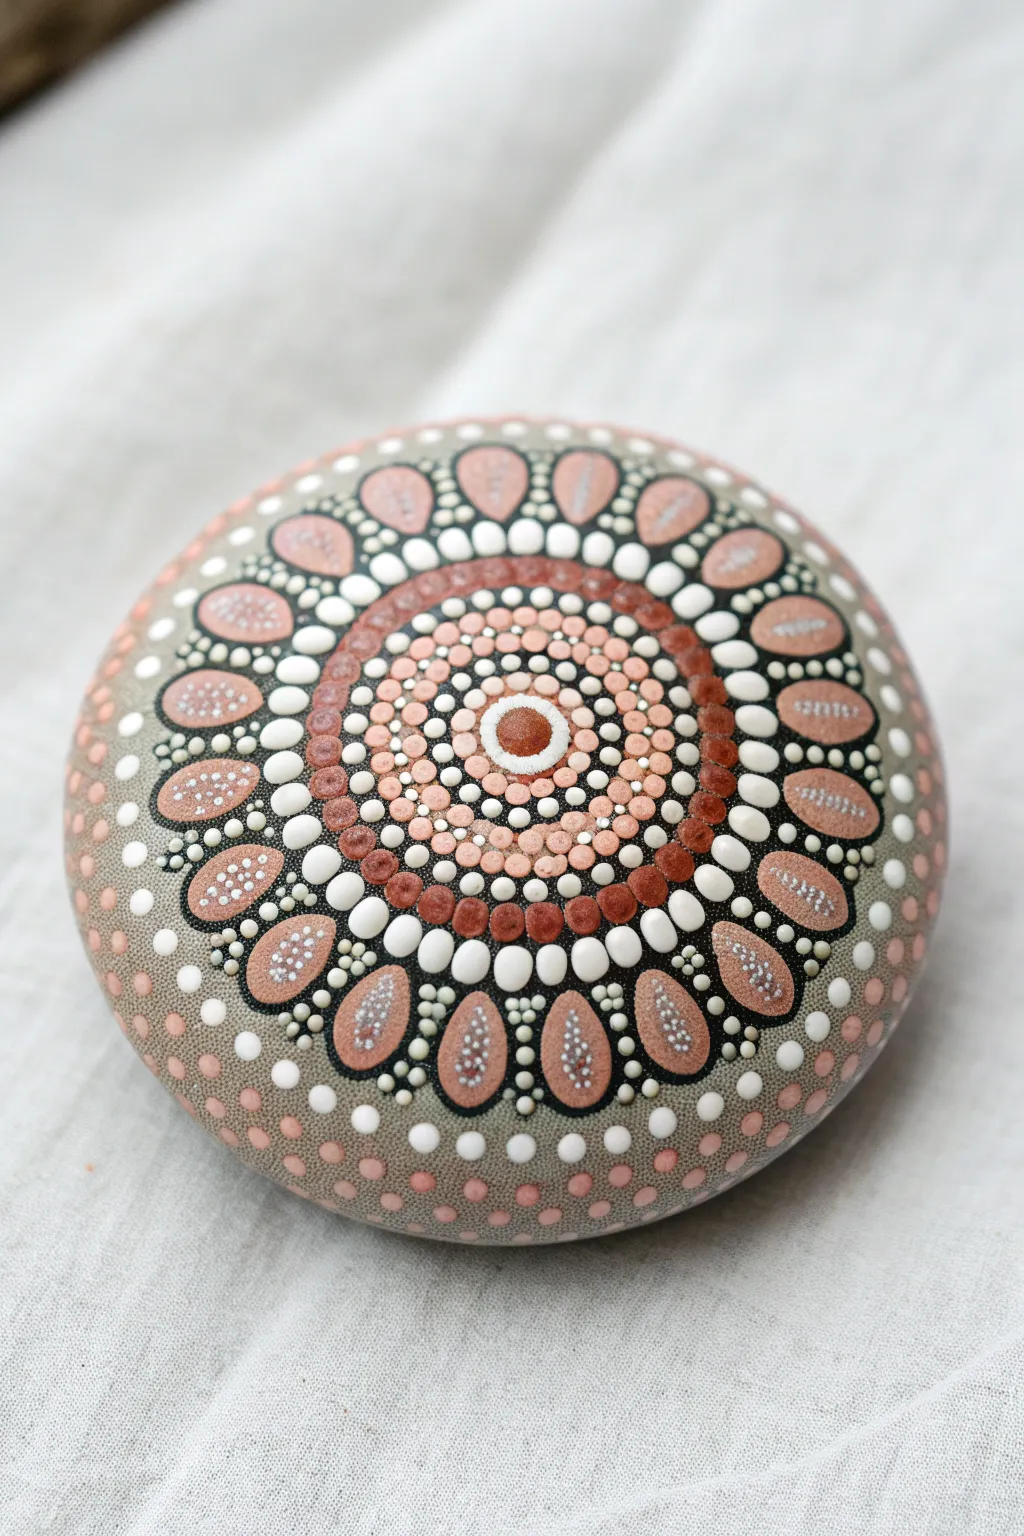

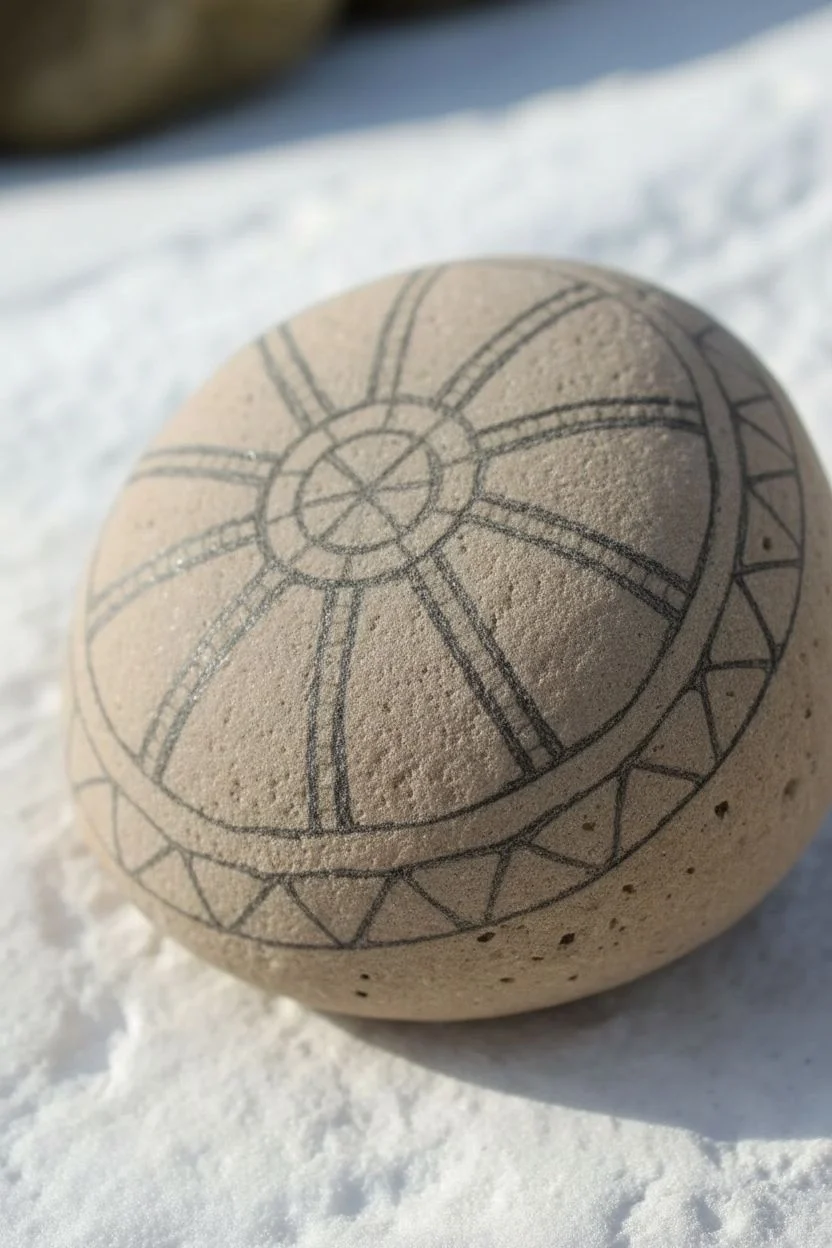
This elegant stone features a mesmerizing radiating pattern that combines the warmth of terracotta and rose with crisp white accents against a soothing grey background. The design creates a delicate petal-like burst that feels both organic and structured, perfect for a meditative painting session.
Step-by-Step Guide
Materials
- Smooth, round river stone (approx. 3-4 inches diameter)
- Acrylic paints: Light Grey (base), Titan Buff or Cream, White, Terracotta, Rose Pink, Deep Rust/Sienna, Black
- Dotting tools (full set with various diameters)
- Small styling tool or toothpick for ‘walking the dots’
- Acrylic matte varnish
- Compass and white chalk pencil (optional for guidelines)
Step 1: Base and Center
-
Prepping the Canvas:
Begin by washing your stone and letting it dry completely. Apply two smooth coats of light grey acrylic paint over the entire top surface, allowing the first coat to dry before adding the second for opaque coverage. -
Establishing the Core:
Find the absolute center of your stone. Using your largest dotter, place a single, prominent white dot right in the middle. Let this tack up slightly. -
Building the Center:
Once the white dot is dry, add a slightly smaller Deep Rust dot directly on top of it to create a bullseye effect. -
First Ring:
Using a small dotting tool, encircle the central dot with tiny cream-colored dots. Keep them tightly spaced and uniform in size.
Step 2: Radiating Warmth
-
Expanding the Pattern:
Moving outward, create a second ring using slightly larger dots in a soft rose pink. Ensure these sit snugly against the previous cream ring. -
Gradient Effect:
Increase your tool size again. Create the next ring using the terracotta shade. I like to make sure these dots are plump and nearly touching. -
Alternating Colors:
Add two more concentric rings, alternating between cream and your Deep Rust color, gradually increasing the dot size with each new row to create that expanding ‘burst’ feeling. -
The Definition Ring:
This is a key transition. Using your Deep Rust/Sienna paint, create a ring of distinct, larger dots. These will serve as the heavy border before we start the petal shapes.
Paint Peaks flattening?
If your dots have pointy peaks, your paint is too thick. Mix in a drop of pouring medium or water to get a meltier texture that settles into a smooth dome.
Step 3: Petals and Details
-
Drafting White Spacers:
Between every second or third rust dot of your last ring (depending on spacing), place a medium-sized white dot. These white dots act as the base or anchors for the petals. -
Creating the Petal Outline:
Using a fine brush or styling tool, carefully paint teardrop shapes radiating outward. Use black paint to outline these petals, starting from the white anchor dots and tapering to a point. -
Filling the Petals:
Fill the inside of these black outlines with the Rose Pink paint. Alternatively, you can paint the pink teardrop first and outline it in black afterward if you have a steady hand. -
Inner Petal dots:
Inside each pink petal, use a tiny tool to add a line of 3-4 graduating white dots down the center, getting smaller as they reach the tip. -
Walking the Dots:
Around the outside curved edge of every black petal outline, ‘walk the dots’ using white paint. Dip your tool once and make consecutive dots without re-dipping to create a fading size effect.
Symmetry Hack
Before painting, use a white chalk pencil and a compass to draw faint concentric circles. This creates a roadmap so your rings don’t become wonky or uneven.
Step 4: Outer Atmosphere
-
Bridging the Gaps:
In the V-shaped spaces between the petals, place a medium white dot. Above that, place a slightly smaller cream dot to begin filling the negative space. -
Outer Confetti:
Scatter different sizes of rose, grey, and cream dots loosely around the outer edge of the stone, letting the dense pattern effectively dissolve into the background. -
Top Dots:
Return to the center area. Add tiny white ‘top dots’ on the larger rust and terracotta circles to add dimension and highlight. -
Sealing:
Allow the stone to cure for at least 24 hours. Lightly brush on a matte varnish to protect your work without adding distracted glare.
Place this stone on your desk or in a garden nook as a gentle reminder of everyday beauty


Concentric Rainbow Rings
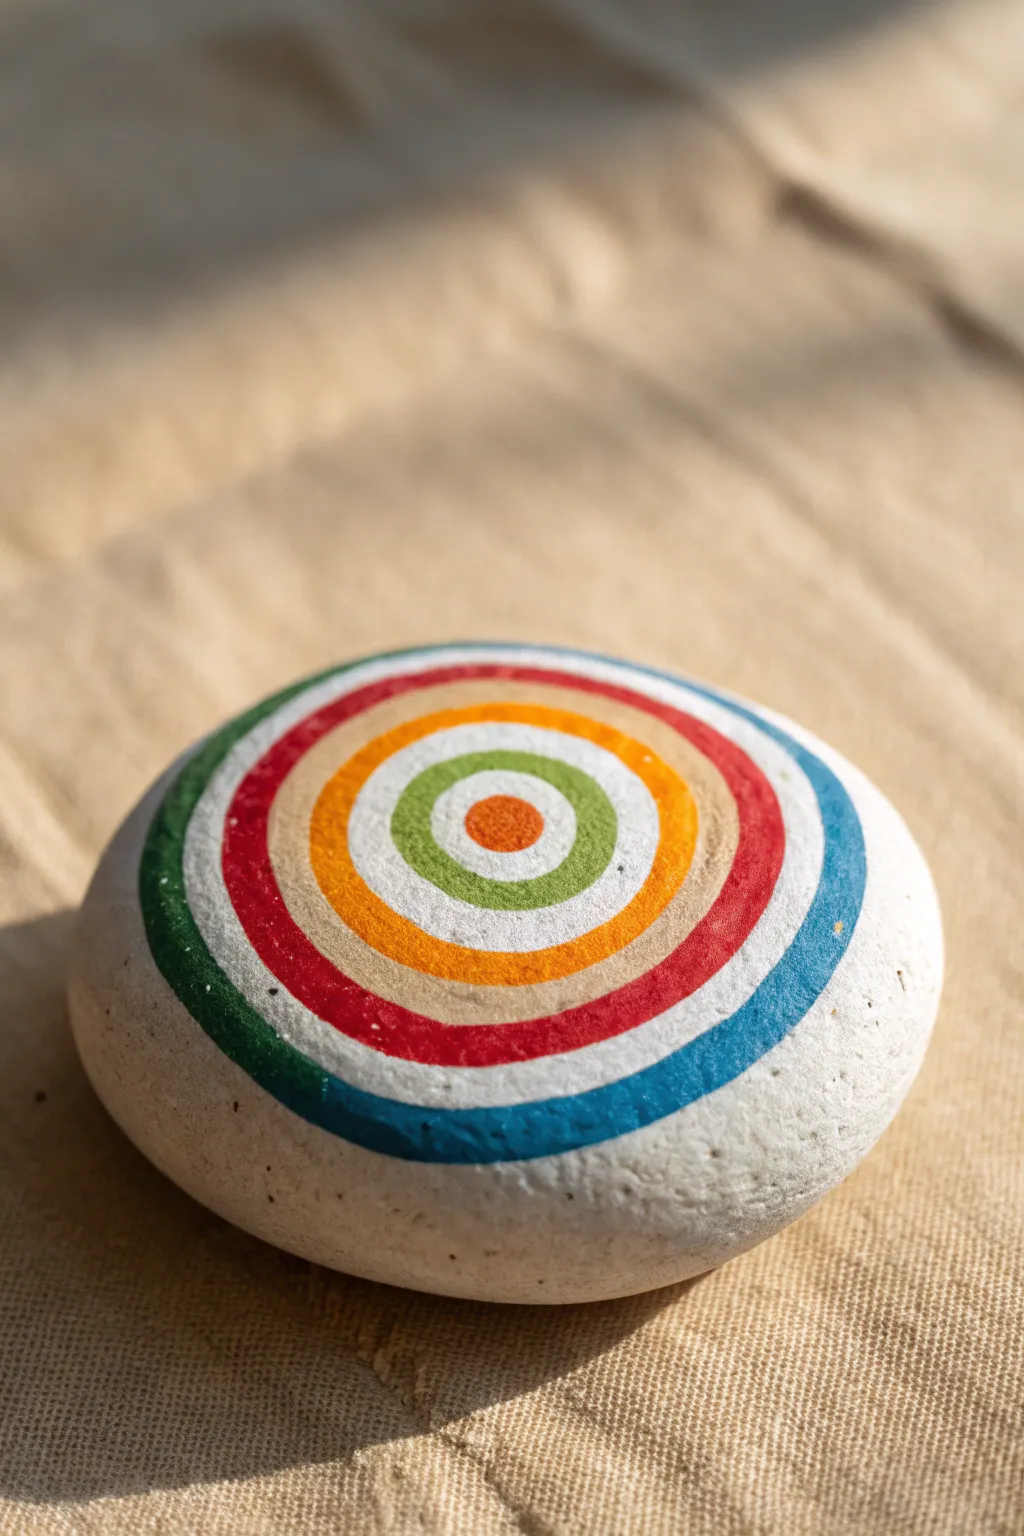
This project transforms a simple smooth river rock into a mesmerizing target of color. The satisfying concentric circles create a modern, graphic look that feels both playful and precise.
Step-by-Step Tutorial
Materials
- Smooth, round river rock (approx. 3-4 inches wide)
- White acrylic paint or gesso (matte finish)
- Acrylic paints: Teal/Aqua, Deep Red, Golden Yellow/Orange, Apple Green, Bright Orange
- Fine detail brushes (size 0 and 00)
- Medium flat brush (for base coat)
- Pencil with a good eraser
- Compass (optional)
- Small cup of water
- Paper towels
- Clear matte sealer (spray or brush-on)
Step 1: Base Preparation
-
Clean the Surface:
Begin by washing your stone with warm soapy water to remove any dirt or grit. Let it dry completely in the sun or with a towel. -
Prime the Stone:
Using your medium flat brush, apply a layer of white acrylic paint or gesso to the top surface of the rock. This creates a bright canvas that makes the colors pop. -
Second Coat:
Once the first layer is dry to the touch, add a second coat of white. Ensure the coverage is opaque and smooth, hiding the natural stone color beneath. -
Find the Center:
With a pencil, lightly mark the approximate center of the stone. This doesn’t need to be geometrically perfect, but it helps anchor the design.
Fixing Wobbly Lines
If a circle looks uneven, don’t wipe it off. Let it dry completely, then paint over the mistake with white paint to ‘erase’ it before trying again.
Step 2: Mapping the Circles
-
Draft the Center Dot:
Draw a small circle around your center mark, about the size of a pencil eraser. -
Sketch the Rings:
Working outward, lightly sketch concentric circles. You don’t need a compass—hand-drawn rings add character—but keep the spacing relatively even. -
Refine the Lines:
If your lines get wobbly, erase and redraw them. You want clear boundaries for where each color will go.
Step 3: Painting the Colors
-
Start with the Core:
Dip a small detail brush into the bright orange paint and fill in the very center dot. -
The Green Ring:
Leave a small gap of white space around the orange dot. Using the apple green paint, carefully fill in the first ring. -
The Golden Band:
Move to the next ring outward. Paint this band with your golden yellow or light orange hue. I find rotating the rock as I paint helps keep the curve smooth. -
The Bold Red Layer:
Select your deep red paint. Fill in the next concentric circle, maintaining a steady hand to keep the edges crisp against the white background. -
Outer Blue Ring:
For the wider outer band, use the teal or aqua blue paint. This ring acts as a frame for the inner colors. -
Edge Detailing:
Finally, add a thin, dark green stripe on the very outer edge of the blue ring to give it definition and depth.
Steady Hand Trick
Rest your pinky finger on the table or a dry part of the rock while painting. This anchors your hand for smoother, more precise curved strokes.
Step 4: Finishing Touches
-
Clean Up Edges:
Once the colored rings are dry, use a tiny brush with white paint to touch up any areas where the color might have bled or the lines became uneven. -
Let it Cure:
Allow the stone to dry completely for at least an hour. The paint should be hard to the touch. -
Seal the Deal:
Apply a coat of clear matte sealer over the entire painted surface to protect your artwork from scratches and moisture.
Place your finished geometric masterpiece on a desk or shelf to add a splash of modern color to your space


Ladybug Dome Design
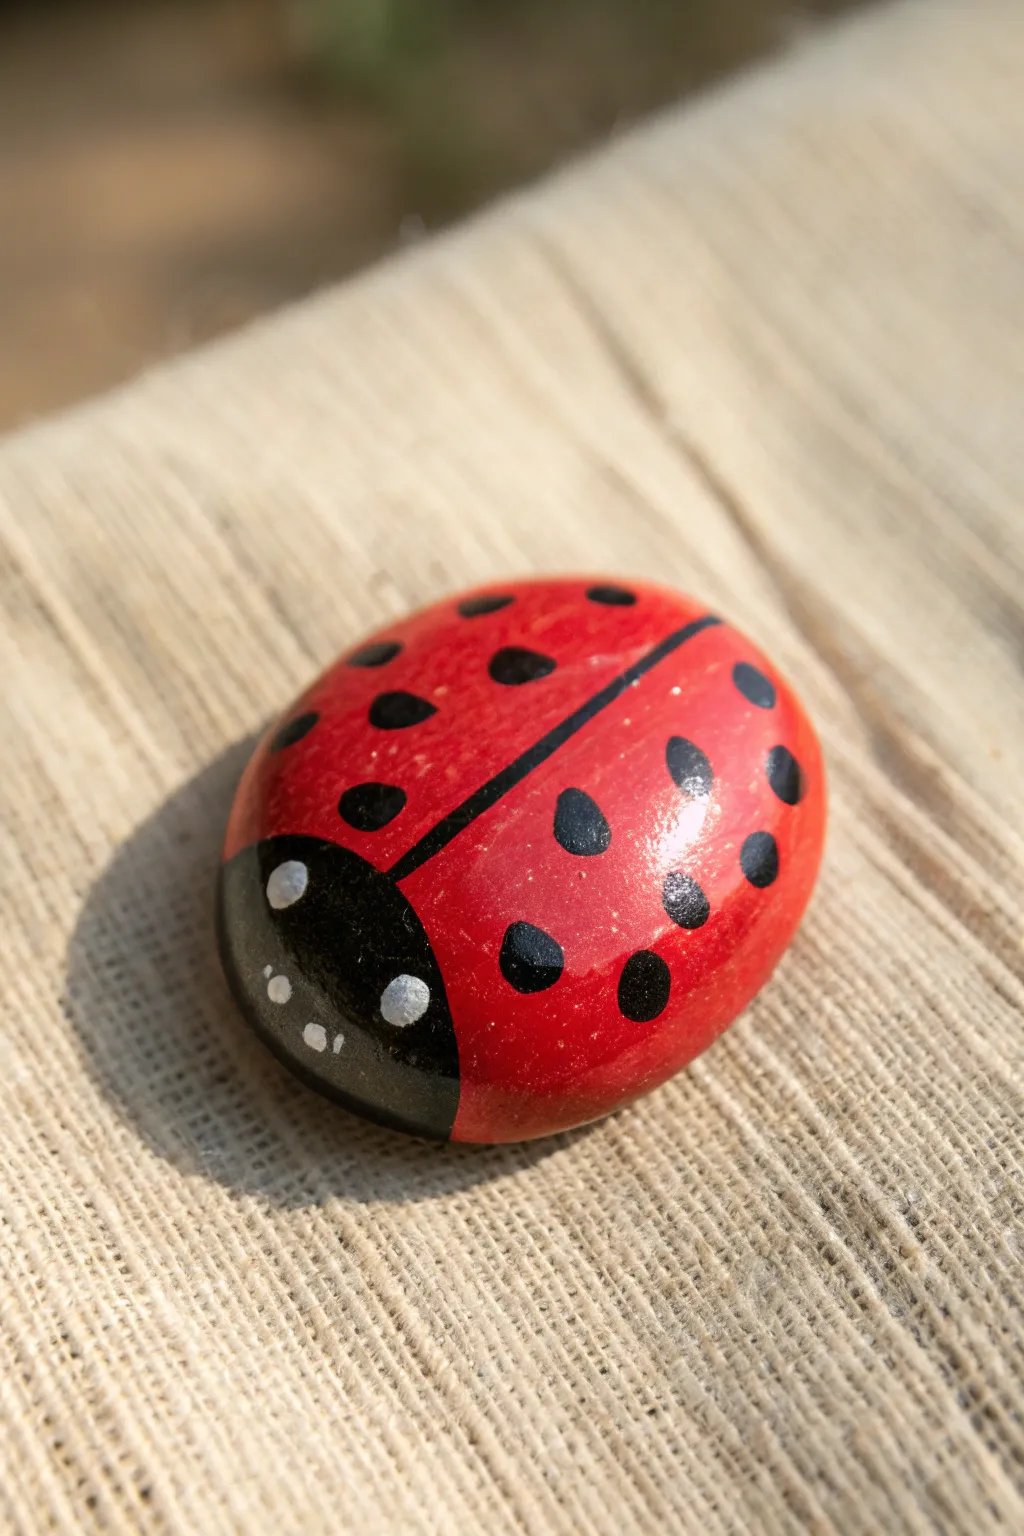
Transform a simple river stone into a charming garden friend with this classic ladybug design. The shiny, rounded surface perfectly mimics the beetle’s shell, making it an adorable addition to plant pots or a windowsill.
Detailed Instructions
Materials
- Smooth, round river rock (palm-sized is ideal)
- Red acrylic paint (bright scarlet or primary red)
- Black acrylic paint
- White acrylic paint
- Flat paintbrush (medium)
- Fine detail paintbrush (round)
- Dotting tool or toothpick
- Pencil
- Clear high-gloss varnish or sealant
- Palette or paper plate
- Water cup and paper towels
Step 1: Base Coating
-
Clean the Stone:
Begin by washing your rock with warm, soapy water to remove any dirt or oil. Dry it thoroughly with a towel or let it sit in the sun for a few minutes. -
Sketch the Head:
Using a pencil, lightly draw a curved line across the front third of the rock to separate the head area from the body. -
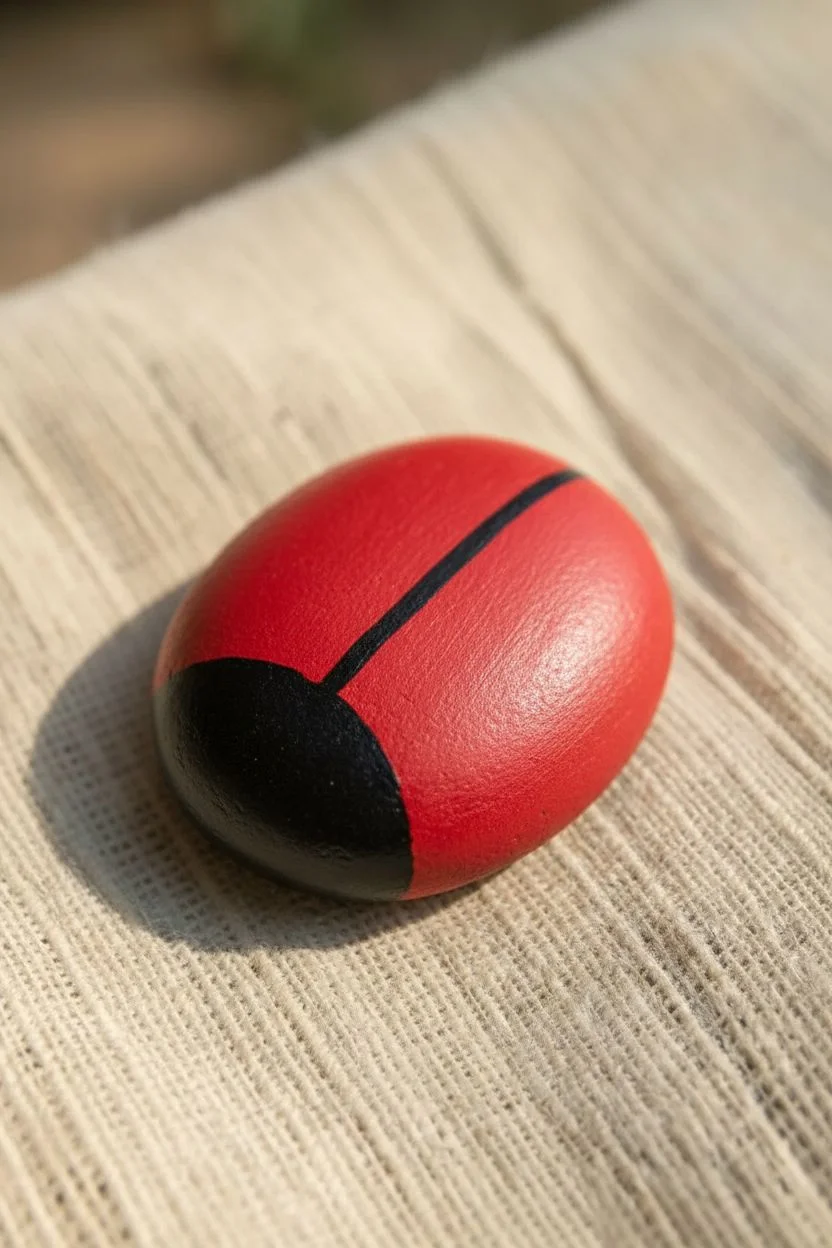
Paint the Body Red:
Load your flat brush with bright red acrylic paint. Paint the larger section of the rock (the body) entirely red, carefully following the pencil curve you just drew. -
Layer the Red:
Acrylic red can be translucent, so let the first coat dry completely. Apply a second or even third coat until the color is solid and vibrant, hiding the rock’s natural color underneath. -
Paint the Head Black:
Using a smaller brush, fill in the front section (the head) with black acrylic paint. Be very careful at the border where the red meets the black to keep a crisp edge.
Smudged edges?
If you smudge black paint onto the red, don’t wipe it! Let it dry completely, then paint over the mistake with a small dab of red paint to cover it up seamlessly.
Step 2: Adding Details
-
Draw the Wing Line:
Once the red paint is fully dry, take a fine detail brush loaded with black paint. Paint a steady, thin line straight down the center of the red body, starting from the black head and going to the back edge of the rock. -
Position the Spots:
Plan where your spots will go. A symmetrical arrangement usually looks best. You can visualize a few near the centerline and others towards the outer edges. -
Paint Large Spots:
Use a small round brush or the large end of a dotting tool dipped in black paint to create the bigger spots on the body. Press down gently and lift straight up for a round shape. -
Add Smaller Spots:
Fill in the gaps with slightly smaller black dots to create variety. I find that varying the size of the dots makes the shell look more organic and interesting. -
Create the Eyes:
Dip a clean dotting tool or the handle end of a paintbrush into white paint. Place two medium-sized dots on the black head area for the eyes. -
Add Eye Highlights:
If you want extra character, add tinier white dots near the bottom of the black head or near the main eyes to suggest reflections or mouthparts.
Make it shimmer
Mix a tiny drop of gold or iridescent medium into your red paint for the final coat. This gives the wings a subtle, sun-kissed beetle sheen.
Step 3: Finishing Touches
-
Check for Touch-ups:
Look over your work. If any black spots look thin, dab a tiny bit more black paint on top of them once the first layer is dry to make them opaque. -
Let it Cure:
Allow the entire rock to dry completely. This is crucial before sealing, as trapped moisture can cloud the finish. Give it at least an hour or two. -
Apply Sealer:
Using a clean, soft brush, apply a layer of high-gloss varnish over the entire painted surface. This gives the ladybug that classic ‘wet shell’ look shown in the photo. -
Dry the Sealant:
Let the varnish dry according to the bottle’s instructions. Keep it in a dust-free area while it dries so nothing sticks to the glossy surface.
Place your shiny new beetle in the garden and watch it brighten up your flower bed


Sweet Owl Face Rock
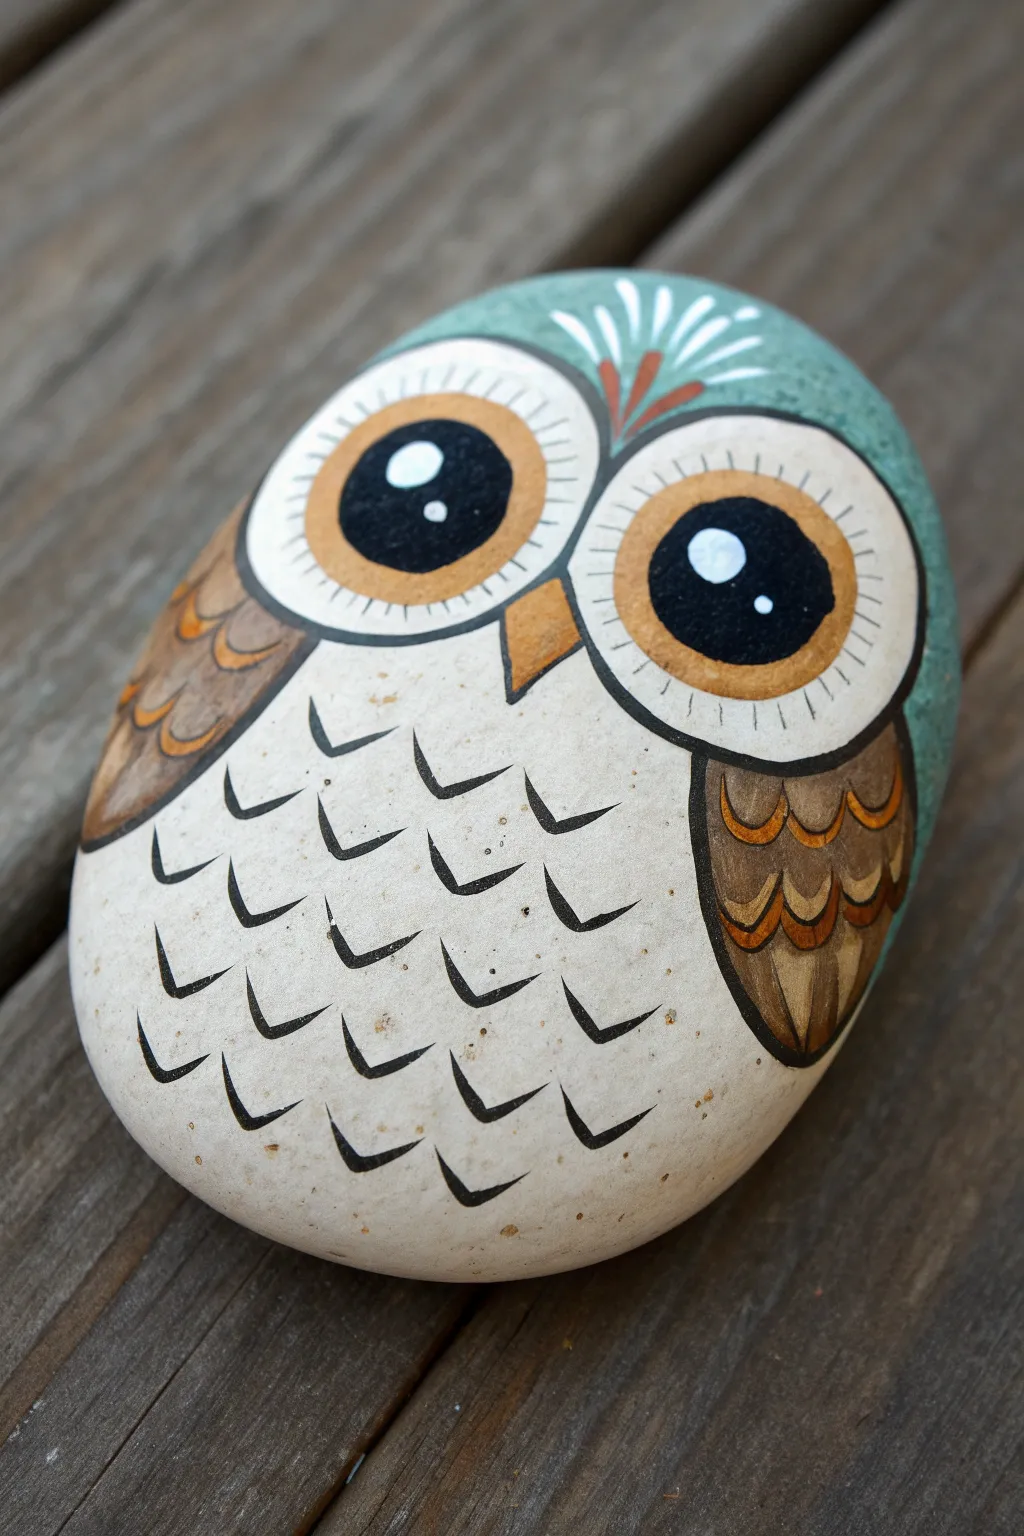
Transform a simple garden stone into a charming woodland friend with this detailed owl painting tutorial. This project features big, expressive eyes, patterned feathers, and a distinct teal “cap” that gives the owl a sweet, decorative personality.
How-To Guide
Materials
- Smooth, oval-shaped river rock (palm-sized)
- Acrylic paints: Cream/Off-white, Turquoise/Teal, Burnt Sienna (warm brown), Black, White, Orange/Ochre
- Paintbrushes: Flat shader (medium), Round brush (small), Fine liner brush (00 or 000)
- Pencil for sketching
- Dotting tool or toothpick
- Clear acrylic sealer (matte or gloss)
Step 1: Base Coat and Sketching
-
Prep the Stone:
Wash your rock thoroughly with soap and water to remove any dirt or oils, then let it dry completely. A clean surface ensures your paint adheres properly and lasts longer. -
Apply the Base Color:
Paint the entire face of the rock with a cream or off-white acrylic paint. You will likely need two or three thin coats to get a solid, opaque coverage. Allow each coat to dry fully before adding the next. -
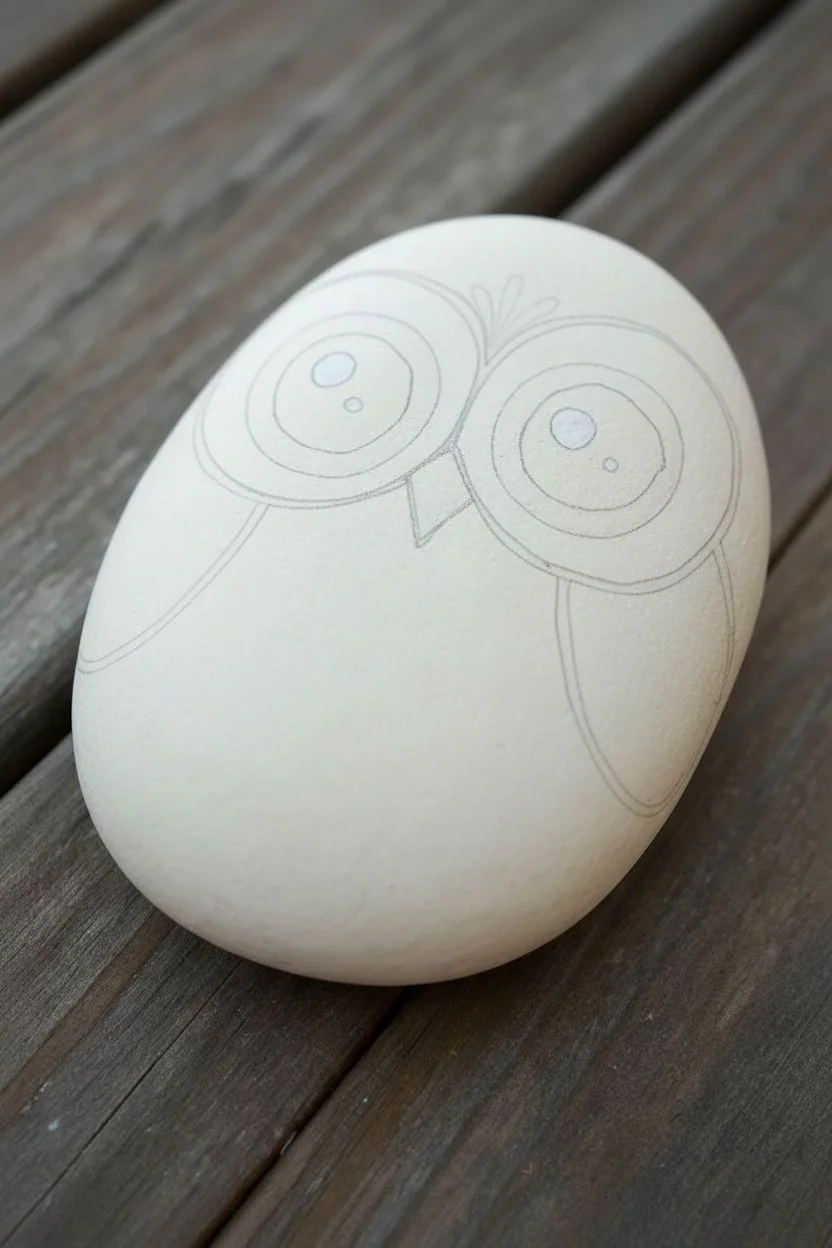
Guideline Sketch:
Once the base is bone-dry, lightly sketch your design with a pencil. Draw a curved line across the top third for the head cap. Mark two large circles for the eyes, leaving a small gap between them for the beak. Sketch the wing curves on the sides and a small triangle for the beak.
Pro Tip: Steady Hand
For the fine black details like the chest feathers, brace your pinky finger against the rock or the table to stabilize your hand while painting.
Step 2: Blocking in Colors
-
Paint the Head Cap:
Fill in the top area above your curved line with turquoise or teal paint. Use a round brush to carefully follow the curve of the forehead. This might need a second coat for vibrancy. -
Define the Eyes:
Paint the two large eye circles with white paint. Even though the base is cream, a fresh coat of bright white here makes the eyes pop. Let this dry completely. -
Add the Iris Rings:
Inside the white eye circles, paint a thick ring using a mix of light brown or ochre. The ring should touch the top and bottom edges of the white circle but leave the center open for the pupil. -
Paint the Pupils:
Fill the center of each eye with black paint. Make these large and round, slightly overlapping the brown iris ring you just painted to create a cohesive look. -
Details on the Iris:
Using a very fine liner brush and black paint, add thin tick marks or radiating lines around the outer edge of the white eye circles. This gives the eyes a bit of texture. -
Add the Beak:
Paint the small triangular beak between the eyes using an orange or golden-yellow shade. Outline it thinly with black later if needed for definition.
Step 3: Wings and Feathers
-
Base the Wings:
Paint the curved wing shapes on the left and right sides of the body using Burnt Sienna (warm brown). Follow the natural curve of the rock. -
Layer Wing Feathers:
Once the brown is dry, add rows of ‘U’ shapes inside the wings using lighter brown or orange paint to simulate layers of feathers. I like to outline these ‘U’ shapes in black for a sharp, illustrated look. -
Create Body Feathers:
Using your fine liner brush and black paint (thinned slightly with water for better flow), paint small ‘V’ or chevron shapes all over the cream belly area. Stagger them in rows to mimic chest feathers.
Troubleshooting: Blunders
If you make a mistake with the black liner, don’t wipe it! Let it dry completely, then paint over it with the base cream color before trying again.
Step 4: Final Details
-
Outline the Eyes:
Carefully outline the large white eye circles with black paint to separate them clearly from the teal cap and the cream body. -
Head Cap Decoration:
On the teal head cap, use white paint to add a small decorative fan or plume in the center. Paint thin lines radiating upward and add a few small brown strokes for contrast. -
Sparkle the Eyes:
Dip the handle end of a paintbrush or a dotting tool into white paint. Place one large dot near the top right of each black pupil, and a tinier dot below it. This reflection brings the owl to life. -
Seal the Artwork:
Allow the rock to dry overnight to ensure all thick layers are set. Apply a coat of clear acrylic sealer—spray or brush-on—to protect your work from scratches and weather.
Place your finished owl in a potted plant or on a windowsill to watch over your home.
BRUSH GUIDE
The Right Brush for Every Stroke
From clean lines to bold texture — master brush choice, stroke control, and essential techniques.
Explore the Full Guide
Cute Cat Face Circle
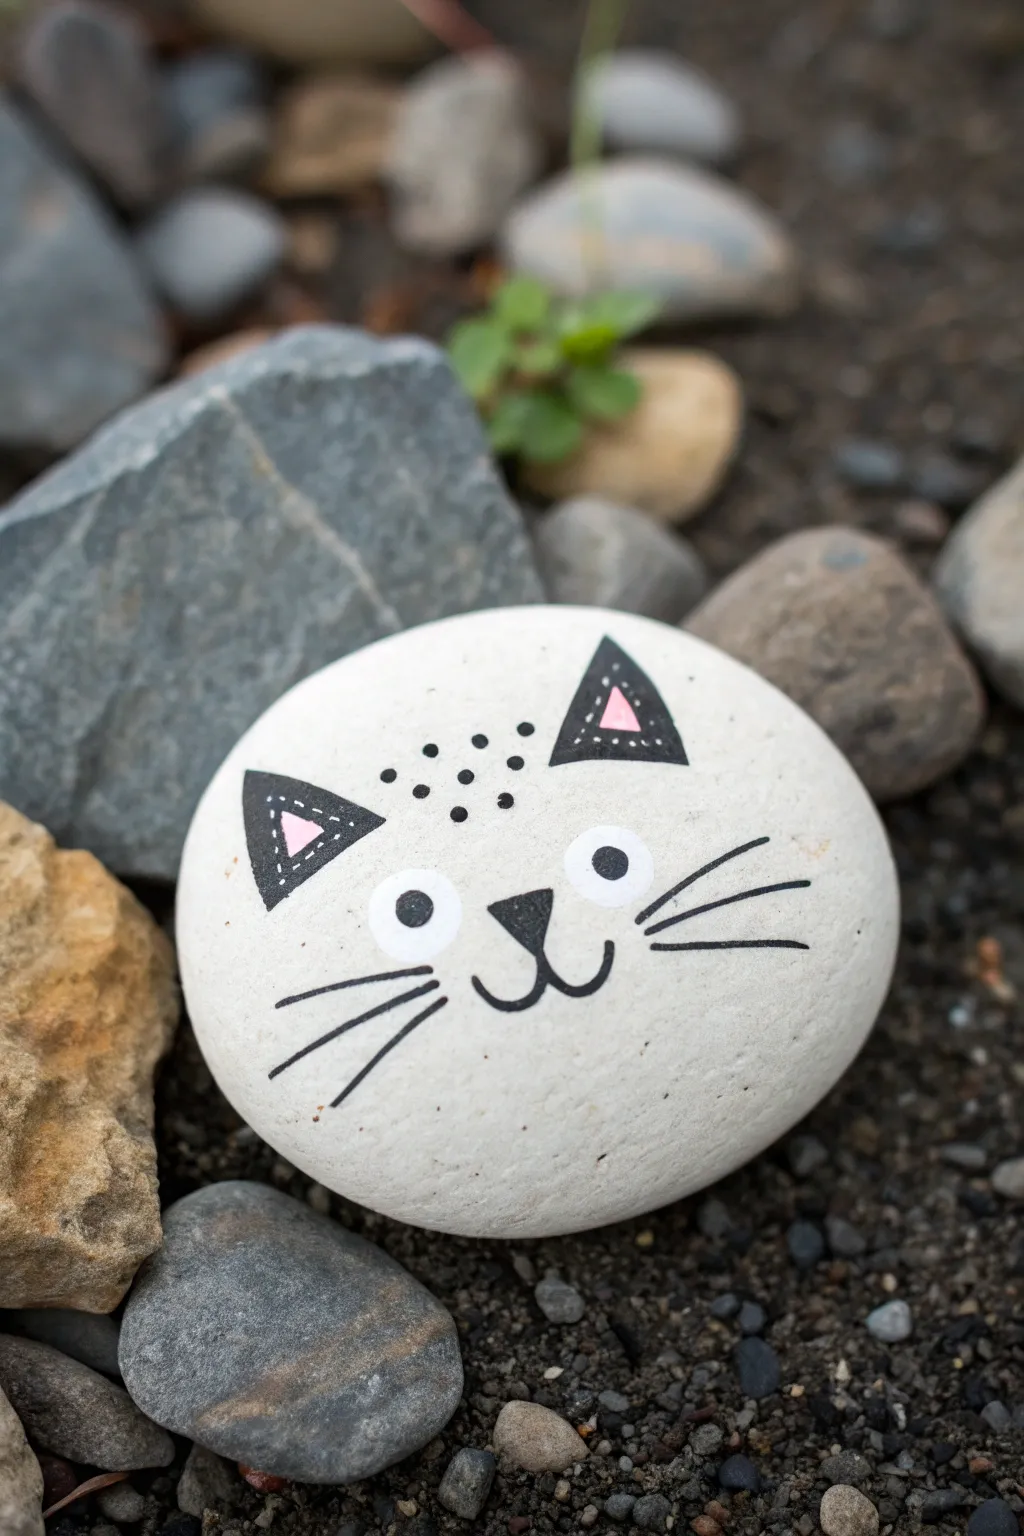
Transform a simple round stone into an adorable feline friend with just a few strokes of paint. This minimalist design features a clean white base, sweet stitched ears, and wide, curious eyes that make for a perfect garden brightener.
Detailed Instructions
Materials
- Smooth, round river rock (approx. 3-4 inches wide)
- White acrylic paint or multi-surface paint
- Black acrylic paint or black paint pen (fine tip)
- Light pink acrylic paint
- Flat paintbrush (medium size)
- Fine detail paintbrush or dotting tool
- Matte or satin sealant spray
Step 1: Preparation & Base Coat
-
Clean your canvas:
Begin by scrubbing your rock with warm, soapy water to remove any dirt or oils. Let it dry completely in the sun or use a hairdryer to speed things up. -
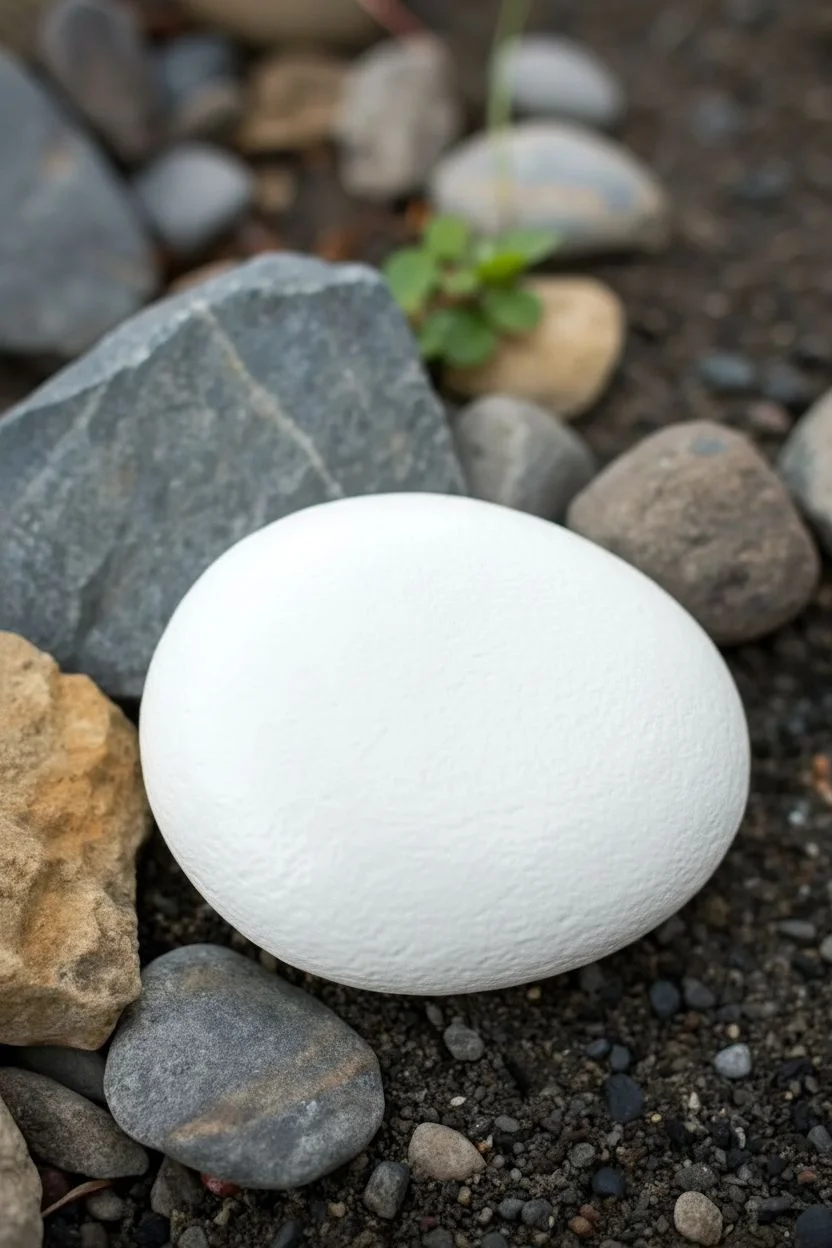
Apply the first layer:
Using your flat brush, paint the entire top surface of the stone with white acrylic paint. Don’t worry if it looks streaky at first. -
Build opacity:
Allow the first coat to dry fully, then apply a second or third coat until the grey color of the rock is completely hidden and you have a solid, creamy white surface.
Step 2: Drawing the Features
-
Outline the ears:
Once the white base is bone dry, load a fine detail brush with black paint (or use a paint pen). Draw two triangles near the top edge of the rock, spacing them widely apart. -
Fill the ears:
Fill in the triangles with solid black paint. Keep your edges as sharp as possible for that crisp illustrated look. -
Add the nose:
Find the center point of the rock face and paint a small, inverted triangle with rounded corners for the nose. -
Paint the mouth:
From the bottom point of the nose, draw a small vertical line down, then curve two ‘J’ shapes outward to the left and right to create a happy smile.
Fixing Smudges
If you smudge black paint on the white base, wait for it to fully dry. Sand the spot lightly, then dab fresh white paint over it.
Step 3: Adding Details & Personality
-
Create the eyes:
With a clean small brush or a large dotting tool, dip into white paint again. Place two white circles just above the nose area. Wait for this to dry completely. -
Paint the pupils:
Add small black dots inside the white circles, positioning them slightly toward the center to give the cat a focused, cute expression. -
Stitch the ears:
Using a very fine brush or white gel pen, add small dashed lines inside the black ear triangles to create a ‘stitched’ fabric effect. -
Add pink accents:
paint a small pink triangle inside each black ear triangle, leaving a border of black around it so the white stitches show clearly. -
Dot the forehead:
Dip the back end of a small brush or a toothpick into black paint. Add a cluster of small dots between the ears for texture. -
Draw the whiskers:
Using a fine liner brush or pen, flick three long lines outward from each cheek area. Try to make the strokes quick so they taper off at the ends.
Make It a Family
Use different sized rocks to create a whole cat family. Vary the ear positions or eye sizes to give each one a unique personality.
Step 4: Finishing Touches
-
Check for errors:
Look over your design. If you need to tidy up any black lines, use a tiny bit of white paint to cover mistakes once the black is dry. -
Seal the rock:
Take the rock outside and apply a coat of spray sealer. This protects the paint from chipping and weather damage if you place it in the garden.
Place your new friendly feline on a porch step or nestle it among your potted plants to greet visitors
Puppy Nose and Eyes
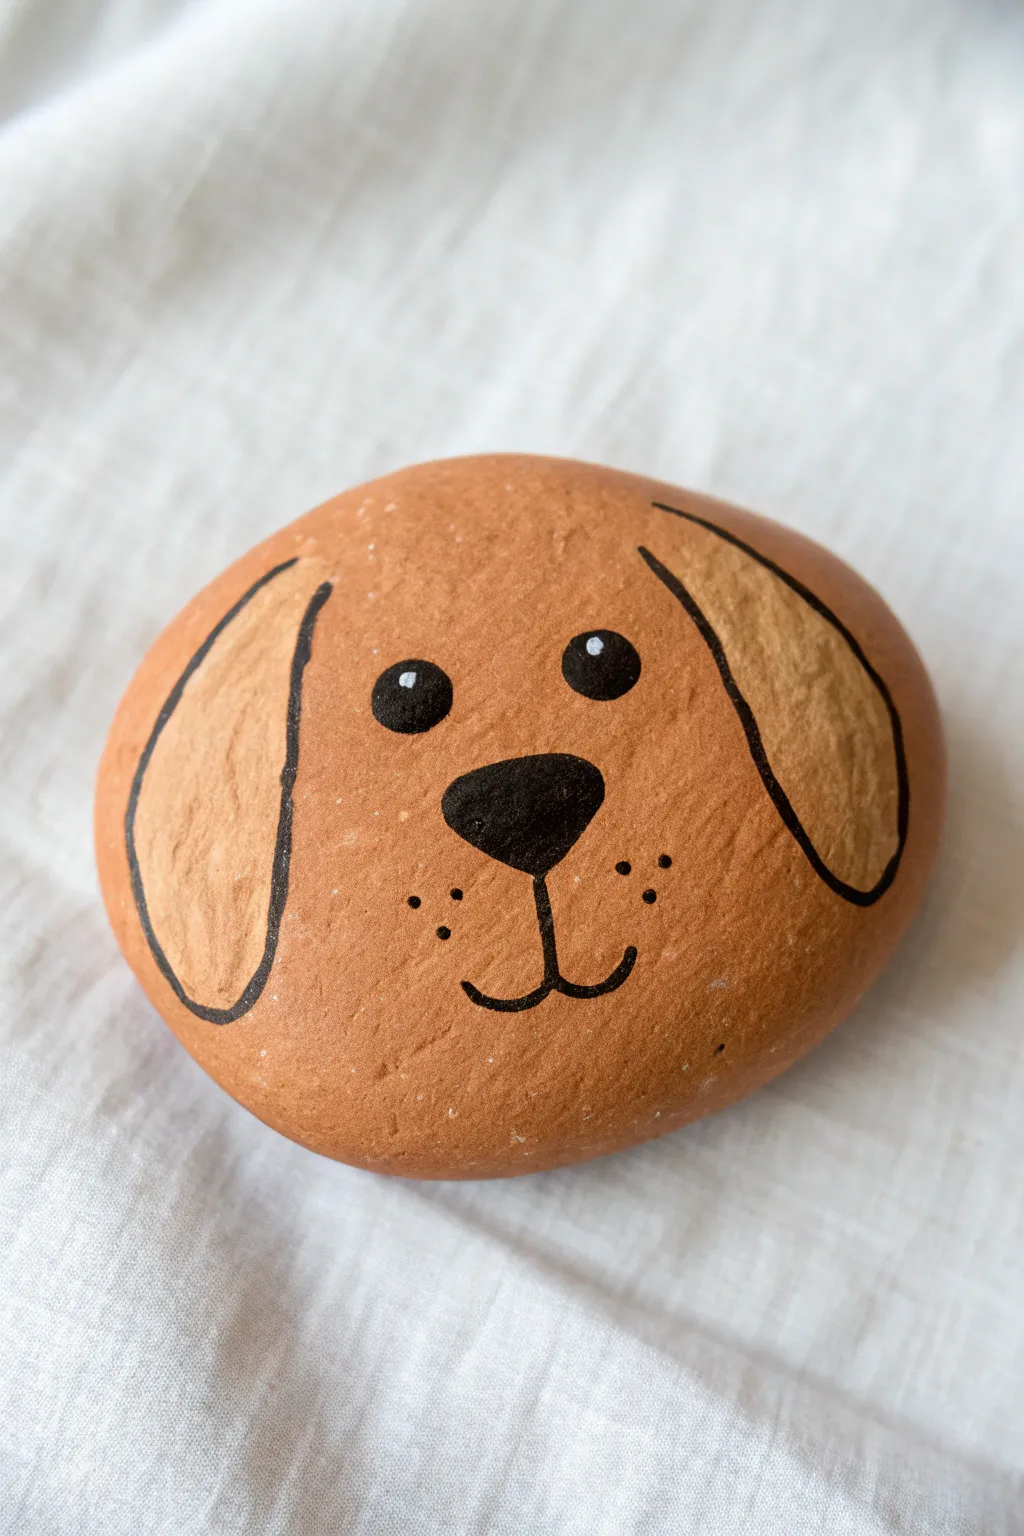
Transform a smooth, round stone into a loyal canine companion with just a few simple strokes of paint. This project features a warm, reddish-brown puppy face with floppy ears and a sweet expression that is perfect for beginners.
Step-by-Step Guide
Materials
- Smooth, round river rock (fist-sized)
- Acrylic paint (terracotta/reddish-brown, light tan/beige, black, white)
- Flat paintbrush (medium size)
- Fine detail paintbrush or paint pen (black)
- Dotting tool or toothpick
- Pencil
- Spray varnish or sealant
Step 1: Base Coat and Outlines
-
Clean your canvas:
Begin by scrubbing your rock with warm soapy water and letting it dry completely to ensure the paint adheres properly. -
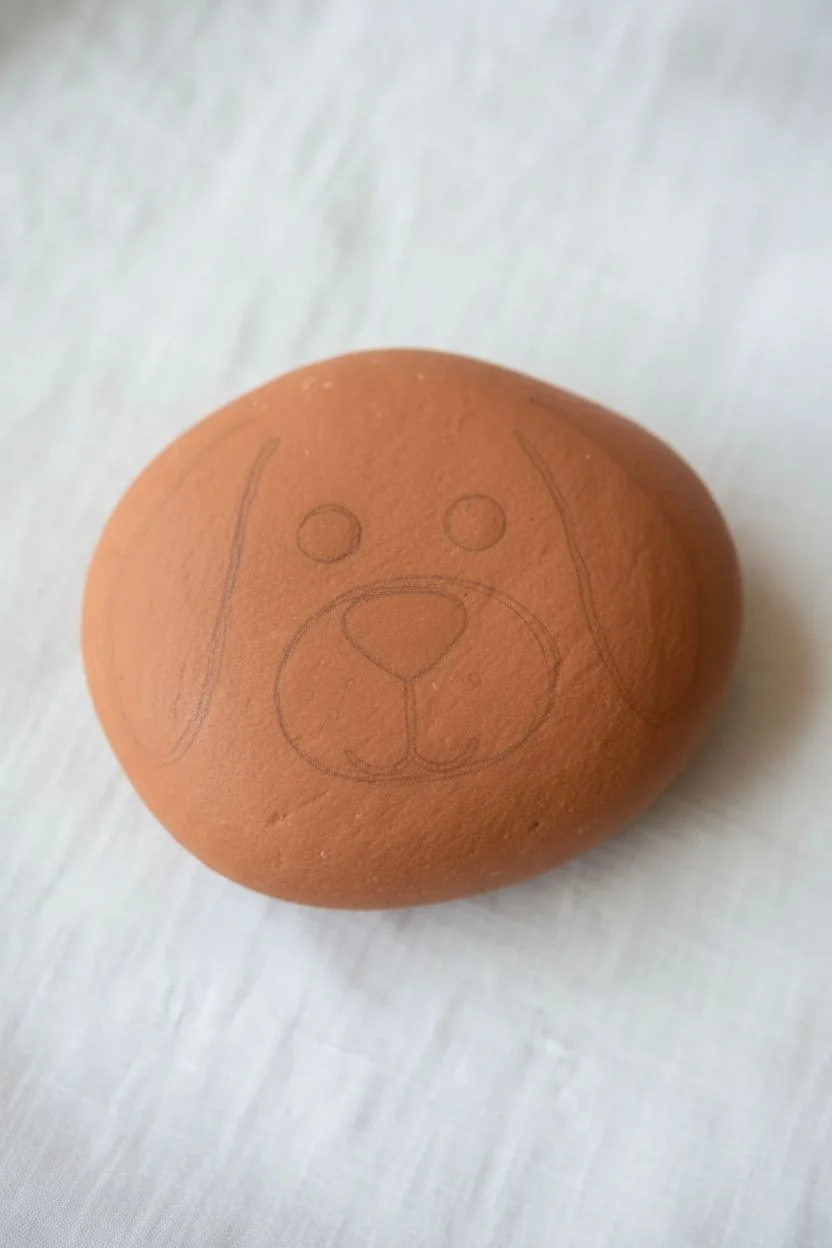
Apply the base color:
Using a flat paintbrush, cover the entire front surface of the rock with a terracotta or warm reddish-brown acrylic paint. -
Add a second coat:
Once the first layer is dry to the touch, apply a second coat to make the color solid and opaque. Let this dry fully. -
Sketch the face:
Lightly sketch the outline of the ears, nose, and eyes with a pencil. Draw two large, drooping ear shapes on the sides and an oval for the snout area in the center.
Step 2: Painting the Features
-
Fill in the ears:
Mix a light tan or beige color. Using a smaller brush, carefully fill in the ear shapes you sketched, keeping the edges neat. -
Build ear opacity:
The tan paint might look transparent over the darker base. I usually apply two or three thin layers here, letting each dry in between, until the color pops. -
Paint the nose:
Switch to black paint and a small detail brush. Create the nose shape, which is somewhat like an inverted triangle with rounded corners, right in the center of the face. -
Create the eyes:
Dip the handle end of a paintbrush or a large dotting tool into black paint. Stamp two solid black circles above the nose for the eyes.
Smooth Operator
If you struggle with shaky hands when painting outlines, rest your wrist on a table or steady it with your other hand. A black POSCA paint pen often gives cleaner lines than a brush.
Step 3: Details and Finishing Touches
-
Outline the ears:
Once the tan paint is bone dry, use a fine liner brush with black paint (or a black paint pen) to draw a smooth outline around the curved edge of each ear. -
Draw the mouth:
Starting from the bottom center of the nose, draw a short vertical line down. From there, curve a line outward to the left and another to the right to create the classic puppy smile. -
Add whisker spots:
Using the very tip of your fine brush or a toothpick, gently tap three tiny black dots on each cheek area, just beside the mouth lines. -
Add the eye sparkle:
Dip a toothpick or small dotting tool into white paint. Place a tiny white dot in the upper right quadrant of each black eye to bring the puppy to life. -
Dry completely:
Allow the rock to sit undisturbed for several hours (or overnight) to ensure the thickest parts of the paint are fully cured. -
Seal the artwork:
Finish by spraying the rock with a clear acrylic sealer. This protects the face from chipping and gives it a nice finished sheen.
Breed Variations
Change the ear color to black for a beagle look, or add patchy spots over one eye. You can also paint a tiny red tongue sticking out for extra cuteness.
Now you have a charming little stone puppy that will never chew your shoes

PENCIL GUIDE
Understanding Pencil Grades from H to B
From first sketch to finished drawing — learn pencil grades, line control, and shading techniques.
Explore the Full Guide
Expressive Smiley Faces

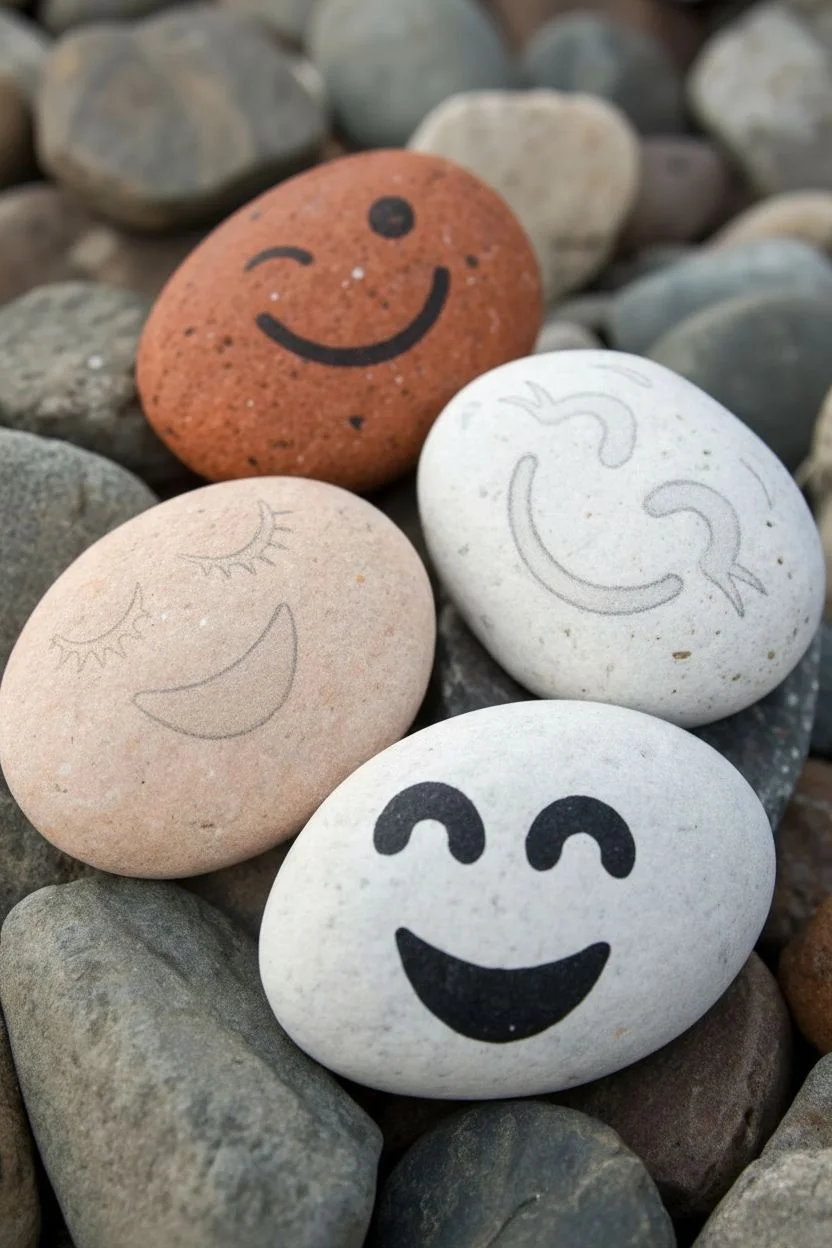
These charming painted stones rely on the natural beauty of smooth river rocks combined with simple, expressive brushstrokes. By utilizing the stone’s existing color and adding bold black features, you can create a family of cheerful characters that are as easy to make as they are delightful to find.
Step-by-Step Tutorial
Materials
- 4 smooth, oval river rocks (mix of terracotta, beige, and white)
- Black acrylic paint (high pigment/opaque)
- Fine liner brush (size 0 or 00)
- Round detail brush (size 1)
- Pencil for sketching
- Eraser
- Matte or satin varnish (spray or brush-on)
- Soap and water
- Paper towels
Step 1: Preparation
-
Select the right canvas:
Hunt for four smooth, rounded river rocks. Aim for a variety of natural base colors if possible—a mix of white, beige, and reddish-brown creates the best variety for this set. -
Clean the surface:
Wash your rocks thoroughly with soap and warm water to remove any dirt or oily residue. Let them dry completely, or speed up the process by placing them in the sun. -
Examine the texture:
Rub your thumb over the surface of each rock to find the smoothest side. This will be your ‘face’ side, as smoother surfaces allow for much cleaner painted lines.
Fixing Shaky Lines
If a line gets wobbly, don’t wipe it! Let it dry completely, then gently scrape the mistake away with a toothpick or a crafting knife before reapplying paint.
Step 2: Sketching the Expressions
-
Drafting the ‘Bashful’ face:
On the beige rock, lightly pencil two downward-curving arcs for closed eyes. Add three small lashes to the outer corner of each eye. -
Adding the grin:
Draw a wide, open-mouth smile below the eyes on the beige rock. It should look like a sideways capital ‘D’ that is slightly tilted. -
Drafting the ‘Winky’ face:
On the reddish rock, sketch a winking expression. Draw a closed, downward-curving lash line on the left and an open, upward-curving eye on the right. -
Drafting the ‘Cheeky’ face:
Select a white rock. Sketch squinting eyes that look like sideways numbers—specifically small ‘3’ shapes or cursive hooks—and a large, crooked grin that curves up to the left. -
Drafting the ‘Jolly’ face:
On the final white rock, draw two simple, bold rainbow arches for happy eyes. Below them, sketch a deep, symmetrical ‘U’ shape for a wide smile.
Step 3: Painting the Features
-
Prepare the paint:
Squeeze a small amount of black acrylic paint onto your palette. I find adding just a single drop of water helps the paint flow more smoothly off specific liner brushes without losing opacity. -
Line the lashes:
Using your finest liner brush (size 00), carefully trace the closed eyelashes on the beige rock. Use very light pressure at the tips of the lashes so they taper off naturally. -
Fill the open smile:
Switch to the slightly larger size 1 brush. Outline the open smile shape first, then fill in the center with solid black. Two thin coats are better than one thick, gloopy coat. -
Paint the wink:
Move to the reddish rock. Use the fine liner to paint the curved winking eye and the open eye. Keep the lines consistent in thickness for a bold, graphic look. -
Execute the quirky grin:
For the first white rock, paint the squinting eye hooks carefully. When painting the large grin, allow the line to be slightly thicker at the bottom of the curve and taper as it goes up. -
Painting the jolly arches:
On the last white rock, paint the two arch eyes. Try to make the arches thick and rounded at the ends, rather than sharp points, to make the face look friendlier. -
Completing the jolly smile:
Fill in the large ‘U’ shaped smile on the final rock. Ensure the edges are crisp and clean against the white stone background. -
Check for consistency:
Look at all four rocks together. If any black lines look patchy or greyish, carefully apply a second layer of black paint over those specific areas.
Add Rosy Cheeks
Dip a Q-tip or a dry brush into a tiny bit of watered-down pink paint. Dab it softly on the ‘cheeks’ of the rocks for a cute blushing effect.
Step 4: Finishing Touches
-
Erase guidelines:
Once the paint is 100% bone dry (give it at least 20 minutes), gently use an eraser to remove any visible pencil marks that weren’t covered by paint. -
Seal the deal:
Apply a coat of matte or satin varnish to protect your artwork from the elements. A spray varnish works best to avoid smearing the black paint.
Now you have a quartet of friendly faces ready to brighten up your garden or windowsill
Daisy or Sunflower Top View
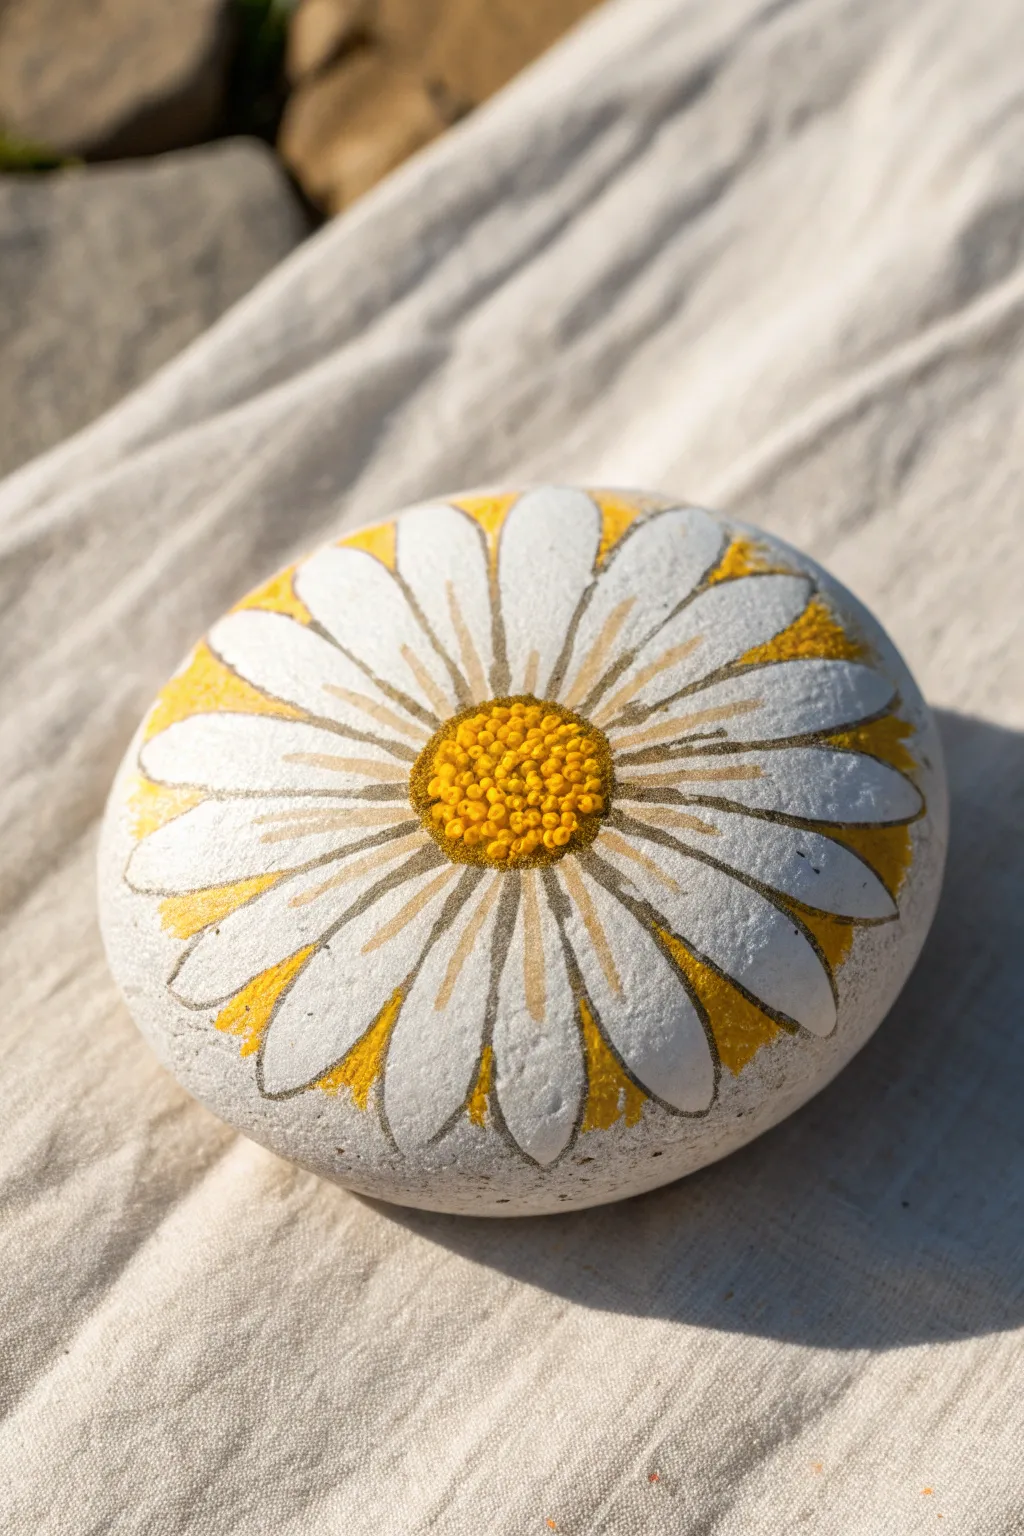
Transforms a simple round stone into a radiant bloom with this cheerful daisy design. The clever use of yellow negative space and stippling creates a dimensional, textured center that practically pops off the rock.
How-To Guide
Materials
- Smooth, round river rock (approx. 3-4 inches diameter)
- White acrylic paint (high opacity)
- Yellow acrylic paint (bright sun yellow)
- Golden-yellow or orange-yellow acrylic paint
- Light grey or taupe acrylic paint
- Medium flat brush
- Fine liner brush (size 0 or 00)
- Small round brush or dotting tool
- Pencil for sketching
- Matte or satin sealant spray
Step 1: Preparation & Base Coat
-
Clean the surface:
Begin by washing your rock with warm, soapy water to remove any dirt or oils that might prevent the paint from adhering properly. Pat it completely dry. -
Prime the stone:
Apply a base coat of white acrylic paint over the entire top surface of the rock. Depending on the color of your stone, you may need two coats to get a solid, opaque white background. Let this dry completely.
Step 2: Drafting the Design
-
Mark the center:
Using a pencil very lightly, draw a small circle right in the middle of the rock. This will be the flower’s center. -
Sketch the petals:
Draw long, slender petal shapes radiating outward from the center circle. They should extend almost to the edge of the rock. Keep the petals relatively uniform in width, but let them curve slightly with the shape of the stone.
Uneven Petals?
If your petals look lopsided, don’t erase! Simply widen the adjacent yellow ‘background’ space to reshape the white petal visually without repainting the whole flower.
Step 3: Adding the Color
-
Paint the negative space:
This step is crucial for the ‘pop’. Using the bright yellow paint and a small brush, carefully fill in the triangular gaps *between* the pencil-sketched petals. Leave the petals themselves white. -
Define the petal tips:
Continue that yellow color slightly around the outer tips of the petals, essentially creating a yellow halo that frames the white flower. -
Refresh the white:
Once the yellow is dry, go back in with your white paint and recoat the petals. This cleans up any yellow smudges and makes the white brilliantly bright against the yellow background.
Perfect Center Texture
For the pollen center, wait for the first layer of yellow dots to be 80% dry before adding the orange dots. If it’s too wet, they will muddy together instead of looking like distinct textures.
Step 4: Detailing & Texture
-
Outline the petals:
Mix a very watery light grey or taupe paint. Using your finest liner brush, trace the outline of each petal. The lines should be delicate, not thick or heavy. -
Add petal definition:
Paint a single, faint line down the center of each petal, starting from the center and fading out about halfway up. This adds dimension to the petals. -
Base the center:
Paint the central circle with your golden-yellow paint. It doesn’t need to be perfect as we will cover it with texture. -
Stipple the pollen:
I prefer to use the handle end of a paintbrush for this. Dip the tip into bright yellow paint and create tiny dots all over the center circle. -
Layer the dots:
While the previous dots are tacky, add a second layer of dots using a slightly darker orange-yellow or gold. Focus these darker dots slightly towards the bottom or one side to create a shadow effect. -
Highlight the center:
Add a few final, tiny dots of pure white or very pale yellow right in the middle-top area of the center to make it look rounded and shiny.
Step 5: Finishing Touches
-
Final inspection:
Check for any uneven edges on your grey outlines. If a line is too thick, you can clean it up by painting over the edge with white once it’s dry. -
Seal the artwork:
Allow the rock to dry for at least 24 hours to ensure all moisture has evaporated from the paint layers. Apply a matte or satin spray sealant to protect your daisy from the elements.
Place your everlasting daisy in the garden or on a sunny windowsill to enjoy a bloom that never fades


Watermelon Slice Circle
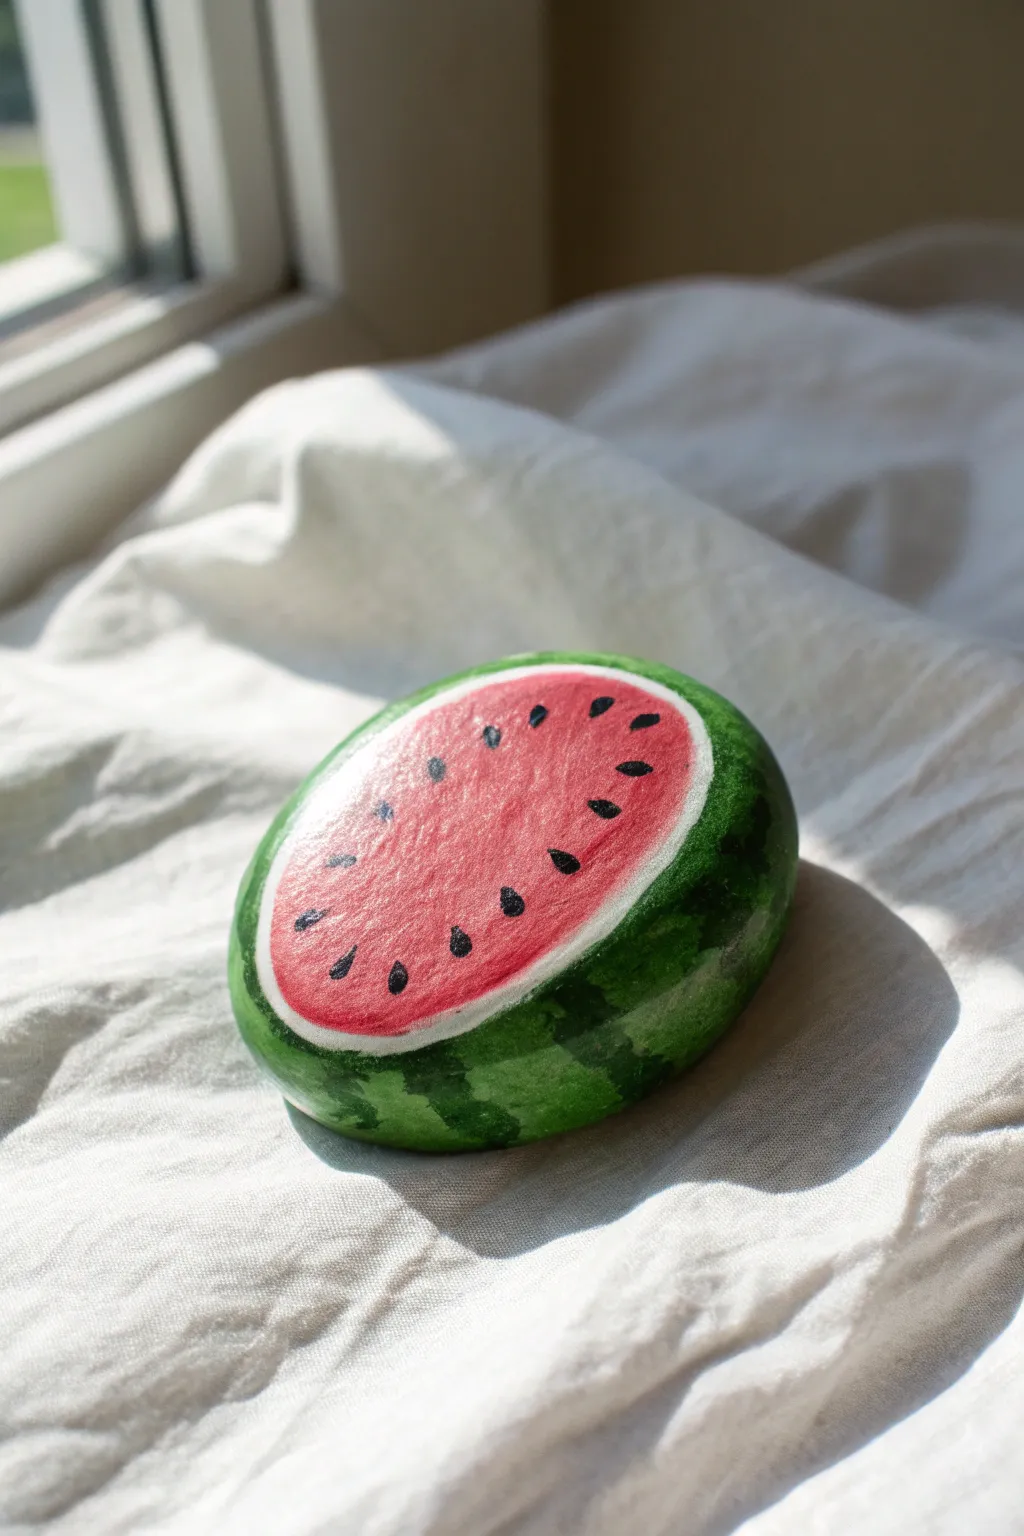
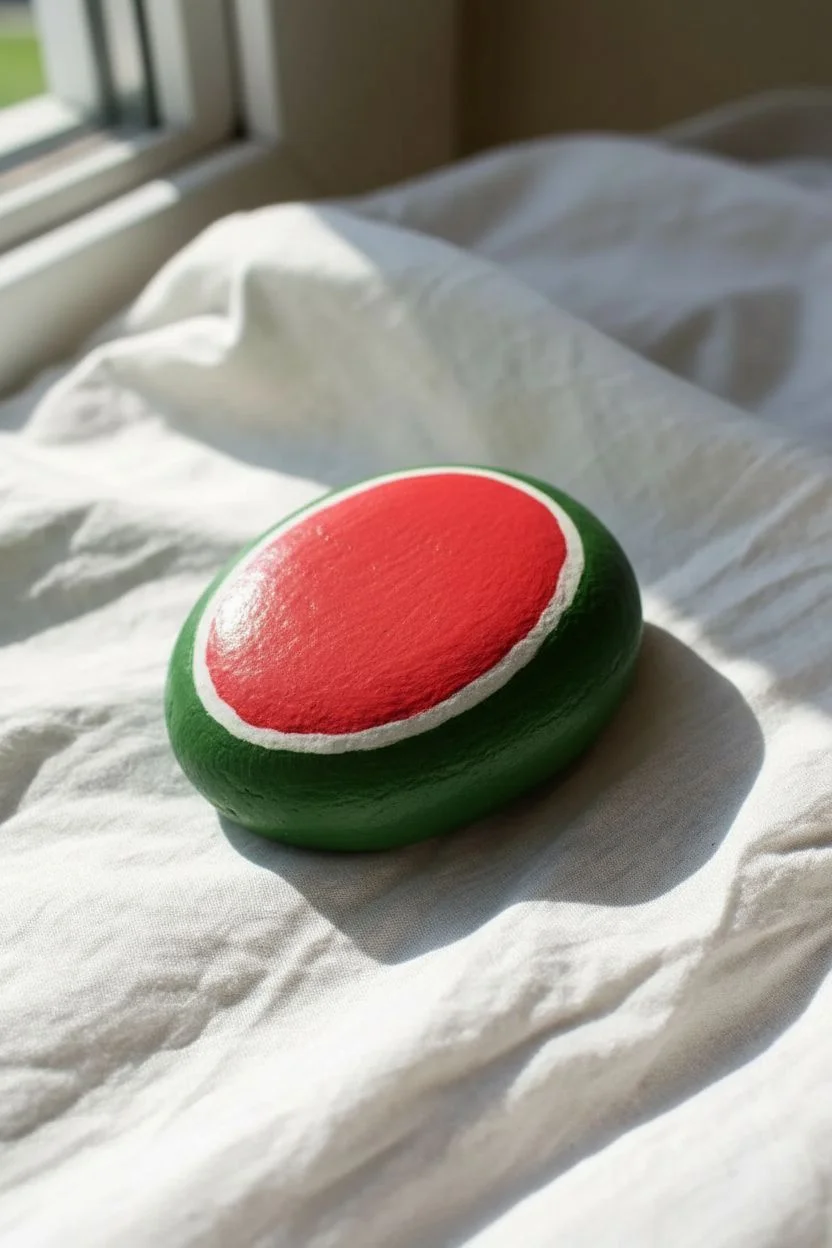
Transform an ordinary garden stone into a juicy slice of summer with this refreshing watermelon rock painting project. The vibrant red center and realistic rind details make this rounded design a cheerful addition to any windowsill or garden bed.
Step-by-Step Tutorial
Materials
- Smooth, round river rock (medium size)
- Acrylic paints: Bright red, dark green, lime green, white, and black
- Flat paintbrush (medium)
- Detail liner brush (fine tip)
- Pencil
- Water cup and palette
- Clear acrylic sealer (spray or brush-on, gloss finish)
Step 1: Painting the Base
-
Prepare the surface:
Begin by washing your rock with soap and water to remove any dirt or oils. Let it dry completely before starting, as moisture can trap bubbles under the paint. -
Draft the boundary:
Lightly sketch a circle on the top face of the rock using a pencil. This circle will become the juicy red center, leaving a border around the edge for the rind. -
Fill the center:
Load your flat brush with bright red acrylic paint. Carefully fill in the circle you just sketched. You may need two coats here to get a solid, opaque red that pops against the gray stone. -
Paint the inner rind:
Mix a small amount of white paint with a tiny drop of lime green to create a very pale, off-white pith color. Using a smaller brush, paint a medium-thick ring directly bordering the red circle. -
Block in the outer rind:
Paint the remaining outer edge and the sides of the rock with a solid coat of dark green paint. Make sure this touches the pale pith line seamlessly without leaving gaps.
Step 2: Adding the Rind Details
-
Create the stripes:
Take your lime green paint and thin it slightly with water. Using a small brush, paint short, wavy stripes over the dark green base on the sides and outer rim. -
Feather the edges:
While the lime stripes are still wet, gently stroke the edges to blend them slightly into the dark background. This gives that organic, variegated look characteristic of real watermelon rinds. -
Highlight the curve:
Add a few very faint touches of pure white on the highest curve of the dark green rind to simulate a glossy reflection, giving the rock a freshly washed appearance.
Red Transparency Fix
If your rock is very dark and the red paint looks dull or see-through, paint a layer of white primer beneath the red circle first to make the color truly vibrant.
Step 3: Seeds and Finishing Touches
-
Position the seeds:
Switch to your fine detail liner brush and black paint. Plan where your seeds will go; they look best arranged in a loose circle pattern midway between the center and the rind. -
Paint the teardrops:
Press the tip of the brush down gently and lift up quickly as you drag it toward the center of the fruit. This motion naturally creates a perfect teardrop seed shape. -
Vary the angles:
Ensure the pointed ends of the seeds generally face inward toward the center of the rock, but vary the angles slightly so it doesn’t look too rigid or geometric. -
Add highlights:
Once the red paint is totally dry, mix a tiny bit of red with white to make pink. Dry-brush a very subtle highlight in the upper left quadrant of the red fruit area to give it a rounded dimension. -
Seed shine:
I always like to add a microscopic dot of white paint to the top of each black seed. This tiny reflection makes the seeds look wet and glossy. -
Final drying:
Allow the entire rock to cure for at least 24 hours to ensure all layers, especially the thick red center, are completely hardened. -
Seal the deal:
Apply a coat of gloss acrylic sealer. A glossy finish works perfectly for this project because it mimics the wet, juicy texture of cut fruit.
Pro Tip: Texture
For realistic ‘flesh’ texture, dab the wet red paint gently with a crumpled piece of paper towel or sponge before it dries to create a porous, fruity surface.
Place your finished slice in a sunny spot to enjoy summer vibes all year round
Citrus Slice Segments
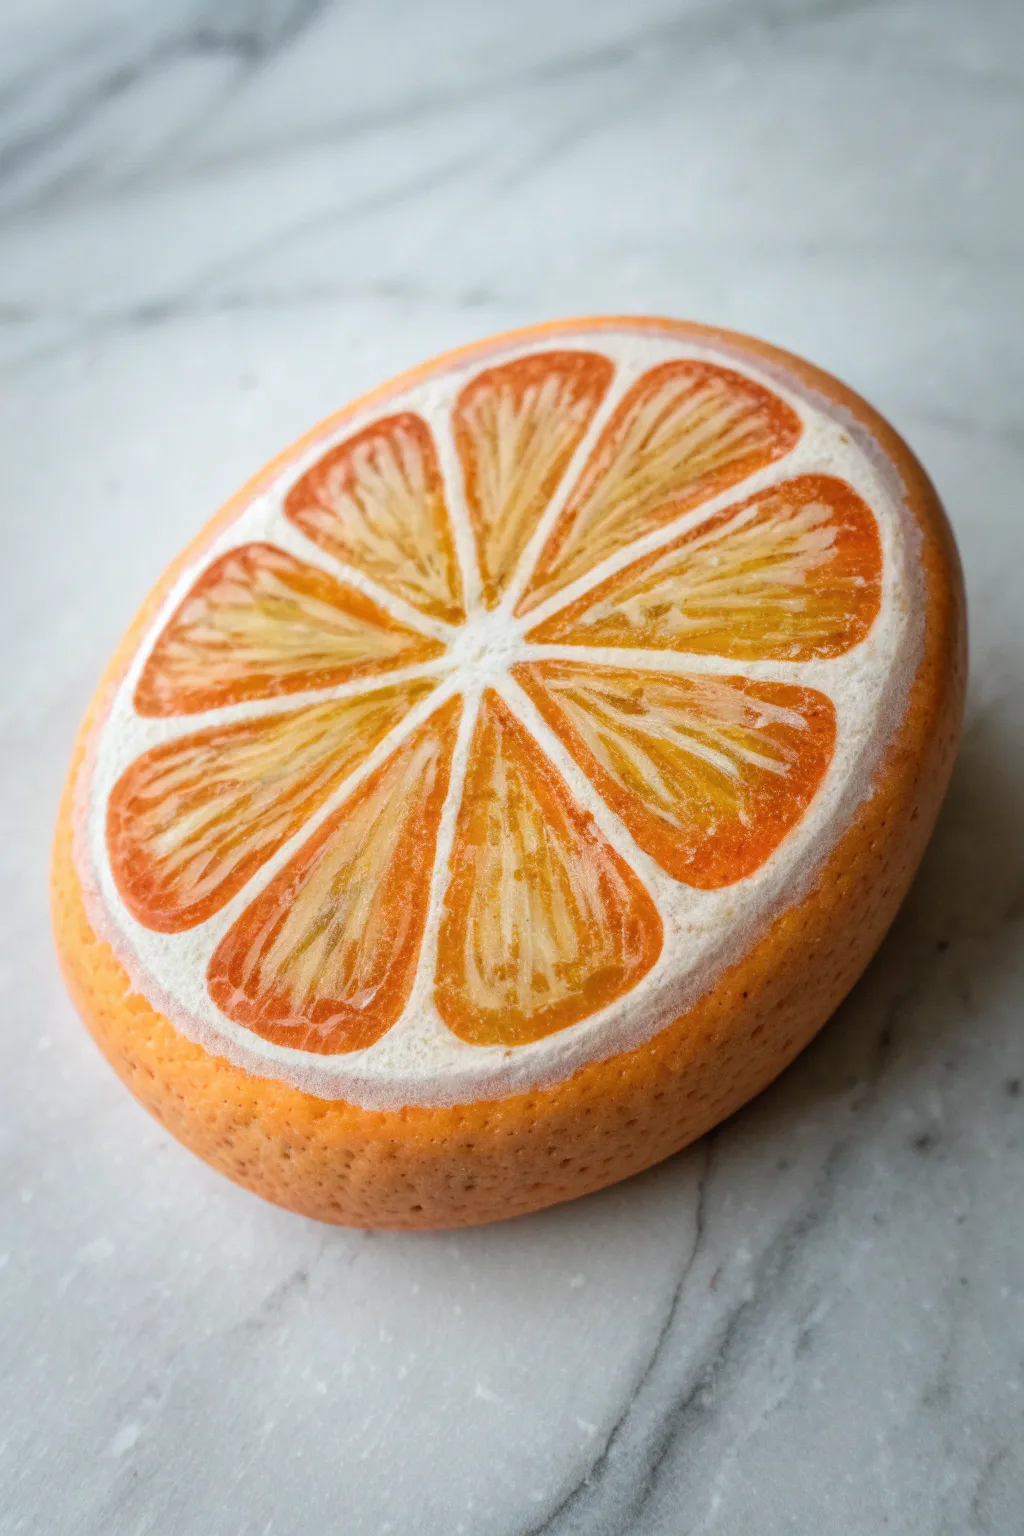
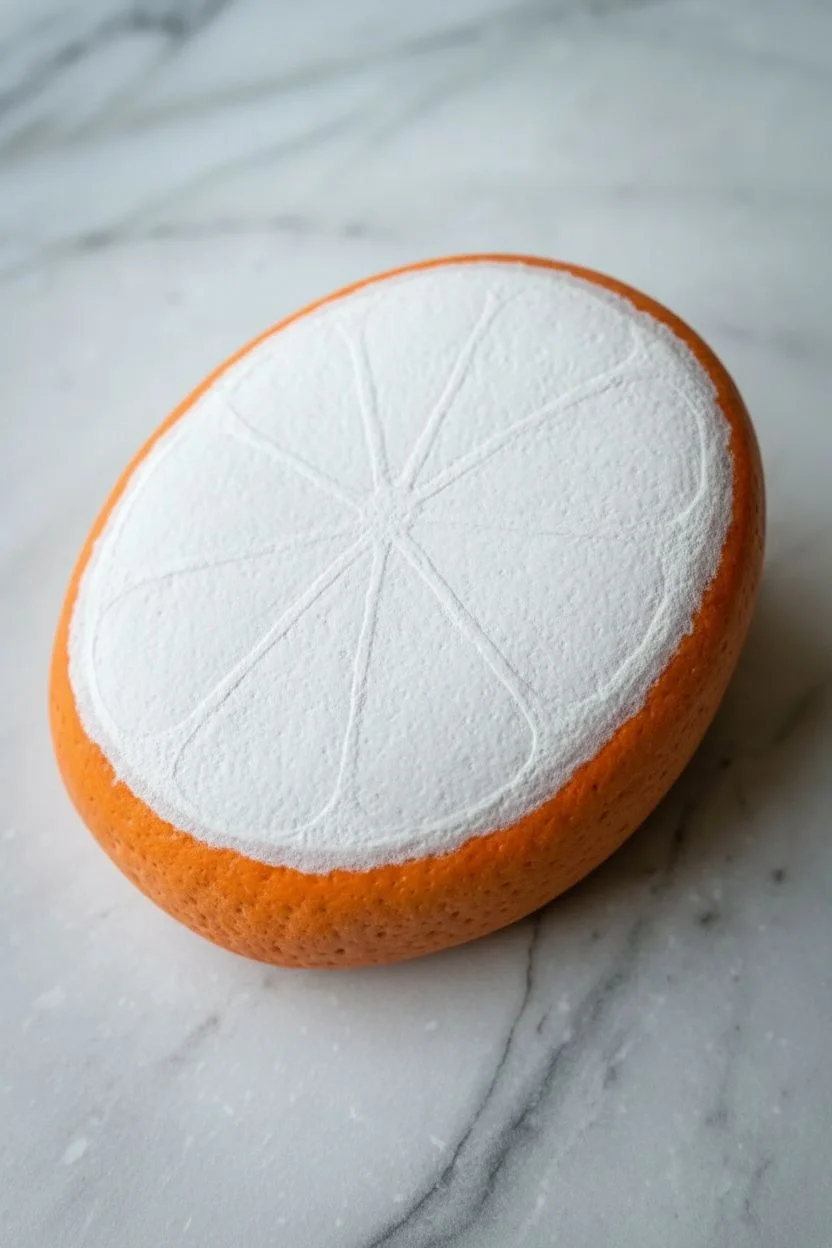
Transform a simple round stone into a juicy, vitamin-packed masterpiece with this realistic citrus slice design. By layering heavy body acrylics and building up translucent textures, you’ll create a trompe l’oeil effect that looks good enough to squeeze.
How-To Guide
Materials
- Smooth, round river rock (flat top preferred)
- White Gesso or primer
- Heavy body acrylic paints (Titanium White, Cadmium Orange, Lemon Yellow, Burnt Sienna)
- Fine detail brushes (sizes 00 and 1)
- Small flat shader brush (size 4)
- Glazing medium (optional but recommended)
- Sponge or stippling brush
- Matte or satin varnish
Step 1: Base and Rind
-
Prime the Surface:
Begin by scrubbing your rock clean and letting it dry completely. Apply a smooth coat of white gesso to the entire top surface where the fruit slice will be, extending slightly down the sides. Let this dry fully to ensure your colors pop. -
Map the Segments:
Using a very light pencil or thinned yellow paint, sketch a small circle in the absolute center. From there, draw 8 to 10 radial lines extending outward like bicycle spokes to define your fruit segments. -
Paint the Pith:
Load your flat brush with pure Titanium White. Paint the central core and the radiating lines between your segments. Make these lines slightly thick and organic—real fruit pith isn’t perfectly straight. -
Create the Outer Rind:
Mix a vibrant orange using Cadmium Orange and a touch of Cadmium Red if needed for warmth. Paint the entire outer rim of the rock, blending it downward to cover the stone’s sides. Use a sponge to dab this color on for a natural, pitted texture. -
Inner Rind Boundary:
Paint a thin ring of white pith just inside the orange skin you just painted, connecting all the radial spokes to this outer circle.
Juicy Texture Tip
Mix gloss gel medium into your orange paint for the inner segments. It physically raises the paint slightly, giving the ‘juice sacs’ actual 3D texture you can feel.
Step 2: Creating Juicy Segments
-
Base Color Layer:
Mix a light, yellowish-orange. Fill in the triangular segment shapes, leaving the white pith lines visible. This base coat doesn’t need to be perfectly opaque; a little streakiness actually helps build texture later. -
Deepening the Corners:
Mix a darker, more saturated orange using a tiny dot of Burnt Sienna. Paint this darker shade into the corners of each triangle segment where they meet the rind and the center, creating depth. -
Drawing the Vesicles:
This is the most crucial step for realism. Switch to your smallest detail brush (size 00). Using a mix of yellow-orange and glazing medium (or water), paint tiny, teardrop-shaped strokes inside the segments. -
Directional Flow:
Ensure all your tiny teardrop strokes point generally inward toward the center of the fruit. Vary their lengths and overlap them slightly to mimic the chaotic packing of juice sacs. -
Adding Highlights:
Mix a very pale yellow-white. Carefully add tiny highlighting lines on top of your previous teardrop shapes. Focus these highlights near the center of the rock where the light would naturally hit the wet fruit. -
Enhancing Translucency:
I find that adding a very thin glaze of pure yellow over the center of the segments creates a wonderful glow. Apply this transparent wash just to the middle area of the slice.
Step 3: Refining Details
-
Sharpening the Pith:
Re-establish the white pith lines if they’ve gotten messy. Use fresh Titanium White to tidy up the spokes and the outer white ring, giving them a crisp (but textured) edge. -
Pith Texture:
Stipple a tiny bit of very light grey or cream onto the white pith areas so they don’t look like flat plastic. Real pith has a spongy, matte texture. -
Rind Pores:
On the outer orange rim (the skin), use a pin or the tip of a toothpick to add tiny dots of a slightly darker orange. This simulates the porous texture of citrus skin. -
Final White Glint:
Add one or two sharp, pure white dots to the ‘wettest’ looking parts of the fruit segments to simulate a strong reflection of light. -
Seal and Protect:
Once the paint is bone dry (give it at least an hour), apply a satin varnish. Avoid high gloss for the rind, but you might want to touch a little gloss varnish just onto the juicy segments for extra realism.
Fixing Flat Colors
If your fruit looks flat, you likely lack contrast. Go back with a darker red-orange glaze in the deep corners and pristine white highlights on the highest points.
Now you have a refreshing piece of permanent fruit decor that brightens up any corner of your home
Fish Scales Around the Curve
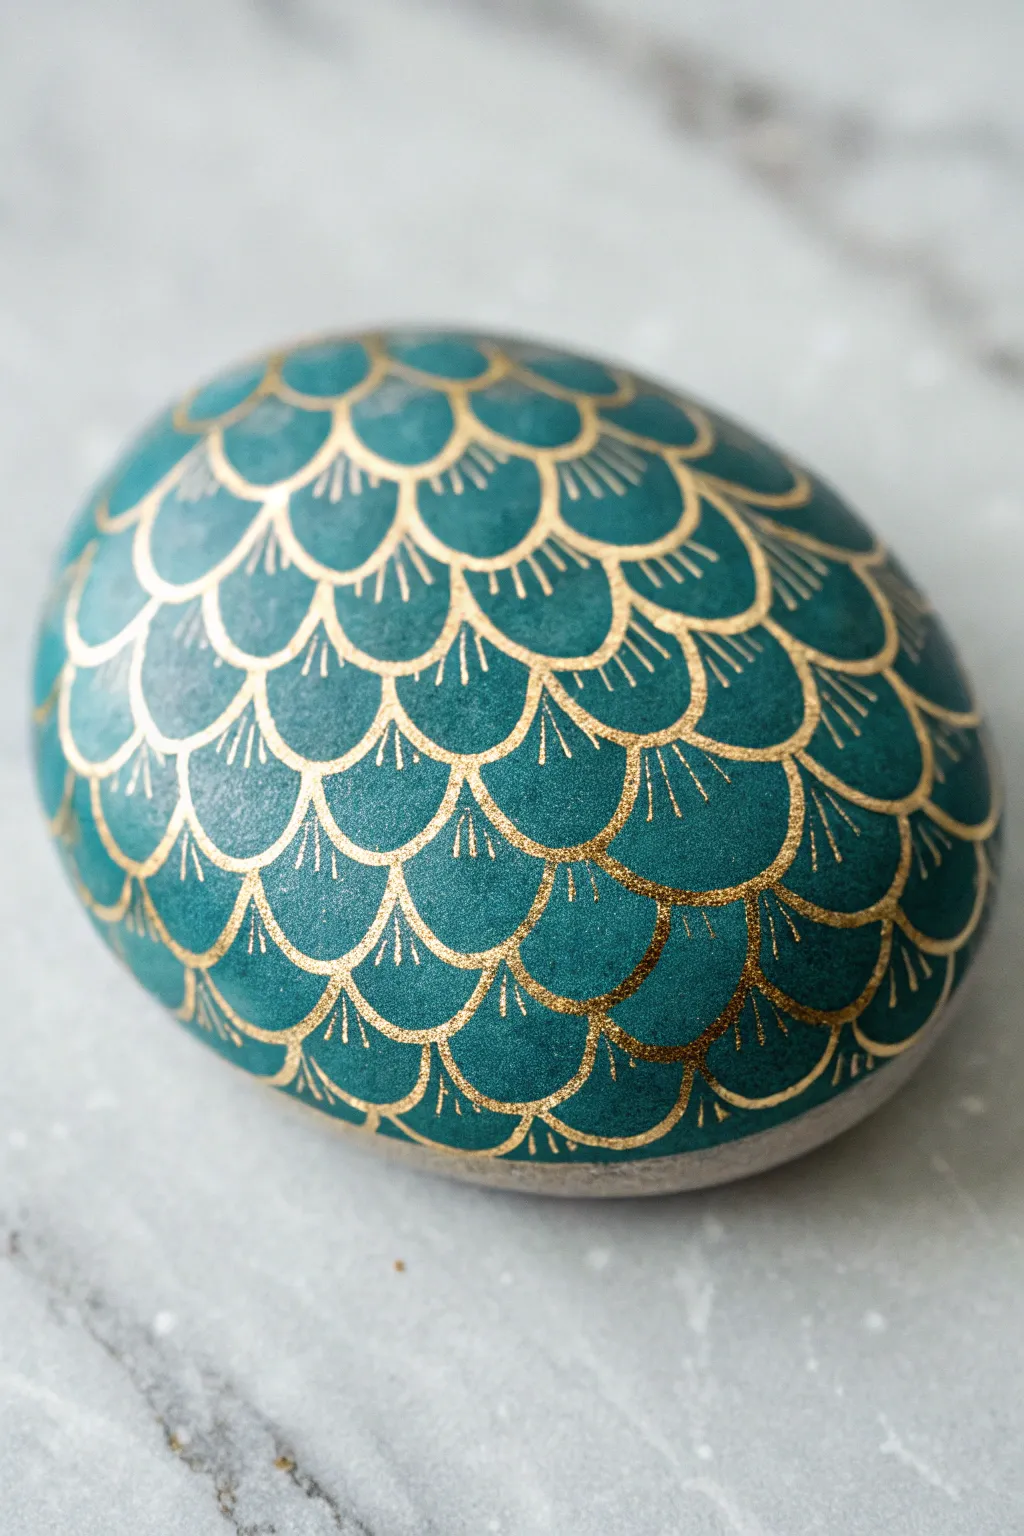
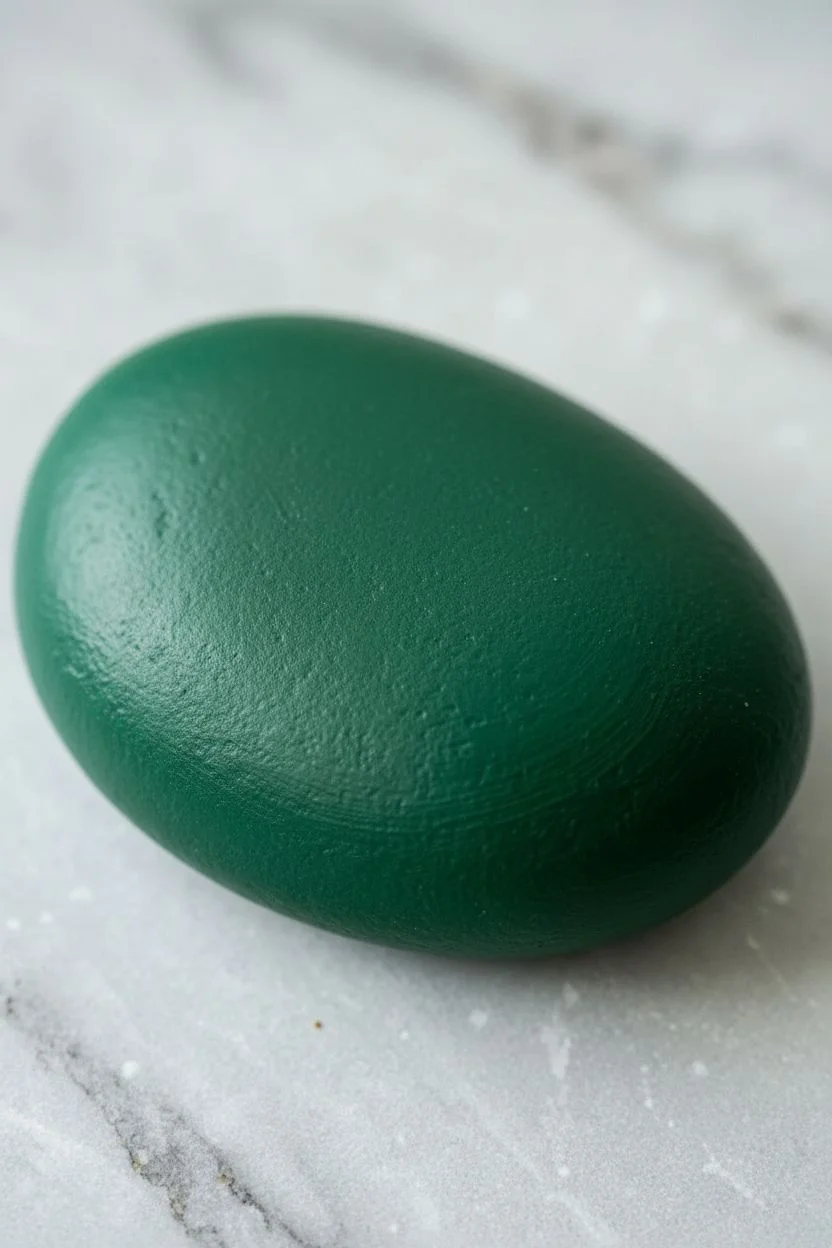
Transform a smooth river rock into a shimmering mermaid egg or dragon scale artifact with this elegant painting technique. By layering deep emerald green with delicate metallic gold linework, you create a dimensional, tessellated pattern that hugs the natural curve of the stone.
Step-by-Step
Materials
- Smooth, oval river rock (ideally palm-sized)
- Teal or emerald green acrylic paint
- Metallic gold paint pen (fine tip/0.7mm)
- Metallic gold paint pen (extra fine tip/0.5mm)
- Flat paintbrush (medium)
- Gloss varnish or sealant
- Pencil (optional for sketching)
- Palette or small dish for paint
Step 1: Base Coloring
-
Clean and prep:
Begin by washing your rock with warm, soapy water to remove any dirt or oils. Let it dry completely before starting, as moisture can trap under the acrylics and cause peeling later. -
Apply the first coat:
Using a flat paintbrush, cover the entire top surface of the rock with your teal or emerald green acrylic paint. Don’t worry if it looks a bit streaky on this first pass. -
Build opacity:
Once the first layer is dry to the touch, apply a second coat of green. Paint in a crisscross motion to minimize brush strokes and ensure a solid, deeply opaque background color. -
Full drying:
Allow the base color to dry completely for at least an hour. Since we will be drawing fine lines over this, the paint must be hard and cured so the pen tip doesn’t dig in.
Scaling Curves
As you paint near the edges of the rock, make your “U” shapes slightly narrower. This tricks the eye and enhances the 3D spherical effect of the stone.
Step 2: Drawing the Lattice
-
Start the center row:
Using your fine tip gold paint pen, draw a horizontal row of “U” shapes across the widest part of the rock. Try to keep them consistently sized, about the width of your thumbnail. -
Overlap the next row:
Work upwards from your center row. Place the bottom of the next “U” shape directly in the valley between the two scales below it, creating a brick-like staggered pattern. -
Complete the top section:
Continue this staggered “fish scale” pattern until you reach the top of the rock, modifying the shapes slightly as the rock curves away from you. -
Work downwards:
Return to your center row and repeat the process moving toward the bottom edge. The scales should eventually fade out near the base of the rock where it sits on the table. -
Refine the lines:
If any gold lines look too thin or faint, trace over them gently a second time with the paint pen to ensure a bright, reflective finish.
Step 3: Adding Detail & Finish
-
Add internal accents:
Switch to your extra-fine tip gold pen if you have one, or use a light touch with the standard one. Draw three to five tiny vertical tick marks inside each scale, radiating up from the bottom curve. -
Repeat for all scales:
Work your way through every scale on the rock. These small details add texture and make the scales look more like individual shell segments. -
Check for gaps:
Look closely at the intersections where scales meet. If the gold ink didn’t quite connect, add tiny dots of gold to bridge the gaps and make the lattice look continuous. -
Dry the ink:
Let the paint pen ink sit for at least 15 minutes. Metallic pens can remain tacky longer than standard markers, and they smudge easily. -
Seal the artwork:
Apply a coat of gloss varnish over the entire painted area. The gloss finish is essential here—it mimics the wet look of fish scales and protects the metallic pigment from tarnishing.
Gradient Magic
Mix a tiny bit of metallic blue into your base green paint, or do an ombre fade from dark green at the bottom to light teal at the top before drawing your gold lines.
Place your finished stone on a shelf where it can catch the light and show off its golden shimmer
Turtle Shell Geometry
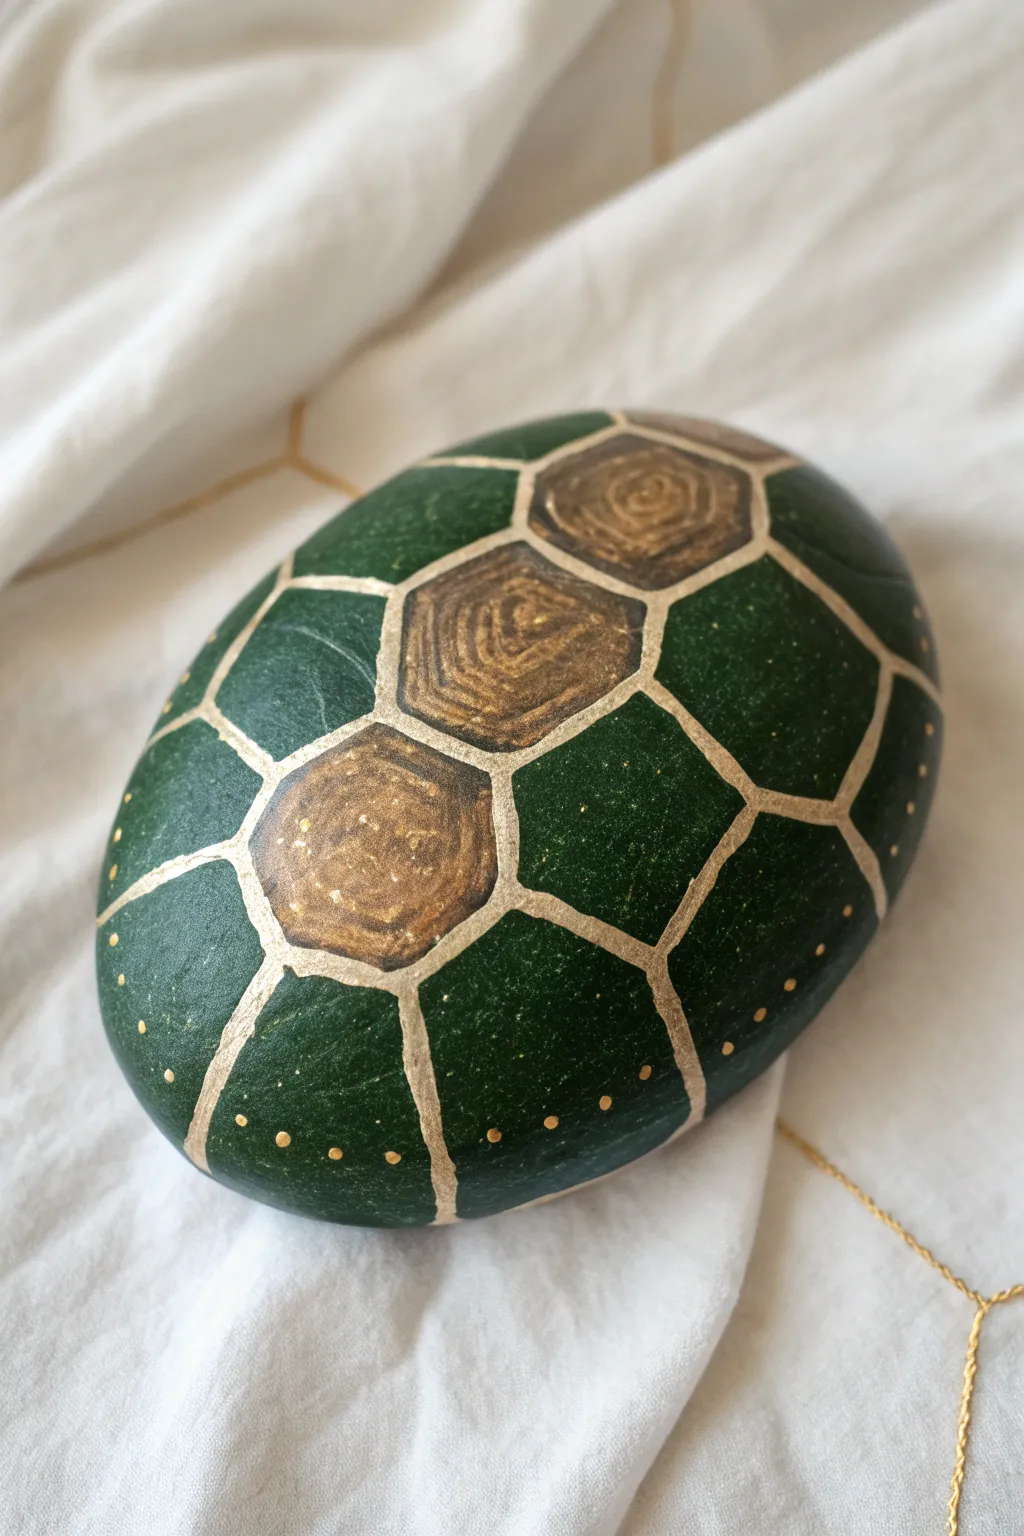
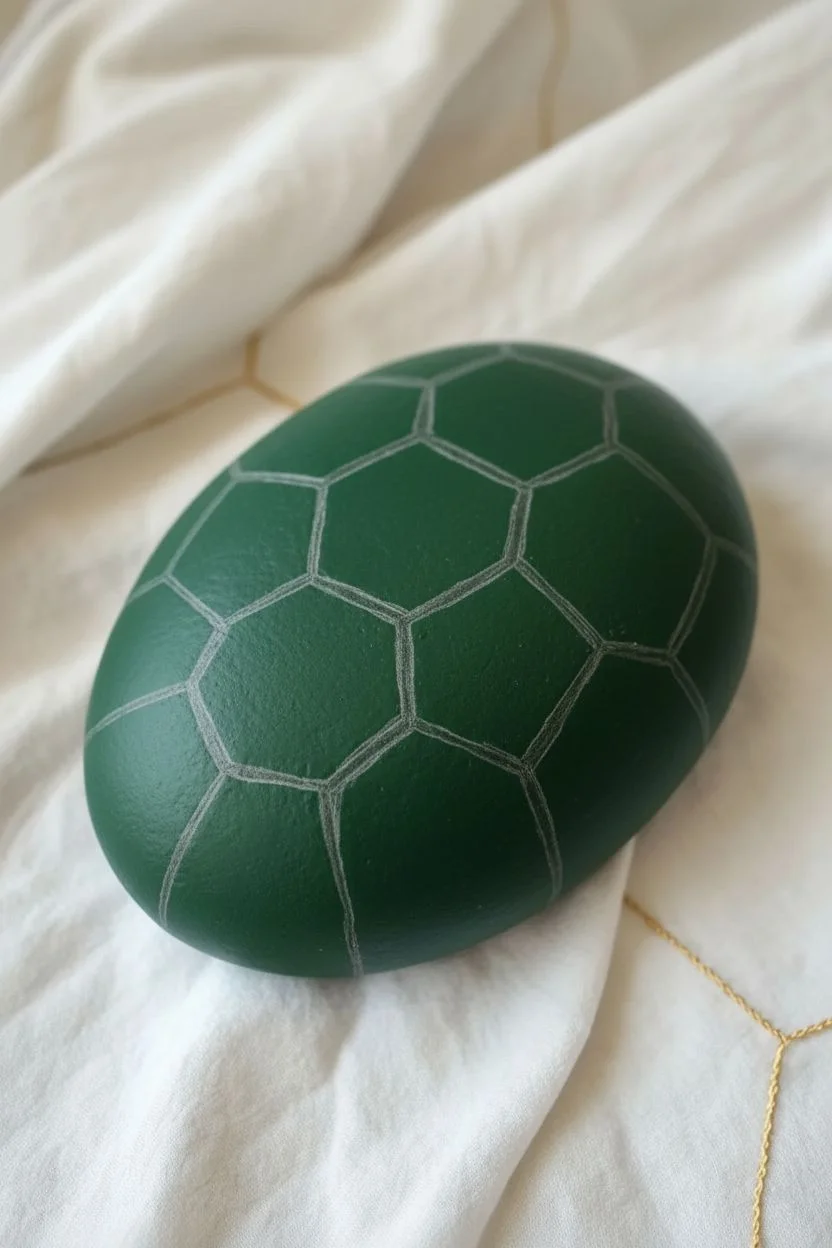
Transform a simple river stone into a sophisticated turtle shell using deep greens and shimmering gold accents. This project relies on geometric precision and metallic contrasts to create an elegant, nature-inspired decorative piece.
Detailed Instructions
Materials
- Smooth, oval-shaped river rock
- Acrylic paints: Deep forest green, metallic bronze, metallic gold
- Fine liner brush (size 0 or 00)
- Small flat brush
- Pencil
- Gloss varnish or clear sealer
- Water cup and palette
Step 1: Preparation & Mapping
-
Clean the canvas:
Begin by scrubbing your rock with soap and water to remove any dirt or oils. Let it dry completely before starting to ensure the paint adheres properly. -
Base coat:
Paint the entire top surface of the rock with your deep forest green acrylic paint. You may need two coats to get an opaque, solid finish. Let this dry thoroughly. -
Sketch the center spine:
Using a pencil very lightly, draw a row of three hexagons running down the center length of the rock. These will be the vertebral scutes along the turtle’s spine. -
Map the costal scutes:
Draw the surrounding plates (costal scutes) radiating out from the center hexagons. These should look like partial geometric shapes that wrap toward the edges of the rock. -
Refine the lines:
Double-check your geometric pattern. The lines separating the shapes should be consistent in thickness, creating a mosaic-like effect.
Steady Hands Pro Tip
Rest your pinky finger on a dry part of the rock while painting the thin gold lines. This anchors your hand and gives you much greater control for straight lines.
Step 2: Painting the Shell Pattern
-
Paint the spine plates:
Fill in the three central hexagons with metallic bronze paint. I like to dab the paint on slightly unevenly here to mimic the texture of a real shell. -
Add spine texture:
While the bronze is still slightly tacky or after it dries, add faint, swirling concentric lines inside the hexagons using a slightly lighter gold or by mixing a touch of gold into your bronze. This creates a growth-ring effect. -
Outline the grid:
Load your fine liner brush with metallic gold paint. Carefully trace over your pencil lines, creating distinct borders between all the green and bronze sections. -
Thicken the borders:
Go over the gold lines a second time if needed. The lines should be opaque and roughly uniform in width, like grout distinctively separating tiles. -
Outer rim details:
Along the very bottom edge of the shell pattern (the marginal scutes), use the tip of your smallest brush or a dotting tool to add a row of tiny gold dots. Space them evenly for a polished look. -
Clean up edges:
If any gold lines look messy, use a small brush with the original forest green to tidy up the edges and sharpen the geometry.
Step 3: Finishing Touches
-
Highlighting:
Mix a tiny amount of yellow or light green into your forest green. dry-brush a very faint highlight in the center of a few green side panels to give them a curved, 3D appearance. -
Final inspection:
Check for any uneven coverage or pencil marks showing through. Touch up as necessary. -
Seal the work:
Once the paint is completely dry (give it at least an hour), apply a coat of gloss varnish. This will protect the paint and make the metallic gold and deep green pop, simulating a wet turtle shell.
Level Up: Texture
Mix a small pinch of baking soda into the bronze paint for the central spine plates. This adds a gritty, realistic 3D texture that contrasts beautifully with the smooth green.
Now you have a stunning, durable piece of art that brings a touch of geometric nature to your garden or desk
Bumblebee Stripes and Wings
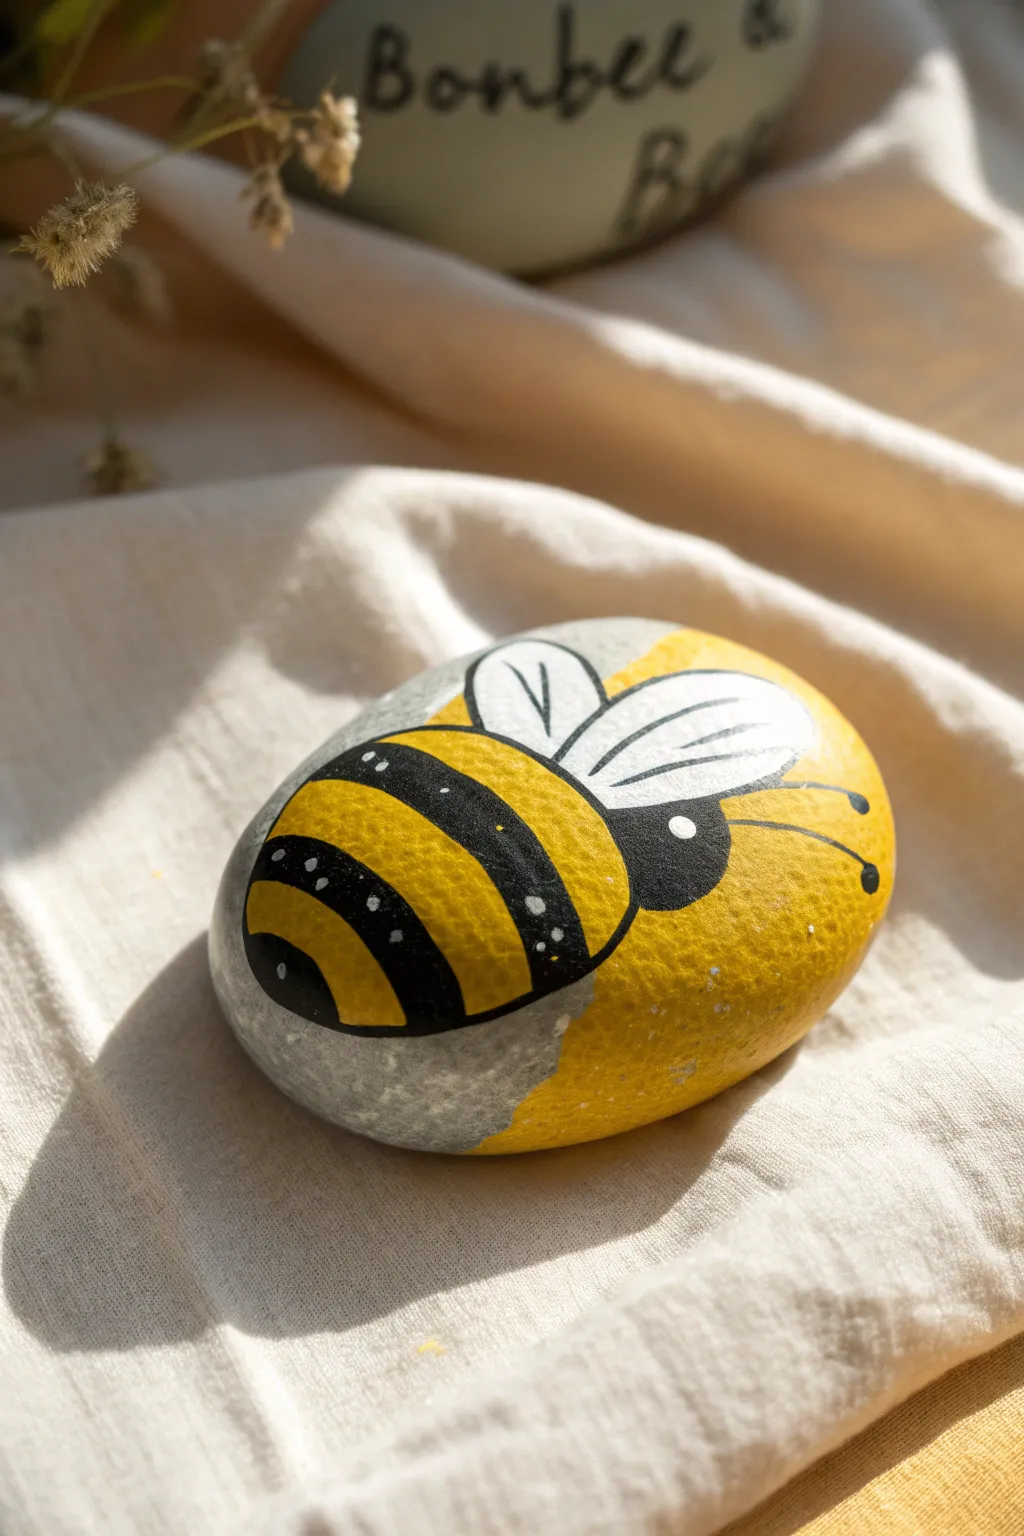
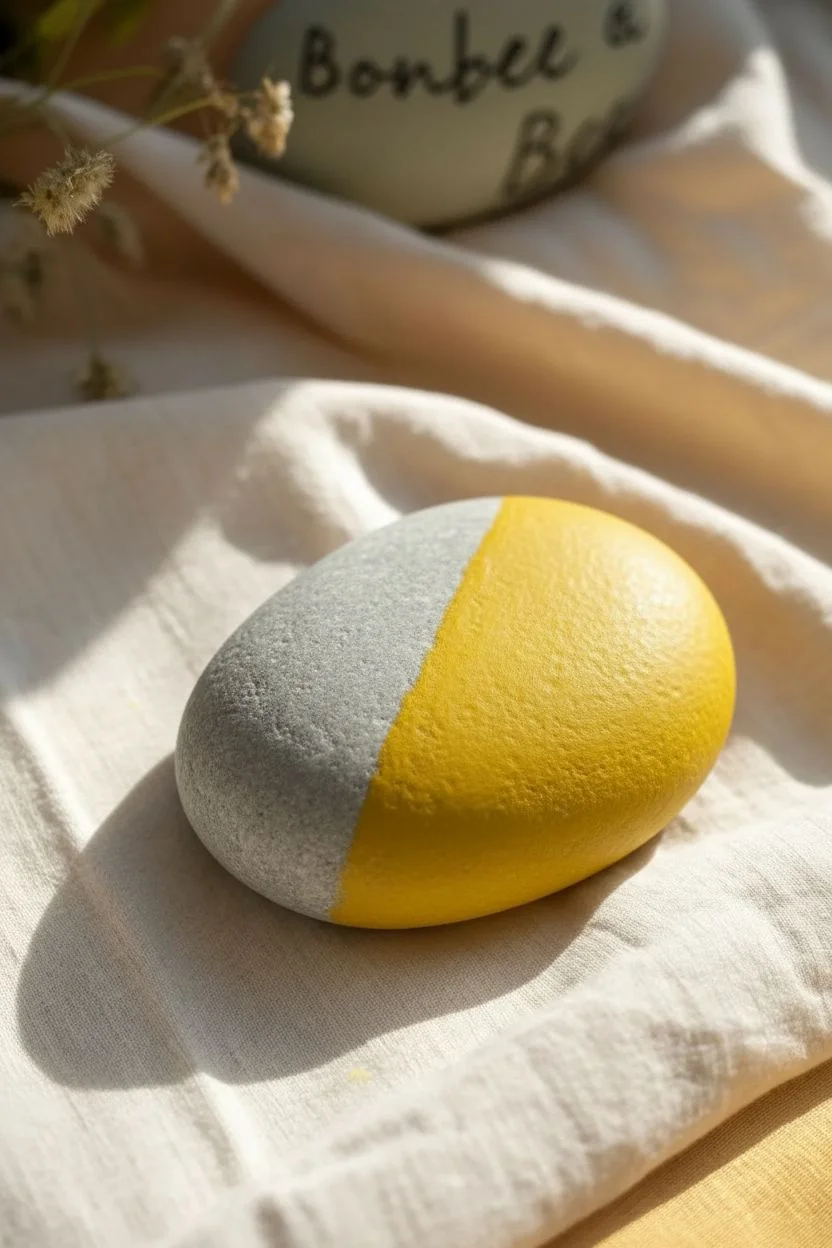
Transform a smooth garden pebble into a cheerful buzzing friend with just a few strokes of paint. This design cleverley uses the natural grey of the stone as a background, making the bright yellow and crisp black stripes pop with cartoon-like charm.
Step-by-Step
Materials
- Smooth oval river rock
- Yellow acrylic paint (bright, sunny shade)
- Black acrylic paint
- White acrylic paint
- Flat paintbrush (medium size)
- Fine liner brush or detail brush
- Pencil (optional)
- Clear matte or gloss sealant spray
Step 1: Base Colors
-
Clean the canvas:
Begin by scrubbing your rock with soap and water to remove any dirt or oils. Let it dry completely before starting, as moisture can trap under the acrylics. -
Map out the shape:
visualize an imaginary diagonal line cutting the rock in half. You will be painting the right side yellow, leaving the left side natural grey to act as the background. -
Paint the body:
Using your flat brush and bright yellow paint, fill in the bumblebee’s body shape. It should look like a large oval on the right side of the rock. -
Add a second coat:
Yellow can be a bit translucent. Once the first layer is dry to the touch, apply a second coat to ensure a solid, opaque finish. I like to let this dry completely before moving on to prevent smudging.
Fixing Mistakes
Smudged a line? Don’t wipe it! Let the acrylic paint dry completely, then simply paint over the mistake with the background color (yellow or white).
Step 2: Stripes and Details
-
Outline the wings:
Switch to your white paint. Paint two tear-drop shapes overlapping the top edge of the yellow body. These will be the wings. -
Fill the wings:
Fill in the wing shapes with solid white paint. You may need two coats here as well to cover the underlying rock color. -
Create the head:
Where the yellow meets the right edge of the rock, paint a semi-circle in black for the bee’s face. -
Start the stripes:
Using black paint and a steady hand, paint three thick, curved stripes across the yellow body. The curve helps the bee look round and dimensional. -
Refine the tail:
Paint a solid black curved shape at the very end of the yellow section to form the bee’s stinger area.
Level It Up
Add personality by painting a tiny pink cheek blush under the eye, or use metallic gold paint for the yellow stripes to make a ‘queen bee’.
Step 3: Fine Lines and Highlights
-
Outline the wings:
Once the white paint is fully dry, use your fine liner brush and black paint to carefully outline the wings. -
Wing details:
Add two small curved lines inside each wing to suggest veins and texture. -
Draw the antennae:
Paint two thin, curved lines extending from the black head face, finishing each with a tiny dot. -
Add the eye:
Dip the handle end of a paintbrush into white paint and dot a small eye onto the black head area. Let it dry, then make a tiny black dot in the center for the pupil. -
Highlight the stripes:
To give the bee a bit of sparkle, add tiny white dots along the top edge of the black stripes. -
Seal the deal:
Allow the entire rock to cure for at least 24 hours. Finish by spraying it with a clear sealant to protect your buzzing artwork from the elements.
Now you have a charming little pollinator perfect for hiding in the garden
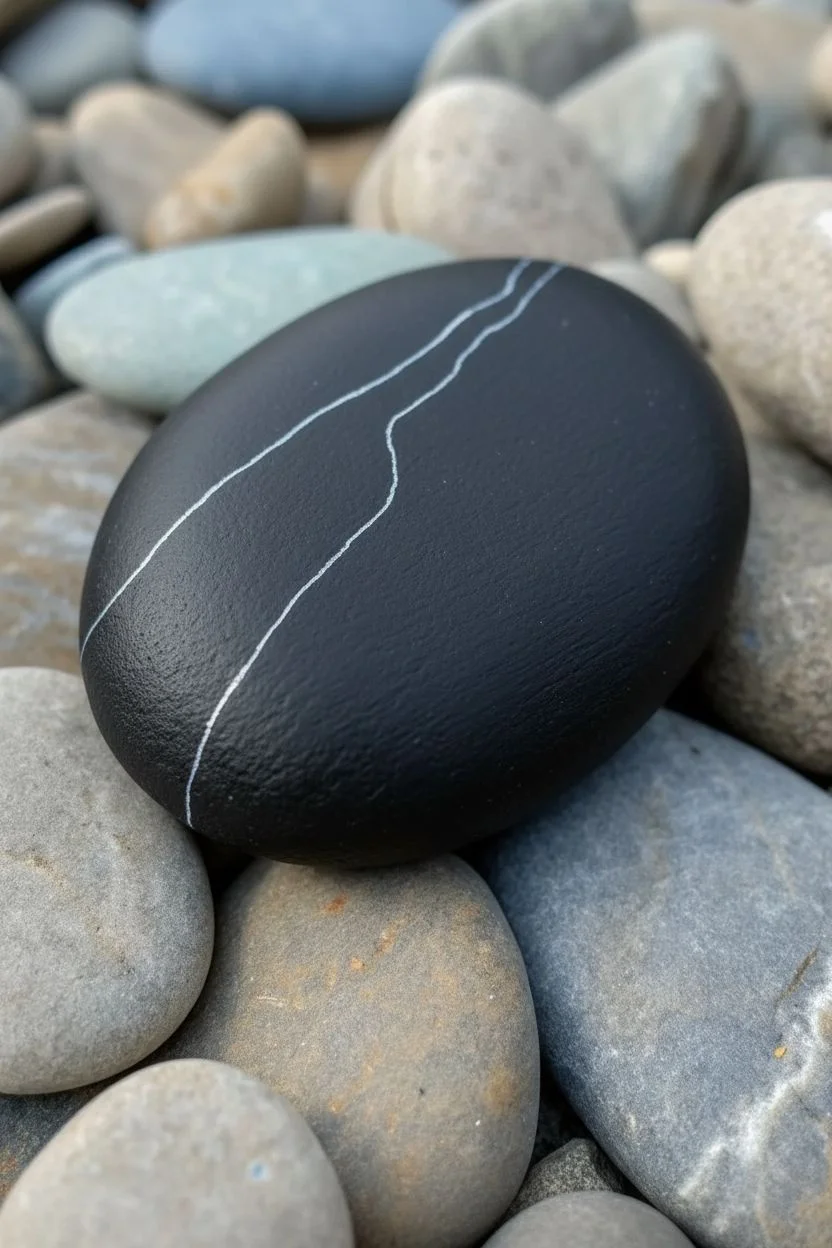
Moon Phases on a Round Rock
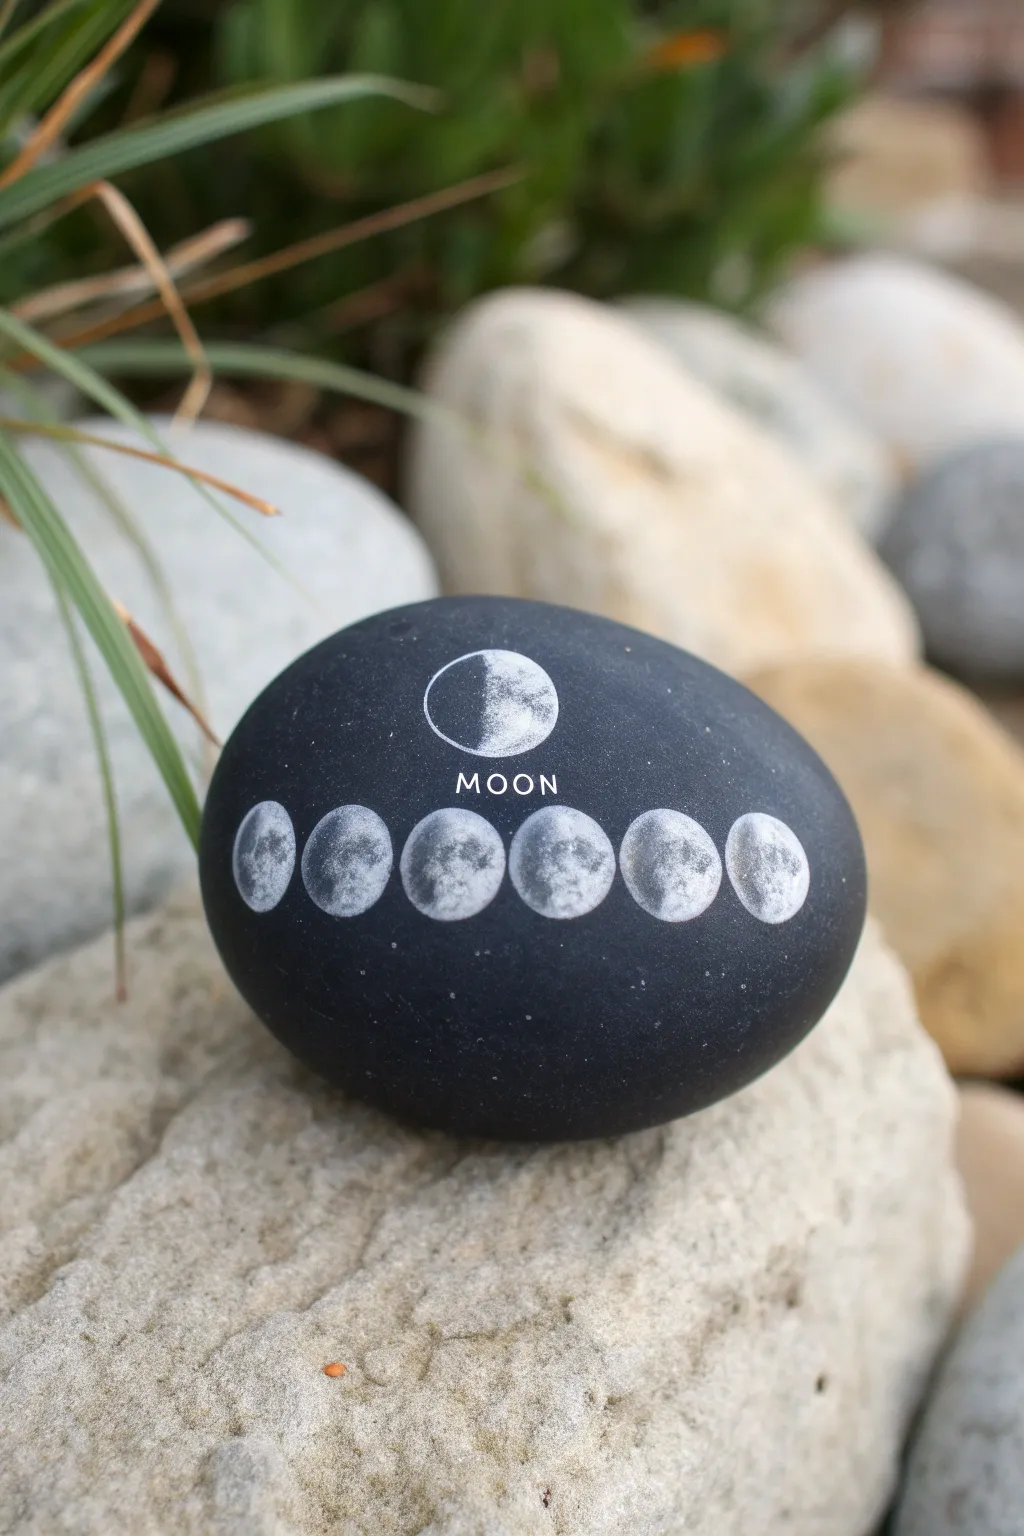
Transform a smooth, dark stone into a stunning piece of celestial art with this detailed moon phase project. By combining decoupage or transfer techniques with a sleek black background, you’ll create a sophisticated display piece that captures the magic of the lunar cycle.
Step-by-Step Guide
Materials
- Smooth, round river rock (approx. 3-4 inches wide)
- Matte black acrylic paint
- High-quality white moon printouts (laser printed on thin paper) or moon-themed rub-on transfers
- Mod Podge or similar decoupage medium
- Small fine-point scissors
- White paint pen (extra fine tip) or white transfer letters
- Soft flat paintbrush
- Sponge brush
- Clear matte sealant spray
- Tweezers
- Bowl of water (if using water-slide decals)
Step 1: Preparation & Base Coat
-
Clean surface:
Begin by thoroughly washing your stone with warm soapy water to remove any grit or oils. Scrub it gently and let it dry completely before starting. -
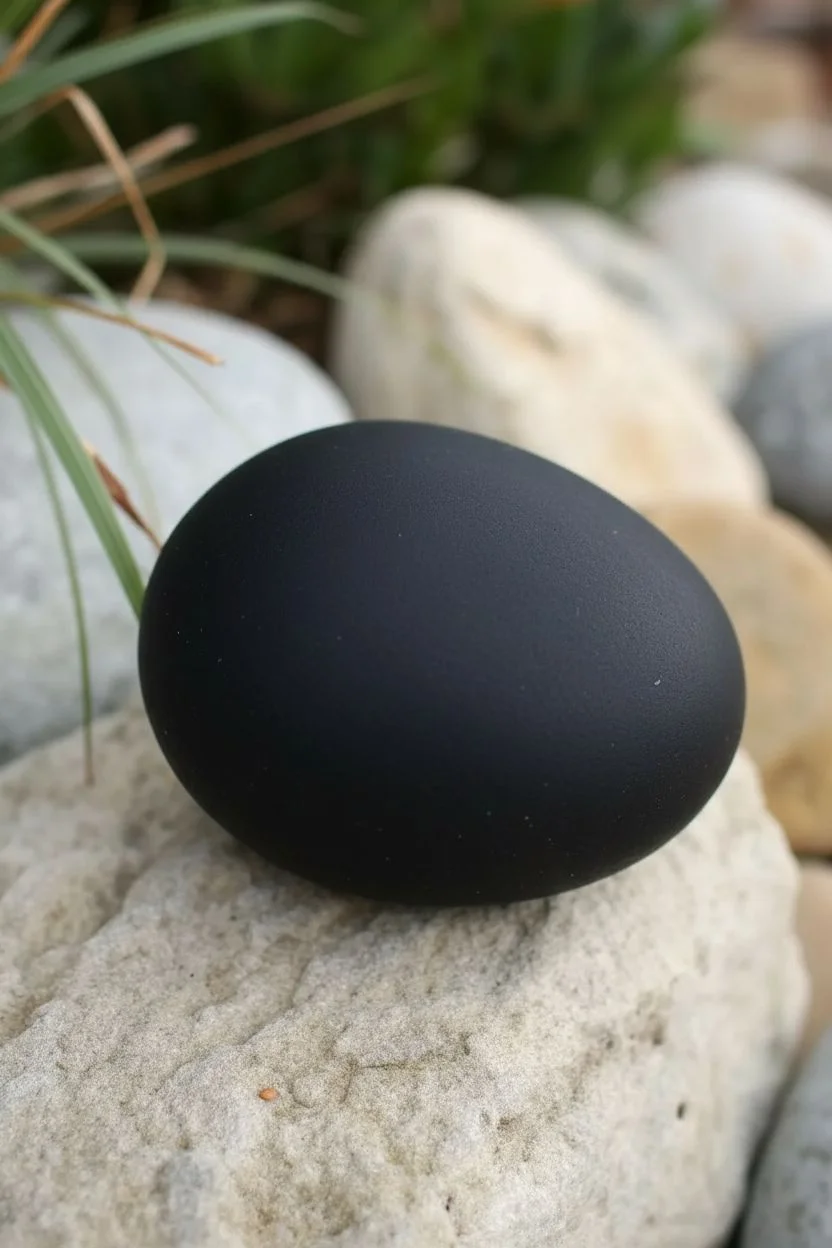
Prime the rock:
Using your sponge brush, apply a thin, even layer of matte black acrylic paint over the entire top surface of the rock. This creates that deep, space-like void background. -
Second coat:
Once the first layer is dry to the touch (usually 15-20 minutes), apply a second coat of black to ensure full opacity. You want a solid, dark foundation so the white moons pop vividly. -
Smoothening:
Inspect the dried paint for any brush strokes or texture. If needed, very lightly sand with fine-grit sandpaper and touch up to get the smoothest possible canvas.
Seamless Edges
For the most invisible edges, use water-slide decal paper instead of regular paper. The film is transparent and melts visually into the background.
Step 2: Detailing the Moons
-
Source your imagery:
To achieve the photorealistic look seen in the photo, painting by hand is incredibly difficult. Instead, find high-resolution images of the moon phases and resize them to fit your rock perfectly. -
Print or purchase:
Print your resized moon images on very thin paper (like rice paper or tissue paper taped to cardstock) using a laser printer. Alternatively, purchase moon-themed water-slide decals or rub-on transfers for the crispest result. -
Cut precisely:
Using small, sharp scissors, cut out your central large moon and the six smaller moon circles. Cut as close to the edge of the image as possible to avoid a visible border. -
Plan the layout:
Dry-fit your pieces on the rock without glue. Place the largest moon centered near the top, leaving room for text underneath, and arrange the six smaller moons in a straight line or gentle curve near the bottom.
Step 3: Applying the Design
-
Adhere the main moon:
Apply a thin layer of decoupage medium to the back of your large moon cutout. Position it carefully on the rock and gently smooth it down from the center outward to push out air bubbles. -
Seal the top moon:
Immediately brush a very thin layer of decoupage medium over the top of the adhered moon to seal it. Be gentle to avoid tearing the damp paper. -
Add the row of phases:
Repeat the process for the row of six smaller moons. I find using tweezers helps immensely here to place these tiny circles without smudging the glue. -
Add the text:
For the word ‘MOON’, you can use tiny white rub-on letter transfers for a clean, printed look. If you have a steady hand, carefully letter it with an extra-fine white paint pen. -
Clean up edges:
If any glue residue is visible on the black paint around your images, use a damp cotton swab to gently wipe it away before it dries completely.
Hazy Glue Marks
If your decoupage glue dries with a visible sheen on the matte black paint, simply paint over the shiny excess with a tiny brush and more black paint.
Step 4: Finishing Touches
-
Dry thoroughly:
Allow the decoupage medium to cure fully. This usually takes at least an hour or two; rushing this step can cause cloudiness. -
Starry details:
Dip an old toothbrush or stiff brush into white paint, wipe most of it off, and very lightly flick tiny specks onto the rock to simulate distant stars. Keep this subtle. -
Final seal:
Take the rock outside and spray it with a clear matte sealant. Several light coats are better than one heavy coat to prevent drips and ensure a durable finish.
Now you have a miniature piece of the night sky to hold in your hand or display on your shelf
Mini Galaxy Sphere
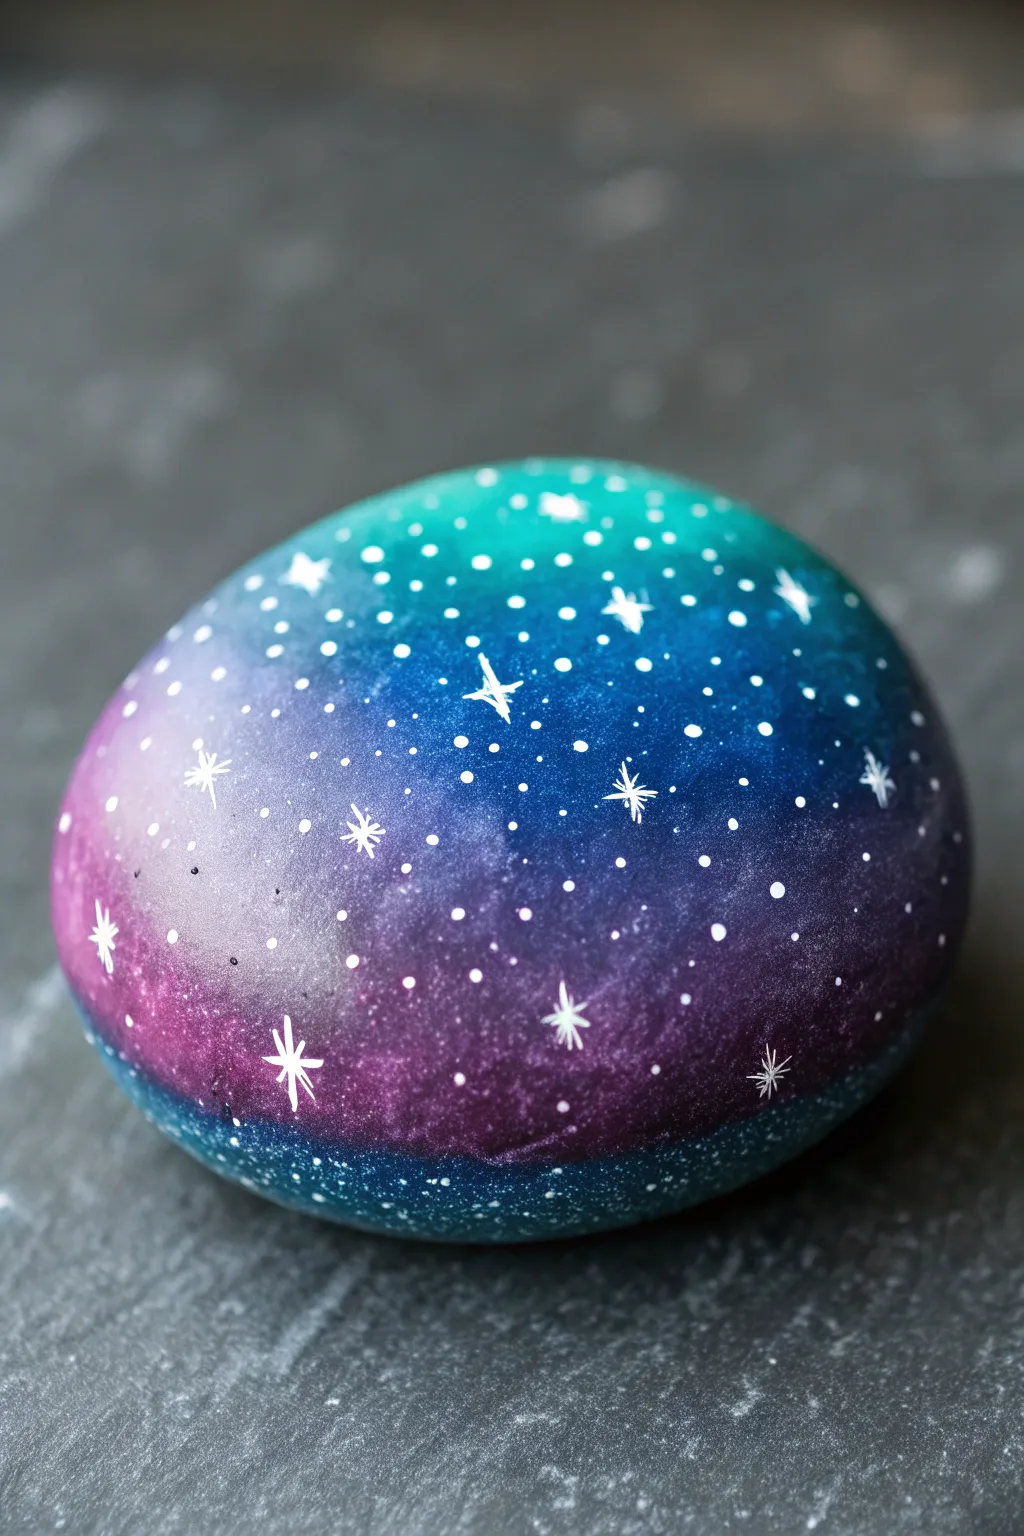
Transform an ordinary smooth stone into a mesmerizing piece of the universe with this galaxy painting project. By blending deep blues, vibrant purples, and teals, you can create a stunning starry night effect right in the palm of your hand.
Detailed Instructions
Materials
- Smooth, round river rock (washed and dried)
- Black acrylic paint (or gesso)
- Acrylic paints: Navy blue, deep purple, magenta, teal, turquoise, white
- Small painting sponges or pieces of makeup wedge sponge
- Fine detail brush (size 0 or 00)
- Toothbrush or stiff bristle brush
- Palette or paper plate
- Water cup and paper towels
- Gloss varnish or sealant spray
Step 1: Preparing the Void
-
Base Coat Application:
Start by applying a solid coat of black acrylic paint over the entire top surface of your clean rock. This dark background is essential for making the galaxy colors pop. -
Ensure Full Coverage:
Check for any bare spots or streaks. If the first coat looks thin or translucent, let it dry completely and apply a second coat for a truly opaque, dark void. -
Let it Dry:
Allow the base coat to dry thoroughly. It should be dry to the touch before you begin adding any colors, usually about 15-20 minutes.
Too much paint?
If your sponge leaves solid blobs instead of misty clouds, dab it firmly on a paper towel before touching the rock. It should feel almost dry.
Step 2: Nebula Formation
-
Sponge Preparation:
Dip a small piece of sponge into your navy blue paint. Dab off the excess paint onto your palette until the sponge is almost dry; having too much paint will ruin the soft, cloudy effect. -
First Nebula Layer:
Gently dab the navy blue sponge randomly across the rock, leaving some black areas visible. Focus on creating irregular cloud shapes rather than solid blocks of color. -
Deep Purple Accents:
Using a fresh sponge or a different corner, pick up some deep purple paint. Lightly sponge this over parts of the navy blue and into some of the black areas to start building depth. -
Adding Vibrancy:
While the previous layers are tacky or dry (either works for this style), sponge on touches of magenta. Place these sparingly near the purple areas to create hot spots in your galaxy. -
Teal Transitions:
Introduce the teal or turquoise paint with a sponge. Focus these brighter colors towards the center of your nebula clouds or along one edge of the rock to suggest a light source. -
Highlighting:
Mix a tiny drop of white into your teal or light blue paint to create a very pale highlight color. VERY lightly dab this into the center of the brightest teal areas to create a glowing core effect. -
Blending Check:
Step back and look at your blends. If any edges look too harsh, take a sponge with a tiny bit of black or navy and gently dab over the edges to soften them back into the darkness.
Step 3: Creating the Stars
-
Splatter Technique:
Water down a small amount of white acrylic paint until it has an ink-like consistency. It needs to be fluid but not transparent. -
Distant Stars:
Dip a toothbrush or stiff brush into the thinned white paint. Test on a paper towel first, then run your thumb across the bristles to flick a fine spray of tiny dots across the rock. -
Targeted Stars:
Take your fine detail brush and dip the tip into un-thinned white paint. Dot individual stars onto the rock, varying the pressure to create different sizes. Place some in the dark areas and some in the colored nebula clouds. -
Painting Starbursts:
Choose a few of the larger white dots to turn into twinkling stars. Using the very tip of your detail brush, carefully pull a thin line upward from the center of the dot. -
Cross Shape:
Pull a matching thin line downward, then one to the left and one to the right, forming a cross. Keep these lines as thin and delicate as possible. -
Diagonal Rays:
For the brightest stars, add smaller diagonal lines in between the main cross arms. I like to keep these shorter than the main vertical and horizontal lines. -
Final Touches:
Allow all the paint to dry completely. Since the white dots can be thick, give this step extra time to ensure you don’t smudge your stars.
Cosmic Glitter
Mix a tiny pinch of fine holographic glitter into your gloss varnish. It adds a secret sparkle that only shows up when the rock catches the sunlight.
Step 4: Protection
-
Varnishing:
Once fully cured (wait at least an hour or two), apply a coat of gloss varnish. The gloss finish mimics the shine of glass and deepens the dark colors, making the galaxy look incredibly vast.
Place your finished galaxy stone on a desk or shelf to add a touch of cosmic wonder to your day
Cracked Geode Illusion
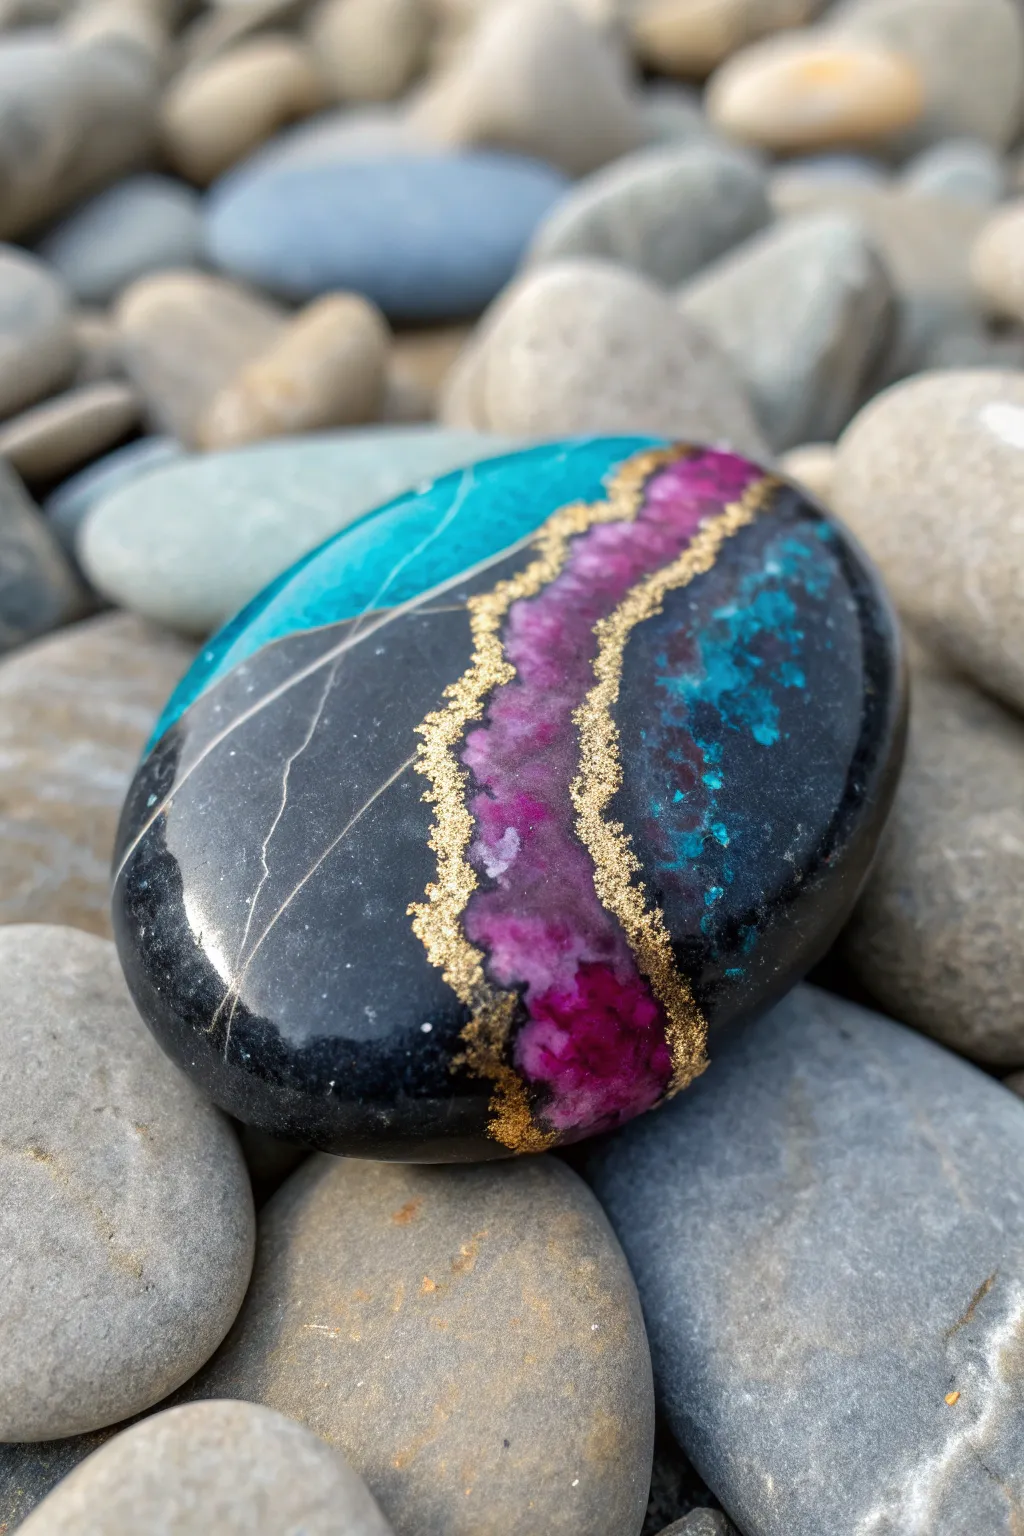
Transform a simple river rock into a stunning faux geode slice with deep jewel tones and shimmering gold accents. This project uses layers of resin or high-gloss paint to achieve a glassy, precious stone finish that captures the light beautifuly.
Step-by-Step Guide
Materials
- Smooth, oval river rock (fist-sized)
- Black acrylic paint
- Teal or turquoise acrylic paint
- Magenta or deep pink acrylic paint
- Gold leaf flakes or metallic gold fluid acrylic
- Gold paint pen (fine tip)
- High-gloss varnish or UV resin
- Fine detail brushes
- Small flat brush
- White colored pencil or chalk
- Mixing palette
- Water cup
Step 1: Base Preparation
-
Clean surface:
Begin by scrubbing your rock with soap and water to remove any dirt or oils. Let it dry completely before starting, as moisture will prevent paint adhesion. -
Base coat:
Paint the entire top surface of the rock with a solid coat of black acrylic paint. You may need two thin coats for full opacity, allowing the first to dry before applying the second. -
Map the fissure:
Once the black base is dry, lightly sketch a wavy, diagonal channel across the rock using a white colored pencil. This will be the main ‘crack’ of your geode.
Sparkle Boost
Mix fine glitter into your colored paint or sprinkle it onto wet wet paint layers for an authentic crystalline shimmer.
Step 2: Creating the Geode Core
-
Pink center layer:
Mix a vibrant magenta with a tiny drop of white to make it slightly opaque but still deep. Paint the very center of your sketched channel with this color, dabbing the brush to create texture rather than smooth strokes. -
Darken the edges:
While the pink is still slightly wet, add a touch of darker purple or black to the outer edges of the pink strip to create depth and shadow. -
Teal accent zone:
On the upper right side of your channel, paint a patch of bright teal. Use a stippling motion to blend it slightly into the black background, creating a mottled crystal effect. -
Secondary teal zone:
Add a sweeping section of teal on the upper left curve of the rock. Keep this paint somewhat translucent so it looks like stained glass over the black base. -
Crystalline details:
Using a very fine brush and pale pink or white paint, dot tiny highlights into the center of the magenta strip to mimic sparkling crystal formations.
Help! Paint looks flat
If your colors lack depth, wait for the first layer to dry and add a second layer of slightly lighter color just in the center of the shapes.
Step 3: Gilding the Edges
-
Gold border application:
load a liner brush with metallic gold paint or use a gold paint pen. Outline the irregular edges of your magenta geode strip. -
Creating the rough edge:
Don’t draw a straight line; instead, use a shaky hand or a dabbing motion to create a jagged, organic gold edge that looks like fractured mineral veins. -
Flecking gold texture:
Dip a stiff brush or toothbrush in gold paint and gently flick it (or stipple heavily) along the borders of the channel to create a scattered gold dust effect. -
Adding cracks:
Draw very thin, branching white or silver lines extending from the geode section into the black stone to simulate stress fractures on the rock’s surface.
Step 4: Finishing Touches
-
Gloss sealing:
The secret to the gem-like look is the finish. Apply a thick coat of high-gloss varnish or UV resin over the painted areas. -
Self-leveling:
If using resin or a pour-on varnish, let it self-level for a moment to create that perfect glass dome effect seen in the photo. -
Final cure:
Allow the stone to dry or cure completely in a dust-free environment for at least 24 hours to ensure the finish remains flawless.
Display your new faux-geode rock on a shelf or use it as a striking paperweight that catches everyone’s eye
Stained Glass Circle Mosaic
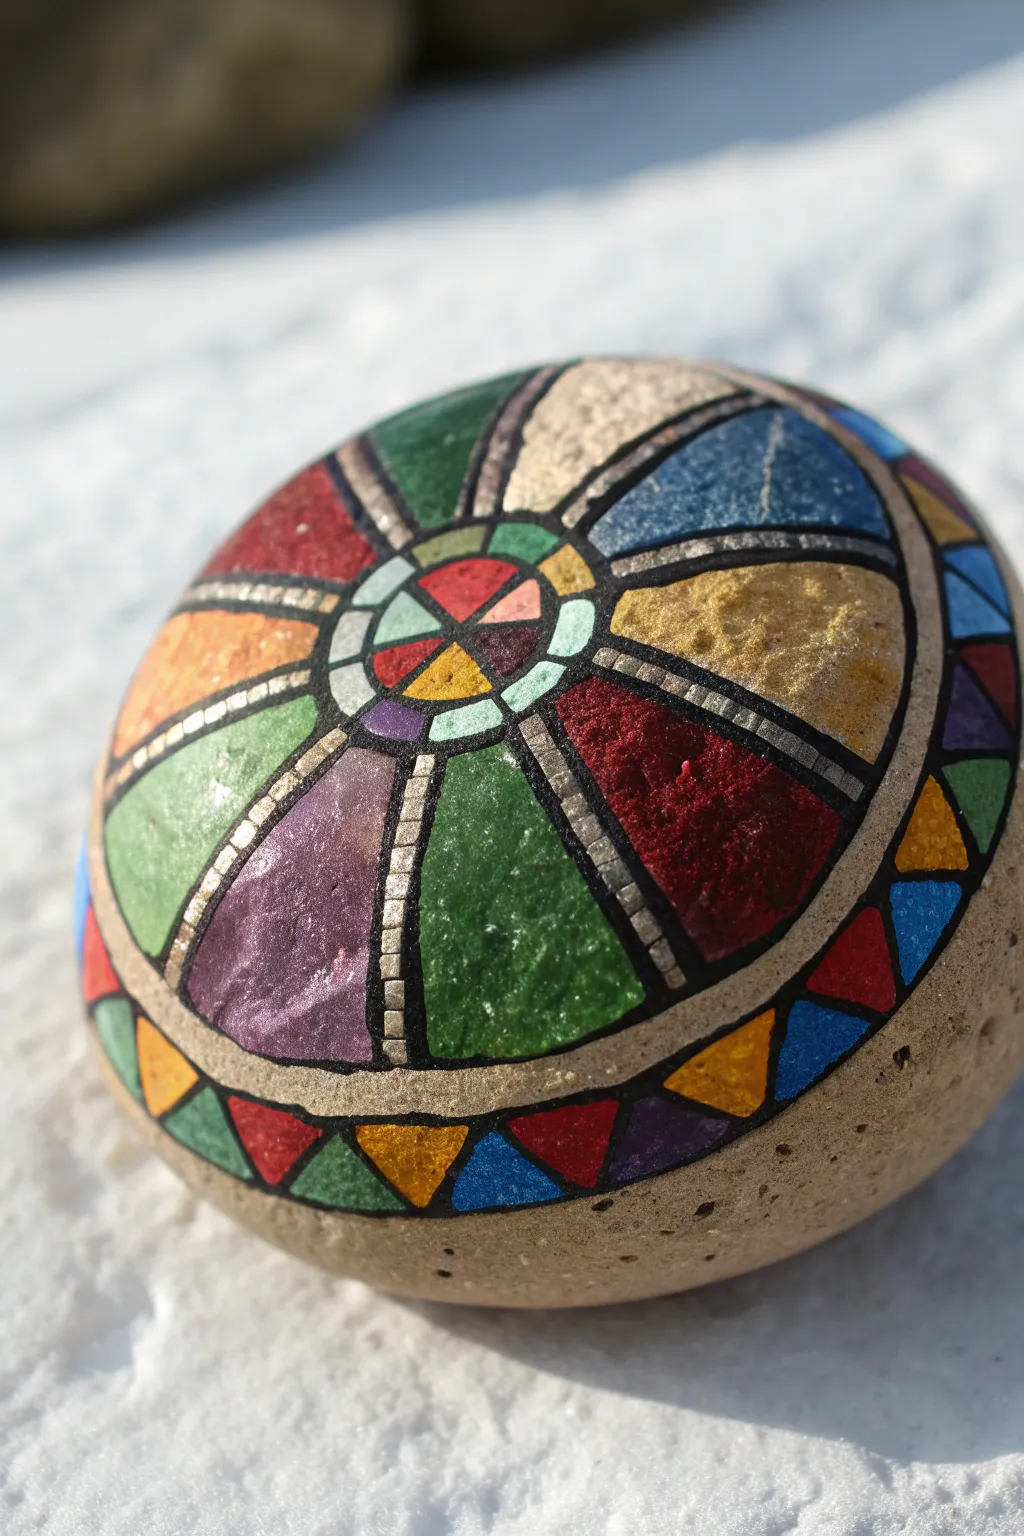
Transform a simple stone into a luminous faux stained glass masterpiece using vibrant acrylics and metallic lining. This geometric design radiates outward like a colorful sun catcher, playing with transparency and bold, dark outlines.
Step-by-Step Tutorial
Materials
- Smooth, round river rock (light-colored works best)
- Pencil and eraser
- Black fine-point paint pen (0.7mm or smaller) or liner brush
- Silver metallic paint pen (fine point)
- Acrylic paints (jewel tones: emerald, violet, ruby, sapphire, gold)
- Small round synthetic brushes (size 0 or 1)
- Gloss varnish or resin (optional for the glass look)
- Ruler (flexible if possible) or compass
Step 1: Drafting the Geometry
-
Find the center:
Begin by cleaning and drying your stone thoroughly. Estimate the visual center of your rock and place a small dot with your pencil. -
Draw the central hub:
Sketch a small circle around your center dot, about the size of a dime. Inside this, draw two crossing lines to create four quadrants. -
Outline the main wheel:
Draw a much larger circle around the first one, leaving a wide band where your main colors will go. Don’t worry if it’s not a perfect circle; following the rock’s natural curve often looks best. -
Create the spokes:
Divide the large band into eight equal segments. I find it easiest to draw a vertical line, then a horizontal one, and then split the remaining quarters in half. -
Add the triangle border:
Around the outer edge of your large circle, sketch a continuous ring of small, connected triangles. These will form the colorful jagged border seen in the photo.
Step 2: Creating the Framework
-
Apply the black outlines:
Using your black fine-point paint pen, trace over all your pencil lines carefully. The stained glass effect relies on these bold separators, so take your time to make them solid and opaque. -
Add the silver lead lines:
This is the secret to the ‘leaded glass’ look. Draw a second line right next to your black spokes using the silver metallic pen. You can create a ‘ladder’ effect on some spokes by drawing tiny horizontal silver dashes over a black line. -
Detail the center:
Inside the small central circle, outline the four quadrants heavily with black, then add a smaller inner ring if space permits. -
Erase guidelines:
Wait at least 15 minutes for the paint pen ink to cure completely, then gently erase any visible pencil marks.
Wobbly Lines?
If your hand shakes while lining, try anchoring your pinky finger on the table or the rock itself for stability. Resting your wrist on a distinct steady surface helps too.
Step 3: Filling with Color
-
Paint the main segments:
Select your jewel-tone acrylics. Paint the large segments, alternating colors to ensure no two adjacent sections are the same. A pattern like green, purple, green, red works well. -
Texture the paint:
To mimic old glass, don’t smooth the paint perfectly. Stippling (dabbing) the paint on slightly thick can create a nice texture once dry. -
Fill the triangle border:
Using a very small brush, fill in the outer triangles. Use bright, contrasting colors like yellow, blue, and red to frame the central design. -
Color the center hub:
Paint the small inner quadrants with contrasting colors. If you used cool colors (blues/greens) nearby, use warm colors (reds/yellows) here to make it pop. -
Let it dry:
Allow the first coat of paint to dry completely. Since acrylics can be translucent, you might need a second coat for the lighter colors like yellow or orange.
Glitter Glass Effect
Mix a tiny pinch of extra-fine holographic glitter into your gloss varnish. When applied, it mimics the sparkle of textured cathedral glass in the sunlight.
Step 4: Finishing Touches
-
Refine the lines:
Paint often overlaps the lines. Once the color is dry, go back over the main black outlines with your paint pen to clean up edges and make everything crisp. -
Highlight the silver:
Re-trace your silver accents if they got covered by stray paint. The metallic shimmer needs to sit on top to catch the light. -
Seal for shine:
To truly sell the glass illusion, apply a coat of high-gloss varnish or a thin layer of resin. This makes the colors appear wet and vibrant, just like real stained glass.
Place your finished stone near a window or in the garden where the sun can catch those metallic accents
3D Button or Candy Pop
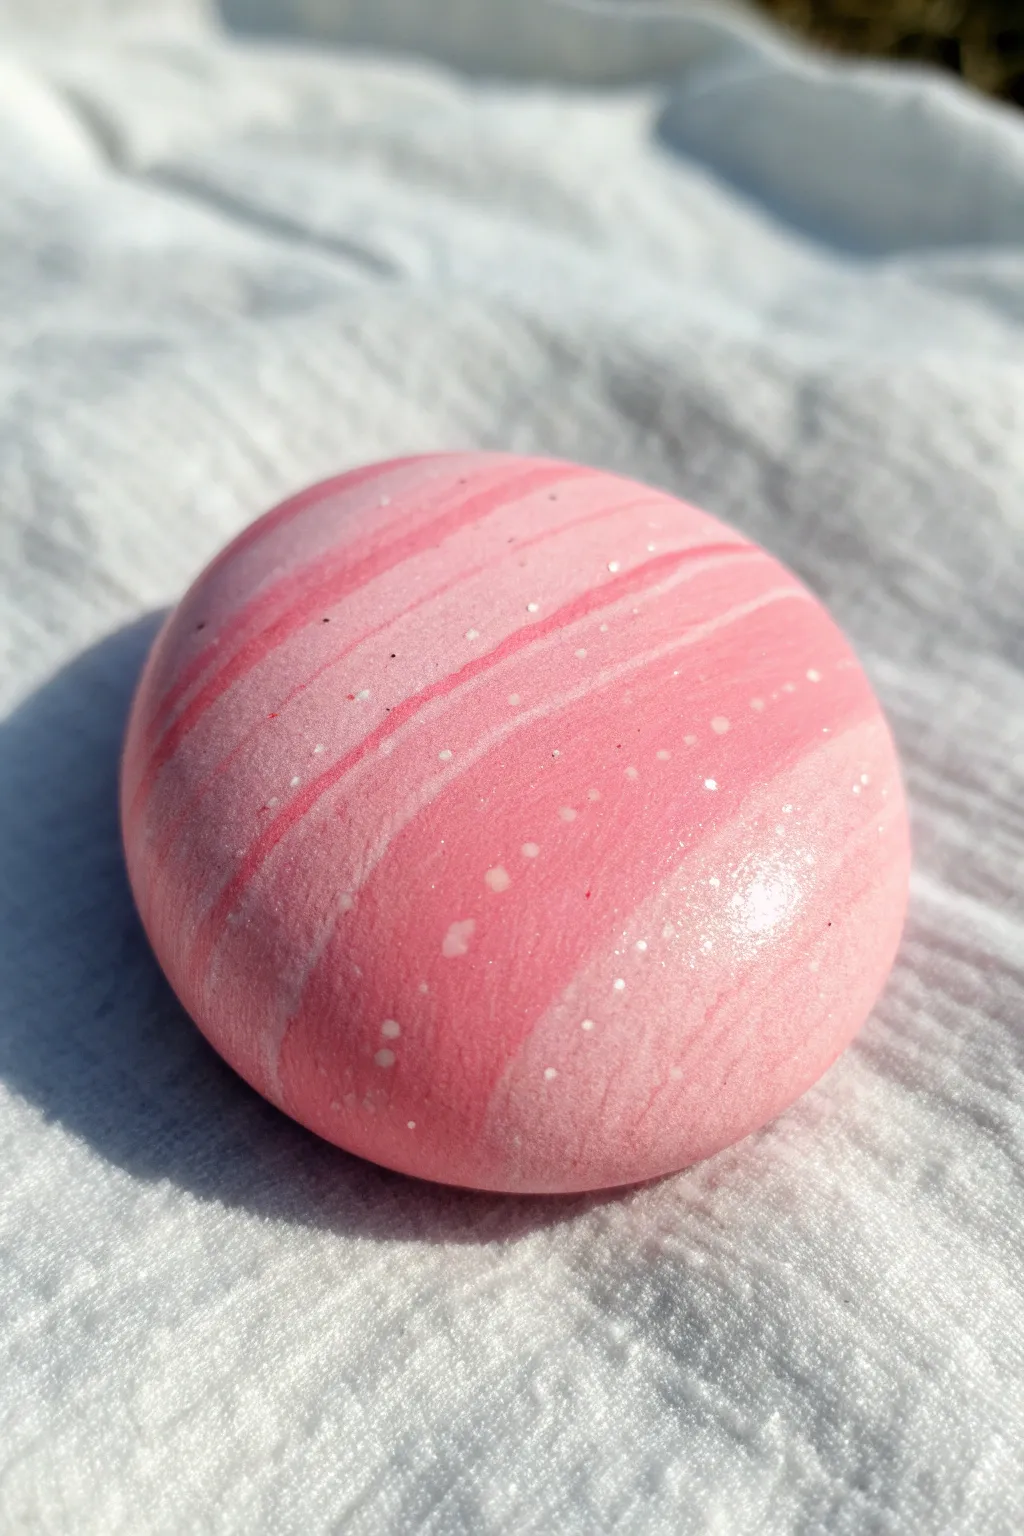
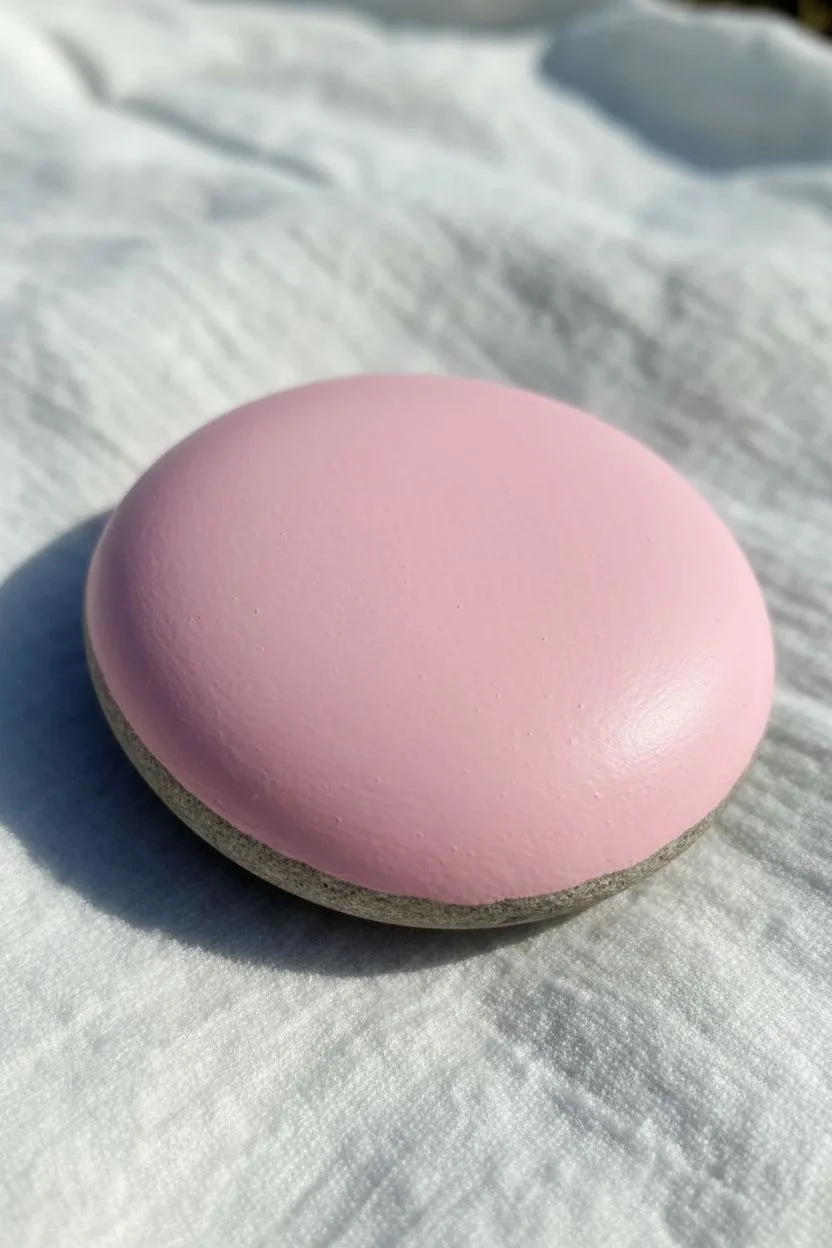
Transform a simple round stone into a mouth-watering piece of eye candy that looks just like a giant piece of strawberry taffy. This design uses layered marbling techniques and subtle details to create a convincing, glossy sweet treat that pops with color.
Step-by-Step
Materials
- Smooth, round river rock
- Gesso or white acrylic primer
- Acrylic paints: White, Light Pink, Hot Pink
- Flat shader brush (size 6 or 8)
- Fine liner brush (size 0 or 00)
- Glazing medium or water (for thinning)
- High-gloss varnish or resin
- Dotting tool or toothpick
Step 1: Base Preparation
-
Clean the surface:
Begin by washing your stone thoroughly with warm soapy water to remove any dirt or oils, then let it dry completely. -
Prime the canvas:
Apply a coat of white gesso or primer. This step is crucial for making the pinks look vibrant later on, as bare rock can dull the colors. -
Mix the base pink:
Create a soft, bubblegum pink by mixing your light pink with a generous amount of titanium white. -
Base coat:
Paint the entire top surface of the rock with your bubblegum pink mixture. You may need two coats for opaque coverage; let each layer dry fully.
Glazing Pro Tip
Mix a tiny drop of retarder medium into your paints. This keeps acrylics wet longer, allowing for smoother blending of the candy swirls without drying out too fast.
Step 2: Creating the Taffy Texture
-
Mix stripe colors:
Prepare two new puddles on your palette: one hot pink (slightly thinned with glazing medium) and a very pale, almost white pink. -
Start the dark streaks:
Using a flat shader brush, load a small amount of the thinned hot pink. Paint gentle, sweeping curves across the rock face diagonally. -
Feather the edges:
While the paint is still wet, stroke over the stripes lightly to soften the edges, making them look like folded sugar rather than harsh lines. -
Add highlights:
Load your brush with the pale pink mixture and paint stripes adjacent to or overlapping the darker pink ones, following the same curved direction. -
Blend for realism:
I like to take a clean, slightly damp brush and run it gently between the dark and light sections to create that smooth, marbled transition typical of hard candy. -
Deepen the contrast:
Once the first layer of stripes is dry, go back in with undiluted hot pink on your fine liner brush to add thin, sharp streaks within the wider dark bands for depth.
Level Up: Scented Stone
Mix a drop of strawberry or vanilla essential oil into your final varnish layer (if compatible) to make your rock smell as sweet as it looks.
Step 3: Sparkle and Shine
-
Micro-dotting prep:
Thin down a tiny amount of pure white paint until it has an ink-like consistency. -
Apply the shimmer:
Dip a toothpick or very fine dotting tool into the white ink. Tap tiny, sporadic clusters of dots across the painted surface. -
Vary dot density:
Concentrate a few dots along the highlight curves to suggest sparkling sugar crystals trapped in the candy. -
Sprinkle effect:
For a subtle texture, you can also flick the bristles of an old toothbrush with white paint over the surface, but protect your workspace first. -
Dry completely:
Allow the rock to sit for at least 24 hours to ensure all layers of paint are cured before sealing. -
The glossy finish:
The secret to the ‘candy’ look is the topcoat. Apply a thick layer of high-gloss varnish or UV resin. -
Final check:
Ensure there are no bubbles in your varnish. If using resin, cure it under a UV lamp until hard and glassy.
Now you have a delectable piece of eternal candy perfect for brightening up a desk or garden pot


Have a question or want to share your own experience? I'd love to hear from you in the comments below!