If you’re planning a paint night and you’re brand-new, you want a project that looks impressive without needing perfect drawing skills. These ideas are my go-to, beginner-friendly paintings that lean on bold shapes, high contrast, and simple color choices so you can actually relax and enjoy the process.
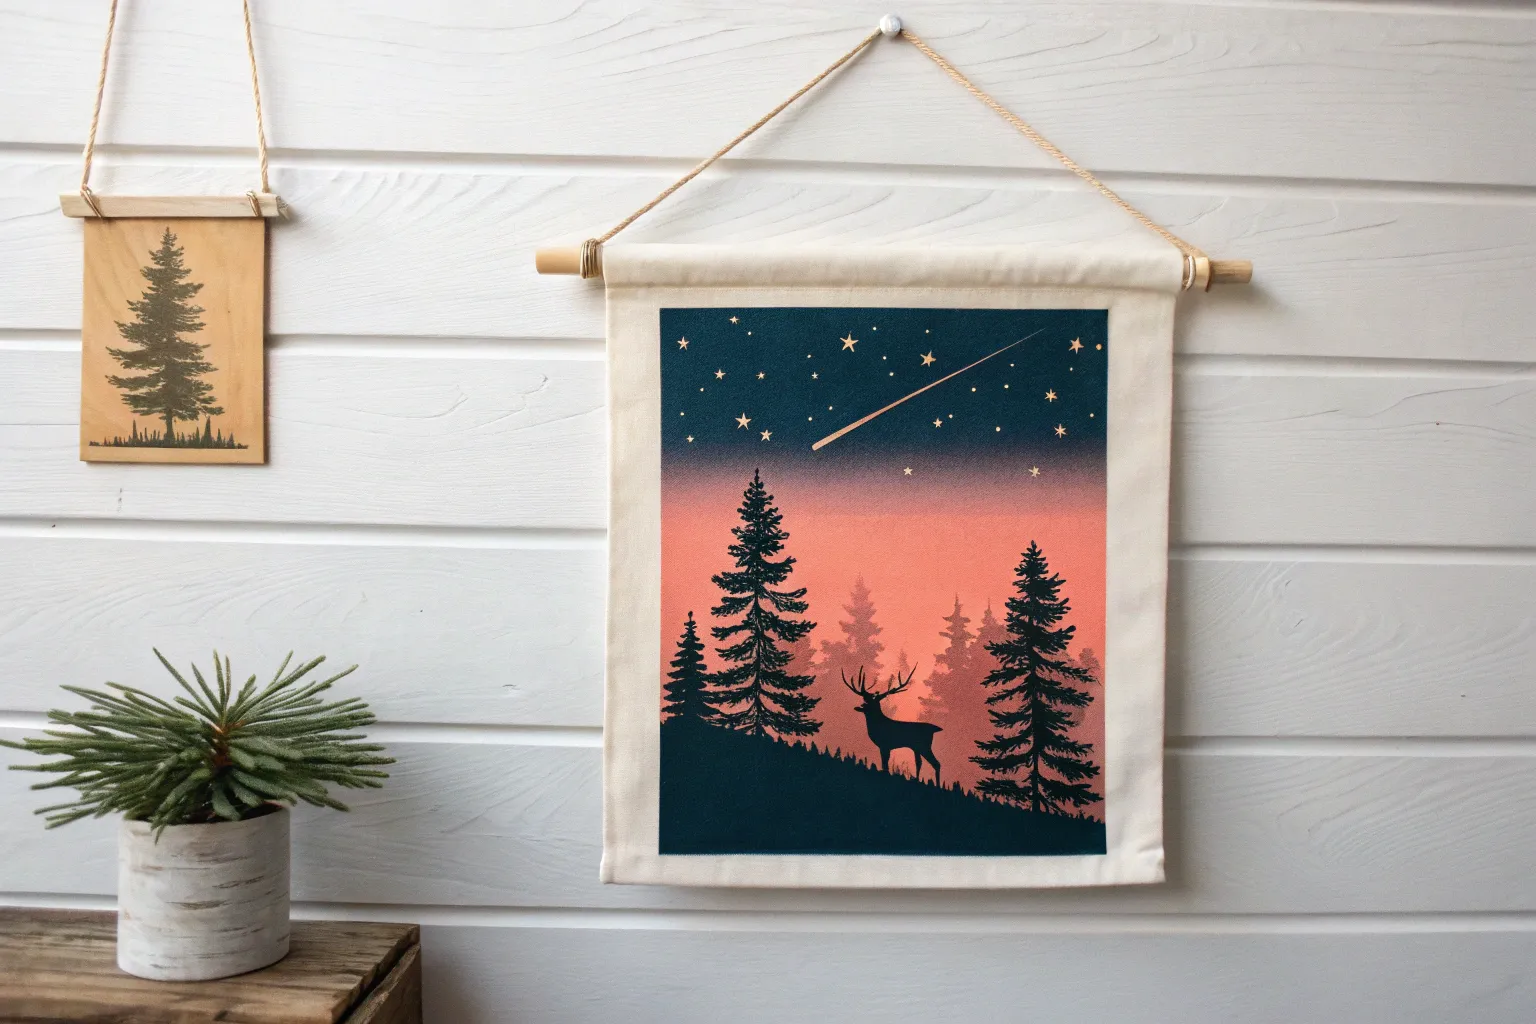
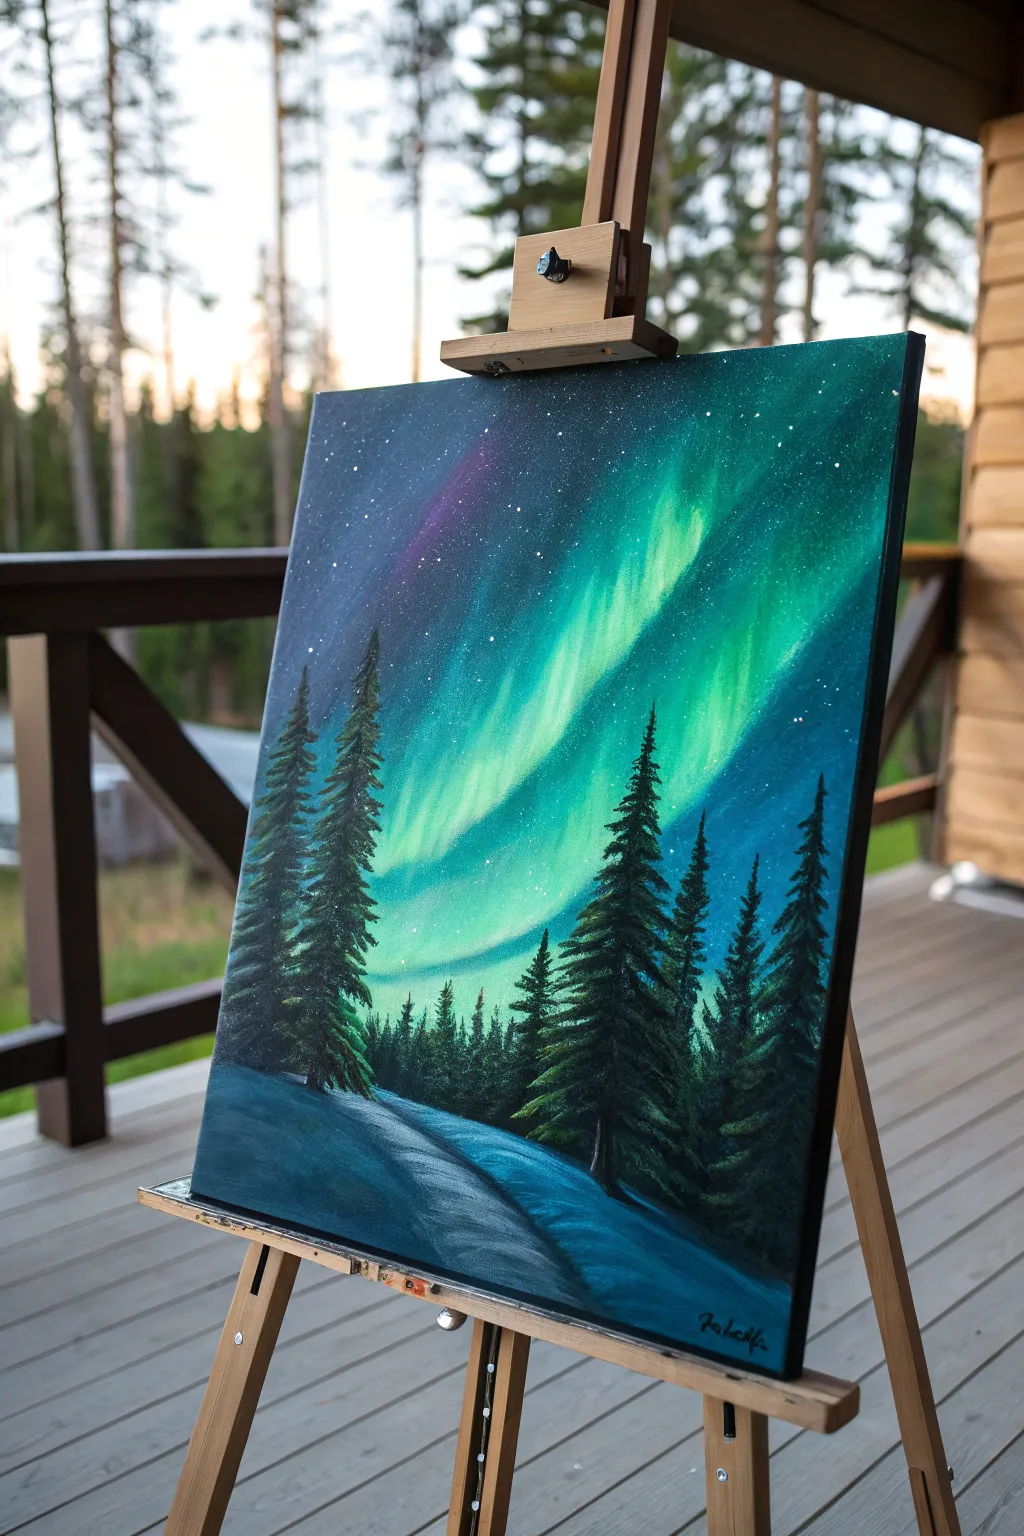
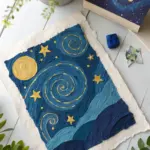
Beginner Paint Night: Starry Sky With Tree Silhouettes
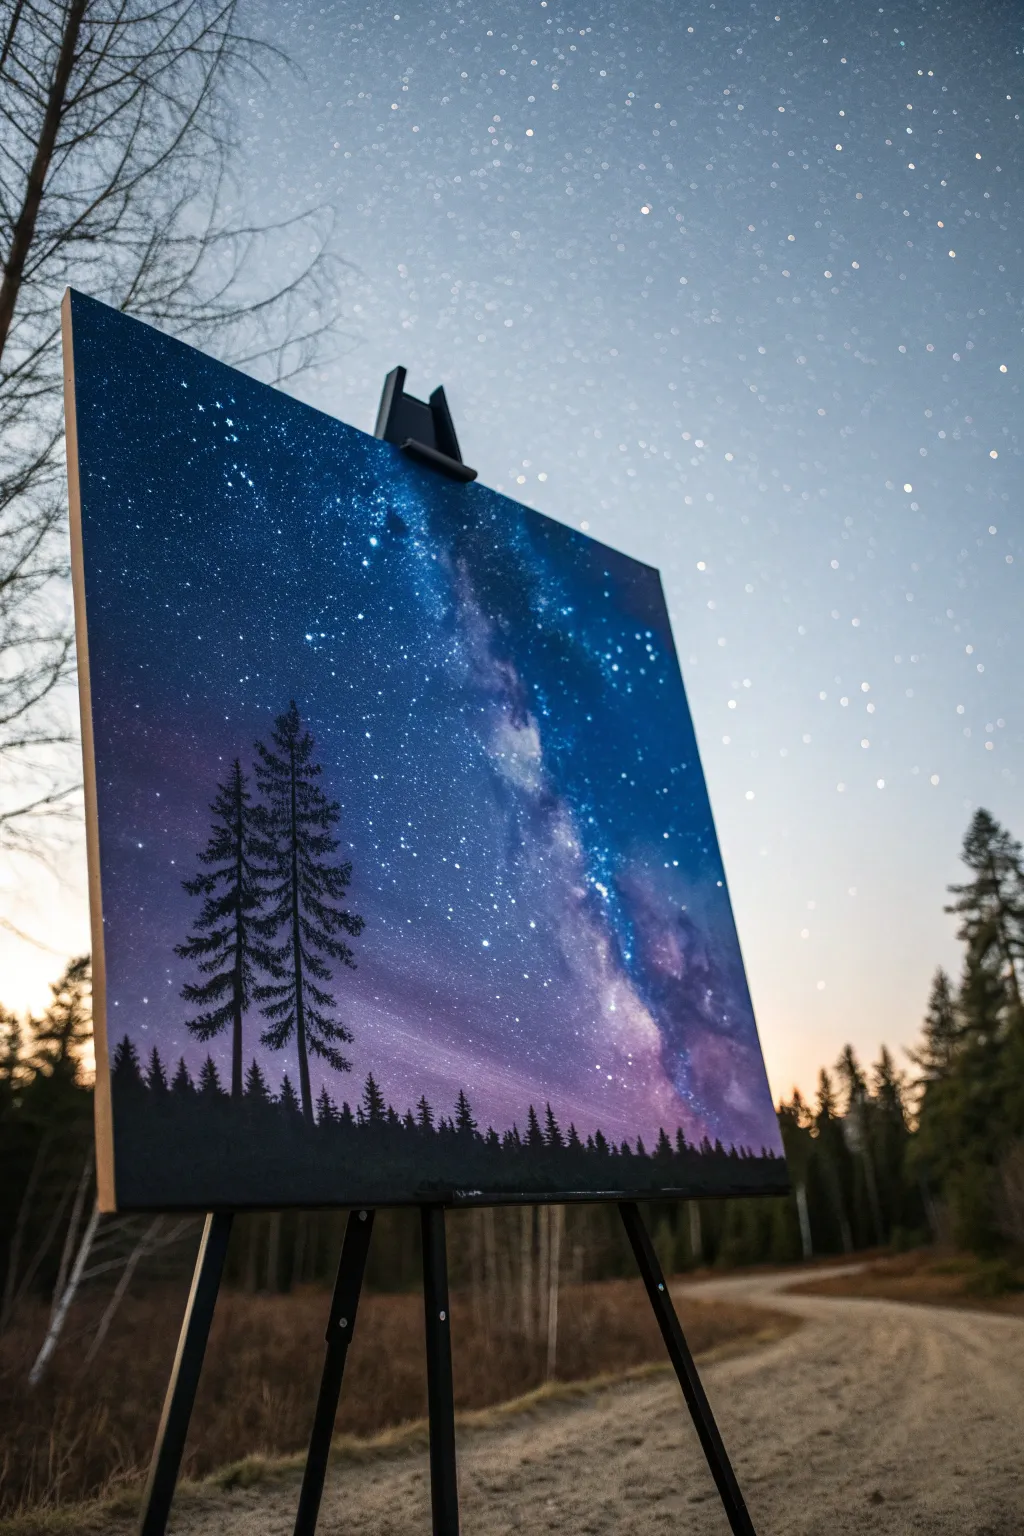
Capture the infinite wonder of the cosmos with this breathtaking night sky painting that features a vibrant Milky Way galaxy rising behind a silent forest. Using simple blending techniques and splatter stars, you’ll create a sense of depth and luminosity that looks professionally done but is surprisingly beginner-friendly.
How-To Guide
Materials
- Stretched canvas (e.g., 16×20 inch)
- Acrylic paints (Phthalo Blue, Ultramarine Blue, Dioxazine Purple, Black, Titanium White, Magenta)
- Set of bristle brushes (large flat brush, medium flat brush, small round brush, liner brush)
- Old toothbrush (for stars)
- Palette or paper plate
- Cup of water and paper towels
- Easels (optional)
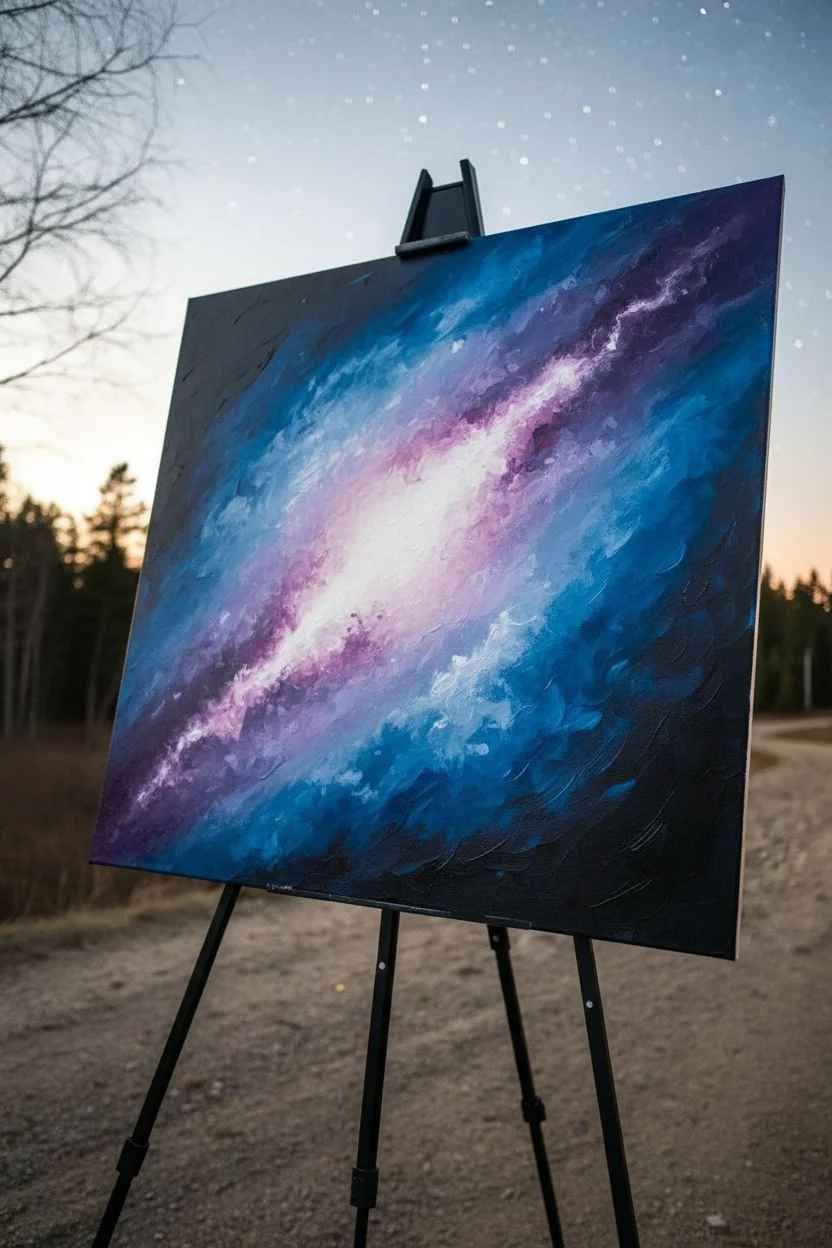
Step 1: Creating the Cosmic Background
-
Prime the colors:
Squeeze out generous amounts of your blues, purple, magenta, and white onto your palette. You’ll want them ready to go because acrylics dry fast, and wet-on-wet blending is key here. -
Establish the Milky Way:
Start by painting a diagonal, uneven stripe of Titanium White mixed with a tiny drop of Magenta across the center of the canvas. This will be the glowing core of your galaxy. -
Add first transition layer:
While the white is still wet, brush a mix of light blue and purple along the edges of your white stripe. Use blending strokes to soften the harsh line where they meet, letting the colors merge into a hazy lavender glow. -
Deepen the outer corners:
Dip your large flat brush into Phthalo Blue and Ultramarine Blue. Paint the top left and bottom right corners, working inward toward the galaxy stripe. -
Blend the gradient:
Where the dark blue meets the lighter galaxy colors, use clean, horizontal strokes to blend them. I like to wipe my brush on a paper towel occasionally to keep the transition smooth and prevent the dark blue from swallowing the light center. -
Intensify the darkness:
To make the stars pop later, the corners need to be pitch black. Mix Mars Black with Phthalo Blue and apply it to the very outer edges of the canvas, feathering it inward just slightly. -
Enhance the galactic dust:
Mix a semi-transparent purple glaze (heavily watered down paint) and dab it randomly over parts of the white Milky Way streak to create ‘dust clouds’ and texture.
Oops! Paint drying too fast?
If your acrylics are drying before you can blend the galaxy, mist the canvas lightly with a spray bottle of water to keep the paint workable longer.
Step 2: A Universe of Stars
-
Prepare the spatter:
Dilute a small dollop of Titanium White with water until it has the consistency of heavy cream or ink. It needs to be fluid but opaque. -
Flick the stars:
Dip an old toothbrush into the thinned white paint. Hold it near the canvas and run your thumb across the bristles to spray fine mist—these are your distant stars. -
Add larger constellations:
Use the handle of a small brush or a dotting tool dipped in pure white to place larger, distinct stars. Focus a few brighter clusters near the Milky Way band.
Level Up: Glowing Horizon
Add a subtle touch of warmth by blending a tiny hint of yellow or orange right at the horizon line before painting the black trees to mimic early dawn.
Step 3: Silhouetting the Tree Line
-
Mix the silhouette color:
Combine Mars Black with a tiny touch of dark blue. Pure black can look flat, so the blue adds richness to the shadows. -
Paint the horizon:
Using a medium flat brush, paint an uneven, jagged distinct line across the bottom 1/5th of the canvas to establish the ground. -
Start the tall pines:
Switch to a small round brush. Draw two vertical lines on the left side: one tall and one slightly shorter. These are the trunks of your main focal trees. -
Add pine branches:
Using a tapping or stippling motion with the tip of your brush, create branches extending from the trunk. Start narrow at the top and get wider as you move down, leaving small gaps to see the sky through. -
Create the distant forest:
Along the rest of the horizon line, paint smaller, simpler tree shapes. They don’t need much detail; just small vertical lines with quick dabs for foliage to suggest a dense treeline. -
Detail the main trees:
Go back to your two large trees and add a few final taps of black to thicken the lower branches, ensuring they feel grounded and heavy. -
Final dry:
Let the entire painting sit for at least 20 minutes to ensure the thick black silhouettes are completely dry before handling.
Step back and admire how your simple layering technique has created a deep, immersive window into the night sky


Beginner Paint Night: Mountain Range Silhouette at Dusk
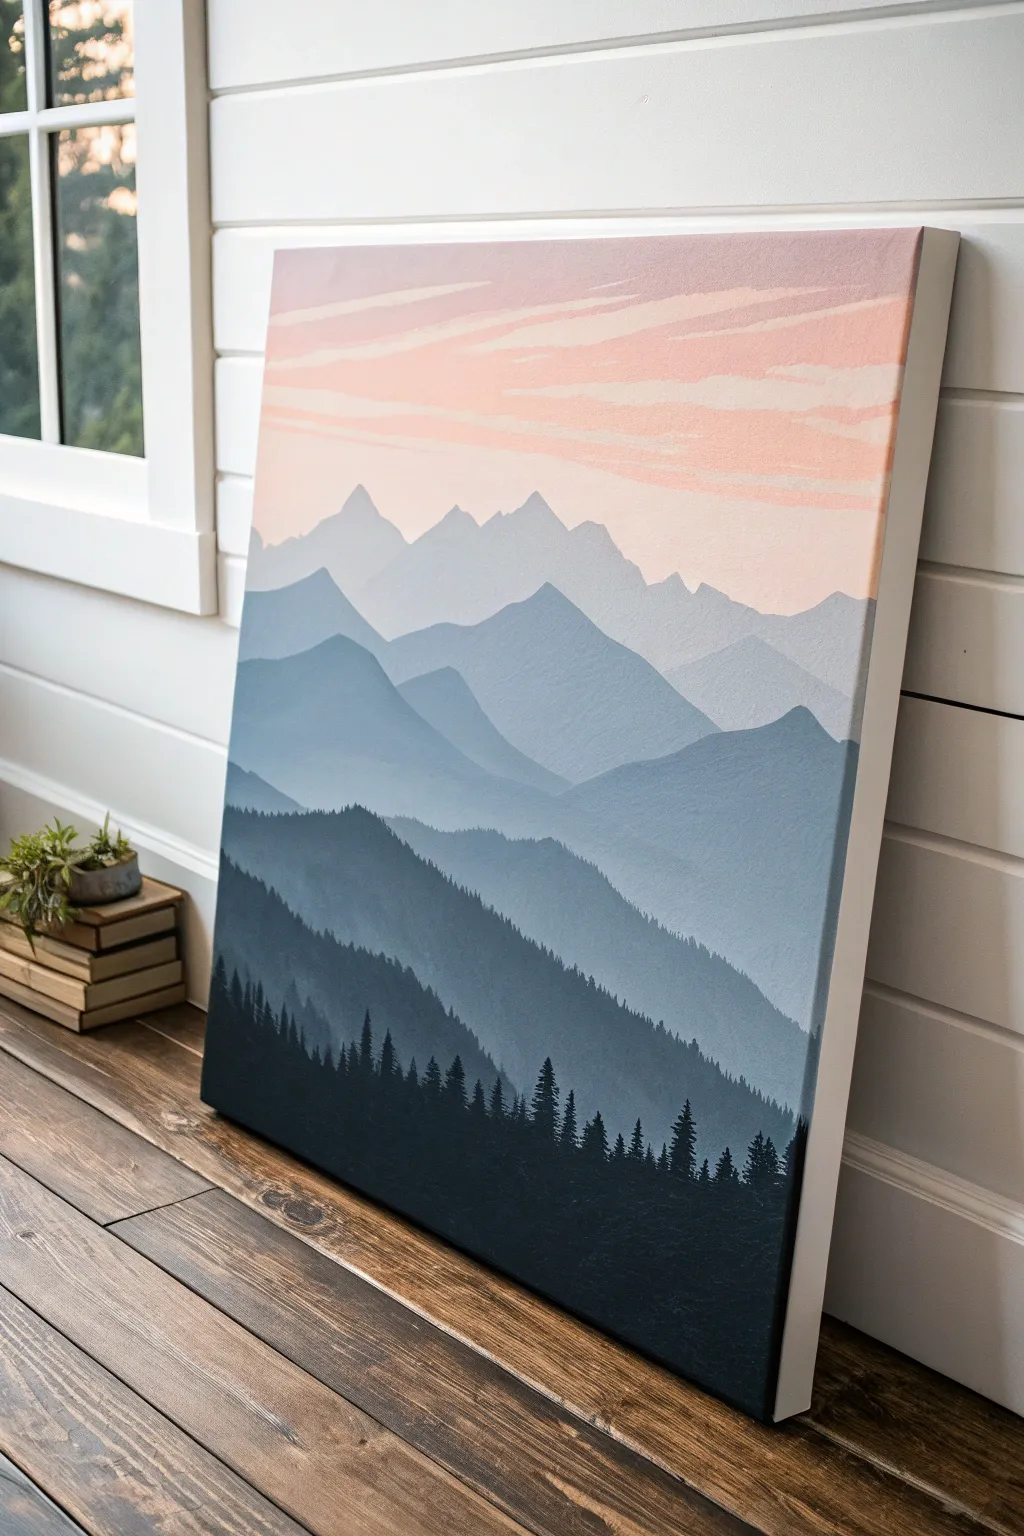
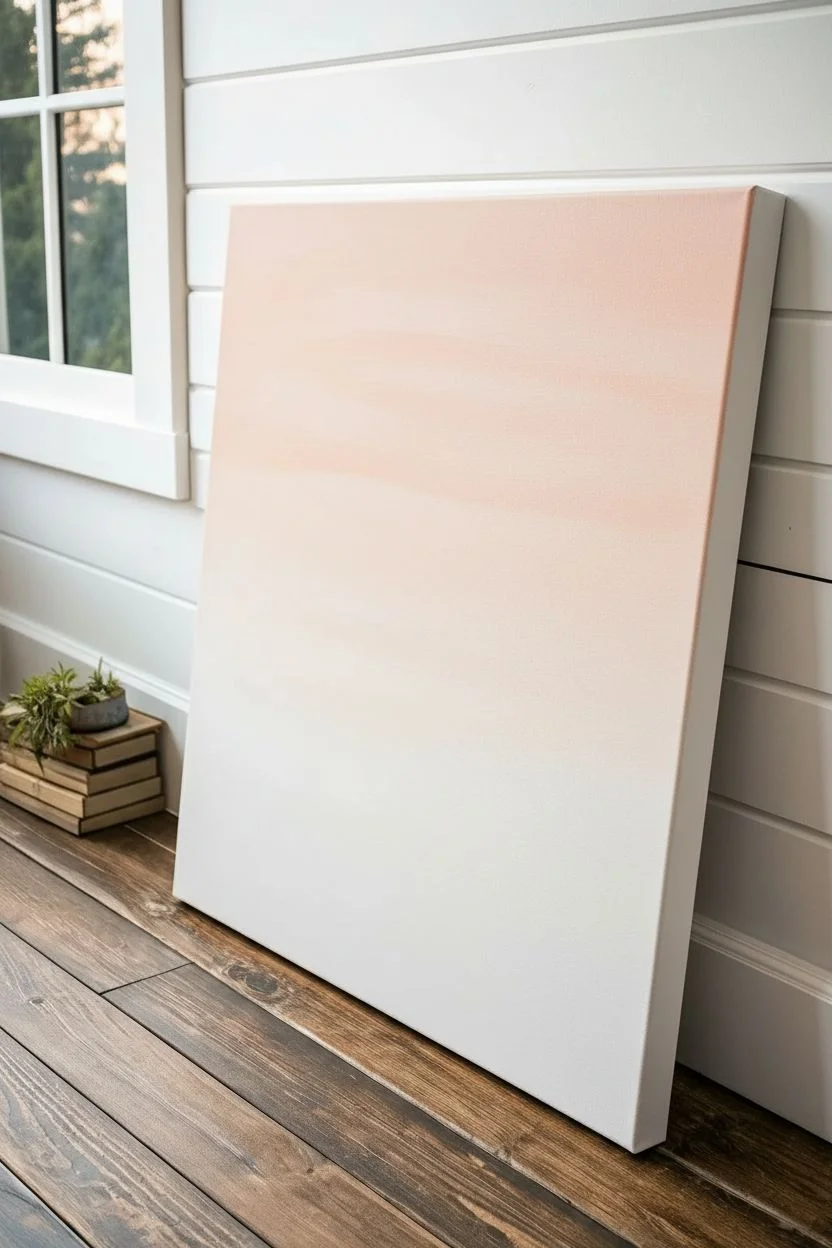
Capture the serene beauty of twilight with this atmospheric mountain landscape that relies on simple layering techniques. By gradually lightening your paint for each receding mountain range, you’ll create a stunning sense of depth that looks professionally done but is perfect for beginners.
Step-by-Step Tutorial
Materials
- Rectangular stretched canvas (e.g., 16×20 inches)
- Acrylic paints: Titanium White, Mars Black, Prussian Blue (or Navy), Crimson Red, Yellow Ochre
- Large flat brush (1-inch width)
- Medium angle brush
- Small fine liner brush
- Palette or paper plate
- Cup of water and paper towels
- Hairdryer (optional, for speed drying)
Step 1: Setting the Sky
-
Mix the sky gradient:
Begin by creating a soft peach tone. Mix a large amount of Titanium White with a tiny touch of Crimson Red and a speck of Yellow Ochre. You want a very pale, warm finish. -
Paint the upper sky:
Using your large flat brush, apply this peach mixture horizontally across the top third of the canvas. Keep your strokes long and smooth to avoid choppy textures. -
Blend the transition:
While the peach is still wet, mix a little more white into your pile to lighten it almost to pure white. Paint just below the peach section, blending the two wet edges together so the color fades out as it moves down the canvas. -
Add cloud streaks:
Wipe your brush clean. Pick up a small amount of the slightly darker peach color. Drag the brush lightly sideways across the wet sky to create thin, wispy cloud streaks. Don’t overthink them; random placement looks best. -
Let it dry:
Allow the sky completely dry before moving on. This is crucial so your sharp mountain peaks don’t blur into the soft clouds.
Mist Effect
To add fog, dry-brush a tiny amount of white paint at the *base* of a mountain layer before painting the next one. It creates a misty separation.
Step 2: Building the Distant ranges
-
Mix the furthest mountain color:
On your palette, mix a light lavender-grey. Combine Titanium White with a very small dot of Prussian Blue and a microscopic touch of black. It should be only slightly darker than your sky. -
Outline the first range:
Using the medium angle brush, paint a jagged line across the canvas, roughly below the midway point. Create random peaks—some high, some low. -
Fill in the shape:
Fill the area below your jagged line with this light lavender mix. You don’t need to go all the way to the bottom, just down a few inches to cover where the next range will overlap. -
Darken the mix:
Add a bit more Prussian Blue and a touch more Black to your previous pile. You want a distinct step darker, moving toward a steely blue-grey. -
Paint the second range:
Paint a new mountain line below the first one. Make the peaks slightly larger and less jagged than the distant ones. Fill in the area below solid.
Step 3: Mid-Ground and Foreground
-
Create the mid-ground blue:
Mix a distinctly darker shade now. Use more Prussian Blue and Black, with just enough White to keep it from being solid navy. It should look like a deep, dusty denim color. -
Layer the third range:
Paint this layer lower down the canvas. Allow this mountain range to slope gently, creating valleys rather than just sharp distinct peaks. -
Mix the near-black shade:
Prepare a very dark mix for the closest hills (before the trees). Use mostly Black and Blue with only a tiny hint of White. It should look like a dark shadow. -
Paint the lowest hill:
Fill the bottom section of the canvas with this dark shadow color, leaving the very bottom edge ready for the final tree layer.
Starry Night Upgrade
Once the sky is dry, use a toothbrush to flick watered-down white paint over the peach gradient for a subtle starry effect before adding mountains.
Step 4: The Forest Silhouette
-
Prepare the tree color:
Mix pure Mars Black with a little Prussian Blue. Even though it looks black, the blue undertone gives it richness. -
Establish the tree line:
Switch to your small fine liner brush or the chisel edge of your angle brush. Paint a solid uneven line across the very bottom of the canvas. -
Paint vertical trunks:
Draw various vertical lines rising from your bottom mass. Make them varying heights—some tall pines, some shorter saplings. -
Add branches:
I like to use a ‘tapping’ motion here. Starting at the top of a trunk line, tap your brush side-to-side, getting slightly wider as you move down the tree to create the classic conical fir shape. -
Fill the dense forest:
Don’t outline every single tree perfectly. In the lower sections, overlap your tapping strokes to create a dense, shadowy forest floor where individual trees merge together. -
Final touches:
Paint the canvas sides in black (gallery wrap style) for a finished look without a frame.
Step back and admire how that simple atmospheric perspective brings a deep sense of peace to your space.


Beginner Paint Night: Simple City Skyline in Silhouette

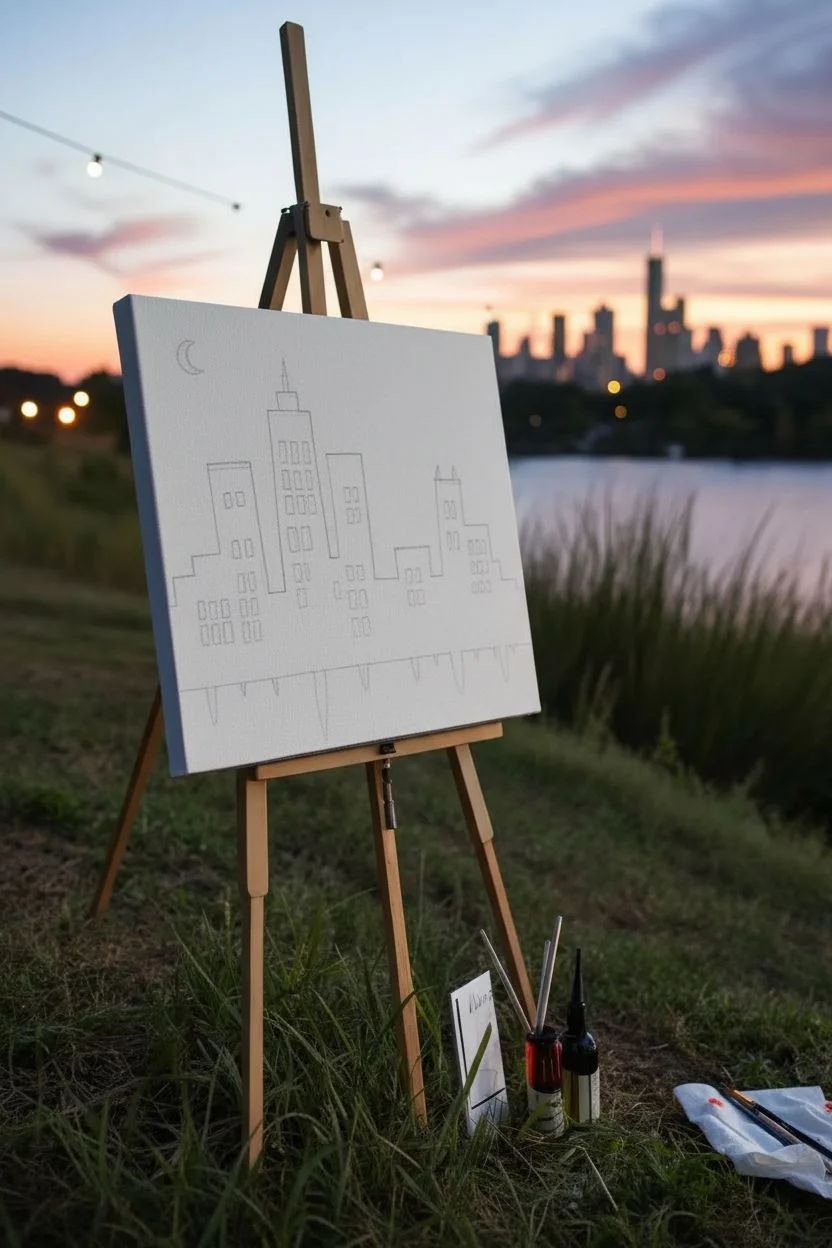
Capture the graphic energy of the city with this striking high-contrast painting that requires absolutely no complex blending. By using negative space for the sky and bold geometry for the buildings, you’ll create a modern piece of art that looks professionally designed.
How-To Guide
Materials
- Small square canvas (e.g., 12×12 inches)
- Black acrylic paint
- Yellow acrylic paint (bright cadmium or primary yellow)
- Small flat brush (¼ inch or similar)
- Fine liner brush or detail brush
- Ruler or straight edge
- Graphite pencil
- Eraser
- Water cup and paper towels
Step 1: Planning the Architecture
-
Establish the horizon:
Begin by deciding where your city will sit. Lightly draw a horizontal line with your ruler about one-third of the way up from the bottom of the canvas. This doesn’t need to be perfectly centered, but it gives your buildings a solid foundation. -
Outline the tallest tower:
Choose a spot slightly off-center for your main skyscraper. Using your ruler, draw a tall, vertical rectangle. To break up the blocky shape, create ‘step-backs’ near the top by drawing smaller, narrower rectangles stacked on the main one, culminating in a simple antenna line. -
Build the surrounding city:
Draw various rectangular shapes on either side of your main tower to represent other buildings. Vary their heights and widths to create visual interest. Some should be short and wide, others tall and thin. Overlap isn’t necessary for this simple style; just place them side-by-side along your horizon line. -
Design the reflection:
Below the horizon line, pencil in inverted versions of your buildings. You don’t need to draw the entire shape; imply a reflection by drawing jagged pointing shapes that mirror the width of the building directly above them. These should look like stalactites hanging down into the water. -
Sketch the windows:
Inside your building outlines, draw grids of small squares for windows. You don’t need to fill every building; creating clusters of lights looks more realistic. I find it helpful to leave some areas dark to simulate the random pattern of city life at night. -
Add the moon:
In the upper left corner of the sky, sketch a simple crescent moon shape. Keep it relatively small so it doesn’t distract from the skyline itself.
Fixing Smudges
Accidentally got black paint in the white sky? Don’t wipe it! Let it dry completely, then paint over the mistake with white acrylic or gesso. It acts like correction fluid.
Step 2: Painting the Colors
-
Illuminating the windows:
Dip your fine liner brush into bright yellow acrylic paint. Carefully fill in the small window squares you sketched earlier. It works best to do this step first, because painting yellow over black is difficult, but painting black around yellow is easy. -
Apply a second coat:
Yellow paint is often translucent. Once the first layer of windows is dry to the touch, dab a second layer of yellow on top to make the lights truly pop against the white canvas. -
Paint the moon:
Using your small detail brush and black paint, fill in the crescent moon shape in the sky. Ensure the edges are crisp and sharp. -
Paint the building outlines:
Switch to your small flat brush and load it with black paint. Carefully paint the straight edges of your buildings. Use the flat edge of the brush against the pencil line to get a crisp, architectural look. -
Fill in the facades:
Fill in the rest of the building shapes with solid black. When you approach the yellow windows, switch back to your finer brush to carefully cut in around the yellow squares, leaving them bright and clean. -
Refine the edges:
Check your vertical lines. If any look wobbly, use the straight edge of your flat brush to tidy them up. Solid opacity is key here, so if the canvas texture is showing through, let it dry and apply a second coat of black. -
Create the reflection effect:
Paint the inverted shapes below the horizon line black. Unlike the crisp tops of the buildings, keep the bottom tips of these reflections slightly tapered or rough to mimic the distortion of water. -
Add the ripple line:
To separate the buildings from their reflection, paint a very thin, straight horizontal line of black right across the horizon where the solid buildings meet the inverted shapes. This grounds the structure. -
Detail work:
Use your liner brush to add the final delicate antenna to the top of your tallest skyscraper. A single confident stroke works better than trying to trace it slowly. -
Final erase:
Once the paint is completely bone-dry (wait at least 15-20 minutes), gently rub a clean eraser over any visible pencil marks in the white sky area to leave a pristine background.
Level Up: Twilight Sky
Before painting the black buildings, paint the entire canvas with a gradient of pink to purple to deep blue. Let it dry fully, then paint the silhouette on top for a sunset background.
Enjoy the sleek, modern aesthetic of your new cityscape masterpiece


Beginner Paint Night: Northern Lights With Dark Forest Line
BRUSH GUIDE
The Right Brush for Every Stroke
From clean lines to bold texture — master brush choice, stroke control, and essential techniques.
Explore the Full Guide
Beginner Paint Night: Rainy Street Lamp Glow Silhouette Scene
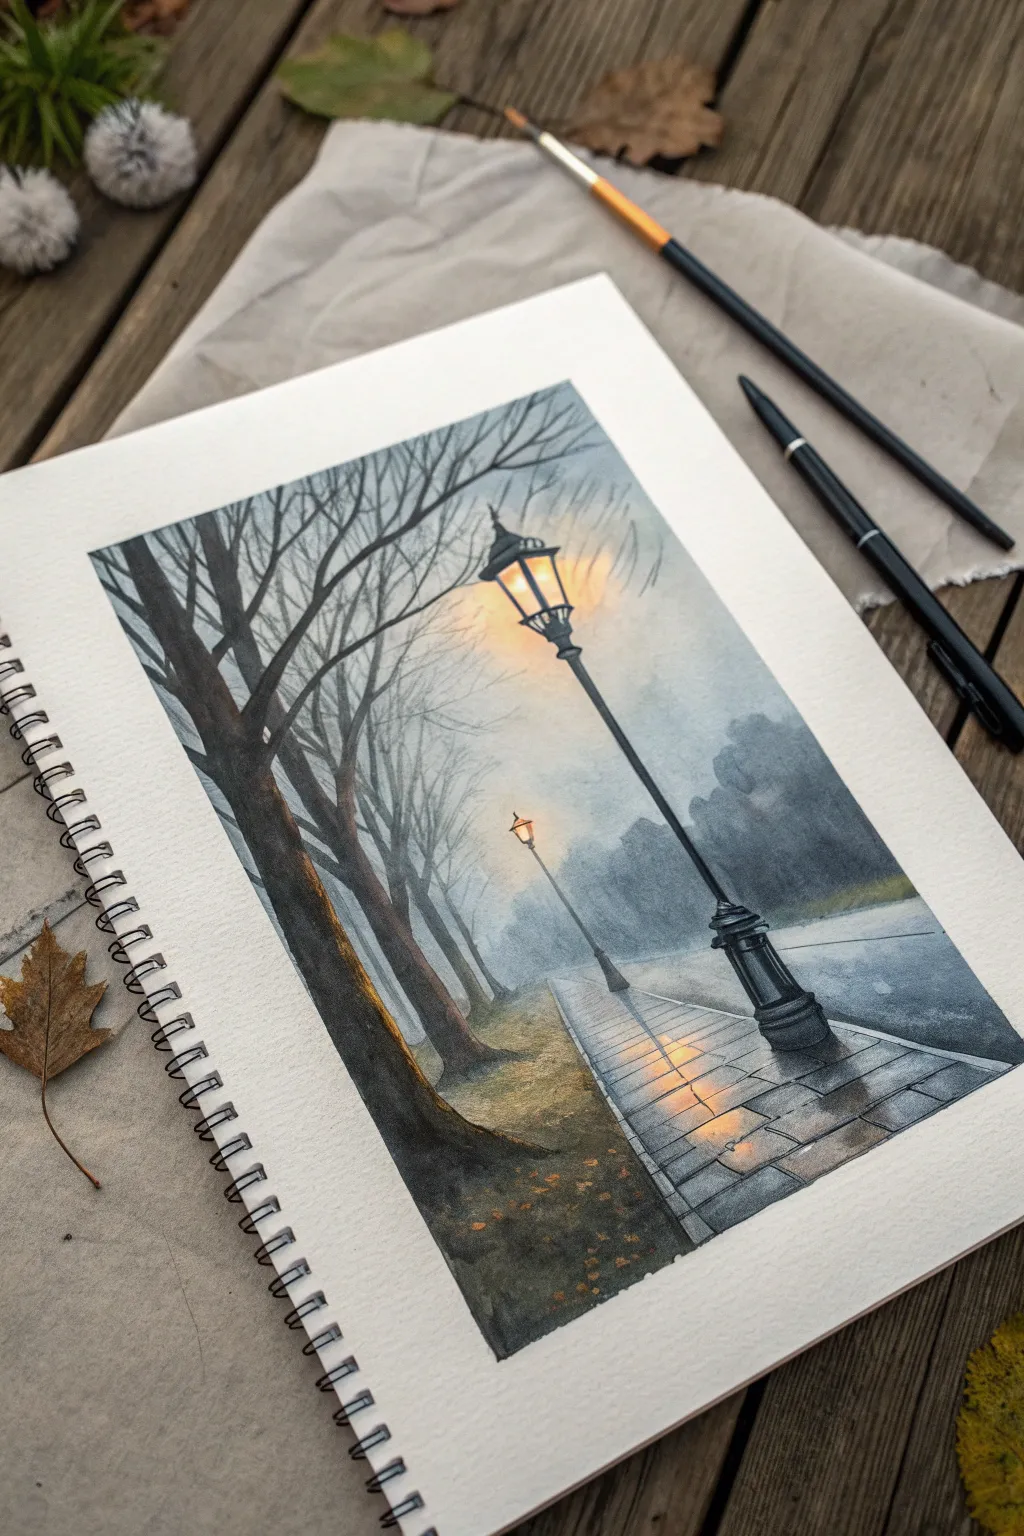
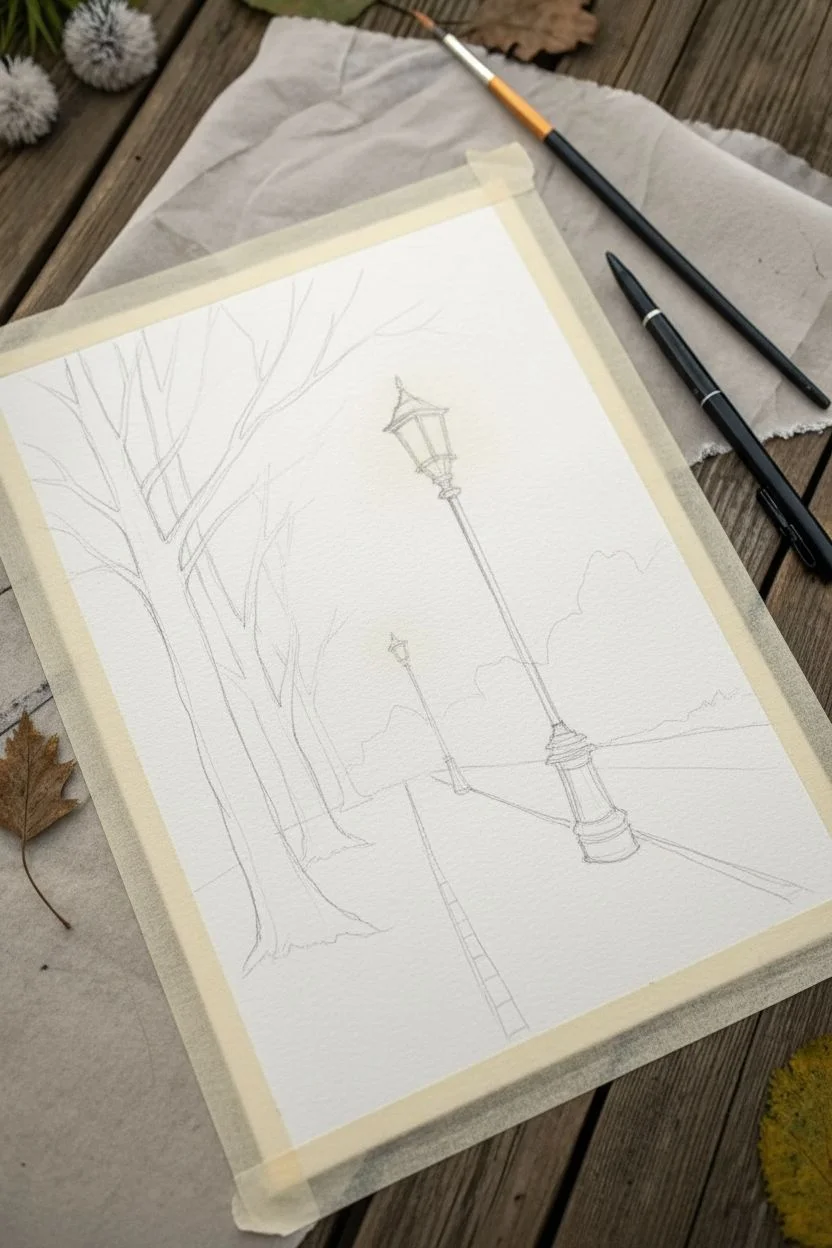
Capture the serene mood of an autumn evening with this watercolor project, featuring glowing streetlamps reflecting on a wet sidewalk. This beginner-friendly scene uses wet-on-wet techniques to create a soft, foggy atmosphere that perfectly contrasts with the sharp silhouettes of winter trees.
Step-by-Step
Materials
- Cold Press Watercolor Paper (140lb/300gsm)
- Watercolor Paints (Payne’s Gray, Burnt Umber, Yellow Ochre, Cadmium Orange, Lamp Black)
- Round Brushes (Size 4, 8, and a fine liner brush)
- Masking Tape
- Pencil and Eraser
- Two jars of water
- Paper Towels
- Ruler (optional)
Step 1: Sketch and Background
-
Tape it Down:
Begin by taping the edges of your watercolor paper to a board or table. This creates that crisp, clean border you see in the finished piece and keeps the paper flat while wet. -
Establish Perspective:
Using a pencil, draw a diagonal line starting from the bottom right corner going towards the middle-left to create the sidewalk edge. Add a second, softer line further back for the park’s grass line. -
Place the Lamps:
Sketch a large, prominent lamppost in the foreground on the right. Draw a smaller, distant lamppost further back along the path to create depth. Don’t worry about perfect straightness; character is key. -
Tree Placement:
Sketch the main tree trunks on the left side. The closest tree should interpret the frame, while distant trees should be thinner and fade into the background. -
The Glow Base:
Wet the area around the lamp heads with clean water. Drop in diluted Yellow Ochre, letting it bleed outwards softly. Add a tiny touch of Cadmium Orange in the very center for warmth. -
Misty Atmosphere:
While the paper is still slightly damp (but not the lamp glow area), wash the sky with a very diluted Payne’s Gray. Let it be uneven to suggest fog and clouds.
Step 2: Middle Ground and Trees
-
Distant Trees:
Mix a watery grey. Paint the ghostly silhouettes of the furthest trees and bushes. These should be pale and indistinct to push them into the fog. -
Grass Texture:
Paint the grassy area using a mix of Burnt Umber and Paynes Gray. Keep the strokes horizontal and textured, darkening the paint as you get closer to the bottom edge. -
Main Tree Trunks:
Using a stronger mix of Burnt Umber and Black, paint the large foreground tree trunks. I like to add a hint of the orange glow color on the right side of the trunk where the lamplight would hit it. -
Add Formatting Branches:
Switch to your liner brush. Pull fine branches upwards and outwards from the main trunks. Let your hand shake slightly to give them a natural, organic gnarl.
Wet-on-Wet Magic
For the softest glow around the lamp, ensure the paper is glossy wet before dropping in the yellow. If the paint stops spreading, the paper is too dry
Step 3: The Lampposts and Reflections
-
Defining the Metal:
With a steady hand and almost pure Black (or thick Payne’s Gray), paint over your lamppost sketches. Use the fine tip of your brush to outline the glass panes around the glowing yellow centers. -
Sidewalk Base:
Paint the sidewalk with a medium wash of grey. While wet, lift out a few horizontal strips with a thirsty brush or paper towel to suggest wet pavement slabs. -
Reflected Light:
While the sidewalk is damp, drop vertical strokes of Yellow Ochre and Orange directly beneath the lamp and the tree trunks. The wet paper will blur these strokes, mimicking reflections on rain-slicked stone. -
Paving Details:
Once the sidewalk is dry, use a fine liner brush with dark grey to draw the grid lines of the paving stones. Break the lines occasionally so they don’t look too rigid. -
Final Shadows:
Glaze a darker, transparent grey over the bottom corners and the base of the trees to anchor the scene and enhance the contrast of the bright lights. -
Fallen Leaves:
Dip a small brush into orange and brown paint. Tap small dots onto the grass and the sidewalk to represent fallen autumn leaves. -
The Reveal:
Wait until the painting is completely bone-dry. Carefully peel away the masking tape at a 45-degree angle to reveal your clean white border.
Add Some Life
Use a white gel pen to add tiny rain streaks against the dark tree trunks or to highlight the metal edges of the lamp for extra realism
Step back and admire the cozy, moody atmosphere you’ve created with just a few simple washes


Have a question or want to share your own experience? I'd love to hear from you in the comments below!