
Whenever I need a little creative reset, I reach for simple cute drawings that come together fast and still look adorable. These easy drawing ideas are all about comfy shapes, tiny details, and that quick “I made something!” feeling.
Cute Hearts With Blush Cheeks
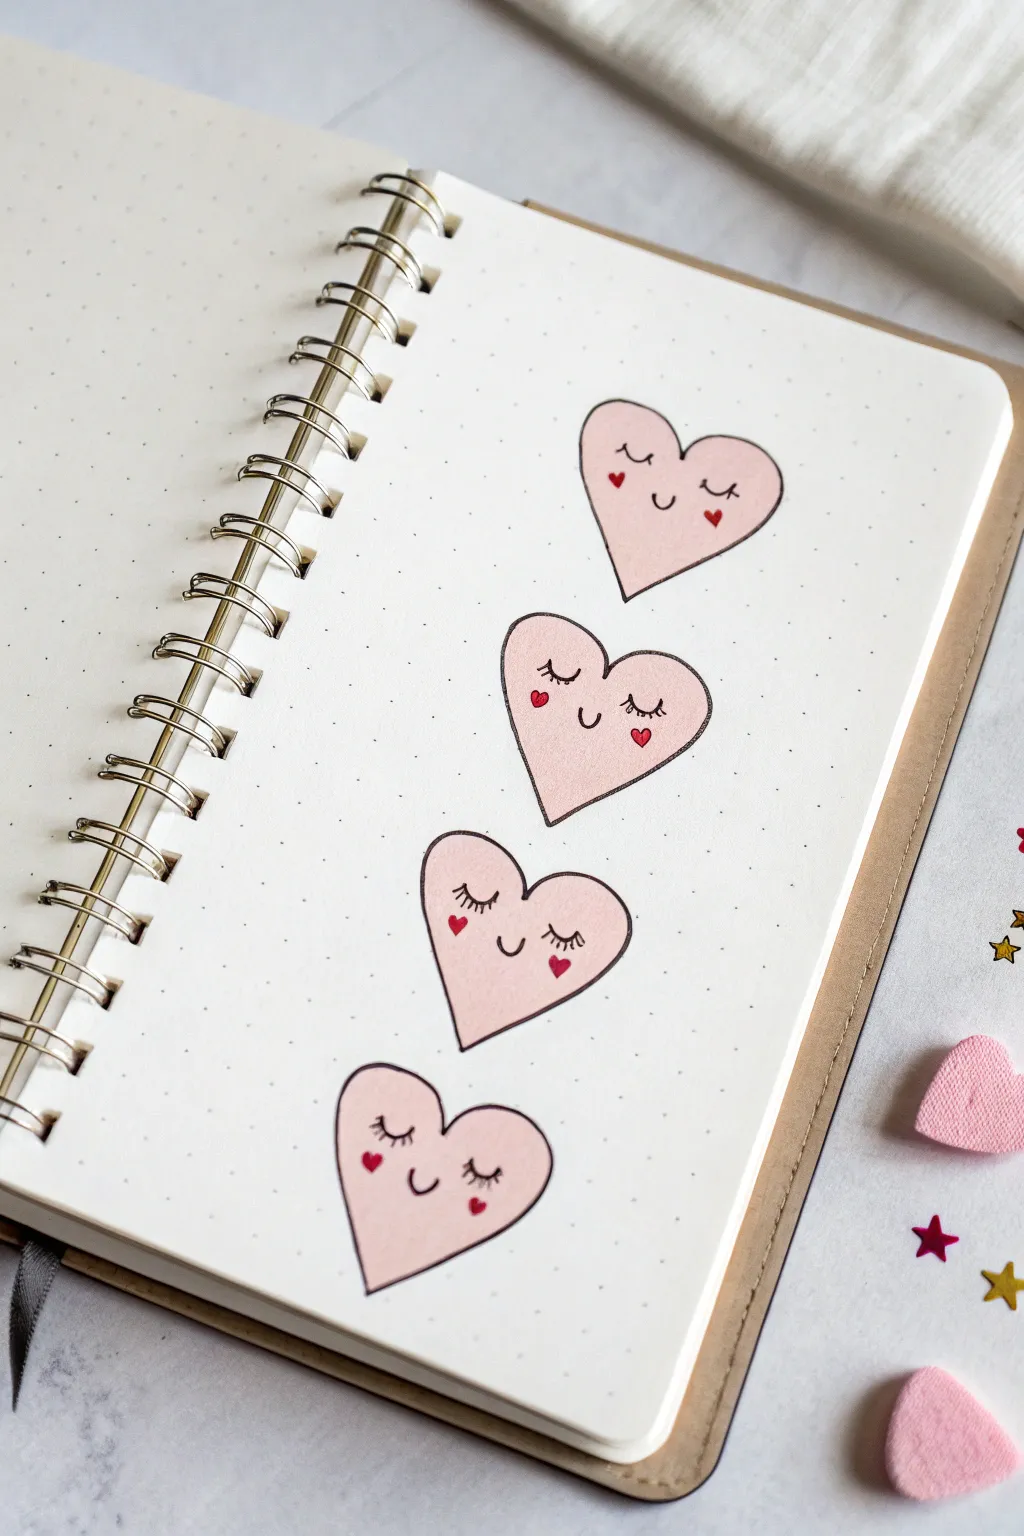
These sweet, smiling hearts are the perfect way to add a touch of love to your bullet journal spreads. With their sleepy eyelashes and rosy cheeks, they create a charming vertical border that’s simple yet expressive.
Step-by-Step
Materials
- Dotted bullet journal or mixed media paper
- Soft pink marker or highlighter (mildliner style)
- Fine liner pen (black, 0.3mm or 0.5mm)
- Red fine-point pen or marker
- Pencil (optional for sketching)
- Eraser
Step 1: Sketching the Base Shape
-
Lightly pencil outline:
Start by sketching four heart shapes vertically down the page using a pencil. Aim to make them roughly the same size and evenly spaced apart, using the grid dots as a guide for alignment. -
Draw the heart outlines:
Take your black fine liner pen and carefully trace over your pencil sketches. Create a classic heart shape, but keep the curves relatively soft and rounded rather than sharp. -
Erase pencil marks:
Once the ink is completely dry, gently erase the visible pencil lines underneath to leave a clean black outline.
Uneven Hearts?
If freehanding hearts is tricky, draw a light ‘V’ shape first as a guide for the bottom point, then loop the two top curves to meet it.
Step 2: Adding the Color
-
Fill with pink:
Use your soft pink marker to color in the first heart. I like to use long, vertical strokes to ensure even coverage without too much streakiness. -
Continue coloring:
Repeat the coloring process for the remaining three hearts. If your paper is thin, be careful not to oversaturate it to prevent bleeding through to the other side. -
Let it dry completely:
Wait a moment for the pink ink to settle and dry. This prevents your black detailed lines from bleeding or feathering when you add the faces next.
Step 3: Creating the Expressions
-
Draw the first eye:
On the first heart, use your black fine liner to draw a small, downward-curved arc on the left side to create a closed, sleeping eyelid. -
Add eyelashes:
Draw three tiny vertical ticks coming off the top of the eyelid curve to represent eyelashes. -
Draw the second eye:
Create a matching closed eye on the right side of the heart, ensuring it’s level with the first one. -
Add the smile:
precise, small ‘u’ shape right in the center, slightly below the eyes, for a gentle smile. -
Repeat for all hearts:
Go down the line and add the exact same face to the other three hearts. Try to keep the spacing of the features consistent for a uniform look.
Pro Tip: Grid Guide
Count the dots! In a dot grid journal, make each heart exactly 4 dots wide and 4 dots high to ensure they are all perfectly identical sized.
Step 4: Finishing Touches
-
Add blush cheeks:
Switch to your red fine-point pen or marker. Draw a tiny solid heart shape on the left cheek, just under the outer edge of the eye. -
Complete the blush:
Draw a matching tiny red heart on the right cheek. These serve as the ‘blush’ marks. -
Finalize the set:
Repeat these cute red heart accents on all the remaining doodles.
Now you have a column of adorable hearts ready to brighten up your diary or planner pages


Easy Stars and Sparkle Doodles
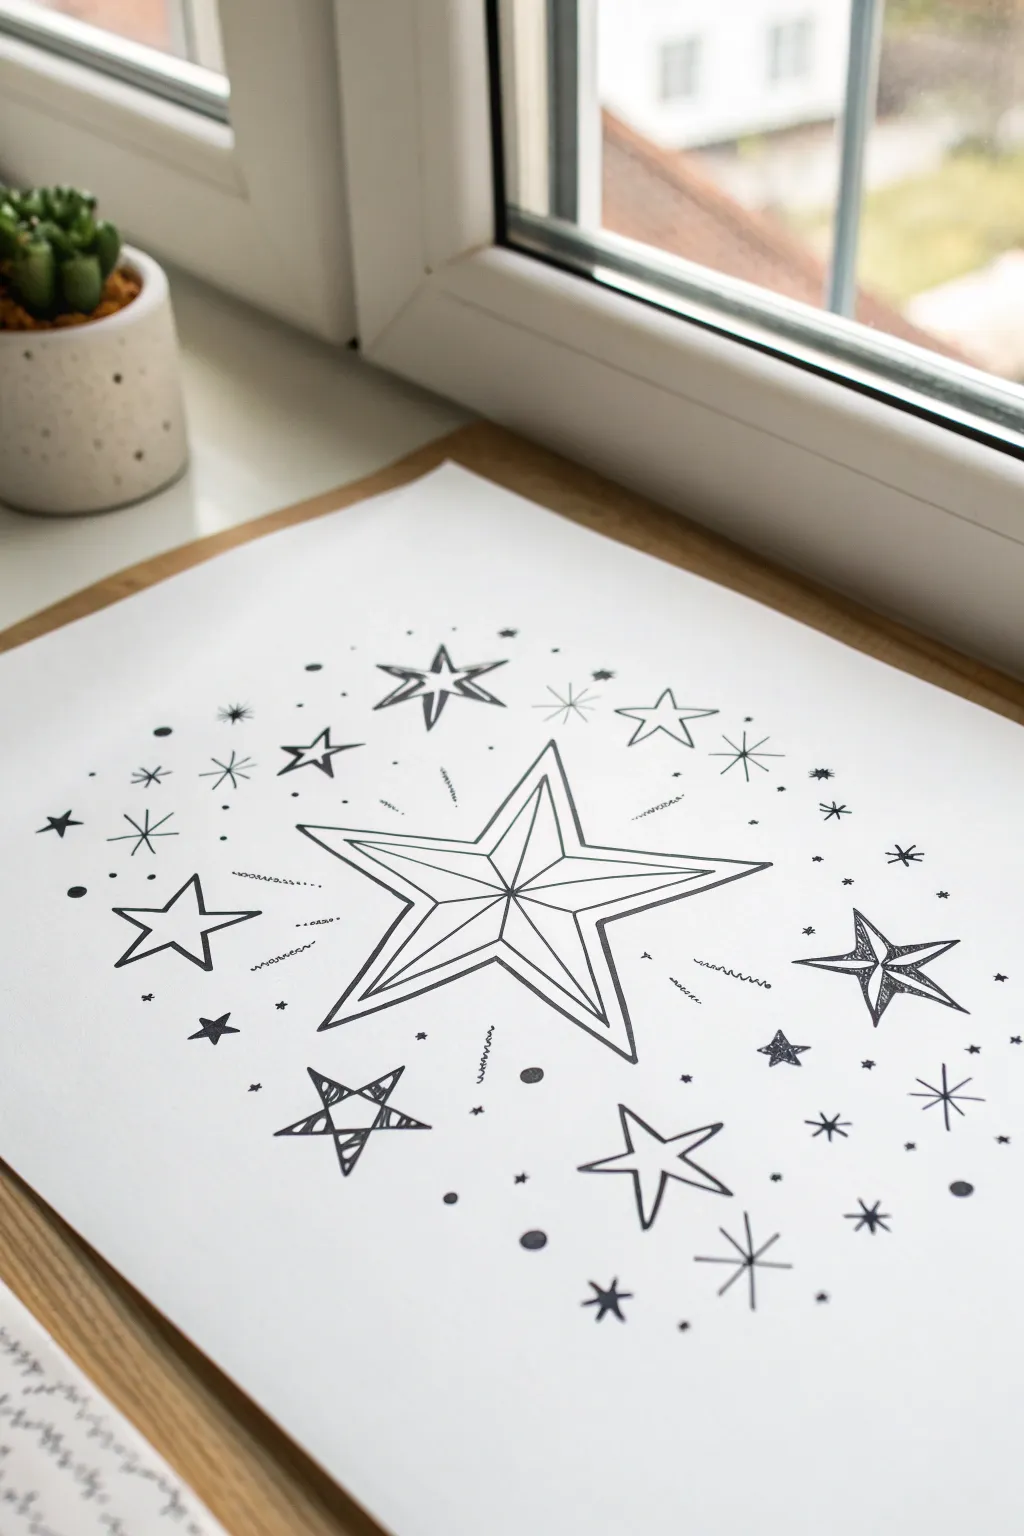
Create a whimsical galaxy of hand-drawn stars that radiate outward from a bold central focal point. This simple black-and-white ink drawing combines geometric shapes with playful doodles for a charming result that looks great on greeting cards or journal pages.
Step-by-Step Guide
Materials
- White cardstock or heavy drawing paper (A4 or letter size)
- Fine liner pen (0.5mm or 0.8mm for main lines)
- Ultra-fine liner pen (0.1mm or 0.3mm for details)
- Pencil (HB or 2H)
- Eraser
- Ruler (optional)
Step 1: Drafting the Constellation
-
Establish the center:
Begin by lightly sketching a large five-pointed star right in the middle of your page with a pencil. Make this star significantly larger than anything else, roughly 3-4 inches wide. -
Add dimension lines:
Inside your large star, lightly draw lines connecting the tip of each point to the center of the pentagon shape in the middle, creating a faceted gemstone look. -
Sketch the inner frame:
Draw a smaller duplicate star inside the main one, following the original outlines closely to create a double-line effect. -
Map out orbiting stars:
Around the central star, lightly sketch the positions of 6-7 medium-sized stars. Vary their styles—some can be classic five-pointed stars, others four-pointed ‘diamond’ stars. -
Place the smallest elements:
Mark spots for tiny fillers like dots, asterisks, and small circles to balance the composition, keeping them roughly within a circular or oval boundary around the center.
Step 2: Inking the Central Star
-
Outline the main shape:
Switch to your thicker fine liner (0.5mm or 0.8mm). Carefully trace the outer perimeter of the large central star. I find it helps to pull the pen toward you for straighter lines. -
Define the inner lines:
Ink the smaller inner star shape. Try to keep the gap between the outer and inner lines consistent. -
Create the faceted effect:
Draw straight lines from each of the five outer points inward to the very center of the star. -
Connect the valleys:
Now draw lines from the inner corners (the ‘valleys’ of the star) to that same central point. This completes the 3D crystal effect.
Star Shaping Tip
Draw five dots in a pentagon shape first. Connect every other dot with a straight line to form a perfect five-pointed star skeleton.
Step 3: Adding the Galaxy Details
-
Ink the medium stars:
Go over your surrounding pencil sketches. For variety, leave some stars purely as outlines, and fill others with simple patterns like stripes or solid black segments. -
Draw simple sparkle bursts:
Create several ‘burst’ stars by drawing a simple cross, then adding an ‘X’ through the middle to make an eight-pointed asterisk shape. -
Add four-pointed stars:
Draw a few stars that look like stretched diamonds—long vertical and horizontal points with curved sides connecting them. -
Incorporate playful scribbles:
Using the thinner pen (0.1mm or 0.3mm), draw tiny zig-zag or squiggle lines floating between the stars to suggest energy or movement. -
Scatter the dots:
Fill empty negative spaces with small solid black circles. Vary the sizes from tiny pinpricks to small peas. -
Add detail flourishes:
Draw tiny single lines radiating off some of the star points or circles to give them a glowing effect. -
Final clean up:
Wait at least 5-10 minutes for the ink to dry completely to avoid smudging. -
Erase guidelines:
Gently erase all remaining pencil marks, sweeping the eraser crumbs away carefully.
Ink Smudges?
If you smudge wet ink, turn the smudge into a ‘shooting star’ trail or cover it with a larger solid black star to hide the mistake.
Enjoy your sparkling constellation drawing and try experimenting with different star shapes next time


Simple Daisy Flowers
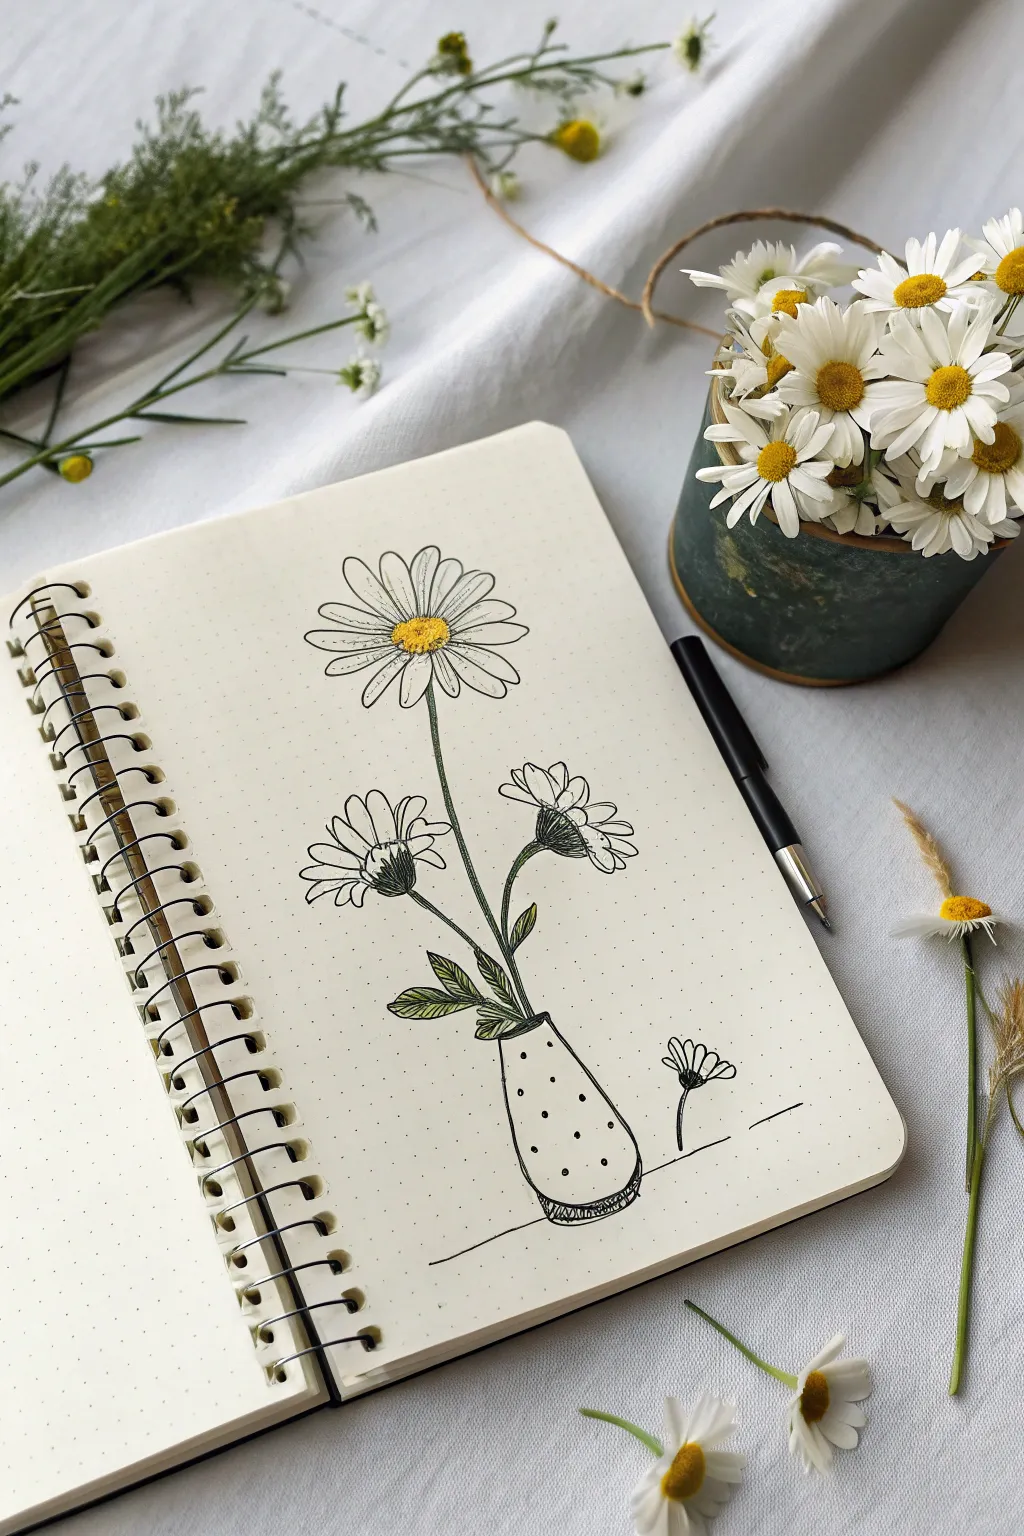
Capture the delicate charm of wildflowers with this simple pen and ink illustration. Using a minimalist line art style with splashes of soft color, you’ll create a lovely floral arrangement that pops right off the page.
Step-by-Step Tutorial
Materials
- Dot grid notebook or sketchbook
- Pencil (HB or lighter)
- Eraser
- Fine liner pen (black, 0.3mm or 0.5mm)
- Yellow colored pencil or marker
- Green colored pencil or marker
Step 1: Sketching the Composition
-
Draft the Vase:
Start near the bottom of your page. Lightly sketch a simple, rounded vase shape. It should look like an elongated teardrop with a flat bottom and a slightly narrower opening at the top. -
Position the Stems:
Draw three central lines extending upwards from the vase opening. Make the middle line the longest and straightest, while the two side lines should curve gently outward to the left and right. -
Outline the Flower Centers:
At the top of your central stem, draw a flattened oval for the main daisy’s center. For the two side flowers, draw cone-like shapes at the ends of the stems to represent flowers facing sideways. -
Sketch the Petals:
Lightly pencil in the petals. For the top flower, draw long, thin ovals radiating around the center. For the side flowers, draw petals that fan out only from the top edge of the cone shape, pointing away from the stem.
Ink Confidence
Don’t worry if your lines wobble! Wobbly lines actually make botanical sketches look more organic and natural than perfectly straight ruler lines.
Step 2: Inking the Lines
-
Ink the Central Flower:
Using your fine liner, trace over the central daisy. Outline the petals with slightly wavering lines to give them a natural, organic feel. Add small creases near the center of a few petals for texture. -
Texture the Center:
Fill the oval center of the main daisy with tiny stippled dots or small scribbles to create a fuzzy, pollen-like texture. -
Ink the Side Flowers:
Outline the petals of the two side flowers. Beneath the petals, draw the sepals (the green base of the flower) using short, jagged lines to suggest small leaves hugging the bloom. -
Draw the Stems:
Trace your stem lines. I find it helps to draw these with a confident, continuous stroke rather than short, sketchy marks to keep them smooth. -
Add Leaves:
Draw small, lance-shaped leaves attached to the lower parts of the stems. Add a central vein line to each leaf for detail. -
Ink the Vase:
Go over the vase outline. Add a small rim at the top opening and a slightly thicker, textured line at the base to ground the object. -
Create Vase Pattern:
Inside the vase outline, draw scattered small dots. This creates a simple ceramic texture or pattern without overwhelming the drawing. -
Add the Tiny Flower:
To the right of the vase, draw a tiny, solitary flower standing on a short stem. It’s a cute little detail that balances the composition. -
Ground the Drawing:
Draw a simple horizontal line underneath the vase and the tiny flower to represent the table surface.
Step 3: Adding Color & Finish
-
Erase Pencil Marks:
Once the ink is completely dry, gently erase all your preliminary pencil sketches to leave a clean black-and-white drawing. -
Color the Centers:
Use your yellow pencil or marker to fill in the center of the main daisy. Apply the color densely in the middle and lighter towards the edges. -
Color the Greenery:
Color the stems and leaves with green. Press lightly for a soft look, or layer the color to add shading on the undersides of the leaves. -
Shade the Side Flowers:
Add a touch of green to the base (sepals) of the two side-facing flowers, blending it slightly up into the bottom of the white petals. -
Final Touches:
Review your drawing. You might want to add a few more stipple dots to the flower centers or darken the line work on the vase base for extra contrast.
Creative Spark
Try changing the vase pattern! Instead of dots, draw tiny hearts, horizontal stripes, or a grid pattern to match your journal’s aesthetic.
Now you have a charming botanical sketch ready to decorate your journal spread


Tiny Cat Face Icons
Fill your bullet journal or sketchbook with these irresistibly cute and minimalistic cat doodles. Using just a few simple shapes and a splash of color, you can create a repetitive pattern of expressive feline faces that add charm to any page.
Step-by-Step Guide
Materials
- Dotted grid notebook or heavy sketchbook paper
- Fine liner pen (black, 0.3mm or 0.5mm)
- Red or pink fine felt-tip marker or colored pencil
- Pencil and eraser (optional for sketching)
Step 1: Planning the Layout
-
Set your spacing:
Using the dot grid of your notebook as a guide, plan for two columns of cat faces. Leave about 3-4 dot spaces between each vertical face so they don’t look cramped. -
Visualize the shapes:
Imagine a slightly flattened circle or a soft oval for each head. You can sketch these lightly in pencil first if you want perfect placement.
Step 2: Drawing the Outlines
-
Start the head curve:
For your first cat, draw a U-shape for the bottom of the face. Keep the bottom fairly flat and the sides curved upwards. -
Add the ears:
At the top of your U-shape, draw two triangles. Instead of closing the top of the head with a straight line, let the ears connect directly to the side curves. -
Close the gap:
Draw a slight curve connecting the inner points of the ears. Don’t worry if it’s broken or imperfect; we will place a bow there later. -
Repeat for the row:
Continue down the column, drawing just the head shapes for all ten cats. Vary the ear sizes slightly to give them individual character.
Uneven Eyes?
If your eyes turn out lopsided, turn the mistake into a wink! Just add a small chevron shape > or a curved line to the wonky eye to make it look intentionally closed.
Step 3: Adding Facial Features
-
Draw the bows:
On most cats, draw a small bow tie shape right at the top of the head, between the ears. For variety, you can place some slightly off-center. -
Inking the bows:
Fill in the bows with your red or pink marker right away so you don’t accidentally draw line work through them later. I find this helps anchor the face’s composition. -
Create sleepy eyes:
For a calm look, draw two small semi-circles curving downwards (like U-shapes) for closed eyes on some cats. -
Create open eyes:
On other cats, draw two solid black dots for eager, wide-open eyes. Try drawing one cat with large circles and smaller pupils for a ‘dazed’ look. -
Add the nose and mouth:
Place a tiny triangle or dot for the nose in the center. connect a small ‘w’ shape or two curved lines coming down from the nose to form the mouth. -
Whiskers are key:
Draw two short, quick strokes on each cheek for whiskers. Keep them light and flick the pen outward.
Level Up: Calico & Tabby
Add patches of orange or grey marker over one ear or eye to create different breeds. Add three stripes on the forehead for a tabby cat look.
Step 4: Variations and Details
-
Mix up expressions:
Look at the example image: make one cat wink by drawing one dot eye and one line eye (`> .`). experiment with circle eyes with small dots inside for a surprised expression. -
Pattern play:
Leave one or two cats without a bow if you prefer, or draw the bow slightly larger on a few for emphasis. -
Texture the bows:
Instead of a solid fill, try hatching or small dots inside the red bows to add a bit of texture. -
Refine lines:
Go back over any lines that look too thin or broken. Stronger outlines on the jawline can make the stickers pop more. -
Erase pencil marks:
Once the ink is completely dry—give it a full minute—gently erase any underlying pencil sketches to clean up the page.
Now you have a whole clowder of cute cats ready to decorate your weekly spread

PENCIL GUIDE
Understanding Pencil Grades from H to B
From first sketch to finished drawing — learn pencil grades, line control, and shading techniques.
Explore the Full Guide
Round Bunny With Long Ears
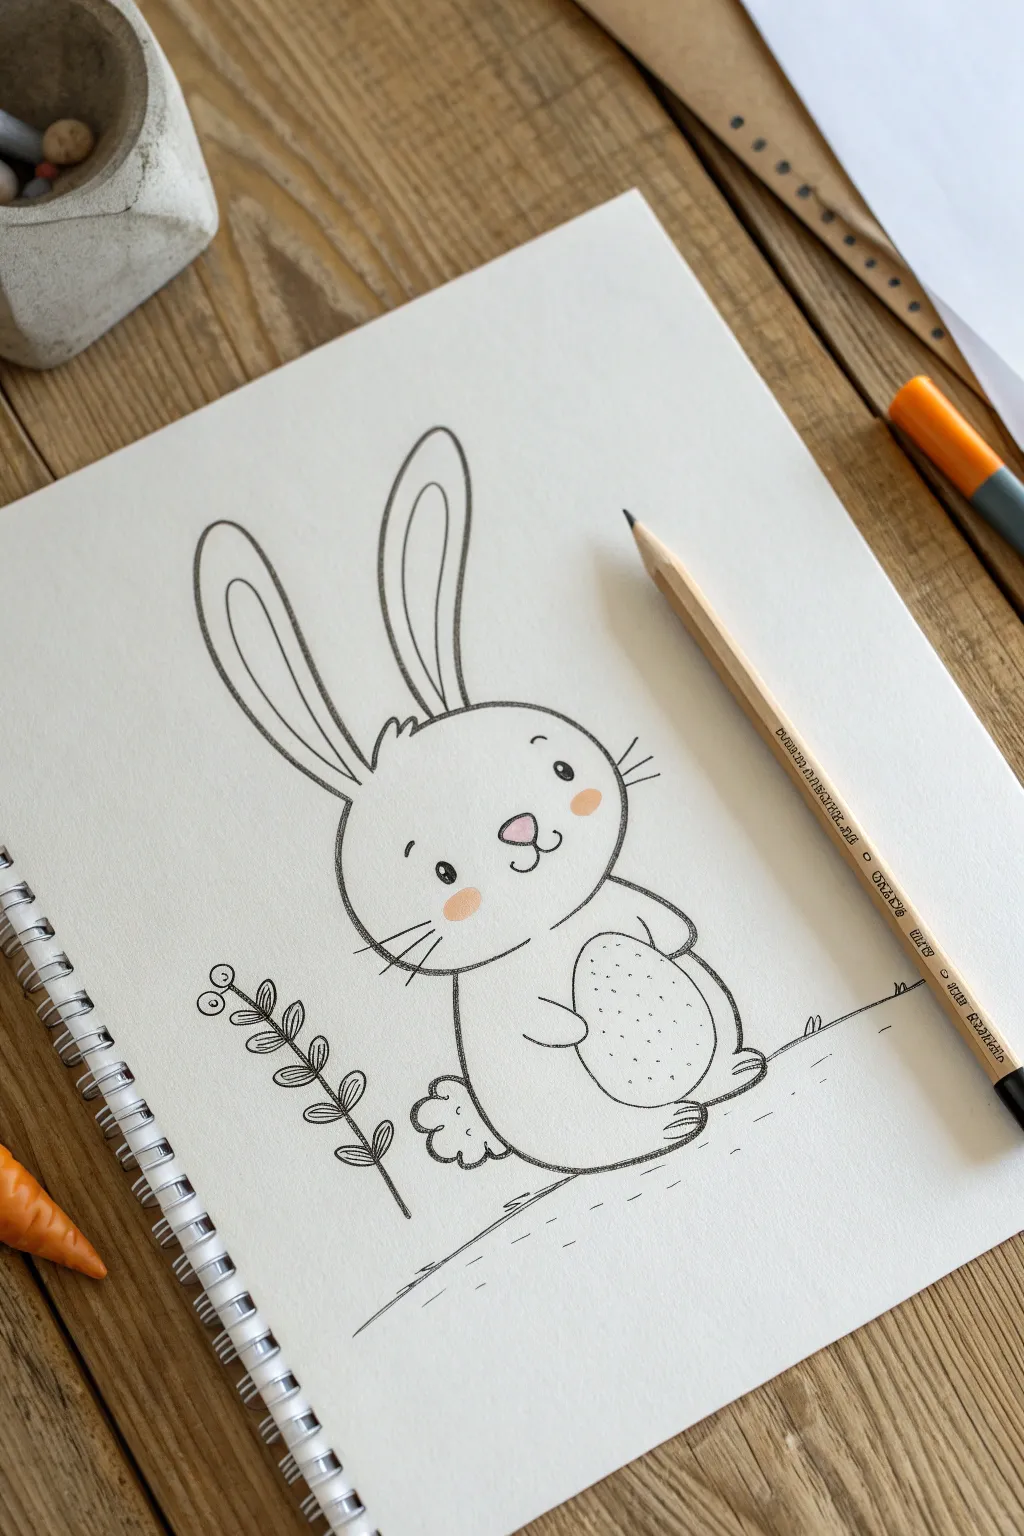
This adorable illustration features a soft, rounded bunny clutching an egg, brought to life with simple pencil strokes and gentle touches of pastel color. It’s a perfect beginner-friendly project that combines cartoonish charm with clean linework.
Step-by-Step Tutorial
Materials
- Sketchbook or drawing paper (heavyweight preferred)
- Graphite pencil (HB or 2B)
- Fine-tip black drawing pen or dark graphite pencil for outlines
- Pink colored pencil or pastel
- Orange or cream colored pencil
- Eraser
Step 1: Sketching the Basic Shapes
-
Map out the head:
Start by lightly drawing a large, perfect circle in the center of your page. This will be the bunny’s head, but slightly flatten the bottom where it meets the body. -
Add the body shape:
Directly beneath the head, sketch a rounded, bean-like shape for the body. It should be slightly wider at the bottom to give the bunny a seated, chubby appearance. -
Draw the ear outlines:
Extend two long, tall loops upwards from the top of the head. Make them slightly narrower at the base and wider towards the top before rounding them off. -
Position the egg:
Sketch an oval shape resting against the bunny’s lower belly area. This will become the egg the bunny is holding.
Step 2: Adding Details and Features
-
Refine the ears:
Draw smaller, matching loop shapes inside each ear to create the inner ear structure. -
Create the face:
Place two small dots wide apart for the eyes. In between and slightly lower, draw a tiny upside-down triangle for the nose. -
Complete the mouth:
From the bottom point of the nose triangle, draw two small curves outward—like a sideways ‘3’—to form the smile. -
Add cheeks and whiskers:
Sketch two or three short, straight lines sticking out from each cheek area for whiskers. Lightly mark circles for the rosy cheeks. -
Add hair tuft:
Draw three small, jagged zig-zag lines at the very top of the head between the ears to represent a tuft of fur. -
Sketch the arms:
Draw small, curved lines extending from the body to hug the egg. The paws should look like simple rounded nubbins overlapping the egg slightly.
Uneven Circles?
If you struggle drawing perfect circles for the head or body, try tracing around a small cup or using a compass, then soften the line with freehand strokes.
Step 3: Lower Body and Scenery
-
Draw the feet:
At the base of the body, draw two long oval shapes sticking out to the sides for feet. Add three small lines on each to indicate toes. -
Fluff the tail:
On the lower left side of the body, sketch a cloud-like shape with three or four bumps to create a fluffy cotton tail. -
Detail the egg:
Add tiny speckles or dots all over the egg inside the oval shape to give it texture. -
Add the botanical element:
To the left of the bunny, draw a tall, thin vertical line. Add small oval leaves in pairs climbing up the stem. -
Ground the drawing:
Sketch a faint horizontal line beneath the bunny to show the ground, adding tiny vertical strokes for grass blades.
Seasonal Twist
Turn this into a holiday card by modifying what the bunny holds! Swap the egg for a heart, a carrot, or a gift box for different occasions.
Step 4: Inking and Coloring
-
Darken the outline:
Using a sharpened darker pencil or a fine-tip pen, go over your main pencil lines. I prefer to use short, sketchy strokes rather than one continuous line to keep that hand-drawn feel. -
Color the nose and cheeks:
Take your pink pencil and gently fill in the nose. Then, create soft circles on the cheeks using a circular motion. -
Shade the inner ears:
Lightly shade the inner loops of the ears with a very pale pink or cream color. -
Clean up:
Once your darker lines are set, carefully erase the initial light sketch marks to leave a clean, crisp illustration.
You now have a charming little drawing perfect for a greeting card or sketchbook page
Chubby Bear in a Sweater
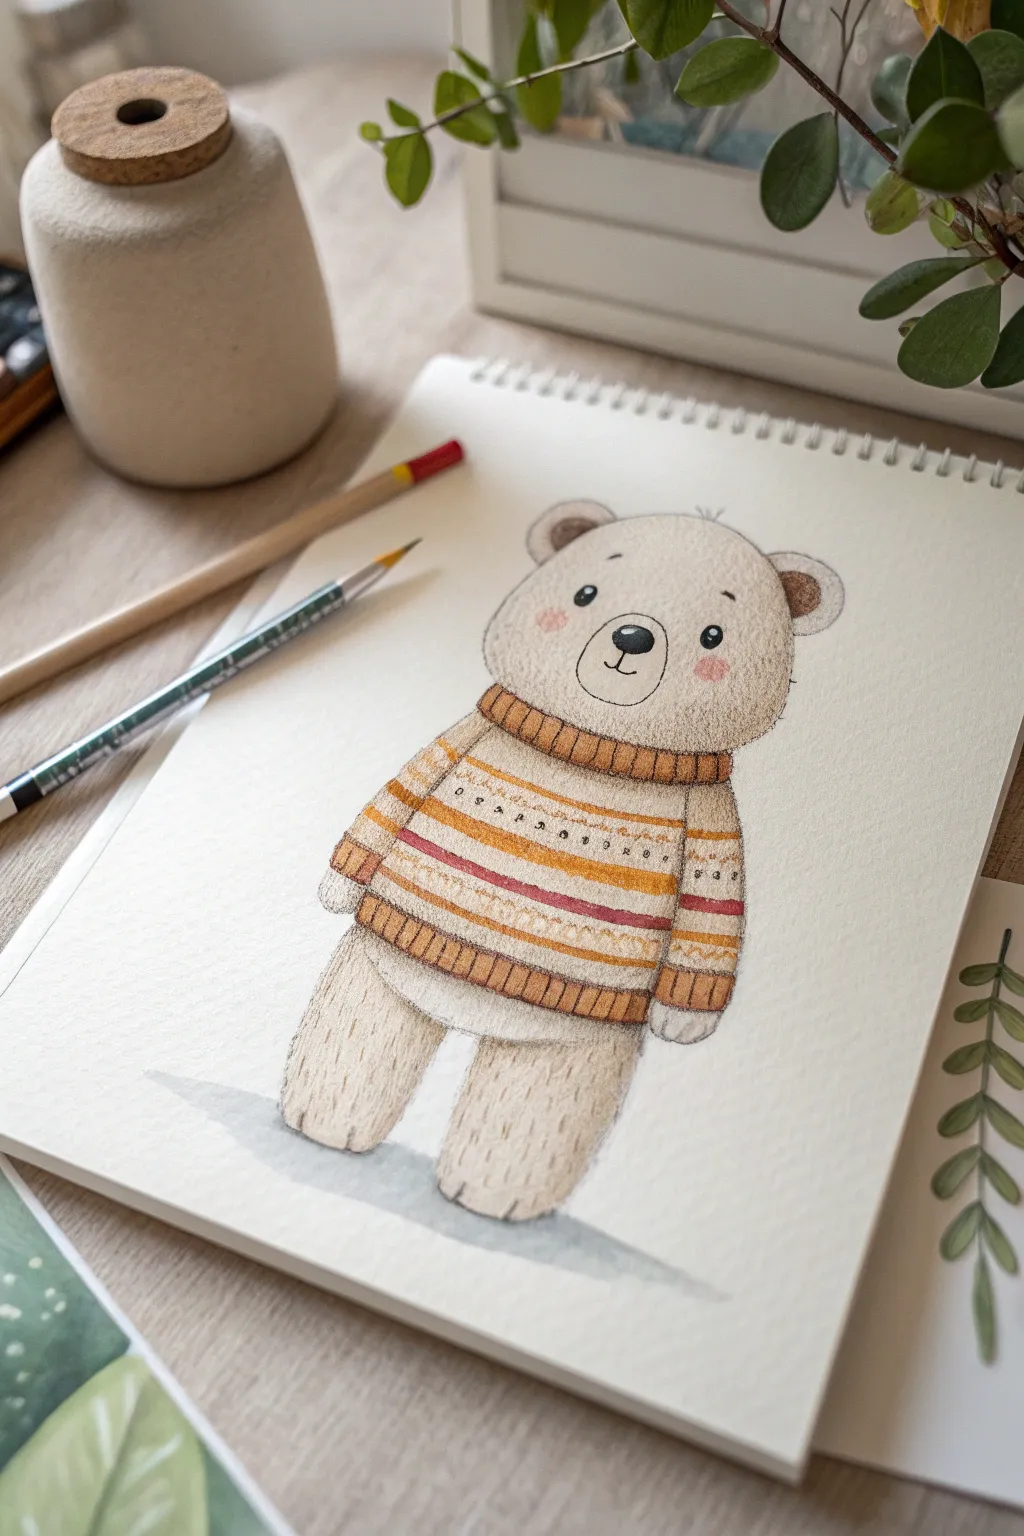
Capture the warmth of a chilly day with this adorable illustration of a soft, chubby bear tucked into a knit sweater. Using colored pencils and fine liners, you’ll build up soft textures to create a huggable character that feels like it popped out of a storybook.
How-To Guide
Materials
- Smooth heavyweight drawing paper or sketchbook
- HB or F graphite pencil for underdrawing
- Kneadable eraser
- Fine liner pen (0.1 or 0.3mm, black or dark grey)
- Colored pencils (Warm beige, light brown, mustard yellow, rusty orange, dark red)
- White gel pen (optional)
- Small blending stump (optional)
Step 1: Drafting the Bear’s Shape
-
Outline the head:
Start with a light, large oval for the head. It shouldn’t be perfectly round; flatten the top slightly and let the cheeks puff out a bit wider at the bottom. -
Add the body mass:
Draw the body shape directly under the head. Imagine a slightly squashed pear shape—wider at the hips and slightly narrower where it meets the head. -
Position the ears:
Sketch two small, rounded semi-circles on the top corners of the head. Place them wide apart to give the bear a sweet, docile expression. -
Draft the legs:
Draw two sturdy, pillar-like legs at the bottom. The paws should be simple rounded stumps, slightly angled inward to look pigeon-toed and cute. -
Mark the sweater lines:
Lightly draw curved lines across the neck and torso to define where the sweater collar and hem will sit. The sweater should look snug but thick.
Fur Texture Trick
Don’t outline the bear with a continuous distinct line. Instead, use tiny, flicking pencil strokes outward to create a fuzzy edge that looks huggably soft.
Step 2: Drawing the Sweater Details
-
Define the collar:
Draw the thick ribbed collar around the neck. Use short vertical lines within the collar band to suggest the ribbing texture. -
Map out the pattern:
Divide the sweater body into horizontal stripes. Alternating wide and narrow bands works best for this retro knit look. -
Add sleeve cuffs:
Draw the cuffs at the end of the short arms, matching the ribbed style of the collar. -
Stitch details:
Inside the stripes, lightly sketch decorative patterns. I usually do simple dashes, tiny ‘x’ shapes, or zig-zags to mimic knitting stitches.
Step 3: Bringing it to Life with Color
-
Base fur layer:
Take your warm beige pencil and gently shade the bear’s head, paws, and legs. Keep the pressure very light to preserve the paper’s texture. -
Add fur texture:
Sharpen the beige pencil and add tiny, short strokes over the shaded areas, following the curve of the body. This creates a fluffy, hairy look. -
Color the sweater base:
Choose a creamy off-white or very pale yellow for the main body of the sweater, coloring lightly between your patterned stripes. -
Fill the stripes:
Use your mustard yellow and rusty orange pencils to fill in the horizontal bands. Press harder here to make the sweater colors pop against the pale fur. -
Deepen the accents:
Use a dark red or maroon pencil for the thinnest stripes to add contrast. Go over the ribbing on the collar and cuffs with the mustard tone.
Seasonal Switch-Up
Change the sweater palette! Try cool blues and silvers for a winter theme, or bright greens and reds for a festive holiday version of your bear.
Step 4: Final Definition
-
Draw the face features:
With a black fine liner or very sharp dark charcoal pencil, draw two small, wide-set eyes and a soft oval nose. Add a small ‘anchor’ shape below the nose for the mouth. -
Add rosy cheeks:
Take a pink or light red pencil and gently swirl two circles on the cheeks. Soften the edges with your finger or a blending stump so it looks like a natural flush. -
Refine the outlines:
Go over your main pencil lines with the fine liner or a sharpened dark brown pencil. Use a broken, sketchy line for the fur to keep it looking soft, not rigid. -
Shadows and grounding:
Add a light grey wash or pencil shading underneath the bear’s feet so he isn’t floating. A simple oval shadow grounds the character effectively. -
Ear details:
Darken the inside of the ears with a medium brown pencil to give them depth. -
Highlights:
If you have a white gel pen, add a tiny dot to the eyes and the nose to make them look wet and shiny.
Now you have a charming little bear friend ready to brighten up any page or greeting card
BRUSH GUIDE
The Right Brush for Every Stroke
From clean lines to bold texture — master brush choice, stroke control, and essential techniques.
Explore the Full Guide
Puppy With Floppy Ears
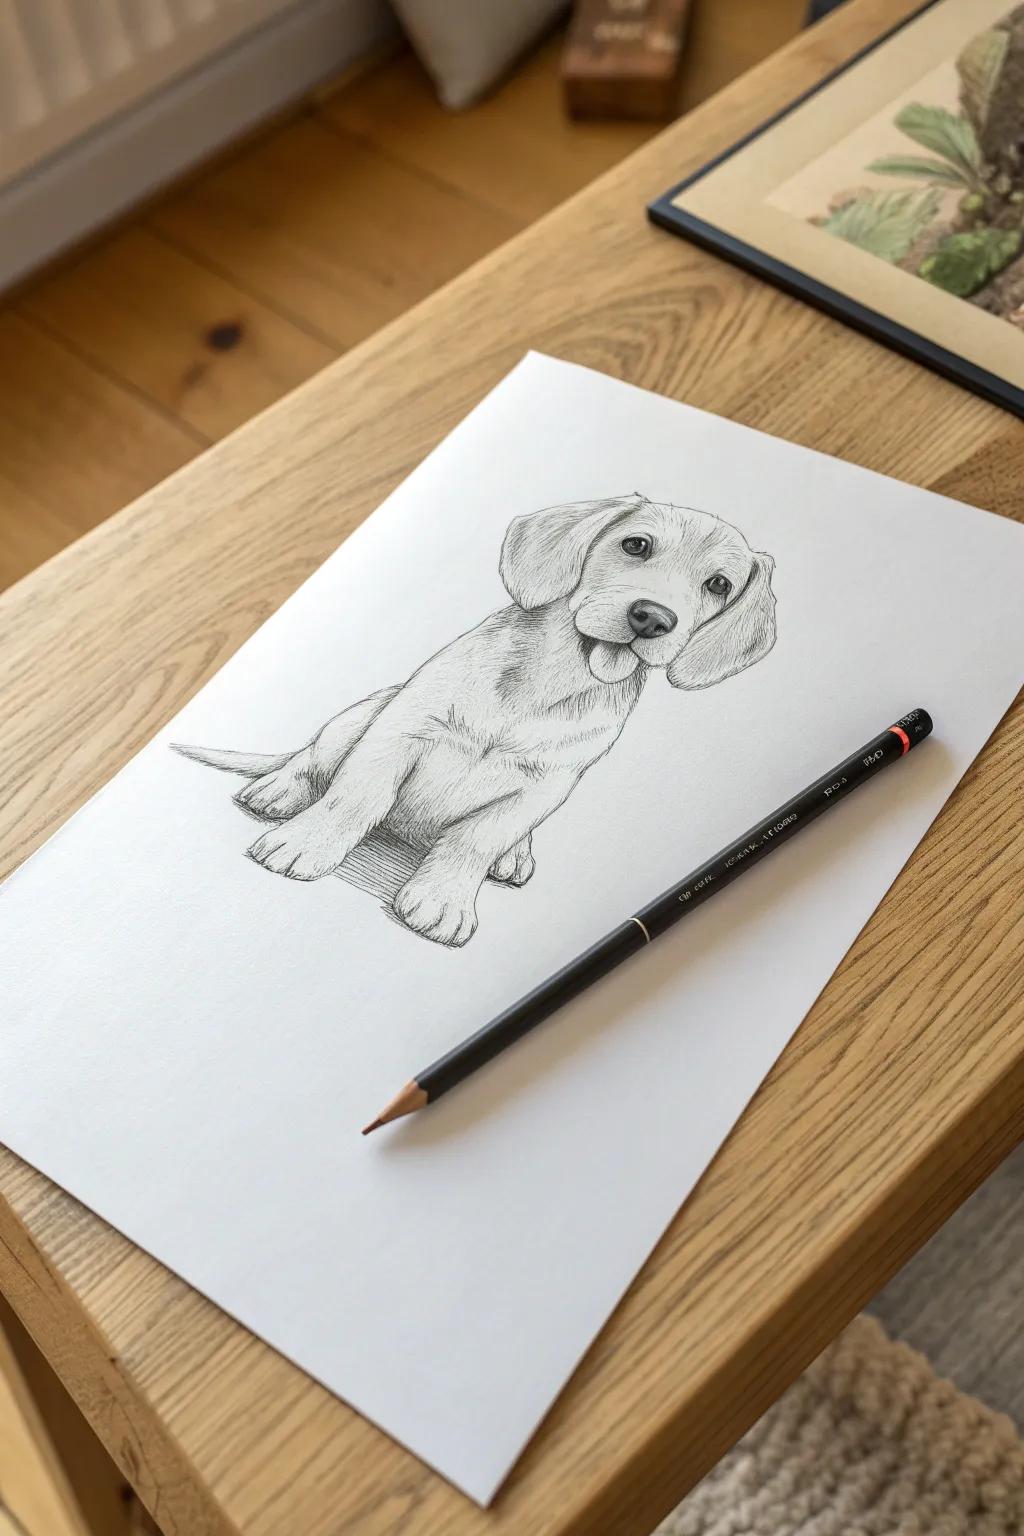
Capture the irresistible charm of a sitting puppy with this simple yet detailed pencil sketch. You’ll learn how to build the form from basic shapes and add texture to create soft, fluffy fur.
Step-by-Step
Materials
- White drawing paper (smooth or slightly textured)
- HB graphite pencil (for initial sketching)
- 2B or 4B graphite pencil (for shading and details)
- Eraser (kneaded eraser preferred)
- Pencil sharpener
Step 1: Laying the Framework
-
Head and muzzle:
Begin by drawing a soft, rounded circle for the puppy’s head near the top center of your page. Just below the center of this circle, add a smaller horizontal oval to define the muzzle area. -
Body guide:
Sketch a larger, bean-like oval extending downwards from the head circle to represent the puppy’s chest and belly. Keep this line light, as the puppy is sitting at a slight angle. -
Leg placements:
Draw two vertical lines coming down from the chest for the front legs, ending in small outward curves for the paws. For the visible back leg, sketch a curved line swooping out from the lower hip area. -
Floppy ears:
Attach two large, teardrop shapes to the sides of the head. Let them hang low and curve slightly inward to frame the face, giving that classic floppy-eared look. -
Tail sketch:
Add a small, pointed triangle shape peeking out from behind the puppy’s left hindquarter to indicate a wagging tail.
Uneven Eyes?
If the eyes look mismatched, draw a light horizontal guideline across the face before placing them. Ensure the distance from the center line to each eye is equal.
Step 2: Building the Features
-
Defining the eyes:
Place two circles inside the head, spacing them evenly above the muzzle. Draw a small highlight circle inside each pupil before filling them in with your darker pencil, leaving the highlight white. -
Nose and mouth:
Draw a rounded triangle for the nose at the top of the muzzle oval. Add a small vertical line dropping down to the mouth, and sketch a ‘U’ shape for the open tongue hanging out. -
Refining the face:
Darken the outline of the head, but instead of a solid line, use short, quick strokes to suggest fur texture. Define the chin area just below the tongue.
Make It Yours
Customize your puppy by adding spots! Use light, circular shading patches over one eye or on the back to turn this into a Dalmatian or Beagle mix.
Step 3: Adding Texture and Detail
-
Fur technique:
Switch to your softer drawing pencil (like a 2B). Start adding fur texture by using short, directional hatching lines. Follow the curve of the body—fur on the chest flows downward, while fur on the ears flows down and out. -
Shadowing the ears:
Darken the underside of the ears where they meet the neck to create depth. Use denser hatching here to show that the ear creates a shadow on the fur below. -
Paw details:
Define the individual toes on the paws using short curved lines. Add a little shading where the paws touch the ground to ground the figure. -
Chest shading:
Add light shading to the chest area and the belly. I find that leaving the center of the chest slightly lighter helps create a sense of rounded volume. -
Deepening contrasts:
Go back over the darkest areas: the nose (leaving a tiny highlight), the inside of the mouth around the tongue, and the pupils. This high contrast makes the drawing pop. -
Ground shadow:
Horizontal hatching lines right underneath the puppy’s bottom and paws create a cast shadow, anchoring your drawing to a surface. -
Final touches:
Review your drawing for any harsh outlines. Soften them with your eraser or add more fur strokes over them so the puppy looks touchably soft rather than rigid.
Now you have an adorable puppy sketch ready to frame or share with friends
Smiling Cloud and Tiny Raindrops
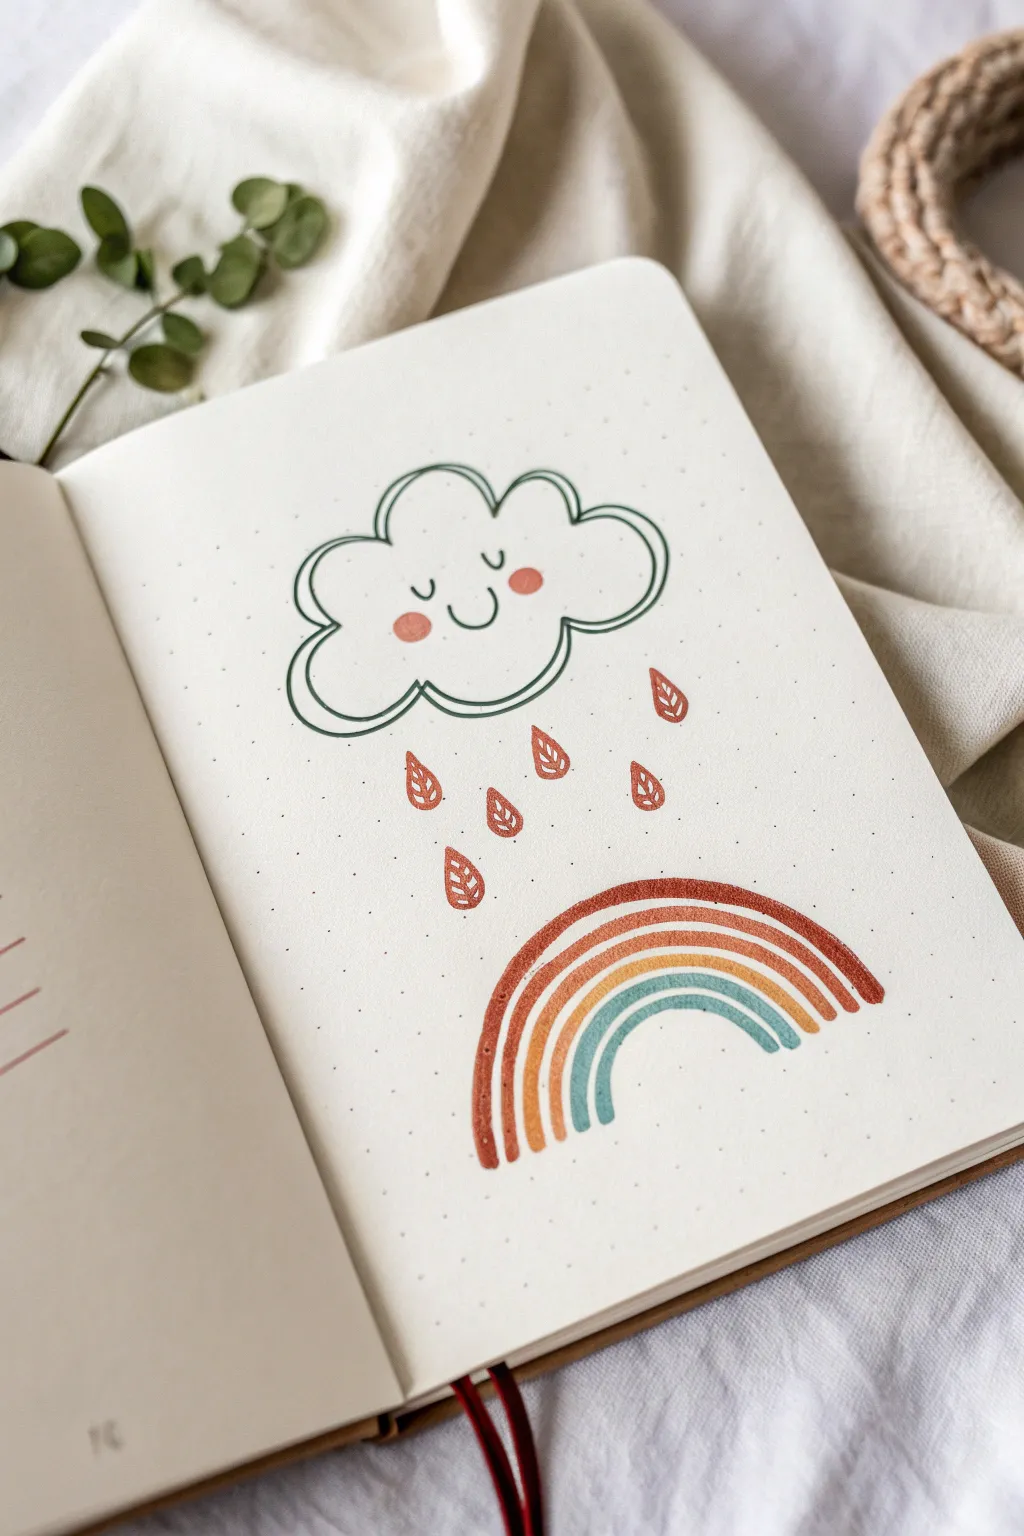
Brighten up your journal page with this charming combination of a happy cloud and earthy-toned rainbow. The clean lines and muted palette create a cozy, autumnal vibe perfect for tracking weather or simply filling empty space.
Step-by-Step Tutorial
Materials
- Dotted bullet journal or sketchbook
- Fine liner pen (black or dark green, 0.3mm or 0.5mm)
- Dual brush pens or markers (muted orange, terracotta, mustard yellow, teal)
- Pencil and eraser for sketching
Step 1: Planning the Layout
-
Light Sketching:
Begin by lightly sketching the outline of your cloud shape in the upper third of your page using a pencil. -
Centering the Elements:
Sketch a gentle arch shape below the cloud to mark where your rainbow will sit, ensuring there is enough vertical space between them for the raindrops. -
Marking Raindrops:
Lightly mark five or six positions for the falling raindrops, staggering them naturally rather than placing them in rigid rows.
Step 2: Drawing the Cloud
-
Inking the Outline:
Using a dark green or black fine liner, trace over your pencil cloud sketch. Instead of one continuous line, try double-lining slightly offset sections to give it a relaxed, hand-drawn feel. -
Adding the Face:
In the center of the cloud, draw two small, closed semi-circles for sleeping eyes. -
Creating the Smile:
Add a small ‘u’ shape between and slightly below the eyes for a sweet smile. -
Rosy Cheeks:
Using a muted terracotta or pink marker, add two small circular dots on either side of the smile for blush.
Steady Hand Trick
Rest the heel of your hand on a separate piece of scrap paper while drawing the rainbow arches. This reduces friction and prevents smudging.
Step 3: Adding the Rain
-
Leaf Drop Shape:
Instead of traditional teardrops, draw small leaf shapes for the rain using a terracotta marker. Make them pointed at the top and rounded at the bottom. -
Adding Veins:
Once the marker ink is dry, use a white gel pen or a very fine dark liner to draw a tiny vertical line or leaf vein inside each drop. -
Varying Angles:
Tilt a few of the drops slightly to the left or right so they look like they are fluttering down.
Make It Sparkle
Add tiny sparkle stars or dots around the cloud using a gold gel pen to give the weather theme a magical, dreamy quality.
Step 4: Creating the Rainbow
-
First Arch:
Start the rainbow with the outermost arch using a deep terracotta or rust-colored marker. Draw this slowly to keep the curve smooth. -
Second Arch:
Nestle a mustard yellow arch directly underneath the first one, leaving a tiny sliver of white space between them if you want distinct definition. -
Third Arch:
Draw the third arch using a muted teal color. I usually try to make this one slightly thicker for visual balance. -
Inner Details:
Using your fine liner, you can add a simple line following the curve inside the yellow band for extra texture. -
Drying Time:
Let the marker ink settle for a minute so the colors don’t bleed into the paper grain. -
Erasing Guides:
Gently erase any remaining pencil marks from your initial sketch, being careful not to smudge the marker ink.
Now you have a cozy weather scene ready to decorate your weekly spread


Sun and Moon Best Friends
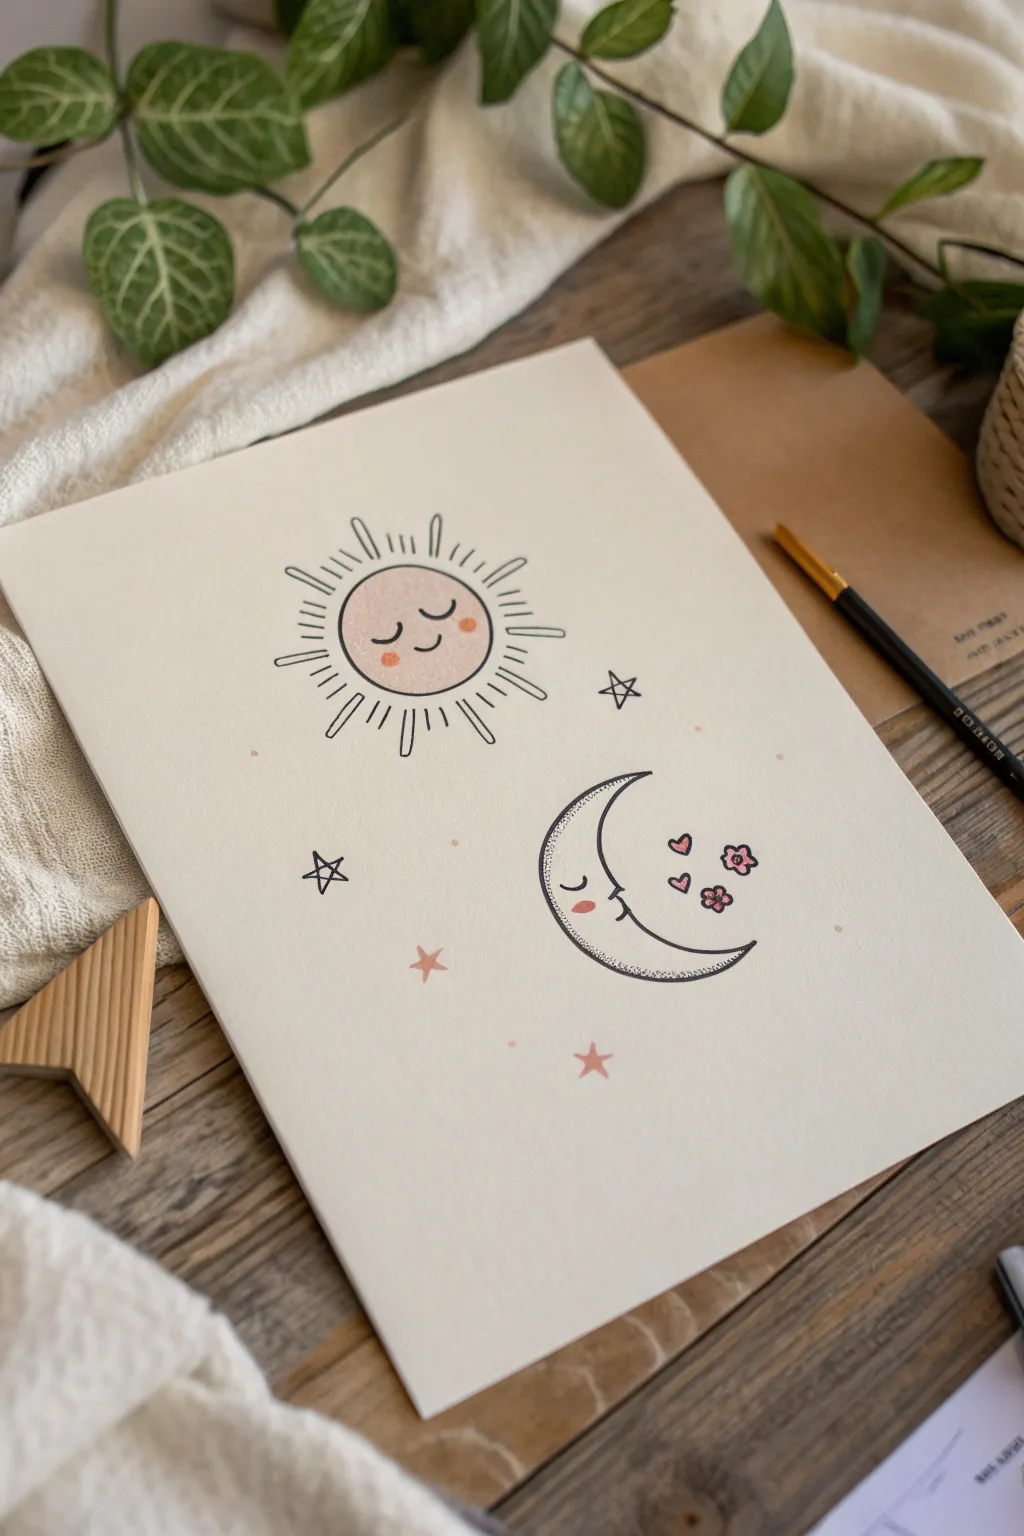
Capture the sweetness of the sky with this charming illustration featuring a smiling sun and a gentle crescent moon. This minimalist project uses clean black lines and soft pastel accents on cream paper to create a heartwarming, decorative piece.
How-To Guide
Materials
- Cream or off-white textured cardstock/drawing paper (A4 size)
- Fine liner pen (Black, Archival Ink, 0.3mm or 0.5mm)
- Soft pink colored pencil or pastel chalk
- Pencil (HB for sketching)
- Eraser (kneadable preferred)
- Small blending stump or cotton swab (optional)
- Drafting compass or a circular object to trace (approx. 2-3 inch diameter)
Step 1: Setting the Sky
-
Position your paper:
Place your cream cardstock vertically on a flat surface. Imagine the page divided into upper-left and lower-right quadrants to balance the composition. -
Draft the sun:
In the upper-left area, use a compass or trace a circular object to lightly draw a perfect circle with your pencil. This will form the face of the sun. -
Draft the moon:
In the lower-right area, lightly sketch a ‘C’ shape. Make the outer curve smooth and deep, tapering the top and bottom points to create a classic crescent moon shape. -
Add the sun’s rays layout:
Still using your pencil, sketch faint guidelines radiating outward from the sun’s circle. You want these to be somewhat random in length to give it a relaxed, hand-drawn feel later.
Step 2: Detailing the Faces
-
Sketch the sun’s face:
Inside the sun circle, draw two U-shaped curves near the bottom center for closed, sleeping eyes. Add a small smile directly beneath them. -
Sketch the moon’s face:
Near the inner curve of the crescent, draw a single closed eye with lashes. Add a tiny nose bump on the profile edge and a small smile. -
Ink the sun outline:
Take your black fine liner and carefully trace over the sun’s main circle. Keep your pressure even for a consistent line weight. -
Ink the sun’s rays:
Draw the rays over your pencil guides. Instead of simple straight lines, draw long, narrow, open-ended rectangles or ‘U’ shapes radiating out. Vary their lengths—some short, some long—for a playful look. -
Ink the moon:
Trace the crescent moon shape. I find it helps to rotate the paper to keep the curve natural with your hand’s movement. -
Ink facial features:
Go over the eyes and mouths on both figures. Add three small lashes to each of the sun’s closed eyes for extra cuteness.
Keeping It Gentle
For the softest look, dull the tip of your pink pencil on scrap paper before coloring. A sharp point can leave harsh scratch marks.
Step 3: Adding Charm & Color
-
Add floating elements:
Around the moon, use the fine liner to draw small floating hearts and a few tiny flowers. Near the sun and in open spaces, draw simple five-point stars. -
Erase guidelines:
Wait at least 5-10 minutes for the ink to dry completely. Gently erase all visible pencil marks with your kneadable eraser. -
Color the sun:
Using a soft pink colored pencil, very lightly shade the entire interior of the sun’s face. Keep the pressure minimal so the cream paper texture shows through. -
Add rosy cheeks:
Press slightly harder with the pink pencil to create two small circular blushes on the sun’s cheeks and one on the moon’s cheek. -
Color the accents:
Fill in the small floating hearts and the center of the flowers with the same pink tone. -
Create background stars:
Draw tiny solid pink stars scattered in the background to tie the two figures together. -
Texturize the moon:
Instead of coloring the moon solid, use your black pen to add stippling (tiny dots) just along the bottom inner edge of the crescent to create depth and shadow.
Smudged Ink?
If you smudge the black ink while outlining, turn the mistake into a whimsical cloud or a small star cluster to hide it seamlessly.
Now you have a sweet piece of celestial art ready to frame or gift to a best friend
Cozy Mug With a Face

This charming little project captures the warmth of a daily coffee ritual in a simple, minimalist style. Using rough-edged textured paper adds a lovely rustic feel to the clean lines and sweet expression of the mug.
How-To Guide
Materials
- Handmade or textured watercolor paper (deckle edge preferred)
- Black fineliner (05 or 08 size)
- Black fineliner (01 or 02 size for details)
- Brown marker or watercolor paint
- Pink colored pencil or pastel
- Pencil
- Eraser
Step 1: Sketching the Shape
-
Draw the rim:
Begin by sketching a flattened oval shape near the center of your paper. This ellipse will form the opening of your mug. Keep it relatively narrow to show perspective. -
Form the body:
Drop two vertical lines down from the widest points of your oval. Curve the bottom line slightly to connect them, mirroring the curve of the front bottom edge of your oval rim. -
Add the handle:
On the right side of the mug, sketch a ‘C’ shape. Add a smaller ‘C’ inside it to create the thickness of the handle. -
Sketch the steam:
Draw two wavy, intertwining lines rising from the center of the cup. They should curve gracefully upward and to the left. -
Map the face:
Lightly mark where the eyes and mouth will go. The eyes should be closed curves with lashes, positioned somewhat low on the mug for a cute effect.
Paper Choice Matters
To get the look in the photo, rip the edges of thick watercolor paper instead of cutting. It creates a soft, deckled edge vibe.
Step 2: Inking the Outline
-
Trace the main lines:
Using your thicker black fineliner (05 or 08), carefully go over your pencil lines for the mug’s body and handle. Use a confident, steady stroke. -
Define the rim:
Ink the oval rim. Note how the back line of the oval stops where the steam rises, giving the illusion that the steam is in front. -
Ink the steam:
Switch to a slightly thinner pen if you have one, or use a lighter touch, to trace the wavy steam lines. Keep them fluid. -
Add floating elements:
Draw a small heart floating to the right of the steam. Add a few tiny ‘plus’ signs (+) and dots around the steam to represent sparkles or warmth.
Make it a Set
Draw a matching teabag, a cookie, or a croissant next to the mug using the same simple line-art style.
Step 3: Adding Personality
-
Draw the face:
With your fineliner, draw two downward-curving arcs for the closed eyes. Add three small lashes to each eye. -
Create the smile:
Draw a small, simple ‘u’ shape between the eyes for a content little smile. I like to make slightly thicker dots at the ends of the smile for cuteness. -
Add movement lines:
Beneath the mug, draw a few curved, broken lines that mimic the bottom curve of the cup. This grounds the drawing and makes it look like it’s sitting on a saucer or table. -
Erase guidelines:
Once the ink is completely dry (give it a minute!), gently erase all your pencil sketches.
Step 4: Bringing it to Life
-
Fill the coffee:
Use a brown marker or a touch of brown watercolor to fill in the oval opening of the mug. Leave a tiny sliver of white near the back rim to suggest a reflection. -
Color the heart:
Gently fill in the floating heart with a soft pink or muted red color. It doesn’t need to be perfectly solid; a sketchy fill looks nice here. -
Add rosy cheeks:
Take a pink colored pencil or pastel and lightly draw small circles or ovals just below the eyes. -
Final touches:
If needed, reinforce the outer line of the mug bottom to make it slightly bolder than the rest, giving it a bit of visual weight.
Now you have a cozy piece of art perfect for a journal or a greeting card
Cute Mushroom Duo
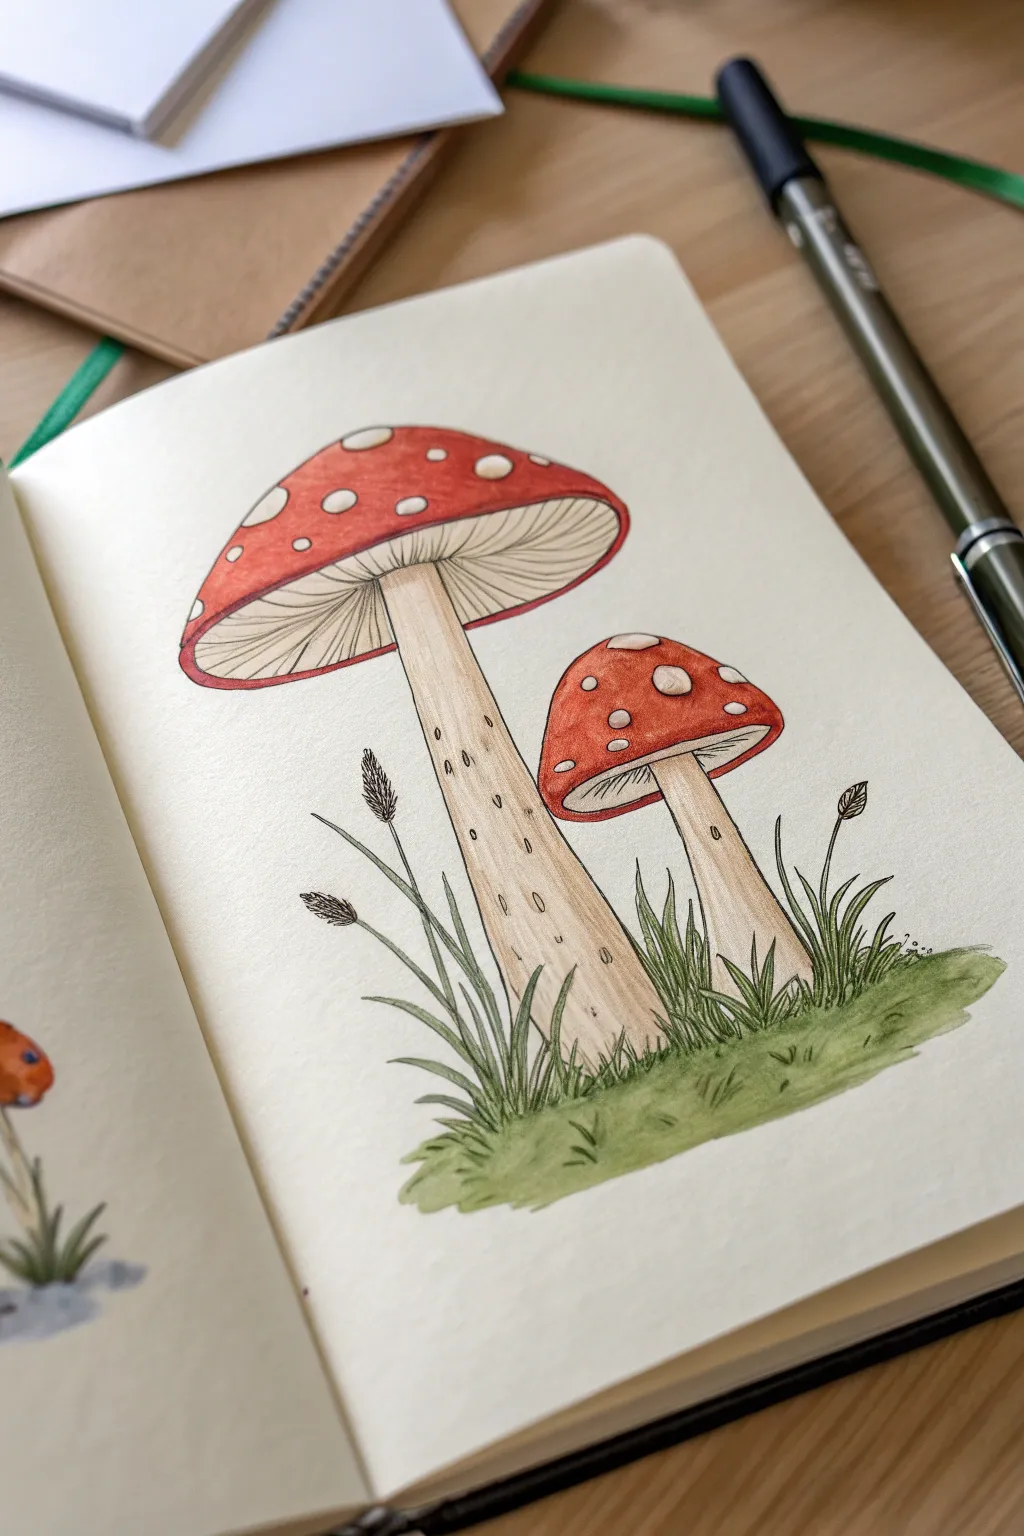
Capture the charm of the forest floor with this delightful illustration featuring two red-capped mushrooms standing tall in grassy tufts. Using simple line work and warm earth tones, you’ll create a cozy botanical sketch perfect for journaling or greeting cards.
Detailed Instructions
Materials
- Smooth sketchbook paper or mixed media paper
- Fine liner pen (black, 0.3mm or 0.5mm)
- Pencil (HB) and eraser
- Alcohol markers or watercolor brush pens (Red, Beige/Sand, Olive Green)
- White gel pen (optional for highlights)
Step 1: Sketching the Shapes
-
Draft the stems:
Begin lightly with your pencil. Draw a long, slightly curved stem on the left side, wider at the base and tapering slightly towards the top. To its right, draw a shorter, stouter stem for the companion mushroom. -
Add the caps:
Sketch a large, semi-circular dome on top of the tall stem. For the smaller mushroom, draw a more rounded, bulbous cap that cups downwards slightly more than the large one. -
Define the gills:
Underneath the large cap, draw a curved line connecting the outer edges of the cap back to the stem, creating an elliptical opening. Repeat this for the smaller mushroom, making the opening narrower. -
Map the spots:
Lightly sketch irregular circles and ovals across the top surface of both caps. Make them vary in size to look organic, avoiding perfect uniformity. -
Ground the scene:
Draw faint lines at the base of the stems to indicate where the grass tufts will go, adding a few tall, thin blades reaching upward.
Uneven Ink Flow?
If your fineliner skips over marker ink, wait for the color to dry completely first. Wax-based pencils can also clog pens; wipe the nib on scrap paper to fix it.
Step 2: Inking the Lines
-
Outline the caps:
Switch to your black fine liner. Trace the outer shape of the mushroom caps with a confident, continuous line. -
Ink the spots:
Carefully outline the circles on the caps. Keep your hand steady; these spots will remain white, so close the shapes cleanly. -
Detail the gills:
Inside the underside of the caps, draw fine lines radiating from the stem outward to the cap’s edge. These should be delicate and close together to mimic mushroom gills. -
Draw the stems:
Ink the outlines of the stems. Add tiny, vertical dash marks and small oval markings scattered sparsely on the stems to give them a textured, natural appearance. -
Create the foliage:
Ink the grass blades with quick, upward flicking motions. Draw a few taller stems with seed heads—small, textured ovals—to add variety to the greenery. -
Erase pencil marks:
Once the ink is completely dry—give it a minute or two—gently erase all your underlying pencil sketches.
Step 3: Adding Color
-
Color the caps:
Take your red marker and fill in the caps, carefully working around the white spots you outlined. I find it helpful to outline the spots with the marker tip first, then fill the rest. -
Shade the stems:
Use a beige or sandy-colored marker to color the stems. To create volume, layer the ink slightly darker along the left and right edges, leaving the center a bit lighter. -
Paint the grass:
Use an olive green marker for the grass. Use short, upward strokes for the individual blades, and a horizontal wash for the ground beneath them. -
Add depth to the ground:
Go back over the base of the grass with a second layer of green to create a shadow where the stems meet the earth. -
Refine the details:
If your markers have blended too much, re-trace any lost black lines with your fine liner. You can also use a white gel pen to clean up any red ink that bled into the white spots.
Add a Magical Glow
Use a white gel pen to add tiny dots or ‘sparkles’ in the air around the mushrooms to give the illustration a magical, fairy-tale atmosphere.
Now you have a charming woodland scene preserved right in your sketchbook
Frog With Big Happy Eyes
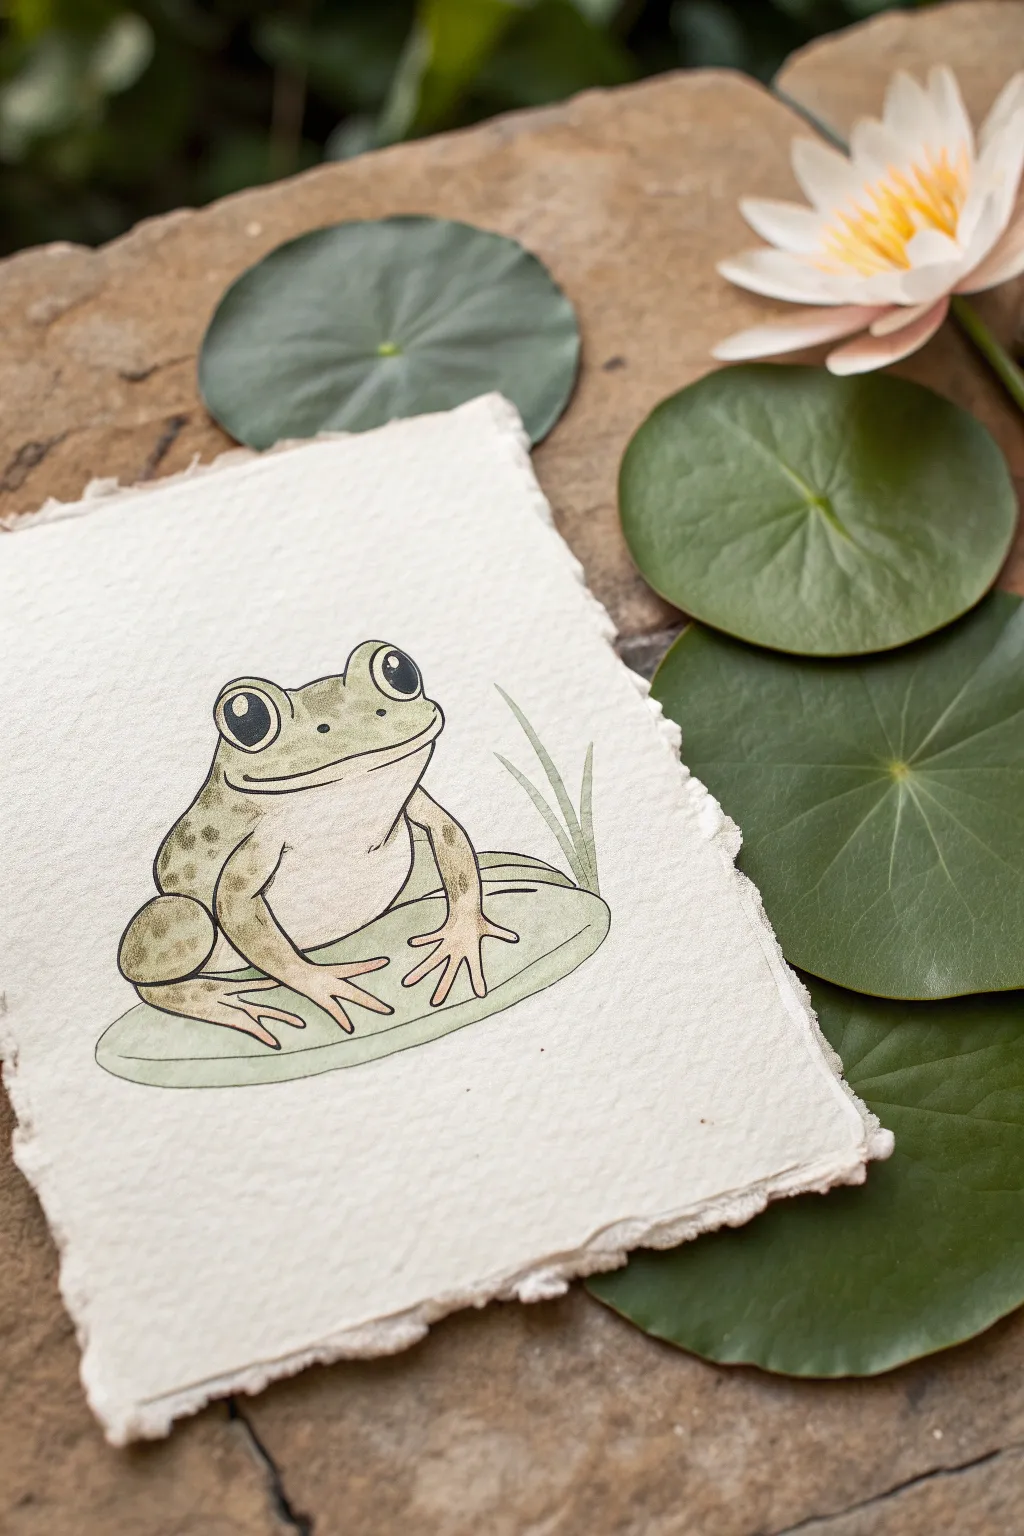
Capture the charm of pond life with this delightful illustration featuring a wide-eyed frog resting on a lily pad. Using soft watercolor washes and crisp ink lines on textured deckle-edge paper creates a professional yet approachable look.
Step-by-Step Guide
Materials
- Heavyweight deckle-edge watercolor paper (cold press)
- Waterproof fine liner pen (01 and 03 sizes)
- Watercolor paints (Olive Green, Sap Green, Yellow Ochre, Burnt Sienna, Payne’s Gray)
- Round watercolor brushes (size 2 and 4)
- Pencil (HB) and kneaded eraser
- Water cup and paper towel
Step 1: Sketching the Outline
-
Position the body:
Start lightly with your pencil in the center of the paper. Draw a wide, slightly flattened oval for the frog’s main body, tilting it slightly to the right. -
Add the head shape:
On top of the body oval, sketch a rounded triangular shape for the head. Smooth out the connection points so the head flows naturally into the body. -
Draw the eyes:
Place two large circles near the top of the head for the eyes. These should be prominent—they are the key to the ‘cute’ look. Make the left one slightly larger to show perspective. -
Sketch the legs:
Draw the front legs extending down from the chest, ending in spread toes. For the back legs, draw large curved humps on either side of the body, with the feet tucked underneath. -
Create the setting:
Underneath the frog, draw a simple, large oval to represent the lily pad. Add two or three thin, tapered blades of grass rising from behind the pad on the right side.
Natural Paper Texture
Using cold-press paper allows the paint to settle into the tiny grooves. Don’t overwork the paint; let the paper’s texture show through for an organic feel.
Step 2: Inking the details
-
Outline the frog:
Using the 03 fine liner, carefully trace your pencil lines. Give the mouth a wide, gentle curve upwards to create a smile. -
Fill the eyes:
Draw smaller circles inside the eyes for highlights, then color the rest of the pupil solid black with your pen. This gives the frog a bright, lively expression. -
Add texture details:
Switch to a thinner 01 pen. Add small, scattered ovals on the frog’s back and legs to represent spots. Refine the toes to make them look grippy. -
Clean up:
Allow the ink to dry completely to avoid smudging. Gently erase all visible pencil marks with the kneaded eraser.
Make It 3D
Once fully dry, use a white gel pen to add tiny ‘wet’ highlights on top of the green skin, specifically on the knees and the top of the nose.
Step 3: Watercolor Washes
-
Base coat for the frog:
Mix a diluted wash of Olive Green and a touch of Yellow Ochre. Using the size 4 brush, paint the entire body of the frog, leaving the belly area lighter or unpainted for now. -
Painting the belly:
For the chest and belly, I like to use a very watery mix of Burnt Sienna or a pale cream color to distinguish it from the green skin. -
Layering the spots:
Once the base green is dry involved, take a slightly more concentrated Sap Green or Olive Green and dab it over the ink spots on the back and legs to deepen their color. -
Coloring the lily pad:
Mix a cooler green, perhaps adding a tiny bit of Payne’s Gray to your green mix. Paint the lily pad surface, keeping the wash fairly flat. -
Shading for dimension:
While the lily pad is still slightly damp, add a darker line of green paint right underneath the frog’s body to create a grounded shadow. -
Finishing the grass:
Use a fresh Sap Green mix for the blades of grass in the background. Start from the base and flick the brush upward for a natural tapered tip.
Display your charming amphibian friend on a small easel or frame it to bring a touch of nature indoors
Baby Whale With Water Spout
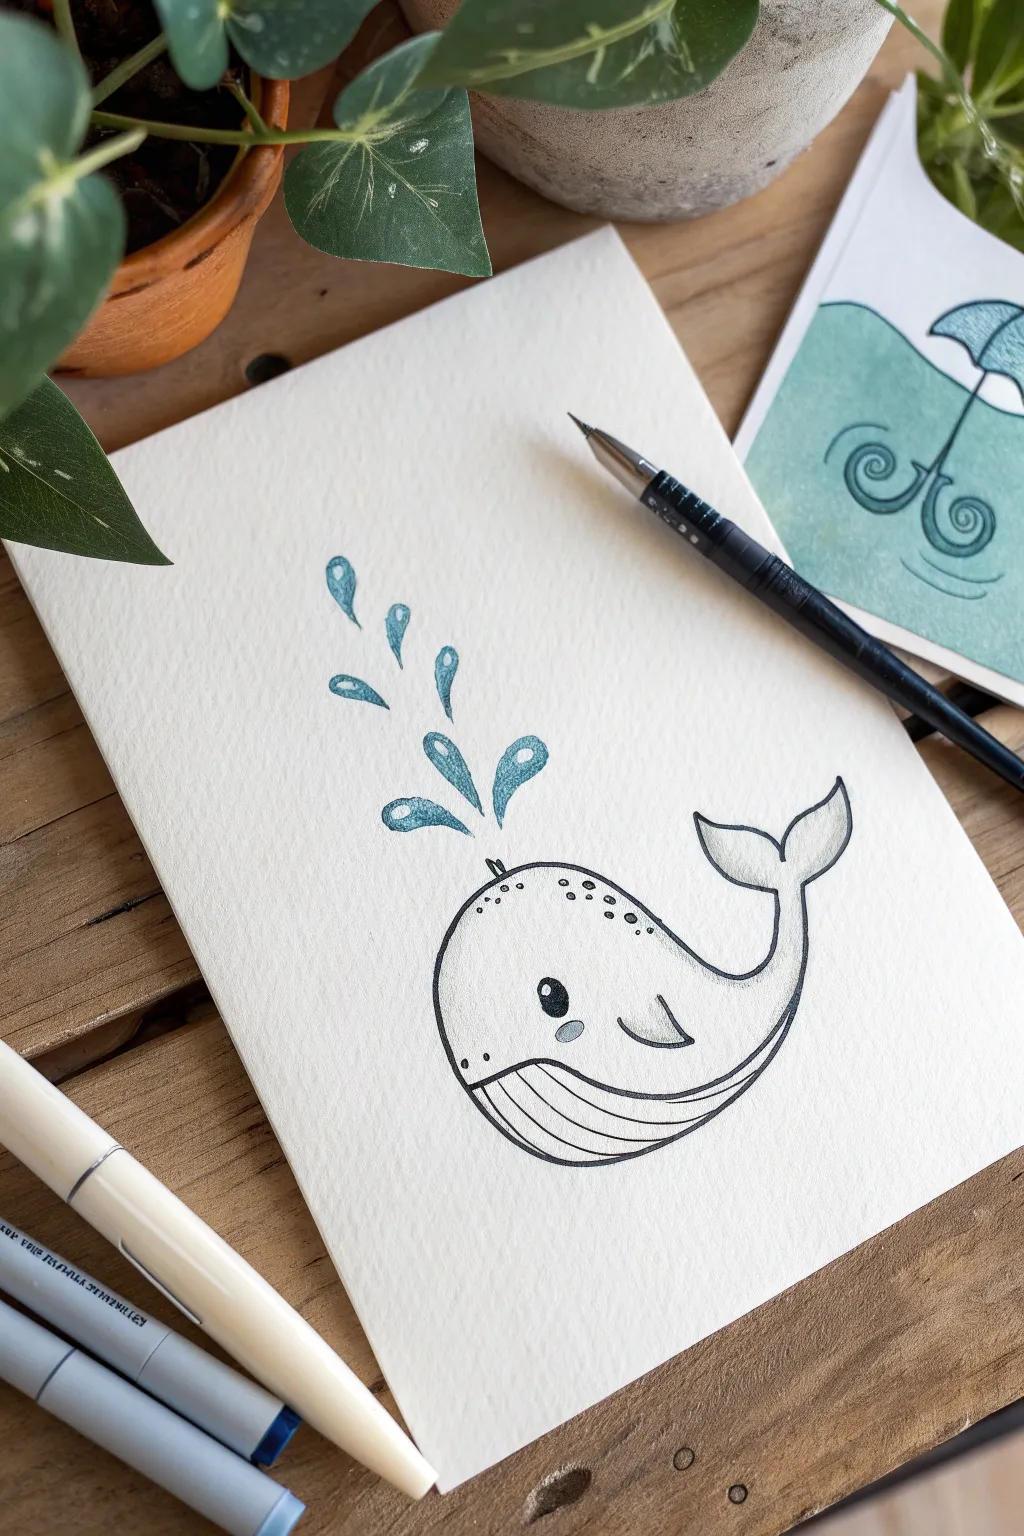
Create a splash with this adorable baby whale illustration that combines clean ink lines with soft watercolor accents. The minimalist style makes this perfect for greeting cards or a simple sketchbook exercise.
Detailed Instructions
Materials
- Textured watercolor paper or heavy cardstock
- Fine liner pen (Black, waterproof, 0.3mm or 0.5mm)
- Pencil and eraser
- Light teal or blue drawing ink (or watercolor paint)
- Small round brush (if using paint)
- White gel pen (optional for highlights)
Step 1: Drafting the Shape
-
Draw the main body:
Start by sketching a large, rounded teardrop shape lying on its side. The roundest part will be the whale’s head on the left, tapering up slightly towards the tail on the right. -
Add the tail flukes:
At the tapered end, draw two curved triangular shapes branching out to form the tail. Make them look like soft leaves pointing slightly upward. -
Define the belly:
Draw a curved line starting from the bottom jaw area and swooping back towards the tail. This separates the smooth upper body from the pleated underbelly.
Ink Confidence
Don’t connect every single line perfectly. Leaving tiny gaps in the water droplets or tail outline can make the drawing feel more organic and less rigid.
Step 2: Inking the Outline
-
Trace the silhouette:
Using your black fine liner, carefully trace over your pencil lines for the main body and tail. Keep your hand steady for a clean, continuous look. -
Draw the fin:
Add a small, curved triangular fin on the side of the body, just above the belly line. It should point backwards towards the tail. -
Add the belly grooves:
Inside the bottom section used for the belly, draw three or four curved lines that follow the contour of the whale’s body. These represent the throat grooves.
Step 3: Adding Details
-
Create the face:
Draw a large, solid black circle for the eye, leaving a tiny white dot in the upper corner for a highlight. Add a small oval blush mark just below it. -
Texture the back:
Along the top curve of the whale’s back, add a few tiny dots and speckles. This gives the skin a little texture without cluttering the drawing. -
Draw the spout base:
Right at the top of the head, draw a tiny curved line or aperture where the water will sprout from. -
Erase pencil lines:
Once the ink is completely dry—I usually wait about two minutes just to be safe—gently erase all underlying pencil sketches.
Make it Yours
Instead of blue water, try rainbow colors for the spout droplets, or add tiny fish swimming alongside the whale for company.
Step 4: Applying Color
-
Outline the droplets:
Using your teal ink pen or a very fine brush, draw five or six teardrop shapes floating above the head. Vary their sizes, making the ones closest to the head smaller. -
Color the droplets:
Fill in the droplets with your teal color. Notice how the example employs a ‘negative space’ highlight—leave a tiny white sliver on the left side of each drop uncolored for a shiny effect. -
Shade the belly:
Add a very faint wash of grey or diluted black ink to the lower belly area to give the whale some dimension. -
Tint the tail:
Similarly, add a very light touch of grey to the tail flukes, keeping the coloring soft and subtle. -
Color the cheek:
Use a very light grey or pale pink to fill in the small oval cheek mark you drew earlier.
Your little whale is now ready to swim off the page
Tiny Dinosaur Side Profile
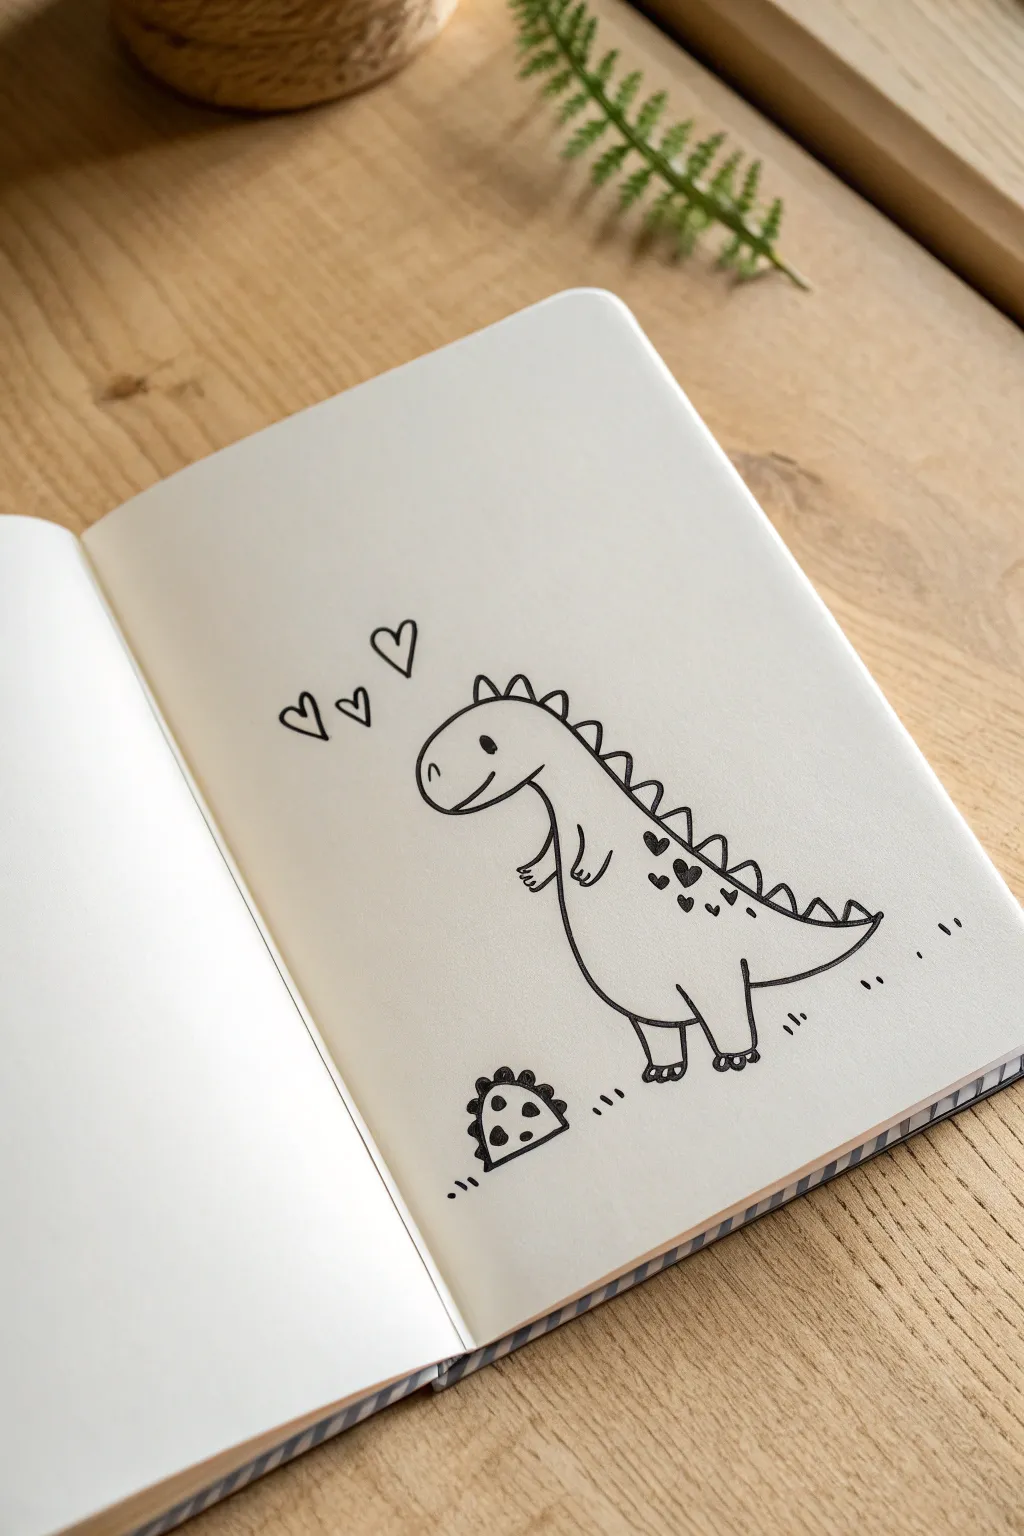
Capture the charm of prehistoric times with this adorable, minimalist dinosaur sketch. The clean lines and heart accents make it a sweet addition to any notebook margin or greeting card.
Step-by-Step
Materials
- Fine-point black fineliner pen (0.3mm or 0.5mm)
- Clean sheet of white paper or bullet journal
- Pencil (optional for sketching)
- Eraser
Step 1: Shaping the Head
-
Draw the Snout:
Begin near the upper middle of your page. Draw a rounded ‘U’ shape on its side, curving slightly upward, to form the dinosaur’s nose and upper jaw. -
Form the Head:
Continue the line from the top of the nose, curving it up and over to create a smooth, domed head shape. -
Add Facial Features:
Place a small, solid black dot for the eye near the top curve of the snout. Just below the nose tip, sketch a tiny, faint curved line for a nostril. -
Create the Smile:
Draw a gentle, upward-curving line extending from the bottom of the snout to create a happy smile.
Wobbly Lines?
If your lines aren’t perfectly smooth, don’t worry. Go over them once more with a slightly thicker line weight to hide jitters, or embrace the ‘sketchy’ look as a style choice.
Step 2: Body and Limbs
-
Extend the Neck and Back:
From the back of the head, draw a long, sloping line downwards that gradually curves up at the end to form the top of the tail. -
Draw the Throat:
Starting from under the jaw, draw a short vertical line curving inward for the neck. -
Front Arms:
Sketch two tiny, stubby arms coming from the chest area. Use simple ‘U’ shapes and add two tiny tick marks on each for claws. -
Belly Line:
Continue the line from under the arms, curving it deeply downwards to create a round belly, stopping where the legs will begin. -
Add Legs:
Draw two chunky, rectangular legs extending from the bottom of the belly. Keep the lines soft and slightly curved. -
Toes:
At the bottom of each foot, draw three tiny semi-circles to represent toes. -
Finish the Tail:
Connect the back of the legs to the tip of the tail with a sweeping upward curve, completing the body outline.
Make it Pop
Use colored pencils to give the dino a soft green or blue tint, but keep the hearts blushing pink to maintain the cute factor.
Step 3: Spikes and Details
-
Spine Spikes:
Starting at the top of the head, draw a series of small, connected triangles running all the way down the back to the tail tip. I find it helps to make them slightly smaller as you reach the tail. -
Heart Spots:
Instead of regular spots, draw three small hearts clustered on the dinosaur’s back and hip area. Fill two of them in with solid black and leave one outlined or dotted. -
Floating Hearts:
Draw three simple open heart shapes floating above the dinosaur’s snout to show some love. -
Grounding Lines:
Add a few disconnected, short dashed lines near the feet and behind the tail to suggest the ground.
Step 4: The Tiny Companion
-
Draw the Shape:
In the bottom left, slightly in front of the dinosaur, draw a small semi-circle shape resting on the ground dashes. -
Add Ridges:
Draw tiny bumps or scallops along the curved top edge of this semi-circle. -
Decorate:
Fill the inside of this small shape with three or four solid black polka dots.
Now you have a charming little prehistoric friend ready to brighten up your page
Boxy Robot With Big Eyes

This charming little robot is a perfect beginner drawing project, combining simple geometric shapes with expressive details. With its prominent boxy head, hopeful antenna, and that sweet heart on its chest, it’s full of personality and easy to sketch.
Step-by-Step Guide
Materials
- Sketchbook or drawing paper
- Pencil (HB or 2B)
- Eraser
- Fine liner pen (black, roughly 0.3mm to 0.5mm)
- Thicker marker or brush pen (black)
- Red or pink marker/colored pencil
Step 1: Constructing the Head
-
Draw the main box shape:
Start by lightly sketching a slightly 3-dimensional cube for the head. Draw a square for the face, then add the side panel by drawing shorter diagonal lines extending back from the left corners, connecting them with a vertical line. -
Add the big eyes:
Inside the face square, draw two large circles. Position them slightly apart but centered. Inside each, draw a smaller circle for the pupil, leaving a tiny white dot for a highlight to make them look shiny. -
Draw the mouth and cheeks:
Place a small, gentle upward curve between the eyes for a smile. On either cheek, draw a small circle to represent blushes or bolts. -
Add the antenna:
On top of the head, draw a small horizontal rectangle as a base. Extend a thin line upward from it, then branch it into a ‘Y’ shape with small circles at the tips. -
Detail the ear:
On the side panel of the head, draw a small oval shape to look like an ear piece or auditory sensor.
Uneven Lines?
Don’t stress straight lines! A slightly wobbly line adds a hand-drawn charm. If a shape looks weird, just thicken the outline to correct it.
Step 2: Building the Body
-
Connect the neck:
Draw a thin, flat horizontal rectangle just below the head to form a neck joint. -
Draw the torso:
Sketch a vertical rectangle for the body, slightly narrower than the head. Give it a bit of depth by adding a side panel on the left, matching the perspective of the head. -
Add the heart:
Right in the center of the chest panel, draw a bold heart shape. This is the robot’s power source (and emotional core). -
Add buttons:
To the right of the heart, draw three small circles in a vertical column to represent control buttons or rivets.
Step 3: Arms and Legs
-
Sketch the shoulders:
Draw basic rounded shapes attached to the top corners of the torso. I find drawing simple half-circles works best here. -
Draw telescoping arms:
Extending down from the shoulders, draw tubular arms. Add horizontal lines across them to create a ribbed, flexible hose texture. -
Create the hands:
At the end of each arm, draw a ‘C’ shape for the pincers. Make sure the pincer on our left is facing inward and the one on the right is hanging naturally. -
Draw the legs:
Similar to the arms, draw two legs extending from the bottom of the torso. Keep them straight and add horizontal stripes for that same ribbed metal effect. -
Add blocky feet:
Draw rectangular blocks for the feet. Give them a 3D look by adding top and side planes, making them look like sturdy boots.
Level Up: Texture
Add tiny dots or scratches on the metal panels to make your robot look rusty or well-loved, or give it a speech bubble saying ‘Hello’.
Step 4: Inking and Finishing
-
Outline with pen:
Go over your pencil lines with a fine liner pen. Use steady, deliberate strokes for the straight edges of the boxes. -
Fill in the blacks:
Use a thicker marker to fill in the pupils of the eyes (remember to save those white highlights!) and color the inside of the ear piece dark grey or black. -
Add color accents:
Use a red or pink marker to color in the heart on the chest, the cheek circles, and the tips of the antenna. -
Shade for depth:
Using thin hatching lines with your pen, add shading to the side panels of the head, body, arms, and feet. This makes the robot look truly 3D. -
Ground the robot:
Draw a few quick horizontal lines beneath the feet to create a shadow, grounding your character so it doesn’t look like it’s floating. -
Clean up:
Once the ink is completely dry, gently erase all your underlying pencil sketches for a crisp finish.
Now you have a lovable mechanical friend ready to greet the world from your sketchbook page
Planets With Sweet Expressions
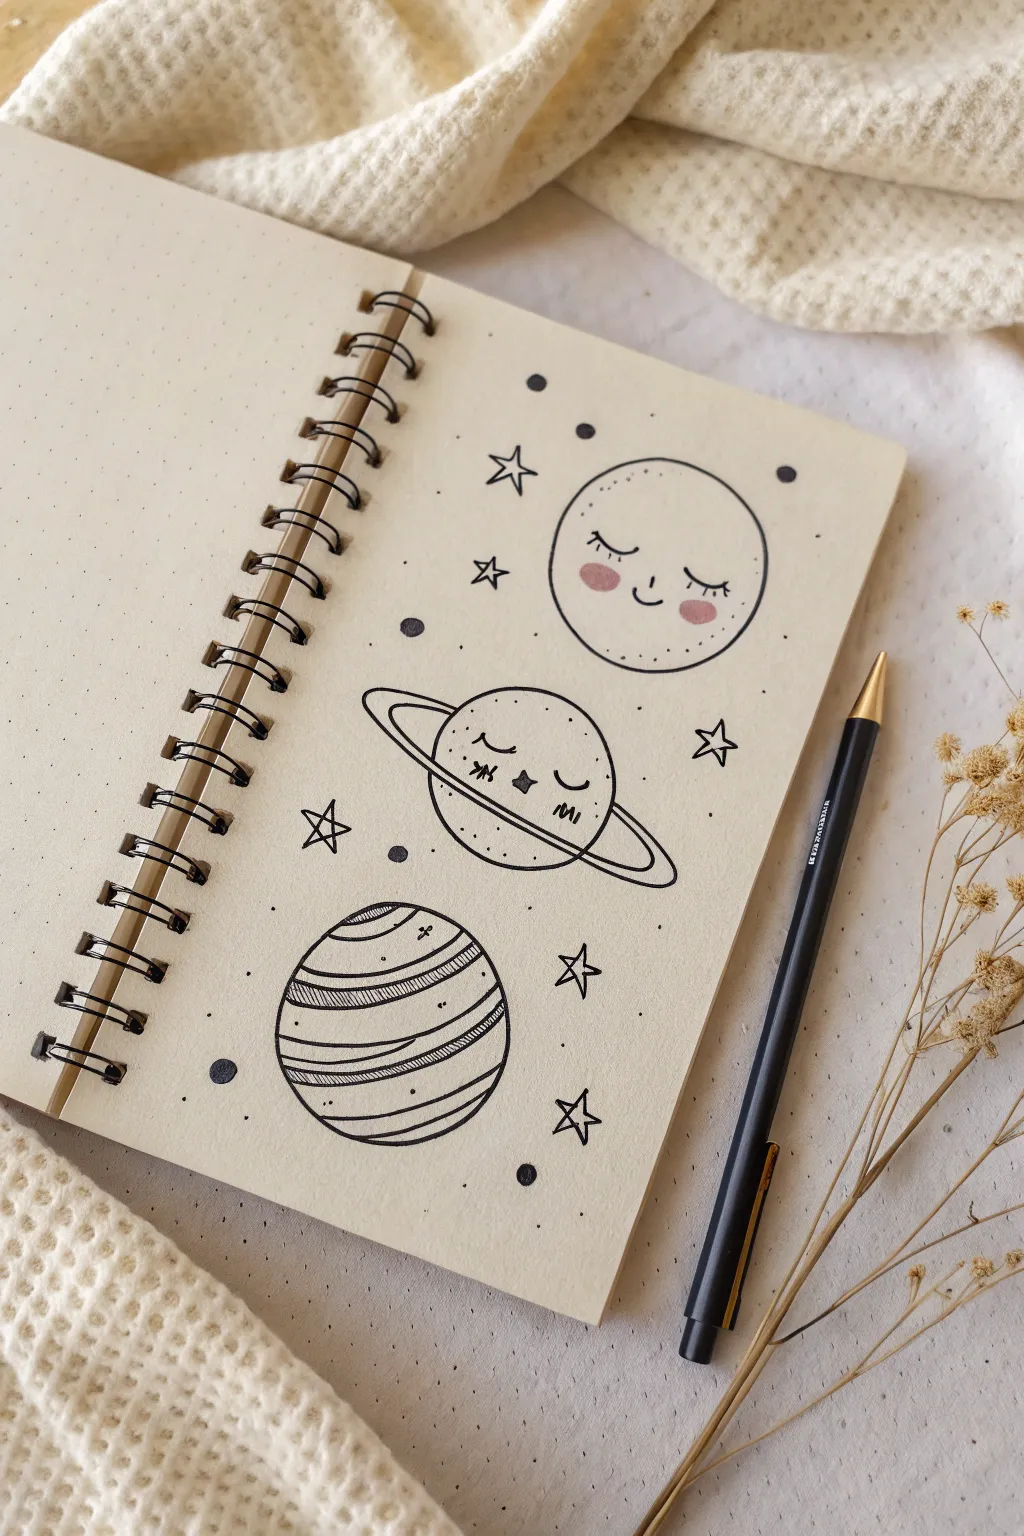
Transform a blank notebook page into a cozy galaxy with these sleepy celestial bodies. This tutorial guides you through sketching three adorable characters—a blushing moon, a ringed planet, and a striped giant—surrounded by twinkling stars.
Step-by-Step
Materials
- Dotted or blank notebook
- Fine-tipped black pen (0.4mm or 0.5mm)
- Pencil for sketching
- Eraser
- Soft pink marker or colored pencil
Step 1: Sketching the Shapes
-
Plan positions:
Visualize three vertical positions on your page. You’ll want the Moon at the top, the ringed planet in the middle, and the striped planet at the bottom. -
Outline the Moon:
Start at the top right. Lightly sketch a perfect circle. Don’t worry if it takes a few tries to get the roundness right; keep your pencil strokes light. -
Outline the Middle Planet:
Below the moon and slightly to the left, sketch a slightly flattened circle (an oval) for the planet’s body. -
Add the Ring:
Draw a long, thin oval that cuts through the middle of the planet. Make sure the ring extends well past the planet’s sides and tilts slightly upward to the left. -
Outline the Bottom Planet:
For final planet at the bottom, draw a large, round circle, making it slightly bigger than the moon at the top.
Uneven Circles?
If freehand circles are tricky, trace a bottle cap or a coin to get the perfect shape. Just hold it steady while outlining.
Step 2: Inking the Lines
-
Trace the Moon:
Using your fine-tipped black pen, carefully trace over your pencil circle for the moon. If your hand shakes a little, it just adds character. -
Trace the Ringed Planet:
Trace the middle planet. When drawing the ring, remember to stop your pen line where the planet body obstructs the back of the ring, creating a 3D effect. -
Detail the Ring:
Add a second line inside the ring to give it thickness, and draw a curved line across the planet’s belly to show where the ring casts a shadow or connects. -
Trace the Striped Planet:
Ink the outline of the bottom planet carefully. -
Add Stripes:
Draw 4-5 slightly curved horizontal lines across the bottom planet. Vary the spacing: make some bands thick and others thin. -
Texture the Stripes:
Fill a few of the bands with simple diagonal hatching lines to create texture and contrast.
Level Up
Use a white gel pen to add tiny highlights on the eyes or cheeks after coloring for an extra shiny, kawaii effect.
Step 3: Adding Faces and Details
-
Moon Face:
On the top moon, draw two small U-shapes for sleeping eyes with tiny lashes. Add a small smile right between them. -
Planet Face:
Give the ringed planet a face above the ring line. Draw two curved lines for sleeping eyes and a tiny ‘o’ or dot for a mouth. -
Blushing Cheeks:
Grab your pink marker or colored pencil. Gently add circular blush spots to the cheeks of the moon and the ringed planet. -
Draw Stars:
Scatter 4-5 five-pointed stars around the open spaces. Keep them simple and open, not filled in. -
Add Dots:
Fill the remaining empty space with small black dots of varying sizes to represent distant stars or space dust. -
Erase Sketches:
Once the ink is completely dry—I usually wait at least five minutes just to be safe—gently erase all underlying pencil lines.
Now you have a serene little galaxy to decorate your journal spread
Everyday Objects With Tiny Faces
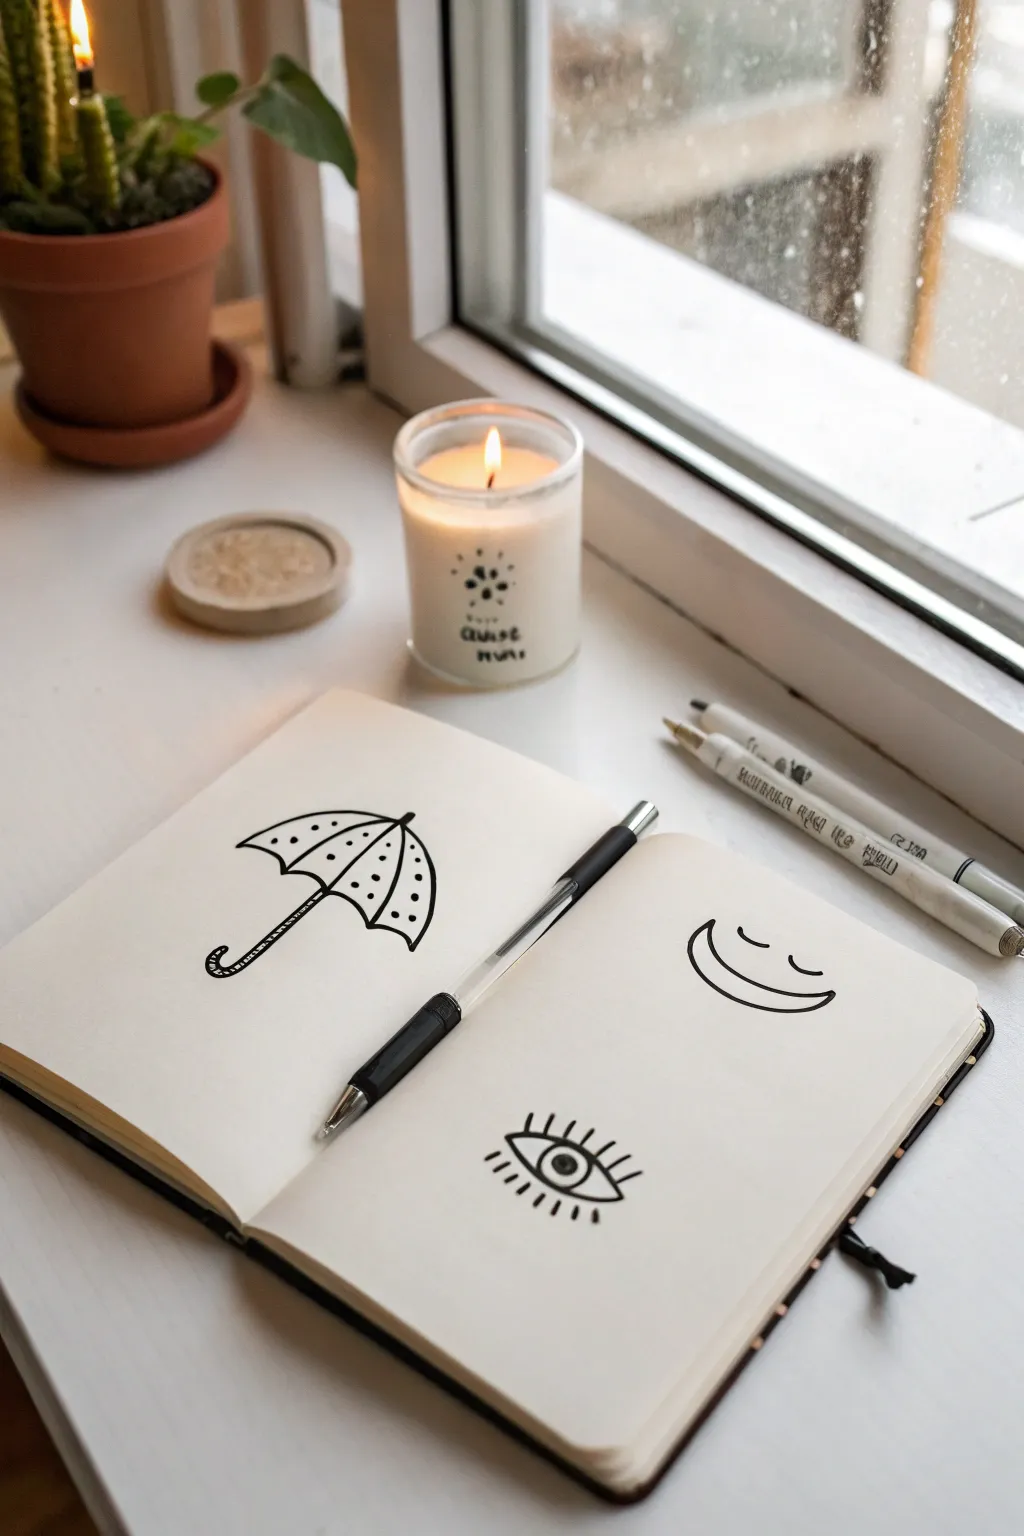
Create a charming set of simple line drawings including a polka-dot umbrella, a smiling crescent, and a stylized eye. These minimalist doodles are perfect for beginners looking to fill a sketchbook page with cute, approachable art.
How-To Guide
Materials
- Sketchbook or drawing paper
- Fine-point black drawing pen (0.5mm or similar)
- Pencil (optional for sketching)
- Eraser
Step 1: The Polka-Dot Umbrella
-
Draw the canopy curve:
Start on the left page. Draw a large, upside-down ‘U’ shape for the top of the umbrella canopy, keeping your line smooth and steady. -
Add the bottom edge:
Connect the ends of your arch with a scalloped line. Create four small downward curves that meet in points, giving the umbrella its classic shape. -
Draw the ribs:
From the very top center point of the arch, draw three curved lines extending down to the points of the scalloped bottom edge. These lines define the umbrella’s structure. -
Add the ferrule:
Draw a tiny triangle or nipple shape at the very top center of the canopy where the ribs meet. -
Create the handle:
Draw a straight double line coming down from the center scallop. At the bottom, curve it upward into a ‘J’ hook shape for the handle grip. -
Stripe the handle:
Fill the ‘J’ hook part of the handle with small, horizontal stripes to give it texture. -
Decorate with dots:
Inside the canopy sections, scatter small black dots. Try to keep them somewhat random but evenly distributed for a playful pattern.
Step 2: The Smiling Crescent
-
Outline the crescent:
On the top right of the opposite page, draw a wide ‘U’ shape. Then, draw a slightly flatter curve connecting the two top points to form a crescent moon or smile shape. -
Add the eyes:
Floating just above the crescent shape, draw two small, downward-curving arcs for closed, happy eyes. -
Internal detail:
Draw a single curved line running through the middle of the crescent shape, following the contour of the bottom curve.
Clean Lines
For the crispest look, sketch lightly in pencil first. When inking, maintain consistent pressure and don’t lift your pen mid-line.
Step 3: The Stylized Eye
-
Draw the lids:
Below the smiling crescent, draw an almond shape. Make the top arch slightly more pronounced than the bottom curve. -
Add the iris:
Inside the almond shape, draw a perfect circle in the center. It should touch both the top and bottom eyelids. -
Create the pupil:
Draw a smaller black dot in the center of the iris circle. -
Add a highlight:
If you wish, leave a tiny speck of white within the pupil or iris for a glint of light, or draw a small circle next to the pupil. -
Draw long lashes:
Add bold, straight lines radiating outward from the top and bottom eyelids. I like to make the top lashes slightly longer than the bottom ones. -
Define the crease:
Draw a floating curved line just above the upper eyelashes to suggest an eyelid crease.
Add Some Color
Use a light watercolor wash or colored pencils to fill the umbrella’s segments or give the iris a pop of blue or green.
Now you have a trio of sweet, minimal doodles filling your page with personality.
Mini Story Doodle With a Banner
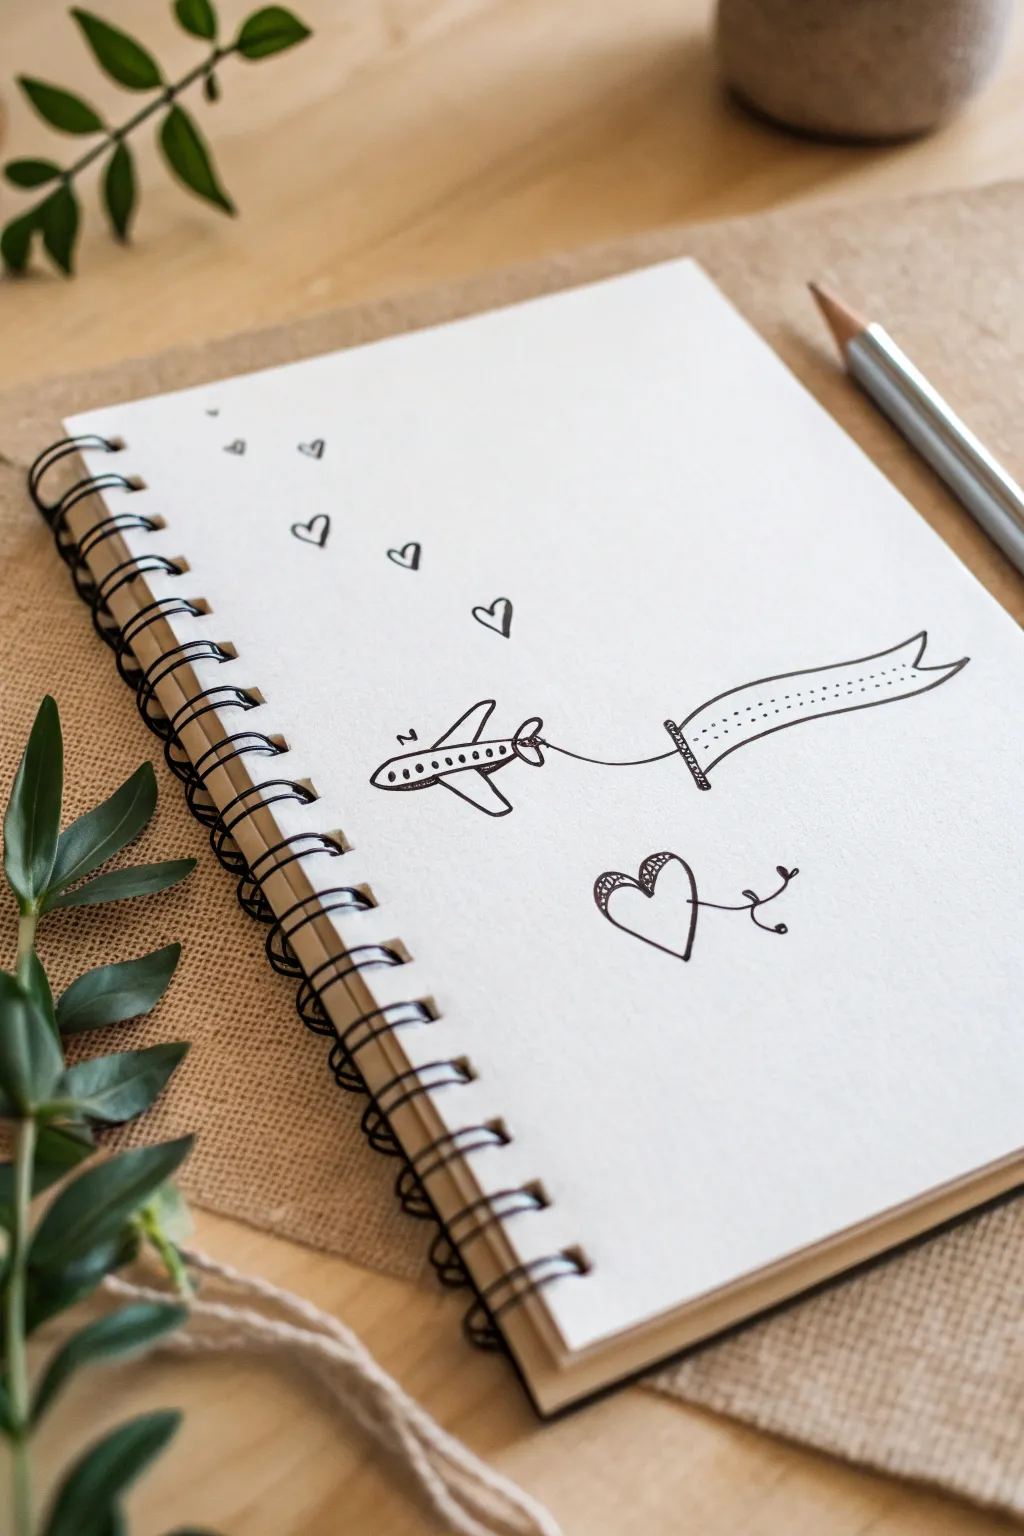
Capture a whimsical moment of romance and travel with this minimalist doodle featuring a tiny plane trailing a customizable banner. It’s a sweet, hand-drawn sketch that fits perfectly in the corner of a journal page or on a greeting card.
Step-by-Step Tutorial
Materials
- Spiral-bound sketchbook or blank paper
- Fine-point black pen (micron or gel)
- Pencil (H or HB for light sketching)
- Eraser
Step 1: Sketching the Plane
-
Draw the fuselage:
Start by drawing a long, narrow oval shape that tilts slightly upward to the right. This will be the main body of your airplane. -
Add the cockpit:
Near the front (left side) of the oval, draw a small horizontal line inside the shape to indicate the nose, and sketch a tiny windshield area. -
Create the wings:
Draw the near wing as a curved triangle pointing downwards from the middle of the body. Add a smaller, partial triangle shape peeking out from the top to represent the far wing. -
Detail the tail:
At the back of the fuselage (the right side), add two small vertical fins—one pointing up and one pointing down—to form the tail section. -
Add windows:
Draw a row of tiny dots along the side of the fuselage to look like passenger windows.
Steady Lines
When drawing the long wavy banner lines, lock your wrist and move your entire arm. This creates smoother curves than trying to just move your fingers.
Step 2: Creating the Banner
-
Draw the tow rope:
Starting from the very back of the plane’s tail, draw a single, slightly curved line extending to the right. This connects the plane to the banner. -
Start the banner pole:
At the end of your tow rope, draw a short vertical line. Thicken this line slightly or add tiny cross-hatching to make it look rigid like a pole. -
Outline the banner shape:
Draw two long, wavy lines extending to the right from the top and bottom of the pole. They should run parallel to each other. -
Close the banner:
Connect the ends of the wavy lines with a ‘V’ shape pointing inward to give the banner a classic ribbon tail look. -
Add banner details:
Inside the banner, draw two rows of tiny dots running along the top and bottom edges to create a stitched border effect.
Step 3: Adding Charming Details
-
Draw the hearts trail:
Starting behind the plane’s tail and moving upward to the left, draw a series of small hearts. I like to make them gradually get smaller as they move further away. -
Scatter the hearts:
Draw about five or six hearts in a loose curve. Outline them simply; don’t worry if they aren’t perfectly symmetrical. -
Add the main heart:
Below the banner, draw a larger, single heart. Give the top left curve of this heart a little scribbled texture for visual interest. -
Anchor the heart:
From the bottom tip of the large heart, draw a playful, curly line extending to the right, ending with two tiny leaves or loops. -
Ink the drawing:
Go over all your pencil lines with your fine-point black pen. Use a steady hand for the long banner lines. -
Erase guidelines:
Once the ink is completely dry, gently erase any visible pencil marks to clean up the page.
Make It Personal
Write a tiny message inside the banner like ‘Miss You’ or a specific date. You can also shade the tiny hearts red using a colored pencil for a pop of color.
Now you have a charming little scene ready to carry your message across the page


Have a question or want to share your own experience? I'd love to hear from you in the comments below!