Christmas paintings don’t have to be complicated to feel magical—sometimes the simplest shapes and a few cozy colors do all the heavy lifting. I pulled together my favorite simple easy Christmas painting ideas that look festive fast, even if you’re painting in one relaxed sitting.
Classic Snowman With a Cozy Scarf
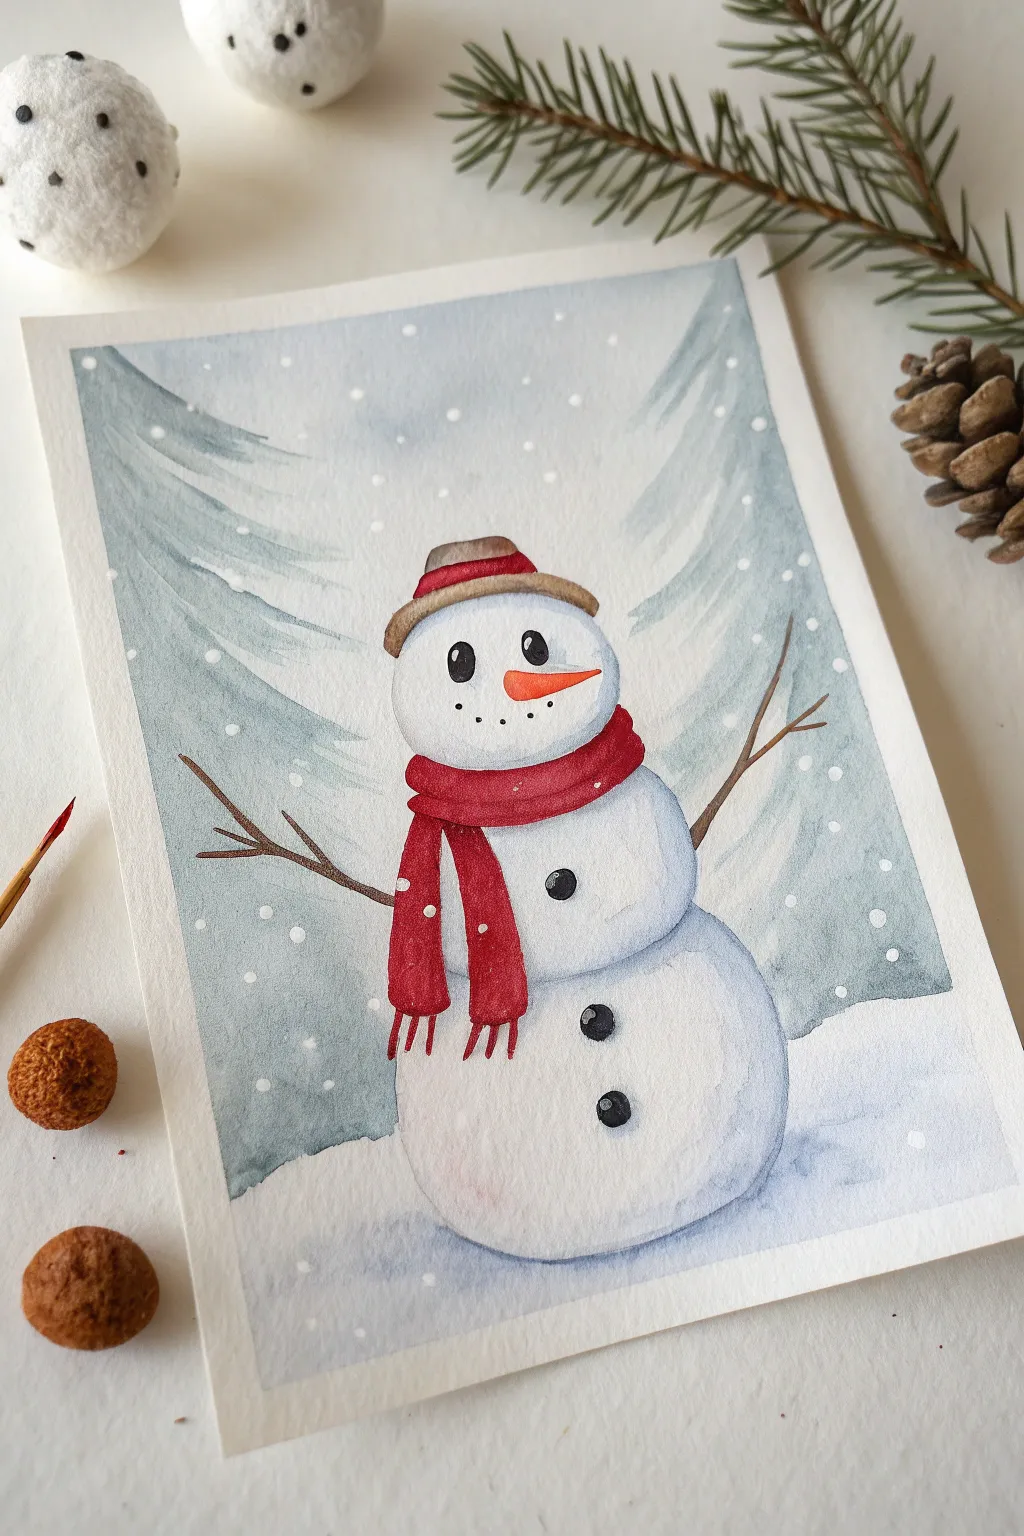
Capture the magic of a snowy day with this charming watercolor illustration featuring a smiling snowman bundled in a cozy red scarf. The soft washes and crisp details create a nostalgic, classic holiday look perfect for handmade greeting cards.
Step-by-Step Tutorial
Materials
- Cold press watercolor paper (300 gsm)
- Watercolor paint set (red, brown, black, orange, indigo/payne’s gray)
- Round watercolor brushes (size 6 for washes, size 2 for details)
- Pencil and kneaded eraser
- Jar of clean water
- Paper towels
- White gouache or white gel pen
Step 1: Sketching the Outline
-
Basic Shapes:
Start by lightly sketching three stacked circles for the snowman’s body. Make the bottom circle the largest and slightly flattened at the base, the middle circle medium-sized, and the head the smallest. -
Adding Accessories:
Draw a rounded rectangle shape on top of the head for the hat brim, followed by a smaller rounded shape for the crown. Sketch the scarf wrapped around the neck, letting the tails hang down the left side of the body. -
Refining Lines:
Lightly pencil in the twig arms sticking out from the middle section. Erase any overlapping lines inside the scarf and hat area so your painting surface is clean.
Step 2: Painting the Background
-
Tree Washes:
Mix a very watery, pale blue-grey using indigo or Payne’s gray. Paint loose, sweeping strokes on either side of the snowman to suggest pine trees, leaving the paper white immediately around the snowman. -
Softening Edges:
While the background paint is still wet, add slightly darker blue-grey strokes near the edges to create depth. Let these distinct tree shapes fade out into the white snowy ground.
Bleeding Colors?
If your red scarf bleeds into the white body, stop immediately. Blot gently with a paper towel and let it bone-dry. Re-wet the area slightly and lift the red pigment with a clean brush.
Step 3: Painting the Snowman
-
Base Shadows:
Using a very diluted purple-grey mixture, paint a crescent-shaped shadow on the bottom right of each snowball segment (head, body, base). This gives the snowman a 3D rounded form. -
Blending:
Immediately use a clean, damp brush to soften the inner edge of these shadows, blending them into the white of the paper so there are no harsh lines. -
Ground Shadows:
Add a wash of cool blue-grey underneath the snowman to ground him, letting the color bleed slightly into the bottom snowball for a cohesive look. -
Drying Time:
Allow the paper near the neck area to dry completely before starting the scarf to prevent the red paint from bleeding into the white snow.
Sparkle Finish
Once the painting is completely dry, brush a very thin layer of clear glue or iridescent medium over the snow areas and sprinkle fine iridescent glitter for a frosty shimmer.
Step 4: Adding Color & Details
-
The Red Scarf:
Load your medium brush with a vibrant red. Paint the loop around the neck first, then fill in the hanging tails. Drop a slightly darker red into the folds where the fabric would bunch up. -
Hat Details:
Paint the brim and top of the hat with a light brown. Once dry, add a red stripe to match the scarf. -
Carrot Nose:
Use a bright orange for the triangular nose, making the base slightly wider near the face. -
Coal Buttons:
Using a concentrated black or dark grey, paint three round buttons on the body. Leave a tiny speck of white paper in each (or add white later) for a highlight. -
Facial Features:
With your smallest brush, paint two black oval eyes and a dotted mouth smile. Add tiny white reflections in the eyes to bring him to life. -
Twig Arms:
Mix a dark brown and paint thin, branching lines for the arms using the very tip of your brush.
Step 5: Final Snow Effects
-
Fringe Details:
Use the small brush with dark red paint to add tiny vertical lines at the bottom of the scarf to create the fringe texture. -
Falling Snow:
Taking opaque white gouache or a white gel pen, dot random snowflakes over the background trees and the snowman’s hat and scarf. -
Scarf Pattern:
Add a few tiny white dots or stripes onto the red scarf to give it a knit texture.
Once the final snowflakes are dry, your festive snowman is ready to be framed or sent as a warm winter greeting


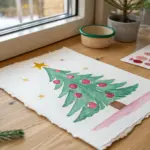
Simple Christmas Tree With Dot Ornaments
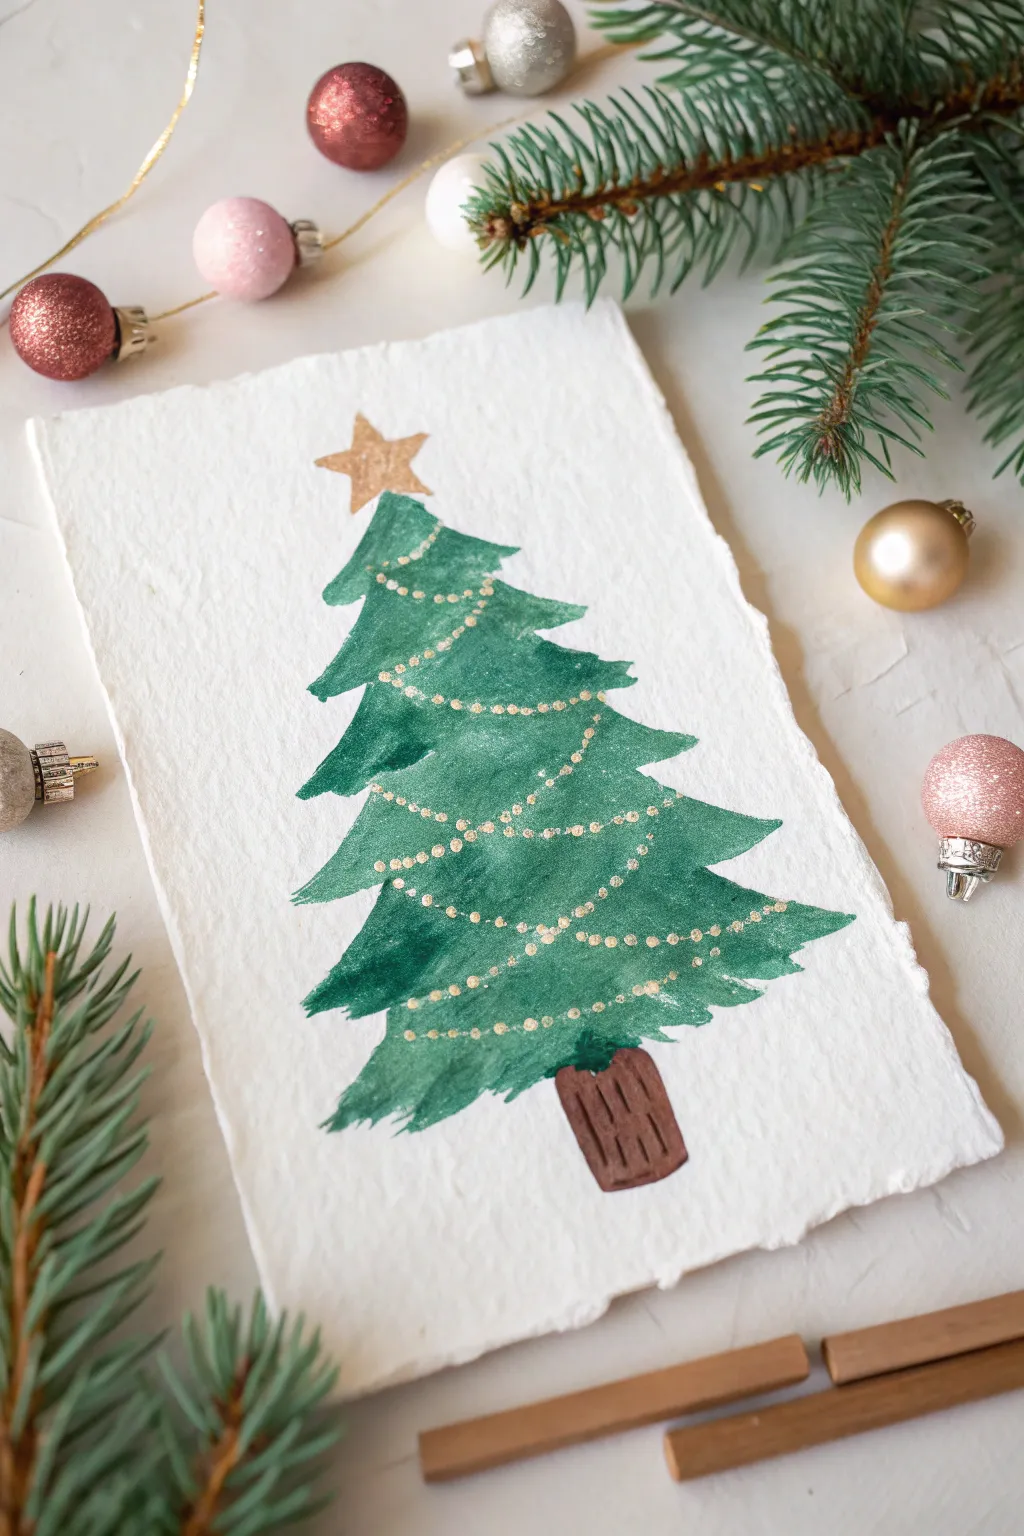
Capture the magic of the season with this charming watercolor Christmas tree, painted on beautiful handmade paper for a rustic touch. The textured edges of the brushstrokes and delicate gold dot garland give it a cozy, handcrafted feel that is perfect for holiday cards.
Detailed Instructions
Materials
- Heavyweight cold-press watercolor paper (or handmade cotton rag paper)
- Watercolor paints (Dark Green, Sap Green, Burnt Umber/Brown, Yellow Ochre)
- Metallic gold paint or gold gel pen
- Round watercolor brush (size 6 or 8)
- Fine detail brush (size 0 or 1)
- Cup of water
- Paper towel
- Pencil (optional)
Step 1: Painting the Tree Shape
-
Prepare your paper:
If you are using a large sheet, tear it down to postcard size (about 4×6 inches) to create those lovely deckled edges seen in the photo. -
Sketch lightly:
Using a pencil, lightly mark a triangle shape on the paper to guide the height and width of your tree, but keep the lines very faint so they don’t show through the paint. -
Mix your greens:
Create a rich, dark green mix on your palette. I like to mix a bit of blue into my Sap Green to get that deep evergreen color. -
Start at the top:
Load your round brush with the green paint. Starting near the top point, make a small, downward-sweeping stroke to create the top tip of the tree. -
Paint the first tier:
Just below the tip, extend your strokes outward to the left and right, flicking the brush tip up slightly at the ends to mimic pine branches. -
Continue downwards:
Work your way down the tree, tiers getting wider as you go. Allow the brush to be loose—don’t worry about perfect symmetry. -
Add texture:
While the paint is wet, charge the brush with slightly more pigment and drop it into the shadow areas underneath the boughs for depth. -
Create the bottom edge:
Finish the lowest tier with wider, jagged strokes that suggest the varying lengths of the bottom branches. -
Paint the trunk:
Rinse your brush and pick up the brown paint. Create a small, rectangular stump at the base of the tree, blending it slightly where it meets the green branches. -
Add trunk details:
While the brown paint is still damp, use the tip of your brush to add a few darker vertical lines to suggest wood grain.
Loose Edges Pro Tip
To get that feathery look on the branches, hold your brush higher up on the handle. This reduces control slightly, creating more natural, organic strokes.
Step 2: Decorating the Tree
-
Let it dry completely:
This is crucial—wait until the green paint is bone dry. If it’s cool to the touch, it’s not ready yet. -
Paint the star:
Mix a yellow ochre or gold paint. Carefully paint a five-pointed star at the very peak of the tree. -
Prepare the gold garland:
Switch to your fine detail brush and load it with metallic gold paint. Ensure the consistency is creamy, not too watery. -
Map the garland path:
Visualize three swag lines draping across the tree segments. You don’t need to draw them; just eyeball the curve. -
Dot the first strand:
Starting near the top, gently dab small dots in a curved line draping from left to right. -
Continue the pattern:
Create the second and third garlands lower down, making the dots slightly larger or more spaced out if you wish. -
Let the gold shine:
Wait for the metallic accents to dry completely so they catch the light distinctively against the matte green.
Level Up: Snow Effect
Mix white gouache with a tiny bit of water and splatter it over the dry painting by tapping your brush against a pencil for a snowy finish.
Once dry, this lovely little tree is ready to serve as a festive greeting card or a framed holiday decoration


Wreath Circle With Loose Green Strokes
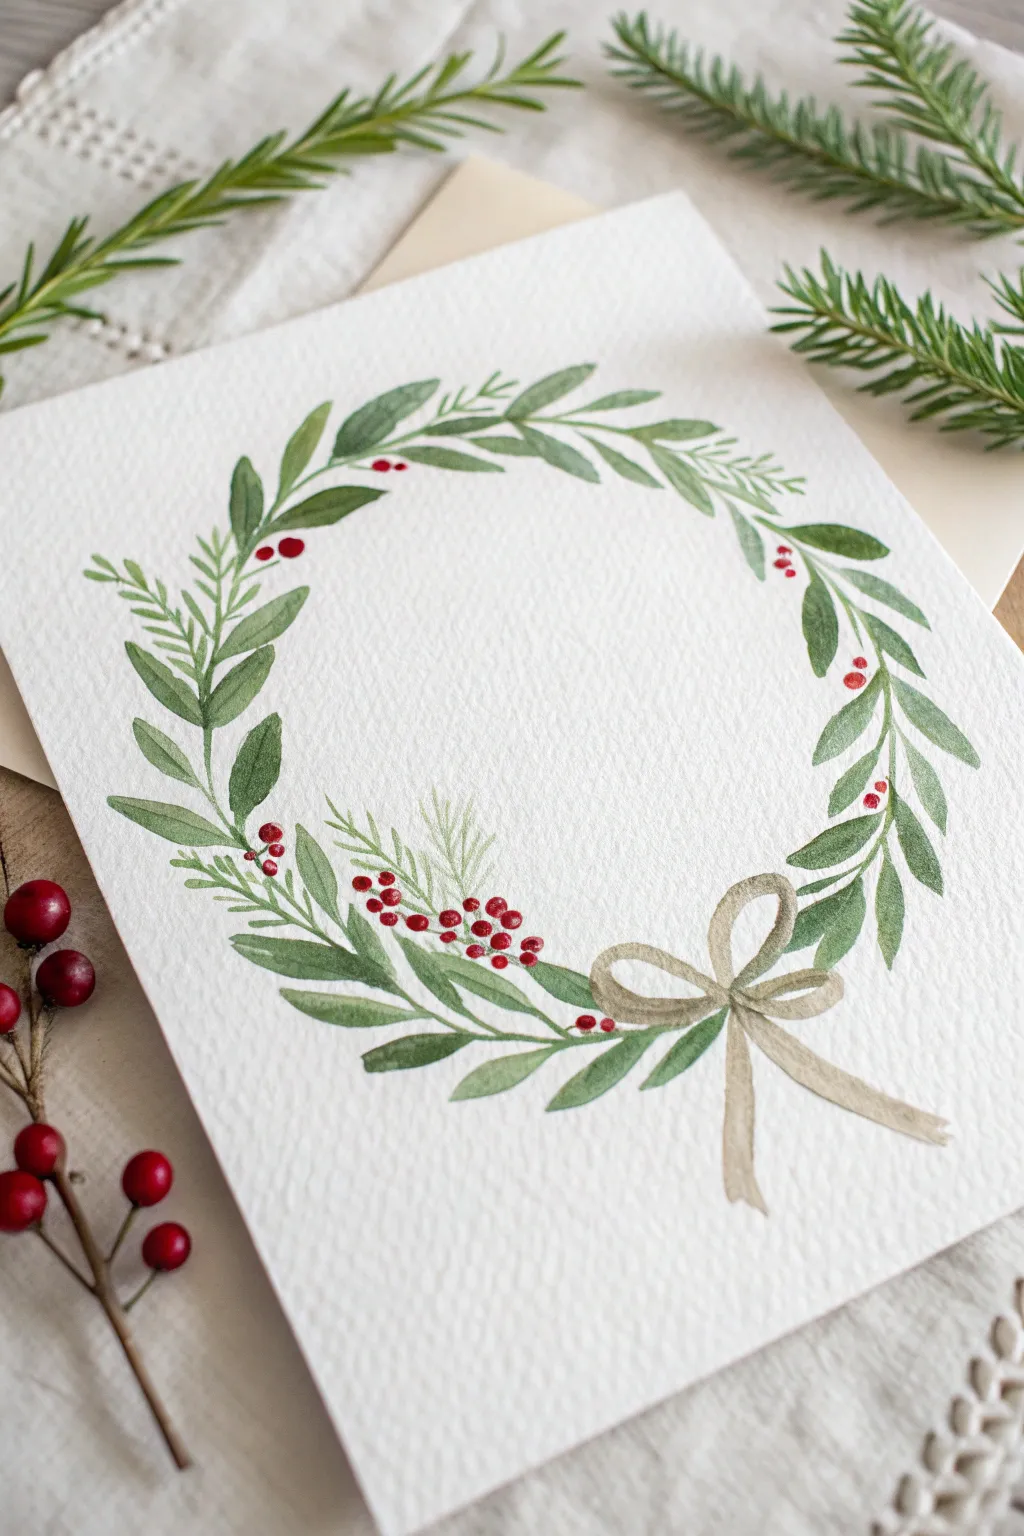
Capture the delicate beauty of the season with this graceful watercolor wreath, featuring loose leafy strokes and bright berry accents. The textured paper adds a refined touch to the organic arrangement, making it perfect for custom holiday cards or framed decor.
How-To Guide
Materials
- Cold press watercolor paper (textured, 300gsm)
- Watercolor paints (Sap Green, Olive Green, Alizarin Crimson, Yellow Ochre/Raw Sienna)
- Round watercolor brush (size 4 or 6)
- Small detail brush (size 0 or 2)
- Pencil
- Compass or a round object to trace
- Jar of clean water
- Paper towels
Step 1: Sketching the Guidelines
-
Mark the circle:
Begin by lightly tracing a circle in the center of your paper using a compass or a round object like a bowl. Use a very light hand with your pencil so the graphite doesn’t show through the translucent watercolor later. -
Plan the bow:
Decide where your bow will sit. In this design, it rests slightly off-center to the bottom right. Sketch a very faint outline of the loops and tails to remind you not to paint leaves over this area.
Brush Technique
For organic-looking leaves, vary the pressure on your brush. Press harder for fat leaves and use just the tip for delicate sprigs.
Step 2: Painting the Foliage
-
Mix your base greens:
Prepare two shades of green on your palette: a lighter, fresher yellow-green (sap green mixed with a touch of yellow) and a deeper, muted woodland green (olive or sap green mixed with a tiny bit of red or brown). -
Start the main stems:
Using your medium round brush and the lighter green, paint a thin, curving line that follows your pencil circle. Break the line occasionally; it doesn’t need to be a solid, unbroken ring. -
Paint the first leaves:
Load your brush with the lighter green mix. Using the tip-press-lift method, create almond-shaped leaves branching off the main stem. Start at the stem with the tip, press down to widen the belly of the brush, and lift up to create a point. -
Vary the direction:
Ensure the leaves flow generally in one direction around the circle (clockwise or counter-clockwise), but angle some slightly inward and some outward for a natural, unforced look. -
Add darker contrast:
While the first layer is drying, pick up your darker green mix. Paint a second set of leaves interspersed among the first, focusing more density near the bottom of the wreath where the bow will be. -
Incorporate pine sprigs:
Mix a very watery, pale green. Using just the very tip of your brush, add delicate, feathery pine branches. These should look like thin, wispy lines fanning out from the main circle, filling in empty gaps. -
Let it breathe:
Don’t overfill the circle. Leave plenty of white space between the leaves to keep the airy, delicate aesthetic that makes this style so charming.
Add Metallic Magic
Once dry, add tiny dots of gold watercolor or metallic gel pen to the center of the berries for a festive shimmer.
Step 3: Adding Details & The Bow
-
Paint the berries:
Load your small detail brush with concentrated crimson red. Dot small clusters of berries onto the stems. Group them in threes or odd numbers for a pleasing composition. -
Add berry stems:
Once the red dots use a tiny bit of brown paint to connect the berries to the main wreath with hairline-thin stems. -
Outline the bow:
Mix a diluted watery beige using Yellow Ochre or Raw Sienna. Paint the loops of the bow first, leaving the center open. -
Finish the ribbons:
Paint the tails of the ribbon flowing downwards. Keep the paint very transparent; if it’s too dark, the bow will look heavy compared to the delicate leaves. -
Shadow the bow:
While the beige is still slightly damp, drop a tiny bit of darker brown into the center knot area and the folds of the ribbon to create soft, natural dimension. -
Final touches:
Look at the overall balance. If one side feels too heavy, balance it by adding a tiny sprig or a single red berry to the opposite side. -
Erase guidelines:
Wait until the painting is completely bone dry—I usually give it at least 20 minutes to be safe. Then, gently erase any visible pencil marks from your initial circle.
Once dry, your elegant wreath is ready to be turned into a heartfelt holiday card or framed as seasonal art


Snowy Night Sky With Splatter Snow
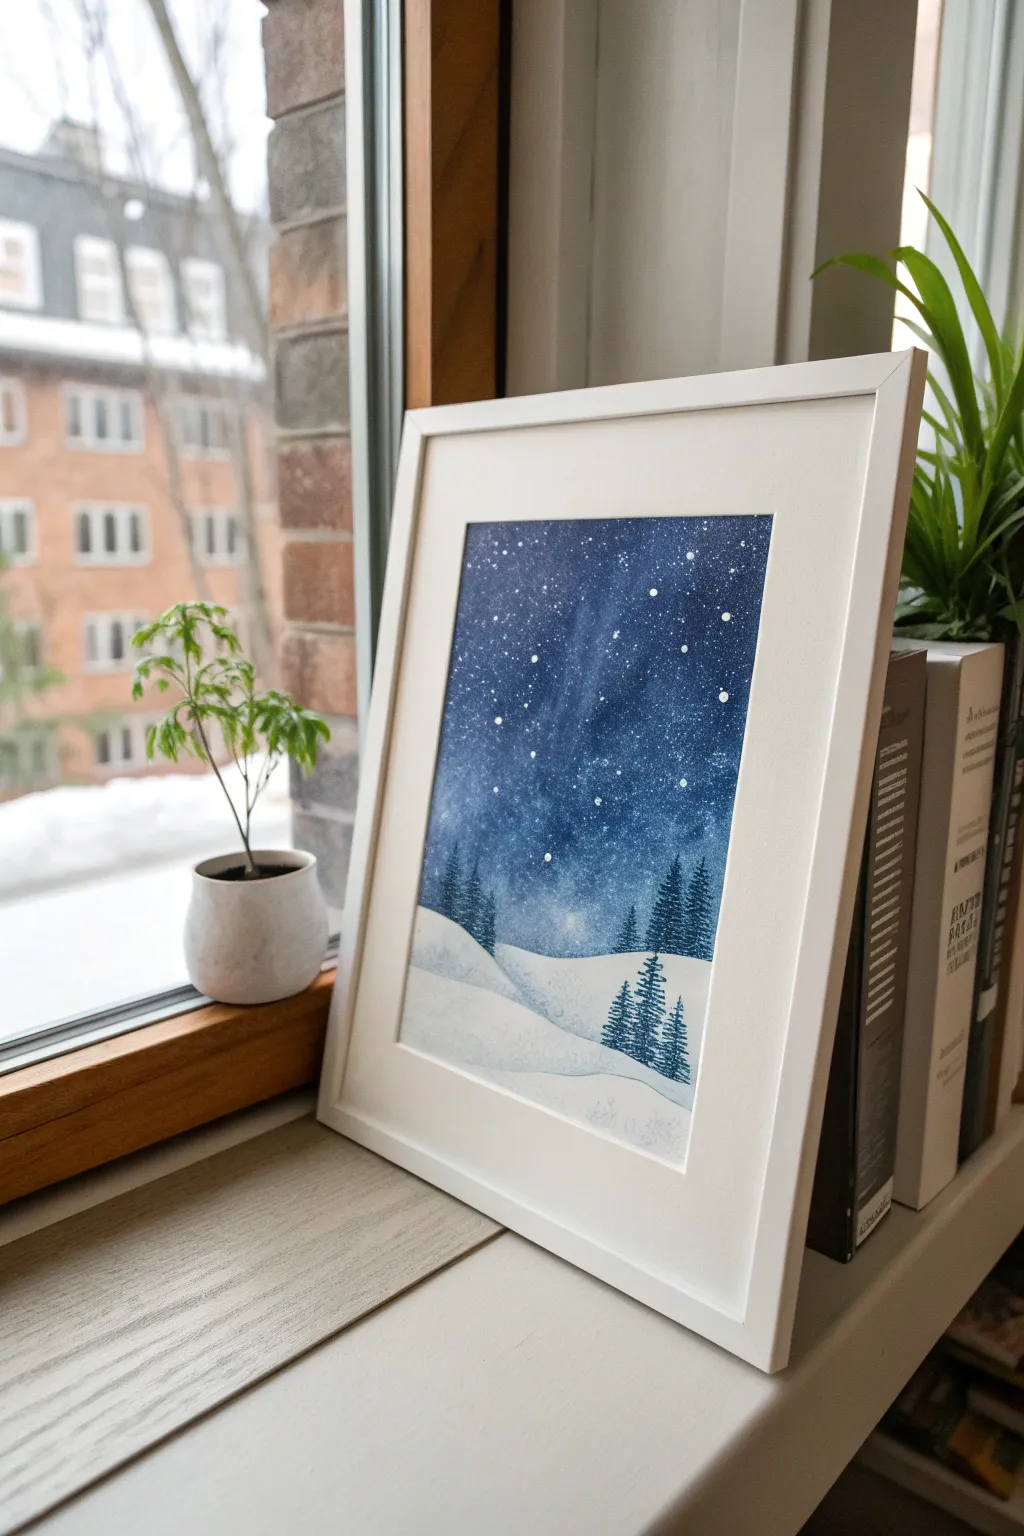
Capture the magic of a silent winter evening with this deep blue watercolor landscape, featuring soft, rolling snowdrifts and a brilliant Milky Way effect. The splatter technique creates natural-looking stars effortlessly, making this an ideal project for beginners wanting to paint a complex-looking sky.
Step-by-Step Tutorial
Materials
- Watercolor paper (cold press, ideally 140lb/300gsm)
- Watercolor paints (Indigo, Payne’s Gray, Ultramarine Blue, Prussian Blue)
- White gouache or white acrylic ink
- Masking tape (painters tape)
- Flat wash brush (large)
- Round brush (size 4 or 6)
- Fine liner brush or rigger brush
- Old toothbrush (for splattering)
- Paper towels
- Two jars of water (one clean, one for rinsing)
Step 1: Preparing the Sky
-
Tape the Edges:
Secure your watercolor paper to a board or table with masking tape. This creates that clean, professional white border seen in the final piece and prevents the paper from buckling when it gets wet. -
Sketch the Horizon:
Using a very hard pencil (like a 2H) so the lines remain faint, lightly sketch two or three rolling hills at the bottom third of the paper. Keep these lines gentle and curved. -
Wet-on-Wet Sky Base:
With your large flat brush, apply clean water to the entire sky area above your pencil line. The paper should be glisten with sheen but not hold puddles. -
Drop in Color:
While the paper is still wet, load your brush with Ultramarine Blue and Prussian Blue. Drop the color onto the wet paper, letting it bloom and spread naturally. -
Deepen the Night:
While the first layer is still damp, mix a strong concentration of Indigo and Payne’s Gray. Apply this to the top corners and edges of the sky to create a vignette effect, leaving the center slightly lighter to suggest the Milky Way. -
Lift Some Light:
If the sky looks too uniform, rinse your brush, dry it slightly on a paper towel, and gently lift a diagonal streak of paint through the center to create a soft, glowing nebula effect.
Sky Too Flat?
If your watercolors dried too evenly and lost the ‘galaxy’ look, lightly re-wet the sky and drop hints of purple or magenta into the wet areas for added dimension.
Step 2: Making it Snow
-
Let the Sky Dry Completely:
Wait until the sky is bone dry. If the paper is cool to the touch, it’s still damp. If you rush this steps, your crisp stars will turn into fuzzy blobs. -
Mix the Snow:
Dilute a small amount of white gouache or acrylic ink with just a drop of water. It should be the consistency of heavy cream. -
The Splatter Technique:
Dip an old toothbrush into the white mixture. Hold it over the painting and run your thumb across the bristles to flick tiny droplets onto the sky. -
Add Distant Stars:
Focus the densest splatter through the lighter diagonal band you created earlier. This mimics the density of stars in the Milky Way. -
Create Major Stars:
Use a fine liner brush dipped in the white gouache to manually dot in a few larger, distinct stars. I like to place these strategically in the darker areas for better contrast.
Step 3: The Winter Landscape
-
Paint Distant Hills:
Mix a very watery, pale wash of Indigo or blue-grey. Paint the furthest hill/slope with this sheer color, letting the white of the paper show through significantly to clear snow. -
Define Foreground Slopes:
For the closer snow banks, use slightly more pigment to define the shadows underneath the ridges, feathering the color out into white paper. -
Paint the Trees:
Using a size 4 or 6 round brush and a thick mix of Indigo and Green, paint vertical lines for the tree trunks. Start with the distant trees on the left. -
Add Pine Foliage:
Using the tip of the brush, use a stippling or zigzag motion to add branches. Keep the distant trees smaller and looser, and the foreground trees (on the right) darker and more detailed. -
Add Shadows:
Once the trees are dry, add a very faint wash of blue shadow on the snow immediately to the left of the trees, assuming the light source is the starlight. -
Final White Touches:
If you want the trees to look snow-laden, carefully dab tiny spots of white gouache onto the tops of the pine branches. -
Remove Tape:
Wait for everything to be completely dry, then peel the tape away slowly at a 45-degree angle to reveal your crisp white border.
Add a Constellation
Before splattering the random stars, use your fine liner brush and white ink to paint a specific constellation, like the Big Dipper or Orion, hidden in the sky.
Now frame your winter masterpiece to bring a cozy chill to your decor
BRUSH GUIDE
The Right Brush for Every Stroke
From clean lines to bold texture — master brush choice, stroke control, and essential techniques.
Explore the Full Guide
Santa Sleigh Silhouette Over the Moon
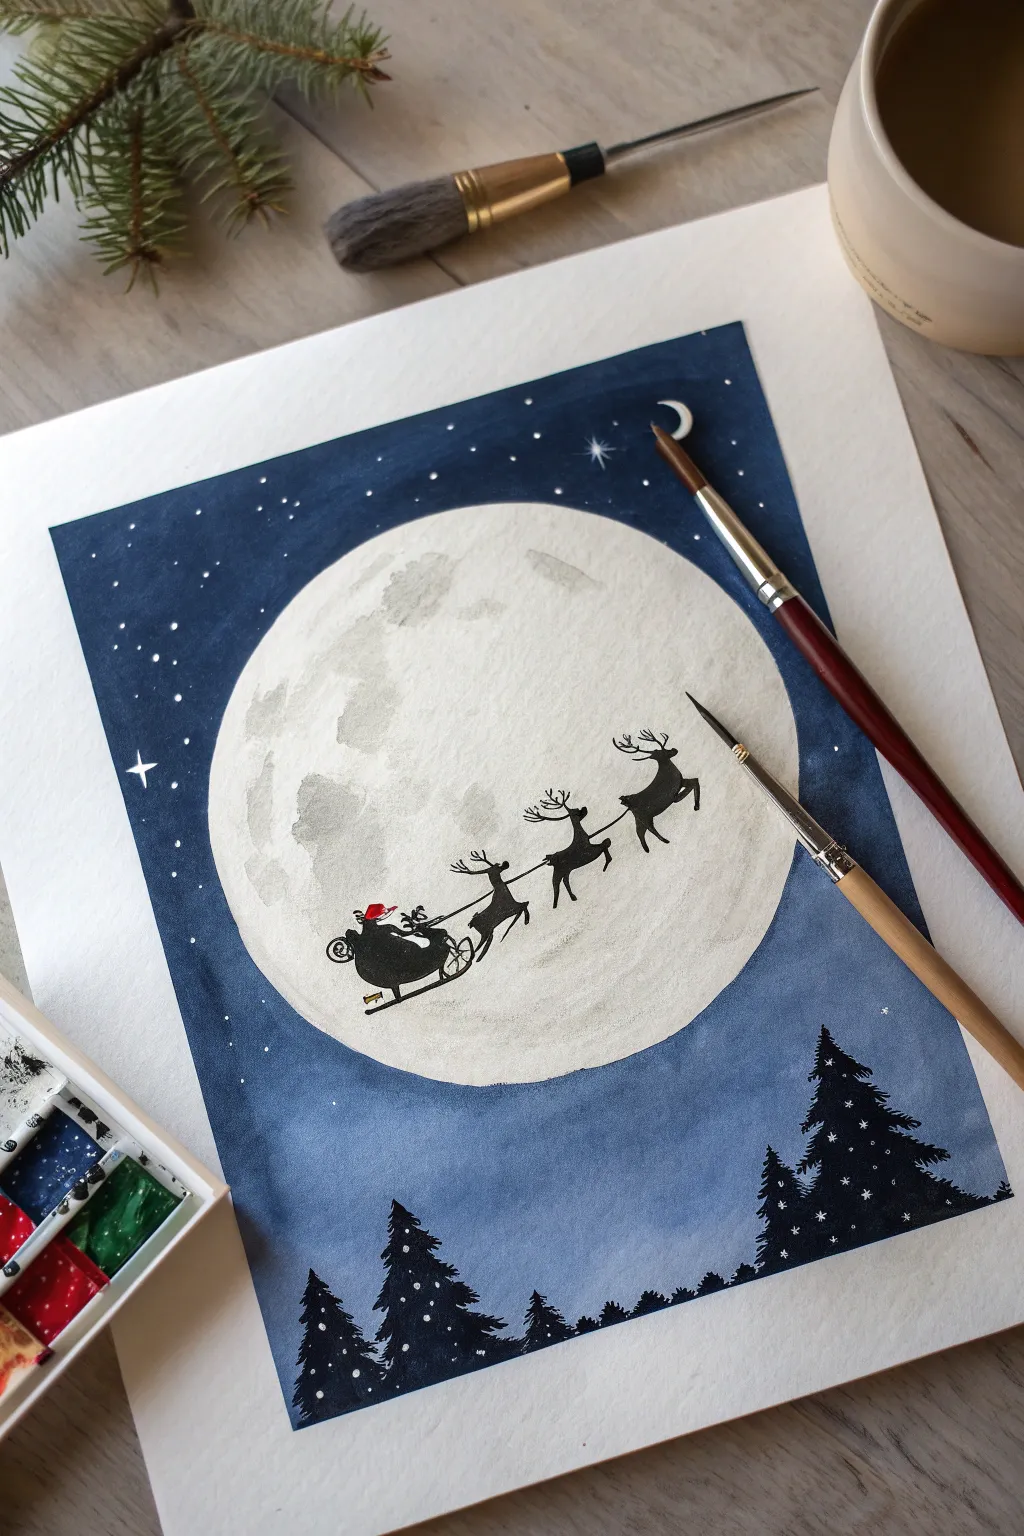
Capture the magic of Christmas Eve with this striking silhouette painting that plays with negative space and deep twilight hues. The contrast of the crisp black reindeer against the glowing full moon creates a dramatic yet simple composition perfect for holiday cards or wall art.
How-To Guide
Materials
- Cold press watercolor paper (block or taped down sheet)
- Watercolor paints (Indigo, Prussian Blue, Payne’s Grey, Black)
- White opacity: White Gouache or bleed-proof white
- Round brushes (sizes 6 or 8 for washes, size 0 or 00 for details)
- Masking fluid (drawing gum) and old brush
- Circular object for tracing (plate or bowl)
- Pencil and eraser
- Palette for mixing
- Two jars of water
- Paper towels
Step 1: Preparation & Sky Wash
-
Trace the Moon:
Begin by placing your circular object in the center of the paper, slightly higher than the midpoint. Lightly trace a perfect circle with a pencil to define where your moon will be. -
Protect the Moon:
Before painting the sky, we need to keep the moon pristine. Carefully apply masking fluid to cover the entire circle using an old brush you don’t care about, or simply paint carefully around the edge if you have a steady hand. -
Mix Your Night Sky:
Create a deep, midnight blue mixture. Combine Indigo and Prussian Blue, perhaps adding a touch of Black to deepen the value for the corners of the painting. -
Apply the First Wash:
Using your larger round brush, paint the area surrounding the moon. Start from the top corners with the darkest pigment and work your way down. -
Create a Gradient:
As you move lower toward the tree line, dilute your paint slightly with water. You want the sky to fade from a deep navy at the top to a lighter, softer blue at the horizon. -
Let it Dry:
Allow this layer to dry completely. The paper must be bone dry before moving on, otherwise, the next steps will bleed and lose their crispness.
Clean Lines
To get a perfect moon circle without masking fluid, draw your circle, wet the paper ‘outside’ the line only, and drop paint onto the wet paper. It won’t cross the pencil line!
Step 2: Painting the Moon
-
Reveal the Moon:
If you used masking fluid, gently rub it away with your finger or a rubber cement pickup to reveal the stark white circle underneath. -
Add Moon Texture:
Mix a very watery, pale grey wash. Using a damp brush, dab subtle, random blotches onto the white moon to mimic craters and texture. Keep this extremely faint; you want the moon to glow, not look dirty. -
Sparkle the Sky:
While the moon dries, take a small brush with white gouache. Dot tiny stars into the dark blue sky, concentrating them more heavily in the darker upper corners. -
Add the North Star:
Select one spot for a larger star. Paint a cross-shape with fine tapered points to create a twinkling effect for visual interest.
Step 3: Silhouettes & Details
-
Outline the Trees:
Load a medium brush with concentrated black paint or very thick indigo. Paint the jagged outlines of pine trees along the bottom edge of the paper. -
Fill the Landscape:
Fill in the tree shapes completely solid black. Vary their heights, making some taller to frame the composition. -
Sketch the Sleigh:
Using a very light pencil touch, sketch the outline of the sleigh and reindeer inside the moon circle. The shapes should be small to emphasize the moon’s vastness. -
Paint the Reindeer:
Use your smallest detail brush (size 0 or 00) and black paint to carefully fill in the reindeer. Focus on the legs and antlers—delicate lines are key here. -
Paint the Sleigh:
Move on to the sleigh body. Keep the silhouette simple; you don’t need internal details, just the outer shape of the runner and the carriage. -
Connect with Reins:
Draw incredibly thin lines connecting the reindeer to the sleigh. I sometimes switch to a black fineliner pen here if the brush feels too risky. -
Add the Red Hat:
For the only pop of color, use a tiny dot of bright red paint for Santa’s hat on the figure in the sleigh. -
Snow on Trees:
Once the black trees are dry, use white gouache to tap tiny dots of ‘snow’ onto the dark tree branches. -
Final Touches:
Step back and assess your stars and silhouettes. Add a small crescent moon shape in the upper corner near your North Star for a whimsical touch.
Add Depth
Mix a tiny bit of metallic silver or pearl watercolor into your white gouache for the stars. They will shimmer beautifully when the light hits the artwork.
This peaceful winter scene is now ready to bring a touch of silent night magic to your home
Cute Reindeer Face With Big Eyes
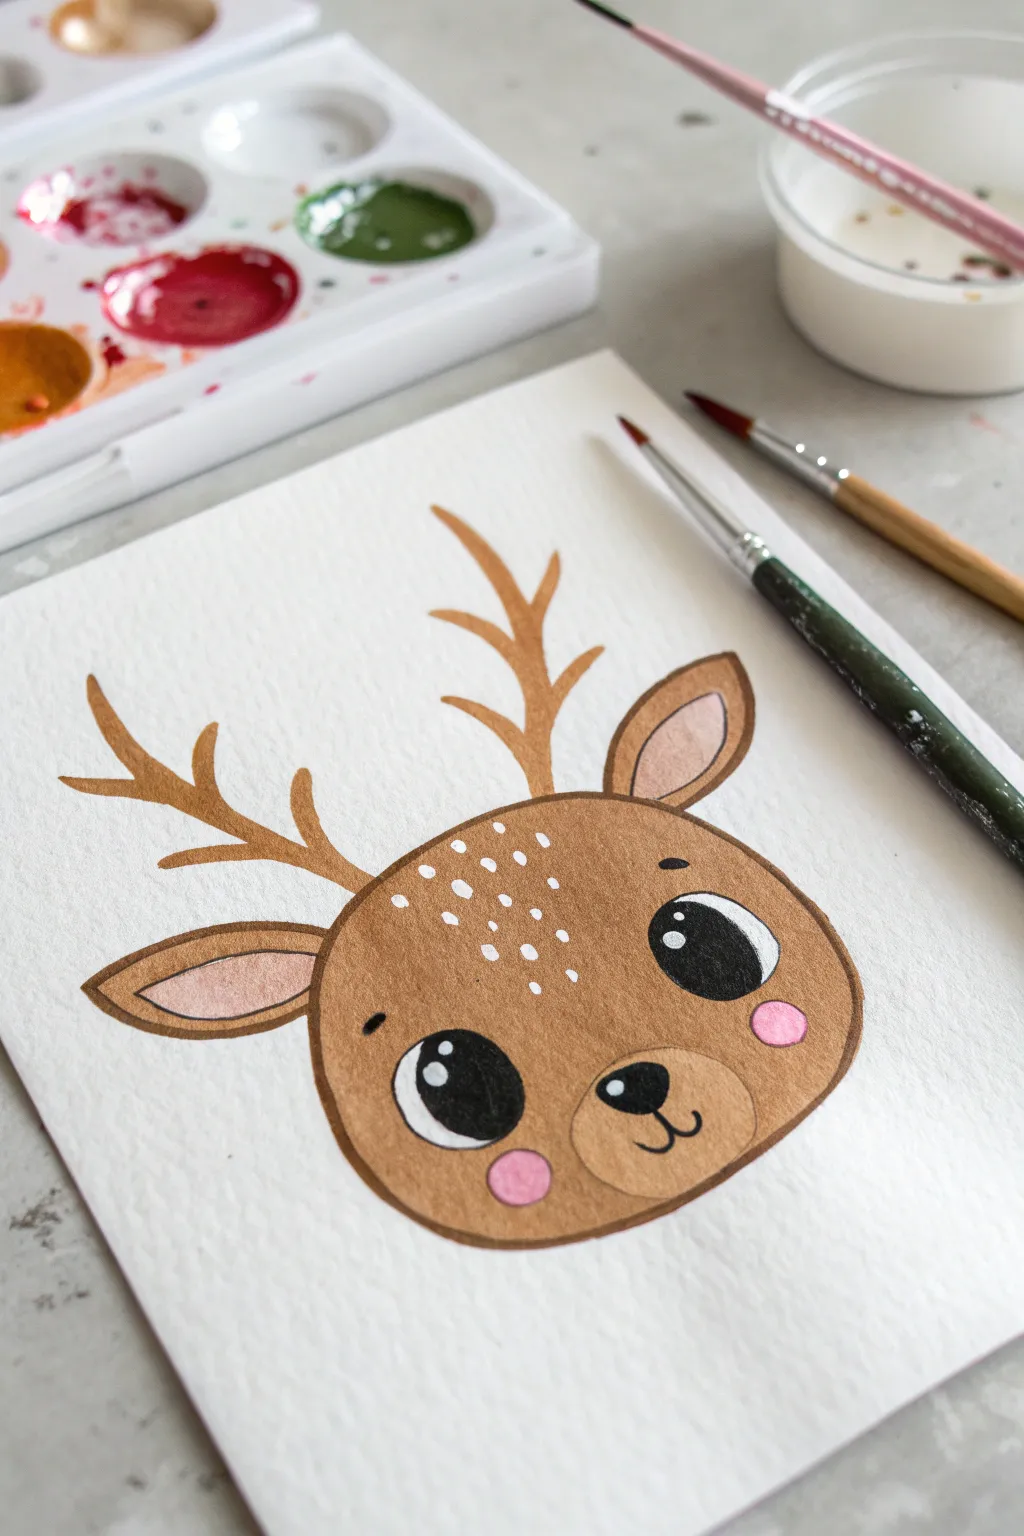
Capture the magic of the holidays with this adorable watercolor illustration featuring a sweet-faced reindeer. The oversized, sparkling eyes and delicate white spots give this character an irresistible charm that’s perfect for handmade holiday cards.
Detailed Instructions
Materials
- Watercolor paper (cold press, medium rough texture)
- Watercolor paints (brown, ochre, pink, black)
- Round watercolor brushes (sizes 2 and 6)
- White gel pen or white gouache paint
- Pencil and eraser
- Micron pen or fine liner (optional for outlines)
- Jar of water and paper towels
Step 1: Sketching the Shape
-
Outline the head:
Start by lightly sketching a wide oval shape for the head. Flatten the top slightly and make the bottom a bit wider, like a soft, rounded bean shape. -
Add the ears:
Draw two leaf-shaped ears extending from the upper corners of the head. Add a smaller inner ear shape inside each one to define the pink area later. -
Draft the antlers:
Sketch simple branched antlers rising from the top of the head using gently curved lines. Keep them relatively thin and playful. -
Mark the features:
Lightly draw two large circles for the eyes, placing them wide apart. Add a small rounded triangle for the nose and a curved ‘W’ shape for the mouth below it.
Step 2: Applying the Base Colors
-
Paint the main fur:
Load your size 6 brush with a warm medium-brown watercolor. Carefully fill in the main head shape, working around the eye circles, the snout area, and the inner ears. -
Fill the ears and antlers:
Use a slightly lighter, more ochre-tinted brown for the antlers. For the outer ears, use the same brown as the head, but keep the paint wet to ensure a smooth finish. -
Define the snout:
Mix a very pale, watered-down version of your brown (or a beige) and paint the oval muzzle area around the nose and mouth. Let this shape blend softly into the main fur if the paint is still damp, or let it stand out if dry. -
Add pink touches:
Dilute a soft pink watercolor and fill in the inner ear shapes. Add two distinct round circles of pink on the cheeks, just below the outer corners of the eyes.
Keep it Clean
Wait for the brown face paint to be fully bone-dry before painting the black eyes. If it’s damp, the black will bleed into the fur and ruin the clear shape.
Step 3: Details & Definition
-
Deepen the eyes:
Using a saturated black watercolor or gouache, fill in the large eye circles. This needs to be very opaque, so you might need two layers. -
Paint the nose and mouth:
Use black paint and a size 2 brush to fill in the nose shape. Carefully trace the ‘W’ mouth line and add a tiny vertical line connecting it to the nose. -
Add outlines:
Once the brown paint is completely dry, use a fine brush with dark brown paint (or a fine liner pen) to outline the head, ears, and antlers for a crisp, illustrative look. -
Create the sparkle:
Dip a fine brush into white gouache or use a white gel pen. Add two white reflection dots in each black eye—one large dot near the top and a smaller one below it. -
Dot the forehead:
Using the same white tool, dab a cluster of small white dots on the forehead between the eyes to mimic fawn spots or snowflakes. -
Final highlights:
Add tiny eyebrow lines above the eyes for expression. If desired, add a tiny white highlight on the black nose to make it look wet and shiny.
Festive Flair
Turn this into a card by painting a red watercolor nose instead of black to make Rudolph, or tangle a string of colorful Christmas lights in the antlers.
Now you have a charming woodland friend ready to brighten up your sketchbook or holiday gift tags

PENCIL GUIDE
Understanding Pencil Grades from H to B
From first sketch to finished drawing — learn pencil grades, line control, and shading techniques.
Explore the Full Guide
Rudolph Nose Glow Trick
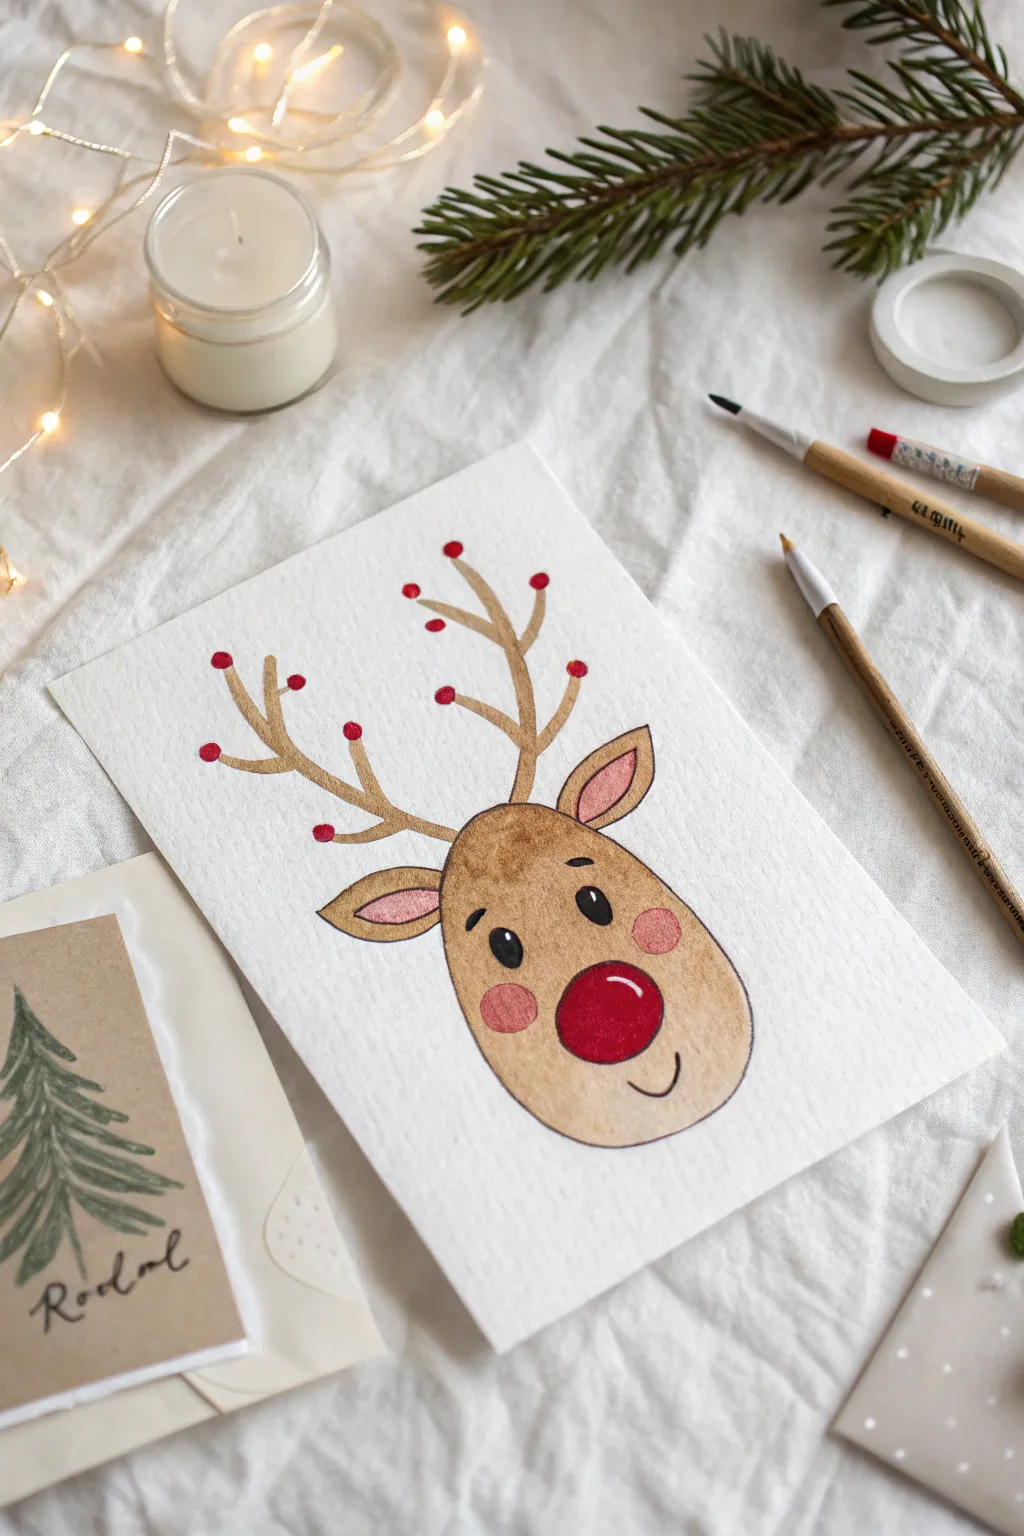
This charming watercolor study captures the playful spirit of the season with a minimalist reindeer portrait featuring delicate antlers and a standout red nose. The textured paper and soft washes give it a cozy, handcrafted feel that is perfect for holiday cards or festive wall art.
How-To Guide
Materials
- Cold-press watercolor paper (heavyweight, textured)
- Watercolor paints (brown, red, pink, beige/ochre)
- Fine round brush (size 2 or 4)
- Detail brush or black fineliner pen (0.3mm or 0.5mm)
- Pencil and eraser for sketching
- Jar of water
- Paper towel
Step 1: Sketching the Shape
-
Outline the head:
Start by lightly sketching a simple egg shape for the reindeer’s head. The bottom should be slightly wider and rounder than the top to give him a cute, chubby look. -
Add the ears:
Draw two leaf-shaped ears extending from the upper sides of the head. Position them just below where the antlers will go, angling them slightly upward. -
Draft the antlers:
Sketch two main branches rising from the top of the head. Add smaller forks branching off—don’t worry about perfect symmetry, as slight variations make it look more organic. -
Map the face:
Lightly mark the position of the eyes, the rosy cheeks, and the large signature nose. Keep the pencil lines very faint so they won’t show through the paint.
Step 2: Painting the Base Layers
-
Wash the fur:
Mix a diluted light brown or ochre watercolor. Apply a smooth, even wash over the entire head shape, leaving the nose area white for now. -
Fill the ears:
Paint the outer shape of the ears with the same light brown. While that dries, mix a soft pink -
Paint the inner ears:
Once the brown is barely damp or dry, paint the inner teardrop shape of the ears with your soft pink mix. -
Color the antlers:
Use a slightly darker, warmer brown for the antlers. Carefully fill in your sketched branches using the tip of your round brush for control.
Nose Glow Trick
To make the nose look like it’s glowing, wet the paper slightly outside the red circle before painting, allowing a faint amount of red to bleed outward softly.
Step 3: Adding Details and Glow
-
Paint the nose:
Load your brush with vibrant red paint. Fill in the large circular nose, ensuring plenty of pigment saturation for that glowing effect. Leave a tiny sliver of white paper unpainted on the upper side for a highlight. -
Add festive berries:
Using the same red, dab small round berries onto the tips of the antler branches. I find that varying their sizes slightly adds a nice whimsical touch. -
Create rosy cheeks:
Mix a watery pink or coral shade. Paint two soft circles on the cheeks just below the eyes. If the edges are too hard, soften them with a clean, damp brush. -
Dry thoroughly:
Let the entire painting dry completely. The paper must be bone-dry before you add the ink details to prevent bleeding.
Festive Card Finish
Turn this painting into a holiday card by adding a handwritten ‘Merry and Bright’ in calligraphy below the reindeer or using gold ink for the antlers.
Step 4: Defining Features
-
Draw the eyes:
Using a very fine black brush or a waterproof fineliner, draw two oval eyes. Fill them in black, leaving a tiny white dot in each for a sparkle. -
Add eyebrows:
Place two small, floating eyebrows above the eyes to give him an expressive, surprised look. -
Outline the head:
Gently outline the head and ears with a fine black line. Keep the line thin and delicate; it doesn’t need to be continuous or heavy. -
Define the mouth:
Draw a small, curved smile directly under the red nose. Keep it simple and minimalistic. -
Highlight touch-up:
If you accidentally painted over the nose highlight, use a tiny dot of white gouache or a white gel pen to bring back that shine.
Now your adorable reindeer is ready to spread some holiday cheer
String Lights as Easy Ovals and Lines
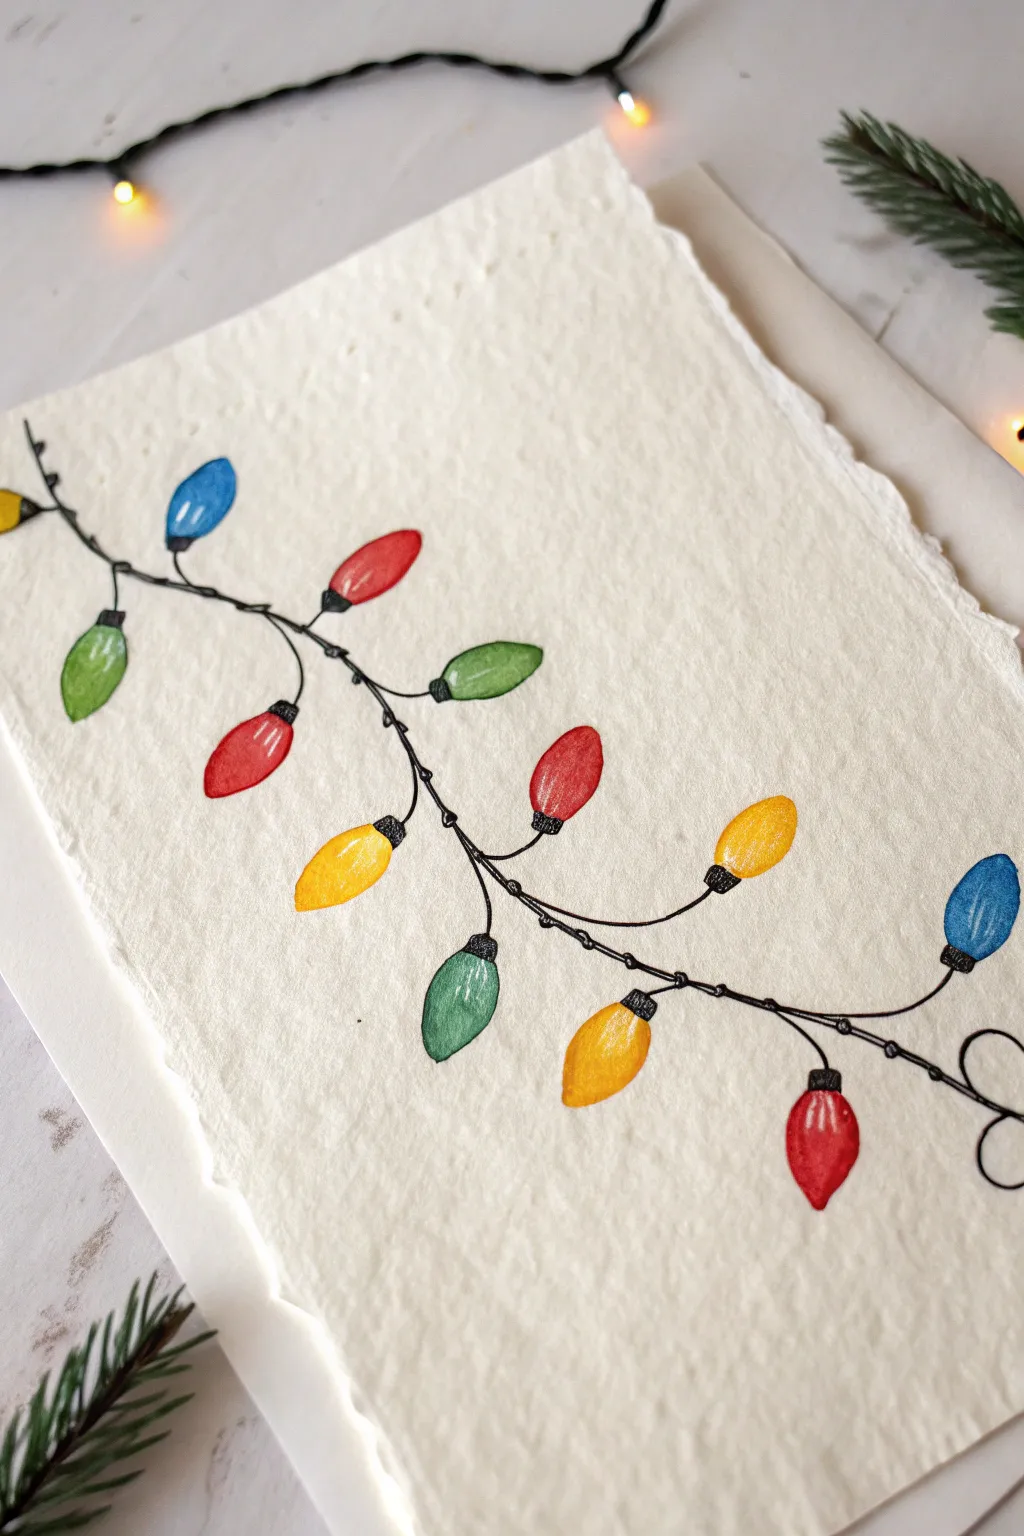
Capture the magic of the holidays with this charming and minimal painting of tangled string lights. Using simple oval shapes and a fine black pen, you can create a festive card design that feels both handmade and wonderfully elegant on textured paper.
Step-by-Step Guide
Materials
- Cold press watercolor paper (textured A5 or A6 size recommended)
- Watercolor paints (Red, Green, Yellow, Blue)
- Small round paintbrush (size 2 or 4)
- Fine liner pen (Black, waterproof, 0.3mm or 0.5mm)
- Pencil (HB)
- Eraser
- Cup of water and paper towel
Step 1: Planning the String
-
Imagine the path:
Before putting pen to paper, visualize where you want your string to go. A gentle, diagonal S-curve or a drooping ‘smile’ shape works best to fill the rectangular space naturally. -
Sketch the wire lightly:
Using your HB pencil, draw a very faint line representing the main wire. Don’t worry about making it perfectly straight; little wobbles add character. I like to add loops at the ends or in the middle to suggest twisting. -
Mark the bulb spots:
Lightly mark small ticks along your line where each bulb will sit. Space them somewhat evenly, but vary the angles so they point in different directions—some up, some down, some sideways.
Smudged Ink?
If your fine liner isn’t perfectly waterproof, avoid painting over it. Always paint the color first, let it dry completely, and then draw the lines on top to prevent bleeding.
Step 2: Painting the Bulbs
-
Mix your first color:
Start with a bright primary yellow. Load your small round brush with paint that is fluid but not too watery, as you want the color to be vibrant. -
Paint the yellow ovals:
Paint simple teardrop or oval shapes at a few of your marked spots. Leave the top of the shape slightly flat where it will connect to the wire. Scatter them randomly so the color is balanced. -
Add the red bulbs:
Rinse your brush thoroughly and switch to a vivid Christmas red. Paint more oval shapes, filling in open spots. Try to keep the size consistent with your yellow bulbs. -
Add the green bulbs:
Next, use a medium festive green. Paint these bulbs, making sure not to touch wet paint from neighboring bulbs if they are close together. -
Finish with blue:
Fill the remaining spots with a bright blue shade. Step back and check if the distribution looks pleasing; if there’s a big gap, you can always squeeze in an extra bulb later. -
Create highlights (optional):
To make the bulbs look shiny, you can lift a tiny bit of wet paint from the center of each bulb with a thirsty (dry) brush, or leave a tiny speck of white paper unpainted when you first lay down the color. -
Let it dry completely:
This is crucial. The paper must be bone dry before you add the ink details, otherwise, the ink will bleed into the paint. Wait at least 10-15 minutes.
Make It Sparkle
Once the paint is dry, use a white gel pen to add a small ‘glint’ or reflection dot on the upper curve of each bulb. It makes the glass look instantly shiny and bright.
Step 3: Inking the Details
-
Outline the wire:
Using your waterproof fine liner, trace over your initial pencil line. Use a confident, fluid motion. If your hand shakes a little, don’t worry—it makes the wire look more realistic. -
Add twisted sections:
String lights are made of twisted wires. To show this, add small, parallel lines closely together at random intervals along the main black line, creating a ‘barbed’ or braided look. -
Draw the sockets:
At the base of every painted oval, draw a small black rectangle or trapezoid that connects the colored bulb to the main wire. -
Detail the sockets:
Fill in these small rectangles with black ink, or draw horizontal stripes inside them to mimic the texture of the plastic socket base. -
Connect the bulbs:
Ensure the wire line actually touches the top of each black socket. If there’s a gap, draw a tiny line to bridge it so the bulbs don’t look like they are floating. -
Add separation lines:
Draw tiny, barely-there lines between the colored bulb and the black socket to clearly define where the glass starts and the plastic ends. -
Erase pencil marks:
Once the ink is 100% dry (give it a few minutes to be safe), gently erase any visible pencil guidelines to leave a clean, crisp illustration.
You now have a delightful piece of holiday art ready to be turned into a greeting card or framed decoration


Minimalist Nativity Star Night
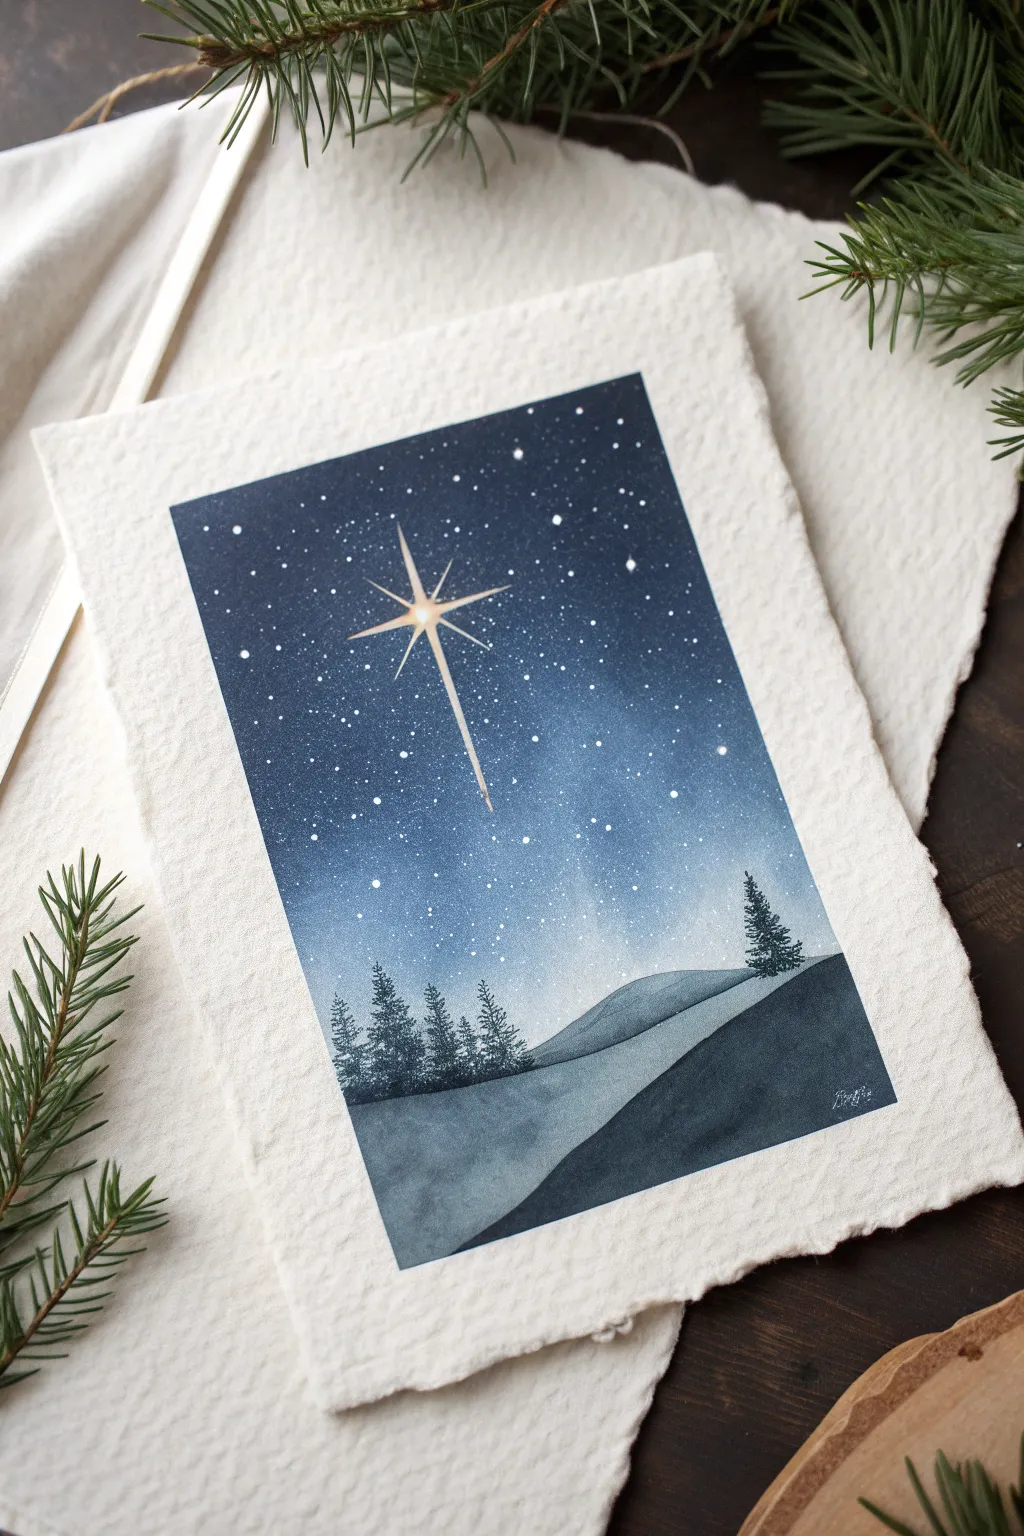
Capture the serene beauty of a winter’s night with this minimalist watercolor painting featuring a brilliant guiding star. The deep indigo gradients and simple silhouetted landscape create a peaceful scene perfect for holiday cards or framed seasonal decor.
How-To Guide
Materials
- Cold press watercolor paper (with deckled edge preferred)
- Watercolor paints: Indigo, Prussian Blue, Payne’s Gray, White Gouache or Bleed Proof White
- Flat wash brush (3/4 or 1 inch)
- Round brushes (size 4 and size 0/liner)
- Masking fluid (optional but recommended)
- Ruler and pencil
- Paper towels and two jars of water
- Masking tape (for securing paper)
- Toothbrush (for splattering stars)
Step 1: Preparation and The Great Star
-
Paper prep:
Begin by taping your watercolor paper to a board. If you want the rustic look shown in the photo, use paper with a deckled edge and float the sheet by taping the back, or just tape the corners so the edges remain free. -
Sketching the star:
Using a ruler, very lightly pencil a cross in the upper left quadrant where your main star will go. Draw a longer vertical line for the tail. -
Protecting the light:
Apply masking fluid to create the central star shape. Draw a thin cross, extending the bottom line significantly longer to form the tail. Let the fluid dry completely before painting. -
Alternative method:
If you don’t have masking fluid, you can simply paint around this shape carefully, or plan to use opaque white gouache at the very end to paint it on top.
Glow Factor
To make the main star really shine, ensure the sky immediately surrounding it is painted with clean water only, leaving a localized ‘halo’ of white paper before the blue paint begins.
Step 2: Creating the Night Sky
-
Wet-on-wet start:
Brush clean water over the entire sky area, stopping roughly where your hill line will begin. The paper should be glisteny but not puddling. -
First wash:
Load your flat brush with a diluted Prussian Blue. Start at the top of the paper and wash downwards. As you get closer to the star and the horizon, rinse your brush and use mostly water to fade the color out to nearly white. -
Deepening the darkness:
While the paper is still damp, mix a strong concentration of Indigo and Payne’s Gray. Verify your paper is still moist; dry edges will create hard lines. -
Dark gradients:
Apply this dark mixture to the very top corners and edges of the sky, letting it bleed downwards into the lighter blue. Keep the area immediately around the star and the horizon very light to create a glowing effect. -
Drying time:
Allow this layer to dry completely. The paper must be bone dry before the next step to prevent the stars from blooming.
Trouble with Blooms?
If you get cauliflower-like edges (blooms) in your sky, it means you added wet paint into semi-dry paper. Wait for it to fully dry, then do a gentle glaze over the whole sky to smooth it out.
Step 3: The Galaxy of Stars
-
Splatter technique:
Mix white gouache with a tiny drop of water until it has a heavy cream consistency. Dip an old toothbrush into the paint. -
Creating the stars:
Hold the toothbrush over the sky area and use your thumb to flick the bristles. Aim mostly for the darker upper corners and avoid the white horizon area. -
Adding larger stars:
Use your size 0 or liner brush to manually dot in a few larger, brighter stars in the dark blue areas to add depth. -
Revealing the guide:
Once the sky is totally dry, gently rub off the masking fluid to reveal the crisp white paper underneath. -
Softening the star:
Dampen a clean brush and very gently soften the edges of your white star so it glows rather than looks like a sticker. You can drop a tiny hint of yellow into the very center for warmth.
Step 4: Landscape and Details
-
Painting the first hill:
Mix a medium-value blue-gray using Payne’s Gray and a touch of water. Paint a sweeping visible curve for the distant hill on the right side. Let it be somewhat transparent. -
Painting the foreground:
Mix a much darker, saturated Indigo and Payne’s Gray. Paint the foreground hill that sweeps from bottom left to right. The contrast between this dark value and the lighter hill behind creates depth. -
Adding trees:
Switch to your size 4 round brush. Using highly concentrated (thick) dark paint, tap the tip of the brush vertically to create tree shapes on the horizon line. -
Tree details:
Start with a thin line for the trunk, then use faint zigzag motions getting wider at the base to suggest pine branches. Place a cluster on the left and a solitary tree on the right. -
Final touches:
Review your contrast. If the foreground needs to be darker to stand out against the snowy ground, add another layer of dark glaze over the bottom hill once the first layer is dry.
Now you have a peaceful, starlit winter scene that captures the quiet magic of the season.
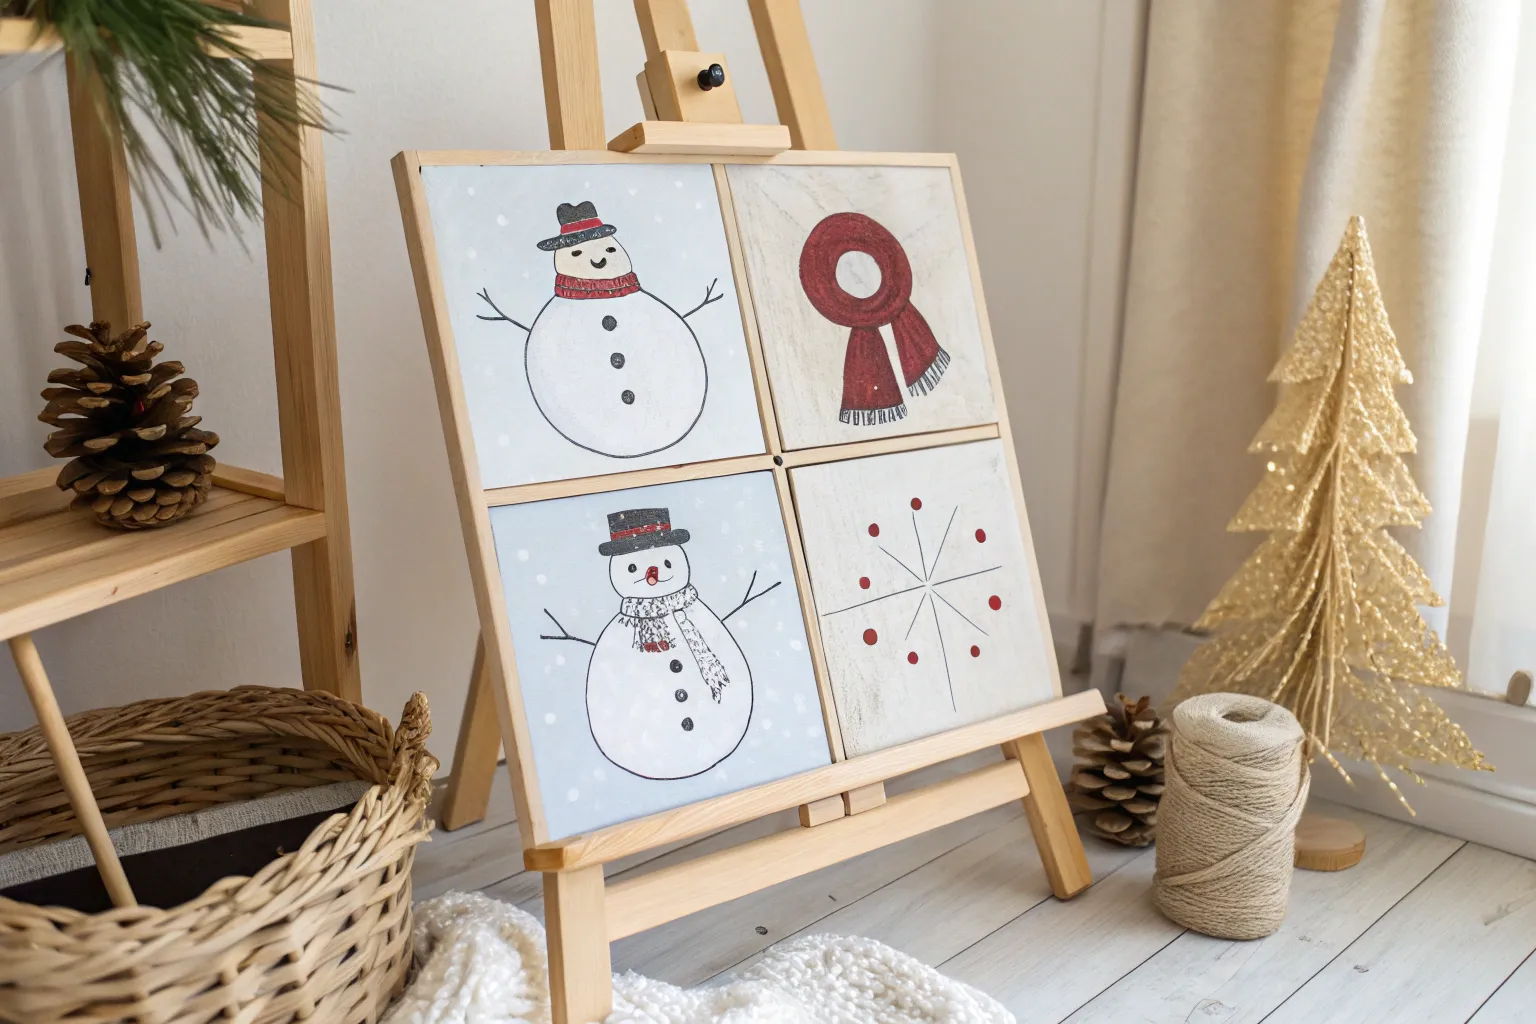
Modern Christmas Color Blocks and Simple Icons
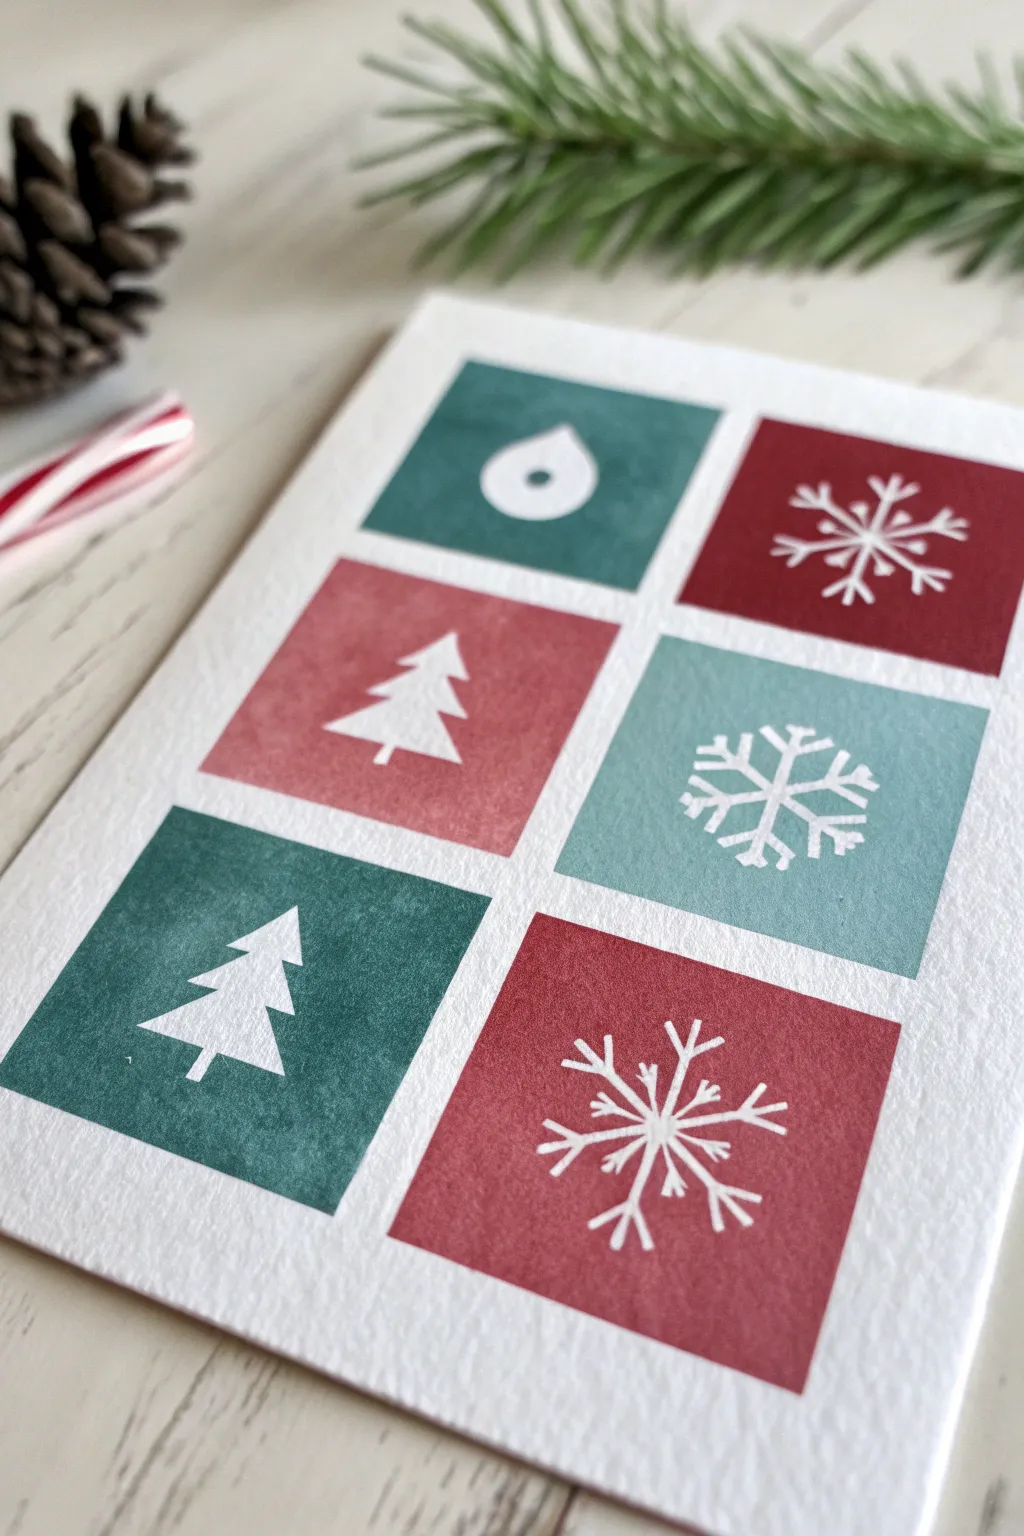
Create a sophisticated holiday card using a clean grid layout that balances negative space with bold blocks of color. This project combines geometric precision with simple white silhouettes for a look that feels both retro and freshly modern.
Step-by-Step Guide
Materials
- Heavyweight watercolor paper or textured cardstock (white)
- Painter’s tape or masking tape (low tack)
- Acrylic paints or gouache (Deep Teal, Muted Red, Sage Green)
- Flat shader brush (approx. 1/2 inch)
- Fine detail brush (size 0 or 00)
- Ruler
- Pencil
- Eraser
- White gel pen or white acrylic ink
Step 1: Grid Preparation
-
Measure the paper:
Begin with a rectangular piece of heavy watercolor paper. A 5×7 inch size works perfectly for a standard greeting card format. -
Mark the margins:
Using your ruler and a pencil, lightly mark a consistent border around the entire paper, leaving about a half-inch of white space. -
Draw the grid lines:
Divide the interior space into six equal squares—two columns wide and three rows high. Measure carefully to ensure the gutters (the spaces between the squares) are uniform. -
Mask the edges:
Apply painter’s tape along the outside border of your pencil lines. This protects the pristine white margin that frames the artwork. -
Mask the gutters:
Carefully tape off the horizontal and vertical spaces between the squares. Press the tape edges down firmly to prevent paint from bleeding underneath.
Step 2: Painting the Color Blocks
-
Mix your palette:
Prepare three distinct holiday shades: a deep forest green, a muted berry red, and a soft sage or teal. Using gouache here gives a lovely matte finish, quite similar to the photo. -
Paint the first diagonal:
Load your flat shader brush with the deep teal color. Paint two non-adjacent squares, perhaps the top left and bottom left, to start distributing the color balance. -
Apply the red tones:
Clean your brush thoroughly and pick up the muted red paint. Fill in the top right and bottom middle squares, keeping your brushstrokes horizontal for a uniform texture. -
Fill the final squares:
Use the lighter sage or teal color for the remaining two blocks (middle right and center left), completing the checkerboard effect. -
Allow to dry:
Let the paint dry completely. This is crucial—if the paint is wet when you peel the tape, it might smear or lift. -
Remove the tape:
Slowly peel back the painter’s tape at a 45-degree angle. This reveals crisp, clean edges between your colorful squares.
Crisp Edge Secret
Before painting your color blocks, brush a tiny bit of white paint over the tape edges to seal them. This guarantees razor-sharp lines.
Step 3: Adding the Icons
-
Pencil the designs:
Very lightly sketch your icon shapes in the center of each colored block. Aim for trees, snowflakes, and simple ornaments. -
Paint the trees:
Using a fine detail brush and white acrylic paint (or gouache), carefully fill in the Christmas tree silhouettes. Start from the top point and work downward to the base. -
Detail the snowflakes:
For the snowflakes, paint a central cross first, then add the diagonal lines. Use the very tip of your brush to add the tiny V-shapes at the ends of the arms. -
Add the ornament:
Paint the circular ornament shape. If you’re nervous about steadiness, a white gel pen offers excellent control for these smaller curved lines. -
Clean up:
Once the white paint is fully dry, gently erase any visible pencil marks from your initial grid sketching.
Stamp It Instead
Carve simple shapes into a soft eraser to make custom stamps. Use white ink to stomp the icons quickly and uniformly over the colors.
Now you have a stunning, graphic card ready to joyous greetings


Have a question or want to share your own experience? I'd love to hear from you in the comments below!