Chalk boards have this magical way of making even simple lines feel charming and intentional. If you’re craving fresh chalk board drawing ideas that mix easy wins with bigger “wow” moments, you’re in the right place.
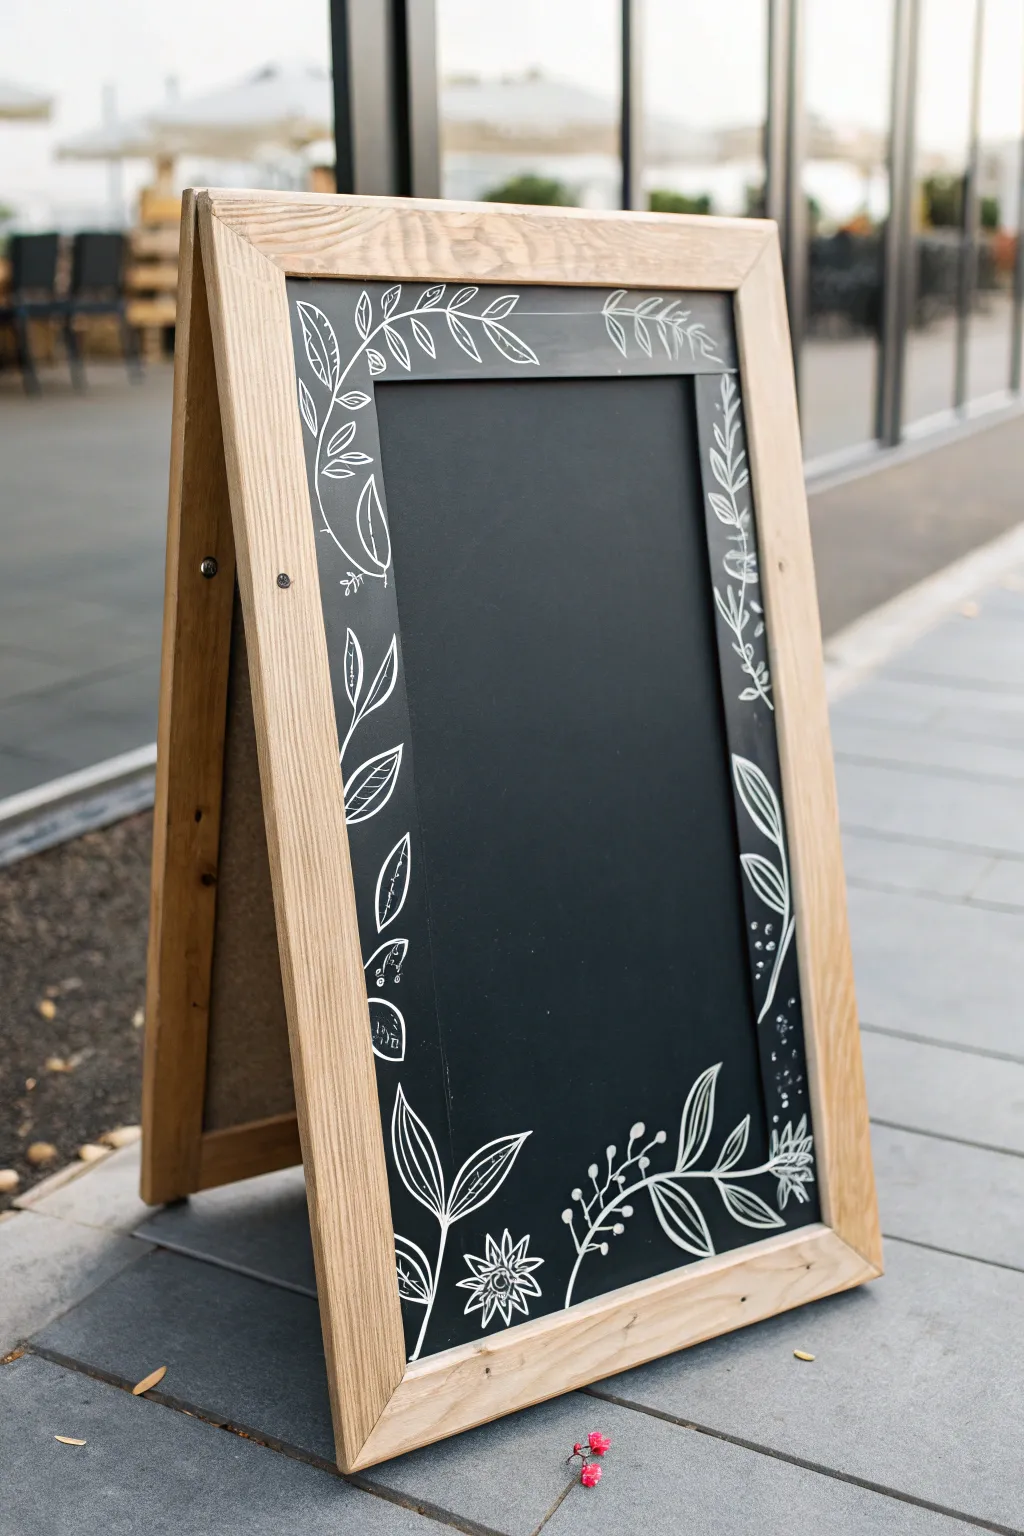
Simple Floral Border Around Words

Transform a plain blackboard into an elegant display piece with this hand-drawn botanical border. Featuring delicate vines, leafy Sprague, and simple daisies, this design creates a perfect natural frame for menus, quotes, or welcome messages.
Detailed Instructions
Materials
- Large chalkboard (framed or unframed)
- White liquid chalk marker (fine tip for details)
- White liquid chalk marker (bold tip for boarders)
- Ruler or straight edge (at least 12-18 inches)
- Microfiber cloth
- Cotton swabs
- Water
- Pencil (optional)
Step 1: Setting the Structure
-
Clean the surface:
Before you begin, ensure your chalkboard is completely clean and dry. Wipe it down with a damp microfiber cloth to remove old chalk dust and let it air dry to prevent smearing. -
Measure the inner frame:
Decide on the margin size for your border. For a standard board like the one shown, leave about 1.5 to 2 inches of space from the outer edge of the chalkboard frame. -
Draw the straight lines:
Using your ruler and the fine-tip liquid chalk marker, draw a large rectangle. If you aren’t confident going straight to ink, you can lightly sketch this line with a pencil first, as graphite often shows up faintly on slate. -
Double the line work:
To give the frame more weight, go over your rectangular line a second time, or use the bold-tip marker to make it stand out against the dark background.
Uneven Ink Flow?
Pump the marker tip on a separate scrap piece of paper, not the board. This prevents sudden puddles of ink from ruining your drawing.
Step 2: Drawing the Botanical Elements
-
Corner anchors:
Start at the top-left corner. Draw a simple five-petal flower on the outside of your rectangle line. This will serve as an anchor point for the vines. -
Add corner accents:
Repeat this process by adding similar flower clusters or large leaf groupings at the bottom-left and bottom-right corners to balance the design. -
Drafting the main vines:
From your corner flower, draw long, flowing curved lines extending outwards along the border space. Let them meander naturally rather than trying to make them perfectly straight. -
Leaf variation: The simple oval:
Along some of the vine lines, draw small, solid oval leaves directly attached to the stem. Space them out evenly, alternating sides. -
Leaf variation: The detailed vein:
Create larger, pointed leaves that float slightly off the vines. Draw the outline first, then add a central line and small diagonal veins inside for texture. -
Leaf variation: The fern style:
For variety, sketch some stems that branch into multiple smaller leaflets, resembling a fern frond. These look great placed near the corners to fill empty negative space. -
Adding whimsical details:
Draw small sprigs with tiny loops or hollow circles at the ends to mimic berries or buds. These soften the look and add movement. -
Top center flourish:
At the very top center of the board, draw a small cluster of leaves or a tiny flower. Connect this to the corner designs with faint, sweeping lines to create a continuous flow.
Step 3: Refining and Touching Up
-
Balancing the composition:
Step back and look at your board. If there are large gaps between the vines and the frame edge, fill them with small floating leaves, asterisks (to look like tiny stars or pollen), or simple swirls. -
Correcting mistakes:
If a line went astray, dip a cotton swab in a little water and carefully erase just that specific small area. Wait for the spot to dry completely before redrawing. -
Highlighting:
Go back over the centers of your flowers or the main stems of the vines to brighten the white ink, making the drawing pop more against the black surface. -
Cleaning up the edges:
Use a damp cloth to wipe away any smudges or pencil guidelines that might still be visible around your finished drawing. -
Final cure:
Allow the liquid chalk to dry undisturbed for at least 15 minutes before moving the focused board or writing your message in the center.
Ghosting Prevention
Before drawing, ‘season’ a new chalkboard by rubbing the side of a stick of chalk over the entire surface, then wiping it off. This primes the pores.
Now you have a beautifully framed space ready for your creativity to shine


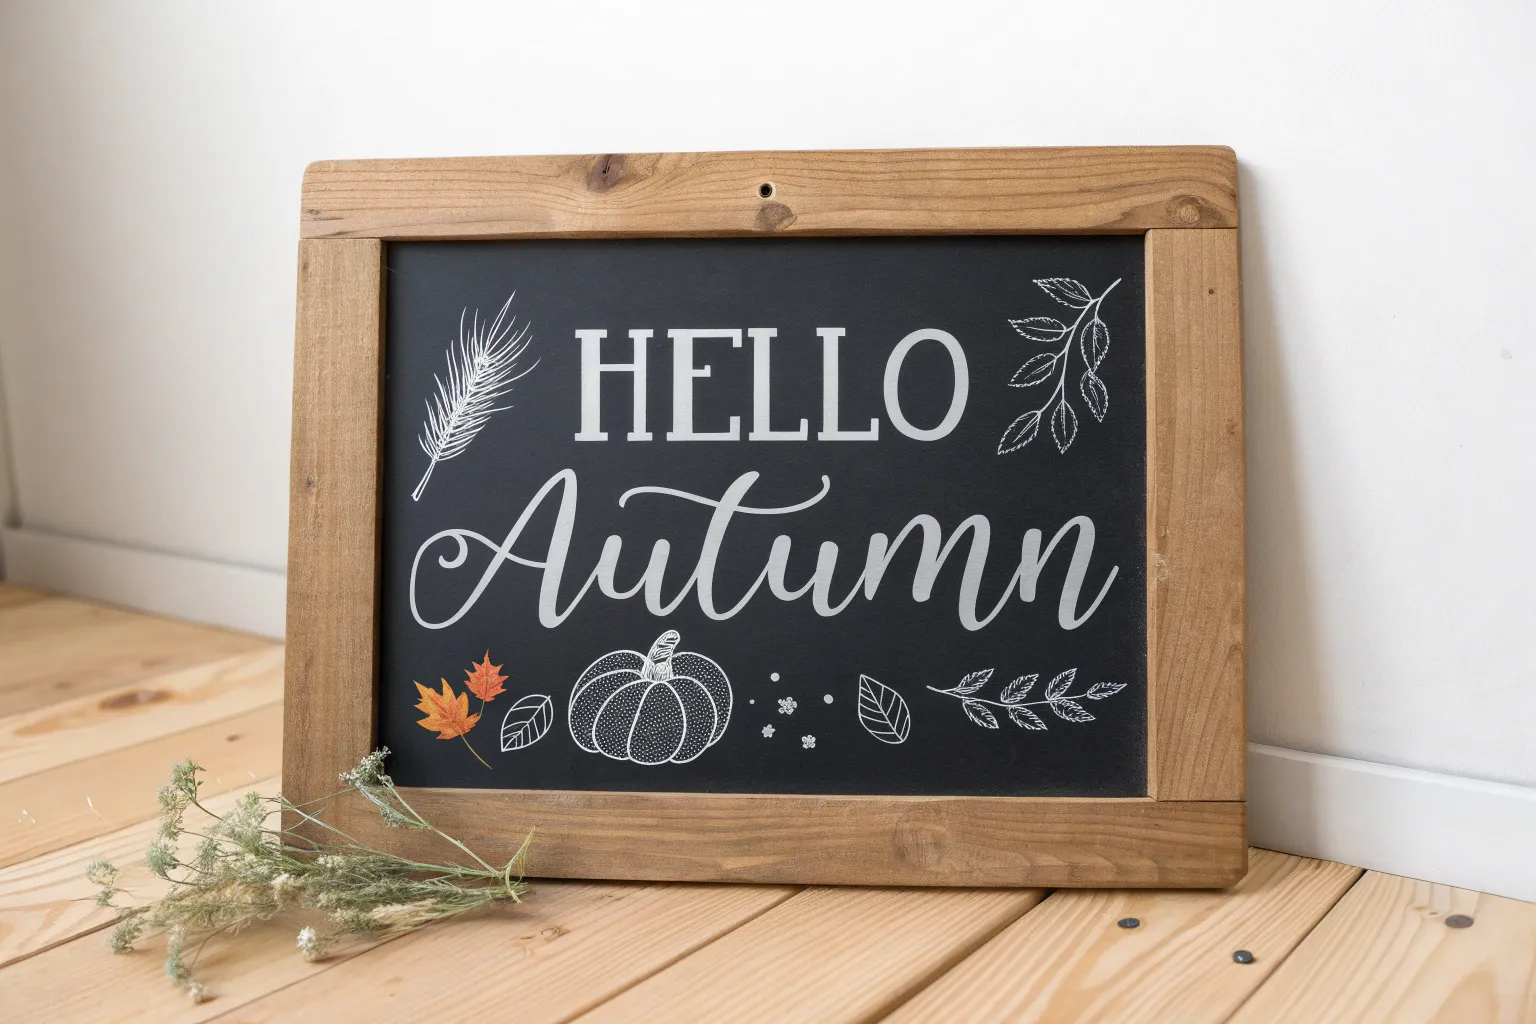
Seasonal Greeting Chalk Board
Transform a plain chalkboard menu or sign into an inviting display with this delicate white floral border. Focusing on organic vines and simple botanical shapes, this design frames your message perfectly without overwhelming it.
Step-by-Step Tutorial
Materials
- A-frame chalkboard (or any standard chalkboard)
- White chalk marker (fine tip, 1-2mm)
- White chalk marker (extra fine tip, 0.7mm)
- Standard stick chalk (white)
- Damp microfiber cloth
- Cotton swabs
- Pencil and paper (for sketching)
Step 1: Planning and Preparation
-
Clean the surface:
Before you begin, ensure your chalkboard is completely clean. Wipe it down with a damp microfiber cloth to remove any old ghosting or dust. Let it dry completely tailored to your board’s material, as moisture can make chalk markers bleed. -
Season the board (optional):
If your board is brand new, ‘season’ it by rubbing the side of a stick of chalk over the entire surface and erasing it. This gives the background a softer, more authentic matte look rather than a harsh, shiny black. -
Sketch the flow:
Using a very light touch with a stick of white chalk, sketch faint guidelines for where your vines will go. For this design, you want a heavy cluster at the bottom right, trailing up the sides, and a sweeping vine across the top left.
Smudge Control
Work from the top down or left to right (if right-handed) to avoid dragging your hand through fresh ink. If you smudge, wait for it to fully dry before wiping away with a barely damp Q-tip.
Step 2: Drawing the Base Vines
-
Draw the main stems:
Take your fine tip (1-2mm) chalk marker. Shake it well to ensure the ink flows. Trace over your main guiding lines, creating fluid, curving stems that wander up the sides of the frame. -
Add secondary branches:
From the main stems, draw shorter, thinner offshoots. These should curve gently away from the main vine. Don’t worry about perfect symmetry; natural vines are irregular. -
Anchor the corners:
Pay special attention to the bottom right corner. Draw several stems originating from this point to create a visual ‘weight’ or anchor for the entire illustration.
Add Depth
Once the white ink is dry, gently rub a tiny bit of grey pastel chalk on the undersides of the largest leaves to create a subtle shadow effect that lifts the drawing off the board.
Step 3: Adding Leaves and Foliage
-
Create willow-style leaves:
On the top left vine, draw long, slender leaves. Press down slightly at the base of the leaf and lift up as you reach the tip to create a tapered point. -
Detail the leaves:
Using the extra-fine marker, draw a single line down the center of each larger leaf. Then, add tiny diagonal veins for texture. -
Draw rounded leaves:
Moving down the left side, switch leaf shapes. Draw smaller, teardrop-shaped leaves on alternating sides of the vine stem to create variety. -
Add fern-like fronds:
On the right side border, sketch long, curved center lines. Then, add many small, short strokes on either side of these lines to mimic the look of a fern or evergreen branch.
Step 4: Drawing the Floral Accents
-
Outline the bottom flowers:
In the bottom right corner, draw the outlines of two or three focal flowers. I like to start with a small circle for the center. -
Add petals:
Around the flower centers, draw pointed, star-like petals. Keep them simple and geometric rather than overly realistic. -
Detail the flower centers:
Fill the center circles with tiny dots or a cross-hatch pattern using your extra-fine marker to add contrast against the black background. -
Draw berry sprigs:
Interspersed among the bottom foliage, draw thin stems topped with small solid circles. These represent berries or buds and add a nice density to the lower border.
Step 5: Refining and Cleaning
-
Thicken select lines:
Go back over the main stems on the bottom and sides. Add a second stroke to thicken them slightly, which helps the design stand out from a distance. -
Add floating details:
Fill any awkward empty spaces near the borders with tiny detached dots or small floating leaves. This makes the design feel cohesive and magical. -
Clean up mistakes:
Dip a cotton swab in a little water to carefully erase any smudges or lines that went astray. A precise edge makes the white chalk pop. -
Let it cure:
Allows the chalk marker ink to dry completely (at least 15 minutes) before moving the sign, ensuring you don’t accidentally smear your hard work.
Now you have a beautifully framed space ready for your daily menu or welcoming message


Banner Ribbon Header
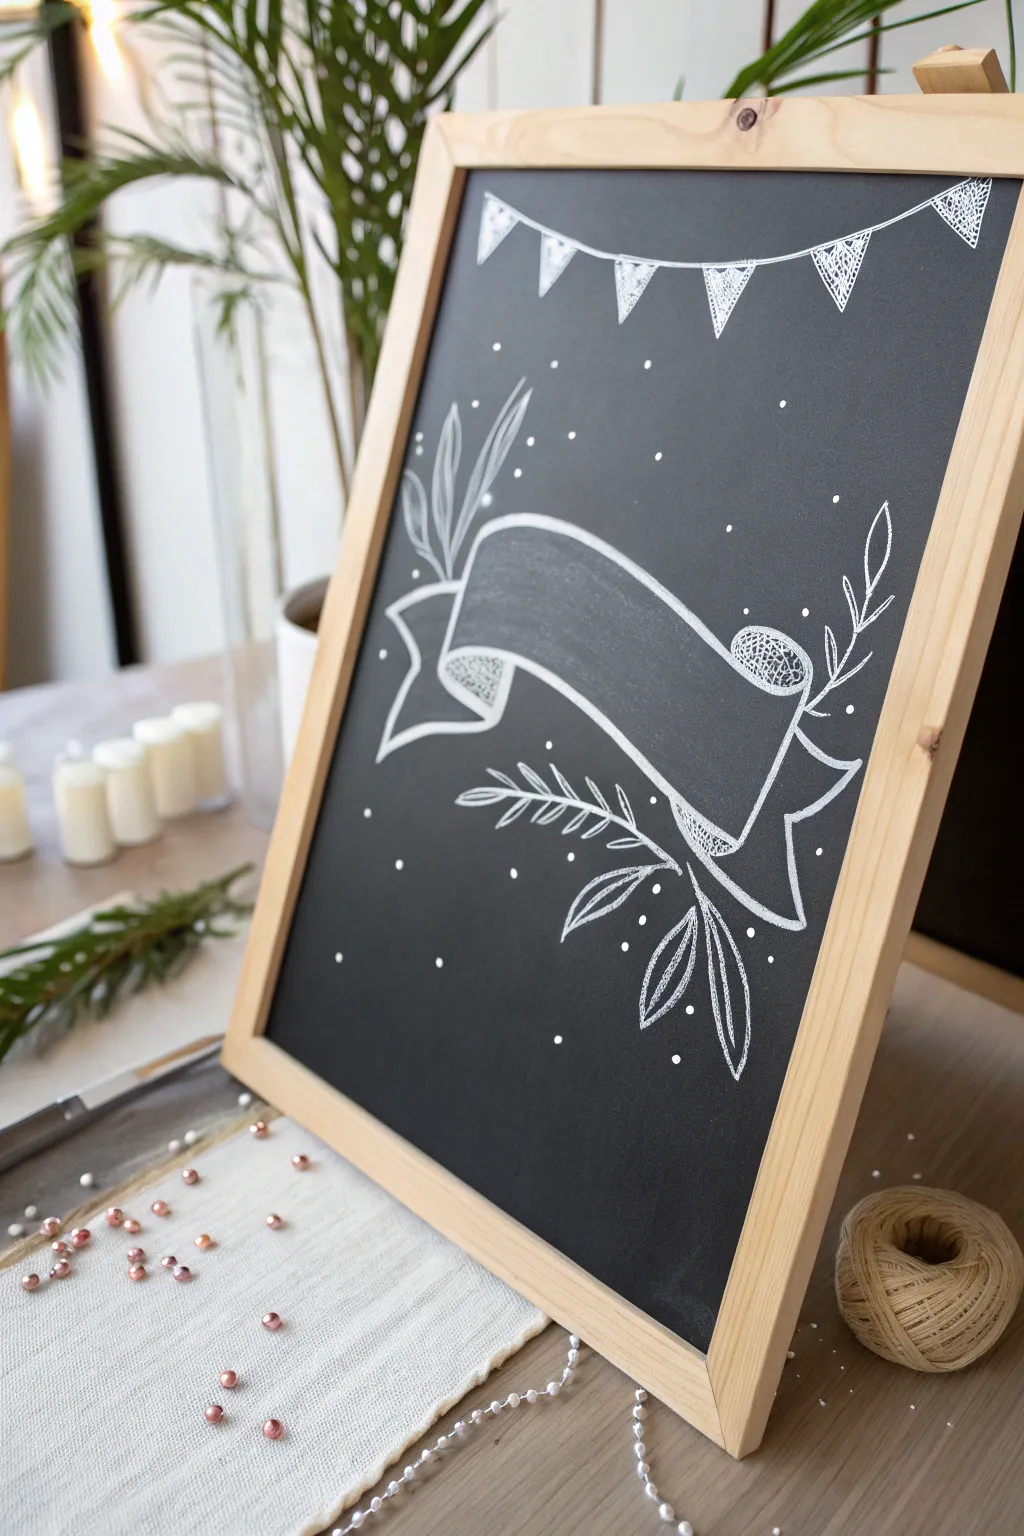
This charming chalkboard display features a classic ribbon banner framed by delicate botanical sprigs and festive bunting. The high-contrast white chalk creates a clean, elegant look perfect for event signage, menus, or welcoming guests into your home.
Step-by-Step
Materials
- Small framed chalkboard (approx. A4 or A3 size)
- White chalk marker (fine tip)
- Standard white chalk stick (for sketching)
- Damp cloth or sponge
- Cotton swabs (optional, for corrections)
- Ruler (optional)
Step 1: Setting the Composition
-
Clean the surface:
Begin by ensuring your chalkboard surface is completely clean and dry. Wipe away any old ghosting or dust with a damp cloth to create a pristine black canvas. -
Sketch the center line:
Using a piece of standard stick chalk, lightly draw a faint horizontal line across the middle of the board. This won’t be part of the final art but will help keep your ribbon straight. -
Outline the main banner shape:
Sketch a long, rectangular shape with a slight wave or curve to it in the center. The top line should curve gently upward and then down, mirroring that curve on the bottom line.
Step 2: Drawing the Ribbon
-
Inking the main panel:
Switch to your fine-tip chalk marker. Trace over your sketch for the main central rectangle, creating crisp, solid white lines. Leave the side ends open for now. -
Create the left fold:
On the left side, draw a short diagonal line angling inward from the bottom corner. Then, draw a ‘V’ shape extending outward to create the fluttering tail of the ribbon. -
Create the right fold:
Repeat the process on the right side, but alter the angle slightly to make the ribbon look like it’s flowing naturally. Draw the back fold connecting the main panel to the tail. -
Add dimension with shading:
Use the chalk marker to fill in the small triangular sections where the ribbon folds back on itself. I like to use a stippling or cross-hatching technique here to simulate shadow and depth. -
Thicken the outline:
Go back over the outer perimeter of the entire ribbon banner to thicken the line weight slightly, making it pop against the black background.
Smudge Control
Work from top to bottom (or left to right if you’re right-handed) to avoid smearing fresh chalk marker with your hand as you draw.
Step 3: Adding Decorative Elements
-
Draw the bunting string:
Near the top of the board, draw a loose, draped line that spans from the left to the right side, dipping slightly in the middle. -
Add bunting flags:
Draw small triangles hanging from the line. Space them out evenly. Fill each triangle with a loose scribble or cross-hatch pattern for texture. -
Sketch the bottom foliage:
Starting from beneath the ribbon, draw a curved stem sweeping downwards to the right. Add elongated, pointed leaves branching off mostly from the top side of the stem. -
Sketch the top foliage:
Draw a smaller sprig peeking out from behind the top-left of the banner. Add three or four simple leaves pointing upward. -
Detail the leaves:
Inside each leaf shape, draw a single central vein line. Keep the strokes light and feathery to suggest movement. -
Add scattered dots:
To fill the empty negative space and add a magical feel, place small dots randomly around the banner and foliage. Vary their size slightly for interest.
Add a Message
The central ribbon is perfect for short text. Try writing ‘Welcome’, ‘Menu’, or a date in a contrasting cursive script.
Step 4: Final Touches
-
Erase guidelines:
Once the marker ink is fully dry, gently wipe away your initial stick-chalk sketch lines with a dry cloth or cotton swab. -
Clean up edges:
Use a slightly damp cotton swab to sharpen any blurry edges or correct any small slips in your line work.
Now you have a professional-looking chalkboard sign ready to personalize with your own custom text


Coffee and Treat Chalk Board Doodles
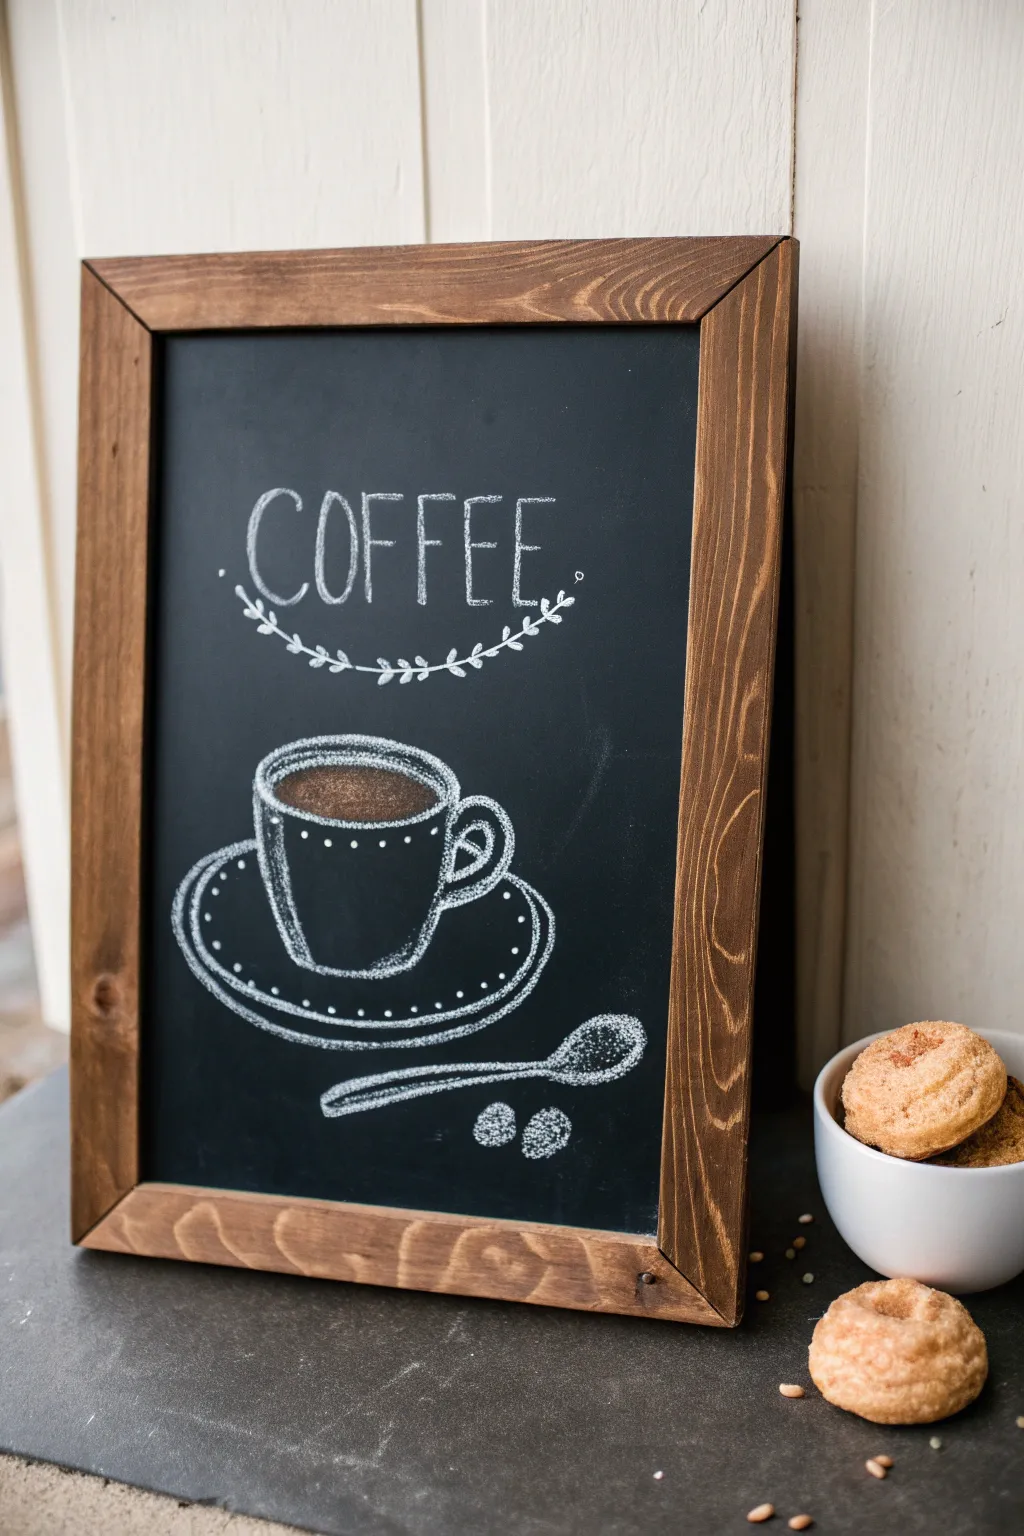
Bring the cozy atmosphere of your favorite coffee shop into your kitchen with this charming chalkboard illustration. The crisp white lines against the dark slate create a classic, inviting look perfect for a coffee station or breakfast nook.
Step-by-Step
Materials
- Framed chalkboard (dark slate surface)
- Sharpened white chalk pencil or fine-tip chalk marker
- Standard white chalk stick (for filling/texture)
- Damp microfiber cloth
- Cotton swabs (Q-tips)
- Ruler (optional)
- Pencil sharpener
Step 1: Lettering & Banner
-
Map out the position:
Visualize the upper third of your chalkboard as the space for the text. Use a very light touch with your chalk pencil to mark a straight horizontal baseline where the letters will sit. -
Draft the letters:
Sketch the word ‘COFFEE’ in tall, narrow capital letters. Keep the lines thin initially. The ‘C’ and ‘E’s should have roughly the same width, while the ‘O’ can be slightly wider. -
Refine the typography:
Go back over your letters with firmer pressure to brighten the white. Add a slightly handwritten feel by not making the lines perfectly rigid; let the crossbars on the ‘F’s and ‘E’s vary slightly in length. -
Create the vine structure:
Draw a curved line swooping underneath the word ‘COFFEE’, starting from the left and curving up to the right, mirroring a smile shape. -
Add the leaves:
Along the curved vine, draw small, simple leaf shapes in pairs. Angle them outwards towards the ends of the vine. At the very ends of the vine, add a few tiny dots for extra decorative flair.
Smudge Control
Work from top to bottom (Text -> Cup -> Spoon) to avoid resting your hand on finished parts. If you’re left-handed, work right to left.
Step 2: The Coffee Cup
-
Outline the rim:
In the center of the board, below the text, draw a flattened oval (ellipse) to form the opening of the cup. Make sure the top and bottom curves are symmetrical. -
Form the cup body:
Draw two vertical lines coming down from the widest points of the oval, tapering them slightly inward as they go down. Connect them at the bottom with a curve that matches the curvature of the rim. -
Add the coffee liquid:
Inside the top oval, draw a second, slightly smaller oval to represent the coffee level. Gently shade the space inside this inner oval using the side of your chalk stick for a textured, foamy look. -
Sketch the handle:
On the right side of the cup, draw a ‘C’ shape for the handle. Add a smaller ‘C’ inside it to give the handle thickness and dimension. -
Detail the cup design:
I like to add character here by drawing a row of small dots just below the rim of the cup. Add a second curved line near the bottom of the cup to suggest a base.
Step 3: Saucer, Spoon & Finishing Touches
-
Draw the saucer rim:
Draw a large, wide oval surrounding the base of the cup. This is the outer edge of the saucer. The back line should disappear behind the cup. -
Add saucer depth:
Draw a second, slightly smaller oval inside the first one to create the rim of the plate. Decorate the space between these two lines with small, evenly spaced dots. -
Draw the plate base:
Underneath the front of the saucer, add a shallow curved line and connect it to the main oval to show the height of the plate. -
Sketch the spoon:
To the right of the saucer, draw a long, thin diagonal oval for the handle. At the end, attach a deeper, bowl-like oval for the spoon head. Fill the spoon head with cross-hatching or stippling to make it look distinct from the dark background. -
Scatter the beans:
Draw two or three small oval shapes near the spoon to represent coffee beans or rogue crumbs. Fill them in with textured shading. -
Clean up:
Use a damp cotton swab to erase any stray draft lines or smudges, creating crisp, sharp edges around your drawing.
Level Up: Steam
Use a dry finger to smudge faint vertical chalk lines rising from the cup. This creates a soft, wispy ‘steam’ effect for hot coffee.
Place your finished piece near your espresso machine or cookie jar to complete the vignette
BRUSH GUIDE
The Right Brush for Every Stroke
From clean lines to bold texture — master brush choice, stroke control, and essential techniques.
Explore the Full Guide
Classroom First-Day Chalk Board
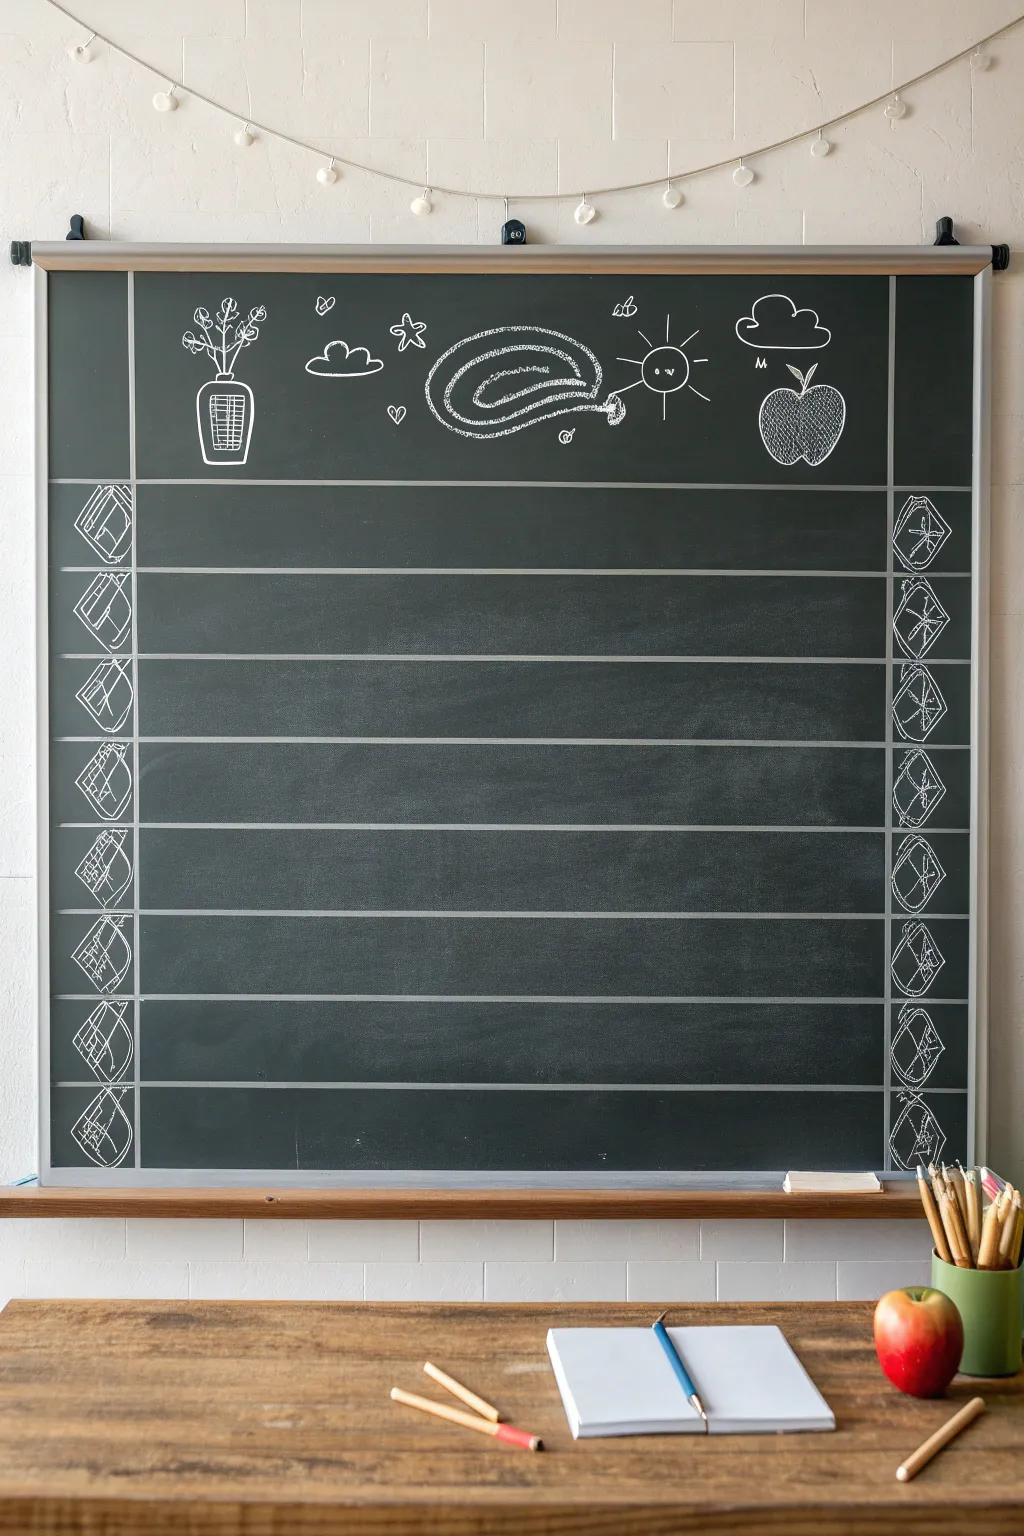
Welcome your students back with a charming, structured display that balances playful doodles with practical organization. This layout features a decorative header full of simple, joyful icons paired with neat, distinct rows perfect for agendas or student names.
Step-by-Step Tutorial
Materials
- Large classroom chalkboard or blackboard vinyl roll
- Ruler or yardstick
- Level (optional but helpful)
- White stick chalk (standard)
- White or light gray chalk marker
- Damp microfiber cloth
- Cotton swabs (for erasing detailed errors)
Step 1: Setting the Structure
-
Clean the slate:
Begin with a freshly wiped board. Use a damp microfiber cloth to remove all chalk dust, ensuring you have a deep black surface for high contrast. -
Define the top header:
Measure about 6-8 inches down from the top frame. Use your ruler to draw a solid, straight horizontal line across the entire width of the board. This creates the dedicated space for your artwork. -
Divide the columns:
Measure about 4 inches in from the left edge and 4 inches in from the right edge. Draw two vertical lines from your horizontal header line all the way to the bottom of the board. These side columns will hold decorative borders. -
Draw the rows:
Divide the large central space and the side columns into eight equal horizontal sections. Use your yardstick to draw straight lines across the board, creating a grid of long central rectangles flanked by smaller squares on the sides.
Sticky Note Trick
Use sticky notes on the edges of your ruler to mark your row spacing. This lets you move the ruler down without remeasuring every single time.
Step 2: Drawing the Header Art
-
Sketch the flower vase:
Starting on the far left of the header, draw a simple rectangular vase with slightly rounded corners. Add a grid pattern inside. Draw three thin stems rising up, topped with cloud-like bunches of flowers. -
Add whimsical elements:
Moving right, draw a few floating clouds. Keep the bottoms flat and the tops bumpy. Add a small star and a heart shape nearby to fill the negative space. -
Create the central swirl:
In the center, draw a large, loose spiral shape, almost like a coiled rope or a snail shell. I like to double-line this shape to give it some visual weight. -
Draw the sun:
To the right of the spiral, draw a small circle with varied lengths of rays sticking out. Add a tiny smiley face inside the circle for a friendly touch. -
Finish with the apple:
On the far right, sketch a classic apple shape. Draw a leaf on top and fill the body of the apple with vertical shading lines to give it texture.
Ghosting Issues?
If old chalk marks persist after erasing, wipe the board with a mix of water and a splash of white vinegar, then let it air dry completely.
Step 3: Adding the Side Borders
-
Decorate the left column:
In each small square on the left side, draw a stylized leaf or book motif. You can achieve this by drawing a diagonal oval and adding a few interior lines for detail. -
Repeat the pattern:
Move down the left column, repeating the same simple design in each box. Consistency is key here rather than perfection. -
Decorate the right column:
For the right side, switch the design slightly. Draw a diamond or gem shape inside each square box. Use varied line directions inside the shape to make it look faceted. -
Clean up the lines:
Once all rows are filled, use a cotton swab dipped in water to sharpen the edges of your boxes and remove any smudges where your hand might have rested.
Step back and admire your organized, welcoming canvas ready for the first day of school
Chalk Board Drawing Prompts Corner
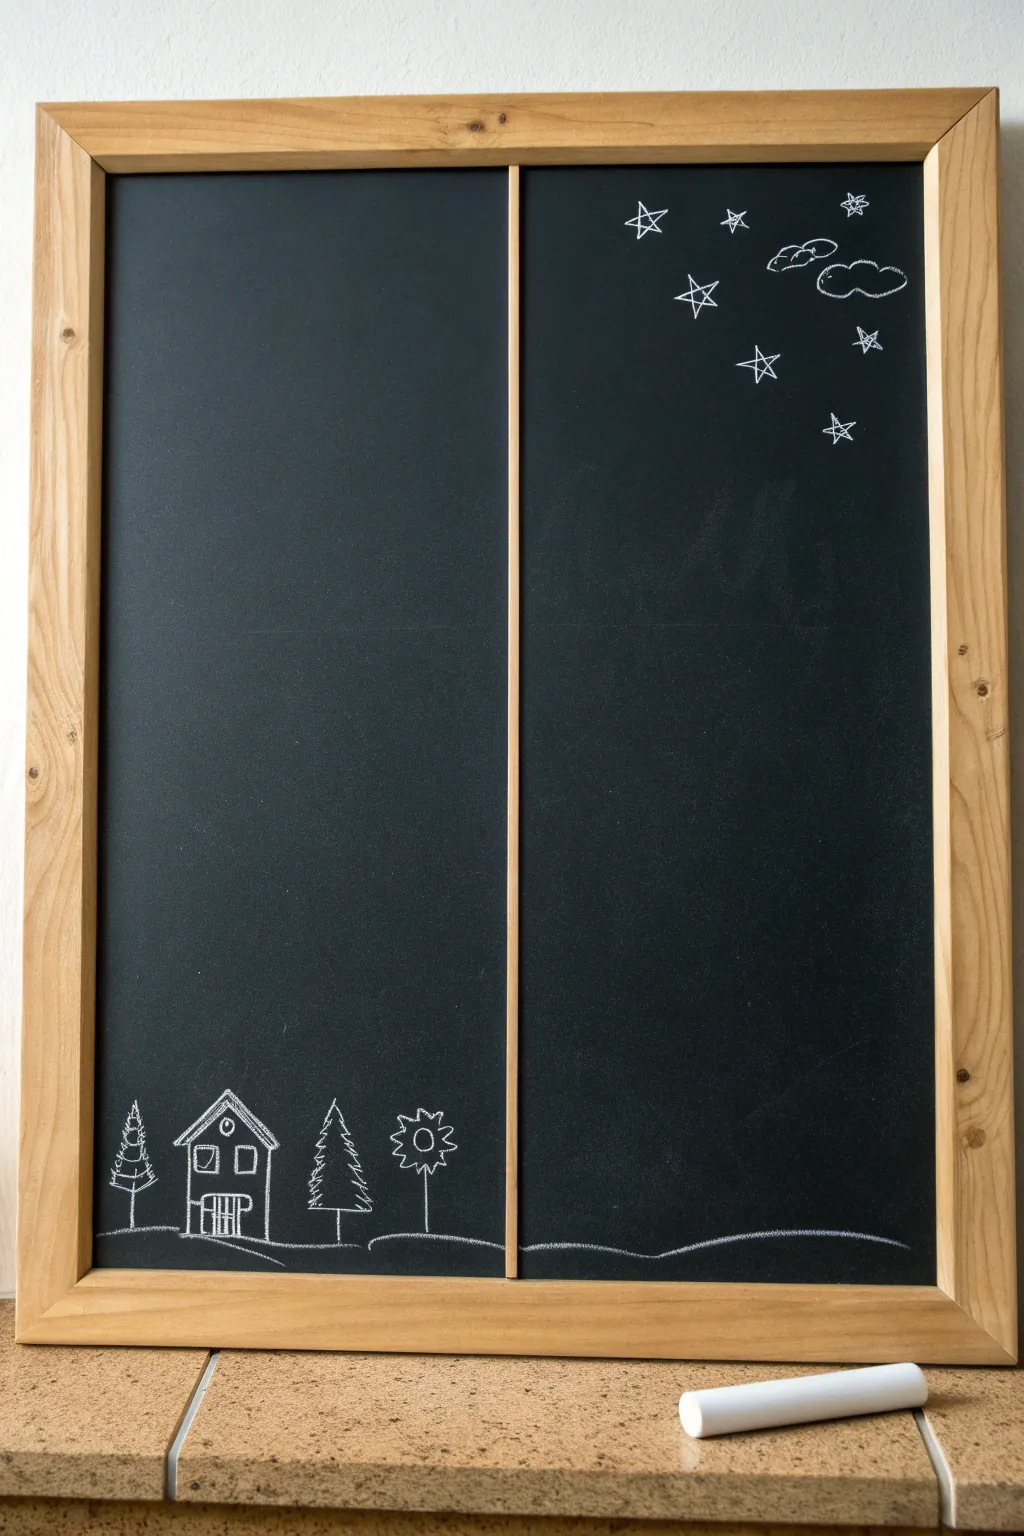
Create a charming two-part chalkboard scene that plays with vertical space by dividing your canvas into day and night zones. This minimalist white chalk drawing features a cozy landscape at the bottom left balanced by a whimsical starry sky at the top right.
Step-by-Step Guide
Materials
- Framed chalkboard (preferably with a central divider)
- White stick chalk (standard school chalk)
- Damp cloth or sponge
- Dry microfiber cloth or chalkboard eraser
- Pencil sharpener (optional, for sharpening chalk)
Step 1: Preparation
-
Clean surface:
Begin by wiping down your chalkboard surface with a damp cloth to remove any old ghosting or dust. -
Dry thoroughly:
Follow up with a dry microfiber cloth to ensure the board is perfectly dry and slate-grey before you start drawing. -
Evaluate the layout:
Notice the natural division in your frame. If your board doesn’t have a physical wood strip like the one shown, you can draw a solid vertical line down the center to create the split-screen effect.
Sharpen Your Tools
Use a large-hole pencil sharpener on your stick of chalk. A sharp point makes drawing the tiny windows and star points much cleaner.
Step 2: Left Panel: The Landscape
-
Draw the ground line:
On the bottom of the left panel, draw a slightly wavy horizontal line about 1-2 inches from the frame edge. Let it trail off as it hits the center divider. -
Sketch the house outline:
Draw a simple house shape in the center of your ground line. Start with a square base and add a triangle roof on top. -
Add architectural details:
Inside the roof triangle, draw a small circle for a vent. Add two small squares for windows on the upper floor. -
Draw the door:
Sketch a rectangular door on the ground floor. Draw vertical lines inside it to suggest wooden planks. -
Refine the roof:
Go over the roof lines again with slightly more pressure to make the eaves pop white against the black. -
Add the first tree:
To the left of the house, draw a vertical line for a trunk. Add zigzag strokes downward from the top to create a pine tree shape. -
Add the second tree:
Repeat the pine tree process to the immediate right of the house, making this one slightly taller than the first. -
Draw the flower:
To the right of the second tree, draw a vertical stem. Add a small circle for the center and loop simple petals around it for a quirky, oversized bloom.
Level Up: Seasonal Twist
Add tiny chalk dots falling from the clouds on the right for rain, or cover the trees on the left with white caps for snow.
Step 3: Right Panel: The Night Sky
-
Continue the horizon:
Start a ground line on the right panel that roughly aligns with the left side, but keep it very simple and low, avoiding any detailed objects here. -
Outline the clouds:
Moving to the very top right corner, draw two fluffy cloud shapes using connected semi-circles. -
Draw primary stars:
Scatter three or four 5-point stars near the clouds. Draw these using the classic continuous line method so the lines cross in the middle. -
Add smaller stars:
Fill in the gaps with smaller stars or simple asterisks (* shapes) to create depth in your starry field. -
Vary star sizes:
Ensure some stars are significantly larger than others to keep the composition dynamic and playful. -
Clean up:
Use a cotton swab or the corner of a damp cloth to tidy up any smudged lines or chalk dust that fell onto clean areas.
Step back and enjoy the balanced contrast of your finished day and night scene

PENCIL GUIDE
Understanding Pencil Grades from H to B
From first sketch to finished drawing — learn pencil grades, line control, and shading techniques.
Explore the Full Guide
Easy Animal Line Art With Labels
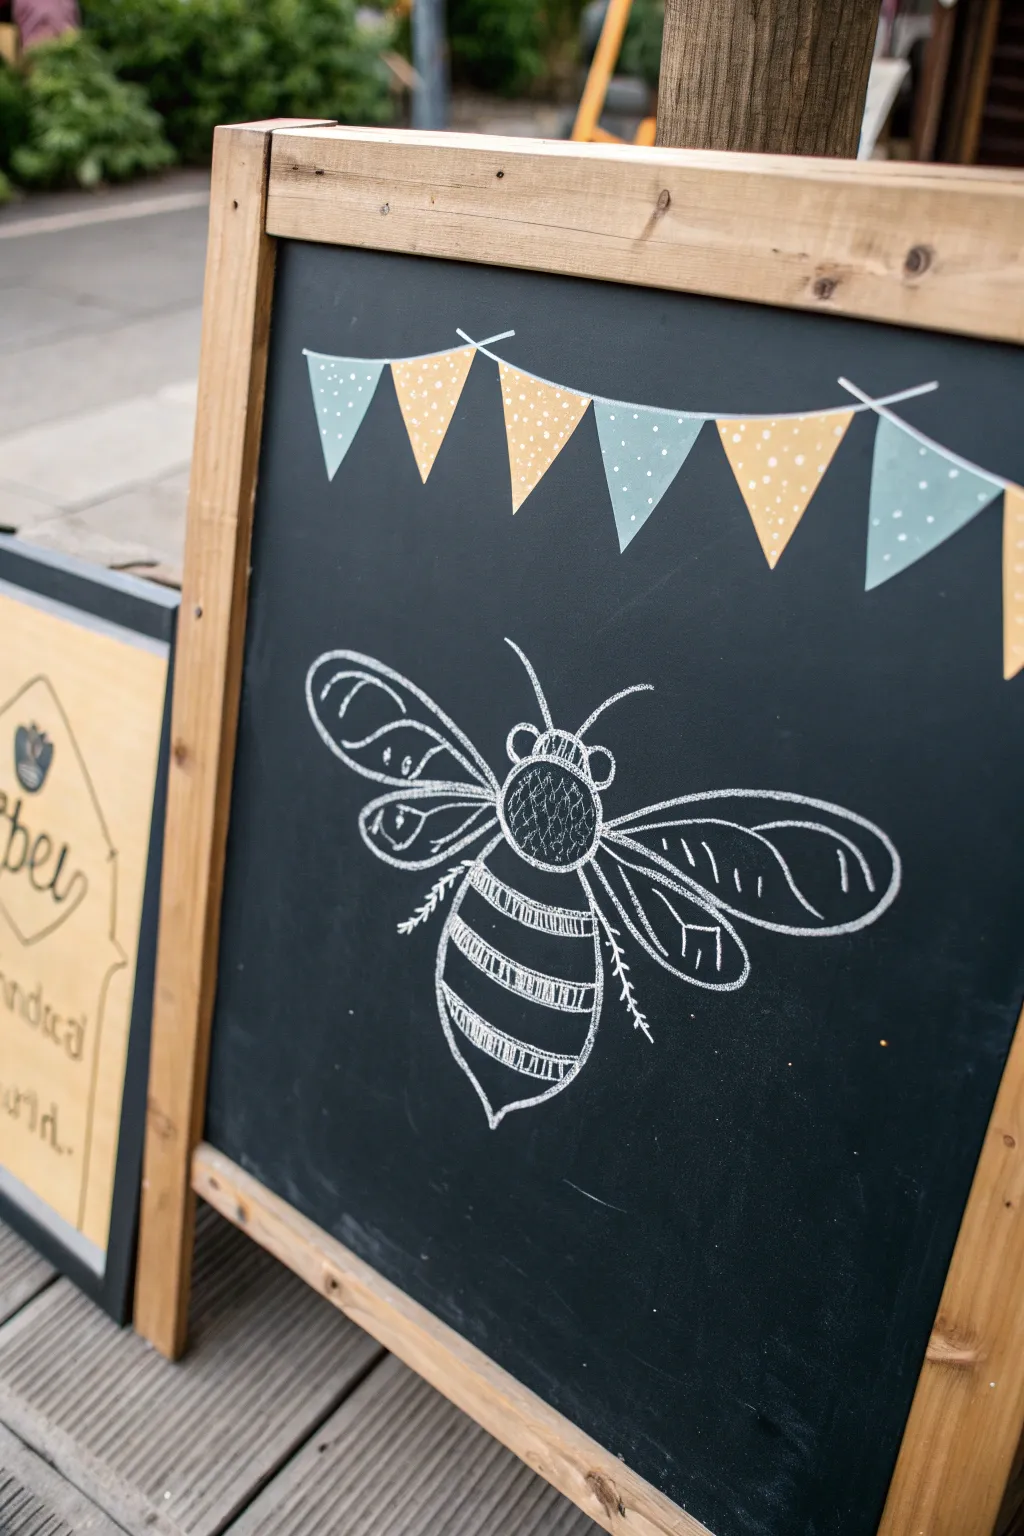
This charming chalkboard design combines festive pastel bunting with a detailed, scientific-style line drawing of a bumblebee. It’s a perfect way to add a touch of whimsy to a garden sign or cafe menu board.
Step-by-Step
Materials
- Large framed chalkboard
- White liquid chalk marker (fine tip)
- Pastel blue chalk marker or standard chalk
- Pastel yellow chalk marker or standard chalk
- Damp cloth
- Ruler (optional)
- Cotton swabs (for cleanup)
Step 1: Drawing the Bunting
-
Establish the curve:
Begin by drawing a gentle, swooping white line across the top third of your board. This will act as the string for your flags, so make sure it dips slightly in the middle for a natural hanging look. -
Outline the triangles:
Along the white line, draw a series of downward-pointing triangles. Leave a tiny gap between each one where they meet the string. Try to keep them relatively uniform in size. -
Fill with color:
Fill in the triangles, alternating between pastel blue and pastel yellow. If you are using standard stick chalk, wet the tip slightly for bolder, more opaque coverage. -
Add pattern details:
Once the filled colors are dry, use your fine-tip white marker to add small decorative dots. I like to scatter them randomly on some flags and place them in neat corners on others for variety. -
Finalize the string:
Go back over your original white string line to crisp it up, adding small ‘knots’ or bows at the ends of the bunting if desired.
Chalk Marker Flow
Store your chalk markers horizontally. Before starting, shake vigorously and press the tip on scrap paper until ink flows to avoid blobs on your board.
Step 2: Creating the Bee Outline
-
Sketch the thorax:
Start the bee in the center of the board by drawing a circle for the thorax (the middle section). It doesn’t need to be perfect; a slightly organic shape works best. -
Add the head:
Draw a smaller, semi-circular shape attached to the top of the thorax for the head. Add two small, oval eyes on either side of the head. -
Draw the abdomen:
Below the thorax, draw a large, pointed oval shape for the abdomen. This should be the largest part of the bee’s body, tapering down to a sharp point at the bottom. -
Define the wings:
Sketch two large, elongated loops extending from the upper thorax on each side. These are the forewings. Below them, tucked slightly underneath, draw two smaller loops for the hindwings.
Fixing Smudges
If you smudge a line, don’t wipe it with a finger. Let it dry completely, then use a damp Q-tip to precisely erase the mistake without ruining nearby art.
Step 3: Adding Details
-
Texture the thorax:
Inside the thorax circle, draw short, scribbled lines to simulate fur. This fuzzy texture is key to making it look like a bumblebee rather than a fly. -
Stripe the abdomen:
Draw several curved horizontal bands across the abdomen. Fill these bands with vertical hatching lines, leaving the spaces between them distinct to create the striped effect. -
Detail the wings:
Inside the wing outlines, draw delicate veins. Use long, sweeping curves that follow the shape of the wing, adding a few branching lines for realism. -
Add the antennae:
Draw two curved lines originating from the center of the head, bending outward. These should be sleek and simple. -
Legs and fuzz:
Draw thin, jointed legs extending from the lower thorax. Add tiny, angled dashes along the legs to represent little hairs. -
Refine lines:
Go over your main outlines one last time with the white marker to ensure they stand out against the dark background. If any lines look shaky, thicken them slightly.
Step back and admire your buzzing new garden artwork
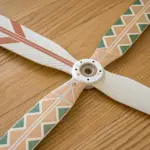
Botanical Corner Clusters
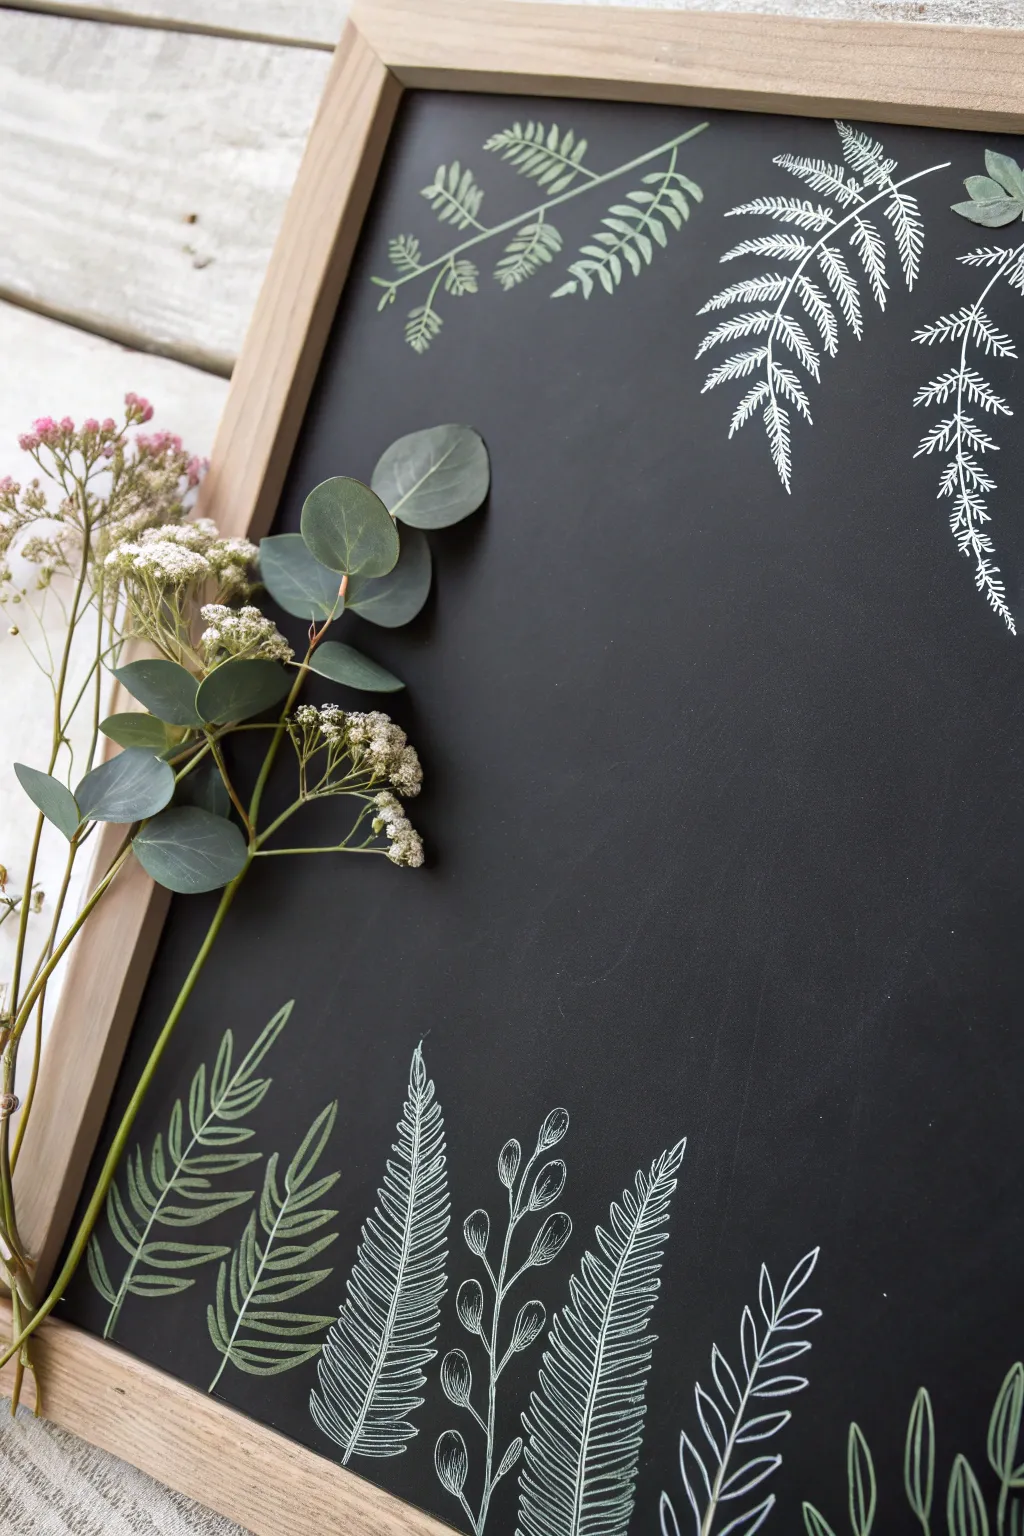
Transform a simple framed chalkboard into a botanical masterpiece by combining delicate hand-drawn ferns with actual fresh greenery. This mixed-media approach creates a lovely 3D effect where drawn illustrations seem to sprout alongside real eucalyptus and baby’s breath.
Step-by-Step Guide
Materials
- Framed chalkboard (rectangular)
- White chalk marker (fine tip)
- White chalk marker (medium tip, optional)
- Light green chalk or pastel pencil
- Fresh eucalyptus stems (silver dollar or similar)
- Fresh baby’s breath or wax flowers
- Floral wire or clear tape
- Damp cloth or cotton swabs (for corrections)
Step 1: Drawing the Upper Canopy
-
Assess your layout:
Begin by mentally dividing your chalkboard. You want to leave the center mostly empty for negative space or future text, focusing your drawings on the corners and the bottom edge. -
Sketch the top-left frond:
Using a light green chalk or pastel pencil, draw a single curved line coming from the top frame edge downward towards the center left. This is the main stem. -
Add leaves to the stem:
Along this green stem, draw small, oval-shaped leaflets in pairs. Keep them simple and slightly filled in to give them a softer texture compared to the stark white lines we will use later. -
Start the top-right ferns:
Switch to your fine-tip white chalk marker. In the top right corner, draw two or three long, arching lines that drape downward. These will be the spines of your fern fronds. -
Detail the fern leaflets:
along these white spines, draw tiny, jagged ‘V’ shapes or quick dashes to represent the delicate, feathery leaves of a fern. I like to make sure the leaves get smaller as they reach the tip of the frond for realism. -
Add a second variety:
Near the first white ferns, draw another stem that branches out more stiffly. For the leaves here, use tiny, distinct lines that look like pine needles or rosemary to create visual variety.
Chalk Marker Pro Tip
Store your chalk markers horizontally. Before drawing, shake well and press the tip on scrap paper until the ink flows smoothly to avoid blobs on your art.
Step 2: Creating the Bottom Garden
-
Outline the bottom stems:
Along the bottom edge of the frame, draw five or six vertical lines of varying heights. These will serve as the stems for your ground-level plants. -
Draw the stylized fern:
Choose a central stem and turn it into a stylized fern. Draw tightly packed, horizontal lines tapering to a point at the top, resembling a tall feather. -
Add the leafy shoots:
For the stems on the far left and right, draw simple, broad leaves. Use an open outline style rather than filling them in, keeping the look airy and illustrative. -
Incorporate berry sprigs:
Pick one of the smaller stems and add small ovals at the ends of short branches. Draw tiny hatch marks inside these ovals to give them dimension, making them look like seeded pods or buds. -
Fill in with grassy textures:
Between your main plants, add a few simple, singular blades of grass or smaller shoots to make the ‘garden’ feel full and grounded.
Step 3: Adding the 3D Botanical Elements
-
Prepare your fresh florals:
Trim a stem of eucalyptus and a stem of baby’s breath (or wax flower) so they are roughly the height of your chalkboard’s left side. -
Arrange the bunch:
Layer the flowering stem over the eucalyptus so the broad green leaves provide a backdrop for the tiny flowers. Twist a small piece of floral wire around the bases to hold them together. -
Secure to the frame:
Position the bundle on the left side of the frame, letting it drape naturally over the board surface. Use strong clear tape or a small tack hidden behind the leaves to secure the stems to the wooden frame itself. -
Adjust the drape:
Gently gently bend the real stems so they curve inward, mingling visually with your green chalk drawing in the top left corner. -
Final clean up:
Check for any smudges from your hand resting on the board. Use a damp cotton swab to erase errant chalk dust or sharpen up the lines of your white marker drawings.
Level Up: Seasonal Swap
Change the fresh greenery with the seasons! Use dried autumnal wheat in fall, holly branches in winter, or bright daffodils in spring to refresh the look.
Now you have a refreshing piece of living art that brings a touch of nature indoors


Chalk Smudge Shading for Depth
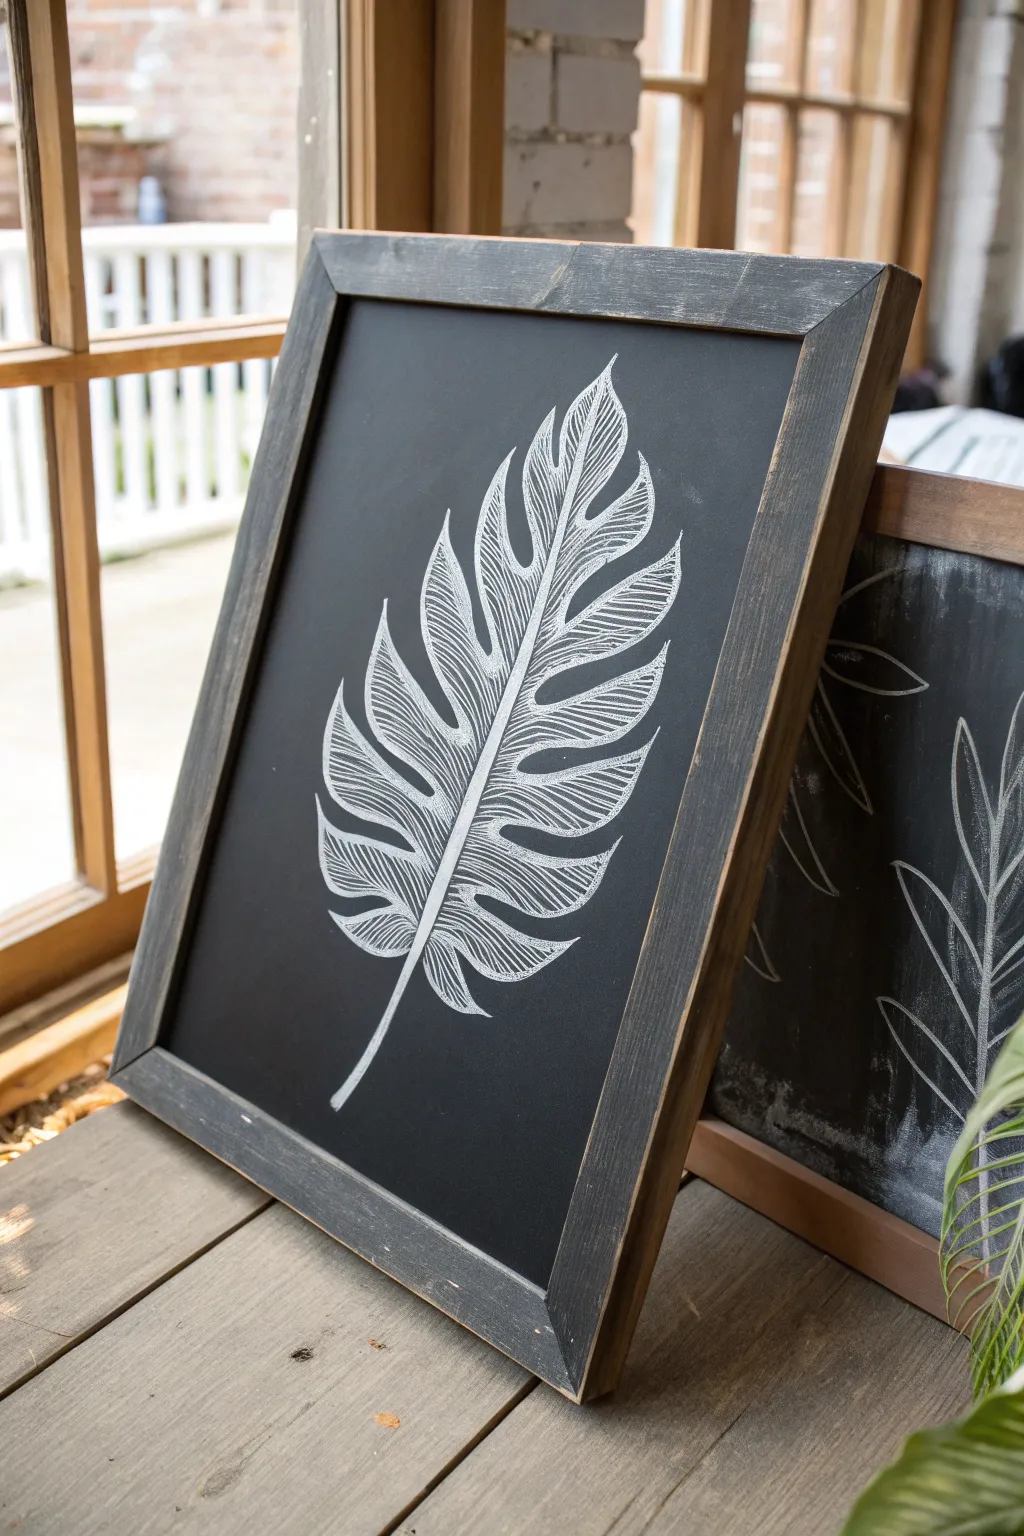
Bring a touch of botanical elegance to your space with this striking monochromatic leaf study. Using a simple combination of bold outlines and delicate hatching, this project creates a sophisticated, textured look that pops against the dark slate background.
How-To Guide
Materials
- Framed chalkboard (black slate or painted MDF)
- Sharpened white chalk stick or fine-point chalk marker
- Pencil sharpener (if using stick chalk)
- Damp cloth or sponge
- Cotton swabs (Q-tips)
- Soft rag or paper towel
Step 1: Preparation and Outline
-
Prepare the surface:
Start by ensuring your chalkboard is clean and completely dry. If it’s a new board, season it first by rubbing the side of a chalk stick over the entire surface and wiping it off—this prevents ‘ghosting’ later. -
Mark the center vein:
Visualize a gentle curve starting from the bottom center-left and arching up toward the top right corner. Lightly sketch this central spine (midrib) of the leaf first. It should slightly taper as it reaches the tip. -
Draft the leaf Shape:
Lightly sketch the outer silhouette of the entire leaf forms around that spine. Think of a large oval shape that points at the top. Don’t worry about the precise jagged edges yet; just get the overall footprint right. -
Define the segments:
Starting from the bottom, sketch the deep indentations that separate the leaf segments. These cuts should curve inward toward the central vein but stop before touching it, leaving a narrow border around the spine. -
Refine the edges:
Go over your sketch with a firmer hand to create the final outline. Make the tips of each leaf segment slightly pointed and the edges natural and organic, not perfectly geometric.
Fixing Mistakes
Line too thick? Don’t wipe it! Wait for the chalk to dry completely if wet, then use a dry Q-tip to gently ‘push’ the chalk edge back into shape from the outside.
Step 2: Adding Texture and Detail
-
Clean up the guides:
Use a slightly damp cotton swab to carefully erase your initial rough sketch lines, leaving only the clean final outline. Let the damp spots dry completely before drawing over them again to avoid damaging the board surface. -
Start the hatching:
Begin with the bottom-most leaf segment. Draw fine, closely spaced lines starting from the central vein and curving outward toward the segment’s edge. This technique, called hatching, creates the illusion of texture and volume. -
Vary the line weight:
Keep your chalk sharp. As you draw these internal lines, apply slightly more pressure near the vein and lift off gently as you reach the outer edge. This creates a subtle gradient effect without messy smudging. -
Follow the form:
Pay close attention to the angle of your lines. They shouldn’t be straight; they should curve slightly upwards, mimicking the natural veins of a real leaf. This directionality gives the drawing life. -
Work your way up:
I usually proceed segment by segment up one side of the leaf, then switch to the other. This prevents your hand from resting on finished work and smearing it. -
Address the tip:
As you reach the top segments, the hatching lines will become steeper and more vertical. Adjust your stroke direction to flow naturally toward the leaf’s peak.
Shade It Up
For a 3D effect, lightly rub the hatching lines near the center vein with your pinky finger. This softens the origin point while keeping the outer tips crisp.
Step 3: Finishing Touches
-
Thicken the spine:
Go back to the central vein you drew in the beginning. Retrace it to double the thickness, making it the boldest element of the drawing. This anchors the delicate lines of the leaves. -
Add highlights:
Selectively re-trace the very outer tips of a few leaf segments to make them pop. This extra brightness adds a sense of dimension. -
Final cleanup:
Look for any chalk dust that has settled where you want deep black. Use a clean, dry Q-tip to lift this dust away without adding water, keeping the contrast sharp. -
Seal (optional):
If this is a permanent piece, you can lightly mist it with a workable fixative spray found at art supply stores. Test the spray on a scrap board first, as some sprays can make chalk transparent.
With your finished botanical sketch, you have a timeless piece of decor that looks far more complex than it actually is
Night Sky Chalk Board Scene
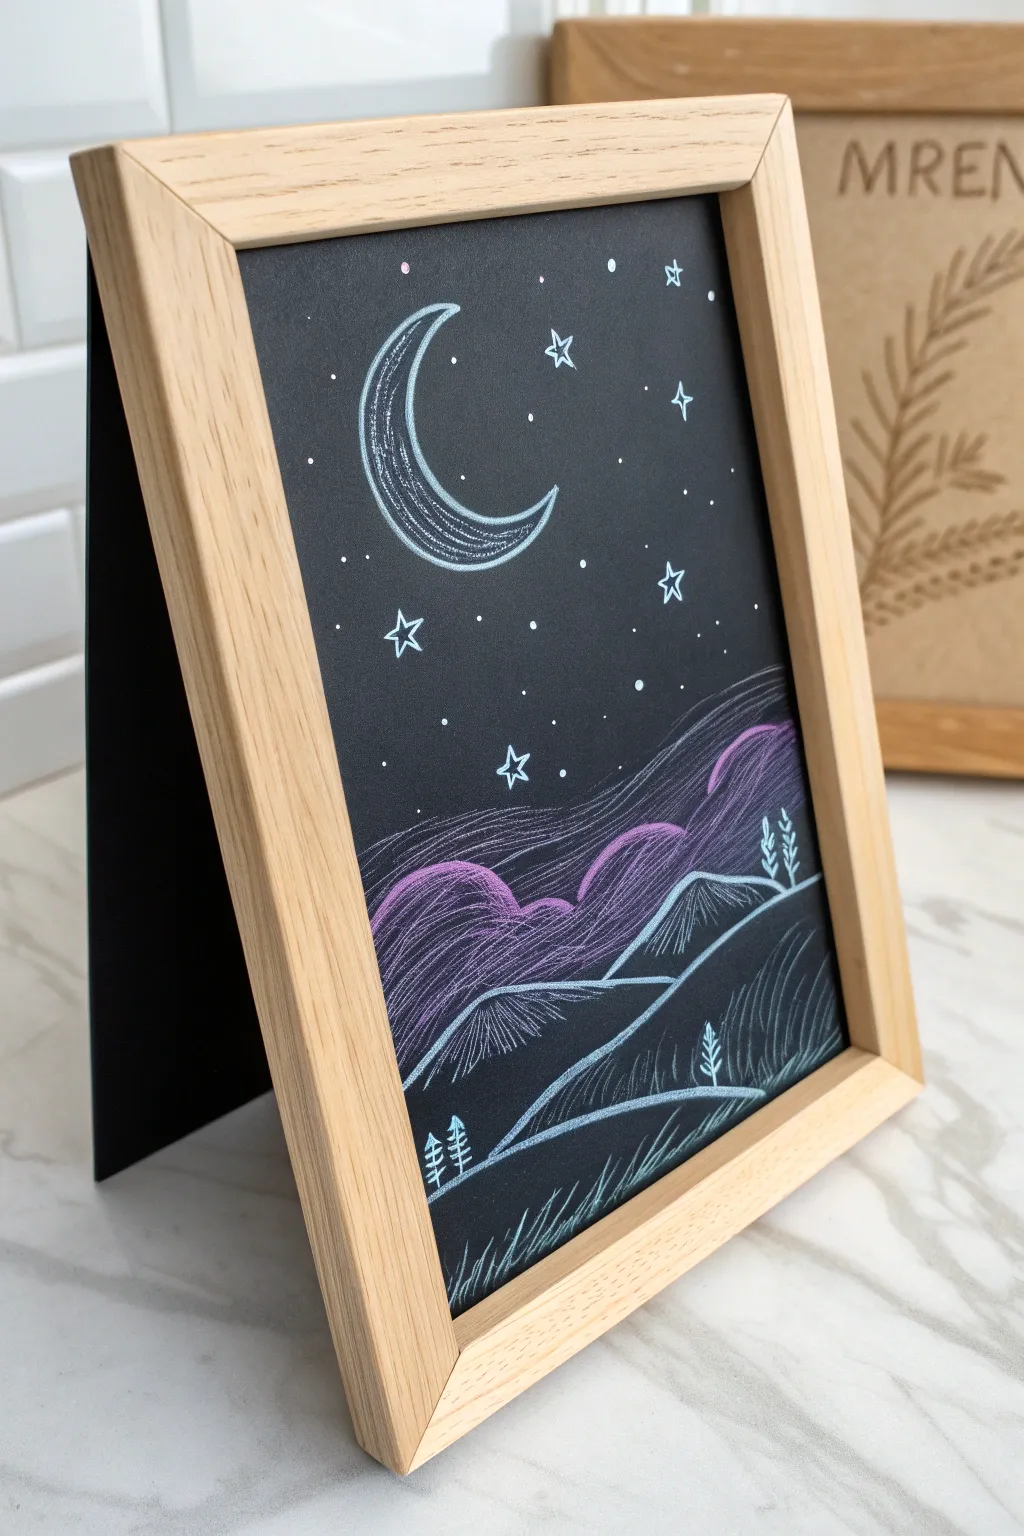
Capture the serene beauty of a quiet night with this charming chalkboard illustration. The contrasting white lines against the dark board, accented with soft purple waves, create a dreamy landscape perfect for a bedside table or cozy shelf.
Step-by-Step Tutorial
Materials
- Small frameless chalkboard or chalkboard stand (approx. 5×7 or 8×10 inches)
- Wooden picture frame (optional, to mount the board)
- White liquid chalk marker (fine tip)
- White soft pastel chalk (stick form)
- Purple soft pastel chalk (stick form)
- Cotton swab or blending stump
- Soft cloth or chalkboard eraser
- Ruler (optional)
Step 1: Setting the Scene
-
Prepare the surface:
Ensure your chalkboard surface is completely clean and dry. If it’s a new board, wipe it down with a damp cloth to remove any dust that might interfere with the chalk adhesion. -
Outline the moon:
Using your fine-tip white liquid chalk marker, draw a large ‘C’ shape in the upper left quadrant. Keep the lines smooth and continuous. -
Thicken the crescent:
Draw an inner curve to connect the points of the ‘C’, creating the crescent shape. Go over the outer edge again to slightly thicken the line weight. -
Fill the moon texture:
Instead of coloring it in solid, use the marker to sketch rough, scratchy lines following the curve of the moon. This gives it a lovely textured, crater-like appearance.
Prime Your Tip
Shake the liquid chalk marker well and press the tip on a scrap piece of paper until the ink flows fully before touching your final board.
Step 2: Creating the Purple Haze
-
Draft the rolling hills:
Switch to your purple soft pastel stick. About halfway down the board, draw a series of gentle, undulating waves across the width of the surface to represent distant hills or low-hanging clouds. -
Fill the color:
Lightly scribble with the purple pastel to fill in the space just below your wave line. You don’t need solid coverage; a sketchy texture works well here. -
Add highlights:
Take your white soft pastel stick (not the marker) and layer a very small amount of white right on top of the purple peaks. -
Blend the colors:
Using your finger or a dry cotton swab, gently smudge the purple and white chalks together in a side-to-side motion. This mimics the soft, ethereal look of mist. -
Add detailed lines:
Once the smudge is set, use the fine white chalk marker to draw thin, scratchy lines horizontally over the purple area. This reintegrates the marker texture with the soft pastel.
Step 3: Foreground and Details
-
Draw the foreground slopes:
With the white chalk marker, draw two distinct hill shapes in the bottom third of the board. I usually start with the right hill sloping down, then add the left hill tucked behind it. -
Outline the slopes:
Go over the top edges of these foreground hills a second time to make the white line bold and crisp. -
Add vertical texture:
Fill the space under the hill outlines with vertical, slightly curved hatching lines. Keep them loose and spaced out to suggest grass or terrain. -
Plant tiny trees:
Draw miniature pine trees on the slopes. Use a simple vertical line with tiny downward dashes for branches. Place a group of two on the left and a few on the right ridge. -
Draw the large stars:
Back in the sky, draw three or four five-pointed stars. Keep them open (don’t color them in) so they match the illustrative style of the moon. -
Add the stardust:
Dot the sky with random small points using the tip of your marker. Vary the pressure to make some dots tiny and others slightly larger. -
Final touches:
Look for any empty spots that need a tiny star or dot. If you smudge a line by accident, wait for the liquid chalk to dry completely before scratching the mistake away with a fingernail.
Add Dimension
Use a grey pastel or charcoal pencil to add shadows to the unlit side of the moon for a subtle 3D effect.
Place your finished art in a light wood frame to emphasize the natural, cozy feeling of the drawing
Geometric Frames With Hand Lettering

Transform a plain chalkboard into a stylish statement piece with this easy-to-recreate geometric border. Using simple triangular motifs filled with varied patterns creates a modern, bohemian look that frames your messages beautifully.
Detailed Instructions
Materials
- Framed chalkboard (clean and dry)
- White creativity chalk marker (fine tip recommended)
- Ruler
- Cotton swabs or a damp cloth (for corrections)
- Pencil (optional, for guidelines)
Step 1: Preparation & Layout
-
Clean the surface:
Before starting, ensure your chalkboard surface is completely free of dust and grease. A quick wipe with a damp cloth followed by a dry finish works best to ensure the marker ink adheres crisply. -
Mark the perimeter:
Visualize a rectangular border about 1.5 to 2 inches inward from the wooden frame. This will be the baseline for your triangles. -
Draw the inner border line:
Using your ruler and the white chalk marker, draw a continuous straight line that forms a rectangle inside the chalkboard. This creates the ‘base’ for all your triangles to rest on.
Step 2: Drawing the Triangles
-
Create the top row:
Starting at the top left corner, draw a series of interconnected triangles resting on your border line. The points should face outward toward the wooden frame. aim for roughly 2-inch wide bases. -
Continue down the sides:
Work your way down the left and right vertical sides. Draw these triangles so their points face outwards towards the side frames. Try to keep them consistent in size with the top row. -
Finish the bottom edge:
Complete the geometric frame by drawing triangles along the bottom line, pointing downward. Don’t worry if the corners don’t meet perfectly; the organic look is part of the charm. -
Let the outline dry:
I like to pause here for just a moment to let the main outlines set, preventing any accidental smudging while filling them in.
Uneven Triangles?
Don’t stress about perfection. If your triangles vary in size, simply adjust the density of the fill pattern. Denser lines verify the shape and hide slight size differences.
Step 3: Filling with Patterns
-
Stripe the top row:
Return to your top row of triangles. Fill each one with horizontal stripes, evenly spaced from base to tip. Leave the very last triangle on the right empty for now. -
Vary the corner accent:
For that last triangle on the top right, switch the pattern to vertical or diagonal lines to add a subtle visual interest point. -
Pattern the side triangles:
For the vertical sides, fill the triangles with a loose, scribbled floral or abstract squiggle pattern. This contrasts nicely with the strict geometric lines of the top row. -
Stripe the bottom left:
On the bottom row, fill the first few triangles on the left side with horizontal stripes, matching the top row’s style. -
Stripe the remaining bottom:
Continue the horizontal striping for the rest of the bottom edge triangles. However, stick to filling only the left side of each triangle with diagonal hatching, or vary the direction slightly to keep it dynamic. -
Check for consistency:
Step back and look at the overall balance. If any triangle looks too empty, add a few more lines to match the density of the others.
Sharper Lines
Prime your chalk marker tip on a piece of scrap paper before starting each section. This ensures a consistent flow of ink and prevents that initial ‘puddle’ on your board.
Step 4: Final Touches
-
Clean up edges:
Use a slightly damp cotton swab to sharpen any triangle points that look bunt or to erase any overdrawn lines. -
Add corner details:
If there are large gaps in the corners between the triangle rows, you can add small double-chevron lines (like arrowheads) to bridge the space aesthetically. -
Let it cure:
Allow the chalk marker to dry completely for at least 15 minutes before moving the board to avoid smearing your hard work.
Now you have a custom-framed space ready for your daily menu or welcome message
Illusion 3D Chalk Board Letters
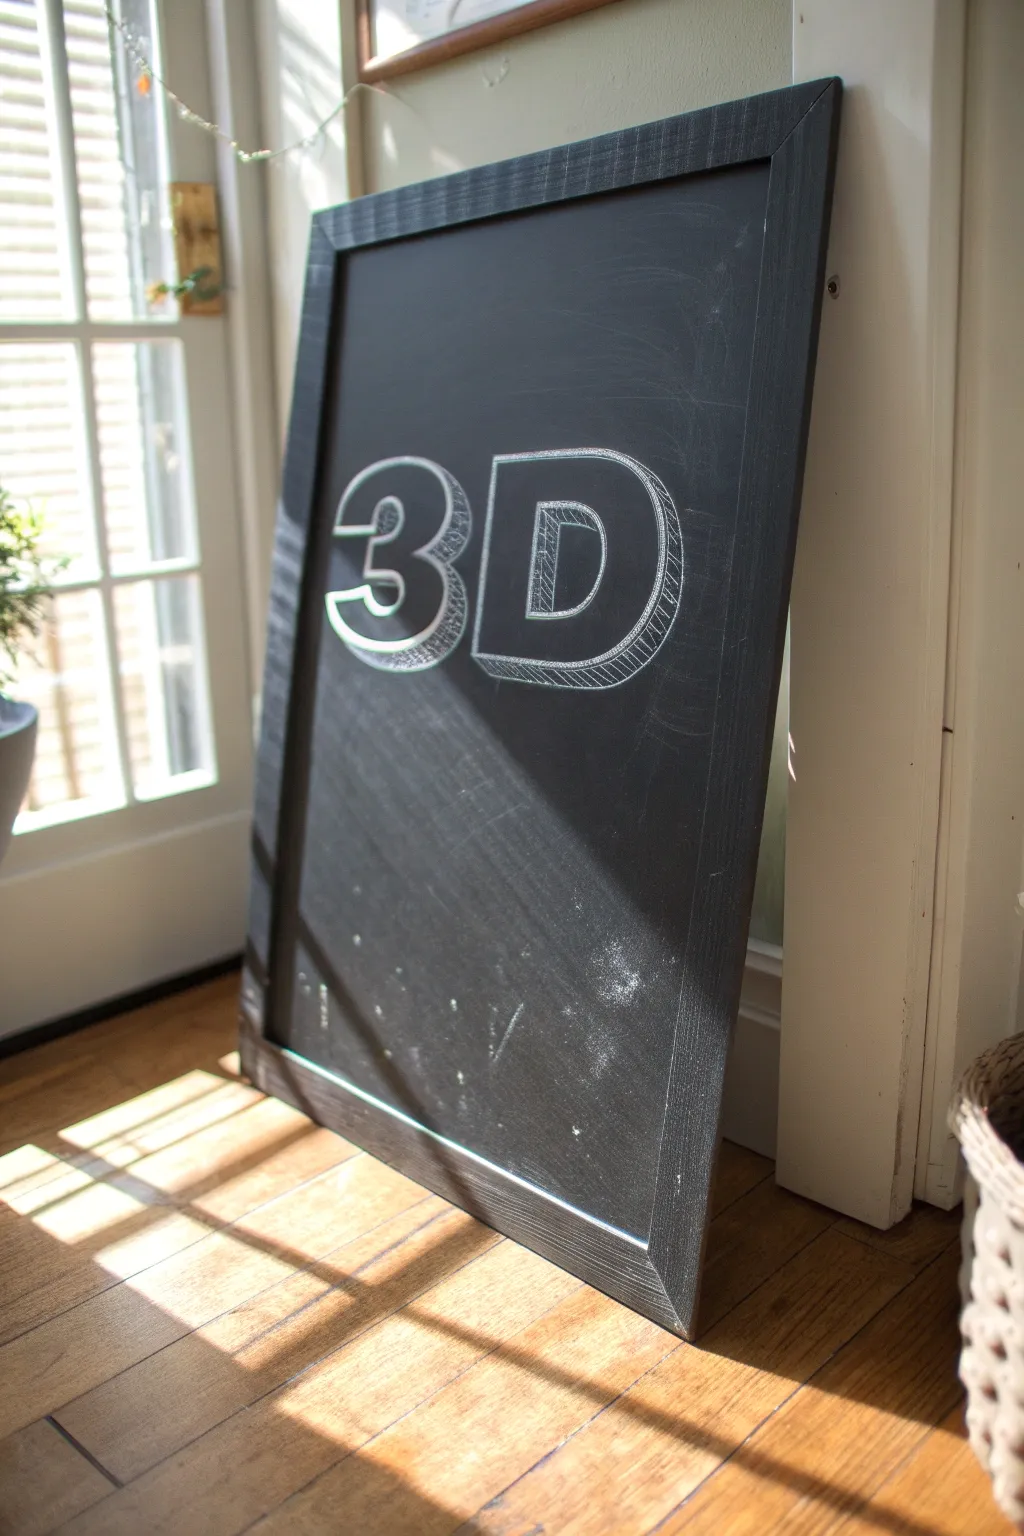
Transform flat text into striking dimensional art with this simple yet effective chalkboard technique. By adding consistent block shading and hatched details, these letters appear to jump right off the board’s surface.
Step-by-Step Guide
Materials
- Medium or large framed chalkboard
- Standard white chalk sticks (sharpened)
- Chalk marker (optional, for sharper edges)
- Microfiber cloth or damp sponge
- Ruler or straight edge
- Cotton swabs (for precise erasing)
Step 1: Drafting the Base
-
Clean the slate:
Begin with a perfectly clean surface. Wipe down your board with a damp microfiber cloth to remove any ghosting from previous drawings, ensuring the black background is deep and matte. -
Outline the skeleton:
Using very light pressure, sketch the basic single-line skeleton of the number ‘3’ and the letter ‘D’. This helps you position them centrally on the board before committing to thickness. -
Thicken the characters:
Flesh out your skeleton into thick block letters. Draw the outer and inner boundaries of the ‘3’ and ‘D’. Keep the stroke width consistent—about 1.5 to 2 inches wide works well for a board this size. -
Refine the main shapes:
Go over your main outlines with a heavier hand or a fresh edge of chalk to make them bold and bright white. Use a cotton swab to clean up any smudge marks or uneven lines.
Sharpen Up
Don’t settle for blunt chalk. Rub the stick against a piece of sandpaper or concrete at an angle to create a chisel tip for those crisp hatching lines.
Step 2: Creating the Dimension
-
Determine the light source:
To create a believable 3D effect, imagine your light is coming from the top right. This means your shadows and ‘sides’ of the letters will project to the bottom left. -
Draw the corners:
Starting at the bottom-left corners of every shape (including the inner hole of the ‘D’), draw short diagonal lines extending downwards and to the left. Keep these lines identical in length and angle. -
Connect the depth lines:
Connect the ends of your diagonal lines with lines that run parallel to the original letter shape. For curved parts like the back of the ‘3’ or the curve of the ‘D’, mimic that curve exactly, just shifted down and left. -
Review the perspective:
Step back and look at your work. The collection of new lines should look like the thick ‘side’ of a block letter. Erase and adjust if any angles look inconsistent.
Step 3: Shading and Texture
-
Start the hatching:
Fill in the drop-shadow/side sections using a hatching technique. Draw closely spaced, thin diagonal lines. I find it helps to keep your chalk sharp for this to distinct texturing rather than a solid smear. -
Cross-hatch for density:
To make the sides look distinct from the bright face of the letters, add a second layer of lines perpendicular to the first set (cross-hatching). This darkens the ‘sides’ without turning them solid white. -
Highlight the edges:
Go back over the very outer perimeter of your 3D extrusion with a firm, solid line. This separates your hatched shading from the black background. -
Clean the interior:
Ensure the main face of the letters (the front ‘3’ and ‘D’) remains mostly black, showing the board surface. If you got chalk dust inside, wipe it carefully with a barely damp swab to maximize contrast. -
Final dust off:
Blow away any loose chalk dust. If needed, use a straight edge to drag a clean cloth along the bottom to remove fallen particles.
Add a Gradient
Instead of simple cross-hatching, smudge the chalk at the deepest corner of the 3D block and fade it out as it moves toward the face for a rounded look.
Place your board in a well-lit spot to capture the full effect of your dimensional typography


Have a question or want to share your own experience? I'd love to hear from you in the comments below!