When I’m craving that dreamy, light-soaked look, I reach for impressionist painting ideas that let me focus on mood over tiny details. These prompts are all about fleeting light, bold color, and brushstrokes you can actually see—no perfection required.
Sunrise Over Water With Broken Color

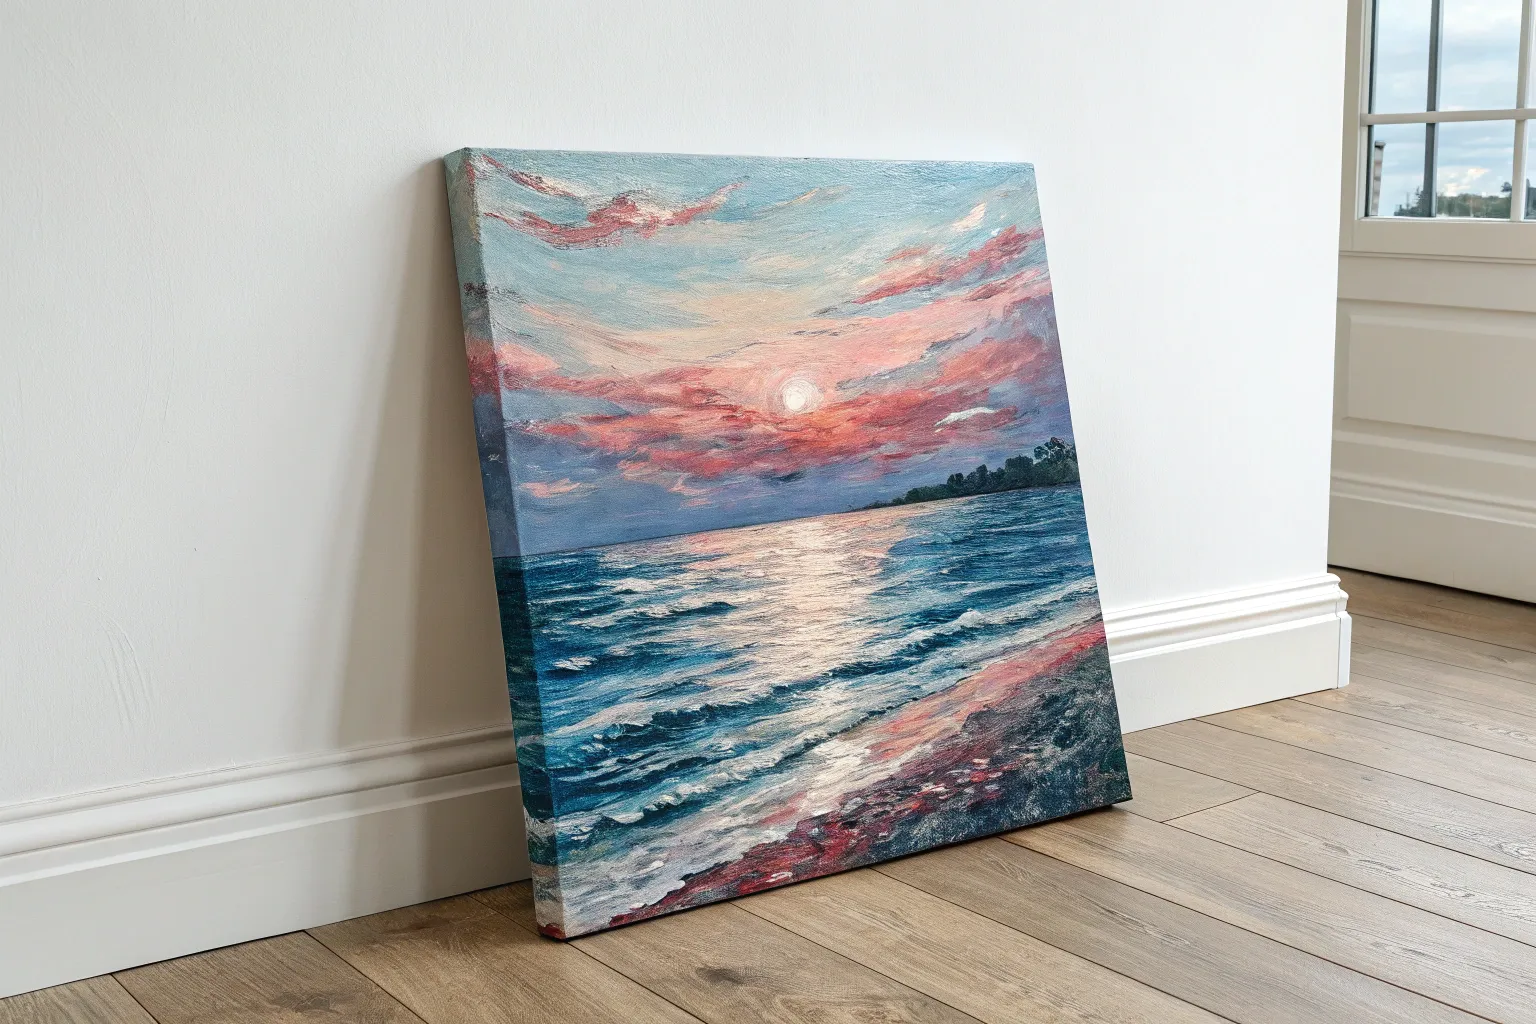
Capture the breathtaking luminosity of a sunrise over water by applying the Impressionist technique of broken color. This project transforms a large canvas into a glowing window to the horizon, where distinct strokes of unblended color optically mix to create vibrant, shimmering light.
Step-by-Step Guide
Materials
- Large stretched canvas (24×36 inches or larger)
- Acrylic or oil paints (Titanium White, Cadmium Yellow, Cadmium Orange, Alizarin Crimson, Cerulean Blue, Ultramarine Blue, Burnt Umber)
- Gesso primer
- Large flat brushes (2-inch and 1-inch)
- Medium filbert brushes (size 6 and 8)
- Small round brush (size 2)
- Palette knife
- Easel suitable for large formats
- Palette for mixing
- Water container or odorless mineral spirits
- Rags or paper towels
Step 1: Preparation and Sky Gradient
-
Prime the Surface:
Coat your large canvas with a layer of gesso to ensure a smooth, receptive surface. Let it dry completely before beginning your painting session. -
Establish the Horizon:
Using a straightedge or masking tape, mark your horizon line roughly one-third of the way up from the bottom. This classical composition keeps the focus on the expansive sky. -
Block in the Upper Sky:
Mix a soft, pale blue using Cerulean Blue and Titanium White. Using your largest flat brush, cover the top corners and edges of the canvas, keeping the center roughly blank for the warmer tones. -
Transition to Warmth:
Mix Cadmium Yellow with a touch of White. Blend this into the blue areas while both are still wet, creating a soft, greenish-gray transition zone, but keep the center area purely warm. -
Create the Sun’s Halo:
In the center just above the horizon, paint a large, diffuse circle of pure Cadmium Yellow mixed with Cadmium Orange. Blend this outwards into the paler yellows to create a glowing atmospheric effect.
Muddy colors?
If your orange and blue mix into a dull brown, stop blending on the canvas. Clean your brush and lay distinct strokes side-by-side. Let the viewer’s eye mix the colors from a distance.
Step 2: Clouds and Broken Color Technique
-
Drafting the Clouds:
Mix a dark purple-gray using Ultramarine Blue, Alizarin Crimson, and a tiny dot of Burnt Umber. With a medium filbert brush, loosely map out the cloud shapes, focusing on the diagonal drift to suggest wind movement. -
Applying Broken Color to Clouds:
Instead of blending the clouds perfectly, dab small strokes of lighter violet and orange onto the dark gray cloud bases. Allow the underlying dark color to peek through between strokes. -
Highlighting Cloud Edges:
Load a small brush with bright orange and pink. Paint the bottom edges of the clouds where the rising sun would hit them. Keep these strokes distinct to simulate the vibration of light. -
Painting the Sun:
Place a solid, bright circle of Titanium White mixed with the tiniest hint of Yellow right in the center of your glow. This is the brightest point of the painting.
Step 3: The Water and Reflection
-
Base Water Tones:
For the water surface, mix a muted version of your sky colors. Use horizontal strokes of blue-gray on the sides, transitioning to warm orange-browns in the center. -
Building the Sun Path:
Directly under the sun, paint a vertical column of pure Orange and Yellow. Use horizontal, chopping brushstrokes to mimic the choppy surface of the water. -
Intensifying the Reflection:
Layer thick strokes of White and bright Yellow in the center of the reflection path. I like to use a palette knife here to drag the paint across the canvas grain, creating a natural sparkle texture. -
Adding Water Ripples:
With a small round brush, add thin, dark contour lines in the water using the purple-gray mix. These lines should be flatter and closer together near the horizon, and slightly more spaced out as they move down the canvas. -
Foreground Details:
In the immediate foreground at the bottom, deepen the water colors with Burnt Umber and Blue to suggest depth. Add suggestions of small waves or foam with quick, loose dashes of pale paint. -
Adding Silhouette Elements:
If desired, paint a tiny silhouette of a distant boat using pure black or dark umber near the horizon line to give the scene immense scale. -
Final Grass Accents:
Using the tip of a rigger brush or the edge of a palette knife, flick partially transparent dark green or black lines up from the bottom right corner to suggest dune grass in the immediate foreground.
Create a seamless view
Paint the canvas edges with the continuing image (gallery wrap). Mount the finished piece outdoors or against a window frame to create a trompe-l’œil effect where the art blends with reality.
Step back and admire how your distinct brushstrokes merge to create a shimmering, photorealistic sunrise


Sunset Reflections In Quick, Loose Strokes
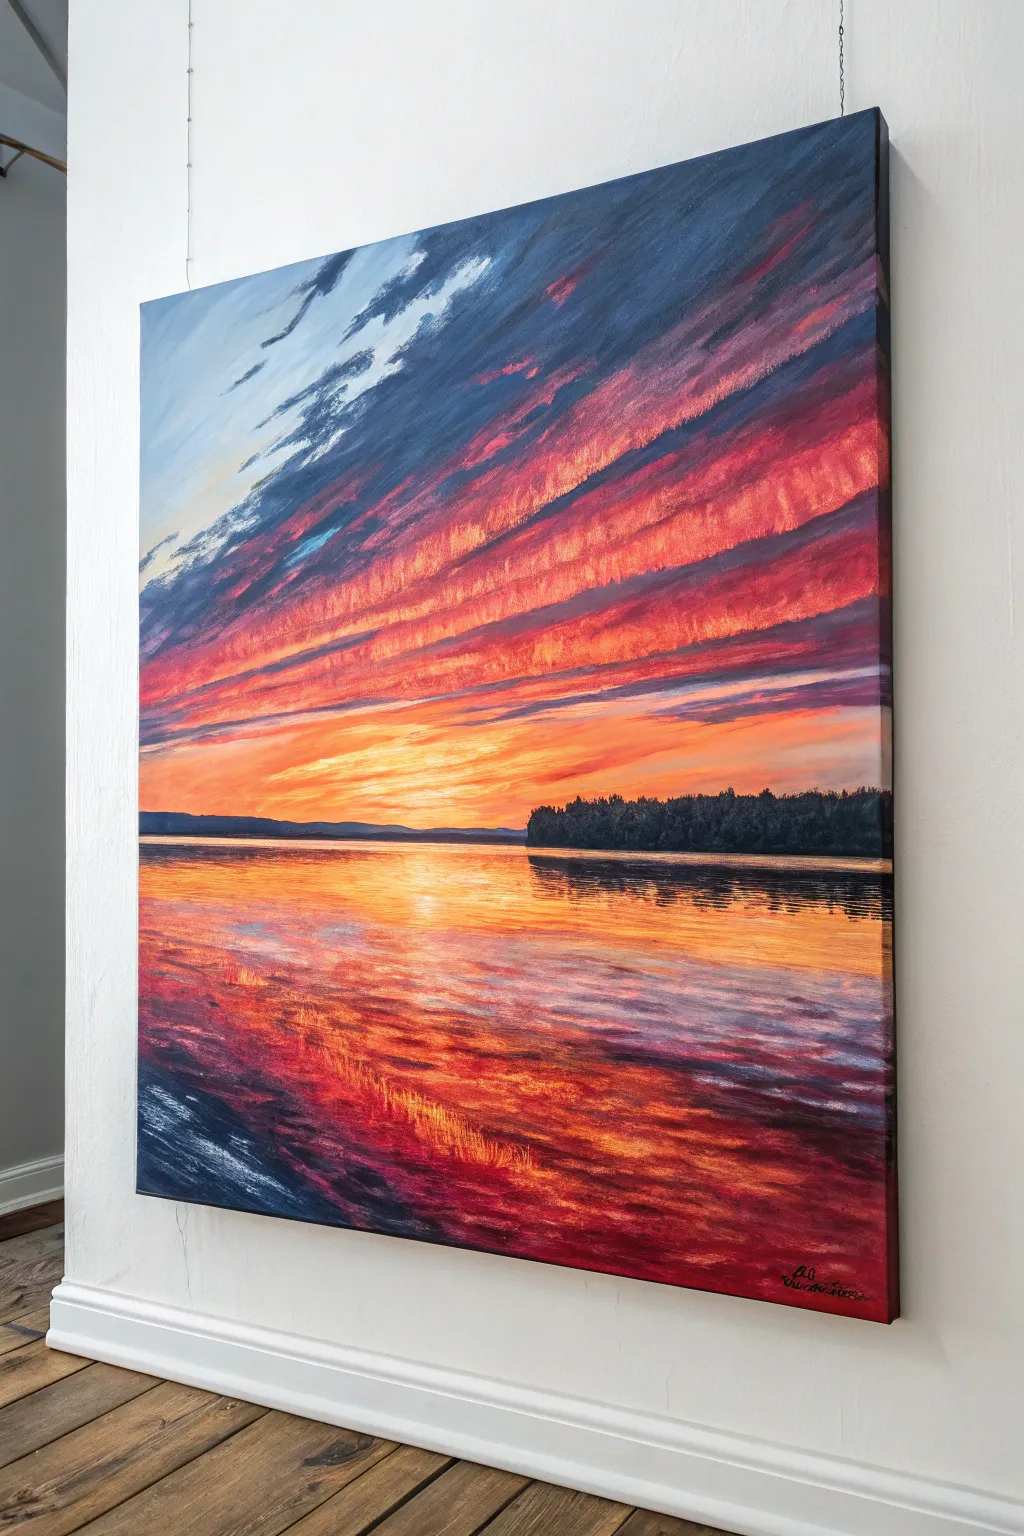
Capture the breathtaking drama of a blazing sunset reflecting over calm waters with this vibrant acrylic painting tutorial. You will learn to use directional brushstrokes to create sweeping clouds and mirrored reflections that seem to glow from within.
Step-by-Step
Materials
- Large square canvas (e.g., 24×24 inches or larger)
- Acrylic paints: Titanium White, Cadmium Yellow, Cadmium Orange, Alizarin Crimson, Ultramarine Blue, Phthalo Blue, Mars Black
- Large flat brush (2-inch)
- Medium filbert brush
- Small round brush for details
- Palette knife (optional for texture)
- Water cup and paper towels
- Easel
Step 1: Setting the Sky’s Foundation
-
Establish the Horizon:
Begin by drawing a faint horizontal line with a pencil or diluted paint about one-third of the way up from the bottom of the canvas. This separates your sky from the water. -
Paint the Upper Sky:
Mix Ultramarine Blue with a touch of white and slate grey. Using your large flat brush, paint the top left corner in diagonal strokes moving downward toward the right, leaving gaps for the fiery colors later. -
Add the Darkest Clouds:
While the blue is still wet, deepen the mix with a tiny bit of black and Phthalo Blue. Add streaks into the upper left section, maintaining that strong diagonal sweeping motion that characterizes this composition. -
Introduce the Glow:
Clean your brush thoroughly. Mix Cadmium Yellow with Titanium White. Paint the area just above the horizon line in the center, blending it outwards to create the sun’s brightest point.
Muddy colors?
If your oranges turn green when meeting the blue sky, let the blue layer dry completely before painting the orange clouds over it.
Step 2: Building the Fiery Cloud Layers
-
Layering Orange Tones:
Mix Cadmium Orange with a little Alizarin Crimson. Using broad, confident strokes, paint diagonal bands across the sky, starting from the right side and sweeping up towards the left blue section. -
Intensifying the Red:
Use pure Alizarin Crimson and blend it into the edges of your orange clouds. I like to let the brush run dry slightly here to create a feathery edge where the red meets the blue sky. -
Connecting Sky and Horizon:
Takes a soft orange mix and fill the remaining sky gap just above the horizon, blending it gently into the yellow sun center you painted earlier. -
Highlighting the Clouds:
With a clean filbert brush, take a light peach color (yellow + white + tiny touch of red) and add highlights to the bottom edges of the diagonal cloud bands to give them volume.
Glossy Finish
Once fully dry, apply a coat of high-gloss varnish to make the darks deeper and give the water a true ‘wet’ looking shine.
Step 3: Creating the Reflective Water
-
Mirroring the Sky Base:
Paint the water surface using horizontal strokes. Use the same yellow-white mix for the center reflection directly under the sun, keeping your strokes flat and smooth. -
Adding Water Depth:
Mix your deep crimsons and blues. Paint the bottom corners of the canvas, using short, choppy horizontal strokes to simulate ripples in the foreground. -
Transitioning Colors:
Blend orange and red tones into the mid-water section, ensuring they mirror the intensity of the sky above but with slightly more muted tones. -
The Silhouette Horizon:
Mix Mars Black with a touch of Ultramarine Blue or green to create a deep, natural dark. Using a smaller brush, paint the tree line along the horizon on the right side. -
Distant Hills:
On the left horizon, paint a lower, flatter landmass using a lighter grey-blue mix giving the illusion of distance.
Step 4: Final Details and Reflection
-
Reflecting the Trees:
Beneath the black tree line, drag your brush straight down with dark paint, then gently swipe horizontally across it to blur the reflection into the water. -
Enhancing Water Texture:
Load a small round brush with bright yellow-orange. Add thin, distinct horizontal lines across the water’s surface, concentrating them in the center path of light. -
Foreground Ripples:
In the bottom left corner, use dark blue and purple mixes to add larger, more distinct wave shapes, suggesting the shore is close. -
Final Light Check:
Step back and assess the contrast. If the sun’s reflection needs more pop, add a few strokes of almost pure white mixed with yellow right in the center of the water.
Hang your masterpiece where it can catch the evening light and extend the sunset into your home


Flower Garden “Dabs” For Instant Texture
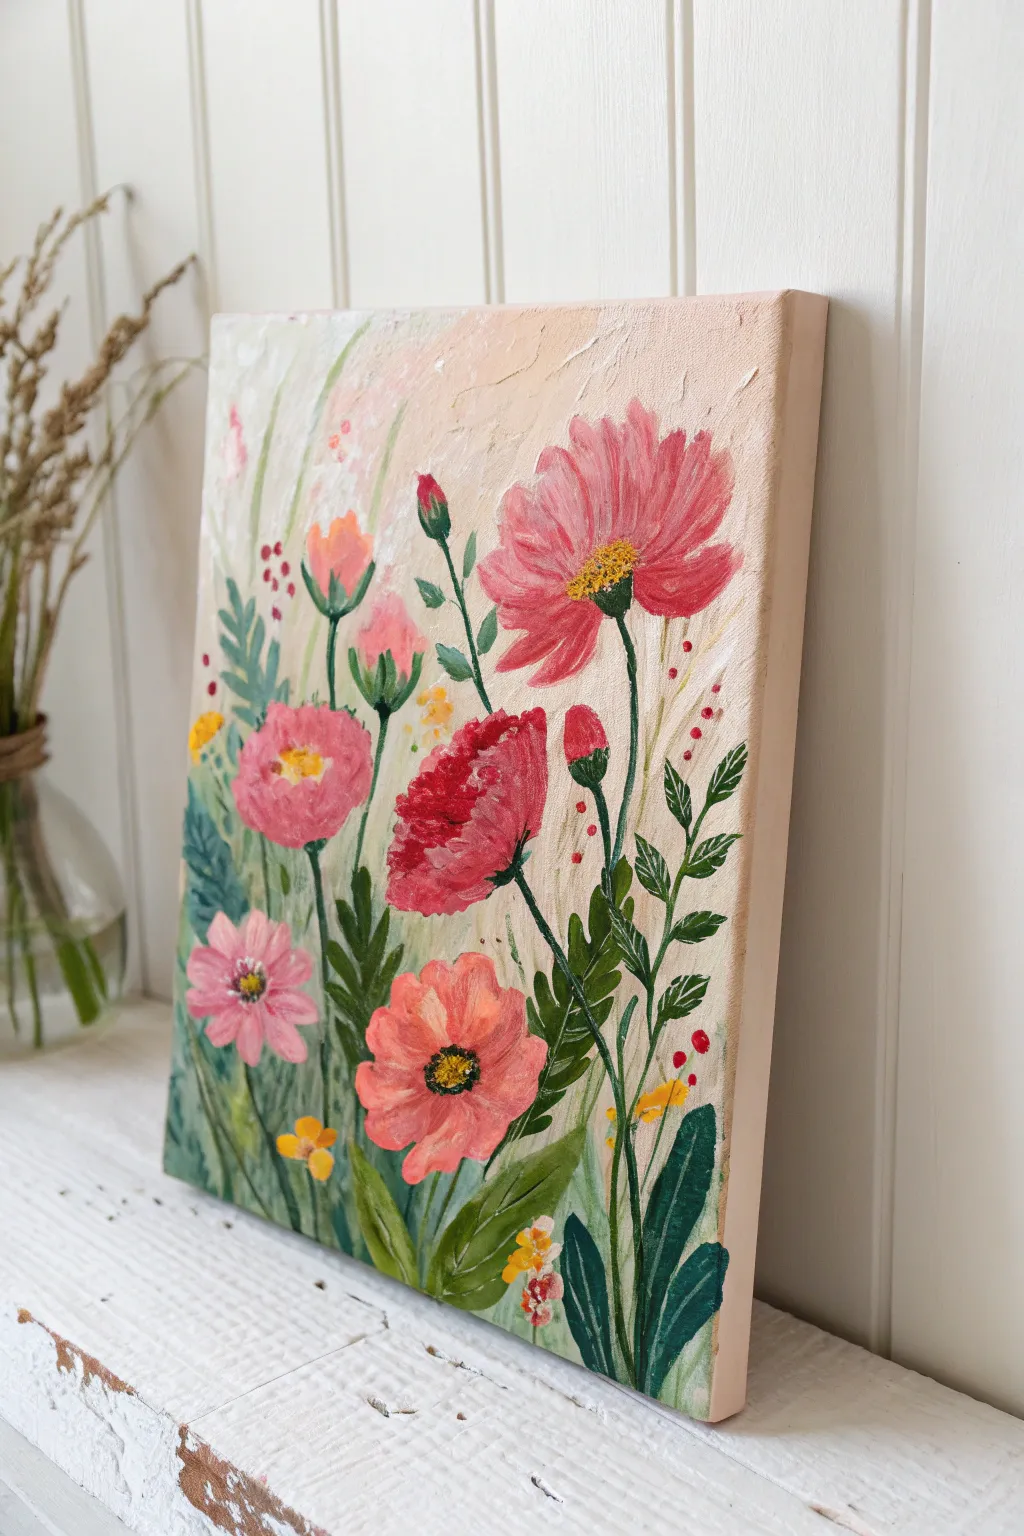
Capture the breezy elegance of a summer garden with this textured acrylic painting on canvas. Using visible brushstrokes and a soft, pastel color palette, you’ll build layers of blooms that seem to lift right off the surface.
Detailed Instructions
Materials
- Stretched canvas (e.g., 8×10 or 11×14 inches)
- Acrylic paints: Titanium White, Light Pink, Magenta, Cadmium Red, Yellow Ochre, Sap Green, Phthalo Green, Burnt Umber
- Modeling paste (optional, for extra texture)
- Assorted brushes: Flat shader (medium), Round brushes (small and medium), Detail linear brush
- Palette knife
- Palette
- Cup of water and paper towels
Step 1: Setting the Background
-
Mix the base tone:
Begin by mixing a large amount of Titanium White with a tiny touch of Yellow Ochre and a speck of Burnt Umber. You want a warm, creamy off-white shade—think oatmeal or light beige. -
Apply the first layer:
Using a palette knife or a large flat brush, spread this creamy mixture over the entire canvas. Don’t worry about being perfectly smooth; allow the knife or brush to leave subtle ridges and sweeping marks for inherent texture. -
Paint the sides:
Don’t forget the edges! Continue your background color around the thick sides of the canvas for a polished, gallery-ready look without needing a frame. -
Add soft washes:
While the base is still slightly tacky or just dry, mix a very watery, transparent wash of Light Pink and Sap Green. Lightly brush vertical strokes in the bottom left and top left corners to suggest distant grass and atmospheric light.
Heavy Body Tip
To get those raised, textured petals without using modeling paste, use heavy body acrylics. apply them essentially undiluted, scooping paint onto the brush like frosting.
Step 2: Base Floral Shapes
-
Map the main blooms:
Mix a vibrant pink using Titanium White and Magenta. Identify where your three largest flowers will go: a large cosmos on the right, a poppy in the center, and a smaller bloom on the lower left. -
Block in color:
Using a medium round brush, paint loose, circular shapes for these main flowers. Keep the edges soft and uneven; we aren’t looking for botanical illustrations, but rather the *impression* of petals. -
Add varying shades:
While the pink is wet, dip your brush into a darker Cadmium Red or Magenta and streak it into the center and lower petals of the main flowers to create depth and shadow. -
Create buds:
Mix a soft coral color and dab small oval shapes floating above the main flowers to represent unopen buds. Vary their heights to keep the composition dynamic.
Palette Knife Magic
Instead of blending colors on the palette, partially mix pink and white on your knife. When applied to the canvas, it creates a marbled, multi-tonal petal in one stroke.
Step 3: Foliage and Stems
-
Mix greens:
Prepare two shades of green on your palette: a light, yellow-green (Sap Green + Yellow Ochre + White) and a deep, cool green (Phthalo Green + Burnt Umber). -
Draw the stems:
Using a detail liner brush and your lighter green, paint thin, wavy lines connecting your blooms to the bottom of the canvas. Let lines cross over each other naturally. -
Paint broad leaves:
Switch to a small flat brush. Load it with the deep green and press firmly at the base of the canvas, pulling upward and lifting off to create tapered, sword-like leaves. -
add feathery details:
Using the tip of a small round brush, add small, fern-like leaves branching off the main stems. Use quick, short dabs to keep them looking airy. -
Anchor the buds:
Paint small green ‘cups’ or sepals at the base of your floating pink buds using the detail brush.
Step 4: Textured Details
-
Define petals:
Mix a pale pink (mostly White with a touch of Red). Using a small round brush, paint defined strokes on the upper edges of your flower petals to simulate light hitting them. This is where I like to load the brush heavily to create physical texture. -
Add flower centers:
Mix Yellow Ochre with a tiny bit of White. Using the very tip of your brush or a toothpick, stipple (dot) the centers of the open flowers. Add a tiny dot of black or dark brown in the middle of the yellow for contrast. -
Paint filler flowers:
Using pure Yellow Ochre or a bright yellow, add tiny clusters of three or four dots in the empty spaces between the green stems to represent wildflowers. -
Add red berries:
With a detail brush and Cadmium Red, dot tiny berries on thin stems primarily on the left side of the composition for a pop of contrasting color. -
Highlight the leaves:
Mix a milky mint green. Add a single line of highlight down the center or along one edge of your largest dark green leaves to give them dimension. -
Final texture check:
Step back. If any flower feels too flat, use a palette knife to gently scrape a thick dab of light pink or white onto the petals for that impasto effect.
Allow the thick paint to dry completely overnight before hanging your garden masterpiece


Lavender Field Path In Soft Evening Light
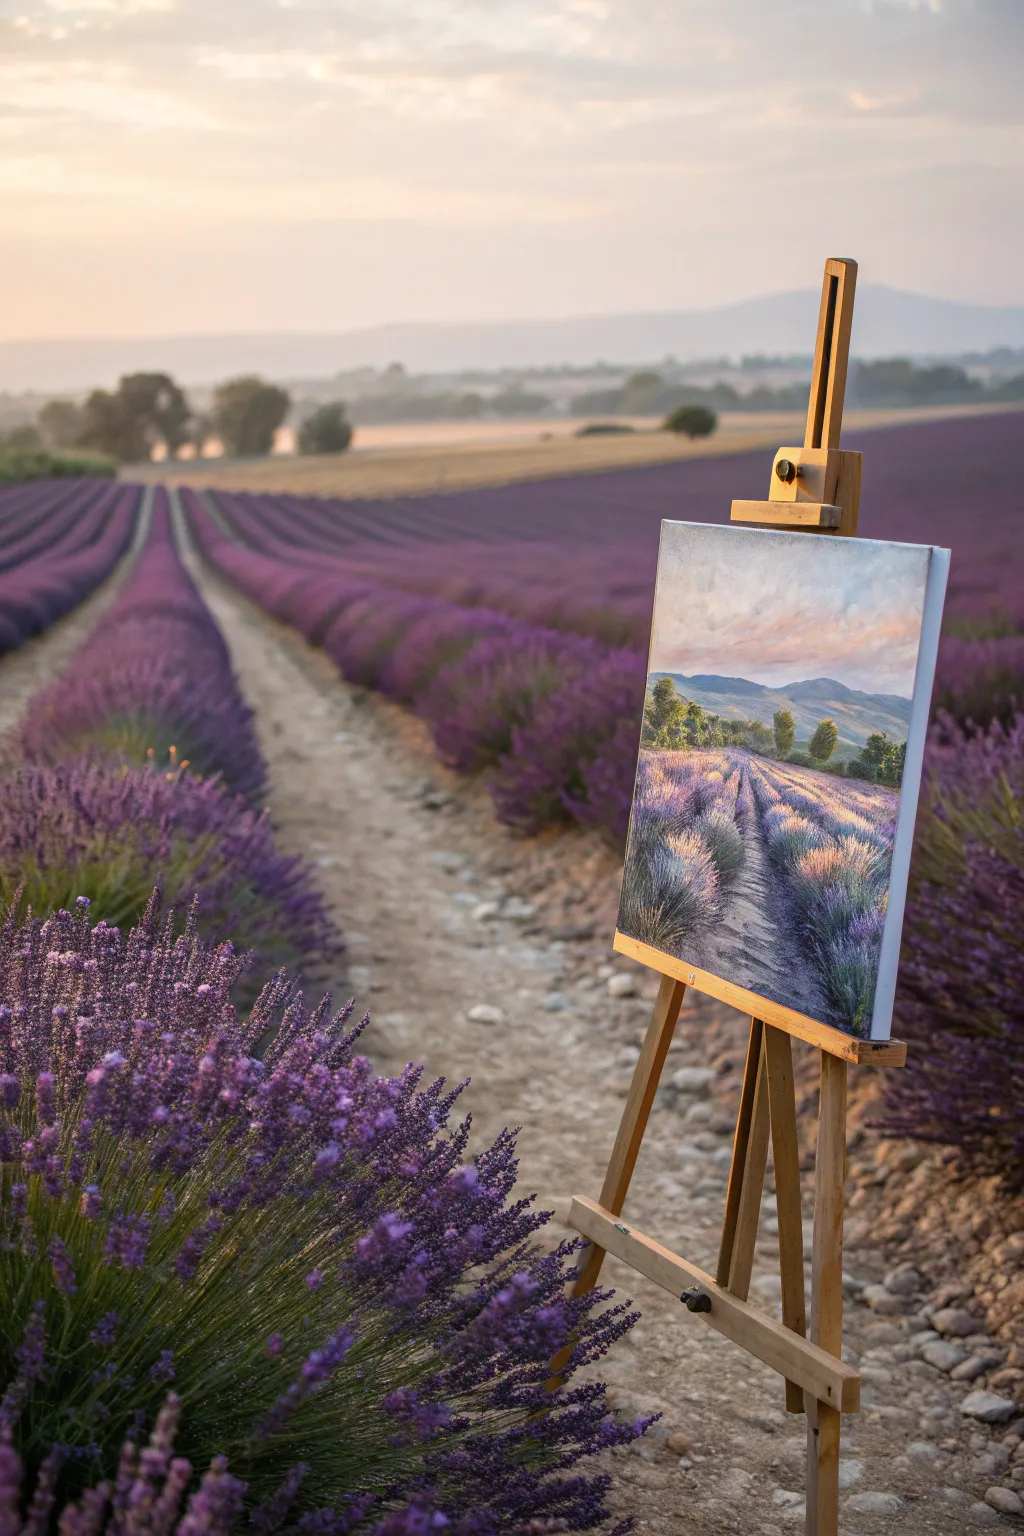
Capture the serene beauty of Provence with this impressionist project, where rows of purple blooms meet the warm glow of a setting sun. You will recreate the interplay of light and shadow on a lavender field path using layered acrylics or oils to achieve rich texture and depth.
Step-by-Step Tutorial
Materials
- Canvas board or stretched canvas (11×14 or similar)
- Acrylic or Oil paints (Ultramarine Blue, Dioxazine Purple, Titanium White, Burnt Umber, Yellow Ochre, Cadmium Yellow, Sap Green, Alizarin Crimson)
- Flat brushes (Sizes 4, 8, 12)
- Small round brush (Size 2 for details)
- Fan brush (optional, for texture)
- Palette knife
- Palette for mixing
- Water jar or solvent container
- Paper towels
Step 1: Planning and Underpainting
-
Sketch the horizon:
Begin by lightly sketching your horizon line about two-thirds of the way up the canvas. This high horizon emphasizes the vastness of the field. -
Map the perspective:
Draw the central dirt path starting wide at the bottom center and narrowing drastically as it recedes toward the horizon line. Add guidelines for the rows of lavender radiating outward from this central path. -
Block in the sky:
Mix Titanium White with a touch of Ultramarine Blue and Alizarin Crimson to create a soft, pale violet-blue. Paint the upper sky area with broad, horizontal strokes. -
Add sunset warmth:
While the sky is still wet, blend in some Yellow Ochre and a tiny bit of Cadmium Yellow near the horizon line to suggest the warm evening glow. Soften the transition between the yellow and blue areas. -
Establish the mountains:
Mix Ultramarine Blue with a small amount of Burnt Umber and White. Paint the distant mountains with flat, smooth strokes, keeping the edges slightly soft to push them into the background.
Step 2: Painting the Landscape
-
Base coat the path:
Mix Burnt Umber, White, and a touch of Dioxazine Purple for a cool, shadowed earth tone. Fill in the dirt path area, using vertical strokes to follow the direction of the road. -
Block in the lavender rows:
Create a dark base mix using Dioxazine Purple and Ultramarine Blue. Paint the shadow shapes of the lavender mounds on either side of the path, leaving the tops unpainted for now. -
Add distant trees:
Using Sap Green mixed with a little Burnt Umber, dab in the small trees near the base of the mountains. Keep these shapes loose and impressionistic rather than detailed. -
Highlight the path:
Mix White with a small amount of Yellow Ochre and Burnt Umber. Apply this lighter mixture to the center of the path and areas where the light hits the dirt, using horizontal scumbling strokes to create a rough, dusty texture.
Paint Direction Matters
Brushstrokes should follow the growth direction. Use vertical flicks for flowers and horizontal sweeps for the sky.
Step 3: Impressionist Textures and Details
-
Highlight the lavender tops:
Mix Dioxazine Purple with White to create a medium lavender tone. Using a fan brush or the side of a flat brush, dab this color onto the tops of the purple rows, simulating the sunlit tips of the flowers. -
Intensify the sunlight:
Create a warm highlight color by mixing White, a touch of Alizarin Crimson, and Cadmium Yellow. Apply this strictly to the right side of the lavender rows to mimic the warm evening sun hitting the flowers. -
Deepen the shadows:
Go back in with your darkest purple-blue mix and define the deep crevices between the rows and at the base of the plants to increase contrast. -
Texture the foreground:
Use a small round brush to flick distinct strokes of lighter purple and white in the immediate foreground. This suggests individual stems and blooms closest to the viewer. -
Refine the path edges:
Blur the boundary between the dirt path and the lavender plants. Scrub a little bit of the earth tone into the purple and vice versa so the plants look rooted. -
Add atmospheric light:
I like to glaze a transparent wash of very watered-down Yellow Ochre over the distant mountains and tree line to unify the lighting and enhance the feeling of a hazy sunset.
Muddy Colors?
Let the bottom layers dry completely before adding highlights. Wet-on-wet blending can turn purple and yellow into heavy gray.
Step back and admire how your brushstrokes have captured the fragrant atmosphere of a summer evening in the fields.
BRUSH GUIDE
The Right Brush for Every Stroke
From clean lines to bold texture — master brush choice, stroke control, and essential techniques.
Explore the Full Guide
Foggy Bridge Silhouette At Dawn
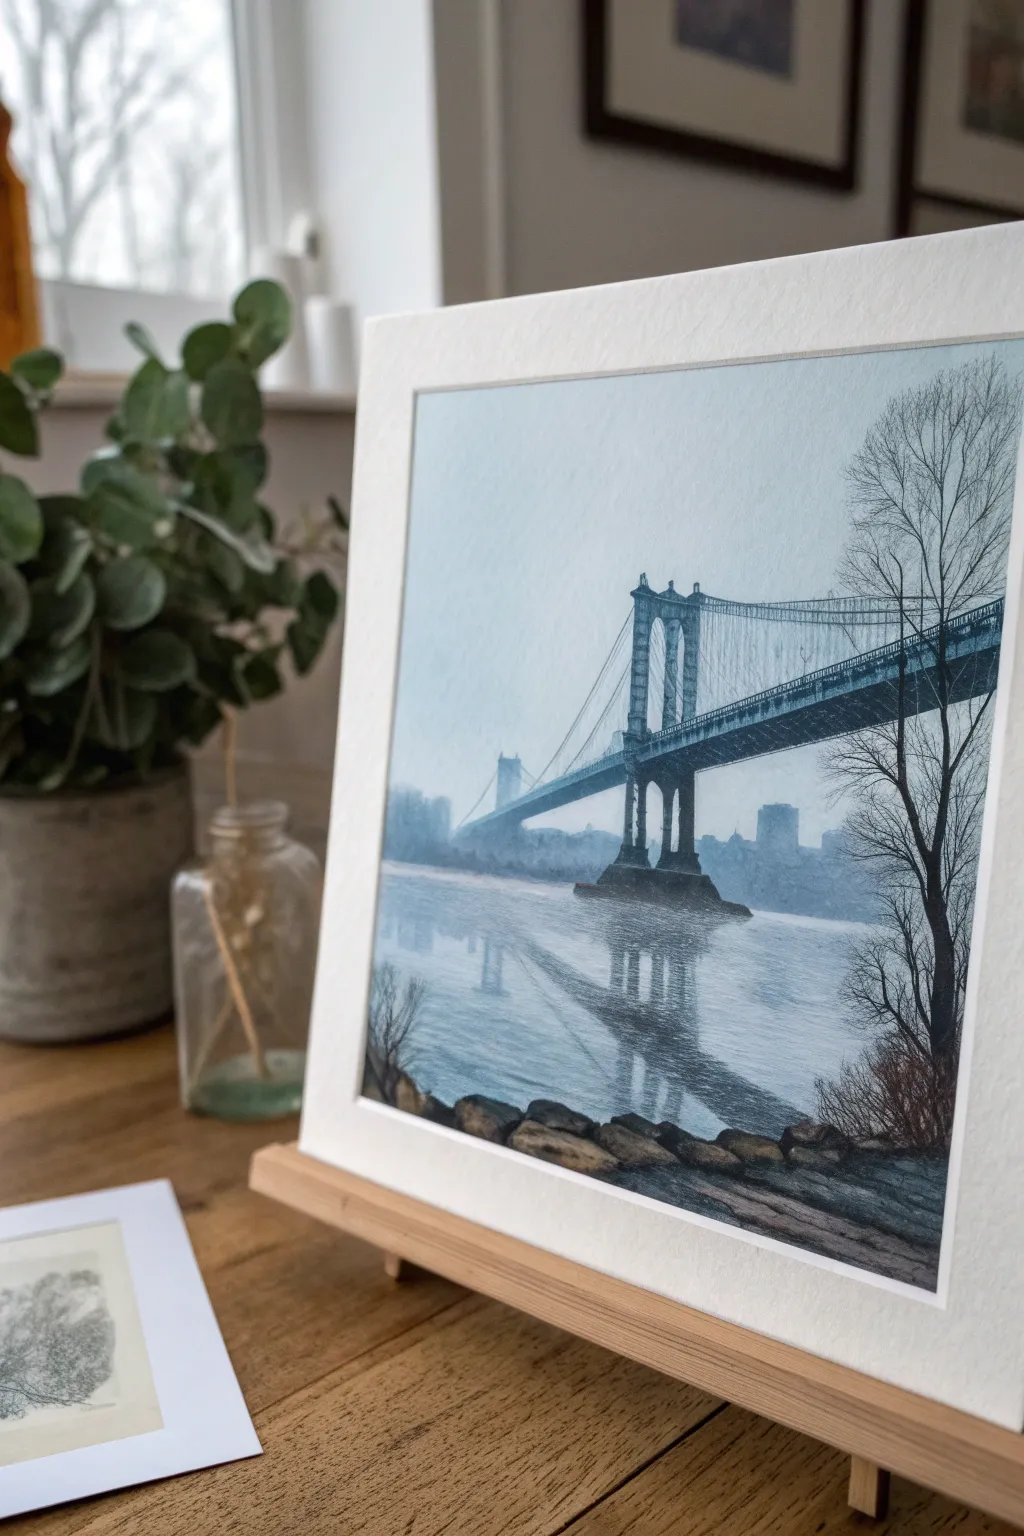
Capture the serene stillness of a foggy dawn with this monochromatic cityscape painting. Using a limited palette of cool blues and grays, you’ll learn to create atmospheric depth through soft washes and delicate architectural details.
Step-by-Step
Materials
- Cold Press Watercolor Paper (300 gsm)
- Watercolor Paints (Payne’s Gray, Indigo, Ultramarine Blue, Burnt Umber)
- White Gouache (for highlights)
- Round Brushes (Size 8 and 4)
- Rigger Brush or Fine Liner (Size 0)
- HB Pencil and Eraser
- Masking Tape
- Two Water Jars
- Paper Towels
Step 1: Setting the Scene
-
Prepare Your Surface:
Tape down all four edges of your watercolor paper to a board to prevent buckling. Ensure the tape is pressed firmly to create a crisp white border later. -
Light Sketching:
Using the HB pencil, lightly sketch the horizon line about one-third up from the bottom. Outline the main tower of the bridge slightly off-center and draw the sweeping curve of the bridge deck. -
Foreground Details:
Sketch the rough shapes of the rocks in the immediate foreground and the bare tree on the right side. Keep lines faint as watercolor is transparent.
Step 2: Creating Atmosphere
-
Sky Wash:
Mix a very watery wash of Ultramarine Blue and a touch of Payne’s Gray. Wet the sky area with clean water first, then drop in the pigment, letting it fade towards the horizon to mimic fog. -
Distant Buildings:
While the sky is still slightly damp, mix a slightly stronger grey-blue. Paint the distant city skyline shapes wet-into-wet so edges remain soft and diffused. -
Water Reflection Base:
Carry the same light blue-grey wash down into the water area. Use horizontal strokes to suggest the movement of the river, leaving a few white paper gaps for sparkle. -
Let It Dry:
Allow these initial atmospheric layers to dry completely before starting the structural work. This prevents the sharp lines of the bridge from bleeding.
Muddy colors?
If your greys look brown or muddy, stop mixing too many colors. Stick to just blue and brown (Indigo + Burnt Umber) to make a clean, cool neutral dark.
Step 3: The Architectural Structure
-
Bridge Tower:
Mix a darker, concentrated Indigo blue. Using a Size 4 brush, paint the vertical towers of the bridge. Vary the pressure to create some texture in the stonework. -
The Bridge Deck:
Paint the underside of the bridge roadway with a dark, cool grey. Make this the darkest value on the bridge to anchor the structure against the light sky. -
Cables and Wires:
Switch to your rigger brush or fine liner. This is where I like to hold my breath a little to steady my hand while painting the delicate suspension cables swooping down. -
Vertical Suspenders:
Add the tiny vertical lines connecting the main cable to the deck. Don’t make them too uniform; slight irregularities add realism.
Pro Tip: Steady Lines
For the long suspension cables, turn your paper sideways or upside down. Pulling the brush toward your body is much easier than pushing it away.
Step 4: Reflections and Foreground
-
Soft Reflections:
Mirror the shape of the bridge tower in the water using a medium-strength grey wash. While wet, lift some pigment out with a thirsty brush to create the rippled effect. -
Bridge Shadow:
Paint the long, sweeping reflection of the bridge deck across the water. Keep the edges less defined than the actual bridge to show water movement. -
Foreground Rocks:
Mix Burnt Umber with Indigo to create a near-black. Paint the rocks at the bottom edge, leaving hard edges to contrast with the misty background. -
The Tree Silhouette:
With the rigger brush and the dark mixture, paint the skeletal tree on the right. Describe the trunk and let the branches taper off into fine twigs reaching into the sky. -
Final Highlights:
Use a tiny dot of white gouache to add highlights on the water ripples or to reclaim lost lights on the bridge structure if needed. -
Reveal:
Once bone dry, carefully peel away the masking tape at a 45-degree angle to reveal the clean, professional border.
Step back and admire the quiet, misty mood you have captured in your cityscape
Park Scene With Flickering Sun And Shade
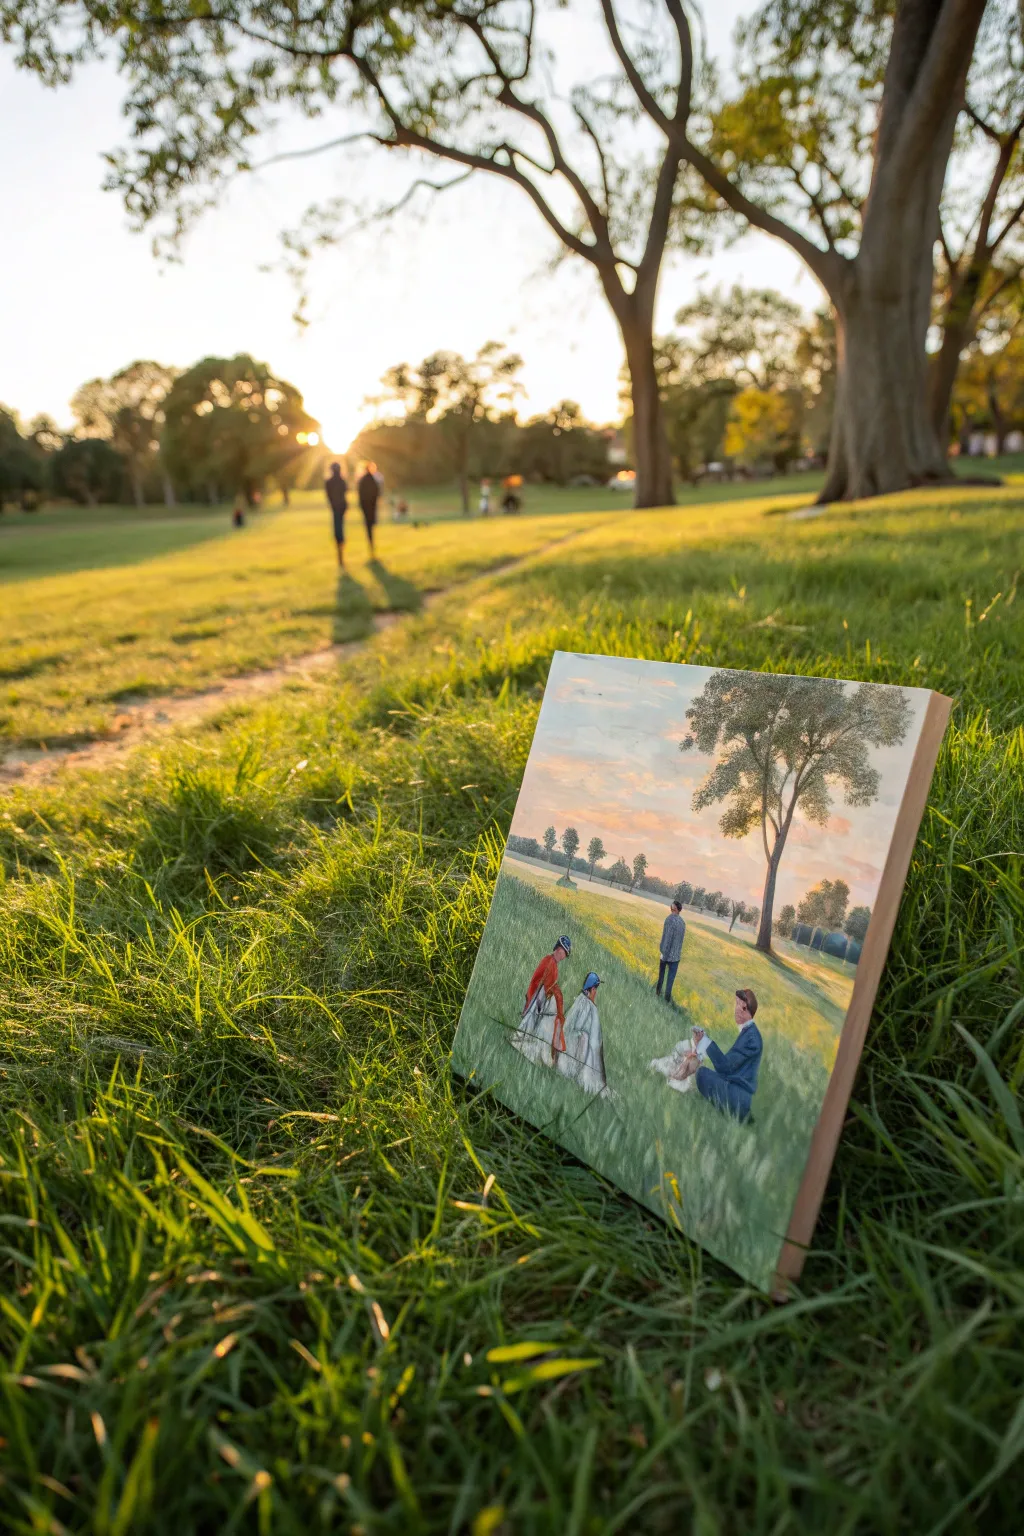
This serene acrylic painting captures the soft, fleeting light of a late afternoon in the park, focusing on long shadows and gentle interactions. You’ll create a layered, atmospheric scene that balances a warm sky with cool, textured grasses.
How-To Guide
Materials
- Canvas board or stretched canvas (roughly 8×10 or 9×12 inches)
- Acrylic paints (Titanium White, Ultramarine Blue, Phthalo Green, Cadmium Yellow, Yellow Ochre, Burnt Sienna, Cadmium Red, Alizarin Crimson)
- Set of brushes (1-inch flat, medium filbert, lush round, and a fine detail liner)
- Palette knife (for mixing)
- Cup of water and paper towels
- Slow-drying medium or fluid retarder (optional)
Step 1: Setting the Scene
-
Prime the Surface:
Begin by applying a very thin, watered-down wash of Yellow Ochre and White across the entire canvas. This kills the harsh white of the canvas and gives the entire painting a warm ‘sunset’ undertone. -
Sketch the Composition:
Using a small brush and diluted Burnt Sienna, lightly map out your horizon line about one-third of the way up the canvas. Sketch the vertical line for the main tree on the right and faint oval shapes for where the main figures will sit.
Pro Tip: Softening Edges
To get that hazy Impressionist look, gently run a dry, soft brush over the distant tree line while the paint is still tacky to blur the edges.
Step 2: Sky and Background
-
Paint the Sky Gradient:
Mix Titanium White with a tiny touch of Ultramarine Blue for the upper sky. As you move down toward the horizon, blend in more White and a hint of Cadmium Yellow or light pink to mimic the sunset glow. -
Add Subtle Clouds:
While the sky is still slightly wet, define soft, horizontal cloud streaks using light pinks and faint purples. Keep the edges soft to maintain that dreamy atmosphere. -
Block in Distant Trees:
Mix Ultramarine Blue, a touch of Phthalo Green, and White to create a muted, atmospheric teal-green. Paint the distant treeline along the horizon, keeping the shapes simple and slightly blurry to suggest depth. -
Create the Tree Shadows:
Before painting the grass fully, identify where the long shadows will fall. Use a cool purple-grey mix to lay down the horizontal shadow shapes stretching from the right side towards the left.
Troubleshooting: Muddy Greens?
If your grass greens look dull or mud-brown, stop mixing all colors at once. Instead, let a layer dry, then glaze a pure yellow or blue wash over it.
Step 3: Fields and Grass
-
Underpainting the Field:
Apply a base layer for the sunny grass areas using Cadmium Yellow mixed with a little Phthalo Green and White. It should look bright and almost lime-colored. -
Paint the Shadowed Grass:
Blend a darker, cooler green (using more Blue and less White) into the shadow areas you mapped out earlier. Merge the edges where the sunlit grass meets the shadowed grass for a soft transition. -
Add Texture:
Switch to an older, frayed brush or use the edge of a flat brush. Flick small vertical strokes of lighter green and yellow over the foreground to simulate individual blades of grass catching the light.
Step 4: The Main Tree
-
Paint the Trunk:
Mix Burnt Sienna and Ultramarine Blue to get a deep, dark brown. Paint the trunk of the large tree on the right, tapering it as it goes up. -
Paint the Foliage:
Stipple the leaves on the tree using a rough brush. Start with dark green for the dense areas, then layer lighter olive greens on the edges where the sun hits the branches. -
Highlight the Tree:
Add a few touches of warm brown or ochre on the left side of the trunk to show where the setting sun is illuminating the bark.
Step 5: Figures and Details
-
Block in Figure Shapes:
Paint the basic silhouettes of the people. Use solid blocks of color first—Cadmium Red for the seated woman’s jacket, white for the dresses, and deep blue for the man’s suit. -
Refine the Seated Women:
For the woman in red, add a dark crimson shadow under the arm. For the woman in white, use light grey-blue strokes to suggest folds in the fabric of her dress. -
Detail the Standing Man:
Paint the standing figure in the background with muted colors (grey or dull blue) so he doesn’t compete with the foreground group. He should look smaller to enhance perspective. -
Detail the Kneeling Man:
Using a fine liner brush, add the details of the blue suit. Add a touch of flesh tone for the face and hands, keeping features vague—impressionism is about suggestion, not precision. -
Cast Shadows for Figures:
Paint dark green-grey shadows extending to the left of each figure, anchoring them to the ground so they don’t look like they are floating. -
Final Highlights:
Mix a very pale yellow-white. Add tiny dots of light on the shoulders of the figures and the tips of the tallest grass blades to maximize the golden hour effect.
Step back and admire how your brushwork has captured a quiet, timeless moment in the park

PENCIL GUIDE
Understanding Pencil Grades from H to B
From first sketch to finished drawing — learn pencil grades, line control, and shading techniques.
Explore the Full Guide
Café Window Glow And Street Reflections
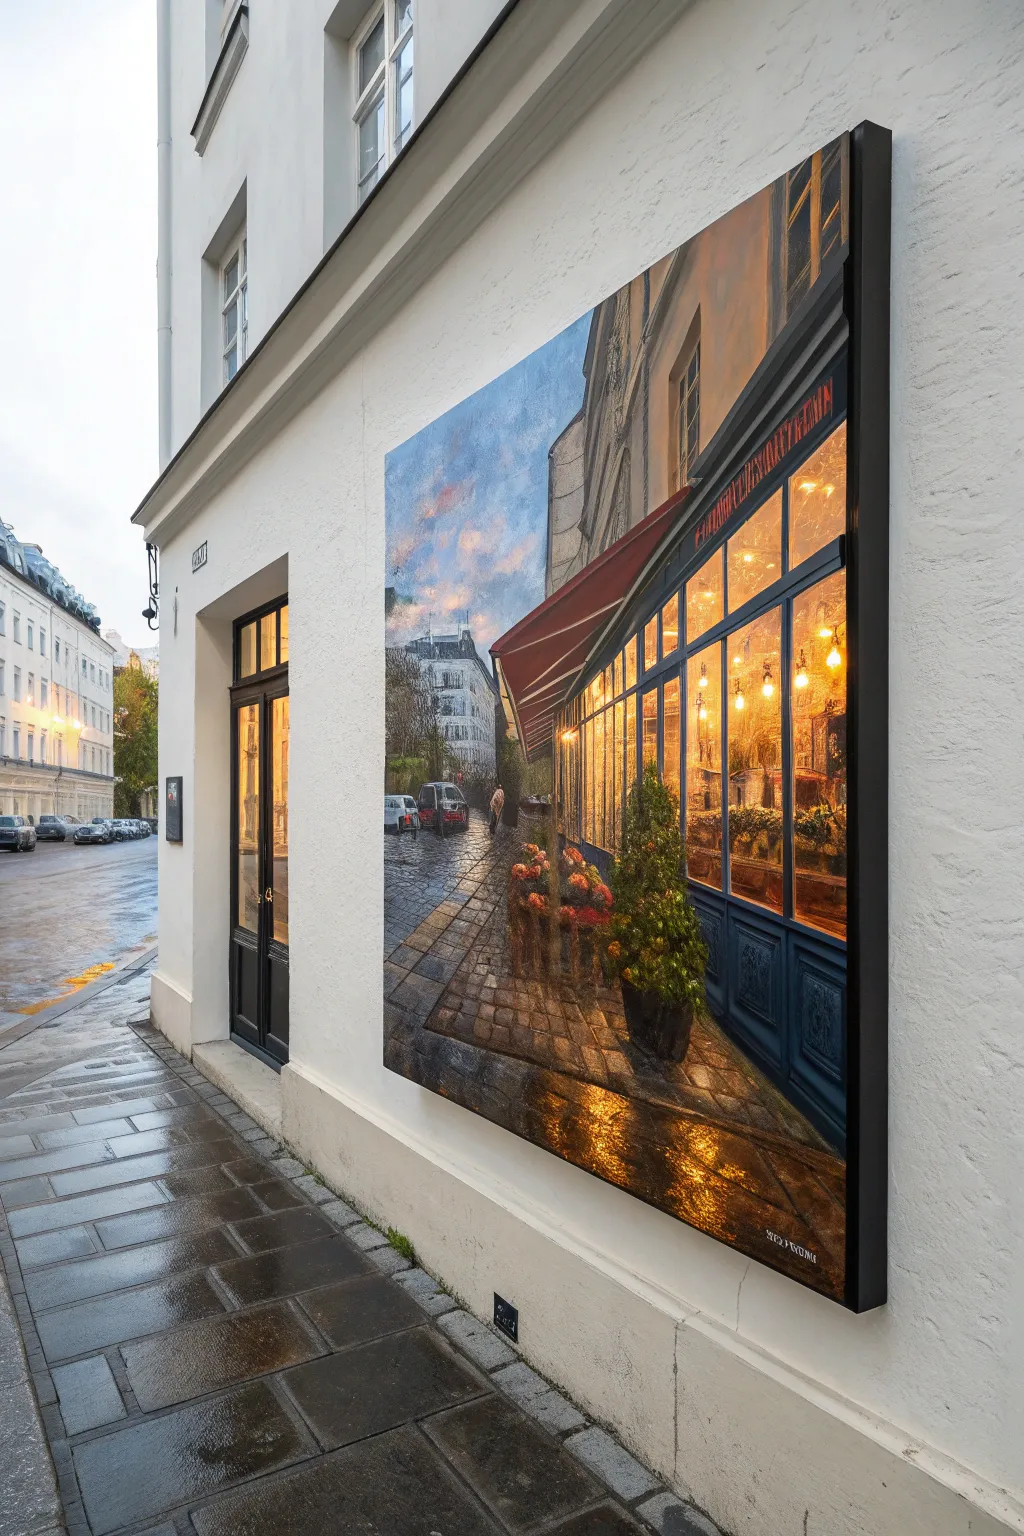
Capture the romantic ambiance of a rain-soaked evening with this luminous impressionist painting tutorial. You’ll learn to contrast the warm, inviting light of a café interior against the cool, wet pavement of a twilight street.
Detailed Instructions
Materials
- Large canvas (24×36 inches or similar)
- Acrylic or oil paints
- Brushes (assorted sizes: large flats, medium filberts, fine liners)
- Palette and palette knife
- Easel
- Water cups or solvent
- Rags or paper towels
- Reference photo of a lit café
Step 1: Setting the Scene
-
Establish the horizon line:
Begin by sketching a light pencil line about one-third up from the bottom of your canvas to establish the ground plane. This is where your buildings will meet the street. -
Block in perspective lines:
Draw the diagonal lines for the café windows and awning on the right side. Ensure these lines converge towards a single vanishing point on the left side of the canvas to create depth. -
Sketch the distant buildings:
Lightly outline the shapes of the buildings in the background. Keep details minimal here; focus on their silhouettes against the sky. -
Underpaint the canvas:
Cover the entire canvas with a thin wash of burnt sienna mixed with a touch of ultramarine blue. This warm, neutral tone will help unify your colors later.
Muddied Colors?
If your warm window lights look dirty, let the dark surrounding paint dry completely before applying the yellow. Mixing wet darks into yellow creates green mud.
Step 2: Painting the Sky and Architecture
-
Paint the twilight sky:
Mix shades of blue, grey, and hints of pink for the sky. Apply these using broad, horizontal strokes, blending wet-on-wet to create soft transitions for the clouds. -
Define the building facades:
Using a grey-blue mix, block in the buildings on the left. Keep the edges slightly soft to suggest distance and atmosphere. -
Fill the café exterior:
Paint the café’s exterior woodwork with a deep, cool blue or charcoal. This dark frame will make the interior glow pop dramatically. -
Add the awning:
Using a vibrant red mixed with a little brown, paint the large sloping awning. Add shadows underneath it to show form and protection from the rain.
Step 3: Creating the Glow
-
Block in warm interior light:
Mix a vibrant orange-yellow color. Fill the window panes of the café with this warm hue, leaving space for the window mullions. -
Add interior details:
Loosely suggest shapes of tables, chairs, and people inside. Don’t be too precise; use dabs of deeper orange and brown to hint at forms. -
Emphasize light sources:
Add bright touches of pure yellow or white mixed with yellow where light bulbs or reflections would be most intense inside the windows. -
Paint the window frames:
Using a fine liner brush and your exterior color, carefully paint the grid of the window frames over your warm background.
Add Life
Paint distant car taillights using small dabs of red on the street. It adds depth and reinforces the rainy, urban atmosphere.
Step 4: Reflections and Atmosphere
-
Paint the wet pavement:
Mix a dark grey for the street. While the paint is wet, drag vertical strokes of your warm window colors downwards into the street area to mimic reflections. -
Add texture to the cobblestones:
Use a smaller brush to imply individual cobblestones in the foreground. Highlight the top edges of stones with light grey where they catch the ambient light. -
Introduce greenery:
Dab various shades of green near the café entrance to create potted plants. Use a stippling motion to suggest texture and leaves. -
Enhance the reflections:
Strengthen the yellow and orange reflections on the wet ground near the bottom of the canvas. Make these strokes wiggly to show the uneven, wet surface. -
Final highlights and details:
Add small touches of white or light yellow to the tips of the plants and the edges of the awning to show where the light hits them. Sign your masterpiece in the corner.
Step back and admire the cozy warmth radiating from your rainy street scene
Dancers As Gesture And Color Notes
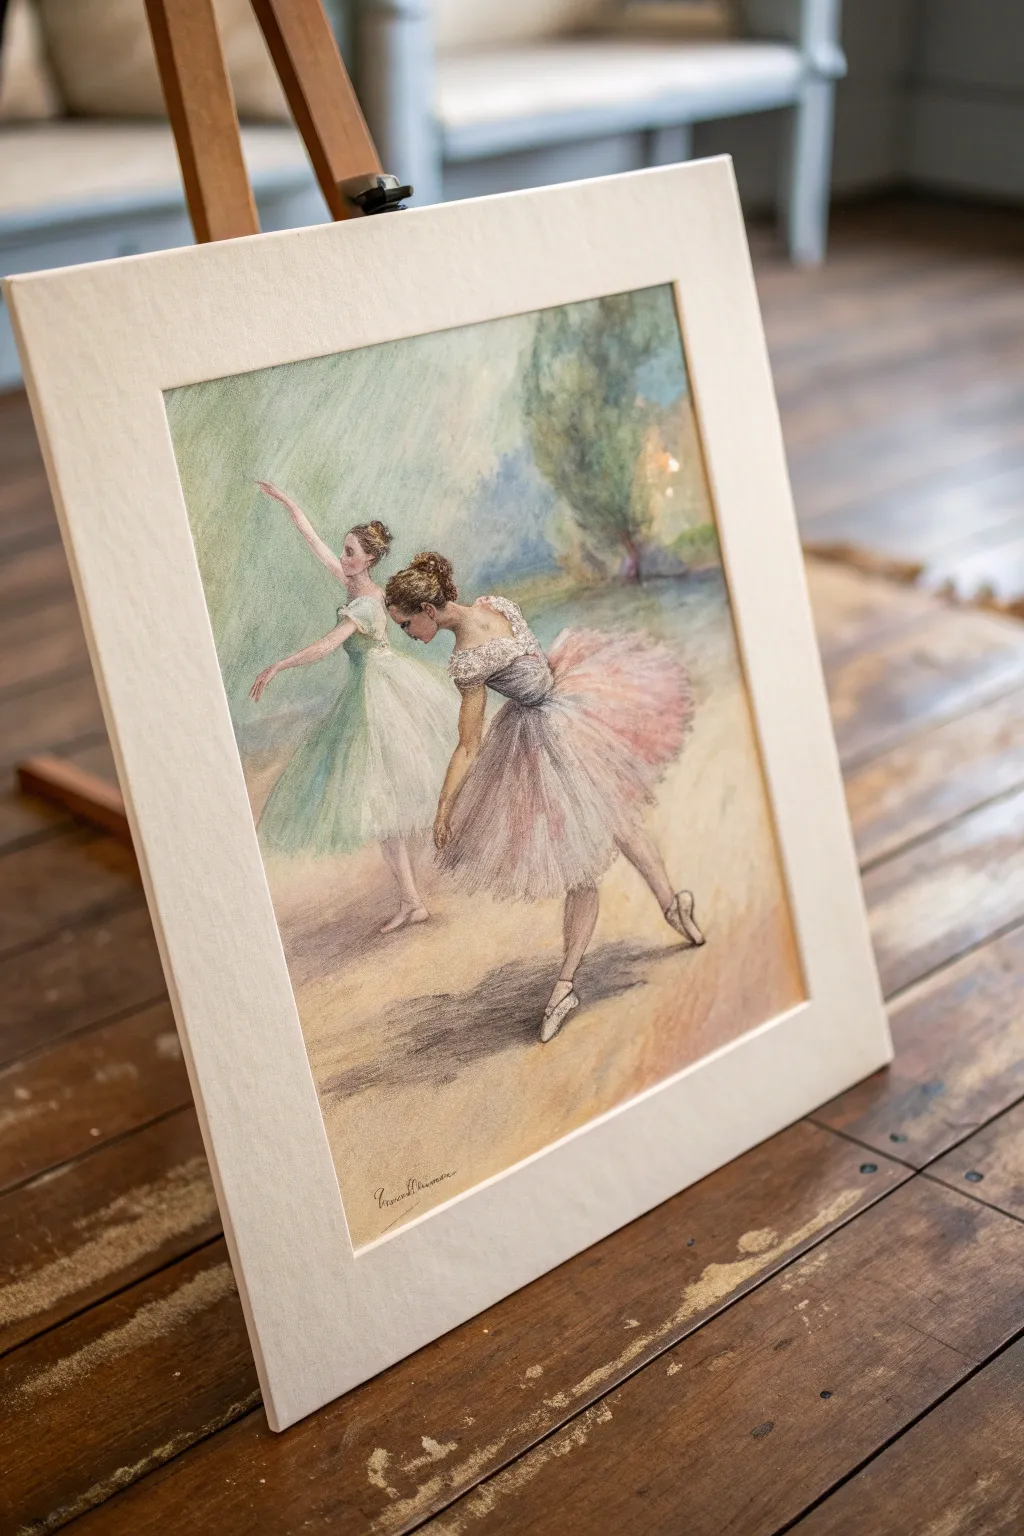
Capture the fleeting elegance of dance with this soft, impressionistic study of two ballerinas. Using a mix of sketchy lines and blended color fields, you’ll create a piece that emphasizes movement and atmosphere over rigid details.
Step-by-Step
Materials
- Textured pastel paper (cream or light beige)
- Soft pastels (various shades of pink, white, sage green, grey, and ochre)
- Pastel pencils (dark brown, charcoal grey, and flesh tones)
- Workable fixative spray
- Paper blending stumps or tortillons
- Kneaded eraser
- Artist tape
- Drawing board or easel
Step 1: Initial Sketching
-
Secure the paper:
Tape your textured paper to a drawing board or easel to keep it flat and prevent it from shifting while you work. Leave a border for framing later. -
Map the composition:
Using a light brown or grey pastel pencil, very lightly sketch the basic stick figures of the two dancers. Place the foreground dancer slightly to the right of center and the background dancer to the left. -
Flesh out the forms:
Loosely outline the shapes of the bodies and the poofy tutus. Keep your lines gestural and light; don’t worry about perfect anatomy, just focus on the tilt of the heads and the extension of the arms.
Muddy Colors?
If distinct colors are turning grey, stop layering. Spray the area with workable fixative, let it dry completely, and then apply fresh color on top to regain vibrancy.
Step 2: Layering the Background
-
Block in background colors:
Use the side of a sage green pastel stick to scumble color into the upper left area, suggesting distant foliage or scenery. Add touches of light blue and cream for the sky area. -
Create the floor:
Apply broad strokes of ochre, warm beige, and light brown to the bottom half of the paper to establish the stage floor. Use diagonal strokes to enhance the perspective. -
Soft blending:
Gently embrace the impressionist style by rubbing these background layers with your fingers or a soft cloth. This pushes the pigment into the paper tooth and creates that dreamy, out-of-focus look.
Make it Shine
Add a touch of iridescent pastel or very fine glitter to the tutus/bodice for a stage-costume sparkle that catches the light beautifully.
Step 3: Defining the Dancers
-
Base skin tones:
Fill in the arms, faces, and exposed backs with flesh-toned pastels. I like to keep this patchy rather than solid to catch the light. -
The green dress:
For the dancer in the back, use strokes of white mixed with mint green. Apply the strokes vertically to suggest the falling folds of the tulle. -
The pink tutu:
On the foreground dancer, use short, radiating strokes of soft pink, dusty rose, and white. Let the strokes fan out from the waist to build the volume of the skirt. -
Bodice details:
Add the lace detail on the foreground dancer’s shoulder using a sharp white pastel pencil. Darken the bodice area with charcoal grey, blending it slightly into the pink skirt.
Step 4: Refining and Atmospheric Effects
-
Deepen the shadows:
Use a dark grey or brown pastel to add cast shadows on the floor beneath the dancers. Keep these shadows soft and elongated. -
Hair textures:
Define the hair buns with burnt umber and touches of ochre highlights. Use the sharp edge of a pastel stick for these smaller details. -
Adding movement:
Scumble a little white and light blue over the background greenery to simulate stage lighting or atmospheric haze. -
Facial features:
Hint at the facial profiles with a dark brown pastel pencil. Remember, impressionism is about suggestion—a mere dot can suffice for an eye. -
Texturing the tulle:
Add final, energetic scratchy marks of white and darkest pink over the tutus to create the texture of stiff netting. -
Final highlights:
touches of pure white on the shoulders, the tips of the ballet shoes, and the highest points of the skirts to make the figures pop.
Finish by signing your work in the corner and placing a mat over it to protect the delicate pastel surface


Harvest Stacks Painted At Two Times Of Day
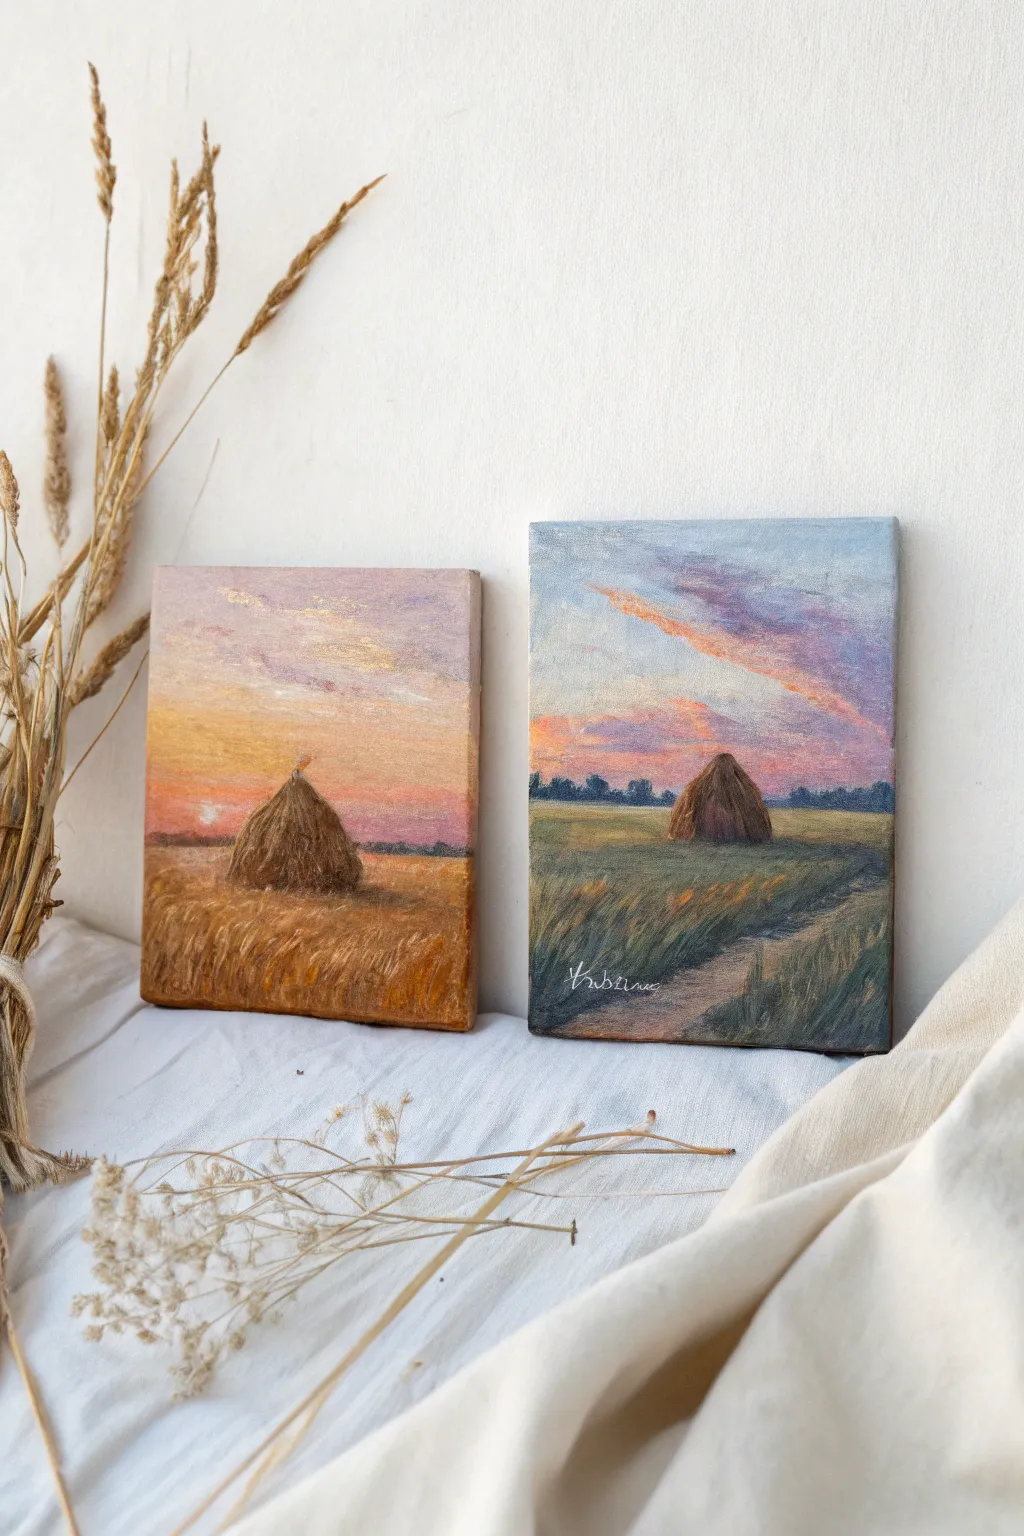
Capture the fleeting beauty of light with this Monet-inspired duo of haystack paintings. By painting the same simple subject in two distinct color palettes—warm sunset and cool twilight—you’ll learn how atmosphere transforms a landscape.
How-To Guide
Materials
- Two small rectangular canvases or canvas panels (e.g., 5×7 inches)
- Acrylic or oil paints (Titanium White, Cadmium Yellow, Yellow Ochre, Burnt Sienna, Burnt Umber, Ultramarine Blue, Alizarin Crimson, Cadmium Red)
- Assorted brushes: flat shaders (size 6-8), small rounds (size 2-4), and a detail liner
- Palette for mixing
- Water cup or solvent
- Paper towels
- Easel or flat working surface
Step 1: Painting the Golden Hour (Left Canvas)
-
Lay the horizon:
Begin on your first canvas by mixing a soft violet-grey using Ultramarine Blue, a touch of Alizarin Crimson, and White. Paint a low horizon line about one-third of the way up the canvas to separate the sky from the field. -
Create a warm gradient:
For the sky, start at the horizon with a warm, pale yellow mix (White + Cadmium Yellow). As you move upward, blend in warmth with very small amounts of Cadmium Red to create a soft orange glow, transitioning into a muted lavender at the very top. -
Block in the field:
Mix Yellow Ochre with a bit of Burnt Sienna to create a golden wheat color. Fill in the ground area below the horizon, using horizontal strokes to suggest the flatness of the field. -
Shape the haystack:
Using Burnt Umber mixed with a little Yellow Ochre, paint a simple mound shape in the center-left foreground. Keep the edges slightly soft rather than crisp to mimic an impressionist style. -
Add warmth to the stack:
On the left side of the haystack (where the sun hits), layer in strokes of pure Burnt Sienna and touches of Orange. Keep the right side darker to establish volume. -
Texture the foreground wheat:
Using a small round brush, add vertical, flickering strokes of Yellow Ochre and Cadmium Yellow in the immediate foreground. This simulates stalks of wheat catching the last rays of the sun. -
Define the sunset clouds:
Return to the sky with a small brush. Add wispy, horizontal streaks of pale violet and soft pink across the upper sky to suggest drifting clouds catching the light.
Muddy Color Alert
Clean your brush thoroughly between warm and cool colors. Mixing orange directly into blue will make a dull brown, ruining your vibrant sky effects.
Step 2: Painting the Twilight Scene (Right Canvas)
-
Establish cool atmosphere:
On the second canvas, mix a sky color using more White, Ultramarine Blue, and a tiny dot of Crimson. Paint the entire sky area, keeping it cooler and bluer than the first painting. -
Paint the distant tree line:
Mix a dark blue-green using Ultramarine Blue and a touch of Burnt Umber. Along the horizon line, dab in a rugged, uneven line to represent distant trees or bushes in shadow. -
Block in the cooler field:
For the grass, create a muted green by mixing Yellow Ochre, Ultramarine Blue, and White. It should look less golden and more like fresh grass in shadow. Fill the ground area. -
Form the twilight stack:
Paint the haystack shape in the middle ground using a mix of Burnt Umber and Ultramarine Blue. Since the light is lower, the stack should feel heavier and darker than the sunset version. -
Carve out the path:
Mix a pale, muddy beige using White, Burnt Sienna, and a touch of Blue. Paint a winding path starting wide at the bottom right and narrowing as it leads toward the horizon, disappearing near the stack. -
Add dramatic sky clouds:
Create a diagonal drama in the sky with streaks of Alizarin Crimson and purple. Paint these clouds angling upward from left to right, contrasting against the cool blue background. -
Highlight the cloud edges:
Mix a bright peach color (White + Orange). Carefully paint the bottom edges of the purple clouds where the setting sun would still be illuminating them from below. -
Detail the chilly grass:
Use a small brush with a mix of green and white to add cool highlights to the grass tips in the foreground. Use quick, upward flicks to give the grass energy and texture. -
Final touches:
Step back and look at both canvases. Add a tiny dot of pale yellow or white near the horizon on the left painting to suggest the sun, and refine any haystack shadows to ensure they sit firmly on the ground.
Impasto Effect
Mix a gel medium into your paint or simply use thicker blobs on your brush for the wheat stalks. This physical texture mimics real dried grass.
Displaying these together creates a beautiful narrative about the passage of time in a single day
Night Street Lights With Dancing Color
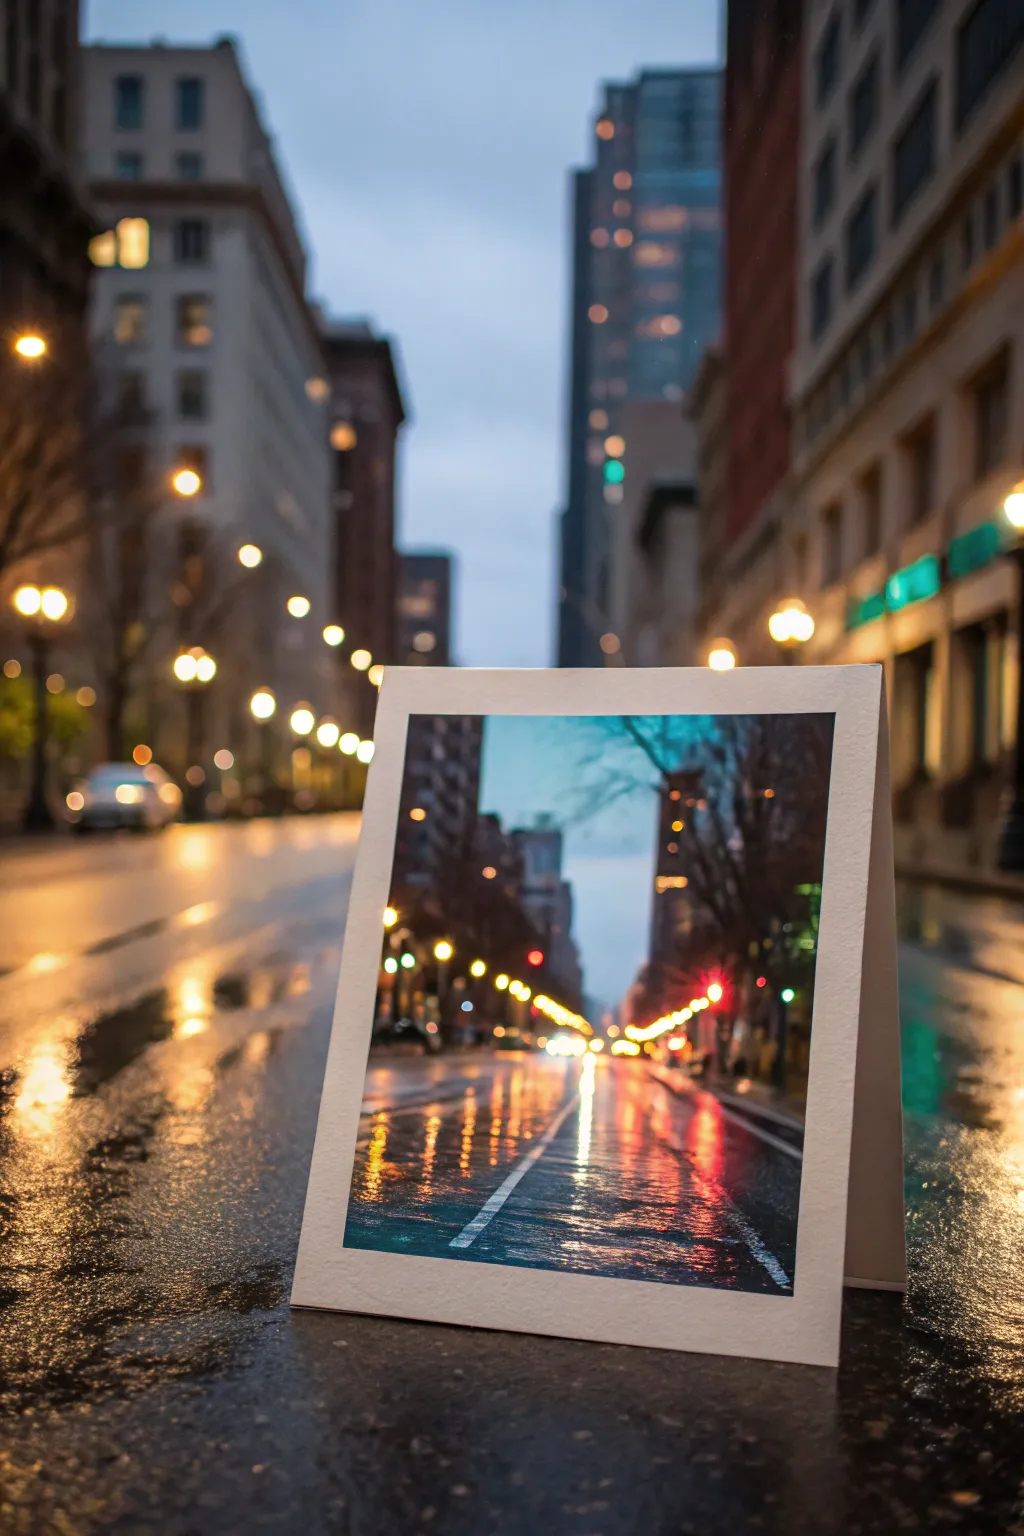
Capture the moody romance of a rainy city night with this evocative acrylic painting project. You’ll layer shimmering reflections and glowing streetlights to create a scene that feels wet and alive with movement.
How-To Guide
Materials
- Heavyweight watercolor paper or canvas board (5×7 or 8×10 inches)
- Acrylic paints: Ultramarine Blue, Phthalo Blue, Alizarin Crimson, Burnt Umber, Cadmium Yellow, Titanium White, and Lamp Black
- Flat brushes (1/2 inch and 1/4 inch)
- Round brushes (sizes 2 and 4)
- Small palette knife
- Masking tape
- Palette for mixing
- Cup of water and paper towels
Step 1: Setting the Scene
-
Tape boundaries:
Begin by taping the edges of your paper to a sturdy board. This creates a clean, professional white border like the one in the photo and prevents buckling while you work. -
Base sketch:
Lightly sketch the perspective lines of the street using a pencil. Mark a vanishing point near the center, slightly below the midpoint, and draw radiating lines for the curbs and buildings. -
Sky wash:
Mix a cool gray-blue using Ultramarine Blue, a touch of Burnt Umber, and plenty of Titanium White. Apply this to the sky area, keeping it somewhat streaky to suggest overcast weather. -
Building silhouettes:
While the sky is drying, mix a dark charcoal color using Ultramarine Blue and Burnt Umber. Block in the tall rectangular shapes of the buildings on both sides, making the ones further away slightly lighter and bluer to create atmospheric depth. -
Underpainting the street:
Paint the street surface with a wash of watery Phthalo Blue and Burnt Umber. Use horizontal brushstrokes near the horizon and gradually switch to vertical strokes as you move down the canvas to mimic the direction of reflections.
Step 2: Creating the Glow
-
Distant lights:
Mix Cadmium Yellow with a tiny bit of White. Using a small round brush, dot in the string of streetlights receding into the distance. Keep the dots smaller as they approach the vanishing point. -
Traffic lights:
Add touches of Alizarin Crimson for taillights on the right side of the street and small dabs of White or very pale yellow for headlights on the left. -
Radiating glow:
To make the lights glow, mix a transparent glaze of yellow-orange. Gently dry-brush this halo around your brightest light sources once the initial dots are dry. This softness is key for the rainy atmosphere.
Pro Tip: The Squint Test
Squint your eyes frequently while painting reflections. This blurs details and helps you focus only on the main shapes and values of the color streaks on the wet road.
Step 3: The Wet Pavement
-
Vertical reflections:
This is the most crucial step. Use a flat brush to pull vertical stripes of color directly beneath your light sources. Drag yellow beneath the streetlights and red beneath the taillights. -
Adding water texture:
Disrupt these vertical lines with occasional horizontal dashes of dark grey or black. These represent the ripples on the wet asphalt. -
Road markings:
Paint the white lane divider line starting wide at the bottom and narrowing to a point. Don’t make it a solid line; break it up slightly to show the texture of the wet road. -
Deepening shadows:
Glaze the corners of the foreground with a mix of Phthalo Blue and Black to vignette the image, focusing the viewer’s eye on the bright center.
Level Up: Gloss Finish
Apply a coat of high-gloss varnish once fully dry. This mimics the actual wetness of rain and deepens the dark colors for a richer night effect.
Step 4: Final Details
-
Brightest highlights:
Using pure Titanium White and your smallest brush, add tiny, sharp dots in the center of the closest streetlights and the brightest reflection on the wet road. -
Tree branches:
Mix a thin, inky black-brown. Use a rigger brush or the tip of a small round brush to paint delicate, bare tree branches reaching out from the sides, overlapping the sky. -
Refining edges:
Clean up the edges of the buildings with your dark mix if the sky wash overlapped too much. Sharpening these silhouettes adds contrast against the glowing sky. -
Peel the tape:
Wait until the painting is completely dry—really dry! Then, carefully peel off the masking tape at a 45-degree angle to reveal your crisp white border.
Step back and admire how a few simple strokes of color can perfectly capture the feeling of a rainy evening walk home
Windy Skies With Swirling, Visible Brushwork

Capture the dynamic movement of the wind with this Van Gogh-inspired landscape painting that focuses on swirling cloud forms and textured fields. You will learn to use thick impasto strokes to bring life and energy to a serene countryside scene featuring iconic cypress trees.
Step-by-Step Guide
Materials
- Canvas panels or stretched canvas (16×20 inches recommended)
- Acrylic or oil paints (Titanium White, Ultramarine Blue, Cerulean Blue, Sap Green, Viridian, Yellow Ochre, Cadmium Yellow, Burnt Sienna, Alizarin Crimson)
- Set of hog bristle brushes (flats, filberts, and rounds in various sizes)
- Palette knife (for mixing and applying texture)
- Palette
- Rags or paper towels
- Solvent (if using oils) or water cup
Step 1: Laying the Groundwork
-
Initial Sketch:
Begin by sketching the major shapes lightly with thinned Burnt Sienna and a small round brush. Outline the horizon line, the rolling hills, the prominent cypress trees on the right, and the winding path. -
Block in the Sky:
Mix a pale blue using Titanium White and a touch of Cerulean Blue. Apply a base layer to the sky area, leaving spaces for the clouds blank for now. -
Underpaint the Field:
For the wheatfield, mix Yellow Ochre with a bit of Cadmium Yellow. Paint broad, horizontal strokes across the lower third of the canvas to establish the golden ground tone. -
Base Hills and Trees:
Block in the distant mountains with a cool mix of Ultramarine Blue and White. Then, use a dark mix of Viridian and Sap Green to fill in the silhouette of the tall cypress trees.
Step 2: Building the Sky and Clouds
-
Cloud Structure:
Load a filbert brush with pure Titanium White. Paint rounded, billowing cloud shapes, focusing on the large formations in the center and upper left. -
Swirling Motion:
This is crucial for the style: use curved, C-shaped brushstrokes to define the clouds. Don’t smooth them out; let the brush marks remain visible to suggest movement. -
Shading the Clouds:
Mix a soft lavender using White, a speck of Alizarin Crimson, and Ultramarine. Apply this to the underside of the white clouds to give them volume. -
Sky Dynamics:
Return to your blues. Mix a slightly deeper Cerulean and add swirling strokes around the clouds, echoing their shapes to create the effect of wind turbulence.
Muddy Colors?
If your swirling sky colors are turning gray, let the base layer dry completely before adding the next color. Wet-on-wet mixing requires very deliberate, singular strokes.
Step 3: Defining the Landscape
-
Mountain Contours:
Refine the distant blue mountains by outlining their ridges with a darker blue mix. Use diagonal strokes to suggest the slope of the land. -
Cypress Texture:
Upgrade your greens. Mix Sap Green with a little Burnt Sienna for warmth, and Viridian with Blue for shadows. Use vertical, flame-like strokes to build the foliage of the cypress trees, layering darks first and then mid-tones. -
Mid-Ground Foliage:
Dab in smaller bushes and trees near the base of the mountains using varigated greens. Keep these strokes short and stippled to differentiate them from the smooth mountains. -
Wheat Textures:
I like to use a flat brush here. Load it with bright Cadmium Yellow and White. Over your base layer, paint short, diagonal dashes to simulate stalks of wheat bending in the breeze. -
Adding Contrast:
Introduce some green and orange strokes into the field area to show variety in the crops and shadows cast by the clouds.
Pro Tip: Directionality
Ensure your brushstrokes follow the form of the object. Curved strokes for round clouds, vertical flames for the trees, and diagonal dashes for the wind-blown wheat.
Step 4: Final Details
-
Painting the Path:
Use a mix of White, Burnt Sienna, and a touch of Blue to create a grayish-tan for the dirt path. Paint the path with curving strokes that lead the eye into the painting. -
Path Accents:
Add touches of green along the edges of the path to show grass growing on the verge. -
Foreground Flora:
Use your smallest round brush to add tiny dabs of blue and red in the foreground wheat to suggest poppies or wildflowers. -
Outlining:
Take a fine brush with thinned blue-black paint and very loosely outline the tops of the mountains and major cloud distinct forms to make them pop. -
Impasto Highlights:
Finally, take your palette knife or a fully loaded brush and apply thick globs of pure White to the brightest parts of the clouds for maximum texture.
Step back and admire the rhythmic motion you have captured in your landscape
Squint Study: Paint Only Big Light Shapes

Capture the essence of a sun-drenched landscape by focusing on large shapes rather than tiny details. This impressionist acrylic study emphasizes broad strokes and subtle color shifts to create a feeling of vast, open space.
Step-by-Step Tutorial
Materials
- Stretched canvas (approx. 16×20 inches)
- Acrylic paints: Titanium White, Yellow Ochre, Burnt Sienna, Ultramarine Blue, Cerulean Blue, Raw Umber
- Large flat brushes (sizes 10-12)
- Medium filbert brush (size 6-8)
- Palette knife (optional for texture)
- Palette for mixing
- Water cup and rags
- Easel
Step 1: Blocking the Sky
-
Establish the horizon:
Begin by deciding where your land meets the sky. For this composition, place the horizon line slightly below the middle of the canvas, giving dominance to the expansive sky. -
Mix the base sky color:
Combine a large amount of Titanium White with a touch of Cerulean Blue. The goal is a very pale, airy blue that feels bright and distant. -
Apply the upper sky:
Using your largest flat brush, paint the top portion of the canvas. Use broad, horizontal strokes, allowing the paint to be somewhat thin so the canvas texture shows slightly. -
Transition to the horizon:
Mix a bit more white into your sky color as you work your way down. Skies generally get lighter and warmer towards the horizon line. -
Add subtle cloud suggestions:
While the blue is still tacky, mix a nearly pure white with a microscopic dot of Yellow Ochre. Scumble this loosely into the upper left area to suggest faint, drifting clouds without painting hard edges.
Pro Tip: Big Brushes Only
Resist the urge to use small brushes. Sticking to large flats forces you to ignore tiny details and focus entirely on the major shapes and light interactions.
Step 2: Creating the Landscape
-
Mix the distant hills:
Create a muted blue-grey for the furthest hills by mixing Ultramarine Blue, White, and a tiny touch of Burnt Sienna to desaturate it. Atmospheric perspective makes distant objects appear cooler and lighter. -
Paint the hill shapes:
Block in the shapes of the distant rolling hills along the horizon. Keep the edges soft where they meet the sky to maintain that hazy, atmospheric look. -
Prepare the field colors:
On your palette, mix a generous amount of Yellow Ochre with White. Prepare a second pile adding a little Burnt Sienna for the deeper shadow areas of the wheat. -
Block in the main field:
Using a large brush, cover the bottom half of the canvas with your lighter Yellow Ochre mix. Use sweeping diagonal strokes that lead from the bottom corners towards the center horizon. -
Add the middle ground ridge:
Mix a slightly darker, greener tone using Yellow Ochre and a touch of Ultramarine Blue. Paint a horizontal strip just below the blue hills to represent the transitional vegetation.
Step 3: Refining and Texture
-
Squint and assess:
Step back and squint at your canvas. This blurs the details and helps you see if your big shapes of light (sky/field) and dark (middle ground ridge) are working together harmoniously. -
Introduce light pathways:
Load a clean brush with a mix of White and Yellow Ochre. Paint distinct diagonal paths of light in the foreground field, simulating how wind or harvest lines catch the sun. -
Deepen the shadows:
Mix Burnt Sienna with a touch of Raw Umber. I find that lightly dragging this color in the lower corners and along the ‘creases’ of the field adds necessary weight and depth. -
Soften the transitions:
Use a dry, clean filbert brush to gently feather the edges between the blue hills and the yellow field. You don’t want a rigid cutout look; let the colors interact slightly. -
Add textural highlights:
Mix a thick, creamy pale yellow (almost white). Use the tip of the brush or a palette knife to dab a few impasto highlights in the nearest foreground to suggest individual stalks catching light. -
Final atmosphere check:
If the distant hills look too dark, glaze over them with a very watery wash of white acrylic to push them further back into the distance.
Troubleshooting: Muddy Colors
If your field looks muddy instead of golden, stop mixing colors directly on the canvas. let the layer dry completely, then apply fresh clean paint on top.
Step back and admire how simple color blocks can evoke a warm, breezy afternoon
Impasto Highlight Challenge With A Palette Knife
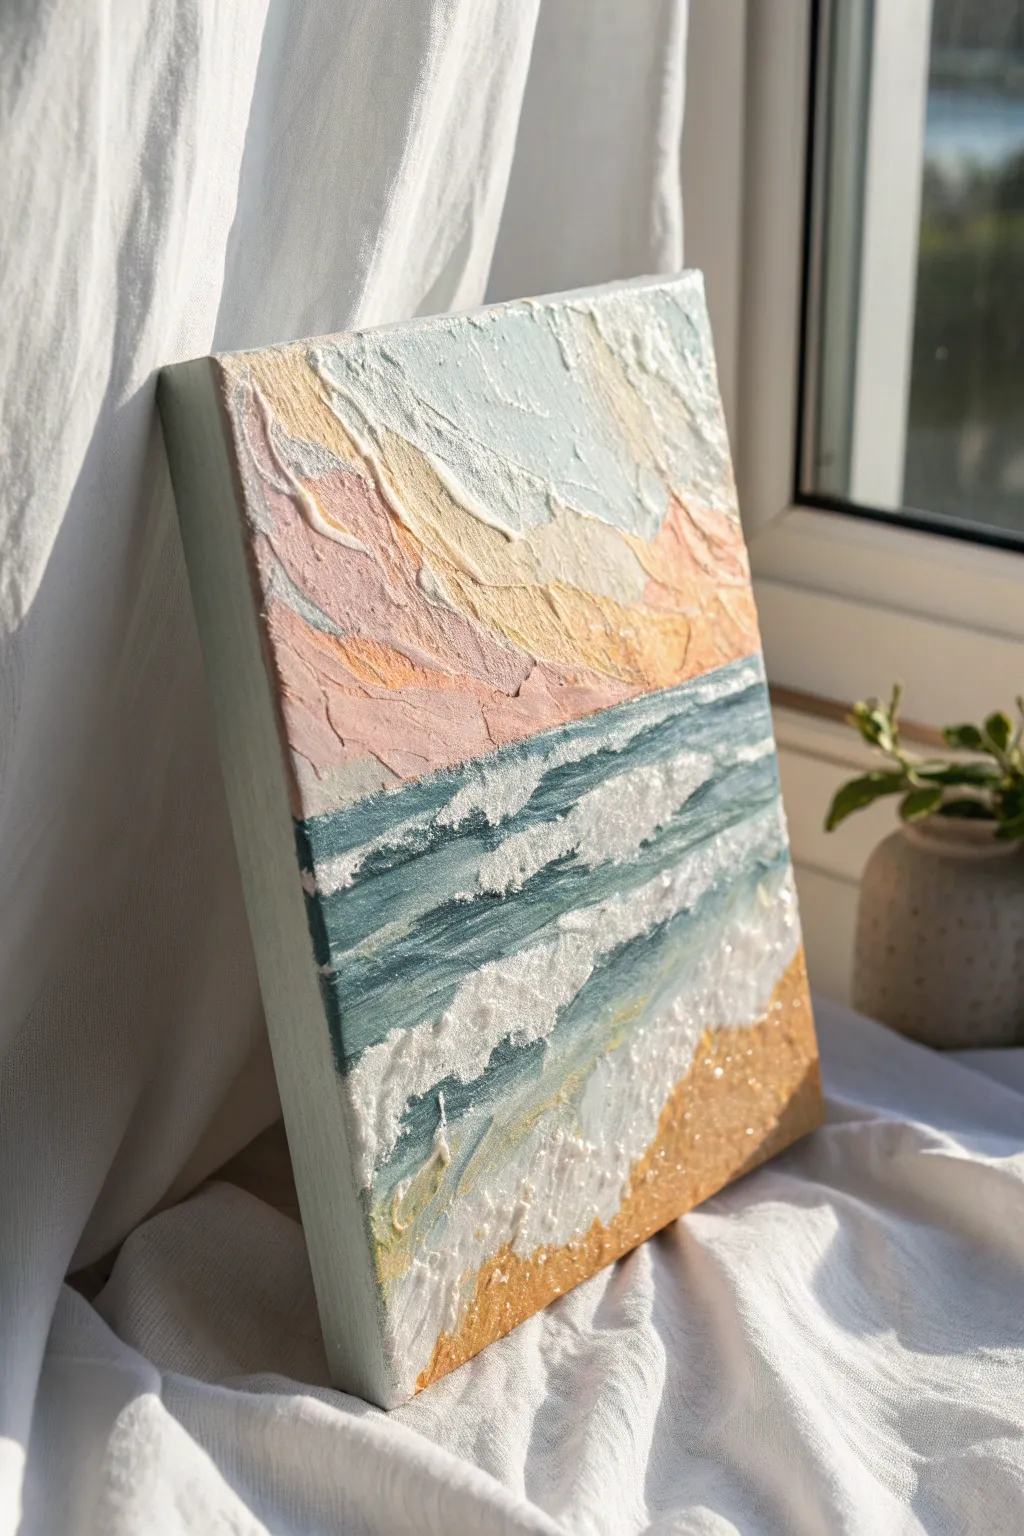
Capture the serene beauty of a pastel sunset over the ocean using heavy body acrylics and impasto techniques. This project relies on thick, sculptural layers of paint to mimic crashing waves and rugged clouds, giving your canvas incredible tactile depth.
Step-by-Step Guide
Materials
- Small square canvas (e.g., 8×8 or 10×10 inches)
- Heavy body acrylic paints (white, light blue, teal, peach, pale yellow, ochre, sandy beige)
- Modeling paste or texture gel (optional, for extra bulk)
- Set of palette knives (diamond and trowel shapes)
- Flat synthetic brush (1 inch)
- Palette or mixing plate
- Paper towels
- Jar of water
Step 1: Setting the Horizon
-
Define the Zones:
Visualize your canvas in three horizontal sections. The top third will be the sky, the middle section the ocean, and the bottom right corner your sandy shoreline. -
Base Layer:
Using a flat brush, apply a very thin, watery wash of blue for the sea and peach for the sky. This doesn’t need to be perfect; it just kills the stark white of the canvas so no gaps show through later. -
Mix the Textures:
Prepare your heavy body paints. If your paint feels too fluid, mix it 50/50 with modeling paste. You want a consistency similar to stiff cake frosting that holds a peak.
Step 2: Sculpting the Sky
-
Pastel Peaks:
Load the bottom edge of a trowel-shaped palette knife with a mixture of white and pale peach. -
Diagonal Application:
Apply the paint to the sky area using upward, diagonal strokes. Press firmly at the start of the stroke and lift off gently to create raised ridges. -
Introducing Sunlight:
Wipe your knife clean, then pick up pale yellow mixed with white. Layer this over the peach in the center right area, letting the colors sit side-by-side rather than blending them smooth. -
Cooler Clouds:
Add touches of very light blue on the upper left side, using the same diagonal knife direction to maintain a cohesive wind-swept look.
Muddy colors?
If your waves look gray instead of crisp, stop over-blending. Impasto relies on laying colors on top of each other. Wipe your knife between every single color switch to keep hues pure.
Step 3: Forging the Waves
-
Deep Ocean Tones:
Mix a teal shade with a touch of grey to create a muted deep sea color. Apply this horizontally across the middle section of the canvas. -
Creating Movement:
Instead of smooth lines, use the flat edge of the knife to ‘butter’ the paint on, creating horizontal shelves or ridges that mimic the rolling motion of water. -
Mid-Tone Transition:
Mix a lighter turquoise. Apply this below the deep teal areas, allowing the darker color to peek through in the ‘troughs’ of the waves. -
Sea Foam White:
Load a liberal amount of pure titanium white onto the tip of a smaller diamond-shaped knife. -
Breaking the Waves:
Drag the white paint horizontally over the textured blue ridges. Use a light hand so the paint catches only on the raised parts of the blue, creating a natural broken foam effect. -
Foreground Swells:
In the lower left water area, apply thicker globs of white and swirl them slightly to suggest churning foam near the shore.
Sparkle Finish
Once fully dry, mix a tiny pinch of iridescent mica powder or fine clear glitter into a gloss varnish and brush it specifically over the white foam tips for a wet, sun-kissed look.
Step 4: The Sandy Shore
-
Beach Base:
Mix yellow ochre with white and a tiny dot of peach to create a warm sand color. -
Stippling Texture:
Apply this mixture to the bottom right corner. Instead of spreading it, use the back of the palette knife to tap the paint up and down, creating a rough, pebbled texture. -
Wet Sand Look:
In the transition area where the water meets the sand, mix a little of your sand color with the water’s white foam color. -
Final Highlights:
Add a few sharp distinct ridges of pure white right at the shoreline to represent the final push of foam onto the beach. -
Dry and Assess:
Check the painting from the side. If any areas look too flat, add another layer of thick paint. Let the piece dry flat for at least 24 hours due to the thickness of the impasto layers.
Place your finished canvas near a window to see how the changing daylight interacts with the deep ridges you created


Have a question or want to share your own experience? I'd love to hear from you in the comments below!