Whenever I’m stuck on what to draw, soccer is one of my favorite themes because it’s packed with motion, texture, and big emotions. Here are some soccer drawing ideas you can pick up and sketch today, whether you love realistic studies or playful, stylized art.
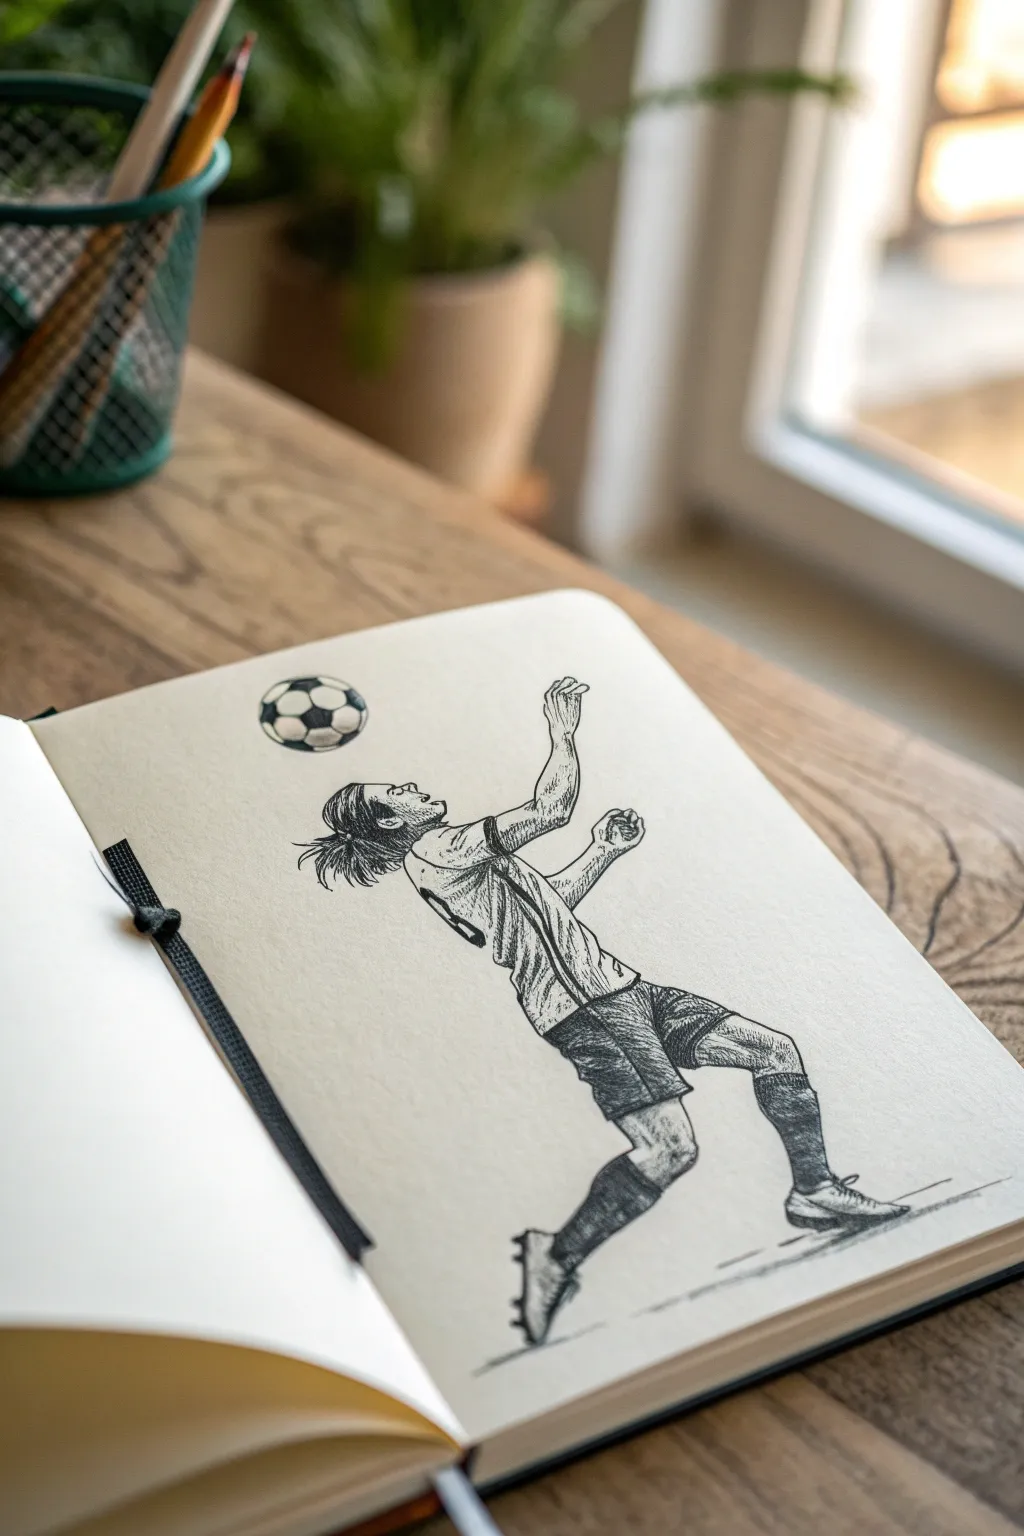
Player Kicking a Soccer Ball

Capture the dynamic motion of a kick with this stylish, minimalist illustration featuring delicate line work and selective pops of orange. The textured, deckle-edged paper adds a rustic and artistic quality that elevates the simple drawing into a framed-worthy piece.
Step-by-Step Tutorial
Materials
- Sheet of heavy handmade paper with deckle edges (off-white or cream)
- Pencil (HB or H for initial sketching)
- Fine liner pens (Black, 0.1mm and 0.3mm)
- Colored pencils or fine markers (Burnt orange/Vermilion)
- Kneaded eraser
- Reference photo of a soccer player kicking
Step 1: Laying the Foundation
-
Gesture drawing:
Begin lightly with your HB pencil, mapping out the gesture of the player. Focus on the curve of the spine and the extension of the kicking leg to capture the energy of the movement. -
Blocking anatomy:
Roughly block in the shapes for the torso, head, and limbs. Don’t worry about details yet; just ensure the proportions look natural, particularly the foreshortening of the planted leg. -
Positioning the ball:
Sketch the soccer ball just below the kicking foot. It should feel like the moment right before impact or the split second after. -
Adding clothing lines:
Draw the outline of the jersey and shorts over your anatomical structure. Add wrinkles around the waist and armpits to suggest fabric bunching exactly as the body twists.
Ink Bleeding?
Handmade paper is absorbent. If lines feather, switch to pigment-based pens (like Micron) and draw faster strokes. Test your pen on a scrap corner first.
Step 2: Inking the Details
-
Refining the face:
Switch to your 0.1mm fine liner. Carefully outline the profile of the face and hair. Keep the lines sketchy and broken rather than one solid contour to maintain that artistic feel. -
Inking the kit:
Move to the jersey using the 0.3mm pen for slightly bolder lines on the clothing folds. I prefer to keep my hand loose here to mimic the movement of cloth. -
Detailing the limbs:
Ink the arms and legs. Add small, subtle tick marks on the legs to suggest muscle definition and hair texture without overdoing it. -
Drawing the socks and shoes:
Outline the folded-down socks and the cleats. Pay attention to the laces and the studs on the bottom of the raised shoe. -
Inking the ball:
Trace your ball circle. Draw the classic pentagon and hexagon pattern, slightly warping them near the edges to show the ball’s curvature. -
Creating the ground shadow:
Use quick, horizontal hatching lines beneath the planted foot and the ball to ground the figure so they don’t look like they are floating in space.
Step 3: Adding Color and Texture
-
Erasing:
Once the ink is completely dry, gently roll your kneaded eraser over the paper to lift the graphite guidelines. Be careful not to roughen the delicate surface of the handmade paper. -
Applying selective color:
Take your burnt orange colored pencil. Color in the stripes on the jersey sleeves, the collar, and the bands on the socks. -
Coloring the ball:
Fill in the dark patches of the soccer ball with the same orange pencil instead of standard black, tying the color palette together. -
Adding skin tones:
Very lightly shade the skin areas—face, arms, and legs—with a light touch of brown or peach pencil, just enough to separate skin from the white clothing. -
Final shadow accents:
Go back with your fine liner and add deeper cross-hatch shading under the shorts on the thigh and under the chin to create depth. -
Distressing edges (optional):
If your paper isn’t already textured enough, carefully feather the edges with your fingers to enhance that raw, deckled look.
Vintage Vibe
Tea-stain your paper before drawing! Briefly dip the sheet in brewed black tea and let it dry flat for an antique, parchment-like background.
Now you have a dynamic piece of sports art that perfectly balances motion with minimalist style

Goalkeeper Midair Save
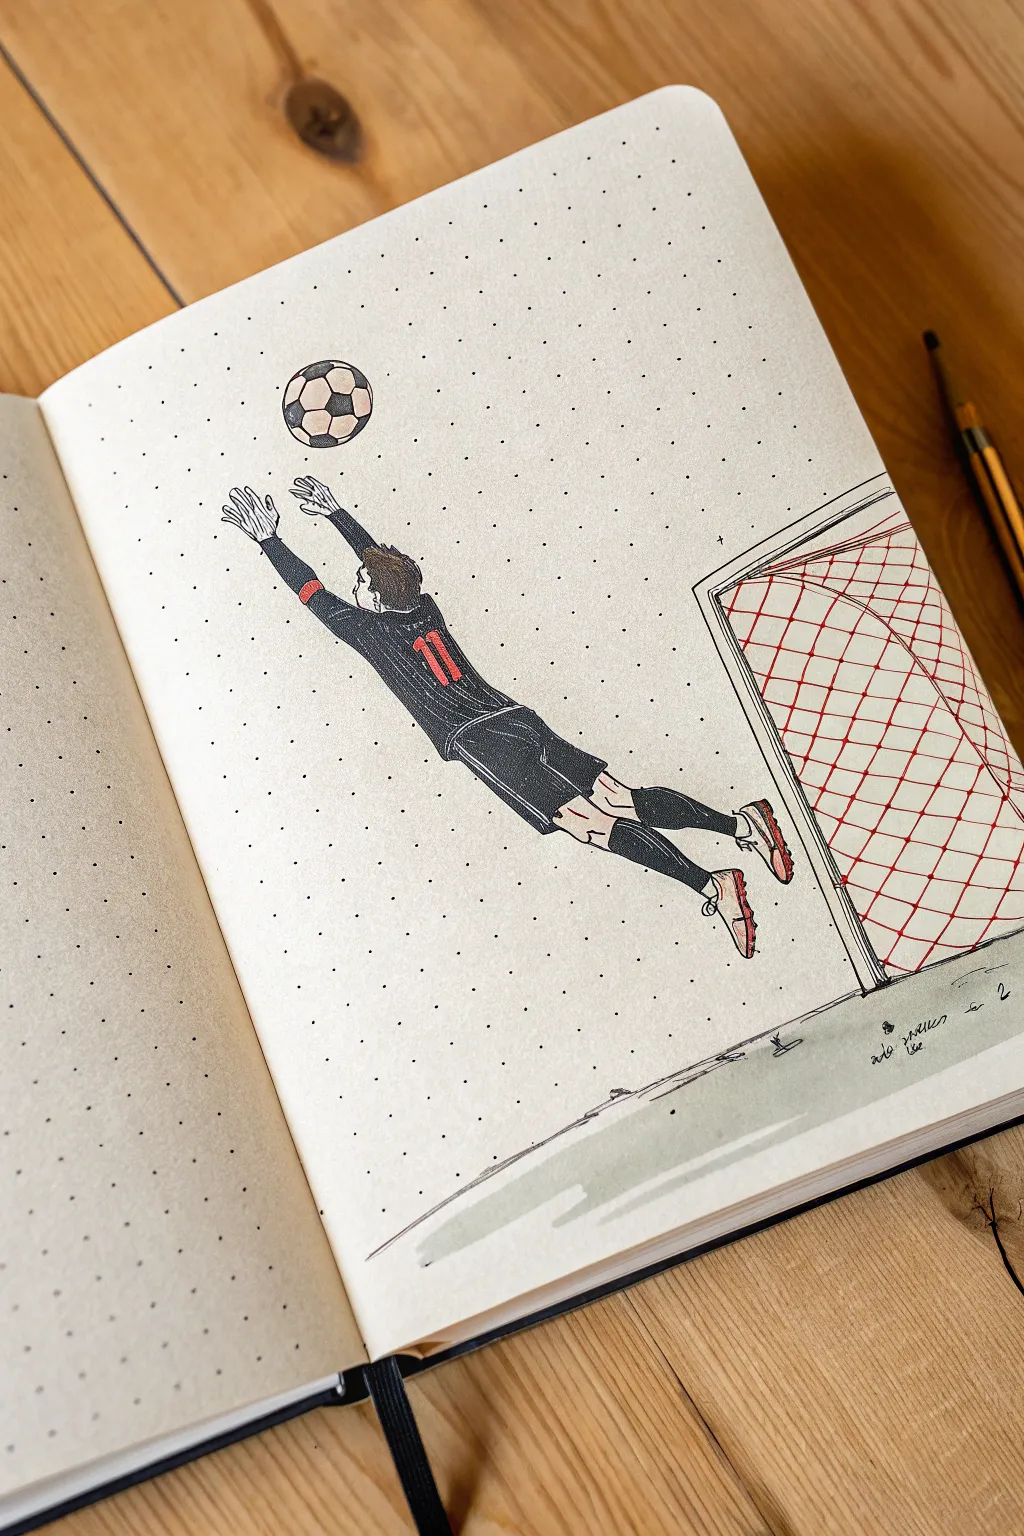
Capture the electrifying moment of a match-saving block with this dynamic bullet journal spread. This illustration uses clean lines and bold black ink to create a high-contrast action shot that pops right off the dotted page.
Step-by-Step
Materials
- Dotted notebook or bullet journal
- Pencil (HB or 2B)
- Eraser (kneaded preferred)
- Fine liner pens (0.1mm, 0.3mm, and 0.5mm)
- Broad black marker or brush pen
- Red marker or colored pencil
- Light grey watercolor or brush pen
Step 1: Drafting the Dynamic Pose
-
Establish the Action Line:
Start by drawing a faint diagonal line across the page with your pencil. This line will serve as the spine of the goalkeeper’s movement, stretching from the feet in the lower right towards the hands in the upper left. -
Block in the Torso:
Sketch a long, rectangular shape along the middle of your action line for the torso. Angle it slightly to show the body is twisted mid-air. -
Add the Limbs:
Draw the legs extending backward. The upper leg should be slightly bent at the knee, while the lower leg is straighter. Sketch the arms reaching forward and upward, fully extended towards where the ball will be. -
Position the Head:
Sketch a small oval for the head, tucked slightly between the shoulders as the goalkeeper focuses upward. The face should be looking towards the outstretched hands. -
Sketch the Goal Post:
In the lower right corner, use a ruler or straight edge to lightly draw the frame of the goal. Angle the vertical post slightly to match the perspective, and add the curved net support behind it. -
Place the Ball:
Draw a perfect circle just beyond the goalkeeper’s fingertips. A small coin works great as a stencil if you struggle with freehand circles.
Step 2: Details & Inking
-
Refine the Uniform:
Go back over your body sketch to add clothing details. Draw the shorts, the rolled-up sleeves, and the distinct line of the socks. Add wrinkles where the fabric bends at the waist and knees. -
Ink the Outlines:
Using a 0.3mm fine liner, carefully trace the outline of the goalkeeper. Use confident strokes. For the hands, switch to a 0.1mm pen to handle the delicate fingers and gloves. -
Draw the Ball Texture:
Inside the ball circle, draw the classic pentagon and hexagon pattern. Ink these lines with your 0.1mm pen. -
Create the Net:
Draw the goal netting using a cross-hatching pattern. Don’t make the lines perfectly straight; let them curve slightly to show the slack in the net. -
Erase Guidelines:
Once the ink is completely dry—give it a good five minutes to be safe—gently erase all your pencil sketches.
Use Negative Space
When filling the black jersey, deliberately leave thin white lines along the seams and folds. This negative space defines the arms against the body without needing outlines.
Step 3: Color & Texture
-
Fill the Kit:
Take your broad black marker or brush pen and fill in the goalkeeper’s jersey, shorts, and socks. Leave thin white gaps between the arms and torso to keep the forms distinct. -
Add White Details:
If you accidentally filled everything in, don’t worry. I sometimes use a white gel pen to add seams or highlights back onto the dark uniform. -
Number the Jersey:
Using your red marker, carefully draw the number ’11’ on the back of the jersey. Since the jersey is black, you might need an opaque paint marker or to have left this area white previously. -
Color the Cleats:
Add touches of red to the bottom of the cleats and the stripes on the socks for a cohesive team look. -
Define the Netting:
Trace over the goal net lines with the red fine liner or pencil. This makes the goal distinct from the black-and-white figure. -
Shade the Ground:
With a light grey watercolor or brush pen, add a quick, loose wash below the figure. This creates a shadow and implies the ground without needing to draw grass blades. -
Final Touches:
Add the black patches to the soccer ball and sketch a tiny signature near the ground line to claim your work.
Smeared the Ink?
If you smudge the black ink while coloring, wait for it to dry fully, then use a white gel pen or correction fluid to clean up the edges or turn the smudge into a motion blur effect.
Now you have an action-packed keeper frozen in time on your page


Goal Celebration Pose
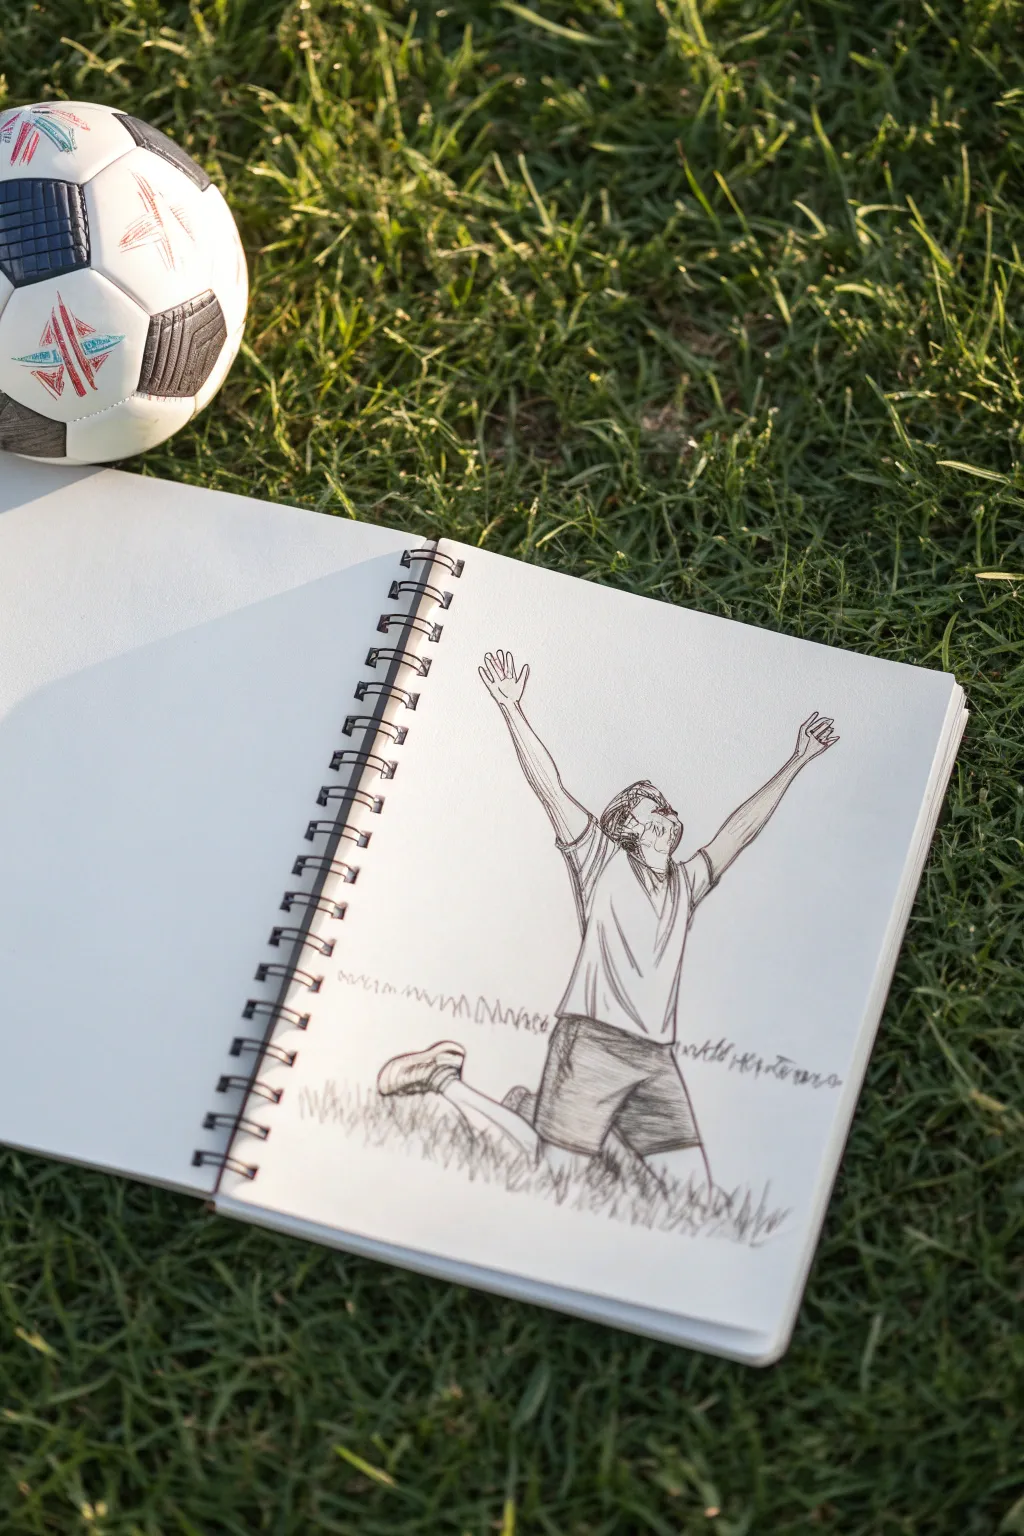
Capture the raw emotion of scoring a winning goal with this dynamic sketch of a player in a moment of pure triumph. This pencil drawing focuses on expressive body language—raised arms and a joyful tilt of the head—making it perfect for capturing the spirit of the game.
Detailed Instructions
Materials
- Spiral-bound sketchbook (heavyweight paper preferred)
- HB or 2B graphite pencil for initial sketching
- 4B or 6B graphite pencil for shading and darks
- Fine-point black fineliner pen (0.3mm or 0.5mm) – optional if inking
- Kneaded eraser
- Pencil sharpener
Step 1: Constructing the Skeleton
-
Establish the curve:
Begin by drawing a gentle, sweeping ‘C’ curve for the spine. The figure is leaning back slightly, so this line dictates the energy of the pose. -
Map the torso:
Sketch a rough oval for the ribcage/upper torso, aligning it with the top of your spine line. Keep it tilted backward. -
Position the hips:
Below the torso, add a boxy shape for the pelvis. This connects the upper body to the legs and grounds the figure. -
Leg placement:
Sketch the right leg bent at the knee, kneeling on the ground. The thigh should be foreshortened slightly. For the left leg (the one trailing behind), draw it bent backward with the foot raised, creating that classic ‘slide’ look. -
Arms to the sky:
Draw lines extending upward and outward from the shoulders. Use small circles to mark the elbows and wrists to ensure the proportions feel natural before adding details. -
Head tilt:
Place an oval for the head, tilting it upward to face the sky. This is crucial for conveying the emotion of the shout/celebration.
Step 2: Fleshing out the Figure
-
Outline the jersey:
Draw the sleeves loosely around the upper arms. Add wrinkles near the armpits where the fabric bunches as the arms lift. -
Refine the torso fabric:
Sketch the sides of the jersey, allowing it to hang naturally but follow the curve of the lean. Add vertical fold lines to suggest the loose fit of athletic wear. -
Draw the shorts:
Outline the shorts around the hips and thighs. The right leg opening should look slightly compressed as it touches the ground. -
Detail the arms:
Define the muscles of the forearms and biceps. Since the arms are raised, the muscles will be elongated but distinct. -
Sketch the hands:
Draw the hands open with fingers spread wide. Don’t worry about perfect detail; the gesture of open palms is more important here. -
Facial features:
Sketch the profile of the face. Focus on an open mouth and a strong jawline to show the shout. Suggest hair with loose, messy strokes.
Wonky Proportions?
If the arms look too long, measure them against the torso. The elbow usually aligns with the waist. Use your pencil as a ruler to check lengths.
Step 3: Shading and Environment
-
Clean up lines:
Use your kneaded eraser to lift away the initial skeletal guidelines, leaving only the defined contours of the player. -
Darken the shadows:
Using a softer pencil (like a 4B), darken the shorts significantly. Use cross-hatching or dense scribbling to create contrast against the lighter jersey. -
Add fabric folds:
Reinforce the wrinkles in the jersey with definitive strokes. I like to add a few sharper lines near the waist where the fabric twists. -
Ground the figure:
Sketch short, jagged vertical strokes around the knees and shins to simulate grass. This hides the exact point of contact and settles the player into the scene. -
Background texture:
Add a very faint, scribbled horizon line of grass behind the figure to give depth, ensuring the player doesn’t look like they are floating in white space. -
Final touches:
Check the contrast between the skin and the clothes. Add a little shading under the chin and arms to define the form.
Add Motion Lines
Add faint ‘whoosh’ lines near the knees or behind the trailing foot to emphasise the sliding motion of the celebration.
Now you have a dynamic sketch that perfectly freezes the joy of the beautiful game in time


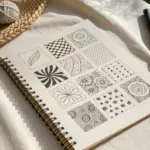
Dribbling Footwork Sequence
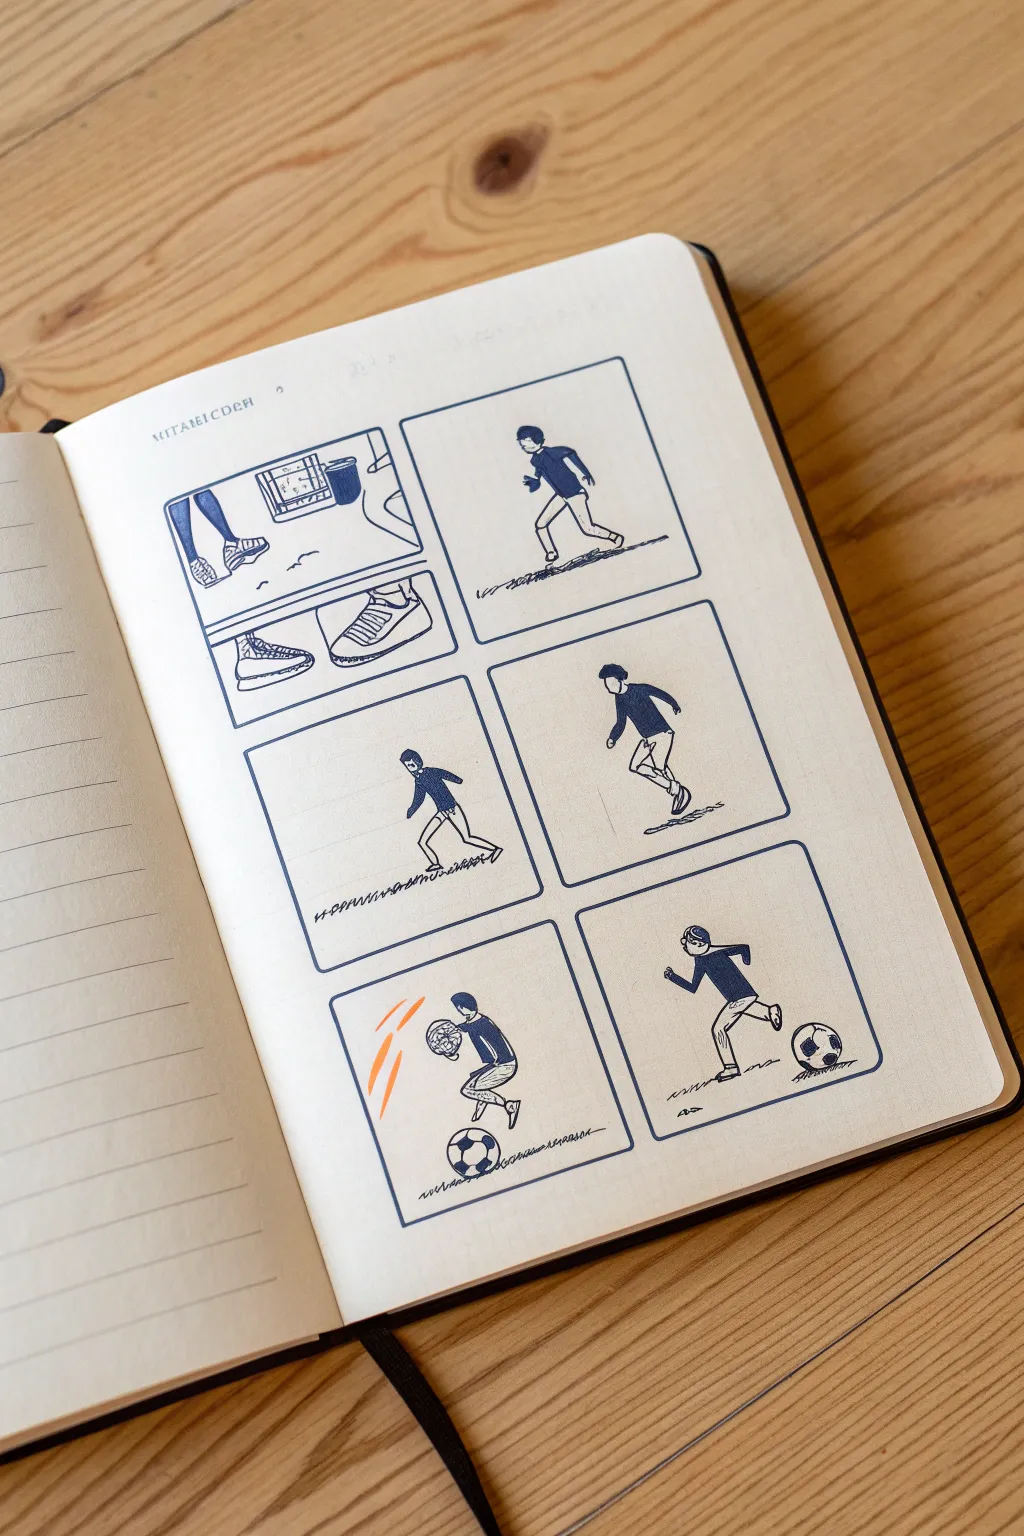
Capture the fluid motion of a soccer drill with this clean, storyboard-style illustration. Using simple line work and blue ink, you’ll break down a dribbling sequence into six distinct panels to analyze the mechanics of the sport.
Step-by-Step
Materials
- Blank journal or sketchbook (ivory pages work best)
- Blue fineliner technical pen (0.3mm or 0.5mm)
- Light pencil (HB or 2H)
- Eraser
- Ruler
- Orange colored pencil or marker (optional for motion lines)
Step 1: Setting the Stage
-
Grid Layout:
Begin by using your ruler and faint pencil lines to lightly map out a 2×3 grid on your sketchbook page. The panels don’t need to be perfectly square—a slightly rectangular shape works well to capture lateral movement. -
Defining the Frames:
Once you are happy with the spacing, trace over your pencil grid with the blue fineliner. I find that freehanding these final lines over the ruler guide adds a nice, organic sketchbook feel rather than looking too rigid. -
Add a Header:
At the top left of the page, lightly letter a title like ‘SOCCER DRILLS’ or ‘FOOTWORK’. Keep the font small and serif-style for a studious, notebook aesthetic.
Ink Smearing?
If your blue pen smears when erasing pencil lines, switching to a specific ‘archival’ or pigment-based fineliner usually solves this immediately as they dry faster.
Step 2: Sketching the Action
-
Panel 1 Setup:
In the top-left box, focus tightly on the feet. Sketch the lower legs and shoes close up, showing the initial stance before the ball moves. Keep the lines loose. -
Panel 2 movement:
Moving to the top-right box, sketch a full-body figure. The pose should show the player accelerating forward, body leaning slightly, knees bent in a running stride. -
Panel 3 Detail:
For the middle-left box, return to a close-up of the footwear. Draw two shoes side-by-side or slightly angled to show the specific foot positioning required for the move. -
Panel 4 Turning:
In the middle-right box, draw the full figure again, this time twisting the hips. The player should look like they are quickly changing direction or shielding a ball. -
Panel 5 Impact:
In the bottom-left box, depict the player making contact with the ball. Draw the knee raised high and the foot angled down towards a sketchy sphere. -
Panel 6 The Strike:
Finish in the bottom-right box with the player following through after a kick. Add a ball near the ground to show the successful result of the dribble.
Make it Tactical
Add small dashed arrows or ‘X’ and ‘O’ annotations around the feet in the close-up panels to give your drawing the technical feel of a coach’s playbook.
Step 3: Inking and Refining
-
Outline the Figures:
Switch back to your blue fineliner. Carefully meaningful outline the pencil sketches of the players. Use solid, confident lines for the torso and legs. -
Fill the Kit:
To make the figures pop, shade in the shirts completely with the blue pen. Leave the shorts and socks white for high contrast. -
Detailing the Shoes:
Add small hatching lines to the sneakers in the close-up panels. This texture differentiates the shoe material from the smooth socks. -
Grounding Shadows:
Underneath each figure’s feet, add a rough, scribbled shadow or grass texture. This prevents the characters from looking like they are floating in space. -
Motion Accents:
If you want to emphasize speed, use the orange pencil to add two or three swift curved lines near the ball impact point in the bottom-left panel. This small splash of color draws the eye immediately. -
Clean Up:
Wait at least five minutes for the blue ink to fully set. Then, gently erase all remaining graphite guidelines, leaving only the crisp blue illustrations.
Now you have a dynamic illustrative guide that breaks down athletic movement into clearer steps

PENCIL GUIDE
Understanding Pencil Grades from H to B
From first sketch to finished drawing — learn pencil grades, line control, and shading techniques.
Explore the Full Guide
Header With Ball in the Air
Capture the intense focus and athleticism of a soccer player mid-header with this detailed pen-and-ink sketch. The drawing relies on careful cross-hatching to create depth and movement, making the figure pop right off the notebook page.
Step-by-Step Guide
Materials
- Sketchbook with smooth or lightly textured paper
- HB graphite pencil
- Kneaded eraser
- Fine liner pens (sizes 0.1, 0.3, and 0.5)
- Ruler (optional for ground lines)
- Reference photo of a soccer player heading a ball
Step 1: Drafting the Pose
-
Establish the curve:
Begin with your HB pencil by drawing a gentle, backward-leaning ‘C’ curve. This action line represents the spine arching back to generate power for the header. -
Block in major forms:
Sketch a circle for the head at the top of your curve, followed by an oval for the torso and another for the hips. Keep these shapes loose and light. -
Position the limbs:
Draw sticks for the arms and legs to find the balance. The right leg should be planted firmly while the left leg lifts slightly. Both arms should be raised for balance and momentum. -
Flesh out the figure:
Thicken your stick figure lines into cylinders for the limbs. Pay attention to the foreshortening on the raised arms so they look like they are reaching upward. -
Place the ball:
Sketch a perfect circle just above the forehead. It should look like it’s inches away from making contact or just striking the player. -
Add clothing details:
Refine the outline by drawing the jersey and shorts over the body forms. Add wrinkles where the fabric bunches at the waist and under the arms to emphasize movement. -
Detail the head:
Sketch the profile of the face looking upward. Add flowing hair that appears to be whipping backward from the motion.
Step 2: Inking and Rendering
-
Initial outlines:
Using a 0.3 fineliner, carefully trace your pencil lines. Use broken lines for the hair to keep it looking soft and fluid. -
Ink the soccer ball:
Draw the classic pentagon shapes on the ball. Shade the dark patches solid black, leaving a small white highlight on the top left of the ball to suggest a light source. -
Start shading the jersey:
I like to start with the lightest hatching here. Use the 0.1 pen to create long, diagonal parallel lines on the side of the jersey away from the light source. -
Darken the shorts:
The shorts are darker in the reference. Use cross-hatching (layers of lines crossing each other) with the 0.5 pen to create deep values, leaving the top of the thigh lighter. -
Render the socks:
Fill the socks with dense hatching or solid black, but leave the fold at the top and the shin area slightly lighter to show cylindrical volume. -
Create texture on the skin:
Switch back to your finest 0.1 pen. Use tiny stippling dots or extremely short dashes on the legs and arms to suggest muscle definition without looking too heavy. -
Define hair and face:
Use swift, curving strokes for the hair strands. Darken the area under the chin and around the eye socket to define the profile. -
Ground the figure:
Draw a few quick, horizontal dashed lines under the feet. This simple addition gives the player a surface to push off from. -
Cleanup:
Once the ink is completely dry—give it a good five minutes—gently erase all underlying pencil marks with the kneaded eraser.
Hatching Direction
Make your hatching lines follow the curve of the body part (e.g., wrap curved lines around the leg). This makes the drawing look 3D rather than flat.
Stiff Figure?
If the player looks too rigid, exaggerate the arch of the back and the angle of the neck. More curve equals more dynamic energy and power.
Now you have a dynamic sports illustration ready to inspire your next game
Team Huddle From Above
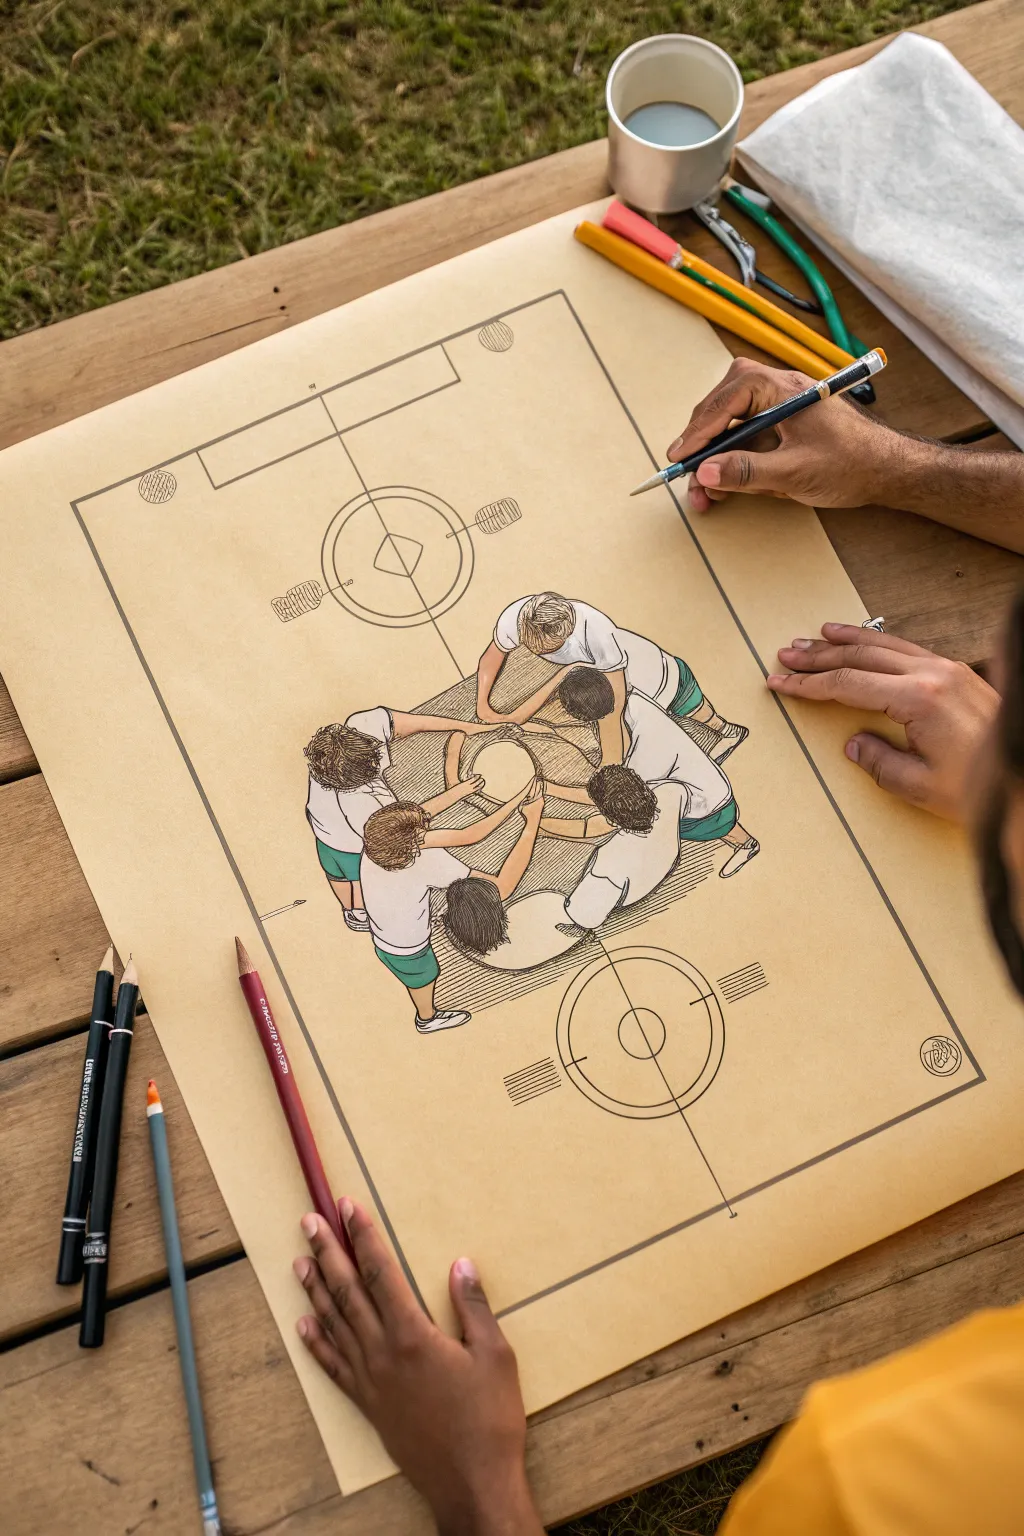
This project combines technical drafting with expressive figure drawing to capture the spirit of unity in soccer. You’ll create a top-down view of a pitch featuring a detailed, isometric-style huddle of players in the center, all rendered on warm-toned paper for a classic look.
Step-by-Step Guide
Materials
- Large sheet of tan or kraft paper (A2 or similar size)
- Graphite drawing pencils (HB and 2B)
- Fine liner pens (black, 0.3mm and 0.5mm)
- Colored pencils (white, forest green, warm grey, black)
- Large straightedge or ruler
- Eraser (kneaded preferred)
- Compass or circular template
Step 1: Drafting the Pitch
-
Set the perspective:
Begin by taping your large tan paper to a smooth surface. Using your ruler and an HB pencil, draw a large rectangle for the pitch boundary. Instead of a flat rectangle, angle the top line slightly so it’s shorter than the bottom line, creating a subtle trapezoidal shape to suggest perspective. -
Mark the center:
Lightly find the visual center of your field. Use your compass to draw the center circle. Make it slightly elliptical rather than a perfect circle to match the perspective of your outer boundary lines. -
Outline the box areas:
Sketch the penalty boxes at the top and bottom ends of the field. Remember to follow the perspective lines; vertical lines should remain straight, while horizontal lines should angle slightly towards a vanishing point. -
Add pitch details:
Draw the corner arcs and the center line. You can add stylized goal posts as simple rectangles or ovals from this top-down view. Keep these lines light and clean, as they form the technical ‘blueprint’ background.
Step 2: Drawing the Huddle
-
Block out the figures:
In the very center of your circle, sketch six oval shapes arranged in a tight ring. These represent the torsos of the players. Imagine looking down on them; their heads will obscure much of their bodies. -
Adding limbs and heads:
Draw circles for heads resting on the torsos. Then, sketch arms reaching into the center, linking the players together. Add legs extending outward, bending at the knees. The arrangement should look like a wheel with spokes. -
Refine the anatomy:
Go over your rough shapes to define shoulders, hair texture, and clothing folds. The view is foreshortened, so focus on the tops of heads and shoulders. -
Ink the huddle:
Switch to a 0.5mm black fine liner. Carefully trace your final pencil lines for the players. Use short, broken strokes for hair to create texture, and smoother, continuous lines for the limbs and clothing. -
Ink the field lines:
Use a ruler and the 0.5mm pen to ink the straight lines of the pitch. For the center circle and curved areas, use a steady hand or a French curve tool if you have one. Double up the boundary lines to give them visual weight.
Fixing Wobbly Circles
If your freehand center circle looks lopsided, trace a bowl or cup rim lightly with pencil first, then ink over it. The object helps guide your hand for a smooth curve.
Step 3: Color and Shading
-
Coloring the kits:
Use a white colored pencil to fill in the shirts. Press firmly to ensure the white stands out opacity against the tan paper. This simulates the bright highlight of a home kit. -
Adding team colors:
Take a forest green colored pencil and fill in the shorts of each player. Apply the color evenly, leaving small slivers of paper showing for highlights on the thighs. -
Skin tones and hair:
Use warm greys or light browns for skin tones on the arms and legs. I like to keep this subtle so it doesn’t overpower the white jerseys. Darken the hair with black or dark brown pencil, using directional strokes. -
Creating dimension:
Use a warm grey pencil to add shadows beneath the huddle. Shade the area in the center of the ring and cast shadows under the legs to ground the figures on the paper. -
Hatching for texture:
add hatched lines (parallel pen strokes) inside the huddle on the ‘ground’ area. This artistic touch differentiates the huddle space from the rest of the clean pitch. -
Final decorative touches:
Add stylized design elements like corner flag circles or small grid lines near the goal posts to enhance the technical drawing aesthetic. A small logo stamp or signature in the corner creates a professional finish.
Pop Those Highlights
If the white pencil looks dull on the tan paper, try a white gel pen for the brightest highlights on the shoulders and shirt folds. It creates crisp contrast.
Step back and admire how the combination of precision lines and organic figures brings your soccer strategy sketch to life
BRUSH GUIDE
The Right Brush for Every Stroke
From clean lines to bold texture — master brush choice, stroke control, and essential techniques.
Explore the Full Guide
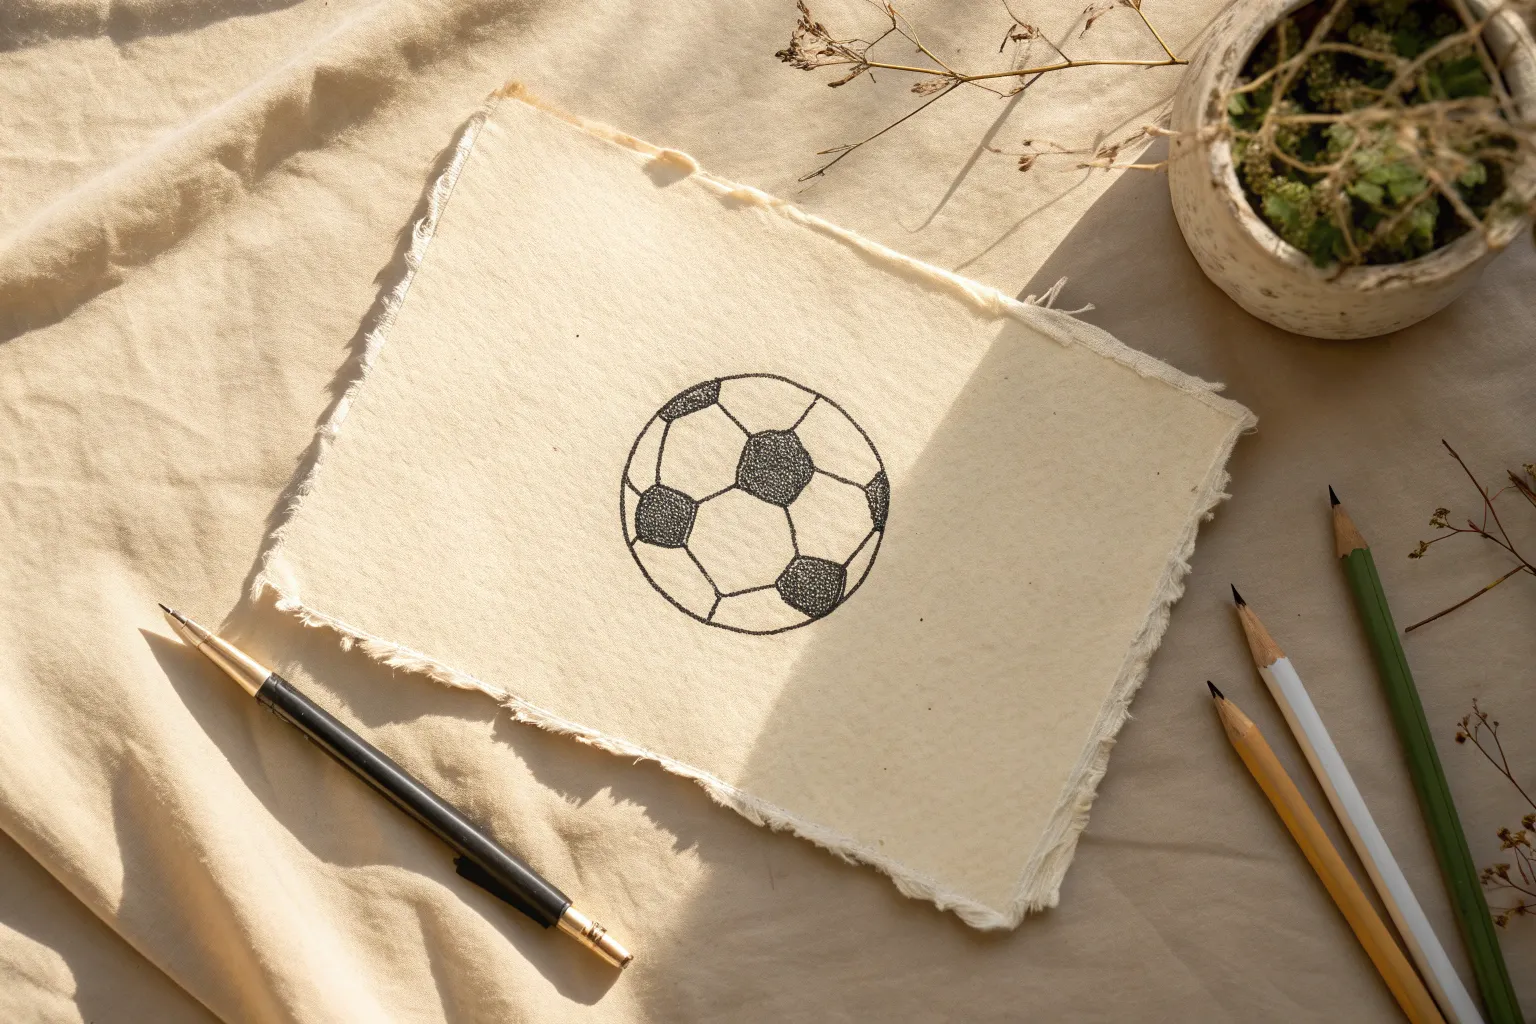
Net and Ball Impact
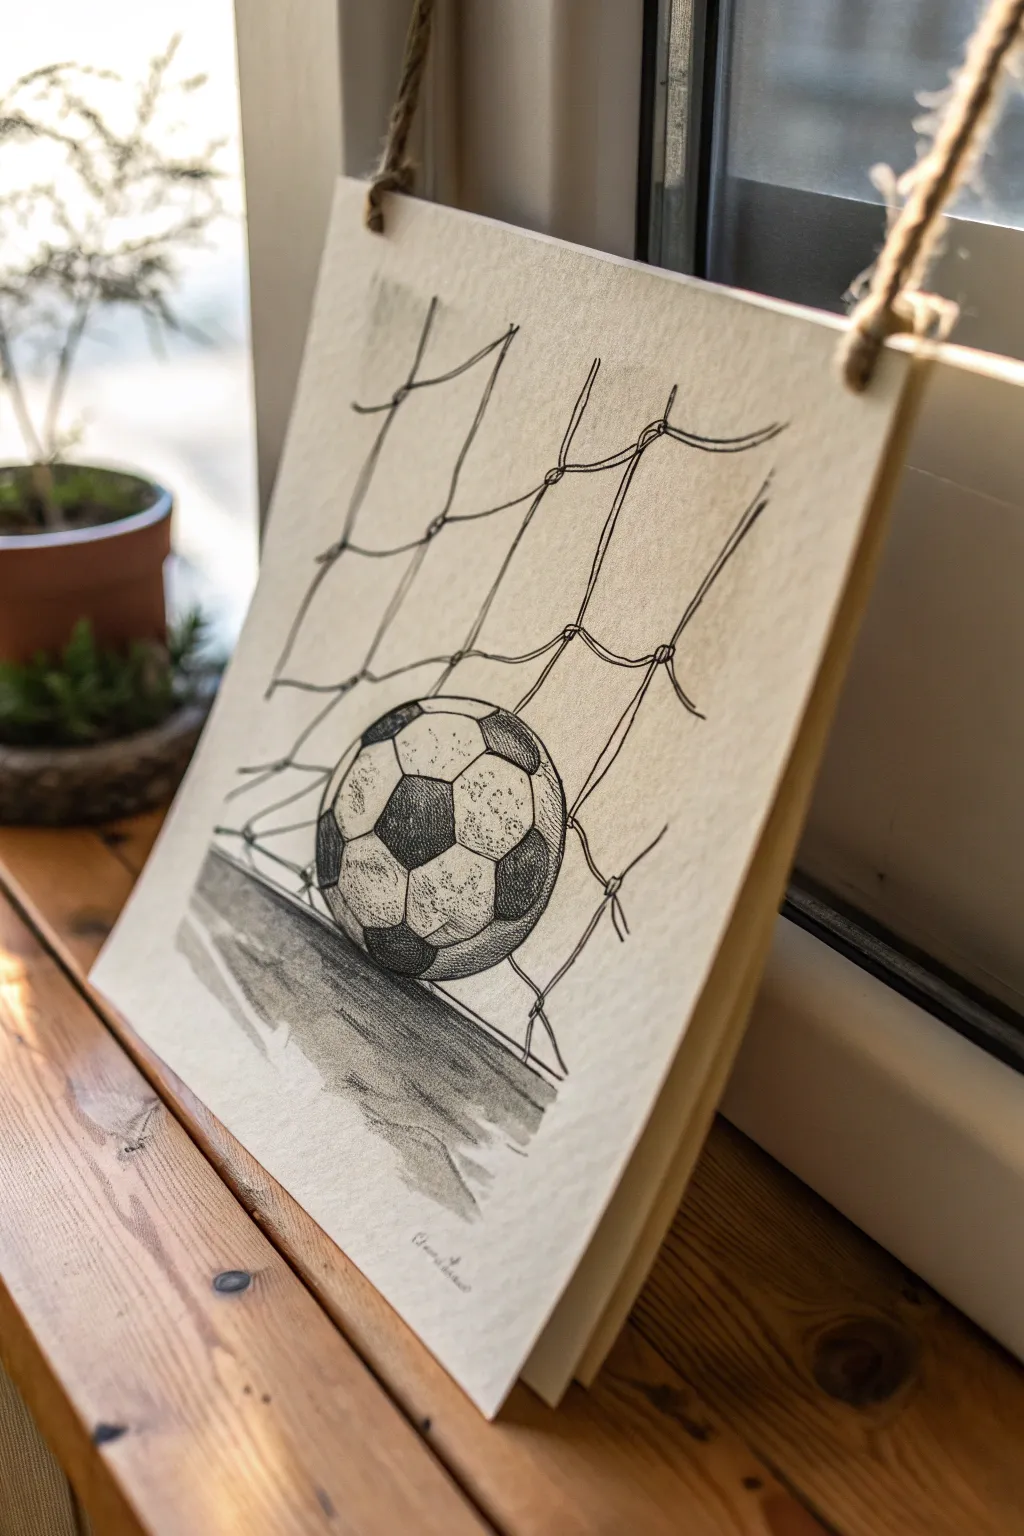
Capture the dynamic moment a soccer ball hits the back of the net with this detailed pen and ink drawing. Using stippling for texture and simple linework for structure, this project creates a classic, vintage-style illustration on textured paper.
How-To Guide
Materials
- Heavyweight textured paper (watercolor or mixed media paper, warm white)
- Pencil (HB or 2B)
- Eraser (kneaded preferred)
- Fine liner pens (sizes 0.1, 0.3, and 0.5)
- Ruler (optional)
- Jute twine or rustic string (for hanging)
- Hole punch
Step 1: Sketching the Composition
-
Position the ball:
Start by lightly sketching a perfect circle in the lower third of your paper. This will be the soccer ball. It shouldn’t be centered; place it slightly to the left or right to create a more dynamic composition. -
Draw the hexagon pattern:
Inside the circle, sketch the classic soccer ball pattern. Start with a central pentagon (five sides) and surround it with hexagons (six sides). Remember, because the ball is round, the shapes near the edges should look compressed and curved. -
Map out the net:
Lightly sketch the net lines behind the ball. Draw vertical lines that drape downwards, bending slightly where they meet the horizontal lines. The lines should look pulled taut by the impact of the ball, radiating outward slightly. -
Add knot details:
Where the vertical and horizontal net lines intersect, sketch small, bulky knots. This adds realism to the netting structure. -
Sketch the ground shadow:
Draw a horizon line near the bottom of the ball and outline a cast shadow stretching underneath it to ground the object.
Step 2: Inking the Outlines
-
Outline the ball:
Using a 0.3 fine liner pen, carefully trace over your pencil lines for the soccer ball. Keep your hand steady but don’t worry if the line isn’t machine-perfect; a little wobble adds character. -
Define the pentagons:
Ink the shapes on the ball. The black shapes are typically pentagons, while the white surrounding shapes are hexagons. -
Draw the net lines:
Switch to a 0.1 pen for the netting. Draw the lines with a slight double-stroke or uneven pressure to mimic the texture of fabric rope rather than a solid wire. -
Ink the knots:
Use the 0.3 pen to darken the knots where the net lines meet. Make these look dense and wrapped.
Stippling Patience
When stippling (shading with dots), keep your pen vertical. Angled strikes create dashes, not dots. Take breaks to avoid hand cramping.
Step 3: Shading and Texture
-
Fill the dark patches:
For the black pentagons on the ball, don’t fill them in solid black immediately. Use tight cross-hatching or dense stippling (lots of dots) with a 0.5 pen to create a rich, textured dark value. -
Texture the white patches:
On the white hexagons, use the 0.1 pen to add very light stippling, concentrating the dots near the edges where the panels curve away. This gives the ball volume. -
Create surface wear:
I like to add a few random scratches or scuff marks on the ball’s surface using the finest pen to make it look well-used. -
Shade the ground:
For the ground shadow, use parallel hatching lines horizontally. Start densely right under the ball and space the lines out as the shadow extends downward. -
Erase pencil guides:
Once the ink is completely dry—give it a few minutes—gently erase all the underlying pencil sketches.
Vintage Wash Effect
Dilute a drop of black ink or watercolor with water and brush a very faint grey wash over the ground shadow for a softer, aged look.
Step 4: Finishing Touches
-
Add rope tension:
Go back to the net and add tiny tick marks or fibers sticking out of the rope lines to make them look like twine. -
Punch holes:
Use a hole punch to create two holes at the top corners of your paper. -
Attach the hanger:
Thread a piece of thick jute twine through the holes from back to front. Tie simple knots on the front side to secure the string, leaving a loop for hanging.
Hang your finished artwork near a window or desk to inspire your next match
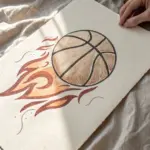
Rainy Match Mood Sketch
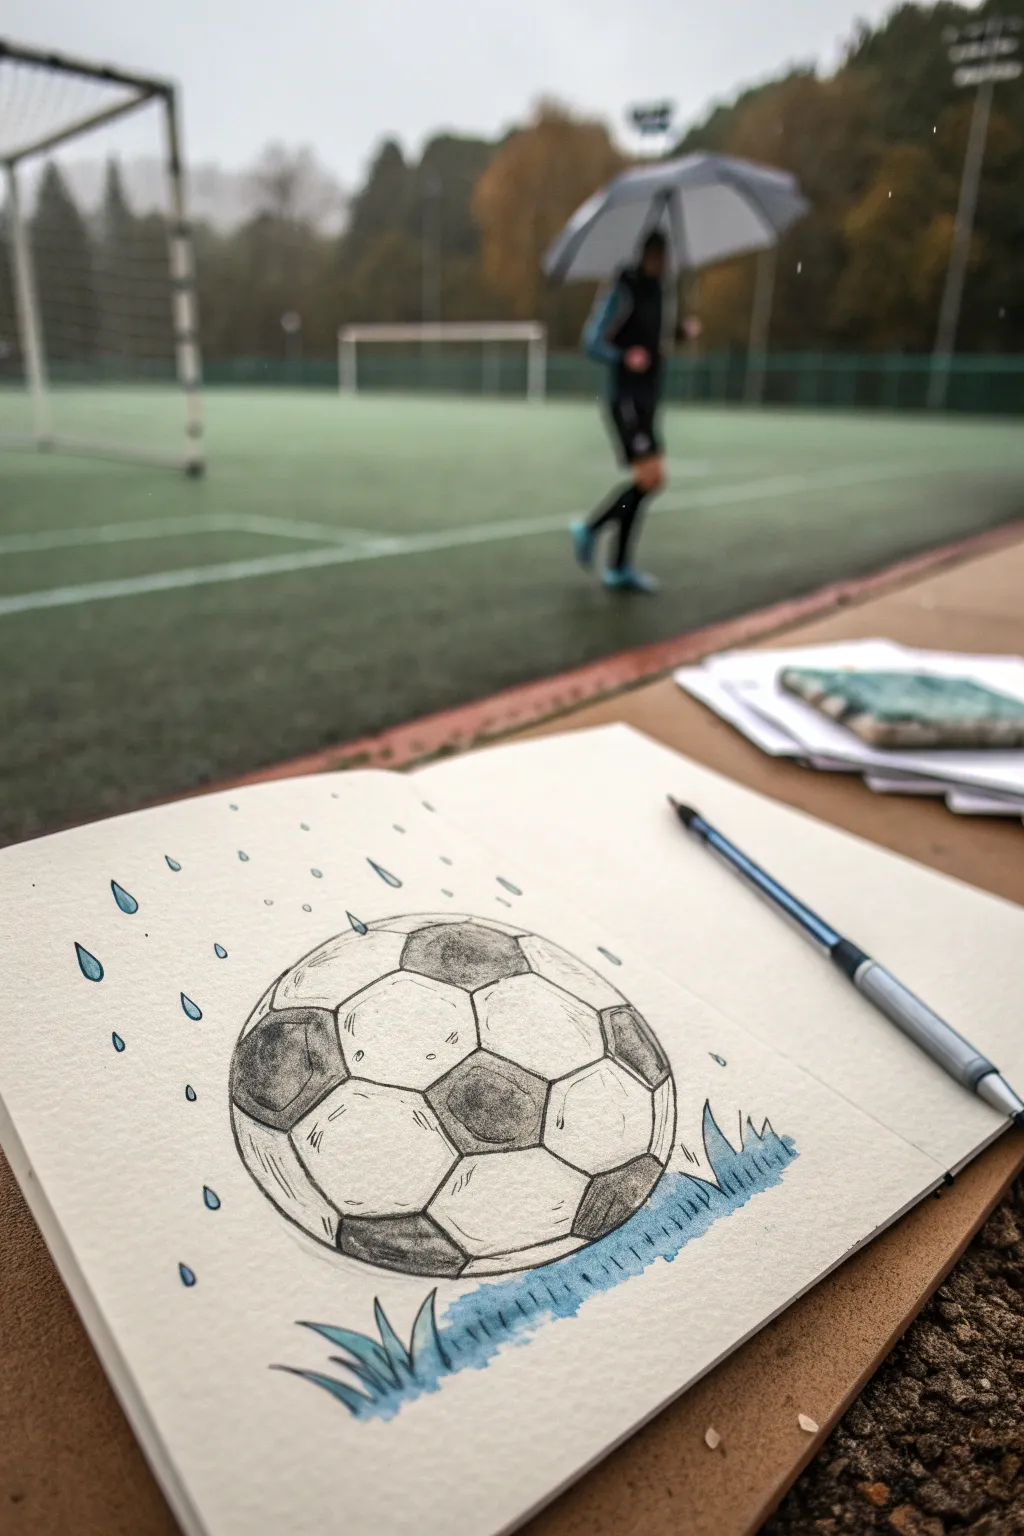
Capture the atmospheric feeling of a wet soccer practice with this charming pen and watercolor sketch. The artwork contrasts a structured, geometrically precise soccer ball with loose, whimsical rain effects to evoke a moody yet sporty vibe.
Step-by-Step Guide
Materials
- Sketchbook with heavy paper (mixed media or watercolor)
- Pencil (HB or 2B)
- Eraser
- Fine liner pen (black, 0.4mm or 0.5mm)
- Watercolor paints or watercolor pencils (blue)
- Small round brush
- Water cup
Step 1: Forming the Soccer Ball
-
Draw the basic circle:
Start by lightly sketching a perfect circle in the center of your page. If you struggle with freehand circles, trace a small cup or a lid to get that initial shape right. -
Place the central pentagon:
Slightly off-center to the left, draw a pentagon. This five-sided shape is the anchor for the rest of the pattern. -
Connect the hexagons:
Surrounding that central pentagon, draw hexagons (six-sided shapes). Since the ball is spherical, these hexagons will look distorted where they curve away from the center. -
Fill in the edges:
Continue the pattern towards the outer circle. You will notice that shapes near the edge of the circle get cut off or become partial triangles and trapezoids; drawing these partial shapes creates the 3D illusion. -
Add volume lines:
Inside the white sections of the ball, add tiny, faint curved hatch marks. These little details suggest the leather texture and the roundness of each individual panel.
Step 2: Inking and Styling
-
Ink the outlines:
Take your black fine liner and carefully trace over your pencil lines. Don’t worry if the lines are slightly shaky; a bit of waviness adds character. Make the outer perimeter line slightly thicker to ground the object. -
Shade the dark panels:
Using a pencil, shade the pentagons (the five-sided shapes). Instead of coloring them solid black, use a textured scribble motion to simulate worn leather. -
Add contrast:
Go back with your pencil and press harder near the edges of the dark panels to create a gradient effect, leaving the centers of these dark shapes slightly lighter. -
Erase guidelines:
Once the ink is completely dry, gently erase all your initial pencil construction lines so the drawing looks clean.
Smudge Alert
Wait at least 5 minutes before erasing pencil lines. If the ink is even slightly wet, it will smear across your clean paper and ruin the crisp look.
Step 3: Adding the Atmosphere
-
Sketch the grass tufts:
At the bottom right and left of the ball, draw sharp, angular grass blades poking up. Keep them simple and stylized, like jagged teeth. -
Draw the rain drops:
Above and to the left of the ball, draw several teardrop shapes falling diagonally. Vary their sizes—some small dots, some larger drops—to create depth. -
Add splatter details:
Draw tiny little circles or specks near the grass and the top of the ball to mimic rain bouncing off surfaces. -
Ink the environment:
Go over your grass and rain sketches with the fine liner. Leave the inside of the raindrops empty for now. -
paint the grass:
Load your brush with diluted blue watercolor. Paint a loose wash under the ball and fill in the grass blades. Let the blue bleed slightly outside the lines for an artistic, watery look. -
Color the rain:
Using the very tip of your brush, carefully fill each raindrop with the same blue. Make the top half of the drop lighter and the bottom darker if you can control the water. -
Final shadow wash:
Add a very faint wash of blue or grey directly beneath the ball to ground it so it doesn’t look like it’s floating in mid-air.
Level Up
Use a white gel pen to add tiny highlights on the top of the raindrops and the dark patches of the ball to make them look wet and shiny.
Now you have a sketchbook page that perfectly captures the feeling of a drizzly match day practice


Line Art Soccer Ball Pattern
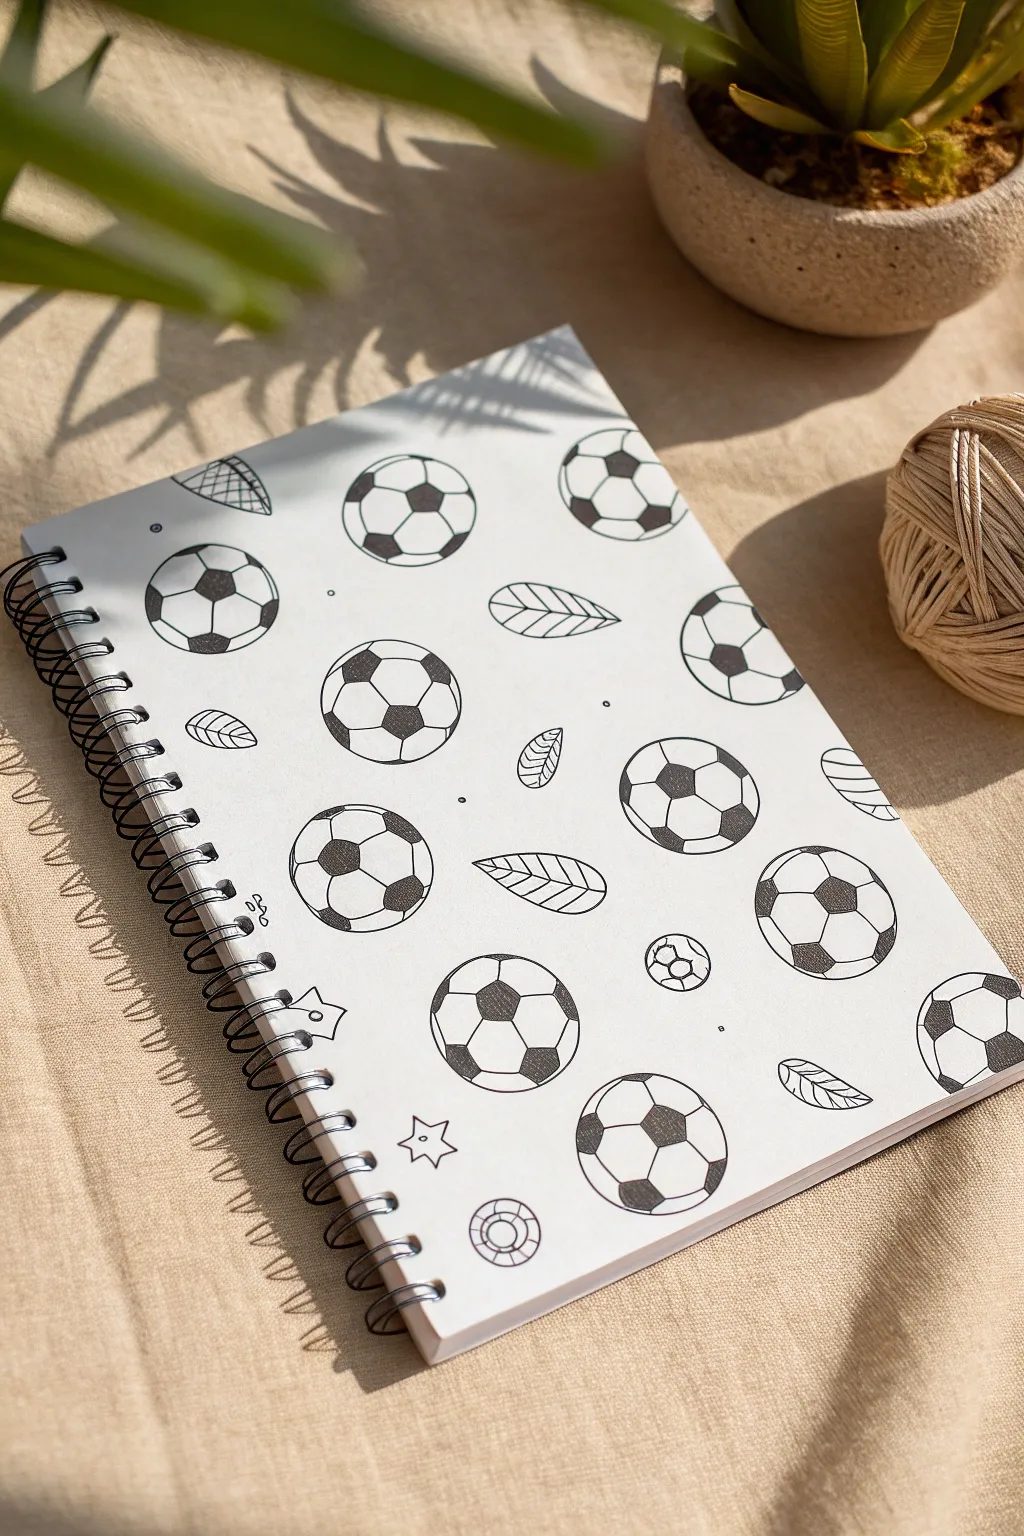
Transform a plain spiral notebook into a customized piece of stationery with this clean, stylish line art pattern. Featuring a mix of classic soccer balls, botanical leaves, and geometric accents, this black-and-white design is modern and minimalist.
Step-by-Step Tutorial
Materials
- Spiral notebook with a plain white or light-colored cover
- Fine liner pen (black, 0.5mm or 0.8mm)
- Ultra-fine liner pen (black, 0.1mm or 0.3mm)
- Pencil (HB or lighter)
- Eraser
- Circular stencil or a small round object (like a bottle cap)
- Ruler (optional)
Step 1: Planning and Layout
-
Prepare the surface:
Ensure the notebook cover is clean and dry. If the surface is glossy, test your pen on the back cover first to make sure the ink adheres and won’t smear. -
Rough placement sketch:
Use a light pencil to map out where your main elements will go. You don’t need to draw details yet, just lightly mark the positions of the larger circles to ensure they are spaced somewhat evenly across the page. -
Create perfect circles:
Using a circle stencil or tracing a small round object (about 1-1.5 inches in diameter), draw your main circles lightly in pencil. Rotate the position of some circles slightly so the pattern feels random rather than grid-like.
Use a barrier sheet
Place a piece of scrap paper under your drawing hand. This acts as a shield, preventing oils from your skin from getting on the paper and ensuring you don’t smudge the fresh ink.
Step 2: Drawing the Main Icons
-
Outline the soccer balls:
Using your thicker fine liner pen (0.5mm – 0.8mm), carefully trace over your pencil circles. Keep your hand steady and try to make the line continuous for a smooth look. -
Draw the pentagons:
Inside each circle, draw a central pentagon. It doesn’t have to be perfectly centered every time; varying the angle makes the balls look like they are tumbling. -
Connect the hexagons:
From each corner of the central pentagon, draw a straight line extending outward toward the edge of the circle. This forms the surrounding hexagonal shapes. -
Add edge details:
Where the lines meet the circle’s edge, draw partial shapes to suggest the curvature of the ball. This helps the drawing look three-dimensional rather than flat. -
Fill in the black patches:
Using the same pen, color in the central pentagon and the alternating partial shapes around the edge. Use firm strokes to ensure the black is solid and opaque. -
Repeat the process:
Continue this pattern for all the large circles on your cover. I like to rotate the paper as I work so I’m not smudging wet ink with my hand.
Wobbly circles?
If your freehand circles aren’t perfect, accept the charm! This is a doodle style. If it really bugs you, thicken the outline slightly to hide any bumps or uneven connection points.
Step 3: Adding Filler Elements
-
Sketch the leaves:
In the empty spaces between the soccer balls, lightly sketch simple leaf shapes. Aim for teardrop outlines with a central vein line. -
Ink the leaves:
Go over your leaf sketches with the fine liner. Add diagonal veins branching off the center line. Keep these lines fairly simple to match the clean aesthetic. -
Add detail icons:
Look for smaller gaps in the composition. Draw tiny stars (outlines only), small circular geometric motifs (like a wheel or segmented circle), or even a tiny soccer ball icon for variety. -
Incidental dots:
To bring the whole piece together, use your ultra-fine pen (0.1mm) to add tiny dots or small circles in any large, awkward white spaces. This adds texture without cluttering the design.
Step 4: Final Touches
-
Review line weight:
Check your drawing for consistency. If some outlines look too thin compared to the filled-in black areas, go over them again to thicken the line weight slightly. -
Let it cure:
Allow the ink to dry completely. This is crucial—give it at least 15 to 20 minutes to prevent gray smudges. -
Erase guidelines:
Gently erase all visible pencil marks. Be careful near the spiral binding so you don’t wrinkle the paper.
Now you clearly have the sportiest notebook in the room ready for your next big idea
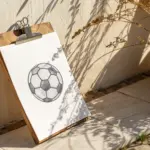
Watercolor Splash Soccer Action
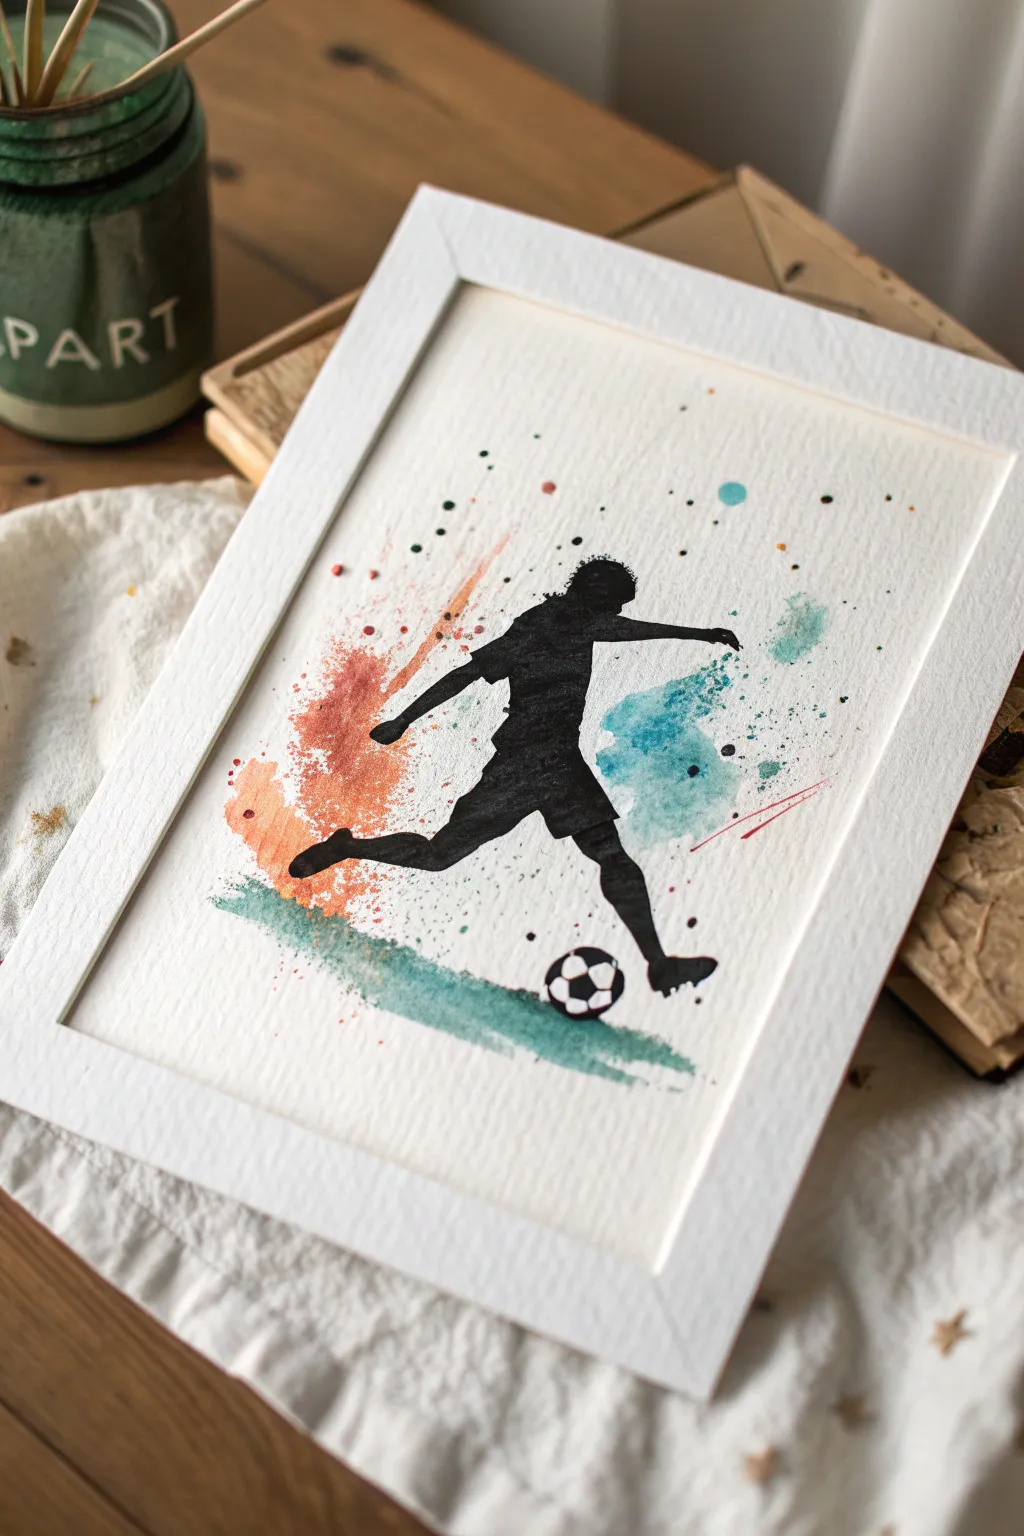
Capture the dynamic energy of the game with this striking mixed-media piece that combines a sharp black silhouette with loose, expressive watercolor splashes. The contrast between the precise player figure and the abstract background bursts creates movement and intensity perfect for any sports fan’s wall.
Step-by-Step
Materials
- Cold press watercolor paper (300 gsm)
- Black waterproof ink or black acrylic paint
- Watercolor paints (burnt sienna/rust, teal/turquoise, cerulean blue)
- Small round brush (size 2 or 4) for details
- Medium round brush (size 8 or 10) for splashes
- Old toothbrush (optional for spatter)
- Pencil and eraser
- Masking tape or painter’s tape
- Reference photo of a soccer player kicking
- White mat frame
Step 1: Preparation & Sketching
-
Secure the paper:
Tape your watercolor paper down to a hard board or your work surface using masking tape on all four sides. This prevents the paper from buckling when we add the water washes later. -
Outline the player:
Using a reference photo, lightly sketch the outline of the soccer player in mid-kick. Focus on the dynamic pose—the extended leg and balancing arm. Keep your pencil lines very faint so they won’t show through the colors later. -
Position the ball:
Draw the soccer ball near the kicking foot. Don’t worry about drawing the pentagons perfectly yet; just get the circle placement right.
Control Your Splatter
Cover the area where you plan to paint the black silhouette with a scrap piece of paper while flicking paint. This keeps the center clean so your black ink goes down smoothly later.
Step 2: Creating the Splash Background
-
Prepare your colors:
Mix a watery puddle of burnt sienna (rust orange) and another of teal/turquoise on your palette. You want these to be juicy and fluid, not thick. -
Apply the rust splash:
Load your medium round brush with the rust color. Paint a loose, jagged shape behind where the player’s back leg will be. Don’t paint inside the silhouette yet; paint *around* the back area, letting the edges stay rough and uneven. -
Add the teal splash:
Rinse your brush and switch to teal. Paint a similar loose splash shapes in front of the player and near the kicking leg. Allow the colors to overlap slightly in the middle if you like, but keep them mostly distinct to maintain contrast. -
Create the movement blur:
While the paint is still wet, use a clean, damp brush to drag the pigment outward in streaks, mimicking the motion of speed. I find pulling the brush quickly away from the center creates the best motion lines. -
Splatter effect:
Load your brush or an old toothbrush with wet paint. Tap it against your finger over the paper to create droplets around the main splashes. Do this with both orange and blue to add energy. -
Ground the figure:
Paint a quick, horizontal swish of teal below the feet to suggest grass or turf. Let this be uneven and textured, fading out at the edges. -
Dry completely:
Allow the watercolor layer to dry 100%. The paper must be bone dry before adding the sharp black silhouette, or the ink will bleed.
Step 3: The Silhouette & Details
-
Outline the silhouette:
Switch to your small brush and black waterproof ink (or acrylic). Carefully outline the pencil sketch of the player. Go slowly around the fingers and hair to keep the details crisp. -
Fill in the figure:
Fill the entire interior of the player shape with solid black. Ensure the coverage is opaque; you may need a second coat if the watercolor texture shows through too much. -
Detail the ball:
Outline the soccer ball in black. Draw the classic pentagon shapes inside. Fill in the black sections of the ball carefully, leaving the white sections as the bare paper. -
Add connecting splatters:
Dip your smallest brush in black ink. Add a few tiny, controlled micro-dots near the foot hitting the ball to emphasize the impact. -
Refine the edges:
Check the edges of your silhouette. If any look shaky, smooth them out with the small brush now. -
Erase pencil lines:
Once the black ink is fully dry, gently erase any visible pencil marks around the edges of the figure. -
Remove tape:
Peel the masking tape away slowly at a 45-degree angle to reveal a clean white border. -
Frame it:
Place your finished artwork into a white mat frame to make the colors pop and give it a professional gallery look.
Fixing Bleeds
If black ink bleeds into the color, stop immediately. Let it dry completely. Then, use white gouache or a white gel pen to touch up and sharpen the edge of the silhouette.
Hang your new masterpiece in a bright spot where the dynamic splashes can truly shine
Geometric Soccer Poster Style
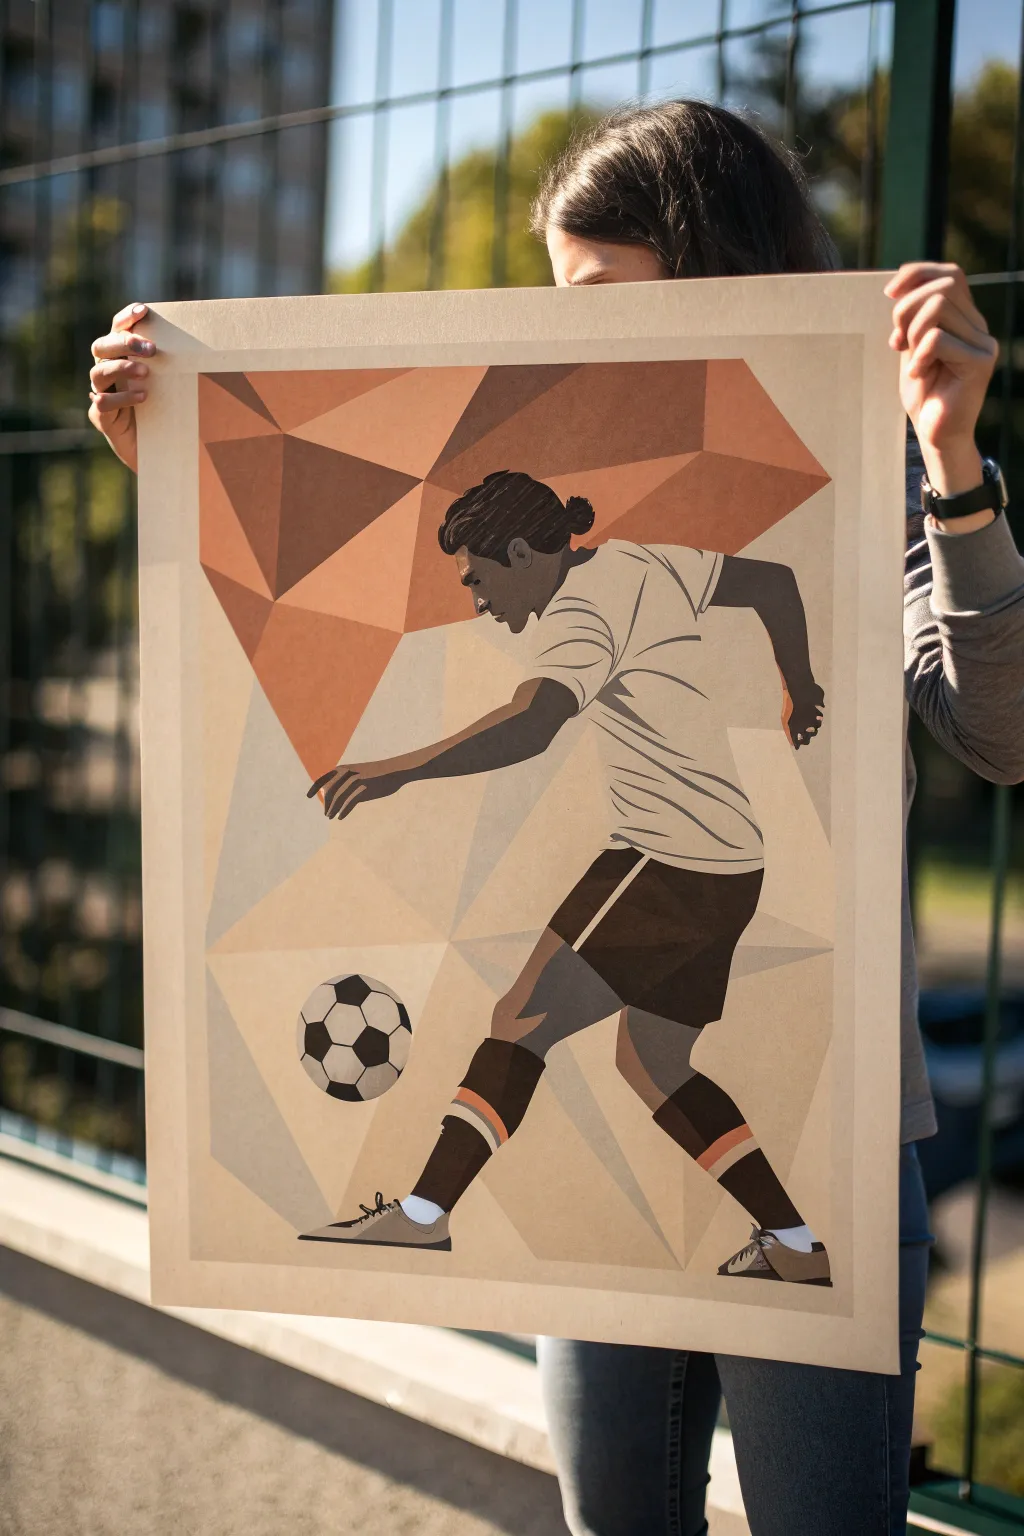
Capture the dynamic energy of soccer through a modern, abstract lens with this geometric poster design. By breaking complex forms down into simple triangles and polygons, you’ll create a striking piece of wall art that feels both retro and contemporary.
Step-by-Step Guide
Materials
- Large format smooth Bristol board or illustration board (A2 or 18×24 inches)
- Digital design software (Illustrator/Photoshop) or tracing paper for the initial layout
- HB pencil and quality eraser
- Drafting ruler or T-square
- Acrylic gouache paints (Burnt Sienna, Cream/Ecru, Dark Umber, Slate Grey, Titan Buff)
- Set of flats and angular shader brushes (various sizes)
- Painter’s tape (low tack)
- Stay-wet palette (optional)
Step 1: Planning and Layout
-
Source Selection:
Begin by finding a high-contrast reference photo of a soccer player in a dynamic action pose, like kicking or running. The pose needs to be clear since we will be simplifying the anatomy significantly. -
Digital Polygon Mapping:
If you are comfortable with digital tools, import your photo into software and draw triangles over the main forms. Break the background, shadows, and highlights into sharp, angular shapes rather than smooth curves. This creates the ‘blueprint’ for your painting. -
Analog Alternative:
If working manually, tape tracing paper over your reference photo. Use a ruler to straighten out every curve—turn a round shoulder into three intersecting straight lines, and simplify the face into planar shapes. -
Transfer to Surface:
Once your line work is finalized, transfer the design onto your large Bristol board. You can use a projector for accuracy or grid the image lightly. Ensure your pencil lines are visible but light enough to be covered by paint.
Step 2: Painting the Background
-
Mixing the Palette:
Prepare your limited color palette. You want a distinct ‘vintage’ feel, so mix a warm cream (Ecru), a deep terracotta orange (Burnt Sienna), and a range of greys. Keep the colors flat and opaque. -
The Upper Polygons:
Start with the abstract shapes in the upper left background. Use your terracotta and dark umber mixes. Paint these geometric shards carefully, using the straight edge of a flat brush to keep the lines crisp. -
The Lower Polygons:
Move to the lower background section. Here, use your lightest cream and very pale grey tones. These subtle shifts in value suggest depth without overpowering the main figure. -
Clean Edges:
For the sharpest possible lines between background shapes, I sometimes use small strips of low-tack tape, but a steady hand with an angular brush often works faster.
Fixing Wobbly Lines
If a straight edge looks shaky, don’t just paint over it. Wait for it to dry completely, apply low-tack tape along the intended line, and paint the correction against the tape edge.
Step 3: Painting the Figure
-
Skin Tones:
Paint the skin areas using a mid-tone grey-brown. Notice how the muscles are defined not by blending, but by sharp changes in color value. Paint the shadow side of the arm a shade darker than the top. -
The Jersey:
Fill in the shirt with a light cream color, distinct from the background. Use thin, dark grey lines to indicate folds and wrinkles in the fabric, keeping them angular rather than flowing. -
Shorts and Socks:
Block in the shorts with your darkest umber or black-brown. Add the detail stripes on the shorts and socks using the terracotta orange to tie the figure back into the background color scheme. -
Leg Definition:
Pay attention to the knees and calves. Use a darker grey tone to create a ‘cutout’ effect for the shadows on the legs, emphasizing the geometric style. -
The Ball:
Paint the soccer ball last. Instead of perfect circles for the spots, use straight-edged pentagons. Use the same cream and dark umber palette to ensure it looks cohesive with the rest of the piece.
Team Customization
Personalize the poster by swapping the geometric background colors to match a favorite team’s official palette, or change the jersey number to match a specific player.
Step 4: Finishing Touches
-
Hair Detail:
Paint the hair as a solid dark mass, then add just a few lighter distinct shapes to suggest shine or overlapping strands. Do not paint individual hairs. -
Line Check:
Step back and look for any shaky edges. Use a small liner brush with your background colors to sharpen up any boundaries where colors meet. -
Matte Varnish:
Once fully dry (give it at least 24 hours), apply a spray matte fixative or varnish. This protects the gouache and unifies the sheen of the surface.
Hang your finished poster in a simple frame to let the bold shapes take center stage
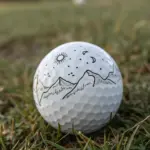
Surreal Soccer Ball Planet
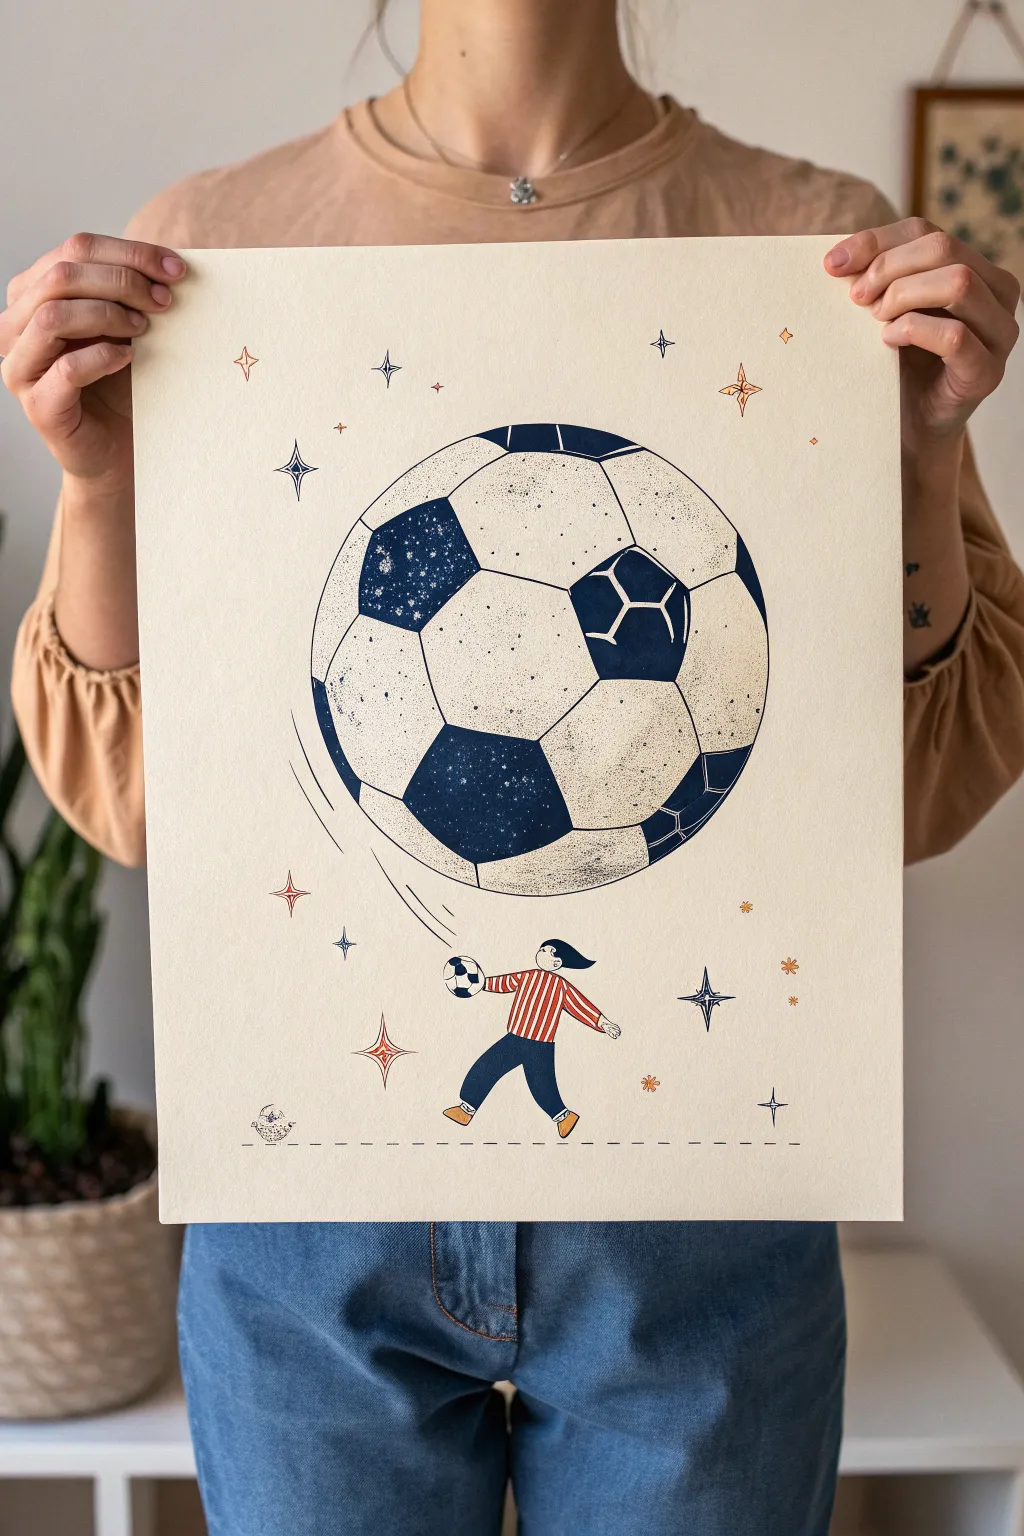
This whimsical illustration plays with scale by reimagining a classic soccer ball as a massive celestial body hovering above a tiny player. Using textured shading and a limited color palette of deep navy, cream, and rust red creates a vintage, risograph-style aesthetic that feels both nostalgic and surreal.
Detailed Instructions
Materials
- Cream or off-white heavy art paper (A3 or 11×17 size)
- Deep navy blue ink pen or fine liner (0.5mm)
- Rust red or burnt orange marker/colored pencil
- Large circular object to trace (like a dinner plate) or a large compass
- Ruler
- Pencil and eraser
- White gel pen or gouache (for stars)
- Texture sponge or stippling brush (optional)
Step 1: Drafting the Composition
-
Establish the Planet:
Begin by lightly tracing your large circular object in the upper center of the page using a pencil. Leave roughly 3-4 inches of space at the bottom for your character. -
Map the Hexagons:
Lightly sketch the classic soccer ball pattern inside the circle. Start with one central pentagon, then draw hexagons surrounding it. Don’t worry about mathematical perfection; a slightly hand-drawn look adds charm. -
Sketch the Player:
Way down at the bottom center, sketch a tiny figure. Draw them in mid-stride, looking up. They should be holding a regular-sized soccer ball, establishing the surreal scale difference. -
Add Motion Lines:
Draw three curved lines swooping from the large ball down toward the tiny player to verify the connection between the two elements.
Uneven Circles?
If your pentagons look warped, draw a faint ‘Y’ shape in the center of the ball first. Use the three prongs as guides for where your first three hexagons will meet.
Step 2: Inking the Giant Ball
-
Outline the Shapes:
Using your navy blue pen, go over the pencil lines of the large ball. Keep your hand steady but allow for slight natural wobbles to maintain that organic illustration feel. -
Fill the Dark Panels:
Color in the pentagons (the dark patches) with the navy ink. Instead of a solid block of color, I like to use a dense stippling or tiny cross-hatching technique here to simulate a grainy, print-like texture. -
Texture the Light Panels:
For the white hexagons, use very spared stippling (dots) with the navy pen. Concentrate the dots slightly near the edges to create a subtle sense of roundness without fully shading it. -
Add Celestial Details:
Inside the dark navy panels, use your white gel pen to add tiny dots or star clusters. This turns the black patches of the ball into mini windows to space.
Go Cosmic
Instead of plain navy for the dark patches, paint them with a dark watercolor wash and sprinkle salt while wet for a true galaxy texture effect.
Step 3: The Tiny Player and Environment
-
Ink the Character:
Outline the tiny player with the navy pen. Give them a striped shirt using the rust red marker. -
Color Block the Pants:
Fill in the player’s pants with solid navy blue. Leave the face and hands uncolored or lightly tinted cream. -
The Small Ball:
Carefully ink the tiny soccer ball in the player’s hand. It needs just enough detail to be recognizing as a match to the giant planet above. -
Ground the Figure:
Use a ruler and the navy pen to draw a dashed line across the bottom of the page, acting as the horizon line the player is walking on.
Step 4: Atmospheric Details
-
Draw the Stars:
scatter various star shapes around the background. Mix simple four-point stars (like diamonds) with traditional five-point stars. -
Color the Stars:
Outline some stars in navy and others in rust red. Leave the insides cream to let the paper show through. -
Final Motion Lines:
Ink the swooping motion lines connecting the planet to the player using thin, swift strokes. -
Clean Up:
Once the ink is completely dry, erase any remaining pencil guidelines gently to keep the paper texture intact.
Hang your finished print on the wall to inspire your next game or creative session


Have a question or want to share your own experience? I'd love to hear from you in the comments below!