Painting on wood just hits different—the wood grain becomes part of the artwork, and every board has its own personality. Here are my favorite wood board painting ideas that feel doable, look amazing on the wall, and lean into that warm, rustic texture.
Sunflower Close-Up With Wood Grain Showing
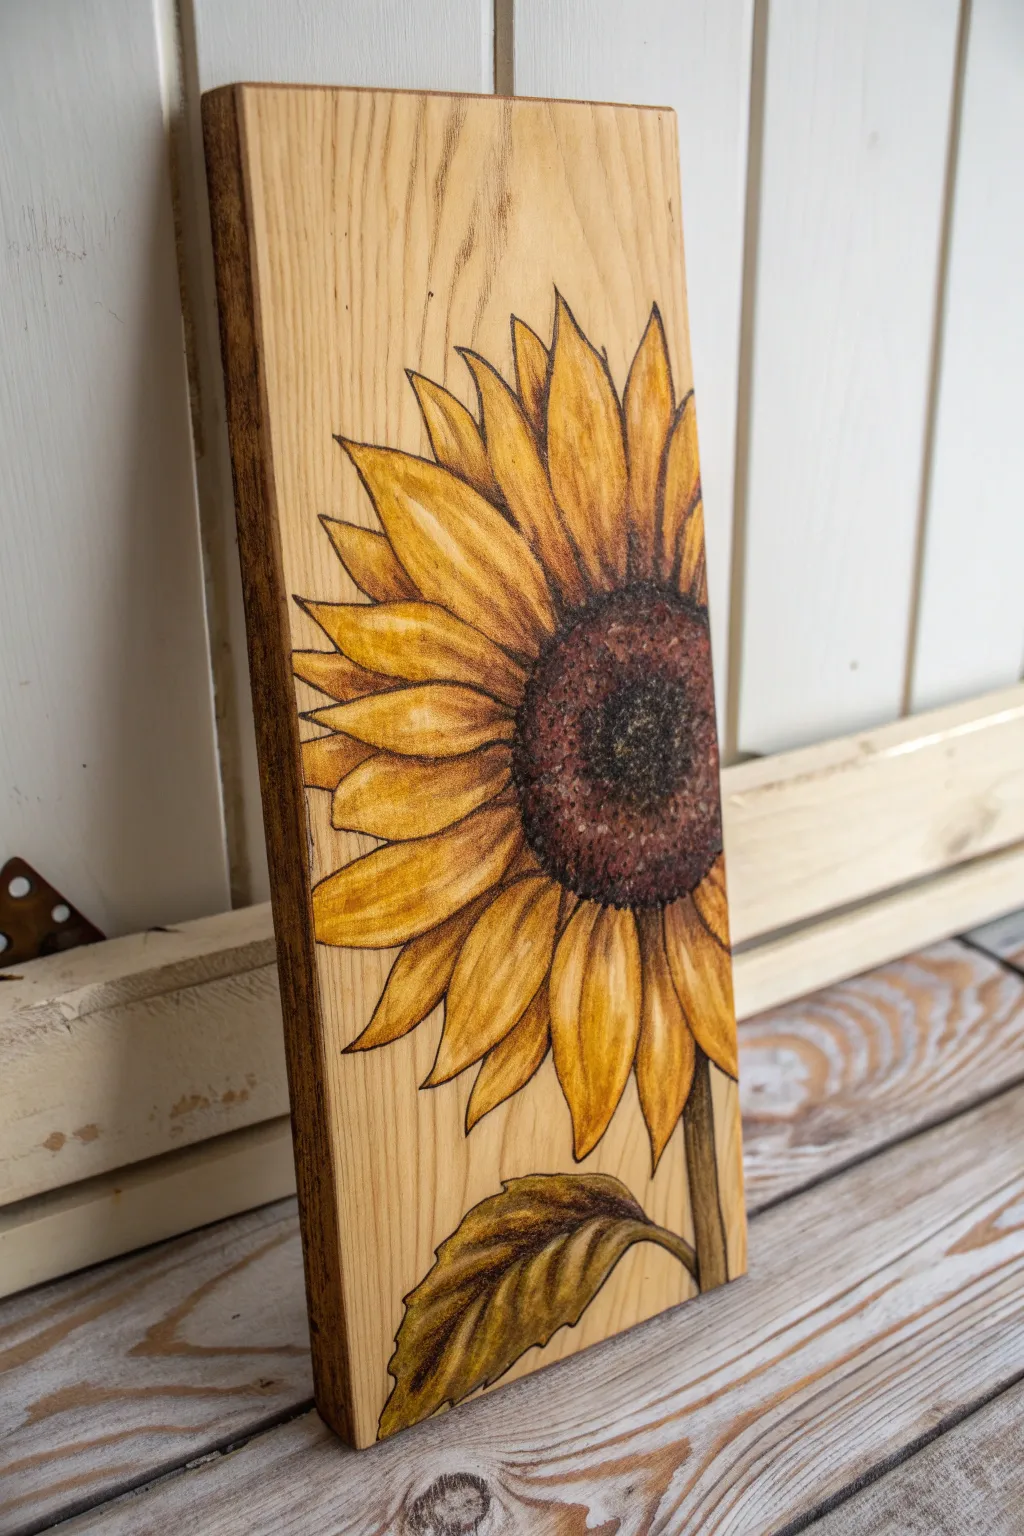
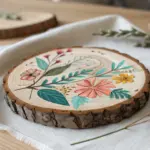
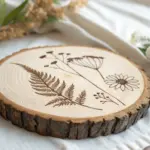
Capture the rustic warmth of summer by combining the natural beauty of wood grain with the bold sunny hues of a sunflower. This project uses pyrography to outline the design and transparent color washes to let the wood’s texture shine through the petals.
Step-by-Step
Materials
- Unfinished wood plank (pine or basswood works well)
- Sandpaper (120 and 220 grit)
- Wood burning tool (pyrography pen) with a universal point
- Carbon transfer paper
- Pencil and masking tape
- Watercolor paints or fluid acrylics
- Small round paintbrush (size 4 or 6)
- Clean water jar and paper towels
- Dark wood stain (optional, for center)
- Clear matte varnish or polyurethane spray
- Sunflower reference photo or line drawing
Step 1: Preparation & Transfer
-
Smooth the Canvas:
Begin by sanding your wood plank thoroughly. Start with 120-grit sandpaper to remove rough spots, then finish with 220-grit for a silky-smooth surface. This is crucial because the wood burning tool can snag on uneven grain. -
Clean the Surface:
Wipe away all sawdust with a damp tack cloth or paper towel. Any lingering dust can mar your paint application later. -
Position the Design:
Print out a large sunflower line drawing or sketch your own. Tape the drawing onto the wood, positioning it off-center so some petals drift off the edge for a dynamic composition. -
Transfer the Outline:
Slide a sheet of carbon paper dark-side-down between the paper and the wood. Trace over your lines firmly with a pencil to leave a crisp guide on the plank.
Bleeding Lines?
If paint bleeds into the wood grain outside your lines, use a slightly drier brush. Avoid saturating the wood too much near the unburned edges.
Step 2: Pyrography Outlines
-
Heat Up:
Plug in your wood burning tool and let it heat up for about 5 minutes. Use a scrap piece of wood to test the temperature and get a feel for the flow. -
Burn the Petal Edges:
Using the edge of a universal tip, slowly trace the transferred lines of the petals. Maintain a steady, moderate pace to create consistent dark brown lines without leaving deep gouge marks. -
Define the Center:
Outline the large central disk of the sunflower. Don’t worry about perfect circles; a slightly organic shape looks more natural. -
Add Texture to the Center:
Switch to a stippling motion for the seed head. Gently dot the tip of the burning tool repeatedly inside the center circle to create a dense, textured look. -
Clean Up:
Once the burning is complete and cooled, use an eraser to gently remove any remaining graphite transfer lines that weren’t burned over.
Pro Tip: Highlight Pop
Once fully dry, use a white colored pencil or a tiny bit of white gouache to add very subtle highlights on the tips of the petals for extra dimension.
Step 3: Adding Color
-
Mix a Golden Wash:
Dilute yellow watercolor or fluid acrylic with plenty of water. You want a translucent wash, not opaque paint, so the wood grain remains visible. -
Paint the Petals:
Apply the yellow wash to the petals. Start from the center and pull the brush outward. Don’t worry about unevenness; it adds to the organic look. -
Deepen the Shadows:
While the yellow is still damp, mix a tiny bit of orange or light brown into your yellow. Touch this darker color to the base of the petals near the center seed head. -
Blend the Gradients:
Use a clean, damp brush to gently blend the orange shadow outward into the yellow, creating a soft transition. -
Color the Leaves:
Mix a muted olive green wash for the stem and lower leaves. Paint these areas, adding a touch of brown near the veins for depth. -
Darken the Seed Head:
For the center, use a concentrated dark brown watercolor or even a tiny amount of dark wood stain. Dab it carefully among the burned stippling dots.
Step 4: Sealing & Finishing
-
Dry Completely:
Allow the paint to dry fully. Since we used water on wood, the grain might raise slightly; only lightly sand if absolutely necessary, avoiding the painted areas. -
Apply Sealer:
Spray the entire board with a clear matte varnish. Avoid brushing on a sealer, as it might smear the watercolors. -
Burn the Edges (Optional):
For a rustic framed look, run your wood burning tool along the sharp corner edges of the board to darken them, framing your artwork.
Hang your blooming masterpiece in a sunny spot to enjoy summer vibes all year round

Pumpkin Patch on Pallet-Style Boards
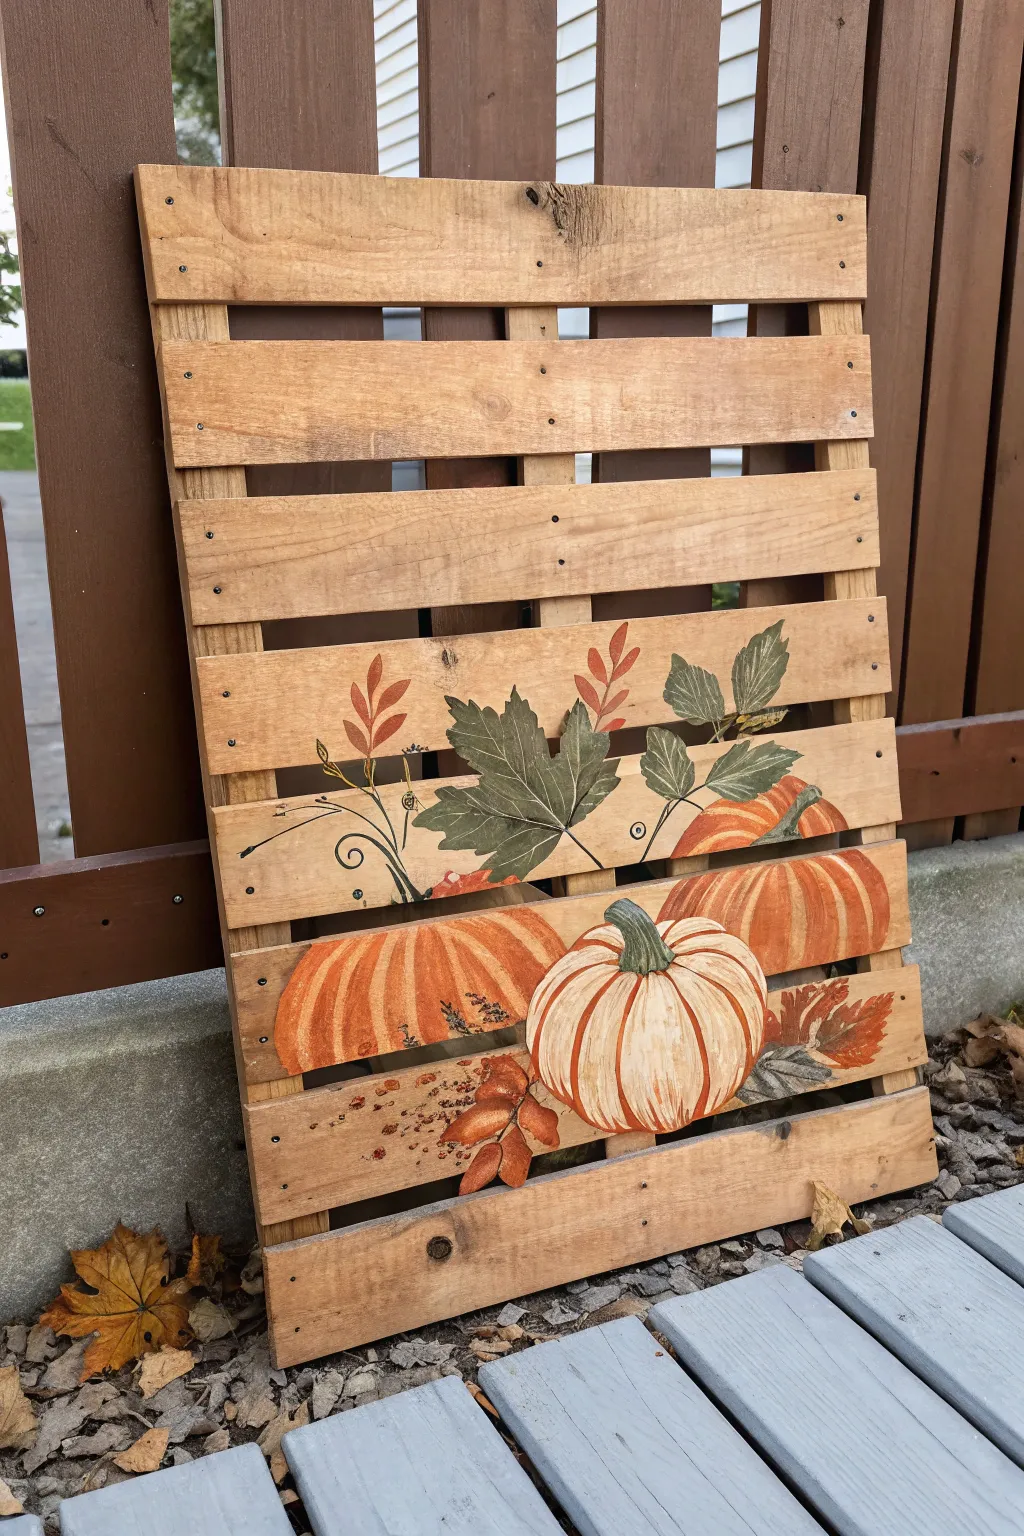
Enhance your front porch for autumn with this charming, rustic sign that combines the warmth of natural wood with vibrant harvest imagery. Slat-style construction gives it a reclaimed look, featuring a cluster of pumpkins and leaves that appear to be resting right at the base.
Step-by-Step Guide
Materials
- Unfinished pallet wood sign blank (approx. 24″ x 16″) or 6 wood slats connected by back braces
- Sandpaper (120 and 220 grit)
- Wood stain (Golden Oak or Early American)
- Clean rag or staining sponge
- Acrylic craft paints (Orange, Burnt Orange, Cream/White, Dark Green, Olive Green, Brown)
- Assorted paintbrushes: 1″ flat brush, medium filbert, small round liner
- Pencil
- Graphite transfer paper (optional)
- Matte spray sealer or clear polyurethane
Step 1: Preparation & Staining
-
Sand the surface:
Begin by sanding your wooden pallet sign. Use 120-grit sandpaper first to remove any major splinters, followed by 220-grit to create a smooth surface for painting. Wipe away all dust with a tack cloth or damp rag. -
Apply the stain:
Using a clean rag or sponge, apply your chosen wood stain. Rub it into the grain, ensuring you get into the gaps between the slats. I like to work in sections to ensure even coverage. -
Wipe and dry:
After letting the stain sit for a few minutes (longer for a darker color), wipe off the excess. Allow the wood to dry completely, preferably overnight, so the paint adheres properly later.
Step 2: Sketching the Design
-
Plan the composition:
Visualize three main pumpkins: a large central white pumpkin, flanked by two orange ones sitting slightly behind it. Add a partial orange pumpkin peeking out from the top left of the group. -
Sketch lightly:
Using a pencil, lightly outline your pumpkin shapes directly onto the lower half of the dried wood. Don’t worry about drawing over the gaps; just treat the whole piece as a single canvas. -
Add foliage details:
Sketch in a few large maple-style leaves tucked behind the pumpkins, along with some vine tendrils and smaller filler leaves. If you aren’t confident in freehand drawing, you can print a design and trace it using graphite paper.
Paint Consistency Pro Tip
Wood absorbs paint quickly! Use slightly thicker paint than usual for the first coat, or apply a clear matte medium first to seal the wood fibers before drawing.
Step 3: Painting the Pumpkins
-
Base coat the orange pumpkins:
Mix a standard orange with a tiny touch of brown to tone it down. Paint the background pumpkins, using vertical strokes that follow the curve of the fruit. You may need two coats for opacity. -
Base coat the white pumpkin:
Paint the central pumpkin using a creamy off-white color. Start from the center and brush outwards in curved strokes to mimic the ribbed texture of the gourd. -
Add shading (Orange Pumpkins):
While the base is dry, take a darker burnt orange or rust color. Paint thin, curved lines to define the ribs of the orange pumpkins. Feather these lines slightly so they aren’t too harsh. -
Add shading (White Pumpkin):
For the white pumpkin, use a diluted light brown or tan paint. Carefully paint in the deep crevices between the ribs. Use a damp brush to blend these lines into the cream base for a soft, round look. -
Highlighting:
Add pure white highlights to the tops of the cream pumpkin’s ribs. Add lighter orange or yellow-orange highlights to the centers of the orange pumpkin ribs to make them look dimensional.
Level Up: 3D Elements
Hot glue faux autumn leaves, raffia bows, or even small wooden cutouts over the painted design to add real texture and dimension to your sign.
Step 4: Painting Foliage & Details
-
Base leaves:
Paint the large maple leaves using a mix of dark and olive green. Let the color vary slightly on the brush for a natural look. -
Add fall colors to leaves:
Before the green dries completely, tap in some touches of brown or rust orange on the edges of the leaves to suggest autumn blending. -
Paint stems and vines:
Using a small liner brush and dark brown paint (watered down slightly for flow), create the pumpkin stems and swirly vines. Make the central stem thick and greenish-grey. -
Leaf detailing:
Once the leaves are dry, use a very fine brush and light green or cream paint to draw the veins on the leaves. -
Decorative speckling:
Dip an old toothbrush or stiff brush into diluted brown paint. Use your thumb to flick fine speckles over the painted area to add a weathered, rustic texture. -
Final seal:
Protect your artwork with a clear matte spray sealer to prevent fading and protect the wood from moisture.
Place your finished board on a porch or entryway to welcome the season with warm, handcrafted style


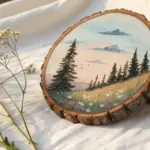
Simple Sunset Silhouette on a Rough Board
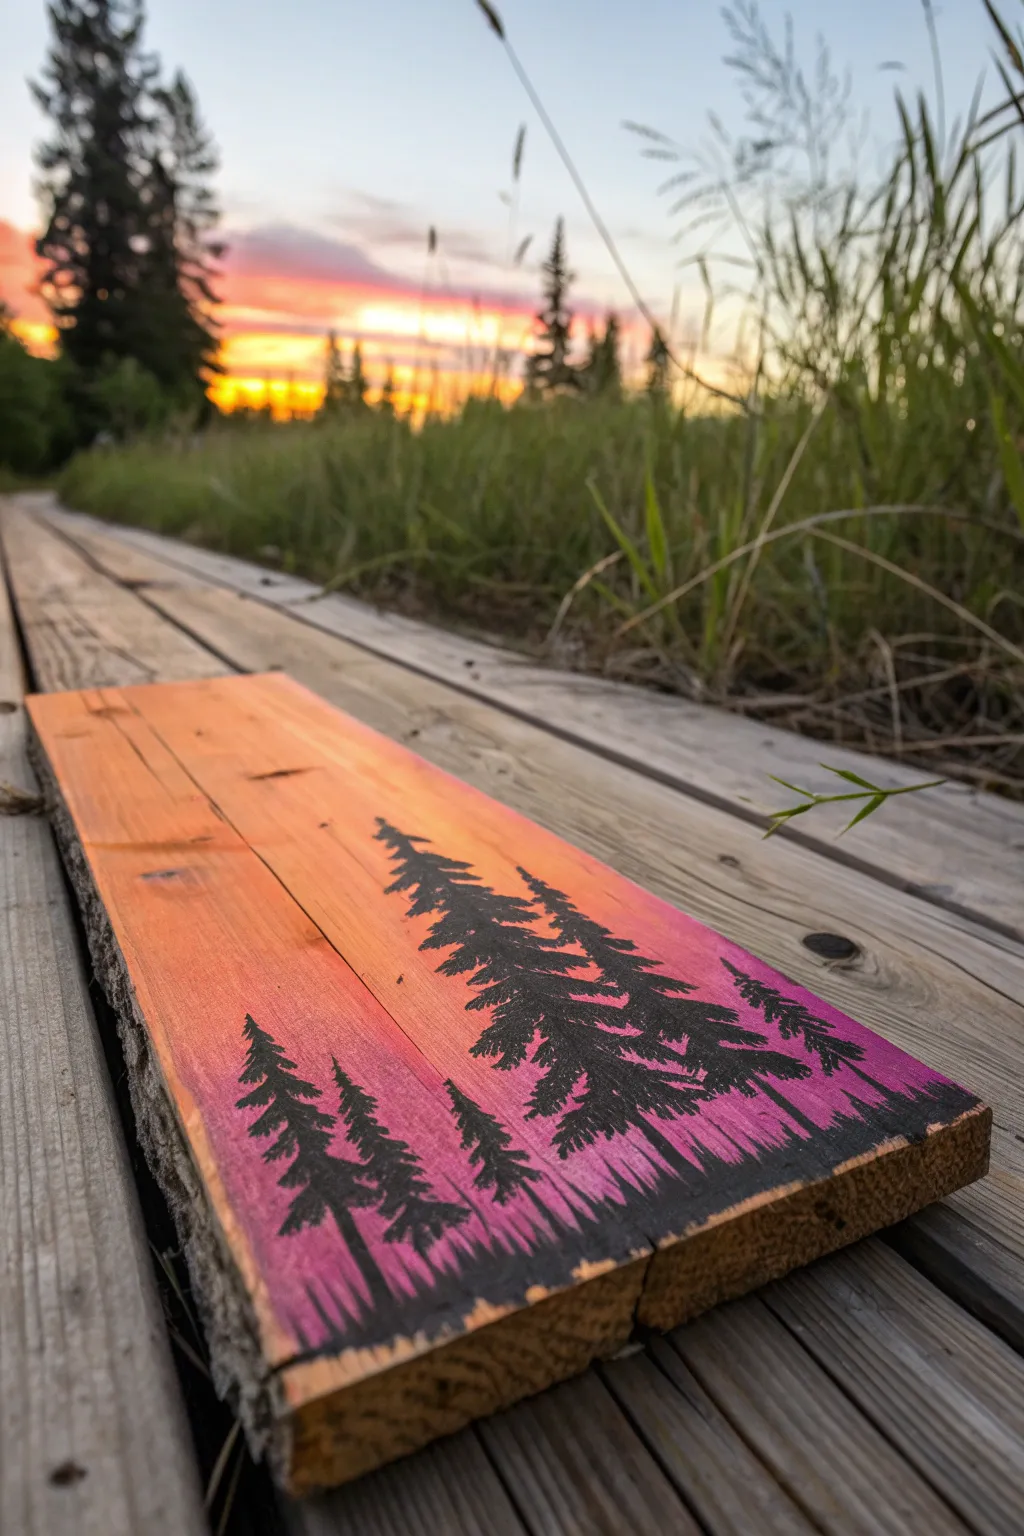
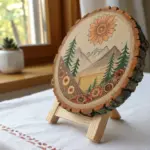
Capture the magic of a fading sunset with this striking silhouette painting on reclaimed wood. The vibrant gradient of orange and pink sets a dramatic backdrop for the stark black pine trees, creating a piece that feels both rustic and modern.
How-To Guide
Materials
- Reclaimed wood board (approx. 6” x 24” with rough edge)
- Sandpaper (120 and 220 grit)
- Acrylic paints: Bright Orange, Deep Magenta/Berry, Black
- Wide flat brush (1-2 inch)
- Medium round brush
- Small fine-liner brush
- Water cup and paper towels
- Matte spray varnish (optional)
Step 1: Prepping the Canvas
-
Select your board:
Look for a piece of wood that has some character. A board with a ‘live edge’ or rough bark texture on one side adds a lot to the rustic feel of the final piece. -
Sand the surface:
Using 120-grit sandpaper, smooth down the main face of the board where you will be painting. You want a relatively smooth surface so your brush glides easily, but don’t sand away all the imperfections. -
Refine the finish:
Follow up with 220-grit sandpaper for a smoother finish. Wipe away the dust thoroughly with a slightly damp cloth or tack cloth before moving to paint.
Paint drying too fast?
Wood absorbs moisture quickly. If your gradient is streaky, mist the wood board lightly with water before applying paint to keep the acrylics workable longer.
Step 2: Creating the Sunset Gradient
-
Start with orange:
Load your wide flat brush with bright orange paint. Apply this color to the top one-third of the board, brushing horizontally with long, smooth strokes. -
Add the magenta:
Without cleaning your brush, pick up the deep magenta or berry color. Start painting the bottom one-third of the board, working your way up. -
Blend the middle:
Where the orange and magenta meet in the middle section, use horizontal back-and-forth strokes to blend them. If the paint is too dry, dip your brush tip in a tiny bit of water to encourage mixing. -
Smooth the transition:
Continue working the middle area until you have a seamless transition where the colors merge into a warm coral-red hue. I find that working quickly while the paint is still wet creates the softest gradient. -
Let it dry:
Allow the background gradient to dry completely. This is crucial because wet background paint will muddy your crisp black silhouettes.
Pro Tip: Realistic texture
For the pine needles, used an old, splayed-out brush instead of a perfect new one. The messy bristles naturally create that jagged, organic foliage look effortlessly.
Step 3: Painting the Silhouettes
-
Establish the ground line:
Using the medium round brush and black paint, create an uneven, slightly bumpy horizon line about an inch from the bottom edge. It shouldn’t be perfectly straight; mimicking uneven terrain looks more natural. -
Place the main trunks:
Switch to your smaller brush. Paint vertical lines to represent the trunks of your pine trees. Vary the heights, making the tallest trees slightly offset from the center for a balanced composition. -
Start the branches:
Starting from the top of a trunk, use the fine-liner brush to dab small, irregular horizontal strokes. At the very top, the branches should be tiny and point slightly upward. -
Build the canopy:
As you work your way down the tree, widen your strokes. Pine branches tend to droop slightly, so curve your strokes downward as you get closer to the base. -
Add texture:
Use a tapping motion with the tip of your brush to create the look of needles rather than solid blocks of color. Leave small gaps of the sunset showing through the branches to keep the tree looking airy. -
Vary the density:
Make some trees denser and darker than others. Add a few tiny saplings near the bottom to fill empty spaces and add depth to the forest floor. -
Connect to the ground:
Ensure the base of the trees blends seamlessly into your black ground line. You can add small vertical strokes of grass along the bottom edge for extra detail.
Step 4: Finishing Touches
-
Review and refine:
Step back and look at your board. If any branch looks too sparse, lightly dab a little more black paint to fill it in. -
Seal the wood:
Once the black paint is fully dry (give it at least an hour), spray the entire painted surface with a clear matte varnish to protect the artwork and keep the colors vibrant.
Display your new artwork on a shelf or mantel to bring a permanent sunset into your home


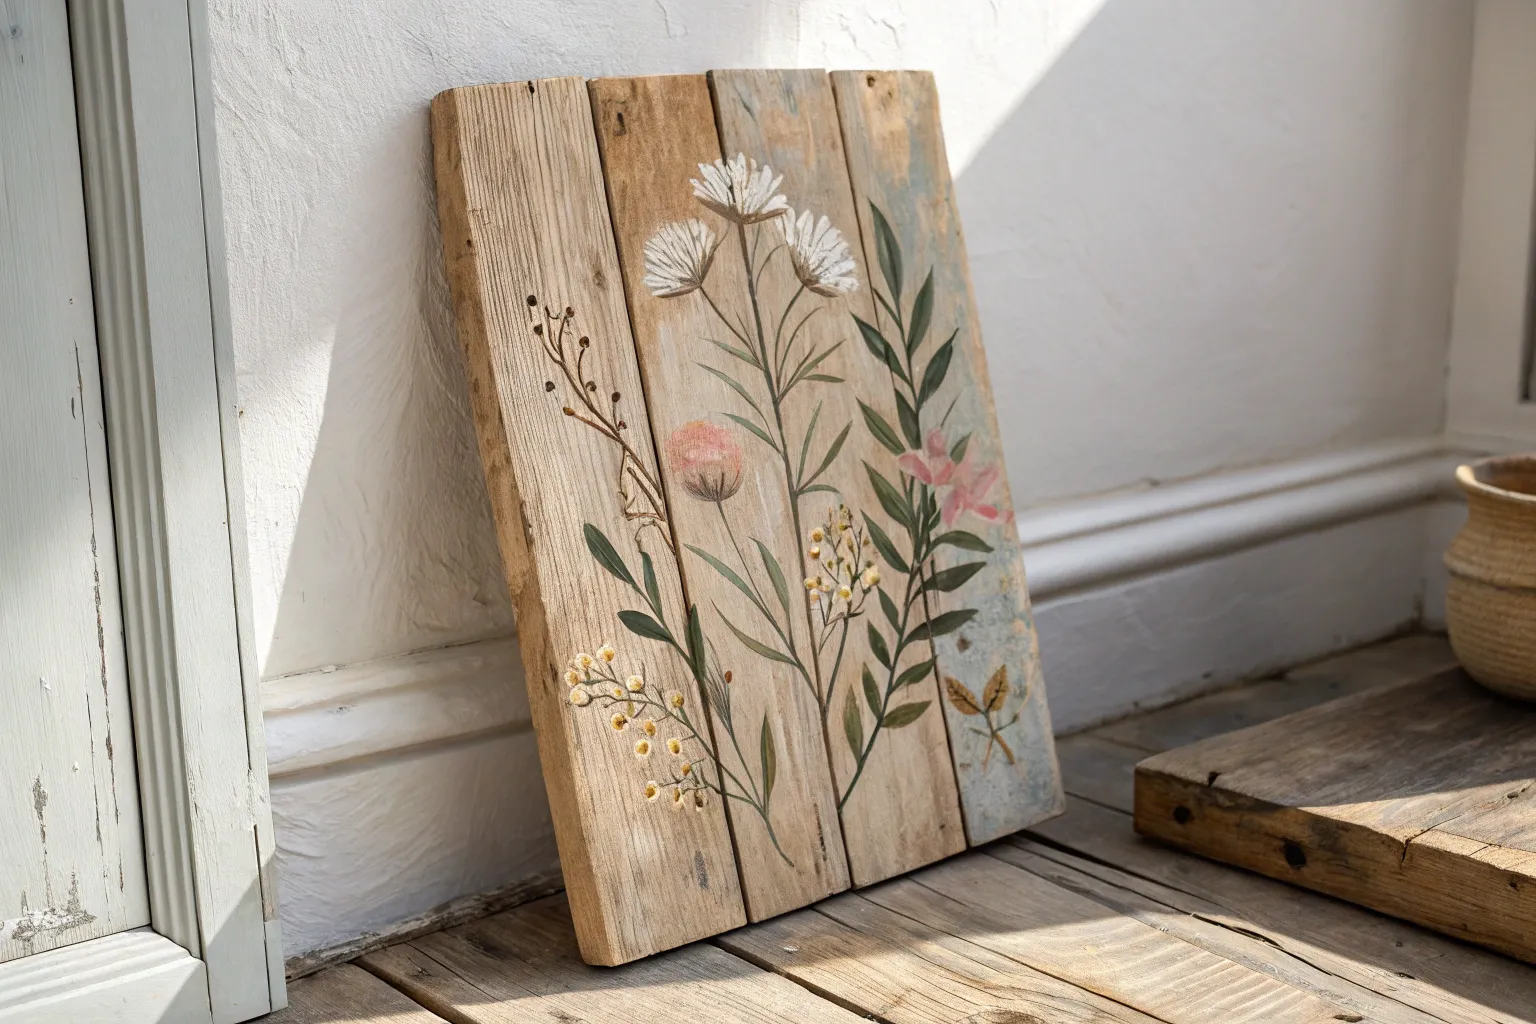
Cozy Winter Scene on Weathered Boards
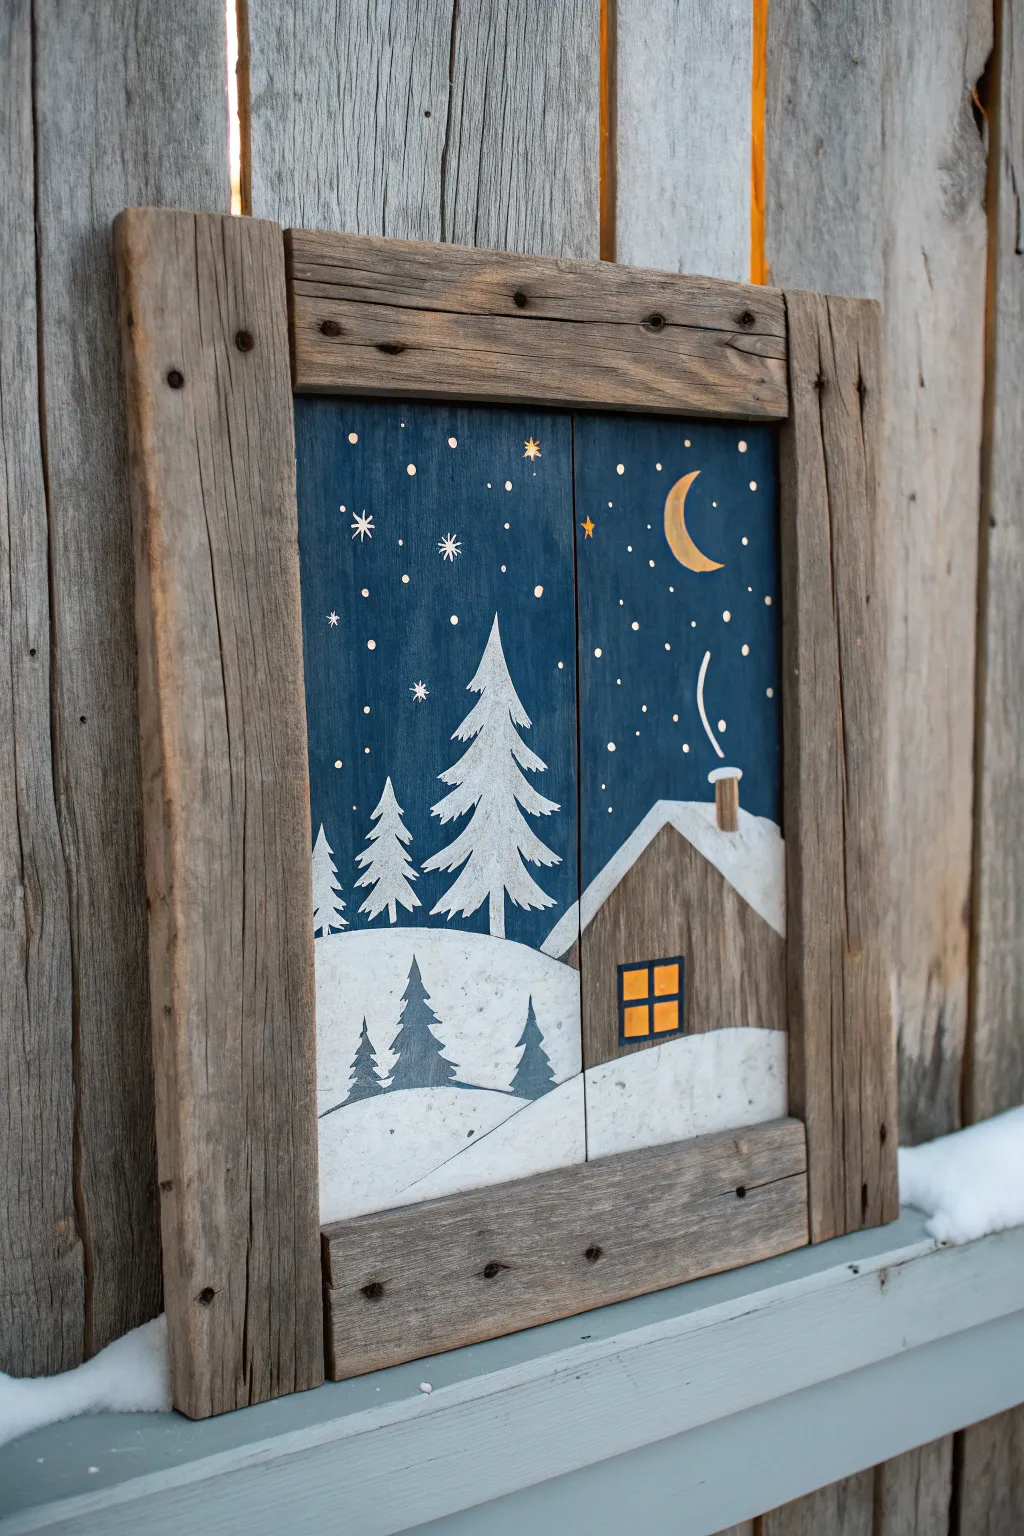
Capture the stillness of a snowy evening with this charming painting on reclaimed wood. The weathered texture of the boards adds instant character to this peaceful cabin scene, making it a perfect cozy addition to your winter decor.
Detailed Instructions
Materials
- Two reclaimed wood planks (painted surface)
- Four weathered wood strips (frame)
- Acrylic paints (navy blue, white, brown, yellow, gold)
- Wood glue and clamps
- Flat shader brushes (medium and small)
- Fine liner brush
- Sandpaper (medium grit)
- Pencil for sketching
- Matte clear sealant spray
Step 1: Preparing the Canvas
-
Select your wood:
Choose two vertical planks for your painting surface. They should have some grain texture but be smooth enough to take paint. Join them side-by-side using wood glue and clamps to create a square panel. -
Build the frame:
Cut four rustic, weathered wood strips to frame your central panel. Attach them using small nails or wood glue, overlapping the corners for a farmhouse look. Ensure the frame sits slightly forward from the painting surface. -
Light sanding:
Give the central painting area a quick pass with sandpaper to remove loose splinters, but don’t over-sand; you want to keep that rustic character visible under the paint.
Starry Night Tip
For a natural starry sky, dip an old toothbrush in watered-down white paint and flick the bristles with your thumb over the blue area.
Step 2: Painting the Background
-
Apply the night sky:
Using a wide flat brush, paint the upper two-thirds of the board in a deep navy blue. Don’t worry about perfect opacity; letting a little wood grain show through adds depth. -
Create the snowy ground:
Paint the bottom third of the board with a warm white. Create a gentle, rolling hill shape where the white meets the blue sky. -
Dry break:
Allow these base layers to dry completely before moving on to avoid muddying your colors.
Step 3: Adding the Main Elements
-
Sketch the layout:
Lightly sketch the position of the cabin on the right side and the large trees on the left with a pencil. -
Paint the cabin structure:
Mix a diluted brown acrylic to paint the cabin walls. Apply it thinly so it looks like stained wood rather than solid plastic. -
Snowy roof:
Add a thick layer of white paint to the roof of the cabin, letting it slightly overhang the eaves to mimic heavy snowfall. -
Chimney details:
Paint a small rectangle for the chimney and add a thin, curling line of white smoke rising into the sky using your liner brush. -
Large trees:
Using white paint and a small flat brush, create the large evergreen trees on the left. Use downward strokes starting from the tip to create the boughs. -
Foreground trees:
Paint three smaller silhouettes of pine trees in the snowy foreground using a dark grey-blue to create perspective.
Add Dimension
Mix texture paste or fine sand into your white paint for the snow drifts and roof to give the artwork real tactile 3D volume.
Step 4: Fine Details & Highlights
-
Window glow:
Paint a small square window on the cabin using bright yellow/orange paint to suggest warmth inside. -
Window panes:
Once the yellow is dry, use your finest liner brush and dark brown paint to create the cross-pane grid on the window. -
Moon and stars:
Paint a crescent moon in the upper right corner using gold or yellow ochre. Dot the sky with tiny specks of white and gold for stars. -
Star accents:
Select a few stars to highlight by drawing tiny crosses or sparkles with a fine brush for extra twinkle. -
Final touches:
Add subtle grey shading under the trees and cabin in the snow to ground the objects. -
Seal it:
Once fully dry, spray the entire piece with a matte clear coat to protect the paint and seal the wood.
Hang this rustic piece near a fireplace or entryway to welcome guests with winter warmth
BRUSH GUIDE
The Right Brush for Every Stroke
From clean lines to bold texture — master brush choice, stroke control, and essential techniques.
Explore the Full Guide
Ombre Sky With Splatter Stars on Wood
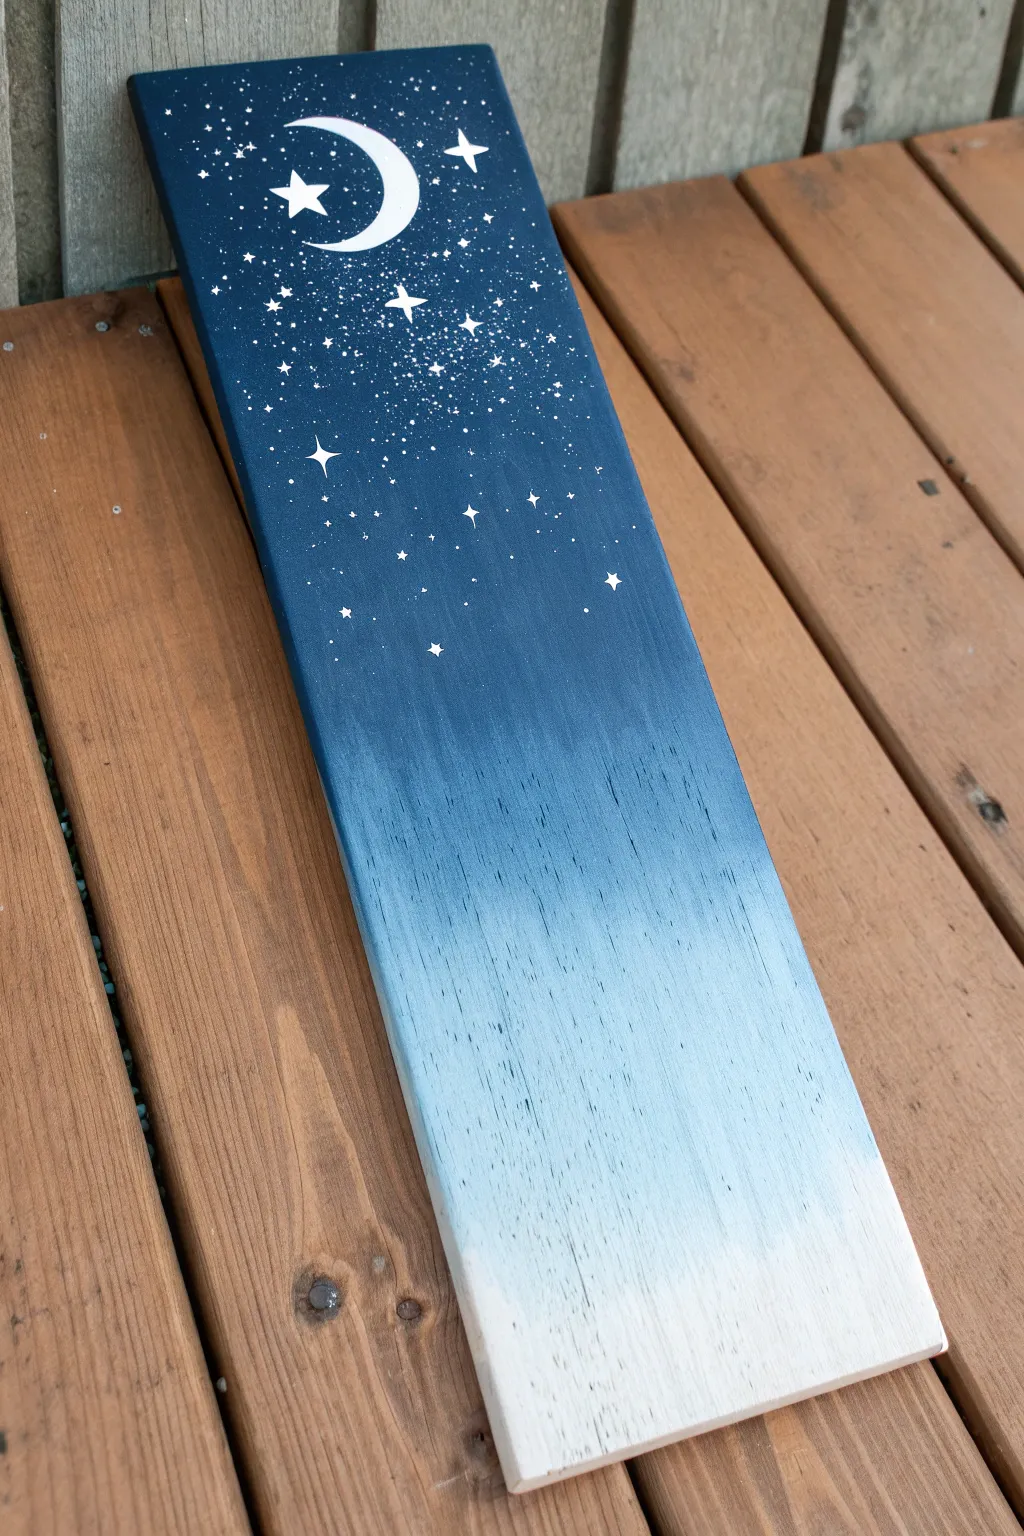
Transform a simple plank of wood into a breathtaking slice of the night sky with this beginner-friendly ombre technique. The gradual fade from deep midnight blue to soft white creates a dreamy backdrop for hand-painted constellations and a glowing crescent moon.
Detailed Instructions
Materials
- Rectangular wood board (sanded smooth)
- Acrylic paint: Navy Blue or Midnight Blue
- Acrylic paint: White
- Acrylic paint: Medium Blue (optional, for smoother transition)
- Wide flat paintbrush or foam brush
- Small round detail brush
- Old toothbrush or stiff bristle brush
- Palette or paper plate
- Water cup and paper towels
- Pencil or chalk (optional)
Step 1: Creating the Ombre Background
-
Prepare the wood:
Begin by ensuring your wooden board is clean and free of dust. If the surface feels rough, give it a light sanding with fine-grit sandpaper so your brush strokes will glide smoothly. -
Apply the top color:
Squeeze a generous mesmerizing amount of midnight blue paint onto your palette. Using your wide flat brush, paint the top third of the board with solid, horizontal strokes, ensuring full coverage on the wood grain. -
Apply the bottom color:
Clean your brush thoroughly. Apply pure white paint to the bottom third of the board. Paint upwards towards the middle, keeping the strokes horizontal and even. -
Mix the mid-tone:
On your palette, mix some of the midnight blue with the white paint to create a medium blue transition shade. -
Blend the middle section:
Apply this mixed medium blue to the center third of the board, filling in the gap between the dark top and the white bottom. -
Create the gradient:
While the paint is still wet (this is crucial), use your brush to blend the seams where the colors meet. Use long, sweeping horizontal strokes. -
Smooth the transition:
Work back and forth over the transition zones. Drag a little dark paint down into the medium section, and drag a little white paint up into the medium section until the harsh lines disappear. -
Let it dry:
Allow the board to dry completely. If the wood grain is showing through too much for your liking, repeat the ombre steps for a second coat.
Paint drying too fast?
If the paint dries before you can blend the ombre, keep a spray bottle of water handy. A very light misting over the board keeps the acrylics workable longer.
Step 2: Painting the Celestial Details
-
Outline the moon:
Once the background is bone-dry, use a pencil or piece of chalk to lightly sketch a crescent moon shape in the upper, darkest section of the board. -
Fill in the moon:
Using your small round detail brush and white paint, carefully fill in the moon shape. You may need two coats to ensure the bright white stands out against the dark blue background. -
Paint large stars:
Identify a few spots near the moon for your prominent stars. Use the detail brush to paint small four-pointed star shapes (like a cross with tapered ends) or simple five-pointed stars. -
Add medium stars:
Dot a few slightly larger circles or tiny diamonds around the upper half of the board to represent medium-sized stars. -
Prepare the splatter:
Dilute a small amount of white paint with a few drops of water until it reaches a creamy, ink-like consistency. -
Test the splatter:
Dip an old toothbrush or stiff bristle brush into the watered-down paint. Test the splatter on a piece of scrap paper by running your thumb across the bristles to flick the paint. -
Create the galaxy:
Hold the brush over the dark blue section of your board. Flick the bristles to spray a fine mist of tiny stars. Concentrate the splatter near the moon and let it fade out as you move down the board. -
Final touches:
Inspect your sky. If any splatter drops look too large or oddly shaped, you can carefully dab them up with a wet Q-tip or paint over them with a touch of blue once dry.
Pro Tip: Masking Magic
Cut a moon shape out of masking tape or adhesive vinyl and stick it on before painting the sky. Peel it off at the end for crisp edges without free-handing.
Hang this serene piece in a bedroom or nursery to add a touch of starlight to your space


Have a question or want to share your own experience? I'd love to hear from you in the comments below!