Spring is basically nature’s permission slip to go brighter, softer, and more playful with your chalk art. I love using this season as an excuse to mix hand-lettered quotes with quick botanical doodles that feel fresh and happy.
Hello Spring Lettering With Floral Corners
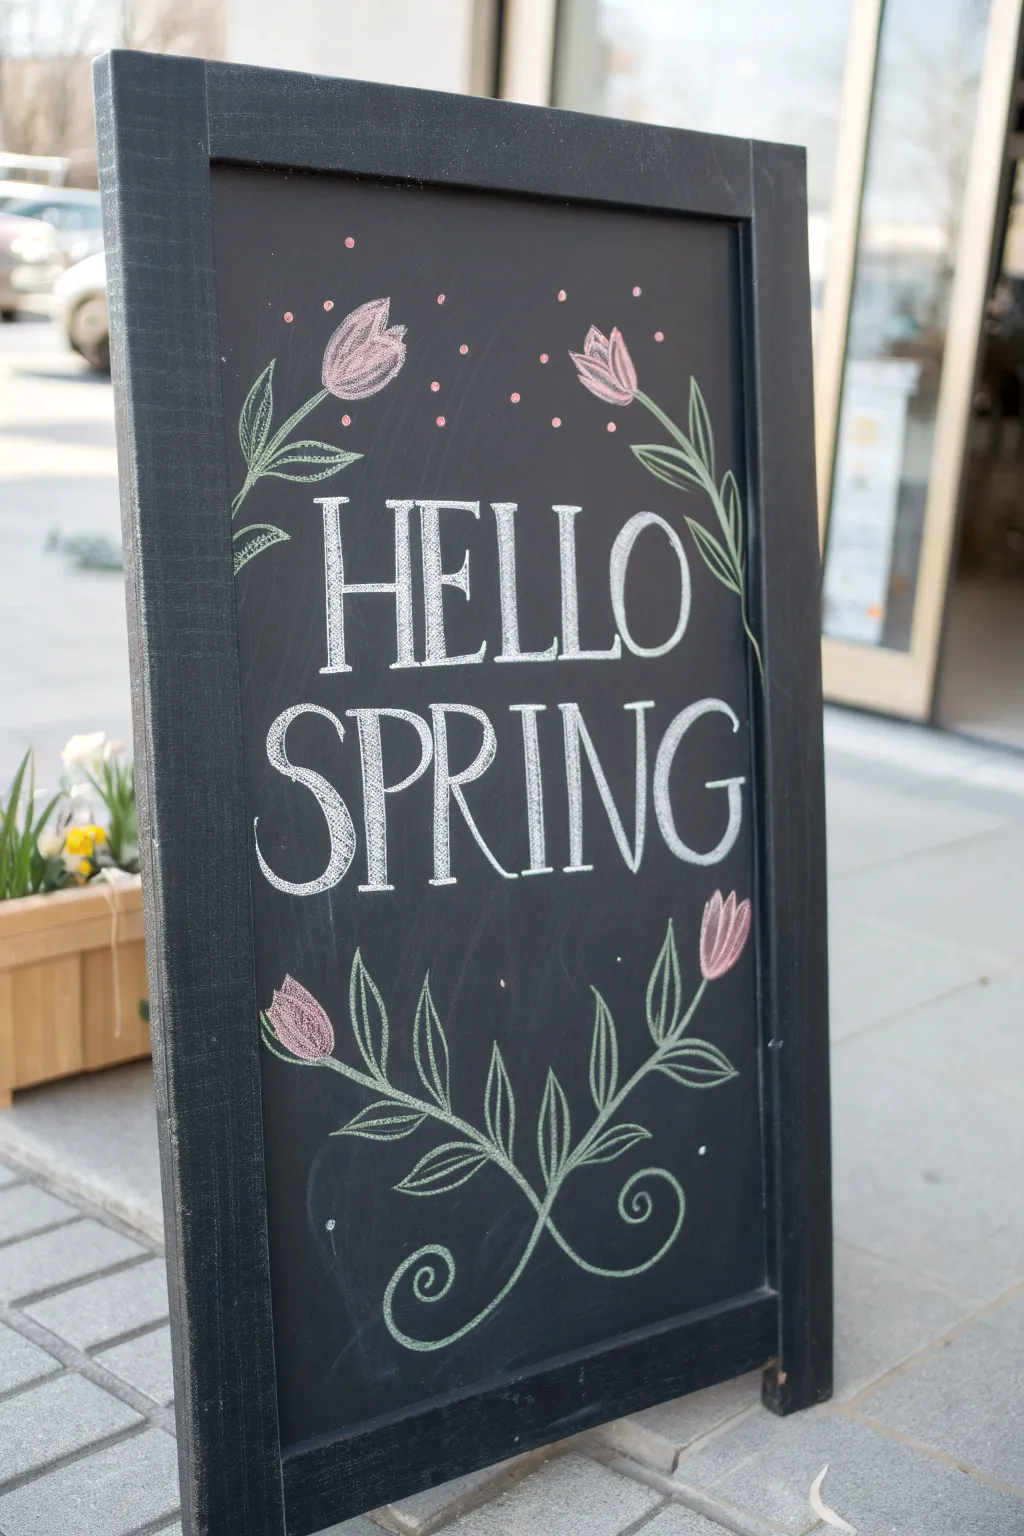
Welcome the changing seasons with this elegant yet approachable chalkboard design featuring classic serif typography and delicate pink tulip accents. The contrast of the bright white lettering against the dark slate, framed by soft floral corners, creates a fresh and inviting entryway display.
Step-by-Step
Materials
- Large A-frame chalkboard or wall-mounted blackboard
- White liquid chalk marker (medium tip)
- White stick chalk (for sketching)
- Pink chalk marker or pastel chalk (soft pink shade)
- Green chalk marker or pastel chalk (muted sage green shade)
- Damp microfiber cloth
- Cotton swabs
- Ruler or level
- Pencil sharpener (optional, for sharpening stick chalk)
Step 1: Planning and Layout
-
Clean the surface:
Begin with a completely clean slate. Wipe down your chalkboard with a damp microfiber cloth to remove any ghosting from previous designs. Let it dry completely preventing any ink bleeding. -
Mark your guidelines:
Using a ruler and a piece of standard white stick chalk, lightly draw two horizontal lines across the center of the board. These will serve as the baseline and cap height for your text. Leave generous space at the top and bottom for the floral elements. -
Sketch the skeleton:
Lightly sketch the words ‘HELLO’ on the top line and ‘SPRING’ on the bottom line using the stick chalk. Focus on centering the words and keeping the letter widths relatively consistent. Don’t press hard; these are just guides.
Seasoning the Board
Before starting, rub the side of a chalk stick over the whole board and erase. This ‘seasoning’ prevents ghost images from burning in permanently.
Step 2: Lettering
-
Draw the main strokes:
Switch to your white liquid chalk marker. Trace over your skeleton letters, creating simple, single-width lines first. Ensure the ‘S’ in Spring has a nice, balanced curve. -
Thicken the downstrokes:
To create the serif look, identify the downstrokes (the parts of the letter where your pen would naturally move downward). Add a second line next to these strokes to thicken them, then fill in the space between. Keep horizontal strokes thin. -
Add serif feet:
Add small horizontal lines (serifs) to the tops and bottoms of your vertical strokes. Keep them sharp and symmetrical. For curved letters like ‘S’ and ‘G’, add a subtle flare at the terminals. -
Review and touch up:
Step back to look at the text as a whole. If any letters look uneven, use a damp cotton swab to tidy up the edges while the ink is still workable.
Fixing Smudges
Don’t wipe wet marker mistakes! Let the ink dry completely, then chip it off with a dry Q-tip. It comes off cleaner than smearing wet ink.
Step 3: Floral Accents
-
Position the top flowers:
Using your pink chalk (marker or pastel), draw two tulip bulb shapes in the upper section—one facing left, one facing right. They should look like rounded teardrops with a small ‘V’ notch at the top center. -
Detail the petals:
Inside the pink bulb shape, draw a faint line or shading to suggest overlapping petals. If using pastels, smudge slightly with your finger for a soft, texture-rich look. -
Add the stems:
With the green chalk marker, draw thin, curved stems extending from the base of the flowers downwards and outwards toward the edges of the board. -
Draw the top leaves:
Add slender, pointed leaves branching off the stems. Draw the outline first, then fill them in with diagonal hatching strokes to mimic leaf veins. -
Create the bottom arrangement:
For the bottom design, draw two long intertwined stems that cross in the middle, creating a wide ‘X’ shape with curled, decorative ends at the bottom. -
Add bottom blooms:
Place a pink tulip bud at the top end of each of these crossed stems, mirroring the style of the top flowers but slightly smaller. -
Fill in lower foliage:
Draw multiple leaves growing upward along the crossed stems. Vary the sizes slightly—larger leaves near the bottom, smaller ones near the flowers.
Step 4: Final Details
-
Add decorative dots:
Take your pink chalk and gently press unrelated dots around the top floral cluster to create a magical, pollen-like effect. Vary the pressure for different dot sizes. -
Define the veins:
If your leaves look too flat, use the white marker to add a very thin, subtle center line to a few leaves for highlight and dimension. -
Clean up guidelines:
Once you are certain all ink is totally dry, use a dry cotton swab or a very slightly damp cloth corner to carefully erase the initial stick chalk guidelines you drew in the first phase.
Place your finished sign by the door or in the garden to officially welcome the new season


Daffodil Cluster With Sunny Yellow Pops
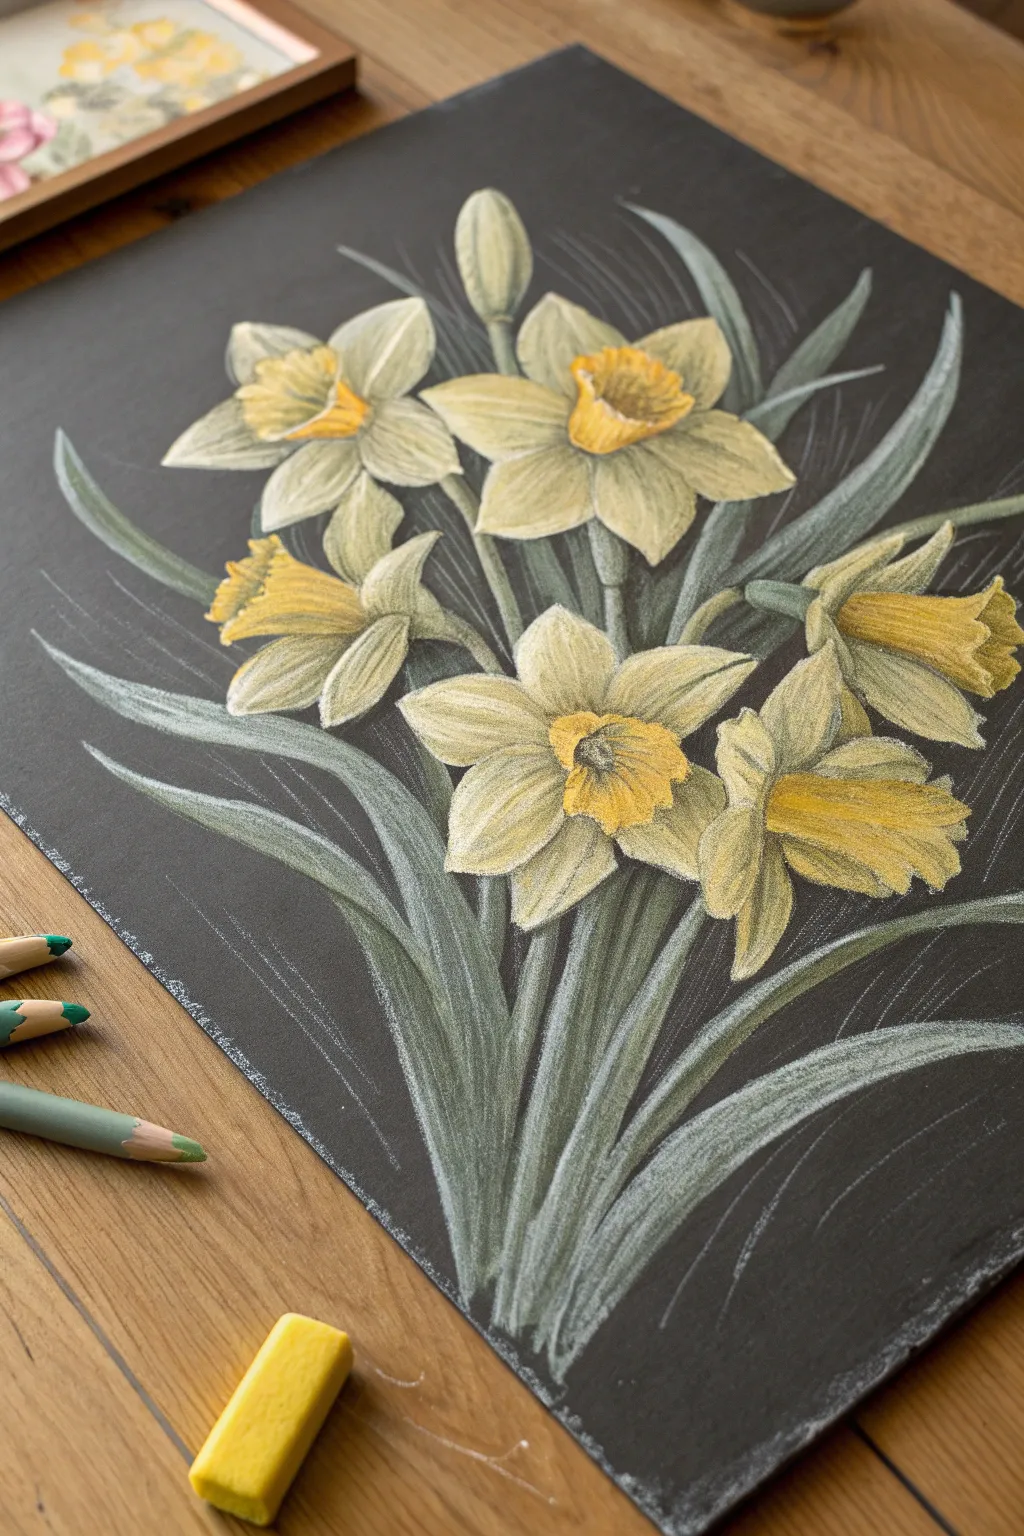
Capture the essence of spring with this striking chalk art piece featuring a vibrant cluster of daffodils. The dark background makes the sunny yellows and soft greens pop with dramatic contrast, creating a sophisticated botanical look.
How-To Guide
Materials
- Black textured paper, chalkboard, or slate surface
- Soft chalk pastels (white, lemon yellow, golden yellow, ochre, pale green, olive green, dark green)
- Pastel pencils (white, dark green, yellow) for detailing
- Blending stump (tortillon) or cotton swabs
- Kneadable eraser
- Workable fixative spray
Step 1: Setting the Composition
-
Lightly sketch the layout:
Using a white pastel pencil, very faintly outline the positions of the flower heads. Aim for a natural, slightly asymmetrical cluster with about five open blooms and one closed bud at the top. -
Map out the stems:
Sketch long, sweeping lines starting from the base of the paper, leading up to each flower head. Ensure they curve gently to mimic the weight of the blooms. -
Block in leaf shapes:
Draw long, slender leaves that interweave with the stems. Some should curve outwards, while others stand straighter, filling the negative space between the flowers.
Step 2: Layering the Petals
-
Base coat fitting:
Fill in the six petals of each daffodil using a creamy white or very pale yellow soft pastel. Apply the chalk lightly, allowing some of the black paper texture to show through for depth. -
Define the trumpets:
For the central trumpet (corona) of each flower, apply a base of golden yellow. Keep the edges slightly rough to mimic the frilled texture typical of daffodils. -
Add first shadows:
Use a light ochre or subtle grey to shade the base of the petals where they meet the trumpet. This separates the petals and adds dimension. -
Highlight the tips:
Go back over the tips and outer edges of the white petals with a brighter, opaque white chalk. This creates a crisp contrast against the dark background.
Clean Hands
Keep a damp towel nearby to wipe your fingers between colors. Chalk dust transfers easily, and you don’t want to muddy your crisp yellow petals with dark green residue.
Step 3: Detailing the Centers
-
Deepen the trumpet color:
Layer a richer orange or dark yellow into the depths of the trumpet cups. I find this creates that necessary ‘cone’ shape effect effectively. -
Create the frilled edge:
Using a sharp yellow pastel pencil, draw tiny, jagged lines around the rim of the trumpet to simulate the ruffled edges. -
Add the stamen:
Place a small dot of pale green or yellow-green right in the center of the darkest part of the trumpet to suggest the stamen.
Muddy Colors?
If your yellows turn green while layering over the blueish stems, spray a light coat of workable fixative first. Let it dry, then apply the yellow layer on top.
Step 4: Realistic Greenery
-
Base green layer:
Fill the stems and leaves with a pale olive green pastel. Apply the strokes in the direction of growth (upwards) to maintain texture. -
Add structural shadows:
On one side of each stem and leaf, run a line of dark green to create a cylindrical form. Blend this gently into the lighter green using your finger or a tortillon. -
Cool highlights:
Apply a touch of pale blue-green or white to the illuminated side of the leaves. This gives them a slightly waxy, realistic finish. -
Define the intersection:
Where the stems enter the flower heads (the spathe), use a lighter green to show the papery texture of the bud casing.
Step 5: Final Touches
-
Refine edges:
Use a black pastel pencil to tidy up any stray chalk dust around the flowers, sharpening the silhouette against the background. -
Add subtle background movement:
Very lightly sketch faint, wispy white lines behind the flowers, mimicking tall grass or wind movement. Keep these extremely subtle to avoid distracting from the main subject. -
Intensify contrast:
Verify your brightest highlights. If the white petals have faded during blending, re-apply a heavy stroke of white on the tips for that final pop. -
Seal the artwork:
Gently spray a workable fixative over the piece from a distance to prevent the chalk from smudging, preserving your spring masterpiece.
Now step back and admire how the bright blooms seem to glow against the dark surface


April Showers Umbrella and Raindrops

Brighten up your chalkboard with this striking, geometrically patterned umbrella that pops against a dark background. Using vibrant orange and teal pastels alongside crisp white lines creates a folk-art aesthetic that turns a gloomy rainy day motif into a cheerful spring declaration.
Step-by-Step Tutorial
Materials
- Large chalkboard or chalkboard wall
- Chalkola markers or similar liquid chalk markers (White, Teal, Orange, Yellow)
- Standard dry chalk (white) for sketching
- Damp cloth or microfiber towel
- Cotton swabs (Q-tips) for corrections
- Ruler (optional)
Step 1: Sketching the Structure
-
Outline the handle:
Begin near the bottom third of your board by drawing a simple ‘J’ shape for the umbrella handle using your standard white dry chalk. Keep the pressure light so it’s easy to adjust. -
Draw the canopy curve:
At the top of your straight handle line, sketch a large, wide arch. This will be the top of your umbrella canopy. -
Add the ribs:
From the very top center point of your arch (the ferrule), draw four curved lines radiating downward to form the ribs of the umbrella. The two outer lines should curve outward, while the center line stays fairly straight. -
Connect the bottom edge:
Connect the bottom tips of these rib lines with slightly curved segments to create the scalloped bottom edge of the umbrella. -
Commit to ink:
Once you are happy with the shape, go over your sketch with a white liquid chalk marker. Use a bold tip if possible for the handle and ribs to make the structure stand out.
Step 2: Detailed Patterning
-
Divide the panels:
Inside each triangular panel of the umbrella, you’ll want to create horizontal bands. I like to visualize dividing each section into three or four distinct horizontal stripes. -
Create the top band:
In the top band of each panel, fill the space with orange liquid chalk. Once dry, add small white dashes or ‘V’ shapes for texture. -
Add the teal accents:
Below the orange band, draw a slightly thinner stripe using teal chalk marker. Add small circles or dots inside this teal stripe for a beaded look. -
Draw the central triangles:
This is the main focal point of the pattern. In the largest middle section, draw a prominent triangle shape with thick white lines. Inside that, draw smaller triangles. -
Fill the geometric shapes:
Color in parts of your central triangles with orange and add small yellow or gold accents to give it that detailed, folk-art feel. -
Add the zigzag border:
For the bottom-most band near the rim of the umbrella, create a running zigzag or chevron pattern in white. This frames the design beautifully. -
Refine the ribs:
Go back over the main rib lines with your white marker to ensure they sit ‘on top’ of your colorful patterns. A second coat here makes everything look crisp.
Clean Lines Secret
Wait for the colored chalk ink to be 100% dry before drawing white lines over it. If the color is still wet, the white marker will pick up the pigment and become muddy.
Step 3: Atmospheric Elements
-
Sketch the clouds:
Near the top of the board, draw three distinct cloud shapes. Keep the bottoms flat and the tops remarkably fluffy and rounded. -
Color the clouds:
Fill the clouds solid with your teal chalk marker. You might need to stroke in one direction to keep the texture uniform. -
Outline the clouds:
Once the teal ink is fully dry, trace the outer edge of the clouds with a thin white outline to make them pop against the black background. -
Create the rain:
Draw raindrops falling all around the umbrella. Vary the sizes—some large, some small teardrop shapes. -
Add raindrop details:
Instead of filling the raindrops solidly, sketch a small vertical line or loop inside each one. This stylistic choice keeps the drawing feeling light and airy. -
Include surface splashes:
Add a few half-circle ‘splash’ shapes near the bottom of the board or bouncing off the top of the umbrella to show movement. -
Final clean up:
Use a damp cotton swab to erase any lingering dry chalk sketch lines or accidental smudges for a professional finish.
Make It 3D
Add a tiny highlight of white ink to the top left of every teal raindrop and the top curve of the clouds. This simple reflection trick instantly adds dimension.
Step back and admire how the vibrant colors transform your chalkboard into a cozy spring scene


Bird on a Blossom Branch
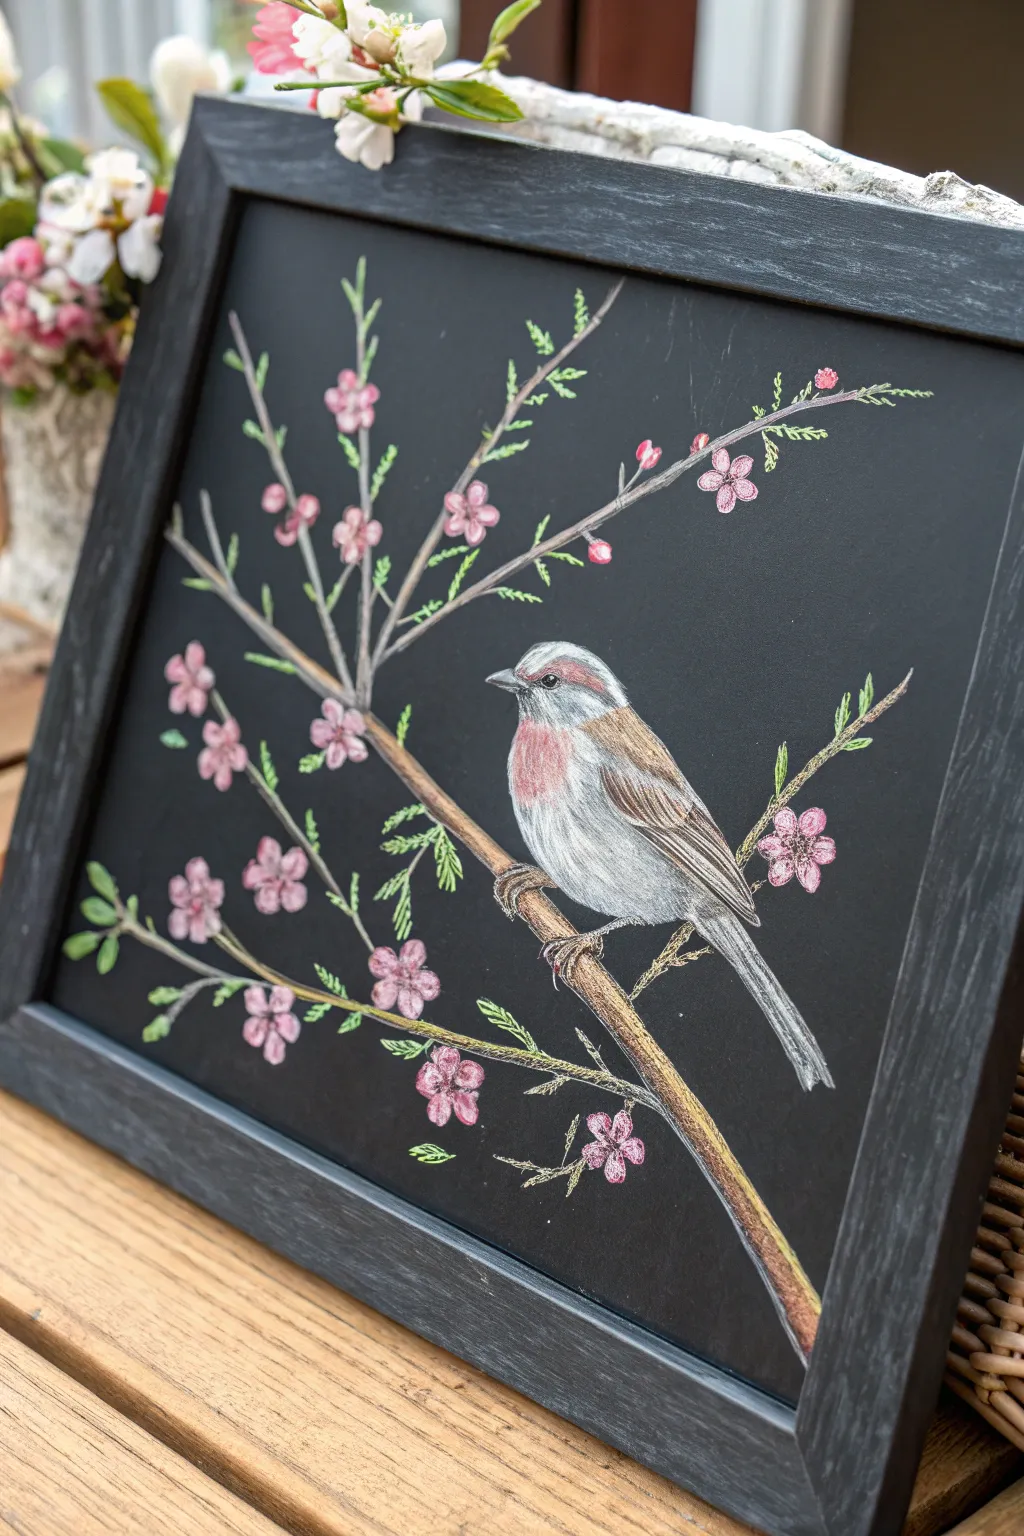
Capture the delicate beauty of spring by sketching a sparrow resting on a flowering branch. This project uses precise chalk pencil techniques on a dark surface to create a stunning contrast that makes the pink blossoms and the bird’s feathers pop.
How-To Guide
Materials
- Framed chalkboard (smooth surface preferred)
- Chalk markers or chalk pastels (white, brown, pink, green, light blue/grey)
- Chalk pencils (for fine details)
- Microfiber cloth
- Cotton swabs
- Pencil sharpener
- Reference photo of a sparrow
Step 1: Drawing the Branch Structure
-
Establish the main line:
Begin by drawing a thick, diagonal line swooping from the bottom right corner up toward the center left. This will serve as the main perch for your bird. -
Add secondary branches:
From the endpoint of your main branch, extend three to four thinner lines fanning upward and outward to create the reaching twigs. -
Thicken and texture:
Go back over your main branch with a brown chalk pencil or pastel, adding uneven pressure to mimic the rough texture of bark. I like to layer a little white or light grey on top to create highlights. -
Create smaller twigs:
Sketch tiny offshoots along the main branch and secondary stems where you plan to place leaves and flowers later.
Chalk Pencil Polish
Keep a sharpener handy! A freshly sharpened chalk pencil is crucial for drawing the tiny bird claws and intricate eye details without smudging.
Step 2: Sketching the Sparrow
-
Outline the body shape:
Lightly sketch a teardrop shape sitting atop the main branch, tilted slightly diagonally to represent the bird’s body. -
Define the head:
Add a smaller, rounded circle overlapping the top of the teardrop for the head, creating a smooth transition into the neck. -
Draw the tail feathers:
Extend a long, rectangular shape pointing downward from the back of the teardrop, tapering it slightly at the end. -
Block in color areas:
Using the side of a white chalk stick or pastel, gently fill in the belly and chest area. Don’t press too hard; you want a soft, feathery look. -
Add wing details:
Use a brown chalk pencil to draw the folded wing shape along the bird’s side. Sketch swift, diagonal lines inside the wing shape to suggest layered feathers. -
Detail the face:
With a fine-point white or light grey pencil, draw the markings around the eye and beak. Add a tiny triangle for the beak and a small dot for the eye. -
Layer the chest plumage:
Add a touch of reddish-brown or pink chalk to the upper chest area, blending it softly into the white belly with your finger or a cotton swab.
Seasonal Switch
Swap the pink blossoms for red berries and green holly leaves to instantly transform this springtime bird into a festive winter decoration.
Step 3: Adding Blossoms and Greenery
-
Place the flowers:
Scatter groups of five small circles (petals) at the tips of your twigs and along the branches. Use a pink chalk pencil for precision. -
Define the petals:
Fill in your petal circles with soft pink, leaving the centers slightly darker or empty for definition. -
Add flower centers:
Place a tiny dot of dark brown or yellow in the center of each flower cluster to make them look realistic. -
Sketch the leaves:
Using a green chalk pencil, draw small, spiked leaves or needle-like foliage emerging from the thin twigs. -
Add buds:
Draw small, solid pink ovals at the very ends of the thinnest branches to represent unopened flower buds.
Step 4: Final Details
-
Refine the feet:
Draw small, curved lines gripping the branch under the bird’s belly using a sharp brown or black pencil. -
Enhance highlights:
Add bright white streaks to the top of the wing feathers and the tip of the tail to simulate light hitting the bird. -
Clean up:
Use a damp cotton swab to sharpen any smudged edges around the flowers or the bird’s outline.
Hang your framed masterpiece in a sunny spot to welcome the season
BRUSH GUIDE
The Right Brush for Every Stroke
From clean lines to bold texture — master brush choice, stroke control, and essential techniques.
Explore the Full Guide
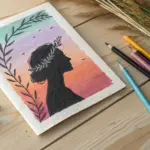
Layered Chalk Blending Sunset Behind Flowers
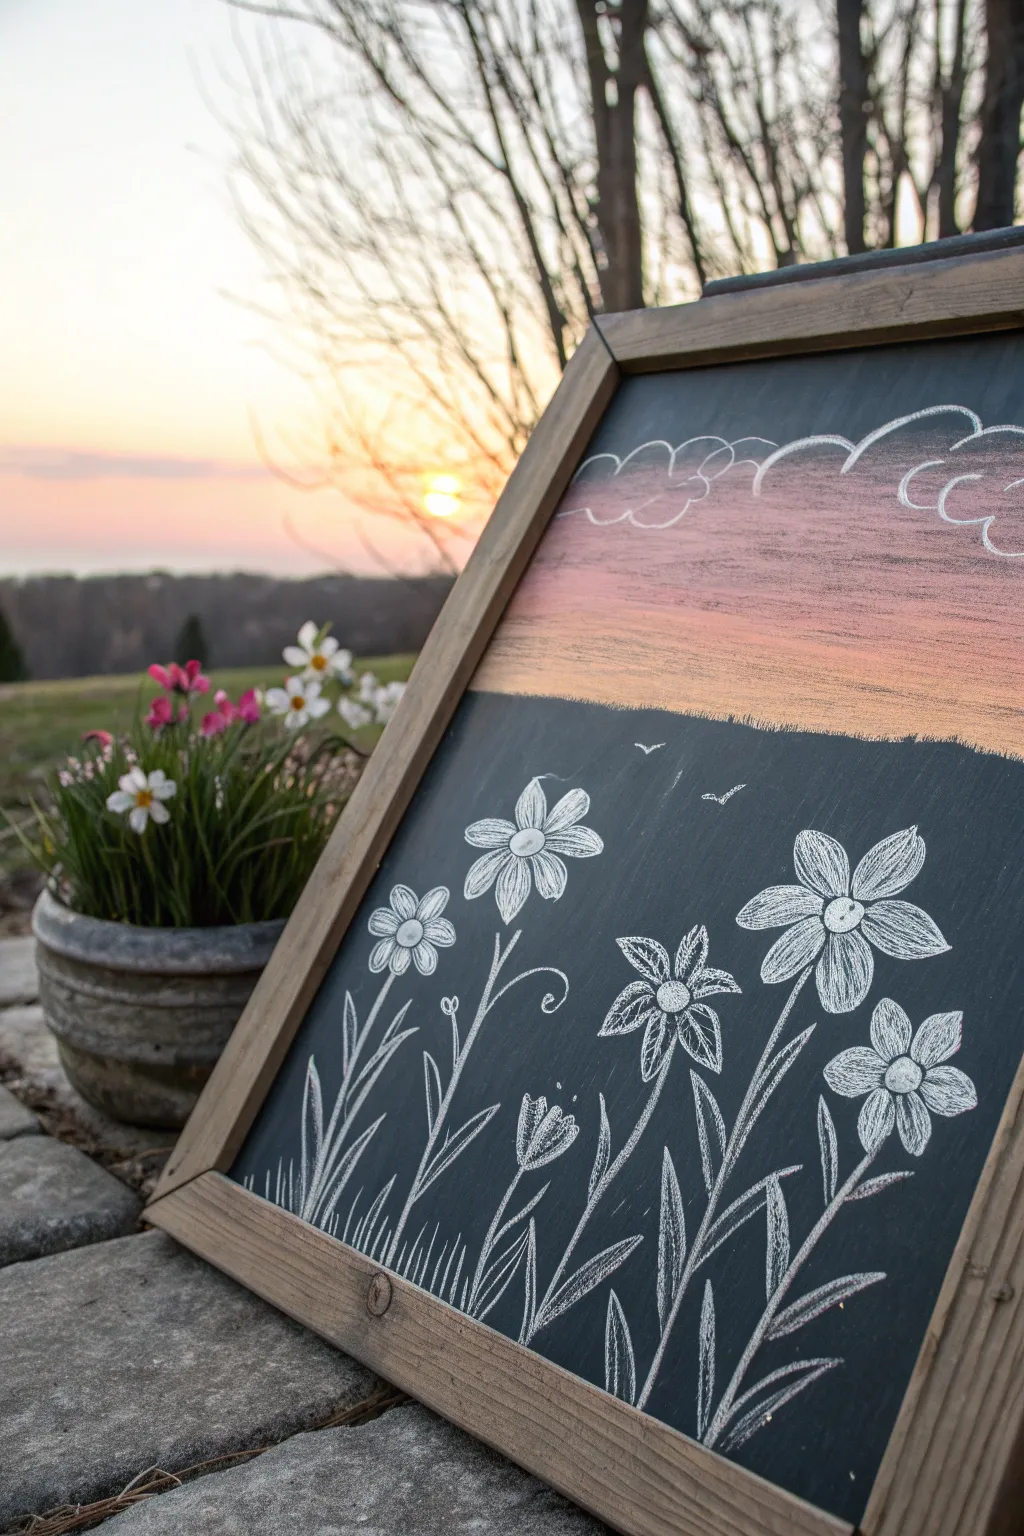
Capture the beauty of dusk with this layered chalkboard art piece. By combining soft, blended gradients for a sunset sky with crisp white floral line work, you create a striking contrast that mimics looking through a meadow at twilight.
Step-by-Step Tutorial
Materials
- Framed chalkboard (medium to large size)
- Soft chalk pastels (white, light pink, dark pink, orange, yellow)
- Standard white stick chalk (sharpened)
- Chalkboard eraser or a soft, dry cloth
- Cotton swabs (Q-tips) or blending stumps
- Paper towels (for cleaning fingers)
Step 1: Setting the Sky
-
Clean the surface:
Begin with a perfectly clean chalkboard. Wipe it down with a damp cloth to remove any old dust, then dry it completely so the new chalk adheres smoothly. -
Mark the horizon:
Visualize where you want your horizon line to be. For this design, aim for just slightly above the halfway mark of the board. You can make a faint tick mark on the side as a guide, but don’t draw the line yet. -
Apply the top layer of clouds:
Using the side of a white soft pastel or chalk stick, lightly scribble a few patches near the very top edge of the board where streaks of clouds might catch the last light. -
Layer the pinks:
Below the white, use the side of a light pink chalk pastel to create a wide horizontal band. Press firmly enough to deposit a good amount of pigment. -
Deepen the sunset:
Switch to a darker pink or magenta shaded pastel. Apply this directly below the light pink, overlapping the two slightly to encourage mixing. -
Add the golden glow:
For the lowest part of the sky (just above your imaginary horizon line), fill the area with orange and yellow chalk. This represents the sun dipping below the earth. -
Blend the gradient:
I like to use my fingers for this step to really warm up the wax and pigment. Smudge the colors horizontally, blending the transitions so there are no harsh stripes, just a smooth fade from pink to orange. -
Define the clouds:
Take a sharpened white chalk stick and draw loose, looping cloud outlines over the blended pink sky. Keep the lines irregular and fluffy for a natural look. -
Clean the horizon:
Use your eraser or a clean cloth to wipe away any chalk dust that fell below your horizon line. You want the bottom half of the board to be stark, clean black.
Clean Lines Trick
To fix mistakes in the black silhouette area without leaving Ghostly smears, use a clean Q-tip dipped in a tiny amount of water for precision erasing.
Step 2: Drawing the Foreground
-
Sharpen your chalk:
The floral details rely on crisp lines. Sharpen your standard white chalk stick to a fine point using a large pencil sharpener or by rubbing it at an angle on concrete. -
Draw the main stems:
Start by drawing long, slightly curved lines rising from the bottom edge of the board. vary their heights and directions—some standing tall, others leaning slightly. -
Add flower centers:
At the top of your stems, draw small circles for the centers of the flowers. Place them at different angles; some facing forward (full circles), some facing upward (ovals). -
Create the petals:
Draw teardrop-shaped petals radiating from the centers. For the daffodils shown, make the petals slightly pointed. Fill the petals with gentle shading or leave them outlines-only for a lighter touch. -
Detail the leaves:
Add long, spear-like leaves coming from the base of the stems. Draw these with quick, confident upward strokes to mimic the look of grass blades. -
Add grass texture:
Fill in the empty spaces along the very bottom edge with short, vertical strokes to represent ground cover and grass. -
Incorporate small details:
Draw a few tiny buds that haven’t opened yet on shorter stems. -
Add silhouette birds:
In the black space between the sky and the flowers, draw two or three tiny ‘v’ shapes to represent birds flying in the distance. -
Final clean up:
Check for any smudges on the black backdrop. Use a slightly damp cotton swab to precision-clean any stray chalk dust that interferes with your high-contrast silhouette.
Level Up: 3D Pop
After drawing the white flower outlines, gently smudge a tiny bit of white chalk inside the petals, leaving the edges crisp. This adds subtle dimension.
Step back and admire how the warm sunset colors make the stark white flowers pop against the dark background
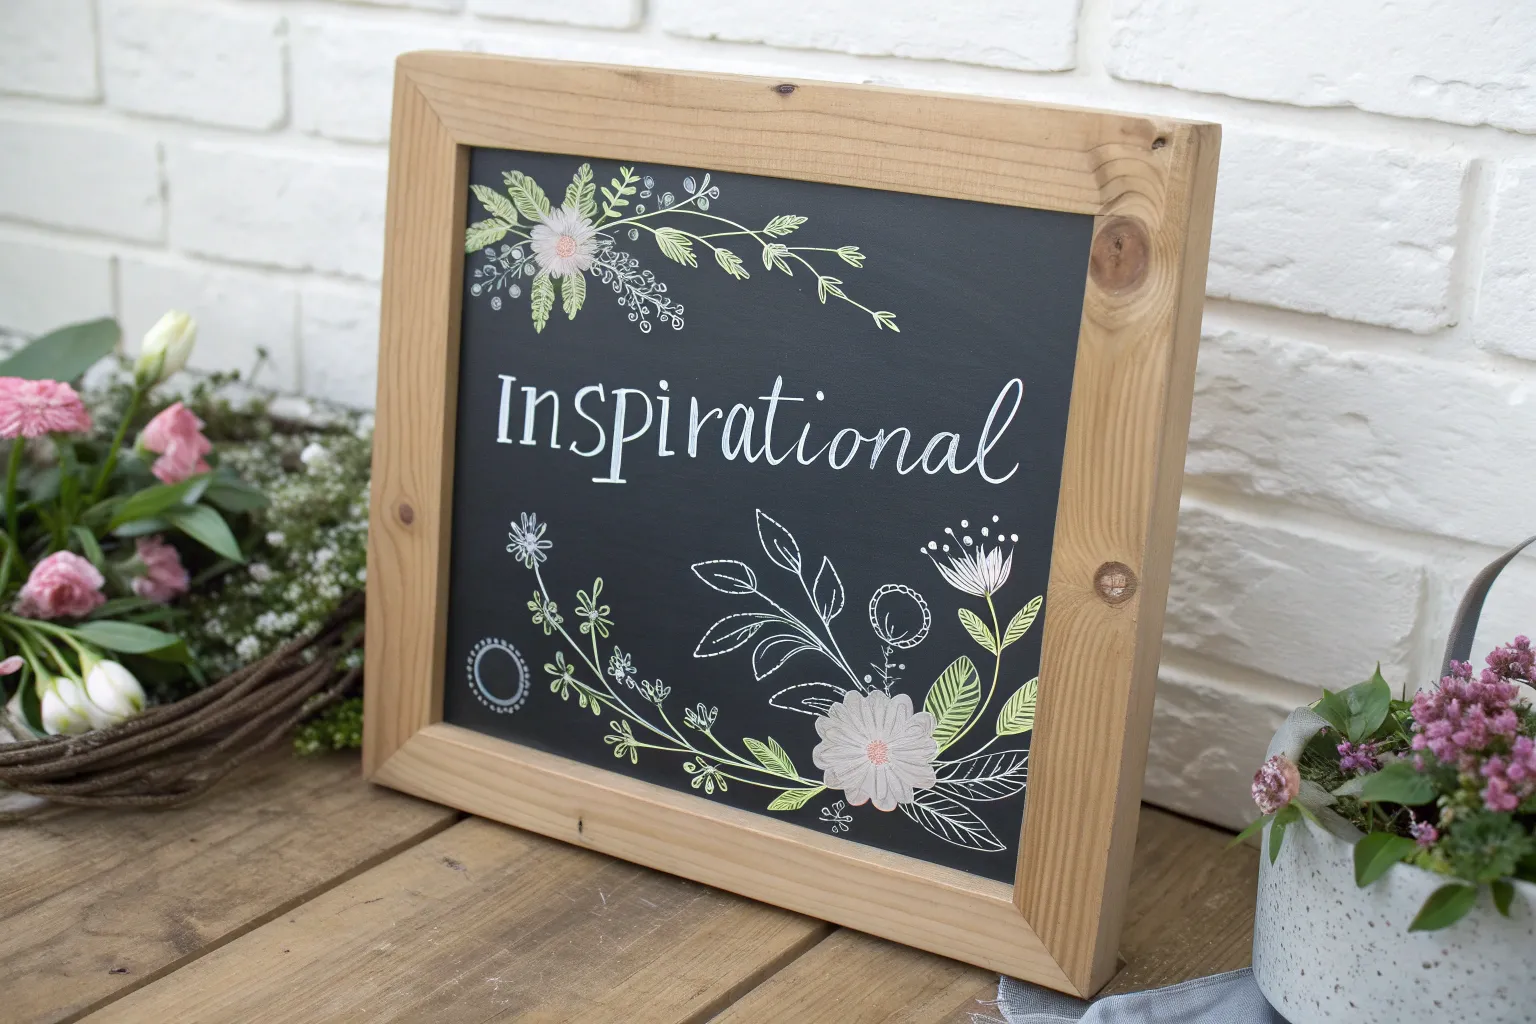
Negative Space Lettering With Leafy Fills
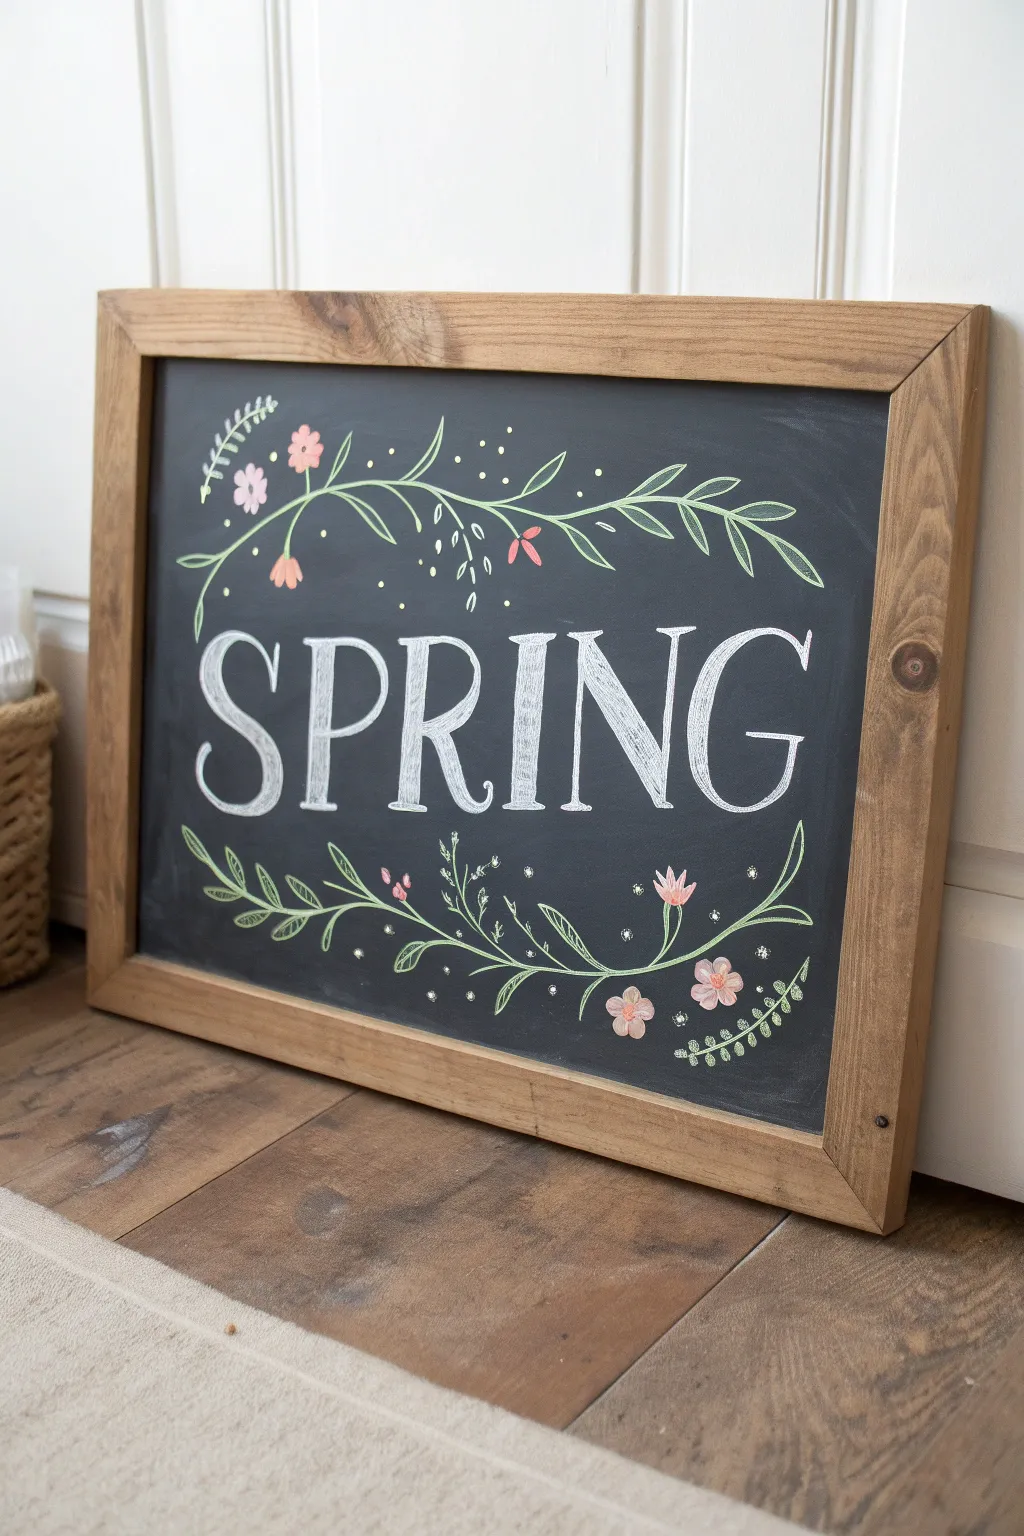
Celebrate the changing seasons with this elegant chalkboard design that combines bold, textured lettering with delicate botanical flourishes. This piece brings a touch of whimsical garden charm indoors, perfect for brightening up an entryway or mantel.
Step-by-Step
Materials
- Large framed chalkboard
- White standard chalk stick
- Chalk markers (fine tip: white, sage green, light pink)
- Ruler
- Pencil
- Cotton swabs or blending stump
- Microfiber cloth or damp paper towel
- Chalk sharpener (optional)
Step 1: Preparing the Canvas
-
Season the board:
Before starting your design, lay a stick of white chalk on its side and rub it over the entire surface of the chalkboard. This creates a base layer that prevents ‘ghosting’ later on. -
Wipe it down:
Gently wipe the board with a dry cloth or paper towel. You want to leave a dusty, cloudy residue rather than cleaning it perfectly black, as this adds rustic character. -
Establish guidelines:
Use a ruler and very lightly sketch two horizontal parallel lines with a pencil or faint chalk across the center of the board to define the height of your letters.
Smudge Patrol
If you make a mistake, don’t use a wet rag immediately, as it creates mud. Let the mistake dry completely, flake it off with a stiff brush, then spot-clean with a damp Q-tip.
Step 2: Lettering
-
Sketch the skeleton:
Using a stick of white chalk, lightly sketch the skeleton of the word ‘SPRING’ in the center. Ensure the spacing is even, leaving generous room between each letter. -
Thicken the strokes:
Go back over your letters to turn the single lines into block serif shapes. Emphasize the vertical strokes by making them thicker while keeping horizontal crossbars slightly thinner. -
Fill the letters:
Using the side of your chalk stick or a thick chalk marker, fill in the letters completely. For that textured, vintage look in the photo, apply the chalk in diagonal hatching strokes rather than a solid opaque block. -
Refine the edges:
Take a sharpened piece of chalk or a fine-tip white marker and outline the letters crisply to clean up any fuzzy edges from the filling process. -
Add serifs:
Accentuate the ends of the letters with curved serifs. For the ‘S’, curl the ends slightly inward; for the ‘R’ and ‘N’, flare the feet outward.
Level Up: Shadowing
Give your letters a 3D pop by adding a thin gray or hatched line to the right and bottom of each letter stroke to create a subtle drop shadow effect.
Step 3: Botanical Borders
-
Draft the main vines:
With your green chalk (or marker), draw two long sweeping curves—one arching over the word ‘SPRING’ and one mirroring it below. Let the ends curl elegantly. -
Add secondary branches:
Draw smaller, thinner offshoot stems coming from the main vine. Vary the direction so some point upward and others droop slightly for a natural flow. -
Draw leaves:
Using the green color, add simple almond-shaped leaves along the stems. Leave these as outlines to keep the design airy, rather than coloring them in solid. -
Incorporate flowers:
Switch to your pink chalk. Draw small, simple five-petal blossoms scattered along the vines. Place a few near the center and a few towards the outer curls. -
Layer in details:
Use a fine-tip white chalk marker to add tiny dots (pollen) to the center of the pink flowers and subtle vein lines inside a few of the larger leaves. -
Add floating accents:
Surround the vines with tiny clusters of white dots and small floating petals to fill empty negative space and enhance the whimsical feel. -
Includes fern sprigs:
Draw a few small, fern-like sprigs using simple straight lines with tiny dashes on either side. I like to tuck these near the corners to frame the composition.
Step 4: Finishing Touches
-
Clean up:
Use a cotton swab dampened with water to erase your original pencil guidelines and clean up any accidental smudges around the letters. -
Set the chalk (optional):
If you want the design to permanent, lightly mist the board with a fixative spray, holding the can at least 12 inches away to prevent dripping.
Step back and admire your fresh floral artwork as it brings the season into your home

PENCIL GUIDE
Understanding Pencil Grades from H to B
From first sketch to finished drawing — learn pencil grades, line control, and shading techniques.
Explore the Full Guide
Chalkboard Menu With a Spring Botanical Frame
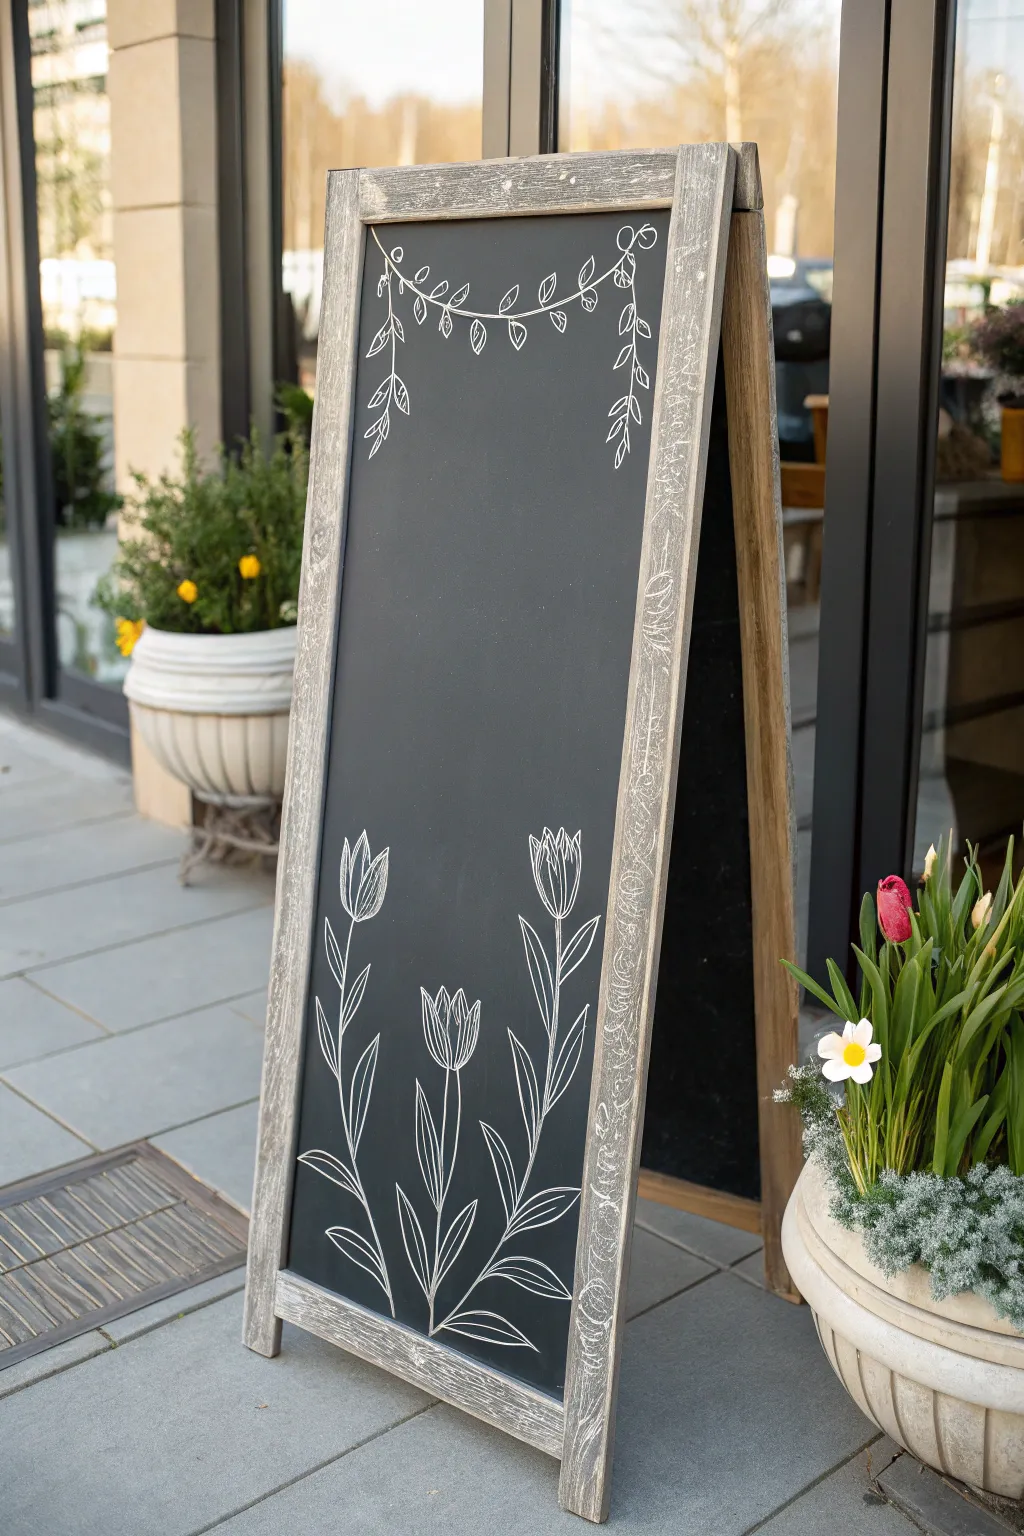
Embrace the freshness of spring with this elegant botanical chalkboard design featuring a delicate leafy garland and a trio of blooming tulips. This minimalist layout provides a sophisticated frame for your menu or daily specials while keeping the center clear for text.
Step-by-Step Guide
Materials
- A-frame chalkboard (sandwich board)
- White liquid chalk marker (fine or medium tip)
- Standard stick chalk (white)
- Microfiber cloth
- Cotton swabs
- Ruler (optional)
- Pencil (optional)
- Water spray bottle
Step 1: Preparation & Layout
-
Season the surface:
Before drawing your final design, lay a piece of standard stick chalk on its side and rub it over the entire board. Wipe it off with a dry cloth. This ‘seasoning’ process prevents ghosting later on and gives the board a nice, matte texture. -
Clean and dry:
Ensure the surface is completely clean of dust. If you used a damp cloth to wipe down the seasoning, wait until the chalkboard is perfectly dry before starting with markers. -
Mark vertical guides:
Visually divide the bottom width of the board into three approximate sections for the flower placement. You can make tiny tick marks with a pencil or standard chalk to ensure your tulips will be evenly spaced. -
Prime the marker:
If using a liquid chalk marker, shake it well and press the tip onto a piece of scrap paper until the ink flows smoothly and consistently.
Chalk Marker Flow Tip
Store your chalk markers horizontally when not in use. If the ink seems faint, press the tip on scrap paper to re-saturate it before touching the board again.
Step 2: Drawing the Upper Garland
-
Draw the main vine:
Start near the top left corner. Draw a loose, slightly wavy line that dips down towards the center and curves back up toward the top right corner. The curve doesn’t need to be perfect; organic lines look more natural. -
Add side tendrils:
From the endpoint of your main vine on the left, draw a secondary squiggly line dangling straight down about 6-8 inches. Repeat this on the right side. -
Sketch the leaves:
Along the top curve and the hanging tendrils, draw small almond-shaped leaves attached to the vine. Alternate the direction of the leaves (left, right, left) as you move along the stem. -
Detail the leaves:
Draw a single line down the center of each leaf to create a vein. This small detail adds significant dimension to the simple line art. -
Incorporate loops:
Where the vine meets the corner, add a small, loose curlicue or loop in the vine stem to give it a whimsical, hand-drawn calligraphy feel.
Fixing Shaky Lines
If your long stem lines are wobbly, don’t erase the whole thing. Just thicken the line in the wobbly areas to smooth out the visual curve.
Step 3: Creating the Tulip Garden
-
Outline the center tulip:
Starting at the bottom center, draw a U-shape for the base of the flower head. Add three pointed petals on top—a central one and two side petals curving inward. -
Draw the side tulips:
Repeat the flower head shape for the left and right tulips. I like to make the side flowers slightly taller or angled outward just a bit to create a fanned-out composition. -
Add detail lines:
Inside each petal shape, draw faint vertical lines following the curve of the petal to suggest texture and form. -
Connect the stems:
Draw long, slender stems extending from the base of each flower head all the way down to the bottom edge of the board. Keep the lines steady but natural. -
Add large leaves:
Draw long, lance-shaped leaves originating from the base of the stems. These should be much larger than the vine leaves, reaching about halfway up the stem. -
Overlap for depth:
Allow some leaves to cross over or behind the stems. Draw a central vein line down the middle of these large leaves just like you did for the top garland.
Step 4: Finishing Touches
-
Refine the lines:
Look over your work for any thin or shaky areas. Go over the main outlines once more to thicken them, making the botanical frame pop against the black background. -
Clean up smudges:
Dip a cotton swab in a little water to carefully erase any small mistakes or overdrawn lines. This works like a precision eraser. -
Fill the center:
Your frame is now complete. The large negative space in the middle is ready for your menu items, welcome message, or inspirational spring quote.
Step back and admire how this simple botanical border transforms your slate into a welcoming piece of spring decor
Mini Spring Doodle Sampler Grid
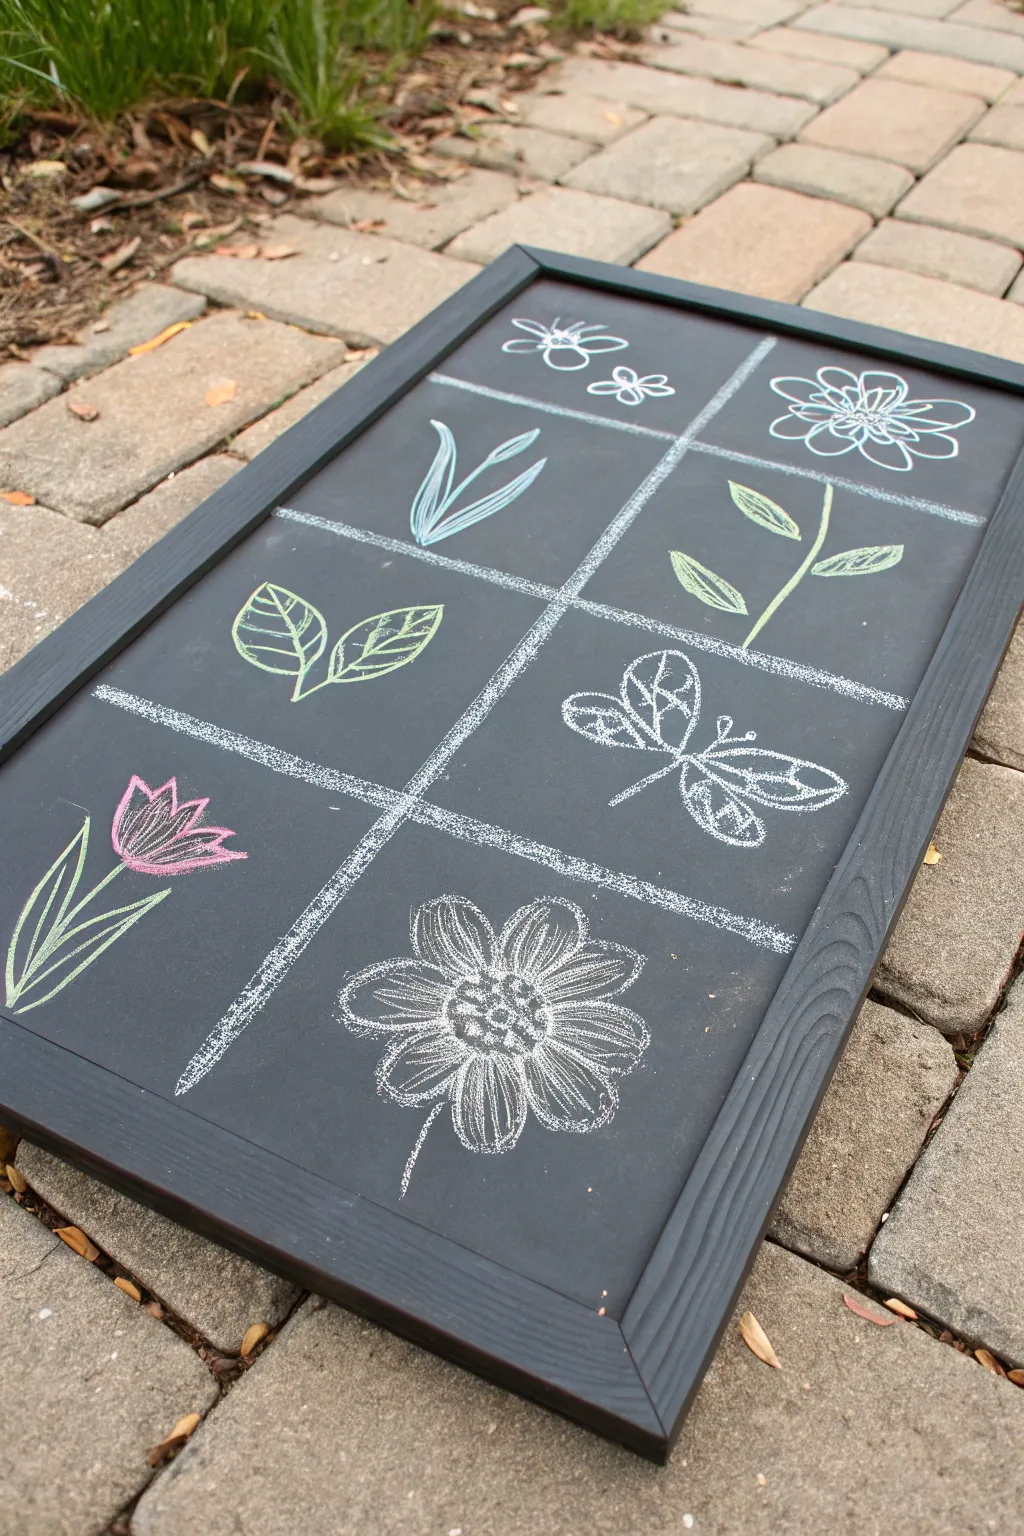
This charming project breaks down complex drawings into approachable mini-masterpieces by organizing them into a neat grid. The stark black background makes the simple white, green, and pink chalk lines pop, creating a modern botanical aesthetic perfect for a garden patio or entryway.
Detailed Instructions
Materials
- Framed chalkboard (approximately 18×24 inches)
- White chalk marker or standard chalk stick
- Light green chalk marker or pastel
- Pink chalk marker or pastel
- Ruler or straight edge
- Damp microfiber cloth
Step 1: Setting the Grid
-
Clean surface:
Begin by wiping down your framed chalkboard with a damp microfiber cloth to remove any dust or old chalk residue. Ensure the surface is completely dry before beginning to draw to prevent the chalk from bleeding. -
Measure the midpoint:
Using your ruler, find the vertical center of the board. Draw a long, vertical line straight down the middle to split the board into left and right halves. I find that using the edge of the ruler as a guide helps keep this line crisp. -
Create horizontal divisions:
Measure the total height of the drawing area and divide it by three. Mark these points lightly. -
Draw grid lines:
Draw two horizontal lines across the entire width of the board at your marked points. You should now have six equal rectangular sections. -
Soften the lines:
If your grid lines are too stark, gently tap them with a dry finger or cloth to give them a textured, sketch-like quality similar to the reference image.
Chalk Marker Flow
Store chalk markers horizontally. If the ink seems faint, press the tip on a scrap paper repeatedly to pump the ink down before drawing on the board.
Step 2: Adding Botanical Doodles
-
Top Left: Simple Blooms:
In the top-left square, use white chalk to draw two small, simple flowers. For the larger one, draw a tiny circle center and five loop petals. Add a smaller, three-petal bud nearby. -
Top Right: Detailed Daisy:
In the top-right square, draw a larger flower head. Start with a messy, scribbled center, then add two layers of petals—shorter ones near the center and longer, looping ones extending outward. -
Middle Left: Grass Sprigs:
Switch to a light green chalk or marker for the middle-left box. Draw three curved lines upward. Add pointed tips and curve them back down slightly to resemble tall blades of grass or tulip leaves. -
Middle Right: Leafy Stem:
Still using green, draw a single curved stem in the middle-right box. Add oval-shaped leaves along the stem, drawing a line down the center of each leaf for detail. -
Bottom Left: Twin Leaves:
In the bottom-left box, draw two large, broad leaves connected at a single stem point using green chalk. Draw veins inside the leaves using a lighter touch or a thinner tip. -
Bottom Center: Dragonfly:
In the bottom-right space (or center right depending on your orientation), draw a dragonfly using white chalk. Draw a long, thin body, then add four distinct wings with cross-hatching inside to mimic vein patterns.
Seasonal Switch
Keep the white grid permanent! Erase the doodles seasonally and replace spring flowers with autumn leaves, snowflakes, or summer fruits.
Step 3: Feature Elements
-
Pink Tulip Pop:
Locate an empty lower section (bottom-left in the finalized layout). Draw a pink tulip bulb shape with three points at the top. Fill it in slightly with scribbled pink lines. -
Tulip greenery:
Add two green leaves curving away from the base of your pink tulip, giving the composition a splash of color balance. -
Large Sunflower:
In the final large bottom section, draw a prominent sunflower shape in white. Create a large center with small dots for seeds, and surround it with two rows of broad, slightly shaded petals. -
Clean up edges:
Use a slightly damp cotton swab or the corner of your cloth to sharpen any smudged edges or correct mistakes.
Hang your sampler in a bright spot to celebrate the new season


Giant Sidewalk Chalk Mandala Made of Spring Flowers
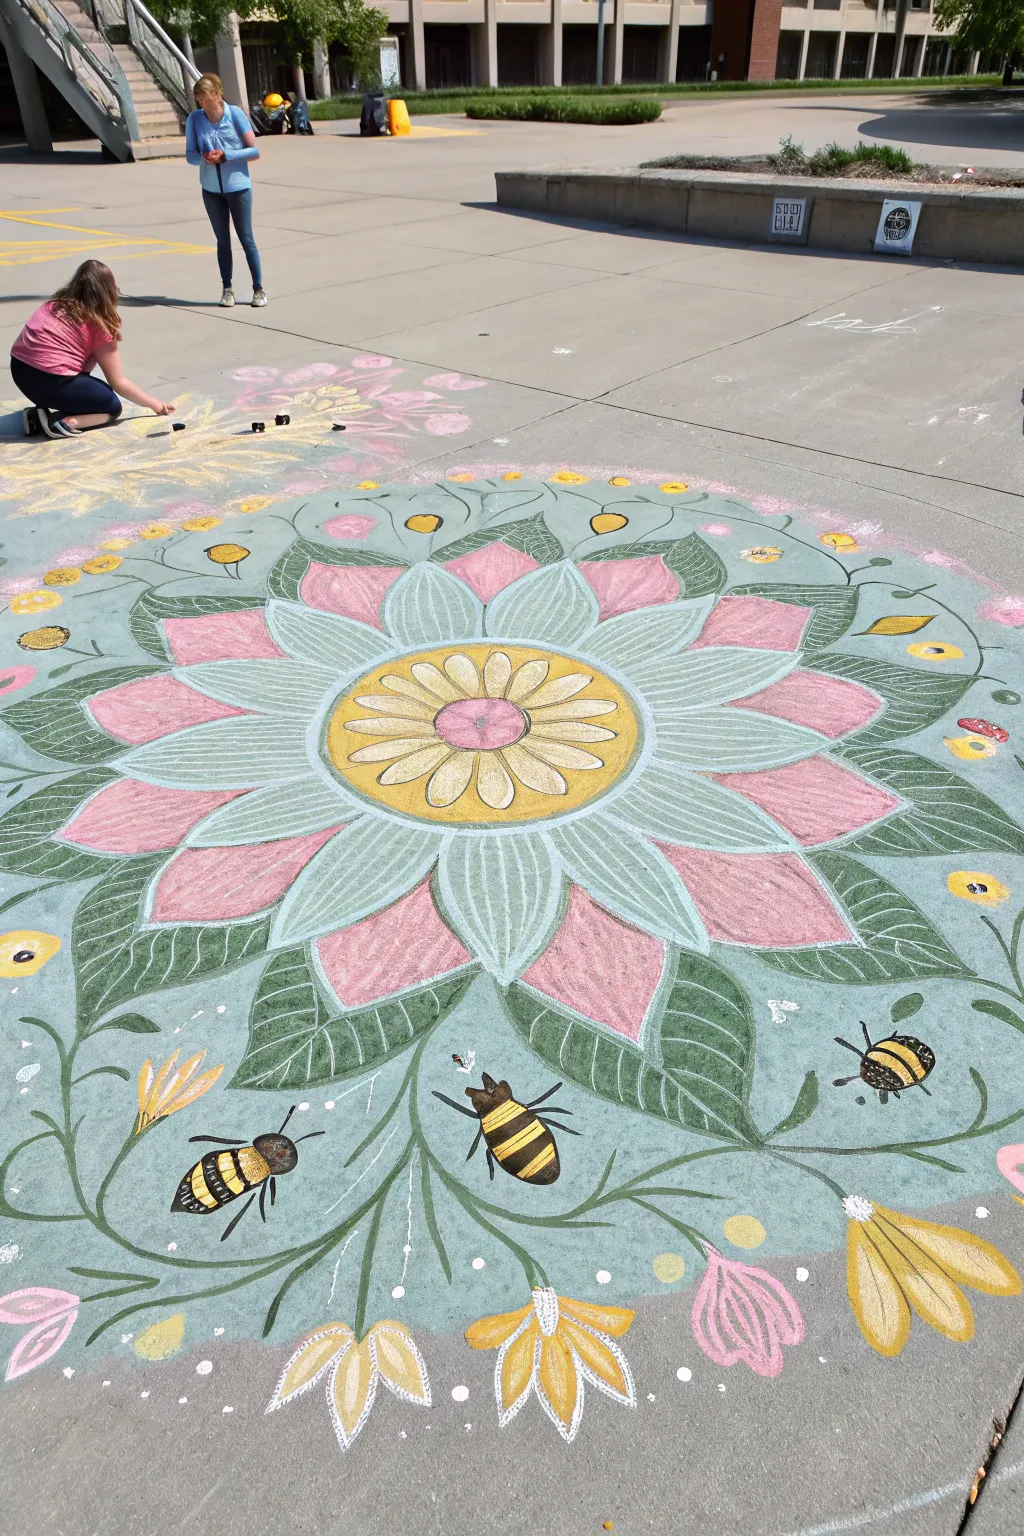
Transform a plain stretch of concrete into a celebration of spring with this sprawling floral mandala. Featuring overlapping layers of pastel petals, stylized green leaves, and buzzy little bees, this giant sidewalk chalk masterpiece is perfect for a sunny afternoon group project.
How-To Guide
Materials
- Sidewalk chalk in various colors (white, yellow, pink, teal, green, black)
- Chalk pastels (for vibrant details)
- A long piece of string or twine (approx. 4-5 feet)
- Measuring tape
- Pivot point (friend’s finger or a heavy rock)
- Knee pads or a gardening kneeling mat
- Blending sponge or old rags
- Water spray bottle (optional, for blending)
Step 1: Setting the Foundation
-
Find your center:
Choose a large, flat area of concrete that is free of loose gravel. Mark a small dot in the very center of your workspace to serve as the anchor for the entire design. -
Draw the guide circles:
Tie a piece of chalk to one end of your string. Have a helper hold the other end firmly at the center dot (or weigh it down). Pull the string tight and walk in a circle to draw a faint white guide line. Repeat this to create concentric circles expanding outward—you’ll want at least three distinct rings: one for the flower center, one for the petal tips, and one for the outer leaves. -
Divide the pie:
Lightly sketch lines radiating from the center like wheel spokes to divide your circle into equal sections. This helps ensure your petals stay symmetrical as you work your way around.
Smooth Blending
To get that painterly look on rough concrete, use a chalkboard eraser or a piece of carpet remnant to rub the chalk into the pavement’s pores.
Step 2: Creating the Central Bloom
-
The inner core:
Start in the smallest circle with a pink center. Surrounding this, draw a ring of tightly packed yellow petals. Outline them in a darker shade or white to make them pop against the concrete. -
First petal layer:
Extend large, pointed petals outward from the yellow center. Color these in a soft teal or light blue. Use the side of your chalk stick to cover large areas quickly. -
Adding texture:
Inside each teal petal, draw vein lines using white chalk. This adds depth and makes the design look less flat. -
The secondary petals:
Between the tips of the teal petals, draw a second layer of pink petals peaking out from behind. Fill them in solidly with pink chalk.
Chalk Keeping Breaking?
If your chalk sticks keep snapping, you might be pressing too hard. Try wetting the chalk tip slightly in a cup of water for richer color with less pressure.
Step 3: Expanding the Mandala
-
Outer foliage layer:
Draw large, pointed green leaves extending from the pink layer out to your widest guide circle. I like to curve the tips slightly to give the design movement. -
Detailed leaf shading:
Fill the leaves with a dark green, then layer a lighter green or teal on top. Use your blending sponge or a rag to smudge the colors together for a smooth gradients. -
Veining the leaves:
Take a sharp piece of white chalk and draw intricate vein patterns over the blended green leaves. -
The background wash:
Color the negative space between the leaves and the outer edge with a very light blue or teal wash. You can rub the chalk gently with a rag to soften it into the concrete.
Step 4: Bringing it to Life
-
Drafting the bees:
Pick three or four spots around the outer edge for your bumblebees. Outline oval body shapes and small semi-circular wings using white chalk. -
Coloring the bees:
Fill the bodies with bright yellow stripes alternating with black. Use deep black chalk or charcoal for the dark stripes and the head to create high contrast. -
Adding wings and legs:
Draw fine black lines for the legs and antennae. For the wings, use white chalk but smudge it slightly so they look translucent. -
Corner flourishes:
In the corners of your pavement canvas, draw sweeping green vines and smaller flower buds (yellow and pink) that curve inward toward the main mandala. This frames the piece beautifully. -
Final highlights:
Walk around the entire piece and reinforce the heavy white outlines on the main petals. Add small white dots or ‘pollen’ specks around the bees and vines for a magical finish.
Step back and enjoy the vibrant garden you’ve grown right on the pavement


Have a question or want to share your own experience? I'd love to hear from you in the comments below!