A plain white mask is basically a tiny stage waiting for your story. I love how just a few bold choices—color placement, linework, and texture—can turn it into a character that feels instantly alive.
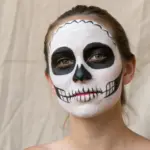
Classic Skull Face Mask
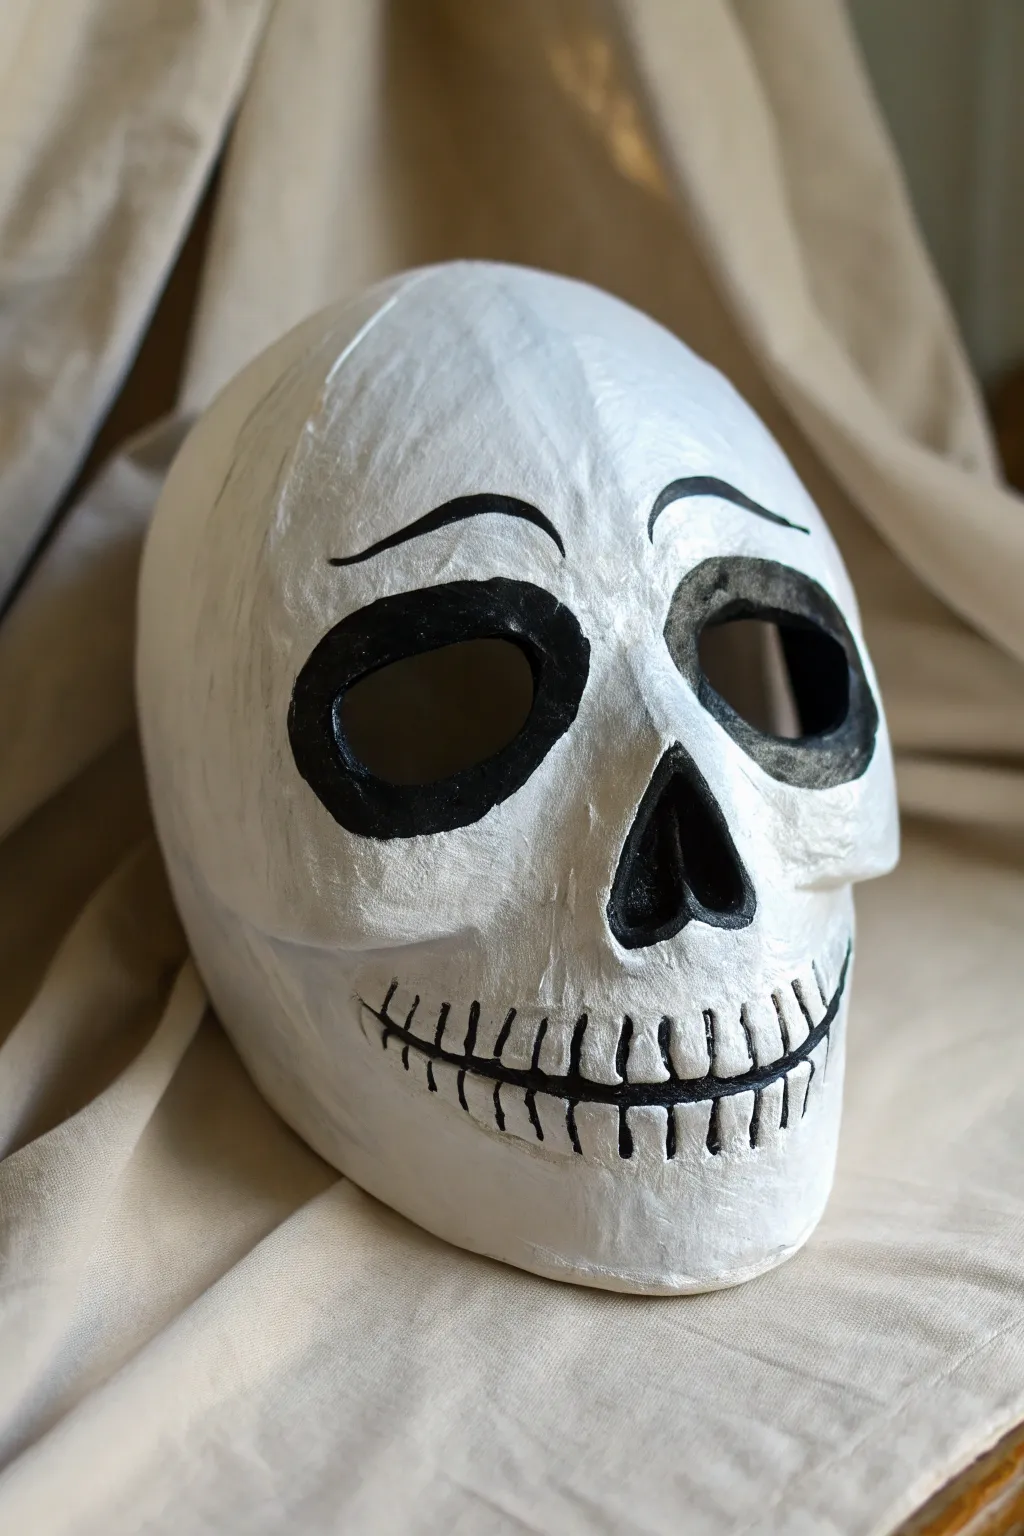
This classic skull mask captures a clean, approachable Halloween look with bold black lines against a textured white base. It’s perfect for Day of the Dead celebrations or a spooky yet not-too-scary costume.
Step-by-Step Tutorial
Materials
- Blank paper mâché or plastic face mask base
- White acrylic paint (matte finish)
- Black acrylic paint
- Medium flat paintbrush
- Small round paintbrush
- Pencil
- Matte sealant or varnish (optional)
- Palette or paper plate
Step 1: Preparing the Base
-
Clean the surface:
Before you start painting, wipe down your mask base with a dry cloth to remove any dust or debris that might interfere with the paint adhesion. -
Apply the first coat:
Using your medium flat brush, apply a generous layer of white acrylic paint over the entire mask. Cover every curve and edge. -
Build texture:
If you want that authentic bone-like texture shown in the photo, don’t smooth the paint out perfectly. Let slight brush strokes remain visible. -
Let it dry:
Allow the first coat to dry completely. This usually takes about 20-30 minutes. -
Add opacity:
Apply a second or even third coat of white paint until the base is solid and opaque. I prefer three thin coats over one thick one to prevent cracking.
Textured Bone Effect
Mix a tiny pinch of baking soda or cornstarch into your white base paint. This creates a slightly gritty, chalky texture that perfectly mimics the look of old, dry bone.
Step 2: Sketching the Features
-
Outline eye sockets:
Lightly use a pencil to draw large, rounded shapes around the eye holes. Make them droop slightly at the outer corners for a sad or thoughtful expression. -
Mark the nose:
Draw an inverted heart shape or spade shape directly on the nose bridge area to represent the nasal cavity. -
Sketch the smile:
Draw a wide line for the mouth, curving upward towards the cheekbones. This mask features a distinct smile, so don’t be afraid to curve it high. -
Detail the teeth:
Lightly mark vertical lines along the mouth curve to indicate where the teeth will be separated. -
Add eyebrows:
Sketch two small, curved arches well above the eye sockets to give the skull some personality.
Add Shadow Depth
Mix a very watery grey wash. Lightly brush it into the temples and under the cheekbones, then quickly wipe away the excess with a paper towel for instant 3D shading.
Step 3: Painting the Details
-
Fill the eyes:
Using black paint and a smaller brush, carefully fill in the outlines you drew around the eyes. Paint entirely inside the socket area. -
Darken the nose:
Fill in the nose cavity shape with solid black paint. Make sure the edges are crisp. -
Paint the brow:
Go over your eyebrow pencil sketches with a single, confident stroke of black paint using your round brush. -
Create the mouth line:
Paint the main horizontal line of the mouth. Start from the middle and work outward to keep it symmetrical. -
Define the teeth:
Using the very tip of your small round brush, paint the vertical lines for the teeth. Make them slightly thicker at the gum line and thinner toward the center. -
Curve the teeth edges:
To make the teeth look seated in the jaw, add tiny curved lines horizontally at the top and bottom of the vertical tooth lines, connecting them slightly. -
Final touches:
Check for any uneven edges in your black lines and touch them up with white paint if necessary once the black is fully dry. -
Seal the mask:
Once everything is bone dry (give it a few hours), apply a matte varnish to protect your work and unify the sheen.
Your classic skull mask is now ready to wear or display as a piece of spooky art


Blood Drip Horror Mask
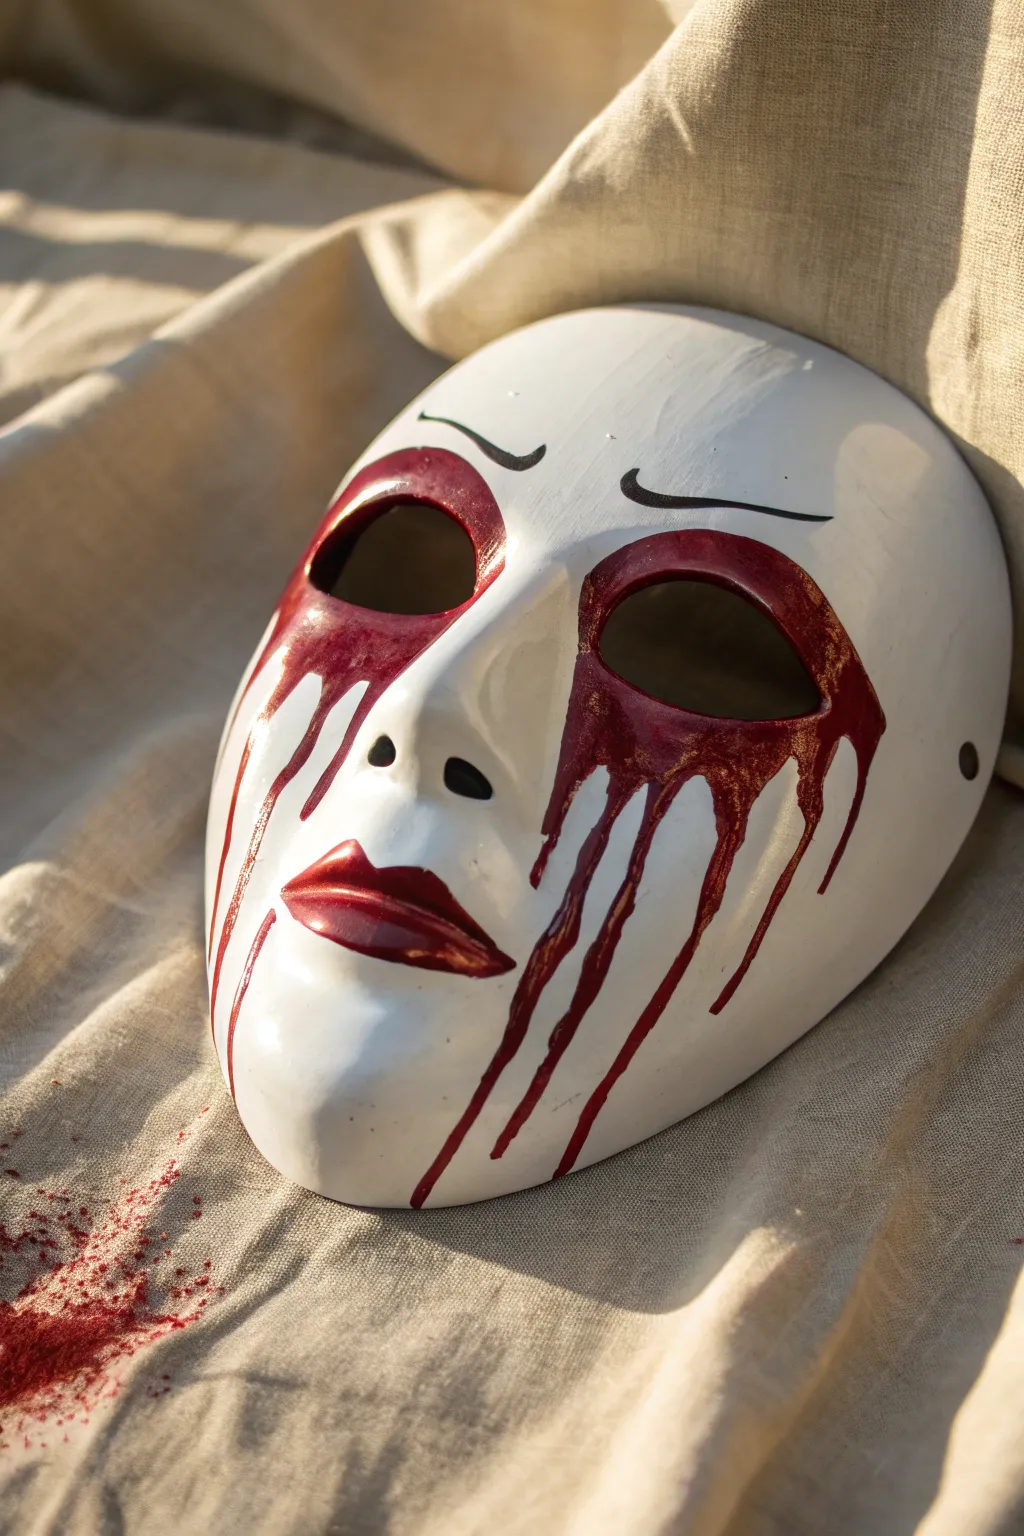
Transform a plain white theater mask into a chilling artifact of horror with this striking blood-drip design. By layering deep reds with subtle metallic accents, you’ll create a terrifyingly realistic weeping effect that looks fresh and unsettling.
How-To Guide
Materials
- White plastic theater mask (full face)
- Acrylic paint: Deep red/Alizarin Crimson
- Acrylic paint: Black
- Fine gold glitter or gold shimmer medium
- High-gloss varnish or clear glaze
- Fine detail brush (size 0 or 1)
- Medium round brush (size 4 or 6)
- Black fine-tip permanent marker
- Cup of water and paper towels
- Palette for mixing
Step 1: Preparation and Mapping
-
Clean surface:
Begin by wiping down your white plastic mask with a damp cloth or a little rubbing alcohol to remove any manufacturing oils or fingerprints. This ensures the paint adheres properly. -
Outline the eyebrows:
Using a black fine-tip permanent marker, draw two thin, arched eyebrows high on the forehead. Keep the lines crisp and slightly separated in the middle for a blank expression. -
Define the lips:
Lightly outline the shape of the lips with a pencil if you need a guide, or prepare to freehand them. The goal is a defined, slightly pouty shape that follows the mask’s molding.
Paint sliding too fast?
If your drips are running uncontrollable, your paint is too thin. Let it sit on the palette for 5 minutes to thicken up, or mix in a tiny bit more heavy-body acrylic to regain control.
Step 2: Painting the base features
-
Base coat for lips:
Mix a small amount of deep red acrylic with a tiny dot of black to darken it slightly. Use your medium round brush to paint the lips completely, ensuring smooth coverage. -
Base coat for eyes:
Using the same dark red mix, paint a ring around the eye sockets. Don’t worry about being perfectly neat at the bottom edge, as we will be dragging this paint down later. -
Thicken the eye application:
Apply a second, thicker layer of red paint around the eyes. You want enough wet paint on the mask so that it has texture and body.
Pro Tip: Gravity Assist
Prop the mask upright while painting the drips. Let gravity do the work for you; just load the brush and touch it to the eye rim, letting a bead of paint roll down naturally.
Step 3: Creating the Blood Effect
-
Prepare the drip mix:
In your palette, mix your deep red paint with a gloss varnish or a little water to thin it slightly. It should be fluid but not watery. -
Add the shimmer:
This is the secret ingredient. Mix a pinch of fine gold glitter or a drop of gold shimmer medium into your red drip paint. This gives the ‘blood’ an unsettling, supernatural glowing quality when it catches the light. -
Start the drips:
Load your medium brush heavily with the shimmer-red mixture. Press the brush against the bottom rim of the eye socket paint you applied earlier. -
Drag the paint:
Gently pull the brush downward to create long streaks. Vary the pressure: push harder at the top for a pool of blood, then lift gradually as you move down the cheek to create a tapering point. -
Vary the lengths:
Create multiple drip trails from each eye. Make some travel all the way to the jawline, while others should stop mid-cheek. Asymmetry makes it look more natural. -
Connect the flows:
Where the drips start near the eye, widen the paint slightly so it looks like it’s welling up and spilling over the rim. -
Intensify color:
While the drips are wet, dip the very tip of your brush into a tiny bit of black paint and streak it into the center of the thickest red areas. This adds depth and makes the blood look congealed.
Step 4: Finishing Touches
-
Gloss the lips:
Once the base lip color is dry, apply a layer of the high-gloss varnish over them. You can add a single stroke of the shimmer-red mix to the center of the lower lip for a highlight. -
Final gloss coat:
Paint a thick layer of clear high-gloss varnish over all the red bloody areas (eyes and drips). This is crucial—it keeps the blood looking fresh and wet permanently. -
Splatter details:
If you want the textural splatter seen in the background, flick a stiff toothbrush loaded with red paint near the chin or onto your display cloth, but keep the mask face mostly clean to maintain the ‘weeping’ illusion.
Now your unsettling creation is ready to hang or wear, freezing a moment of horror in time.


Stitched Mouth Illusion
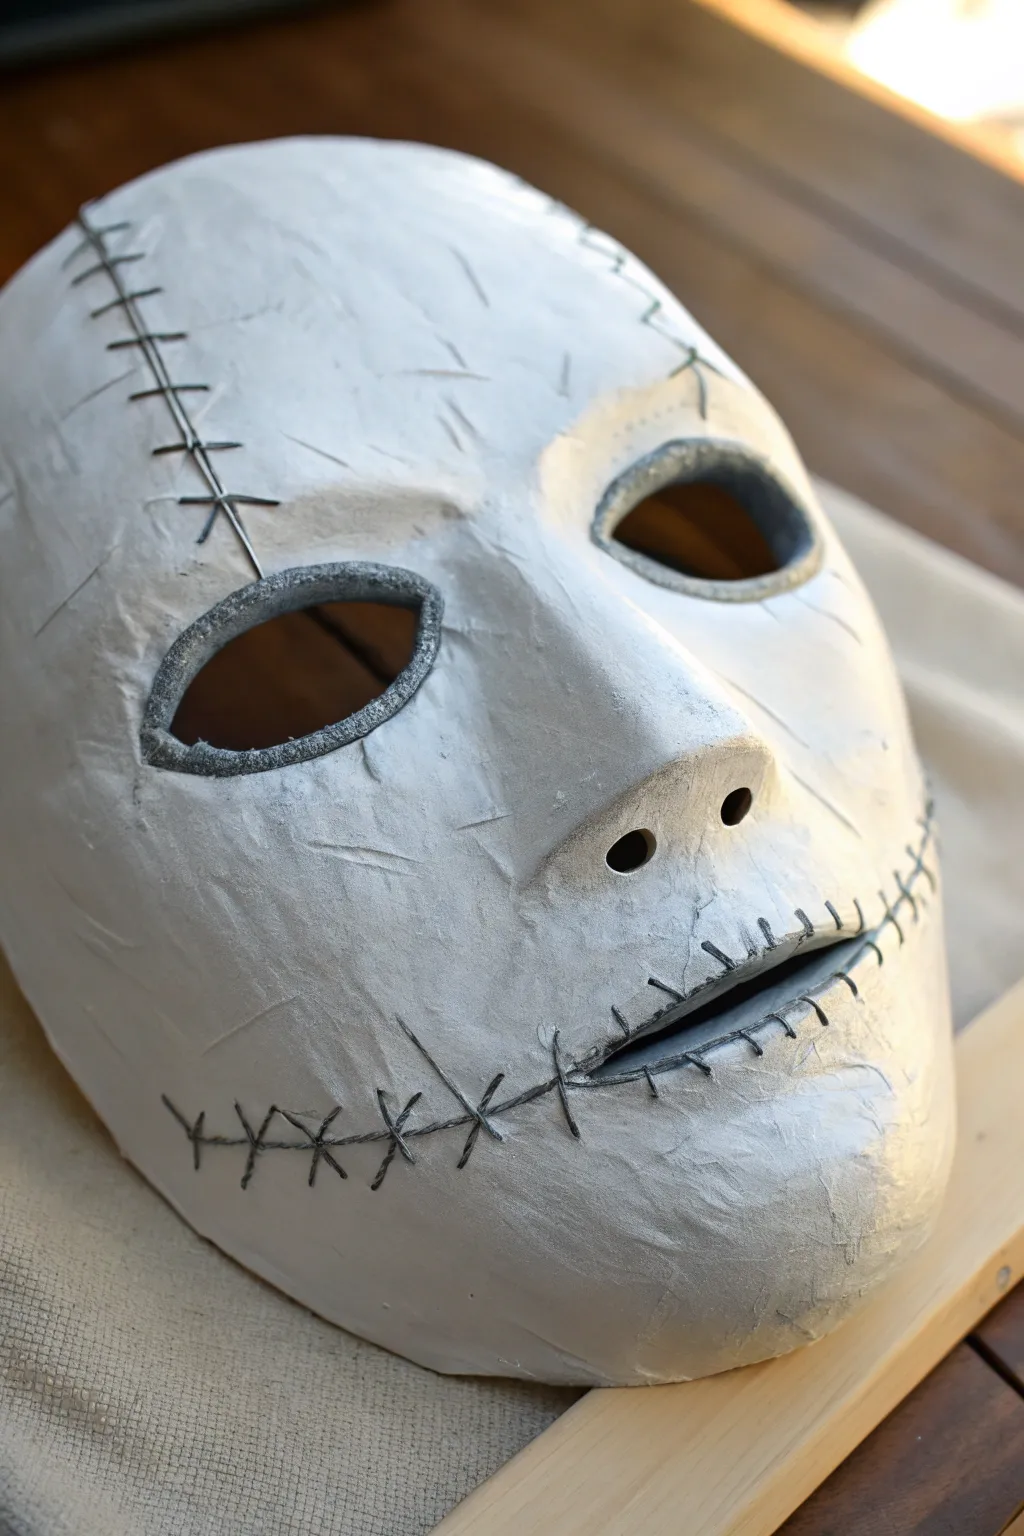
Transform a plain base into a chilling visage with this textured, stitched-mouth mask project. The rough, plaster-like finish creates an unsettling foundation for the painted staples and hollowed-out expression.
Step-by-Step Tutorial
Materials
- Plastic craft mask base (full face)
- White air-dry clay or plaster cloth
- Sandpaper (fine grit)
- White acrylic paint or gesso
- Grey acrylic paint
- Black acrylic paint
- Fine detail paintbrush
- Medium flat paintbrush
- Black embroidery floss or thick thread (optional for 3D effect)
- Small craft knife or sculpting tool
- Matte sealant spray
Step 1: Building the Foundation
-
Prepare the base:
Start with a standard plastic craft mask. If the surface is very smooth, lightly scuff it with sandpaper to help your texturing material adhere better. -
Apply the texture layer:
Cover the entire front surface with a thin layer of white air-dry clay or plaster cloth. Smooth it out with your fingers, but don’t aim for perfection; slight bumps and ridges add to the creepy, weathered aesthetic. -
Sculpt the features:
While the material is still pliable, refine the shape around the nose and lips. For this specific look, flatten the mouth area slightly so the “cut” will look more pronounced later. -
Carve the scars:
Using a sculpting tool or a dull knife, carefully press a deep horizontal line across the mouth to simulate a slit. Create a similar vertical line running from the forehead down to the left eyebrow region. -
Add surface damage:
Scratch small, random hash marks and nicks all over the mask surface to mimic scratches and wear. I find that being a bit messy here actually improves the final result. -
Let it cure:
Allow the mask to dry completely according to your material’s instructions. This usually takes 24 hours for clay or a few hours for plaster cloth.
Step 2: Painting and Detailing
-
Base coat:
Once dry, paint the entire mask with a solid coat of white acrylic or gesso. This creates a uniform matte finish and seals the texture you just created. -
Shadowing the surface:
Mix a very light wash of grey paint with water. Brush this over the mask and immediately wipe most of it off with a rag. The grey will settle into the tiny scratches and texture, creating depth. -
Darkening the eyes:
Paint the rim of the eye sockets with dark grey paint. Use a stippling motion to create a rough, uneven border rather than a perfect line, giving the eyes a sunken appearance. -
Painting the stitches:
Focus on the mouth slit and forehead scar. Using a fine detail brush and black paint, draw small X-shapes or vertical lines crossing the carved gaps to look like heavy sutures. -
Adding dimension to stitches:
To make the stitches pop, add a tiny dot of white highlight to the center of each black thread line, and a subtle grey shadow underneath each one. -
Deepening the cuts:
Paint the inside of the mouth slit and the forehead cut with pure black paint. This negative space makes the mask look truly hollow. -
Defining the nose:
Don’t forget the nostrils. Paint the inside of the nose holes black to match the eyes and mouth, ensuring no white base material is showing through. -
Final weathering:
Inspect your work. If it looks too clean, dry brush a little more grey onto the chin and forehead areas to simulate grime. -
Seal the deal:
Take the mask outside and spray it with a matte sealant. This protects the paint and eliminates any unwanted shine that might ruin the spooky effect.
Pro Tip: Real Texture
Instead of just painting stitches, glue short lengths of actual black waxed thread across the gaps for a disturbing 3D tactile effect.
Troubleshooting: Cracks
If your air-dry clay cracks while drying, fill the fissures with a mix of white glue and baking soda, then sand smooth once dry.
Now your mask has a silent, eerie story to tell


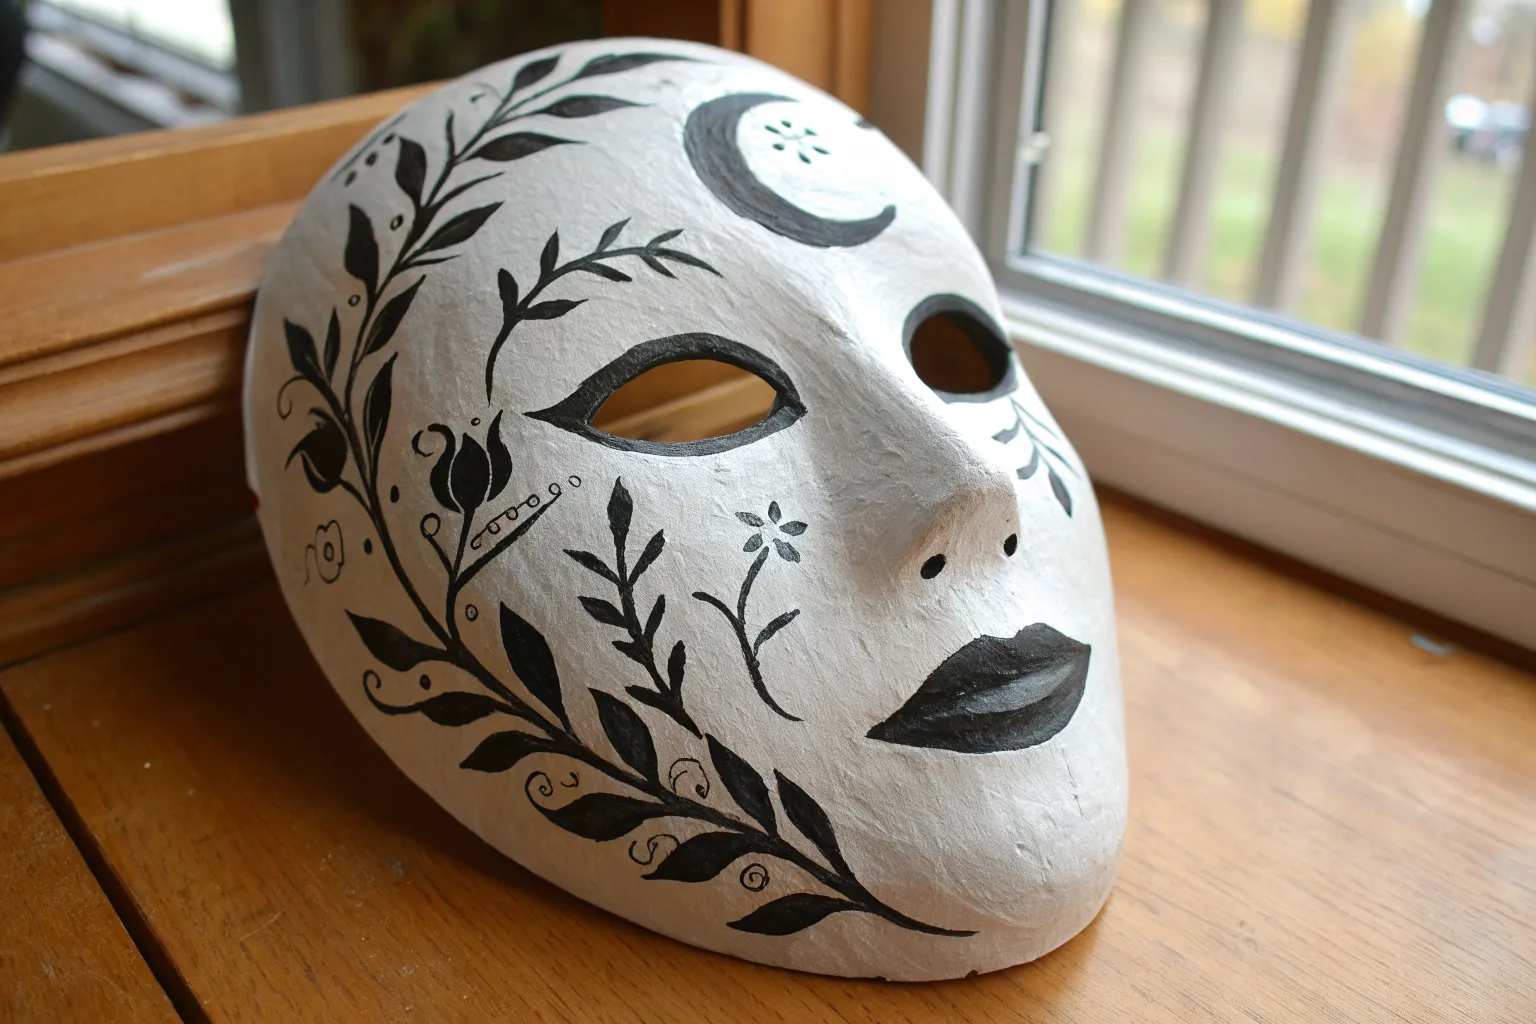
Masquerade Swirls and Filigree
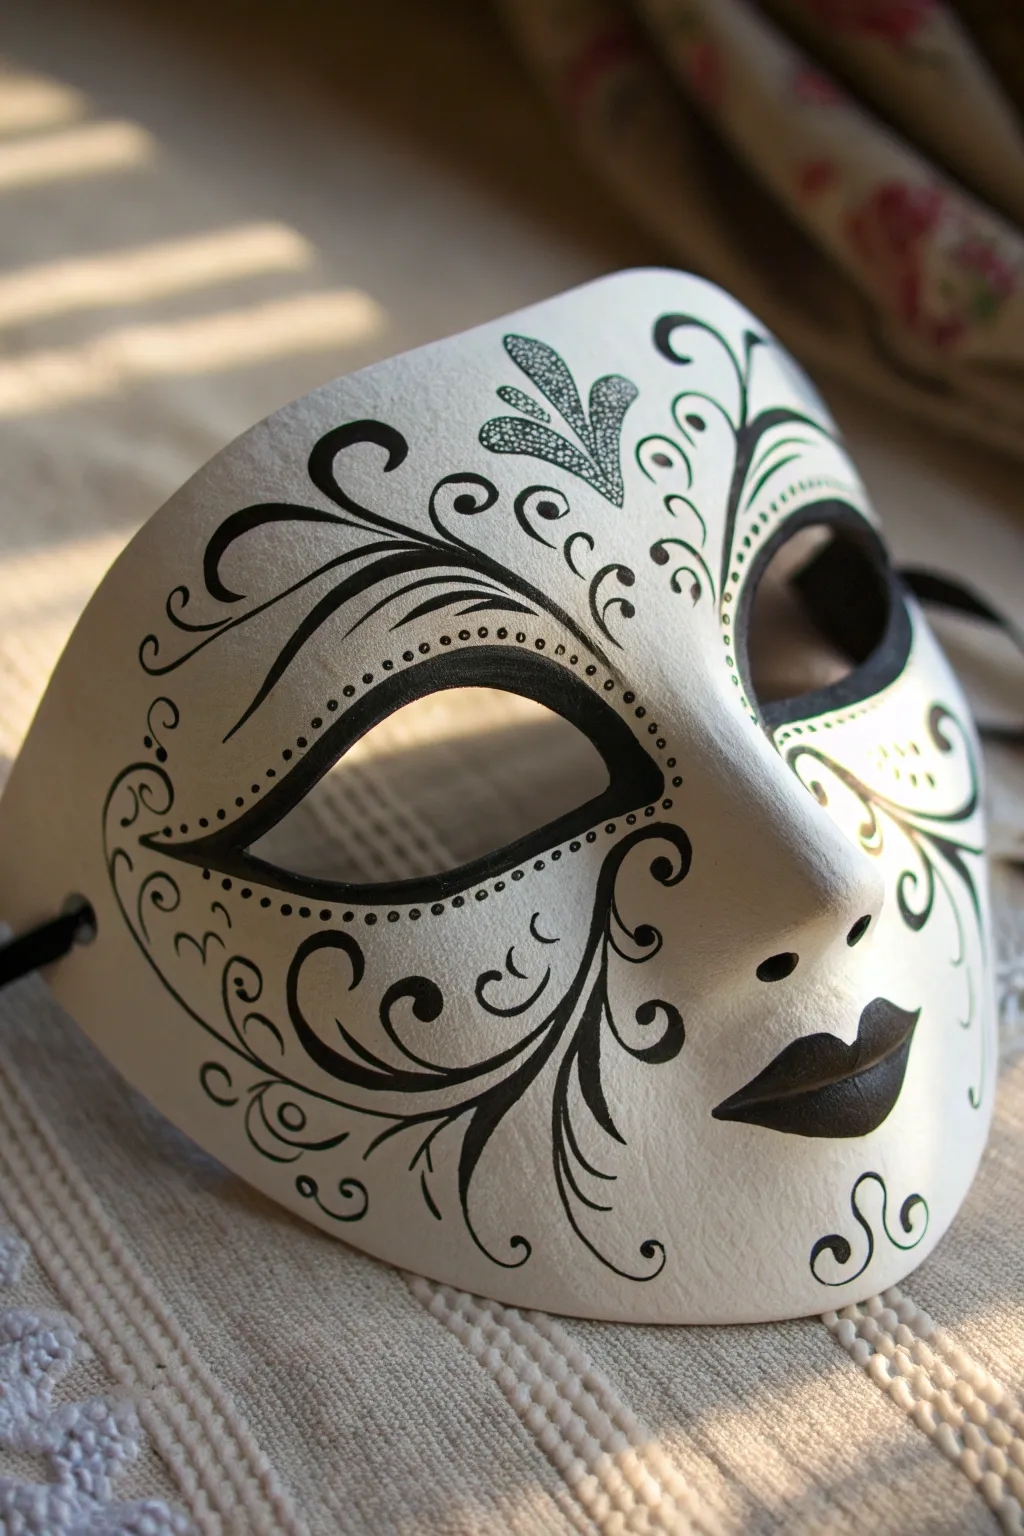
Discover the art of high-context simplicity with this stunning black and white masquerade mask design. By combining bold, sweeping vines with delicate stippling, you’ll transform a plain white base into a sophisticated accessory fit for a mysterious ball.
Detailed Instructions
Materials
- Ready-to-paint white paper mâché or plaster mask
- Fine-grit sandpaper (optional)
- Black acrylic paint or India ink
- Black permanent marker (fine tip)
- Black permanent marker (medium/thick tip)
- Round detail paintbrush (size 0 or 1)
- Pencil and eraser
- Clear matte varnish spray
Step 1: Preparation and Mapping
-
Prep the surface:
Examine your white mask for any rough bumps or mold lines. If necessary, gently buff them away with fine-grit sandpaper to ensure your pen glides smoothly, then wipe away all dust with a dry cloth. -
Define the eyes:
Using a pencil, lightly outline the area immediately surrounding the eye holes. This border will eventually be filled with solid black, creating a dramatic cat-eye effect that anchors the rest of the design. -
Sketch the main vines:
Softly sketch the primary S-curves. Start from the outer corner of the left eye, sweeping up towards the forehead and down towards the cheek. Repeat on the right side, aiming for near-symmetry but allowing for organic variation. -
Add floral elements:
At the top center of the forehead, sketch a clover-like floral motif or a trio of petal shapes. This acts as a centerpiece to bridge the gap between the two sides. -
Fill empty spaces:
Look for larger gaps in your pencil sketch and add smaller curls, C-shapes, and tendrils. The goal is to create a sense of movement without cluttering the white space too heavily.
Steady Hand Pro-Tip
Rest your pinky finger on a dry part of the mask while drawing. This anchors your hand, giving you better control over curves and preventing smudges.
Step 2: Inking the Design
-
Outline the eyes:
Switch to your medium-tip black marker or a small brush with acrylic paint. Carefully trace the pencil border you made around the eye holes. -
Fill the eye borders:
Fill in the space between your outline and the actual eye opening. I find it helpful to do two thin coats here to ensure the black is opaque and rich. -
Paint the lips:
If your mask has molded lips, paint them solid black now. Use a steady hand to define the cupid’s bow sharply, giving the mask a bold, graphical look. -
Trace main vines:
Using the medium-tip marker, go over your main structural pencil lines. Vary the pressure: press harder on the curves to thicken the line, and lift off at the ends to create tapered, elegant points. -
Thicken curves:
Go back over the thickest parts of your vines. Add weight to the outer edge of the curves to mimic traditional calligraphy stamps.
Step 3: Detailing and dot work
-
Add delicate tendrils:
Switch to your fine-tip marker. Trace the smaller, secondary swirls you sketched earlier. These lines should remain consistently thin and delicate. -
Create the forehead motif:
Outline the floral shape on the forehead. Instead of filling it in solid, use a texturing technique like stippling or tiny cross-hatching inside the petals for visual interest. -
Add decorative dots:
Place a series of small dots following the curve of the main eye vines. Spacing them evenly is key to making this look intentional and polished. -
Refine the edges:
Inspect your lines. If any marker edges look ragged or fuzzy, smooth them out with the very tip of your fine marker. -
Erase guidelines:
Wait at least 15 minutes to ensure all ink is completely dry. Gently erase any visible pencil marks, being careful not to smudge the artwork. -
Seal the work:
Take the mask to a well-ventilated area and apply a light coat of clear matte varnish spray. This prevents the marker from fading and protects the white surface from yellowing.
Bleeding Markers?
If the ink feathers into the paper fibers, seal the specific problem area with a tiny dab of clear acrylic medium, let it dry, and then draw over it again.
Once the varnish cures, tie on a black satin ribbon and your dramatic masquerade piece is ready to wear
BRUSH GUIDE
The Right Brush for Every Stroke
From clean lines to bold texture — master brush choice, stroke control, and essential techniques.
Explore the Full Guide
Sugar Skull Floral Mask
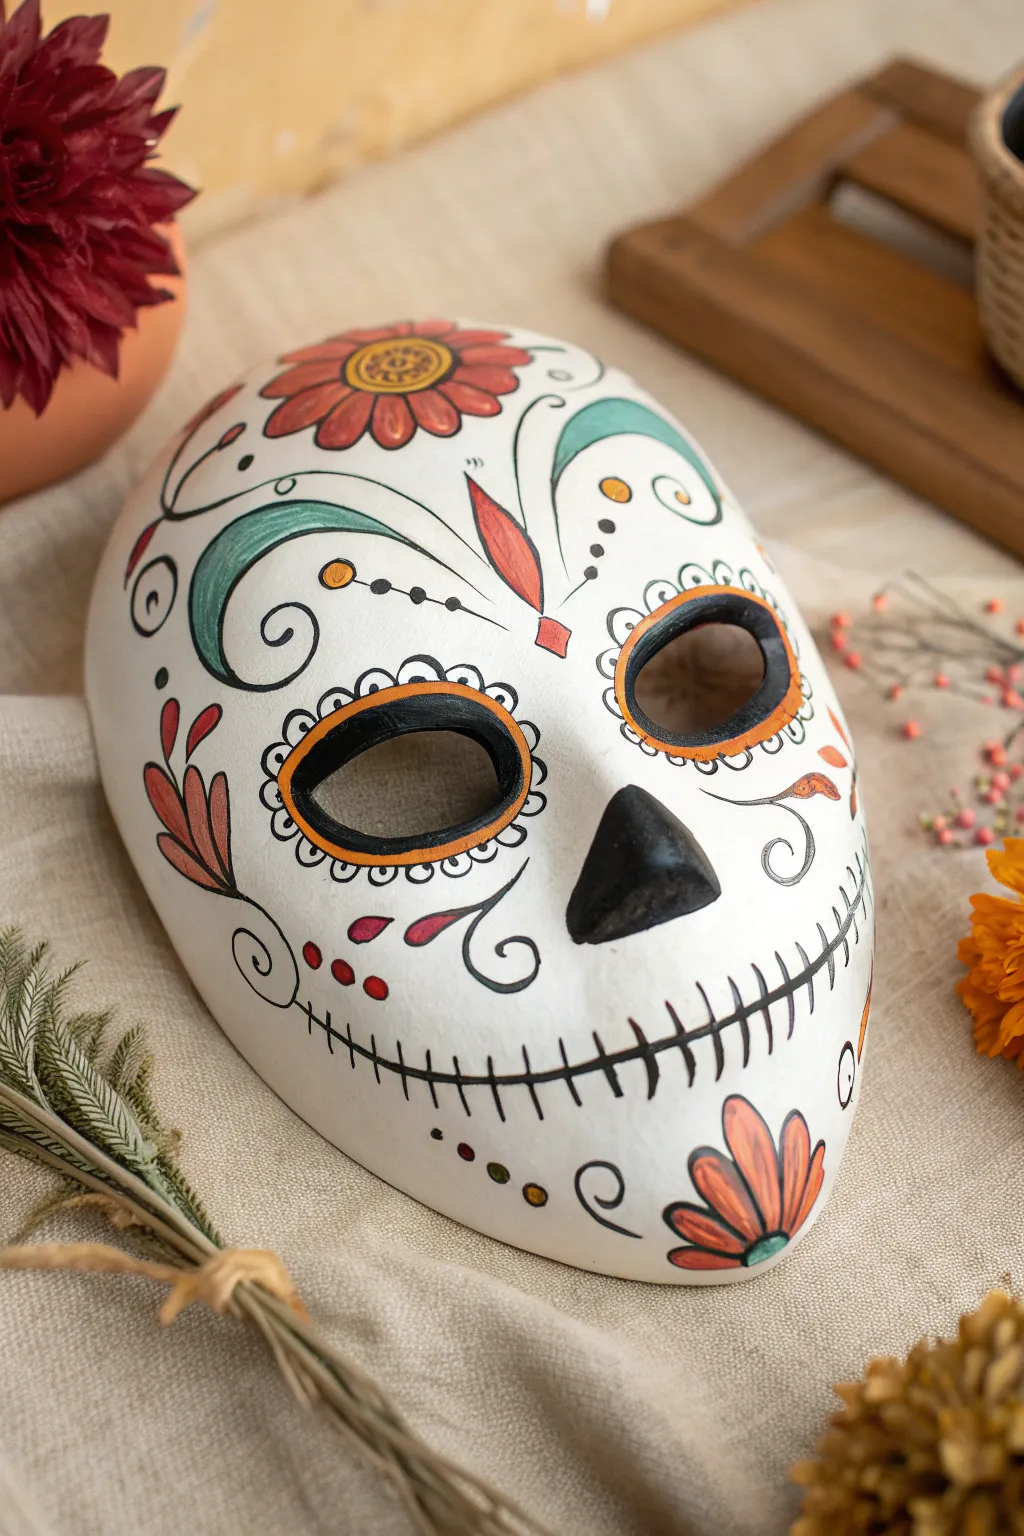
Transform a plain white mask into a vibrant Day of the Dead celebration piece. This design balances bold black linework with soft floral motifs in red, orange, and teal for a classic sugar skull aesthetic.
Step-by-Step Tutorial
Materials
- Plain white paper mache or plastic full-face mask
- Acrylic paints: Black, Bright Red, Orange, Teal/Turquoise, Yellow
- Detail brushes (sizes 00 and 1)
- Small flat brush (size 4 or 6)
- Pencil for sketching
- Eraser
- Matte spray varnish (optional)
Step 1: Sketching the Design
-
Plan the Face Features:
Begin by lightly sketching the large eye sockets. Draw a wide oval around each eye opening, leaving plenty of space for the decorative scalloped edge later. -
Outline the Nose and Mouth:
Sketch a triangular shape or an upside-down heart over the nose area. For the mouth, draw a long horizontal line extending from cheek to cheek, curving slightly upward at the ends. -
Add the Central Flower:
At the very center of the forehead, sketch a large flower. Start with a small circle center and add distinct, separate petals radiating outward. -
Draft the Florals and Swirls:
Sketch the intricate vines and leaves. Place a large teal swirl starting near the left temple and curving inward. Add reddish leaf shapes near the center and floral motifs on the chin.
Step 2: Blocking in Color
-
Paint the Nose:
Using your black paint and a small flat brush, fill in the nose shape completely. Ensure the edges are crisp and opaque. -
Fill the Eye Sockets:
Paint a thick black ring around the actual eye holes of the mask. Next, paint the larger rings you sketched in orange, leaving the space between the black and orange white for now. -
Detail the Forehead Flower:
Paint the petals of the forehead flower with bright red. Once dry, fill the center circle with yellow. -
Paint the Greenery:
Use your teal paint to fill in the large swirl on the forehead and the small leaf detail at the chin. Keep the paint application smooth and even. -
Add Secondary Flowers:
Paint the teardrop-shaped leaves on the left cheek and the flower on the right chin using a mix of red and orange to give them depth.
Steady Hand Trick
Rest your pinky finger on a dry part of the mask while painting delicate black lines. This acts as an anchor and prevents your hand from shaking during detailed work.
Step 3: Line Work and Details
-
Create the Scalloped Eyes:
Using your finest detail brush and black paint, outline the orange eye rings. Add small semi-circles (scallops) all around the outer edge of the orange ring. -
Dot the Eyes:
Place a single small black dot inside each scalloped semi-circle for a lace-like effect. -
Define the Forehead:
Outline the red flower petals and the yellow center in thin black lines. Add small detail lines inside the yellow center for texture. -
Outline the Vines:
Carefully outline the teal swirl and the red leaves. I find that pulling the brush toward me helps keep these long curves steady. -
Stitch the Mouth:
Go over your horizontal mouth line with black paint. Add vertical ‘stitch’ lines across it, spacing them slightly closer together near the center and wider apart toward the cheeks. -
Add Decorative Flourishes:
Paint small, delicate black swirls and curlicues around the cheeks and temples to fill empty space. Add a few red dots near the mouth stitches for a pop of color.
Add Texture
Glue small adhesive gems or sequins into the center of the forehead flower or around the eyes to catch the light and add a 3D element to your design.
Step 4: Finishing Touches
-
Connect the Patterns:
Draw thin stems utilizing black ink or paint to connect loose floral elements, like the orange buds on the right side of the face. -
Final Inspection:
Check for any pencil marks still visible and gently erase them if the paint is fully dry. Touch up any black lines that look faded. -
Seal the Mask:
If you plan to wear or display this for a long time, give the entire mask a light coat of matte spray varnish to protect the paint.
Your beautifully painted mask is now ready to be the highlight of your celebration or wall display
Cracked Porcelain Doll Mask
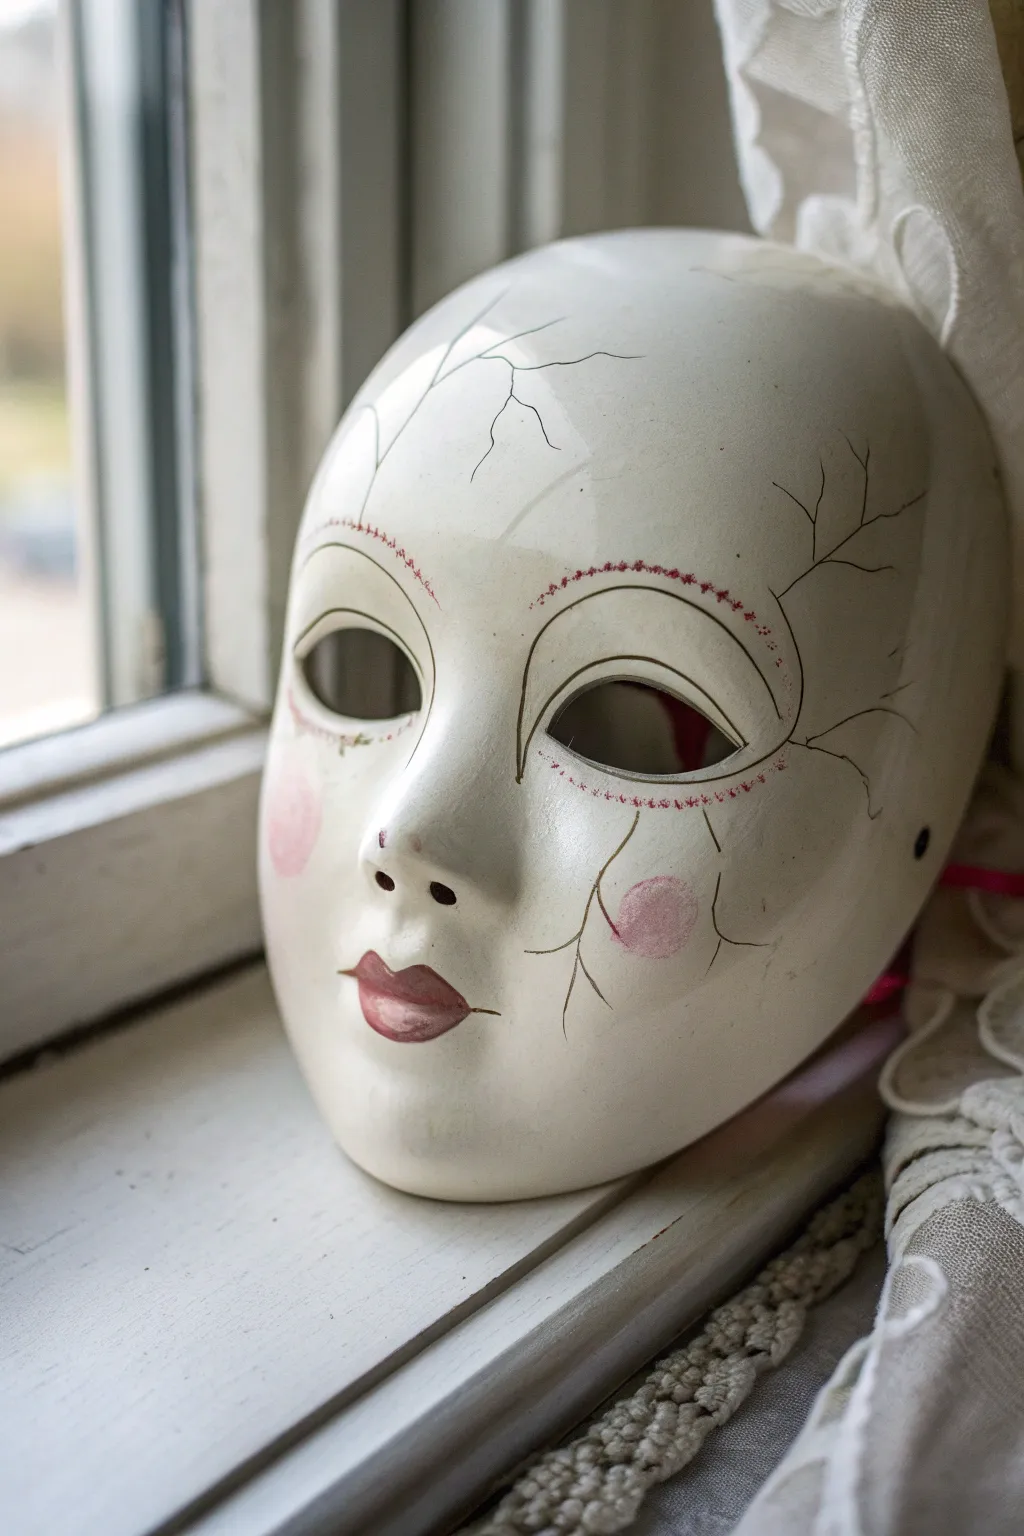
Transform a plain white mask into an eerily beautiful piece that mimics the look of shattered antique china. This project relies on delicate line work and subtle shading to create realistic cracks without breaking anything.
Step-by-Step Guide
Materials
- Blank white full-face decorating mask (plastic or papier-mâché)
- White gesso or acrylic primer
- Fine-grit sandpaper (400 grit)
- High-gloss white acrylic paint or spray paint/varnish
- Fine liner brush (00 or 000 size)
- Black liquid ink or thinned black acrylic paint
- Red fine-point marker or red acrylic paint
- Soft pink pastel chalk or blush powder
- Soft makeup brush or cotton pads
- Dark red/burgundy acrylic paint (for lips)
- Clear high-gloss spray sealant
Step 1: Preparation & Base
-
Prepare the surface:
Begin by lightly sanding your blank mask to remove any manufacturing ridges or rough spots. Wipe away all dust with a damp cloth. -
Prime the mask:
Apply two coats of white gesso or primer. This ensures a consistent texture and covers any slight discoloration in the base material. -
Create the porcelain finish:
Paint the entire mask with high-gloss white acrylic paint. You may need 3-4 thin coats to achieve that deep, ceramic-like shine. Let each layer dry fully. -
Seal the base:
For an ultra-authentic look, spray a coat of clear gloss varnish over the white paint. This creates a slick surface that helps your later ink lines glide smoothly.
Step 2: Delicate Features
-
Outline the eyes:
Using a fine liner brush and black ink, carefully trace the rim of the eye holes. Keep the line extremely thin and consistent. -
Draw the eyelid crease:
Paint a thin, arched line about half an inch above the eye cutout to simulate a heavy upper eyelid, typical of antique dolls. -
Add decorative stitching:
With your red marker or red paint on a fine brush, create a dotted or stitched pattern following the curve of the eyebrow area, arching over the eyelid crease you just painted. -
Blush the cheeks:
Scrape a little dust from a pink pastel chalk. Pick it up with a soft makeup brush or cotton pad and gently buff circular pink spots onto the cheeks. Build the color slowly rather than applying it all at once. -
Repeat blush application:
Add smaller, fainter touches of pink to the chin and the tip of the nose to give the ‘skin’ a flushed, lifelike appearance. -
Paint the lips:
Using burgundy or dark red paint, fill in the lips. Keep the shape petite and centered—a ‘rosebud’ mouth is key to the vintage doll aesthetic. -
Refine the lip shape:
Add a tiny highlight of white or lighter pink to the center of the lower lip to make it look plump and glossy.
Ink Flow Tip
If your black acrylic paint is too thick for fine lines, add a drop of water or flow improver. It should have the consistency of heavy cream to create sharp cracks.
Step 3: The Shattered Effect
-
Map out the cracks:
Visualize where the mask would have ‘broken’ if dropped. I find it helps to start major cracks from the edges, like the temples or chin, moving inward. -
Draw primary fissures:
Using your finest liner brush and black ink, paint thin, jagged lines. Avoid smooth curves; real porcelain cracks in sharp angles and zigzags. -
Branch out:
From your main lines, draw smaller, hairline fractures branching off like lightning bolts. These should be even thinner than the main cracks. -
Crossing features:
Allow some cracks to run directly through the painted features, like the painted stitches or the blush, to enhance the illusion that the surface itself is broken. -
Add impact points:
Where two cracks intersect or at the edge of the mask, slightly thicken the line to suggest a chip in the ceramic glaze. -
Final gloss coat:
Once all ink is bone dry, spray the entire mask with a final layer of high-gloss sealant to lock in the design and unify the sheen.
Aged Patina
For an older look, lightly wipe a wash of diluted brown or warm grey paint over the mask, letting it settle into the ‘cracks’ before wiping the surface clean.
Now you have a hauntingly lovely artifact that looks fragile enough to shatter at a touch

PENCIL GUIDE
Understanding Pencil Grades from H to B
From first sketch to finished drawing — learn pencil grades, line control, and shading techniques.
Explore the Full Guide
Jester Harlequin Diamonds
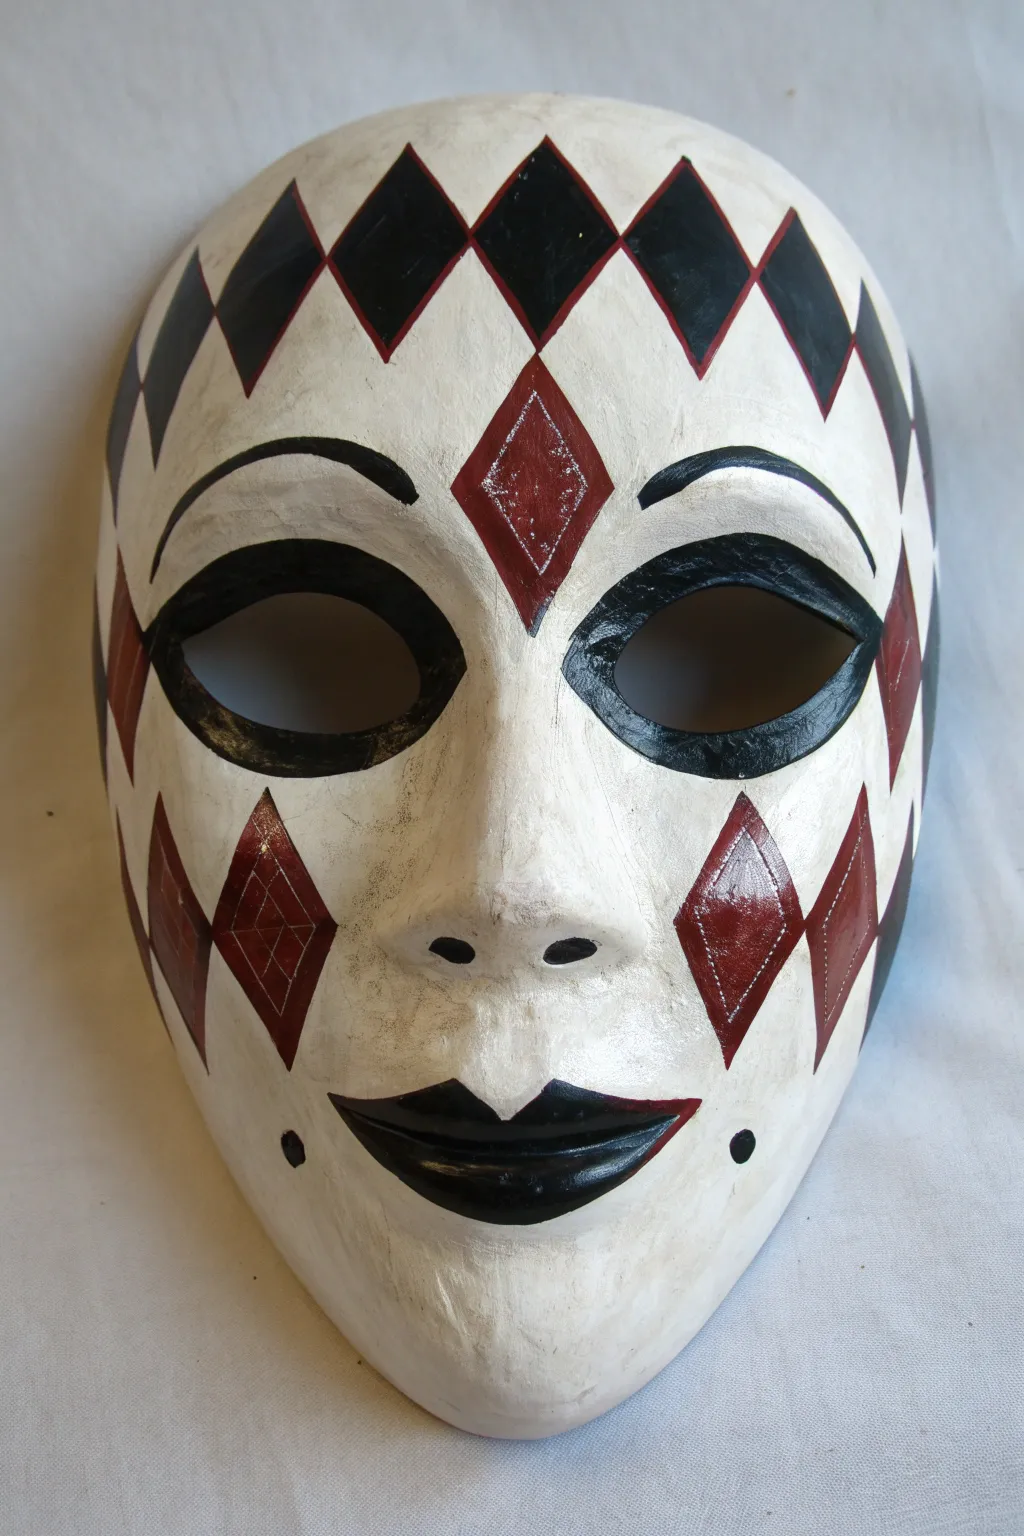
Transform a plain white mask into a classic Venetian masterpiece with this bold geometric design. Featuring a traditional harlequin pattern in deep red and black, the finish includes subtle antiquing for an authentic, aged theater look.
Step-by-Step
Materials
- Plain white full-face mask (paper mache or plastic)
- Acrylic paints: Black, deep red (crimson or burgundy), and white
- Gesso (optional, for priming)
- Pencil and eraser
- Ruler or flexible measuring tape
- Flat shader brushes (small and medium)
- Fine liner brush
- Gloss varnish or sealant
- A small sponge or rag for antiquing
Step 1: Preparation and Mapping
-
Surface Prep:
If your mask is shiny plastic, lightly sand it first to help the paint adhere. Apply a coat of white acrylic or gesso to create a uniform, matte base. Let this dry completely before sketching. -
Central Diamond:
Using a pencil, find the exact center of the forehead above the nose bridge. Draw a vertical diamond shape here. This central diamond acts as the anchor for the rest of your pattern. -
Top Row Grid:
From that central diamond, lightly sketch a horizontal line across the forehead to guide your top row. Mark even intervals for the subsequent diamonds towards the temples. -
Cheek Placement:
Map out the lower diamonds on the cheeks. Notice how the cheek diamonds align roughly under the eyes; sketch these shapes, ensuring they taper nicely with the curve of the mask. -
Facial Features:
Lightly outline the eyebrows, drawing them high and arched for a theatrical expression. Sketch the border around the eye holes and define the shape of the lips.
Fixing Wobbly Lines
Can’t get straight edges? Use pieces of painter’s tape or low-tack masking tape to create stencils for your diamonds. Press edges down firmly to stop leaks.
Step 2: Painting the Pattern
-
Black Diamonds:
Start with your black acrylic and a flat shader brush. Carefully fill in the diamonds on the upper forehead row. Use the edge of the brush to keep your lines sharp and crisp. -
Red Diamond Center:
Paint the central diamond between the eyes in a deep red. If your red is too bright, mix in a tiny dot of black or brown to darken it. This single red diamond is a focal point. -
Cheek Diamonds:
Fill the lower cheek diamonds with the same deep red. Applying two thin coats usually gives better coverage than one thick, gloppy coat. -
Diamond Details:
Once the red diamonds are dry, use your fine liner brush and thinned white paint (or a silver gel pen) to draw a very subtle cross-hatch or diamond grid inside the red shapes for added texture. -
Lining the Diamonds:
For an extra clean look, you can outline the red diamonds with a very thin line of darker red or crimson, though this is optional.
Step 3: Defining the Features
-
The Eyes:
Using black paint, outline the entire eye hole. Make the line thicker at the outer corners and taper it as it moves inward, creating an almond shape. -
Eyebrows:
Paint the eyebrows black, following your sketched high arch. Start thick near the nose and taper to a sharp point towards the temples. -
The Mouth:
Paint the lips black. Emphasize the Cupid’s bow on the top lip and curve the corners slightly upward for a mysterious half-smile. -
Beauty Marks:
Add two small black dots (beauty marks) on the lower jaw area, positioned symmetrically below the cheek diamonds.
Add Metallic Flair
Swap the white detail lines inside the red diamonds for gold leaf pen or gold paint. It adds a subtle shimmer that catches stage lights beautifully.
Step 4: Antiquing and Finishing
-
Creating the Wash:
Mix a small amount of black or brown paint with a lot of water to create a translucent ‘dirty water’ wash. -
Applying the Wash:
I like to dampen a sponge, dip it in the wash, and gently dab it over the white areas of the mask. This knocks back the bright white and makes the mask look aged and bone-like. -
Wiping Back:
Immediately wipe off excess wash with a clean rag. The dark pigment will stay in the textured crevices of the papier-mâché, highlighting the mask’s form. -
Sealing:
Once absolutely everything is dry, apply a coat of gloss varnish. This protects the paint and gives the mask a finished, porcelain-like sheen.
Now your mysterious harlequin mask is ready to be worn to the ball or displayed as art
Glitter Edge Masquerade Mask
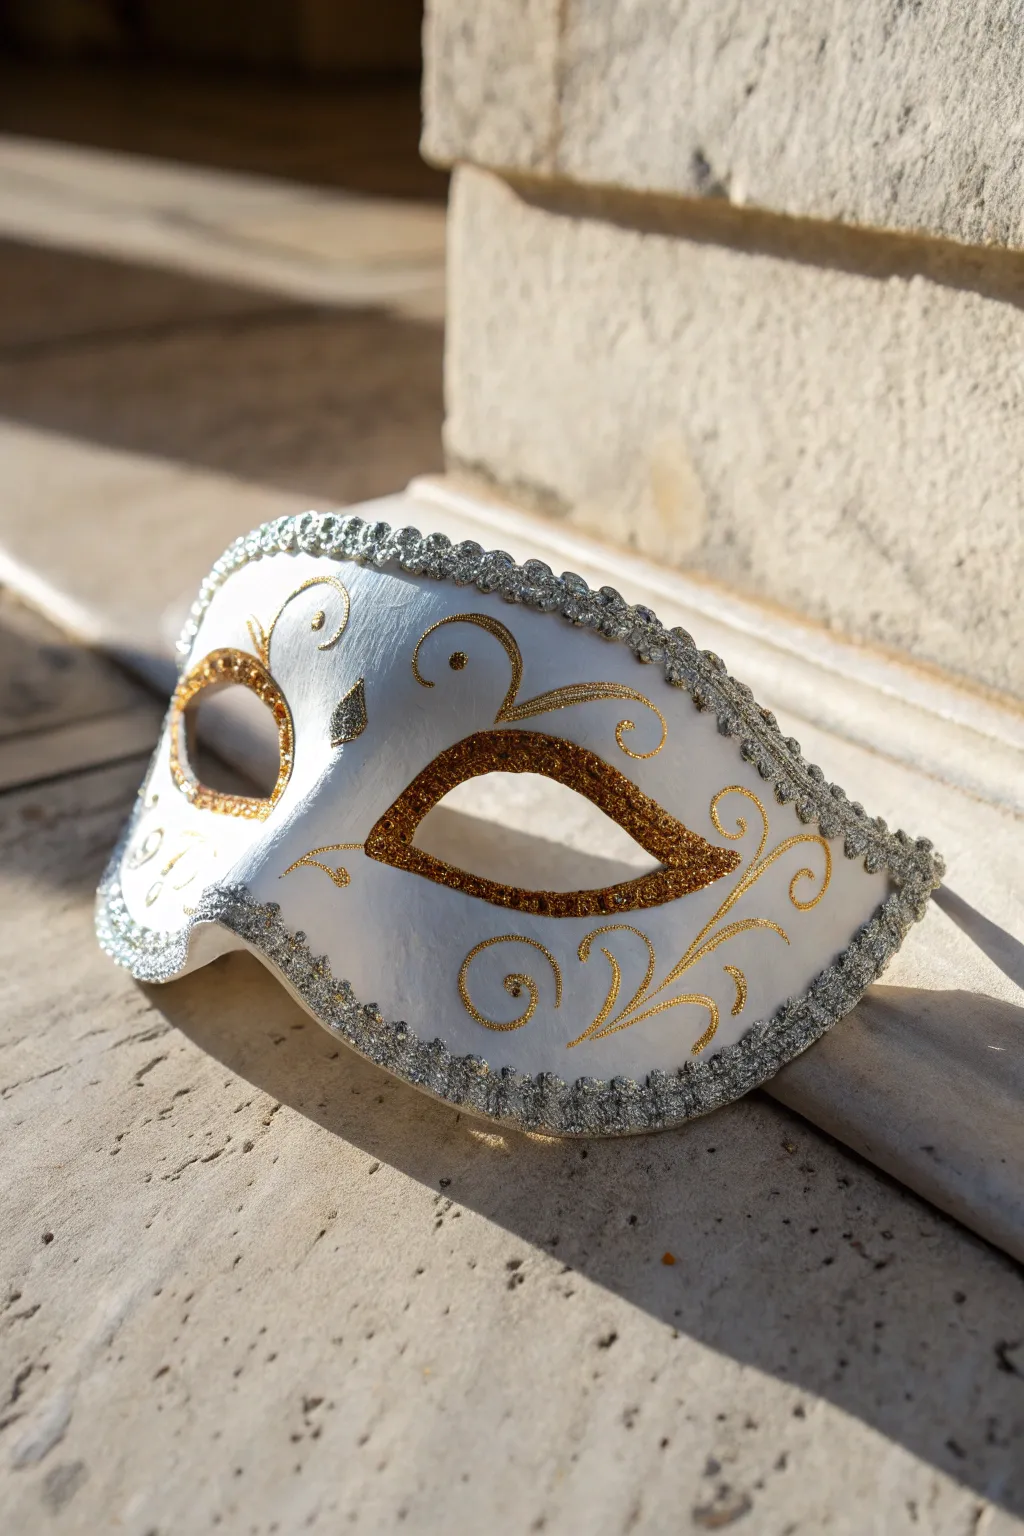
Transform a plain white mask into a sophisticated Venetian-style accessory with just a few touches of metallic charm. This design combines intricate gold scrollwork with a bold silver glitter border for a look that catches the light from every angle.
Step-by-Step Guide
Materials
- Plain white masquerade mask (paper maché or plastic foundation)
- White acrylic paint (matte or satin finish)
- Glitter glue or 3D dimensional fabric paint (Gold)
- Tacky glue or heavy-bodied craft glue
- Silver scallop-edged trim or sequins
- Loose silver glitter (coarse grain)
- Small paintbrush
- Pencil (H or HB)
- Eraser
- Sealer spray (optional gloss finish)
Step 1: Preparation & Base Coat
-
Prime the Surface:
Even if your mask is already white, giving it a fresh coat of high-quality white acrylic paint creates a uniform, professional canvas. Apply a smooth layer using a soft brush to minimize streak marks. -
Dry Completely:
Allow the white base coat to dry thoroughly for at least 30-60 minutes. -
Sketch the Design:
Using a pencil very lightly, sketch the swirling vine patterns onto the cheeks and forehead. Draw the teardrop shape at the bridge of the nose and the outlines around the eye holes.
Steady Hands
Rest your elbow on the table while piping the gold swirls. This stabilizes your arm and gives you much smoother curves than hovering your hand in the air.
Step 2: Gold Detailing
-
Outline the Eyes:
Using your gold glitter glue or dimensional paint, carefully trace the rim of both eye holes. Apply steady pressure to the bottle to keep the line thickness consistent. -
Fill the Eye Borders:
Thicken the gold line around the eyes to about 1/4 inch wide. If using glue, sprinkle loose gold glitter over it now while wet; if using glitter paint, simply ensure full coverage. -
Create the Scrollwork:
Follow your pencil sketches on the cheeks and forehead with the gold applicator. Create the spirals and curved lines slowly to maintain control. -
Add the Central Accent:
Draw and fill in the small teardrop or diamond shape located right between the eyes using the gold medium. -
Allow Setting Time:
Let the gold details dry completely. Dimensional paint often takes longer than standard acrylics, so waiting a few hours is best to prevent smudging.
Clogged Tip?
If your dimensional paint bottle stops flowing smoothly, don’t squeeze harder. Insert a sewing pin into the nozzle to clear the blockage instantly.
Step 3: The Silver Border
-
Apply Adhesive to the Rim:
Working in small sections of 2-3 inches at a time, apply a thick bead of tacky glue along the very outer edge of the mask. -
Attach the Trim Base:
Press your silver scallop trim or a line of silver sequins into the glue. This acts as a foundation for the heavy glitter layer. -
Coat with Glue:
Once the trim is secured around the entire perimeter, brush a generous layer of glue directly over the top of the trim to prepare it for the glitter. -
Apply Silver Glitter:
While holding the mask over a piece of scrap paper, pour coarse silver glitter over the glue-covered trim. I find that pressing the glitter down gently with a dry brush helps it adhere better. -
Shake Off Excess:
Tap the mask gently to remove loose glitter specks. Use the scrap paper to funnel the excess glitter back into your jar.
Step 4: Finishing Touches
-
Clean Up:
Refine the edges by using a dry, clean brush to sweep away any stray glitter particles from the white face of the mask. -
Erase Visible Marks:
Check for any visible pencil lines near your gold scrolls and gently erase them if the paint is fully cured. -
Final Seal:
Once absolutely everything is dry (give it overnight to satisfy the heavy glitter glue), mist the mask with a spray sealer to lock the glitter in place.
You have created a stunning piece of wearable art perfect for your next masquerade event


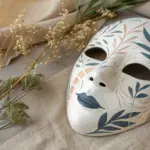
Gothic Lace Shadow Effect
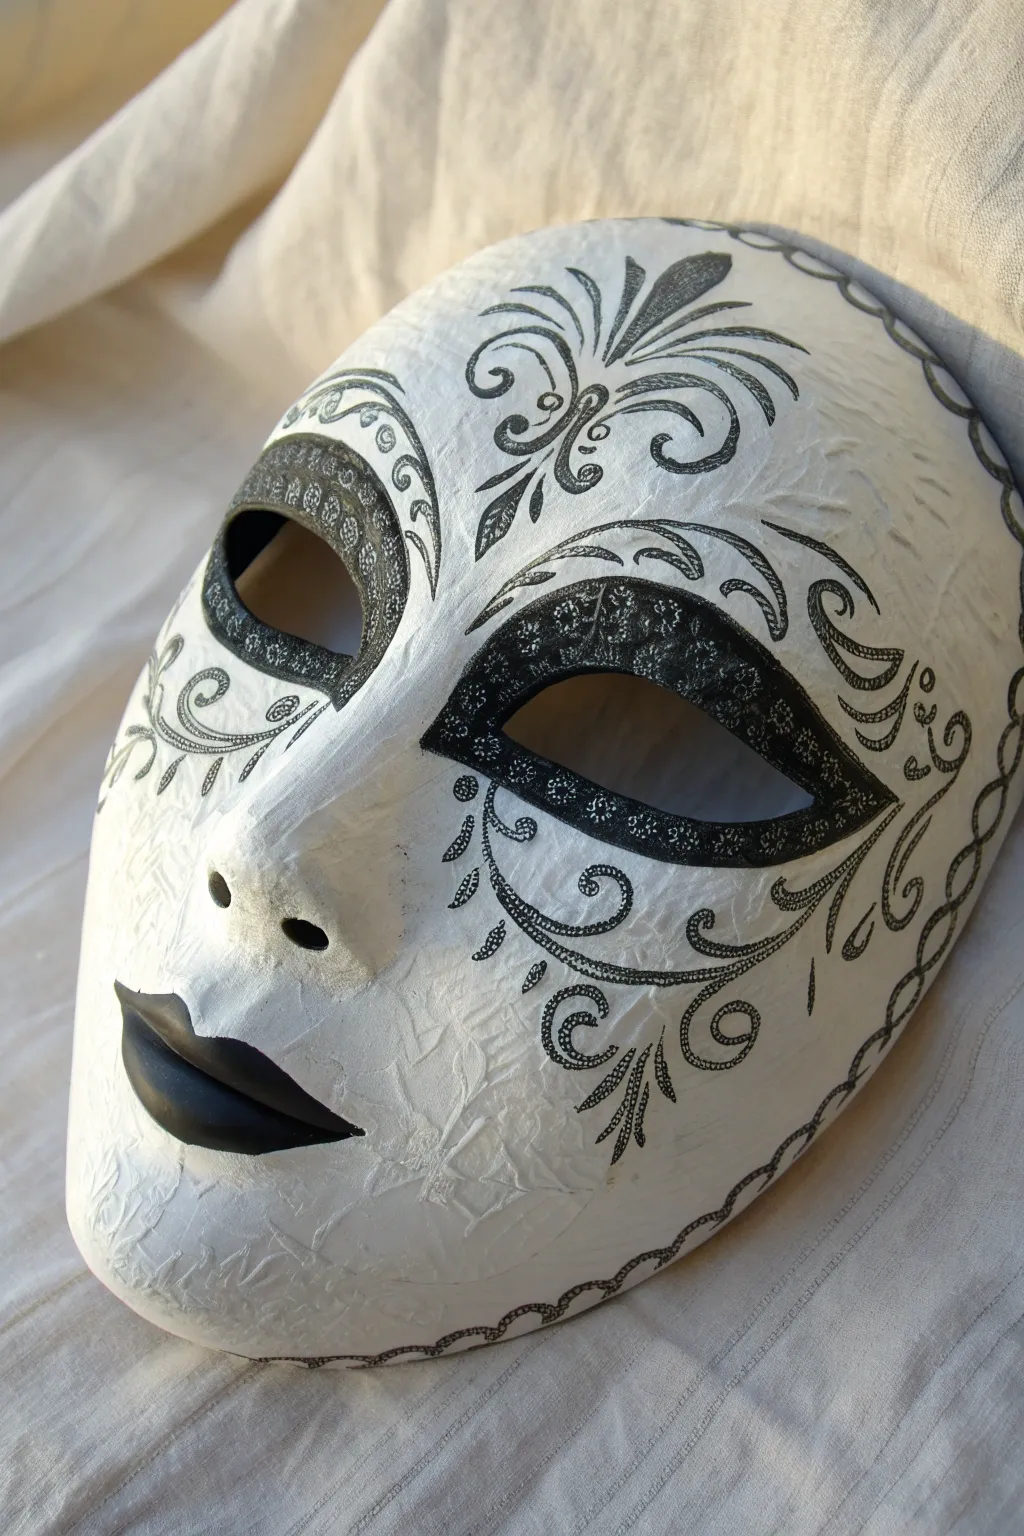
This elegant mask project combines the stark contrast of black and white with delicate, lace-like line work to create a sophisticated masquerade piece. The result is a mysterious, slightly gothic accessory perfect for a costume party or striking wall decor.
How-To Guide
Materials
- Blank white paper mache mask (full face)
- White acrylic gesso or primer
- Matte white acrylic paint
- Fine-grit sandpaper (400 grit)
- Black acrylic paint
- Ultra-fine tip permanent black marker (0.5mm or smaller)
- Small round brushes (size 0 and 2)
- Pencil and eraser
- Clear matte varnish spray
Step 1: Base Preparation
-
Smoothing the surface:
Begin by gently sanding your blank mask with fine-grit sandpaper. You want to knock down any large bumps or rough papier-mâché edges without removing too much texture. -
Priming:
Apply a coat of white gesso to seal the paper material. This creates a non-porous surface that prevents your marker ink from bleeding later. -
Base coating:
Once the primer is dry, paint the entire mask with matte white acrylic paint. For a solid, bright finish, apply two thin layers rather than one thick one, letting it dry completely between coats.
Step 2: Eye and Lip Definition
-
Sketching the shapes:
Lightly sketch the outlines for the eye designs with a pencil. Draw an exaggerated almond or cat-eye shape around the existing eye holes, extending the outer corners upwards towards the temples. -
Define the lips:
Sketch the lip shape. Follow the natural molding of the mask’s mouth but refine the edges to be sharp and symmetrical. -
Painting the eyes:
Use a small round brush and black acrylic paint to carefully fill in the almond shapes around the eyes. Keep your hand steady to ensure the edges are crisp curves. -
Painting the lips:
Fill in the lips with black acrylic paint. I find it helpful to start from the center and brush outward to keep the corners sharp. -
Adding texture to the black:
Once the black eye areas are dry, take your white paint and a very fine brush (or a white gel pen). Add tiny, intricate swirls or stippling inside the black area to create a ‘lace’ texture.
Bleeding Lines?
If your marker bleeds into the white paint, the base coat is too porous. Seal the area with a thin layer of matte medium or clear varnish before re-drawing the lines.
Step 3: Filigree Detailing
-
Planning the filigree:
Using your pencil very lightly, map out the main flow of the filigree vines. Focus on a large central motif on the forehead and sweeping curves along the cheeks and chin line. -
Inking the center motif:
Switch to your ultra-fine black marker. Start with the central forehead design, drawing tear-drop shapes and swirls that fan out symmetrically from the center. -
Cheek embellishments:
Draw long, sweeping S-curves down the sides of the cheeks. Add small offshoot vines and tiny leaves to fill the negative space without overcrowding. -
Chin detailing:
Add smaller floral or vine motifs near the chin to balance the heaviness of the forehead design. -
Border work:
Create a scalloped lace border along the very bottom edge of the mask using small, connected semi-circles with the marker. -
Micro-detailing:
Go back into your larger marker lines and add tiny dots, cross-hatching, or double lines to simulate the depth and texture of real lace. -
Finishing touches:
Erase any visible pencil marks gently. Finally, seal your work with a light mist of clear matte varnish to protect the ink and paint from moisture.
Add Dimension
Glue tiny clear rhinestones at the center of the forehead swirls or the corners of the eyes to add a subtle sparkle that catches the light.
Now you have a stunning, hand-painted mask ready for display or your next masquerade event
Burnt and Sooted Mask Look
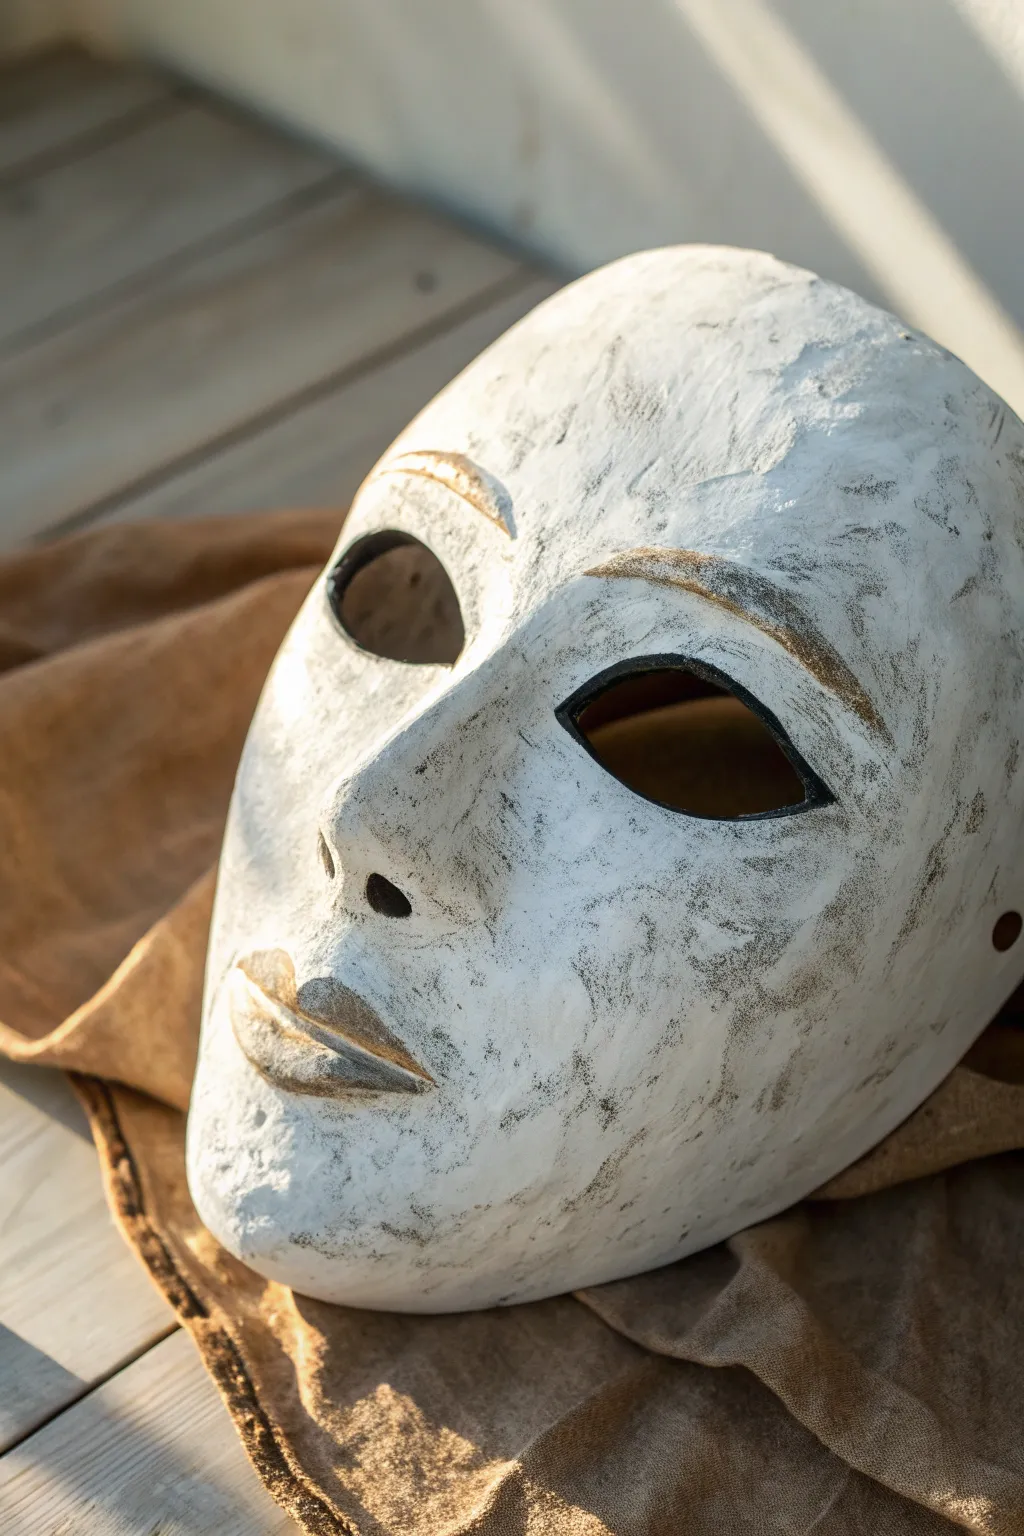
Transform a plain white base into a relic that looks like it has survived centuries of fire and ash. This technique uses simple dry-brushing and layering to achieve a hauntingly realistic, weathered porcelain effect perfect for theater or display.
Detailed Instructions
Materials
- White paper maché or plaster mask base
- White gesso or primer
- Matte white acrylic paint
- Black acrylic paint
- Metallic gold or bronze acrylic paint (optional but recommended)
- Rough-grit sandpaper (80-100 grit)
- Fine-grit sandpaper (220 grit)
- Stiff bristle brush (chip brush)
- Small detail brush
- Paper towels or old rag
- Matte clear sealant spray
Step 1: Texturing the Base
-
Prime for texture:
Start by applying a thick, uneven coat of gesso to your mask. Don’t try to be smooth; use a dabbing motion with your brush to create little peaks and valleys that will catch the ‘soot’ later. -
Add physical distress:
Once the gesso is fully dry, take your rough-grit sandpaper and scratch up specific areas. Focus on the cheeks and forehead to create deep grooves that mimic cracked porcelain or aged plaster. -
Base coat application:
Paint the entire mask with matte white acrylic paint. This unifies the scratched gesso and the original surface. Let this layer dry completely before moving on.
Step 2: Creating the Sooted Effect
-
Prepare the dry brush:
Squeeze a tiny dot of black paint onto your palette. Dip the tip of a stiff chip brush into it, then vigorously wipe almost all the paint off onto a paper towel until the brush leaves only a faint, dusty mark. -
Initial dusting:
Lightly sweep the dry brush over the entire mask. The tiny amount of black paint should only catch on the high points of the texture you created with the gesso and sandpaper. -
Deepening the shadows:
Reload your brush and wipe it off again, but leave slightly more paint on this time. Focus this darker application on the edges of the mask, under the cheekbones, and around the jawline to create volume. -
Defining the eyes:
Using a small detail brush with wet black paint (not dry-brushed), carefully line the inside rim of the eye sockets. This creates a stark, hollow depth. -
Feathering the eyes:
While the eye rim paint is still slightly tacky, use a clean, dry brush to smudge the black paint outward slightly, blending it into the surrounding white area so it doesn’t look like a harsh eyeliner line. -
Highlighting features:
If you look closely at the reference, there are touches of metallic warmth. Dry brush a very small amount of metallic gold or bronze over the eyebrows and the upper lip. -
Weathering the gold:
Immediately after applying the gold, scuff it back with a clean rag. The metal tone should look like it’s wearing off, revealing the white beneath, rather than freshly painted on. -
The nostril details:
Paint the inside of the nostrils black to match the eyes. I find this small detail adds immense realism to the hollow ‘skull’ look. -
Adding specific scuffs:
Use the edge of your stiff brush with black paint to create a few distinct scratch marks on the forehead or cheeks. These shouldn’t be blended; they represent fresh damage.
Too much soot?
If you apply too much black paint, don’t panic. Wait for it to dry, then dry-brush white paint over the mistake to push the darkness back into the recesses.
Step 3: Finishing Touches
-
Knocking back white:
If any white areas look too pristine and ‘plastic,’ lightly sand them with fine-grit sandpaper to dull the sheen and expose a bit of the raw texture underneath. -
Final soot pass:
Do one last very light dry-brush pass with black over the high points of the lips and nose bridge to ensure the features pop against the texture. -
Sealing the work:
Take the mask to a well-ventilated area and spray it with a matte clear sealant. This protects the paint from rubbing off and locks in that dusty, dry appearance.
Uneven Texture Tip
Mix a pinch of baking soda or fine sand into your white base coat paint. This creates a gritty, stone-like surface that grabs dry-brushing beautifully.
Now you have a mask that carries the weight of history in its weathered features
Galaxy Night Sky Mask
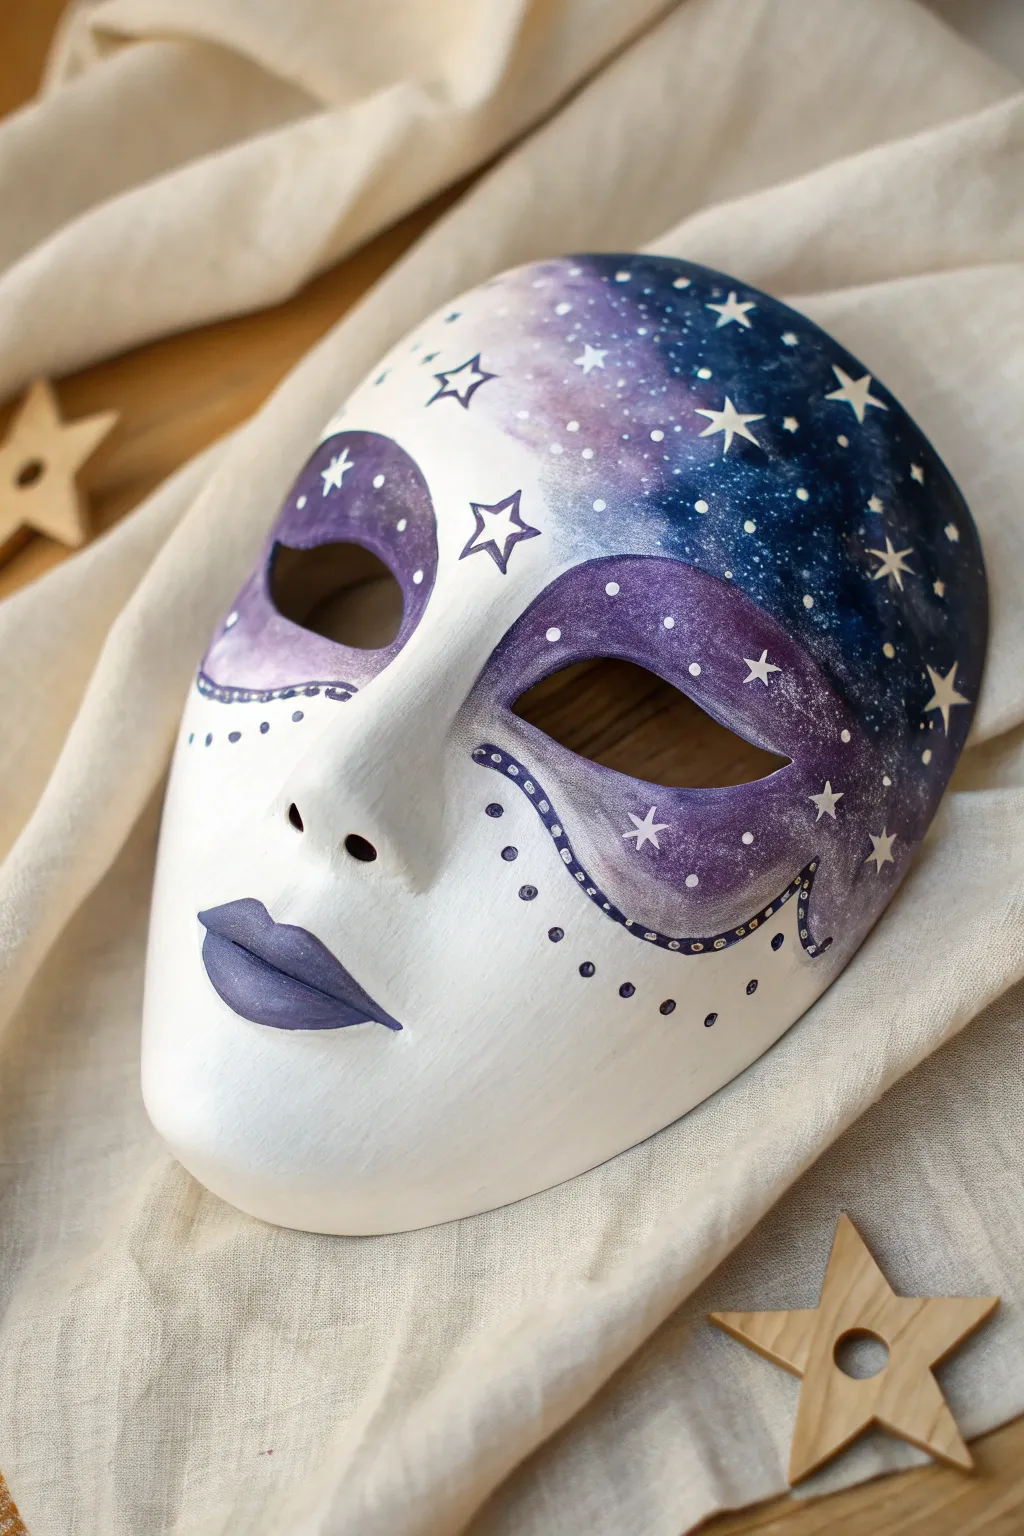
Transform a plain white mask into a dreamy piece of wearable art featuring deep cosmic blues, soft violets, and a dusting of stars. This celestial design combines smooth gradient blending with delicate linework to capture the magic of the night sky.
Step-by-Step
Materials
- Blank white paper maché or plastic full-face mask
- Gesso or white acrylic primer
- Acrylic craft paints: Deep Navy Blue, Violet/Purple, Lavender, White, Black
- Soft synthetic brushes: large flat shader, medium filbert, fine liner (size 0 or 00)
- Small sponge applicator or makeup sponge
- Pencil
- Water cup and palette
- Matte or satin varnish (optional)
Step 1: Base and Gradient
-
Prime the Surface:
Even if your mask is already white, apply a thin coat of white gesso or acrylic paint to the entire surface. This creates a uniform texture that grabs the color better than bare plastic or paper maché. -
Map the Design:
Lightly sketch a curved line starting from the top center of the forehead, sweeping down across the right cheek and under the right eye. This marks where your galaxy area will end and the white face begins. -
Start the Galaxy Base:
Using a sponge or a soft flat brush, apply your deepest Navy Blue paint to the upper right corner of the forehead. While the paint is wet, dab it gently to create a textured, cloudy effect rather than flat strokes. -
Blend in Purple:
While the navy is still slightly tacky, pick up your Violet paint. Blend it into the navy edge and bring it down towards the right eye area, allowing the colors to mix directly on the mask for a seamless transition. -
Fade to Lavender:
Switch to a lighter Lavender shade for the edges of the colorful section. Dab this color along the pencil line you drew earlier, feathering it out softly so it disappears into the white base rather than leaving a harsh line. -
Create the Eye Accents:
Paint the eyelids. Apply the Violet shade over both eyelids, extending slightly upward towards the eyebrows. On the left eye (the white side), keep this contained just above the eye socket. On the right eye (the galaxy side), blend it into the surrounding blue.
Starry Splatter
Load a stiff toothbrush with watered-down white acrylic. Run your thumb over the bristles to flick tiny mist-like stars onto the dark sections for a realistic nebula look.
Step 2: Details and Stars
-
Deepen the Shadows:
Mix a tiny drop of black into your Navy Blue. Use this to darken the very top edge and the outer right rim of the mask, adding depth to your night sky. -
Paint the Lips:
Using a medium filbert brush, carefully paint the lips with the Violet acrylic. For a subtle dimensional look, I like to mix a tiny bit of Navy into the corners of the mouth and a dot of White on the center of the bottom lip for a highlight. -
Add Decorative Dots:
Dip the handle end of a small paintbrush or a dotting tool into dark Navy or Purple paint. Create a sweeping line of dots underneath the left eye, mimicking the curve of a cheekbone. -
Add Lower Dots:
Continue with a decorative line of dots swooping from under the galaxy section on the right cheek down towards the chin. -
Outline the Scallops:
Using your finest liner brush and dark Navy paint, draw a scalloped or curved line underneath the galaxy section to define the transition more clearly. Add small dots inside the scallops for extra detail. -
Paint Large Stars:
With the fine liner brush and White paint, draw five-pointed stars. Place a few large outline-only stars on the white portion of the forehead and darker filled-in stars on the blue galaxy background. -
Add Tiny Stars:
Using the very tip of your smallest brush or a toothpick, dot tiny white speckles across the blue and purple gradient areas to represent distant star clusters. -
Create Glowing Stars:
For the brightest stars, place a slightly larger dot of white paint, and while wet, use a clean, slightly damp brush to blur the edges outward, creating a glowing halo effect. -
Final Touches:
Check your symmetry and clean up any stray smudge marks with a touch of white paint.
Add Some sparkle
While the paint is still tacky, gently press loose silver glitter onto the darkest blue areas. Or, glue small rhinestones in the center of the largest stars for 3D shine.
Once dry, seal your artwork with a clear varnish to protect the delicate star details and keep the colors vibrant for your next masquerade event
Peeling Paint Underlayer Reveal
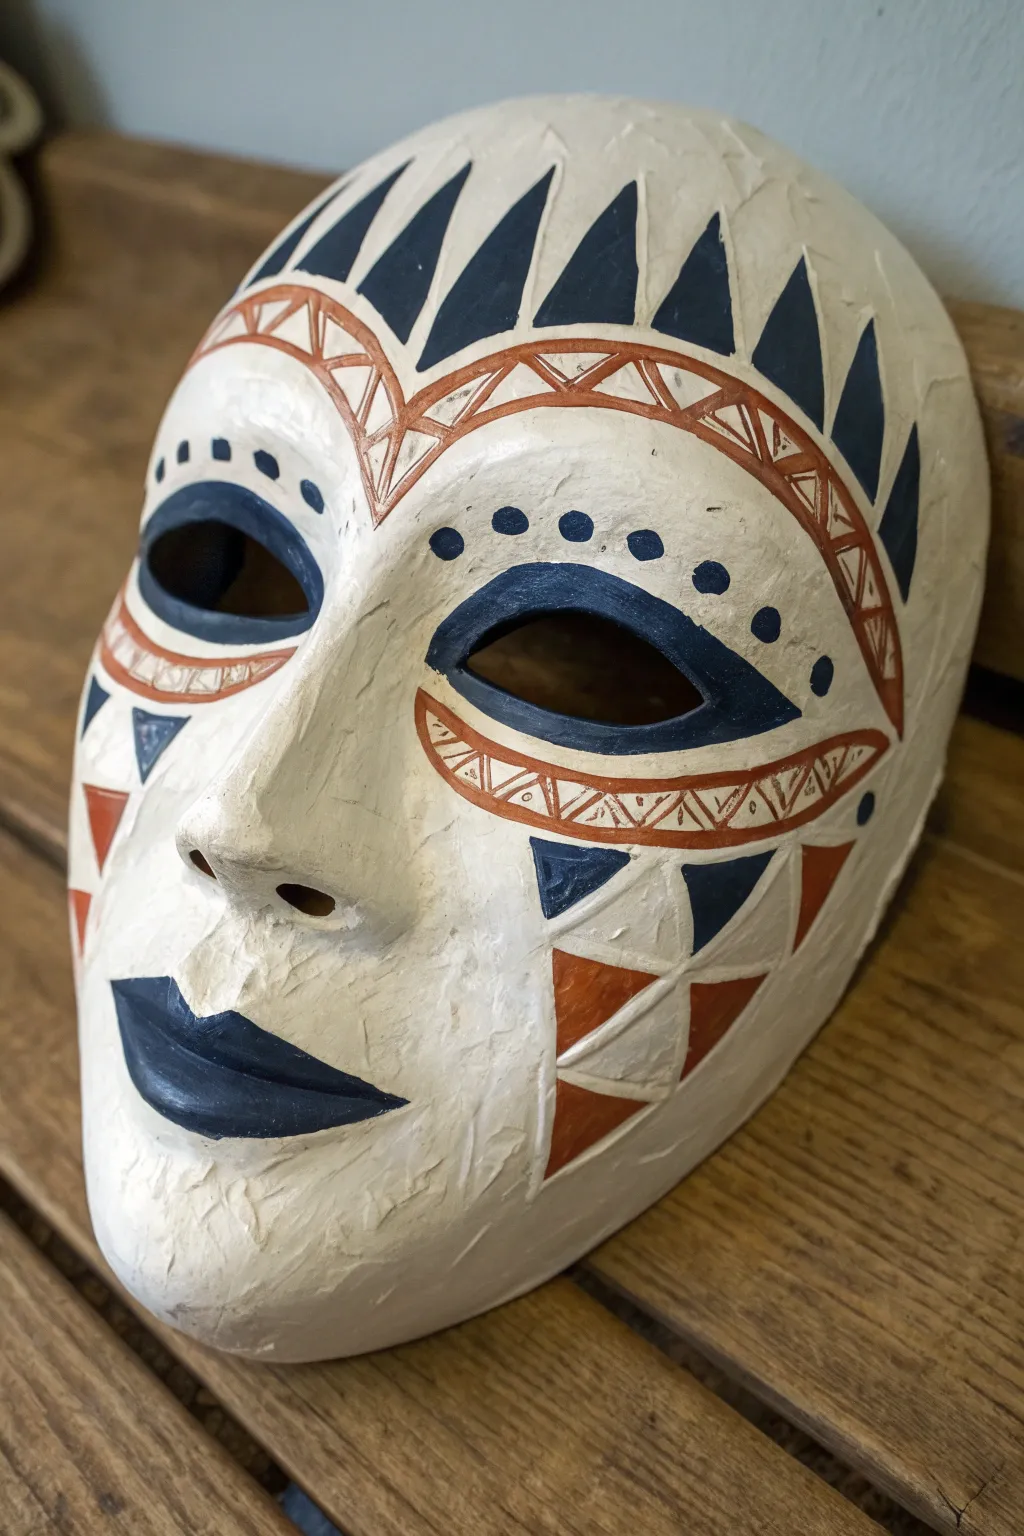
Transform a plain white mask foundation into a striking piece of ethnographic-inspired art using geometric patterns and bold contrast. The design features sharp navy blue triangles and intricate terracotta linework, all set against a richly textured, off-white background that mimics the look of carved wood or ancient pigment.
Step-by-Step
Materials
- Plain white paper mache or plastic full-face mask
- Gesso or texture paste
- Acrylic paints: Navy Blue, Burnt Sienna (Terracotta), Off-White/Cream
- Matte varnish or sealant
- Stiff bristle brush (for texture)
- Small round detail brush (size 0 or 1)
- Flat shader brush (size 4 or 6)
- Pencil for sketching
- Palette and water cup
- Fine grit sandpaper (optional)
Step 1: Base Preparation
-
Prime the Surface:
Begin by applying a generous coat of Gesso or texture paste over the entire mask. Don’t smooth it out perfectly; instead, use a stiff brush to dab and cross-hatch, creating ridges and bumps that will give the mask an aged, handmade feel. -
Apply the Base Color:
Once dry, paint the entire mask with an off-white or cream acrylic. I like to mix a tiny drop of brown into white to warm it up so it doesn’t look too sterile. -
Dry Brushing (Optional):
To enhance the texture you created, lightly dry brush a pure white highlight over the raised areas. This adds depth before you even start the pattern.
Fixing Shaky Lines
If your geometric lines look wobbly, don’t panic. Wait for the paint to dry fully, then use the off-white base color to ‘cut back’ into the shape and straighten the edge.
Step 2: Planning the Design
-
Sketch the Forehead Guide:
Using a pencil very lightly, draw a curved line across the forehead that dips slightly in the center, framing the brow area. This divides the upper tribal pattern from the eye area. -
Outline the Eyes:
Sketch almond shapes around the eye sockets, extending the corners outward slightly to create a dramatic look. -
Mark the Cheek Triangles:
On the cheeks, lightly draw the large triangle sections that point downwards. Divide these main triangles into smaller geometric segments for the color blocking later. -
Sketch the Brow Band:
Above the curved forehead line, draw a secondary parallel line about half an inch above it to create a band. Inside this band, sketch a zigzag or diamond pattern.
Step 3: Applying Color
-
Paint the Upper Triangles:
Using your flat brush and Navy Blue paint, fill in the bold triangles radiating from the top of the head down toward the brow band. Ensure the points are sharp. -
Define the Eyes:
Fill in the almond shapes around the eye sockets with the Navy Blue. If the paint is slightly translucent, let it dry and add a second coat for opacity. -
Paint the Lips:
Carefully paint the lips with the Navy Blue. Use the small round brush to get a crisp edge on the cupid’s bow and corners of the mouth. -
Create the Terracotta Band:
Switch to your Burnt Sienna or Terracotta paint. Using the fine detail brush, outline the brow band strip. I prefer to steady my hand on the table for these long, curved lines. -
Detail the Brow Pattern:
Inside the terracotta band, paint the zigzag or cross-hatching lines. These should be delicate and thin. -
Add Under-Eye Accents:
Paint a curved band underneath the blue eye area using the Terracotta paint. Fill this band with the same zigzag details used on the forehead.
Level Up: Aged Look
After sealing, wipe a very diluted brown paint wash over the mask and immediately wipe it off with a rag. The dark pigment will settle into the texture for an antique finish.
Step 4: Refining Details
-
Adding Dots:
Dip the back end of your paintbrush into the Navy Blue paint. Dot a row of circles following the curve above the eye sockets and below the brow band. -
Cheek Geometry – Blue:
Return to the cheek triangles. Paint specific segments in Navy Blue according to your sketch, creating an alternating pattern. -
Cheek Geometry – Terracotta:
Fill the adjacent segments with the Terracotta paint. Leave some segments as the base off-white color to create negative space. -
Side Accents:
Add small triangular accents near the temples or outer cheeks using the Terracotta paint to balance the design. -
Clean Up Edges:
Use your smallest brush and the off-white base color to tidy up any lines where the blue or orange may have smeared outside the intended shape. -
Final Seal:
Once completely dry, apply a matte varnish over the entire piece. Avoid glossy finishes, as the matte look suits the natural, tribal aesthetic better.
Hang this mask on a gallery wall or use it as a striking prop for your next costume event
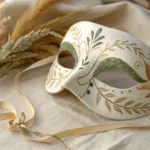
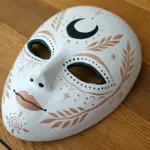
Two-Faced Mood Mask Concept
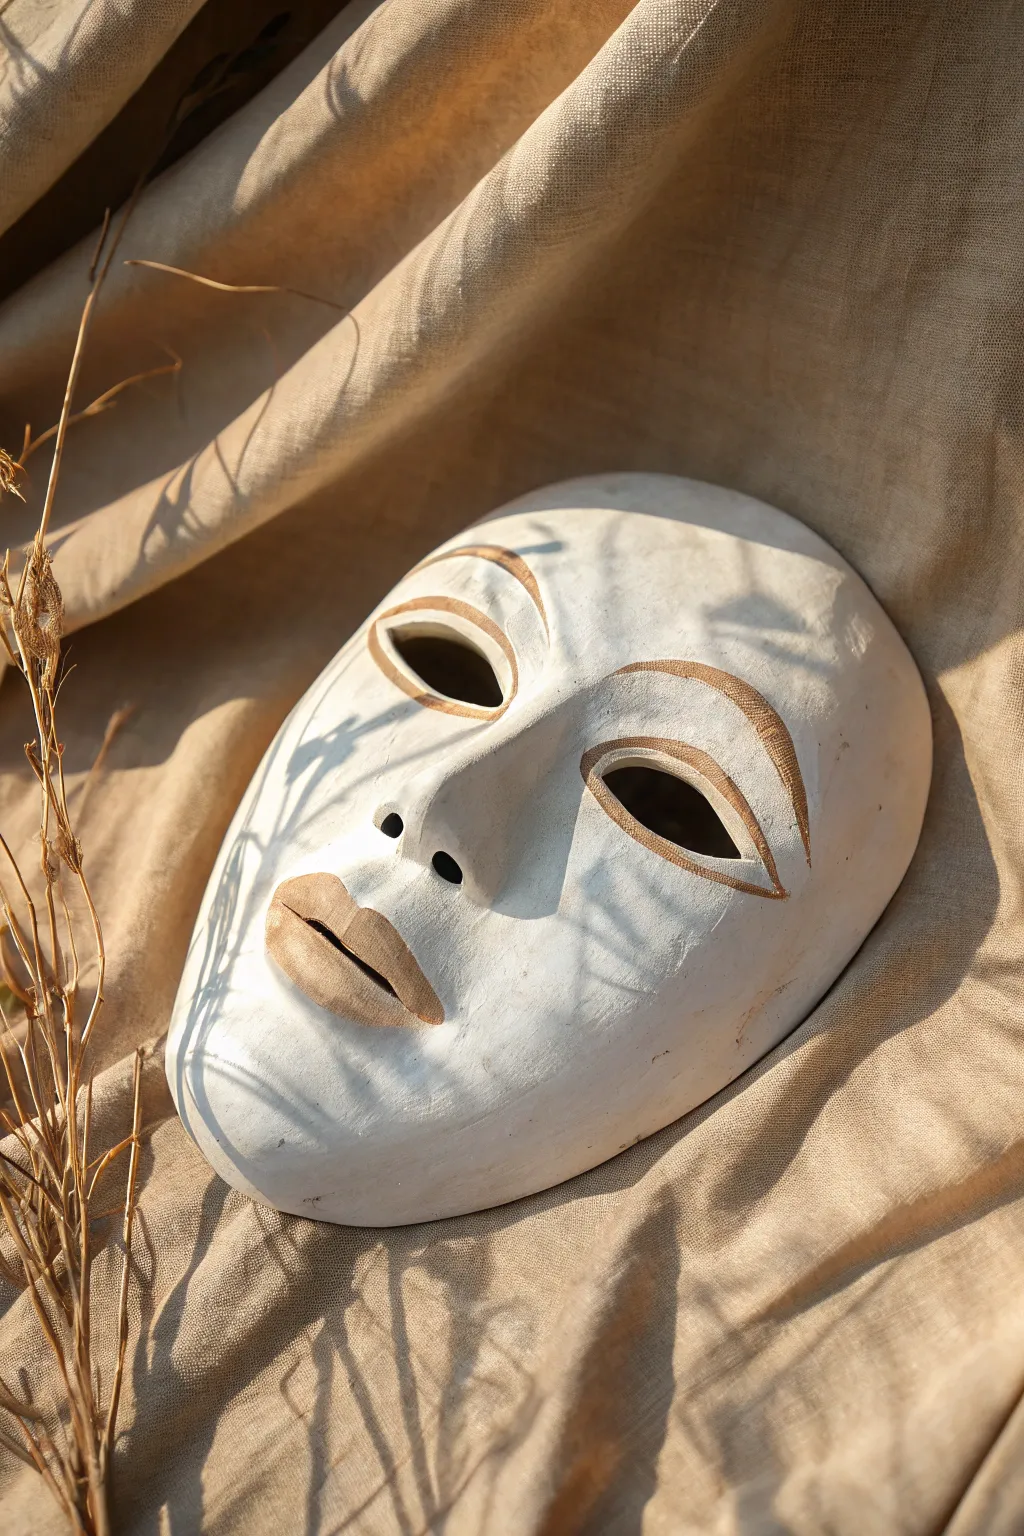
Embrace the elegance of simplicity with this understated mask design that focuses on form and subtle definition. By using a warm metallic bronze to outline key features on a matte white base, you create a piece that feels ancient yet modern, perfect for a sophisticated two-faced mood concept.
Step-by-Step Tutorial
Materials
- Plain white papier-mâché or plaster mask base
- Gesso or matte white acrylic paint
- Metallic bronze or antique gold acrylic paint
- Fine round paintbrush (size 0 or 1)
- Medium flat paintbrush
- Fine-grit sandpaper (optional)
- Matte spray varnish
- Palette for mixing
- Water cup and paper towels
Step 1: Preparing the Canvas
-
Assess the surface:
Begin by inspecting your mask blank. If there are any rough seams or stray bits of paper pulp, gently smooth them down with facial tissue or very fine-grit sandpaper. -
Prime the base:
Using your medium flat brush, apply a coat of gesso or matte white acrylic paint over the entire front of the mask. This ensures a uniform, non-porous surface. -
Build opacity:
Allow the first layer to dry completely. If the original mask color or texture is still showing through, apply a second coat of white. I find that two thin coats adhere better than one thick, gloppy one. -
Final smooth check:
Once the white base is bone dry, run your fingers over the surface. It should feel chalky and matte, providing a perfect grip for the detail work to come.
Natural Texture
Don’t sand the papier-mâché perfectly smooth. Leaving a few subtle bumps adds an organic, almost ceramic feel that contrasts nicely with the metallic paint.
Step 2: Mapping the Features
-
Identify the contours:
Study the natural geography of the mask. Notice the raised ridge of the brow, the slope of the nose, and the fullness of the lips. -
Outline the eye shape:
Load your fine round brush with metallic bronze paint. Carefully paint a thin line along the very edge of the eye opening, following the curve exactly. -
Thicken the upper lid:
Go back over the top curve of the eye opening, slightly thickening the line to mimic an upper eyelid or eyeliner. Taper it gently at the corners. -
Create the crease:
Paint a curved line about half an inch above the eye opening. This line represents the eyelid crease and adds depth to the expression. -
Connect the lines:
At the outer corner of the eye, very delicately extend the crease line downward to almost meet the lash line, creating an almond shape. -
Repeat for symmetry:
Recreate these steps on the other eye, stepping back frequently to ensure they look balanced.
Step 3: Defining the Expression
-
Draft the eyebrows:
Above the eye crease, paint a sweeping arch for the eyebrow using the bronze paint. Keep the start of the brow slightly thicker and taper it to a fine point at the tail. -
Outline the lips:
Moving to the mouth, use the fine brush to outline the perimeter of the lips. Follow the cupid’s bow carefully for a sharp, defined look. -
Fill the lips:
Fill in the lip area with the bronze paint. Do this in thin layers to avoid brushstrokes showing up in the metallic finish. -
Refine the edges:
Check the edges of your bronze sections. If any lines look shaky, you can use a clean, damp brush to gently tidy them up before the paint sets. -
Dry brush shading (optional):
For a subtle aged look, wipe most of the paint off your brush until it’s ‘dry.’ Lightly dust a tiny amount of bronze around the nostrils to define them without drawing a hard line.
Fixing Shaky Lines
If you smudge the bronze paint, don’t panic. Let it dry completely, then carefully paint over the mistake with your base white color to ‘erase’ it.
Step 4: Finishing Touches
-
Let it cure:
Allow the bronze paint to dry completely. Metallic acrylics can sometimes take a little longer to cure than matte colors. -
Seal the work:
Take your mask to a well-ventilated area. Hold a can of matte spray varnish about 10 inches away and apply a light, even mist to protect your paint job without adding unwanted gloss. -
Inspect the finish:
Once the varnish is dry, check that the white areas remain matte while the bronze retains a slight shimmer, creating that beautiful contrast shown in the reference.
Now you have a striking art piece that proves less is truly more when it comes to capturing emotion


Have a question or want to share your own experience? I'd love to hear from you in the comments below!