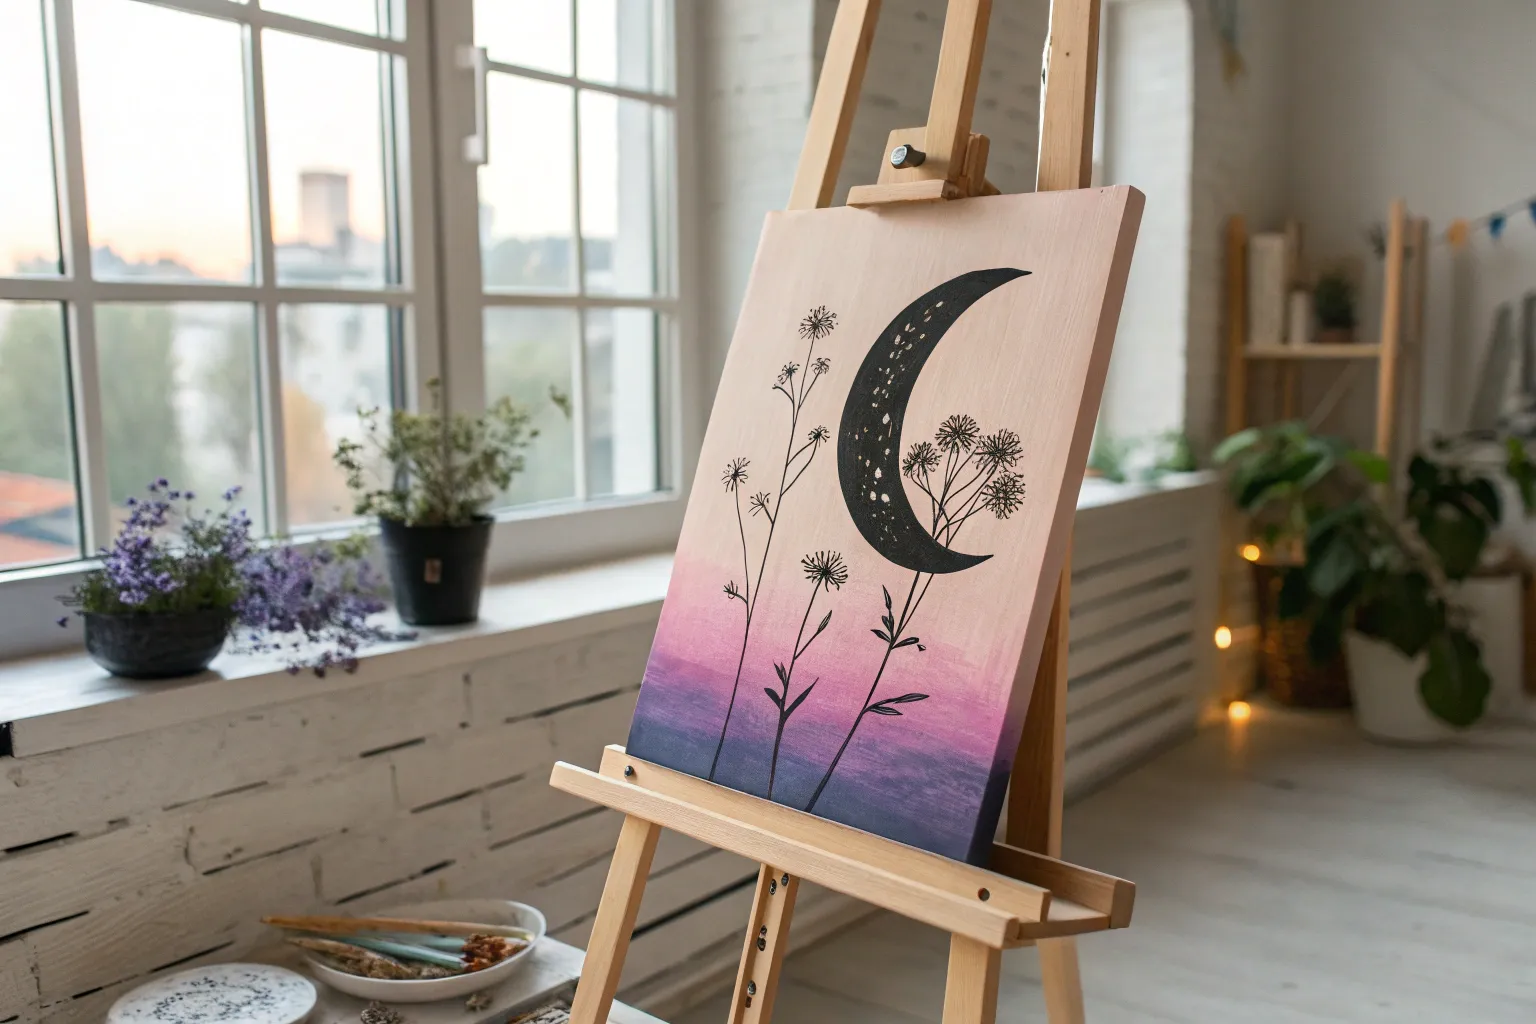
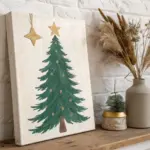
If you’ve ever stared at a blank canvas and wished for a simple starting point, I’ve got you. These canvas sketch ideas are the kind of easy, satisfying outlines that can stay minimalist or turn into a full painting when you feel like going further.
Simple Mountains With Pine Linework
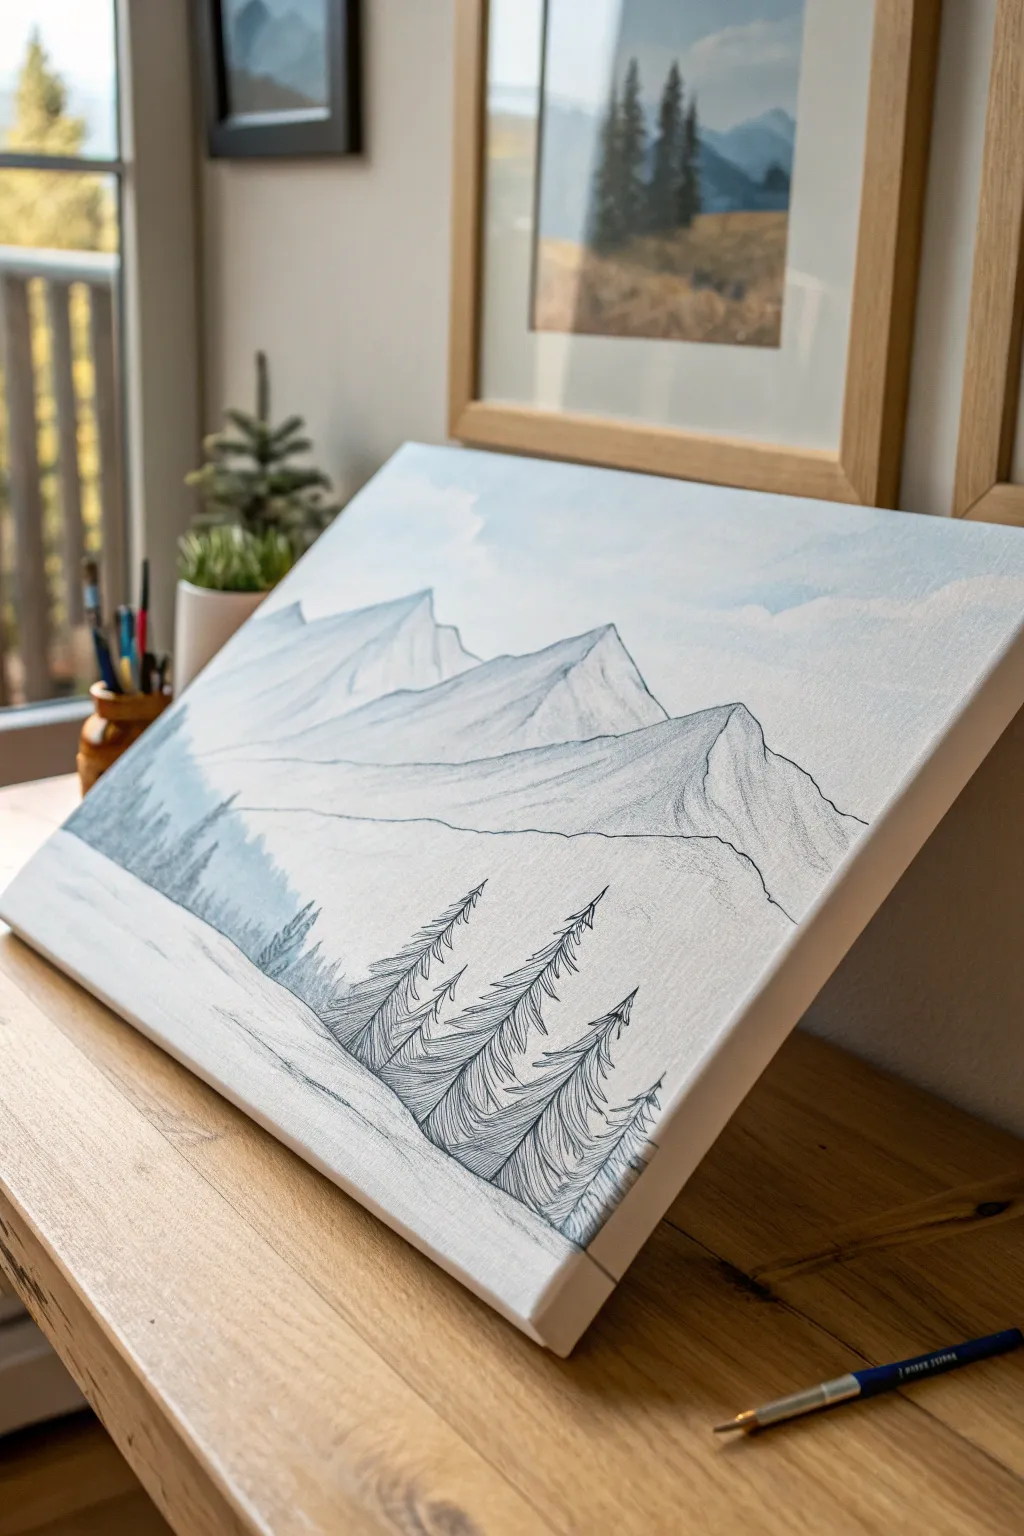
This serene landscape combines the crispness of fine-line sketching with the gentle flow of watered-down pigment. By layering simple triangular mountain forms over a soft atmospheric background, you’ll create a piece that feels both structured and airy.
Step-by-Step Tutorial
Materials
- Stretched canvas (12×16 or similar)
- Black fine-liner pens (waterproof/archival ink, varying sizes like 0.3mm and 0.5mm)
- HB pencil and eraser
- Watercolor paints or acrylics (Payne’s Grey, Cerulean Blue, White)
- Large flat wash brush
- Medium round brush
- Cup of water and paper towels
Step 1: Planning and Sketching
-
Divide the space:
Visualize your canvas in roughly three horizontal bands. The top band is for the sky, the middle for the mountain peaks, and the bottom third for the foreground slopes and pine trees. -
Sketch the mountains:
Using your HB pencil loosely, lightly sketch the outlines of the mountain ranges. Draw three main peaks: a smaller background range on the left, a central peak, and a larger, more dominant peak on the right that slopes down towards the center. -
Add foreground contours:
Sketch a soft, rolling line across the bottom third of the canvas to establish the snowy foreground slope where the pine trees will sit. -
Place the pines:
Lightly mark the vertical center lines for the three foreground pine trees on the right side. Make them descending in height, with the rearmost tree being slightly shorter to create depth.
Ink Bleed Test
Before inking on painted areas, touch your pen to a painted corner or the folded back of the canvas. If the ink spiders out, the support is still too wet.
Step 2: Painting the Wash
-
Mix a sky wash:
Dilute a tiny amount of Cerulean Blue with plenty of water. If you are using acrylics, use water or glazing medium to make it transparent. -
Paint the sky:
Apply the pale blue wash to the top third of the canvas. Keep it uneven and blotchy in places to suggest clouds and atmosphere. -
Mix a mountain grey:
Create a very watery mix of Payne’s Grey with a touch of blue. You want this to be barely visible—like a shadow or mist. -
Fill the mountains:
Gently fill in the mountain shapes with your grey wash. I like to be a bit imprecise here, letting the color fade out before hitting the bottom contour lines to suggest snow or fog. -
Add distant trees:
While the mountain wash is still slightly damp, mix a darker, more saturated blue-grey. Dab this along the lower left ridgeline to create a blurry, distant forest effect. Let the paint bleed slightly. -
Dry completely:
This is crucial: Let the canvas dry 100% before moving to ink. If the canvas is damp, your pen will bleed and ruin the crisp lines.
Step 3: Inking the Details
-
Outline the peaks:
Take your 0.5mm waterproof fine-liner. Trace the main ridge lines of the mountains. Keep your hand loose; shaky lines actually look more like natural rock formations than perfectly straight ones. -
Add texture shading:
Switch to a finer 0.3mm pen. Add vertical hatching lines down the shadowed sides of the mountains (usually the right side of each peak). Vary the length and density of these lines to show craggy rock faces. -
Ink the foreground trees:
Start with the vertical trunks of the foreground pines using the 0.5mm pen. Don’t draw a solid line; use a broken line that gets thicker near the base. -
Draw pine branches:
Using quick, flicking motions, draw the pine needles. Start at the top of the tree and work down, flicking outward and downward in a ‘skirt’ shape. Make the bottom branches wider and denser. -
Detail the slope:
Add very sparse horizontal lines and tiny scratches along the bottom foreground slope to suggest the texture of snow and wind-blown ice. -
Final touches:
Erase any visible pencil lines once the ink is totally dry. If the distant forest on the left looks too faded, you can gently add a few tiny pen scratches to suggest tree tops.
Level Up: Metallic Pop
Mix a tiny amount of silver pearlescent watercolor into your blue sky wash. It adds a subtle ‘frosty’ shimmer that catches the light beautifully.
Step back and admire how a few simple lines can build such a majestic range of peaks


Single Flower Stem Line Sketch
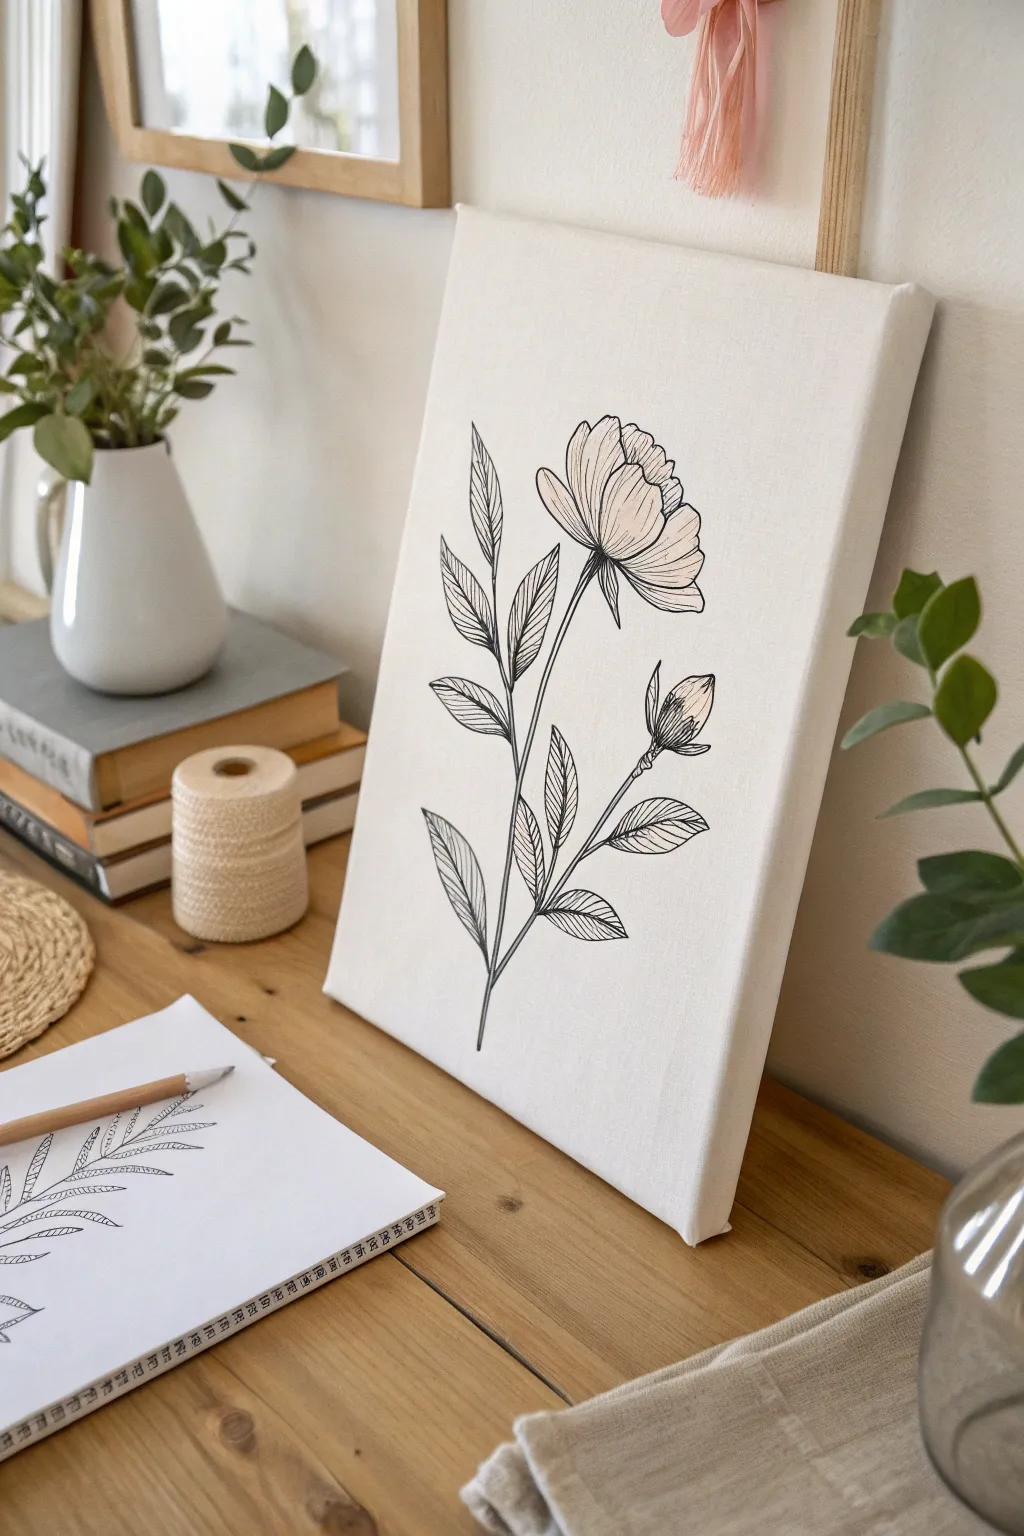
Capture the graceful simplicity of nature with this elegant line drawing on rough canvas. This project focuses on confident lines and subtle shading to create a timeless piece of botanical art that works perfectly in neutral or minimalist spaces.
Step-by-Step
Materials
- Small rectangular stretched canvas (approx. 8×12 or similar)
- Graphite pencil (HB or B)
- Fine-point permanent black marker (0.3mm to 0.5mm)
- Eraser (kneaded preferred)
- Ruler (optional for spacing)
- Reference photo of a peony or similar bloom
Step 1: Drafting the Design
-
Establish the stem line:
Begin by lightly sketching a central vertical line with your pencil. Curve it slightly near the bottom to give the plant an organic, natural posture rather than a rigid stick. -
Position the main bloom:
Near the top right of your stem, sketch a rough oval shape to act as a placeholder for the main flower head. This helps you visualize the finished composition. -
Add leaf guidelines:
Draw simple lines radiating from the main stem where you want your leaves to go. Aim for asymmetry—alternating leaves on the left and right creates a more realistic look. -
Sketch the bud placement:
Add a smaller secondary stem branching off to the right, topped with a small teardrop shape for the unopened bud. -
Outline the petals:
Inside your top oval, start defining the individual petals. Focus on overlapping curves, keeping the center tighter and the outer petals larger and more unfurled. -
Shape the leaves:
Flesh out your leaf guidelines into pointed oval shapes with jagged or smooth edges, depending on your preference. Draw a central vein line down the middle of each leaf. -
Refine the sketch:
Review your pencil lines and darken the ones you want to keep. Gently erase any confusing stray marks so your final inking path is clear.
Bleed Prevention
Canvas is porous. Test your marker on the back first! If it bleeds, apply a thin coat of clear gesso or matte medium over the sketch area before inking.
Step 2: Inking the Artwork
-
Start firmly at the top:
Using your fine-point black marker, begin tracing the main flower petals. Use a confident, continuous stroke for each petal edge to avoid shaky lines. -
Ink the central stem:
Draw the main stem line. I find it helps to pull the pen toward you rather than pushing it away for a smoother line. -
Outline the leaves:
Go over your leaf outlines. Once the outline is secure, draw the central vein for each leaf. -
Trace the bud:
Ink the small bud and its connecting stem, ensuring the junction with the main plant looks connected and natural. -
Add petal details:
Return to the flower head and add very fine, short lines near the base of the petals to suggest curvature and depth. -
Leaf shading technique:
This is the crucial step for texture. On one half of each leaf, draw closely spaced diagonal lines (hatching). This creates the shadowed effect seen in the example. -
Vary line density:
Keep your hatching lines parallel but vary their length slightly to follow the curve of the leaf. Do this for every leaf on the stem. -
Check for gaps:
Look over the entire drawing for any lines that don’t quite connect or areas that feel too empty. Add small ticks or details where needed. -
Erase pencil marks:
Wait at least 10 minutes for the ink to fully dry. Then, gently erase all underlying pencil sketches using a kneaded eraser to avoid smudging the canvas texture.
Add a Pop
Once the black ink is dry, use a deeply diluted watercolor wash in pale pink or sage green to add a ‘ghost’ of color to just the petals or leaves.
Place your new canvas on a wooden easel or lean it against a wall for an instant touch of botanical charm.


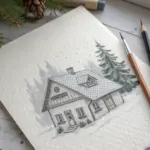
Cozy Cabin With Snowy Tree Shapes
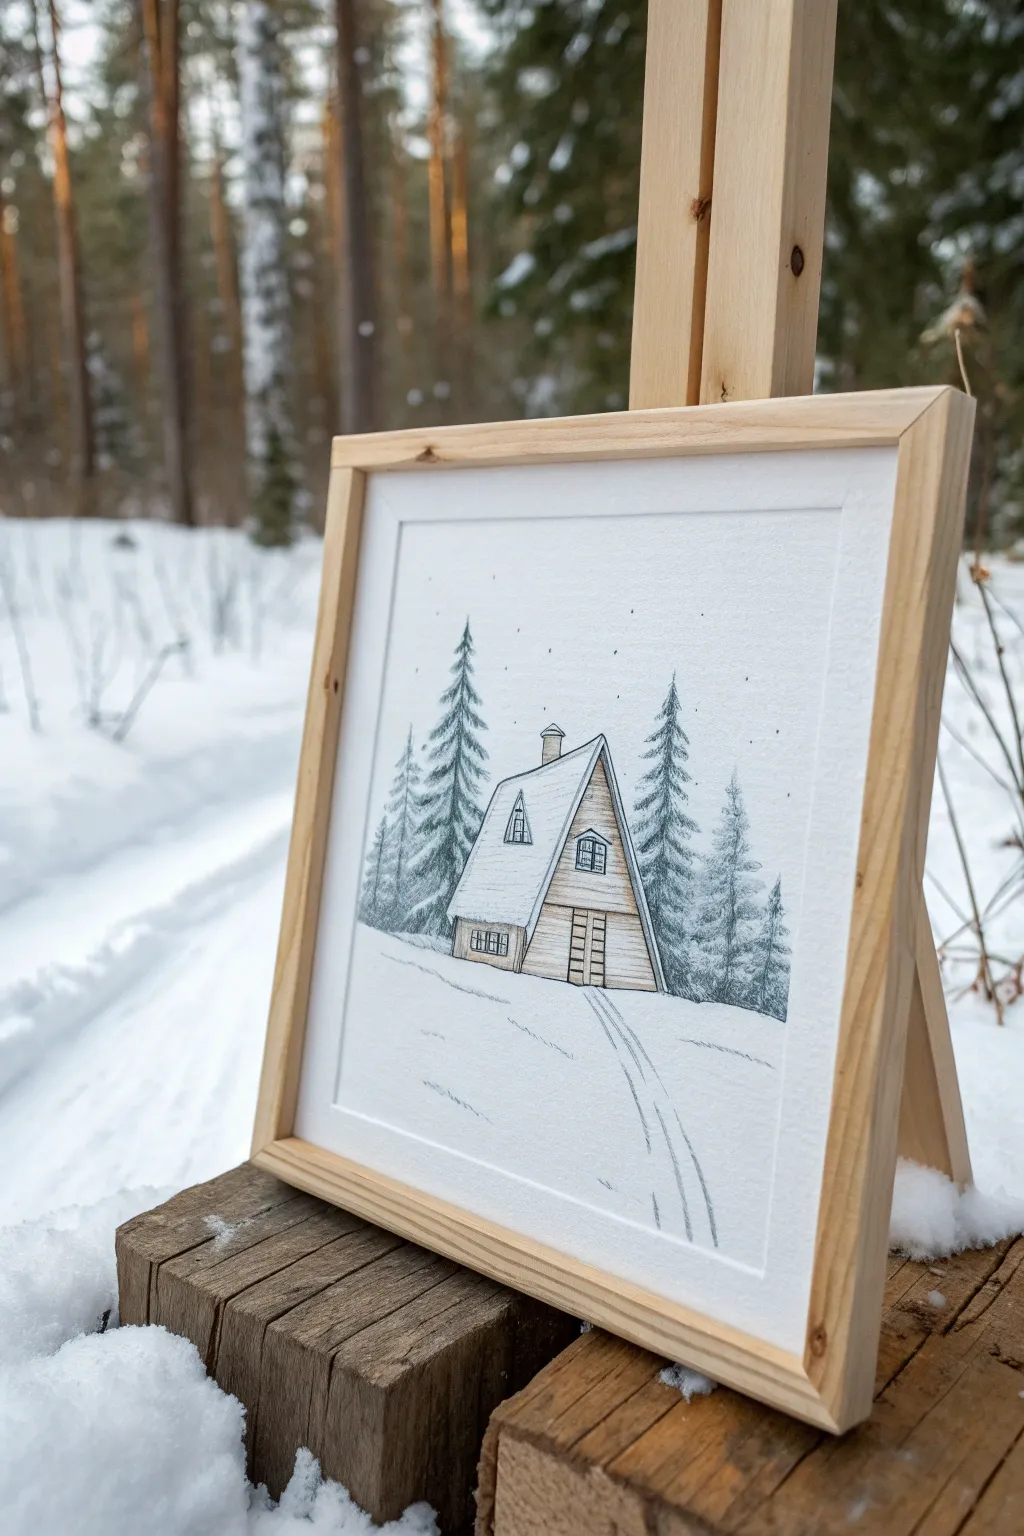
Capture the stillness of a snowy hideaway with this charming mixed-media sketch of an A-frame cabin nestled among evergreens. The soft combination of crisp ink lines and gentle pencil shading perfectly evokes the cozy atmosphere of a winter evening.
Step-by-Step Guide
Materials
- High-quality textured paper or bristol board
- Fine liner pens (0.1, 0.3, and 0.5mm in black)
- Graphite pencils (HB and 2B)
- Colored pencils (Warm grey, dark green, slate blue, wood brown)
- Ruler
- Eraser
- White gel pen (optional for snow)
- Light wood frame (square)
Step 1: Drafting the Cabin Structure
-
Establish the Horizon:
Lightly sketch a sloping horizon line across the lower third of your paper using an HB pencil. This slope will create the snowy hill the cabin sits on. -
Draw the Triangle Shape:
Center your A-frame shape on the hill. Use a ruler to draw a tall isosceles triangle. Since this is an A-frame cabin, the roof reaches all the way to the ground, so make your lines long and steep. -
Add Perspective:
To give the house depth, draw a second line parallel to the right side of your triangle, slightly offset. Connect the peaks and the base to form the front face and the side roof of the cabin. -
Detail the Exterior:
Sketch a rectangular extension on the left side for a smaller room. Add a simple chimney rectangle near the roof’s peak. -
Windows and Doors:
Pencil in a large triangular window on the upper floor of the main face, a smaller window on the side extension, and tall double doors at the base. Use the ruler to keep window panes straight.
Step 2: Adding the Landscape
-
Position the Trees:
Sketch vertical guidelines for your evergreen trees. Place a large one directly behind the cabin to the left, and a couple of varying heights to the right to balance the composition. -
Define the Tree Shapes:
Rough in the conical shapes of the pine trees around your guidelines. Keep the edges jagged to represent branches. -
Sketch the Path:
Draw two curving lines leading from the bottom right corner up towards the cabin door to suggest a trodden path in the snow.
Snow Texture Tip
Don’t outline the snow on the trees. Instead, draw the dark green branches *around* empty white spaces to imply clumps of heavy snow resting on boughs.
Step 3: Inking the Drawing
-
Outline the Cabin:
Switch to your 0.3mm fine liner. Go over the main structural lines of the cabin. Use the ruler for the straight roof edges but go freehand on the wood textures to keep it organic. -
Detail Boarding:
With the 0.1mm pen, draw horizontal lines across the front face of the cabin to create the look of wood siding. Keep these lines light. -
Ink the Trees:
Use the 0.3mm pen for the tree trunks and a scribbly, textured motion for the pine needles. Don’t outline the whole tree; instead, build up density with short, rapid strokes. -
Erase Pencil Guidelines:
Wait several minutes to ensure the ink is completely dry, then gently erase all your initial pencil sketches.
Level Up: Cozy Glow
Use a warm yellow or diluted orange pencil very lightly inside the window panes. It creates the illusion that the lights are on inside, making the scene warmer.
Step 4: Shading and Coloring
-
Color the Wood:
Take your wood brown colored pencil and lightly shade the front face of the cabin. Use slightly more pressure under the roof overhang to create a shadow. -
Shade the Roof:
Currently, the roof is ‘white’ with snow. Use a very light touch with a slate blue or cool grey pencil to shade just the edges and underneath the chimney to give the snow volume. -
Enhance the Trees:
Apply dark green colored pencil over your inked trees. Layer a bit of deep blue or grey near the bottom of the trees to ground them. -
Create Snow Shadows:
Use a light grey or pale blue pencil to shade the side of the snowy hill and the indentations of the path. This negative space defines the white snow without actually coloring it white. -
Final Atmosphere:
With a 0.1mm pen, add tiny dots in the sky area to represent falling snow. Vary the spacing so it doesn’t look too uniform.
Place your finished piece in a simple wooden frame to complete the rustic aesthetic


Faceless Portrait With Hat and Hair
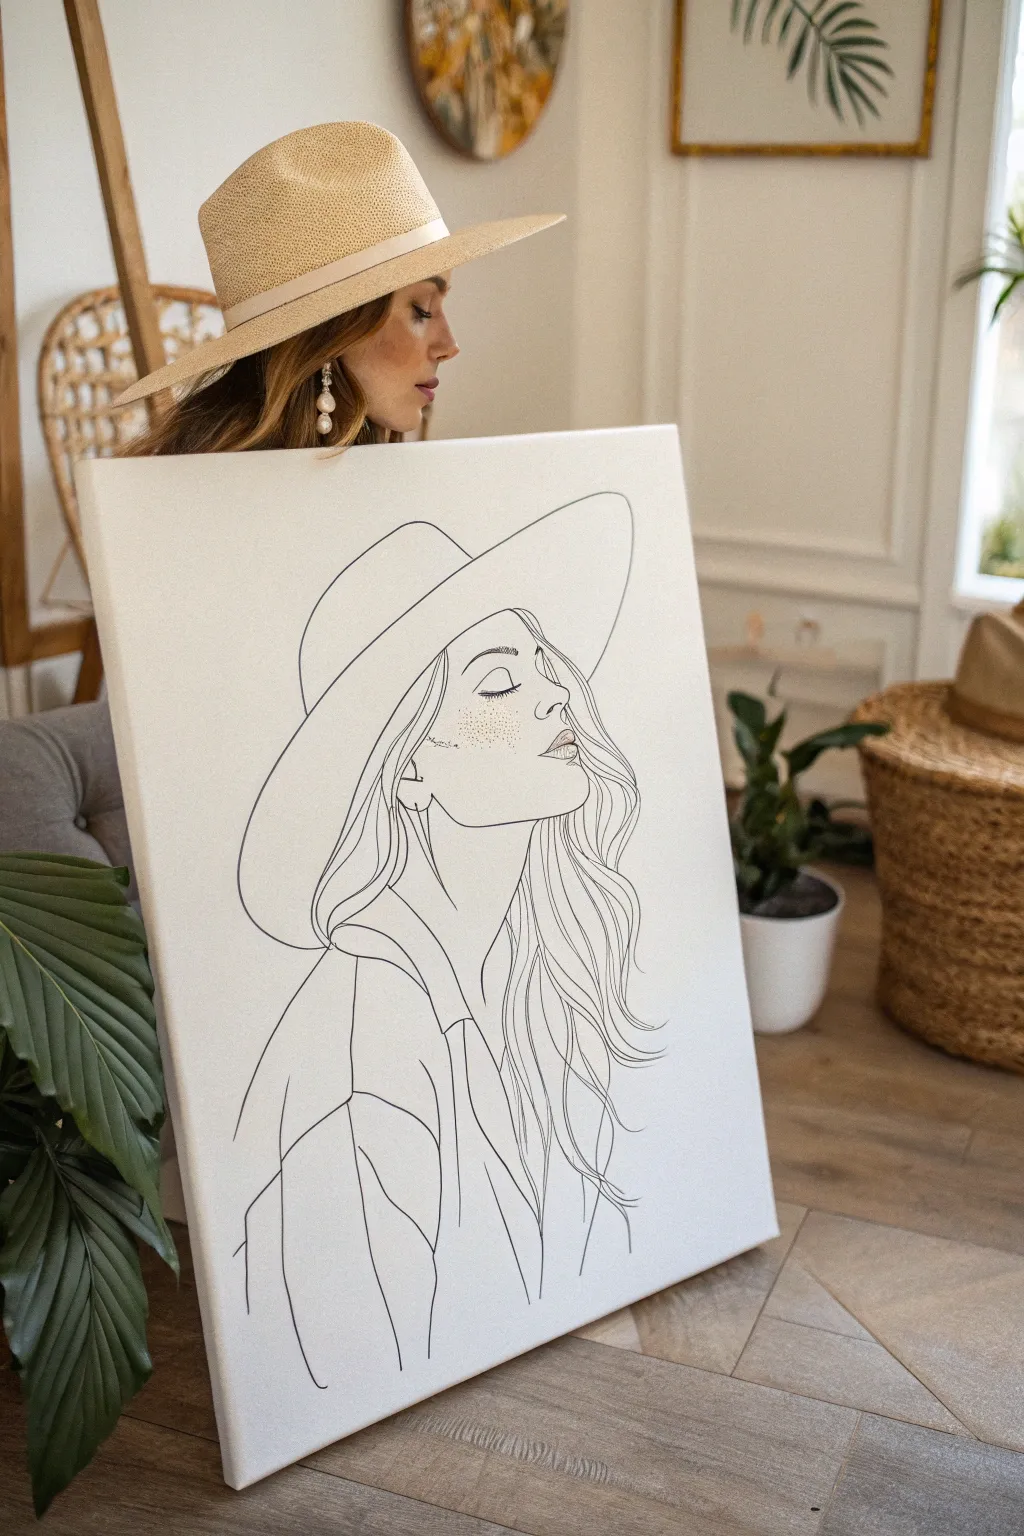
Capture the essence of relaxed elegance with this striking, minimalist line drawing on a large canvas. This project focuses on clean, continuous-style lines to create a sophisticated portrait that feels both modern and timeless.
Detailed Instructions
Materials
- Large stretched canvas (24×36 inches or similar)
- White gesso (optional, for priming)
- Graphite pencil (HB or H)
- Large eraser
- Black acrylic paint marker (fine tip, 1-2mm)
- Black acrylic paint marker (medium tip, 3-5mm)
- Ruler or straight edge
- Tracing paper (optional)
Step 1: Preparation and Sketching
-
Prime the Surface:
Even pre-primed canvases can benefit from an extra coat of white gesso to ensure the surface is ultra-smooth. Apply a thin layer and sand it lightly once dry to prevent your marker nibs from snagging on the canvas texture. -
Map the Composition:
Using your pencil very lightly, mark the top, bottom, and center points of where the figure will sit. The hat should dominate the upper third, while the hair and shoulders fill the lower space. -
Draft the Hat Brim:
Start by sketching the large, sweeping curve of the hat’s brim. It acts as the anchor for the entire piece. It should tilt slightly downward to frame the face. -
Outline the Face Profile:
Connect the jawline and chin to the underside of the hat. Keep this line soft and rounded. Don’t press hard with the pencil; you want these guides to be easily erasable later. -
Place Facial Features:
Lightly sketch the closed eye, nose, and lips. The eye is a simple curved crescent with lashes, situated just below the brim line. The nose is a subtle L-shape, and the lips are slightly parted. -
Flowing Hair Architecture:
Draw the main shapes of the hair. Instead of drawing individual strands, think of the hair in large ribbons or sections that wave down the right side of the canvas. -
Shoulder and Clothing:
Sketch the suggestion of a shirt collar and shoulder line on the left side. These lines should be looser and more abstract than the face to keep the focus on the portrait.
Confident Strokes Tip
Draw mostly from your shoulder, not your wrist. Locking your wrist and moving your whole arm creates smoother, longer curves essential for the hair and hat brim.
Step 2: Inking the Lines
-
Test Your Markers:
Before touching the canvas, test your paint markers on a scrap piece of paper to ensure the ink is flowing smoothly without blobs. -
Trace the Face and Hat:
Begin with the medium-tip marker for the heavy structural lines: the hat brim and the main outline of the face. Use confident, steady strokes. If you hesitate, the line may look shaky. -
Detail the Features:
Switch to the fine-tip marker for the delicate facial features. carefully trace the eyelashes, the freckles on the cheek, and the details of the lips. -
Add Subtle Freckles:
I like to gently tap the fine-tip marker on the cheek area to create a cluster of tiny freckles. Keep them irregular for a natural look. -
Create Hair Volume:
Return to the medium or fine marker (depending on your preference for line weight) to draw the hair. Use long, sweeping motions from the root down to the ends to capture the movement. -
Vary Line Thickness:
For added depth, go back over the shadowed areas—like under the chin or the underside of the hat brim—to thicken those lines slightly. This adds dimension without shading. -
Clothing Details:
Trace the clothing lines last. Keep these lines fairly simple and unadorned so they don’t compete with the detailed flow of the hair.
Step 3: Finishing Touches
-
Let the Ink Cure:
Allow the paint marker to dry completely. This usually takes about 15-20 minutes, but give it an hour to be safe so you don’t smudge the black ink. -
Erase Pencil Guidelines:
Take your large eraser and gently remove all visible graphite marks. Be sure to brush away the eraser crumbs carefully. -
Final Inspection:
Step back five feet to look at the canvas. If any lines look too thin or disconnected from a distance, carefully touch them up now.
Level Up: Texture
Add actual texture by gluing a small piece of fabric or ribbon onto the painted hat band, or use gold leaf on the earrings for a mixed-media 3D pop.
Hang your chic new artwork in a well-lit spot to admire the clean lines and modern aesthetic


Have a question or want to share your own experience? I'd love to hear from you in the comments below!