
A car can be way more than transportation—it can be a rolling canvas that shows off your personality from a block away. Here are my favorite car paint ideas that range from classic show-stoppers to artsy, unexpected designs you can totally make your own.
Glossy Solid Color With Extra Depth
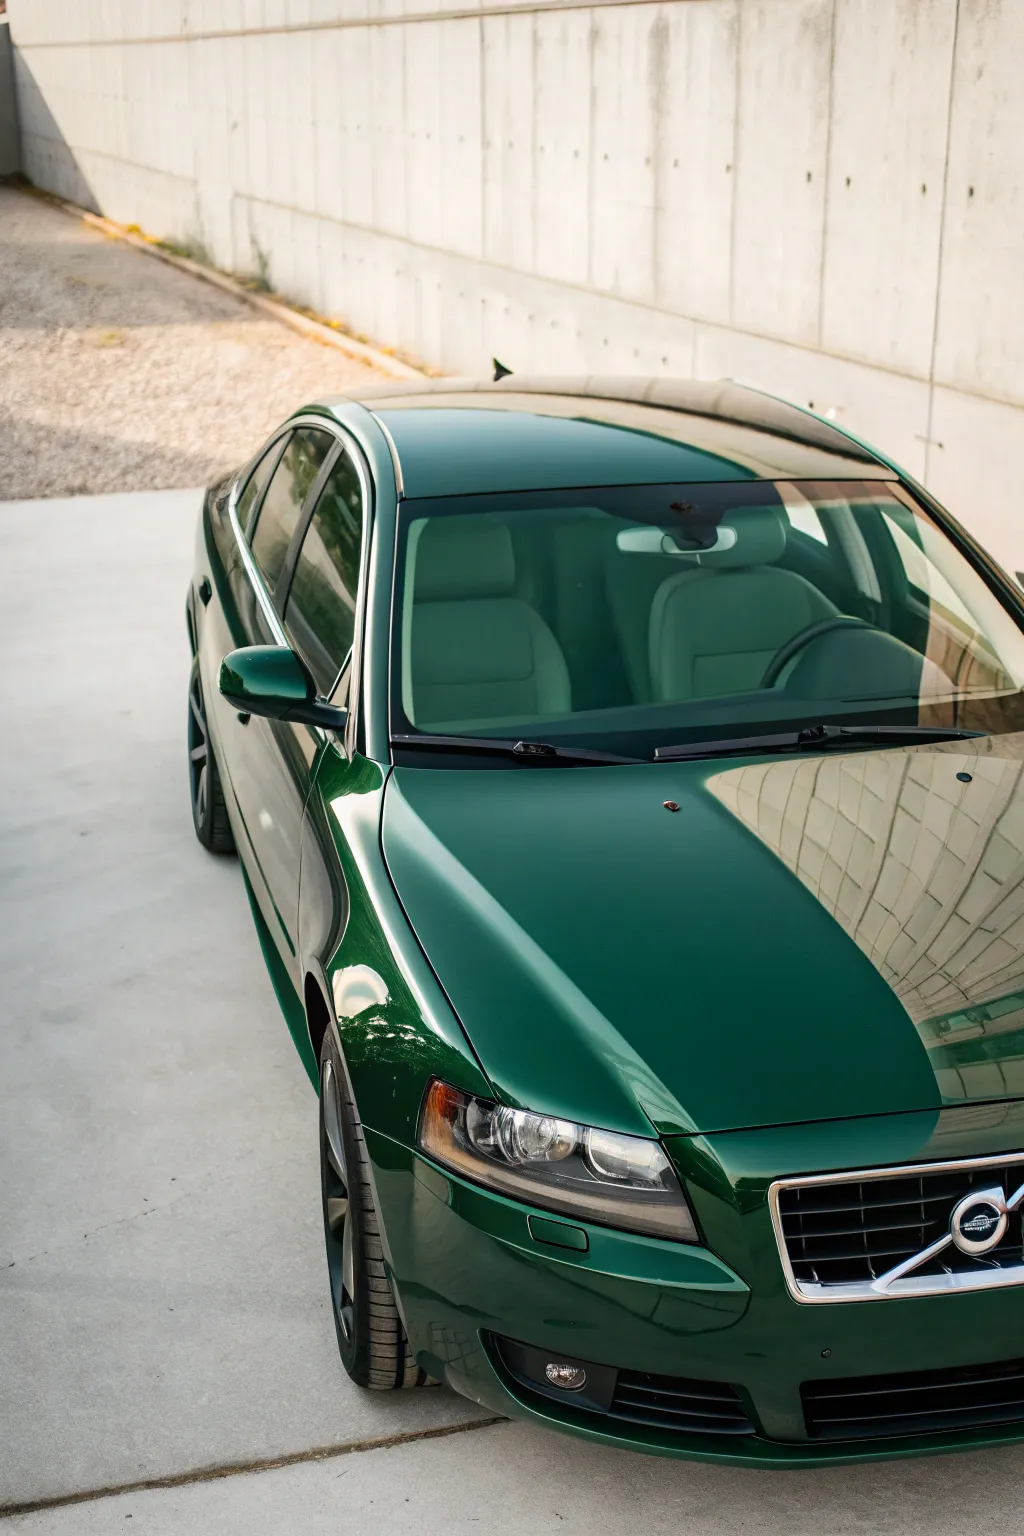
Achieve a showroom-quality finish with this project, transforming a standard paint job into a mirror-like, deep British Racing Green. The secret lies in meticulous surface preparation and a high-solid clear coat that adds incredible depth to the non-metallic color.
How-To Guide
Materials
- High-quality automotive base coat (Dark Green/British Racing Green)
- High-solids 2K Clear Coat kit (with hardener)
- Epoxy primer or high-build primer
- Assorted grit wet/dry sandpaper (400, 600, 800, 1500, 2000, 3000)
- HVLP spray gun (1.3mm or 1.4mm tip for clear coat)
- Dual-action polisher
- Rubbing compound and finishing polish
- Masking tape and automotive masking paper
- Tack cloths
- Wax and grease remover
Step 1: Preparation & Priming
-
Clean and Disassemble:
Start by thoroughly washing the vehicle with dish soap to strip old waxes. Remove exterior trim, door handles, and lights where possible to ensure edge-to-edge coverage. -
Sand the Old Finish:
Using 400-grit sandpaper, wet sand the entire car smooth. You need to create a dull, uniform surface for the new paint to adhere to; any shiny spots left behind will cause adhesion failure. -
Masking:
Carefully mask off all windows like the windshield and sunroof, as well as tire rubber and any unremovable trim. Take your time here, as good masking is the difference between an amateur and pro job. -
Degrease:
Wipe down every panel with wax and grease remover using lint-free shop towels. I prefer to use the two-towel method: one wet wipe followed immediately by a dry wipe. -
Apply Primer:
Spray a consistent layer of high-build primer. This fills minor imperfections and provides a neutral base color that ensures your dark green covers evenly. -
Block Sanding:
Once the primer is cured, guide coat and block sand with 600-grit paper until the surface is perfectly flat and level.
Depth Trick
For extra richness in dark solid colors, sand the clear coat with 800 grit and apply two more coats of ‘flow’ clear for a show-car ‘dipped in glass’ look.
Step 2: Painting & Coloring
-
Final Wipe Down:
Before pouring any paint, do one final wipe with a tack cloth to pick up microscopic dust particles. -
Mix the Base Coat:
Mix your dark green solid base coat according to the manufacturer’s ratio (usually 1:1 with reducer). Ensure the temperature in your booth is stable. -
First Coat Application:
Apply a medium-wet coat of the green base. Don’t aim for full coverage immediately; keep the gun moving at a steady pace to avoid runs. -
Second and Third Coats:
After the proper flash time (usually 10-15 minutes), apply two more coats until you achieve full opacity. The deep green should look even, though it will appear matte or semi-gloss at this stage.
Step 3: The High-Gloss Finish
-
Clear Coat Setup:
Mix your high-solids 2K clear coat. This type of clear is thicker and builds a deeper lens over the paint than standard clears. -
Flow Coat:
Spray your first coat of clear. Aim for a ‘wet’ look but be cautious of sags. This layer seals the color. -
The Depth Layer:
After allowing the first coat to flash off, apply a second, heavier layer of clear coat. This builds the physical thickness required for that deep, liquid appearance. -
Curing:
Allow the car to cure fully. This usually takes 24 to 48 hours depending on ambient temperature and hardener speed. -
Color Sanding:
Level the clear coat texture (orange peel) by wet sanding carefully with 1500, then 2000, and finally 3000 grit sandpaper. The surface should look completely flat and dull. -
Compounding:
Using a wool pad and heavy cutting compound on your polisher, buff out the sanding marks. The deep glossy green will start to emerge vividly. -
Final Polish:
Switch to a foam styling pad and a fine finishing polish to remove any swirl marks and bring the finish to a mirror-like shine.
Ceramic Shield
Wait 30 days for paint to fully outgas, then apply a ceramic coating. This preserves the high-gloss reflection and makes maintenance washing much safer.
Step back and admire the liquid-like reflection of your new deep green finish


Metallic Flake That Sparkles in Motion
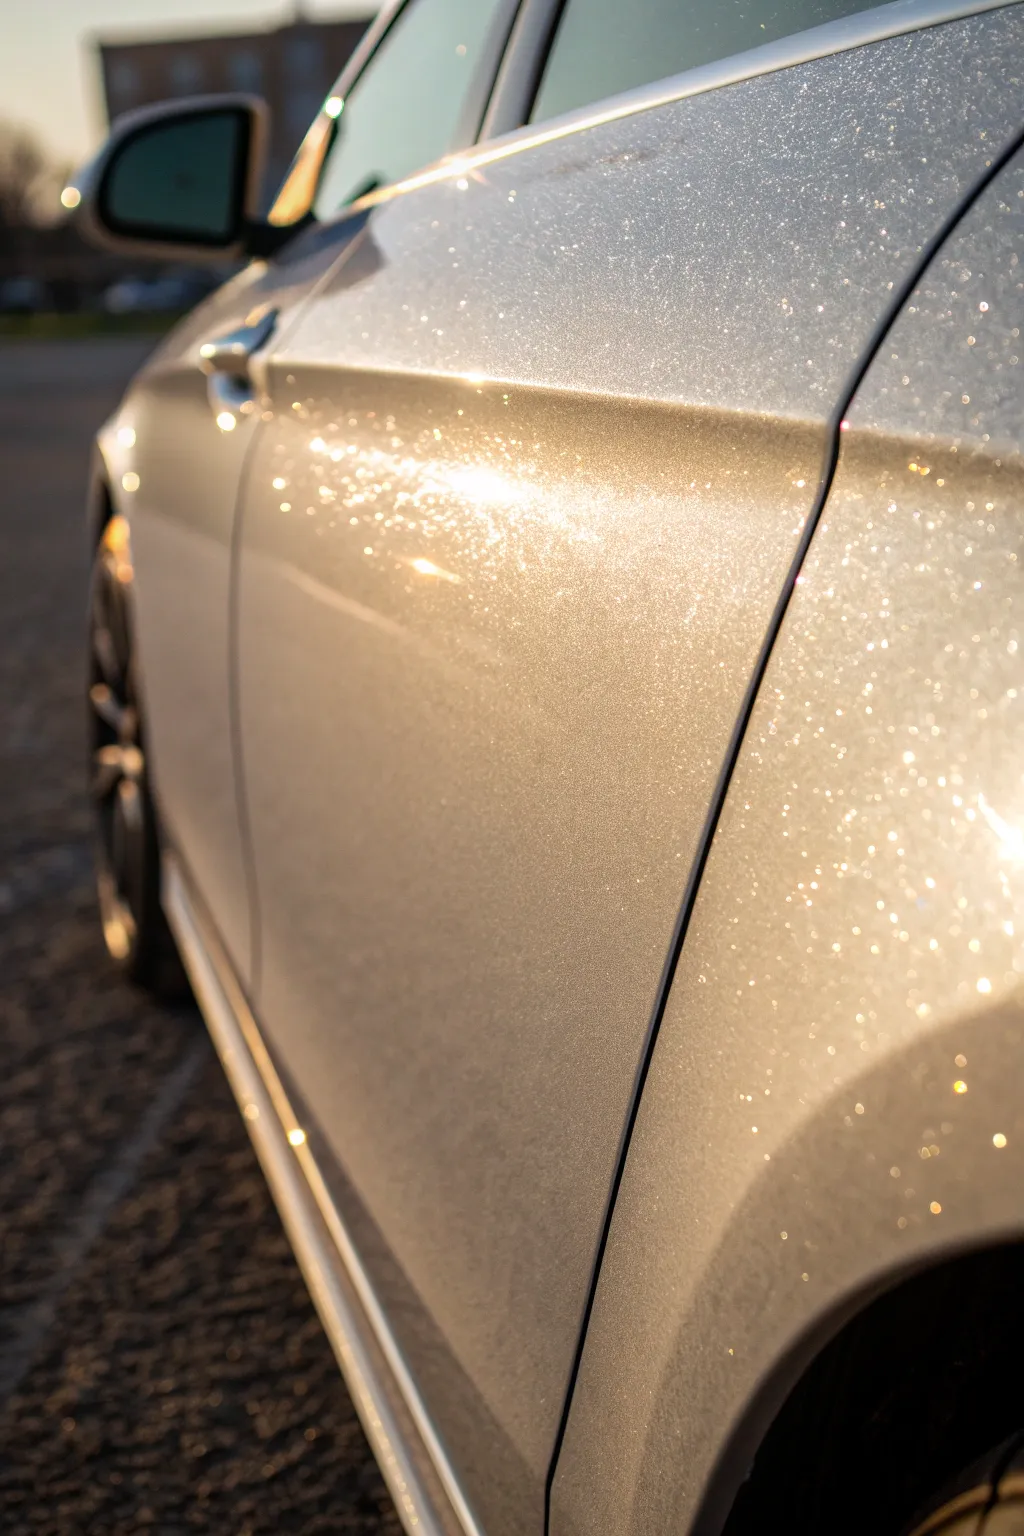
This project transforms a standard car panel into a shimmering spectacle using heavy metallic flake suspended in clear coat. The result creates a depth and sparkle that mimics crushed diamonds when hit by sunlight, giving the vehicle a high-end, custom appearance.
Step-by-Step Tutorial
Materials
- High-quality automotive base coat (Silver)
- Automotive clear coat kit (with hardener)
- Dry metal flake (.004 or .008 hex cut, Silver/Holographic)
- Flake buster gun or dedicated 2.5mm tip HVLP spray gun
- Prep materials (sandpaper: 400, 600, 800 grit)
- Tack cloths
- Masking tape and paper
- Wax and grease remover
- Respirator and safety goggles
- Red scuff pad
Step 1: Preparation and Base Coat
-
Surface Prep:
Begin by thoroughly washing the car panel to remove any road grime. Once dry, wipe it down with a wax and grease remover to ensure a distinct chemical bond. -
Sanding:
Sand the existing finish with 400-grit sandpaper until the surface is completely dull. Any shiny spots left behind can lead to peeling later. -
Scuffing:
Use a red scuff pad to get into tight crevices, door handle recesses, and edges where sandpaper might miss, ensuring every millimeter has mechanical adhesion. -
Final Clean:
Blow off dust with compressed air and wipe the panel down one last time with wax and grease remover. Follow up immediately with a tack cloth. -
Base Coat Application:
Mix your silver base coat according to the manufacturer’s ratio. Spray the first medium-wet coat, overlapping your passes by 50%. -
Second Base Layer:
Allow the first coat to flash dry (usually 10-15 minutes). Apply a second coat to achieve full color coverage. I usually inspect it under a bright light here to check for blotchiness.
Step 2: Applying the Flake
-
Clear Coat Setup:
Mix a small batch of clear coat. You will need a spray gun with a large nozzle tip (at least 2.5mm) or a specialized ‘flake buster’ dry flake gun to handle the particles without clogging. -
Flake Mixing:
If spraying wet, mix the stunning silver metal flakes directly into the clear coat or an intercoat binder. A ratio of 1-2 tablespoons per sprayable quart is a good starting point for a heavy effect. -
First Flake Pass:
Spray the flake mixture over the panel. Hold the gun slightly further back than usual (about 8-10 inches) to distribute the flakes evenly rather than flooding the surface. -
Building Density:
Apply 2-3 coats of the flake mixture, allowing flash time between each. Change your spray pattern direction (horizontal vs. vertical) on alternating coats to prevent striping. -
Inspection:
Use a flashlight to check the sparkle density. The goal is even coverage without piling the flakes so high that they create a rough, sandpaper-like texture.
Rough Texture?
If the finish feels like sandpaper after clear coating, you simply need more clear. Sand it flat (don’t sand into the flake!), clean it, and spray 2 more flow coats of clear.
Step 3: Burying and Polishing
-
Burying the Flake:
Switch to a standard 1.3mm or 1.4mm tip gun. Apply pure clear coat (no flake) heavily. You need enough clear to completely cover the texture of the flakes. -
Layering Clear:
Apply at least 3-4 distinct flow coats of clear. The flake adds physical height, so you need substantial clear coat thickness to level it out. -
The Long Dry:
Allow the clear coat to cure for at least 24 hours. It may shrink back as it dries, revealing the texture of the flake again. -
Level Sanding:
Wet sand the clear coat carefully with 800-grit, then 1500-grit, and finally 2000-grit sandpaper until the surface is perfectly flat and glass-smooth. -
Buffing:
Use a rotary buffer with a cutting compound on a wool pad to remove sanding scratches. Follow up with a polishing pad and finishing polish to bring out that intense, deep gloss.
Agitate the Cup
Flakes are heavy and sink fast. If mixing flake into liquid clear, drop a clean marble into your paint cup and shake the gun frequently while spraying to keep suspension even.
Roll the car out into the sun and watch that deep metallic finish come alive


Pearl Finish for That Soft Glow
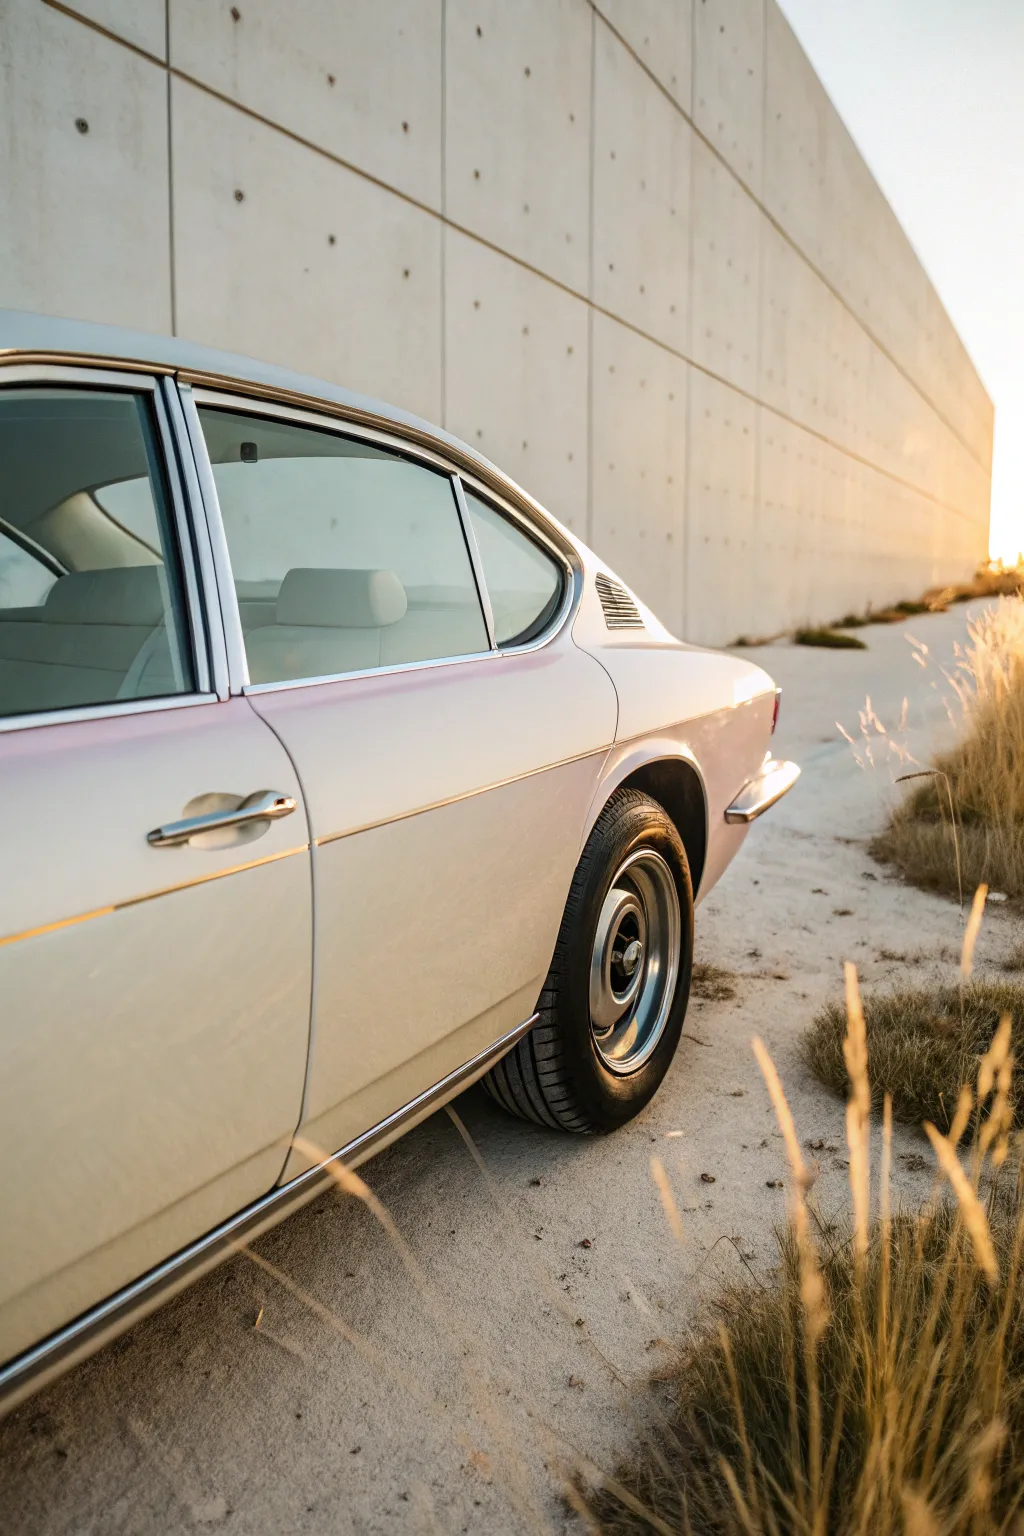
Capture the ethereal beauty of a sunset-lit vintage coupe with this multi-layered paint project. You will recreate the subtle shift from creamy white to soft pink pearlescence, giving your vehicle a finish that looks liquid and alive.
Step-by-Step Guide
Materials
- White primer/sealer
- Base coat: Pure White automotive paint
- Mid-coat: Red/Gold Pearl interference powder or liquid additive
- Clear coat inter-coat binder (transparent base)
- High-gloss 2K clear coat
- Automotive masking tape and paper
- HVLP spray gun (1.3mm or 1.4mm tip)
- Mixing cups and strainers
- Tack cloths
- Sanding block and sandpaper (600-800 grit wet)
- Respirator and protective suit
Step 1: Preparation and Base
-
Surface Prep:
Ensure the car body is perfectly smooth, as pearl finishes amplify imperfections. Block sand the existing primer with 600-grit wet sandpaper until uniform. -
Clean and Mask:
Wash the surface thoroughly and wipe down with a prep solvent or wax and grease remover. I always double-check the masking around chrome trim and window seals to prevent overspray on those classic details. -
Sealer Application:
Apply a coat of white sealer to create a uniform canvas. This ensures the white base coat covers efficiently without color variation from the underlying bodywork. -
Base Coat Layering:
Spray your Pure White base coat in 2-3 medium wet coats. Allow proper flash time (usually 10-15 minutes) between coats until you have full, solid coverage. -
Final Base Check:
Inspect the white base for any dirt nibs or mottling. If necessary, lightly denib with fine sandpaper and apply a final light drop coat of white.
Uneven Pearl Effect?
If you see stripes in the pearl coat, apply one final ‘orientation coat’ by misting the pearl mixture from a greater distance (10-12 inches) to even out the metallic distribution.
Step 2: The Pearl Mid-Coat
-
Mixing the Pearl:
Mix your red/gold pearl interference powder into the transparent inter-coat binder. A standard ratio is about 1 teaspoon of pearl per sprayable quart, but test on a spray-out card first. -
Test Panel:
Spray your test card with the pearl mixture over a white background. Check it in natural sunlight to verify the ‘glow’ matches the subtle pinkish-gold hue seen in the reference image. -
First Pearl Coat:
Apply the first coat of the pearl mixture over the entire car. Use a 75% overlap pattern with your spray gun to avoid ‘tiger striping,’ which is visible in pearl finishes. -
Distance Check:
Hold the gun slightly further back (about 6-8 inches) than you did for the base coat. This helps the metallic pearl flakes lay down randomly rather than standing up. -
Evaluating Density:
Let the first pearl coat flash. I usually step back and look at the car from an angle. You want a subtle shimmer, not a solid metallic look. Add a second coat only if you need more iridescence. -
Tack Between Coats:
Gently run a tack cloth over the surface if the window allows, removing any loose dust before sealing the pearl.
Step 3: Gloss and Finish
-
Clear Coat Setup:
Mix your high-gloss 2K clear coat according to the manufacturer’s instructions. A high-solids clear gives that deep, wet look essential for vintage restoration styles. -
First Clear Pass:
Apply a medium wet coat of clear to seal the pearl flakes. Be careful not to run the clear, but ensure it flows out smoothly. -
Second Clear Pass:
After the first coat has flashed sticky, apply a second, heavier flow coat. This provides the UV protection and depth that makes the pearl pop. -
Curing:
Allow the car to cure in a dust-free environment for at least 24 hours before touching or unmasking. -
Color Sanding:
Wet sand the clear coat with 1500, then 2000, and finally 3000 grit sandpaper to remove orange peel and create a mirror-flat surface. -
Buffing:
Compound and polish the finish using a rotary buffer to bring out the brilliant, soft glow of the pearl. -
Reassembly:
Carefully remove masking and reinstall chrome trims and badges against your protected new paint.
Sunlight Test
Always check your pearl density with a specialized ‘sun gun’ or bright LED light while painting. Shop lights can hide thin spots that daylight will reveal.
Now step back and admire how the light plays across those classic curves


Two-Tone Split With a Clean Line

This striking two-tone design modernizes the classic Mini silhouette by slicing it diagonally with contrasting hues. The creamy front section keeps things vintage, while the metallic bronze rear adds a warm, contemporary warmth that catches the light beautifully.
Detailed Instructions
Materials
- High-quality automotive masking tape (various widths)
- Fine-line tape (3mm or 6mm)
- Cream/Off-White automotive basecoat
- Metallic Bronze/Copper automotive basecoat
- 2K Clear coat
- Wax and Grease remover
- Tack cloths
- Sanding block and sandpaper (400-800 grit)
- Grey scuff pads
- Spray gun (HVLP recommended) or high-quality aerosol cans
- Respirator mask and protective gear
- Masking paper and plastic sheeting
Step 1: Preparation & Base Color
-
Clean everything thoroughly:
Begin by washing the entire vehicle with soap and water to remove surface dirt. Dry completely, then wipe down every panel with wax and grease remover to eliminate invisible road oils. -
Scuff the surface:
Use a grey scuff pad or 600-grit sandpaper to scuff the entire clear coat. You need a dull, matte finish for the new paint to adhere, but be careful not to sand through to the metal. -
Mask critical areas:
Before spraying any color, mask off the windows, trim, lights (if not removed), wheels, and tires. Take your time here; overspray is the enemy of a clean finish. -
Apply the lighter color first:
Spray the cream/off-white tone over the front half of the car, extending well past where you plan your diagonal line to be. I like to fade it out toward the rear to save material. -
Build coverage:
Apply 2-3 coats of the cream basecoat until full coverage is achieved, observing flash times between coats. Let this base color dry fully—usually overnight is safest—before taping over it.
Clean That Tape Edge
Before spraying the second color, run a fingernail firmly along the fine-line tape edge. This seals it tightly to prevent bleed-through.
Step 2: Creating the Split
-
Lay the fine-line tape:
This is the most critical step. Using your 3mm fine-line tape, lay out the diagonal swooping line. Start near the bottom of the front wheel well or door jam and arc it upwards across the door to the B-pillar. -
Adjust the line:
Step back and look at the car from a distance. The beauty of fine-line tape is that you can lift and reposition it until the curve looks fast and organic. -
Mask the front section:
Once satisfied with the line, use wider masking tape and paper to cover the entire front cream section of the car. Ensure the paper is sealed tight against the fine-line tape so no bronze paint bleeds under.
Step 3: Applying the Bronze & Finishing
-
Prep the rear surface:
Lightly tack cloth the exposed rear section to remove any dust that settled during the masking process. -
Spray the bronze basecoat:
Apply the metallic bronze paint to the rear half. Metallic paints require steady, even passes to avoid mottling or ‘tiger striping’. Keep the gun perpendicular to the curves. -
Check for coverage:
Apply 3 coats, or until the white underneath is completely hidden. On the final coat, I sometimes do a ‘drop coat’ (slightly lower pressure, further distance) to even out the metallic flakes. -
Remove the masking:
Allow the bronze to flash dry until it’s tacky but not wet. Carefully peel the masking paper and the fine-line tape back upon itself at a sharp angle to leave a crisp edge. -
Clear coat preparation:
Gently tack cloth the entire vehicle again to remove any final dust nibs or tape residue. -
Apply clear coat:
Spray 2-3 wet coats of high-quality 2K clear coat over the entire car. This seals both colors and, crucially, helps level out the ridge created by the tape line. -
Cut and buff:
Once the clear is fully cured (check your product’s datasheet), wet sand with 1500-2000 grit to flatten the transition line and polish to a high gloss.
Fixing Paint Bleed
If paint bleeds under the tape, let it fully dry. Use a razor blade to gently scrape the excess, then touch up with a tiny artist brush.
Step back and admire how that simple diagonal line completely transforms the character of your ride
BRUSH GUIDE
The Right Brush for Every Stroke
From clean lines to bold texture — master brush choice, stroke control, and essential techniques.
Explore the Full Guide
Racing Stripes That Stretch the Shape
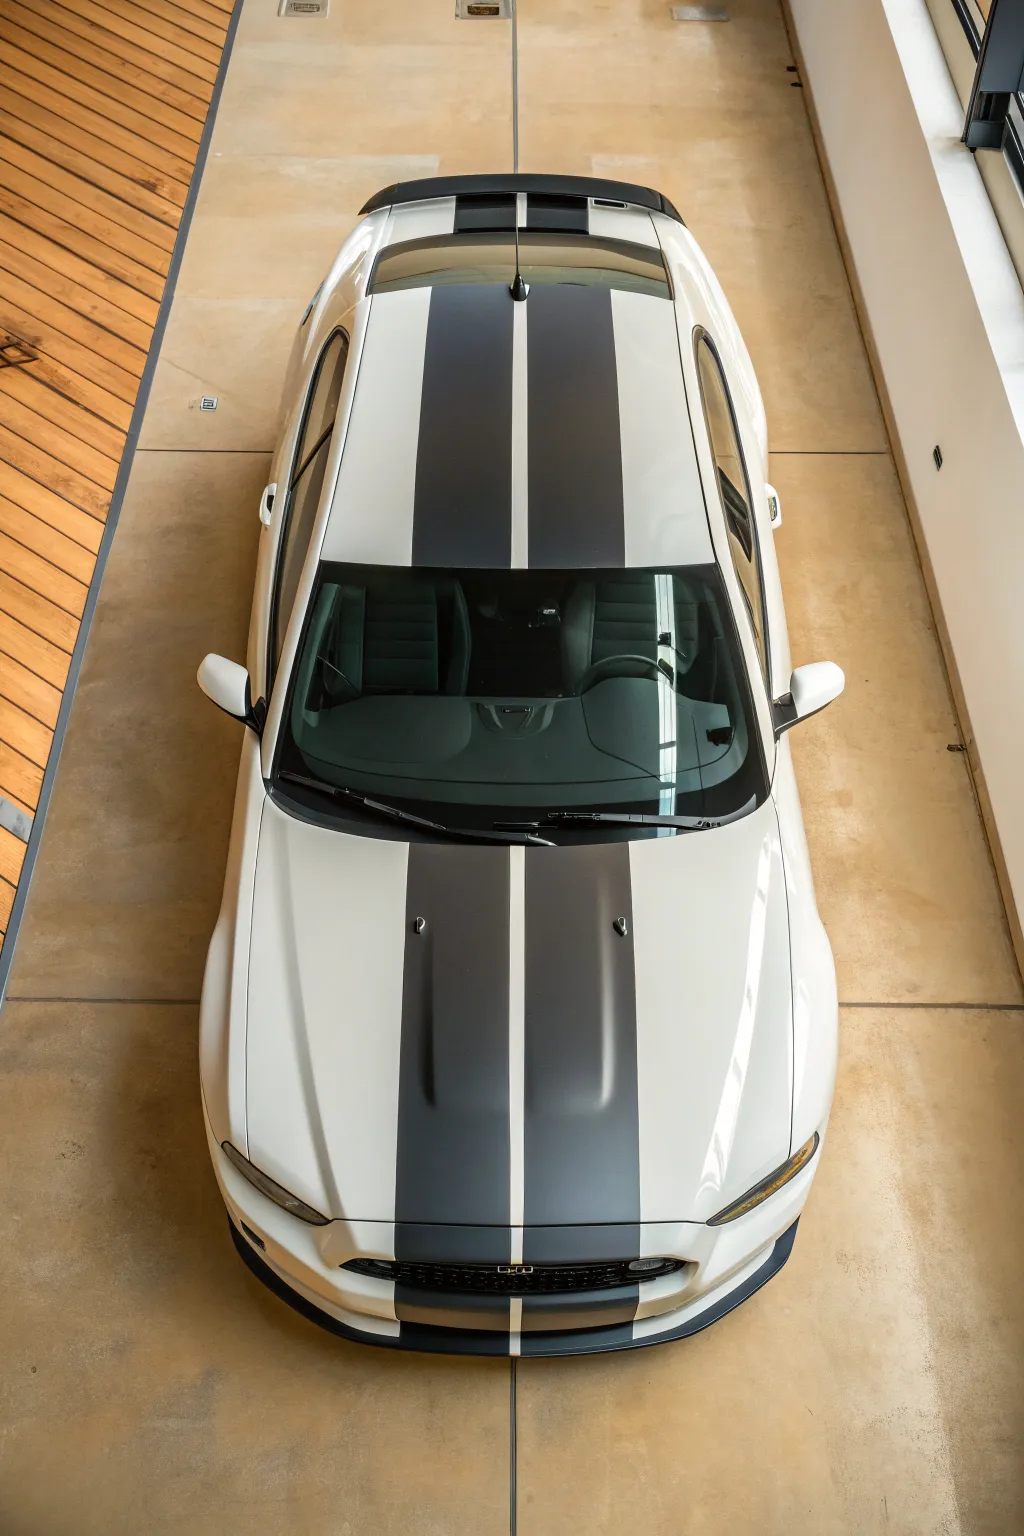
Transform a white vehicle into an aggressive, track-ready machine with these bold, dark charcoal dual racing stripes. Running seamlessly from bumper to bumper, this modification visually elongates the car while adding a timeless muscle car aesthetic.
How-To Guide
Materials
- High-quality vinyl wrap film (Dark Matte Grey or Charcoal)
- Knifeless tape (highly recommended for paint safety)
- Isopropyl alcohol and lint-free microfiber towels
- Clay bar kit
- Measuring tape and ruler
- Masking tape (low tack)
- Squeegee with felt edge
- Heat gun
- Precision knife with fresh blades
- Wax and grease remover
Step 1: Preparation & Cleaning
-
Wash the vehicle:
Start with a thorough wash using dish soap to strip away old wax and sealants. Rinse completely and dry. -
Clay bar the surface:
Run a clay bar over the hood, roof, and trunk lid to remove embedded contaminants. The surface needs to be glass-smooth for the vinyl to adhere properly. -
Final wipe down:
Use isopropyl alcohol or a dedicated wax remover on all paint surfaces where the stripes will go. Pay special attention to edges and gaps between panels. -
Remove obstacles:
If possible, carefully remove the washer nozzles from the hood and the antenna from the roof to ensure a cleaner installation.
Wet vs. Dry Application
Beginners may prefer the ‘wet method’ (spraying soapy water first). It allows you to slide the vinyl into place before squeegeeing.
Step 2: Layout & Mapping
-
Find the center line:
Measure the width of the hood at both the front and back. Mark the exact center distinctively with a small piece of masking tape. -
Repeat for roof and trunk:
Do the same for the roof and trunk lid. Run a long strip of masking tape down the exact center length of the car to serve as your guide. -
Define the gap:
Decide on your gap width (usually 1-2 inches). Measure out from your center tape line on both sides and mark the inner edges of where the stripes will sit. -
Lay knifeless tape:
Apply knifeless tape along the lines where your stripes will be cut. This is crucial for getting straight lines without risking knife scratches on your paint.
Bubbles Appearing?
Don’t panic. Small bubbles often disappear in the sun. For larger ones, prick with a tiny air-release pin and press flat.
Step 3: Installation
-
Pre-cut vinyl sheets:
Cut your vinyl film into manageable rectangular sections for the hood, roof, and trunk, leaving a few inches of excess on all sides. -
Position the hood panel:
Peel back a few inches of the liner and align the vinyl with your layout marks. Tac it down lightly. -
Squeegee method:
Working from the center outward, use overlapping strokes with your felt squeegee. Keep the vinyl taut but don’t overstretch it. -
Address contours:
For the hood scoop area, I like to use a little heat to soften the vinyl, allowing it to conform to the dip without bunching. -
Trim with knifeless tape:
Pull the filament of the knifeless tape through the vinyl to create your clean cut. Remove the waste vinyl and the tape carrier. -
Repeat for roof:
Apply the roof section next. Since this is usually flatter, it’s often the easiest panel to work with. -
Install trunk section:
Apply the trunk vinyl. Be mindful of the vertical drop-off at the rear bumper; use heat to relax the film over the edge.
Step 4: Finishing Touches
-
Tuck the edges:
Use your squeegee or a specialized tucking tool to push the vinyl edges into the panel gaps for a painted-on look. -
Reinstall hardware:
Poke small holes for the washer nozzles and antenna, trimming carefully, then reinstall the hardware. -
Post-heat:
Go over all the surfaces, especially edges and recesses, with a heat gun (around 180°F or 80°C) to kill the vinyl’s memory and ensure permanent adhesion. -
Final clean:
Wipe down the new stripes with a detailer spray to remove fingerprints and admire the new stance.
Take your car out for a spin and enjoy the aggressive new look you’ve achieved.
Retro Pinstriping With Hand-Drawn Flair
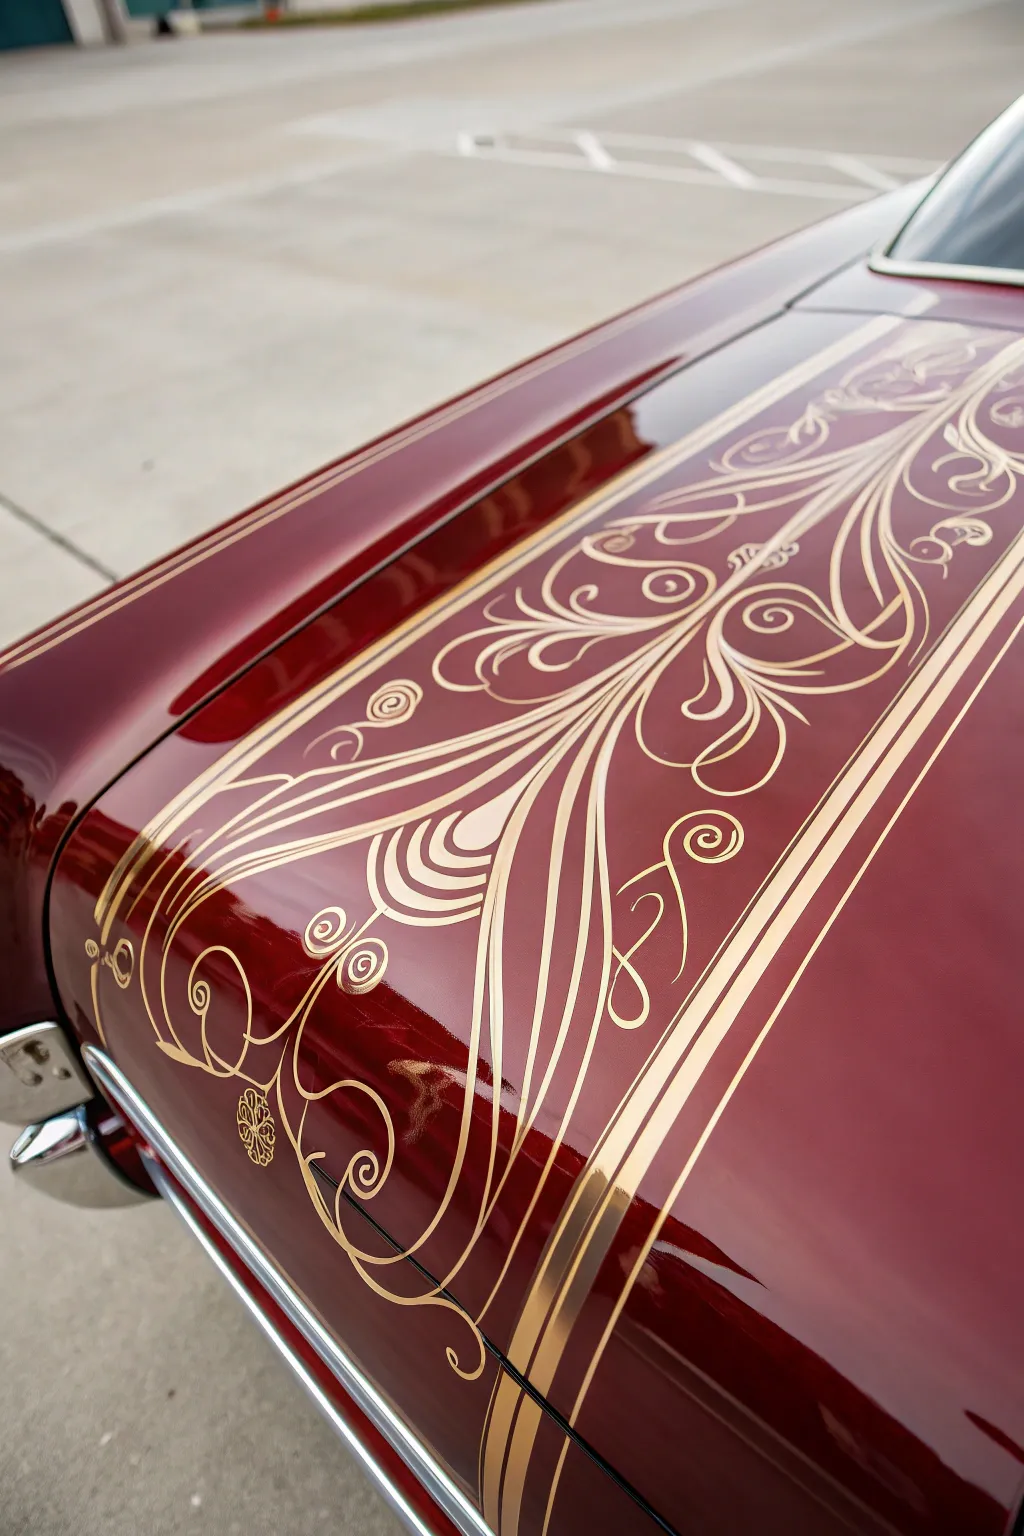
Transform a deep candy paint job into a masterpiece of kustom kulture with this intricate scrollwork pinstriping design. This tutorial guides you through laying out symmetrical, organic gold lines that evoke the classic elegance of 1960s boulevard cruisers.
Step-by-Step Tutorial
Materials
- High-quality lettering enamel (One Shot or similar) in Metallic Gold
- Deep Red urethane basecoat/clearcoat car paint (pre-applied base canvas)
- Mack Series 10 or 20 squirrel hair striping brush (Sizes 00 and 0)
- Stabilo pencil (white or yellow) for sketching
- Fine line tape (1/8 inch or 1/16 inch)
- Slow-dry reducer or enamel hardener
- Measuring tape
- Magnetic centerline strip
- Grease and wax remover
- Lint-free microfiber cloths
- Palette or magazine page for palleting brushes
- Baby powder or pounce bag
Step 1: Surface Preparation & Grid Layout
-
Clean the canvas:
Ensure your base automotive paint is fully cured, then wipe the trunk lid down thoroughly with grease and wax remover to eliminate any oils or fingerprints. -
Establish the centerline:
Measure the trunk lid width carefully to find the exact center. Apply a magnetic centerline strip or run a piece of fine line tape straight down the middle to act as your anchor. -
Build the grid:
Using a Stabilo pencil and a ruler, lightly mark out a rectangular box where the main design will live. This design relies on long vertical flow, so ensure your boundaries are straight. -
Dust for friction:
Lightly dust the area with a pounce bag or a pinch of baby powder. This cuts the surface tension, allowing the paint to flow smoothly without beading up on the slick clear coat.
Step 2: Drafting the Design
-
Sketch the primary spine:
With your Stabilo pencil, freehand the central ‘spine’ of the design. Start from the bottom near the latch, sweeping upwards and outwards like a fountain or a blooming flower. -
Mirror the main scrolls:
Draw the large, dominant scrolls on the left side first. Once happy with the flow, carefully replicate them on the right side to maintain symmetry. Don’t worry about perfection yet; the brush will refine it. -
Add secondary flourishes:
Fill in the negative space with smaller teardrops, commas, and reverse scrolls. The goal is density without clutter, keeping the lines fluid and connected to the central stem. -
Double-check balance:
Step back five feet to view the whole trunk. Look for any heavy spots or gaps in your pencil sketch and adjust before dipping your brush.
Palette Like a Pro
Use an old glossy magazine as a palette. The pages absorb excess oil from the paint, making the enamel tackier and easier to control for long, smooth lines.
Step 3: The Striping Process
-
Prepare the palette:
Mix a small amount of metallic gold lettering enamel with a few drops of slow-dry reducer. You want a consistency similar to heavy cream or melted ice cream. -
Load the brush:
Dip your squirrel hair quill into the paint, saturating the belly. Pull the brush across your palette, turning it slightly to shape the hairs into a perfect, sharp chisel edge. -
Paint the long lines:
Start with the long, continuous lines that frame the design. Plant your pinky finger as a bridge (pivot point) and pull the brush smoothly towards you, keeping consistent pressure. -
Execute the main scrolls:
Move on to the large C-curves. Apply pressure at the start of the curve to widen the line slightly, then slowly lift as you curve around to taper off into a fine point. -
Connect the center:
Paint the converging lines at the bottom center. These lines should nestle together tightly, creating a dense ‘root’ for the floral pattern to spring from. -
Add the teardrops:
Fill the interior detailing with teardrop shapes. Use a ‘push and lift’ motion: touch down, push slightly to flair the brush, and lift quickly while dragging to create a sharp tail. -
Border striping:
Outline your design panel. I prefer running a double line here—one thick, one thin—to contain the organic scrollwork within a structured geometric frame.
Wobbly Lines?
Adjust your reducer mix. If the brush drags or skips, add reducer. If paint drips or the line widens uncontrollably, let the puddle sit for 5 mins to thicken.
Step 4: Cleaning and Curing
-
The dry check:
Allow the enamel to set until it is tacky but not wet to the touch. This usually takes about an hour depending on humidity and reducer used. -
Remove the roadmap:
Gently wipe away the Stabilo pencil marks and excess baby powder using a clean microfiber cloth and a little water or very mild degreaser, being extremely careful not to smudge the fresh paint. -
Final inspection:
Check for any light spots in the gold coverage. If needed, carefully touch up connectors, but avoid overworking the paint as metallic enamels can get muddy. -
Hardening time:
Let the car sit in a dust-free environment for at least 24 hours before driving or washing to ensure the enamel bites fully into the clearcoat.
Once the paint cures, the gold will gleam against that deep red background, giving your ride a timeless and handcrafted custom look

PENCIL GUIDE
Understanding Pencil Grades from H to B
From first sketch to finished drawing — learn pencil grades, line control, and shading techniques.
Explore the Full Guide
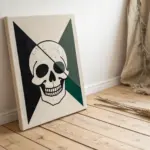
Black-and-White Doodle Wrap Style
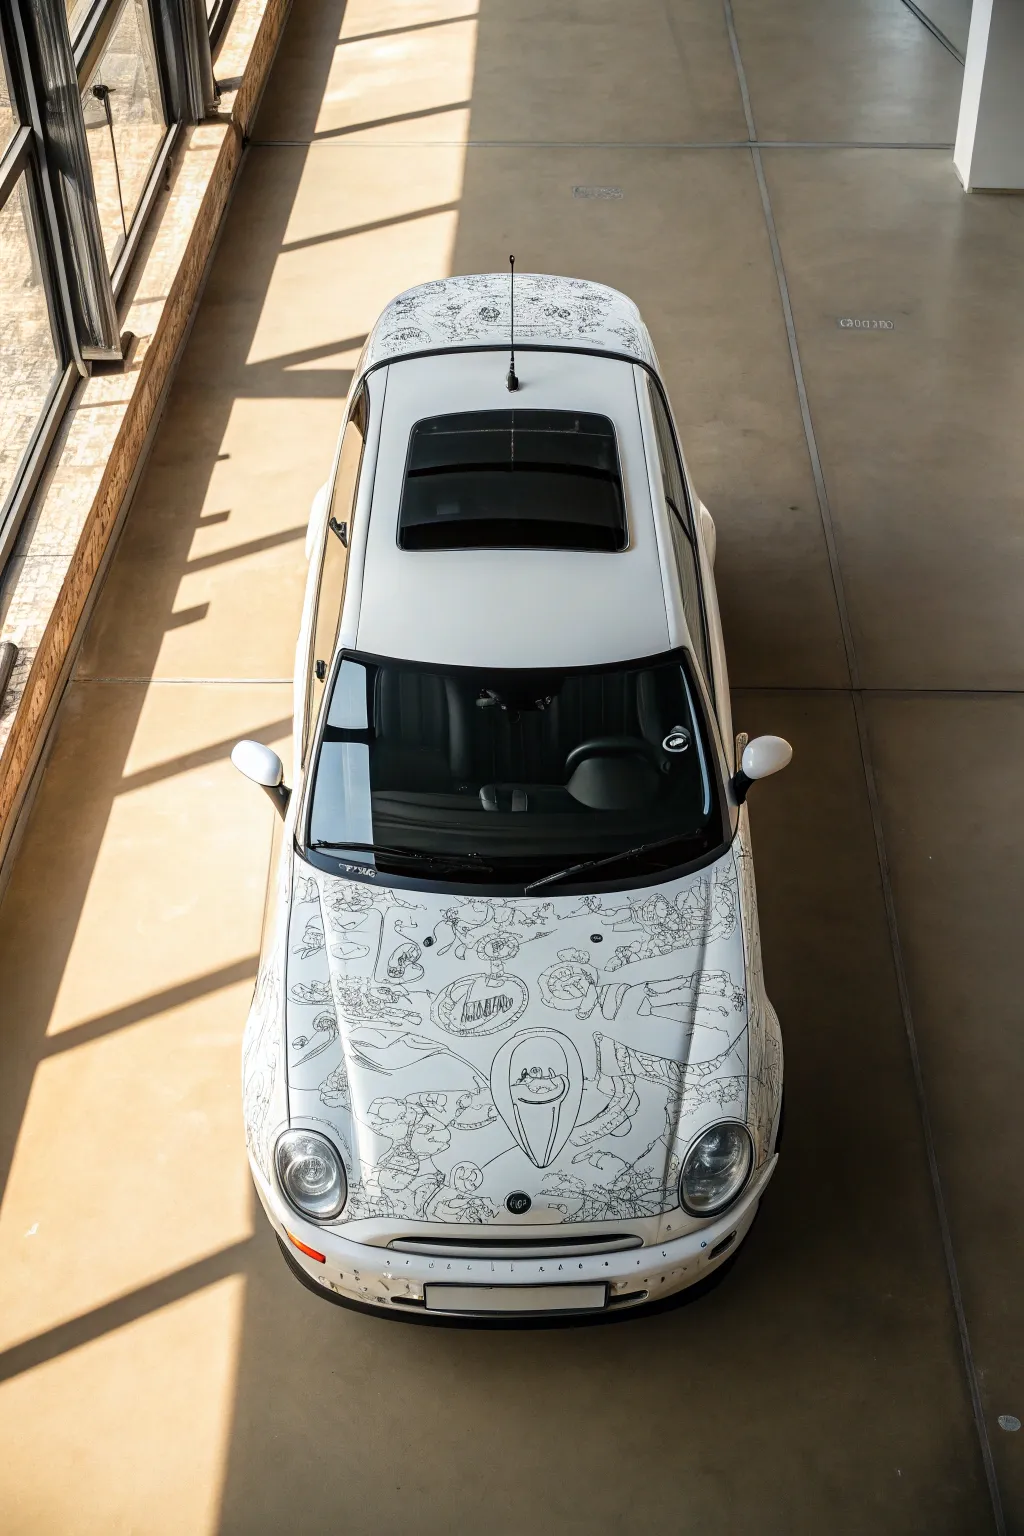
Transform a standard vehicle into a rolling sketchbook with this bold, monochromatic customization. By covering key panels like the hood and roof with intricate, hand-drawn Sharpie-style art, you create a striking contrast against the factory paint that turns every drive into an art show.
Step-by-Step
Materials
- White vinyl wrap film (cast vehicle grade)
- Oil-based paint markers (black, fine and medium tips)
- Black Posca markers (extra fine for details)
- Isopropyl alcohol (70% or higher)
- Microfiber towels
- Squeegee with felt edge
- Heat gun
- Knifeless tape or precision cutting blade
- Clear automotive clear coat (spray can or spray gun compatible)
- Wax and grease remover
- Masking tape
- Pencil for sketching (optional)
Step 1: Preparation & Vinyl Base
-
Clean the surface:
Begin by thoroughly washing the hood and roof of the car to remove any road grime or bugs. Once dry, wipe the entire area down with wax and grease remover to strip any old wax or ceramic coatings. -
Final wipe down:
Give the panels one last pass with isopropyl alcohol on a clean microfiber towel. This ensures the best possible adhesion for the vinyl wrap. -
Measure and cut vinyl:
Roll out your white vinyl film over the hood, leaving at least 3-4 inches of excess on all sides to allow for stretching and tucking. -
Apply the hood vinyl:
Peel the backing paper partially and tack the center of the vinyl to the hood. Work from the center outward using your felt-edged squeegee, using overlapping strokes to push air out. -
Stretch and adhere:
Gently heat the vinyl with a heat gun to make it pliable around curves and corners. Stretch it firmly over the edges, ensuring no wrinkles remain. -
Trim the edges:
Use your precision blade or knifeless tape to trim the excess vinyl, wrapping it neatly around the underside of the hood panel for a seamless look. -
Repeat for the roof:
Follow the same process for the roof panel. Pay special attention to the antenna and sunroof areas; carefully cut around these obstacles and tuck the vinyl underneath rubber seals.
Ink Smearing?
If your clear coat makes the ink run, you applied the first coat too heavily. The first pass must be a dry ‘dusting’ only to seal the pigment before heavier layers.
Step 2: The Doodle Process
-
Plan your zones:
Before uncapping a permanent marker, use small pieces of masking tape or a very light pencil sketch to mark out large focal points. This prevents the drawing from feeling unbalanced. -
Start with major elements:
Using a medium-tip oil-based marker, draw your largest ‘anchor’ illustrations first. In the reference, notice the large balloon shapes and figures—get these down first to define the space. -
Connect the drawings:
Start bridging the gap between your main drawings with connecting lines, flowing ribbons, or abstract shapes. I find it helpful to rotate around the car constantly so the orientation of the drawings varies. -
Fill the voids:
Switch to a fine-tip marker to fill the negative spaces. Add smaller doodles, textures, varying line weights, or geometric patterns to create density without making it look like a solid black blob. -
Detail work:
Go back in with an extra-fine Posca marker to add tiny details like eyes on characters, cross-hatching for shading, or intricate patterns inside the larger shapes. -
Let it cure:
Allow the ink to dry completely. Oil markers can take longer than alcohol markers, so waiting at least 24 hours is crucial to prevent smearing during the sealing phase.
Practice Makes Perfect
Don’t draw directly on the final vinyl immediately. Buy a small test sheet of vinyl, stick it to a clipboard, and test your markers and clear coat compatibility first.
Step 3: Sealing and Protection
-
Clean lightly:
Very gently dust off the surface with a dry microfiber cloth to remove any dust that settled during the drawing phase. Do not scrub. -
Apply mist coat:
Spray a very light ‘mist coat’ of automotive clear coat over the artwork. Do not wet the surface yet; you just want a tacky layer that locks the ink in place. -
Apply wet coats:
Once the mist coat is tacky (check manufacturer times), apply 2-3 fuller wet coats of clear coat. This UV-protects the ink and prevents fading from the sun. -
Final cure:
Let the clear coat harden fully according to the product instructions before exposing the car to rain or washing.
Now you have a completely unique ride that turns heads at every intersection with its custom illustrative flair
Neon Accents for Nighttime Pop
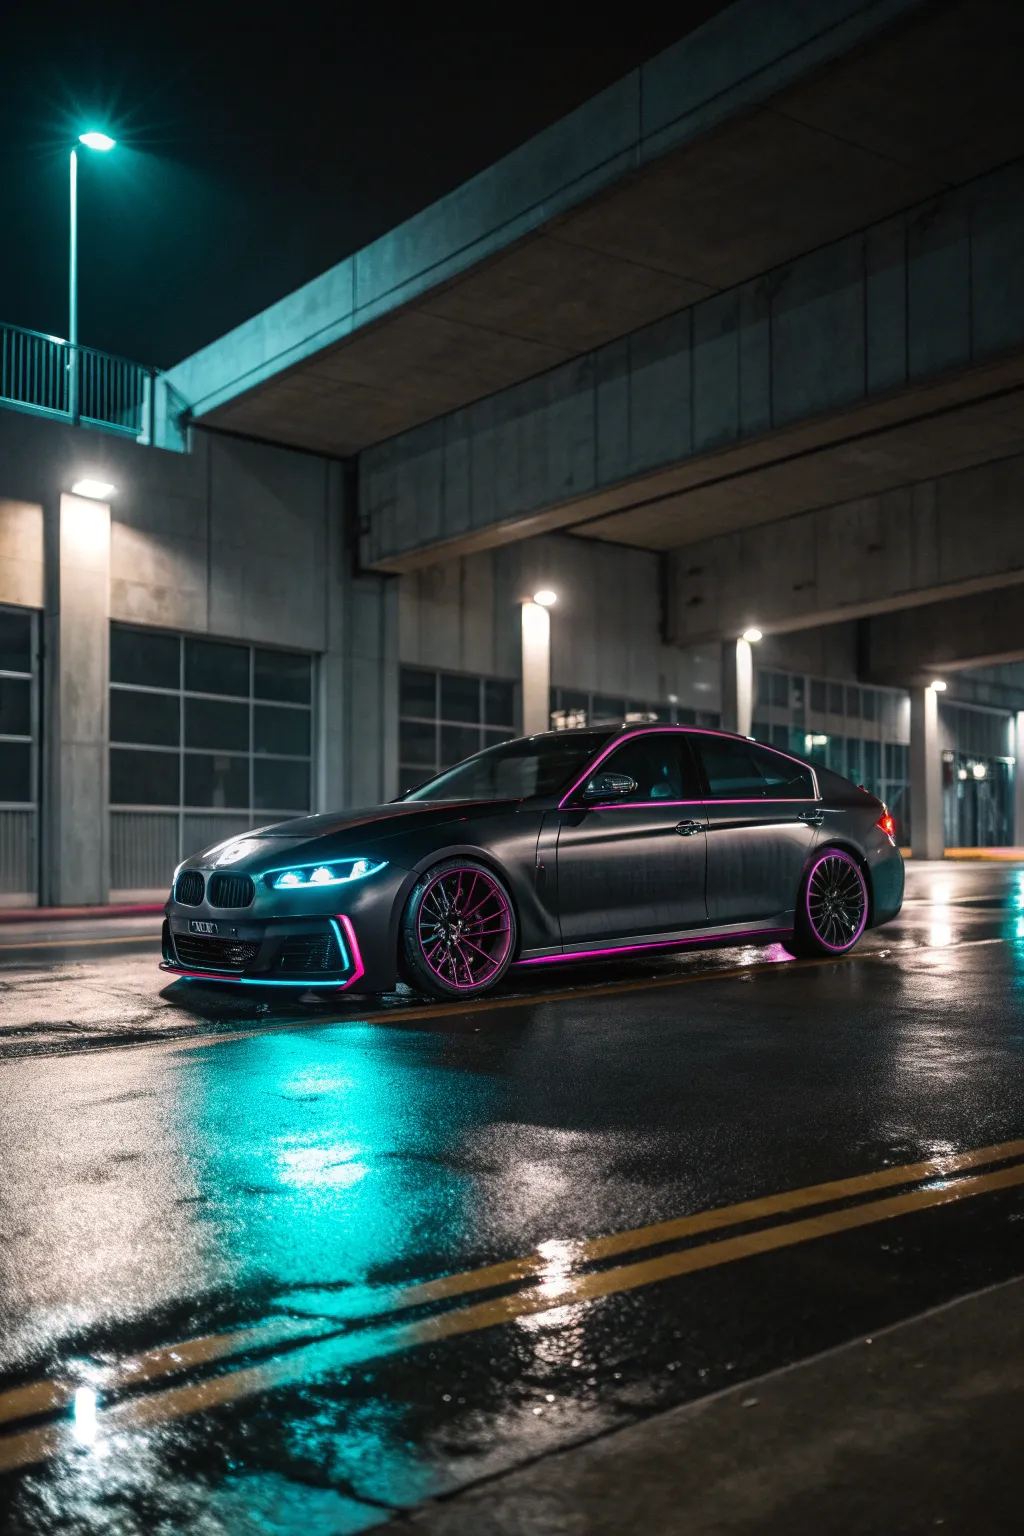
Transform a standard vehicle into a glowing synthwave masterpiece using contrasting matte finishes and vibrant neon vinyl. This project relies on the interplay between deep, light-absorbing surfaces and ultra-bright accent lines to mimic the look of electrified trim.
Step-by-Step
Materials
- Matte charcoal or satin black vehicle wrap vinyl
- Neon magenta striping tape (1/4 inch and 1/2 inch widths)
- Neon cyan striping tape (1/4 inch)
- Knifeless tape (design line)
- Vinyl wrap squeegee with felt edge
- Heat gun
- Isopropyl alcohol and microfiber towels
- Precision craft knife (with fresh blades)
- Clay bar kit (for surface prep)
- Masking tape
Step 1: Surface Preparation & Base Layer
-
Deep Clean:
Wash the car thoroughly with a wax-stripping detergent to remove any existing residues. -
Decontaminate:
If you are applying the matte wrap yourself rather than customizing an existing matte finish, use a clay bar across all panels to remove embedded grit that would show through the vinyl. -
Panel Wipe:
Wipe down every targeted surface with isopropyl alcohol and a clean microfiber cloth to ensure perfect adhesion. -
Apply Matte Base:
Apply the matte charcoal or satin black vinyl to the main body panels. Since this is a large task, focus on getting the finish smooth and bubble-free; this darkness is the canvas for your neon light.
Peeling Corners?
If sharp corners lift, use an adhesion promoter pen on the edges before reapplying. Ensure you aren’t stretching the tape too hard around tight bends.
Step 2: Drafting the Neon Lines
-
Study the Body Lines:
Identify the natural creases and character lines of the vehicle. For this look, we want to trace the shoulder line, the window trim, the lower rocker panels, and the front air dam geometry. -
Test Placement:
Use standard masking tape to mock up where your neon accents will go. This lets you step back and check the flow without wasting expensive vinyl. -
Plan the Color Split:
Decide which lines get magenta and which get cyan. A good rule of thumb I use is to keep horizontal flow lines (like the rocker panels and window trim) one color (magenta), and vertical or accent details (like the front bumper vents) the contrasting color (cyan).
Underglow Upgrade
Install an RGB LED underglow kit synced to your rim color. The light bouncing off wet pavement completes the cyberpunk aesthetic perfectly.
Step 3: Applying the Accents
-
Prepare the Rocker Panels:
Start with the lowest horizontal line. Clean the area again with alcohol to remove any oils from your hands during the planning phase. -
Lay the Magenta Base:
Apply the wider 1/2 inch neon magenta tape along the side skirt. Keep tension steady but don’t overstretch the vinyl, or it might shrink back later. -
Trace the Window Trim:
Carefully run the thinner 1/4 inch magenta tape over the chrome or black window surrounds. Use the smooth tool to tuck the edges into the rubber seals for a factory-finished look. -
Highlight the Wheels:
Clean the wheel rims meticulously. Apply a slow, steady curve of magenta rim tape to the outer lip of the alloy wheels to connect them visually to the body. -
Front Bumper Details:
Switch to the neon cyan tape. Outline the aggressive angles of the front bumper intakes and the lower splitter lip. -
Headlight Integration:
If your local laws permit, apply a thin strip of cyan translucent tint or accent tape strictly to the non-illuminated housing edge of the headlight to simulate the glowing ‘eye’ effect seen in the image.
Step 4: Finishing and Sealing
-
Trim the Ends:
Use your precision knife to trim the ends of all neon strips at panel gaps. Never bridge a panel gap with tape, as opening the door will tear it. -
Tuck the Edges:
Open the doors and hood to wrap the cut ends of the vinyl tape around the panel edges for a seamless appearance. -
Post-Heat:
Go over all your applied vinyl—both the matte base and neon strips—with a heat gun set to around 200°F (90°C). This ‘kills’ the vinyl memory and ensures it stays locked in place. -
Final Wipe Down:
Give the entire car a final wipe with a spray detailer designed for matte finishes to remove fingerprints without adding unwanted gloss.
Step back and admire how the neon lines reshape the car’s silhouette against the dark matte background


Color-Shift Paint That Changes by Angle
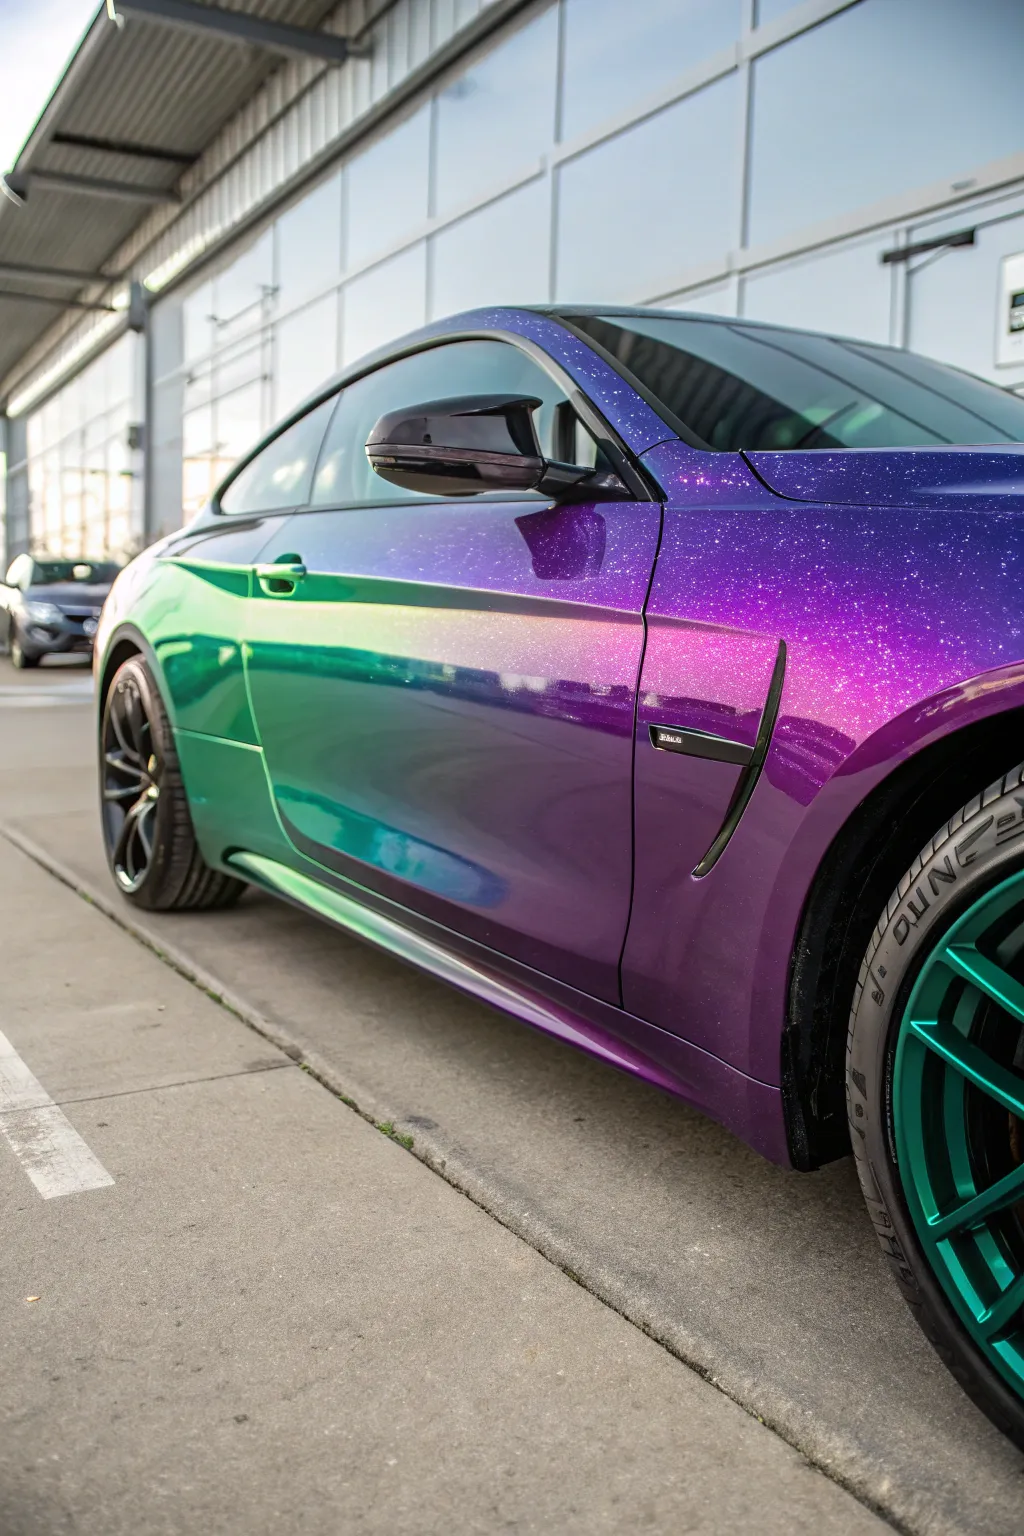
Transform your vehicle into a rolling galaxy with this stunning color-shift project that moves from deep violet to emerald green. This tutorial guides you through applying a specialized chameleon flake finish that reacts dynamically to light and viewing angles.
Step-by-Step Guide
Materials
- High-quality automotive primer (grey or black base recommended)
- Black automotive base coat (essential for color shift intensity)
- Color-shift/Chameleon pearl pigment (Purple/Blue/Green shift)
- Holographic metal flake (micro-flake size)
- Automotive urethane clear coat (high gloss)
- Hardener and reducer suitable for your temperature
- HVLP spray gun (1.3mm or 1.4mm tip)
- Paint mixing cups and stir sticks
- Tack cloths
- Strainers (190 micron)
- Masking tape and paper
- Respirator and safety suit
- Sandpaper (400, 600, 800, 1500, 2000 grit)
- Polishing compound and buffer
Step 1: Preparation & Base Coat
-
Surface Prep:
Begin by thoroughly washing the car to remove all wax, grease, and road grime. Sand the existing clear coat with 400-600 grit sandpaper until the surface is completely dull and matte. This mechanical ‘tooth’ is vital for adhesion. -
Masking:
Carefully mask off all windows, trim, wheels, and any areas you don’t want painted. Take your time here; good masking saves hours of cleanup later. -
Applying the Base:
Apply a black automotive base coat. The black background is non-negotiable for color-shift pigments as it absorbs light, allowing the pearls to reflect their true colors. Apply 2-3 medium wet coats until you have solid, opaque coverage. -
Flash Time:
Allow the base coat to flash off (dry matte) between coats, usually 10-15 minutes depending on your reducer and shop temperature. Do not sand this layer if you can avoid it, as scratches will show through the pearl.
Step 2: Mixing & Spraying Effect Layers
-
Mixing the Pearl:
Mix your clear intercoat binder or a dedicated carrier base. Add the Purple-to-Green chameleon pearl powder. A standard ratio is about 25-50 grams per mixed gallon, but check your specific product instructions. I prefer to start lighter; you can always add more coats. -
Adding the Sparkle:
To achieve the starry look in the reference photo, mix a small amount of holographic micro-flake into the same pearl mixture. Go meaningful but sparse—you want a galaxy effect, not a glitter bomb. -
Effect Coat 1:
Spray your first coat of the pearl/flake mixture. Use a 50-75% overlap pattern. It will look transparent and uneven at first—don’t panic. Walk the full length of the panel to avoid start-stop marks. -
Effect Coat 2 & 3:
Apply 2-3 more coats of the effect mixture. Step back between coats and use a flashlight to check the color density. You are looking for an even distribution of the shift, where the black base is still doing the heavy lifting underneath. -
Drop Coat:
For the final effect layer, pull the gun back slightly and increase air pressure just a touch. Dust a final ‘drop coat’ over the panels to orient the metallics and pearls randomly, preventing ‘tiger stripes’.
Tip: Lighting Matters
Install bright LED strip lights on your spray gun or ensure your booth is extremely well-lit. Shadows make it impossible to see if your pearl coverage is even.
Step 3: Clearing & Finishing
-
Mixing Clear Coat:
Mix your high-gloss urethane clear coat with the activator. Ensure your mixing cup is clean and the mix is precise. -
Sealing the Deal:
Apply the first coat of clear. This should be a medium coat—not too wet to run, but wet enough to flow. This layer locks in your pearls and creates depth. -
Flow Coats:
Apply 2 more wet coats of clear, allowing proper flash time in between. The extra clear helps bury the texture of the micro-flakes so the final surface feels smooth like glass. -
Curing:
Let the car cure for at least 24 hours (or follow manufacturer specs). The paint needs to be hard enough to sand without dragging. -
Color Sanding:
Wet sand the clear coat with 1500 and then 2000 grit sandpaper to remove any orange peel or dust nibs. Use a squeegee to check your progress; the surface should be uniformly flat. -
Buffing:
Using a rotary buffer and wool pad with heavy cutting compound, buff out the sanding scratches. Follow up with a foam pad and finishing polish to bring out that deep, wet-look shine. -
Wheel Accent:
Don’t forget the details. In the image, the wheels are matched with a teal accent colour. Mask the tires and spray the rims with a matching teal candy paint or powder coat to tie the whole look together.
Level Up: Hidden Graphics
Before the pearl layer, place a lace stencil or decal over the black base. Spray the pearl, then remove the stencil for a ‘ghost’ pattern.
Park your freshly painted ride in the sun and watch the colors dance across the curves
Modern Camouflage in Oversized Shapes
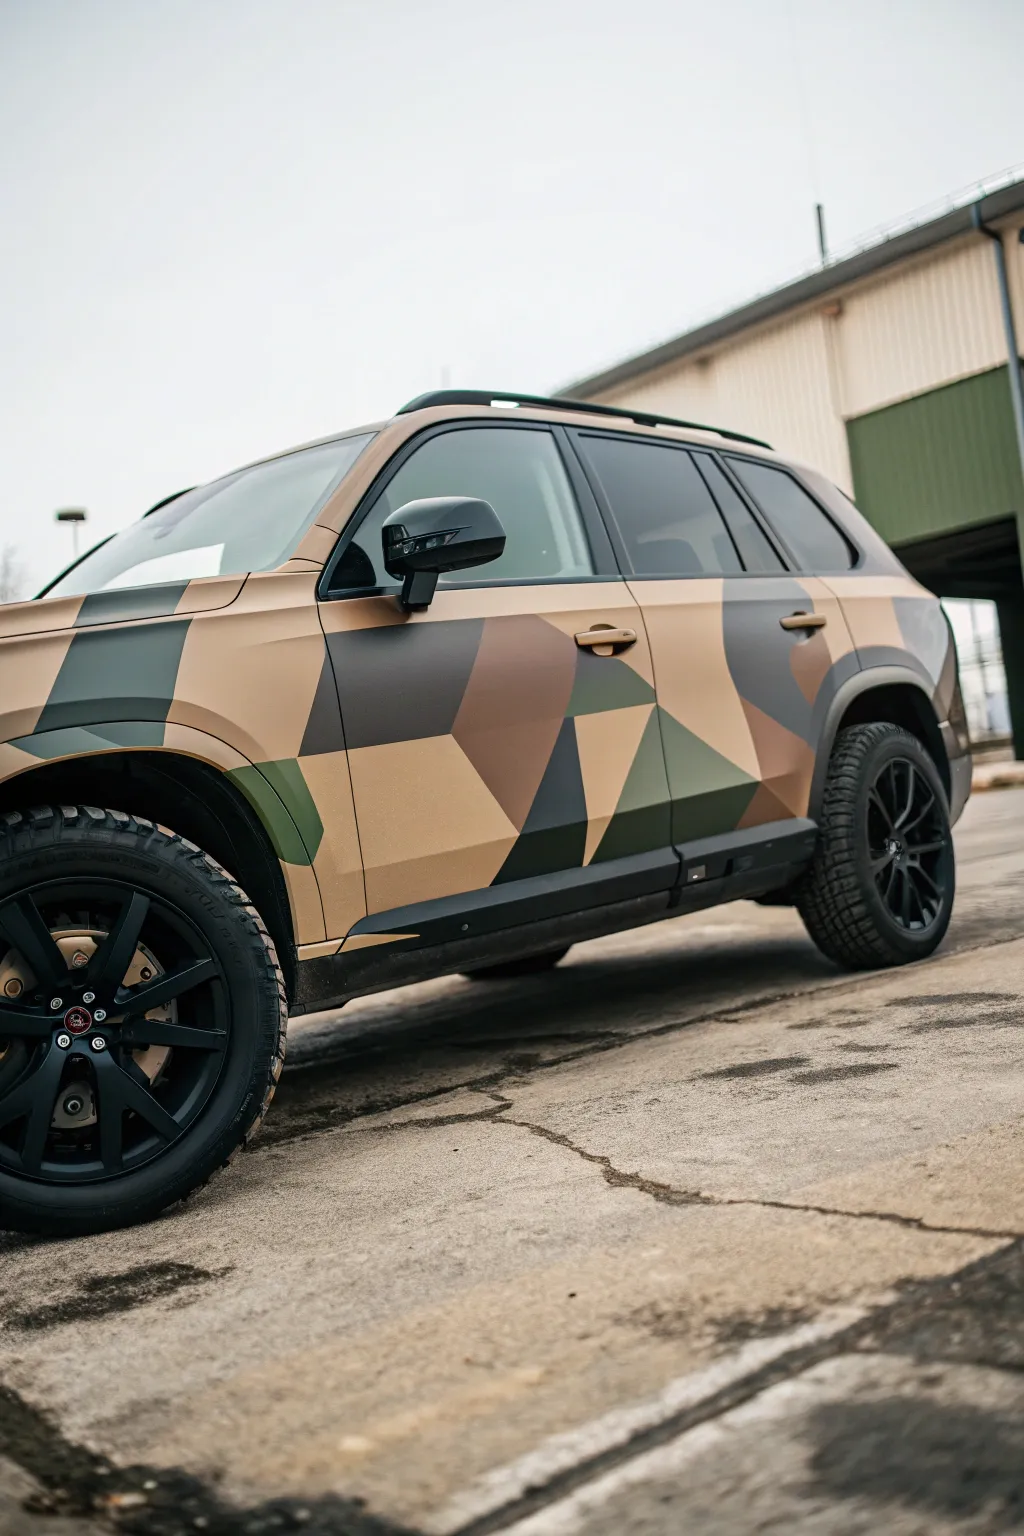
Transform a standard SUV into a rugged, tactical statement piece with this oversized geometric camouflage design. Using large, angular blocks of matte earth tones instead of traditional small blobs creates a contemporary, aggressive aesthetic that is surprisingly approachable for DIYers.
Detailed Instructions
Materials
- Vehicle vinyl wrap (Matte Tan/Desert Sand)
- Vehicle vinyl wrap (Matte olive/military green)
- Vehicle vinyl wrap (Matte dark brown/chocolate)
- Vehicle vinyl wrap (Matte black)
- Knifeless tape (essential for clean cuts)
- Vinyl application squeegee with felt edge
- Heat gun
- Isopropyl alcohol and lint-free microfiber towels
- Clay bar kit
- Masking tape (low tack)
- Precision knife with fresh snap-off blades
- Measuring tape
- Wrap magnets (to hold pieces in place)
Step 1: Preparation & Cleaning
-
Wash thoroughly:
Begin by washing the entire vehicle with a dish soap solution to strip away old wax and grease. Do not use wash-and-wax products. -
Clay bar treatment:
Run a clay bar over every painted surface to remove embedded contaminants. The surface must feel smooth like glass for the vinyl to adhere properly. -
Final wipe down:
Clean all surfaces, edges, and wheel arches with isopropyl alcohol and a lint-free towel. Pay extra attention to recesses where dirt hides. -
Remove hardware:
Use appropriate tools to carefully remove door handles, mirrors, and trim pieces if you feel comfortable doing so; this makes wrapping much easier.
Use Knifeless Tape!
Never cut directly on the car with a blade. Knifeless tape uses a filament to cut through the vinyl from underneath, preventing paint damage.
Step 2: Base Layer Application
-
Apply the dominant color:
The tan/sand color acts as the background or ‘base’ for this pattern. Wrap the major panels (doors, fenders, hood) completely in the matte tan vinyl first. -
Squeegee technique:
Work from the center outwards using your felt-tipped squeegee to push out air bubbles. Use overlapping strokes for consistent adhesion. -
Heat for corners:
Gently warm the vinyl with a heat gun when approaching curves or recessions to make the material pliable, then stretch it slightly to fit. -
Trim edges:
Leave about 3-5mm of excess vinyl at the edges to tuck behind panels or rubber seals for a factory finish.
Make It Reflective
Swap the matte black vinyl for a black reflective vinyl. In daylight it looks standard, but at night the black shapes reflect headlights.
Step 3: Designing the Camo Pattern
-
Plan the geometry:
Look at the reference image; the shapes are large trapezoids and triangles, not small pixelated squares. Use masking tape to map out where your green, brown, and black shapes will go directly on top of the tan base. -
Apply knifeless tape:
Lay down knifeless tape along the lines you just mapped out. This is the secret to cutting vinyl on the car without scratching the paint or the base layer. -
Layer overlapping shapes:
I usually start with the largest secondary color shapes (the olive green). Place a sheet of green vinyl over the specific area covering your knifeless tape lines. -
Squeegee the second layer:
Press the green vinyl down firmly over the area and the tape line. -
Pull the tape:
Snap the knifeless tape line and pull it through the vinyl to create a perfect cut. Peel away the excess material.
Step 4: Adding Depth and Detail
-
Add dark brown accents:
Repeat the knifeless tape process for the dark brown shapes. Ideally, have some brown shapes overlap the green or tan to create depth. -
Incorporate black shards:
Use the matte black vinyl for the smallest, sharpest geometric accents. These high-contrast pieces help break up the larger blocks of earth tones. -
Handle door gaps:
When a pattern crosses a door gap, cut the vinyl carefully down the center of the gap, heat it, and wrap the edges inward around the door jamb. -
Post-heating:
Once all shapes are applied, go over the entire car with your heat gun (around 90°C/194°F usually) to ‘kill’ the memory of the vinyl and ensure it stays put. -
Reassemble:
Reinstall any door handles, mirrors, or trim you removed in the beginning.
Step back and admire your new rugged ride, ready for the urban jungle or the trail
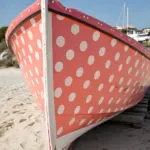
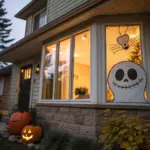
Creature Mouth on the Front Bumper
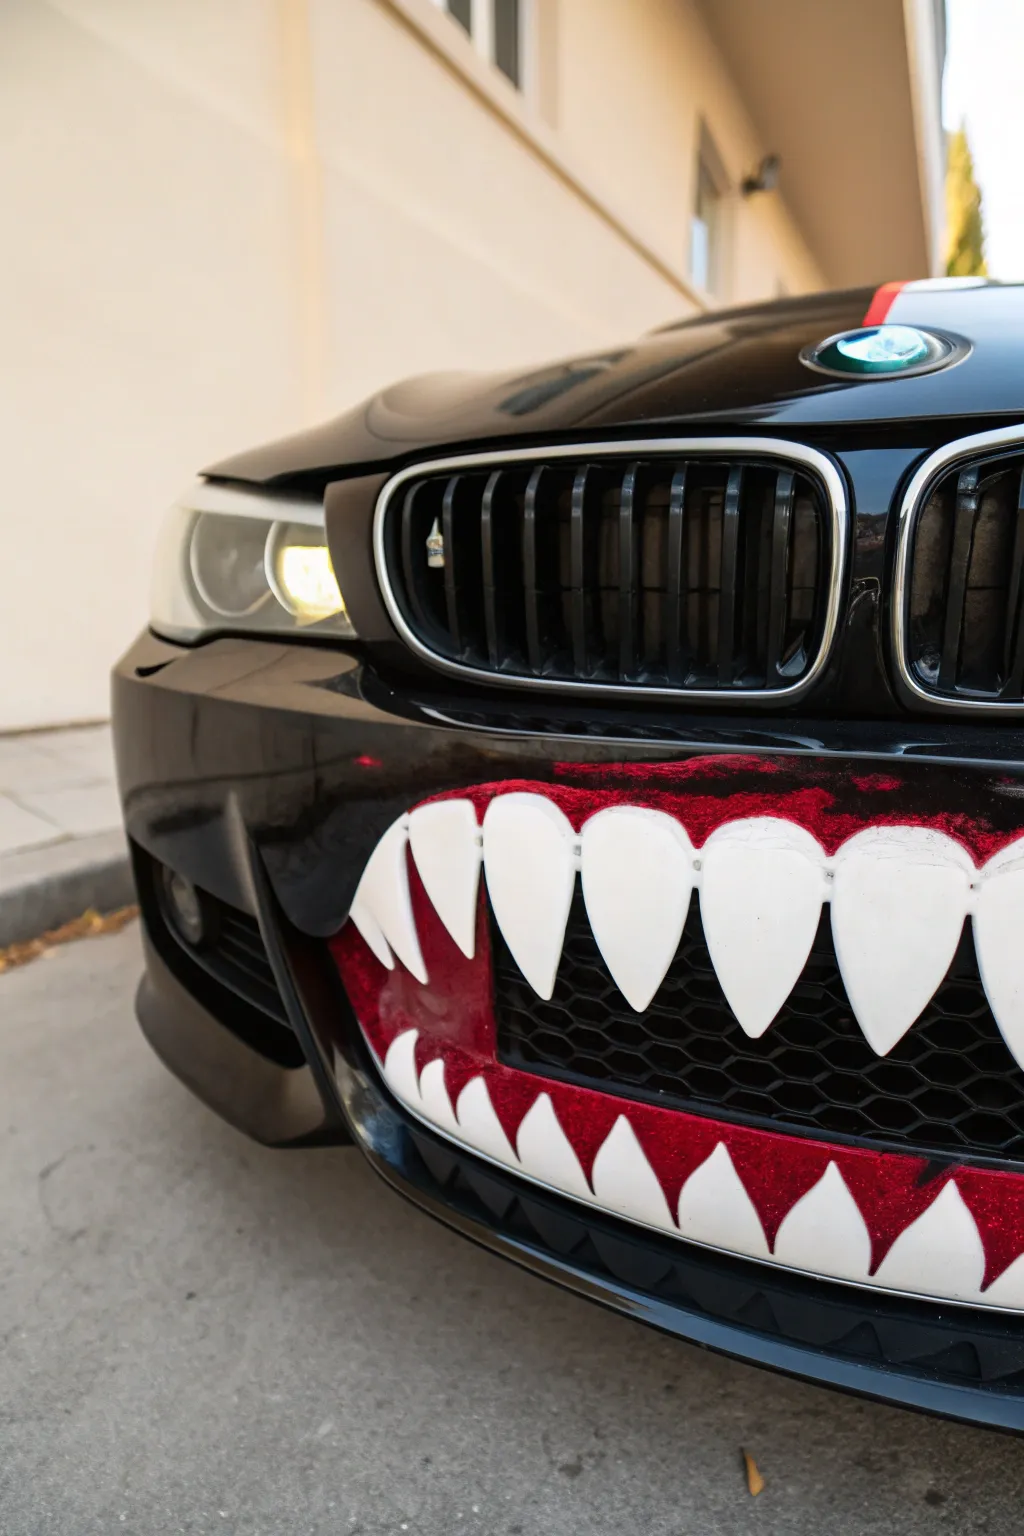
Transform your mundane front bumper into a menacing, toothy grin with this creature-inspired modification. Using bold red accents and stark white teeth, this aggressive design gives your vehicle an unmistakable, predatory look that is perfect for car shows or Halloween.
Step-by-Step Tutorial
Materials
- Plasti-dip spray (Black, Red, White)
- Masking tape (various widths)
- Painter’s tape
- Plastic drop cloths or newspaper
- Degreaser or prep solvent
- Microfiber towels
- Sanding sponge (fine grit, optional)
- X-Acto knife or sharp razor blade
- Cardboard or stiff paper (for templates)
- Pencil
Step 1: Preparation and Design
-
Clean the surface:
Thoroughly wash the front bumper area with soap and water to remove any road grime. Follow up with a degreaser or prep solvent and a clean microfiber towel to ensure absolutely no wax or grease remains, as this will prevent adhesion. -
Protect the perimeter:
Use painter’s tape and plastic drop cloths or newspaper to mask off the grilles, headlights, emblem, and the hood area above the bumper. Be generous with the masking to prevent overspray on the rest of the car. -
Create tooth templates:
Sketch various sizes of sharp triangles onto stiff cardboard to act as your teeth templates. Cut them out. Having physical templates allows you to test the layout against the bumper’s contours before committing to paint.
Use Liquid Tape
For sharper corners on the teeth, brush on a tiny bit of liquid electrical tape at the very tips. It creates a defined point that spray cans sometimes miss.
Step 2: Creating the Red Gums
-
Define the mouth area:
Using thin masking tape, outline the shape of the mouth opening on the bumper. This line will separate the black car paint from the red gum area. -
Base coat application:
Spray a light, dusting coat of white Plasti-dip within the masked mouth area first. This white base layer makes the red pop properly against the black bumper. -
Applying the red:
Once the white base is dry to the touch, apply 3-4 distinct coats of red Plasti-dip. Allow about 10-15 minutes of drying time between each coat to build a solid, vibrant color without runs. -
Adding texture:
For that organic, fleshy look seen in the photo, I sometimes dab a sponge with a slightly darker red or black onto the wet red surface, creating a subtle, uneven texture. -
Remove tape while wet:
Immediately after the final red coat, carefully peel away the perimeter tape. Pulling the tape while the product is wet prevents it from peeling up the edges of your new paint.
Uneven Texture?
If the red paint looks bumpy or ‘orange-peeled’, don’t panic. This uneven texture actually adds to the biological, gross creature effect you want.
Step 3: Adding the Teeth
-
Masking the gums:
Allow the red layer to fully cure for at least 4 hours. Once solid, use your cardboard templates to trace the tooth shapes onto masking tape, then apply the tape over the red area, leaving only the negative space for the teeth exposed. -
Alternative vinyl method:
If painting feel too risky, you can cut the teeth shapes out of white vinyl wrap. This is often easier for beginners. If using vinyl, simply clean the red surface and stick them on. -
Painting the teeth:
If spraying, cover the entire red area with tape except for the triangular tooth shapes. Apply 4-5 coats of white Plasti-dip to ensure total opacity. The multiple layers create a raised, 3D effect. -
Detailing the edges:
Before the white dries completely, peel the masking tape away. Use an X-Acto knife very gently to score any edges if the rubberized paint starts to pull.
Step 4: Clean Up
-
Remove main masking:
Take off all the protective newspaper and plastic sheeting from the hood and grilles. -
Clean overspray:
Use a microfiber towel with a little naphtha or dip dissolver to wipe away any tiny speckles of overspray that might have landed on the headlights or surrounding paint. -
Final inspection:
Check the edges of the teeth and gums. If any lines aren’t crisp, you can use a fine-tip brush and a bit of the liquid dip to manually touch up small imperfections.
Step back and admire your vehicle’s aggressive new personality as it’s now ready to prowl the streets
Kintsugi-Inspired Panel Patches as Art

Transform a standard vehicle finish into a rolling masterpiece inspired by the Japanese art of repairing broken pottery with gold. This technique uses custom vinyl cutting and gold leaf detailing to create the illusion of precious, gilded fissures running across the car’s bodywork.
Step-by-Step Guide
Materials
- High-gloss white vinyl wrap (if not using base paint)
- Knifeless tape (Design Line)
- Gold chrome or metallic gold vinyl wrap
- Heat gun
- Felt-tipped squeegee
- Precision craft knife (X-Acto or similar)
- Isopropyl alcohol and lint-free cloths
- Detailing clay bar
- Fine-line tape (1/8 inch)
- Clear paint protection film (optional, for sealing)
Step 1: Preparation and Mapping
-
Surface Decontamination:
Before applying any vinyl, thoroughly wash and clay bar the vehicle to remove embedded contaminants. The surface must be surgical-grade clean for the thin gold inlays to adhere properly. -
Degreasing:
Wipe down the target panels (fenders, doors, and rear quarter) with isopropyl alcohol to strip any remaining wax or grease residue. -
Design Visualization:
Using fine-line tape, sketch out the ‘crack’ pattern directly onto the car. Aim for jagged, organic lightning-bolt shapes that flow across the body lines rather than straight geometric cuts. -
Create the Jagged Edge:
Once satisfied with the flow, run a strip of knifeless tape along the path of your fine-line tape design. I prefer to make this line erratic, occasionally zigzagging to mimic a natural fracture. -
Establish the Gap:
Run a second line of knifeless tape parallel to the first, varying the width between them from 2mm to 10mm. This gap will become the gold vein.
Tape Tension Tip
When laying knifeless tape for cracks, keep the tension loose. High tension creates straight lines; loose tension allows for the shaky, organic wiggles needed for realism.
Step 2: Applying the Gold Inlay
-
Lay the Gold Base:
Cut a strip of gold chrome vinyl slightly wider than your taped gap. Apply it over the knifeless tape lines, bridging the gap completely. -
Squeegee the Gold:
Firmly press the gold vinyl onto the car body between your two knifeless tape lines using the felt edge of your squeegee to ensure full adhesion. -
Cutting the Vein:
Pull the filament of the knifeless tape through the gold vinyl to cut your custom shape. Do this for both sides of the vein. -
Weeding:
Carefully peel away the excess gold vinyl from outside the cut lines, leaving only the jagged gold vein on the paint. -
Post-Heat Sealing:
Use a heat gun on a low setting over the gold vinyl to set the memory of the film and ensure the edges don’t lift.
Step 3: Overlay and Finishing
-
Prepare the Top Layer:
If you are wrapping the whole panel white (to create a recessed look), apply your knifeless tape directly on top of the cured gold vein, tracing the exact same jagged path but slightly narrower. -
Apply White Vinyl:
Lay your main sheet of white vinyl over the entire panel, covering the gold vein completely. Squeegee it smooth to remove air bubbles. -
Reveling the Gold:
Pull the knifeless tape filament through the white top layer. This cuts a window, revealing the gold layer beneath. -
Refining Edges:
Use your squeegee to tuck the edges of the white vinyl down around the gold vein. This creates a tactile, 3D effect where the gold looks like it’s inside the cracks. -
Wheel Accents:
For the wheels, clean the spokes thoroughly. Apply thin strips of gold vinyl to specific spokes, using heat to stretch the material around the complex curves. -
Final Inspection:
Check all edges and corners. If any gold corners are lifting, heat them gently and press them back down with a gloved finger. -
Ceramic Coating:
Apply a ceramic coating over the entire wrap. This protects the delicate edges of the intricate design from peeling during washes.
Textured Gold
Instead of smooth chrome gold, use a textured metallic or even actual gold leaf sealed under PPF for a more authentic, ancient pottery aesthetic.
Step back and admire how the imperfections have become the most stunning feature of your vehicle


Have a question or want to share your own experience? I'd love to hear from you in the comments below!