
If you love spooky season vibes but want to keep things sweet, cute ghost paintings are the perfect little project. I’m sharing my favorite ideas that feel friendly, cozy, and totally doable—whether you’re painting for a relaxing night in or making something giftable.
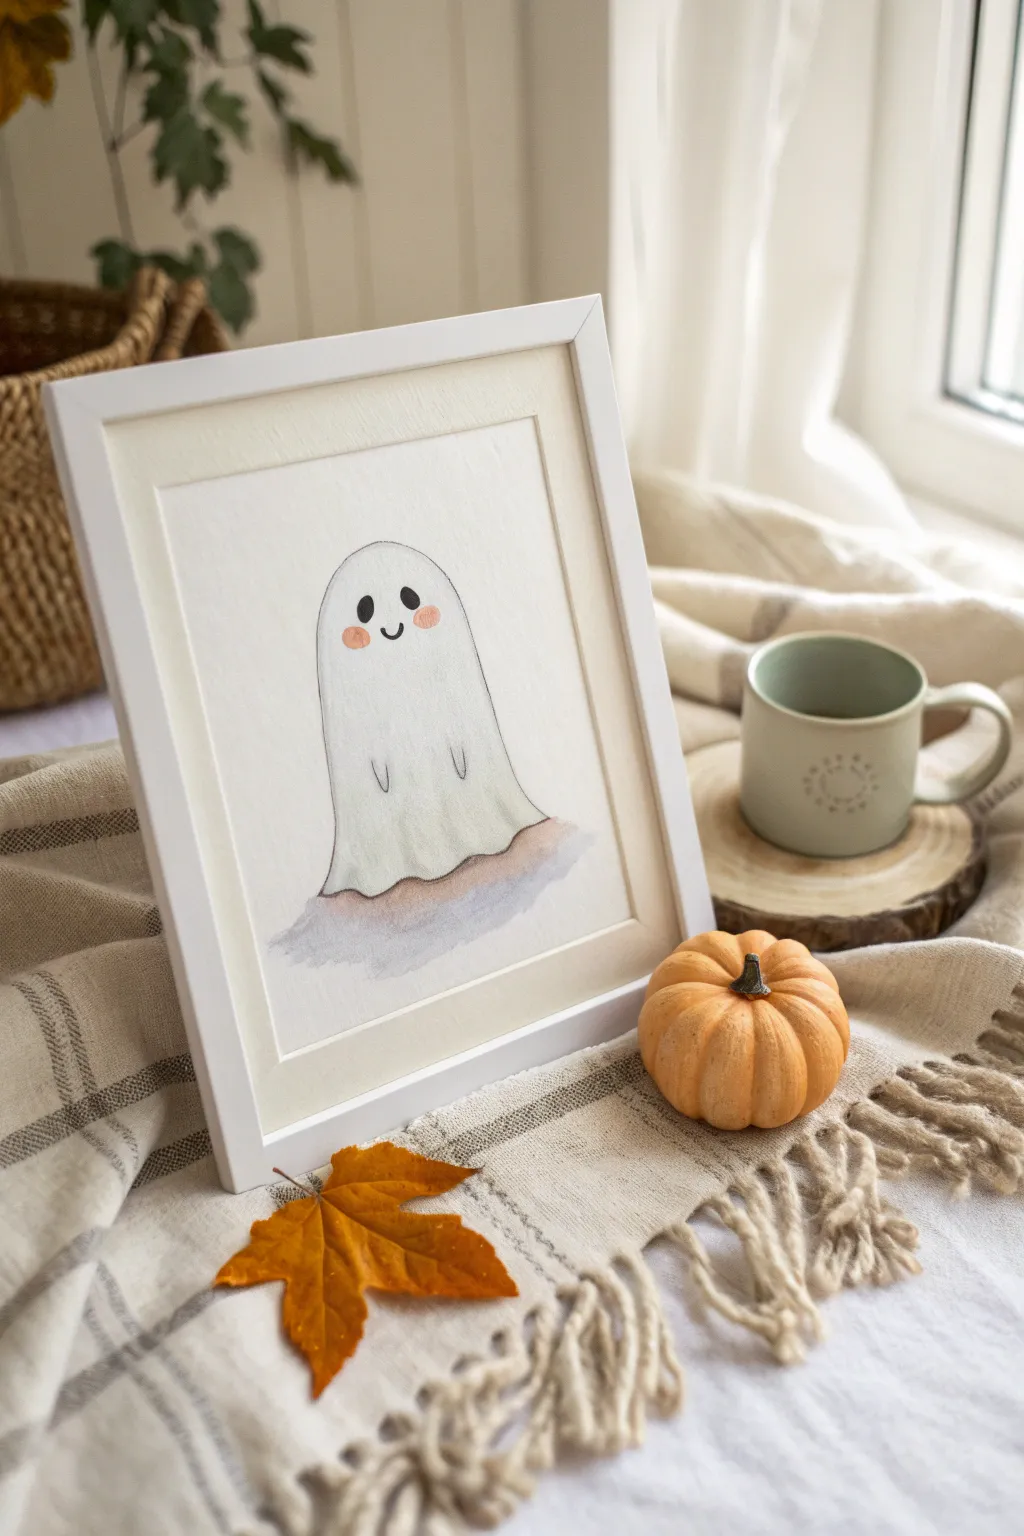
Classic Sheet Ghost With Blush Cheeks
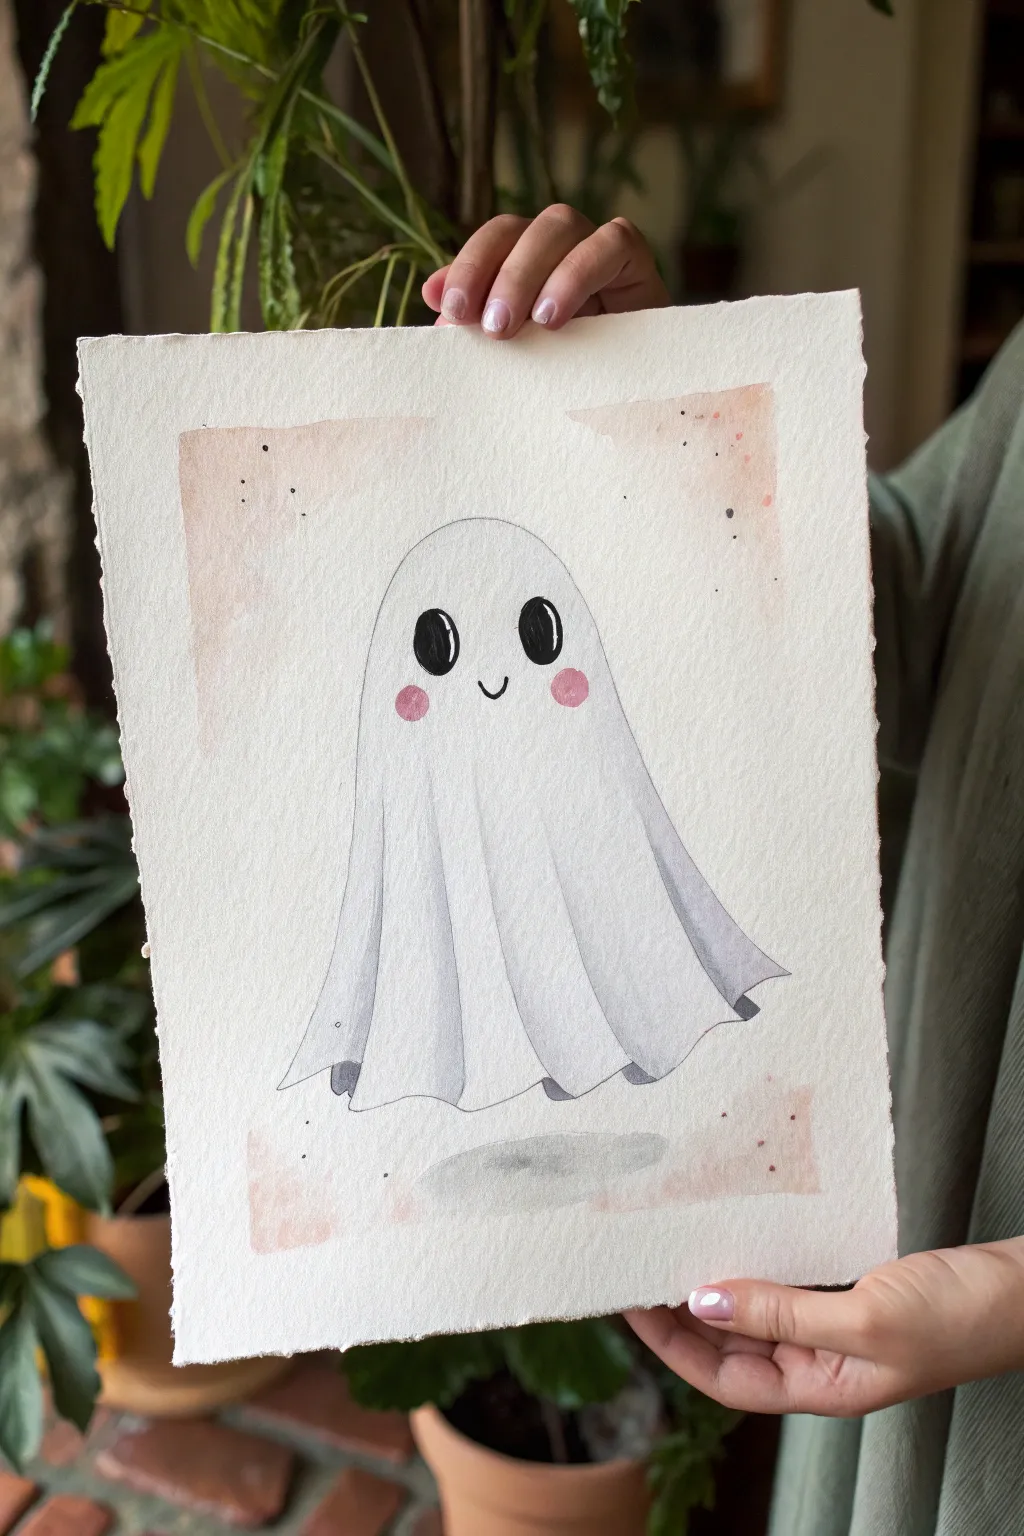
This adorable watercolor project captures the classic nostalgia of a sheet ghost but gives it a modern, sweet twist with rosy cheeks and soft shading. The textured paper and gentle washes create a cozy, handmade feel perfect for subtle Halloween decor.
Step-by-Step Tutorial
Materials
- Cold press watercolor paper (deckled edge optional but recommended)
- Watercolor paints (Payne’s Grey, Blush/Rose Pink, light brown/beige)
- Round watercolor brushes (size 6 for washes, size 2 for details)
- Pencil (HB or H)
- Kneaded eraser
- Jar of clean water
- Paper towels
- White gouache or gel pen (optional for highlights)
Step 1: Sketching
-
Outline the Shape:
Start by lightly sketching a tall, rounded dome shape in the center of your paper. This will be the ghost’s head and body. Keep your pencil pressure very light so the graphite doesn’t show through the translucent watercolor later. -
Add the Folds:
From the bottom of the dome, draw wavy lines extending downward to create the hem of the sheet. Then, draw vertical, slightly curved lines running from the hem up toward the ‘shoulders’ to indicate where the fabric is folding. -
Face Placement:
Pencil in two large ovals for eyes near the top third of the shape. Between them, add a small, simple ‘u’ shape for a smile. Sketch two circle placements for cheeks right under the eyes.
Fixing Water Blooms
If your gray shadows dry with hard, cauliflower-like edges, lightly scrub the edge with a damp stiff brush to soften it, or glaze a thin layer of water over the whole area once dry to unify it.
Step 2: Painting the Ghost
-
First Shadows:
Mix a very watery wash of Payne’s Grey (or a mix of black and blue) so it appears as a pale cool gray. Using your larger round brush, apply this wash along the vertical fold lines you sketched, softening the edges with clean water so they fade into the white of the paper. -
Deepening Folds:
Once the first layer is damp but not soaking, add a slightly more pigmented gray into the deepest parts of the folds at the bottom hem. This helps the fabric look three-dimensional. -
Under Shadow:
Paint the small slivers of ‘inside’ space at the bottom hem with a dark gray to show that the sheet is hollow. Then, wash a soft, oval-shaped gray shadow on the ‘ground’ directly beneath the ghost so it creates a hovering effect. -
Dry Time:
Let these gray layers dry completely. If you paint the face while the body is wet, the black eyes will bleed into the white sheet.
Add a Prop
Give your ghost a personality by painting a small object in its invisible hands, like a tiny orange pumpkin pail, a lantern, or even a small autumn leaf to hold.
Step 3: Facial Features
-
The Eyes:
Using a smaller brush and highly concentrated black or dark Payne’s Grey, carefully fill in the oval eyes. Leave a tiny speck of white paper untouched in each eye for a highlight, or add it later with white gouache. -
The Smile:
Paint the small ‘u’ smile with a fine tip brush using the same dark color. Keep the line thin and delicate. -
Blush Cheeks:
Load a round brush with a soft rose or coral pink. Dab two circular spots onto the cheek areas. I like to blot this gently with a paper towel immediately if it looks too heavy, keeping it soft and translucent.
Step 4: Background Details
-
Corner Washes:
Mix a very diluted wash of light brown or dusty pink. Paint loose, abstract patches in the corners of the paper, framing the ghost without touching it. Keep edges ragged and organic. -
Splatter Texture:
Load your brush with watery black or dark brown paint. Tap the handle of the brush against your finger over the paper to create fine speckles. Focus these around the background washes rather than on the ghost’s face. -
Final Highlights:
If you missed saving the white of the paper for the eye highlights, add a tiny dot of white gouache or white gel pen to the upper part of each black pupil now that they are dry.
Let your spooky new friend dry completely before framing or displaying on a mantle.


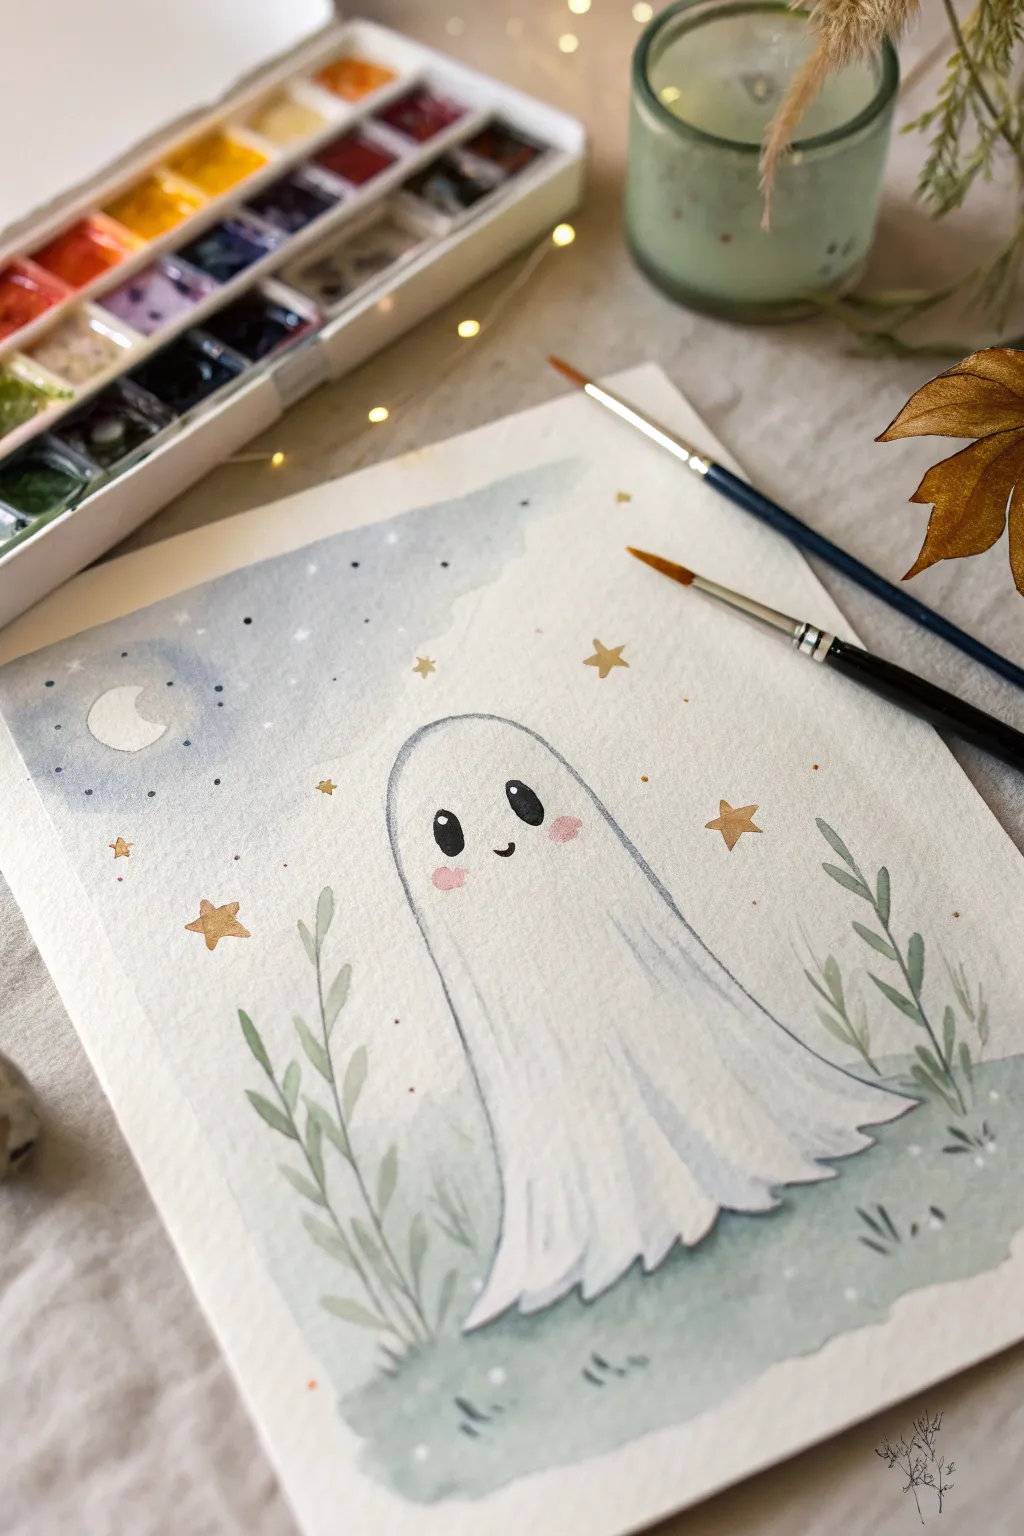
Ghost Under a Starry Night Sky
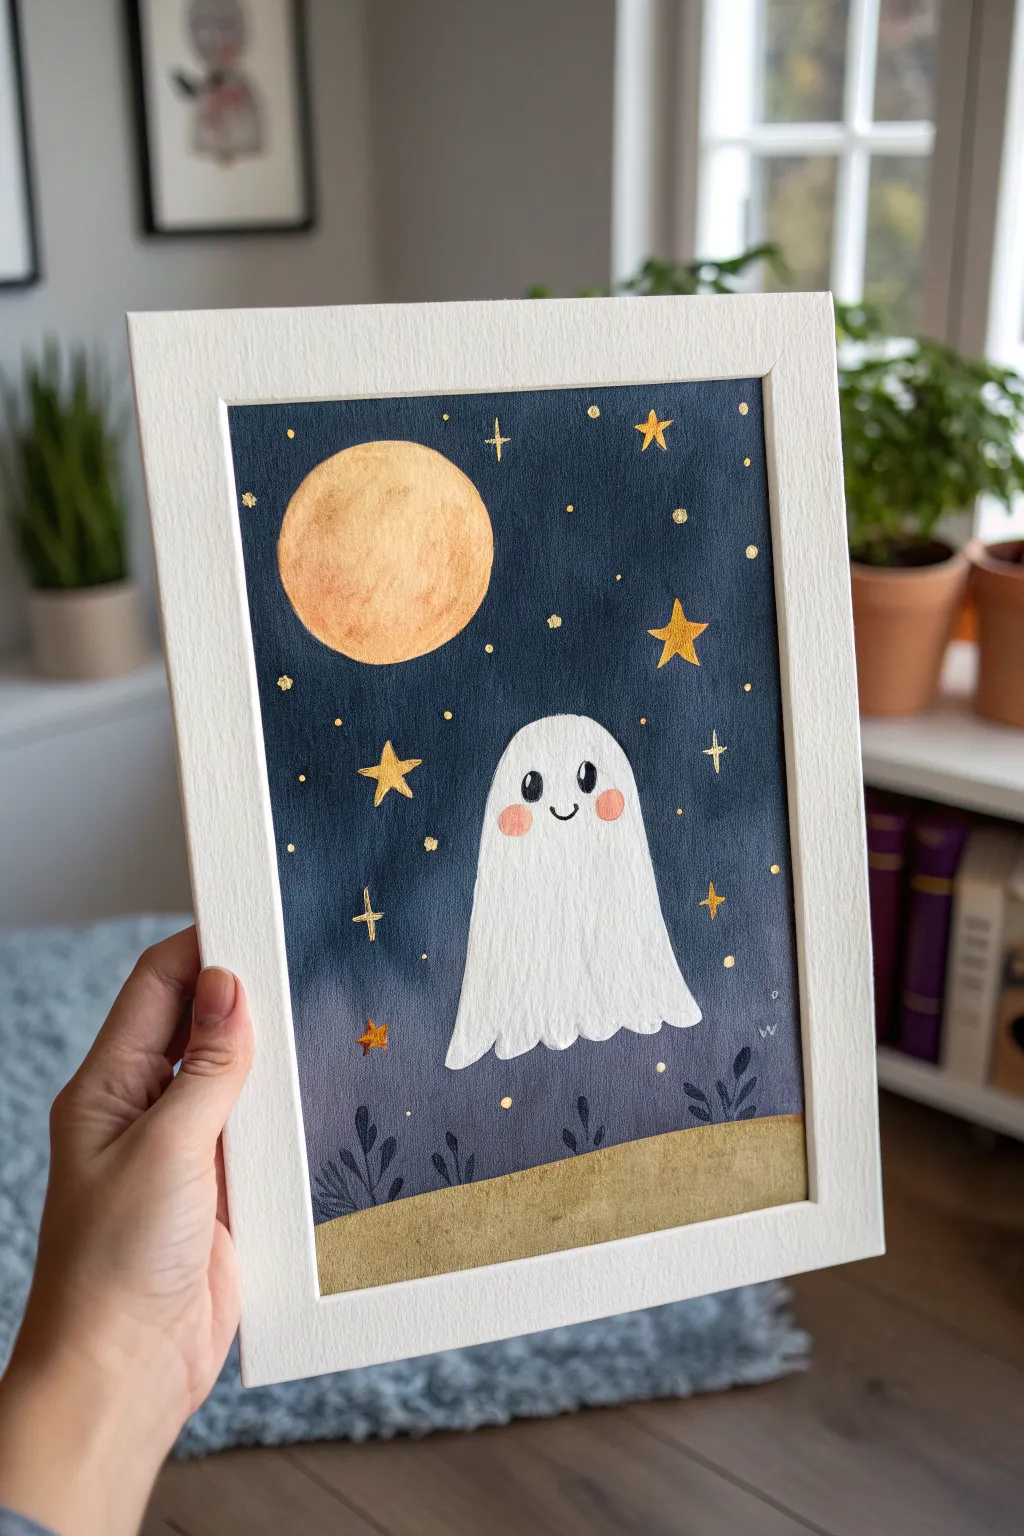
Capture the sweetness of the sprouting season with this adorable painting of a friendly ghost under a golden full moon. Using opaque gouache or acrylics on watercolor paper creates a lovely texture while keeping the colors bold and magical.
Detailed Instructions
Materials
- Cold press watercolor paper (A5 or A4 size)
- White or light wooden frame (optional)
- Painter’s tape or masking tape
- Gouache or acrylic paints (Navy blue, Indigo, White, Yellow Ochre, Gold metallic paint, Black, Pink)
- Flat shader brush (medium)
- Round detail brushes (size 0 and 2)
- Palette
- Water cups
- Paper towels
- Pencil and eraser
Step 1: Preparation & Sketching
-
Secure your paper:
Before we begin painting, tape your watercolor paper down to a flat board or your table using painter’s tape. This creates that crisp, clean white border when you peel it off later. -
Outline the main shapes:
Using a light pencil, sketch a large circle for the moon in the upper left quadrant. Don’t worry about it being perfectly round; a little irregularity adds charm. -
Draw the ghost:
Sketch a simple, rounded hump shape in the center for the ghost. Add the wavy bottom edge to suggest fabric floating in the air. -
Mark the ground:
Draw a slightly curved line near the bottom of the page to separate the night sky from the ground.
Step 2: Painting the Background
-
Mix your night sky color:
On your palette, mix a deep navy blue with a touch of black or indigo to get a rich, dark night sky color. You want it to be dark enough for the stars to pop later. -
Paint the sky:
Using your flat shader brush, carefully paint around the moon and the ghost shape. Fill the entire sky area down to the horizon line. I like to keep the paint consistency slightly creamy for smooth coverage. -
Create a slight gradient:
As you move closer to the horizon line, you can water down your paint slightly or add a tiny bit of white to create a very subtle fade, suggesting atmospheric depth. -
Paint the ground:
Mix a muted, earthy gold or ochre color. Paint the strip of ground at the very bottom. This provides a warm base for the scene.
Clean Edges Trick
Before painting, run a bone folder or your fingernail firmly along the inner edge of your tape. This seals it tightly to the paper and prevents paint from bleeding under, keeping your border crisp.
Step 3: Adding the Main Characters
-
Fill in the moon:
Wash your brush thoroughly. Mix a warm yellow-orange color using yellow ochre and a touch of white. Paint the moon circle. -
Texture the moon:
While the moon is still slightly damp (or after it dries for a layered look), dab in touches of deeper orange or diluted brown to create a crater-like texture. -
Paint the ghost white:
Use clean titanium white paint for the ghost. Applying two coats might be necessary to ensure it is completely opaque against the paper, especially if you had any pencil lines showing through. -
Add rosy cheeks:
Once the white body is dry, mix a soft pink. gently dab two oval circles on the ghost’s ‘face’ area for blushing cheeks. Paint them slightly transparent for a softer look. -
Give it a face:
Using your smallest detail brush (size 0) and black paint, add two oval eyes and a small, u-shaped smile right between the cheeks.
Add Some sparkle
Once the painting is dry, use glitter glue or a shimmer spray lightly over just the moon and stars area. This adds a real twinkle effect when the light hits your artwork.
Step 4: Magical Details
-
Paint the stars:
Switch to your gold metallic paint or a bright yellow mix. Paint various sized stars in the sky—some simple 5-point stars, some 4-point crosses, and small dots for distant starlight. -
Enhance the background:
Using a dark blue-grey (slightly darker than the horizon but lighter than the deep sky), paint simple leafy plant silhouettes rising from the horizon line. -
Highlight the moon:
Add a very thin rim of gold or light yellow to the top edge of the moon to make it glow. -
Final touches:
Look over your piece. If the white of the ghost looks patchy, add one final smooth layer. You can also add tiny white highlights to the black eyes to make them sparkle. -
The reveal:
Wait until the painting is absolutely bone dry. Slowly and carefully peel away the painter’s tape at a 45-degree angle to reveal your crisp white border.
Frame your spooky little friend and enjoy the cozy autumn vibes it brings to your space


Ghost Hugging a Pumpkin
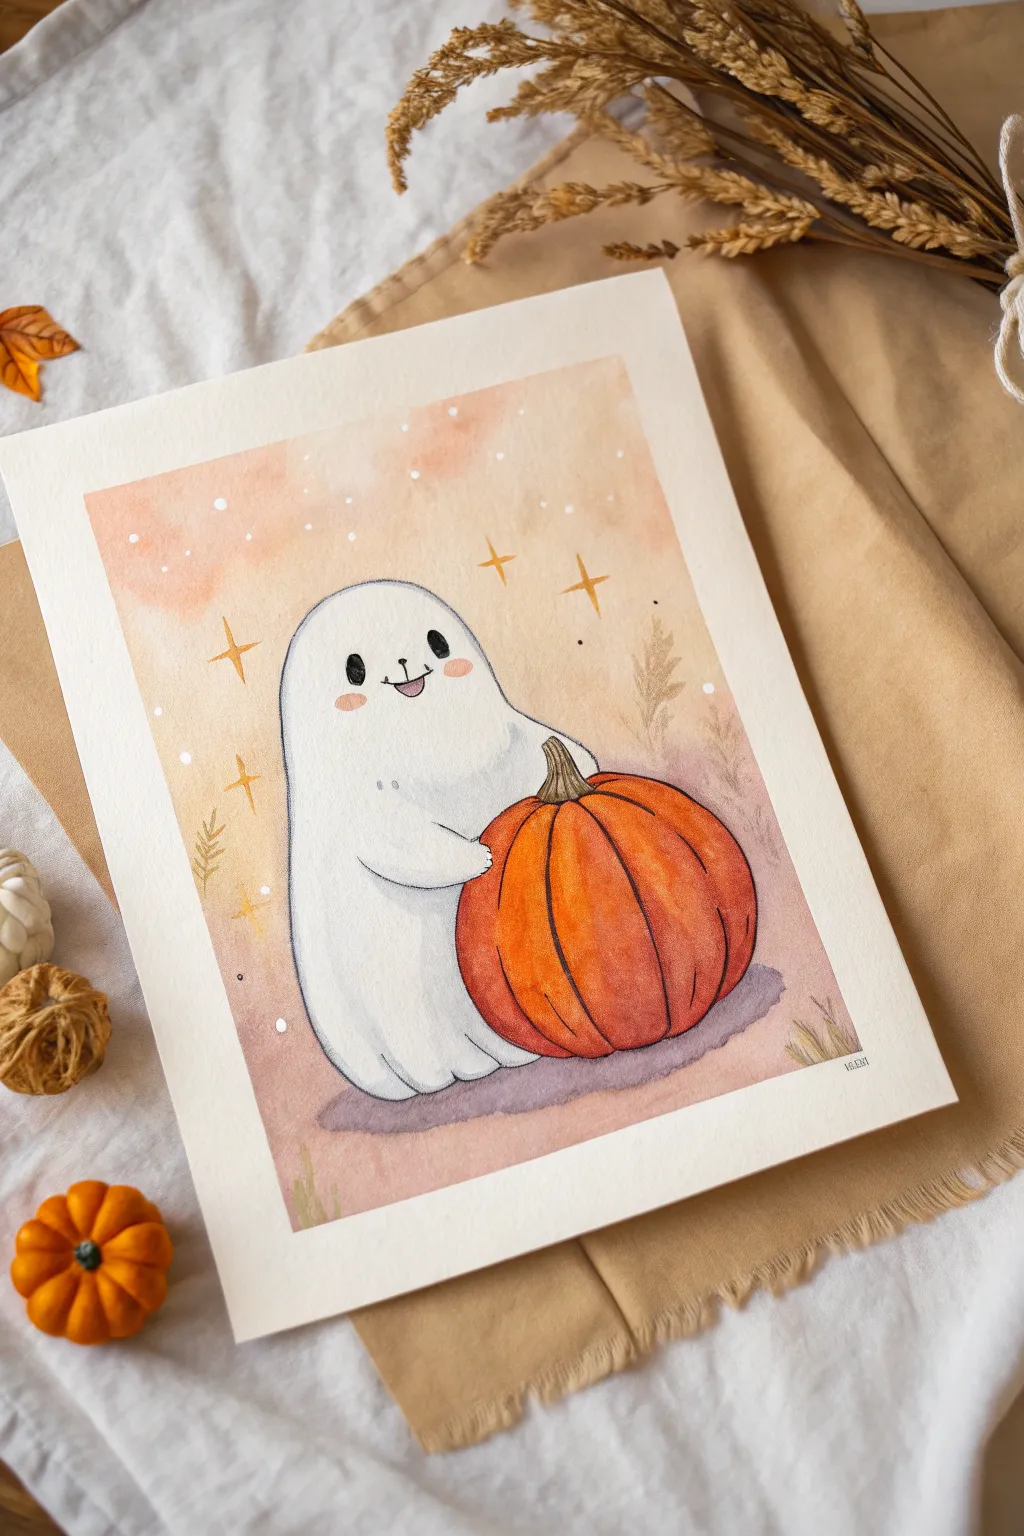
This adorable watercolor piece features a friendly seal-like ghost embracing a giant pumpkin against a dreamy autumn sky. It’s the perfect mix of spooky and sweet, using soft washes and crisp details to bring character to your Halloween decor.
Step-by-Step
Materials
- Cold-press watercolor paper (300 gsm)
- Watercolor paints (burnt orange, yellow ochre, Payne’s grey, rose madder, burnt sienna)
- Round watercolor brushes (sizes 4, 8, and a fine detail size 0)
- HB Pencil
- Kneaded eraser
- White gel pen or gouache
- Masking tape
- Jar of clean water
- Paper towels
Step 1: Sketching the Composition
-
Prepare the paper:
Begin by taping down all four edges of your watercolor paper to a board. This creates that crisp white border seen in the final piece and prevents the paper from buckling when wet. -
Outline the pumpkin:
Lightly sketch a large, round pumpkin shape on the lower right side. Don’t make it a perfect circle; give it natural ribs and a slight skew so it looks heavy and organic. -
Add the ghost:
Draw a smooth, gumdrop-shaped ghost form leaning slightly over the pumpkin. Its body should curve around the top left of the pumpkin, with two small ‘nubs’ for arms—one hugging the front. -
Refine the face:
Place the facial features low on the ghost’s head for maximum cuteness. Sketch two wide-set eyes, a tiny nose, and a happy little mouth. Erase any pumpkin lines that cross through the ghost’s arm.
Soft Edges
To keep the ghost looking fluffy and friendly, soften any hard paint edges on the body shadows by running a damp, clean brush along the line before the paint dries.
Step 2: Painting the Background
-
Wet-on-wet sky base:
Using a large brush, wet the background area around the main subjects with clean water. While damp, drop in a very watery mix of yellow ochre and a touch of rose madder. -
Create the gradient:
While the paper is still wet, add a slightly stronger concentration of burnt sienna or muted orange near the top, letting it fade into the lighter peach tones below. This creates a sunset glow. -
Lift clouds:
If the sky looks too uniform, dab a clean, thirsty brush or twist a paper towel to lift small patches of paint, creating soft, hazy cloud effects. -
Ground shadow base:
Beneath the ghost and pumpkin, paint a soft, irregular shadow shape using a very diluted mix of rose madder and purple or grey. Let the entire background dry completely.
Step 3: Bringing the Subjects to Life
-
Pumpkin base layer:
Load your size 8 brush with bright burnt orange. Paint the pumpkin segments, leaving tiny white gaps between some ribs or lifting paint in the center of each segment to create a highlight. -
Pumpkin shading:
While the orange is still slightly damp, drop darker burnt sienna or rust color into the bottom curves and the crevices between ribs to add volume. -
Ghost shadows:
The ghost stays white, but it needs form. Mix a very pale, watery grey (using Payne’s grey). Paint shadows along the bottom edge, under the arm, and the right side where the light doesn’t hit. -
Rosy cheeks:
While the ghost’s face is dry, mix a diluted rose madder. Paint two small oval blushes just below the eyes. Soften the edges with a damp brush if they look too harsh. -
Stem detail:
Paint the pumpkin stem with a mix of burnt umber and a touch of green. Use vertical brush strokes to mimic the woody texture.
Level Up: Metallic Pop
Swap the yellow ochre for metallic gold watercolor paint when doing the stars and sparkles. It will make the artwork shimmy beautifully when it catches the light.
Step 4: Details & Magic
-
Facial features:
Switch to your size 0 detail brush or a fine liner pen. Paint the eyes and nose with concentrated black or dark grey. Add a small white highlight to each eye once dry. -
Outlining:
Loosely outline the main shapes with a charcoal pencil or a fine detail brush with diluted black paint. Keep the lines sketchy and broken rather than solid walls. -
Adding texture:
With a slightly dry brush, add faint grass blades in the background using muted ochre. Add tiny dots or specks to the sky for a magical atmosphere. -
Sparkles:
Using gold paint or yellow ochre, paint four-pointed stars (cross shapes) floating around the ghost to emphasize the enchanting mood. -
White highlights:
Finalize the piece with a white gel pen. Add little dots to the sky, highlights on the pumpkin stem, and accents on the sparkles.
Peel off your tape carefully to reveal those crisp edges and enjoy your new artwork


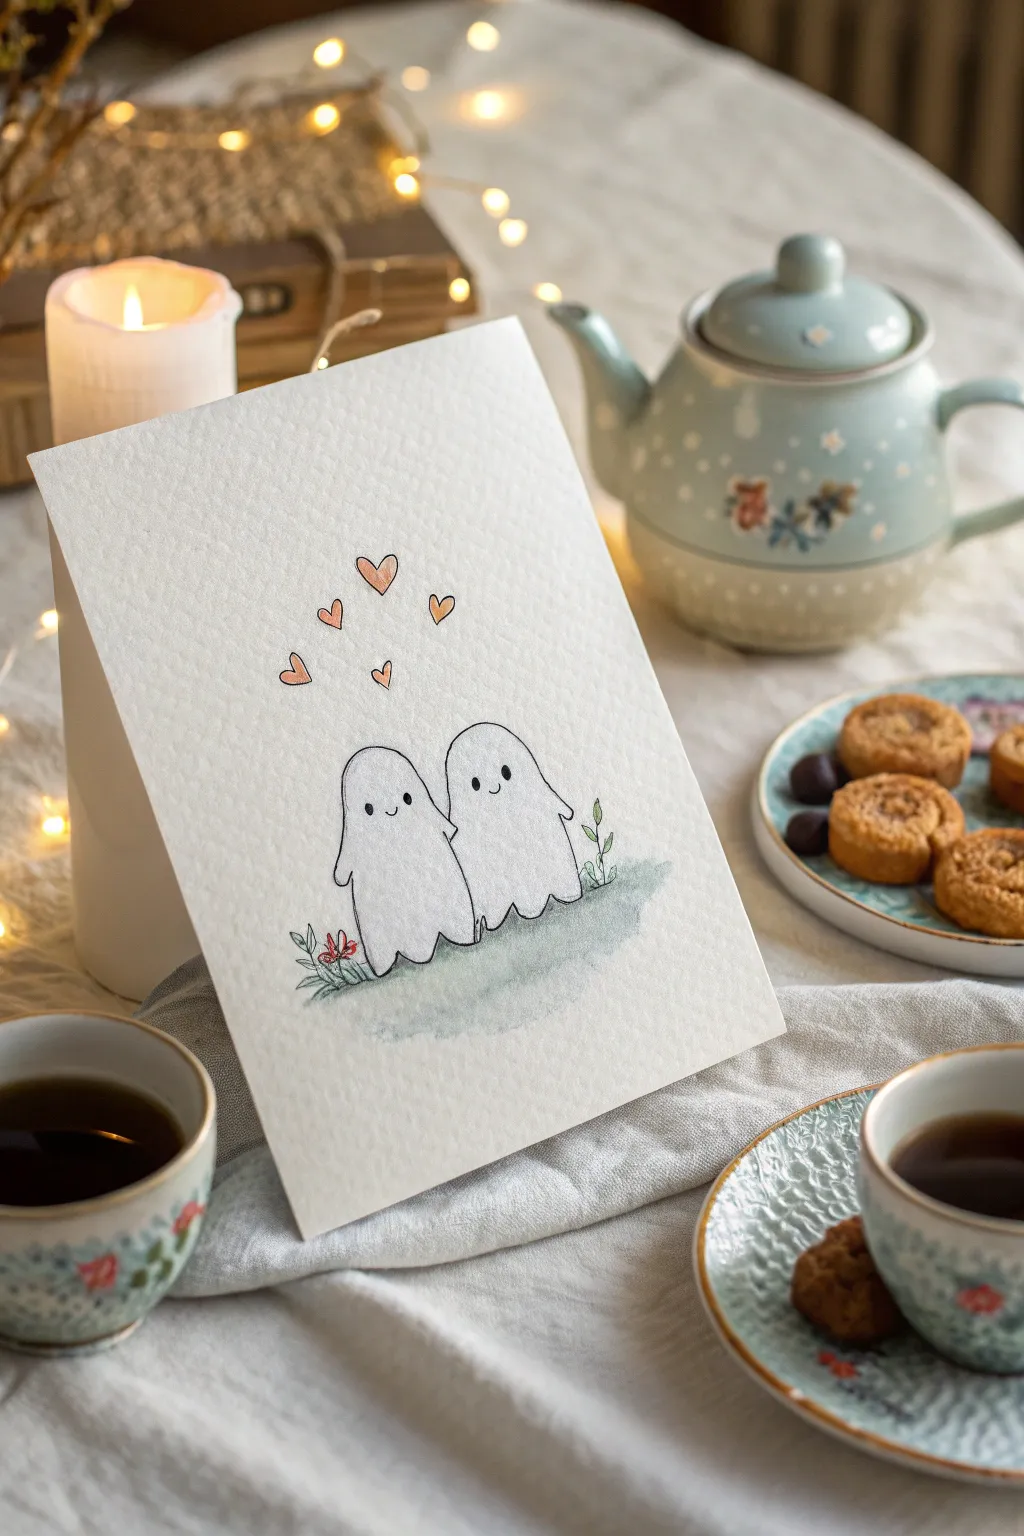
Two Ghosts Holding Hands
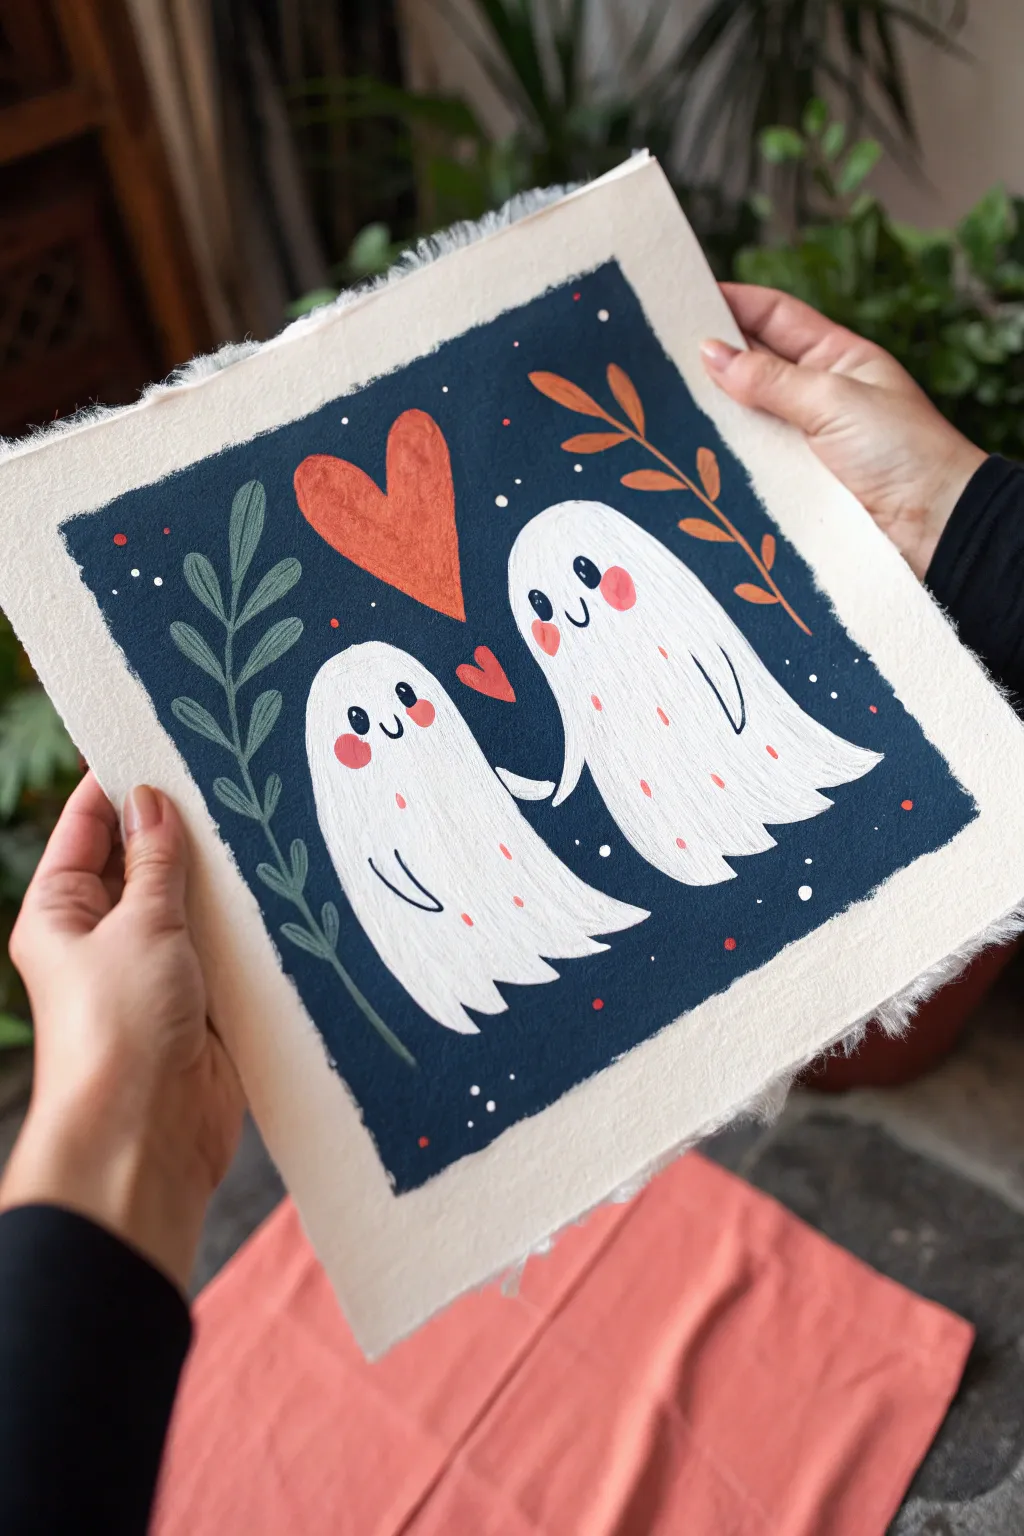
Capture a sweet, supernatural moment with this charming painting of two ghosts sharing a loving gaze. The contrast between the deep navy background and the textured white figures creates a cozy, folk-art feel perfect for Halloween decor.
Step-by-Step Tutorial
Materials
- Heavyweight cold-press watercolor paper or handmade cotton rag paper
- Gouache or acrylic gouache paints (Navy Blue, Titanium White, Warm Red/Coral, Sage Green, Orange)
- Painter’s tape or masking tape
- Flat shader brush (size 6 or 8)
- Round detail brushes (size 0 and 2)
- Palette for mixing
- Cup of water and paper towels
- Pencil for sketching
- Kneaded eraser
Step 1: Preparing the Composition
-
Paper selection:
Choose a piece of paper with a nice texture. If you have handmade paper with a deckle edge like in the photo, that’s ideal. If not, you can carefully tear the edges of watercolor paper against a ruler to mimic that rustic look. -
Sketch the outlines:
Lightly sketch a square frame in the center of your paper, leaving a wide border. Inside this square, draw two kidney-bean shapes for the ghosts standing side-by-side. -
Add details:
Position their arms so they reach out and touch in the middle. Add a large heart floating above them, a smaller heart between them, a leafy vine on the left, and an orange branch on the right. -
Refine the sketch:
Use a kneaded eraser to lighten your pencil ghost lines until they are just barely visible. This prevents the graphite from muddying your light paint later.
Opacity Secret
If your white ghost paint looks streaky over the dark blue, mix a tiny bit of white gouache with white acrylic to boost its covering power without losing the matte finish.
Step 2: Painting the Background
-
Block in the blue:
Mix a deep, rich navy blue. Using your flat brush, carefully paint the background space around your sketched ghosts and elements. Don’t worry about perfect straight edges on the outside border; a slightly rough, painterly edge adds character. -
Detail work:
Switch to a smaller round brush to get the navy blue into tight corners, like between the ghosts’ hands and around the leaves. Let this background layer dry completely.
Step 3: Bringing the Ghosts to Life
-
Base white layer:
Load a round brush with titanium white. Paint the bodies of the ghosts. You may need two coats to get full opacity over any stray blue marks, but let the first coat dry before adding the second. -
Add texture:
While painting the white, use vertical brush strokes that follow the drape of the sheet. I like to leave slight ridges in the paint to emphasize movement. -
Rosy cheeks:
Mix a soft coral pink. While the white face area is dry, paint two round circles on each ghost for cheeks. Place them slightly wide apart for a cuter look. -
Facial features:
Using your smallest detail brush and the navy blue mix (or black), paint tiny oval eyes and small smiles. The eyes should sit just above the cheek line. -
Ghostly details:
Mix a diluted grey or very light blue. Paint thin, curved lines effectively outlining the bottom hem of the sheet and the arms to give them definition against the white body. -
Speckled pattern:
Using the tip of your brush and the watered-down red or coral paint, add tiny ticks or specks onto the ghosts’ bodies for texture.
Wobbly Lines?
Support your painting hand with your pinky finger resting on a dry part of the paper. This acts as a stabilizer for those tiny eyes and smiles.
Step 4: Foliage and Finishing Touches
-
Paint the hearts:
Fill in the large heart and the small floating heart with a warm, reddish-orange color. The color should look slightly textured, not perfectly flat. -
Left vine:
Mix a muted sage or blue-green. Paint the stem and leaves on the left side. Use a ‘press and lift’ motion with your round brush to create the leaf shapes naturally. -
Right branch:
Use a burnt orange or rust color for the branch on the right side. Keep the leaves improved and simplified. -
The starry night:
Take your smallest brush or a toothpick. Dip it in pure white paint and dot tiny ‘stars’ scattered across the navy background. -
Final accents:
add a few tiny red dots among the white stars to tie the color palette together. Let the entire piece dry flat.
Now you have an adorable piece of ghostly art to bring a little spirit to your walls
BRUSH GUIDE
The Right Brush for Every Stroke
From clean lines to bold texture — master brush choice, stroke control, and essential techniques.
Explore the Full Guide
Trio of Tiny Ghosts in a Row
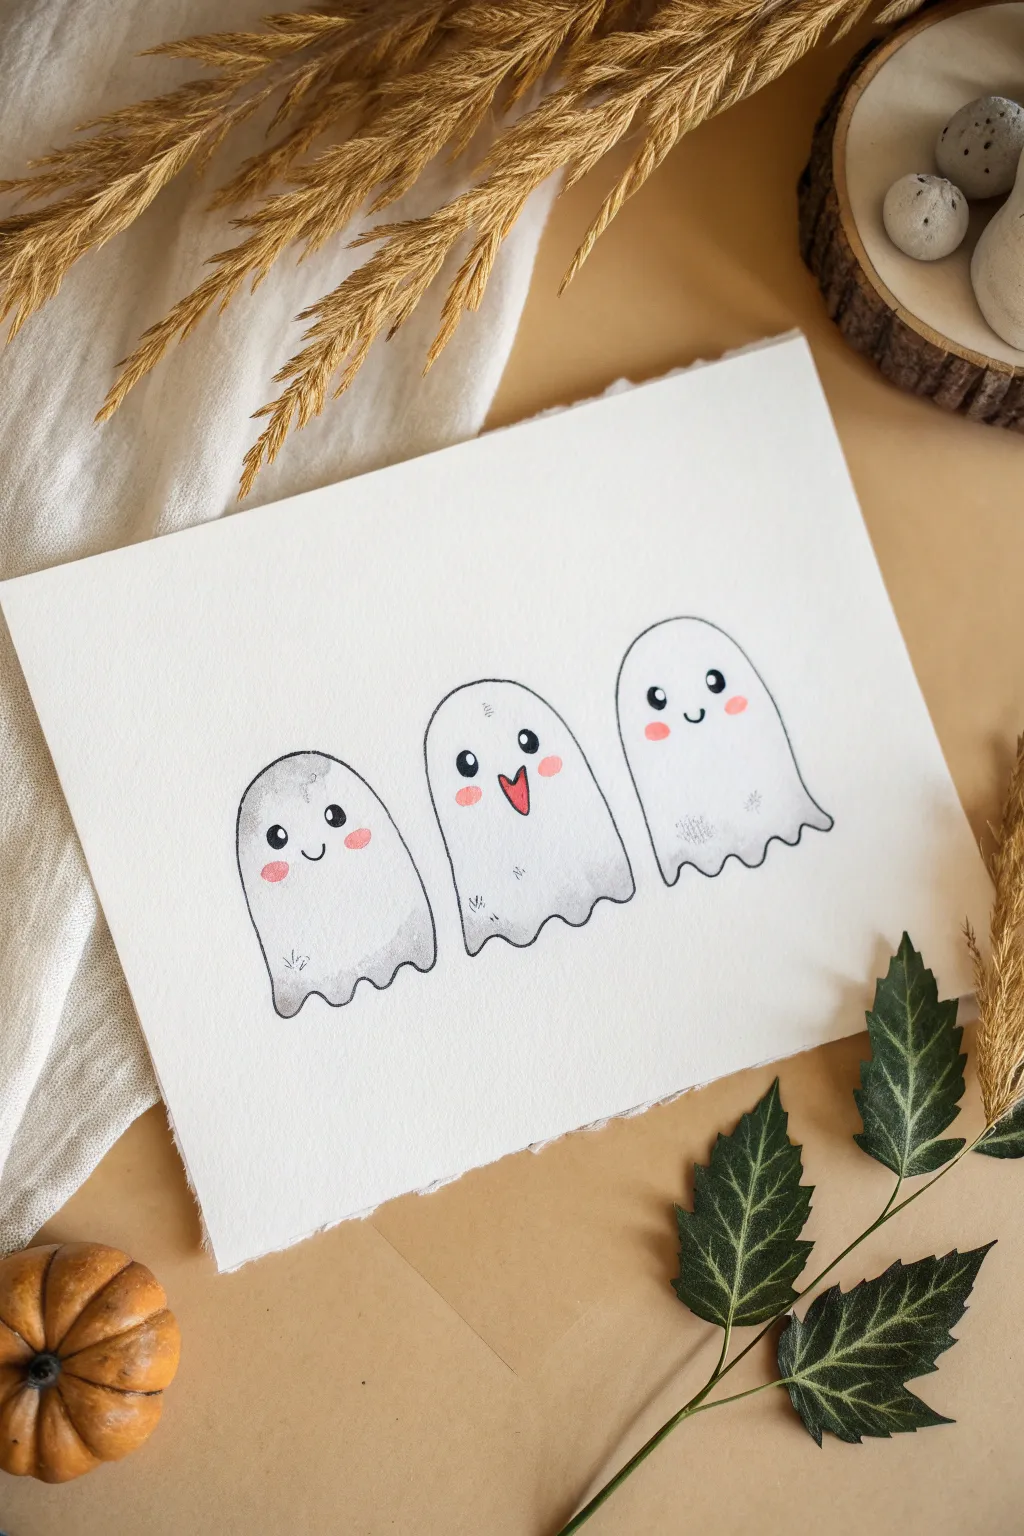
Capture the spirit of the season with this adorable watercolor illustration featuring three friendly phantoms lined up in a row. Their simple shapes and expressive faces make this a perfect project for beginners looking to practice wet-on-dry techniques and facial details.
How-To Guide
Materials
- Cold press watercolor paper (approx. 5×7 inches)
- Pencil (HB or H)
- Kneaded eraser
- Waterproof fine liner pen (01 or 03 size, black)
- Watercolor paints (Payne’s Gray or a diluted Black Lamp)
- Red or pink watercolor paint (or a pink marker) for cheeks
- Round watercolor brush (size 4 or 6)
- Small detail brush (size 0 or 1)
- Paper towels
- Jar of clean water
Step 1: Sketching the Shapes
-
Outline the bodies:
Start by lightly sketching three gumdrop-like shapes in a horizontal row. Make the center ghost slightly taller than the two outer ghosts to create a pleasing composition. -
Add the wavy bottoms:
Refine the bottom edge of each ghost with a scalloped, wavy line. The waves don’t need to be uniform; keeping them irregular adds to the floaty, fabric-like appearance. -
Sketch visible features:
Lightly mark where the eyes and mouths will go. The ghost on the left looks right, the middle one is surprised with an open mouth, and the right one looks straight ahead. -
Ink the outlines:
Using your waterproof fine liner, carefully trace over your pencil lines for the ghost bodies. Do not ink the faces yet—we will paint those later for a softer look, or ink them after painting depending on your preference. -
Erase pencil marks:
Wait a moment for the ink to fully dry, then gently use a kneaded eraser to lift away all visible pencil sketches, leaving just the crisp ink outlines.
Uneven Watermark Lines?
If your gray shading dries with harsh lines, use a damp, clean brush to gently scrub the edge of the dried paint, then blot with a paper towel to soften the transition.
Step 2: Adding Shadows and Texture
-
Mix a light gray wash:
Dilute a tiny amount of Payne’s Gray or black watercolor with plenty of water. You want a very pale, watery gray for the initial shading. -
Shade the left ghost:
Apply the pale gray wash to the bottom third of the first ghost, as well as along the top curve of its head. This suggests roundness and a shadowy hem. -
Soften the edges:
While the paint is still wet, dip your clean brush in water and drag the inner edges of the gray paint inward to fade it out towards the white center of the ghost. -
Shade the middle ghost:
Repeat the process for the center ghost, focusing the gray shading specifically near the bottom wavy hem to ground the figure. -
Shade the right ghost:
Brush the light gray wash along the bottom hem of the third ghost. Add a few tiny, scribbly texture marks with the gray paint near the bottom to mimic creases. -
Deepen the shadows:
Once the first layer is dry, mix a slightly darker gray. Carefully paint just the very tips of the bottom waves on all three ghosts to add contrast.
Spooky Accessories
Give each ghost a unique personality by painting a tiny witches hat, a bow tie, or a holding a miniature pumpkin bucket in one of their invisible hands.
Step 3: Painting the Faces
-
Paint the eyes:
Using a small detail brush focused with concentrated black paint (or your liner pen), draw perfect circles for the eyes. Leave a tiny white spec in each pupil for a highlight. -
Add the mouths:
Draw small, U-shaped smiles on the outer ghosts. For the center ghost, paint an upside-down teardrop shape for an open, singing mouth. -
Color the open mouth:
Fill the bottom half of the center ghost’s mouth with a red or coral color to represent a tongue. -
Apply rosy cheeks:
Using a very watered-down pink or red paint, dab small oval shapes just below the eyes on each ghost. You can also use a pink marker if you prefer more control.
Step 4: Final Touches
-
Add texture details:
Using a very dry brush with a bit of gray paint, add tiny scuff marks or little ‘hairs’ on the bodies to give them a vintage, worn-fabric look. -
Evaluate highlights:
If you accidentally painted over the eye highlights, use a white gel pen to add the sparkle back into their eyes.
Let your ghostly trio dry completely before displaying this charming piece of seasonal art.
Ghosts in a Pumpkin Patch
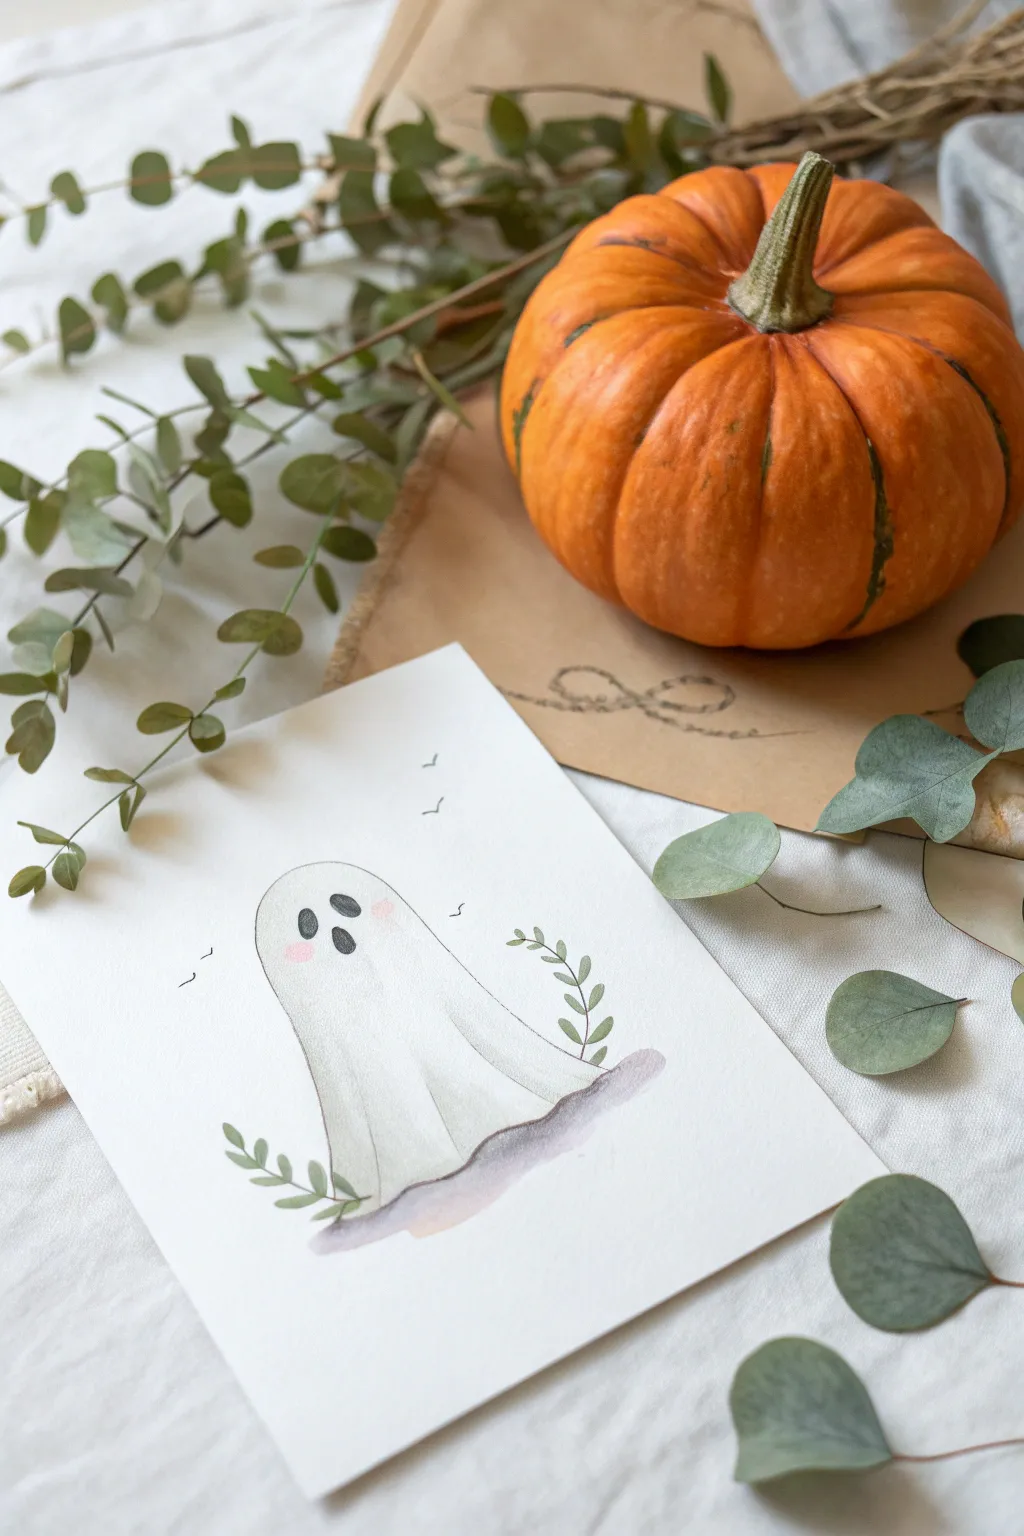
This charming project features a sweet, slightly blushing ghost surrounded by delicate foliage, painted in soft watercolors. It’s a minimalist yet expressive piece that perfectly captures a cozy, non-spooky Halloween vibe on textured paper.
Step-by-Step
Materials
- Cold press watercolor paper (approx. 5×7 inches)
- Watercolor paints (Payne’s Grey or Black, Sap Green, muted Violet/Purple, Rose or Pink)
- Round watercolor brush (size 4 or 6)
- Fine detail brush (size 0 or 1)
- HB pencil
- Kneaded eraser
- Jar of clean water
- Paper towels
Step 1: Sketching the Outline
-
Draw the ghost shape:
Start near the center of your paper. Lightly sketch a rounded dome shape for the head. Extend the lines downward, letting them flare out slightly to create the flowing ‘sheet’ body of the ghost. Keep the bottom hem uneven and wavy to suggest fabric folds. -
Add facial features:
Place two small ovals for eyes just above the visual center of the head. They should be slightly tilted towards each other for a cute expression. -
Sketch the foliage:
Draw two simple sprigs of leaves near the bottom hem of the ghost, curving upwards on the left and right sides. Keep these shapes loose and organic. -
Refine the lines:
Use your kneaded eraser to gently lift the graphite until the lines are barely visible. Heavy pencil marks can show through watercolor and look messy, so getting them faint is key.
Uneven Watercolors?
If your grey wash dries with hard edges you didn’t want, re-wet the edge slightly with clean water and gently scrub it to soften the line.
Step 2: Painting the Ghost
-
Prepare a grey wash:
Mix a very dilute wash of Payne’s Grey or black with plenty of water. You want a watery, pale grey, not a solid dark color. -
Apply the first wash:
Using your size 4 or 6 brush, lightly paint the outline of the ghost’s body, dragging the wet paint inwards just a little bit. Leave the center of the ghost mostly white to give it form and volume. -
Create folds and shadows:
While the paper is still slightly damp, drop a tiny bit more pigment into the bottom folds and along the sides. Let the paint bleed naturally to create soft shadows that suggest drapery. -
Define the eyes:
Switch to your fine detail brush. Load it with a saturated black or dark grey mix (less water this time). carefully fill in the oval eyes. -
Add the blush:
Dilute a small amount of pink or rose paint. Once the ghost’s face area is completely dry, gently dab two small circles under the eyes for rosy cheeks. Soften the edges with a clean, damp brush if they look too harsh.
Step 3: Adding Details & Background
-
Paint the bottom shadow:
Mix a muted purple or violet with a touch of grey. Paint a soft, horizontal shadow underneath the ghost’s bottom hem to ground the figure. Blend the edges out with water so they fade into the white paper. -
Paint the leaves:
Using your Sap Green, paint the small leaves along the stems you sketched earlier. Vary the pressure on your brush to get tapered leaf shapes—press down for the belly of the leaf and lift for the tip. -
Add floating elements:
With your fine liner brush and black paint, add three or four tiny ‘v’ shapes or curved ticks floating above the ghost to represent small bats or birds in the distance. -
Enhance contrast:
I like to go back in once the main ghost wash is dry and add very thin, crisp lines of pale grey to define the folds of the sheet even more. This sharpens the look without making it heavy. -
Final touches:
Check your leaf stems; if they need connecting, use the very tip of your fine brush to draw thin lines joining the leaves. -
Let it dry completely:
Allow the entire piece to dry flat. If the paper has buckled slightly, you can place it under a heavy book overnight once it is bone dry.
Soft Blush Trick
For the softest cheeks, apply clean water to the cheek circles first, then drop in a tiny amount of pink paint. This is the wet-on-wet technique.
You now have a wonderfully gentle ghost illustration that’s perfect for a seasonal greeting card or framed decoration

PENCIL GUIDE
Understanding Pencil Grades from H to B
From first sketch to finished drawing — learn pencil grades, line control, and shading techniques.
Explore the Full Guide
Ghost by a Candlelit Window

Capture the cozy spirit of the season with this charming watercolor illustration of a friendly phantom gazing out a snowy window. The soft blue moonlight and warm candlelight create a peaceful atmosphere perfect for an autumn or winter art session.
How-To Guide
Materials
- Cold press watercolor paper (A5 size recommended)
- Pencil (HB or 2B) and eraser
- Waterproof fine liner pen (0.3mm or 0.5mm, black)
- Watercolor paints (Indigo, Burnt Sienna, Yellow Ochre, Cadmium Orange, Sap Green)
- White gouache or white gel pen
- Round watercolor brushes (size 2 and 6)
- Masking tape
- Paper towel and water jar
Step 1: Drawing the Base
-
Secure the paper:
Begin by taping down the edges of your watercolor paper to a board or table. This creates a clean white border and prevents the paper from buckling when wet. -
Sketch the window frame:
Use a pencil to lightly sketch a large rectangle leaving generous space around the edges. Draw a vertical and horizontal line to create the window panes, angling the inner lines slightly to give the frame perspective and depth. -
Add the character:
In the lower left quadrant, sketch a rounded, gumdrop shape for your ghost. Give it a gentle wave at the bottom hem for a spectral effect. Add two small ovals for eyes and a tiny ‘u’ for a smile. -
Place the details:
Sketch a small cylinder shape on the right windowsill for the candle and a flame shape above it. Add a crescent moon in the upper right pane and sketch the top of a plant peeking in from the bottom right corner. -
Outline with ink:
Trace your pencil lines with a waterproof fine liner. Be careful not to outline the moon or the candle flame heavily if you want them to stay soft; however, a clean outline works well for the illustrative style shown. Erase pencil marks once the ink is totally dry.
Uneven Sky Wash?
If your blue sky dries with hard edges or blooms, dampen a clean brush and gently scrub the edge to soften it. For the next layer, ensure your paper is evenly damp for a smoother flow.
Step 2: Painting the Scene
-
Paint the night sky:
Mix a deep Indigo blue. Carefully paint the window panes behind the ghost and frame, avoiding the moon and the candle flame area. I like to keep the area around the candle slightly lighter or wash it out to suggest a glow. -
Color the window frame:
Mix Burnt Sienna with a touch of Indigo to create a muted wood tone. Paint the window frame, using a slightly darker version of the mix for the shadowed sides of the wood to enhance the 3D effect. -
Create the warm glow:
Use diluted Yellow Ochre to paint the candle flame. While the paint is still damp, drop in a tiny bit of Cadmium Orange at the base of the flame. Paint the candle wax body a warm terracotta or brown. -
Shade the ghost:
The ghost stays mostly paper-white, but needs volume. Mix a very watery grey-blue wash. Apply a thin line of shadow along the right side and bottom hem of the ghost figure to ground it in the scene. -
Paint the floor and plant:
Wash the floor area with a very pale, diluted mix of grey and brown. Use Sap Green for the plant leaves in the corner, keeping the strokes loose and organic.
Step 3: Finishing Touches
-
Add the stars:
Once the blue night sky is completely dry, use white gouache or a white gel pen to dot small snowflakes or stars onto the window panes. -
Highlight the moon:
If you masked the moon or painted around it, clean up the edges with white gouache to make it pop against the dark blue sky. -
Enhance the candlelight:
Using a dry brush technique with a tiny amount of yellow or orange, gently scuff around the candle flame to simulate light scattering on the glass. -
Final ink details:
Recheck your black lines. If painting faded the ghost’s eyes, darken them again with your pen to ensure that cute expression stands out. -
Reveal the border:
Wait until the painting is 100% dry to the touch. Slowly peel away the masking tape at a 45-degree angle to reveal your crisp, clean edges.
Make it Magical
Add metallic gold watercolor paint to the candle flame and the crescent moon. When the light hits your painting, these elements will shimmer and truly look like they are glowing.
Frame your spooky little friend or gift it as a handmade card to brighten someone’s autumn evening
Ghost Carrying a Little Lantern
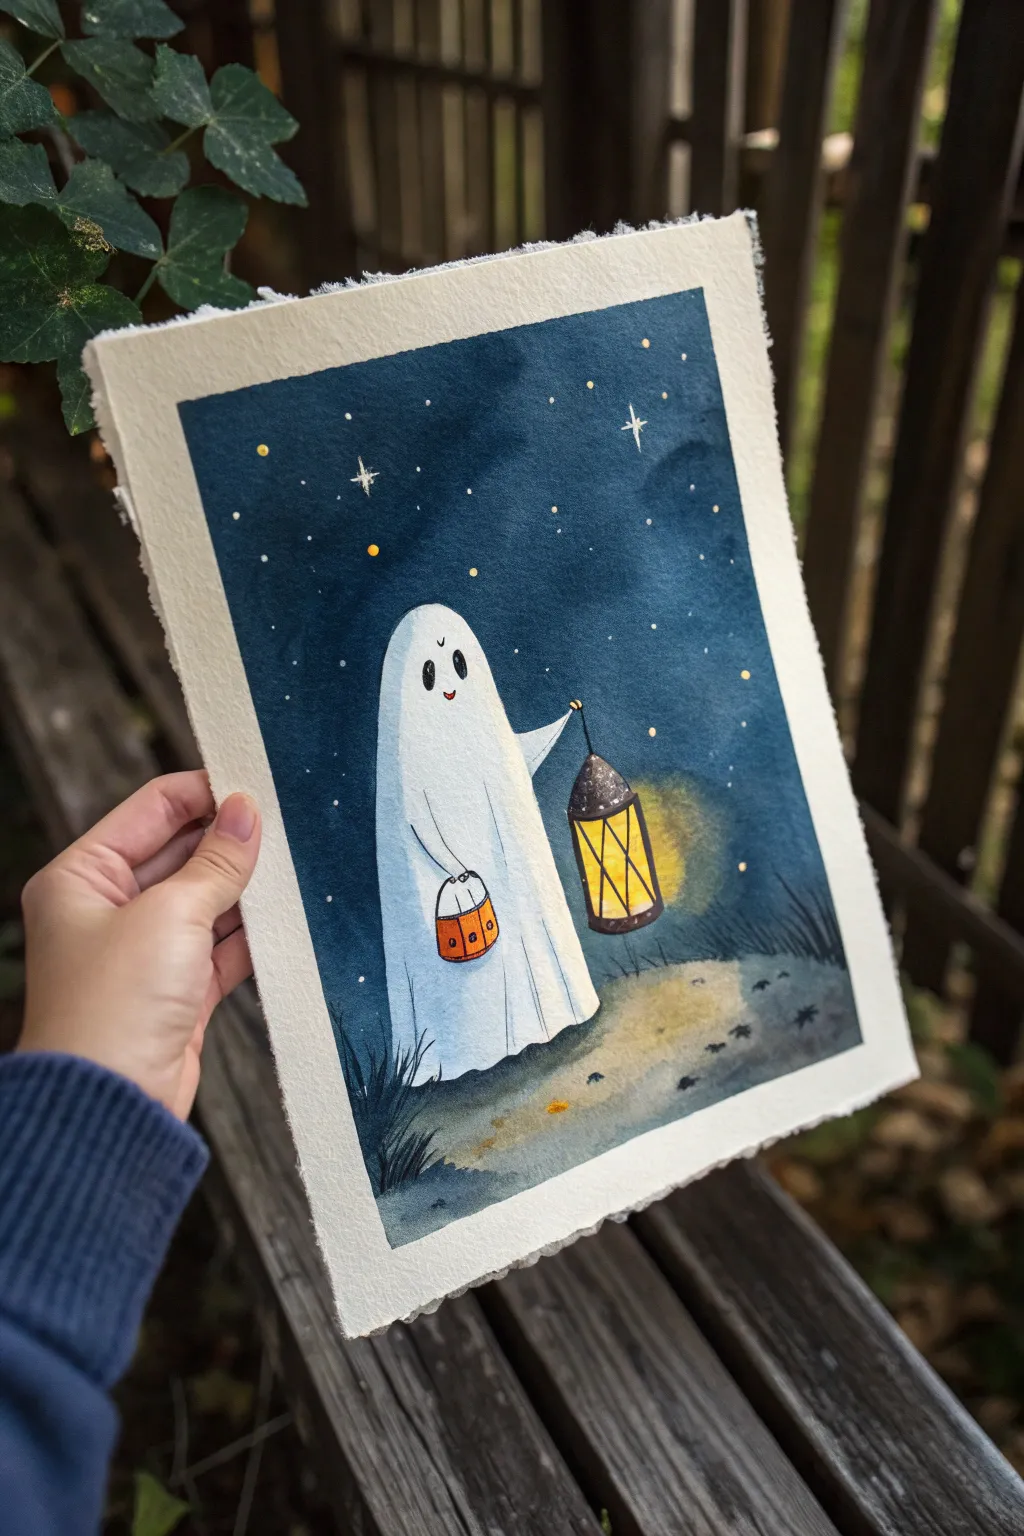
This charming watercolor painting captures a sweet ghost on a nightly stroll, illuminating the darkness with a glowing lantern and carrying a tiny pumpkin bucket. This project balances deep, moody blues with warm, inviting yellows for a cozy spooky vibe.
Detailed Instructions
Materials
- Cold press watercolor paper (deckle edge optional)
- Watercolor paints (Indigo, Payne’s Grey, Lamp Black, Cadmium Yellow, Orange, Burnt Sienna)
- White gouache or white gel pen
- Masking fluid (optional)
- Round brushes (sizes 2, 6, and 10)
- Pencil for sketching
- Painter’s tape or board for mounting
- Two jars of water
- Paper towels
Step 1: Sketching & Preparation
-
Outline the ghost:
Begin with a light pencil sketch in the center of your paper. Draw a tall, rounded dome shape for the ghost’s head, flowing down into a wavy, sheet-like hem at the bottom. -
Add the accessories:
Sketch a simple curved arm on the left side holding a small pumpkin bucket. On the right, draw an arm extending outward to hold the lantern. Keep the lantern shape simple: a cylindrical body with a conical top and a wire handle. -
Define the horizon:
Lightly mark a curved horizon line behind the ghost’s feet to separate the starry sky from the grassy ground. -
Protect the white:
Since the ghost needs to stay bright white, carefully apply masking fluid over the entire ghost shape if you are comfortable using it. Alternatively, simply paint very carefully around the outline in the next steps.
Glow Pro Tip
To make the lantern light really pop, wash a very pale, transparent yellow glaze over the blue sky immediately surrounding the lantern after the sky is dry.
Step 2: Painting the Sky
-
Wet the sky area:
Using your largest brush, apply clean water to the sky area specifically, stopping right at the ghost’s outline and the horizon line. Avoid the lantern area. -
Drop in the blue:
Load your brush with a deep Indigo or Navy Blue. Start at the top corners where the sky should be darkest and let the color flow down. The wet-on-wet technique creates that smooth, dreamy texture. -
Add depth:
While the paper is still damp, dab in some Payne’s Grey or a touch of Black near the top edges to create a vignette effect, making the center feel brighter. -
Create the lantern glow:
Around the lantern area, carefully soften the blue paint with a clean, slightly damp brush to leave a lighter halo effect where the light will shine.
Level Up: Texture
Sprinkle a tiny pinch of salt onto the wet sky wash while it’s drying. Brush it off later to create unique, bloomy textures that look like distant nebulae.
Step 3: Ground & Details
-
Paint the ground:
Mix a diluted wash of Payne’s Grey with a hint of Yellow Ochre for the ground. Apply this loosely below the horizon line, keeping it lighter near the ghost’s feet and darker at the bottom corners. -
Add shadows:
While the ground is drying, drop in darker grey shadows directly underneath the ghost and in small patches to suggest uneven terrain. -
Grass textures:
Once the ground layer is dry suitable to touch, use your smallest brush with concentrated indigo or black to flick upward strokes along the bottom corners, creating silhouette grass blades.
Step 4: The Ghost & Light
-
Remove masking:
If you used masking fluid, gently rub it away once the sky is completely bone-dry. You should reveal the crisp white paper underneath. -
Shadowing the sheet:
Mix a very watery, pale grey-blue wash. Paint vertical, curved lines on the ghost’s body to suggest folds in the fabric. I like to keep these strokes minimal to maintain the ‘white sheet’ illusion. -
Paint the lantern:
Fill the glass panes of the lantern with a bright, warm Yellow. Let it bleed slightly into the surrounding sky if you want extra glow. Paint the metal framework with a dark Burnt Umber or Black. -
The pumpkin bucket:
Use a vibrant Orange for the pumpkin bucket. Once dry, add the tiny black face details and the handle with a fine-tip brush. -
Facial features:
Using solid black paint or a waterproof pen, draw two oval eyes and a tiny smile on the ghost’s face. Add a small ‘u’ shape on top for a cute eyebrow or forehead crease.
Step 5: Final Magic
-
Background stars:
Load a toothbrush or stiff brush with white gouache or slightly watered-down white acrylic. Flick the bristles to splatter tiny stars across the dark sky. -
Detailed stars:
Use a white gel pen or a size 0 brush with opaque white to manually draw a few larger, four-pointed stars and specific dots where the splatter missed. -
Glowing accents:
Add tiny dots of yellow or gold paint among the stars to make the night sky twinkle with warmth.
Now this adorable spirit is ready to light up your wall with its cheerful spooky glow


Ghost With a Tiny Witch Hat
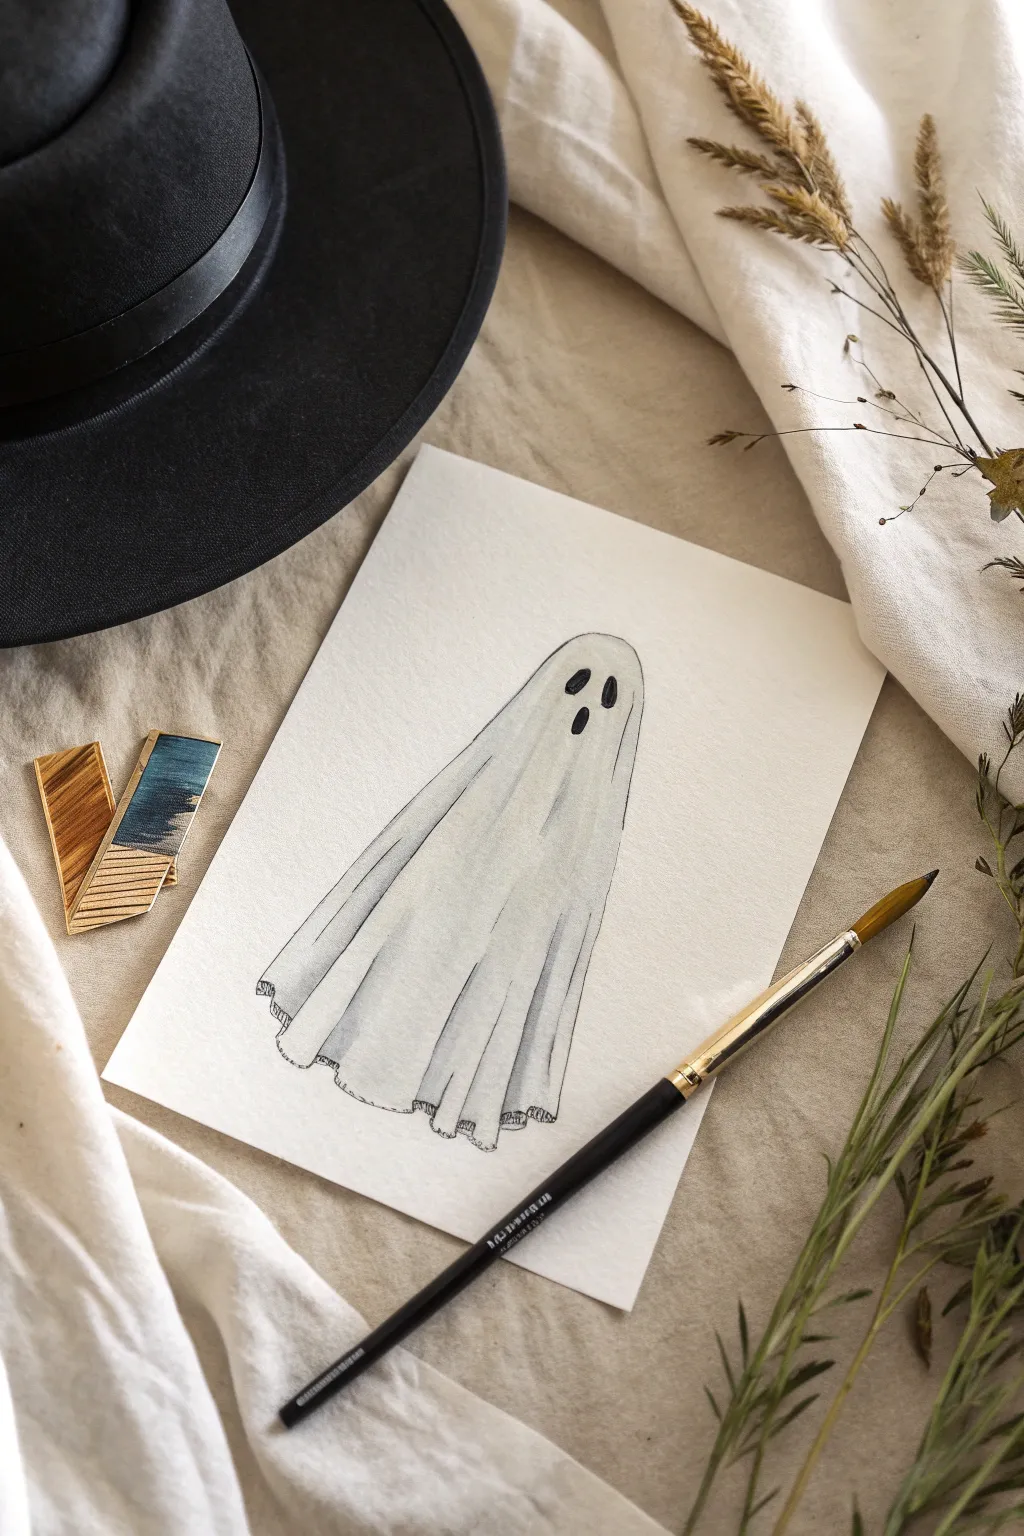
Master the art of subtle shading with this classic bedsheet ghost illustration. Despite its spooky nature, the gentle folds and soft watercolor washes give this friendly phantom a decidedly elegant and minimalist charm.
Step-by-Step
Materials
- Cold press watercolor paper (300 gsm)
- Pencil (HB or H)
- Kneaded eraser
- Watercolor paints (Payne’s Grey, Lamp Black)
- Round watercolor brush (size 4 or 6)
- Fine detail brush (size 0 or 1)
- Jar of clean water
- Paper towels
Step 1: Sketching the Silhouette
-
Outline the head:
Start near the upper middle of your paper. Draw a soft, rounded arch to form the top of the ghost’s head. Keep your pencil strokes extremely light so they don’t show through the paint later. -
Draft the body length:
Extend lines down from the head, angling them slightly outward to create a flowing, A-line shape. The ghost should look tall and slender rather than short and squat. -
Create the hemline:
Connect the bottom with a wavy, rippled line. The hem shouldn’t be straight; think of how fabric pools and folds at the floor. Add small upward ticks where the fabric folds deeply. -
Add face details:
Sketch three simple ovals for the face—two smaller ones for eyes and a slightly larger, elongated one for the mouth. Place them high on the ‘head’ area. -
Define the folds:
Draw faint vertical lines running from the top of the head down toward the hemline ticks. These guidelines will help you know where to place your shading later to simulate draped cloth.
Muddy Shadows?
If your grey shadows look patchy or dirty, you didn’t use enough water. Watercolor dries lighter than it looks wet, so start very pale and build up layers patiently.
Step 2: Painting the Wash
-
Mix a watery grey:
Dilute a tiny amount of Payne’s Grey with plenty of water. You want a very pale, almost transparent ‘shadow’ color. Test it on a scrap piece of paper first; it should look like dirty water. -
Apply the first wash:
Gently paint over the entire ghost shape with clean water first, avoiding the eye and mouth holes. This ‘wet-on-wet’ technique prepares the paper. -
Drop in shadow:
While the paper is still damp, load your brush with your pale grey mix. Touch the brush to the vertical fold lines you sketched earlier. The paint will naturally bleed outward, creating soft transitions. -
Darken the edges:
Run a slightly more pigmented grey along the left and right outer edges of the ghost to give it dimension and separate it from the white background. -
Let it dry completely:
Wait for this layer to be bone dry. If the paper feels cool to the touch, it’s still wet.
Step 3: Defining Texture and Details
-
Deepen the folds:
Mix a slightly darker version of your grey. Using the tip of your round brush, carefully paint thin stripes down the length of the folds you established in the previous step. -
Soften the lines:
Immediately after painting a shadow line, rinse your brush, damp it slightly on a paper towel, and run it along one side of the line. This ‘feathers’ the edge so the fold looks rounded, not sharp. -
Detail the hem:
Add extra shading at the very bottom hemline where the fabric bunches up. I usually add little shadowed triangles here to imply thickness to the sheet. -
Paint the face:
Switch to your fine detail brush and load it with Lamp Black paint. It should be creamy, not too watery. Carefully fill in the three oval shapes for the eyes and mouth. -
Add texture lines:
Once the grey shading is dry, use a very dry brush with faint grey paint to add scratchy, textural marks vertically along the sheet. This mimics the weave of old fabric. -
Outline the silhouette:
Using a very fine liner brush and black paint (or a waterproof ink pen), trace the outer silhouette of the ghost with a broken, sketchy line. Don’t make it a solid cartoon outline; keep it loose. -
Outline the hem:
Continue that sketchy outline along the bottom hem, emphasizing the ripples and folds.
Level Up: Accessories
Give your ghost personality by painting a tiny witch hat hovering above its head, or add a pumpkin pail in a ‘hand’ formed by a fold in the fabric.
Now you have a charmingly spooky restless spirit ready to frame or turn into a greeting card
Ghost and Black Cat Besties
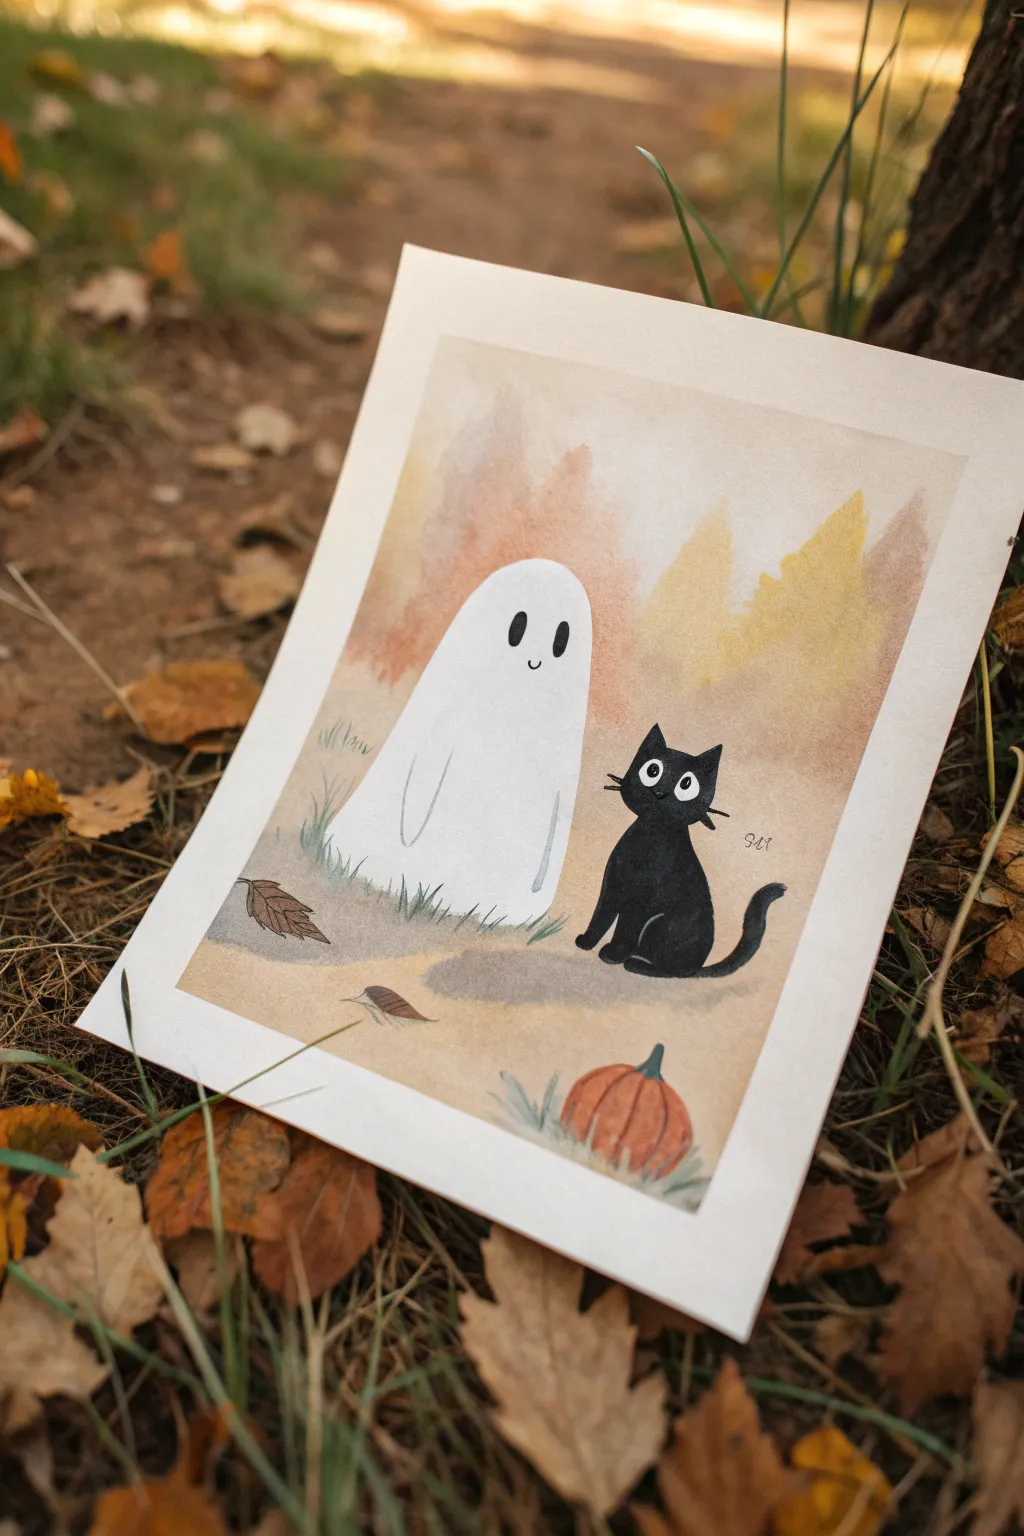
Capture the sweetness of an unlikely friendship with this charming watercolor illustration. Featuring a simple white ghost and a wide-eyed black cat against a hazy autumnal forest, this piece uses soft washes and distinct character shapes to create a heartwarming seasonal scene.
How-To Guide
Materials
- Cold press watercolor paper (approx. 5×7 or 8×10 inches)
- Watercolor paints (Yellow Ochre, Burnt Sienna, Payne’s Gray, Lamp Black, Orange)
- White gouache or white gel pen
- Round watercolor brushes (size 2, 6, and 10)
- Masking fluid (optional but helpful)
- Pencil and kneaded eraser
- Painter’s tape
- Jar of water and paper towels
Step 1: Sketching and Preparation
-
Tape down the paper:
Secure your watercolor paper to a hard board using painter’s tape on all four sides. This creates a clean white border and prevents the paper from buckling when wet. -
Draft the characters:
Lightly sketch the outline of the ghost on the left side. It’s essentially a tall, rounded dome shape with a wavy bottom edge. Leave space next to it for the cat. -
Add the cat and pumpkin:
Sketch the black cat to the right of the ghost. Draw a rounded head with triangular ears and a simple pear-shaped body. Add a curved tail. Then, draw a small pumpkin near the bottom right corner. -
Outline the environment:
Very faintly indicate where the horizon line falls (just below the characters) and sketch vague triangular tree shapes in the background. Keep these lines minimal as they will be painted loosely.
Uneven Washes?
If your background dries with unwanted ‘blooms’ or hard edges, use a slightly damp, clean brush to gently scrub and soften the edges while the paint is still semi-wet.
Step 2: Painting the Background
-
Protect the white space:
If you have masking fluid, apply it over the ghost shape to keep it perfectly white. If not, you’ll simply need to paint carefully around it. -
Wet-on-wet sky wash:
Using your largest brush, wet the upper portion of the paper with clean water. Drop in dilute washes of Yellow Ochre and a touch of Burnt Sienna to create a warm, hazy autumn sky. -
Create soft trees:
While the paper is still damp, paint the background trees using slightly more concentrated Yellow Ochre and muted reddish-browns. Let the edges bleed slightly to keep the focus soft. -
Paint the ground:
Switch to a sandy brown color for the forest floor. Paint horizontal strokes under the characters, allowing the color to fade out towards the edges of the paper. -
Add shadows:
Mix a diluted grey-purple using blue and brown. Paint soft, elongated shadows stretching forward from the base of the ghost and the cat to ground them in the scene.
Step 3: Bringing Characters to Life
-
Paint the ghost’s form:
Once the background is bone dry (remove masking fluid now if used), paint very faint grey-blue shadows along the bottom hem and one side of the ghost to give it volume. -
Fill in the black cat:
Using Lamp Black or a very dark Payne’s Gray, carefully fill in the cat’s silhouette. Use a size 2 brush for the pointy ears and tail tip to keep the edges sharp. Leave two tiny white circles for eyes if you can, or paint over them and add white later. -
Paint the pumpkin:
Fill the pumpkin shape with a vibrant orange. While wet, drop a slightly darker red-orange into the vertical grooves to create roundness. Paint the stem a dark green-brown. -
Ghost facial features:
Using a tiny brush and black paint, add two tall oval eyes and a small ‘u’ shaped mouth to the ghost. The expression should be simple and sweet. -
Cat facial details:
If you painted the cat solid black, use opaque white gouache to paint two large round eyes. Add black pupils inside. Use a thin liner brush to pull out a few whiskers from the cheeks.
Make It Sparkle
Mix a tiny bit of metallic gold watercolor into your yellow ochre for the background trees. It gives the autumn foliage a magical, subtle shimmer when the light hits it.
Step 4: Final Details
-
Add grass texture:
Mix a muted green-grey color. Using upward flicks with your smallest brush, add tufts of grass around the base of the ghost, the cat, and the pumpkin. -
Paint falling leaves:
Scatter a few brown leaf shapes on the ground. A simple diamond shape or teardrop shape works perfectly for these forest floor details. -
Sign and reveal:
Add your signature or initials near the cat in a thin pen or small brush. Once everything is completely dry, slowly peel off the painter’s tape at a 45-degree angle to reveal the crisp border.
Frame your whimsical forest scene and enjoy the cozy autumn vibes it brings to your space
Ghost With Falling Autumn Leaves
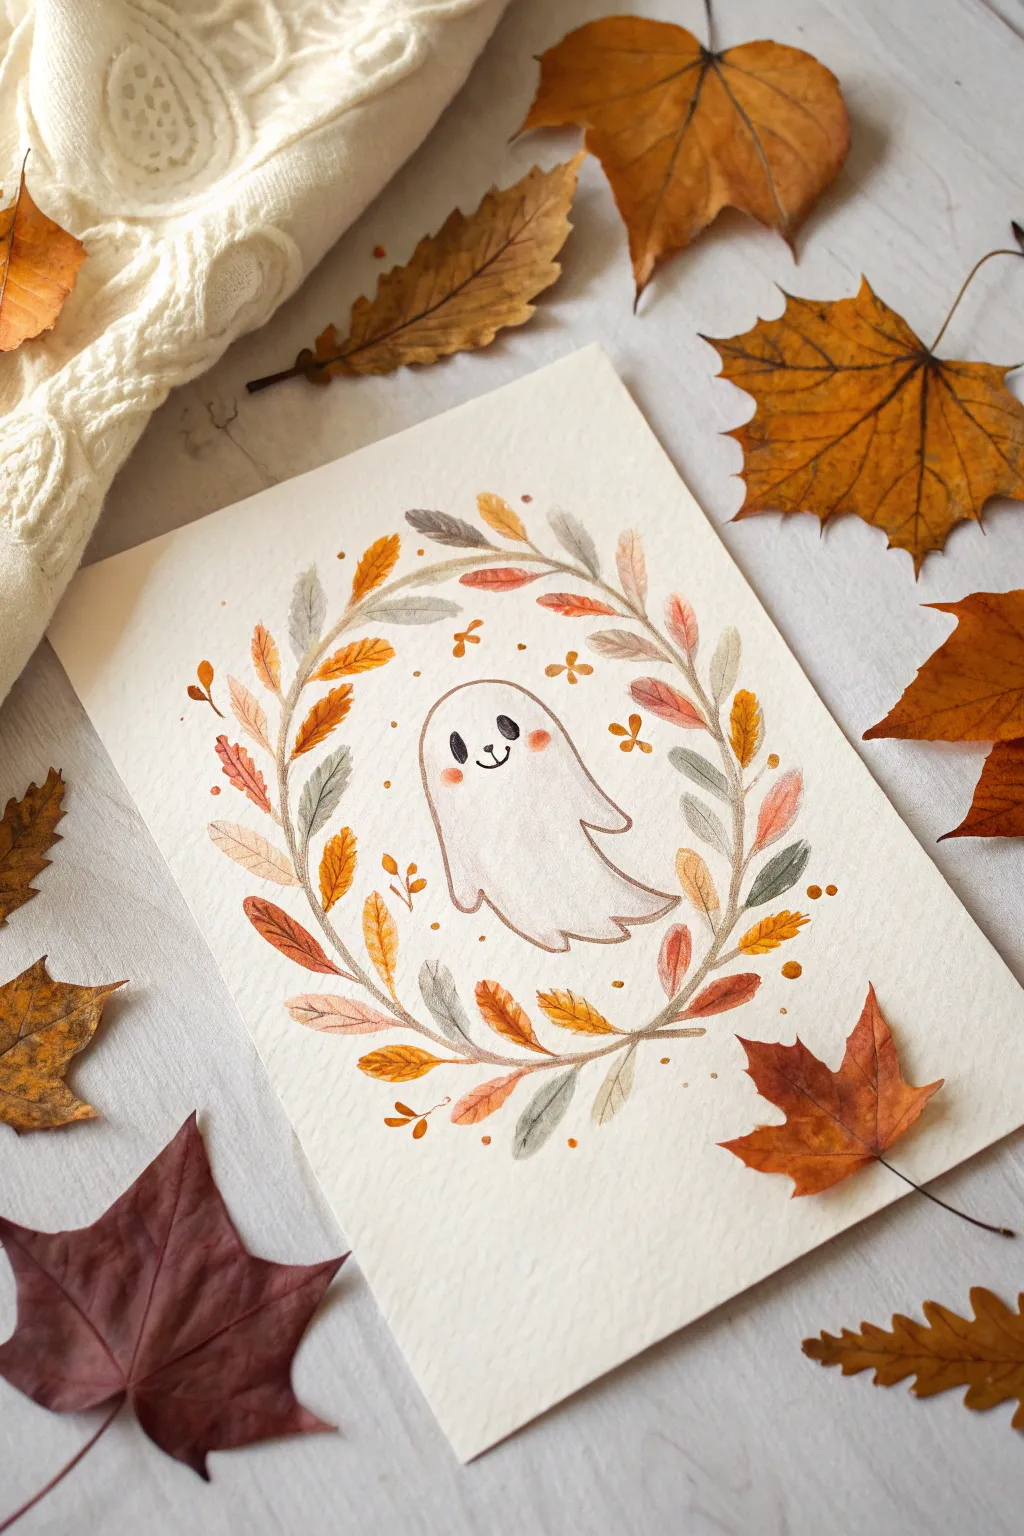
Capture the cozy spirit of fall with this charming watercolor illustration featuring a friendly, blushing ghost encircled by a delicate wreath of autumn foliage. The soft, warm palette and simple shapes make this an approachable project for creating festive seasonal art.
Step-by-Step
Materials
- Cold press watercolor paper (approx. 5×7 inches)
- Watercolor paints (burnt sienna, yellow ochre, sap green, payne’s gray, alizarin crimson)
- Round watercolor brushes (size 2 and 4)
- Pencil (HB or lighter)
- Kneaded eraser
- Clean water jar
- Paper towel
- Fine liner pen (optional, for eyes/mouth)
Step 1: Sketching the Layout
-
Outline the ghost:
Begin in the center of your watercolor paper by lightly sketching a simple rounded ghost shape. Draw a dome for the head that flows down into a wavy bottom edge. Add two small, rounded nubs for arms on either side. -
Sketch the wreath structure:
Draw an imaginary oval or circle around the ghost to serve as your guide. Lightly sketch two main stems that curve around the ghost, meeting at the bottom center and curving upwards toward the top, leaving a small gap above the ghost’s head. -
Map out the leaves:
Along the curved stems, sketch small, simple leaf shapes. Alternate the direction of the leaves to create a natural flow. Keep the pencil lines very faint so they won’t show through the translucent paint later.
Step 2: Painting the Ghost
-
Base wash:
Using a very dilute mixture of Payne’s Gray or a soft violet, paint a transparent wash over the ghost’s body. The goal is to keep it mostly white, adding just a hint of shadow. -
Add dimension:
While the paper is still slightly damp, drop a tiny bit more pigment into the bottom folds and under the ‘arms’ to create soft shadows. Let this dry completely before moving on. -
Draw the face:
Once dry, use a size 2 brush with concentrated black or dark gray paint to add two oval eyes and a small, smiling mouth. Alternatively, a fine liner pen works well here for precision. -
Rosy cheeks:
Dilute a small amount of Alizarin Crimson or pink. Gently dab two soft circles beneath the eyes for blushing cheeks. I find blotting the brush on a towel first helps prevent the cheeks from being too dark.
Muddy Colors?
If your wreath leaves look muddy, let each leaf dry fully before painting a neighbor. Wet paint touching wet paint will bleed and mix unintentionally.
Step 3: Creating the Autumn Wreath
-
Paint the stems:
Mix a light brown using Burnt Sienna and a touch of Payne’s Gray. With the tip of your size 2 brush, carefully trace the main stems of your wreath. -
Yellow and orange leaves:
Start with your lightest colors. Mix Yellow Ochre and paint scattered leaves around the wreath. While these are wet, you can touch the tips with a bit of orange to create a gradient. -
Rust and red leaves:
Mix Burnt Sienna with a touch of red to create a rust color. Fill in more leaf shapes, ensuring they are evenly distributed to balance the composition. -
Muted green accents:
Create a muted green by mixing Sap Green with a little brown or red to dull it down. Paint the remaining leaves with this sage-like tone to break up the warm colors. -
Adding texture:
Once the leaves are dry, use a slightly darker version of each color and your smallest brush to paint a delicate central vein line down the middle of a few select leaves. -
Filler details:
Fille empty spaces in the wreath with tiny dots, berries, or small ‘v’ shapes in gold or rust tones to make the wreath look fuller.
Add Some Sparkle
Use metallic gold watercolor paint for the final splatters or the detailed veins on the leaves to give the piece a festive, shimmering finish.
Step 4: Final Touches
-
Add splatters:
Load your brush with a watery gold or rust paint. Tap the handle against your finger to create tiny, subtle splatters around the ghost and wreath for a magical atmosphere. -
Clean up:
Allow the entire painting to dry completely. Gently erase any visible pencil marks with your kneaded eraser, being careful not to scrub the paint.
Place your finished piece in a rustic frame or tape it into your journal to celebrate the season
Ghost Wearing a Floral Crown
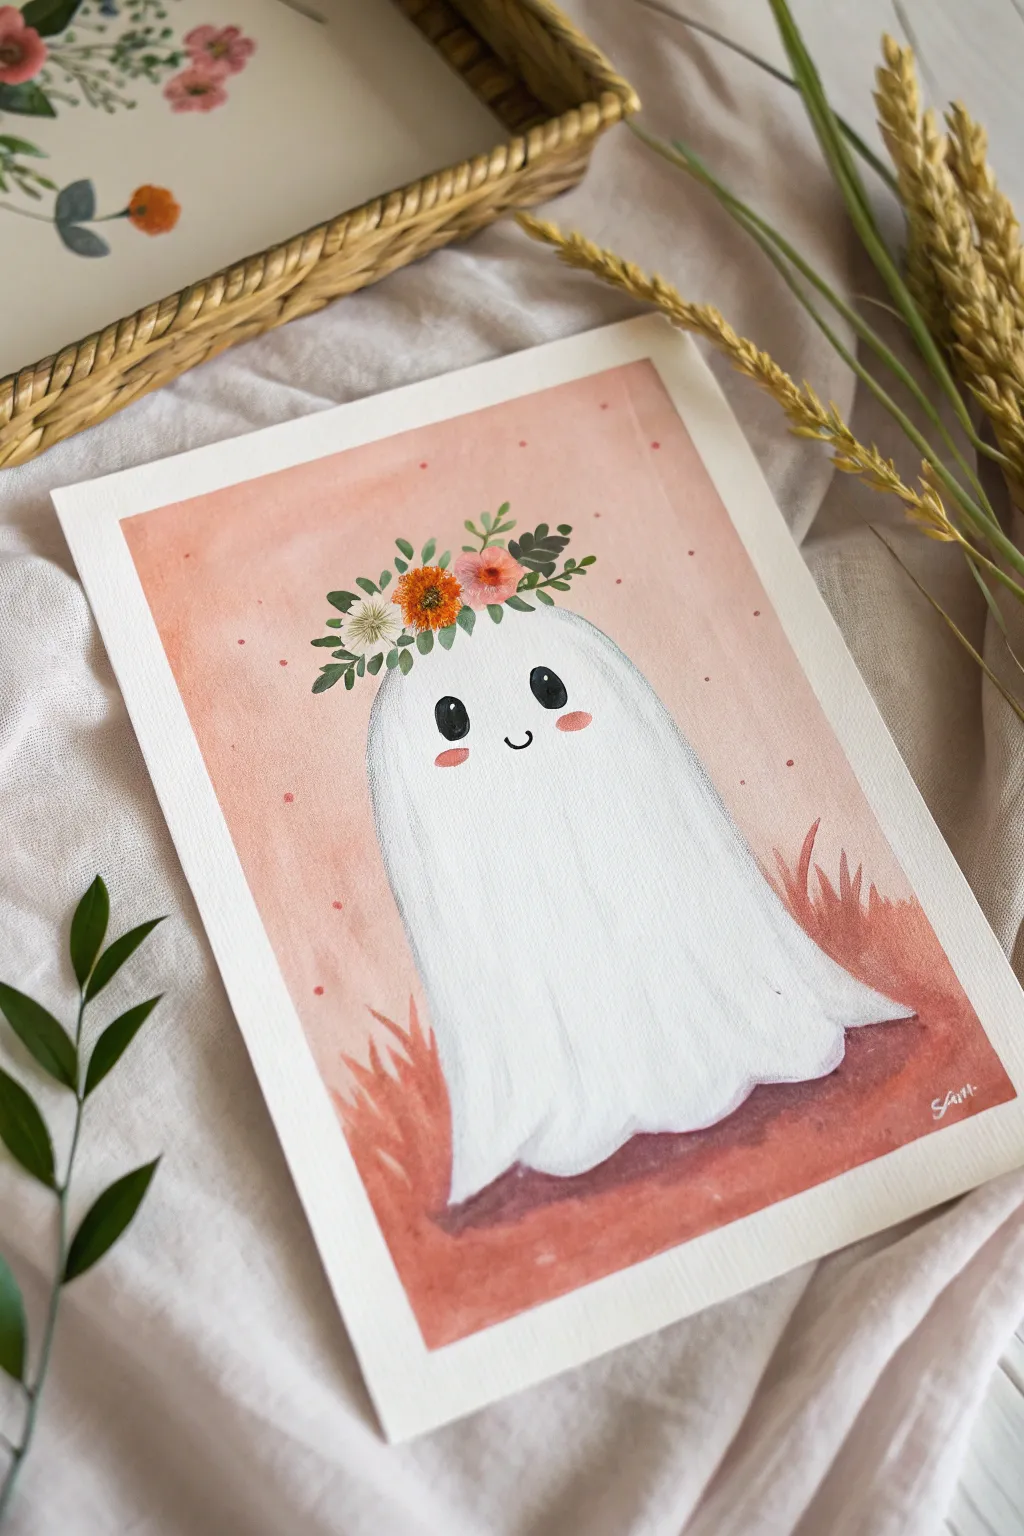
Soft pink hues and delicate botanicals give this friendly little ghost a warm, autumnal vibe. This watercolor and gouache piece combines simple shapes with detailed floral work to create a charming piece of seasonal decor.
How-To Guide
Materials
- Cold press watercolor paper (A5 size works well)
- Watercolor paints (Peach/salmon pink, burnt sienna, sap green)
- White gouache paint (for opaque coverage)
- Round watercolor brushes (size 6 for washes, size 0 or 1 for details)
- Pencil and eraser
- Palette
- Two jars of water
- Paper towels
- Washi tape or masking tape
Step 1: Preparation and Sketching
-
Tape the edges:
Begin by taping down all four edges of your watercolor paper to a hard board or table. This creates that clean white border you see in the final piece and prevents the paper from buckling when wet. -
Draft the ghost shape:
Using a pencil, lightly sketch a tall, rounded dome shape in the center of the paper. Curve the bottom edges into a wavy, scalloped line to imply the fabric folds of a sheet. -
Add floating details:
Lightly mark where the face will go—two oval eyes and a small ‘u’ mouth. Sketch a rough halo shape on top of the head for the flower crown placement, but keep the lines very faint.
Pro Tip: Clean Lines
If your background wash accidentally bleeds into the ghost shape, don’t panic. Since white gouache is opaque, you can simply paint over the mistake in the final phase to cover it up.
Step 2: The Background Wash
-
Mix the background color:
In your palette, mix a generous amount of watery salmon pink. You want a soft, peachy tone, achieved by mixing a little orange into pink or diluting a coral shade. -
Paint the background:
Using your larger round brush, paint the entire area around the ghost shape. Be careful to cut in neatly around the ghost’s outline so the center stays white. Keep the wash uneven for a textured, vintage look. -
Add darker accents:
While the background is still slightly damp, drop in touches of burnt sienna or a darker pink near the bottom corners to suggest ground or grass. Let this layer dry completely. -
Paint the grass details:
Once the base is dry, take a slightly thicker mix of the burnt sienna or dark coral. Paint small, flicking strokes at the bottom left and right to create stylized grass blades framing the ghost. -
Add atmospheric dots:
Dip a small brush into your darker pink mix and gently tap tiny dots scattered randomly across the background to add magical atmosphere.
Step 3: Painting the Ghost
-
Base white layer:
Squeeze out some white gouache. Paint the entire ghost shape. Gouache is opaque, so it will give you a solid, crisp white that stands out against the pink background. -
Shadowing the folds:
Mix a tiny drop of grey or diluted purple into your white gouache. Use this light grey to paint vertical streaks along the sides and bottom hem of the ghost to create the illusion of draped fabric. -
Painting the face:
Switch to your smallest detail brush and black paint (or ink). Carefully fill in the two oval eyes and the small smile. Paint two small pink ovals on the cheeks for blush. -
Adding eye highlights:
Once the black eyes are dry, use a dot of pure white gouache to add a tiny sparkle highlight to the top right of each eye.
Level Up: Metallic Touch
Use gold or copper watercolor paint for the atmospheric dots in the background or the centers of the flowers. It adds a subtle shimmer that catches the light wonderfully.
Step 4: The Floral Crown
-
Leafy base:
Mix a muted sap green. Using the tip of your small brush, paint short, leafy sprigs curving around the top of the ghost’s head. Imagine them hugging the curve of the dome. -
Main blooms:
Using orange and soft pink watercolor, paint three small circular blossoms among the leaves. I like to dab the color on loosely rather than painting perfect circles. -
Flower centers:
When the flowers are dry, add a tiny dot of yellow or brown in their centers to give them depth. -
White filler flowers:
Using your white gouache again, paint tiny star-shaped flowers or white dots interspersed between the green leaves and colored blooms. -
Final reveal:
Ensure the painting is 100% dry to the touch. Slowly peel away the masking tape at a 45-degree angle to reveal your crisp, clean borders.
Prop your finished painting on a shelf or frame it for an instant touch of cozy autumn spirit
Ghost in a Teacup
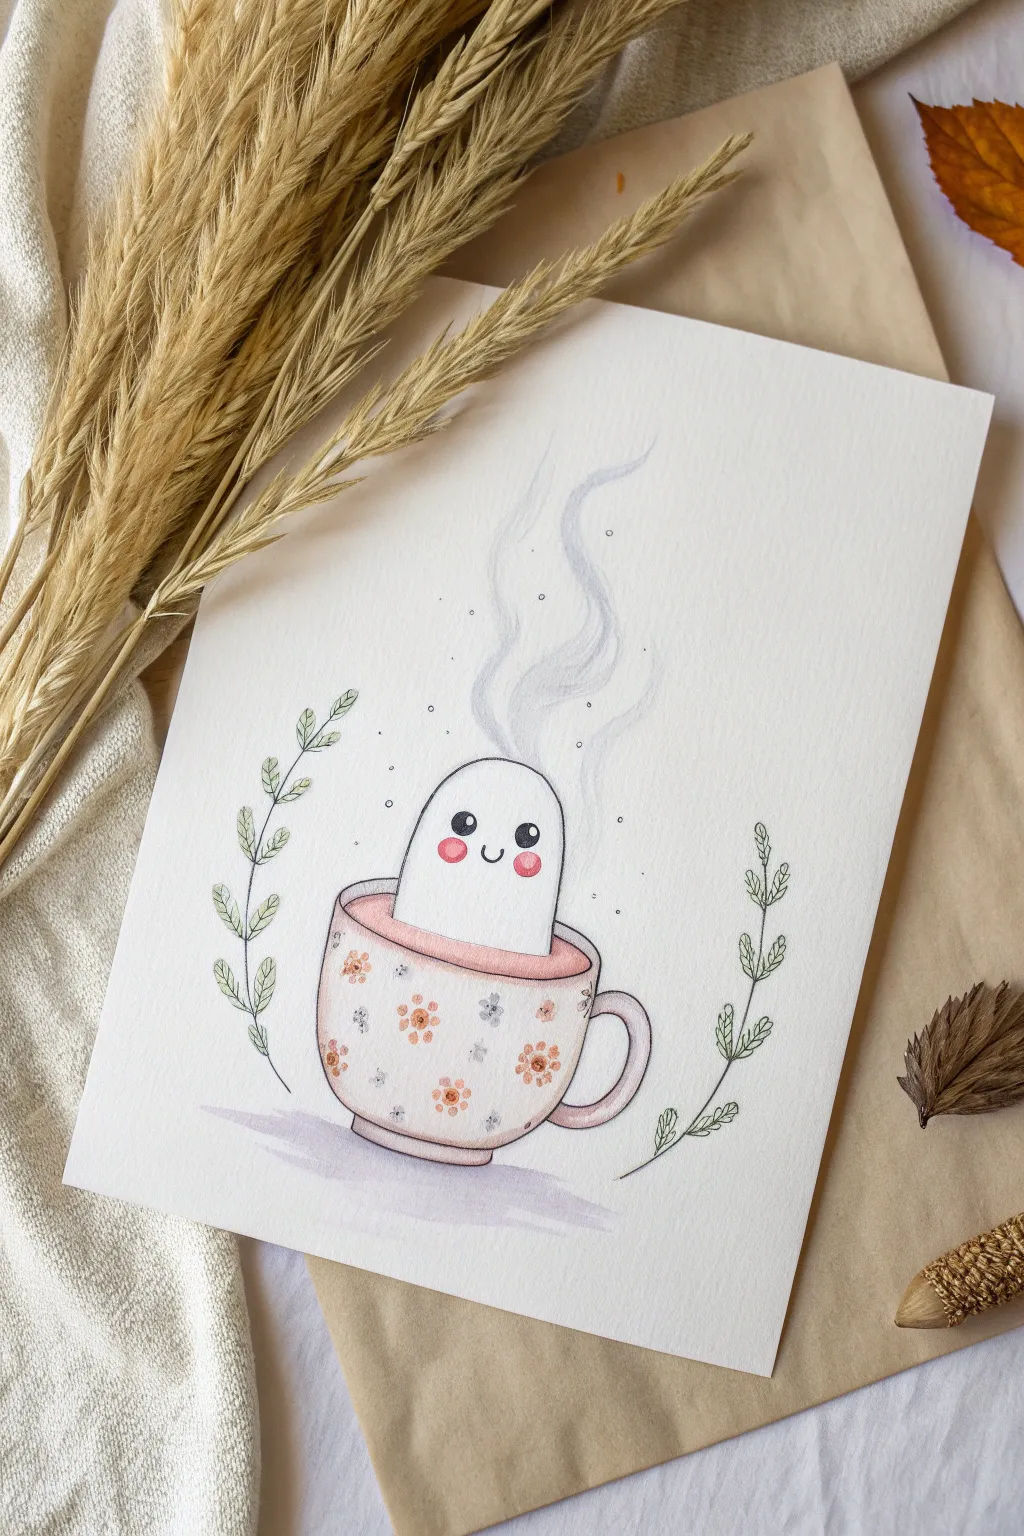
This whimsical illustration features a sweet little ghost taking a warm bath in a vintage floral teacup, surrounded by delicate greenery. With soft watercolor washes and fine ink details, it captures the perfect cozy autumn vibe.
Step-by-Step
Materials
- Cold press watercolor paper (300 gsm)
- HB pencil and kneaded eraser
- Waterproof fine liner pen (black, 0.1mm)
- Watercolor paints (Pink, Brown, Green, Paynes Grey/Black)
- Round watercolor brushes (size 2 and 4)
- White gel pen (optional)
- Paper towel and water cup
Step 1: Sketching the Composition
-
Draw the ghost shape:
Start near the center of your page by drawing an inverted ‘U’ shape for the ghost’s body. Keep the lines smooth and rounded at the top. -
Add the teacup rim:
Draw an oval that wraps around the base of the ghost. Ensure the ghost looks like it is sitting inside the opening, rather than floating on top. -
Form the cup body:
Sketch a deep, rounded bowl shape underneath the oval rim. Add a small foot at the very bottom for stability. -
Place the handle:
On the right side of the cup, draw a curved ‘C’ shape for the handle, giving it enough thickness to look holdable. -
Sketch the face and details:
Add two small circles for eyes and a tiny ‘u’ mouth on the ghost. Lightly sketch floral patterns on the cup and two curving vines flanking the teacup.
Step 2: Inking the Outlines
-
Outline the main shapes:
Using your 0.1mm waterproof pen, carefully trace over the pencil lines for the ghost, teacup, and vines. -
Add the steam:
Instead of a solid line, use very faint, broken touches or sketching lines to draw wisps of steam rising from the ghost’s head. You can also use pencil here if you want the steam softer. -
Detail the face:
Fill in the ghost’s eyes with black ink, leaving a tiny white speck in each pupil for a highlight. This brings the character to life. -
Clean up:
Once the ink is completely dry, gently erase all visible pencil marks with your kneaded eraser.
Uneven Watercolors?
If you get hard edges in your paint (blooms), soften them with a clean, damp brush while the paint is still slightly wet to blend the harsh line away.
Step 3: Watercolor Washes
-
Paint the beverage:
Mix a diluted dusty pink or warm tea color. Carefully paint the liquid surface inside the cup, working around the ghost’s body. -
Add the cup’s base color:
Apply a very pale, watery wash of beige or cream to the outside of the teacup to give it a ceramic feel without being stark white. -
Paint the floral pattern:
Using a size 2 brush, dab small spots of terra cotta or soft orange for the flowers. Add tiny grey or blue dots for filler flowers. -
Blush the ghost:
Wet the cheek area slightly with clean water, then drop in a tiny amount of pink paint. Let it bleed softly for a natural blush effect. -
Shadow the ghost:
I like to mix a very watered-down grey or lavender. Apply a thin line of shadow along the left side and bottom of the ghost where it meets the liquid.
Make it Yours
Change the pattern on the mug to match a real cup from your cupboard, or swap the tea color for a rich brown to turn this into a hot cocoa bath.
Step 4: Refining Details
-
Paint the vines:
Use a muted sage green for the leaves on either side. Keep the paint translucent rather than opaque for a delicate look. -
Add steam volume:
Use extremely diluted grey paint to add just a hint of shadow to the steam ribbons, keeping them ethereal. -
Ground the object:
Paint a wash of purple-grey underneath the teacup to create a shadow grounding it to the table. -
Enhance the cup:
Add slightly darker beige shading under the rim of the cup and on the handle to give the object three-dimensional form. -
Final highlights:
If your paper allows, use a white gel pen to add tiny dots to the flower centers or extra sparkles in the steam.
This little spirit is now ready to warm up your sketchbook or become a charming greeting card
Ghost Tea Party on a Table
Create a heartwarming piece of greeting art featuring two adorable ghosts holding hands amidst floating hearts. This project combines simple line drawing with gentle watercolor washes for a charming, minimalist aesthetic perfect for a cozy occasion.
Step-by-Step Tutorial
Materials
- Cold press watercolor paper (A5 size or folded cardstock)
- Fine liner pen (waterproof, black, size 03 or 05)
- Watercolor paints (Payne’s Grey, Green Earth, Rose/Pink)
- Small round paintbrush (size 2 or 4)
- Pencil (HB or H)
- Kneaded eraser
- Clean water and paper towel
Step 1: Sketching the Composition
-
Position the ghosts:
Begin by lightly sketching two rough oval shapes in the center of your paper. The ghost on the left should be slightly shorter than the one on the right, and they should be close enough to touch. -
Define the silhouettes:
Refine the top of the shapes into smooth, rounded domes. For the bottom edges, draw a wavy, scalloped line to create the ‘sheet’ effect of the ghost bodies. -
Add arms and hands:
Sketch small, nub-like arms. The most important detail is the center where their inner arms meet; draw a small connection point to show they are holding hands. -
Draw the faces:
Place two small dots for eyes on each ghost. Add a tiny, curved smile between the eyes. Keep the features wide-set for maximum cuteness. -
Float the hearts:
Sketch five small hearts floating above their heads in an arch shape, varying their sizes slightly for visual interest. -
Ground the scene:
Lightly indicate a few blades of grass and a small flower near the bottom left corner of the ghosts to give them a place to stand.
Keep it Clean
Since the ghosts stay white, keep a separate paper towel to shield the drawing area from hand oils or accidental smudges while you work.
Step 2: Inking the Outline
-
Trace main lines:
Using your waterproof fine liner, carefully trace over your pencil sketches of the ghosts. Keep your hand relaxed to get smooth curves. -
Detail the surroundings:
Ink the floating hearts and the small botanical details at the base. Make the lines for the grass leaves thin and delicate. -
Erase pencil marks:
Once the ink is completely dry—I usually wait at least five minutes to be safe—gently accept the sketch lines with your kneaded eraser until the paper is clean.
Step 3: Adding Watercolor Washes
-
Paint the hearts:
Mix a diluted wash of soft pink or rose. Carefully fill in the hearts, keeping the color translucent so the texture of the paper shows through. -
Shadow the ghosts:
Dilute a tiny amount of Payne’s Grey with plenty of water to make a very pale gray. Paint a thin shadow line along the right side and bottom of each ghost to give them volume. -
Paint the ground:
Mix a muted green tone. Apply a loose, horizontal wash beneath the ghosts’ feet, letting the color fade out at the edges for a vignette effect. -
Detail the grass:
With a slightly more concentrated green, carefully paint the leaves on the left. Add a dot of red or pink to the tiny flower. -
Final touches:
If the gray shadows look too stark once dry, you can soften the edges with a clean, damp brush to blend them further into the white of the paper.
Uneven Washes?
If your paint dries with hard edges, create a ‘bead’ of water at the chaotic edge and pull it slowly across the shape to keep the color creating a flat wash.
Now you have a sweet, handmade card ready to brighten someone’s day
Ghost Picnic on a Gingham Blanket
Capture the charm of the season with this incredibly sweet watercolor ghost painting. Its gentle expression and soft, flowing shape make it perfect for adding a subtle spooky touch without any of the fright.
How-To Guide
Materials
- Cold press watercolor paper (approx. 140lb/300gsm)
- Watercolor paints (Payne’s Grey, Blush Pink, Lavender or Periwinkle)
- Fine liner pen (waterproof, black, size 0.3 or 0.5)
- Round watercolor brush (size 6)
- Detail brush (size 0 or 2)
- Pencil (HB) and soft eraser
- Jar of clean water
- Paper towel
Step 1: Sketching the Shape
-
Outline the body:
Begin by lightly sketching a tall, inverted ‘U’ shape for the ghost’s head and body. Keep the top nice and rounded. -
Add the hem:
At the bottom, draw a wavy line to connect the sides, giving the impression of fabric flowing on the ground. -
Mark the face:
Lightly place two ovals for eyes and a small ‘u’ shape for the smile about one-third of the way down the body. -
Draw simple arms:
Add two very small, simple ‘u’ shapes on the front of the body to suggest tiny arms draped under the sheet.
Wet-on-Wet Magic
For the softest cheeks, ensure the paper is damp before applying pink paint. The color will bloom naturally into perfect blurry circles.
Step 2: Painting the Ghost
-
Prepare the grey wash:
dilute a small amount of Payne’s Grey with plenty of water. You want a very pale, almost transparent grey tone. -
Define the edges:
Using your size 6 brush, paint a thin strip of this grey wash along the inner left and right edges of your pencil outline to create dimension. -
Soften the wash:
Quickly rinse your brush and use just clean water to blend that grey paint inward towards the white center, creating a soft gradient. -
Shadow the folds:
While the paper is still slightly damp, add a tiny bit more pigment to the bottom hem area where the fabric creates ruffled folds. -
Paint the ground shadow:
Mix a soft Lavender or Periwinkle color. Paint a loose, bubbly shadow shape underneath the ghost’s wavy hemline. -
Blend the shadow:
Use clean water to soften the bottom edge of this purple shadow so it fades naturally into the white paper.
Make It Sparkle
Once dry, use a metallic silver or gold gel pen to add tiny stars or magic dust floating around your ghost for extra whimsy.
Step 3: Adding Details
-
Rosy cheeks:
Before painting the face details, dampen the cheek area slightly. Dab a small amount of watered-down Blush Pink to create two soft, fuzzy pink circles. -
Let it dry COMPLETELY:
Wait for all paint layers to be bone dry. If the paper is cool to the touch, it’s still wet. -
Ink the outline:
Take your waterproof fine liner pen and carefully trace over your original pencil lines for the body shape. -
Create sketchy lines:
Don’t try to be too perfect with the ink; a slightly loose or broken line in places adds to the illustrative hand-drawn charm. -
Fill in the face:
Using the same black pen or a small detail brush with concentrated black paint, fill in the two oval eyes and draw the little smile. -
Define the arms:
Ink the two small ‘u’ shapes for the arms, keeping the lines thin and delicate. -
Erase guidelines:
Once the ink is fully set, gently erase any visible pencil marks to clean up your finished piece.
Pop your friendly spirit into a white frame and enjoy your adorable new autumn decor
Ghost on a Beach at Sunset

Capture the magic of golden hour with this whimsical watercolor piece featuring a friendly ghost enjoying a beach stroll. The blend of warm pinks, purples, and oranges creates a dreamy backdrop that perfectly complements the simple, charming subject.
Step-by-Step Tutorial
Materials
- Cold press watercolor paper (300 gsm)
- Watercolor paints (Indigo, Purple, Rose/Pink, Cadmium Orange, Burnt Sienna)
- Masking tape
- Flat wash brush (1/2 or 3/4 inch)
- Round brushes (sizes 4 and 8)
- White gouache or white acrylic paint
- Pencil and kneaded eraser
- Paper towels
- Two jars of water
Step 1: Preparation and Sketching
-
Secure the paper:
Tape down all four edges of your watercolor paper to a board or table using masking tape. This creates a crisp white border and prevents buckling when the paper gets wet. -
Sketch the horizon:
Using a light pencil, draw the horizon line about one-third of the way up the paper. Keep it straight, representing the division between the ocean and sky. -
Outline the ghost:
Lightly sketch the ghost shape standing on the sand. The bottom should be uneven and wavy to look like fabric, and the top round and smooth. Don’t press too hard, as you want these lines to disappear under the paint later. -
Define the shoreline:
Draw a diagonal line for the water’s edge, sweeping from the left side towards the bottom right, passing right behind or through the lower part of the ghost.
Bleeding Colors?
If your sky colors are bleeding into the ghost, your paper was too wet or you painted too close. Let the background dry fully, then clean up the ghost’s edge with opaque white gouache.
Step 2: Painting the Sky and Sea
-
Wet-on-wet sky base:
Wet the sky area with clean water, stopping carefully around the ghost’s outline. You want the paper damp but not puddling. -
Apply the sunset gradient:
Start at the top with a mix of indigo and purple for the night sky. As you move down, blend in rose pink, and finally a warm orange near the horizon line. Let the colors bleed naturally into each other. -
Add soft clouds:
While the sky is still slightly damp, dab in some purple-pink clouds using a round brush. The damp paper will soften the edges, making them look fluffy. -
Paint the ocean:
Mix a deep blue-grey color for the water. Paint horizontal strokes starting at the horizon line. Lift a little color near the shoreline to suggest foam or lighter shallow water. -
Create the sand:
For the beach, mix burnt sienna with a touch of rose. Apply a wash over the sand area, making it slightly darker and purpler near the bottom right to imply shadow and texture. Avoid painting inside the ghost shape.
Gouache for Opacity
Make the ghost pop by using white gouache instead of watercolor for the body. It’s more opaque and covers the background wash if you accidentally painted over the lines.
Step 3: The Ghost and Details
-
Paint the ghost base:
Once the background is completely dry, use diluted white gouache or very pale grey watercolor to fill in the ghost. Keep it mostly white, but you need a base for shading. -
Add fabric folds:
Mix a very watery purple-grey shadow color. Paint vertical, wavy lines on the ghost to act as folds in the sheet. I like using a size 4 brush here for better control over these delicate shadows. -
Deepen the shadows:
Add slightly darker shading at the very bottom of the ghost where it touches the sand to ground the figure. -
Paint the face:
Using a small brush and concentrated black paint (or a black fineliner once dry), add two small oval eyes and a tiny smile. The placement is key for that cute expression. -
Sea foam details:
Use thick white gouache to paint the crashing waves along the shoreline. Use a stippling motion to create the texture of sea foam. -
Starry night:
With a small brush or a white gel pen, add tiny white dots in the purple section of the upper sky for stars. -
Final reveal:
Wait until the painting is 100% dry to the touch. Carefully peel away the masking tape at a 45-degree angle to reveal your clean edges.
Now you have a charming little spirit to keep your summer memories alive all year round
All-Over Mini Ghost Pattern
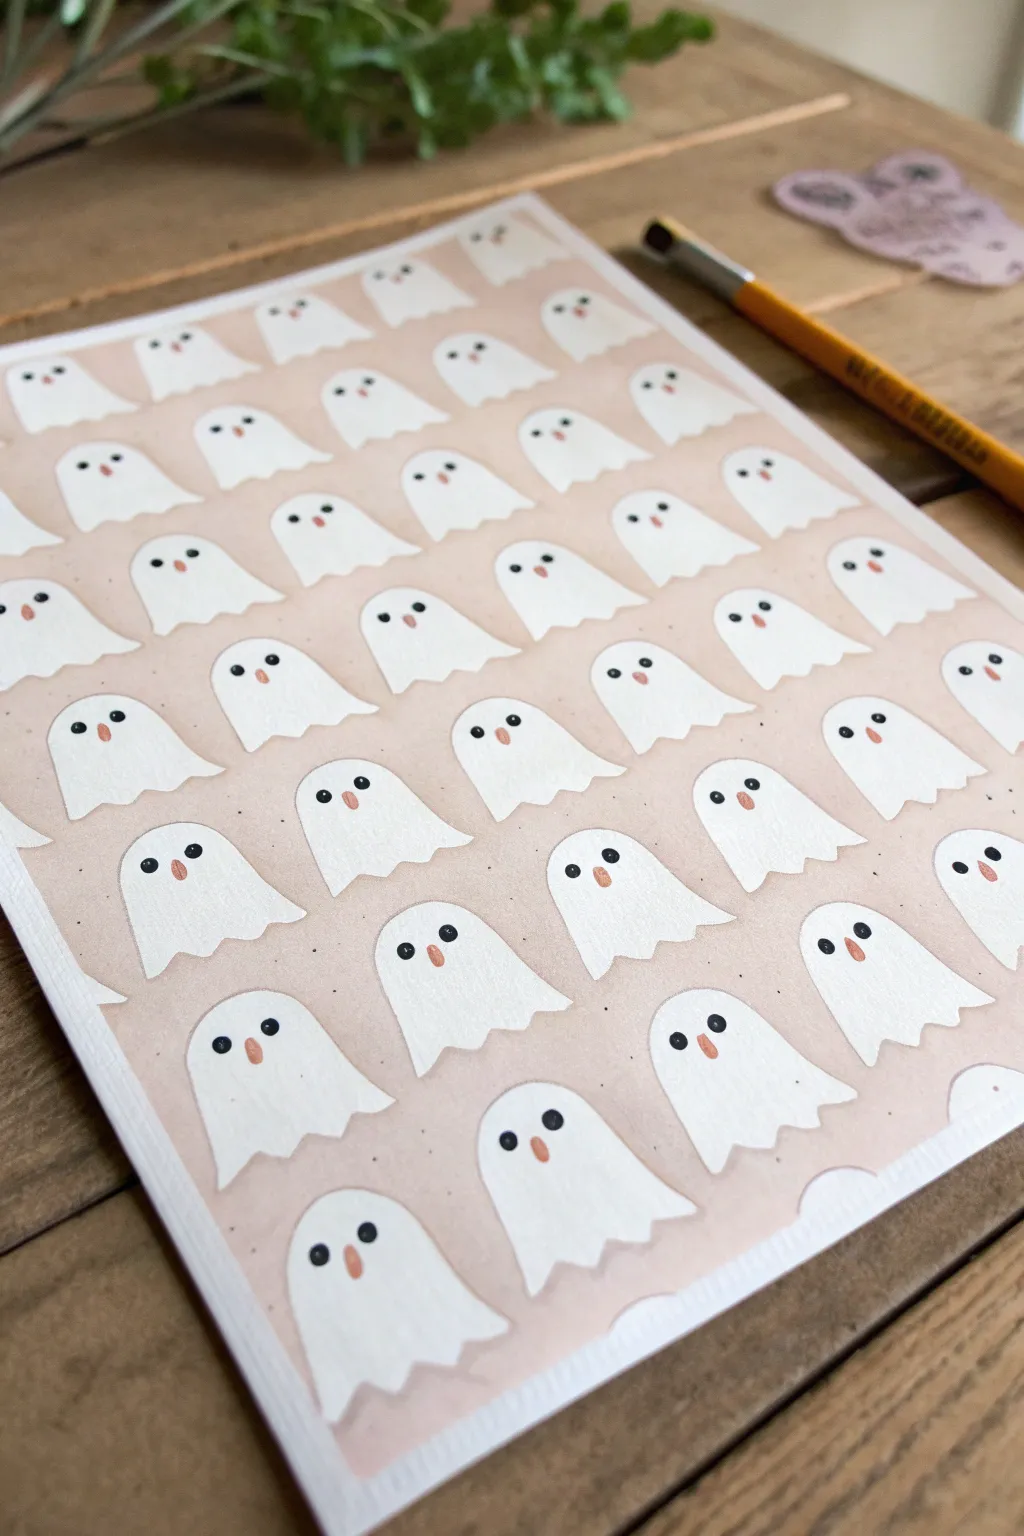
Transform a simple sheet of paper into a sea of friendly spirits with this charming all-over ghost pattern. The soft peach background and repetitive, slightly varied ghost shapes create a soothing and aesthetic piece of seasonal art.
Detailed Instructions
Materials
- Heavyweight watercolor or mixed media paper (A5 or similar size)
- Peachy-beige watercolor or gouache paint (for background)
- Opaque white acrylic paint or white gouache
- Fine tip black permanent marker or black acrylic paint
- Terracotta or orange paint (tiny amount for noses)
- Wide flat wash brush
- Small round detail brush (size 0 or 1)
- Painter’s tape
- Palette for mixing
- Water cup and paper towels
Step 1: Preparation and Background
-
Secure the paper:
Tape down all four edges of your paper to your work surface using painter’s tape. This prevents the paper from buckling when wet and creates a crisp white border around your final piece. -
Mix background color:
Create a warm, light background shade. Mix a small amount of orange or brown into a large amount of white, aiming for a soft ‘band-aid’ beige or pale peach tone. -
Apply the wash:
Using your wide flat brush, paint the entire surface of the paper with your mixed background color. Ensure the coverage is even, though slight watercolor texture adds character. -
Let it dry completely:
Wait for the background layer to be bone dry. If the paper is cool to the touch, it’s still damp. Do not proceed until it is fully dry or the white paint will bleed.
Step 2: Painting the Ghost Shapes
-
Consistency check:
Prepare your opaque white paint. It should be thick enough to cover the background color but fluid enough to flow off a small brush smoothly. -
Start the top row:
Using a small round brush, paint the first row of ghost shapes. Aim for a simple rounded arch for the head. -
Create the heavy bottom:
Extend the paint down and create a wavy bottom edge for each ghost. I find three little scallops usually look the cutest. -
Establish spacing:
Continue painting ghosts across the row, leaving a small gap of background color between each one. Don’t worry if they aren’t identical; variation adds charm. -
Offset the second row:
Begin your second row below the first. Position the center of these ghosts so they sit below the gaps of the row above, creating a brick-lay pattern. -
Fill the page:
Continue this alternating brick pattern all the way down the page. Remember to paint ‘partial’ ghosts on the left and right edges where the pattern runs off the page. -
Dry the white layer:
Let the white paint dry thoroughly. Depending on your paint’s opacity, you might need a second coat on the ghost bodies to make them bright white.
Opacity Secret
If your white paint looks streaky over the peach background, mix a tiny drop of white gouache into white acrylic. Gouache is naturally more opaque and smooths the texture.
Step 3: Adding Details
-
Paint the eyes:
Using a very fine brush with black paint, or a fine-tip marker, add two small dots for eyes on each ghost. Place them relatively wide apart for a cuter look. -
Add the noses:
Mix a tiny amount of terracotta or soft orange paint. Between and slightly below the eyes of each ghost, paint a tiny vertical oval or dot for the nose. -
Background speckles:
To fill the empty space, take your fine black marker or a very dry brush with black paint and add tiny, random speckles in the peach background areas. -
Remove tape:
Once absolutely everything is dry, slowly peel away the painter’s tape at a 45-degree angle to reveal your clean white border.
Placement Woes?
If you struggle to keep the rows straight, lightly draw horizontal grid lines with a pencil and a ruler before painting. Erase these gently after the background paint is dry.
Now you have a delightfully spooky sheet of custom artwork perfect for framing or scanning for digital paper
Watercolor Ghost With Soft Glow
Capture the friendly spirit of Halloween with this charming watercolor tutorial featuring a smiling ghost beneath a starry sky. You’ll learn how to create soft washes for a magical glow and add crisp details to bring your floating friend to life.
Step-by-Step Guide
Materials
- Cold-press watercolor paper (approx. 5×7 inches)
- Watercolor paints (Payne’s Grey, Indigo, Sap Green, Burnt Sienna, Yellow Ochre, Pink)
- White gouache or white gel pen
- Gold watercolor paint or gold metallic marker
- Pencil specifically for sketching (HB)
- Kneaded eraser
- Round watercolor brushes (size 6 for washes, size 2 for details)
- Clean water jar and paper towels
Step 1: Sketching the Composition
-
Outline the ghost:
Begin by lightly sketching a tall, rounded dome shape in the center of your paper. Flare the bottom out slightly into a wavy, tattered hemline to suggest floating fabric. -
Add floating leaves:
Sketch two vertical stems on either side of the ghost, adding simple, almond-shaped leaves growing upwards. These anchor the ghost in a little grassy patch. -
Mark celestial elements:
Draw a small crescent moon in the upper left corner. Then, lightly mark spots where you plan to place larger stars around the ghost’s head. -
Define the face:
Draw two large oval eyes slightly wide-set on the ghost’s ‘face’ and a tiny curved smile right between them. Keep the expression sweet and simple.
Fixing Blooms
If your sky wash creates unwanted cauliflower-like edges (blooms), soften them with a slightly damp brush while the paint is still manageable, blending the hard edge away.
Step 2: Painting the Background
-
Mix a night sky wash:
Prepare a watery mix of Indigo and a touch of Payne’s Grey. You want a cool, muted blue tone that isn’t too dark. -
Apply the sky wash:
Using your larger round brush, paint the upper left corner of the paper, letting the color fade out diagonally as it moves toward the center. Paint carefully around the moon. -
Add water droplets:
While the sky is still wet, drop in tiny amounts of clean water or darker pigment to create a varied, blooming texture that looks like a misty night. -
Paint the ground:
Mix a desaturated green using Sap Green and a tiny bit of Payne’s Grey. Paint a loose, uneven wash at the very bottom of the paper for the ground, letting it overlap slightly with the bottom of the ghost sketch for a transparent effect.
Level Up: Glow Effect
Make the stars really shine by painting a faint, watery yellow circle around each gold star. This creates a subtle halo effect that mimics glowing light.
Step 3: Bringing the Ghost to Life
-
Shadow the fabric:
Now for the ghost itself. Mix a very dilute, watery grey. Paint minimal shadows along the sides of the ghost and within the folds of the bottom hem to give it dimension without coloring the whole shape. -
Add rosy cheeks:
Take a tiny amount of diluted pink paint. Dab two small, soft circles just below the eyes while the paper is dry to give the ghost a blushing look. -
Fill in the eyes:
Using a saturated black or dark grey paint and your small brush, carefully fill in the oval eyes and the smile. Leave a tiny speck of white paper in each eye for a highlight, or add it later with white gel pen. -
Paint the foliage:
Return to your green mixture, perhaps adding a touch more pigment for strength. Paint the stems and leaves on either side, using the tip of the brush for the thin ends.
Step 4: Magical Details
-
Add gold stars:
Once your background is fully dry, use gold watercolor paint or a marker to draw five-pointed stars. Vary the sizes—some large, some just tiny dots like distant stardust. -
Define the moon:
If you painted around the moon, it might look stark. Soften it with a very pale wash of yellow ochre or keep it white, adding a thin outline if needed for visibility. -
Enhance the outline:
I like to take a fine liner or a very thin brush with dark grey paint and loosely outline the ghost’s body to make it pop against the background. -
Create magical sparkles:
Using white gouache or a gel pen, add tiny white dots in the blue sky area and a few on the ground to mimic dew or magic dust. -
Final touches:
Add small scratchy marks or grass blades in the green ground area to give it texture, confirming everything is dry before you erase any visible pencil sketch lines.
Now you have a sweet spectral friend ready to haunt your art collection.
Textured Acrylic Ghost With Bold Brushstrokes
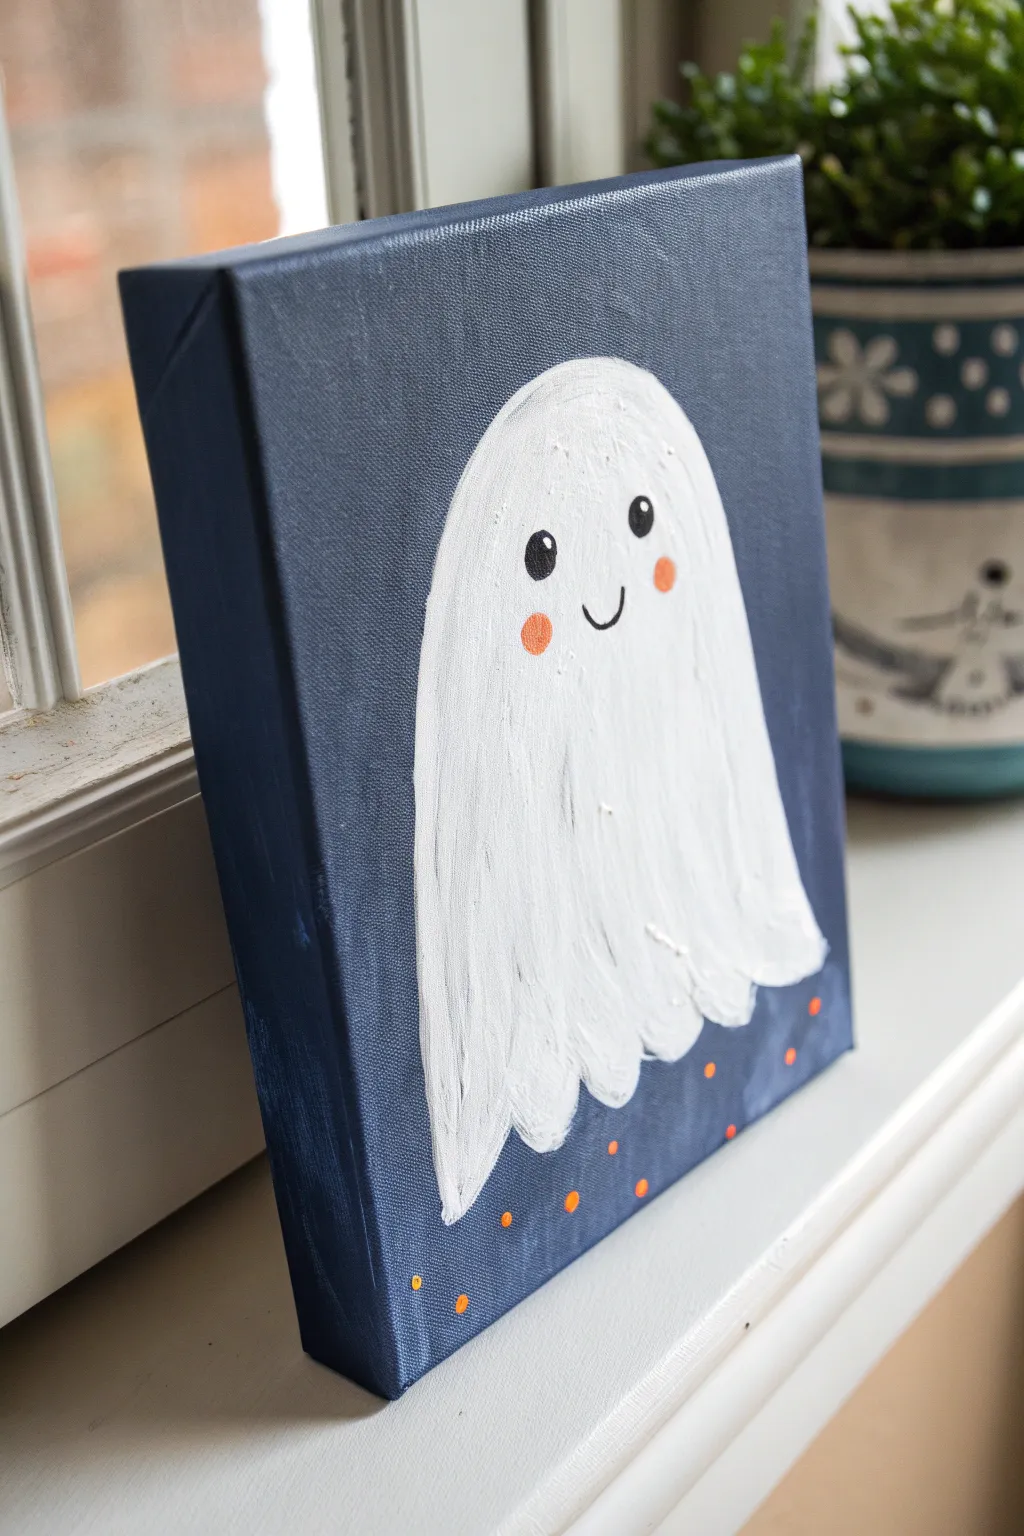
Capture the playful spirit of Halloween with this charming acrylic painting that features a friendly ghost against a moody navy backdrop. The generous use of white paint creates a delightful texture that makes your specter pop right off the canvas.
Step-by-Step Tutorial
Materials
- Small stretched canvas (e.g., 6×6 or 8×10 inches)
- Acrylic paint: Navy Blue, Titanium White, Carbon Black, Orange
- Flat paintbrush (1-inch width) for background
- Round paintbrush (medium) for the ghost shape
- Fine detail brush for facial features
- Small round brush or dotting tool
- Palette or paper plate
- Cup of water and paper towels
Step 1: Setting the Scene
-
Prepare your canvas:
Ensure your canvas is clean and free of dust. If the surface feels rough, you can do a quick light sanding, but the canvas texture actually helps grip the paint for this project. -
Mix the background color:
Squeeze out a generous amount of Navy Blue paint. If you want a deeper, midnight look, mix in a tiny touch of black, but keep it predominantly blue. -
Paint the background:
Using your flat brush, cover the entire front surface of the canvas with the dark blue paint. Use long, smooth strokes to get even coverage. -
Cover the edges:
Don’t forget the sides! Paint the top, bottom, and side edges of the canvas with the same blue so the artwork looks finished from every angle when displayed. -
Let it dry completely:
Allow the blue layer to dry fully before moving on. This is crucial so your white ghost stays bright and doesn’t turn light blue.
Step 2: Summoning the Ghost
-
Outline the ghost shape:
Using a medium round brush and a thin layer of white paint, lightly sketch the outline of your ghost. Draw a large upside-down ‘U’ shape for the head and let the lines flow down toward the bottom. -
Create the flowing hem:
Connect the bottom of your lines with a wavy, scalloped edge to mimic a sheet. It doesn’t need to be symmetrical; a little irregularity adds character. -
Fill in the base layer:
Fill the ghost shape with white paint. This first layer might look streaky against the dark background, but don’t worry—we are building it up. -
Apply a textured second coat:
Once the first white layer is tacky or dry, load your brush heavily with Titanium White. Apply this layer thickly, using vertical strokes to mimic the flow of fabric. -
Add texture strokes:
While the paint is wet, use the bristles of your brush to leave visible vertical streaks and ridges in the white paint. This gives that lovely textured look seen in the photo. -
Dry the ghost:
Let this thick layer of white paint dry completely. Because it’s textured, it may take a bit longer than the background did.
Paint Transparency?
If your white paint looks gray or blueish, stop! Let the current layer dry 100% before adding another. Wet-on-wet mixing causes the dull color; layering builds opacity.
Step 3: Adding Personality
-
Paint the eyes:
Switch to your fine detail brush and black paint. Paint two solid black vertical ovals for the eyes, placing them slightly wide apart on the upper half of the ghost. -
Add the smile:
Paint a small, simple ‘u’ shape between and slightly below the eyes for a happy little smile. -
Rosy those cheeks:
Dip a small round brush or even your fingertip into a bit of orange paint. Dab two soft round circles on either side of the smile for blush. -
Highlight the eyes:
For that crucial spark of life, dip the very tip of a clean detail brush (or toothpick) into white paint. Place a tiny white dot in the upper right corner of each black eye.
Texture Pro Tip
For extra thick texture on the ghost’s body, mix a pea-sized amount of baking soda or cornstarch into your white paint before applying the final top coat.
Step 4: Finishing Touches
-
Mix a lighter orange shade:
Take a tiny bit of your orange paint and mix it with a speck of white if you want varied tones for the polka dots, or stick with the pure orange for high contrast. -
Add decorative dots:
Using the handle end of a paintbrush or a dotting tool, dip into the orange paint. Press gently onto the blue background near the bottom of the ghost to create small, scattered festive dots. -
Final check:
Look over your canvas for any spots where the blue background shows through the ghost too much. If needed, touch up with a bit more white texture. -
Sign your work:
Once everything is dry, sign your initials in the corner using a fine brush or a paint pen.
Place your new friendly specter on a shelf or mantelpiece to bring a smile to everyone who passes by
Negative-Space Ghost in a Color Field
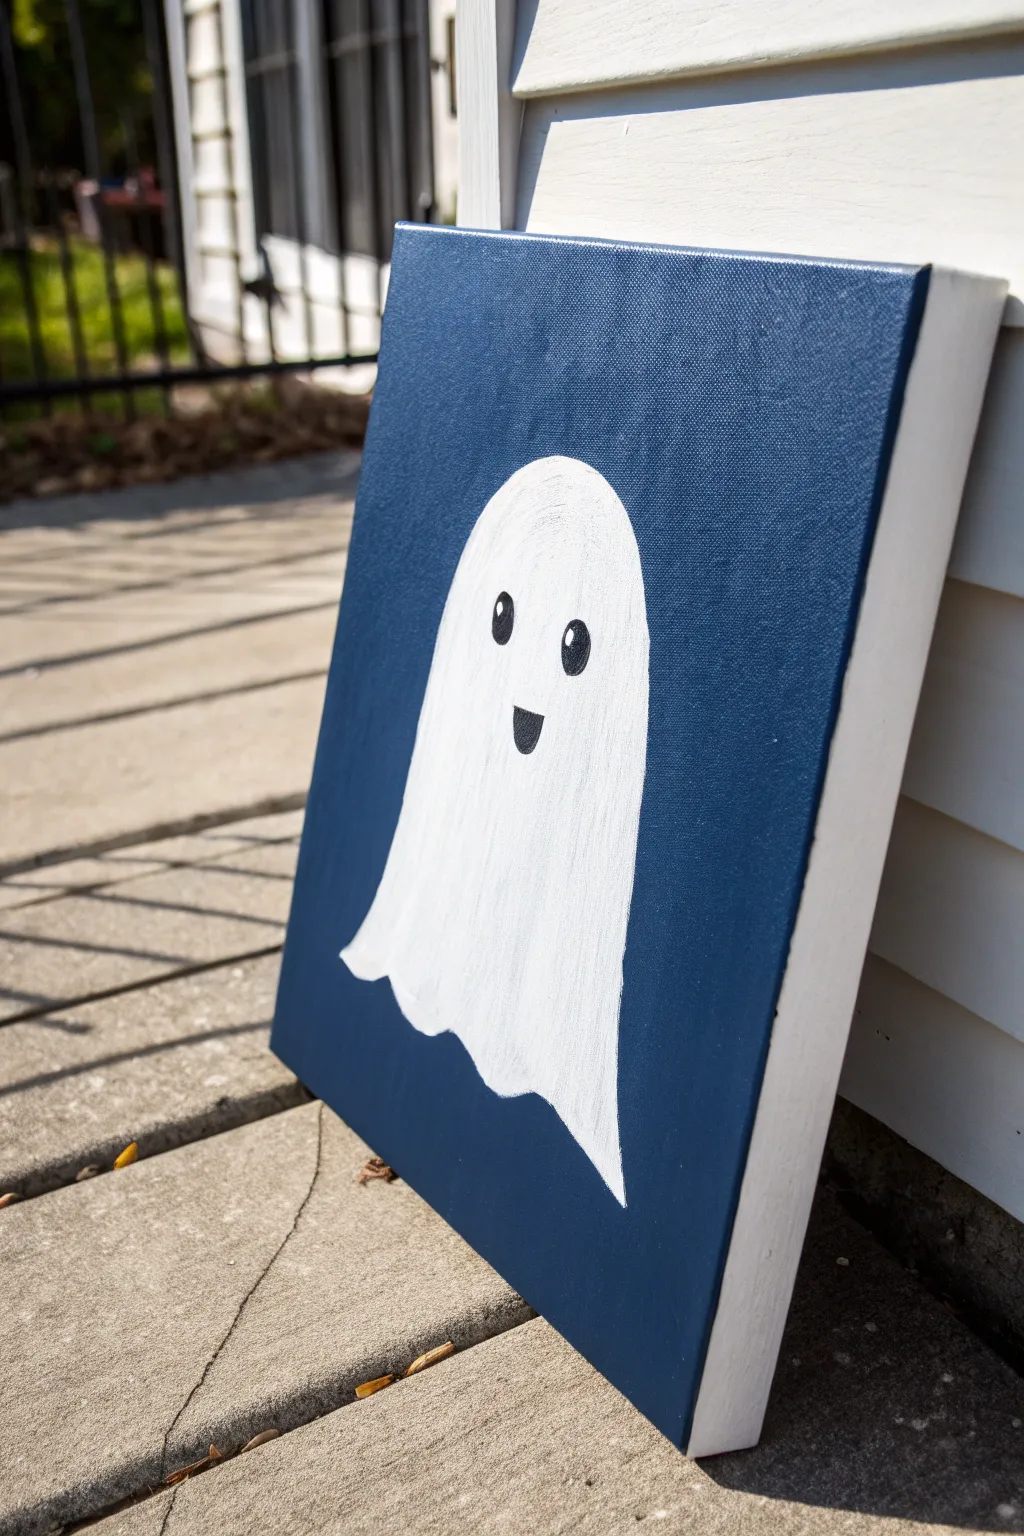
This charming project features a friendly, round-headed ghost popping up against a rich navy background, perfect for adding a touch of spooky cuteness to your decor. The simple shapes and contrasting colors make this an excellent piece for beginners looking to practice clean lines and smooth coverage.
Detailed Instructions
Materials
- Square stretched canvas (approx. 10×10 or 12×12 inches)
- Acrylic paint: Navy Blue (or Prussian Blue)
- Acrylic paint: Titanium White
- Acrylic paint: Mars Black
- Large flat brush (1-inch width)
- Medium filbert brush (rounded tip)
- Small round detail brush
- Pencil
- Paper plate or palette
- Water cup and paper towels
Step 1: Setting the Scene
-
Prepare your canvas:
Before you begin painting, wipe down your canvas with a clean, dry cloth to remove any dust that might interfere with paint adhesion. -
Mix the background color:
Squeeze out a generous amount of Navy Blue acrylic paint onto your palette. If you want an even darker, moodier sky, mix in a tiny dot of black, but be careful not to dull the blue too much. -
Apply the base coat:
Using your large flat brush, apply the blue paint to the entire front surface of the canvas. Use long, horizontal strokes to ensure an even finish without choppy texture. -
Paint the edges:
Don’t forget the sides! Paint the four edges of the canvas with the same blue mixture so the artwork looks finished even without a frame. -
Let it dry completely:
Allow this background layer to dry fully. It needs to be dry to the touch so your pencil sketch won’t dig into the paint. This usually takes 20-30 minutes.
Fixing Opacity
If your white paint looks streaky or gray over the navy, don’t overwork it while wet. Let it fully dry, then apply another thin coat. It’s better to do three thin coats than one thick, gloppy one.
Step 2: Drafting the Ghost
-
Sketch the outline:
Using a pencil very lightly, draw the ghost shape. Start with a large, rounded arch for the head placed near the center-top of the canvas. -
Draw the body:
Extend lines down from the arch on both sides, widening slightly as you go down to create a bell shape. -
Create the hem:
Connect the bottom edges with a wavy line. Make the waves irregular—some wider, some narrower—to give it a floaty, fabric-like appearance. -
Sketch the face:
Draw two vertical ovals for eyes about one-third of the way down the head. Place a small half-circle shape below them for the smiling mouth.
Glow Effect
To make the ghost ‘glow,’ mix a tiny amount of white into your nail blue color (making a light blue). Dry brush this faint halo around the outside edge of the ghost for a spectral effect.
Step 3: Bringing the Ghost to Life
-
Start the white fill:
Switch to your medium filbert brush and load it with Titanium White. I like to start in the center of the ghost and work my way outward to the edges. -
Paint the edges:
Carefully trace the outline of your pencil sketch with the white paint. The rounded edge of the filbert brush is perfect for getting that smooth curve on the head. -
Apply a second coat:
White paint over a dark blue background will likely look translucent at first. Let the first layer dry, then apply a second (and possibly third) coat until the ghost is bright opaque white. -
Paint the strokes vertically:
On your final coat of white, use vertical brush strokes from the top of the head down to the hem to mimic the flow of a draped sheet. -
Dry the ghost:
Ensure the white section is completely dry before moving on to the facial features to prevent the black paint from turning gray.
Step 4: Adding Personality
-
Fill the eyes:
Using your small round detail brush and black paint, carefully fill in the two oval eye shapes you sketched earlier. Keep your hand steady and rest your pinky on the dry canvas for stability. -
Paint the mouth:
Fill in the small half-circle mouth with black. Make the top line flat and the bottom curved for a classic happy expression. -
Add eye sparkles:
Clean your small brush thoroughly or use a stylus. Dip the very tip into white paint and add a tiny dot to the upper right corner of each black eye. This ‘catchlight’ brings the character to life immediately. -
Final touches:
Check the edges of your ghost. If you went over the lines with white, you can use a small brush and your leftover blue paint to touch up the background for a crisp silhouette.
Hang your friendly new spirit on a wall or rest it on a shelf to greet guests with a smile
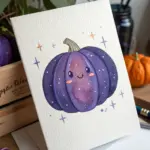


Have a question or want to share your own experience? I'd love to hear from you in the comments below!