When I’m craving a mixed media canvas, I start thinking in layers—paint, paper, texture, and a little bit of “what if I just glue that on?” These ideas are meant to help you build a canvas that feels tactile and personal, with plenty of dimension and room to play.
Classic Collage-and-Paint Layers
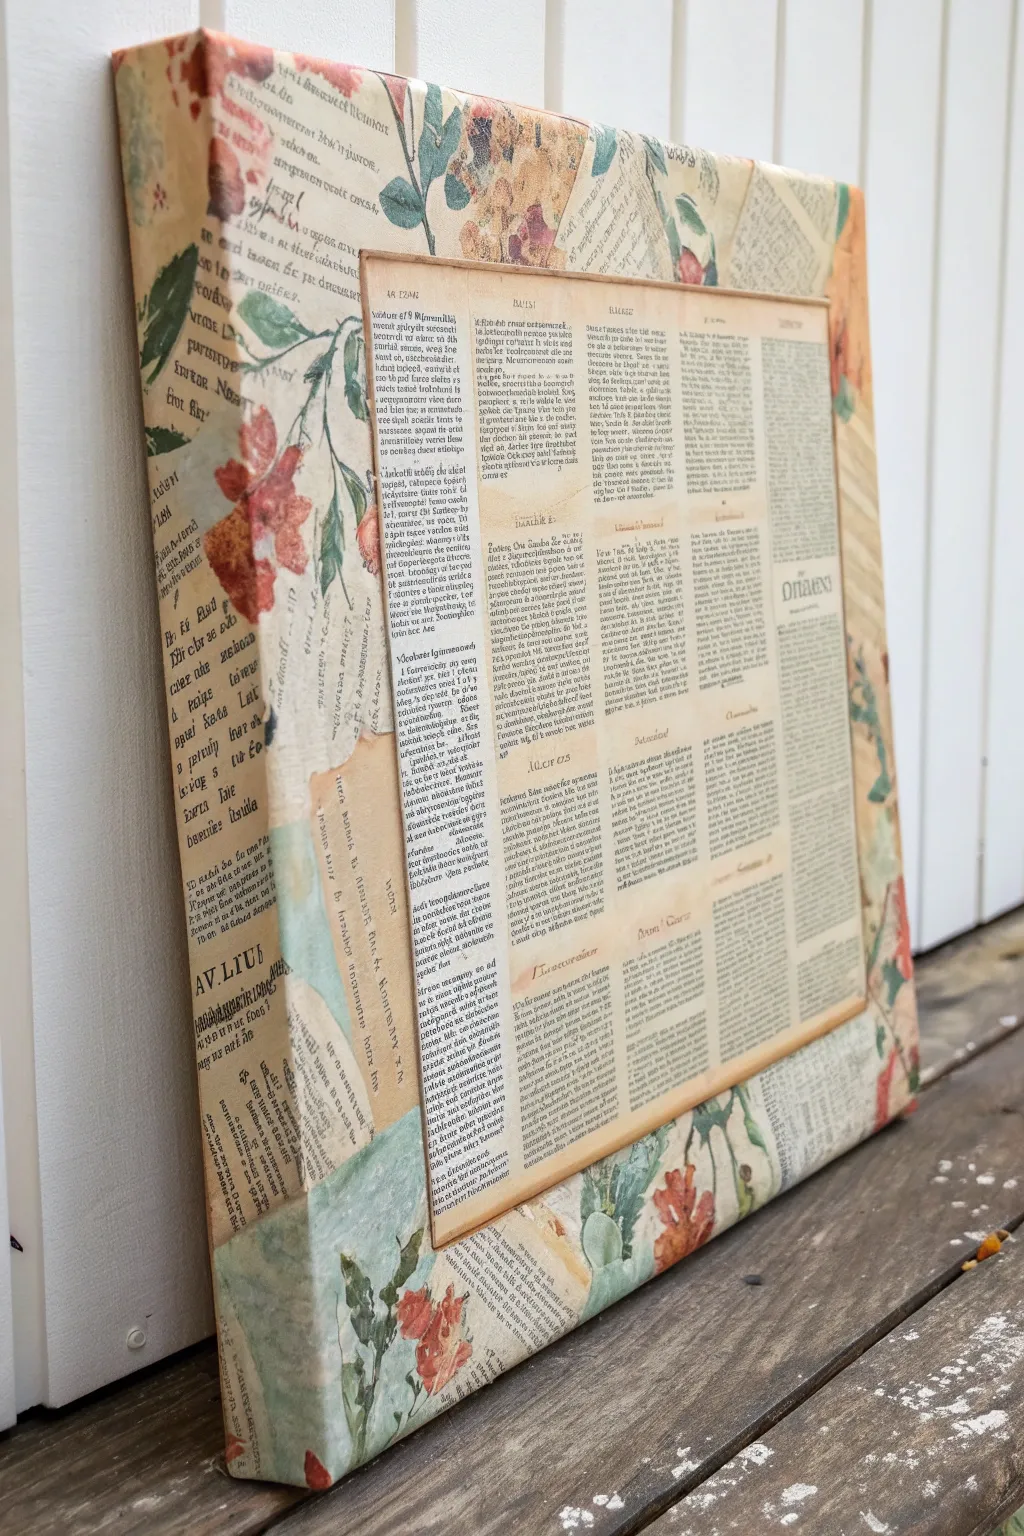
Transform a plain canvas into an antique-inspired masterpiece by layering old book pages, botanical imagery, and distressed text. This mixed media project creates a warm, intellectual focal point that looks like a carefully preserved artifact from a bygone era.
Detailed Instructions
Materials
- Stretched box canvas (square format recommended)
- Vintage book pages (dictionaries, encyclopedias, or novels)
- Botanical ephemera or scrapbook paper (floral/leaf patterns)
- Matte Mod Podge or heavy gel medium
- Soft flat paintbrushes (1-inch width)
- Antique wax or distress ink (brown/sepia tones)
- Scissors and a craft knife
- Ruler
- Brayer or old credit card
- Paper towels
- Beige or off-white acrylic paint (optional)
Step 1: Preparing the Base Layer
-
Prepare your canvas:
Start with a clean stretched canvas. If your book pages are very thin, you might want to give the canvas a quick coat of beige or off-white acrylic paint first to prevent the bright white canvas texture from showing through too much. -
Tear the collage papers:
Gather your botanical papers and subordinate book pages. Tear them into varied shapes—triangles, strips, and irregular rectangles. Tearing rather than cutting creates softer, more organic edges that blend better. -
Map out the background:
Lay your torn pieces loosely onto the canvas to plan the composition. Focus on covering the edges and wrapped sides of the canvas first, leaving a flatter space in the center for your focal element. -
Adhere the first layer:
Apply a thin, even layer of Mod Podge or gel medium to the canvas surface. Press your first background paper down firmly. I find it helpful to start at the corners and work inward. -
Wrap the edges:
Ensure your papers wrap fully around the thickness of the canvas frame to the back. This gives the artwork a finished, gallery-style look without needing a frame. -
Smooth out bubbles:
Immediately after sticking down a piece, use a brayer or an old credit card to smooth it from the center outward. This removes trapped air bubbles and ensures a flat surface.
Wrinkle Prevention
Paper expands when wet. To avoid massive wrinkles, apply medium to BOTH the canvas and the back of the paper, then let it sit for 30 seconds before sticking it down.
Step 2: Creating the Central Focus
-
Select the focal text:
Find a large, intact page from an old dictionary, encyclopedia, or textbook. This will be the rectangular centerpiece. Trim it neatly with a ruler and craft knife for sharp, straight edges. -
Mount the center page:
Determine the exact center of your canvas. Apply flexible medium to the back of your focal page and position it carefully. It should overlap the messy edges of your background collage layer. -
Add bordering elements:
If the transition between the center page and the background looks too harsh, cut thin strips of a contrasting paper or use botanical cutouts to bridge the gap and frame the central text block. -
Seal the surface:
Once all paper elements are glued down, apply a top coat of matte medium over the entire front and sides of the canvas. This seals the paper and prepares it for antiquing. -
Let it cure:
Allow the project to dry completely. The papers must be fully dry and cool to the touch before adding any wet aging effects to prevent warping.
Step 3: Antiquing and Finishing
-
Apply distress ink:
Using a blending foam or a dry brush, lightly apply sepia or brown distress ink to the edges of the canvas. Focus on the corners and anywhere the paper layers overlap to create depth. -
Age the center page:
Very lightly drag your inked tool across the central text page. Don’t cover the text, but simply darken the paper slightly to make it look convincingly old. -
Clean up borders:
If unwanted white edges from torn paper are visible, dab them gently with a bit of watered-down coffee or brown ink to blend them into the vintage aesthetic. -
Final protective coat:
For longevity, apply a final thin layer of matte varnish or medium. Use long, unidirectional strokes to minimize brush marks. -
Check the sides:
inspect the wrapped sides one last time. Ensure no paper is peeling up at the back staples and add a dab of glue if necessary.
Too Much Brown?
If you over-applied the antiquing wax and the piece looks muddy, gently wipe the surface with a barely damp baby wipe to lift some pigment before it sets.
Hang your new vintage-style canvas in a reading nook or study to add a touch of timeless literary charm


Vintage Ephemera Patchwork Canvas
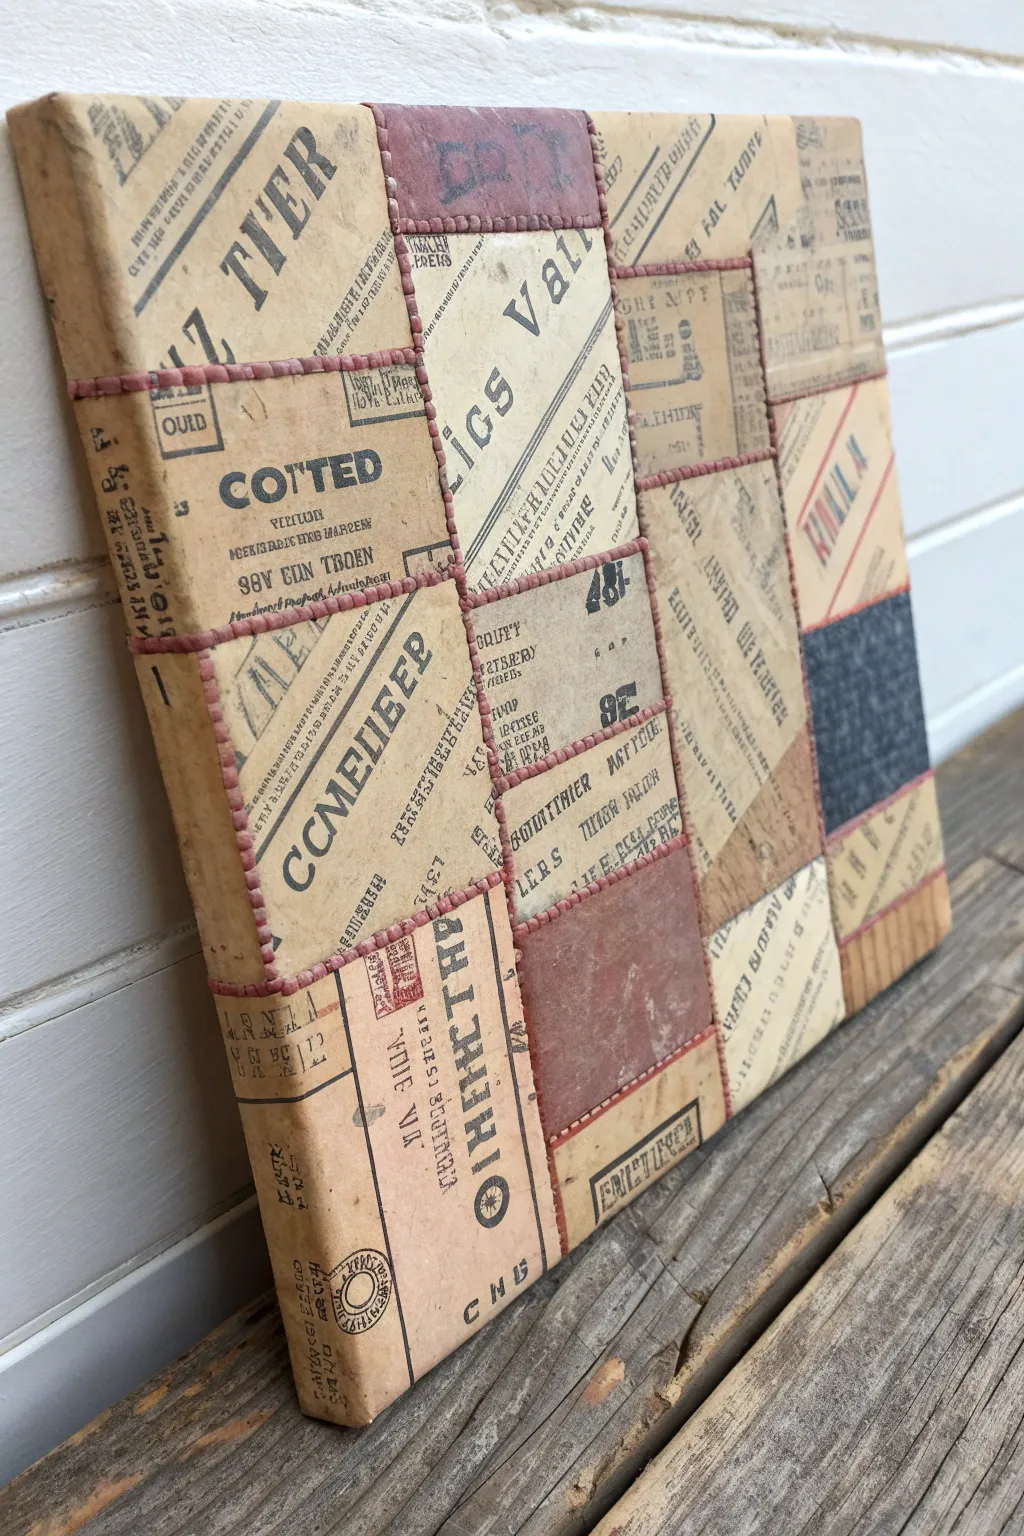
Transform a simple canvas into a textured, nostalgic statement piece by combining the art of collage with hand-embroidery. This project mimics the warmth of a quilt using scraps of vintage typography and bold stitching to create a striking grid pattern.
How-To Guide
Materials
- Stretched canvas (square, e.g., 12×12 inches)
- Vintage ephemera (old book pages, tickets, newspaper clippings)
- Cardstock or heavy paper (for backing the ephemera)
- Chunky embroidery floss or yarn (reddish-brown or rust color)
- Ruler
- Pencil
- Craft knife or scissors
- Matte Mod Podge or decoupage medium
- Foam brush
- Awl or heavy-duty needle (for pre-punching holes)
- Large-eye tapestry needle
- Cardboard or cutting mat
Step 1: Preparing the Patchwork Blocks
-
Plan the grid:
Measure your canvas and decide on a grid layout. For a 12×12 canvas, a 4×4 grid of 3-inch squares works perfectly. Sketch this lightly on the canvas face if helpful. -
Select your papers:
Gather your vintage ephemera. Look for variety in typography, density of text, and orientation. Mix in a few solid colored squares—like deep red or charcoal—to add visual rest stops among the busy text. -
Reinforce the paper:
Because vintage paper can be brittle, glue your chosen scraps onto cardstock or heavy paper using Mod Podge. Smooth out any bubbles immediately with your fingers or a brayer. -
Cut the squares:
Once dry, cut your reinforced papers into precise squares matching your grid measurements. I find a metal ruler and craft knife produce the sharpest, cleanest edges for this step. -
Dry fit the layout:
Arrange your cut squares on a flat surface to finalize the composition. Rotate pieces until you have a pleasing balance of text and white space.
Step 2: Assembling the Canvas
-
Adhere the squares:
Apply a thin, even layer of Mod Podge to the back of each square and press them firmly onto the canvas. Ensure the edges butt up against each other tightly to minimize gaps. -
Seal the surface:
Coat the entire surface of the canvas with a layer of matte Mod Podge. This protects the vintage paper and reinforces the surface for the stitching step later. -
Wrap the sides:
Don’t forget the edges! Cut strips of vintage paper to cover the sides of the canvas, wrapping them slightly around the back for a finished gallery look.
Wrinkled Paper?
If the paper ripples after gluing, place a sheet of wax paper over the surface, stack heavy books on top, and let it sit overnight to flatten out perfectly as it dries.
Step 3: Stitching the Grid
-
Mark the stitch holes:
Using a pencil and ruler, lightly mark small dots along the seams where the paper squares meet. Space them about 1/4 inch apart to mimic a chunky blanket stitch. -
Pre-punch the holes:
Use an awl or a sharp, heavy-duty needle to carefully punch holes through the canvas at each mark. Place a piece of cardboard under the canvas frame to support it while punching. -
Thread the needle:
Cut a long length of your chunky embroidery floss or yarn. Thread it through a large-eye tapestry needle and knot the end securely. -
Begin stitching vertical lines:
Start from the back of the canvas. Sew straight stitches over the vertical seams, going up through one hole and down through the next, pulling the thread taut but not enough to warp the canvas. -
Fill the gaps:
Depending on the look you want, you can double back to fill in the gaps for a solid line, or leave it as a running stitch. -
Switch to horizontal lines:
Repeat the process for the horizontal seams. When you cross a vertical line, stitch right over it to create a small raised ‘plus’ sign at the intersection. -
Finish the edges:
For the outer perimeter, loop the thread around the edge of the canvas (a whip stitch) or simply run a straight stitch just inside the border. -
Secure the back:
Once all grid lines are stitched, tie off your yarn securely on the back of the canvas on the wooden stretcher bars or by weaving it under existing stitches.
Distressing Tip
Before sealing, lightly rub a brown ink pad or diluted coffee along the edges of your squares. This enhances the separation between blocks and adds instant age.
Hang your textured masterpiece on the wall and enjoy the cozy, historical charm it brings to your space


Stitched Details Right on the Canvas
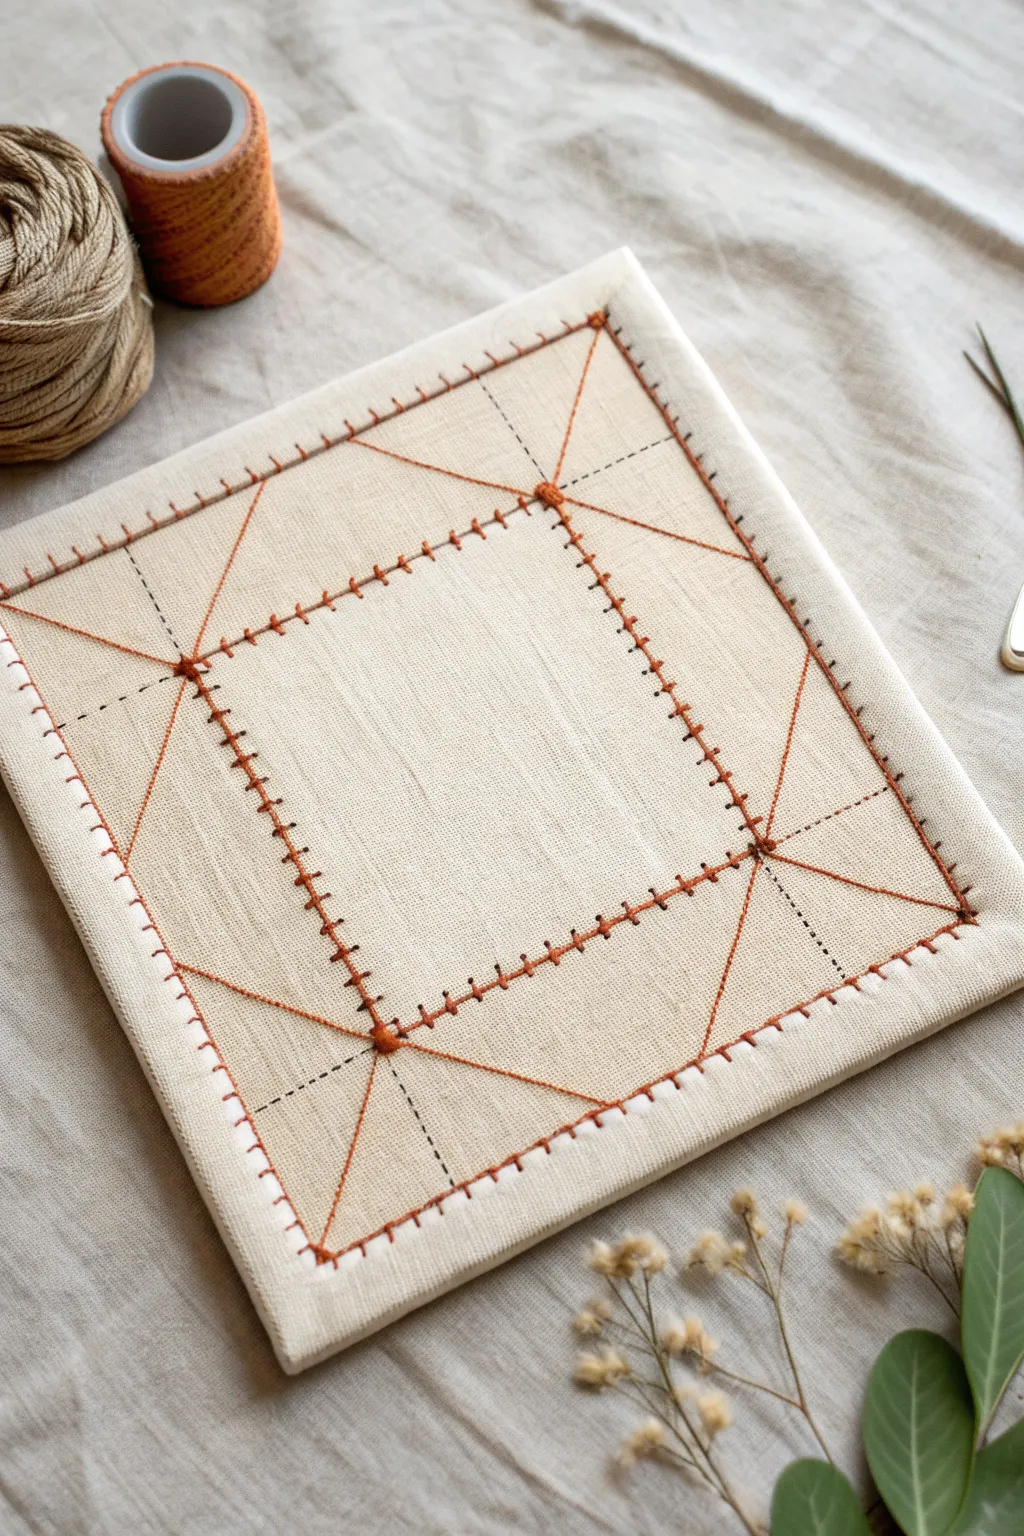
Transform a simple stretched canvas into a tactile piece of art by incorporating bold, geometric stitching directly onto the surface. This project combines the minimal aesthetic of linen with the warmth of rustic embroidery thread creates a striking focal point.
Step-by-Step Guide
Materials
- Small square stretched canvas (approx. 8×8 inches, preferably linen or unprimed fabric)
- Pencil and ruler
- Thick embroidery floss or pearl cotton (burnt orange/terracotta color)
- Large-eye embroidery needle (sharp point)
- Thimble (optional but recommended for thick canvas)
- Pair of scissors
- Awl or pushpin (for pre-punching holes)
Step 1: Planning the Grid
-
Measure the center:
Start by finding the exact center of your square canvas. Use your ruler to measure equal distances from each edge to define a smaller inner square. A 2-inch border is a good starting point. -
Draw the main lines:
Lightly sketch the inner square using a pencil. Then, draw diagonal lines connecting the corners of your inner square to the corresponding corners of the outer canvas edge. -
Mark the stitch spacing:
Along the pencil lines you just drew, make small tick marks every quarter-inch or half-inch. These marks will guide where your needle goes to ensure even stitches. -
Pre-punch the canvas:
Canvas fabric can be tough to push a needle through repeatedly. I find it really helpful to use a sharp awl or pushpin to carefully pre-poke holes at every tick mark you made. This saves your fingers later.
Step 2: Stitching the Design
-
Thread the needle:
Cut a long length of your terracotta embroidery floss. Thread your needle, knotting the end securely. You want the thread thick enough to stand out against the texture of the fabric. -
Begin the inner border:
Start from the back of the canvas, bringing the needle up at a corner of the inner square. Begin stitching along the square’s perimeter using a simple backstitch or a running stitch. -
Add the perpendicular stitches:
To get the ‘ladder’ or ‘blanket stitch’ look shown in the photo, create small perpendicular stitches that radiate outward from your main square line. These should be short, distinct dashes crossing your main line. -
Secure the corners:
When you reach a corner of the inner square, create a small cluster of stitches or a French knot to anchor the design visually. This acts as a ‘hub’ for the radiating lines. -
Stitch the diagonals:
From each inner corner ‘hub’, stitch a long straight line extending out to the very corner of the canvas frame. Keep this thread tight so it creates a clean, sharp line. -
Create triangle connecters:
Notice the triangular shapes formed at the corners. Add two additional straight stitches flanking the main diagonal line, connecting the inner hub to points about an inch away from the canvas corner. -
Repeat for all corners:
Continue this pattern for all four corners of the canvas. Rotate the canvas as you work to keep your stitching hand comfortable.
Save Your Fingers
Painting the back of the canvas with a thin layer of gesso or water first can stiffen the fabric slightly, making it easier to punch clean holes without fraying the weave.
Step 3: Finishing the Edges
-
Mark the outer border:
If you haven’t already, lightly mark a perimeter line about a half-inch from the very edge of the canvas frame. -
Stitch the outer perimeter:
Using a whip stitch or a blanket stitch, work your way around the entire outer edge of the canvas. This frames the artwork and hides the raw transition of the canvas fold. -
Tie off securely:
Once all stitching is complete, bring your needle to the back of the canvas. Weave the tail end under existing stitches on the back side and knot it firmly. -
Erase guidelines:
Gently use a white eraser to remove any visible pencil marks. Be careful not to rub the thread too vigorously so it doesn’t fray.
Add Dimension
Place a square of felt or colored cardstock behind the canvas before you start. As you stitch, the punched holes will reveal tiny peeks of the accent color underneath.
Now you have a beautifully textured piece that bridges the gap between traditional craft and modern art, ready to hang or display on a shelf


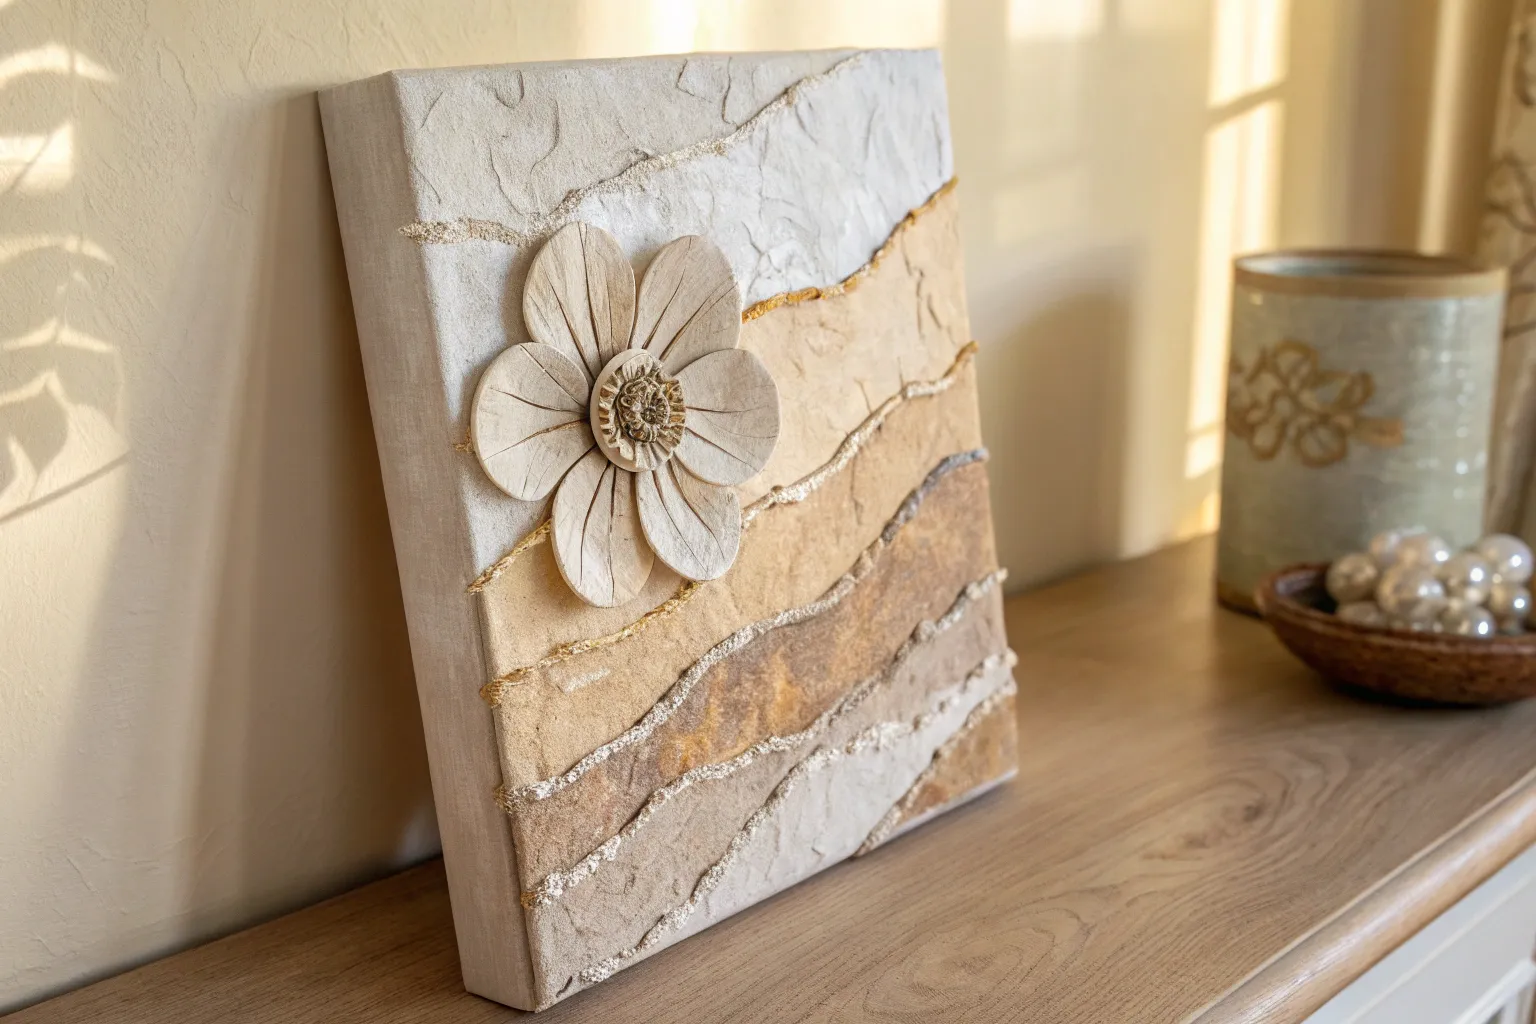
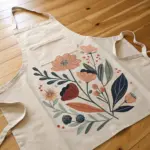
Torn Paper Florals With Painted Petals
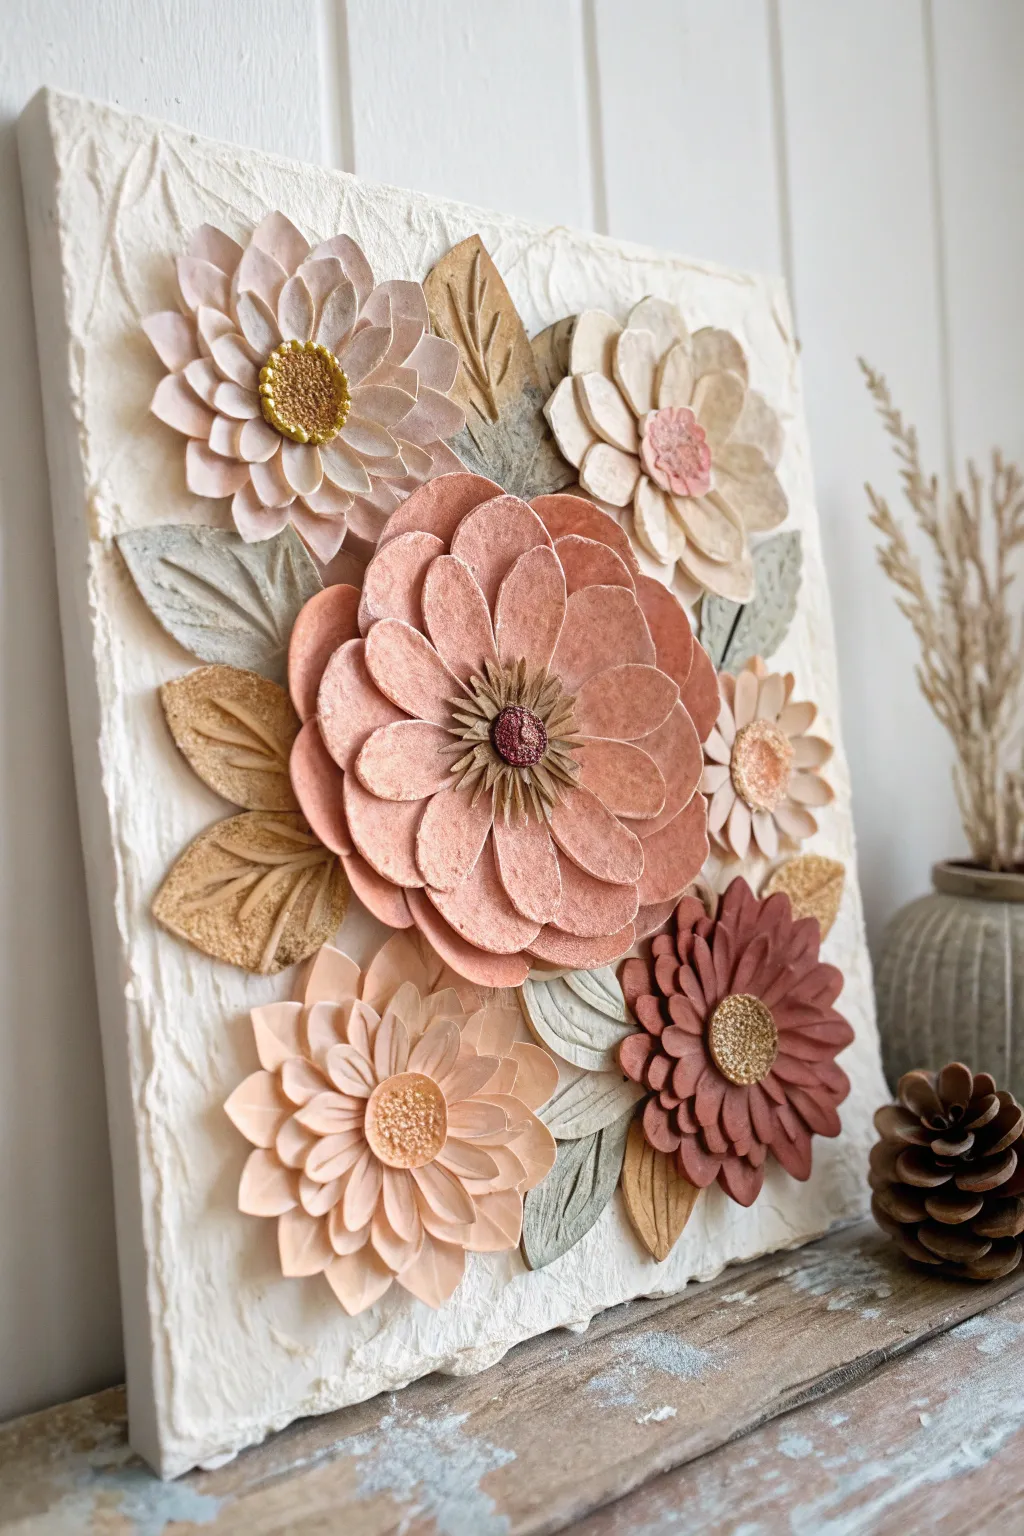
Transform simple scraps into a sophisticated bouquet with this textured mixed-media canvas. Using torn paper techniques and layered paint, you’ll create dimensionally rich florals that pop against a rugged, plaster-like background.
Step-by-Step
Materials
- Stretched canvas (approx 12×12 or 16×20 inches)
- Modeling paste or thick gesso
- Heavy watercolor paper or cardstock (various weights)
- Acrylic paints (dusty pinks, terracotta, cream, sage green, metallic gold)
- Palette knife
- Small detail brushes and shader brushes
- Hot glue gun and glue sticks
- Fine glitter or microbeads (gold and copper)
- Scissors (for base shapes)
- Water spray bottle
Step 1: Preparing the Textured Canvas
-
Prime with texture:
Begin by spreading a generous layer of modeling paste or thick gesso over the entire canvas surface using a palette knife. -
Create the stucco look:
Before the paste dries, use the flat side of your knife to tap and pull away from density, creating raised peaks and a rough, stucco-like surface. Let this dry completely overnight. -
Light wash:
Once dry, apply a very diluted wash of cream or off-white acrylic paint to seal the texture and warm up the bright white base.
Step 2: Creating Paper Petals
-
Rough cutting:
Cut your watercolor paper into rough squares of varying sizes—large for the central bloom, medium and small for the surrounding flowers. -
The tearing technique:
To get that specific soft edge, lightly spritz the paper with water, let it sit for a moment to dampen, and then carefully tear petal shapes out by hand. The moisture helps guide the tear and creates a fibrous, feathered edge. -
Shaping the petals:
While the paper is still slightly damp, gently curl the edges or press the centers with your thumb to cup them. This adds the necessary 3D volume. -
Painting base layers:
Paint the petals individually. Use a dusty rose for the large flower, mixing cream and terra cotta for variation. For the smaller flowers, use darker terracotta and pale blush tones. -
Adding depth:
Once the base coat is dry, dry-brush a slightly lighter shade on the centers of the petals and a darker shade near the base to enhance the cupped shape. -
Making leaves:
Tear leaf shapes from the paper. Paint them in muted sage greens and metallic golds. Use a scoring tool or the back of a knife to press vein lines into the damp paper for texture.
Soften the Tear
If your paper is tearing too sharply, run a wet paintbrush along the line where you want the tear to happen. The water weakens the fibers for a softer, fuzzier edge.
Step 3: Assembly and Detailing
-
Building the blooms:
Start assembling your flowers off the canvas. Glue the petals in concentric circles, starting with the largest outer petals and layering inward with smaller ones. -
Creating centers:
For the flower centers, cut small circles of paper or create small mounds of hot glue. Paint them in contrasting dark browns or golds. -
Adding sparkle:
Apply a dab of craft glue to the painted centers and dip them into gold glitter or copper microbeads to mimic pollen texture. -
Inner details:
For the large central flower, create an inner ring of very fine, spikey torn paper strips painted dark brown to surround the glitter center. -
Layout check:
Arrange your completed flower heads and loose leaves on the dried canvas without glue first to find the most balanced composition. -
Final adhesion:
Use hot glue to secure the flowers to the canvas. I like to apply a generous amount so the flowers float slightly off the textured background. -
Leaf placement:
Tuck the painted leaves under the petals of the secured flowers, gluing them down so they radiate naturally outward. -
Finishing touches:
Inspect the artwork from the side. If any white paper edges are too visible and distracting, gently touch them up with a small brush and matching paint.
Antique Shadowing
Mix a tiny amount of brown paint with glazing medium. Brush it into the deep crevices between petals and wipe away the excess to create an instant vintage, aged look.
Hang your textured masterpiece in a spot with good side lighting to really show off the dimension of the paper petals
BRUSH GUIDE
The Right Brush for Every Stroke
From clean lines to bold texture — master brush choice, stroke control, and essential techniques.
Explore the Full Guide
Focal Point Assemblage Cluster
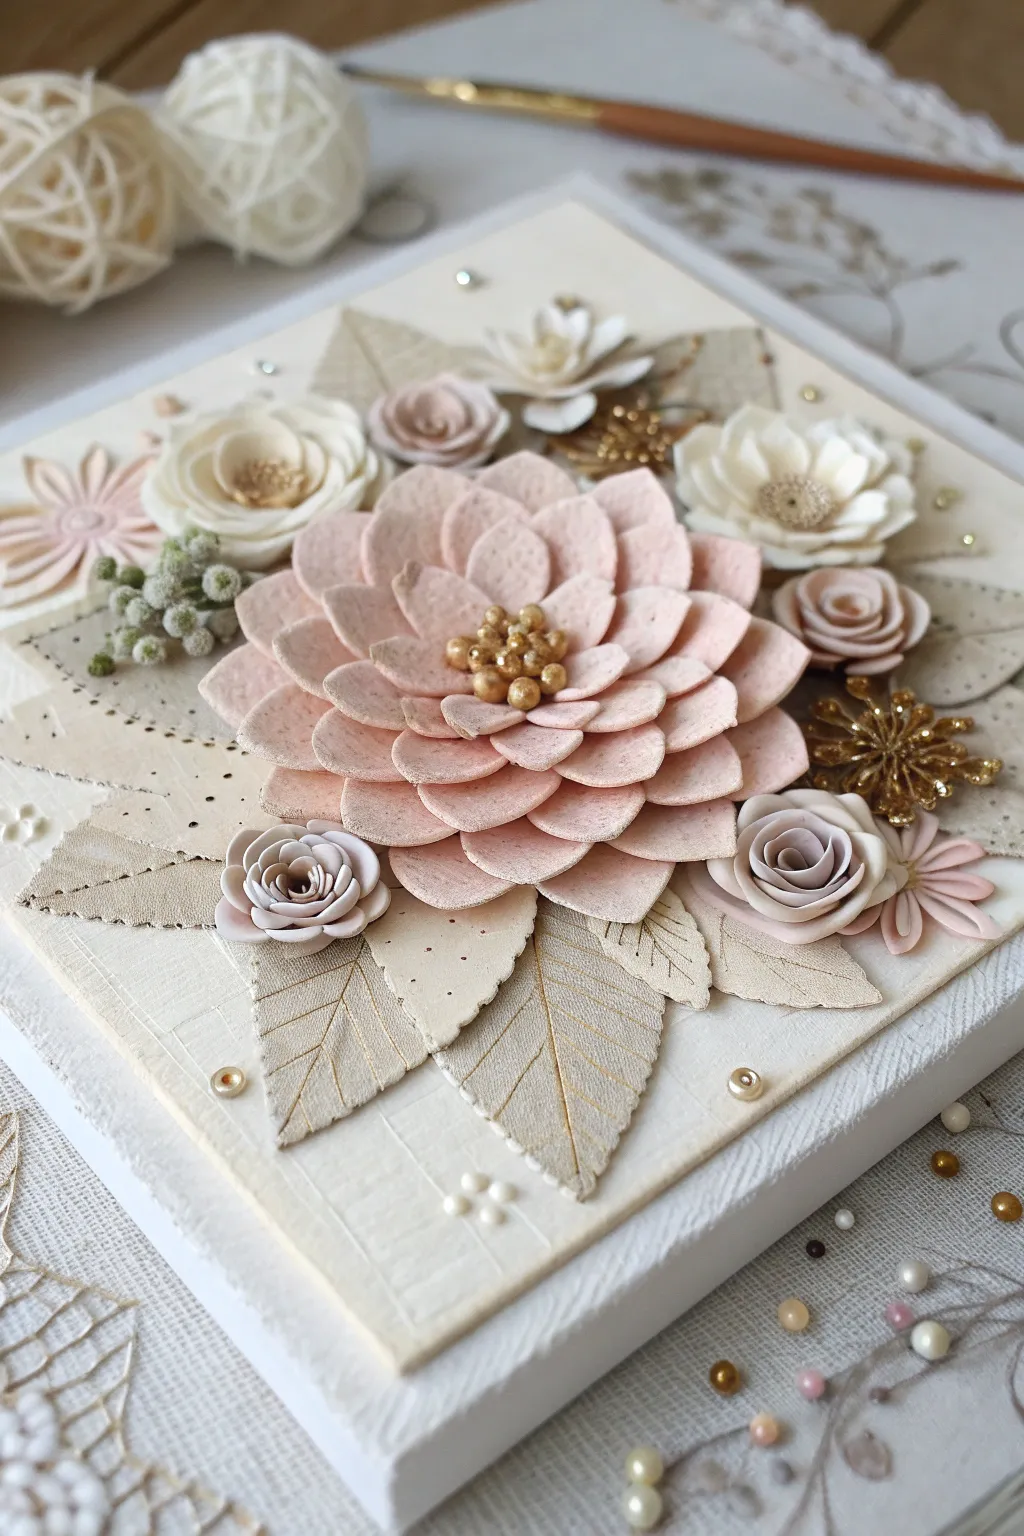
This elegant mixed media piece centers on a stunning dimensional floral cluster, combining soft blush pinks and creams for a romantic, vintage feel. The interplay of textured leaves, fabric flowers, and delicate beadwork creates a sophisticated focal point perfect for gift-giving or home decor.
Detailed Instructions
Materials
- Small deep-edge canvas (approx. 6×6 or 8×8 inches)
- Textured cream cardstock or heavy watercolor paper
- Light pink and cream felts or thick cardstock for flowers
- Pre-made flat paper flowers (roses, daisies)
- Leaf dies or templates
- Gold metallic paint or gilding wax
- Gold and pearl beads (various sizes)
- Artificial berry sprigs (frosted green)
- Fine-tip glue gun and hot glue sticks
- Tacky glue or heavy gel medium
- Scissors and tweezers
- Gold sequins or rhinestone embellishments
Step 1: Preparing the Foundation
-
Base Layer:
Cut a piece of textured cream cardstock slightly smaller than your canvas face to leave a clean white border. Adhere it firmly to the canvas using gel medium or tacky glue, smoothing out any air bubbles. -
Adding Texture:
For extra dimension, you can lightly emboss the background paper or distress the edges before gluing. I like to add a few subtle splatters of watered-down gold paint directly onto this background layer for a shimmer effect. -
Leaf Preparation:
Cut several leaf shapes from beige or light taupe textured cardstock. Using a scoring tool or the back of a craft knife, score vein lines down the center and sides of each leaf to mimic real foliage. -
Gilded Edges:
Lightly brush the edges and the raised vein lines of your paper leaves with gold metallic paint or gilding wax. This highlights the texture and separates the leaves from the background.
Use Tweezers for Precision
When placing tiny beads in the flower center, use fine-point tweezers. It keeps your fingers clean and allows for perfect, tight placement of the cluster.
Step 2: Constructing the Central Bloom
-
Petal Cutting:
For the main focal flower, cut three sizes of teardrop-shaped petals from stiff light pink felt or thick textured paper. You will need about 8-10 petals for each layer. -
Shaping Petals:
If using paper, gently curl the edges of each petal inward using a pencil or shaping tool. If using felt, pinch the base of each petal and secure with a tiny drop of glue to create a cupped shape. -
Flower Assembly:
Cut a small circle base from cardstock. Glue the largest petals around the outer edge, overlapping them slightly. Continue with the medium petals in an inner ring, and finally the smallest petals in the center. -
Golden Center:
Apply a generous dollop of hot glue to the very center of your main flower. While the glue is hot, carefully place a cluster of gold beads, pressing them in with tweezers to ensure they set securely.
Step 3: Arranging the Assemblage
-
Layout Planning:
Before gluing anything down, dry-fit your elements. Place the large pink flower in the center, slightly offset. Tuck the gold-edged leaves underneath the flower to frame it. -
Securing the Base Layer:
Once satisfied with the arrangement, hot glue the leaves down first. Glue them only at the base of the stems, allowing the tips to lift slightly off the canvas for 3D volume. -
Mounting the Focal Flower:
Adhere the large central flower on top of the leaves. Press down firmly in the center to bond it well with the layers beneath. -
Adding Supporting Blooms:
Arrange the smaller pre-made roses and daisies around the main flower. Tuck a white rose near the top right and a few smaller taupe roses at the bottom. Vary their angles so they don’t look too uniform.
Add Scented Oil
For a multi-sensory experience, place a drop of essential oil on the felt or paper petals. Rose or peony scents will complement the visual theme perfectly.
Step 4: Final Embellishments
-
Sprigs and Texture:
Cut small pieces of the frosted green berry sprigs. tuck these into the gaps between flowers, particularly on the left side, to add a contrasting texture and color. -
Metallic Accents:
Glue a gold snowflake or starburst embellishment on the right side, partially tucked under the petal layers, to introduce a metallic spark. -
Scattered Pearls:
Using tweezers and tiny dots of tacky glue, scatter pearl and gold seed beads across the background and on the leaves. Group them in threes or arrange them in lines to guide the eye. -
Finishing Touches:
Inspect the canvas from all angles. Remove any hot glue strings with tweezers or a blast from a heat tool (be careful with plastic beads) to ensure a polished look.
Display your dimensional floral canvas on a small easel or hang it as part of a gallery wall to soften the room’s aesthetic
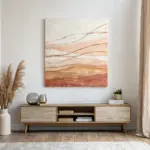
Metallic Accents Over Matte Layers
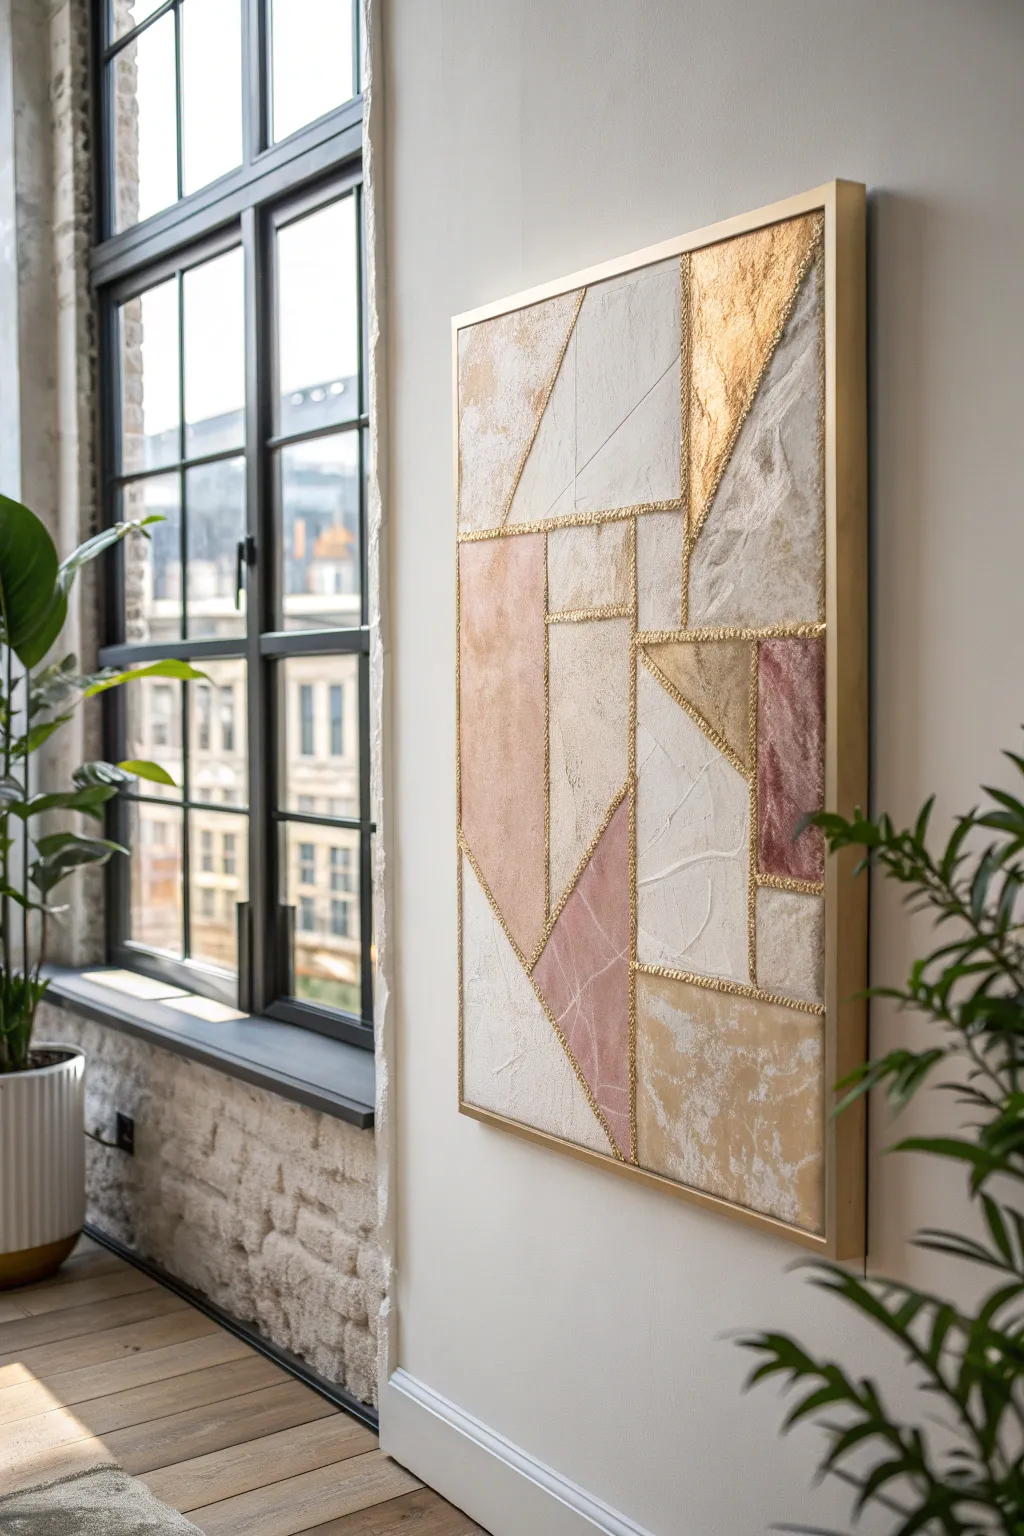
This sophisticated mixed media piece combines rough architectural textures with the delicate shine of gold leaf to create a stunning geometric statement. By layering matte plaster finishes against shimmering metallic accents, you’ll build a canvas that changes beautifully with the natural light of your room.
Detailed Instructions
Materials
- Large rectangular canvas (24×36 or similar)
- Modeling paste or thick gesso
- Tissue paper or textured handmade paper
- Acrylic paints (Soft Pink, Beige, Cream, White)
- Gold leaf sheets
- Gold leaf adhesive (sizing)
- Gold metallic paint or gilding wax
- Gold floating frame (or wood strips to build one)
- Palette knives (various sizes)
- Masking tape or painter’s tape (various widths)
- Piping bag or fine-tip squeeze bottle
- Matte gel medium
- Sealer (gloss or satin)
Step 1: Base Preparation
-
Map the Design:
Begin by sketching your geometric layout lightly with a pencil directly onto the canvas. Focus on intersecting large triangles and rectangles, ensuring a balanced composition like the reference image. -
Create Texture Zones:
Select specific shapes to receive extra texture. For the rougher areas, crumple tissue paper, apply a layer of matte gel medium to the canvas, and press the paper down, creating deliberate wrinkles and folds. -
Apply Modeling Paste:
For the smoother, stone-like sections, use a palette knife to spread a layer of modeling paste. Keep it relatively flat but allow some natural trowel marks to remain for organic interest. -
Let it Cure:
Allow the entire canvas to dry completely. This is crucial; if the paste is wet, the next steps will muddy the texture. This usually takes 12-24 hours depending on thickness.
Clean Lines Pro-Tip
Use painter’s tape to mask off adjacent shapes when painting different colors. This keeps your geometric edges crisp, even if the texture is rough.
Step 2: Defining the Grid
-
Pipe the Relief Lines:
Fill a piping bag or squeeze bottle with thick modeling paste. Trace over your original pencil lines to create raised borders between the geometric shapes. -
Texture the Lines:
While the piped lines are still wet, gently tap them with a rough brush or sponge. This knocks down the artificial ‘perfect’ look and gives them a crumbly, stone-like texture. -
Dry the Grid:
Wait for these raised borders to harden completely before painting.
Step 3: Color Blocking
-
Mix Your Palette:
Prepare your acrylics. You want soft, earthy tones: a dusty rose, a warm sandstone beige, and a bright cream white. Dilute them slightly with water to create a wash effect. -
Paint the Pink Sections:
Identify the triangular sections meant for the pink tones. Apply the paint as a wash, letting it settle into the crevices of the crinkled paper texture. -
Fill the Beiges:
Paint the adjacent shapes with your beige and sandstone mixes. I find that scelling dry-brush techniques over the modeling paste highlights the texture beautifully. -
Brighten with White:
Use the cream or white paint for the remaining largest shapes, keeping them bright to contrast with the colored zones.
Fixing Loose Gold
If the gold leaf flakes off too much, your adhesive wasn’t tacky enough. Reapply a tiny dot of size, wait 15 minutes, and press a flake back on.
Step 4: Gilding & Finishing
-
Apply Gold Size:
Brush a thin layer of gold leaf adhesive onto specific focal triangles (usually one large one near the top) and carefully along the tops of all your raised grid lines. -
Wait for Tacky Stage:
Let the adhesive sit until it becomes clear and tacky. Do not rush this, or the gold leaf will slide right off. -
Apply Gold Leaf:
Gently press gold leaf sheets onto the tacky areas. Use a soft, dry brush to tamper it down, ensuring it adheres to the textured high points. -
Burnish the Grid:
For the raised borders, you can rub a gold gilding wax over the gold leaf to deepen the metallic luster and catch the light even more. -
Seal the Work:
Apply a spray sealer over the artwork to protect the gold leaf from tarnishing and lock in the acrylics. -
Frame It:
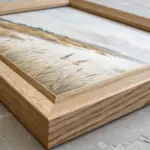
Place the finished canvas into a gold floating frame to echo the metallic details and give the piece a professional gallery finish.
Hang your masterpiece near a window, and enjoy how the gold accents shift and sparkle throughout the day.

PENCIL GUIDE
Understanding Pencil Grades from H to B
From first sketch to finished drawing — learn pencil grades, line control, and shading techniques.
Explore the Full Guide
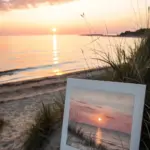
Tiny Found Objects Shadow-Box Canvas
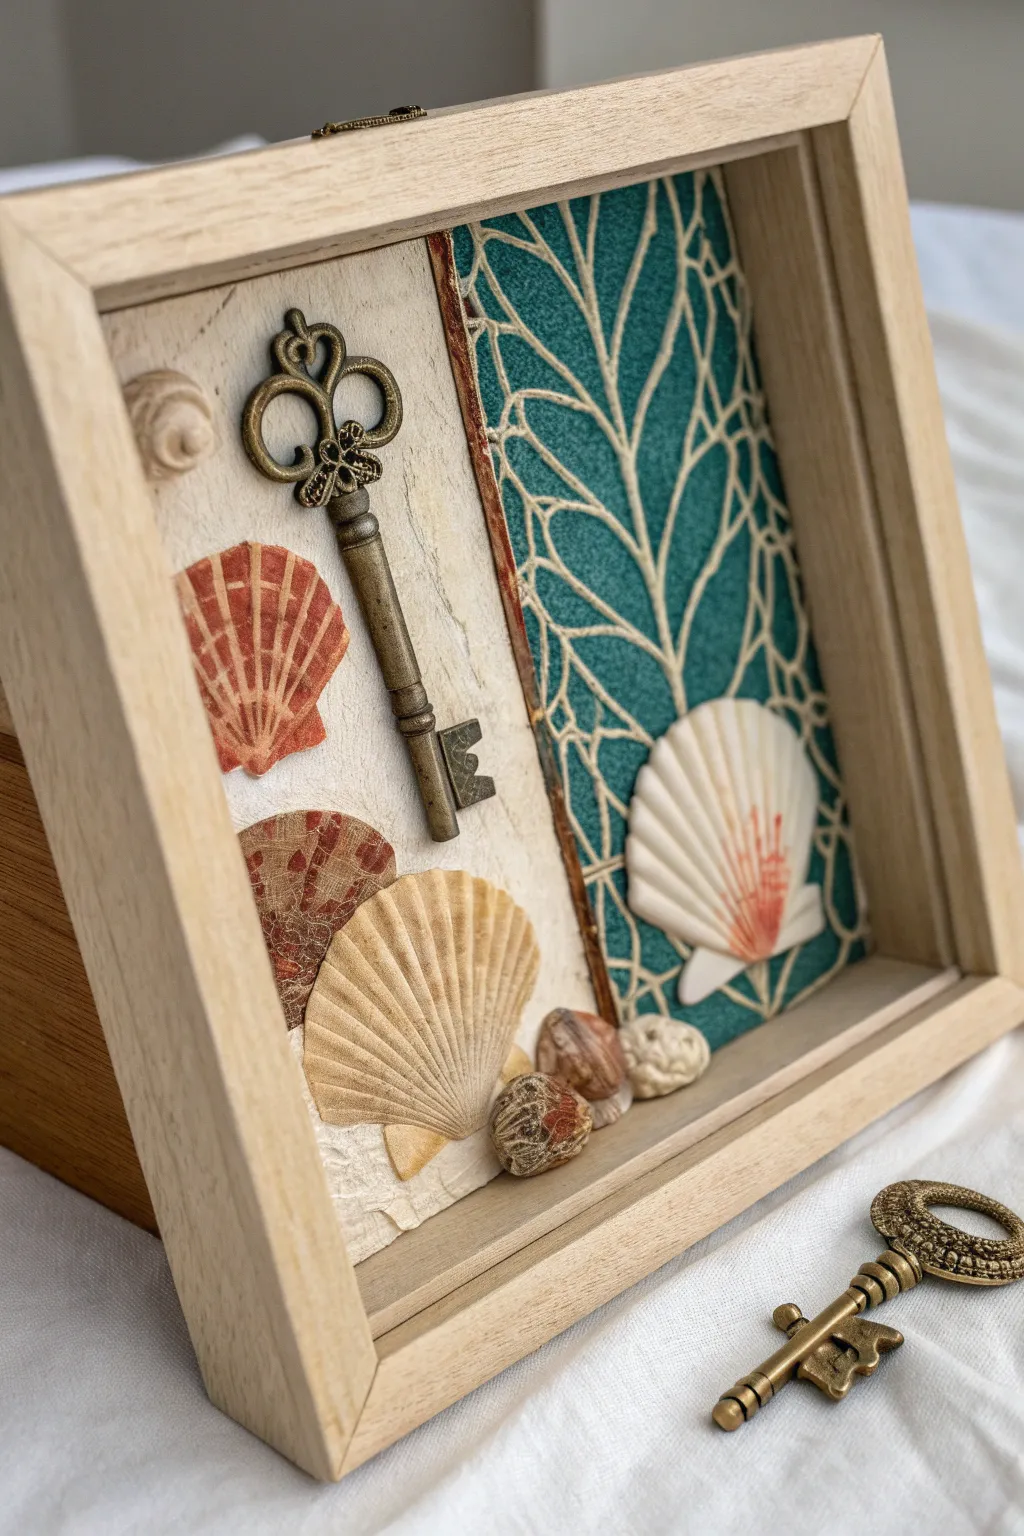
Capture the romance of the coast with this elegant shadow box that combines texture, vintage charm, and natural elements. The juxtaposition of the rough, creamy paper against the smooth teal pattern creates a sophisticated backdrop for your deep-sea treasures.
How-To Guide
Materials
- Deep wooden shadow box frame (unfinished or light wood, approx. 8×10)
- Thick, handmade textured paper (cream or off-white)
- Patterned teal scrapbook paper or fabric (web or coral motif)
- Vintage skeleton key (brass or bronze finish)
- Assorted seashells (scallop shells, small conch shells)
- Reddish-brown decorative paper (for faux shells)
- Decoupage medium (like Mod Podge)
- Strong craft adhesive (E6000 or heavy gel medium)
- Scissors and precision craft knife
- Small paintbrush
- Ruler and pencil
- Cardstock or thin cardboard for backing
Step 1: Preparing the Background
-
Measure the Backing:
Remove the back panel from your shadow box frame. If the panel is flimsy, cut a piece of sturdy cardstock or heavy cardboard to the exact dimensions of the frame’s interior to serve as your base. -
Divide the Space:
Decide on your composition. For this look, we want a vertical split—about two-thirds for the left section and one-third for the right. Lightly mark this vertical line on your backing board with a pencil. -
Tear the Textured Paper:
Take your thick, handmade cream paper. Instead of cutting it with scissors, tear the right edge vertically. This creates a soft, organic deckled edge that adds character. Ensure the piece is wide enough to cover the left two-thirds of your backing. -
Cut the Patterned Layer:
Cut your teal patterned paper (or fabric) to fit the right side of the backing board. Make it slightly wider than the pencil mark so the cream paper can overlap it comfortably without showing gaps. -
Adhere Background Layers:
Apply a thin, even layer of decoupage medium to the right side of the backing board and press the teal paper down, smoothing out bubbles. Then, apply adhesive to the left side and place the torn cream paper on top, letting the torn edge overlap the teal section.
Aged Perfection
To render the paper shells more realistic, lightly distress the edges with a brown ink pad or a diluted wash of coffee before sealing them.
Step 2: Creating the Focal Points
-
Prepare Paper Shells:
If you don’t have flat, reddish scallop shells, you can create faux ones using decoupage. Cut scallop shell shapes from your reddish-brown decorative paper. -
Mount Paper Shells:
Adhere these paper shapes flat onto the cream section of your background. Position them where they will sit behind or near the key. Apply a top coat of decoupage medium to seal them and give them a slight sheen. -
Position the Key:
Take your vintage brass skeleton key and test its placement vertically on the cream section. It should look centered within that cream panel, resting partly over the paper shells for a layered effect. -
Glue the Key:
Using a strong craft adhesive or heavy gel medium, apply a generous amount to the back of the key. Press it firmly onto the paper. I like to let this dry briefly while holding it in place to ensure it doesn’t slide.
Heavy Items Sliding?
If the key or large shell slides down while drying, use a small piece of painter’s tape to hold it in position until the glue sets firmly.
Step 3: Adding Dimension
-
Select Natural Shells:
Choose a medium-sized white scallop shell and a few smaller polished stones or spiral shells for the bottom cluster. Clean them gently if they are fresh from the beach. -
Mount the White Shell:
Apply strong adhesive to the edges or high points on the back of the white scallop shell. Place it on the right side, overlapping the boundary between the teal and cream papers. This helps visually bridge the two textures. -
Create the Bottom Cluster:
Arrange a small fan shell and two or three small stones/spiral shells at the very bottom center of the cream section. This grounds the composition. -
Apply Adhesive to Cluster:
One by one, glue these bottom elements down. Use enough glue to fill the gaps between the uneven shell surfaces and the paper backing. -
Final Assembly:
Allow all glue to cure completely (usually 24 hours for heavy objects) before placing the artwork back into the shadow box frame. Secure the back panel.
Hang your finished shadow box in a sunlit spot where the shadows can play across the textures throughout the day

Have a question or want to share your own experience? I'd love to hear from you in the comments below!