If you’re staring at a blank page trying to make your Social Studies cover look cute and smart, I’ve got you. These social studies drawing ideas are perfect for title pages, project files, and notebooks—easy to customize and fun to draw.
Bold Social Studies Title Lettering

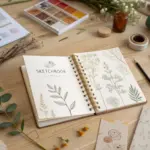
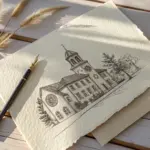
Transform a plain notebook into a dedicated study space with this clean, minimalist cover design. Using bold serif lettering framed by a simple sun and vine motif, this layout creates an organized and inviting aesthetic perfect for any social studies course.
Step-by-Step Guide
Materials
- White spiral-bound notebook (or sketchbook)
- Pencil (HB or 2B)
- Eraser
- Fine-point black fineliner pen (0.5mm)
- Medium-point black marker or brush pen
- Ruler
Step 1: Planning the Layout
-
Find the center:
Begin by lightly measuring the width of your notebook cover to find the vertical center line. Make a very faint mark with your pencil to guide your text placement. -
Mark text boundaries:
Decide how large you want your title to be. Use your ruler to draw two parallel horizontal guidelines where the top word ‘SOCIAL’ will sit, and another set below it for ‘STUDIES’. -
Draft the letters:
Using your pencil, lightly sketch out the words ‘SOCIAL STUDIES’ in capital letters. Aim for a classic serif font style, where the letters have small feet or lines at the ends of strokes. -
Refining spacing:
Step back and look at your sketch. Ensure the letters are evenly spaced and centered on the page. Since ‘STUDIES’ is longer than ‘SOCIAL’, the bottom line should extend slightly wider than the top line. -
Thicken the strokes:
Go back over your pencil letters and double-up the vertical lines to create thickness. This creates a block-letter effect that we will ink later.
Smudge Alert
If you are left-handed, place a scrap piece of paper under your hand as you ink. This prevents your palm from dragging across wet ink and ruining the crisp white background.
Step 2: Adding Decorative Elements
-
Position the sun:
In the upper left corner, above the word ‘SOCIAL’, lightly sketch a small circle for the sun. It should sit comfortably in the negative space without crowding the text or the spiral binding. -
Add sun rays:
Draw short, straight lines radiating outward from your circle. Keep them simple and relatively short to maintain the minimalist look. -
vine placement:
Below the word ‘STUDIES’, lightly draw a gentle, curved line that dips slightly in the middle. This will be the stem for your vine decoration. -
Sketch the leaves:
Along this curved line, sketch four or five small leaf shapes. Alternate the direction they point—some up, some down—to create a rhythmic flow. -
Add leaf details:
Draw faint center veins inside each leaf shape to give them a bit of dimension.
Add Subtle Color
While black and white is classic, use a pale highlighter or colored pencil to fill just the leaves or the sun to color-code your notebook by subject.
Step 3: Inking and Finalizing
-
Outline the text:
Switch to your fine-point black fineliner. Carefully trace the outer edges of your ‘SOCIAL STUDIES’ letters. I find it helps to rotate the notebook slightly to get the best angle for vertical lines. -
Fill the letters:
Using the medium-point marker, color in the thick parts of the letters you just outlined. Keep within the lines to ensure sharp, crisp edges. -
Ink the sun:
Use the fine-point pen to trace the sun circle and its rays. Keep your hand steady but don’t worry if the circle isn’t geometrically perfect; a hand-drawn look adds character. -
Ink the vine:
Trace the leaves with the fine-point pen. Instead of a solid line for the vine stem, use small dots between the leaves to connect them, matching the style in the photo. -
Add leaf texture:
Draw the center vein in the leaves and add small diagonal lines for texture, but don’t fill them in completely black like the text. -
Erase guidelines:
Wait at least 5-10 minutes for the ink to dry completely to prevent smudging. Then, gently erase all your pencil guidelines and sketch marks. -
Final touches:
Inspect your letters for any uneven spots in the black fill and patch them up with your marker if needed.
Now you have a professional-looking notebook cover that makes studying feel a little more organized


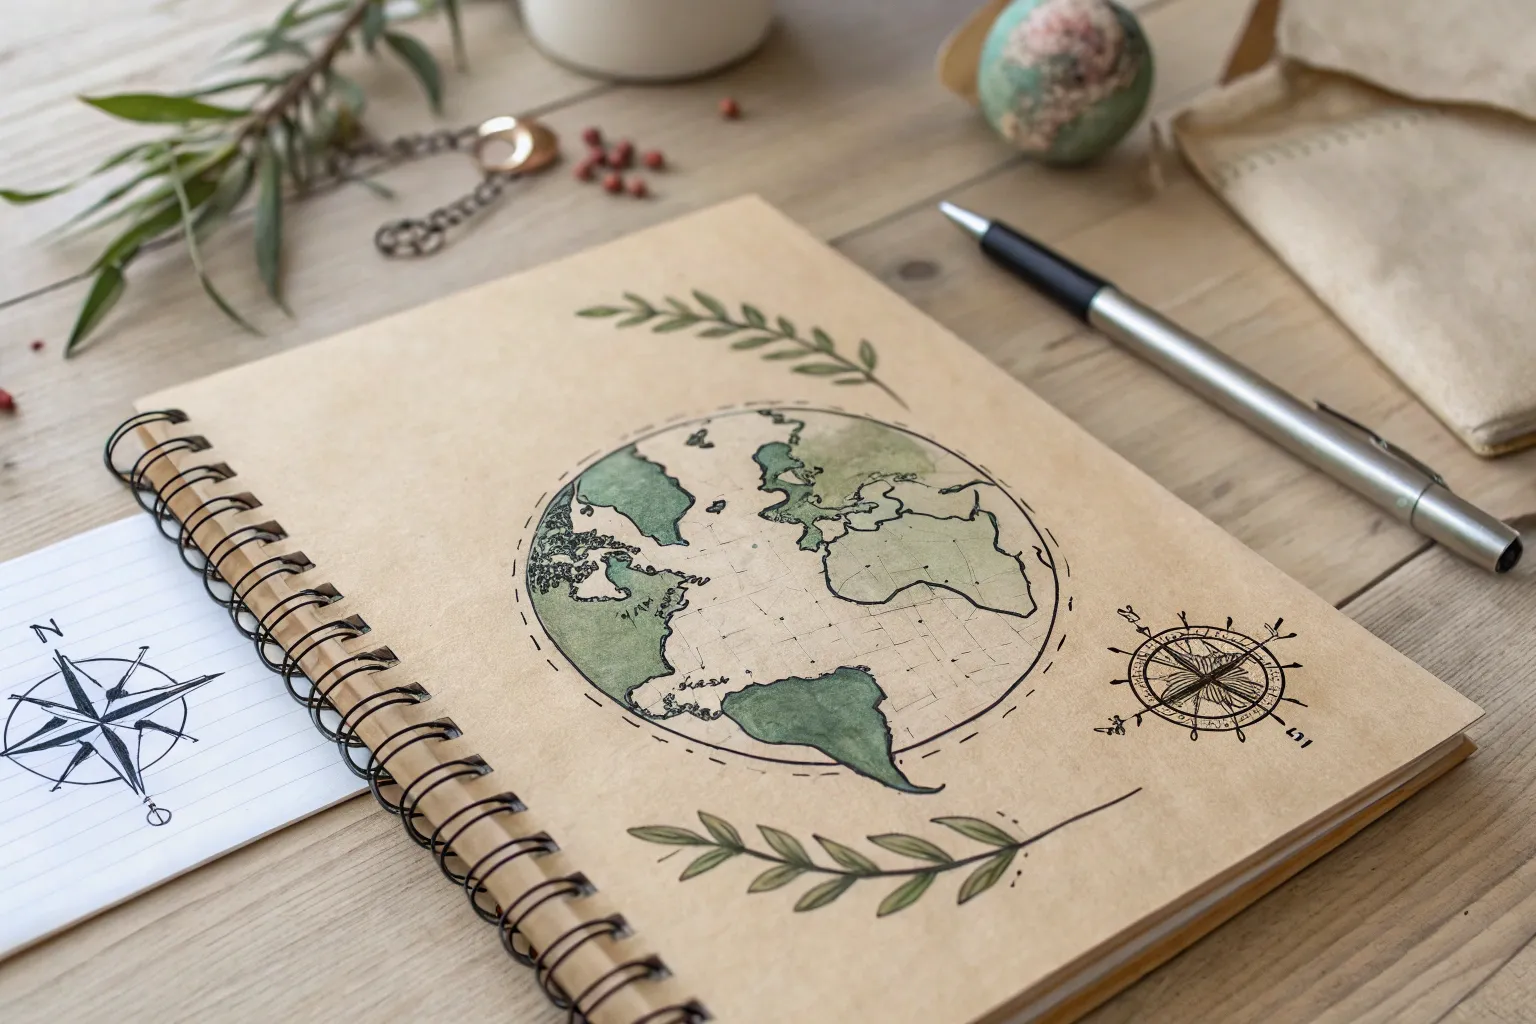
Globe Centerpiece Cover Page
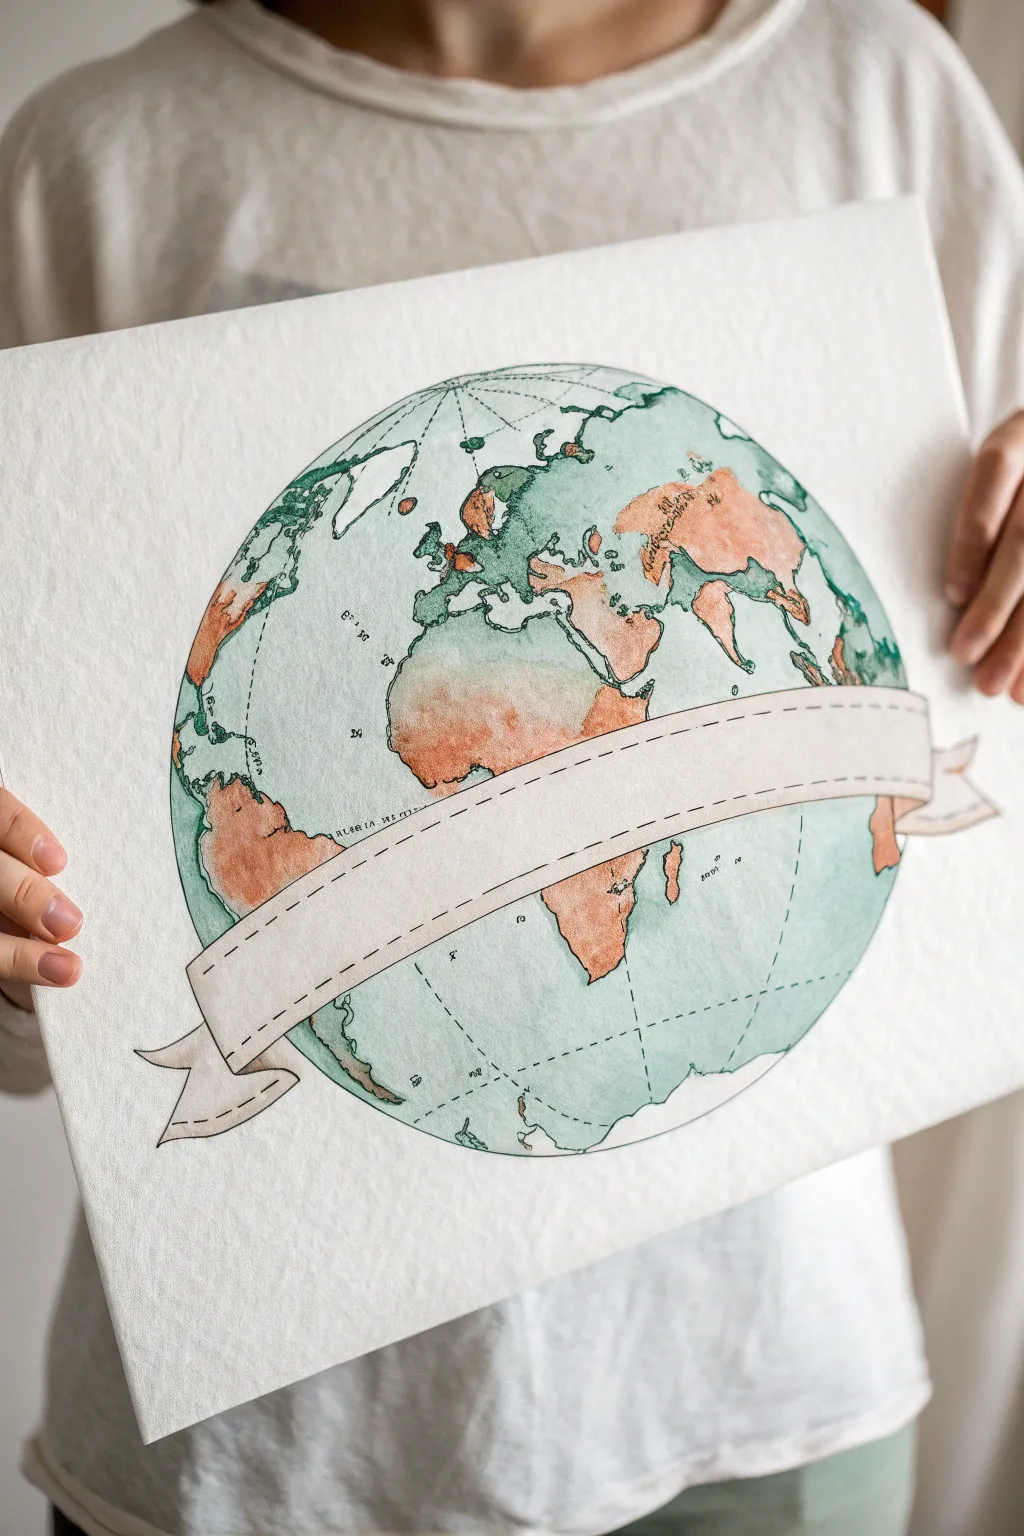
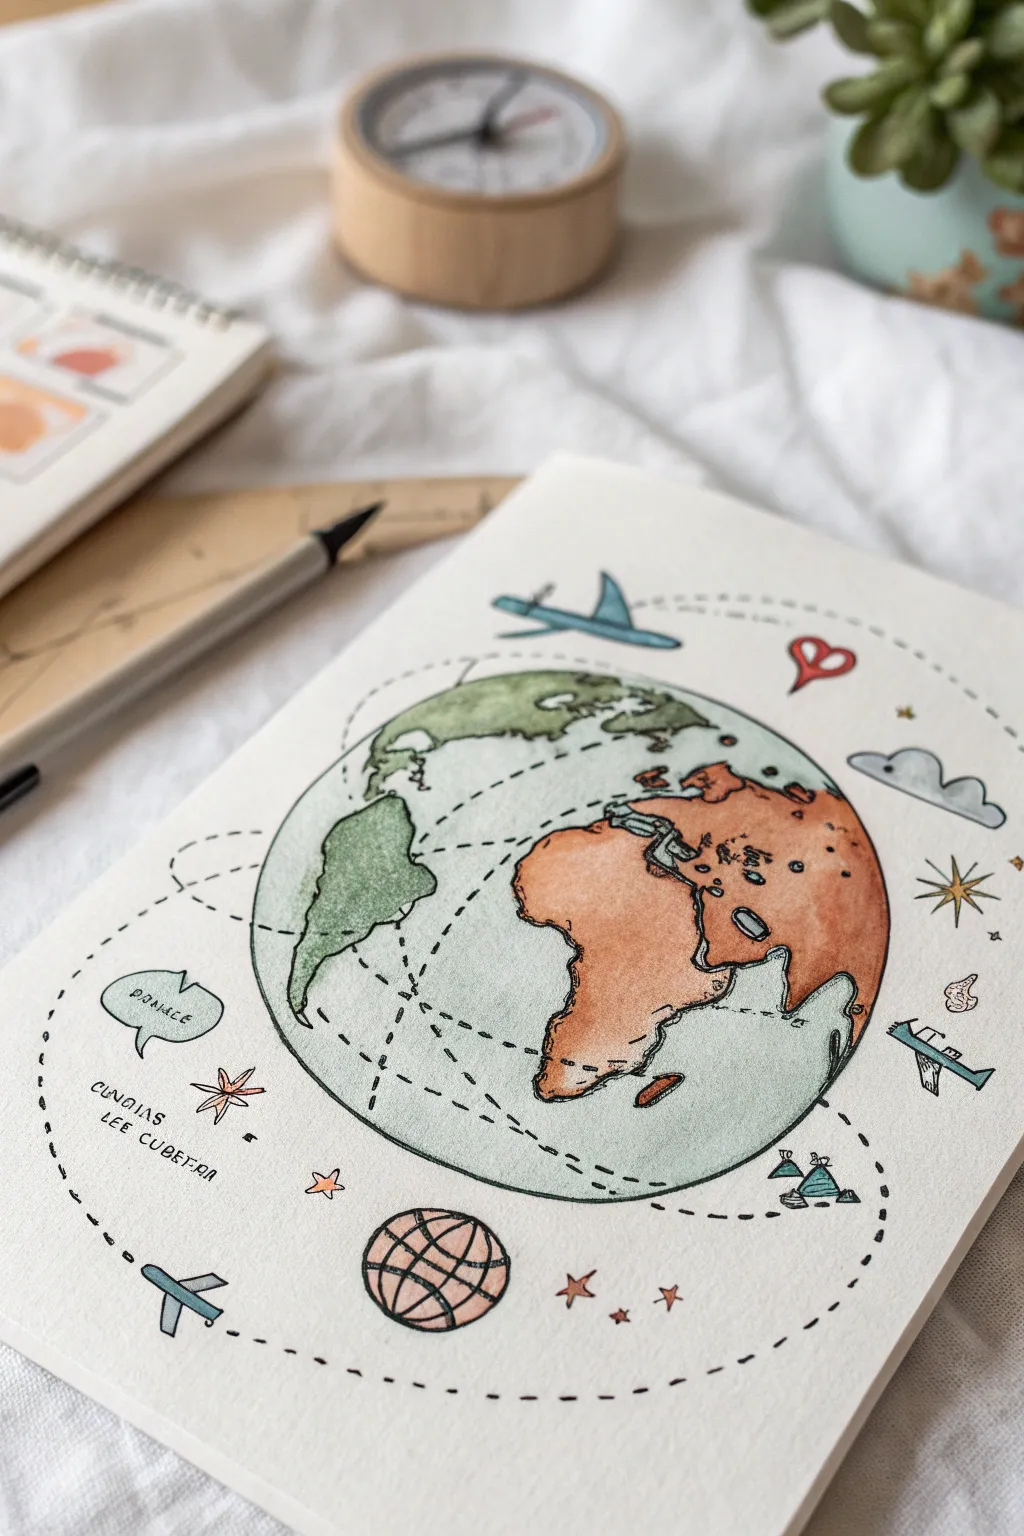
Create a classic, explorer-style cover page with this watercolor globe illustration featuring a customizable banner. The muted color palette of sage greens and terracotta gives it a timeless, scholarly feel perfect for any social studies project.
Detailed Instructions
Materials
- Heavyweight cold-press watercolor paper or canvas sheet (A3 or similar size)
- Pencil (HB or 2H)
- Compass or large circular object for tracing
- Waterproof fine liner pen (black or dark sepia, 0.3mm)
- Watercolor paints (Sage Green, Burnt Sienna/Terracotta, Payne’s Grey, Teal)
- Soft round watercolor brushes (sizes 4 and 8)
- Ruler
- Eraser
- Water cup and paper towels
Step 1: Drafting the Outline
-
Establish the circle:
Begin by finding the center of your paper. Use a compass or trace a large round object (like a dinner plate or mixing bowl) to draw a light pencil circle that fills most of the page. Leave at least an inch of margin on all sides. -
Sketch the banner:
Draw a gently curving banner that sweeps across the lower third of the globe. Start with two parallel curved lines about 1.5 inches apart. Add the folded ‘ribbon’ ends on either side—the left side dipping down and the right side flipping up slightly. -
Map out the continents:
Lightly sketch the continents inside the circle. Don’t worry about perfect geographical accuracy; aim for recognizable shapes. Focus on Africa and Europe in the center, with South America on the left and parts of Asia on the right. Remember to interrupt your drawing where the banner crosses over the map. -
Add longitude and latitude:
Using a ruler for straight lines and freehanding curves, lightly sketch grid lines. Draw a central vertical meridian and curved longitudinal lines radiating from the poles. Add horizontal latitude lines that curve slightly to emphasize the sphere’s roundness.
Aged Paper Hack
Want an antique look? Before painting, lightly brush the whole paper with diluted tea or coffee and let it dry. This warms up the background instantly.
Step 2: Inking the Design
-
Trace the banner first:
Take your waterproof fine liner and ink the banner outlines first. This ensures you won’t accidentally draw map details through the banner area. Add dashed lines inside the banner borders to mimic stitching. -
Outline the continents:
Ink the coastlines with a somewhat shaky, organic hand. Avoid perfectly smooth lines; a little jaggedness makes the coastlines look more realistic. -
Complete the circle and grid:
Ink the main outer circle of the globe. Then, trace your grid lines, but use a broken or dashed line style for these to keep them subtle and distinct from the coastlines. -
Clear pencil marks:
Wait at least 5-10 minutes for the ink to dry completely to prevent smudging. Gently erase all visible pencil sketches to reveal a clean line drawing.
Bleeding Lines?
If your ink runs when painting, your pen isn’t waterproof. Switch to a Micron or Pigma pen, or paint first and do the line work last after it dries.
Step 3: Watercolor Application
-
Mix your ocean color:
Prepare a watery wash of sage green mixed with a tiny drop of teal. You want this to be very pale and transparent. I like to test the transparency on a scrap piece of paper first. -
Paint the oceans:
Apply the ocean wash over all the water areas. Keep the edges wet to avoid hard lines forming where you don’t want them. Leave the banner and continents completely dry for now. -
Mix the land color:
While the ocean dries, mix a terracotta shade using Burnt Sienna with a touch of orange or brown. Dilute it so it isn’t opaque; you want the texture of the paper to show through. -
Paint the landmasses:
Fill in the continents with your terracotta wash. For visual interest, drop a slightly more concentrated pigment into the silhouette of the land while it’s still damp, creating natural variations in tone. -
Shadow the banner:
Mix a very diluted grey or brown. Paint a thin shadow line along the bottom edge of the banner where it ‘hovers’ over the globe to give it dimension. You can also lightly shade the folded parts of the ribbon graphic.
Step 4: Finishing Details
-
Enhance text labels:
Once the paint is bone dry, you can use your fine liner to add tiny, scribbled text labels on the continents or oceans for a cartographic look. These don’t need to be legible—just squiggles that suggest place names. -
Final touches:
Check for any areas that need more definition. You might want to darken the coastline in a few spots to make the land pop against the water.
Now you have a stunning, professional-looking cover page ready for your project title


History Timeline With Icons
Transform a standard history lesson into a work of art with this elegant, parchment-style timeline. Using simple line icons and a clean vertical layout, you’ll create a visually striking summary of historical events that looks ancient yet modern.
Step-by-Step
Materials
- Heavyweight cream or off-white drawing paper (textured paper works best)
- Black fine-liner pens (sizes 0.1, 0.3, and 0.5)
- Ruler
- Pencil (HB or 2H for sketching)
- Eraser (kneaded eraser preferred)
- Tea bag and warm water (optional for aging effect)
- Sponge or wide brush (optional)
Step 1: Paper Preparation
-
Format the Paper:
Cut your paper into a long, vertical strip. A width of about 5-6 inches works well for a single-column timeline like this. -
Optional Aging:
If you want the parchment look shown in the photo but have bright white paper, lightly stain it with brewed strong tea using a sponge. Let it dry completely under a heavy book to keep it flat. -
Establish the Axis:
Using your ruler and a light pencil, draw a faint vertical line down the center of the paper, leaving about an inch of margin at the top and bottom.
Step 2: Drafting the Layout
-
Mark Key Dates:
Decide on which 5-6 historical events you want to feature. Mark their positions along the central line with small dots, spacing them out unevenly to represent the passage of time accurately suitable for your chosen era. -
Sketch the Icons:
To the left of each dot, lightly sketch a symbol representing that event. Keep shapes geometric and simple—think triangles for boats, rectangles for buildings, and columns for temples. -
Sketch the Text:
To the right of each dot, lightly pencil in the corresponding year and a very brief label or title. Align the text horizontally with the center of your icon.
Ink Smearing?
If your ink smudges when erasing, you likely didn’t wait long enough. If you’re impatient, place a scrap piece of paper over the art and press straight down to blot excess ink before erasing.
Step 3: Inking the Timeline
-
Draw the Timeline Axis:
Switch to a 0.5mm pen. Instead of a solid line, ink the central axis using a dashed line pattern. Make the dashes consistent in length. -
Add Focus Points:
At every mark where an event occurs, draw a solid black circle on the dashed line. This anchors the eye to the specific date. -
Outline the Architecture:
Use a 0.3mm pen for the main outlines of your icons. I find it helpful to start with the base of the buildings and clear structural lines before adding details. -
Refine Icon Details:
Switch to a 0.1mm pen to add subtle details within the icons, like the rigging on the sailboat, windows on the tower, or columns on the temple. Keep these lines delicate. -
Ink the Dates:
carefully trace your penciled dates using the 0.3mm or 0.5mm pen creates a bold contrast. A typewriter-style serif font adds a nice historical touch. -
Add Decorative Elements:
If you have empty space at the very bottom, sketch a small floral motif or corner design to balance the composition.
Pro Tip: Perspective
Keep all your icons in a ‘flat’ 2D perspective or a very slight isometric view. Mixing 3D drawings with flat symbols will make the timeline look cluttered and inconsistent.
Step 4: Finishing Touches
-
Erase Guidelines:
Wait at least 10-15 minutes for the ink to fully cure. Gently erase all pencil marks, being careful not to buckle the paper. -
Create Rough Edges:
For that authentic artifact feel, you can carefully tear the very edges of the paper strip by hand or run the side of a scissor blade along the edge to distress it. -
Final Inspection:
Check for any gaps in your black circles or faint lines that need strengthening. A second pass on the central dots can make them pop.
Now you have a beautifully illustrated record of time ready to be displayed


Split History and Geography Theme

Capture the essence of social studies with this clean, minimalist icon set that bridges the gap between history and geography. Using simple black lines on grid paper, you’ll create a cohesive collection of symbols ranging from hourglasses to globes that look perfect in any bullet journal or study guide.
Step-by-Step Guide
Materials
- Spiral-bound grid notebook (A5 or similar size)
- Fine liner pen (black, 0.3mm or 0.5mm)
- Pencil (HB or 2B)
- Soft eraser
- Ruler (clear plastic is best for grid paper)
Step 1: Preparation & Layout
-
Grid selection:
Open your notebook to a fresh page. The grid is your best friend here; identify a roughly 3×3 or 4×4 square area for each icon to keep them uniform in size. -
Sketching the layout:
Lightly mark the center points for six distinct icons using your pencil. Space them out evenly—two columns and three rows works beautifully to fill the page without crowding.
Step 2: Drawing the History Icons
-
The classic hourglass:
Start near the top right. Draw a horizontal oval for the top and a matching one for the bottom. Connect them with two straight vertical lines that taper inward to form the ‘neck’ of the hourglass. -
Adding hourglass details:
Add thickness to the top and bottom plates by drawing parallel lines. Sketch a small triangle of sand in the bottom bulb and a few falling grains in the center neck. -
The ornate clock tower:
For the bottom right icon, draw a tall rectangle base. Add a decorative top piece resembling a mantel clock with small columns. This one is a bit more complex, so take your time with the vertical lines. -
Adding the clock face:
Inside the structure, sketch an hourglass shape again, but this time stylize it with small wings on the sides to represent ‘time flying.’
Wobbly circles?
If freehanding the circular globe is tough, trace a small coin or a bottle cap. Even a slightly imperfect circle looks intentional if the latitude lines are confident.
Step 3: Drawing the Geography Icons
-
The expedition flag:
In the top left spot, draw a vertical pole. Add a waving rectangular flag shape attached to the right side. It doesn’t need to be perfectly rigid; a little curve adds movement. -
Flag symbol:
Inside the flag contour, draw a small circle. Add grid lines across it—one vertical, one horizontal—to mimic a globe or coordinate system. -
The compass rose:
In the middle left, draw a small central circle. Extend four straight lines outward (North, South, East, West). Add arrowheads to the ends of these lines. -
Simple tent:
Below the flag, sketch a triangle. Draw a line down the center to show the opening, and add cross-hatching or diagonal lines on one side to suggest texture or shadow. -
The large globe:
At the bottom center, use a compass or steady hand to draw a large circle. Draw two curved horizontal lines for latitude and two curved vertical lines for longitude to give it a 3D spherical look.
Grid guidelines
Use the grid lines to ensure symmetry! Count the squares (e.g., 2 squares wide for the hourglass top) so the left and right sides match perfectly without measuring.
Step 4: The Innovation Icon
-
Lightbulb outline:
In the middle right space beween the hourglasses, draw a classic lightbulb shape—a circle tapering down into a square base. -
Filament and glow:
Draw the screw threads on the base using small horizontal stripes. Inside the bulb, add a tiny filament. Finally, add short, dashed lines radiating outward around the top to show it’s ‘shining.’
Step 5: Inking & Finishing
-
Tracing lines:
Take your fine liner pen and carefully trace over your pencil sketches. I like to rotate the notebook as I draw to keep my hand at a comfortable angle. -
Refining details:
Ensure corners are sharp where they need to be (like the flag) and curves are smooth (like the globe). Add a slightly thicker line weight to the outer edges of the main shapes for bold contrast. -
Drying time:
Let the ink sit for at least five full minutes. Smudging is the enemy here, so be patient before touching the page. -
Cleanup:
Gently erase all underlying pencil marks. Ensure your eraser is clean before you start so you don’t leave gray streaks on the paper.
Now you have a set of clean, intellectual doodles ready to decorate your notes
BRUSH GUIDE
The Right Brush for Every Stroke
From clean lines to bold texture — master brush choice, stroke control, and essential techniques.
Explore the Full Guide
Hot Air Balloon Over a Map

Merge the spirit of adventure with geography in this charming mixed-media illustration featuring a vintage hot air balloon drifting over watercolor continents. The soft, washed-out hues of the map provide a dreamy background for the detailed ink work, making it a perfect project for combining social studies with artistic expression.
Step-by-Step
Materials
- Cold press watercolor paper (A4 or similar size)
- Pencil (HB or similar for sketching)
- Fine liner pen (black, waterproof, 0.1mm – 0.3mm)
- Watercolor paints (shades of muted green, rust, and brown)
- Round watercolor brush (size 4 or 6)
- Small detail brush (size 0 or 1)
- Container of water and paper towels
- Eraser
Step 1: Sketching the Composition
-
Map Placement:
Begin by lightly sketching the outline of a world map on your paper. You don’t need geographical perfection here; focus on capturing the general shapes of the continents, particularly South America, Africa, and parts of Europe and Asia. Keep the pencil pressure extremely light so it disappears under the paint later. -
Balloon Outline:
Position a large oval shape centrally, slightly overlapping the continents. This will be the main body of your hot air balloon. -
Basket and Ropes:
Below the oval, sketch a small rectangular shape for the basket. Connect the basket to the balloon with several straight, converging lines representing the ropes. -
Balloon Details:
Draw curved vertical lines contouring the balloon’s shape to create the segments. Near the bottom third of the balloon, add a horizontal band where the decorative bunting will go.
Wet-on-Wet Magic
For the continents, pre-wet the paper with clean water before adding pigment. The paint will bloom and spread on its own, creating organic coastlines without you needing to draw them perfectly.
Step 2: Watercolor Washes
-
Mixing Green Tones:
Create a watery mix of sage green and a touch of gray. You want a desaturated, vintage map look rather than bright primary colors. -
Painting Continents:
Apply the green wash loosely to the landmass shapes. Allow the water to pool slightly in some areas like the edges of Africa to create natural texture. -
Adding Warmth:
While the green is still slightly damp in places, drop in hints of a warm, sandy beige or diluted ochre. I find this creates a nice ‘aged parchment’ feel to the land. -
Softening Edges:
Use a clean, damp brush to gently fade the edges of the continents into the surrounding white paper. This vignette effect removes harsh lines and keeps the focus central. -
Initial Balloon Wash:
Mix a diluted rusty red or terracotta color. Paint every other stripe on the hot air balloon, leaving alternate stripes white for now. Let this layer dry completely.
Step 3: Inking the Details
-
Main Outline:
Once the watercolor is bone dry, use your waterproof fine liner to trace the balloon’s outer shape. Do not trace the continents; leave those soft and painted only. -
Defining Segments:
Ink the vertical curved lines on the balloon. Keep your hand steady but allow for slight organic wobbles that add character. -
Drawing Bunting:
Along the horizontal band you sketched earlier, draw small triangular flags hanging down. This adds a festive, celebratory touch to the flight. -
Basket Texture:
Outline the basket and use a cross-hatching technique—drawing intense perpendicular small lines—to simulate the woven wicker texture. -
Rigging Lines:
Carefully draw the thin lines connecting the basket to the balloon collar. Quick, confident strokes work best for straight lines.
Smudged Ink?
Verify your pen is waterproof before starting. If unsure, do the ink drawing first, let it dry for at least 30 minutes, and then paint over it. Or, just paint within the lines carefully.
Step 4: Finishing Touches
-
Bunting Color:
Using a very small brush, dab tiny bits of yellow, ochre, or rust paint into the triangular flags. -
Basket Depth:
Add a wash of dark brown over the inked basket to give it weight and solidity. If the ink is truly waterproof, it won’t smudge. -
Shadows:
Paint a very faint gray shadow on the white stripes of the balloon, specifically on the side facing away from your imagined light source, to give the object volume. -
Clean Up:
Once everything is completely dry, use your eraser to gently remove any visible pencil marks, particularly around the map edges.
Now you have a whimsical piece that celebrates exploration and history
Global Connections Network Doodles
Illustrate a charming, hand-drawn globe that visualizes worldwide travel and connectivity through playful doodles and flight paths. This project combines loose watercolor washes with crisp ink linework to create a whimsical exploration of geography.
Step-by-Step Tutorial
Materials
- Heavyweight watercolor paper or mixed media sketchbook
- Pencil and eraser
- Waterproof fine liner pens (black, 0.3mm and 0.5mm)
- Watercolor paint set (focus on muted greens, earthy terracottas, and soft blues)
- Small round paintbrush (size 4 or 6)
- Circular object for tracing (like a roll of tape or a jar lid)
- Ruler (optional)
Step 1: Drafting the Globe
-
Trace the circle:
Start by placing your circular object in the center of the page. Lightly trace around it with a pencil to establish the perfect round shape for your Earth. -
Sketch the continents:
Lightly sketch the outlines of the continents. Don’t worry about perfect cartographic accuracy; aim for recognizable shapes for North/South America and Africa/Europe/Asia. Keep your pencil lines faint. -
Add travel icons:
Around the globe and sometimes overlapping it, sketch small icons like airplanes, clouds, a starburst compass, and even a smaller mini-globe at the bottom. -
Plan flight paths:
Draw sweeping curved lines that connect different continents or circle around the globe. These will become your dashed flight trails later. -
Include text bubbles:
Sketch a small speech bubble on the left side. You can pencil in placeholder text like ‘France’ or coordinates, though we will ink these later.
Muddy colors?
Ensure each section is dry before painting the next. If green land touches wet blue ocean, they will bleed. Use a hairdryer on low for speed.
Step 2: Inking the outlines
-
Outline the continents:
Using your waterproof 0.3mm fine liner, go over your pencil lines for the landmasses. Use a slightly jagged, organic line to mimic coastlines rather than a perfectly smooth stroke. -
Ink the globe’s edge:
Carefully trace the main circle. If your hand shakes a little, don’t worry—it adds to the hand-drawn sketchbook aesthetic. -
Define the doodles:
Ink your airplanes, clouds, and stars. For graphical elements like the compass rose or the heart icon, keep your lines clean and deliberate. -
Create dashed paths:
Go over your flight path lines using a dashed stroke. Vary the length of the dashes slightly to give the movement a dynamic, energetic feel. -
Erase pencil marks:
Wait until the ink is completely dry to prevent smudging, then gently erase all your initial pencil sketches to reveal a clean line drawing.
Personalize the journey
Instead of random paths, trace the actual flight route of a dream vacation or a past trip you’ve taken to make it a memory map.
Step 3: Adding Watercolor
-
Paint the ocean base:
Mix a very watery, pale blue-green. Apply a light wash over the ocean areas of the globe. I like to leave some areas white near the center to suggest a spherical highlight. -
Color the Americas:
Using a muted mossy green, paint North and South America. Let the color pool slightly in some areas for texture, but keep it transparent enough to see the texture of the paper. -
Paint the Eastern Hemisphere:
Mix an earthy terracotta or warm orange-brown shade. Fill in the African and European shapes. If the blue ocean paint is still wet, handle the edges carefully to avoid bleeding. -
Tint the icons:
Add small splashes of color to the surrounding doodles. Use a light blue for the airplanes and clouds, and a touch of red for the heart icon. -
Layering shadows:
Once the first continent layers are dry, add a tiny bit more pigment to the right edges of the landmasses. This subtle shading gives the continents a bit of dimension. -
Adding the mini-globe:
Paint the small decorative globe at the bottom with a simple pink or peach grid pattern to contrast with the main drawing.
Step 4: Final Details
-
Strengthen lines:
After the paint is fully dry, use a slightly thicker 0.5mm pen to re-trace just the outer edge of the main globe or the shadow side of the continents to make them pop. -
Add text labels:
Write your specific destination names or notes in the speech bubble and add tiny decorative text (like the coordinates) in the open space on the left. -
Final flourish:
Add tiny stippling dots or small ‘x’ marks in the ocean areas or near the compass to fill negative space and balance the composition.
Now you have a beautiful, artistic visualization of global connections ready to display in your sketchbook

PENCIL GUIDE
Understanding Pencil Grades from H to B
From first sketch to finished drawing — learn pencil grades, line control, and shading techniques.
Explore the Full Guide
Notebook Doodle Grid of Social Studies Icons
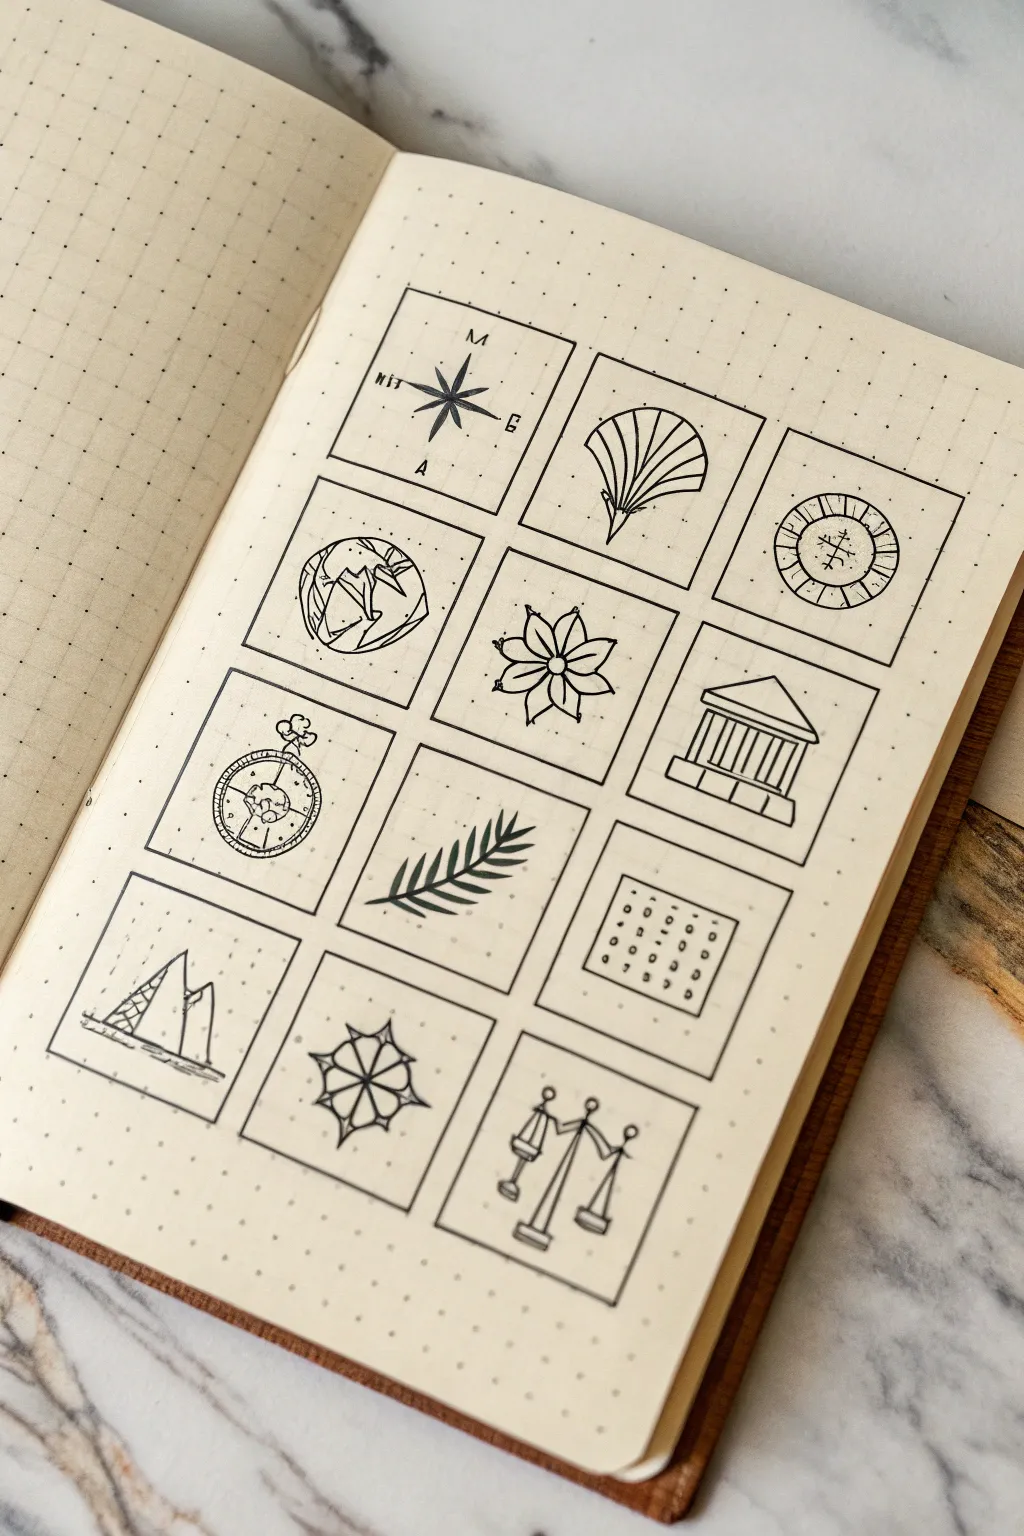
Create a stunning visual index for your social studies notes with this perfectly organized icon grid. Using a dot-grid notebook as your guide, you’ll sketch twelve miniature symbols representing everything from geography to justice in clean, crisp ink.
Step-by-Step Guide
Materials
- Dot grid notebook (A5 size recommended)
- Pencil (HB or mechanical)
- Ruler
- Fine liner pen (01 or 03 nib size)
- Eraser
Step 1: Setting the Structure
-
Define the grid:
Begin by counting your dot grid spacing. You’ll need to layout a 3×4 grid (three columns, four rows). Calculate the space so each square is roughly 8×8 or 10×10 dots, leaving a 1-2 dot gap between them for breathing room. -
Draft the frames:
Using your pencil and ruler, lightly sketch the twelve square outlines. Keep your pressure very light so these lines can be easily adjusted or erased later if needed. -
Ink the borders:
Once you are happy with the spacing, trace over your pencil squares with the fine liner. Use the ruler for stability to ensure sharp, professional-looking corners.
Smudge Prevention
When working in a grid, move your hand from left-to-right (if right-handed) to avoid dragging your palm across wet ink.
Step 2: Row 1: Navigation & Nature
-
Draw the compass rose:
In the top-left box, draw a vertical line and a horizontal line crossing in the center. Add diagonal lines between them. Connect the tips to form an eight-pointed star, shading the right half of each point dark. -
Label the directions:
Add tiny letters for North, South, East, and West around your compass star. -
Sketch the shell:
In the middle box, draw a fan shape starting from a distinct point at the bottom. Divide the fan into segments with curved lines radiating outward to represent a seashell fossil. -
Add the coin artifact:
In the top-right box, draw a circle. Inside, draw a slightly smaller circle to create a rim. Add simple hash marks on the rim and a cross-symbol in the center to mimic an ancient coin.
Level Up: Color Coding
Use a mild highlighter to color just one element in each icon (like the mountain peaks or the coin center) to unify the theme.
Step 3: Row 2: Earth & Architecture
-
Create the globe:
For the left box of the second row, draw a circle. Sketch jagged, abstract shapes inside to represent continents, and add a few curved lines specifically to suggest the globe’s spherical shape. -
Draw the flower emblem:
In the center box, start with a small circle. Draw five pointed petals radiating outward. Add a line down the center of each petal for detail. -
Build the Parthenon:
In the right box, draw a triangle roof sitting on a horizontal rectangle. Draw several vertical lines beneath it for columns, finishing with a stepped base at the bottom.
Step 4: Row 3: Tools & Time
-
Sketch the pocket watch:
In the left box of the third row, draw a circle with a smaller inner circle. Add a small loop and winding knob at the top. Sketch faint hands pointing to a time. -
Draw the olive branch:
For the center box, draw a single curved stem extending diagonally. Add small, narrow leaves in pairs along the stem, getting smaller toward the tip. -
Create the data tablet:
In the right box, draw a square/rectangle shape. Fill it with rows of tiny circles or dots to simulate a braille slate, punch card, or ancient stone tablet.
Step 5: Row 4: Symbols of Society
-
Draw the mountains:
In the bottom-left box, draw two triangles overlapping slightly. Add jagged ‘snow caps’ at the peaks and some horizontal lines at the base for ground. -
Design the wheel:
In the center bottom box, draw an eight-point star or wheel shape with a circle at the center and distinct spokes radiating to the outer edge. -
Balance the scales:
In the final bottom-right box, draw a central vertical pole with a horizontal beam across the top. Hang two triangles or bowls from each end of the beam to represent scales of justice. -
Erase and refine:
Wait at least five minutes for the ink to fully dry. Then, take your eraser and gently remove all remaining pencil guidelines to reveal your clean black-and-white icons.
Your finished grid is now ready to serve as a beautiful cover page or visual reference for your studies
Infographic Style Social Studies Cover
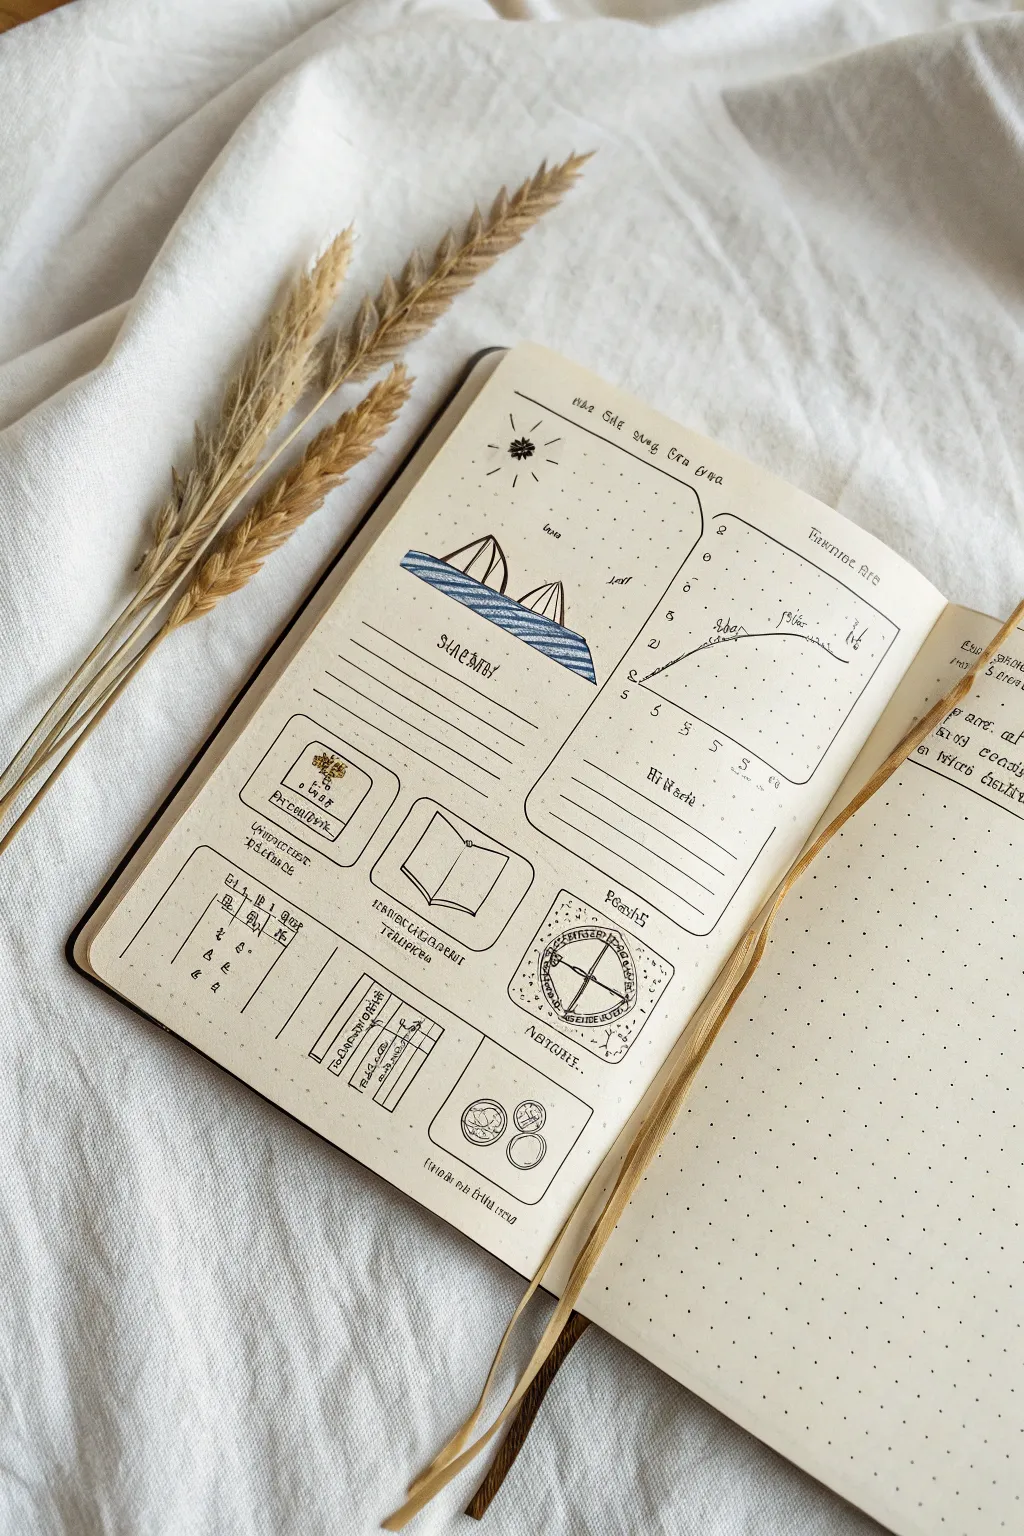
Transform a standard notebook page into a beautiful data dashboard that feels like an explorer’s field guide. This layout uses clean lines, minimal color, and structured sections to organize information in a visually appealing, infographic style.
Step-by-Step
Materials
- Dotted grid notebook or journal
- Fine liner pen (black, 0.3mm or 0.5mm)
- Ruler
- Blue highlighter or colored pencil
- Pencil and eraser
Step 1: Planning and Layout
-
Map the grid:
Start by visualizing your page as a grid. Lightly sketch a vertical line down the center of the left page, stopping about two-thirds of the way down to leave room for the bottom row of boxes. -
Create main sections:
Sketch a large rectangular box in the top right quadrant for the graph. To its left, mark out an open space for the mountain illustration and header text. -
Define the bottom row:
Along the bottom third of the page, pencil in four distinct square or rectangular containers. These will hold your icons like the open book and compass.
Fixing Smudges
If you smudge ink while erasing, turn the mistake into a “shadow” by adding hatching lines, or label it as an intentional texture mark.
Step 2: Drawing the Key Elements
-
Inking the line graph:
In the top right box, draw your X and Y axes using a ruler. Add small tick marks for data points. Draw a curved trend line rising upwards, and add a dashed reference line if you like. -
Sketching the mountains:
In the top left section, draw two simple, overlapping triangles for mountains. Add vertical stripes inside them to give them form. -
Adding color accents:
Use your blue highlighter or colored pencil to fill the base of the mountains with horizontal strokes, representing water or ground. This pop of color anchors the drawing. -
Details: The sun:
Above the mountains, draw a small circle with radiating lines to create a stylized sun or star icon.
Step 3: Adding Text and Structure
-
Horizontal writing lines:
Under the mountain section, use your ruler to draw several evenly spaced horizontal lines. These serve as a specific area for notes or summaries. -
Drawing the containers:
Go over your bottom row sketches with ink. Create rounded rectangles for a softer look. Inside one, draw a simple open book icon using two curved trapezoids. -
Creating the compass:
In another bottom box, draw a circle. Add a cross in the middle and small triangles at the cardinal points to create a simple compass rose. -
Final containers:
Fill the remaining bottom boxes with relevant icons—try a simple flower/plant doodle or a few stacked coins depending on what subject you are tracking.
Add Antique Flair
Use a tea bag to lightly stain the page edges before drawing (let it dry fully!) for a worn, vintage explorer’s journal aesthetic.
Step 4: Finishing Touches
-
Lettering titles:
Add small headers above each section. Keep the font simple and all-caps for a clean, scientific look. You can mock faux-cyrillic or rune-style lettering for an adventurous vibe. -
Adding micro-details:
Sprinkle in tiny decorative dots or plus signs in the negative space around the graph to balance the layout. -
Erase pencil marks:
Wait until the ink is completely dry to avoid smudging, then gently erase all your initial pencil guidelines.
You now have a structured, visually engaging page ready to be filled with your observations


Have a question or want to share your own experience? I'd love to hear from you in the comments below!