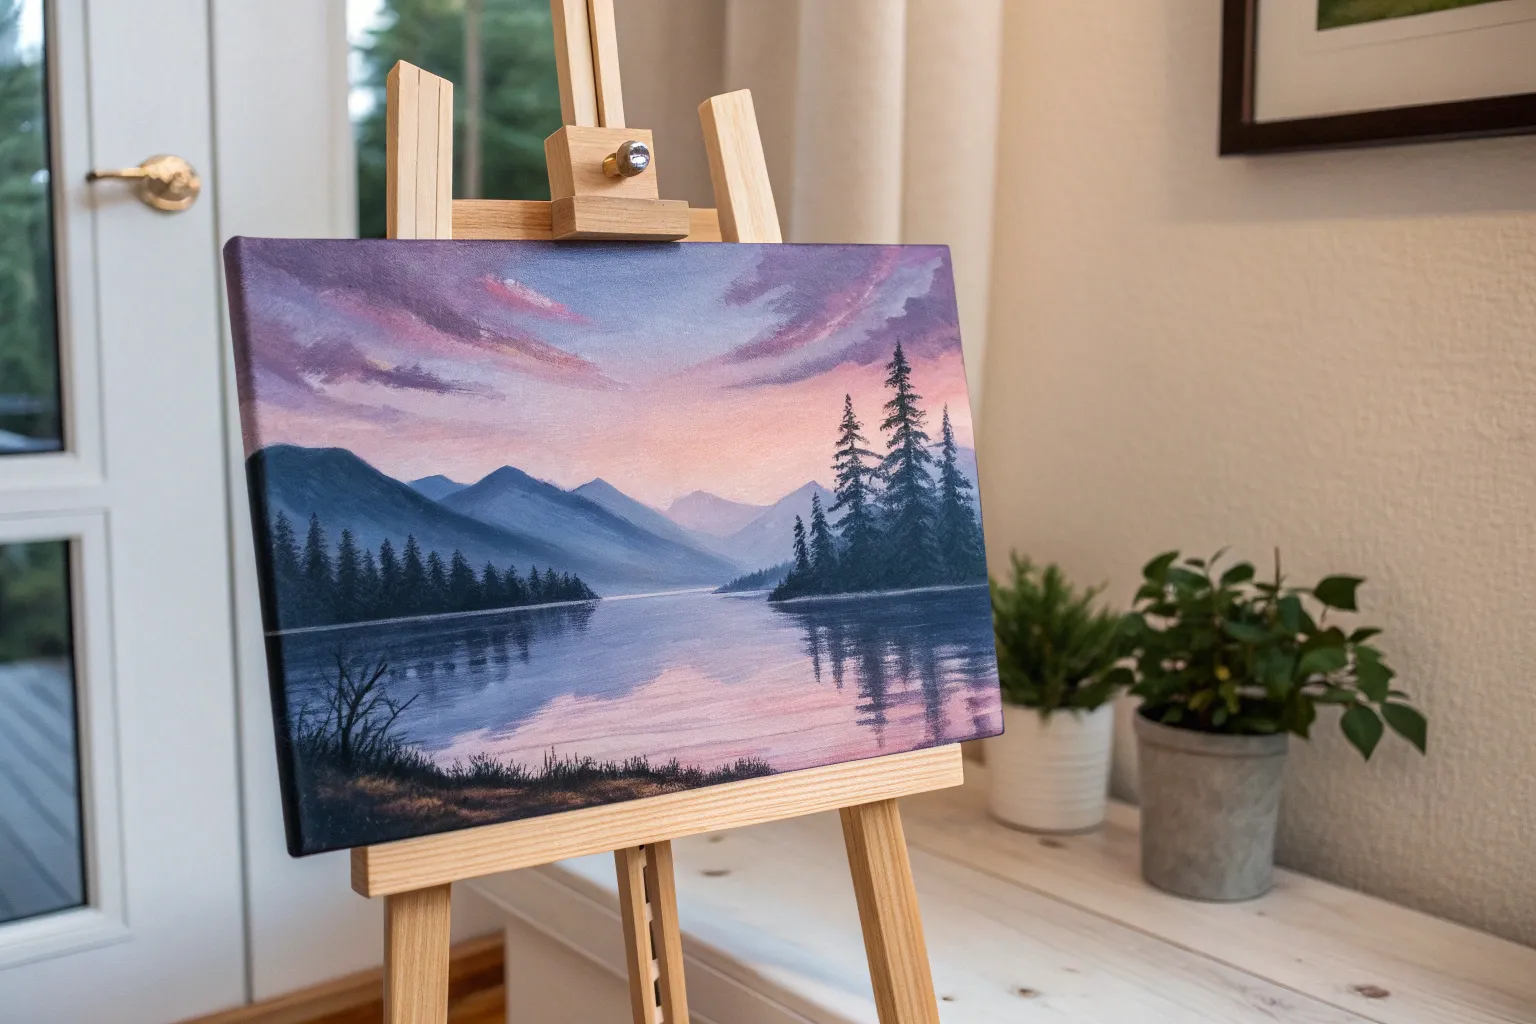
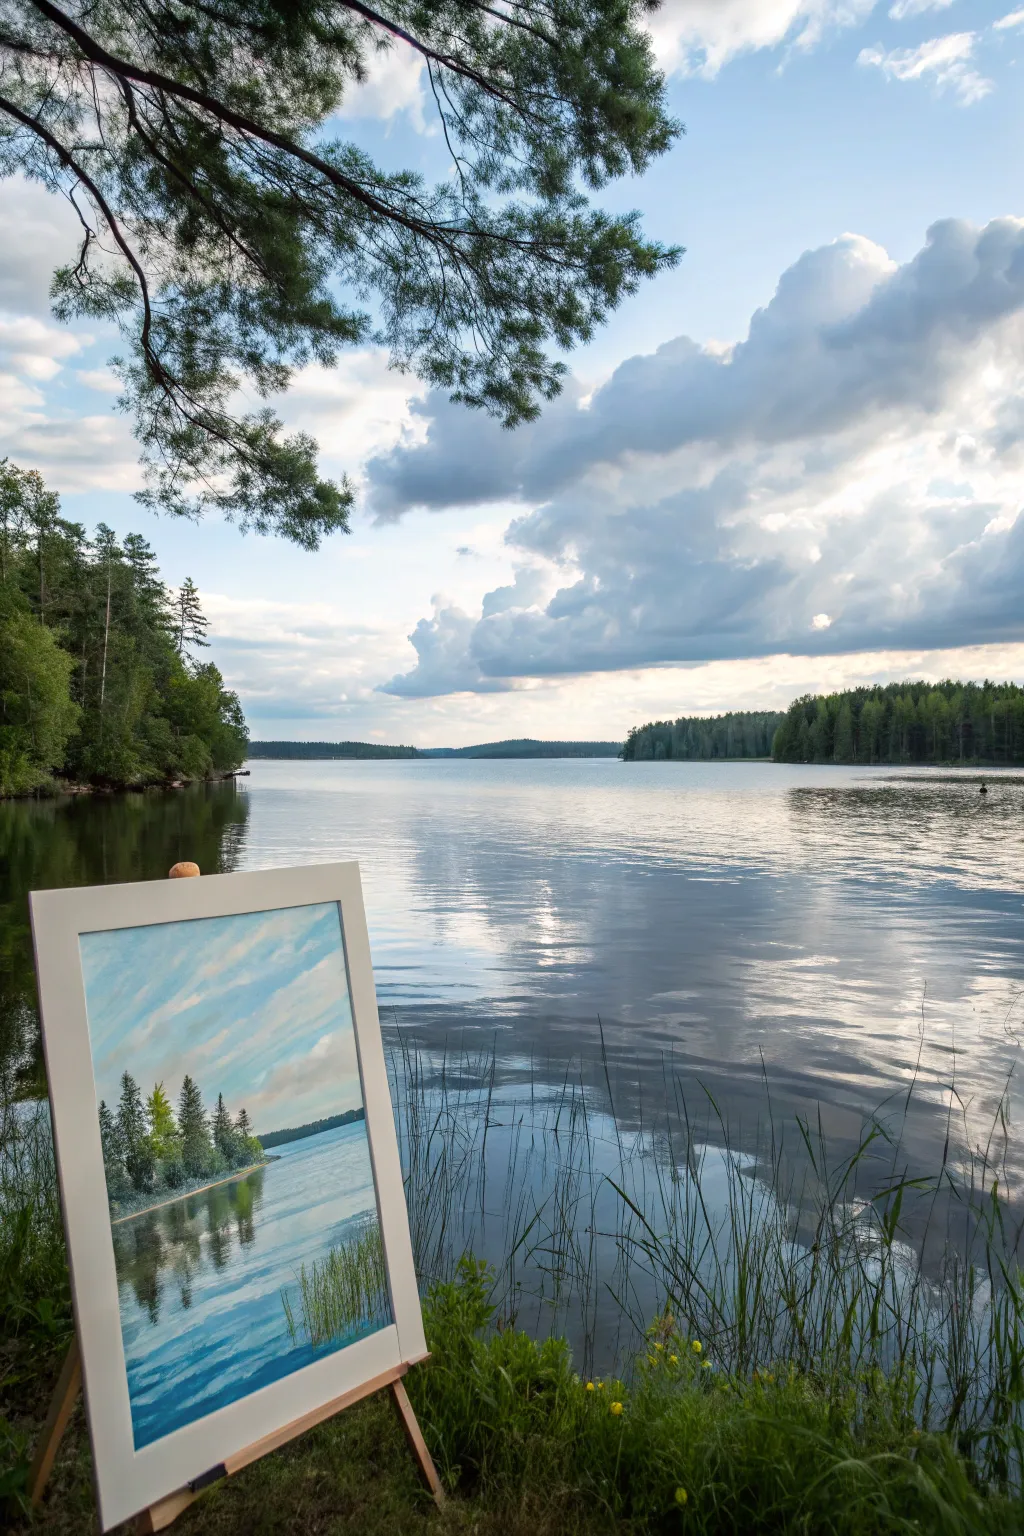
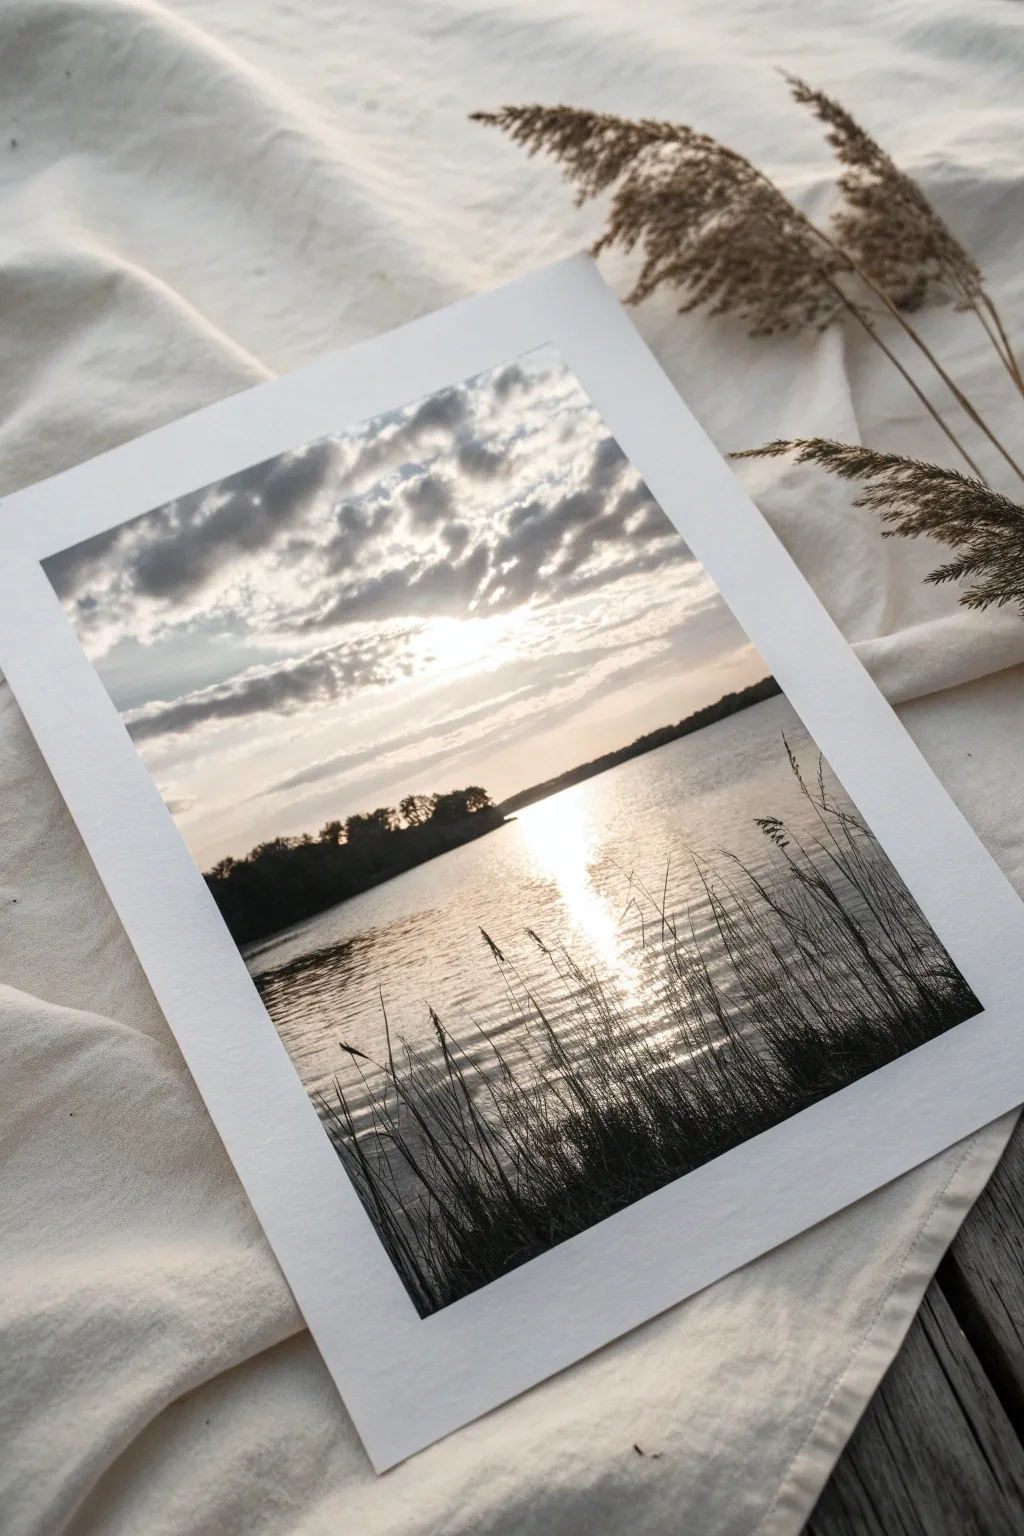
When I’m craving calm, I paint lake scenes—they’re the perfect mix of simple shapes and magical light. Here are my favorite lake painting ideas to help you play with reflections, smooth sky gradients, and those cozy shoreline details without overthinking it.
Mountain Backdrop With Mirror Reflection
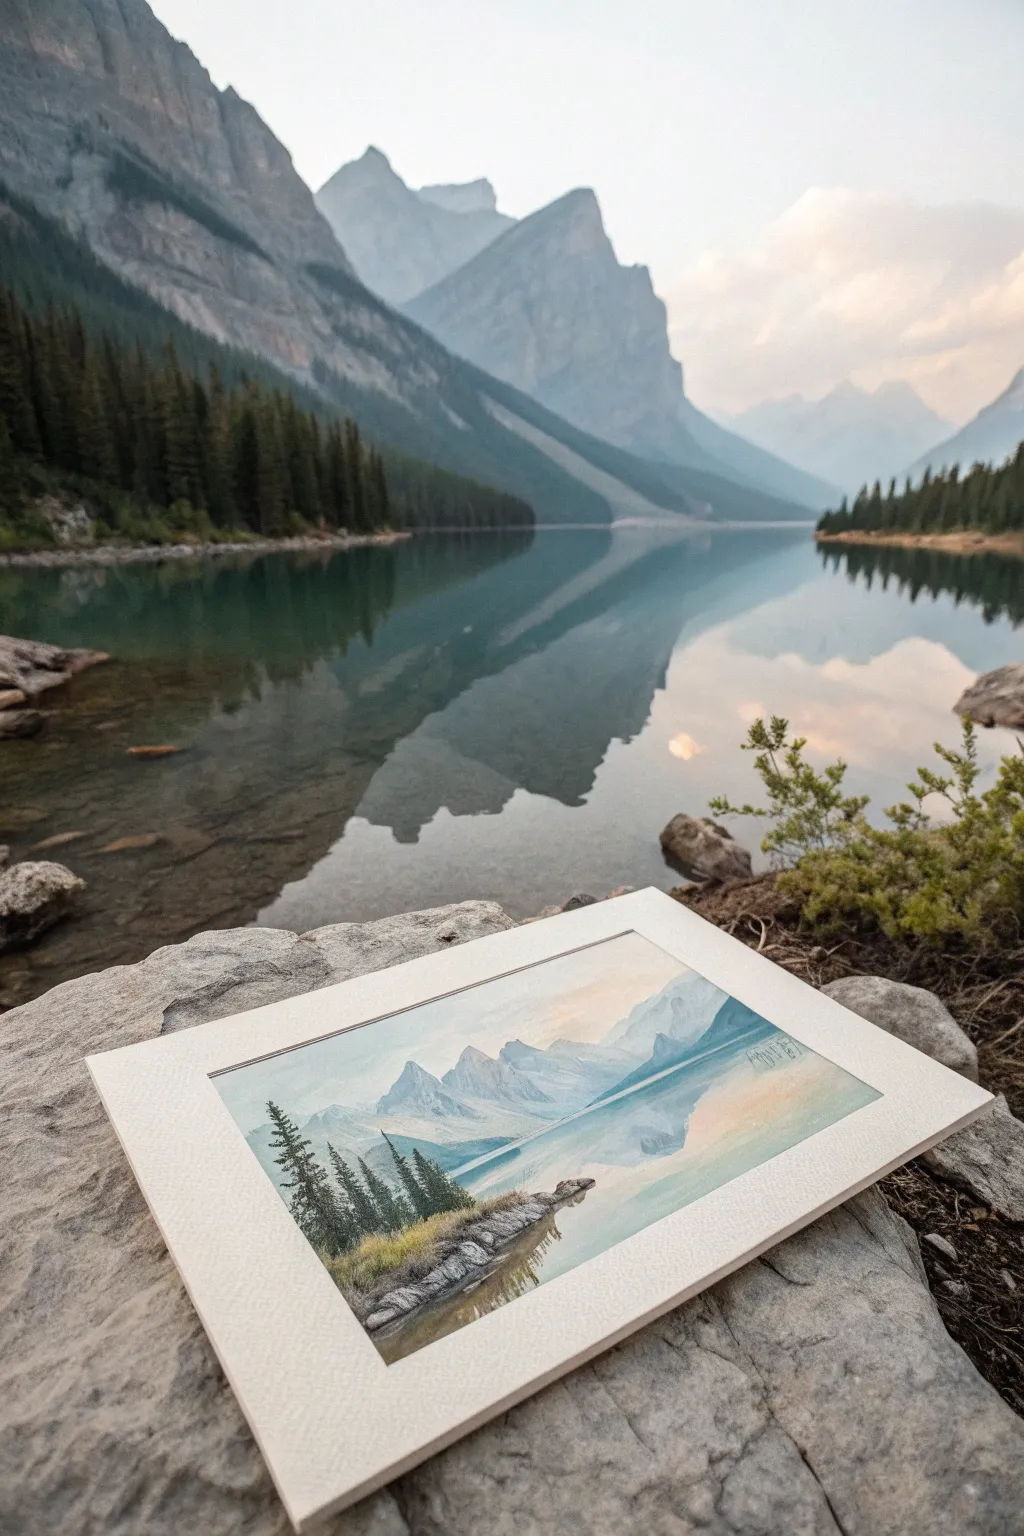
Capture the tranquil beauty of a glacial lake nestled among towering peaks with this watercolor study. This project focuses on soft washes and achieving a glass-like mirror reflection that mimics the stillness of early morning mountain scenes.
Step-by-Step Guide
Materials
- Cold-pressed watercolor paper (140lb/300gsm)
- Watercolor paints (phthalo blue, ultramarine, burnt umber, payne’s gray, sap green, alizarin crimson)
- Masking tape
- Wooden drawing board
- Large flat wash brush (1 inch)
- Round brushes (sizes 4, 8, and 12)
- Small rigger or detail brush
- Two jars of water
- Paper towels
- Pencil (HB) and kneaded eraser
Step 1: Setting the Scene
-
Prepare the paper:
Tape your watercolor paper securely to a wooden board on all four sides. This ensures the paper stays flat when wet and leaves a crisp white border around your finished piece. -
Establish the horizon:
Using a light hand and an HB pencil, sketch the horizon line about one-third of the way up from the bottom. Do not make this line perfectly straight; allow for slight undulations where the land meets the water. -
Sketch the peaks:
Lightly outline the major mountain shapes. Focus on the large triangular mass on the right and the receding peaks on the left. Keep details minimal, just mapping out the main ridges and slopes. -
Foreground placement:
Sketch the rocky shoreline in the immediate foreground on the left. Indicate the vertical shapes of a few pine trees, but don’t draw individual branches.
Wet Paper Troubles?
If your paper buckles heavily, you may have used too much water or too light a paper. Tape all edges down before starting and don’t remove tape until fully dry to help flatten it.
Step 2: Sky and Base Layers
-
Wet-on-wet sky:
Wet the sky area above the mountains with clean water. Drop in a very pale wash of Phthalo Blue mixed with plenty of water. Keep it lightest near the mountain peaks to suggest atmospheric haze. -
Mountain warmth:
While the sky is drying, mix a very faint wash of Alizarin Crimson and Burnt Umber. Apply this to the sunlit sides of the mountain peaks (the right sides) to give them a subtle morning glow. -
Shadow shapes:
Once the warm wash is dry, mix Ultramarine Blue with a touch of Payne’s Gray. Paint the shadowed sides of the mountains. Use the side of your round brush to create jagged edges that mimic rock faces. -
Distant peaks:
For mountains further in the background, add more water to your shadow mix. This reduction in value creates depth through atmospheric perspective.
Pro Tip: Softening Edges
For distant mountains, run a clean, damp brush along the bottom edge of your paint strokes. This softens the transition into the valley mist and adds depth.
Step 3: The Reflective Lake
-
Inverted wash:
To start the water, replicate the colors of the mountains but in reverse. Wet the lake area and drop in vertical strokes of the shadow color (Ultramarine/Gray) directly below the mountain shapes. -
Smoothing the water:
While the paint is still damp, engage your flat wash brush. Gently pull horizontal strokes across the water area to blur the vertical reflections slightly, creating that ‘glassy’ look. I like to leave a few thin slivers of white paper to suggest surface tension or ripples. -
Deepening the reflection:
Near the shoreline at the bottom, darken the water mix with a bit more Payne’s Gray. The reflection is often clearer and darker closer to the viewer.
Step 4: Foreground Details
-
Painting the pines:
Mix a strong Sap Green with Payne’s Gray for a deep forest color. Using the size 4 round brush, paint the pine trees on the left foreground. Start with a vertical line for the trunk and tap the brush tip outward to create jagged branches. -
Shoreline rocks:
Use Burnt Umber and Gray for the rocky foreground ledge. Paint rough, angular shapes. Let colors bleed slightly for a natural texture, but keep the edges sharp against the water. -
Grassy textures:
While the rock paint is damp, scrape a few lines out with a credit card edge or palette knife, or lift color with a thirsty brush to suggest dry grasses catching the light. -
Final reflection touches:
Use the rigger brush with a watery mix of the mountain color to add very thin, horizontal lines cutting across the reflections. This breaks up the image just enough to confirm it is water, not a mirror. -
Remove tape:
Wait until the paper is completely bone-dry. Carefully peel the masking tape away at a 45-degree angle to reveal your crisp, professional border.
Now frame your piece or place it on a mat board to admire your peaceful mountain escape


Pine Trees Framing a Lake View
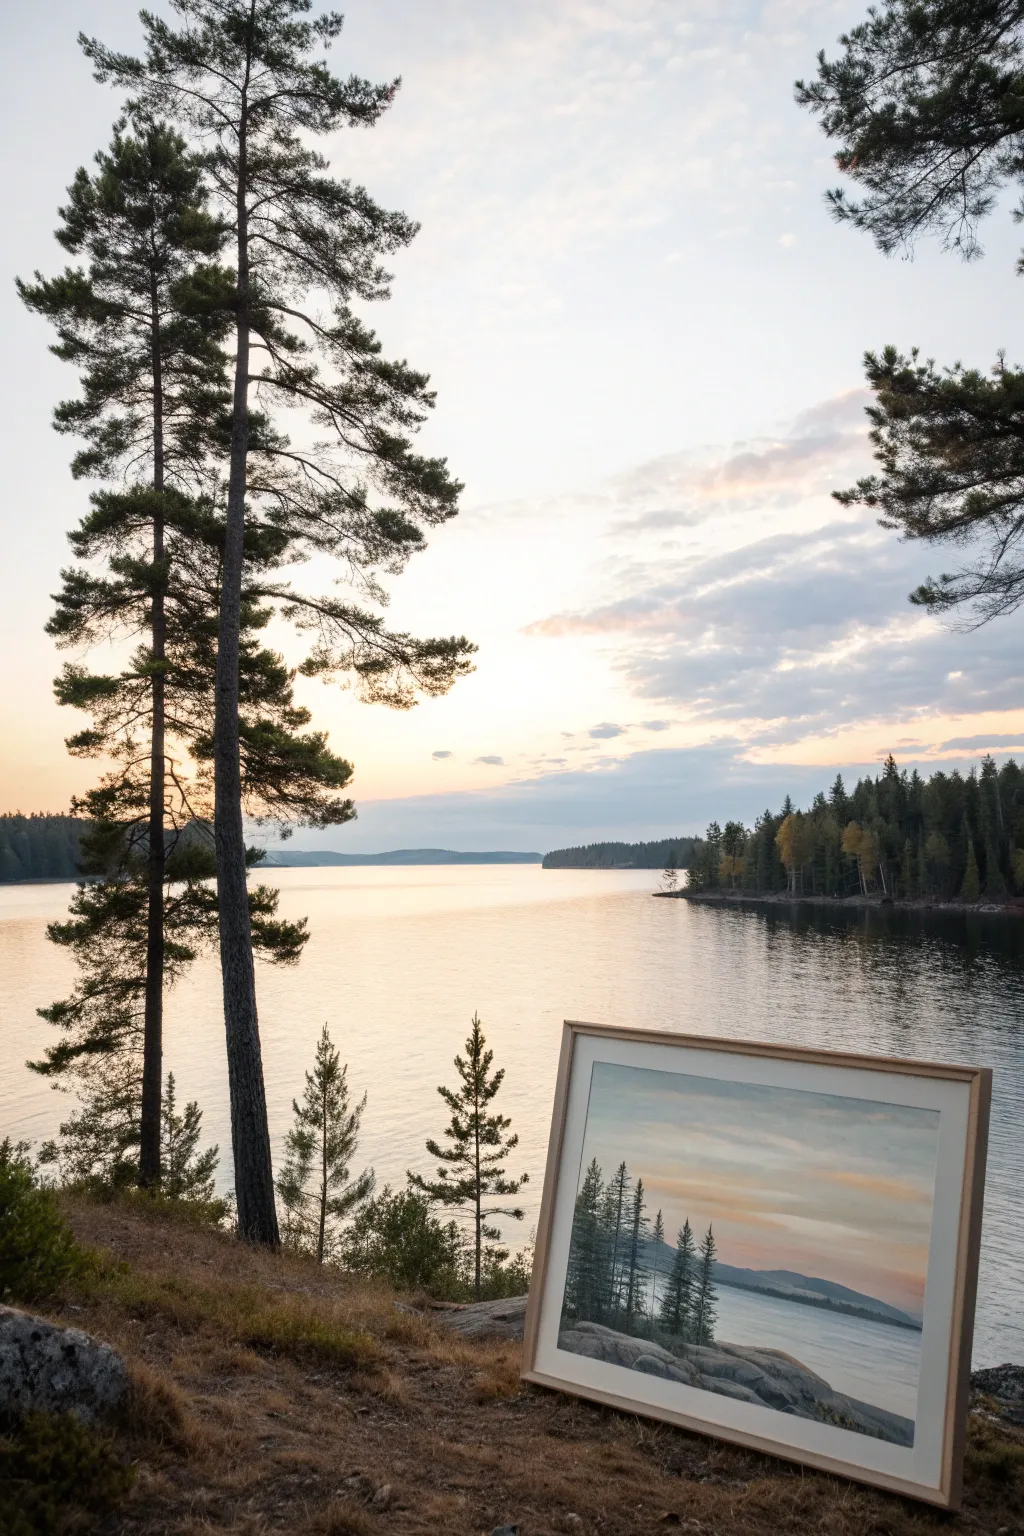
Capture the tranquil beauty of dusk with this layered landscape painting that emphasizes depth through silhouette. By balancing soft pastel skies against stark, dark pines, you will create a piece that feels like a window into a peaceful evening retreat.
Step-by-Step Tutorial
Materials
- Canvas board or stretched canvas (16×20 inches recommended)
- Acrylic paints (Titanium White, Phthalo Blue, Ultramarine Blue, Alizarin Crimson, Cadmium Yellow, Burnt Umber, Mars Black)
- Set of brushes: 1-inch flat wash, medium filbert, lush round brush, small rigger/liner brush
- Palette for mixing
- Water container and paper towels
- Wooden floating frame (natural finish)
- Easel or flat working surface
Step 1: Setting the Sky and Water
-
Prime the horizon:
Begin by lightly sketching a low horizon line about one-third up from the bottom of your canvas using a pencil or diluted gray paint. This ensures your water and sky proportions feel balanced. -
Mix the sky gradient:
Create a pale, creamy yellow by mixing a large amount of Titanium White with a touch of Cadmium Yellow. Start painting just above the horizon line in horizontal strokes. -
Add warmth:
While the yellow is still wet, blend in a soft peach tone (White + tiny dot of Alizarin Crimson + Yellow) immediately above it. Let these colors merge seamlessly. -
Transition to cool tones:
Moving upward, introduce a pale lavender-gray mix. Use White, a touch of Ultramarine Blue, and the smallest hint of Crimson. Blend this downward into the peach layer so there are no hard lines. -
Paint the upper sky:
Finish the top of the canvas with a slightly deeper blue-grey. Keep the application smooth; a large flat wash brush works best here to avoid choppy texture. -
Mirror the water:
Recreate the sky colors for the lake surface below the horizon. Use the same peach and yellow tones near the horizon line, but make them slightly duller or darker than the sky to distinguish the water. -
add water movement:
While the water paint is wet, drag your clean, dry flat brush horizontally across the surface to create a soft blur that mimics calm water.
Don’t Over-mix Clouds
When blending your sky, stop before the colors are perfectly smooth. Leaving slight streaks of pink or yellow adds a natural, cloud-like texture without needing to paint actual cloud shapes.
Step 2: The Middle Ground
-
Form the distant hills:
Mix a muted purple-grey using Ultramarine Blue, Alizarin Crimson, and Burnt Umber with some White. Paint a low, rolling mountain shape right on the horizon line. -
Soften the distance:
Add a little more white to the bottom edge of your mountain shape where it creates the shoreline, suggesting atmospheric perspective and mist. -
Define the shoreline:
Using a slightly darker grey-blue mix, paint a thin, uneven line at the very base of the mountains to establish the separation between land and water.
Step 3: Foreground Pines and Framing
-
Block in the foreground rocks:
Mix a dark grey using Burnt Umber, Mars Black, and White. Paint large, rounded rock shapes at the bottom left and right corners, anchoring the composition. -
Highlight the rocks:
With a lighter grey, gently dry-brush the tops of the rocks to show where the fading light hits them. -
Mix the deepest darks:
Combine Mars Black with Phthalo Blue to create a rich, cold dark color for the pine trees. I find pure black can look flat, so the blue adds depth. -
Draft the tree trunks:
Using a liner or small round brush, paint vertical lines for the tree trunks on the left side. Vary their heights and lean them slightly for a natural look. -
Stipple the foliage:
Switch to an old, worn filbert or fan brush. Tap the dark paint onto the branches, starting narrow at the top and getting wider towards the bottom of the trees. -
Refine the branches:
Use your rigger brush to extend tiny, delicate branches out from the main foliage masses, ensuring the trees don’t look like solid triangles. -
Add reflection hints:
If your composition allows, lightly glaze a few dark vertical strokes in the water directly beneath the trees to suggest a reflection. -
Final drying and framing:
Allow the painting to dry overnight before placing it into the natural wood floating frame to complete the organic aesthetic.
Create Atmosphere
Mix a tiny amount of your sky color into your tree green for the trees that are furthest back. This ‘desaturation’ pushes them into the distance, enhancing the 3D effect.
Once framed, this piece brings the quiet majesty of the lakeside indoors, ready to hang.


Misty Morning Lake With Soft Edges
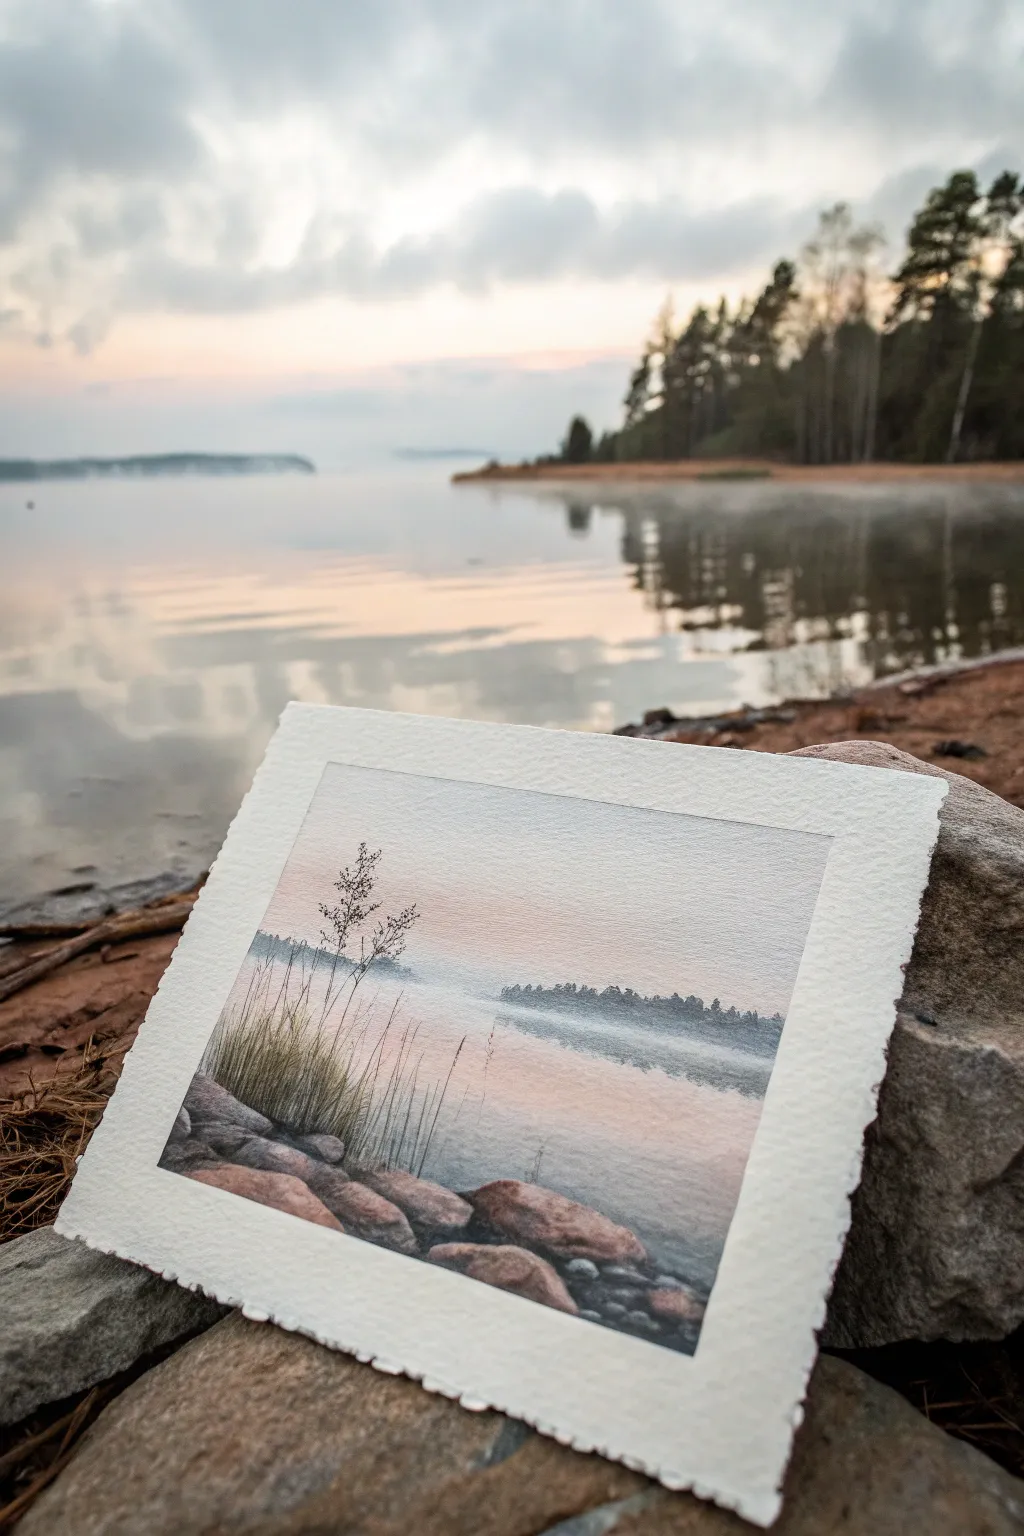
Capture the tranquil beauty of a misty lakeside morning with this soft and atmospheric watercolor painting. You’ll learn how to build delicate layers of pastel washes to create depth and fog, contrasting them with detailed foreground rocks and grasses.
Step-by-Step Tutorial
Materials
- High-quality watercolor paper (cold press or rough texture, ideally 300gsm)
- Watercolor paints (Indigo, Burnt Sienna, Yellow Ochre, Rose Madder, Sepia)
- Masking tape
- Soft round brushes (sizes 4, 8, and 12)
- Fine liner brush (size 0 or 1)
- Two jars of water (clean and dirty)
- Paper towels
- Pencil for sketching
- Masking fluid (optional)
Step 1: Preparation and Initial Washes
-
Paper Prep:
Begin by taping down your watercolor paper to a board to prevent buckling. If you want those lovely deckled edges seen in the photo to show, tape only the very back or use a block, but for a standard crisp border, tape the front edges leaving a 1-inch margin. -
Light Sketching:
Using a hard pencil (like 2H), lightly sketch the horizon line about one-third up from the bottom. Outline the larger rocks in the bottom left corner and indicate where the tall grasses will grow. Keep these lines very faint. -
Sky Gradient:
Wet the sky area with clean water using your largest brush. While wet, drop in a very dilute wash of Rose Madder near the horizon, blending upwards into a soft, pale gray-blue mix (Indigo + water) at the top. Let gravity help the colors merge seamlessly. -
Water Reflection:
While the sky is drying, wet the water area below the horizon. Mirror the sky colors here: pale pink near the horizon line fading into the soft blue-gray towards the bottom. Ensure this wash is lighter than the sky to suggest reflection. -
Creating the Mist:
As the paper starts to lose its sheen but is still damp (the glossy stage is gone), gently lift out a horizontal strip of color right at the horizon line using a clean, damp brush. This creates the soft, white fog bank effect.
Fixing Muddy Colors
If your mist looks dirty, you likely overworked the wet-on-wet stage. Stop, let it dry fully, and try lifting color gently with a damp magic eraser sponge to reclaim the light.
Step 2: Building the Landscape
-
Distant Trees:
Once the paper is completely bone dry, mix a watery, pale gray-purple (Indigo + a touch of Rose Madder). Paint the distant tree line along the horizon. Keep the bottom edge soft by running a damp brush along it so it fades into the ‘mist’ you created. -
Middle Ground Haze:
For the slightly nearer island or peninsula on the left, use a slightly more saturated mix of the gray-purple. Paint this shape but keep the edges soft and diffused to maintain that misty atmosphere. -
Foreground Rocks Base:
Now move to the foreground rocks. Mix Burnt Sienna with a tiny touch of Indigo for a warm, earthy tone. Paint the shapes of the rocks wet-on-dry, leaving small gaps of white paper for highlights. -
Rock Definition:
While the rock shapes are still damp, drop in darker Sepia or concentrated Indigo at the bottom edges of the rocks to create weight and shadow. Let the colors bleed slightly for a natural stone texture. -
Texture and Shadow:
Once the rocks are dry, use a smaller brush to add dry-brush texture. Drag the brush lightly over the paper’s grain with a darker mix to simulate the roughness of the stone.
Soft Mist edges
To get perfectly soft misty horizons, pre-wet the horizon line with clean water before painting the distant trees. The paint will bleed into the damp area, creating natural fuzziness.
Step 3: Foregroung Details
-
Painting Grasses:
Switch to your fine liner brush. Mix a dark green-brown (Sepia + Yellow Ochre + Indigo). With quick, confident upward flicks, paint the tall grasses emerging from behind the rocks. -
Varying the Grass:
Ensure your grass blades vary in height, thickness, and direction. Some should cross over each other. Use a more diluted mix for grasses that are slightly further back to create depth. -
Seed Heads:
Add tiny dots and clusters at the tips of the tallest grass stalks to represent seed heads. Keep these delicate; a heavy hand will ruin the ethereal feel. -
Water Ripples:
Using a dilute mix of the sky color (Indigo), paint very thin, horizontal lines in the water area. These should be broken lines, wider near the foreground and becoming mere dashes towards the horizon. -
Final Touches:
Assess the contrast. If the rocks need more grounding, glaze a transparent dark shadow at their base where they meet the water. I like to stand back at this point to ensure the mist effect reads clearly.
Finish by carefully removing the tape to reveal your crisp edges and sign your atmospheric masterpiece with a fine pencil


Moonrise Over a Still Lake

Capture the serene beauty of a full moon rising over a tranquil lake with this atmospheric watercolor painting. The striking contrast between the deep indigo sky and the glowing lunar reflection creates a peaceful yet dramatic scene perfect for beginners.
Step-by-Step Guide
Materials
- Watercolor paper (cold press, 300gsm)
- Masking fluid or white wax crayon
- Painter’s tape
- Watercolor paints (Indigo, Payne’s Gray, Lamp Black, Prussian Blue)
- White Gouache paint (for highlights and stars)
- Round brushes (flats for washes, small rounds for details)
- Jar of clean water
- Paper towels
- Palette for mixing
Step 1: Preparation and The Moon
-
Secure the paper:
Begin by taping down all four edges of your watercolor paper to a hard board using painter’s tape. This creates a crisp white border and prevents the paper from buckling when wet. -
Sketch the layout:
Using a light pencil, draw a circle for the moon in the upper center of the paper. Roughly mark the horizon line about two-thirds of the way down the page. -
Protect the moon:
Apply masking fluid carefully inside the circle of the moon. Let this dry completely before painting; otherwise, the blue from the sky will bleed into your bright white moon.
Bleeding Edges?
If paint bleeds under your tape, use a slightly thicker acrylic white or gouache to carefully touch up the borders after peeling the tape.
Step 2: Painting the Sky
-
Mix your blues:
Prepare a large puddle of deep blue paint. I like to mix Indigo with a touch of Prussian Blue for a rich, velvety night sky color. -
Start the wash:
Wet the sky area with clean water first (wet-on-wet technique). Starting from the top, apply your dark blue mix, letting it get gradually lighter as you approach the horizon line. -
Create a gradient:
As you move down toward the horizon, dilute your paint slightly with water or add a tiny bit of lighter blue to create a glowing effect near where the moon sits. -
Let it dry:
Allow the sky layer to dry completely. The paper should feel cool to the touch but not damp.
Step 3: The Lake and Reflection
-
Establish the horizon:
Paint a distant treeline along the horizon using a mix of Indigo and Lamp Black. Keep the top edge slightly jagged to suggest tree shapes. -
Start the water:
For the lake, use a horizontal stroke motion. Start with dark blue at the horizon and corners, leaving the center area directly under the moon mostly blank or very light. -
Paint the reflection path:
While the blue water paint is still damp, carefully lift out horizontal pigment streaks in the center using a clean, thirsty brush, or simply leave negative space on the white paper to represent the moonlight reflection. -
Deepen the water:
Add darker glazes of Indigo to the left and right sides of the water to frame the light path, ensuring the reflection stands out brightly.
Make it Sparkle
Mix a tiny pinch of silver mica powder or metallic watercolor into your white gouache for the moon reflection to give the water a magical shimmer.
Step 4: Details and Highlights
-
Reveal the moon:
Once everything is bone dry, gently rub off the masking fluid from the moon area to reveal the white paper underneath. -
Texture the moon:
Mix a very watery pale gray. Dab subtle shadows onto the moon’s surface to create craters and texture, keeping the edges of the moon crisp. -
Enhance the reflection:
Using white gouache, paint horizontal zig-zag lines across the reflection path on the water. Make them thicker near the horizon and thinner as they come forward. -
Add stars:
Load a toothbrush or stiff brush with white gouache and gently flick it over the sky to create a field of stars. You can hand-paint a few larger stars with a fine tip brush. -
Foreground grasses:
Mix a thick, dark black-green. Using a fine liner brush, paint tall grasses and reeds emerging from the bottom corners, overlapping the water slightly. -
Final touches:
Add tiny hints of white gouache to the tips of the waves in the foreground for extra sparkle. -
Reveal the border:
Wait until the painting is completely dry, then slowly peel away the painter’s tape at a 45-degree angle to reveal your clean edges.
Step back and admire the tranquil atmosphere you’ve captured in your night scene
BRUSH GUIDE
The Right Brush for Every Stroke
From clean lines to bold texture — master brush choice, stroke control, and essential techniques.
Explore the Full Guide
Glitter Path Across Sunset Water
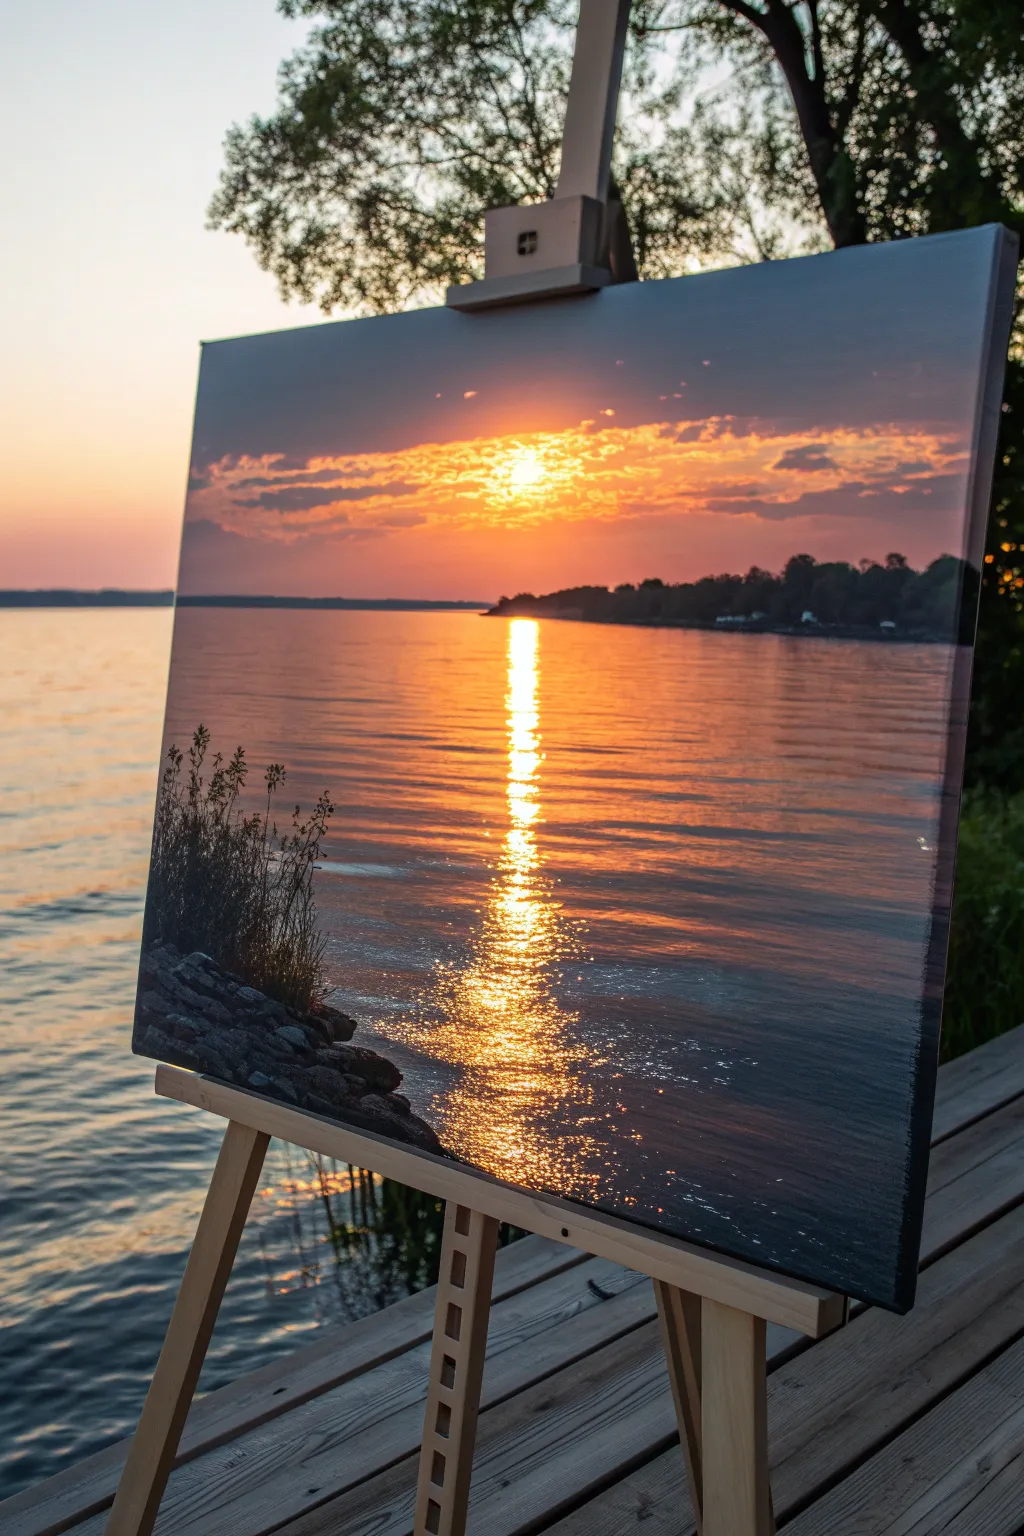
Capture the breathtaking serenity of a lakeside sunset with this advanced sparkling water technique. By layering warm transparent glazes over a bright underpainting, you will create a luminous path of light that seems to shimmer right off the canvas.
Step-by-Step
Materials
- Stretched canvas (18×24 or similar)
- Acrylic paints: Titanium White, Cadmium Yellow, Cadmium Orange, Burnt Sienna, Burnt Umber, Payne’s Grey, Phthalo Blue
- Large flat brush (2 inch)
- Medium flat brush (1/2 inch)
- Small round brush (size 2)
- Fan brush
- Palette knife
- Water container and distinct palette
- Slow-drying blending medium (optional)
Step 1: Setting the Scene
-
Prime with warmth:
Begin by covering your entire canvas with a wash of Cadmium Orange mixed with a touch of white. This warm base will help the sunset glow from within. Let this layer dry completely before moving on. -
Establish the horizon:
Using a ruler or simply a steady hand, paint a faint horizon line roughly one-third of the way down from the top. It is crucial to keep this perfectly level to sell the illusion of water. -
Paint the sky gradient:
Mix Titanium White with a tiny dot of yellow for the sun area just above the horizon. Radiating outward, blend into pure yellow, then orange, and finally a mix of Phthalo Blue and Burnt Umber at the very top corners for the dusky evening sky. -
Mirror the water:
Create a similar gradient below the horizon line for the water. Start with the bright sun reflection in the center using yellow and white, blending outward into oranges. Keep the water strokes strictly horizontal to suggest calmness. -
Add cloud texture:
Using a small amount of Burnt Sienna mixed with purple on a dry brush, scumble in the horizontal clouds across the sun. Keep the edges soft so they look distant and atmospheric.
Knife Control
When painting the light path, try using the edge of a palette knife to lay down thin, crisp lines of white paint. It creates a sharper ‘glitter’ effect than a brush.
Step 2: Creating Depth
-
Paint the distant shore:
Mix a dark, almost black color using Payne’s Grey and Burnt Umber. Using a medium flat brush, tap in the treeline along the horizon. Vary the heights to make the trees look natural, but keep them relatively small to show distance. -
Add shore reflections:
While the tree paint is wet, pull the color directly downward into the water with a clean brush. Gently brush across these vertical distinct lines horizontally to blur them into the water’s surface. -
Form the foreground rocks:
In the bottom left corner, use Payne’s Grey and Burnt Umber to block in a rocky shoreline. Use a palette knife here to create jagged, rocky textures rather than smooth brushstrokes. -
Highlight the stones:
Mix a light grey-blue. With the edge of your palette knife, lightly graze the tops of the rocks to catch the ‘light’ from the sky, giving them dimension and form. -
Plant vegetation:
Switch to your small round brush. Using black or very dark green, flick upward strokes from the rocks to create tall grasses and weeds. Make these strokes quick and confident to ensure they taper naturally at the tips.
Metallic Magic
For a truly radiant finish, glaze a thin layer of metallic gold paint over the orange sections of the water once the acrylics are fully dry.
Step 3: The Glitter Path
-
Establish the core reflection:
Now for the magic. Load a small flat brush with pure white mixed with a touch of yellow. Paint a solid, bright vertical column directly under the sun, starting at the horizon and widening slightly as it comes toward the bottom. -
Break the column:
While the paint is wet, use horizontal slicing strokes to break up the edges of this column, integrating it into the surrounding orange water. -
Add localized sparkles:
Using a small round brush and thick Titanium White, dot intense highlights down the center of the reflection path. I find clustering these distinct dots closer together near the horizon and spreading them out near the foreground creates the best perspective. -
Enhance water ripples:
Mix a dark orange-brown. Paint thin, horizontal lines between the bright white sparkles. These dark lines represent the troughs of the waves, occurring in shadow. -
Final shimmer details:
Add a few scattered, tiny dots of pure white on the dark water areas adjacent to the main path to suggest ripples catching the last rays of light.
Step back and admire how the light seems to dance on the water as you move around the room
Autumn Trees Reflected in a Lake
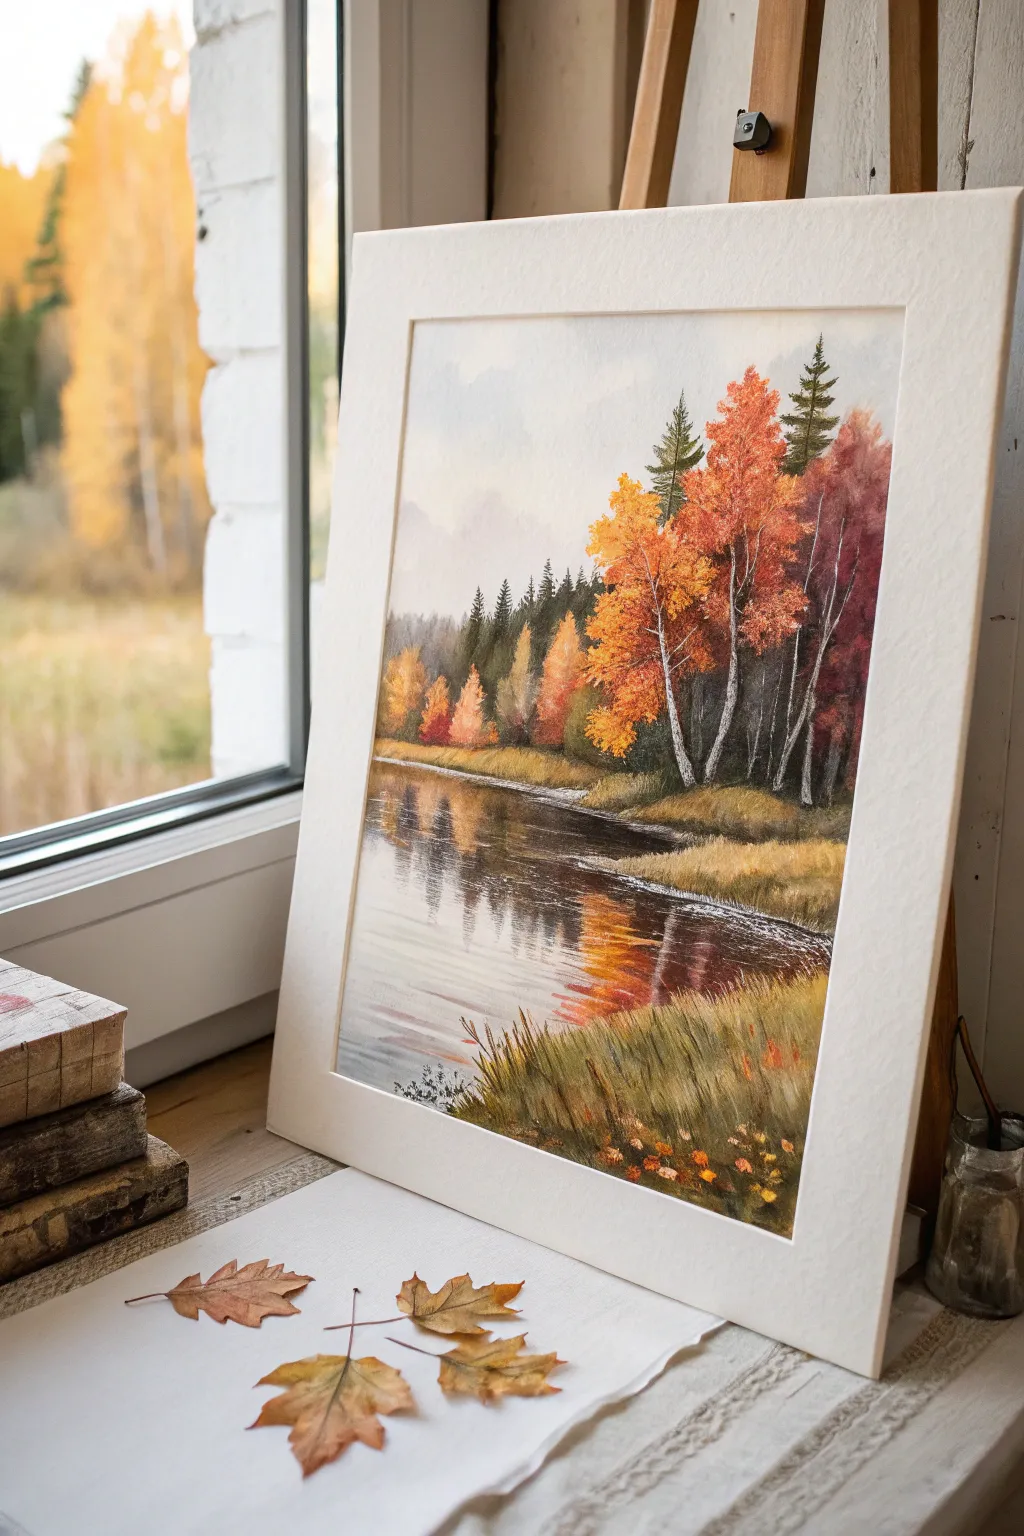
Capture the stillness of a crisp fall day with this vibrant watercolor landscape featuring brilliant orange trees mirroring themselves in calm water. The composition balances hazy distant pines with highly detailed foreground foliage, creating a serene depth that draws the viewer in.
Step-by-Step Guide
Materials
- Cold press watercolor paper (140lb/300gsm)
- Watercolor paints (burnt sienna, yellow ochre, cadmium orange, sap green, indigo, payne’s gray, alizarin crimson)
- Masking fluid
- Large flat wash brush (3/4 inch)
- Round brushes (sizes 4, 8, and 12)
- Rigger or liner brush
- Paper towels
- Water containers
- White gouache (optional for highlights)
- Pencil for sketching
- Painting tape
- Board to mount paper
Step 1: Preparation and Sketching
-
Paper Setup:
Begin by taping your watercolor paper securely to a board with painting tape. This prevents buckling and ensures you get that crisp, clean white border shown in the final piece. -
Light Sketching:
Using a hard pencil (like an H or 2H), very lightly sketch the horizon line about one-third up from the bottom. Outline the shape of the riverbank on the right and mark the general position of the main birch tree trunks. -
Masking Trees:
Apply masking fluid carefully with an old brush or a ruling pen to the thin, white birch trunks on the right bank. This preserves the pure white of the paper against the dark background we’ll add later.
Muddy Reflections?
If your water reflections turn muddy, wait for the paper to dry completely. Then, gently scrub the area with a stiff damp brush to lift color, and re-apply fresh, clean horizontal strokes.
Step 2: The Sky and Distance
-
Wet-on-Wet Sky:
Wet the entire sky area above the horizon line with clean water. Drop in a very dilute wash of indigo and a touch of alizarin crimson to create a soft, cloudy mauve-grey sky. Keep it pale; the drama is in the trees. -
Background Hills:
While the sky is still damp near the horizon, paint faint, distant hills using a watery mix of indigo and purple. The damp paper will soften the edges, pushing these hills into the distance. -
Distant Pines:
Once the sky is dry, mix a dull green using sap green and indigo. Paint the row of distant pine trees along the horizon line. Vary their heights to look natural and let the color fade slightly as you move left.
Step 3: Vibrant Foliage
-
Underpainting Foliage:
On the right bank, start with a loose wash of yellow ochre and cadmium orange where the main tree canopy will sit. Let the colors bleed into each other freely. -
Building Texture:
While the underlayer is still moist but not soaking, stipple in thicker burnt sienna and alizarin crimson with a size 8 round brush to suggest clusters of leaves. Leave some of the yellow showing through for light. -
Darkest Darks:
Mix a deep shadow color using indigo and burnt umber. Apply this near the base of the trees and in the gaps between branches to create volume and 3D form. -
Left Bank Accents:
Paint the smaller shrubbery on the far left bank using the same orange and yellow palette, but keep the details less distinct than the main foreground trees.
Level Up: Texture
Use a toothbrush to splatter tiny droplets of masking fluid over the foreground grass before painting. Rub off later for realistic seed heads or highlights.
Step 4: Reflections and Water
-
Water Base:
Wet the water area. Mirror the sky colors upside down—dilute gray-purple at the bottom, transitioning to the colors of the bank near the horizon line. -
Dropping in Color:
While the water area is wet, drop in horizontal strokes of cadmium orange, burnt sienna, and deep green directly below the corresponding trees. The wet paper will naturally blur these into reflections. -
Surface Tension:
Once the initial wash dries, use a dry-brush technique with horizontal strokes of white gouache or lifted paint to suggest ripples on the water surface, cutting across the colorful reflections.
Step 5: Foreground and Details
-
Riverbank Base:
Paint the earthy bank in the immediate foreground using a mix of yellow ochre and green. Use upward brush flicks to simulate the direction of grass growth. -
Unmasking:
Gently rub away the masking fluid from the birch trunks. If the white is too stark, glaze over the shadowed side of the trunks with a very watery gray to round them out. -
Tree Markings:
Using a rigger brush and black or dark gray paint, add the characteristic horizontal lenticels (stripes) and small broken branches to the birch trunks. -
Grass Textures:
With the rigger brush or the tip of a small round brush, paint individual blades of tall dry grass in the foreground using burnt sienna and deep green. Vary the pressure to make the blades taper naturally. -
Fallen Leaves:
I like to add small dabs of pure orange and red in the immediate foreground grass to represent fallen autumn leaves, adding a nice pop of detail near the frame’s edge. -
Final Contrast:
Assess the painting for contrast. Deepen the reflection line where the land meets the water with a thin line of very dark paint to separate the proper bank from the reflection.
Peel off the tape carefully to reveal that crisp edge which makes your colorful autumn scene look professionally framed

PENCIL GUIDE
Understanding Pencil Grades from H to B
From first sketch to finished drawing — learn pencil grades, line control, and shading techniques.
Explore the Full Guide
Snowy Lake With Cool Shadow Colors
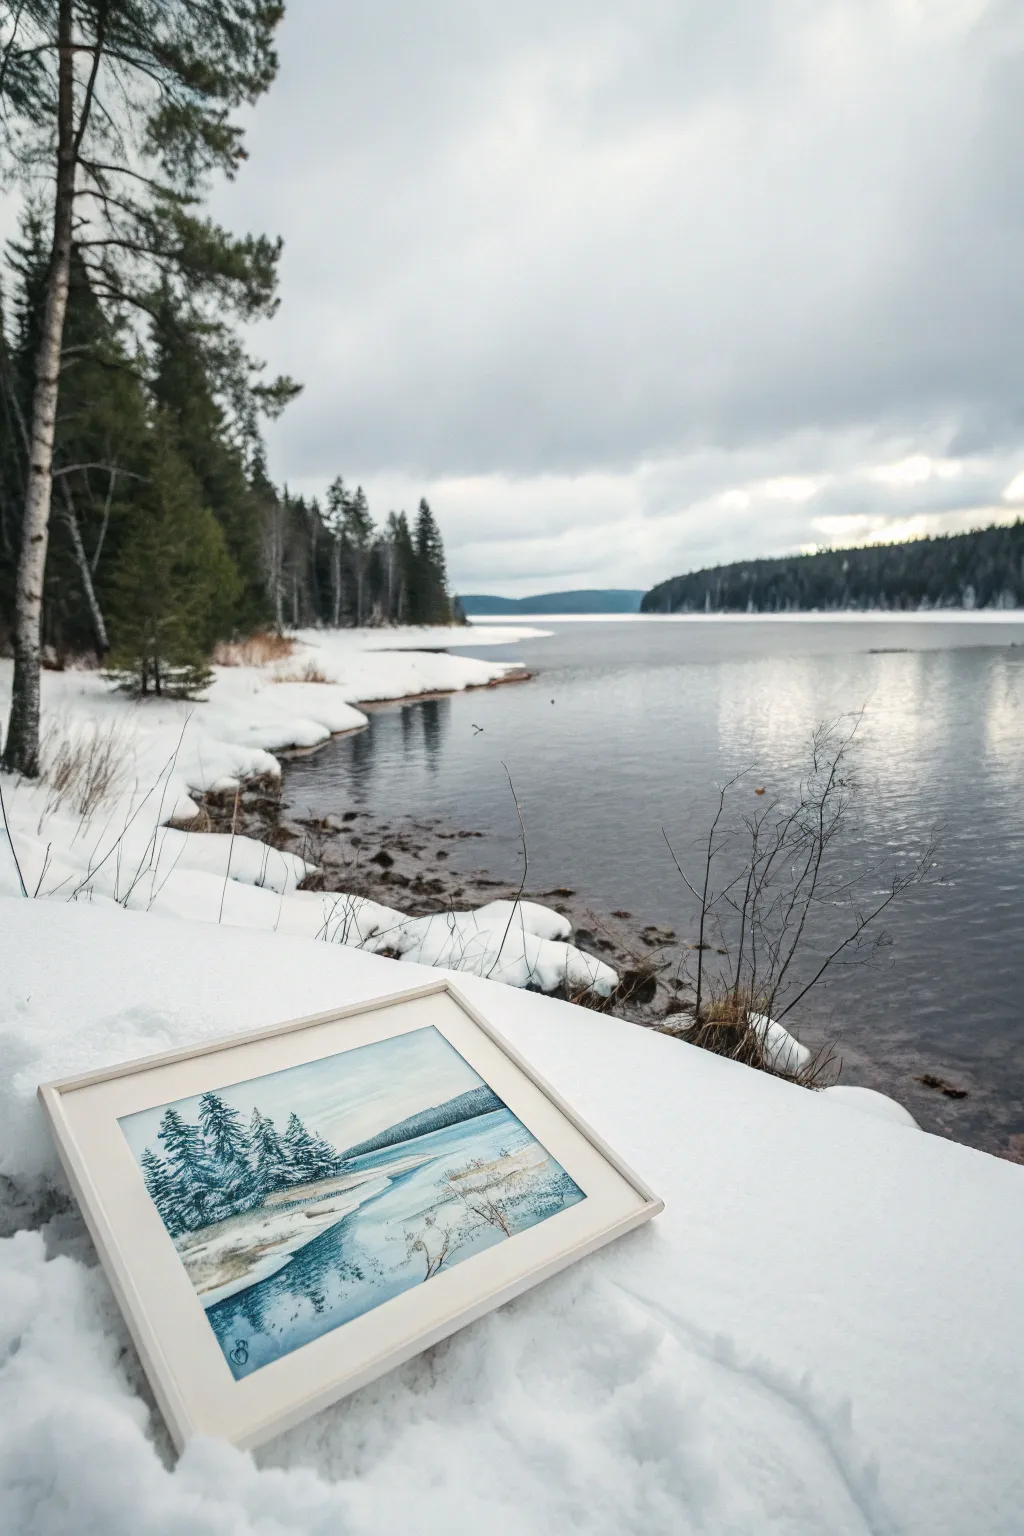
Capture the serene chill of a frozen lakeside with this watercolor tutorial that emphasizes cool shadow play and misty atmosphere. You will learn to balance crisp evergreen details against soft, slushy washes to recreate exactly what you see in this snowy landscape.
How-To Guide
Materials
- Cold Press Watercolor Paper (140lb/300gsm)
- Watercolor Paints: Prussian Blue, Payne’s Grey, Cerulean Blue, Burnt Umber, Indigo, White Gouache
- Brushes: Large Flat Wash (3/4 inch), Round Bristle (#8 and #4), Fine Rigger or Liner brush
- Masking Fluid (optional but recommended)
- Painter’s Tape
- Two jars of water
- Paper towels
- Pencil (HB) for light sketching
- White or light wood frame (for final presentation)
Step 1: Preparation and Sketching
-
Tape and Prep:
Secure your watercolor paper to a board using painter’s tape on all four sides. This creates that crisp white collection border seen in the final piece and prevents buckling. -
Horizon Line:
Lightly sketch a horizon line just above the halfway point of your paper. Keep your pencil pressure very light so graphite doesn’t smudge into the wet paint later. -
Mapping the Shoreline:
Sketch the jagged shoreline coming from the bottom left corner, sweeping diagonally toward the center right. Outline shapes for snowbanks along the water’s edge. -
Tree Placement:
Indicate the position of the pine grouping on the left side. Don’t draw every branch; just mark the vertical trunks and the general triangular shape of the canopy.
Bleeding Lines?
If your crisp shoreline blurs into the snow, your paper was too wet. Let the snow area dry bone-dry before painting the adjacent dark water edge.
Step 2: Sky and Distant Hills
-
Wet-on-Wet Sky:
Pre-wet the sky area with clean water. While shiny, drop in a very diluted wash of Cerulean Blue near the top right, fading to almost clear water as you reach the horizon. -
Soft Clouds:
While the sky is still damp, lift out a few soft horizontal streaks with a clean, thirsty brush to create subtle cloud movement. -
Distant Hill Layer:
Once the sky is dry, mix a pale, watery grey-blue using Payne’s Grey and a touch of Indigo. Paint the distant hill line across the horizon. Keep the bottom edge soft where it meets the lake. -
Adding Hill Texture:
While the hill wash is damp, drop in slightly darker pigment along the top ridge to suggest tree density in the distance.
Step 3: The Icy Lake
-
Water Base Layer:
Mix a cool, glassy blue using Prussian Blue and plenty of water. Paint the open water area, leaving irregular patches of white paper untouched near the shore to represent floating ice and snow. -
Deepening Values:
While the water wash is still wet, charge in darker Indigo horizontally to create ripples and depth, focusing on the foreground area. -
Shoreline Shadows:
Use a mix of Cerulean Blue and a tiny touch of Burnt Umber to paint the shadows on the snowbanks. Paint the side of the snow facing away from the light source. -
Defining the Edge:
Once the water is distinct, use a liner brush with dark Indigo to carefully outline the damp edge where the water meets the snow. This crisp line is crucial for the ‘frozen’ look.
Pro Tip: Scratching Out
While the dark tree paint is wet, use a clean fingernail or palette knife to scratch vertical lines. This pushes pigment aside to create pale trunks.
Step 4: Trees and Foreground Details
-
Mixing Evergreen Green:
Mix a deep, cool green using Indigo and a touch of Burnt Umber or a cool yellow. The color should differ from the blue water but still feel wintry and muted. -
Painting Pine Trunks:
Draw the main vertical trunks of the left-hand trees using a rigger brush. Vary the thickness and don’t make them perfectly straight. -
Adding Foliage:
Using a #4 round brush, stipple the pine needles onto the branches. Keep the texture open so the sky shows through in places. I like to start at the top and work downward, widening the strokes. -
Snow on Boughs:
If you masked areas, rub off the fluid now. If not, use thick White Gouache to tap highlighted snow onto the top edges of your pine branches. -
Foreground Shrubs:
Use your finest brush and a watery mix of Burnt Umber to flick in delicate, bare twigs emerging from the snow in the bottom right corner. -
Final Highlights:
Add tiny sparks of White Gouache to the water surface or shoreline ice for extra sparkle. -
Framing:
Once fully dry, remove the tape carefully. Place the artwork into a simple, light-colored frame to let the cool tones breathe.
Step back and enjoy the peaceful chill of your winter landscape before finding the perfect spot to display it
Rainy Lake With Texture and Ripples
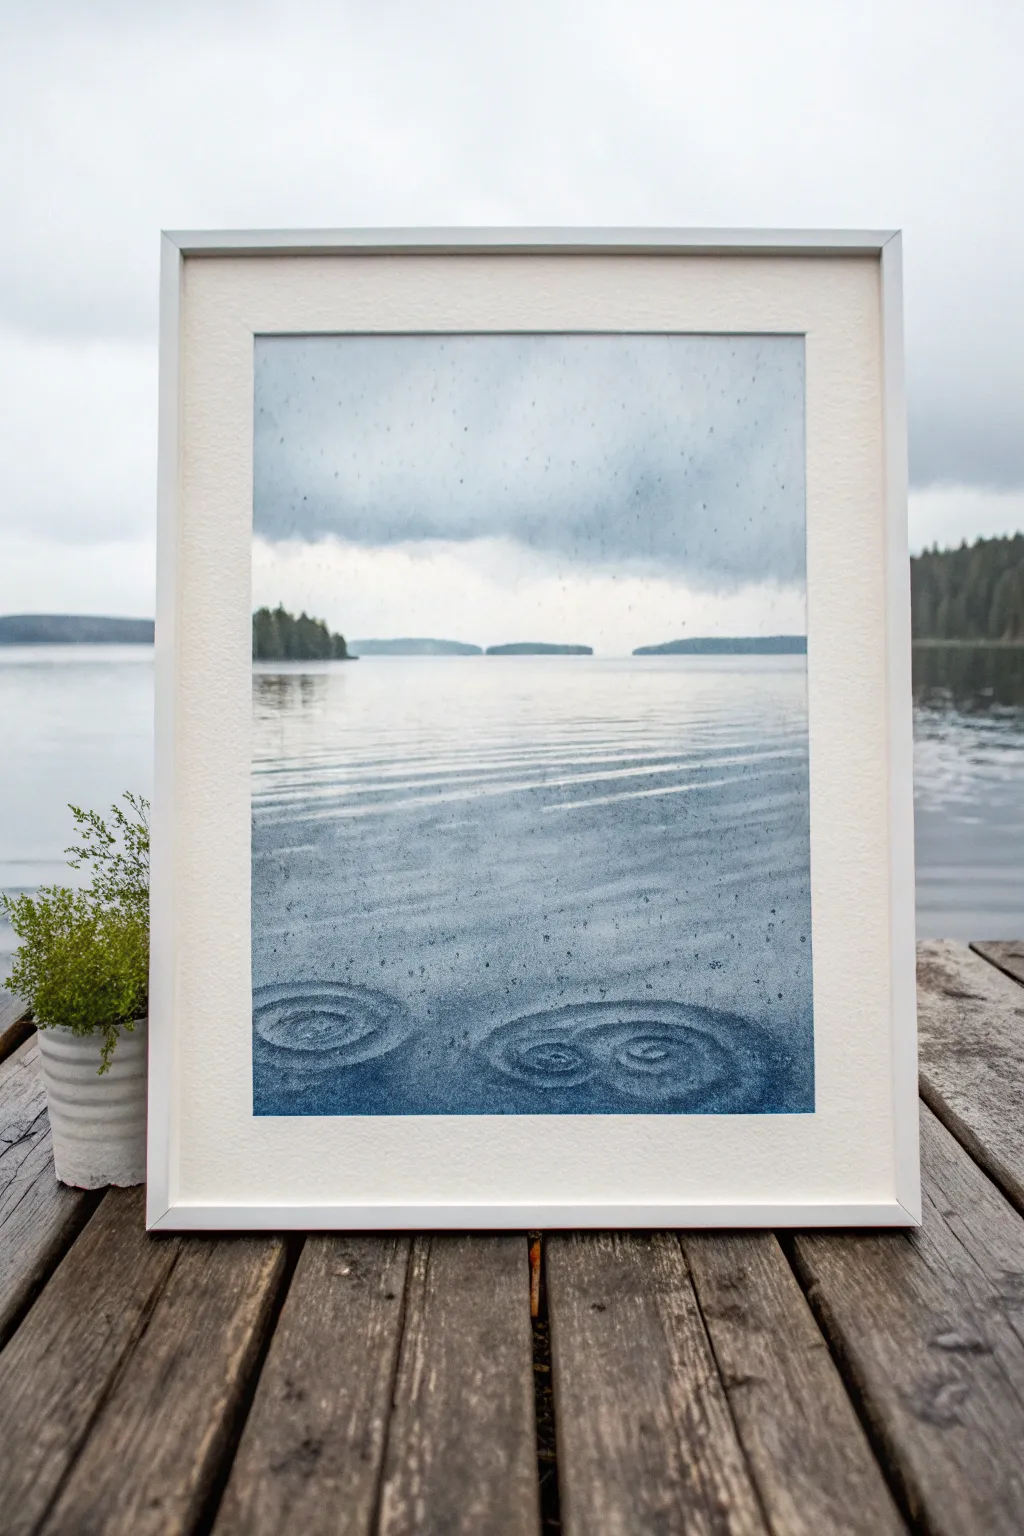
Capture the moody atmosphere of a rainy day at the lake with this textured, monochromatic painting. By using simple tools to create ripples and splatter effects, you can replicate the soothing rhythm of rainfall hitting calm water.
Step-by-Step Tutorial
Materials
- Heavyweight watercolor paper (300gsm, cold press)
- White or light wood frame with mount
- Payne’s Grey watercolor paint
- Indigo watercolor paint
- Large flat wash brush (1-inch or larger)
- Medium round brush
- Old toothbrush or stiff bristle brush
- Paper towels
- Two jars of water
- Hairdryer (optional)
- Masking tape
Step 1: Setting the Scene
-
Secure the paper:
Begin by taping down all four edges of your watercolor paper to a sturdy board. This prevents the paper from buckling when you apply the heavy washes needed for the lake background. -
Establish the horizon:
Lightly sketch a very faint horizon line about one-third of the way down from the top. Don’t worry about being perfectly straight; a natural, slightly uneven line works best for distant land. -
Mix your base wash:
Create a watery mixture of Payne’s Grey with a significant amount of water. You want a very pale, misty grey-blue for the sky area. -
Paint the sky:
Using your large flat brush, apply this pale wash to the sky area, fading it out to almost pure water as you reach the horizon line to suggest distant mist.
Uneven Water Blooms?
If your water droplets created harsh ‘cauliflower’ edges, lightly scrub the dry edge with a damp stiff brush to soften the transition back into the background wash.
Step 2: Creating the Water and Land
-
Paint the distance:
While the sky is still slightly damp, mix a darker concentration of Indigo and Payne’s Grey. Paint the distant tree line just above your horizon, letting the bottom edge bleed slightly into the wet paper for a soft, rainy look. -
Start the lake gradient:
For the water, start at the horizon with a very light wash, similar to the bottom of the sky. As you move down the paper towards the foreground, gradually add more pigment to darken the water. -
Add surface ripples:
While the main water wash is wet, lift out horizontal streaks using a clean, slightly damp brush. This negative painting technique creates the illusion of light reflecting off gentle waves. -
Deepen the foreground:
At the very bottom of the paper, apply your darkest mix of Indigo. This anchors the painting and provides contrast for the ripples we will create next. -
Dry the base layer:
Let this entire layer dry completely. It must be bone dry before the next step to prevent the textures from blurring into mud.
Use Salt for Texture
Sprinkle coarse sea salt onto the wet foreground wash. Leave it until completely dry, then brush it off. This creates organic, crystalline textures that look like churning water.
Step 3: Adding Rain Texture
-
Spatter masking:
Cover the top sky portion of your painting with a sheet of scrap paper. We want the heavy rain texture to be focused primarily on the water surface and the foreground. -
Create rain splatter:
Dip an old toothbrush into clean water, or water slightly tinted with pigment. Run your thumb across the bristles to flick varying sizes of droplets onto the dry water area. -
Lift the droplets:
Wait about 10-15 seconds for the water droplets to activate the underlying paint. Then, press a paper towel firmly onto the surface to blot them up, leaving behind light, textured spots. -
Paint concentric rings:
Select two or three larger ‘splatter’ spots in the foreground. Using a fine round brush and a dark mix of Indigo, carefully paint thin, concentric circles around these spots to mimic ripples expanding. -
Soften the ripples:
I like to take a damp brush and gently blur the outer edges of these painted rings so they look integrated into the water rather than stamped on. -
Add falling rain:
Remove the scrap paper covering the sky. Take a slightly dry, stiff brush with pale grey paint and drag it vertically across the sky area in quick, light strokes to suggest falling rain.
Step 4: Finishing and Framing
-
Enhance contrast:
Once everything is dry, evaluate the distant treeline. If it faded too much, glaze a second, darker layer over the trees to make them pop against the mist. -
Remove the tape:
Carefully peel away the masking tape at a 45-degree angle away from the painting to ensure a crisp white border. -
Mount the artwork:
Place your dried painting behind the bevelled mount. Ensure the horizon line is level before securing it to the back of the mount. -
Final assembly:
Clean the inside of the glass to remove any dust, place the mounted artwork inside the frame, and secure the backing clips.
Hang your finished piece in a well-lit spot to enjoy the calming, rainy vibe every day


Wildflower Foreground by the Lake
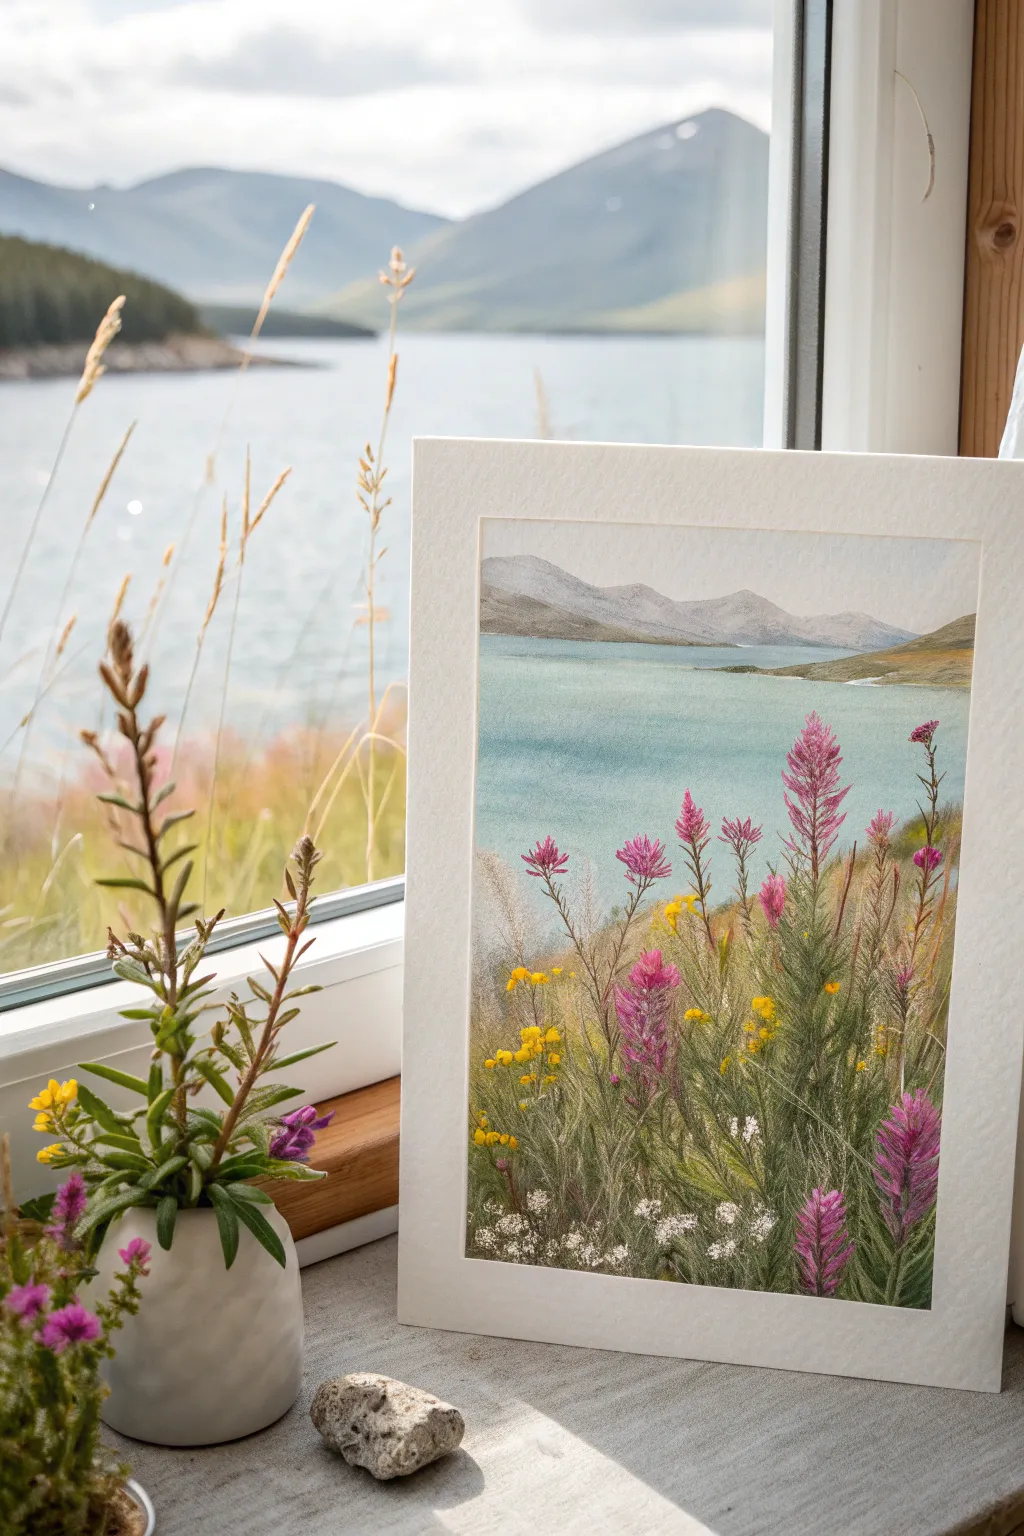
Capture the serene beauty of a mountain lake framed by vibrant wildflowers in this detailed watercolor study. This project focuses on building atmospheric depth, from distant misty peaks to the sharp, colorful textures of fireweed in the foreground.
Detailed Instructions
Materials
- Cold pressed watercolor paper (140lb/300gsm)
- Watercolor paints (Cerulean Blue, Ultramarine, Sap Green, Burnt Sienna, Alizarin Crimson, Lemon Yellow, Paynes Grey)
- White gouache or white gel pen
- Round brushes (sizes 2, 6, and 10)
- Rigger or liner brush
- Masking fluid
- Pencil (HB) and eraser
- Two jars of water
- Paper towels
Step 1: Sketching & Preparation
-
Establish the horizon:
Begin by lightly sketching the horizon line about two-thirds up the paper. This high horizon emphasizes the foreground flowers. -
Outline the mountains:
Draw the contour of the distant mountains. Keep the lines faint and slightly undulating to mimic natural terrain like the scene outside the window. -
Map the foreground:
Lightly indicate the main clusters of fireweed (the tall pink spikes) on the right side. You don’t need to draw every petal, just the general vertical shapes and heights. -
Protect the highlights:
Apply masking fluid carefully over the tallest flower spikes and some thin grass blades. This preserves the bright white paper so your pinks and yellows will pop later.
Natural Haze
To make distant mountains look further away, dilute your paint heavily with water. Cooler colors (blues/purples) naturally recede, while warm greens come forward.
Step 2: Painting the Atmosphere & Water
-
Wash the sky:
Wet the sky area with clean water. Drop in a very pale wash of Cerulean Blue, keeping it lighter near the mountain tops to suggest distance. -
Base layer for mountains:
While the sky is still damp (but not soaking), paint the distant mountains with a mix of Ultramarine and a touch of Burnt Sienna. This creates a muted, grey-purple tone that recedes visually. -
Add mountain details:
Once the first mountain layer is dry, add slightly darker shadows in the crevices using a bit more pigment. Keep edges soft to maintain that misty look. -
Paint the lake:
Mix a large puddle of turquoise using Cerulean Blue and a tiny bit of Sap Green. Apply this across the water area, using horizontal strokes. -
Deepen the water:
While the lake wash is wet, drop slightly darker blue into the foreground water area to create depth, but leave the water near the far shore lighter.
Muddy Greens?
If your wildflower stems are blending into the grass background, wait for the background to dry completely before painting the crisp stem lines over it.
Step 3: The Foreground Landscape
-
Underpainting the grass:
Mix a warm, earthy green using Sap Green and Burnt Sienna. Paint the grassy slope area, letting it be patchy and uneven to suggest terrain. -
Remove masking:
Wait until the paper is completely bone-dry. Gently rub away the masking fluid to reveal the stark white shapes of your flowers. -
First layer of Fireweed:
Using a size 2 brush and Alizarin Crimson mixed with a touch of purple, dab small, irregular petal shapes onto the upper parts of the flower spikes. -
Add yellow wildflowers:
Dot in clusters of Lemon Yellow among the grasses. Keep these loose and organic, varying the size of the dots. -
Paint stems and leaves:
Use your rigger brush with a dark green mix to pull thin, vertical lines for stems. Connect your flower heads to the ground, allowing lines to cross over each other.
Step 4: Final Details
-
Deepen shadows:
Mix a dark, neutral green (almost black) using Sap Green and Payne’s Grey. Paint negative space between the grass blades at the very bottom to anchor the scene. -
Refine the flowers:
Go back into the pink fireweed with a more saturated magenta to add specific petal details on the shadowed side of the blooms. -
Add white accents:
Using white gouache or a gel pen, add tiny highlights to the flower tips and draw delicate white baby’s breath or seed heads near the bottom. -
Final dry brush texture:
Take a nearly dry brush with brown paint and lightly drag it over some grass areas to create the texture of dried seed heads and wheat.
Step back and admire how the layers of paint have transformed into a peaceful lakeside view full of botanical life
Minimal Lake Horizon With Foggy Hills

Capture the serene stillness of a foggy morning on the water with this atmospheric watercolor painting. This project focuses on subtle gradations and soft transitions to create a sense of depth and tranquility.
Step-by-Step Guide
Materials
- Cold press watercolor paper (300 gsm)
- Masking tape
- Pencil and eraser
- Watercolor paints (Indigo, Payne’s Grey, Burnt Umber, Ultramarine Blue, Titanium White/White Gouache)
- Flat wash brush (¾ inch)
- Round brushes (sizes 4 and 8)
- Rigger brush or liner brush
- Two jars of water
- Paper towels
Step 1: Preparation and Sky
-
Secure the edges:
Begin by taping down all four edges of your watercolor paper to a board with masking tape. This creates a crisp white border and prevents the paper from buckling when wet. -
Establish the horizon:
Lightly sketch a straight horizontal line about one-third of the way down from the top of the paper. This will be your horizon line where the sky meets the distant land. -
Pre-wet the sky:
Using your large flat brush and clean water, wet the area above the horizon line. The paper should be damp and glistening but not holding puddles. -
Apply the stormy sky:
Mix a diluted wash of Payne’s Grey with a touch of Indigo. working wet-on-wet, drop this color into the upper sky, letting it bloom downward naturally to assist the cloudy effect. -
Soften the horizon:
While the paint is still damp, lift a little pigment right above the horizon line using a thirsty brush (a clean, damp brush) to suggest distant light breaking through the fog.
Muddy Waters?
If your grey looks brown or ‘muddy,’ you likely over-mixed the orange and blue tones. Let layers dry completely between washes to keep colors distinct and clean.
Step 2: Painting the Water
-
Base wash for the lake:
Mix a very watery, pale blue-grey wash using Ultramarine Blue and a tiny bit of Burnt Umber. Apply this across the entire water section, from the horizon line down to the bottom tape. -
Deepen the foreground:
While the wash is still wet, add a slightly stronger mix of Indigo to the bottom third of the paper. Gently blend this upward to create a smooth gradient, making the water look deeper closer to the viewer. -
Add surface ripples:
Once the initial wash is damp (not soaking), use a round brush size 8 with a slightly thicker grey mix to paint horizontal streaks. Keep these strokes minimal and soft to mimic calm water ripples. -
Let it dry completely:
Allow the entire painting to bone dry. This is crucial before adding the sharp details of the land and trees to prevent them from bleeding into the sky or water.
Add Texture
Sprinkle a tiny pinch of salt onto the wet foreground wash before it dries. The salt absorbs pigment, creating unique textures that resemble foam or bubbles.
Step 3: Trees and Land
-
Paint the distant landmass:
Mix a medium-value grey. Using the size 4 brush, paint a low, rolling hill shape sitting directly on the horizon line on the right side, extending towards the left. -
Create the tree line:
Switch to a more pigmented mix of Payne’s Grey and Indigo. While the hill shape is still damp, dab in vertical shapes along the top ridge to suggest a dense forest. -
Refine the tree tops:
While the paint is wet, use the tip of your brush to pull out tiny points for the tops of the pine trees. Vary the heights to make the forest look natural. -
Add the reflection:
Immediately beneath the landmass, paint a mirror image of the trees into the water. Use vertical strokes that pull downward, then swiftly run a clean, damp brush horizontally across them to blur the reflection. -
Create atmospheric perspective:
For the land furthest to the left, use a much more diluted, watery grey. This paler value pushes those trees further into the distance, enhancing the foggy effect.
Step 4: Foreground Details
-
Mix the darkest value:
Creating a near-black mix using Indigo and Burnt Umber. You want a creamy consistency for the sharp foreground details. -
Paint the reeds:
Load your rigger or liner brush. Starting from the very bottom edge of the paper, flick upward with quick, confident strokes to create thin grasses and reeds in the bottom right corner. -
Vary the grass:
Ensure your reed strokes vary in length and curvature. Some should cross over others to create a natural, tangled look. -
Final mist touches:
If the tree line looks too stark, you can glaze a very thin layer of white gouache over the area where the trees meet the water to simulate low-hanging mist. -
Reveal:
Once the painting is 100% dry, carefully peel away the masking tape at a 45-degree angle to reveal your crisp, clean border.
Step back and enjoy the calming atmosphere you’ve captured on paper
Reflections Broken by Windy Water
Capturing the serene beauty of a lakeside afternoon, this project focuses on the interplay between calm stillness and the gentle motion of wind on water. You will recreate the harmonious balance of soft clouds, dark pines, and their fragmented reflections dancing on the lake’s surface.
How-To Guide
Materials
- Canvas board or stretched canvas (11×14 or similar)
- Acrylic or oil paints (Titanium White, Ultramarine Blue, Cerulean Blue, Sap Green, Burnt Umber, Payne’s Grey, Yellow Ochre)
- Flat brushes (sizes 8, 4, 2)
- Round detail brush (size 1)
- Fan brush (optional, for trees)
- Palette knife
- Water jar or solvent
- Paper towels
- Easel
Step 1: Sky and Horizon Base
-
Prime the sky:
Begin by blocking in the upper two-thirds of the canvas with a mix of Titanium White and a touch of Cerulean Blue. The blue should be strongest at the very top, gradually fading to almost pure white as you move down toward the horizon line. -
Cloud formation:
While the sky paint is still wet (especially if using oils), use a clean brush to scumble in soft, diagonal cloud shapes using pure White mixed with a tiny hint of Yellow Ochre for warmth. Keep the edges soft and feathery to suggest movement. -
Establish the horizon:
Mix Ultramarine Blue with a touch of Payne’s Grey and White to create a distant, hazy blue-grey. Paint a thin, straight strip across the horizon line to represent the far shore, keeping it low-contrast to push it into the background. -
Water underpainting:
Mirror the sky colors onto the water surface below the horizon. Use horizontal strokes here, keeping the blue slightly darker than the sky itself to account for the depth of the water.
Muddy Reflections?
If your water ripples are blending too much into the dark reflection color, stop and let the dark under-layer dry completely. Then, glaze the light ripple lines on top for crisp separation.
Step 2: The Tree Line
-
Mix the foliage greens:
Prepare a range of greens on your palette. Mix Sap Green with Burnt Umber for the shadows, and Sap Green with Yellow Ochre for the sunlit tips. Keep a separate pile of very dark green (almost black) for the deepest recesses. -
Block in tree shapes:
Using a size 4 flat brush, paint the main shapes of the pine trees on the left side. Start with a vertical line for the trunk, then dab outward to create the conical silhouette. Vary the heights, making the trees tallest on the far left and tapering down toward the center. -
Adding texture and depth:
Switch to a smaller brush or the corner of a fan brush. Use your dark shadow mix to define the dense interior of the trees, then layer the mid-tone greens on top. -
Highlighting the foliage:
Lightly touch the left-facing branches (assuming the light comes from the left) with your lightest green mix. This creates dimension and separates the individual trees from the mass. -
The shoreline base:
Paint a thin, sandy-colored line at the base of the trees using a mix of White, Burnt Umber, and Yellow Ochre. This grounds the trees and separates the land from the water.
Pro Tip: Atmospheric Haze
For the distant tree line on the horizon, mix a tiny bit of the sky color into your green. This desaturates the green and visually pushes those trees further back into the distance.
Step 3: Reflections and Ripples
-
Vertical reflection blocking:
Directly under the tree line, pull vertical strokes of dark green and brown downward into the water. These strokes should basically mimic the shape of the trees above but inverted. -
Breaking the image:
While the reflection paint is wet, take a clean, dry flat brush and gently drag it horizontally across the vertical reflections. This ‘cuts’ the image and creates the illusion of a smooth surface. -
Adding the wind:
Now comes the crucial step for that ‘windy water’ look. Mix a light blue-grey color (sky color slightly darkened). Using the chisel edge of a flat brush, paint thin, horizontal lines cutting through the dark tree reflections. -
Varying the ripples:
Make the ripple lines closer together and thinner as they recede toward the horizon, and slightly wider and more distinct in the foreground. This perspective trick gives the water surface flatness. -
Sky reflection details:
In the open water area (away from the trees), add stronger horizontal dashes of white and pale blue to reflect the clouds and sky movement.
Step 4: Foreground Elements
-
Foreground reeds:
In the bottom right corner, use your liner brush or a rigger brush with thinned paint (Sap Green + Yellow Ochre) to flick upward strokes representing tall grasses or reeds. -
Reed reflections:
Add faint, squiggly reflections for these reeds directly below them in the water, but keep them very subtle compared to the tree reflections. -
Final highlights:
Add a few sparkles of pure white on the water’s surface where the light hits the strongest ripples, and check the tree tops for any final touches of light.
Step back and admire how a few horizontal strokes can transform a mirror image into a living, moving body of water
Top-Down Aerial Lake Shapes
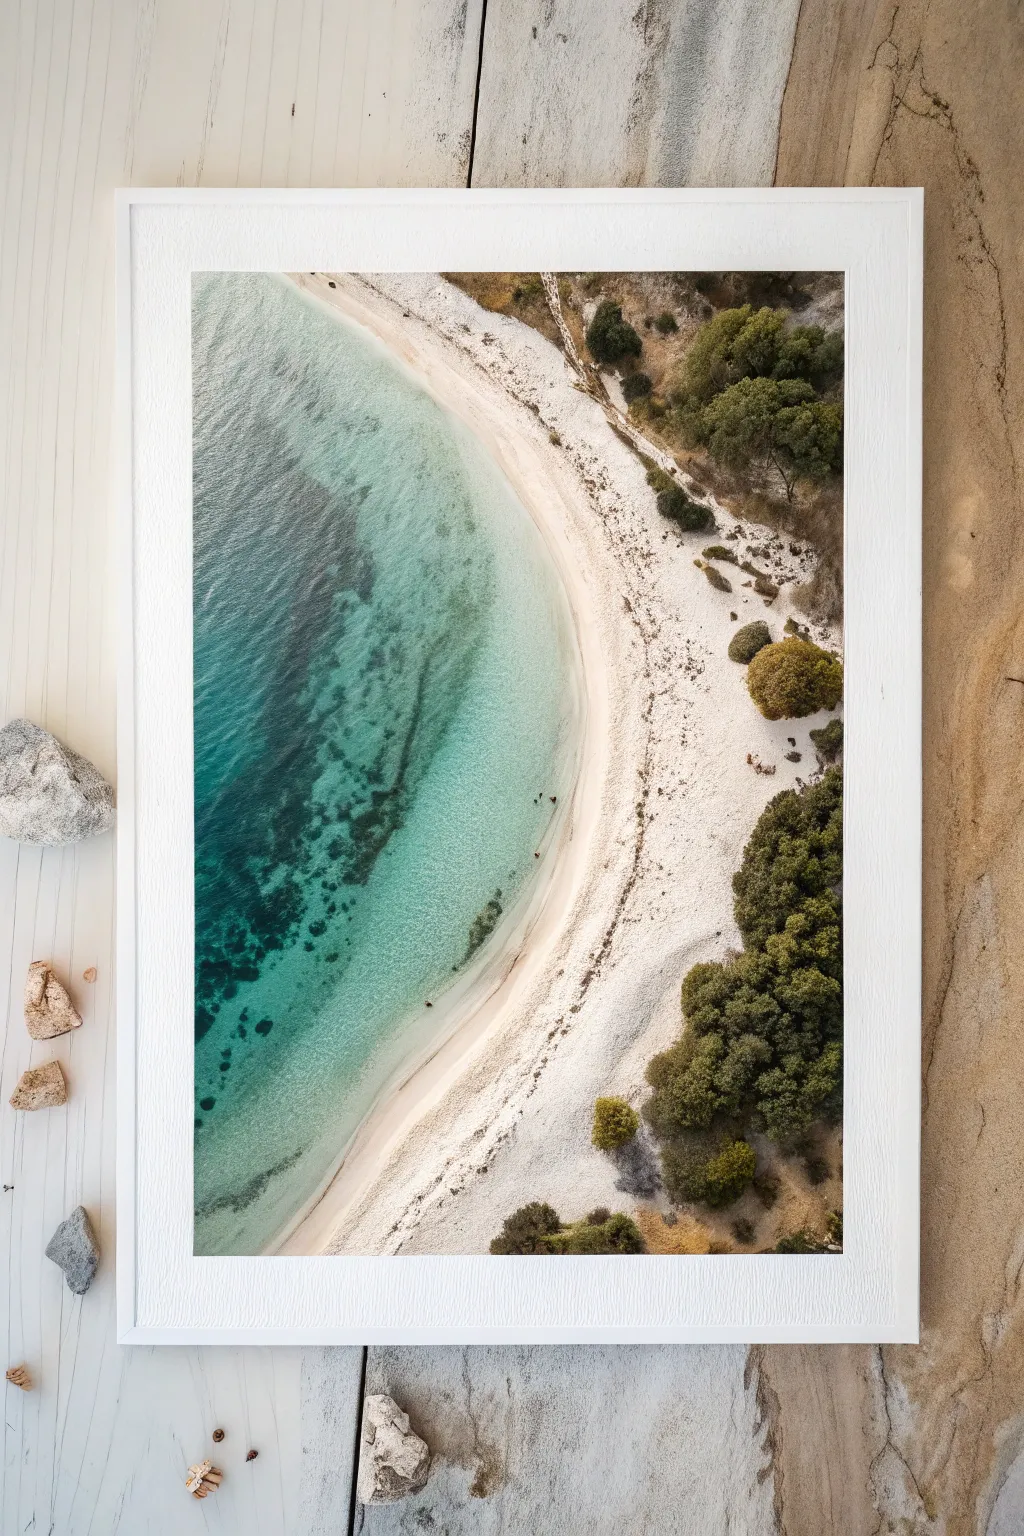
Capture the serene beauty of a secluded cove with this top-down aerial painting tutorial. Using watercolor techniques, you’ll recreate the stunning gradient of turquoise waters meeting pristine white sand and lush coastal greenery.
Detailed Instructions
Materials
- Cold press watercolor paper (300 gsm)
- Watercolor paints (Phthalo Blue, Viridian Green, Sap Green, Burnt Umber, Yellow Ochre, Indigo)
- White gouache or acrylic ink
- Masking fluid
- Round brushes (sizes 2, 6, and 10)
- Small stippling brush or old toothbrush
- Painter’s tape
- Paper towels
- Two jars of water
- Pencil and eraser
Step 1: Planning and Preparation
-
Secure the paper:
Tape your watercolor paper down firmly to a board using painter’s tape on all four sides to prevent buckling when the paper gets wet. -
Sketch the shoreline:
Lightly sketch a large, gentle curve extending from the top left corner down to the bottom right. This line separates the ocean from the beach. Keep the pencil lines very faint so they don’t show through the final paint. -
Protect the foam line:
Apply a thin, irregular line of masking fluid right along the water’s edge on the sand side. This will preserve the brilliant white of the crashing waves later.
Natural Shorelines
Avoid perfectly smooth curves for your shoreline. Wiggle your brush slightly and allow small jagged variations to make the beach look organic and eroded by nature.
Step 2: Painting the Ocean
-
Wet-on-wet base:
Using your largest round brush, wet the entire ocean area with clean water until it glistens but isn’t pooling. -
Initial wash:
Start near the shoreline with a very diluted mix of Viridian Green and a touch of Phthalo Blue. I like to keep this area very light and transparent to mimic shallow crystal-clear water. -
Deepening the depths:
While the paper is still wet, mix a stronger concentration of Phthalo Blue and Indigo. Apply this to the far left edge of the paper, letting it bleed naturally toward the lighter shoreline color to create a gradient. -
Adding texture:
Drop in spots of darker blue-green into the wet mid-depth areas to simulate underwater rocks and seaweed patches. Soften any hard edges with a damp brush if they spread too little. -
Dry completely:
Let the ocean layer dry entirely before moving on. This is crucial to prevent the sand color from bleeding into your pristine water.
Add 3D Texture
Mix actual fine sand or salt into your wet beach paint wash. Once dry, brush off the excess salt for a gritty, realistic texture that catches the light.
Step 3: Creating the Sandy Beach
-
Sand base tone:
Mix a very watery wash of Yellow Ochre with a tiny dot of Burnt Umber. Apply this to the beach area, leaving some spots almost white for sun-bleached sand highlights. -
Texturing the sand:
While the sand wash is damp, splatter tiny droplets of clean water and slightly darker brown paint using an old toothbrush or stiff brush. This creates the granular look of sand and debris. -
Shadows and depth:
Add slightly darker sandy tones near the vegetation line to suggest slope and shadow, giving the beach dimension.
Step 4: Vegetation and Details
-
Base foliage shapes:
Mix Sap Green with a little Indigo for a deep, natural green. Using a size 6 brush, dab in irregular cloud-like shapes along the right edge of the paper to form the tree canopy. -
Building form:
While the green is wet, drop in Burnt Umber near the ‘roots’ or centers of the bushes to add density. Use a lighter yellow-green on the tops of the trees to indicate where the sun hits them. -
Adding texture:
Once the main foliage shapes are dry, use a small, relatively dry brush to stipple darker green details on top, creating the look of individual leaves and rough textures. -
Reveal the waves:
Gently rub off the masking fluid from the shoreline to reveal the crisp white paper underneath. -
Foam details:
Using white gouache, paint thin, broken lines parallel to the shore in the shallow water to create ripples. Stipple a little white over the transition area where the masking fluid was to soften the hard edge. -
Final touches:
Add tiny dark specks on the sand or in the water to represent rocks or even small figures swimming, which gives the scene a sense of immense scale.
Now step back and admire your personal slice of paradise, ready to be framed and displayed
Night Sky Stars Over a Dark Lake
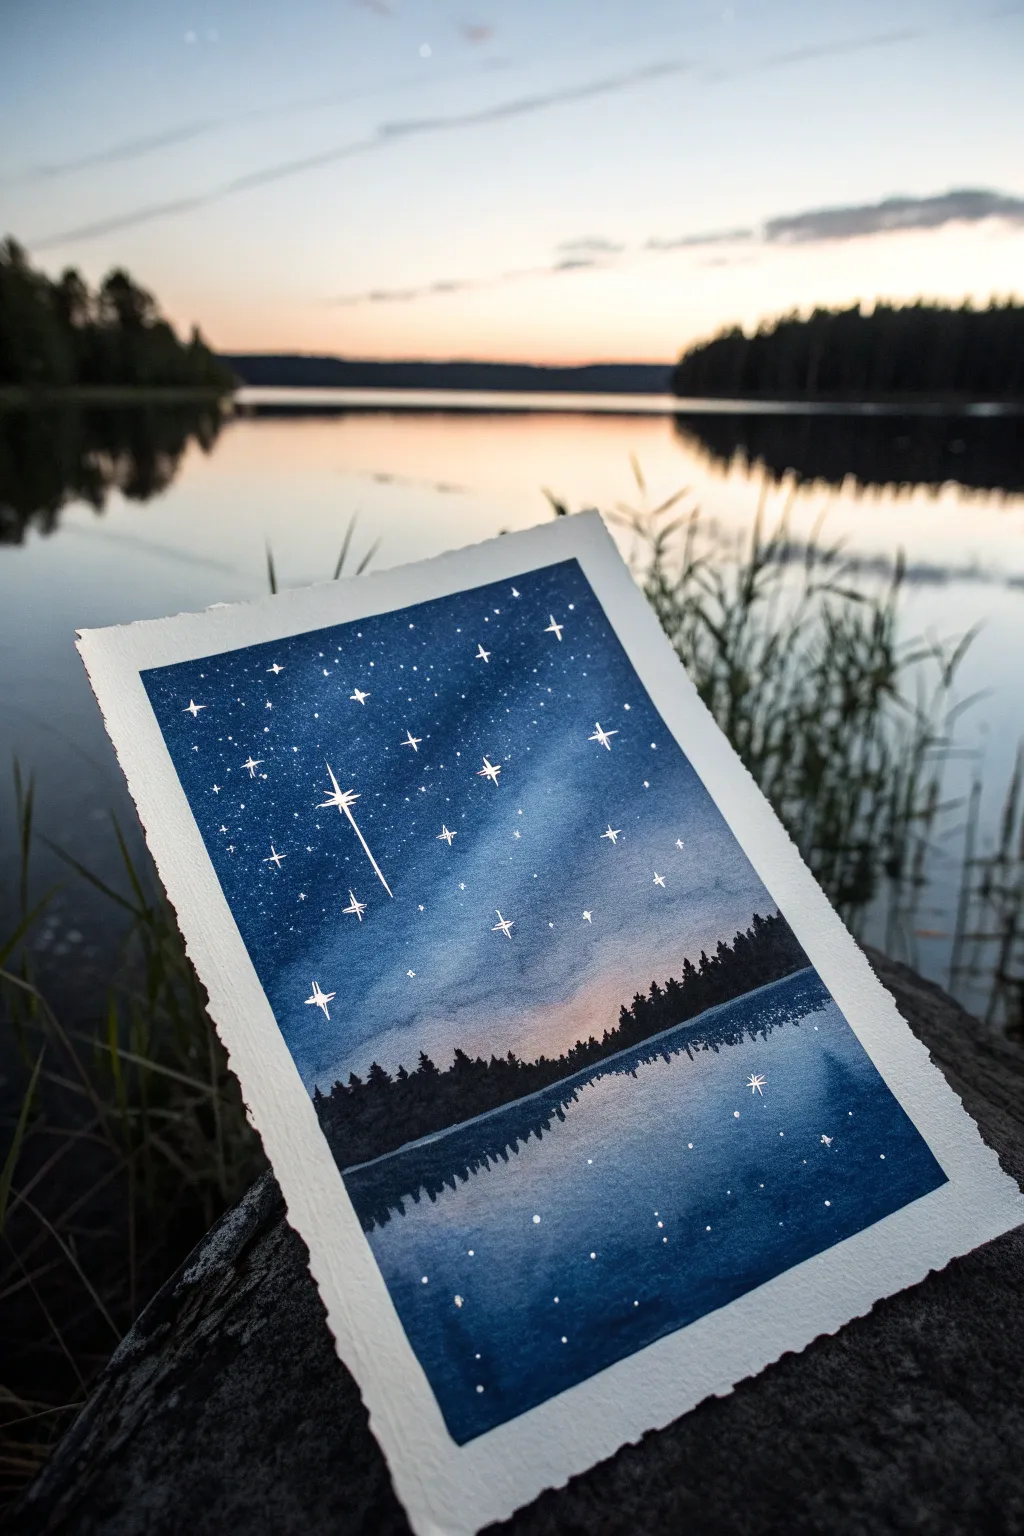
Capture the magic of a clear, starry night reflected in calm waters with this deep blue watercolor study. This project uses wet-on-wet techniques to create a glowing horizon before layering on delicate stars and dark silhouettes.
Detailed Instructions
Materials
- Cold press watercolor paper (300 gsm)
- Painter’s tape or masking tape
- Watercolor paints: Indigo, Prussian Blue, Black (Lamp Black or Payne’s Gray), and a warm tone like Burnt Sienna or Alizarin Crimson for the horizon
- White opacity: White Gouache or a White Gel Pen
- Round brushes: Size 8 (for washes) and Size 2 or 0 (for details)
- Clean water and mixing palette
- Paper towels
Step 1: Setting the Scene
-
Tape edges:
Begin by taping down all four edges of your paper to a flat board. This creates the crisp white border seen in the photo and prevents the paper from buckling during heavy washes. -
Horizon line:
Lightly sketch a straight line about one-third of the way up from the bottom. This separates your sky from the lake. -
Pre-wet the sky:
Using your large round brush, wet the entire sky area with clean water. The paper should glisten but not have standing puddles.
Pro Tip: Glowing Stars
Before adding the white dot, lift a tiny circle of blue paint with a damp brush. Place the white star in the center of this lighter spot for a glowing halo effect.
Step 2: Painting the Sky Gradient
-
Deep corners:
Start at the very top of the paper with your darkest blue (Indigo or Payne’s Gray). Use broad strokes, letting the paint flow downwards. -
Mid-tones:
Switch to Prussian Blue as you move toward the middle of the sky, blending it seamlessly into the darker top section while the paper is still wet. -
Milky way streak:
Leave a slightly lighter, diagonal streak through the center-right of the sky by lifting a little pigment occasionally or applying less paint here. -
Sunset glow:
Just above the treeline, introduce a very faint touch of diluted warm color—pink or peach. Blend this gently upward into the blue so there are no hard lines. -
Initial drying:
Let this sky layer dry completely. If you move on too soon, the sharp details later will bleed.
Troubleshooting: Cauliflowers?
If ‘blooms’ or watermarks appear in your sky, it means you added water into semi-dry paint. Embrace them as cloud textures, or wait until totally dry to glaze over.
Step 3: Creating the Reflection
-
Mirror effect:
Re-wet the bottom section (the lake area) with clean water. -
Reverse gradient:
Paint the water in reverse order of the sky. Start with the faint warm glow just below the horizon line. -
Darkening the bottom:
Transition into your mid-tone blues and finish with the darkest indigo at the very bottom edge of the paper. -
Full dry:
Allow the entire painting to dry completely. It must be bone-dry to touch before adding the silhouette.
Step 4: Silhouettes and Stars
-
Treeline base:
Mix a thick, concentrated black or dark indigo. Using the tip of your small brush, paint a jagged line right across the horizon. -
Tree details:
Pull small vertical strokes upward from that base line to create pine tree shapes. Keep them varied in height for realism. -
Reflection silhouette:
Paint a similar, but softer, tree line upside down in the water. I like to gently blur the edges of the reflected trees with a slightly damp brush to show water movement. -
Star placement:
Using white gouache or a gel pen, dot stars into the dark parts of the sky. Vary the sizes—some tiny specks, some larger dots. -
Major stars:
Choose 3-4 spots for brighter ‘hero’ stars. Draw a small cross or plus-sign shape with extended tails to create the twinkle effect shown in the example. -
Shooting star:
Draw one long, thin line trailing from a bright star cluster to mimic a shooting star. -
Reflected stars:
Add corresponding white dots in the water section. Keep these slightly fewer and softer than the sky stars. -
The reveal:
Once everything is perfectly dry, slowly peel away the tape at a 45-degree angle to reveal your clean edges.
Now you have a serene piece of the cosmos captured on paper.
Abstract Color-Block Lake Landscape
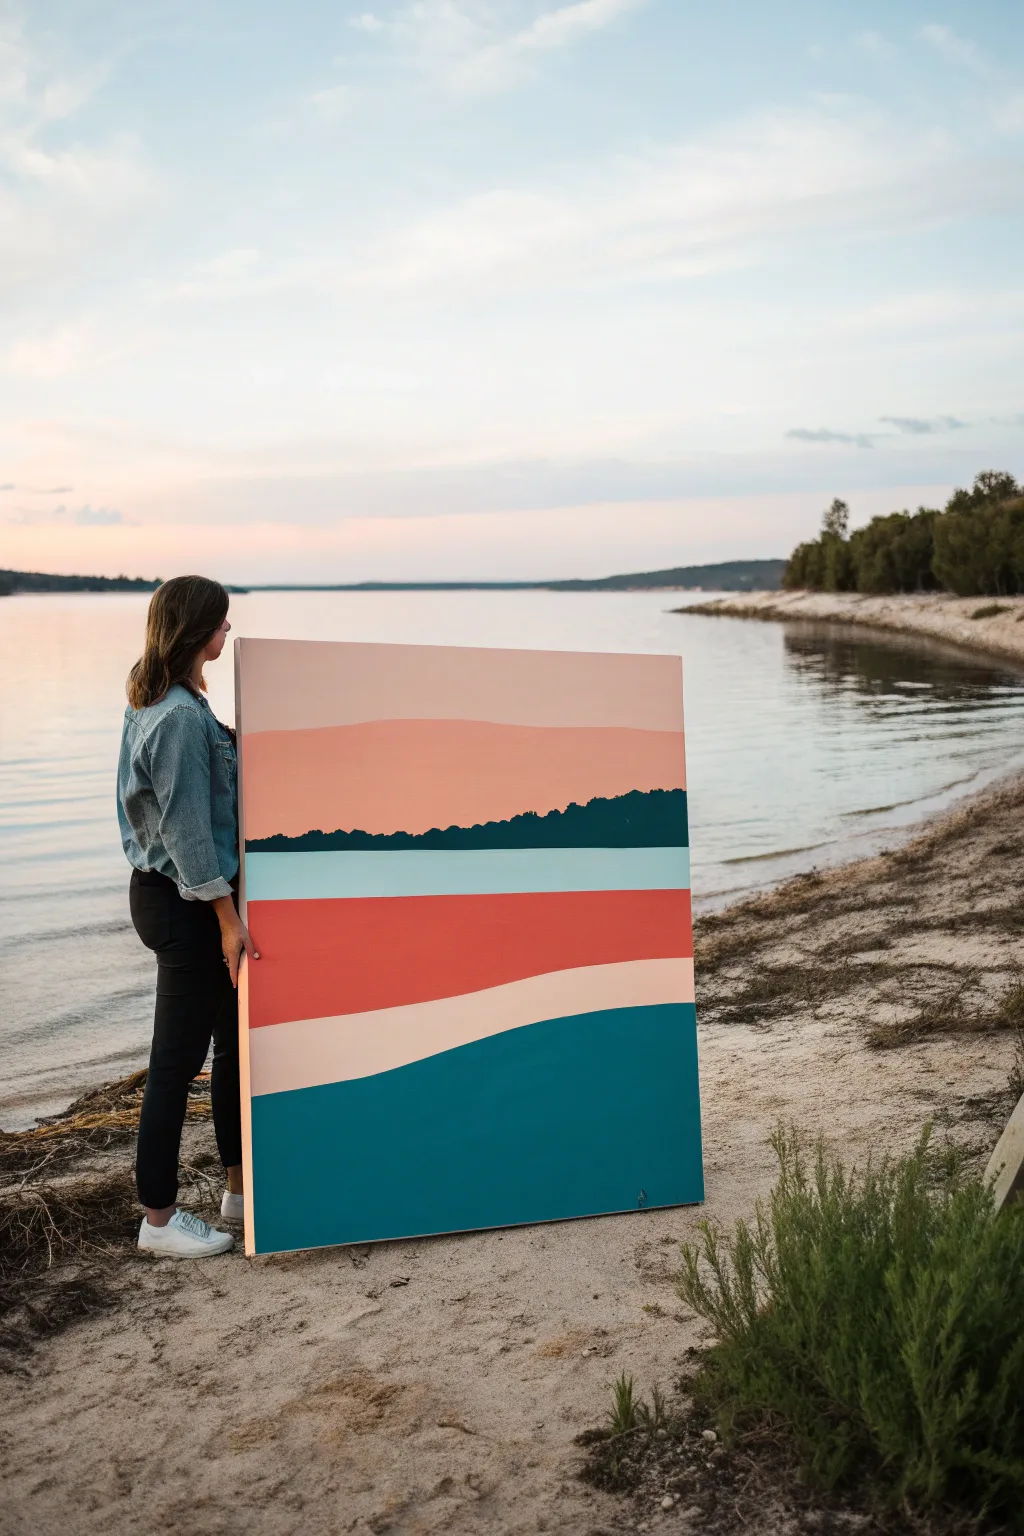
Capture the serene beauty of a lakeside evening with this minimalist abstract landscape. Using bold, horizontal blocks of color and gentle curves, you will recreate the soothing layers of water, land, and sky in a modern style.
Step-by-Step Tutorial
Materials
- Large stretched canvas (at least 24×36 inches recommended)
- Acrylic paints (Teal, Dark Teal/Forest Green, Coral, Cream, Light Blue, Peach, White)
- Set of wide flat brushes (2-inch to 4-inch)
- Painter’s tape or masking tape (optional for straight lines)
- Pencil
- Palette or mixing tray
- Cup of water and paper towels
- Easel or flat work surface
Step 1: Planning the Composition
-
Analyze the layers:
Look at the project image and break the design down into six distinct horizontal zones: the deep water at the bottom, the sandy shoreline, the bold reflection, the distant water line, the tree silhouette, and the two-tone sky. -
Sketch the guides:
Lightly sketch horizontal lines across your canvas to mark these zones. For the bottom water and sand sections, draw gentle, rolling curves rather than perfectly straight lines to mimic natural waves. -
Detail the tree line:
For the dark strip in the middle, sketch a slightly uneven top edge to represent the silhouette of a distant forest. Keep these bumps small and subtle.
Step 2: Painting the Water and Shore
-
Mix the deep teal:
Create a rich, dark cyan or teal color. Apply this to the large bottom section, filling the space with smooth, horizontal brushstrokes to minimize texture. -
Paint the sand layer:
Mix a warm cream or beige tone. Carefully paint the curved band directly above the deep teal water. Use a steady hand or a smaller flat brush to get a crisp edge where the colors meet. -
Add the coral reflection:
Mix a vibrant coral or salmon-orange hue. Fill in the band above the sand, ensuring the color is opaque and solid. I find two thin coats often look smoother than one thick coat here. -
Create the distant water:
Mix a very light, icy blue. Paint the thin, straight horizontal strip just above the coral band. This represents the calm water stretching to the horizon.
Uneven Edges?
If you struggle with shaky hands, use painter’s tape for the straight sections. Press the edges down firmly to prevent bleed-through, but peel it off while the paint is still wet.
Step 3: Adding the Horizon and Sky
-
Paint the tree silhouette:
Using a very dark teal or forest green (almost black), carefully fill in the shape you sketched for the trees. Use the corner of your brush to define the tiny bumps of the tree tops against the sky. -
Mix the sunset peach:
Create a soft, warm peach or dusty rose color. Paint the large section of sky directly above the tree line. -
Finish with the upper sky:
For the final top strip, mix a very pale blush or off-white. Blend this edge slightly with the peach below it if you want a gradient, or keep it distinct for a graphic look. -
Check for opacity:
Step back and look for any streaky areas. Apply a second coat to any color blocks that let the canvas weave show through.
Layering Colors
For the vibrant coral band, paint a layer of white underneath it first. This acts as a primer and makes the orange tone pop much brighter than painting directly on canvas.
Step 4: Finishing Touches
-
Touch up edges:
Use a small detail brush with the appropriate colors to sharpen any wavy lines or clean up spots where paint may have crossed over into a neighboring section. -
Paint the sides:
Don’t forget the edges of your canvas. Extend the horizontal bands of color around the sides for a professional, gallery-wrapped finish. -
Varnish (optional):
Once fully dry, you can apply a matte or satin varnish to protect the paint and unify the sheen across all the different colors.
Hang your artwork in a well-lit room to bring those soothing sunset vibes indoors
Monochrome Ink Wash Lake Mood Study
Capture the serene drama of a lakeside sunset using stark contrasts and fluid ink washes. This project balances the crisp silhouette of shoreline grasses against a luminous, cloud-streaked sky, all rendered in expressive monochrome.
Step-by-Step
Materials
- Heavyweight watercolor paper (300gsm, cold press)
- Black India ink or Sumi ink
- Large round watercolor brush (size 10 or 12)
- Small liner or rigger brush (size 0 or 1)
- Flat wash brush (1 inch)
- Masking fluid (drawing gum)
- Old toothbrush or bristle brush
- Paper towels
- Two water containers (one for rinsing, one for clean water)
- Mixing palette with deep wells
- Masking tape
- Artist board or stiff backing
Step 1: Preparation & Sky Wash
-
Secure the paper:
Begin by taping your watercolor paper securely to your artist board on all four sides. This prevents buckling when we apply heavy washes later. -
Mask the sun:
Identify where the bright sun reflection hits the water and breaks through the clouds. Use masking fluid to paint a rough, organic shape for the sun and the strongest glimmers on the water surface. -
Pre-wet the sky:
Once the masking fluid is bone dry, wet the entire sky area with clean water using your flat wash brush. The paper should be glistening but not forming puddles. -
Establish the cloud base:
Mix a very dilute grey wash (mostly water, tiny drop of ink). Drop this into the wet paper to establish the softest, lightest cloud forms, leaving white space around the masked sun area. -
Deepen the cloud shadows:
While the paper is still damp, mix a slightly stronger medium-grey ink wash. Dab this into the undersides of the clouds to create volume and that dramatic, stormy look. -
Add high-contrast details:
Switch to your round brush and undiluted ink. Add a few purposeful, dark strokes into the wettest parts of the clouds to let the ink bloom and create soft, dramatic edges.
Step 2: Horizon & Water
-
Paint the distant tree line:
Allow the sky to dry partially. Mix a dark, nearly black ink solution. With your round brush, paint the distant shoreline. The top edge should be jagged to suggest trees, but keep the bottom edge straight where it meets the water. -
Create the water wash:
Wet the water area of the paper with clean water. Apply a light-to-medium grey wash, dragging your brush horizontally. This mimics the calm movement of the lake surface. -
Add ripples and reflections:
While the water area is damp, use a stronger ink mix to paint horizontal dashes and lines. Concentrate these darker ripples near the foreground and under the tree line, fading them out near the sun reflection. -
Remove masking:
Wait for the painting to be completely 100% dry. Gently rub away the masking fluid with your finger or a rubber cement pickup to reveal the stark white paper underneath. -
Soften the sun edges:
If the edges of the sun look too harsh, take a slightly damp, clean brush and gently scrub the edges to soften them back into the sky.
Pro Tip: Controlling Bloom
Work on an angled surface. Gravity pulls the ink down, helping you control the wash for the sky and preventing ‘cauliflower’ back-runs in your smooth gradients.
Step 3: Foreground Details
-
Anchor the foreground:
Using pure, undiluted black ink, paint the solid mass of shadow in the bottom right corner. This grounds the composition. -
Sketch the reeds:
Switch to your liner or rigger brush. Load it with black ink and practice a quick, upward flicking motion on scrap paper first. Then, draw tall, thin grasses extending up from the dark corner. -
Add seed heads:
At the tips of some grass blades, stipple tiny dots or dashes to represent seed heads or cattails. Vary the height and direction so they don’t look like a picket fence. -
Refine water texture:
Look at the water reflection again. Use a dry-brush technique with medium-grey ink to gently drag sparkling texture across the white area where the masking fluid was, integrating the reflection. -
Final assessment:
Step back and assess your values. If the distant trees have faded too much upon drying (ink often dries lighter), add a second layer to ensure they remain a strong silhouette against the bright sky.
Level Up: Warm Undertones
Before starting your ink work, apply a very faint, pale yellow watercolor wash to the sun area. This adds a subtle sepia warmth to the finished monochrome piece.
Now you have a stunning, high-contrast landscape that captures the quiet beauty of twilight.


Have a question or want to share your own experience? I'd love to hear from you in the comments below!