If you’re craving a face paint design that feels instantly magical, unicorn face paint is the perfect place to play with color, sparkle, and dreamy details. I’m sharing my favorite unicorn face paint ideas—from classic party looks to artsy twists you can riff on in your own style.
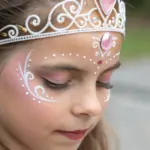
Galaxy Unicorn With Starbursts
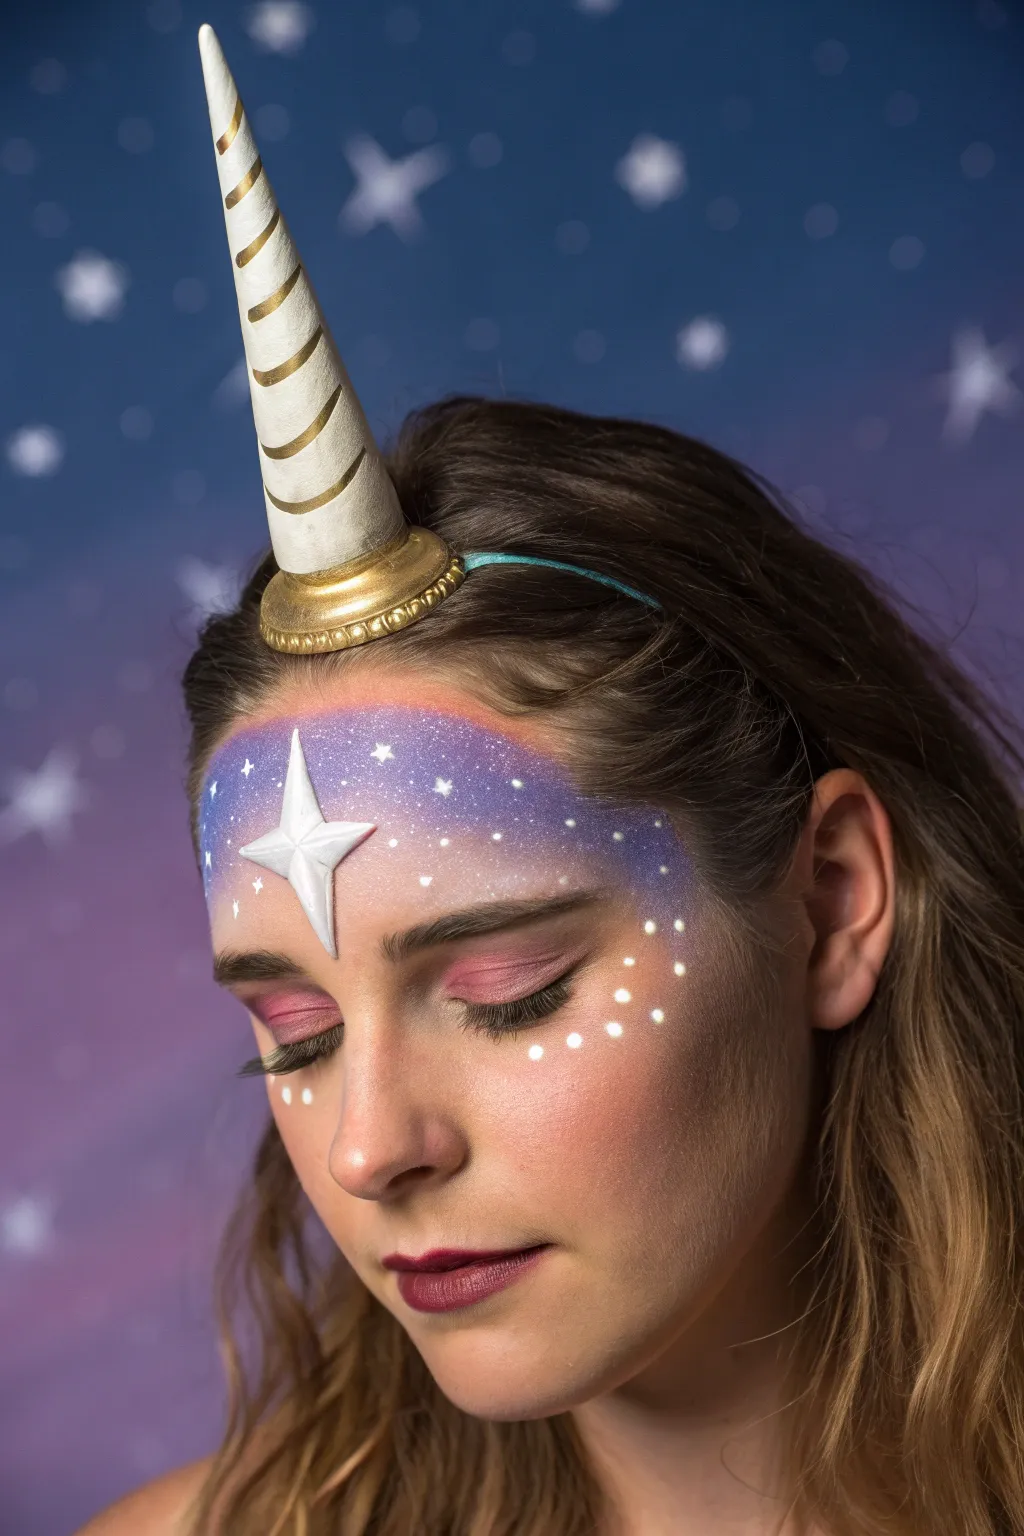
This ethereal design combines the classic elements of a unicorn with a dreamy, celestial landscape right on your forehead. Featuring a soft gradient galaxy background and a striking 3D starburst, it’s a sophisticated take on unicorn makeup perfect for festivals or costume parties.
Step-by-Step Guide
Materials
- Purple face paint (water-activated)
- Blue face paint (water-activated)
- White face paint
- Pink eyeshadow or blush
- Sponges (high-density)
- Small round brush (size 1 or 2)
- Medium filbert brush
- Large blending brush
- Cosmetic adhesive (spirit gum or skin-safe glue)
- Foam clay or lightweight modeling clay (white)
- Gold modeling clay or gold paint
- Unicorn horn headband
- Matte finish setting spray
Step 1: Sculpting the Starburst
-
Shape the clay:
Before you start painting, create your centerpiece. Take a small amount of white foam clay and mold it into a four-point star shape. Pinch the center so it rises up slightly, creating a faceted, 3D diamond effect. -
Allow to dry:
Set the star aside on a clean surface to cure. Foam clay is ideal because it’s incredibly lightweight, so it won’t weigh down your forehead later.
Step 2: Creating the Galaxy Base
-
Load the sponge:
Dampen a high-density sponge and load it with a vibrant purple face paint. Ensure the consistency is creamy, not drippy. -
Apply the purple arch:
Stipple the purple paint across the forehead, creating a wide arch shape that extends from temple to temple. Keep the edges soft and diffused rather than creating a hard line. -
Layer in blue tones:
Load a fresh corner of your sponge with a medium or dark blue. Dab this randomly within the purple area to add depth and dimension to your nebula. -
Highlight the center:
Using a barely-damp sponge with a tiny bit of white or pale lavender, gently pat the very center of the forehead area. This creates a glow and prepares the spot for the starburst. -
Blend the gradient:
While the paint is slightly tacky, use a clean sponge to soften the transition between colors, ensuring a seamless, cloudy galaxy look.
Adhesion Issues?
If the clay star won’t stick, ensure the paint underneath is 100% dry. Wipe the specific attachment spot with a dry q-tip to remove powdery residue before gluing.
Step 3: Adding the Stars
-
Paint large stars:
Switch to a fine round brush loaded with opaque white paint. Paint a few four-point stars scattered across the purple field. Vary their sizes for interest. -
Create distant stars:
For the tiny background stars, load your brush with watery white paint. Gently flick the bristles or tap the brush handle to splatter tiny speckles across the galaxy. -
Add the constellation dots:
Using the back end of your brush handle dipped in white paint, dot a curved line of larger ‘stars’ sweeping down from the temple onto the upper cheekbone.
Starry Splatter Support
When flicking white paint for stars, hold a piece of paper towel over the figure’s eyes and nose to protect the rest of your makeup from unwanted speckles.
Step 4: Eye Makeup & Details
-
Apply pink eyeshadow:
Sweep a soft, dusty pink eyeshadow over the entire eyelid. Blend it upwards into the crease, ensuring it complements but doesn’t clash with the purple forehead design. -
Deepen the lash line:
I like to smudge a little dark brown shadow or liner along the upper lash line to define the eyes without overpowering the softness of the look. -
Detail the lips:
Apply a berry or plum lipstick. For a cohesive look, choose a shade that has similar cool undertones to your galaxy face paint.
Step 5: Final Assembly
-
Attach the starburst:
Apply a small dot of cosmetic adhesive (like spirit gum) to the back of your dried clay star. Press it firmly into the center of the forehead, right over the highlighted area. -
Secure the star:
Hold the star in place for about 30 seconds to ensure the glue sets comfortably. -
Set the makeup:
Mist the entire face with a matte setting spray. This prevents the water-activated paints from smudging if you get warm. -
Position the accessories:
Place the unicorn horn headband on your head. Position it so the base of the horn sits just above the painted galaxy design.
Now you are ready to sparkle under the starlight with your unique unicorn creation


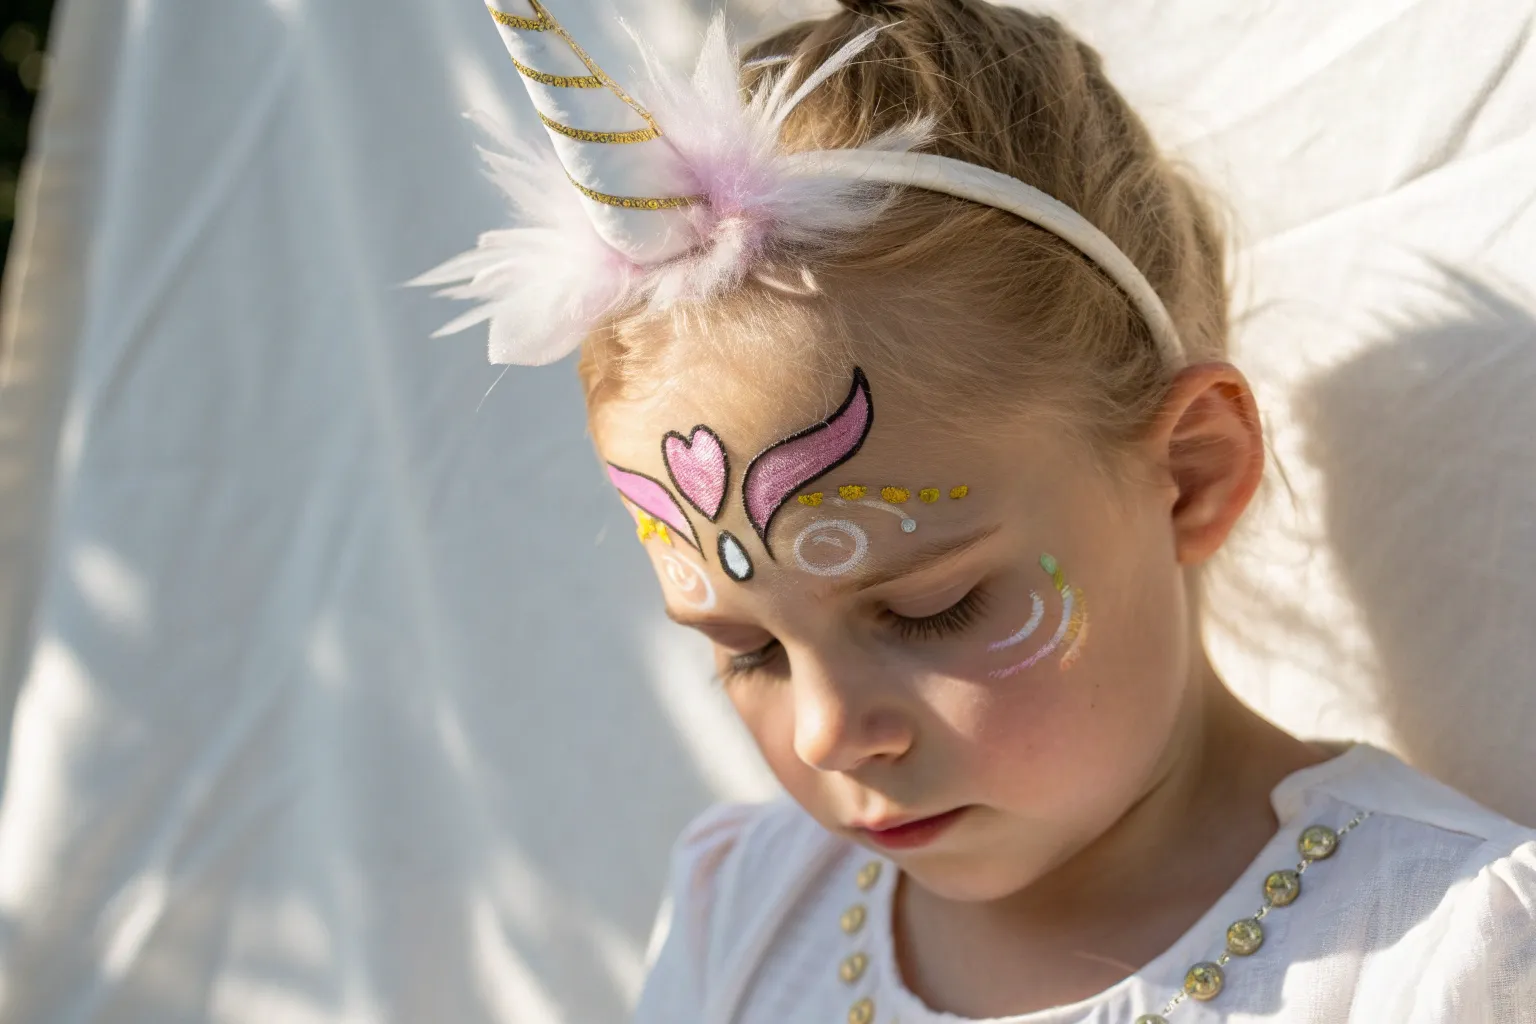
Floral Crown at the Horn Base
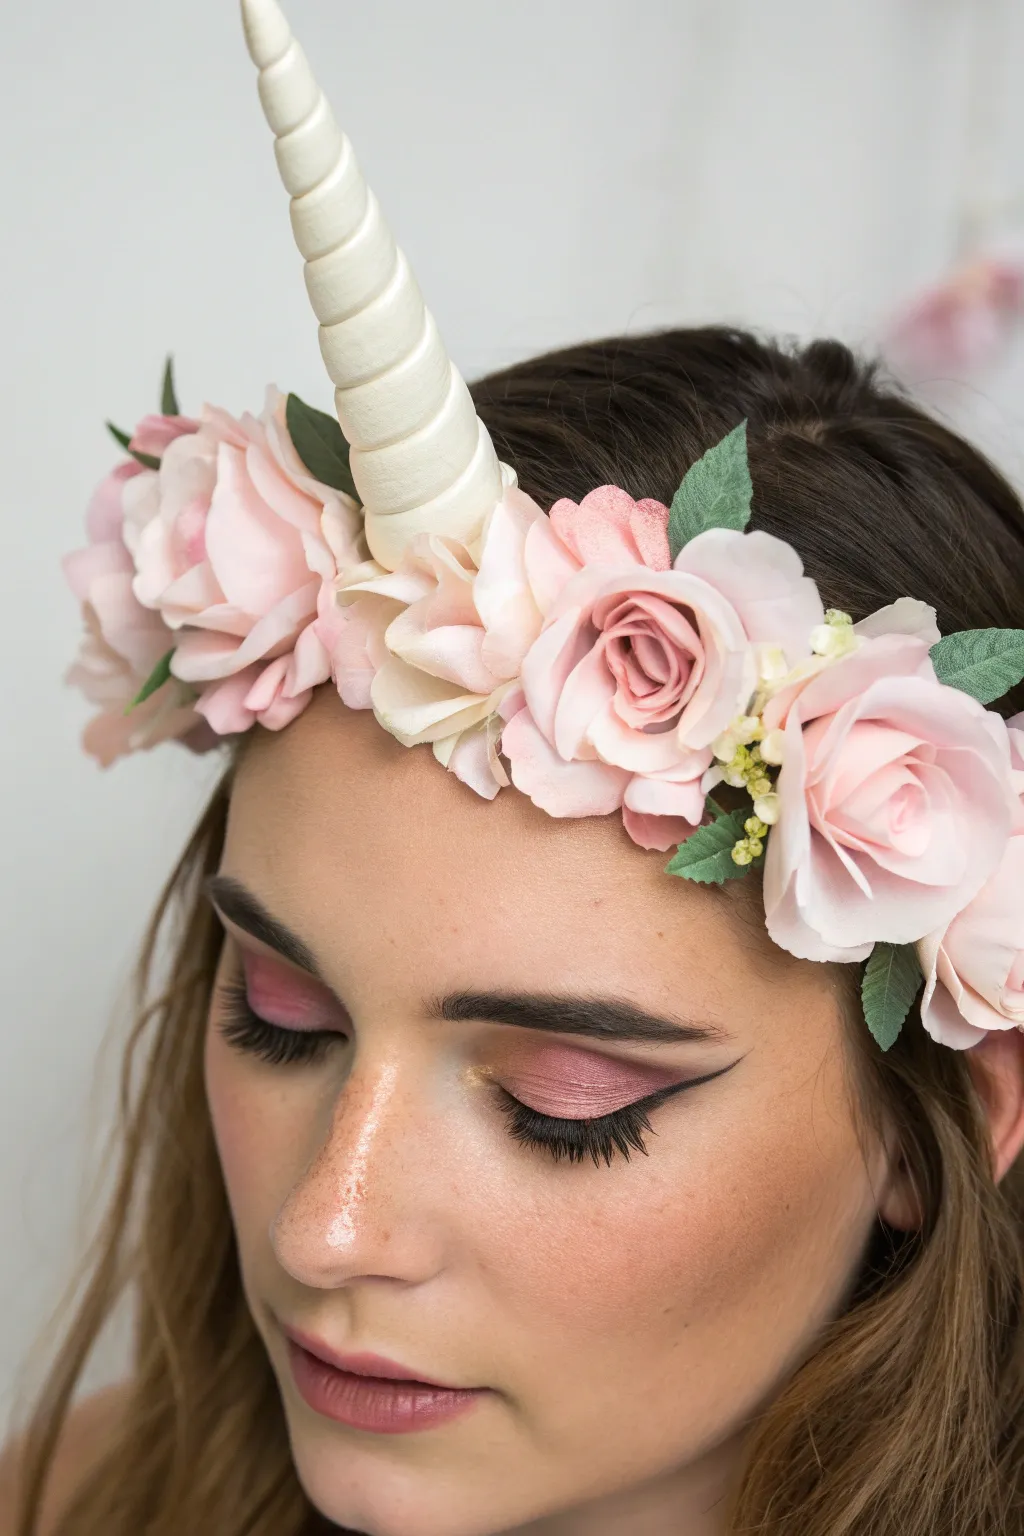
Transform into a mythical creature with this delicate DIY headband that pairs a spiraled unicorn horn with a romantic wreath of soft pink roses. The look is completed with subtle, shimmering eye makeup to match the floral hues, creating a whimsical and dreamy aesthetic perfect for festivals or costumes.
Step-by-Step Tutorial
Materials
- Plastic or foam unicorn horn (white/cream)
- Artificial roses (pale pink and dusty rose shades)
- Artificial green leaves
- Small white filler flowers (baby’s breath style)
- Plain plastic headband (white or clear)
- Hot glue gun and glue sticks
- Scissors or wire cutters
- Felt sheet (white or cream)
- Pale pink shimmer eyeshadow
- Dark grey or black eyeliner
- Highlighter (champagne or gold tone)
- Mascara
Step 1: Constructing the Horn Base
-
Prepare the headband:
Start with a clean, dry plastic headband. If your headband is very slippery, you can lightly scuff the top center with sandpaper to help the glue adhere better. -
Cut a felt stabilizer:
Cut a small circle of felt, slightly larger than the base of your unicorn horn. This will act as an anchor point between the horn and the headband. -
Attach the felt:
Apply a generous dab of hot glue to the underside of the headband at the very center. Press the center of your felt circle onto the glue and hold until set. -
Secure the horn:
Apply hot glue to the flat bottom of your unicorn horn. Press it firmly onto the felt circle on top of the headband. Hold it in place for at least 30 seconds to ensure it stands straight up without leaning. -
Reinforce the edges:
Added extra glue around the seam where the horn meets the felt to ensure maximum stability, as florals will cover this area later.
Step 2: Creating the Floral Arrangement
-
Prep the flowers:
Using wire cutters or scissors, snip the stems off your artificial roses and leaves. You want the flower heads to sit as flat as possible against the headband. -
Start at the center:
Apply hot glue to the back of your largest, most open pink rose. adhere it directly next to the base of the horn on the right side. -
Mirror the placement:
Take a similar-sized rose and glue it to the left side of the horn base. The goal is to conceal the bottom of the horn completely with blossoms. -
Build outward:
Continue adding slightly smaller roses down the sides of the headband, moving away from the horn. Slightly angle them so they face forward rather than straight up. -
Add greenery:
Tuck the artificial green leaves behind and between the roses. I like to glue them so the tips peek out, adding contrast and a natural woodland feel. -
Fill the gaps:
Inspect the crown for any visible headband or glue. Use the small white filler flowers or tiny rosebuds to plug these empty spaces. -
Check the back:
Ensure the back of the arrangement looks tidy, especially if your hair won’t fully cover it. You can add a few leaves to the back to hide the felt base.
Secure the Weight
If the horn feels heavy, sew the felt base directly around the headband before gluing. The stitching acts as a ‘grip’ so the horn won’t swivel.
Step 3: Applying the Unicorn Makeup
-
Prime the eyes:
Apply an eyeshadow primer to your lids to ensure the pink pigment stays vibrant and vibrant throughout your event. -
Apply base color:
Sweep a generous layer of pale pink shimmer eyeshadow across the entire eyelid, extending slightly above the crease. -
Deepen the look:
Use a slightly darker, mauve or dusty rose shadow in the outer corner and blend it inward to create dimension. -
Highlight the face:
Using a fan brush or fingers, tap a strong champagne or gold highlighter onto the high points of your cheeks and down the bridge of your nose for that magical glow. -
Define the eyes:
Draw a thin, winged line along the upper lashes using black or dark grey liquid liner. Keep the wing sharp but delicate. -
Finish with lashes:
Complete the look with two coats of lengthening mascara on the upper lashes to flutter beautifully beneath your floral crown.
Too Much Glue?
If hot glue strings are visible on your flowers, wait until they are completely cold and brittle, then blast them briefly with a hair dryer to melt them away.
Now you are ready to enchant everyone with your magical, handcrafted unicorn crown


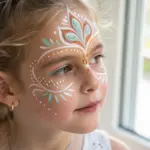
Minimal Line-Art Unicorn Cheek
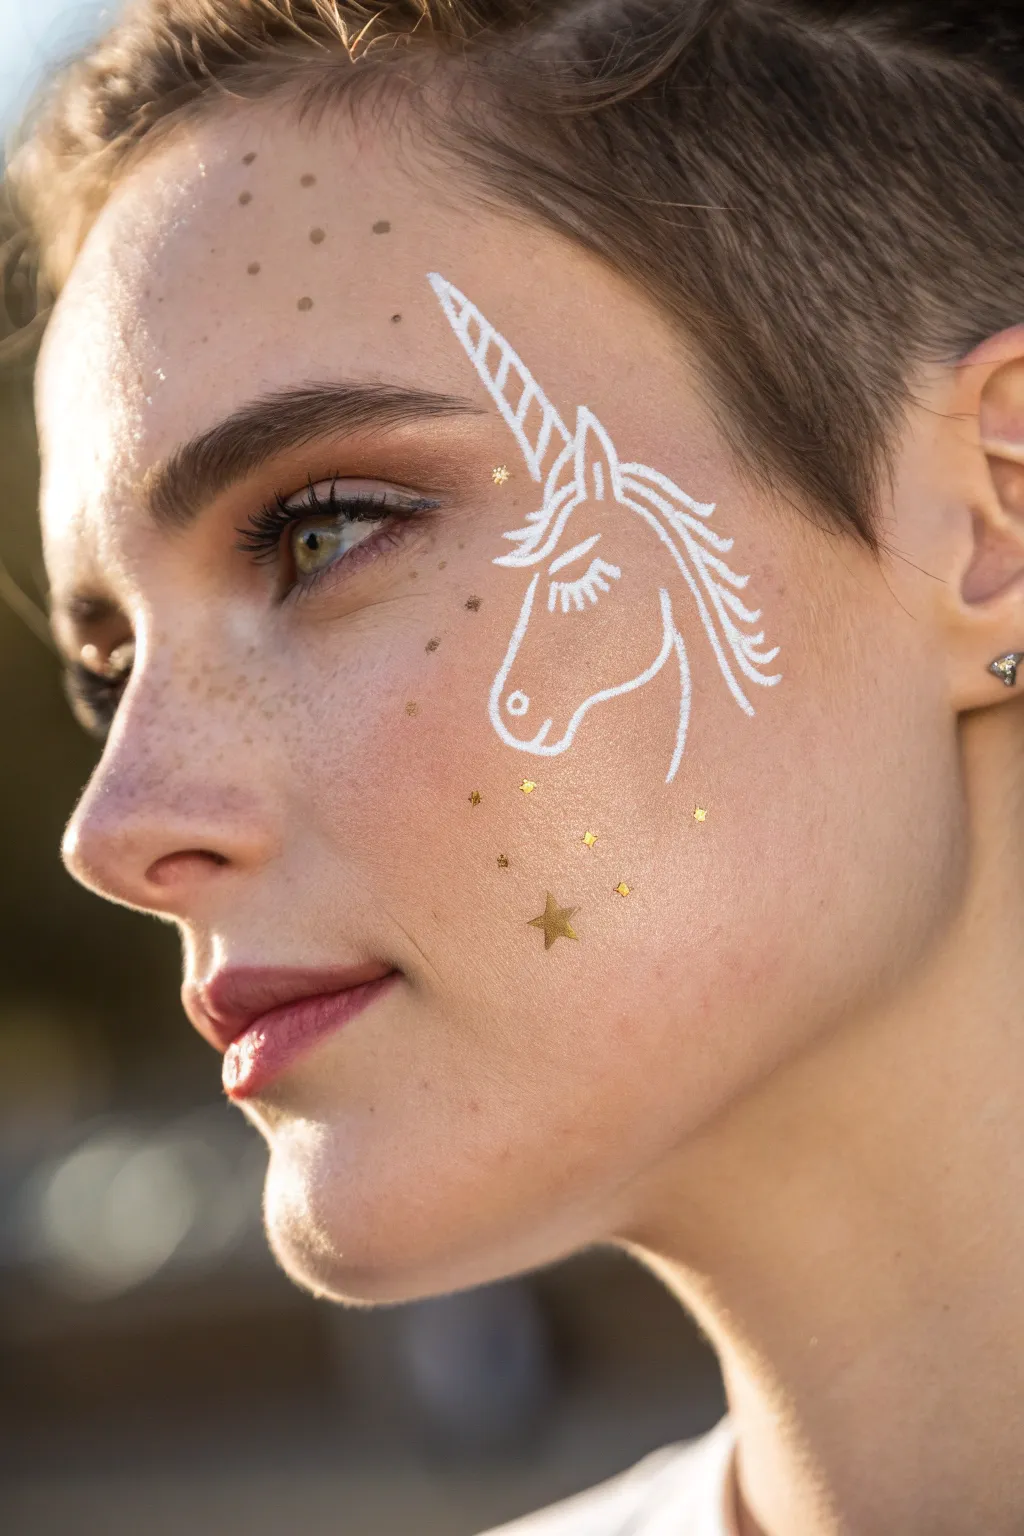
Embrace a subtle touch of magic with this delicate, white line-art unicorn design. Perfect for festivals or parties where you want a sophisticated fantasy look, this style relies on fine brushwork and sparkling accents to create an elegant finish.
Detailed Instructions
Materials
- High-quality white face paint (water-activated cake or cream)
- Fine liner brush (size 0 or 00)
- Gold glitter gel or loose cosmetic glitter
- Gold star sequins or chunky glitter shapes
- Gold shimmer eyeshadow or highlighter
- Small flat brush (for glitter)
- Setting spray (optional)
- Small cup of water
Step 1: Prepping the Canvas
-
Prepare the skin:
Start with clean, dry skin. If the subject is wearing foundation, ensure it is set with powder so the face paint doesn’t slide around. -
Add a glow:
Using a fluffy brush, lightly dust gold shimmer eyeshadow or highlighter across the cheekbone and temple area. This creates a radiant base that catches the light underneath your design.
Shakey Hands?
If lines look wobbly, clean them up with a damp Q-tip wrapped in a makeup wipe. It acts like a tiny eraser for crisp edges.
Step 2: Drafting the Unicorn
-
Load your brush:
Wet your fine liner brush and swirl it into the white face paint until you have a creamy consistency, similar to ink or melted ice cream. It shouldn’t be too drippy. -
Start with the horn:
Begin near the eyebrow tail. Paint a diagonal line extending upward for the horn’s spine. Add small, curved segments stacking up this line to create the spiral texture. -
Draw the forehead:
From the base of the horn, draw a short, gentle curve downwards to form the forehead and the start of the nose. -
Shape the mane:
Create the first section of the mane right behind the horn. Use quick, flicking strokes that taper off at the ends to mimic hair, pulling them backward towards the ear. -
Outline the muzzle:
Continue the line from the forehead down to create the nose, curving inward slightly for the nostril area, then rounding underneath for the chin. -
Detail the nostril and mouth:
Within the muzzle outline, paint a tiny teardrop shape for the nostril. Add a small, subtle line for the mouth just above the chin curve. -
Define the jawline:
Draw the jawline extending back from the chin, curving gently upward toward the ear. Keep this line smooth and deliberate. -
Form the neck:
Add a sweeping curve extending down from the jawline to suggest the neck, giving the unicorn a regal posture. -
Finish the mane:
Add several more sections of mane flowing down the back of the neck. Vary the length of your strokes to make the hair look windswept and natural. -
Add the eye:
In the center of the face, paint a simple, closed eyelid shape—a small downward curve. Add three or four tiny lashes flicking outward for a sleepy, peaceful expression. -
Paint the ear:
Finally, add a pointed ear shape emerging from the mane, just behind the eye area.
Step 3: Adding the Sparkle
-
Place freckle dots:
Dip a small tool or the back of your brush into gold glitter gel. Dot a series of ‘freckles’ across the nose and upper cheek area, scattering them randomly. -
Add gold speckles:
Create tinier dots using bronze or dark gold face paint amidst the glitter freckles to add depth and variation. -
Position the stars:
Using a tiny dab of skin-safe adhesive or wet face paint, adhere a few gold star sequins. Place the largest star lower on the cheek, and scatter smaller ones upward towards the temple. -
Highlight the forehead:
I like to add a few concentrated gold dots or stars high on the forehead near the hairline to balance the composition.
Make it Pop
Trace over the white lines with UV-reactive paint for a hidden glow that reveals itself under blacklight at night events.
Now you are ready to shine with this sophisticated take on magical face art

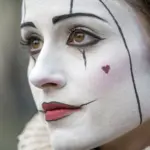

Frosted Unicorn With Snowflakes
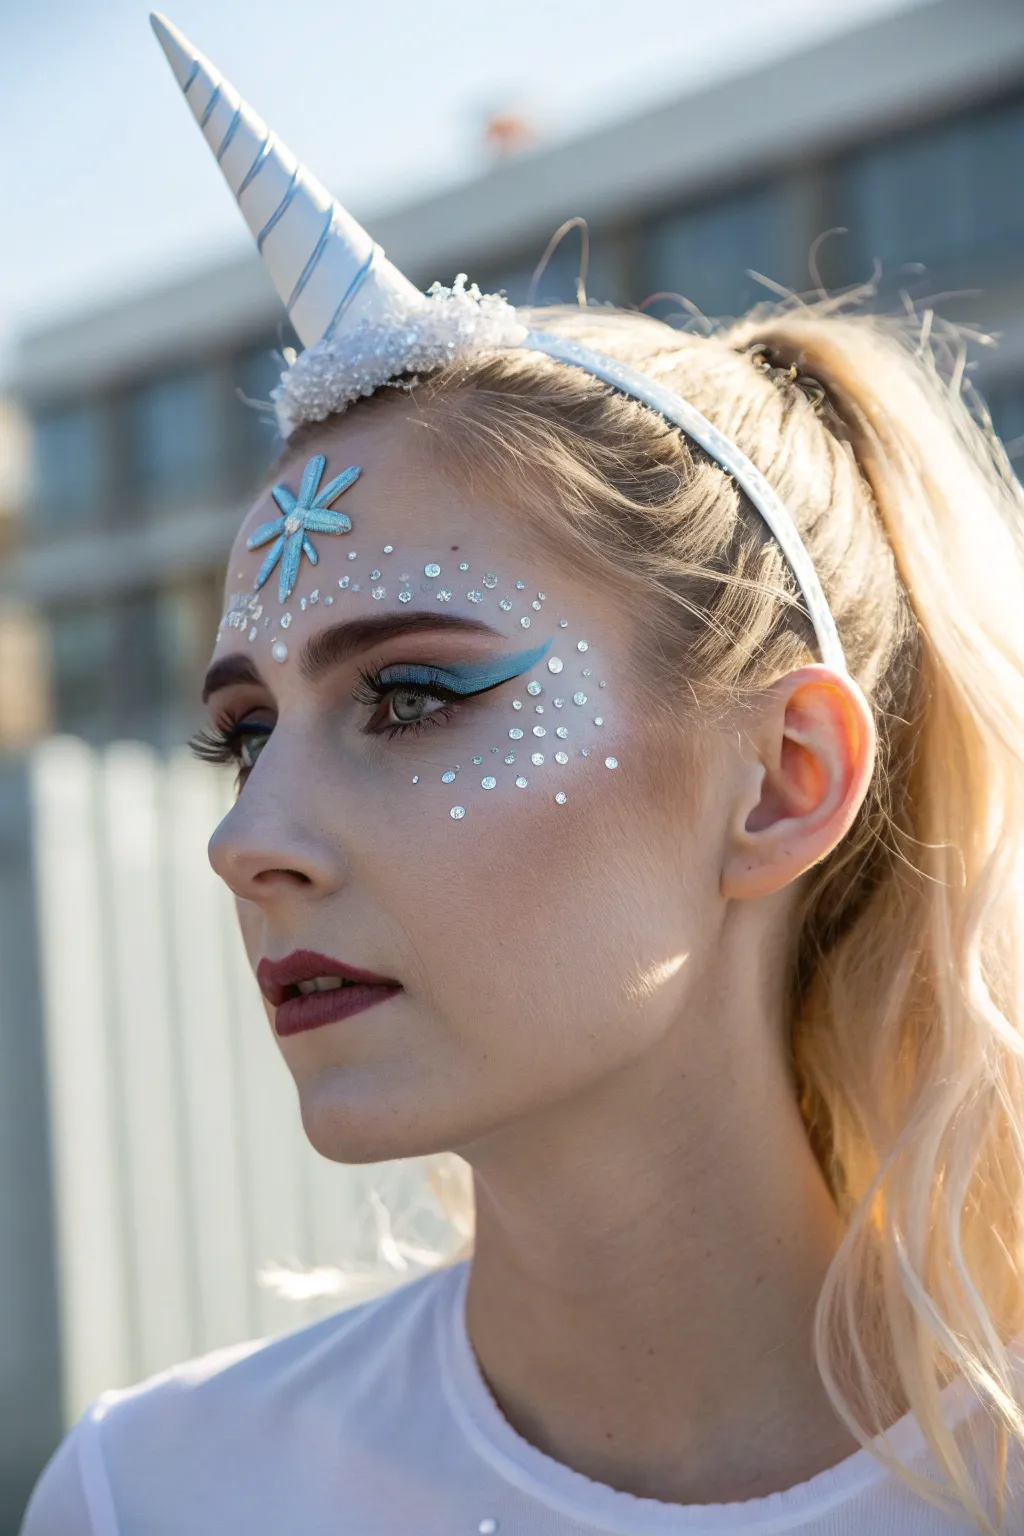
Channel an ethereal, icy aesthetic with this frosted unicorn look that combines sharp graphic liners with delicate gemstone details. The cool blue tones and sparkling rhinestones create a sophisticated fantasy style perfect for winter festivals or costume parties.
Step-by-Step
Materials
- White cream face paint or foundation (for pale base)
- Light blue matte eyeshadow
- Teal or turquoise gel eyeliner
- Black liquid eyeliner
- White liquid eyeliner
- Small flat angled brush
- Fine detail brush
- Flat shader brush
- Face adhesive or lash glue
- Small iridescent rhinestones (various sizes)
- Large blue foam or fabric snowflake sticker
- Unicorn horn headband
- Fluffy blending brush
- Setting spray
- Deep berry lipstick
Step 1: Base and Eyes
-
Prep the canvas:
Start with a clean, moisturized face. Apply a foundation that is one or two shades lighter than your natural skin tone to create a pale, wintry base. Set this with a translucent powder to ensure your face paint stays crisp. -
Apply base shadow:
Load a flat shader brush with light blue matte eyeshadow. Pat this color all over the eyelid, extending it slightly past the outer corner. -
Create the blue wing:
Using a small angled brush and teal or turquoise gel eyeliner, draw a dramatic winged liner. Start from the inner corner and thicken the line as you move outward, flicking it up towards the tail of the brow. -
Define the lash line:
Take your black liquid eyeliner and draw a very thin line right along the upper lash roots. This adds depth without overpowering the blue wing. -
Add lashes:
Curl the lashes and apply two generous coats of mascara. If you want extra drama, apply a pair of wispy false lashes now. -
Highlight the brow bone:
Use a clean blending brush to sweep a tiny amount of shimmery white or pale silver highligher just under the arch of the eyebrow to lift the eye area.
Step 2: Forehead and Details
-
Position the snowflake:
Take your large blue snowflake sticker or embellishment. Apply a dot of face adhesive to the back and press it firmly onto the center of the forehead, just slightly above the eyebrows. -
Map out the curve:
Imagine a swooping ‘S’ curve starting from the snowflake, going over the eyebrow, and curving down onto the cheekbone. This is where your gems will sit. -
Apply adhesive dots:
Using the back of a brush or a tool, dot small amounts of lash glue along this imagined curve on the temple and upper cheekbone area. -
Place the main gems:
Use a wax picker or tweezers to place medium-sized iridescent rhinestones on the larger dots of glue. Scatter them loosely rather than in a rigid line. -
Fill with micro-gems:
Fill in the gaps with the smallest rhinestone sizes. I find this creates a gradient ‘stardust’ effect that looks much more magical than using a single size. -
Add white dots:
Dip a fine detail brush or a dotting tool into white liquid eyeliner or face paint. Add tiny white dots interspersed among the rhinestones to mimic falling snow.
Adhesive Pro Tip
Allow the dots of lash glue to get tacky for about 30 seconds before placing the gems. This prevents them from sliding down your cheek while they dry.
Step 3: Finishing Touches
-
Contour subtly:
With a large fluffy brush, lightly sweep a cool-toned contour powder under the cheekbones to define the face without adding too much warmth. -
Paint the lips:
Apply a deep berry or wine-colored lipstick. Use a lip brush for crisp edges, as this dark color contrasts beautifully with the pale, icy skin. -
Secure the look:
Mist the entire face with a setting spray to lock the powders and paints in place. -
Add the crown:
Finally, place the unicorn horn headband on your head. Position it so the horn aligns with the center of your forehead, sitting just behind the hairline.
Gem Troubleshooting
If gems keep popping off, ensure there is no heavy oil or moisturizer on that specific patch of skin. Wipe the area with rubbing alcohol before applying glue.
Step back and admire your glistening, frosty creation before heading out


Have a question or want to share your own experience? I'd love to hear from you in the comments below!