
If you’re craving strong, bold subject matter, eagle painting ideas are pure magic—majestic shapes, powerful contrast, and tons of texture to play with. I pulled together a mix of classic bald eagle compositions and more unexpected twists, so you can pick what fits your mood and skill level.
Soaring Flight Across Cloudy Sky
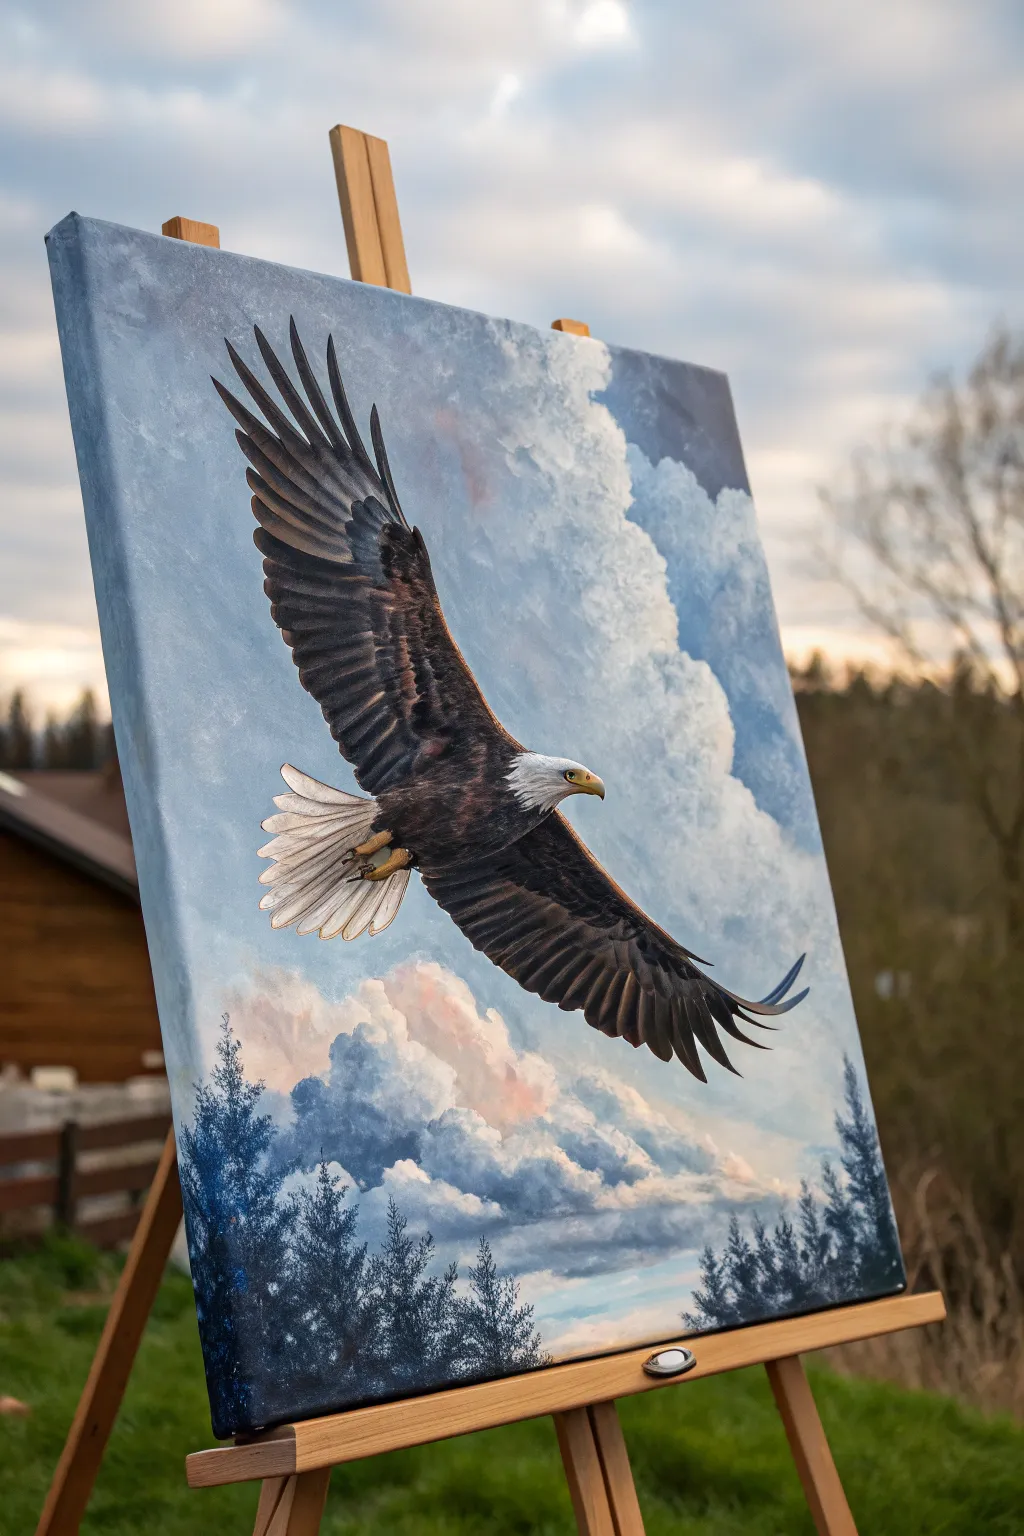
This project guides you through creating a breathtaking scene of a bald eagle in mid-flight against a dramatic cloudscape. You’ll layer soft atmospheric skies with sharp, detailed feather work to achieve this realistic and inspiring composition.
Step-by-Step Tutorial
Materials
- Stretched canvas (18×24 inches or similar vertical format)
- Acrylic paints (primary blue, titanium white, mars black, burnt umber, yellow ochre, cadmium yellow, burnt sienna, crimson red)
- Set of synthetic brushes (large flat wash, medium filbert, small round, fine liner)
- Palette knife
- Water container and paper towels
- Easle (optional but recommended)
- Pencil and eraser for sketching
Step 1: The Atmospheric Foundation
-
Gradient Base:
Begin by covering the entire canvas with a gradient mix. Blend titanium white with a touch of primary blue at the top, fading into a very pale, almost white blue near the bottom horizon line. -
Cloud Structure:
Using a large filbert brush, block in the major cloud shapes. Mix white with a tiny hint of black and blue to create a neutral gray for the shadow areas of the clouds. -
Adding Volume:
Apply pure titanium white to the tops of the cloud formations. Use a scumbling motion—scrubbing the brush in small circles—to create fluffy, soft edges where the light hits. -
Warm Undertones:
Mix a very translucent glaze of crimson red and yellow ochre with plenty of water or glazing medium. Lightly wash this over the lower cloud sections to simulate the soft, pinkish warmth of a setting sun. -
Forest Silhouette:
Mix deep primary blue with mars black to create a cool, dark navy. Use a medium brush to dab in the tree line at the very bottom, creating jagged, irregular tops to suggest pine trees.
Muddy Clouds?
If your clouds turn grey instead of fluffy, let the paint dry completely between layers. Don’t over-blend wet paint; use fresh white for highlights.
Step 2: Drafting the Raptor
-
Sketching the Form:
Once the background is fully dry, lightly sketch the outline of the eagle with a pencil. Focus on the diagonal composition, placing the wingspan so it dominates the central space. -
Blocking the Body:
Fill in the eagle’s body and wings with a base coat of burnt umber mixed with a little black. Paint the head and tail feathers with a base coat of light grey (not pure white yet). -
Defining the Beak:
Paint the beak and talons with a mixture of cadmium yellow and yellow ochre. Add a tiny dot of black for the eye placement.
Step 3: Detailing the Feathers
-
Wing Texturing:
Switch to a smaller flat brush. Mix burnt sienna with burnt umber to create a mid-tone brown. Apply individual brush strokes following the direction of the feathers on the upper wings. -
Flight Feather Separation:
Use a darker mix (black and umber) to define the long flight feathers at the wing tips. Ensure there are gaps between the tips to show the sky through them, which adds realism. -
Head Brightness:
Apply pure titanium white over the grey base of the head. Use short, fine strokes with a small round brush to mimic the sleek texture of the head feathers. -
Tail Feathers:
Paint the tail feathers white, but leave thin grey lines between them to show separation. I like to add a touch of yellow ochre near the base of the tail for shadow. -
Highlighting the Wings:
Mix a light tan color. Lightly dry-brush the edges of the brown wing coverts where the sunlight would catch the feathers, giving the wing three-dimensional volume.
Pro Tip: Perspective
Make the feathers near the body smaller and fuzzier, while the flight feathers at the wing tips should be long, sharp, and distinct to show scale.
Step 4: Final Touches
-
Facial Details:
Use your finest liner brush to refine the eye with a yellow iris and a black pupil. Add a tiny white reflection dot to make the eye look alive. -
Beak Shadow:
Add a thin line of burnt sienna along the bottom of the beak to give it curve and weight. -
Talon Definition:
Define the individual talons tucked under the tail with dark brown shadows and bright yellow highlights on the top surfaces. -
Atmospheric Integration:
If the eagle looks too ‘stuck on’, thinly glaze a tiny bit of the sky color over the farthest wing tip to push it back into the distance. -
Forest Refinement:
Go back to the tree line with your finest brush and pull up single, sharp vertical lines to suggest the very tips of the pine trees against the sky.
Step back and admire how the light catches the wings of your majestic creation.


Landing Pose With Talons Out
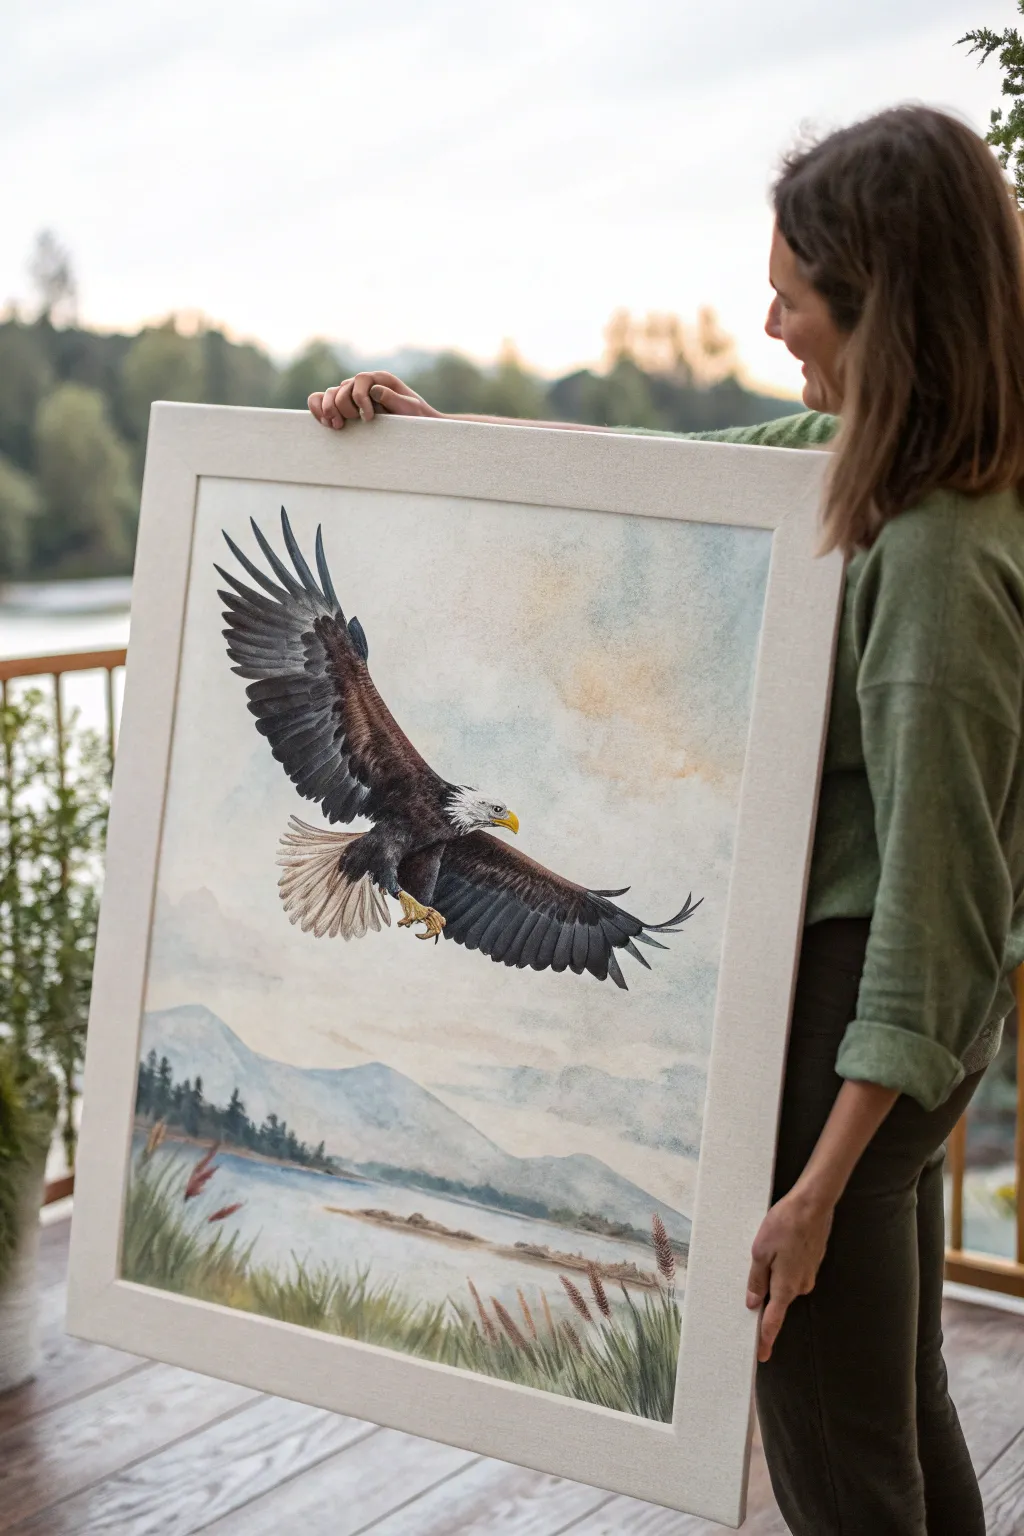
Capture the raw power and grace of a bald eagle just moments before touchdown in this expansive acrylic painting. By combining a soft, misty landscape with a highly detailed, sharp-focused bird, you’ll create a stunning depth of field that brings the action right to the foreground.
Step-by-Step Guide
Materials
- Large stretched canvas (at least 24×30 inches)
- Acrylic paints (Titanium White, Mars Black, Burnt Umber, Sienna, Ultramarine Blue, Hooker’s Green, Yellow Ochre, Cadmium Yellow)
- Set of synthetic brushes (large flat wash, medium filbert, fine liner)
- Slow-drying medium or retarder
- Gesso (optional for priming)
- Palette knife
- Water containers and paper towels
- Reference photo of eagle landing
Step 1: Setting the Scene
-
Prime and sketch:
Ensure your canvas is primed with a smooth layer of gesso. Once dry, lightly sketch the horizon line about one-third up from the bottom. Sketch the mountain outlines and the large diagonal shape of the eagle, paying close attention to the wing angles and claw placement. -
Paint the sky:
Mix a large amount of Titanium White with a touch of Ultramarine Blue and a hint of Burnt Sienna for a warm, clouded sky. Using your large wash brush, cover the upper two-thirds of the canvas with sweeping, crisscross strokes to create a soft, atmospheric texture. -
Add cloud definition:
While the sky layer is still slightly damp, mix a bit more Burnt Sienna into your white to create warm, peachy cloud formations. Dab these loosely into the center and right side of the sky, blending the edges so they fade seamlessly into the blue-grey background. -
Block in distant mountains:
Create a pale, misty mountain color using Ultramarine Blue, white, and a tiny dot of black. Paint the distant peaks, keeping the edges soft to simulate atmospheric perspective. As you move to lower foothills, add a touch of green to the mix. -
Create the water:
Reflect the sky colors into the water area below the mountains. Use horizontal strokes with your flat brush, alternating between the pale blue-grey and the warmer peach tones found in the clouds to suggest calm movement on the surface.
Pro Tip: Wing Transparency
Glaze a thin, watery layer of yellow-orange over the very tips of the backlit transparency feathers. This makes the sun look like it’s shining through them.
Step 2: The Eagle Takes Flight
-
Underpaint the eagle:
Block in the eagle’s body and wings with a solid coat of dark brown (Burnt Umber mixed with a little Black). Don’t worry about feathers yet; just establish the silhouette and solid form. -
Map the white areas:
Paint the tail feathers and the head with a base coat of light grey rather than pure white. Pure white will be saved for the brightest highlights later, giving the feathers volume. -
Layering wing feathers:
Starting from the trailing edge of the wings, use a filbert brush to paint rows of feathers. Mix Burnt Umber with Sienna for the mid-tones. Use distinct strokes that curve inward toward the bird’s body, layering them like shingles on a roof. -
Detailing flight feathers:
Switch to a smaller round brush. Darken your braown mix with black and define the long, primary flight feathers at the wingtips (the ‘fingers’). I like to add thin, light brown lines along the quill of each feather to show structure. -
Refining the head:
Using your smallest brush, paint short, directional strokes of Titanium White over the grey base of the head to simulate fur-like feathers. Add the yellow beak with Cadmium Yellow and a touch of Ochre for shadow, placing a small white highlight on the top curve. -
The talons:
Paint the legs and talons using Yellow Ochre mixed with white. Use Burnt Umber to create shadow and separation between the toes. Finally, use black for the sharp, curved claws, adding a tiny spec of white for the glossy shine.
Step 3: Foreground and Details
-
Paint the shoreline:
Establish the near shore and the small sandbar with strokes of Burnt Sienna and white. Keep these strokes horizontal and somewhat rough to suggest earth and mud texture. -
Add distant trees:
Along the far bank of the water, dab in a line of dark green (Hooker’s Green + Black). Keep these shapes small and indistinct to maintain the illusion of distance. -
Foreground grasses:
Load a liner brush with varied greens—some dark, some mixed with yellow. Use quick, upward flicking motions to create tall grasses in the immediate bottom foreground. These should be the sharpest part of the landscape. -
Seed heads:
Add the reddish-brown seed heads to the tall grasses using a stippling motion (rapid dots). This adds a nice pop of color that complements the warmth in the eagle’s wings. -
Final highlights:
Step back and assess your painting. Add final touches of pure Titanium White to the eagle’s tail feathers and the brightest part of the head. Strengthen the dark shadows under the wing where it connects to the body to maximize contrast.
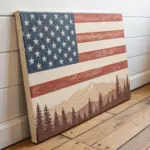
Level Up: Frame It Right
Build a custom floating frame with light-colored pine or birch wood. The natural gap between canvas and frame enhances the airy, open feel of the artwork.
Hang your masterpiece where it can catch natural light to really bring those atmospheric layers to life


Eagle Over Mountain Pines
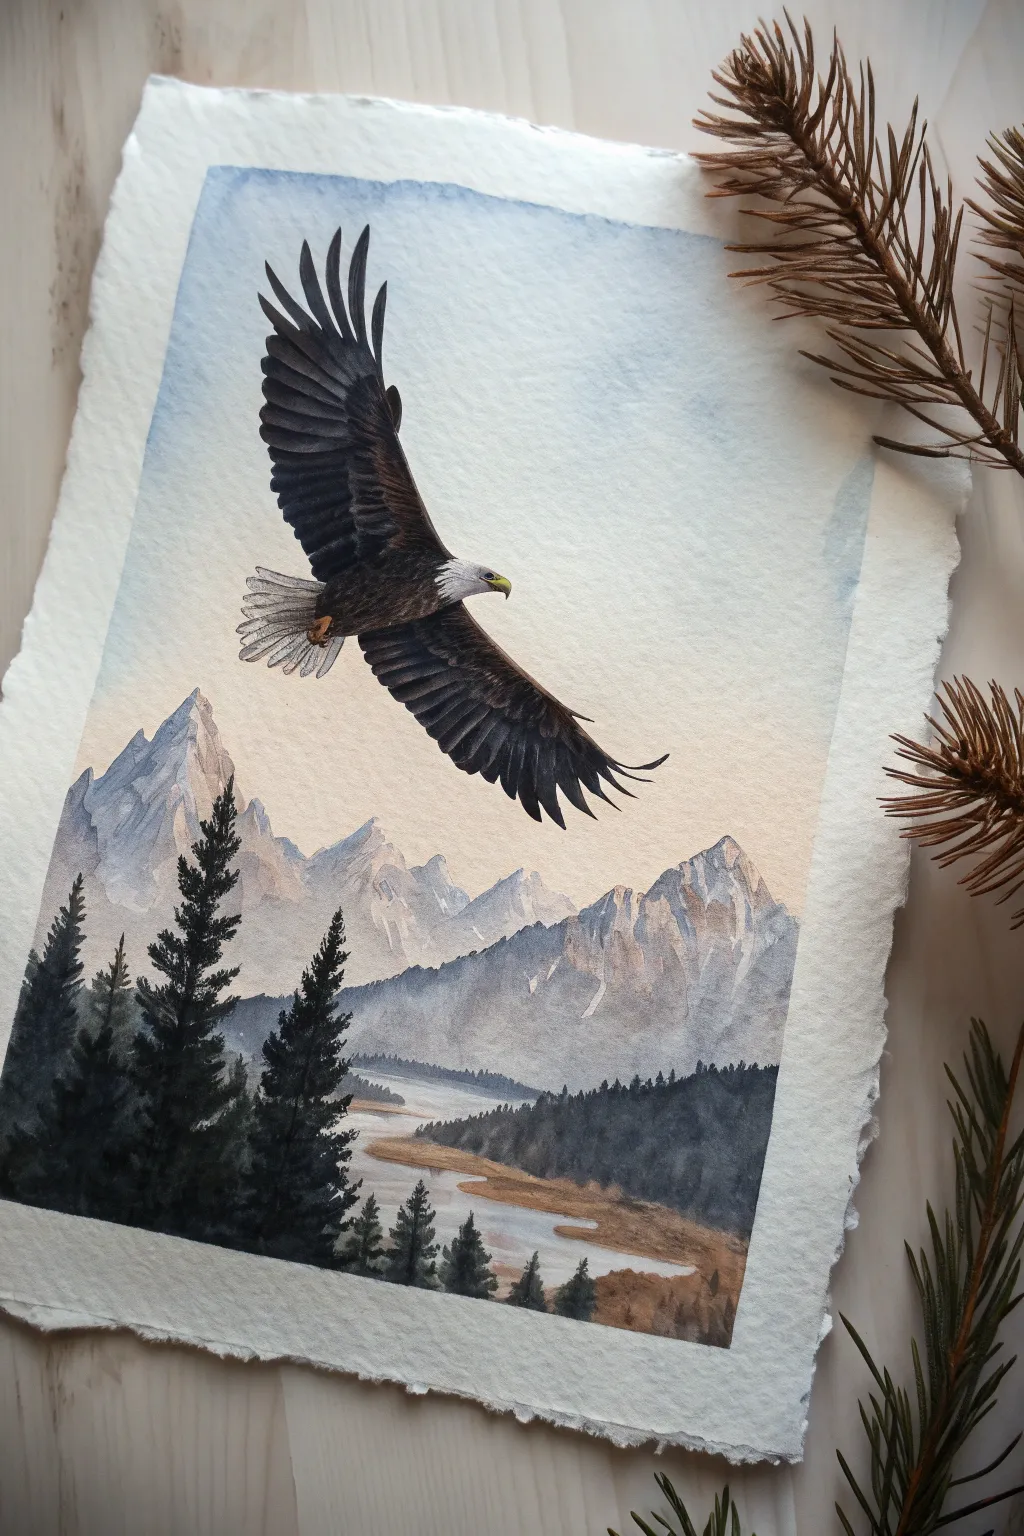
Capture the majestic flight of a bald eagle gliding over a rugged mountain landscape with this detailed watercolor tutorial. The scene combines soft, misty mountain peaks with sharp, darkly silhouetted pines for bold atmospheric depth.
Step-by-Step Tutorial
Materials
- Cold press watercolor paper (deckle edge preferred)
- Watercolor paints (Payne’s Grey, Burnt Umber, Yellow Ochre, Ultramarine Blue, Cerulean Blue, Sepia)
- White opacity gouache or white gel pen
- Pointed round brushes (size 4, 8, and a fine liner)
- Pencil (HB or 2H)
- Masking fluid (optional)
- Palette for mixing
- Clean water
Step 1: Sketch and Sky
-
Light Sketching:
Begin with a very faint pencil sketch. Outline the contours of the eagle in the upper left-center, the jagged mountain range below, and the winding river path. Keep your pencil pressure extremely light to avoid lines showing later. -
Wet-on-Wet Sky:
Wet the entire sky area with clean water, stopping just above the mountains. While wet, drop in a very diluted wash of Cerulean Blue at the top, fading to clear water or a tiny touch of Yellow Ochre near the horizon for a soft glow. -
Drying Time:
Allow the sky to dry completely before touching the mountains to prevent bleeding.
Wing Depth Trick
To make the wing feathers look layered, paint the upper wing coverts (sketchy, small feathers) slightly lighter than the long, dark primary flight feathers at the tips.
Step 2: The Mountain Range
-
Distant Peaks:
Mix a watery blend of Ultramarine Blue and a touch of Payne’s Grey. Paint the furthest mountain peaks with this pale wash, leaving the white of the paper untouched on the highlighted left slopes to suggest snowy caps lit by the sun. -
Mid-Ground Mountains:
While the first layer is barely damp, add slightly darker gray-blue tones to the shadowed sides of the craggy peaks. This creates dimension without hard lines. -
Lower Foothills:
As you move lower into the valley, introduce a warmer, muddier tone using a mix of Burnt Umber and Indigo for the distant tree line base that sits at the foot of the mountains.
Golden Hour Glow
Glaze a very watered-down transparent orange or pink over the mountain peaks once dry. This mimics the warm light of a sunrise hitting the snow.
Step 3: The River Valley
-
Painting the Water:
With a dilute wash of the sky color (pale blue-grey), paint the winding river. Leave small horizontal slivers of white paper to mimic light reflecting off the water’s surface. -
Valley Floor:
Use Yellow Ochre mixed with a dot of Burnt Umber to paint the banks of the river. Keep this wash loose and uneven to represent dry grass and soil. -
Distant Trees:
Using a size 4 brush, stipple a dark grey-green mix along the far bank of the river to create a dense, faraway forest texture.
Step 4: The Foreground Pines
-
Mixing Deep Greens:
Mix a very saturated dark green using Sepia and Indigo (or Prussian Blue). You want this value to be nearly black to push the foreground forward. -
Left Side Trees:
Start with the tall pines on the left. Draw a thin vertical line for the trunk, then use jagged, downward strokes to create the pine boughs. I like to keep the tops wispy and the bottoms dense. -
Lower Right Foliage:
Add the tops of smaller trees peeking up from the bottom edge of the paper using the same dark mix, grounding the composition.
Step 5: The Eagle
-
Base Wing Color:
For the eagle’s body and wings, start with a warm Burnt Umber wash. Let this dry fully so you have a base tone. -
Feather Texture:
Using your smallest brush and a mix of dark Sepia and Black, paint the individual flight feathers. Leave thin gaps of the underlying brown showing between the dark feathers to create separation. -
The Head and Tail:
Be incredibly careful around the white head and tail feathers. If you painted over them, use white gouache now to reclaim the bright white. Add tiny grey sketch lines to suggest feather texture on the white areas. -
The Beak and Eye:
Paint the beak with a bright Yellow Ochre. Once dry, use a micro-pen or the tip of your liner brush to add the black eye and the nostril detail. -
Final Talons:
Paint the tucked talons with the same yellow tone used for the beak, adding slight shadows underneath.
Step 6: Final Touches
-
Atmospheric Glaze:
If the mountains look too sharp, you can run a clean, damp brush over the distant ridges to soften their edges slightly. -
Cleanup:
Erase any remaining pencil lines once the painting is 100% dry.
Enjoy the sense of freedom this majestic bird brings to your art portfolio


Sunset Silhouette Wingspan
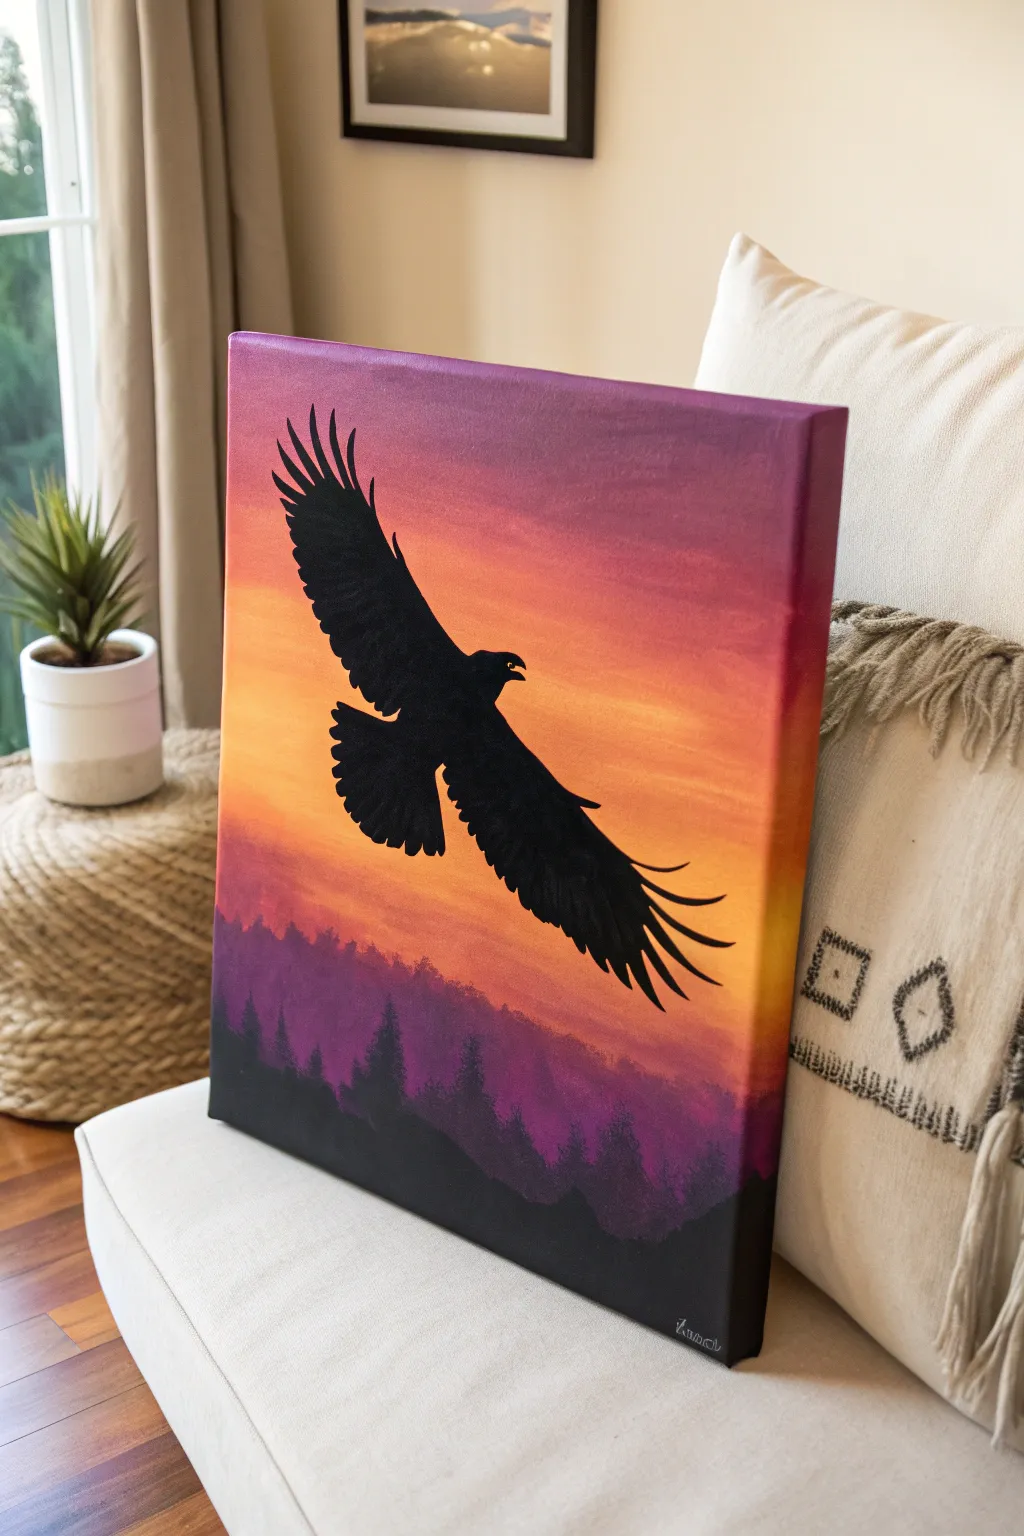
Capture the majesty of an eagle in flight against a breathtaking twilight sky with this silhouette painting project. By layering warm gradients and crisp black forms, you’ll create a stunning contrast that makes the bird appear to truly lift off the canvas.
Detailed Instructions
Materials
- Stretched canvas (e.g., 16×20 inches)
- Acrylic paints (Titanium White, Cadmium Yellow, Orange, Magenta/Deep Violet, Mars Black)
- Large flat brush (1-2 inch) for blending
- Medium flat brush
- Small round detail brush (size 0 or 1)
- Pencil or chalk for sketching
- Paper plate or palette
- Cup of water and paper towels
- Reference photo of an eagle silhouette
Step 1: Painting the Sky Gradient
-
Prime the top horizon:
Start by mixing a small amount of deep violet with magenta. Using your large flat brush, paint a wide horizontal band along the very top edge of the canvas. -
Blend downward:
While the violet layer is still wet, introduce pure magenta just below it. Use long, horizontal strokes to blend the two colors together seamlessly, creating a smooth transition. -
Add the warmth:
Clean your brush thoroughly. Mix orange with a touch of magenta and apply this band below the pure pink. Work quickly to blend the edges while the paint remains wet. -
Create the sunset glow:
As you move toward the middle of the canvas, switch to pure orange, followed by a mix of yellow and orange. This should be the brightest part of your sky. -
Fade to the horizon:
Near the bottom third of the canvas, blend the yellow back into a soft orange-magenta mix to simulate the haze near the distant tree line. -
Paint the canvas edges:
Don’t forget to wrap your sky colors around the sides of the canvas for a polished, gallery-ready look. Let the entire background dry completely before proceeding.
Smooth Gradients
If your acrylics are drying too fast to blend, mist the canvas lightly with water or mix a slow-drying medium into your paints.
Step 2: Creating the Misty Forest
-
Mix the forest haze:
Create a translucent purple by mixing your deep violet with a tiny bit of white and black. You want a color that looks like distant mountains in shadow. -
Block in the tree line:
Using a medium flat brush, tap in a bumpy, uneven horizon line across the bottom quarter of the canvas. Keep the top edge irregular to suggest pine tree tops. -
Add depth to the forest:
While the purple layer is still tacky, take pure black and tap it near the very bottom edge, blending it slightly upward into the purple. This grounds the painting. -
Suggest tree details:
Switch to a smaller brush and use a stippling motion to flick tiny vertical strokes upward from the purple mass, creating the illusion of individual pine tree tips against the sunset.
Step 3: The Eagle Silhouette
-
Sketch the outline:
Once the background is bone dry, lightly sketch the shape of the eagle using a pencil or white chalk. Focus on the wide wingspan and the angle of flight. -
Refine the wing feathers:
Pay special attention to the flight feathers (the ‘fingers’ at the wing tips). I find it helpful to draw these a bit larger than you think they need to be. -
Fill the main body:
Load a medium round brush with slightly watered-down Mars Black paint (for smoother flow). Fill in the solid center of the bird’s body and the bulk of the wings. -
Paint the feathers:
Switch to your smallest detail brush. Carefully paint the individual feathers on the wing tips, pulling the brush outward to create sharp, tapered points. -
Detail the head and beak:
Use the very tip of your small brush to define the hooked beak and the ruffled feathers on the neck. Sharpness is key here for a realistic silhouette. -
Clean up edges:
Check the perimeter of your silhouette. If any edges look ragged, smooth them out with the detail brush and a bit more black paint. -
Add the signature signature:
Sign your name in the bottom corner using a contrasting light color, like white or pale yellow, so it stands out against the dark forest base.
Make It Mystical
Mix a tiny amount of glitter or iridescent medium into the yellow section of the sky for a subtle, magical shimmer when the light hits it.
Hang your masterpiece in a well-lit spot where the vibrant sunset colors can warm up the room
BRUSH GUIDE
The Right Brush for Every Stroke
From clean lines to bold texture — master brush choice, stroke control, and essential techniques.
Explore the Full Guide
Nest Scene With Young Eagles
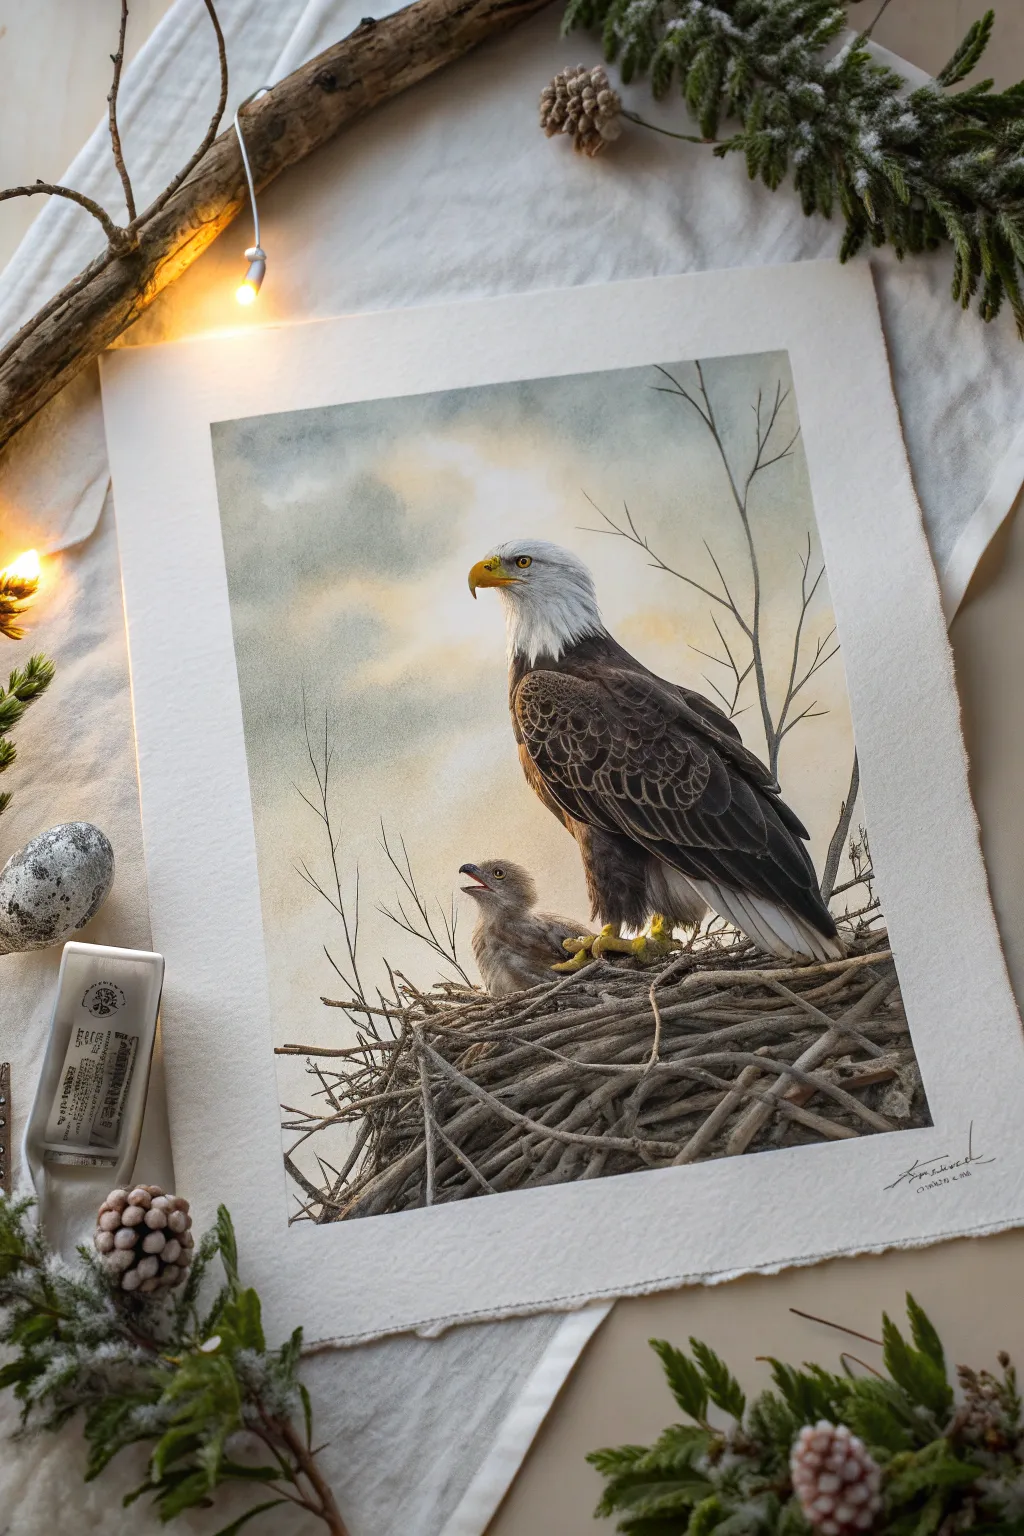
Capture the tender majesty of nature with this detailed watercolor and gouache study of a bald eagle watching over its chick. The soft, atmospheric sky provides a perfect backdrop for the crisp, realistic textures of the feathers and the rugged nest structure.
Step-by-Step Guide
Materials
- Heavyweight cold-press watercolor paper (300gsm or heavier)
- Watercolor paints (Payne’s Grey, Burnt Umber, Yellow Ochre, Ultramarine Blue, Alizarin Crimson)
- White Gouache paint (for opaque highlights)
- Round watercolor brushes (Size 2, 6, and 10)
- Fine liner brush (Size 0 or 00)
- Masking fluid (optional)
- HB Pencil and kneadable eraser
- Two jars of water
- Paper towels
Step 1: Sketch and Sky Layer
-
Initial outline:
Begin with a light HB pencil sketch. Focus on the triangular composition: the adult eagle standing tall on the right and the small, rounded shape of the eaglet to the left. Sketch the chaotic, interwoven lines of the nest base loosely. -
Prepare the sky:
Wet the entire background area with clean water, avoiding the birds and the nest. You want the paper glistening but not puddling. -
Paint the atmosphere:
Drop in a dilute mix of Payne’s Grey and a touch of Yellow Ochre for a moody, clouded sky. Keep it very pale near the eagle’s head to create contrast and darker towards the upper corners. -
Background details:
While the sky is still slightly damp but no longer shiny, use a size 6 brush with a grey-brown mix to paint the distant, out-of-focus tree branches. Let the edges blur slightly into the wet paper.
Step 2: The Bald Eagle
-
Eye and beak:
Once the paper is bone dry, start with the eagle’s eye using a bright yellow. Add the pupil with concentrated black. Paint the beak with Yellow Ochre, fading into a darker grey near the face. -
Head structure:
For the white head feathers, use a very dilute grey-blue wash to define the shadows and shape of the skull, leaving the majority of the paper white. -
Body base layer:
Apply a wash of Burnt Umber and Ultramarine Blue to the eagle’s body. Don’t worry about individual feathers yet; just establish the dark mass of the bird. -
Feather detailing:
Using your size 2 brush and a darker, thicker mix of dark brown, start painting the distinct feather shapes on the wing. Leave tiny gaps between strokes to suggest the lighter edges of the feathers. -
Adding texture:
Switch to the fine liner brush. I find adding tiny, hair-like strokes on the chest creates that realistic fluffiness. Use a mix of gouache and watercolor for opacity here.
Feather Precision
Don’t outline every single feather. Focus detail on the focal point (the wing shoulder) and let the lower feathers stay looser and undefined.
Step 3: The Eaglet and Nest
-
Eaglet down:
Paint the chick with a soft wash of warm grey. While wet, drop in slightly darker shadows under the chin and wing to give it form. -
Fuzzy texture:
Once dry, use a dry-brush technique with opaque grey-brown to stipple the fuzzy texture of the eaglet’s downy feathers. -
Nest foundation:
Instruction for the nest begins with a messy wash of dark, cool brown to create the deep shadows within the sticks. -
Stick definition:
Using a creamy consistency of brown and grey paint, draw individual sticks over the dark background. Vary the thickness and direction to look natural. -
Highlights:
Mix white gouache with a tiny bit of Yellow Ochre. Paint thin highlights on the top edges of the sticks and the eagle’s talons to separate them from the shadows.
Muddy colors?
If your browns look dull, you likely over-mixed them. Let the Burnt Umber and Ultramarine mix on the paper rather than completely on the palette.
Step 4: Final Touches
-
Refining edges:
Go back with your finest brush and crisp up the beak outline and the pupil of the eye. -
Atmospheric depth:
If the foreground sticks look too flat, add a quick, watery glaze of blue-grey over the bottom-most twigs to push them visually backward. -
Signature:
Sign your work in the corner with a fine pencil or liner brush.
Step back and admire the beautiful connection between parent and chick you have created on the page
Loose Watercolor Eagle Washes
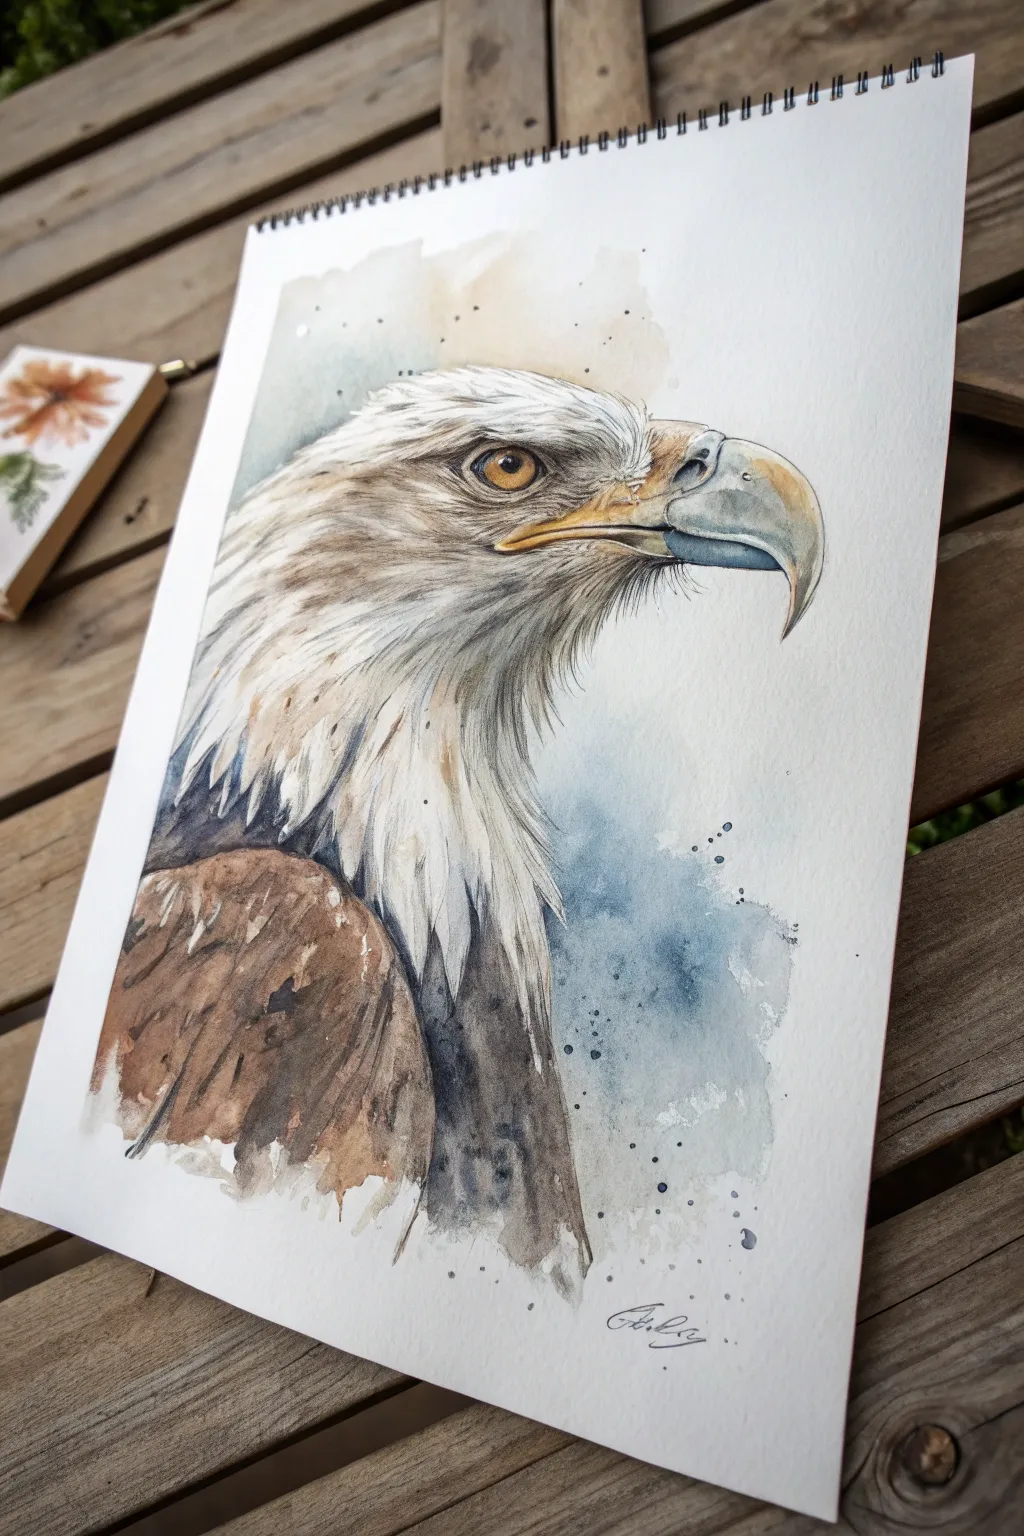
Capture the fierce elegance of an eagle using a blend of detailed brushwork and expressive, loose watercolor washes. This project balances precise facial features with a beautifully unrefined background for a dynamic, artistic result.
Step-by-Step Tutorial
Materials
- Cold press watercolor paper (300 gsm)
- Watercolor paints (Payne’s Grey, Burnt Sienna, Yellow Ochre, Ultramarine Blue, Burnt Umber)
- Small round brush (size 2 or 4) for details
- Medium round brush (size 8 or 10) for washes
- Pencil (HB or 2H)
- Kneaded eraser
- Masking fluid (optional)
- Clean water and paper towels
Step 1: Drawing and Initial Washes
-
Sketch the silhouette:
Begin with a light pencil sketch. Focus on the sharp curve of the beak, the intense brow ridge, and the sweeping lines of the neck feathers. Keep your pencil pressure light so lines don’t show through later. -
Define the eye:
Carefully draw the eye circle and the pupil. This is the focal point, so take your time getting the proportions right. It sits deep under the brow. -
First wash on the beak:
Mix a very diluted Yellow Ochre with a touch of grey. Apply this pale wash to the upper beak, leaving a crisp white highlight line near the top edge unpainted. -
Painting the eye:
While the beak dries, paint the iris with a rich Yellow Ochre. Once dry, add a dot of Burnt Umber for shadow at the top and paint the pupil pure black (or concentrated Payne’s Grey) leaving a tiny white catchlight. -
Shadowing the beak:
Mix a cool grey using Ultramarine Blue and a touch of Burnt Sienna. Glaze this over the lower beak and the hooked tip of the upper beak to create dimension. Let the colors bleed slightly for a natural transition.
Fixing Muddy Feathers
If your white head feathers look dirty, you likely overworked the grey shadows. Lift lift excess pigment with a clean, damp brush or paper towel while wet.
Step 2: Feather Texture and Coloring
-
Base layer for the head:
Wet the head area lightly with clean water, avoiding the eye and beak. Drop in very pale washes of diluted Burnt Umber and grey to suggest the underlying shadows of white feathers. -
Building feather texture:
Switch to your smaller brush. Using a mix of Payne’s gray and Burnt Umber, paint thin, rapid strokes following the direction of feather growth, starting from the beak and moving back. -
Creating the neck ruff:
As you move down the neck, lengthen your brushstrokes. Make them shaggier and less uniform to mimic the loose, longer feathers of the eagle’s neck. -
Painting the body:
Load your medium brush with a strong mix of Burnt Sienna and Burnt Umber. Paint the dark shoulder area with confident, broad strokes, leaving some white gaps for texture. -
Deepening the contrasts:
While the body paint is still damp, drop in concentrated Payne’s Grey into the shadowed areas near the bottom of the neck to create a sense of depth and volume.
Add Metallic Flair
Mix a tiny amount of gold watercolor or gouache into the yellow of the eye. It creates a subtle, piercing glimmer that catches the light beautifully.
Step 3: Atmospheric Background
-
Preparing the background wash:
Mix a watery puddle of Payne’s Grey with a hint of Ultramarine Blue. We want a cool, moody tone to contrast with the warm browns of the bird. -
Applying the blue wash:
Paint the background area behind the neck and under the beak. Use a very wet brush and let the pigment pool naturally. Don’t try to make it smooth; the blooms add character. -
Softening the edges:
Where the background meets the white neck feathers, carefully soften some edges with a clean, damp brush, but leave other edges crisp to suggest loose feathers. -
Adding the upper wash:
Above the head, add a very faint, warm wash of diluted Yellow Ochre or dirty water from your rinse jar. This creates a subtle halo effect. -
Splatter texture:
Load a brush with watery blue-grey paint. Tap the handle against your finger to splatter droplets around the lower neck and background, adding energy to the composition. -
Final details:
Using your smallest brush and dark grey paint, add a few sharp, stray feather lines extending out from the back of the head and the chin area. -
Refining the eye:
I like to go back to the eye one last time to deepen the dark ring around the iris, ensuring the eagle looks properly intense.
Step back and admire how the loose washes make the sharp details of the eagle’s face stand out even more

Have a question or want to share your own experience? I'd love to hear from you in the comments below!