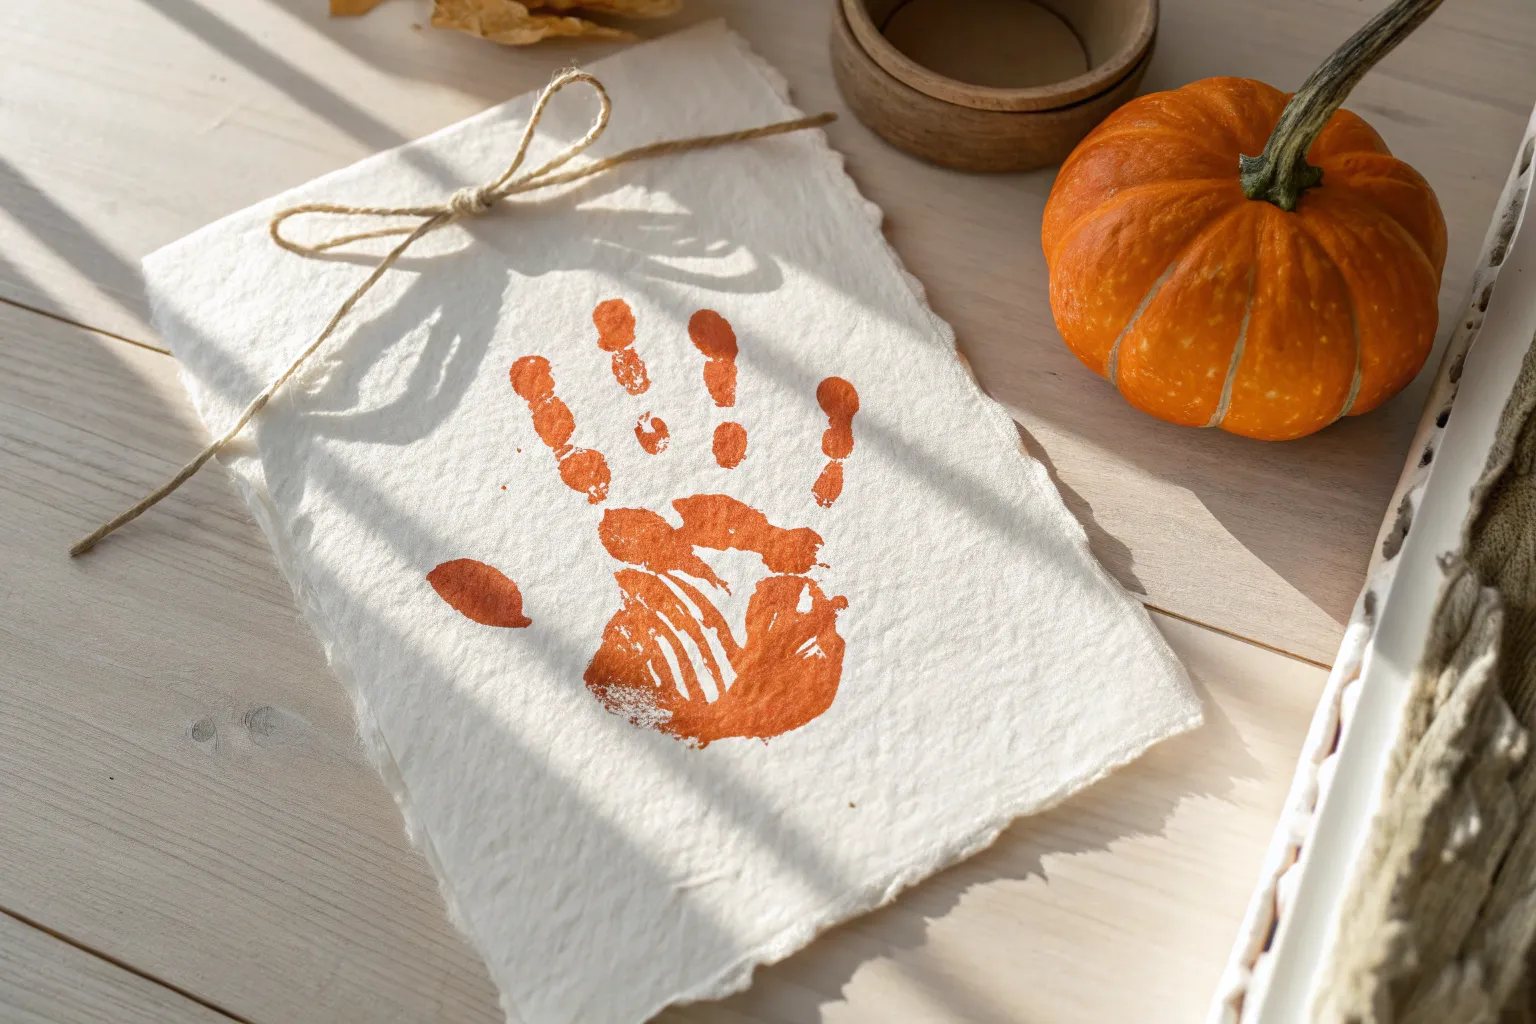
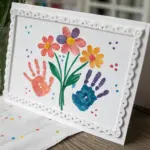
I love Halloween finger painting because it’s the perfect mix of spooky-cute and gloriously messy, with results that actually look like something right away. If you’ve got handprints and fingerprints ready to go, these ideas will turn them into pumpkins, ghosts, creepy crawlies, and more in no time.
Witch Handprint Silhouette
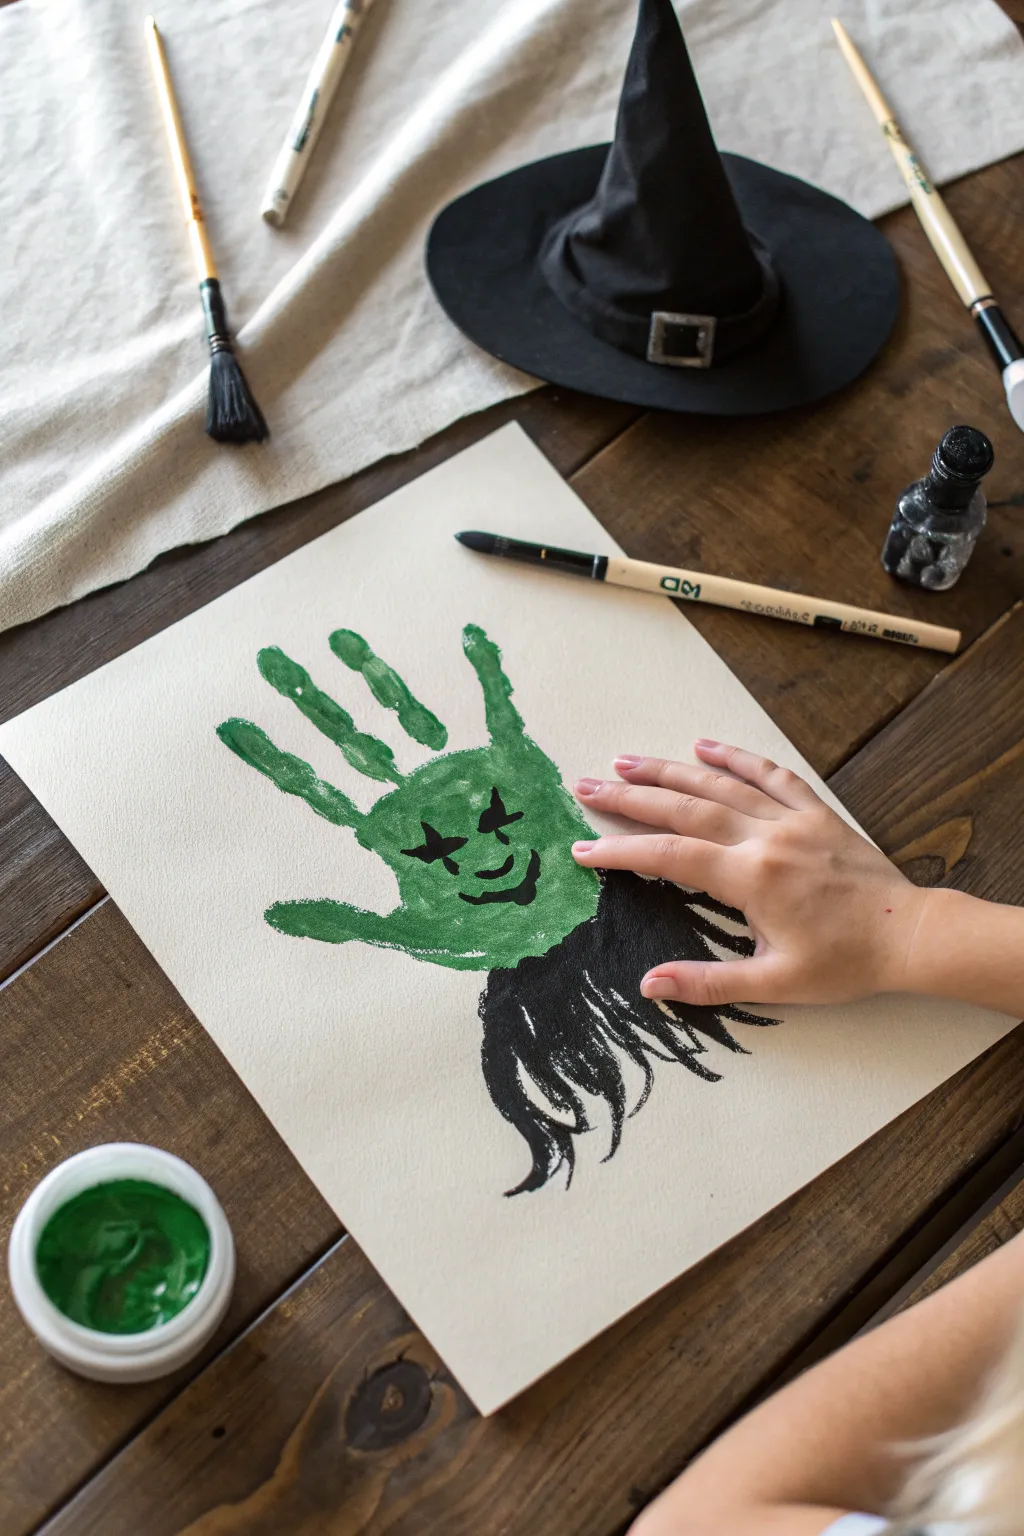
Transform a simple handprint into a cackling witch with this clever upside-down art project. By using the fingers as spooky hair and the palm as a face, you’ll create a striking silhouette that captures the fun of Halloween.
Step-by-Step Tutorial
Materials
- Heavyweight white paper or cardstock
- Green acrylic or poster paint
- Black acrylic or poster paint
- Medium flat paintbrush
- Small detail paintbrush
- Water cup and palette
- Paper towels
Step 1: Creating the Base
-
Prepare the paint:
Squeeze a generous dollop of green paint onto your palette or a paper plate. You want a vibrant, ‘witchy’ green, so mix in a little yellow if your green is too dark. -
Coat the hand:
Using a medium paintbrush, apply a thick, even layer of green paint to your child’s hand. I prefer painting the hand rather than dipping it to ensure full coverage without globs. -
Check coverage:
Make sure the palm and all five fingers are fully coated. The paint should be wet enough to stamp but not dripping. -
Position the paper:
Place your sheet of heavyweight paper on a flat surface. Position it vertically to allow room for the hair we’ll add later. -
Make the print:
Press the painted hand firmly onto the center of the paper with fingers spread slightly apart. Press down on each finger and the palm gently to get a solid impression. -
Lift and dry:
Carefully lift the hand straight up to avoid smudging the print. Let this green handprint dry completely before moving to the next phase.
Clean Prints Only
Does the handprint look patchy? While the green paint is still wet on the paper, use a brush to gently fill in any white gaps inside the hand shape before it dries.
Step 2: Painting the Face
-
Orient the artwork:
Once dry, flip the paper so the fingers are pointing upward. In this orientation, the fingers become the wild hair and the palm becomes the face. -
Load black paint:
Switch to your small detail brush and load it with black paint. Remove excess paint so you have good control for fine lines. -
Paint the eyes:
In the middle of the palm area, paint two star-shaped eyes. Start with a small cross and add diagonal lines to create a spiky, magical look. -
Add the nose:
Just below and between the eyes, paint a small, curved line or a tiny wart-like dot for the witch’s nose. -
Create the smile:
Paint a curved black smile near the bottom of the palm (which is now the chin area). Add small tick marks at the ends of the mouth for extra character.
Smudge Alert
If the black paint smudges into the green, turn it into a ‘wart’ or a beauty mark. Witches are supposed to have bumpy skin, so imperfections work in your favor.
Step 3: Adding the Hair
-
Define the hairline:
Using the black paint and a medium brush, paint a jagged black line right at the wrist area of the original print (the bottom of your current face). -
Extend the strands:
Drag the brush downwards from that hairline to create long, flowing black hair. Let your strokes be loose and wavy. -
Create volume:
Add more strokes on the left and right sides, flaring them out slightly. This hair helps disguise the rounded wrist shape of the print. -
Texture the ends:
Feather the ends of the black hair strokes so they look tattered and spooky rather than perfectly straight. -
Final touches:
Add a few stray black wisps coming off the main hair mass for a messy, wild witch effect. Allow all black paint to dry fully.
Hang your witchy portrait up on the fridge for a spooktacular decoration


Vampire Handprint Cape
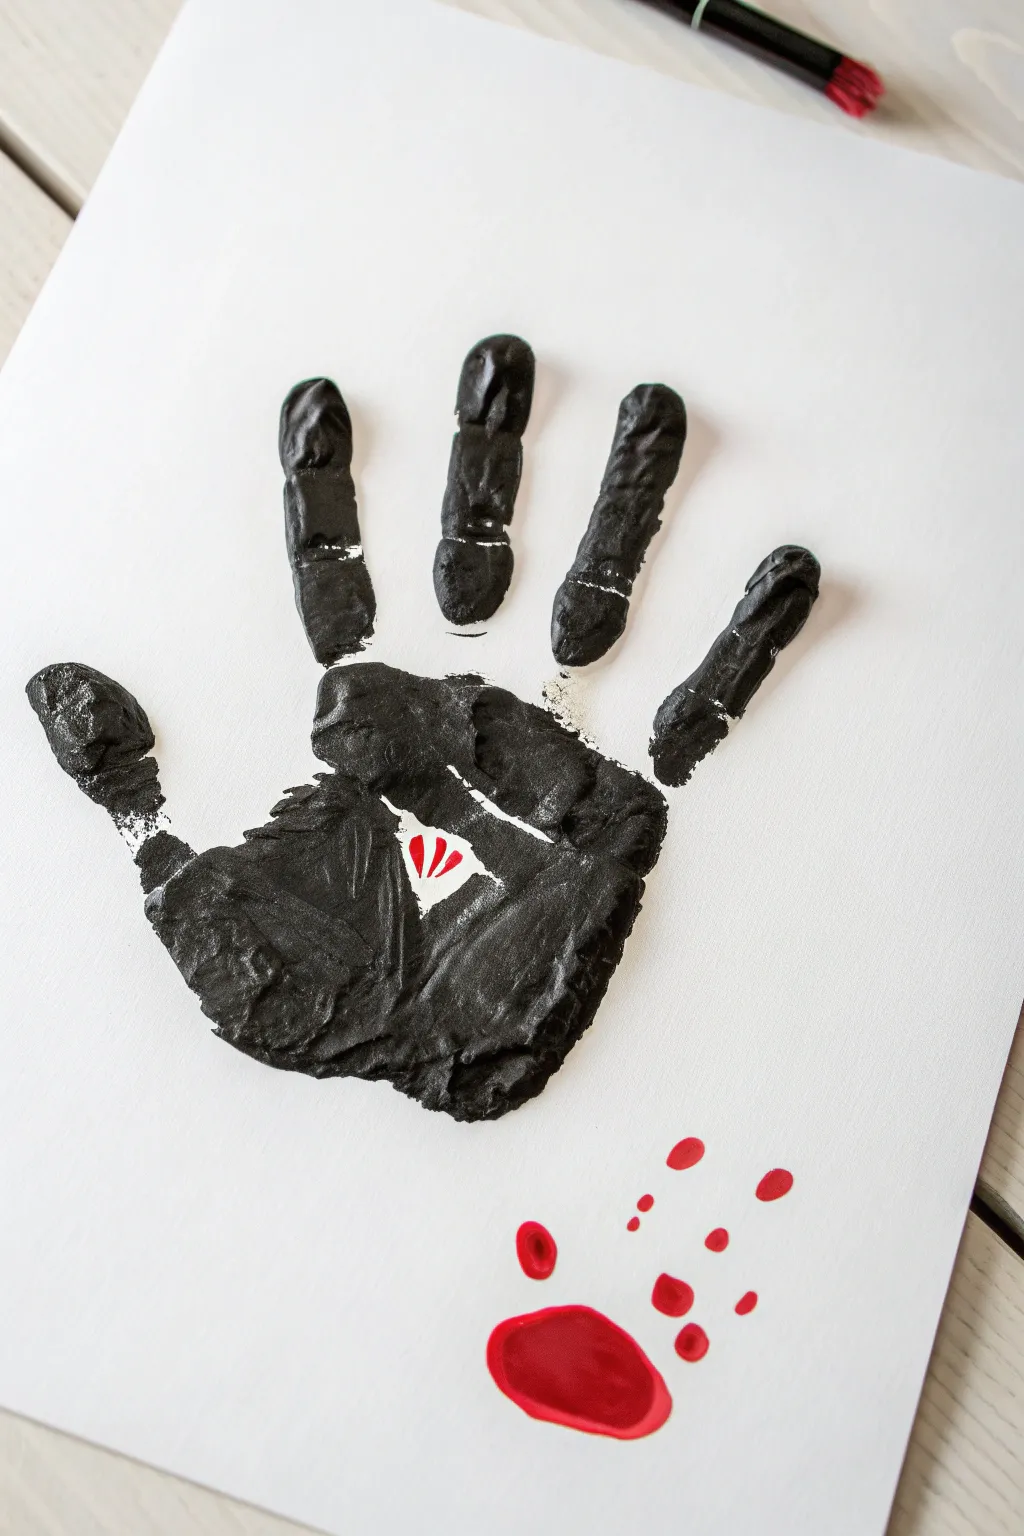
Transform a simple handprint into a spooky vampire cape with this clever use of negative space. The black paint creates a dramatic silhouette, while a hidden detail in the palm reveals a classic vampire collar.
Step-by-Step Tutorial
Materials
- Heavy white cardstock or watercolor paper
- Black acrylic paint
- Red acrylic paint
- Medium paintbrush
- Small detail brush
- Paper plate or palette
- Paper towels
- Wipes for cleanup
Step 1: Preparation & Handprinting
-
Prepare your workspace:
Lay down newspaper or a protective covering on your table. Squeeze a generous amount of black acrylic paint onto your paper plate or palette. -
Paint the palm:
Using the medium paintbrush, start applying black paint to the palm of the hand. Be generous with the paint to get a solid, opaque print. -
Create the negative space:
This is the crucial trick: carefully wipe away or avoid painting a small, upside-down triangle shape in the center of the lower palm. This unpainted area will become the white shirt of the vampire. -
Paint the fingers:
Thoroughly coat all five fingers with black paint. Ensure the paint extends all the way to the fingertips for a complete impression. -
Check coverage:
Review the hand before printing. The paint should be wet and thick, but not dripping. If the negative space triangle got smudged, use a clean Q-tip or wipe corner to clear it out again. -
Press onto paper:
Firmly press the painted hand onto the center of your white cardstock. Keep the fingers slightly spread to create the ‘cape’ flowing effect. -
Lift and reveal:
Hold the paper down with your other hand and lift the painted hand straight up to avoid smearing. You should see a solid black print with a white triangle gap in the palm. -
Wash up:
Immediately wash the black paint off the hand with warm soapy water or wipes before it dries completely. -
Let it dry:
Allow the black handprint to dry fully. This is important so the red paint we add later doesn’t mix and turn muddy.
Clean Edges Trick
Use a piece of painter’s tape to mask off the triangle area on the palm before painting. Peel it off right before printing for a sharp, crisp edge.
Step 2: Adding Vampire Details
-
Prepare red paint:
Squeeze a small amount of bright red acrylic paint onto your palette. -
Paint the buttons:
Using your smallest detail brush, carefully dip into the red paint. Inside the white triangle space on the palm, paint three small, vertical teardrop shapes or dashes to represent the vampire’s shirt buttons or vest detail. -
Start the paw print:
Dip your thumb into the red paint. Press it onto the paper below and to the right of the black handprint to create the main pad of a paw print (or a subtle blood splatter effect). -
Add toe prints:
Dip your index finger or pinky into the red paint. Press four small dots or fingerprints in an arc above the larger red thumbprint to complete the paw shape. -
Refine edges:
If any edges of your black handprint look too rough, you can lightly touch them up with the paintbrush, but the natural texture of the skin print adds character. -
Final drying:
Set your artwork aside in a safe place to let the red details dry completely.
Smudged Print?
If the hand slides and blurs the print, turn it into a ‘ghost’ moving quickly by adding googly eyes, or simply let it dry and paint another layer on top.
Now you have a wonderfully spooky personalized decoration for your Halloween display

Zombie Green Handprint
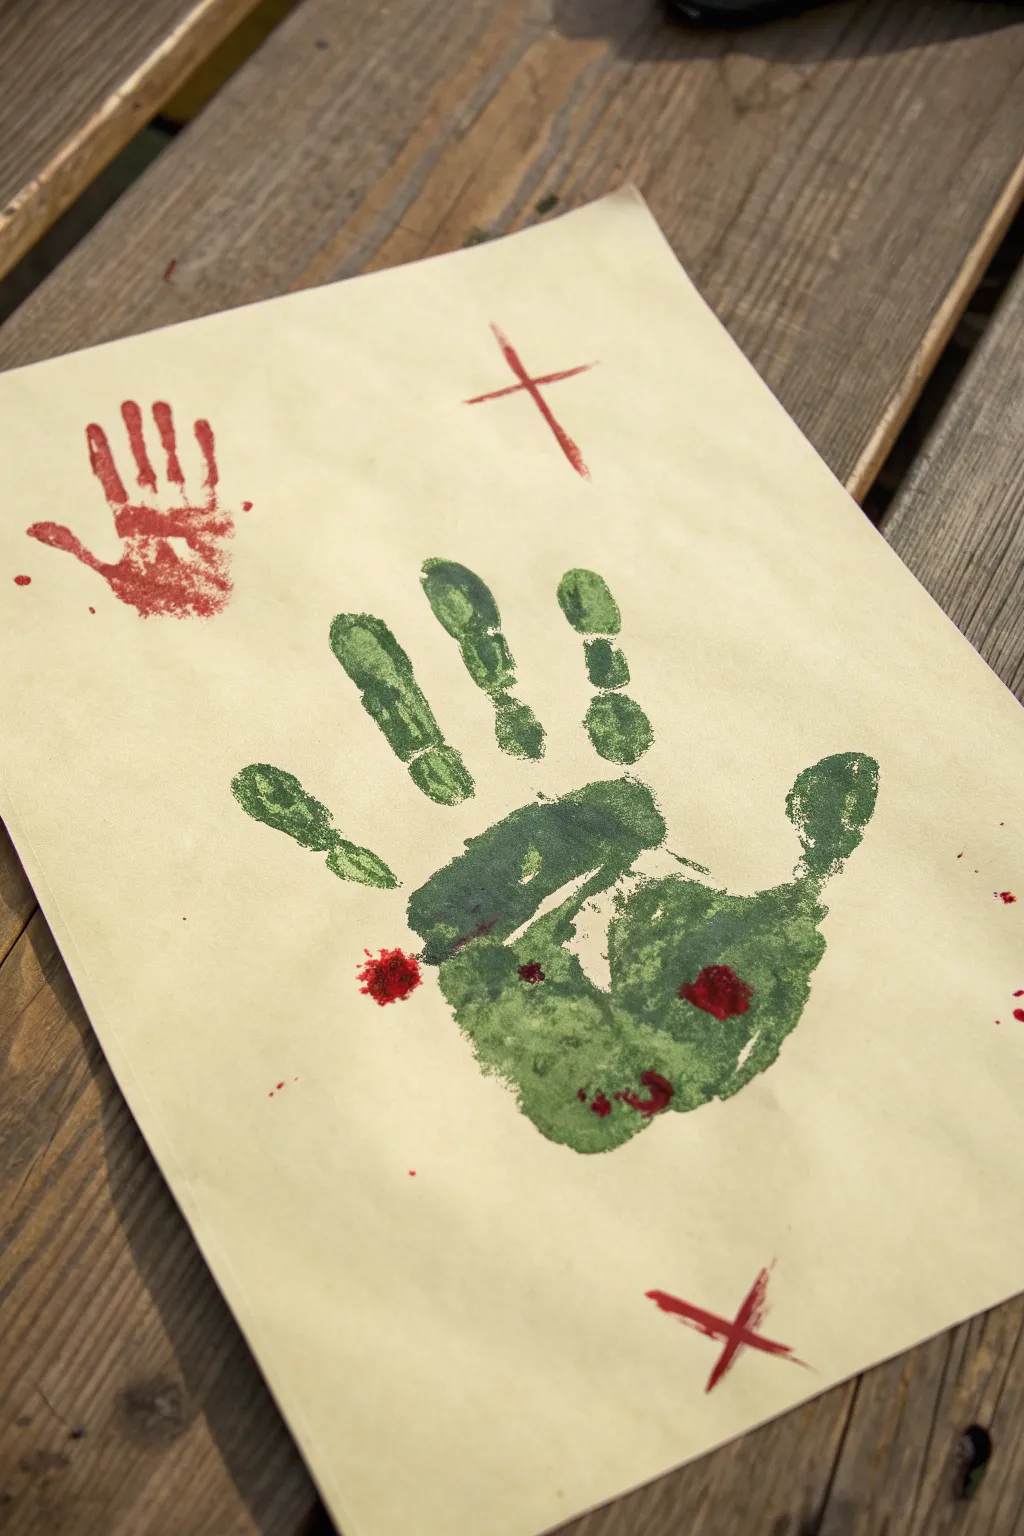
Capture the eerie essence of the undead with this spooky handprint project. Featuring a textured zombie-green hand accented by a smaller bloody print and mysterious symbols, creates a wonderfully creepy artifact perfect for Halloween décor.
Step-by-Step Guide
Materials
- Heavyweight beige or off-white construction paper
- Green tempera or acrylic paint (dark/forest green)
- Red tempera or acrylic paint (bright blood red)
- Flat paint tray or palette
- Medium paintbrush
- Small detail brush
- Paper towels or a rag
- Table covering (newspaper or messy mat)
Step 1: Preparation & Green Handprint
-
Prepare the workspace:
Lay down your protective covering on a flat surface, like a wooden table. Place your beige construction paper in the center, ensuring the surface beneath is stable. -
Mix the green paint:
Pour a generous amount of dark green paint onto your palette. If the green looks too flat, I sometimes mix in a tiny drop of brown or black to give it that murky, decaying ‘zombie’ tone. -
Coat your hand:
Using a medium paintbrush, coat the palm and fingers of your hand entirely with the green paint. Don’t make the layer too thick; you want the natural texture of your skin prints to show through. -
Position the hand:
Spread your fingers slightly to create a classic ‘grabbing’ pose. Hover your hand over the center of the paper, angling it slightly so the fingers point towards the top right. -
Press and lift:
Press your hand firmly onto the paper. Ensure the heel of your palm and each fingertip makes contact. Lift your hand straight up carefully to avoid smudging the edges. -
Enhance texture:
If the print looks too perfect or solid, lightly dab a crumpled paper towel over the wet paint in the palm area to lift a little color and create a mottled, decaying skin effect. -
Let it dry:
Allow the green handprint to dry completely before moving on to the red details. This usually takes about 10-15 minutes depending on the thickness of the paint.
Step 2: Adding the Bloody Details
-
Prep the red paint:
Clean your palette or use a fresh section for the bright red paint. This needs to be vibrant to contrast with the dull green. -
Create the small handprint:
Paint the palm and fingers of a smaller hand (or just use your own fingertips if you don’t have a helper) with red paint. Position this smaller print in the upper left corner of the paper. -
Press the red hand:
Press the red-painted hand firmly onto the paper. Lift swiftly. This print represents a ‘bloody’ mark and serves as a striking visual counterweight to the green zombie hand. -
Add gore spots:
Dip your finger or a small brush into the red paint. Dab a few ‘blood’ spots directly onto the green handprint—specifically on the palm and near the thumb—to suggest injury. -
Paint the upper cross:
Using a small detail brush dipped in red paint, draw a simple cross symbol near the top center of the page, slightly to the right of the red handprint. Keep the lines somewhat jagged. -
Paint the lower cross:
Draw a second, slightly askew cross (resembling an ‘X’ or St. Andrew’s cross) in the bottom right corner of the paper to balance the composition. -
Add distinct splatters:
Finish by adding tiny splatter marks. Dip a small brush in red paint and lightly tap it over the paper to create random droplets around the hands, avoiding big blobs. -
Final drying time:
Let the red details dry completely. Once dry, the paint will have a nice matte finish that looks great on the textured beige paper.
Aged Paper Hack
To get that weathered background look, crumple your beige paper into a ball and smooth it out again before painting. You can even lightly stain it with tea water for extra age.
Smudged Print?
If you smudge the handprint while lifting, turn it into a feature! Use a dry brush to drag the smudge outward slightly, making the zombie hand look like it’s dragging across the page.
Display your eerie creation on a wall or door to give visitors a frightful welcome


Have a question or want to share your own experience? I'd love to hear from you in the comments below!