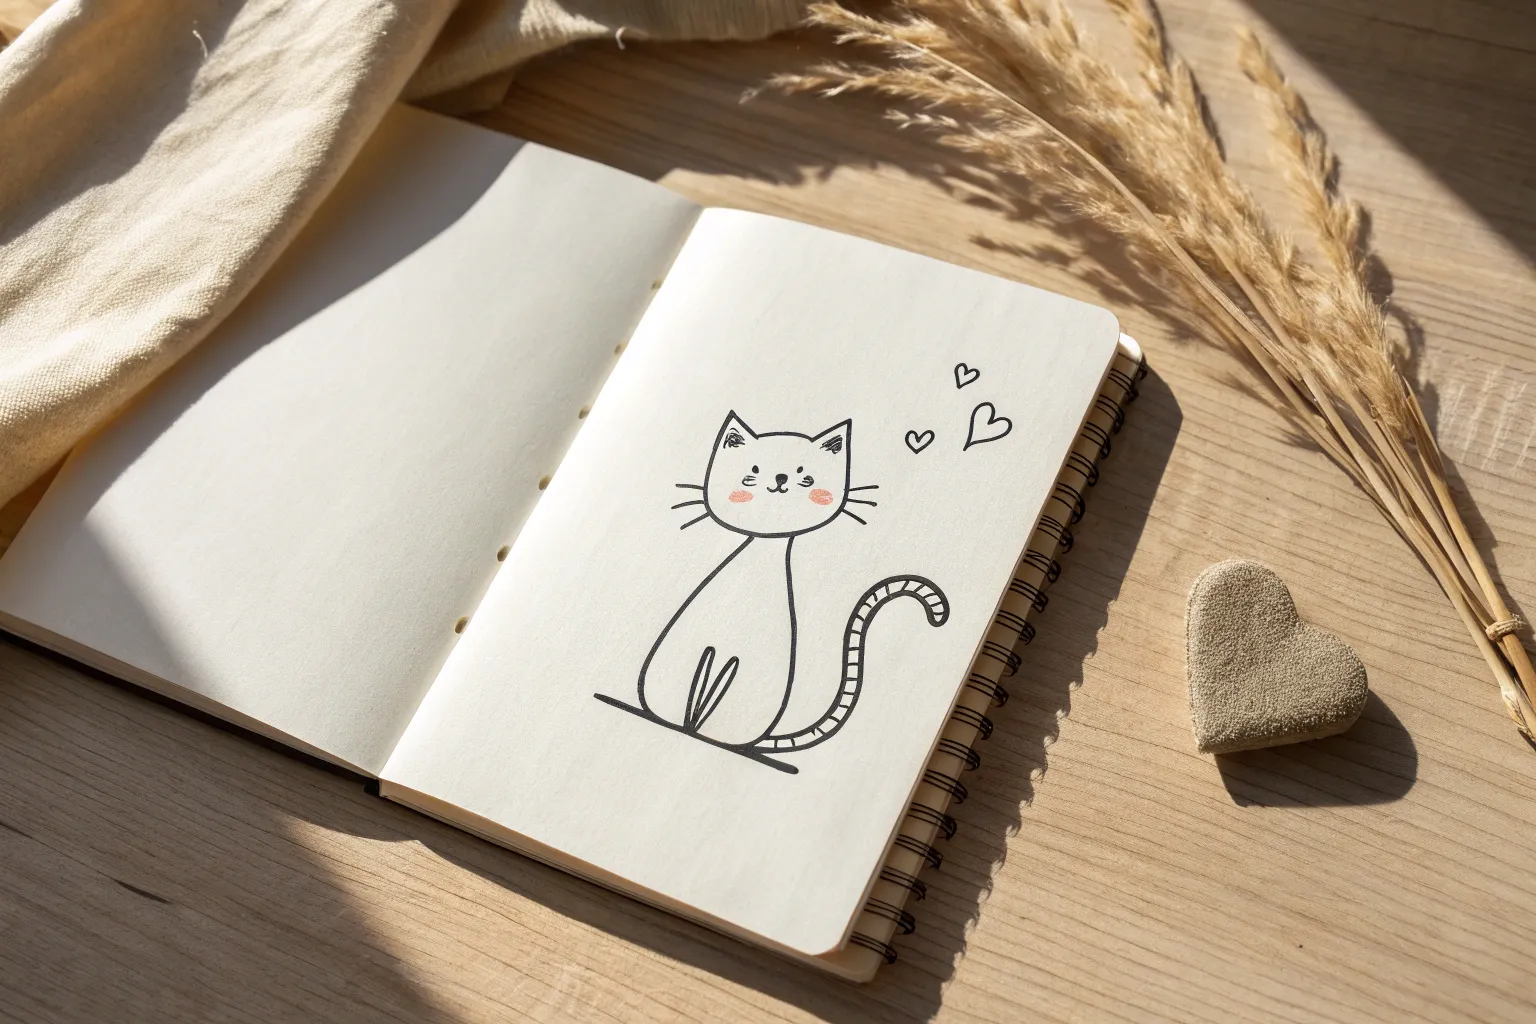
If you ever catch yourself drawing the same little kitty over and over, you’re in good company—I do it too. Here are my favorite cat doodle ideas to keep your sketchbook pages feeling fresh, cute, and super doable.
Classic Cat Face Doodle
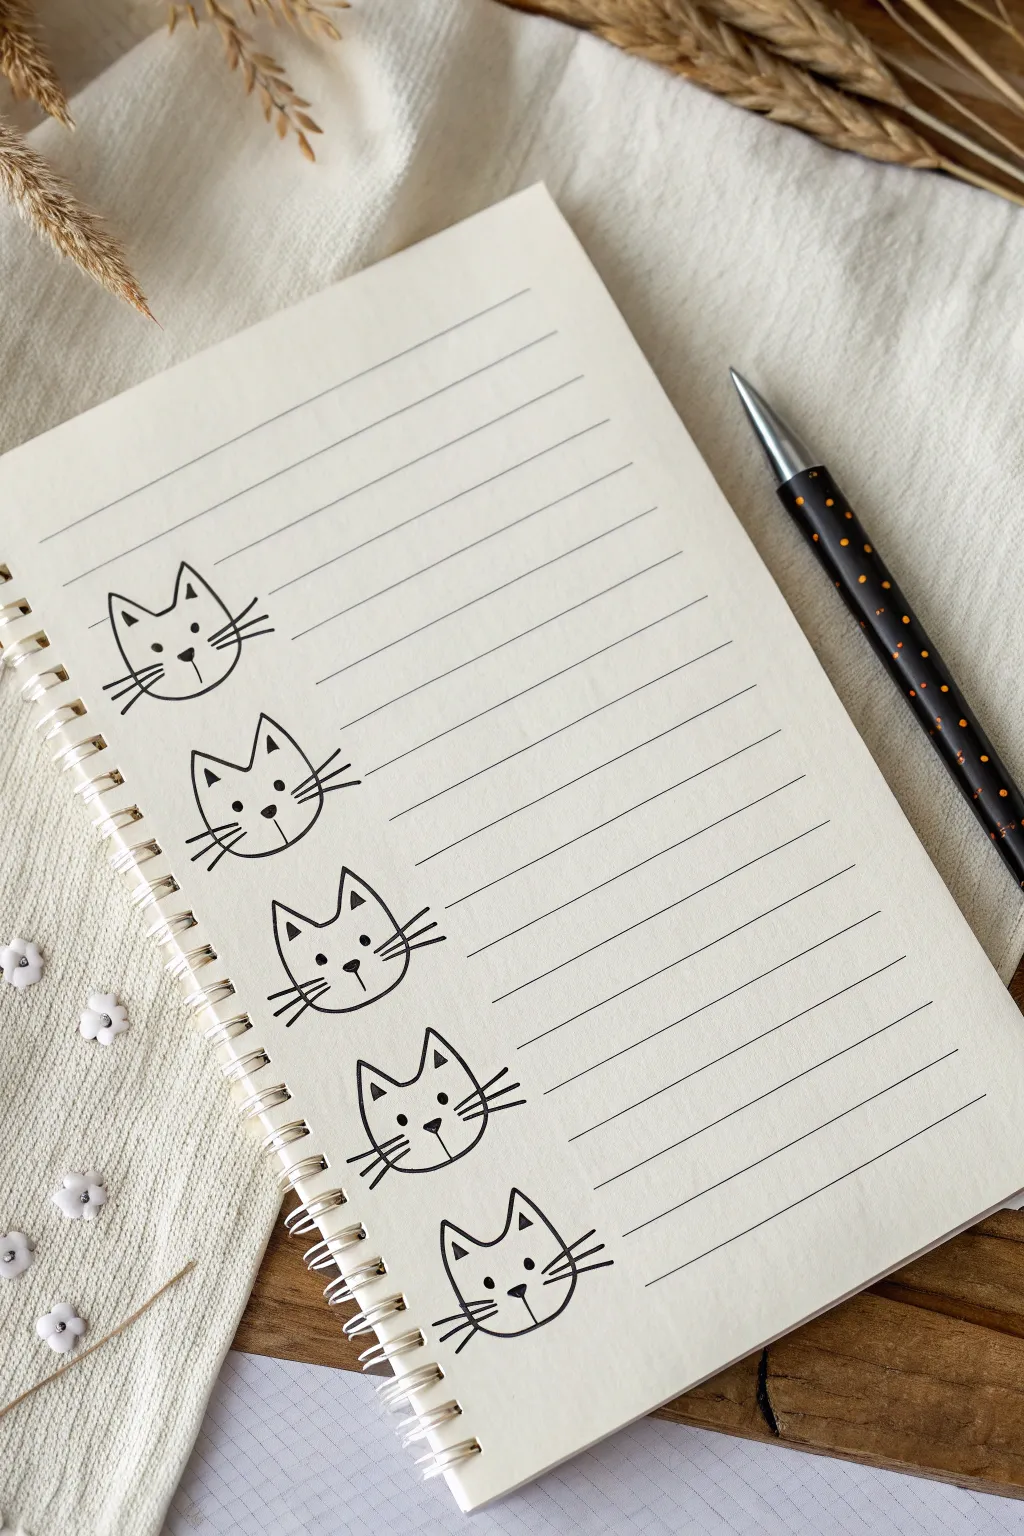
Transform a plain spiral notebook into a customized planner with this column of adorable, minimalist cat faces. This simple line-art project adds a touch of whimsy to your daily to-do lists or journaling spread.
Detailed Instructions
Materials
- Spiral-bound notebook (lined paper)
- Black fine-liner pen (0.5mm or 0.7mm recommended)
- Pencil (optional, for sketching)
- Eraser
Step 1: Setting Up the Layout
-
Page Selection:
Begin with a fresh, blank page in your spiral-bound notebook. Ensure the paper is flat and ready for ink. -
Spacing Strategy:
Identify the margin on the left side of the page. You will be drawing five cat faces vertically aligned, situated just to the right of the spiral binding. -
Vertical Placement:
Plan to leave roughly equal space between each cat head. A good rule of thumb is to skip about 3-4 ruled lines between the chin of one cat and the ears of the next.
Confident Strokes Tip
For the whiskers, flick your wrist outward quickly rather than dragging the pen slowly. This creates a more dynamic, tapered line.
Step 2: Drawing the Base Outline
-
The First Ear:
Starting with the top cat, draw a small inverted ‘V’ shape for the left ear. Keep the lines crisp and straight. -
Top of the Head:
Draw a short, slightly curved horizontal line connecting the base of the first ear to where the second ear will start. -
The Second Ear:
Draw the right ear as another inverted ‘V’, matching the size and angle of the first one. -
Face Shape:
From the outer base of the left ear, draw a curve downwards and inwards to form the cheek. Repeat on the right side. Connect them at the bottom with a gentle curve for the chin. The shape should resemble a soft U-shape closing the head. -
Repeat the Outline:
Repeat this head outline process four more times down the page, maintaining your planned vertical spacing. I find it easier to draw all the outlines first before adding details to ensure consistency.
Ink Smearing?
If you’re left-handed or notice smudges, place a scrap piece of paper under your hand as a guard while you draw down the column.
Step 3: Adding Facial Features
-
Ear Details:
Go back to the top cat. Draw a small, simple triangle inside each ear to add depth. -
The Eyes:
Place two small, solid black dots for eyes in the middle of the face. Space them widely enough to leave room for the nose. -
Nose and Mouth:
Draw a tiny upside-down triangle between and slightly below the eyes for the nose. From the bottom tip of the nose, draw a small vertical line down, splitting into two small curves for the mouth. -
Whiskers:
Add three straight lines extending outwards from each cheek. Use quick, confident strokes so the lines taper naturally at the ends. -
Batching the Details:
Now, systematically add these features to the remaining four cat outlines. Keeping the expression identical creates a cohesive, patterned look.
Step 4: Finishing Touches
-
Check for Gaps:
inspect your lines. If any connections (like where ears meet the head) are too faint, carefully go over them to darken the line weight. -
Clean Up:
If you used a pencil sketch underneath, wait at least five minutes for the ink to dry completely, then gently erase any visible graphite marks.
Now you have a charming custom page ready for your lists.


Sitting Cat Side View
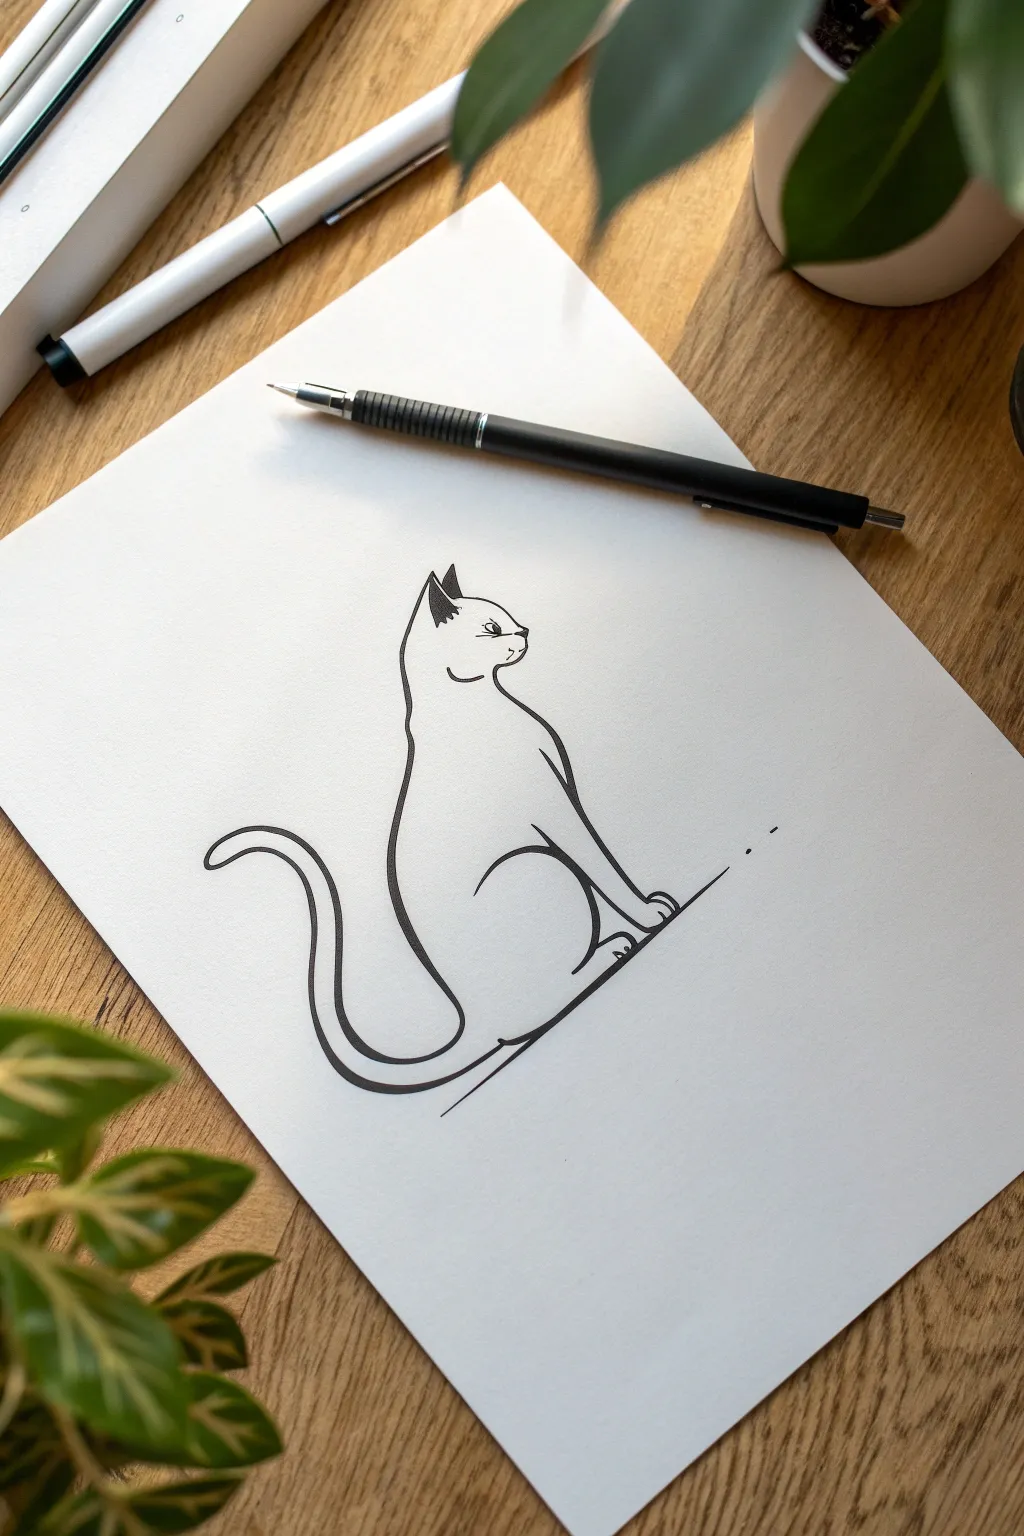
Capture the quiet elegance of a feline friend with this clean, minimalist doodle. Using smooth, confident lines, you’ll create a side-view drawing of a sitting cat that looks striking in its simplicity.
Step-by-Step Guide
Materials
- Smooth white drawing paper (A4 or letter size)
- Black fine-point drawing pen (0.5mm or similar)
- Pencil (HB for sketching)
- Eraser
Step 1: The Basic Shapes
-
Sketch the head:
Start by lightly sketching a small circle for the head with your pencil. This barely needs to be visible; it’s just a guide for placement. -
Outline the body curve:
From the back of your head circle, draw a long, sweeping ‘S’ curve downwards to establish the cat’s spine and rear end. This line defines the posture. -
Mark the chest:
Sketch a gentle outward curve starting from the chin area, moving down to where the front legs will begin. This creates the puffed-out chest of a sitting cat.
Step 2: Refining the Silhouette
-
Draw the ears:
Switch to your pen now if you feel confident, or continue sketching. Add two triangular shapes at the top of the head. The ear closest to us should be slightly larger and more upright. -
Define the profile:
Trace over the face contour. Create a small dip for the nose bridge and round out the muzzle slightly before tucking the line back for the chin. -
Outline the back:
Follow your initial spine guide with the pen. Start from behind the ears, dip slightly for the neck, and then arch smoothly down to the base of the tail. -
Add the front leg:
Draw a long, nearly vertical line for the front leg. At the bottom, create a small, rounded paw shape with tiny bumps for toes. -
Form the belly and haunch:
Draw a curved line representing the thigh muscle. It should start mid-body and curve down towards the ground, ending in a rear paw tucked just behind the front one.
Wobbly Lines?
If your long curves look shaky, try drawing from your shoulder rather than your wrist. Moving your whole arm creates smoother, more confident strokes.
Step 3: Tail and Details
-
Start the tail:
From the bottom of the cat’s back, extend a line outward and curve it upwards. This makes the top edge of the tail. -
Finish the tail loop:
Draw the underside of the tail, following the curve of the top line but keeping it thicker near the base and slightly tapering at the tip. The tail should look like a relaxed ‘J’ shape. -
Connect the lines:
Ensure the tail line flows seamlessly into the bottom of the cat’s haunch, completing the silhouette. -
Add facial features:
Place a small dot or tiny curve for the eye, positioned slightly forward on the face. Add a small line for the mouth/nose slit. -
Detail the ears:
I like to color inside the far ear completely black to show depth. For the near ear, add a few small scribbles or lines to suggest inner ear fur. -
Ground the figure:
Draw a straight horizontal line under the cat. It doesn’t need to touch the paws perfectly; floating it slightly below adds a stylistic touch. -
Add motion marks:
Place two small dots or dashes at the end of your ground line to suggest a fading horizon or movement.
Make it Yours
Turn this into a calico or tabby by adding small patches or stripes with stippling dots. Keep the patterns sparse to maintain the minimalist style.
Step 4: Final Touches
-
Thicken key lines:
Go back over the main curve of the back and tail to add line weight variety. Making the outer silhouette slightly bolder helps the drawing pop. -
Clean up:
Once the ink is completely dry—give it a full minute—erase any visible pencil guidelines.
You have now captured a quiet moment of feline grace on paper


Loaf Cat Pose
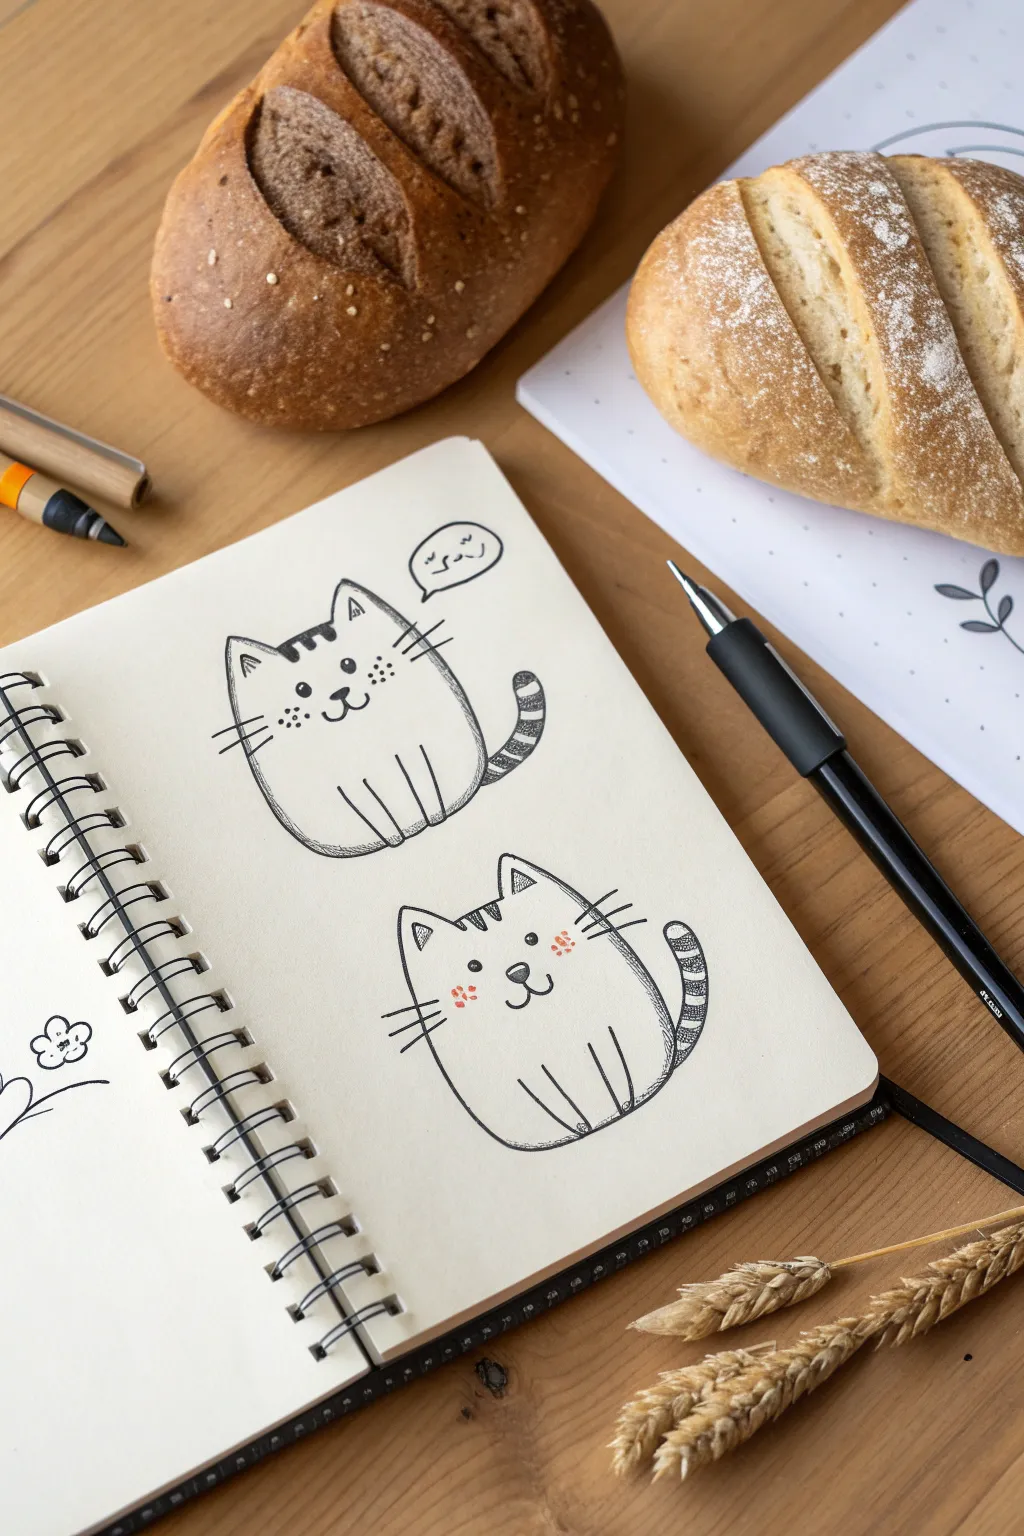
Master the art of drawing adorable, squishy cats in their most comfortable ‘loaf’ position. These simple line drawings capture that cozy, tucked-in pose using just a few curves and expressive faces.
Step-by-Step
Materials
- Sketchbook or drawing paper (heavyweight preferred)
- Pencil (HB or 2B)
- Eraser
- Fine liner pen (black, 0.3mm or 0.5mm)
- Orange or pink marker (optional for cheeks)
Step 1: Drawing the First Loaf
-
Outline the body shape:
Start by lightly sketching a large, rounded shape that resembles a loaf of bread or a bean. The bottom should be slightly flatter than the top, creating a stable base for your cat. -
Define the ears:
At the top left of your curve, draw two triangles for ears. Keep them somewhat pointy but with softened tips to maintain the cute aesthetic. -
Add forehead stripes:
Draw three small, vertical rectangles or dashes between the ears to create tabby stripes. Fill these in with your pen later for contrast. -
Place the face features:
In the center of the shape, just below the midline, draw a small nose. From the nose, extend two curved lines outward for the mouth, forming a ‘3’ shape sideways. Add two wide-set dots for eyes. -
Draw the whiskers and paws:
Sketch three straight lines extending from each cheek for whiskers. At the bottom of the body, draw three vertical lines to suggest the tucked-in front paws. -
Create the tail:
On the right side of the body, draw a curved, thick tail rising upwards. Add stripes to the tail by drawing small curved lines across it. -
Ink the outline:
Go over your pencil lines with the fine liner pen. Use a slightly jagged or broken line for the bottom edge to imply fur texture rather than a smooth, solid line. -
Add a thought bubble:
Draw a small wobbly cloud shape above the cat’s head. Inside, you can add squiggly text or sleeping symbols.
Fur Texture Tip
Don’t connect every line perfectly. Leaving small gaps in the outline, especially at the base, makes the cat look fluffier and less stiff.
Step 2: Drawing the Second Loaf
-
Sketch the second body:
Draw another rounded loaf shape below the first one. Make this one slightly wider at the bottom to give it a ‘melting’ appearance. -
Add ears and stripes:
Draw the triangular ears again. This time, add the forehead stripes by drawing three small vertical lines coming down from the top edge between the ears. -
Detail the face:
Place the eyes a bit wider apart than the first cat. Draw a small, inverted triangle for the nose and a simple ‘w’ mouth. Add small dots on the cheeks for blush. -
Draw the tucked paws:
For this pose, draw two ‘U’ shapes at the bottom center of the body to show the knees or folded legs more prominently. -
Add the tail:
Draw the tail curling up the right side of the body, hugging the curve of the back. Stripe it with small bands of ink. -
Inking and texture:
Trace your pencil lines with the ink pen. I like to add tiny stipple dots near the bottom curves to create a shadow effect and sense of volume. -
Add blush details:
Using your orange or pink marker, gently dab three small dots on each cheek area for a pop of color. -
Final clean up:
Once the ink is completely dry, carefully erase all pencil guidelines to leave a crisp, clean illustration.
Level Up: Pattern Play
Instead of stripes, try drawing calico patches, Siamese points, or tuxedo markings to customize the cats to match your own pets.
Start filling a whole page with these little loaves in different sizes and expressions


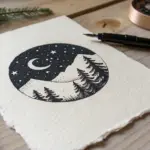
Curled-Up Sleeping Cat
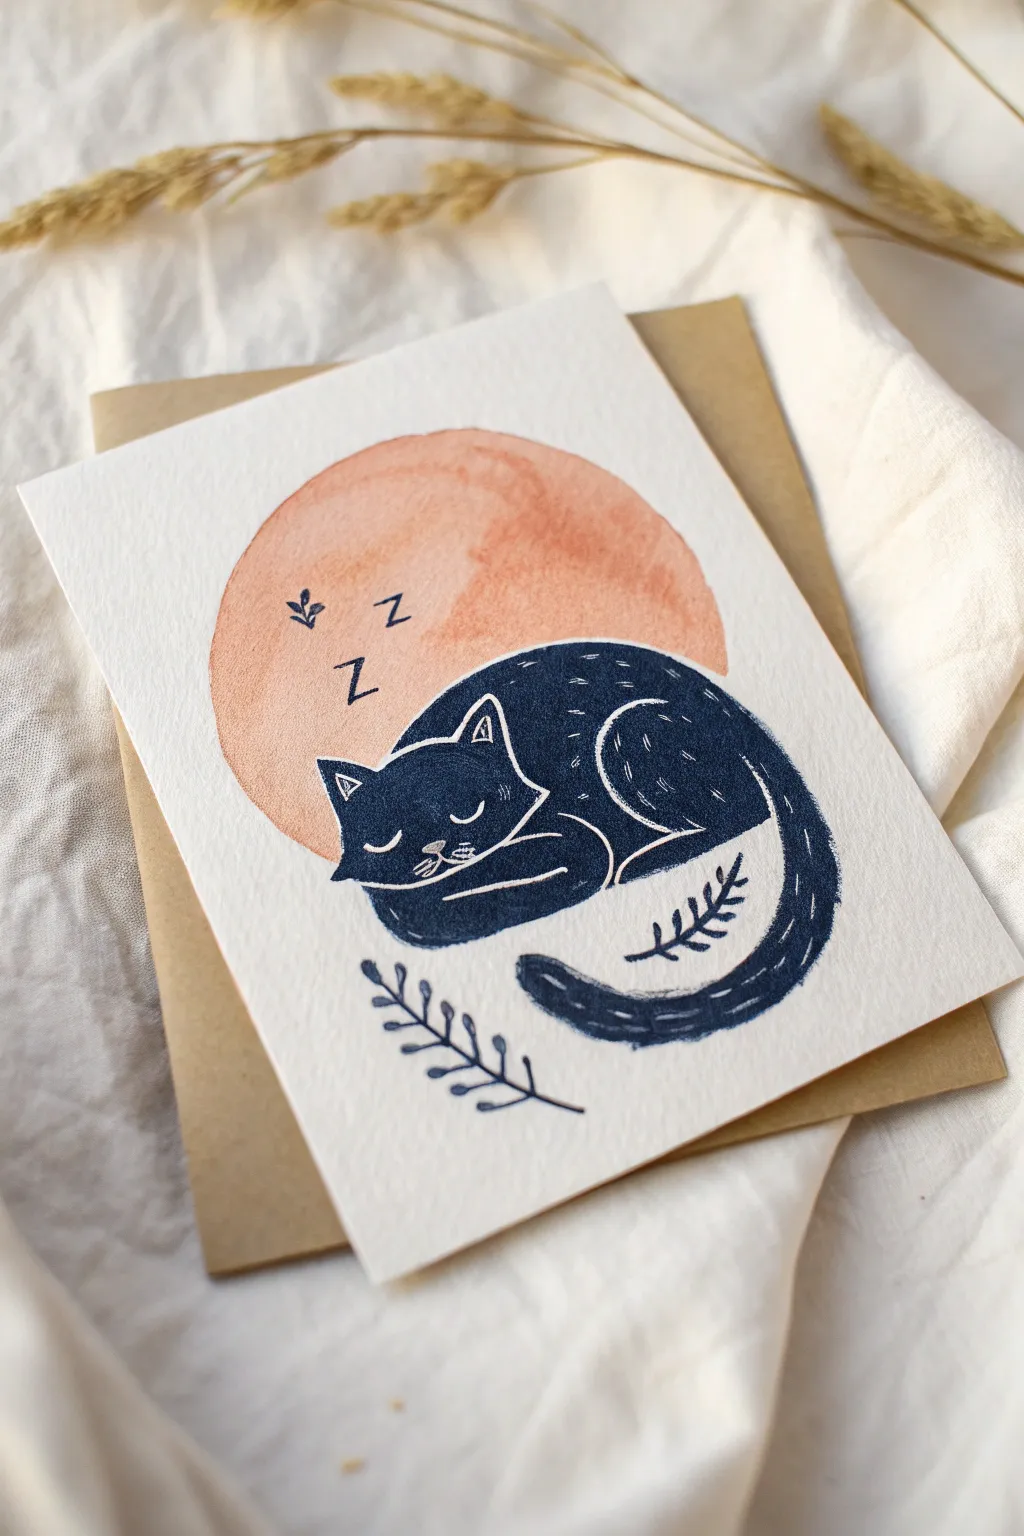
This serene card design captures a peaceful black cat snoozing against a warm, peachy moon. The contrast between the soft watercolor textures and the crisp linework creates a cozy, modern aesthetic perfect for greeting cards or wall art.
Step-by-Step Guide
Materials
- Cold press watercolor paper (cut to card size)
- Peachy-orange watercolor paint
- Dark navy blue gouache or acrylic paint
- Round watercolor brush (size 6 or 8)
- Fine detail brush (size 0 or 1)
- White gel pen (0.8mm or 1.0mm)
- Pencil and eraser
- Compass or circular object (for tracing)
- Dark navy or black fine-liner pen
- Kraft paper envelope (optional for display)
Step 1: Setting the Scene
-
Drafting the circle:
Begin by lightly tracing a circle in the center of your watercolor paper using a compass or by tracing a cup rim. Keep the pencil line very faint so it doesn’t show through the paint later. -
Sketching the cat:
Lightly sketch the outline of the cat overlapping the bottom half of the circle. Create a large, kidney-bean shape for the clear curve of the back and the tucked-in head. -
Refining the sketch:
Add two triangular ears on the head area and curve the tail so it sweeps upward, overlapping the cat’s body slightly. Don’t worry about facial features yet; just get the silhouette right.
Uneven Moon?
If your watercolor circle dries with hard water edges (called ‘blooms’), don’t restart. This adds organic texture. Just ensure the area is flat before painting the cat.
Step 2: Painting the Background
-
Mixing the moon color:
Mix a watery wash of peachy-orange watercolor. You want a color that looks like a soft sunset or an apricot, significantly lighter than the cat will be. -
Painting the circle:
Fill in the circular moon shape, carefully painting around the top edge of your cat sketch. It’s okay if the paint looks little uneven; that watercolor texture adds charm to the final piece. -
Letting it dry completely:
Wait until the orange circle is bone dry. If the paper feels cool to the touch, it’s still damp. Painting the cat too soon will cause the dark blue to bleed into the peach.
Metallic Magic
Swap the white gel pen for a metallic gold or silver pen for the whiskers and fur details to give the card a luxurious, shimmering finish.
Step 3: Bringing the Cat to Life
-
Mixing the cat color:
Prepare your dark navy gouache or acrylic. Gouache is ideal here because it dries opaque and matte, providing a solid, velvety look compared to the translucent moon. -
Filling the silhouette:
Using your round brush, carefully fill in the entire cat shape with the navy paint. Ensure your edges are crisp, specifically where the cat overlaps the painted moon. -
Checking opacity:
If the orange moon shows through the navy paint, wait for the first layer to dry and apply a second coat for a completely solid, dark silhouette. -
Drying time:
Allow the dark paint to dry completely. This is crucial because the white gel pen won’t write clearly on wet or tacky paint.
Step 4: Adding Delicate Details
-
Drawing the face:
With your white gel pen, draw two small closed eyelids (u-shapes), a tiny triangle nose, and a simple mouth line on the cat’s face. -
Defining the form:
Use the white pen to outline the separation between the head, the front leg, and the hind leg. These simple curves help the viewer understand the tucked-up posture. -
Adding texture:
Draw short, dashed white lines along the cat’s back and tail to suggest fur texture. Keep these loose and sparse rather than uniform. -
Detailing the ears:
Outline the inner triangles of the ears with the white gel pen to make them pop against the dark head. -
Adding background elements:
Switch to your dark navy fine-liner pen. Draw small ‘Z’ letters inside the orange moon near the cat’s head to indicate sleeping. -
Drawing the botanical sprig:
Using the same dark pen or the tip of your detail brush with navy paint, draw a curved botanical sprig beneath the cat. Add small leaves branching off a central stem. -
Final flourish:
Add a second, smaller leafy sprig inside the cat’s tail curve using the navy pen or paint, creating a nice balance with the darker tones. -
Clean up:
Once all ink is dry, gently erase any visible pencil marks from your initial sketch that haven’t been covered by paint.
Now you have a charming, handcrafted card ready to share with a fellow cat lover

PENCIL GUIDE
Understanding Pencil Grades from H to B
From first sketch to finished drawing — learn pencil grades, line control, and shading techniques.
Explore the Full Guide
Stretching Cat Silhouette
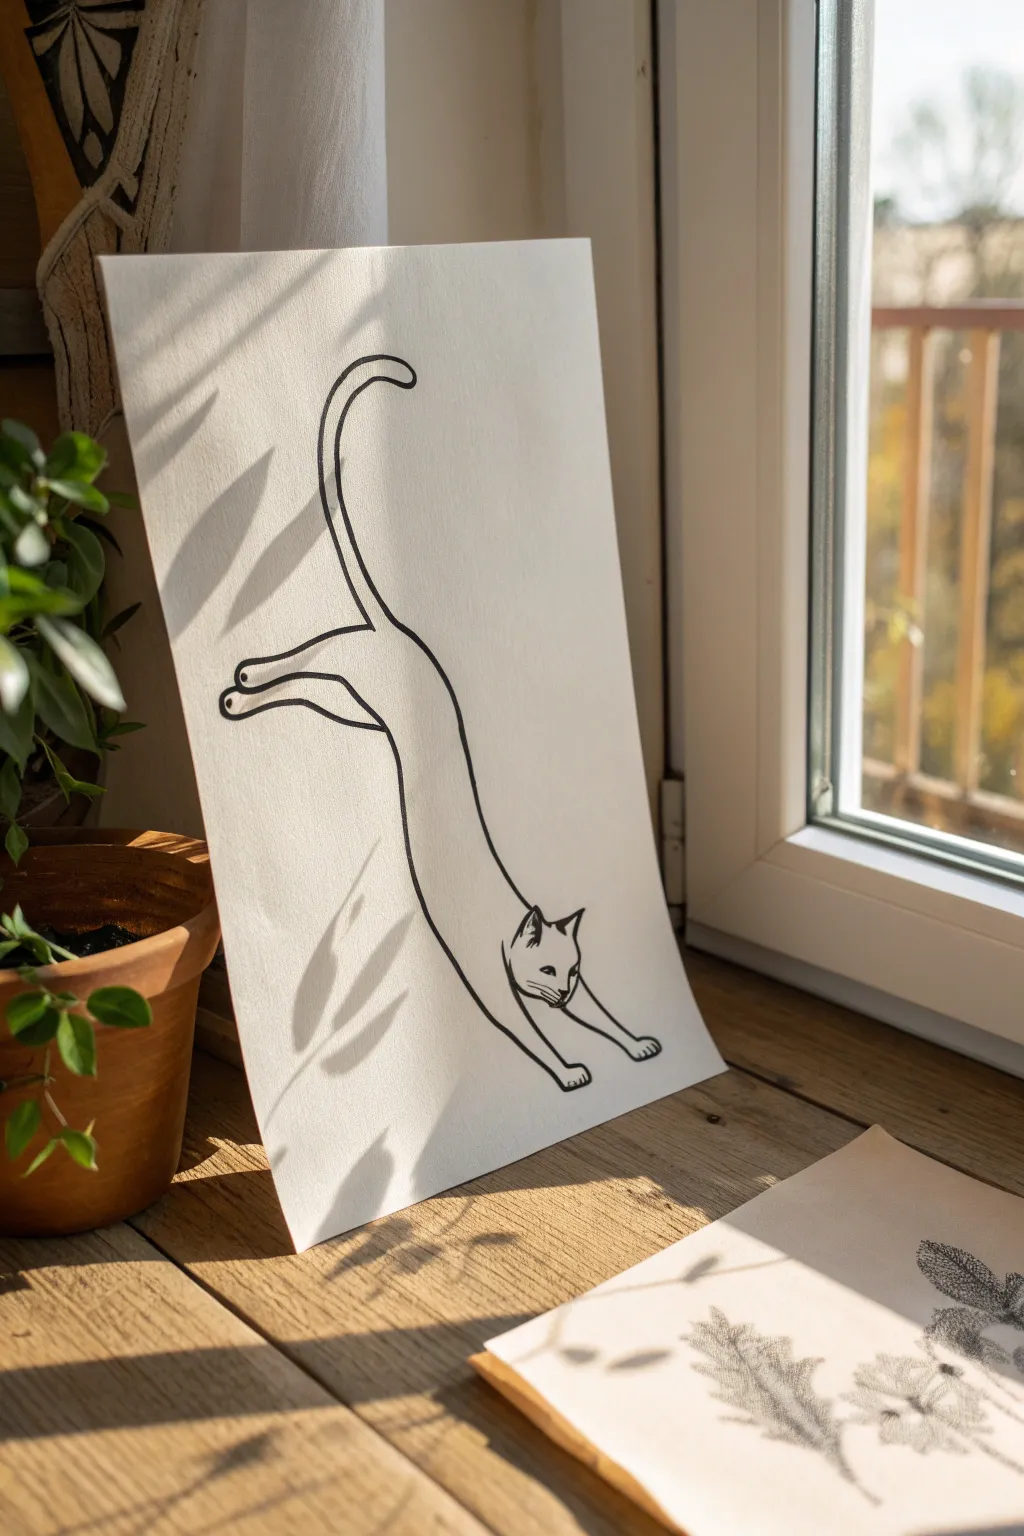
Capture the graceful fluidity of a feline morning stretch with this elegant, minimalist line drawing. Using a single continuous-feel line technique creates a piece that feels both dynamic and effortlessly simple.
Detailed Instructions
Materials
- High-quality white drawing paper or cardstock (A4 or similar)
- Black fine-liner pen (0.5mm or 0.8mm)
- Black brush pen or broad marker (for the bold outline)
- Pencil (HB or 2B)
- Eraser
- Ruler (optional, for centering)
Step 1: Drafting the Pose
-
Establish the curve:
Start by lightly sketching a long, gentle ‘S’ curve with your pencil. This will serve as the spine of the cat, starting from where the tail begins down to where the head will be near the bottom. -
Position the head:
At the bottom end of your curve, draw a small oval shape tilted slightly to the right. This will become the cat’s head. It should be positioned lower than the rest of the body to emphasize the downward stretch. -
Outline the body shape:
Lightly sketch the elongated body. The torso should be long and lean. Connect the head to the body with a very subtle neck indication, keeping the lines flowing smoothly. -
Sketch the back legs:
Near the top of the body curve, outline the back legs. The visible back leg should extend backward, almost parallel to the ground but slightly angled up. Add a small rounded paw at the end. -
Draft the front paws:
Draw two long, straight lines extending from the chest area downwards. These arms are fully extended in the stretch. Add small, rounded paws at the very tips, pressing against the imaginary floor. -
Add the tail:
From the top of the rump, draw a long, slender tail that curves upward and then hooks slightly at the tip. This adds balance to the vertical composition. -
Refine the details:
Sketch the ears on the head oval—triangular and perked up. Mark the position of the eyes, nose, and whiskers lightly.
Step 2: Inking the Silhouette
-
Trace the main contour:
Switch to your black brush pen or broad marker. I like to start at the top of the tail to get a clean, confident stroke. Follow your pencil lines, keeping the pressure consistent to create a uniform, bold line weight. -
Define the back legs:
Carefully ink the extended back leg. Notice how the line dips in slightly at the ‘knee’ joint before extending to the paw. Include the small separation lines for the toes. -
Ink the long belly stretch:
Draw the long, sweeping line of the belly. This is crucial for the feeling of tension in the stretch. Ensure the line is smooth and unbroken from chest to hip. -
Draw the front legs:
Ink the forearms. These lines should taper slightly as they reach the paws. Make sure the paws look firmly planted. -
Focus on the face:
Switch to a thinner fine-liner (0.5mm) for the face if you want more precision, or use the very tip of your brush pen. Outline the ears and the curve of the jaw carefully. -
Fill in facial features:
Using the fine-liner, draw the almond-shaped eyes, the small triangular nose, and the mouth line. Add three distinct whiskers on each side of the muzzle. -
Connect the neck:
Ensure the lines connecting the head to the shoulders are seamless. The transition should look fluid, not disjointed. -
Review line weight:
Look over your main outline. If any parts look too thin, go over them again with the broad marker to ensure the silhouette pops against the white paper.
Don’t Hesitate
For the smoothest look, draw long lines with your arm, not just your wrist. Confident, quick strokes wobble less than slow ones.
Step 3: Finishing Touches
-
Let the ink set:
Allow the ink to dry completely. This is vital to prevent smudging your crisp lines. -
Erase guidelines:
Gently erase all the underlying pencil sketches. Be thorough, as stray graphite can dull the high-contrast look. -
Final inspection:
Check for any small gaps in your ink lines or areas that need a tiny touch-up. The beauty of this piece lies in its clean simplicity.
Make It Pop
Try using textured watercolor paper. The slight roughness breaks up the ink line slightly for a lovely organic, vintage illustration feel.
Place your finished doodle near a window where shadows can play across the paper, bringing your stretching cat to life
Expression Sheet of Cat Heads
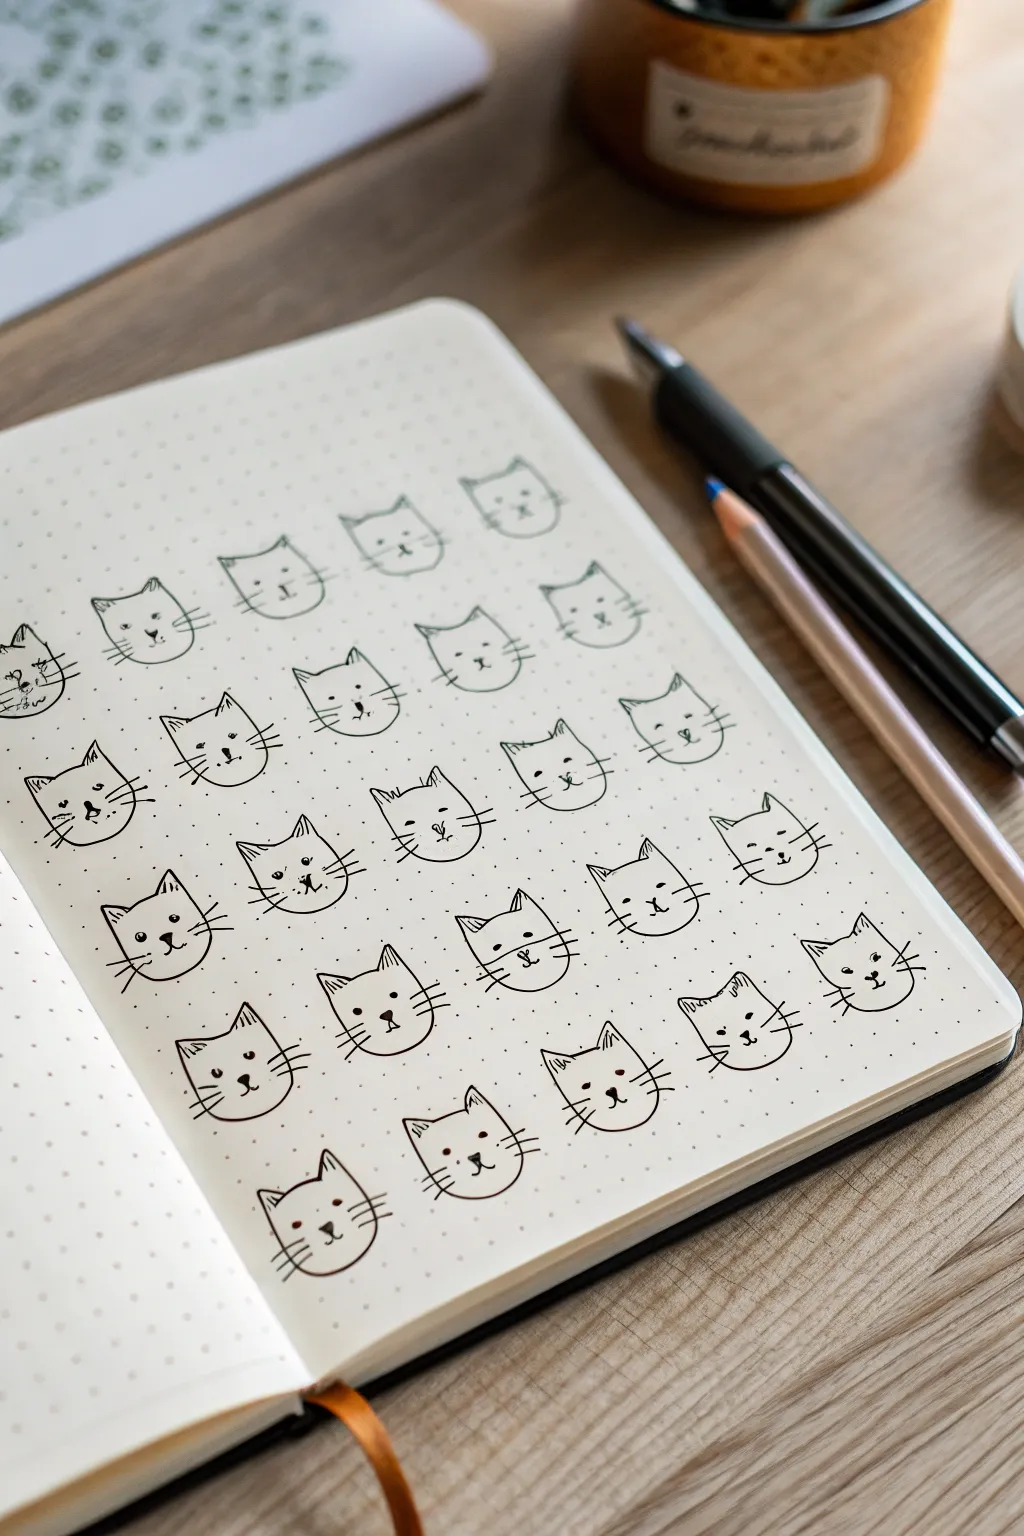
Fill a page of your bullet journal with an adorable army of cat doodles, each sporting a slightly different expression. This minimalist line art project uses a simple grid layout to create a satisfying and cohesive collection of feline friends.
How-To Guide
Materials
- Dotted notebook or bullet journal
- Fine liner pen (black, 0.3mm or 0.5mm)
- Pencil (HB or 2H)
- Eraser
- Ruler (optional, but helpful for spacing)
Step 1: Planning the Layout
-
Define the grid:
Start by identifying the dot grid on your paper. You will be using the dots as anchors for your cat heads. I like to leave about 3 or 4 dot spaces between each cat horizontally to ensure they aren’t crowded. -
Set vertical spacing:
Determine the vertical rhythm. Leave roughly 4 to 5 dot spaces between the rows. This gives enough room for the ears of the bottom row not to touch the chins of the top row. -
Rough sketch (optional):
If you are nervous about committing to ink immediately, lightly sketch circles or ovals with your pencil where each head will go to establish your layout.
Uneven Eyes?
Don’t stress if eyes aren’t perfectly level. If one is higher, tilt the mouth slightly towards it—now your cat is just cocking its head inquisitively.
Step 2: Drawing the Base Heads
-
Draw the ear outlines:
Starting at the top left, draw two small triangles for ears. Keep the tips slightly rounded for a softer, cuter look rather than sharp points. -
Connect the forehead:
Draw a slight curve connecting the inner corners of the two ear triangles. This forms the top of the head. -
Shape the face:
From the outer base of each ear, draw a continuous U-shape downwards to create the cheeks and chin. Depending on your preference, you can make these round like a circle or slightly squashed like a wide oval. -
Repeat the process:
Continue this process across the first row, then move down to subsequent rows until your grid is filled with blank cat head outlines. Try to keep the size consistent, using the dot grid as a measuring guide.
Step 3: Adding Facial Features
-
Place the eyes:
On the first cat, add two small dots for eyes. Place them relatively wide apart, about halfway down the face shape. -
Add the nose:
Draw a small, inverted triangle or a tiny oval between and slightly below the eyes for the nose. Color it in black. -
Draw the mouth:
From the bottom point of the nose, draw a small ‘w’ shape or two curved lines branching out to form the signature cat smile. -
Whiskers are key:
Add two or three short lines on each cheek. Keep them quick and flicked outwards for energy. Varying the angle slightly adds character. -
Inner ear detail:
Draw a smaller triangle inside each ear to give the drawing depth. -
Vary drawing techniques:
As you move to different cats, subtly change the features. Draw some eyes as closed curves (sleeping), make some mouths smaller or open, or change the direction of the whiskers. -
Experiment with shapes:
Notice how some cats in the example have slightly wider heads or taller ears. Allow these small natural variations to happen; it makes the page feel hand-drawn and organic.
Level Up
Use colored pencils to give each cat a different fur pattern. Add orange patches, grey stripes, or calico spots to break up the black and white grid.
Step 4: Finishing Touches
-
Review the grid:
Look over your rows. If any cat looks too empty, you can add tiny details like a hair tuft on top of the head or little eyebrows. -
Wait for ink to dry:
Give your page a few minutes to ensure the ink is completely set. Smudging lines now would be heartbreaking. -
Erase guidelines:
Gently erase any pencil marks you made during the planning phase, being careful not to crumple the paper.
Now you have a charming reference sheet of expressions for all your future journaling needs
BRUSH GUIDE
The Right Brush for Every Stroke
From clean lines to bold texture — master brush choice, stroke control, and essential techniques.
Explore the Full Guide
Chibi Cat With Big Eyes
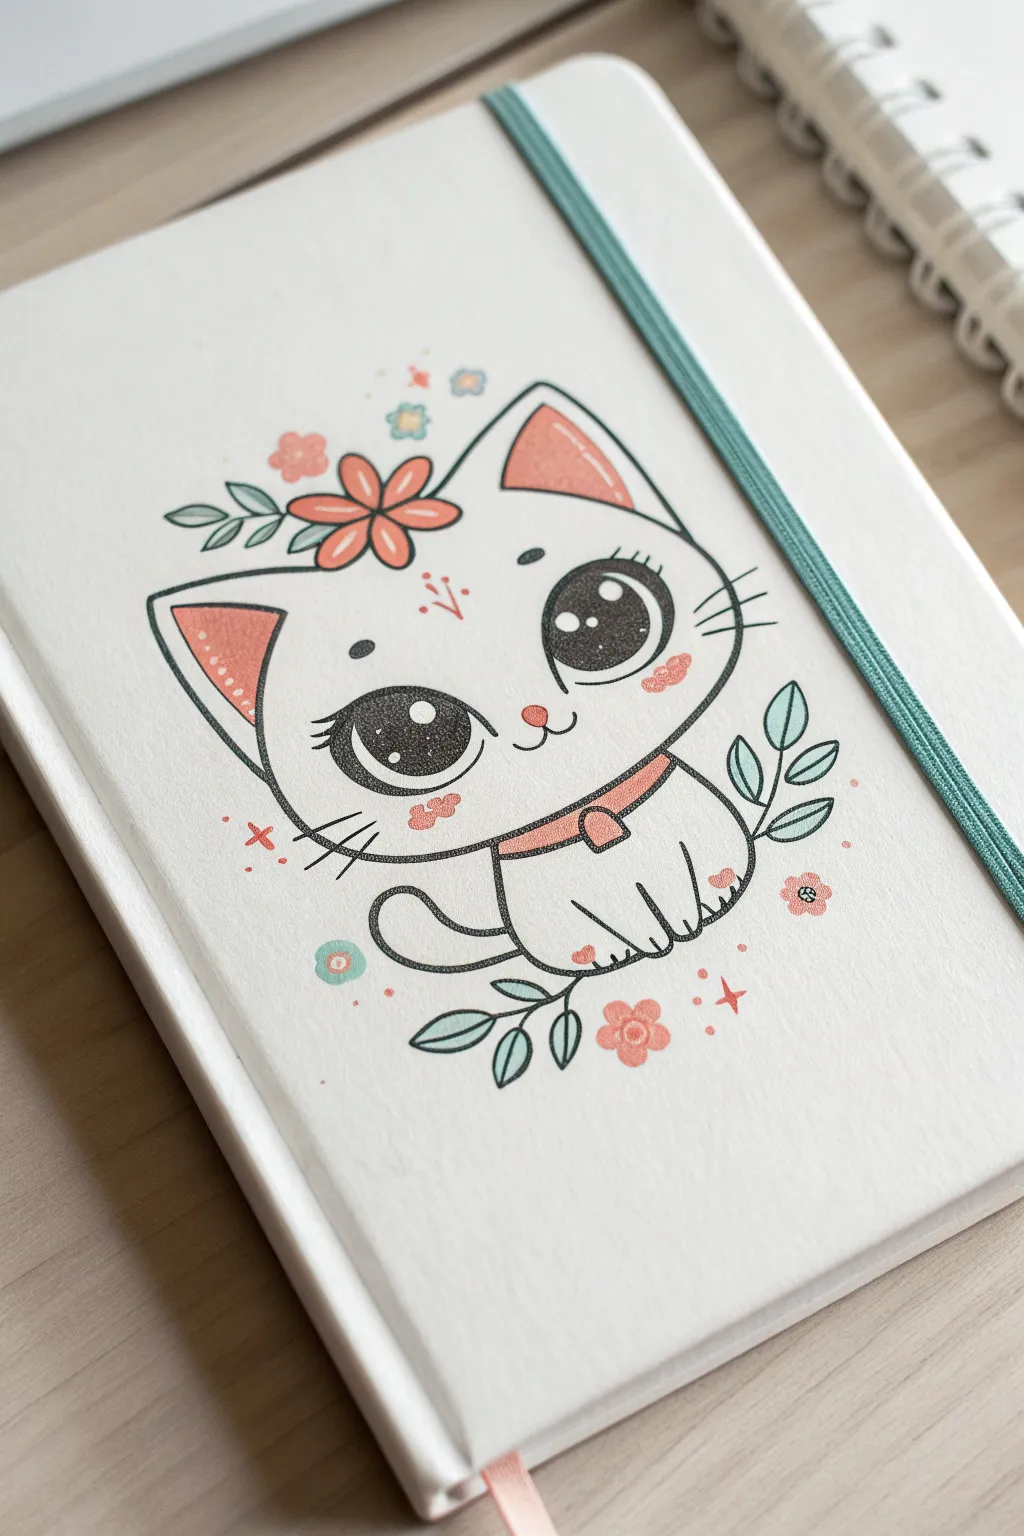
Transform a plain sketchbook into a charming companion with this adorable chibi cat doodle featuring oversized, sparkling eyes and delicate floral accents. The soft pastel palette combined with bold black outlines creates a sticker-like effect that pops beautifully against the white cover.
Step-by-Step
Materials
- White or cream hardcover notebook (smooth texture preferred)
- Pencil (HB or H for light sketching)
- Black fine liner pen (01 or 03 nib)
- Black brush pen or thicker marker
- Alcohol markers or paint pens (coral pink, teal/mint green, light grey)
- White gel pen (for eye highlights)
- Eraser
Step 1: Sketching the Base Framework
-
Map out the head shape:
Start by drawing a large, soft trapezoid shape with rounded corners for the cat’s head. The bottom line should be slightly wider than the top to give it those chubby, cute cheeks. -
Add the ears:
Top the head with two large, triangular ears. Keep the points slightly rounded rather than sharp to maintain the soft, friendly aesthetic. -
Draft the body:
Below the head, sketch a small, rounded body. It should be significantly smaller than the head—this ‘big head, small body’ ratio is the secret to the chibi look. -
Position the paws and tail:
Draw three simple U-shapes at the bottom of the body for paws. Add a curved, S-shaped tail wrapping around the left side of the body.
Texturing Tip
For a vintage print effect, stipple tiny dots of a darker shade over the flat colors (like the pink ears) instead of blending shades smoothly.
Step 2: Adding Facial Features & Details
-
Outline the giant eyes:
Place two very large ovals in the lower half of the face. Space them widely apart to leave room for the nose and mouth. -
Draw the nose and mouth:
Right between the bottom edges of the eyes, draw a tiny oval nose. Connect it to a small ‘w’ shape for the mouth. -
Add floral accessories:
Sketch a simple five-petaled flower resting on the cat’s forehead, slightly to the left. Allow a few leaves to poke out from behind it. -
Sketch the collar:
Draw a curved band around the neck area with a small bell or charm hanging from the center. -
Surround with decorative elements:
Lightly pencil in floating leaves, small flowers, and sparkles around the cat to frame the composition.
Make It Yours
Change the flower crown to seasonal items, like holly leaves for winter or a tiny pumpkin for autumn, to match the time of year.
Step 3: Inking & Coloring
-
Ink the main outlines:
Using your fine liner, trace over your pencil lines. Use confident strokes. For the outer perimeter of the cat, I sometimes thicken the line weight just a tiny bit to make it stand out. -
Fill the eyes:
This is crucial: Color the large ovals black, but leave two or three distinct white circles empty inside each pupil for that ‘sparkly’ anime look. If you accidentally fill them, don’t worry—we’ll fix it later. -
Erase pencil marks:
Wait until the ink is completely dry to avoid smudging, then gently erase all visible pencil sketches. -
Color the ears and cheeks:
Use the coral pink marker to color the inner triangles of the ears. Add two soft pink ovals on the cheeks, right under the eyes. -
Paint the floral details:
Color the head flower coral pink and the surrounding leaves in mint green or teal. Repeat these colors for the floating elements around the cat. -
Color the collar:
Fill in the collar with the coral pink marker to match the flowers and ears. -
Add white highlights:
Using the white gel pen, add crisp white dots to the eyes (if you filled them in earlier) and small highlights on the nose and flower petals. -
Apply texture dots:
To mimic the printed look of the reference, use your fine liner to add tiny stippling dots on the pink cheek patches and inside the ears for texture.
Now you have a custom notebook cover that is sure to make note-taking a little more joyful
Black Cat With Simple Shapes
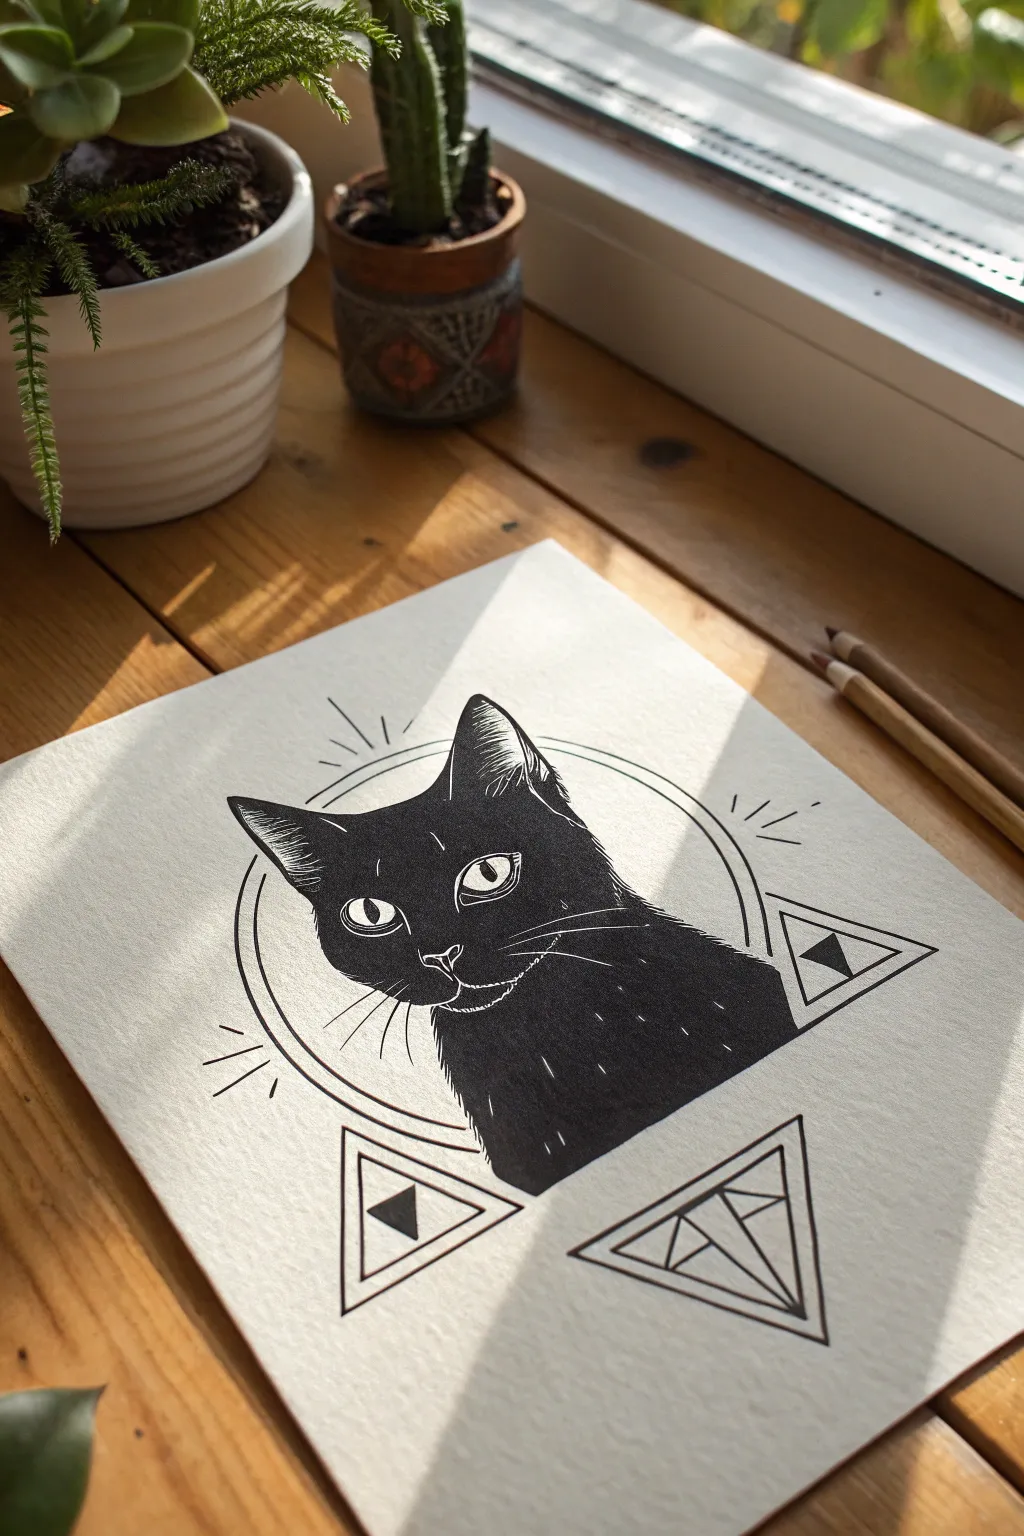
Embrace the contrast of deep black ink and crisp linework with this striking cat illustration. By combining a naturalistic black cat portrait with clean geometric shapes, you’ll create a piece that feels both modern and filled with quiet mystery.
Detailed Instructions
Materials
- Heavyweight drawing paper or Bristol board
- Pencil (HB or 2H)
- Eraser (kneaded preferred)
- Compass or circular object for tracing
- Ruler
- Fine liner pens (0.1mm, 0.3mm, 0.5mm)
- Black brush pen or India ink with a small brush
- White gel pen or gouache
Step 1: Drafting the Geometry
-
Establish the Center:
Find the general center of your paper. This will be the focal point for the cat’s face, so ensure you have plenty of surrounding negative space. -
Draw the Main Circle:
Using a compass or tracing a medium-sized bowl, lightly sketch a perfect circle in pencil. This frames the portrait. -
Add Triangle Guides:
Position three triangles around the circle: two at the bottom corners pointing up, and one protruding from the right side pointing right. Use your ruler to keep the lines sharp. -
Sketch the Cat’s Outline:
Inside the circle, lightly sketch the contour of the cat’s head. The ears should break the circle’s boundary at the top, and the neck should extend slightly below. -
Detail the Face:
Mark the placement of the eyes, nose, and mouth. The eyes are almond-shaped and tilted slightly upward; keep the nose small and triangular.
Step 2: Inking the Cat
-
Outline the Features:
Switch to a 0.3mm fine liner. Carefully ink the outline of the eyes, the pupils, and the delicate shape of the nose and mouth line. -
Fill the Black Areas:
Using a brush pen or India ink, fill in the entire silhouette of the cat. Be very careful around the eyes—leave them white for now—and around the whiskers area. -
Refine the Edges:
While the ink is wet, ensure your brush strokes follow the direction of the fur at the edges, particularly on the chest and ears, to suggest a soft texture rather than a hard line. -
Add Texture with White:
Once the black ink is completely dry, use a white gel pen to add tiny dashes on the chest, ear tips, and above the eyes to suggest individual hairs catching the light. -
Detail the Eyes:
Use a 0.1mm pen to add tiny, intricate shading inside the iris, leaving a small white highlight to make the eyes look alive. -
Draw the Whiskers:
With a steady hand and your white gel pen, flick the whiskers outward from the muzzle. Quick, confident strokes create the smoothest lines.
Clean Lines Tip
When inking the long geometric lines or circles, encourage steadiness by moving your entire arm from the shoulder, rather than just your wrist.
Step 3: Geometric Finishing Touches
-
Ink the Circle:
Go back to the 0.5mm black pen and trace the large circle behind the cat. I usually break the line where the cat’s ears overlap it to create depth. -
Double the Line:
Draw a second, thinner line (use the 0.1mm pen) just inside the main circle on the left side to add a graphical design element. -
Ink the Triangles:
Use the ruler and a 0.5mm pen to ink the three triangles. Add inner borders or smaller geometric fills like solid triangles within the larger shapes. -
Add Radiating Lines:
Draw short, straight lines radiating outward from the main circle. Keep them evenly spaced but varying in length for a ‘burst’ effect. -
Final Cleanup:
Wait at least 15 minutes for all ink to cure, then gently erase all remaining pencil marks to reveal the high-contrast artwork.
Gold Leaf Accent
For a magical twist, fill the small geometric triangles or the cat’s eyes with gold leaf or metallic paint instead of leaving them black or white.
Step back and admire the stark beauty of your geometric feline portrait


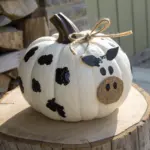
Scaredy Cat Arched Back Pose
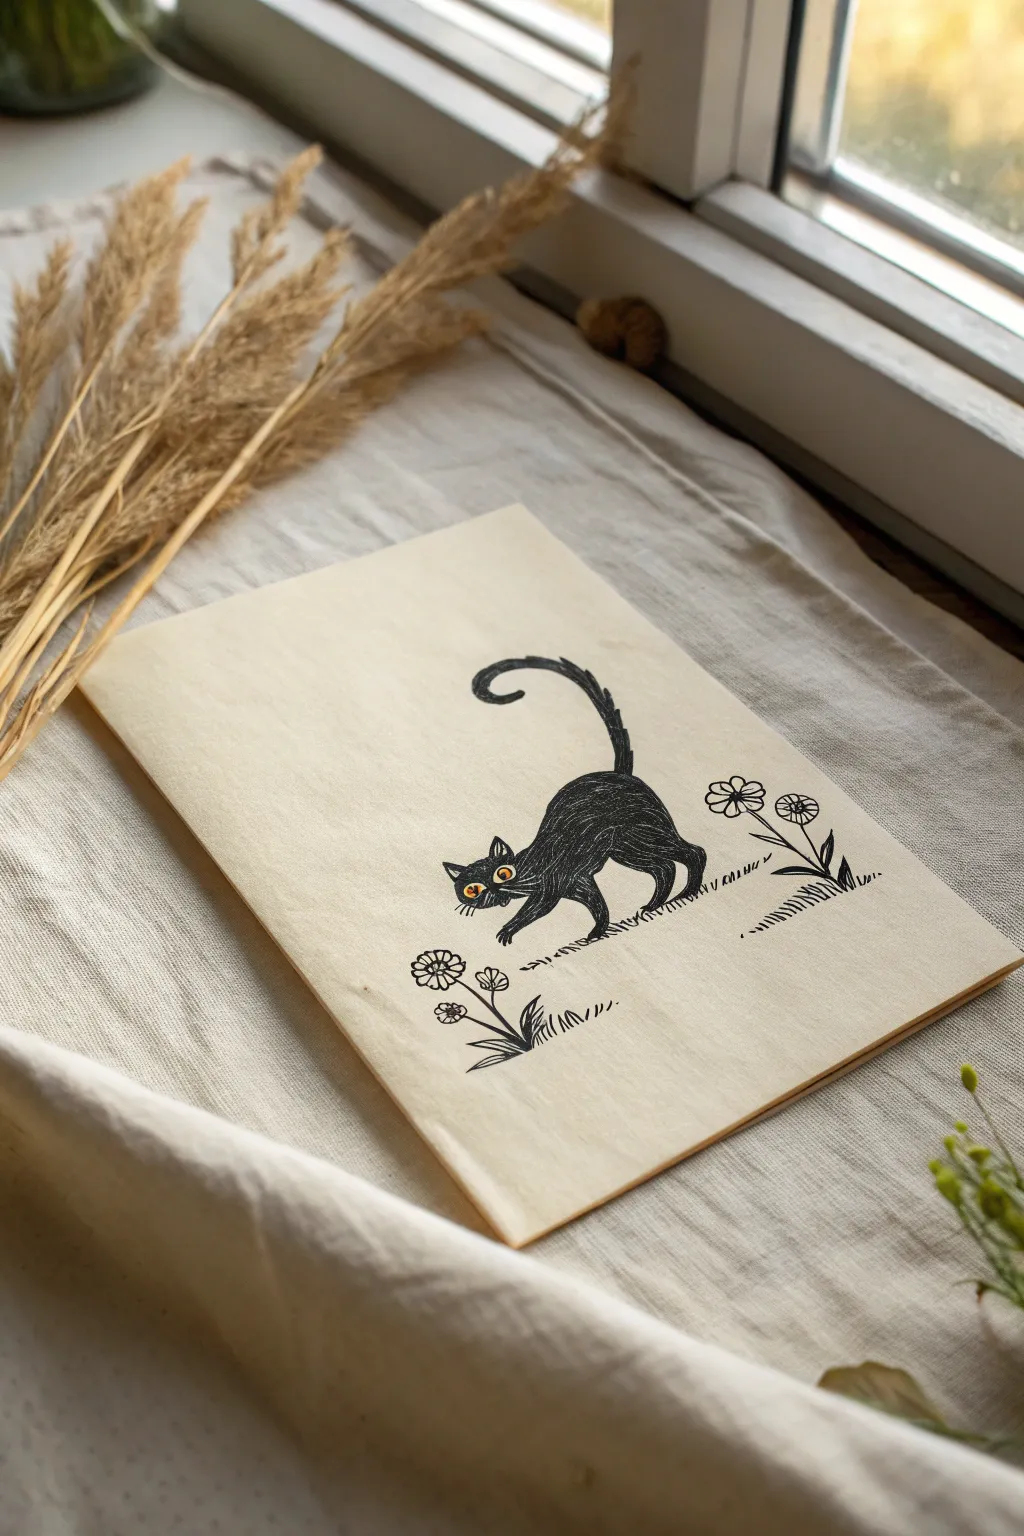
Capture the classic Halloween silhouette of a startled black cat with this charming ink doodle. This simple project uses bold black ink and a touch of orange to create a whimsical card or art print perfect for cat lovers.
Step-by-Step Guide
Materials
- Cream-colored cardstock or heavy mixed-media paper
- Fine-point black drawing pen (0.3mm or 0.5mm)
- Thick black marker or brush pen
- Orange colored pencil or gel pen
- Pencil and eraser
Step 1: Drafting the Shapes
-
Sketch the body arc:
Start lightly with a pencil. Draw a high, curved hill shape in the center of your paper to represent the cat’s arched back. -
Add the head:
To the left side of your arch, sketch a small, somewhat flattened circle for the head, connecting it slightly lower than the highest point of the back. -
Position the legs:
Sketch four stick-like lines extending downward from the body. The front left leg should reach forward, while the back legs brace backward to emphasize the startled pose. -
Outline the tail:
Draw a long, curved line erupting from the back of the arch. Curve it upwards and curl the tip slightly inward, like a question mark. -
Thicken the forms:
Go over your stick lines to give the legs thickness and paws. Flesh out the tail so it looks fluffy and bristled. -
Add facial features:
On the face, sketch two large, wide ovals for eyes. Add two triangular ears pointing outward on top of the head. -
Place the flowers:
Lightly sketch outlines for two simple flower clusters—one near the front paws and one behind the cat—to ground the composition.
Fur Texture Tip
Instead of a smooth outline, create a ‘scared’ texture by using tiny, rapid zigzag strokes on the back and tail. This mimics bristled fur perfectly.
Step 2: Inking the Cat
-
Outline the silhouette:
Switch to your fine-point black pen. Carefully trace the outer perimeter of your pencil sketch. Use short, jagged strokes along the back and tail to mimic fur standing on end. -
Detail the face:
Ink the outlines of the eyes and ears. Do NOT fill in the eyes yet; we need those to stay bright. -
Fill the body:
Using a thicker black marker or brush pen, color in the entire body of the cat solid black, being careful to work around the eye ovals. -
Add texture lines:
Once the solid black is dry, take your fine pen again. Add faint white gel pen lines or scratchy black lines extending from the silhouette if you want extra ‘frizz,’ though the jagged outline usually suffices. -
Draw whiskers:
With a quick, confident flick of your wrist, draw three or four thin whiskers extending from the cat’s snout area.
Step 3: Finishing Touches
-
Color the eyes:
Take your orange colored pencil or gel pen and fill in the two eye ovals. Add a tiny black vertical slit in the center of each for the pupil. -
Ink the flowers:
Use your fine-point pen to outline the flowers. Draw simple varying petals and centers. Don’t worry about perfect symmetry; a doodled look is better here. -
Add the stems:
Draw straight lines down for stems and add a few saw-toothed leaves at the base. -
Create the ground:
Under the cat’s paws and the flowers, add short, hatched lines to suggest grass or dirt. I find this helps the drawing feel less like it’s floating in space. -
Erase guidelines:
Wait at least five minutes to ensure all ink is completely bone dry. Gently erase any visible pencil marks.
Make it 3D
Use a white gel pen to add tiny highlights on the black fur—specifically on the shoulder blade and hip—to show muscle definition.
Now you have a purr-fectly spooky little doodle ready to display or send to a friend
Peekaboo Cat Behind a Line
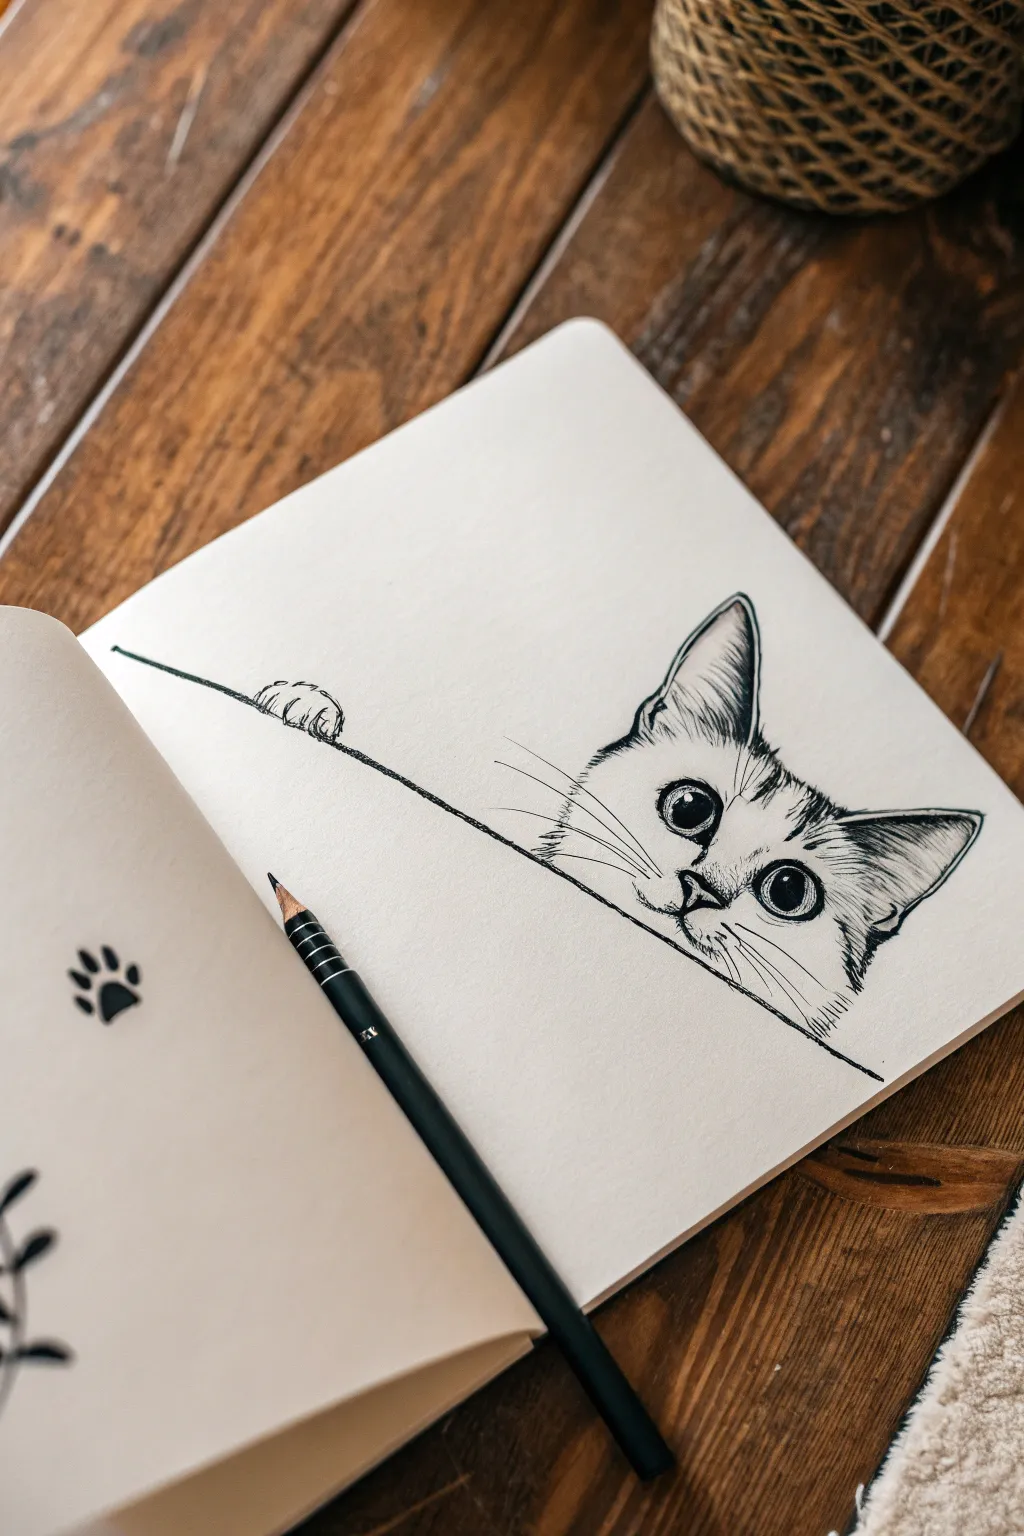
This charming doodle captures a curious cat peering over a ledge, using simple ink lines to create a surprisingly expressive face. The high-contrast black ink against cream paper gives it a classic, illustrative feel that looks more complicated than it actually is.
Step-by-Step
Materials
- Fine-point black drawing pen (i.e., micron 05 or 08)
- Pencil (HB or 2B)
- Eraser
- Cream or white sketchbook paper
- Ruler (optional, for the straight line)
Step 1: Planning the Composition
-
Map the ledge:
Start by lightly sketching a long, straight diagonal line across your page with your pencil. It doesn’t need to be perfectly straight; a slight natural wobble adds character. -
Position the head:
Above the right side of your line, sketch a flattened oval or semicircle shape for the top of the cat’s head. The bottom of the head should be cut off by the line you just drew. -
Add ear triangles:
Draw two large, pointed triangles on top of the head for ears. Make the outer lines curve slightly outward and the inner lines curve slightly inward for a natural shape. -
Place the paw:
To the left of the head, draw a small, rounded mound resting directly on top of the line. This will become the little paw gripping the edge.
Uneven Eyes?
If the eyes look lopsided after inking, thicken the upper lash line of the smaller eye. This balances the visual weight without needing to redraw the whole circle.
Step 2: Refining the Sketch
-
Mark eye placement:
Lightly draw two large circles in the middle of the head space. Because the cat is peeking up, these should be sitting quite low, near the horizontal line. -
Nose and mouth guide:
Place a small triangle between the eyes for the nose, and draw a tiny split line coming down from it. -
Define the fur pattern:
Sketch light outlines for the tabby stripes. I usually place a distinct ‘M’ shape on the forehead and some triangular markings on the cheeks.
Personalize It
Change the texture! Use stippling (lots of tiny dots) instead of hatching lines for the fur markings to create a softer, more delicate kitty portrait.
Step 3: Inking the Cat
-
Ink the main line:
Switch to your black pen. Trace over the main horizontal line first, breaking the line where the paw and the head overlap it so the cat appears to be *in front*. -
Detail the paw:
Ink the paw shape with a slightly jagged line to suggest fur. Add three small curved lines inside the mound to define the toes. -
Outline the ears:
Draw the ears with confident strokes. Add inner ear details by drawing fine, vertical hatching lines to suggest the fluff inside. -
Create the eyes:
This is crucial: Outline the large eye circles. Draw a large pupil inside each, leaving a distinct white circle (highlight) in the upper right of each pupil. Fill the pupils black, but keep the highlight pure white. -
Nose and muzzle:
Ink the nose triangle and the small mouth lines. Add a few dots on the muzzle area where whiskers will originate.
Step 4: Shading and Texture
-
Fill the stripes:
Use short, quick strokes to fill in the tabby markings on the forehead and side of the face. Do not color them solid black; use directional lines to mimic hair growth. -
Add fur texture:
Along the outline of the head and ears, add tiny flicking strokes rather than a solid continuous line. This gives the cat a soft, fuzzy appearance. -
Draw the whiskers:
With quick, confident flicks of your wrist, draw long whiskers extending outward from the muzzle. Don’t overthink these; speed helps them look straight and sharp. -
Add eyebrows:
Add three or four very long, thin whiskers above the eyes, reaching up into the forehead stripes. -
Final clean up:
Wait at least five minutes to ensure the ink is totally dry. Then, gently erase all your underlying pencil sketches to leave a crisp black-and-white image.
You now have a curious feline friend permanently peering out from your sketchbook page
Cat in a Box Doodle
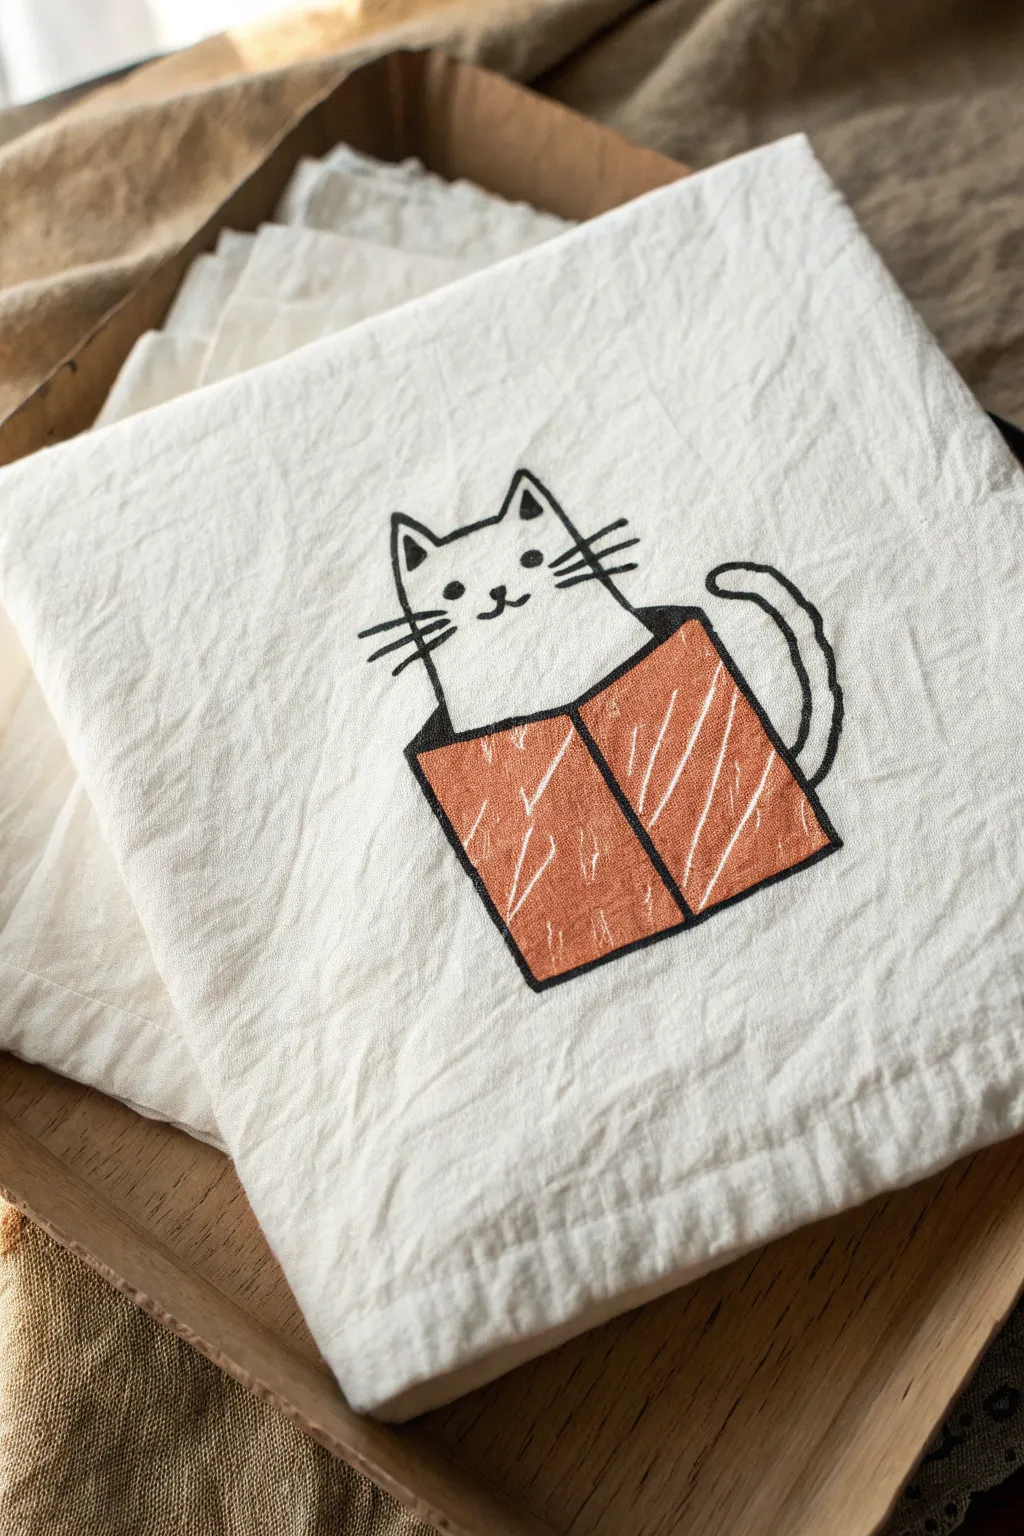
Transform a plain linen napkin into a charming piece of home decor with this wonderfully simple doodle. The design features a minimalist cat peering out of a textured gift box, rendered in crisp black lines and a block of warm terracotta color.
How-To Guide
Materials
- Light-colored linen or cotton napkin/tea towel (pre-washed)
- Black fabric marker (fine tip)
- Black fabric marker (medium tip)
- Terracotta or burnt orange fabric paint
- Small flat paintbrush (size 4 or 6)
- Pencil (HB or lighter)
- Ruler
- Iron and ironing board
- Piece of cardboard (scrap)
Step 1: Preparation and Sketching
-
Prepare the fabric:
Ensure your napkin is clean, dry, and ironed flat to provide a smooth surface for drawing. Place a piece of scrap cardboard underneath the fabric layer where you plan to draw; this prevents ink from bleeding through to the other side. -
Sketch the box outline:
Using a pencil very lightly, draw a vertical line straight down for the center corner of the box. From the top and bottom of this line, draw angled lines outward to create the two visible sides of the box, forming a shallow ‘V’ shape for the top and bottom edges. -
Connect the box sides:
Close off the box shape by drawing vertical lines on the left and right ends, connecting your angled top and bottom lines. The perspective should look like you are seeing the corner of a cube. -
Add the cat outline:
Sketch the cat’s body emerging from the top of the box. Draw two vertical lines rising from the box opening, slightly narrower than the box width. -
Detail the head and tail:
Top the body lines with pointed triangular ears and a slightly curved line between them for the head. On the right side of the box, sketch a curved, fluffy tail shape that arcs out and back in, resting near the box edge.
Fabric Tension Trick
Tape the corners of your napkin to your work surface or the cardboard backing. Taut fabric prevents the material from dragging with your marker pen.
Step 2: Inking the Outline
-
Trace the main lines:
Switch to your medium-tip black fabric marker. Carefully trace over your pencil lines for the box, the cat’s body, and the tail. Use confident, steady strokes rather than short, sketchy ones for a cleaner look. -
Draw the face:
Using the fine-tip marker, add two small dots for eyes and a small ‘w’ shape for the mouth. Place a tiny triangle nose between them. -
Add whiskers:
Draw three straight whiskers extending horizontally from each cheek. Keep them simple and slightly varied in length for a playful expression. -
Define the ears:
Inside each ear triangle, draw a smaller triangle to give them depth. -
Refine the tail:
Go over the tail outline with slightly wavy lines to suggest fur texture, rather than a perfectly smooth curve.
Step 3: Painting and Finishing
-
Fill the box color:
Dip your flat brush into the terracotta fabric paint. Carefully fill in the two sides of the box. -
Create texture:
Don’t aim for perfectly opaque coverage. Applying the paint somewhat thinly allows the fabric grain to show through, creating a stamped block-print effect. I find that dragging the brush vertically gives the best texture here. -
Leave white details:
While painting, intentionally leave a few very thin, scratchy vertical lines unpainted or lightly painted within the orange box. This mimics the ‘white noise’ texture seen in the photo and adds visual interest. -
Let it dry completely:
Allow the paint to air dry for the time recommended on your specific paint bottle (usually 24 hours). Do not touch the wet paint. -
Set the design:
Once fully dry, heat-set the design to make it permanent. Place a thin cloth over the artwork and iron it on a high, non-steam setting for a few minutes.
Bleeding Lines?
If the marker ink spreads into the fibers excessively (feathering), your fabric might be too damp or absorbent. Iron freezer paper to the back before drawing.
Now you have a delightful custom linen that brings a touch of whimsy to your table setting
Playful Cat With Yarn Ball

Capture the whimsical energy of a cat mid-play with this minimalist ink doodle. Using clean lines and simple stippling textures, you’ll create a charming illustration that looks perfect on a greeting card or sketchbook page.
Detailed Instructions
Materials
- Heavyweight white cardstock or drawing paper
- Fine liner pen (01 or 03 size, black ink)
- Pencil (HB or H for light sketching)
- Pencil eraser (kneaded preferred)
- Ruler (optional for positioning)
Step 1: Planning the Composition
-
Positioning the Subject:
Start by finding the center of your paper. Make a very faint mark about two-thirds of the way down the page; this is where the cat’s lower body will rest, leaving plenty of white space above for the yarn ball. -
Sketching the Body Shape:
Lightly sketch a long, curved bean shape for the cat’s torso. The body should be angled diagonally upward to the right, suggesting upward movement. -
Adding the Head and Limbs:
Draw a rounded shape at the top of the torso for the head, adding two small triangles for ears. Sketch two front paws reaching upward and a curved line for the tail sweeping out from the base. -
Placing the Yarn Ball:
Draw a simple circle floating above the cat’s paws. Keep the distance relatively close so it looks like the cat is just about to bat at it.
Loose Lines
Don’t press too hard with your pen. Keeping a light grip allows for slightly shaky, organic lines that give this specific doodle style its charm.
Step 2: Inking the Outline
-
Tracing the Head:
Switch to your fine liner pen. Carefully ink the outline of the head, connecting the ears smoothly. Add three small whiskers on the left side of the face. -
Defining the Paws:
Ink the front paws. Draw the left paw slightly lower and bent, while the right paw reaches higher up towards the ball. -
Drawing the Back and Tail:
Draw a confident, continuous line down the cat’s back. Continue this line into the tail, curving it downward and then hooking it back up to create a ‘J’ shape. -
Closing the Body Shape:
Ink the belly line, connecting the tail base to the lower leg area. Keep the line slightly curved to show the cat’s flexibility. -
Inking the Yarn Ball:
Go over the circle for the yarn ball. Don’t worry if it isn’t a perfect geometric circle; a little irregularity adds character.
Step 3: Adding Details and Texture
-
Face Details:
Add two tiny dots for eyes and a small ‘Y’ shape for the nose and mouth. Keep these features minimal to maintain the style. -
Stripes on the Back:
Draw four or five short, curved stripes along the cat’s back. These should wrap slightly around the form to give the drawing volume. -
Stippling the Belly:
Instead of outlines for the belly fur, use a stippling technique. Gently tap your pen to create a cluster of dots on the stomach area, fading them out as you move upward. -
Connecting the String:
Draw a wavy line extending from the yarn ball down to the cat’s paw. I find it helpful to draw this quickly to keep the line looking relaxed and fluid. -
Trailing Yarn:
Continue the yarn line from the paw, letting it trail off behind the cat in a loose ‘S’ curve. Add a few small dots near the end of the line to suggest movement or dust. -
Yarn Ball Patterns:
Fill the yarn ball circle with curved parallel lines in different directions to simulate wrapped string.
Ink Smudges?
If you smudge the ink while erasing, turn it into a shadow or a spot pattern on the cat. Use a white gel pen to correct small mistakes over the black ink.
Step 4: Finishing Touches
-
Erasing Sketch Lines:
Wait at least 5 minutes for the ink to dry completely. Gently erase all your pencil guides using a kneading motion to avoid smudging the black ink. -
Review and Refine:
Look over your drawing. If any lines look too thin, go over them once more to thicken the stroke slightly, especially on the outer edges of the cat.
Now you have a simple yet expressive piece of art ready to frame or gift
Cat With Accessories
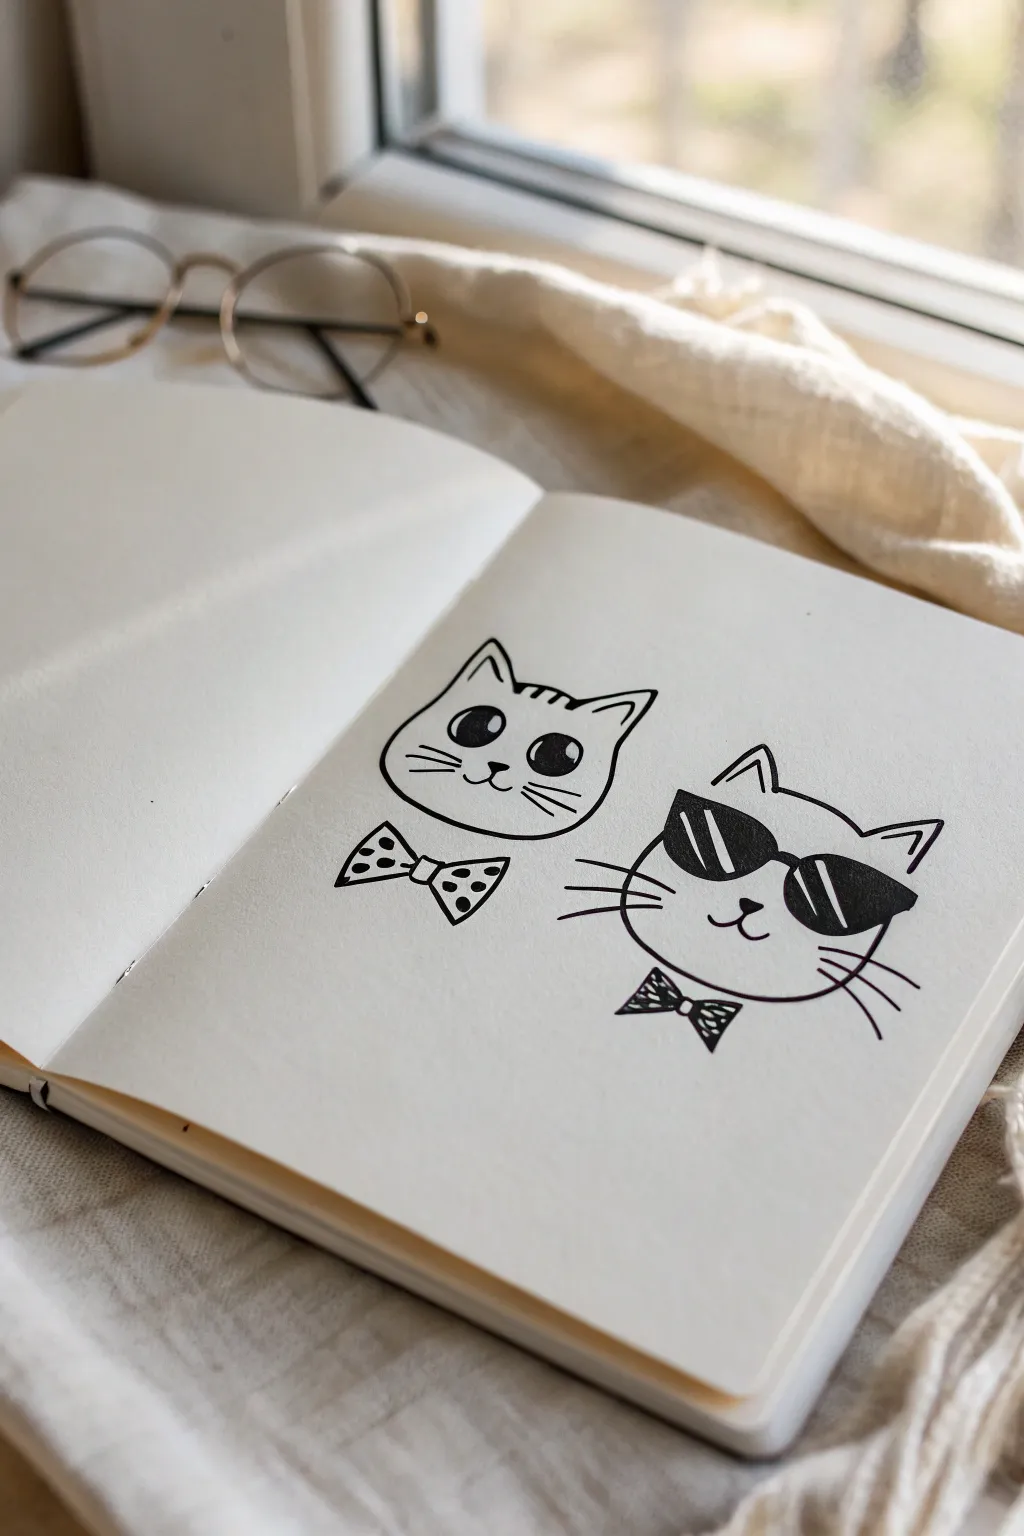
Capture the charm of these two cool cats in your sketchbook with this crisp, black ink line drawing. This project features one wide-eyed kitty sporting a polka-dot bow tie and a second, ultra-cool companion rocking sunglasses and a classic black bow tie.
Step-by-Step
Materials
- Sketchbook with smooth paper
- Pencil (HB or 2B for sketching)
- Eraser
- Fine liner pen (black, 0.3mm or 0.5mm)
- Thicker marker or brush pen (black, for filling)
Step 1: Sketching the Left Cat
-
Outline the head shape:
Start on the left side of your page by lightly sketching a rounded oval shape for the first cat’s head. Make the bottom slightly flatter than the top to give it a soft jawline. -
Add the ears:
Sketch two triangles on top of the head. Curve the outer edges slightly outward and detail the inner ear with a simple, jagged line to suggest fur texture. -
Mark the facial features:
Place two large circles in the middle of the face for eyes. Between and slightly below them, draw a small nose connected to a smiling mouth. -
Draft the bow tie:
Directly under the chin, sketch a bow tie shape. It should look like two sideways triangles meeting at a central knot. Keep it slightly askew for a playful look.
Ink Stability
Check if your pen is waterproof before erasing pencil lines. If not, wait at least 15 minutes to prevent smearing.
Step 2: Sketching the Right Cat
-
Position the second head:
To the right and slightly lower than the first, sketch a similar rounded head shape. This cat is a bit broader, so widen the oval slightly. -
Outline the sunglasses:
Instead of eyes, draw two large D-shapes turned on their sides for sunglasses. Connect them with a small bridge over the nose area. -
Add ears and mouth:
Sketch the triangular ears on top. Below the sunglasses, lightly mark a small nose and a simple W-shaped mouth. -
Draw the second bow tie:
Position a smaller bow tie under this cat’s chin. It should be tighter and sharper than the first one.
Step 3: Inking and Details
-
Ink the left cat’s eyes:
Switch to your fine liner. Outline the large circular eyes of the left cat. Draw a smaller circle inside each for a highlight, then fill the rest of the eye solid black. -
Ink the main outlines:
Go over your pencil lines for the head, ears, and facial features of the first cat. Use confident, smooth strokes. -
Add tabby stripes:
Draw three small, curved stripes on the forehead of the left cat using quick strokes. -
Detail the polka-dot tie:
Outline the left bow tie. Inside the shape, draw several small circles, then color in the background space black, leaving the circles white for polka dots. -
Fill the sunglasses:
Moving to the right cat, outline the sunglasses frames. Use a white gel pen or simply leave negative space for diagonal reflection lines, then fill the lenses solid black. -
Finish the right face:
Ink the head shape, ears, nose, and mouth. I find adding a tiny vertical line under the nose helps connect the mouth naturally. -
Color the second tie:
Outline the right bow tie. Draw faint diagonal lines across it first if you want a pattern, then fill alternating sections or just fill the whole thing black with small white accents. -
Add whiskers:
Using quick, flicking motions, draw three long whiskers on each cheek for both cats. Let the pen lift off the paper at the end of the stroke for a tapered look. -
Erase pencil lines:
Wait until the ink is completely dry to avoid smudging. Then, gently erase all visible pencil sketches to reveal your clean artwork.
Make it Pop
Use a subtle grey marker to add drop shadows underneath the cats and bow ties to lift them off the page visually.
Enjoy your stylish new sketchbook page filled with feline personality
Cat Doodle Border for Journal Pages
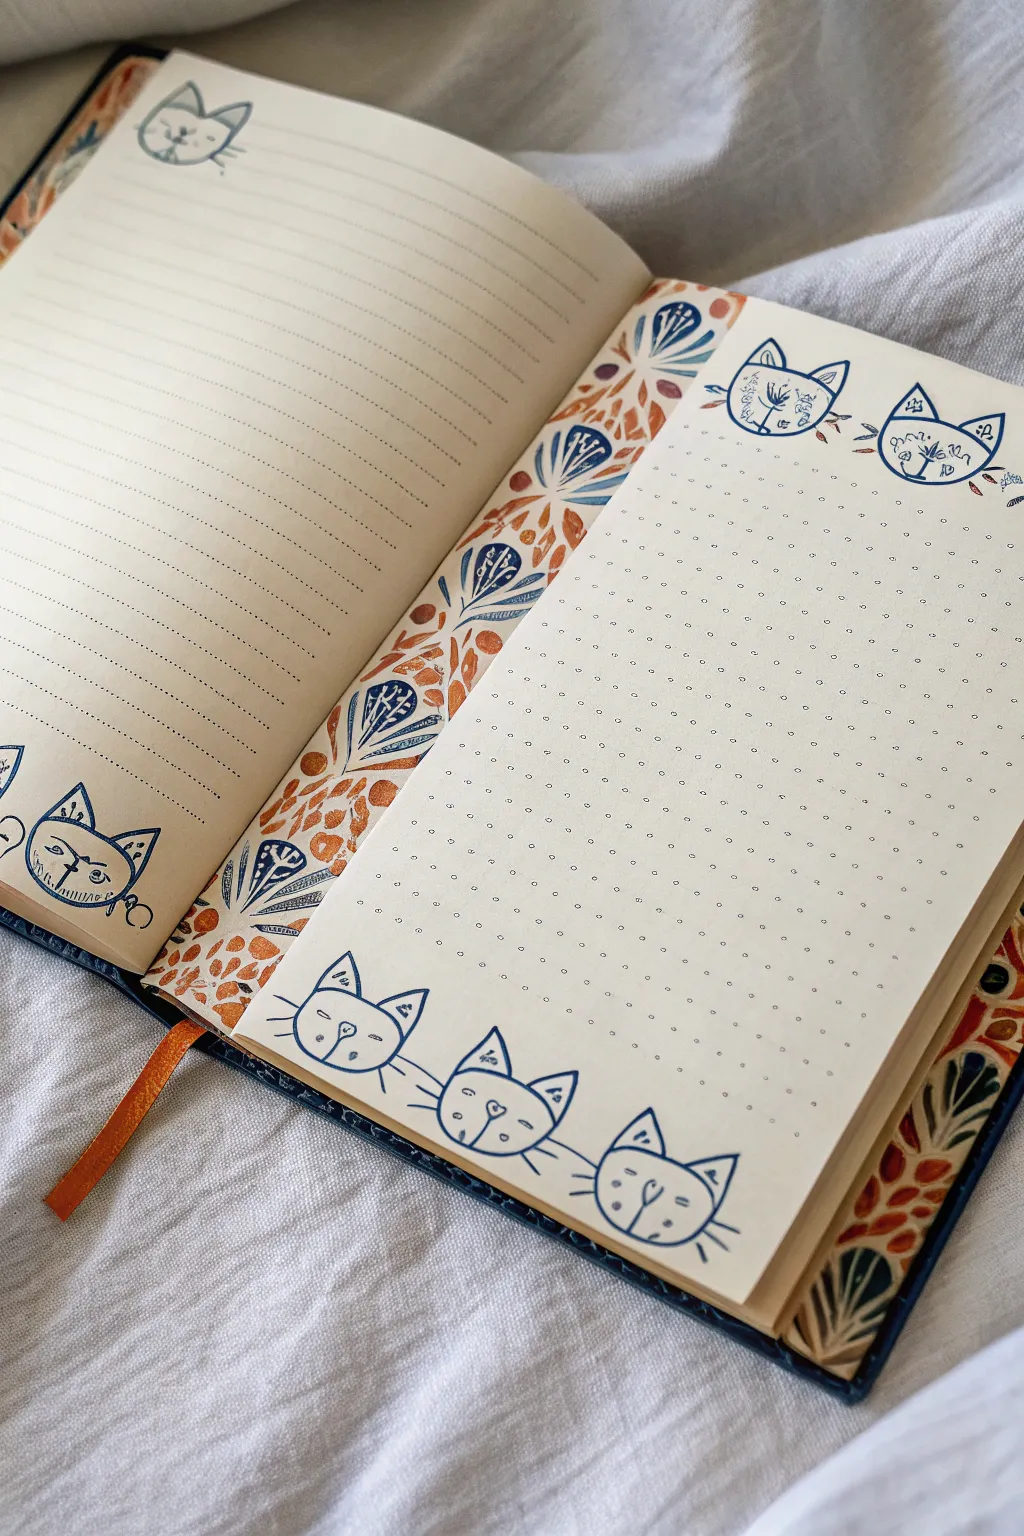
Transform a plain journal spread into a charming feline-themed layout using hand-carved stamps or simple line drawings. This project combines a decorative spine border with playful cat heads peeking out from the corners to frame your writing space.
Detailed Instructions
Materials
- A5 or B6 sized journal (lined on left, dot grid on right)
- Linoleum carving block or soft rubber eraser block
- Linoleum carving tool (V-gouge)
- Dark blue stamp pad (e.g., VersaFine Clair in medieval blue)
- Pencil and eraser
- Tracing paper (optional)
- Washi tape with floral/organic pattern (approx. 15-20mm wide)
- Orange or rust-colored stamp pad (optional for accents)
- Fine liner pen (dark blue or black)
Step 1: Creating the Cat Stamp
-
Sketch the design:
Draw a simple, stylized cat head directly onto your carving block or eraser. Aim for a wide oval shape with two tall, triangular ears. Keep the features minimal—two dots for eyes, a small triangle nose, and a curved line for the mouth. -
Refine the lines:
I like to thicken the outline of the head slightly in my sketch so I know exactly where to carve. Make sure the ears have a defined inner triangle. -
Carve the outline:
Using your V-gouge tool, carefully carve away the negative space around the cat’s head. Move the block, not the tool, to navigate curves smoothly. -
Detail the face:
Gently carve thin lines for the whiskers sticking out from the cheeks. Carve out the space inside the ears and the facial features so they remain raised (or carve them away if you want a negative line effect—the image shows a line drawing style, so you might actually be stamping the solid lines). -
Test the stamp:
Ink up your new stamp with dark blue ink and press it onto scrap paper. Check for any stray ridges that need trimming.
Uneven Stamping?
If your stamped image is patchy, lay a smooth, slightly cushioned surface (like a mousepad or magazine) under your journal page before stamping to ensure even pressure.
Step 2: Designing the Right Page
-
Create the bottom border:
On the bottom of the right-hand (dot grid) page, plan to stamp a row of three cats. Position your stamp pad and ink the cat stamp thoroughly. -
Stamp the first cat:
Press the stamp firmly in the bottom center. Rock it very slightly to ensure the ink transfers evenly. -
Complete the row:
Stamp one cat to the left and one to the right of the center cat. Overlap their ears or whiskers slightly for a cozy, huddled look. -
Stamp the top corners:
Ink the stamp again and place one cat head in the top left corner and another in the top right corner of the page. Angle them slightly inward as if they are looking down at the page content. -
Add hand-drawn details:
If your stamp didn’t pick up fine whiskers well, use your fine liner pen to draw three whiskers on each cheek of every stamped cat. You can also touch up eyes or noses if needed. -
Decorative fills (Optional):
The image shows interesting patterned fills inside some cats. You can doodle small flowers or geometric shapes inside the cat heads using a lighter blue or contrasting ink pen.
Stamp Variation
Carve two slightly different cat expressions on opposite ends of a long eraser. This lets you switch between a happy cat and a sleepy cat instantly without changing tools.
Step 3: Designing the Left Page
-
Corner accents:
On the left-hand (lined) page, stamp a single cat head in the top left corner, ensuring it doesn’t cover too many writing lines. -
Bottom cluster:
Stamp two cat heads in the bottom left corner, stacking them slightly or placing them side-by-side to mirror the bottom border on the facing page.
Step 4: Applying the Center Border
-
Select your tape:
Choose a wide washi tape with an organic, leafy print in autumn colors like rust, orange, and blue. This separates the two pages visually. -
Measure the length:
Unroll a strip of tape slightly longer than the height of your notebook page. -
Apply the tape:
Carefully align the tape with the inner edge (gutter) of the right-hand page. Press it down firmly from top to bottom, smoothing out air bubbles. -
Trim the edges:
Use scissors or a craft knife to trim the excess tape flush with the top and bottom of the page for a clean finish.
Now you have a purr-fectly customized spread ready for your daily thoughts and lists
One-Line Continuous Cat Doodle
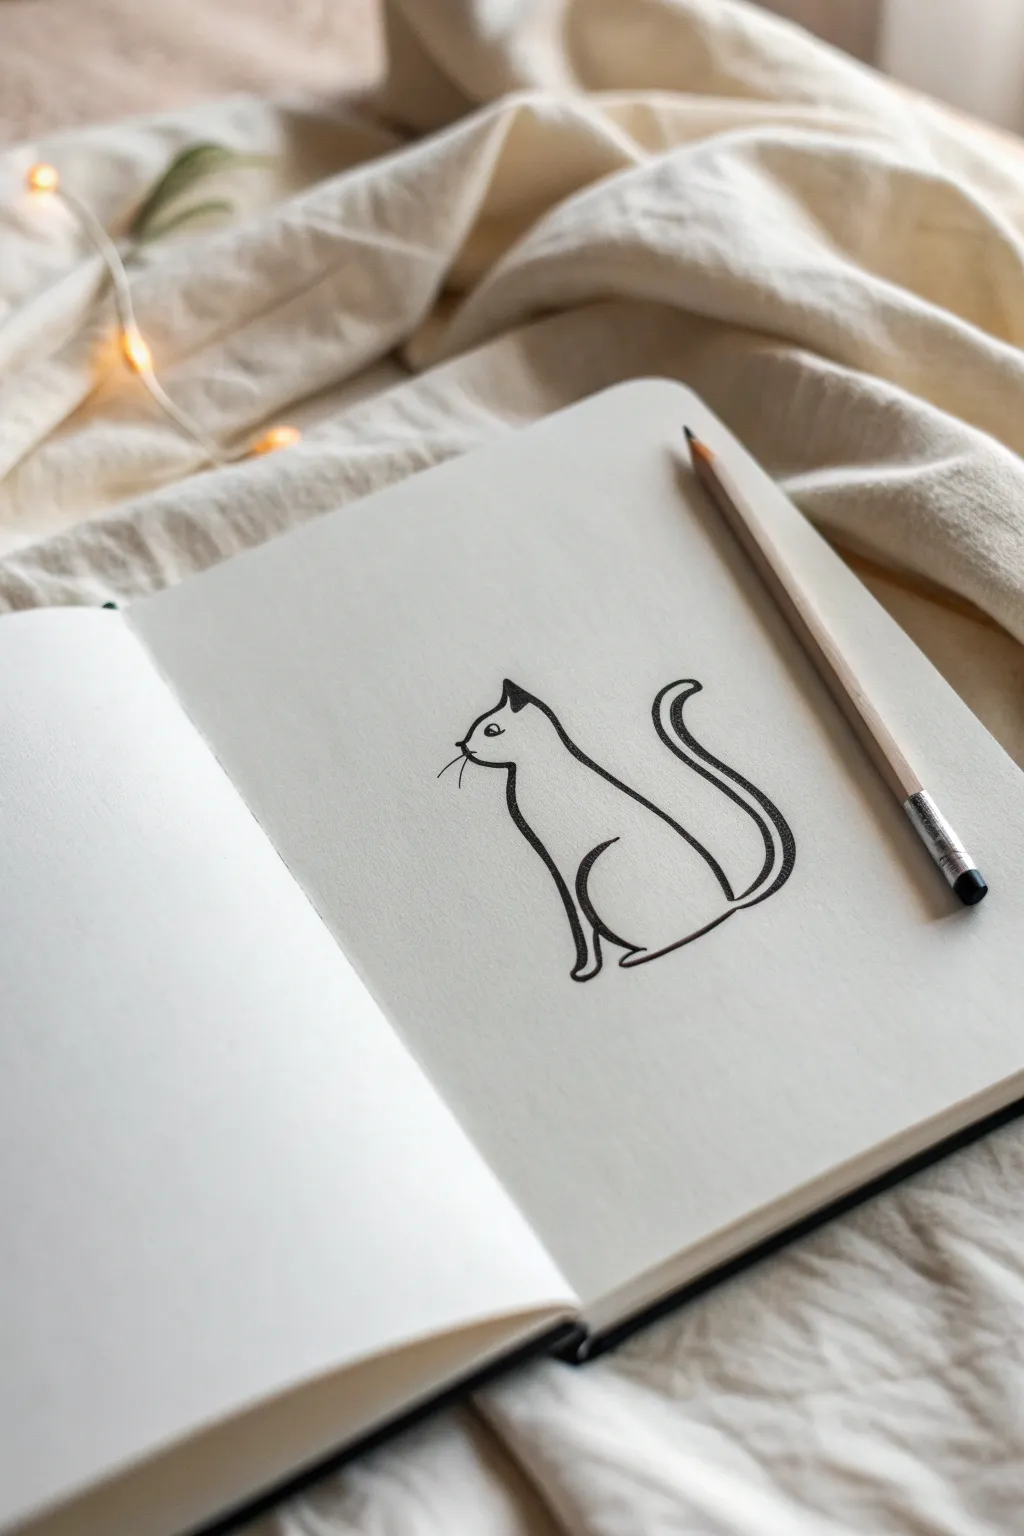
Capture the essence of feline grace with this elegant, minimalist doodle that uses clean, sweeping lines to suggest form rather than detail. This project is perfect for beginners looking to practice confident pen control and negative space.
Step-by-Step Guide
Materials
- Sketchbook or quality drawing paper
- Pencil (HB for sketching)
- Fine-point black drawing pen or archival ink marker (0.5mm or 0.8mm)
- Eraser
Step 1: Planning the Form
-
Visualizing the posture:
Before putting pen to paper, visualize a simple S-curve. This cat sits with a tall, upright posture, so imagine a vertical alignment from the ears down to the paws. -
Light pencil sketch (optional):
If you are nervous about committing to ink immediately, lightly sketch a teardrop shape for the body and a small circle for the head using your HB pencil.
Shaky Lines?
If your long lines look wobbly, try drawing from your shoulder rather than just your wrist. Move your whole arm to get smoother, more confident curves.
Step 2: Drawing the Outline
-
Start at the ear:
Begin your ink line at the top of the head. Draw a small, pointed triangle for the left ear. -
Form the head slope:
Continue the line downwards in a gentle slope to create the forehead and nose bridge. There is no complex face detail here, just a smooth contour. -
Define the chest:
From the nose area, pull the line down and slightly outward to create a puffed chest, mimicking that proud cat stance. -
Draw the front leg:
Extend the chest line straight down to form the front leg. At the bottom, curve it slightly to suggest a paw resting on the ground. -
Create the back line:
Pick up your pen again at the top of the ear. Draw a long, elegant line sloping downwards to create the neck and back. Keep this line fluid and uninterrupted. -
Curve the haunch:
As you reach the bottom of the back, curve the line sharply inward to define the seated thigh area. -
Connect the base:
Draw a short, curved line connecting the bottom of the haunch to the front leg area, grounding the figure.
Make it a Series
Try drawing three cats in a row with slightly different poses—one stretching, one sleeping, and this seated one—to create a minimalist triptych.
Step 3: Adding Details
-
The tail sweep:
This is the signature part of this doodle. Start near the base of the back and draw a thick, double-lined tail that curves upward in a ‘C’ shape. -
Refining the tail:
Ensure the tail maintains a consistent width as it curves up, tapering slightly at the very tip. -
Inner leg definition:
Add a simple curved line inside the body shape, near the bottom right. This separates the rear thigh from the front of the body. -
The eye:
Place a single small dot or tiny almond shape for the eye. Position it somewhat low on the face to give a focused expression. -
The second ear:
Draw a small triangle behind the initial head line to represent the other ear, shading it in solid black for depth. -
Whiskers:
With a very light flick of your wrist, draw two or three long, thin whiskers extending from the nose area.
Step 4: Finishing Touches
-
Line weight variation:
Go back over your main contour lines. I find thickening the back curve and the underside of the tail adds a sense of weight and shadow. -
Clean up:
Once the ink is completely dry, gently erase any visible pencil guidelines.
Now you have a charming, gallery-worthy doodle that proves less is often more
Pattern-Fill Cat Silhouette
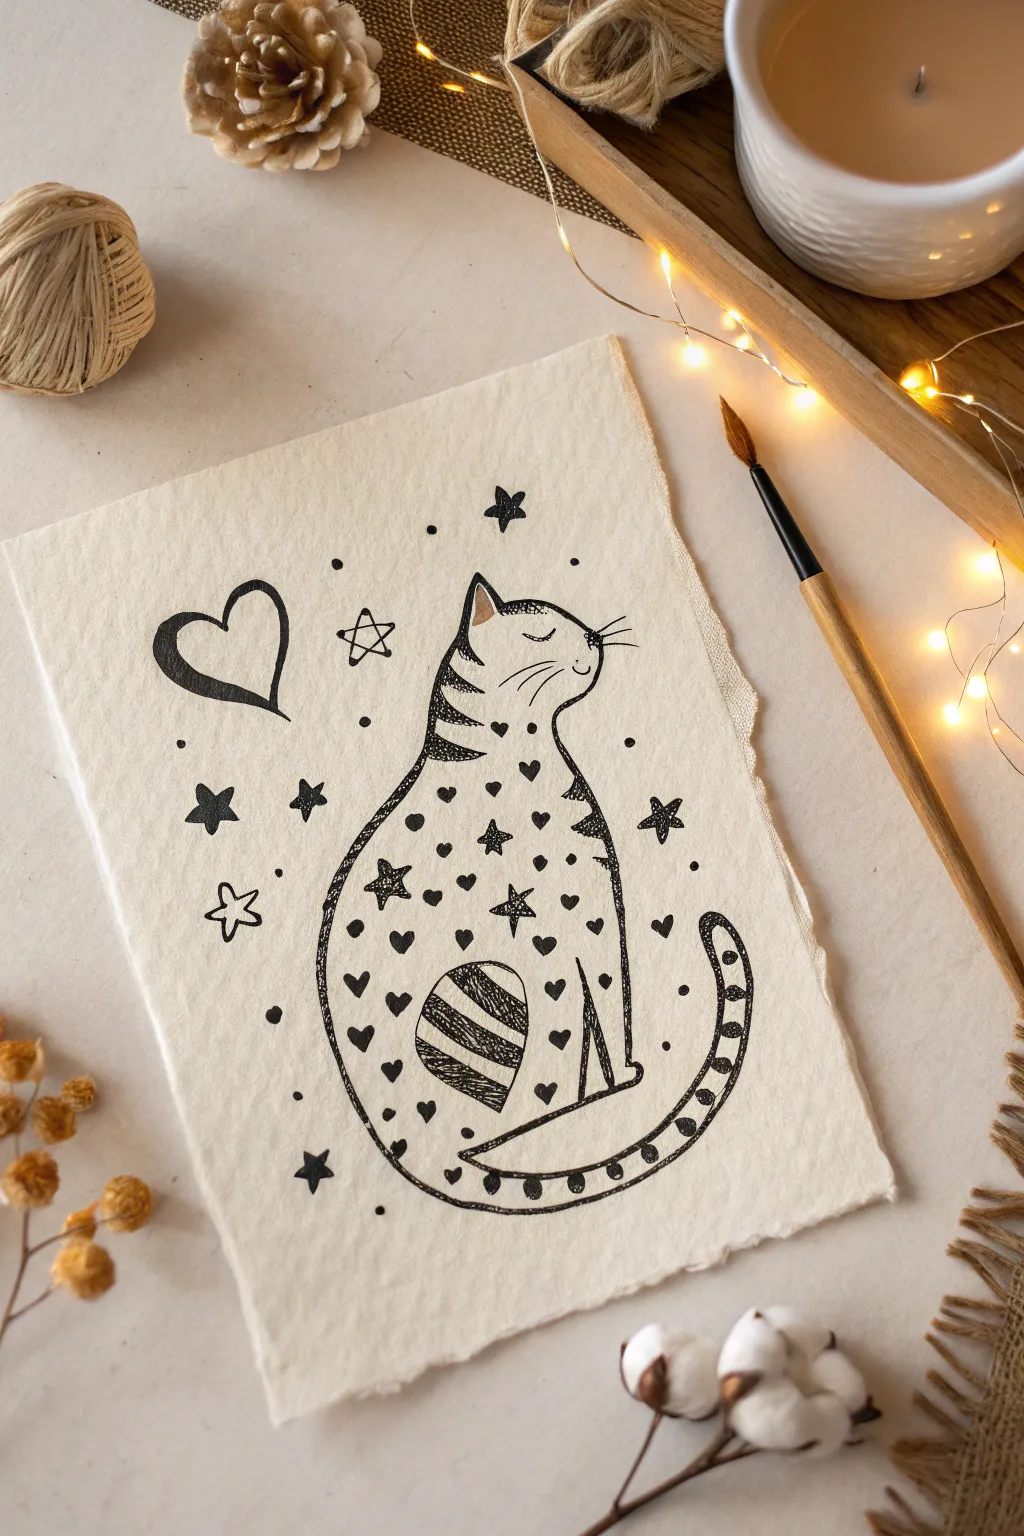
Capture the magic of a starry night with this whimsical cat doodle, featuring a silhouette filled with charming hearts and stars. The rough handmade paper adds a rustic, cozy texture that makes the simple black ink lines pop.
Step-by-Step
Materials
- Sheet of handmade cotton rag paper or high-texture watercolor paper (approx. 5×7 inches)
- Black fine-liner pens (sizes 01, 03, and 05)
- Black brush pen or calligraphy marker
- Pencil (HB or H)
- Kneaded eraser
- Gold or light brown colored pencil (optional for ear detail)
Step 1: Drawing the Base Outline
-
Sketch the posture:
Begin with a light pencil sketch of the cat’s general shape. Draw a pear-shaped body sitting upright, with a smaller oval for the head slightly tilted upwards. -
Refine the silhouette:
Smooth out the lines to connect the head and body. Add two triangular ears on top and define the curve of the back leg sitting against the body. -
Add the tail:
Sketch a long tail wrapping around the cat’s base, curving upwards near the flank. Keep the pencil lines faint so they don’t groove the soft paper. -
Inking the outline:
Using an 05 fine-liner, trace over your pencil sketch. Use quick, confident strokes rather than slow ones to avoid ink bleeding into the textured paper fibers.
Ink Bleeding?
Handmade paper is thristy! If ink feathers, spray the paper with a matte fixative or hairspray first. Let it dry fully before drawing to seal the fibers.
Step 2: Adding Details and Patterns
-
Face details:
Switch to an 01 fine-liner for delicate features. Draw a closed, curved eye, two dots for the nose, and a small smile. Add three long whiskers extending from the cheek. -
Striped accents:
On the neck and the top of the rear leg (the knee area), draw horizontal curved bands. Fill these alternating bands with solid black ink to create a striped tabby effect. -
Tail pattern:
Draw small circles running down the length of the tail’s center line. Fill the spaces between the circles with black ink, leaving the circles themselves the color of the paper. -
Filling the body:
This is where the magic happens. Randomly disperse small black hearts and five-pointed stars inside the cat’s body outline. Try to keep the spacing somewhat even, but not rigid. -
Connecting dots:
Fill the gaps between the hearts and stars with tiny single dots. This adds density to the pattern without making it look cluttered. -
Ear accent:
Use a gold or light brown colored pencil to gently shade the inside of the left ear for a tiny pop of warmth.
Touch of Magic
Go over the open stars and the circles on the tail with a gold gel pen or metallic watercolor. It catches the light beautifuly against the matte black ink.
Step 3: Creating the Background
-
The main heart:
To the left of the cat’s head, draw a large, stylized heart with a slightly thicker brush pen or the 05 liner. Leave a small gap in the outline for an artistic touch. -
Star clusters:
Draw several five-pointed stars around the cat. Vary their styles—some solid black, some open outlines with a dot in the center. -
Floating elements:
Scatter small solid circles and tiny dots around the main stars to create a galaxy effect surrounding the cat. -
Erase guidelines:
Wait until the ink is completely dry—handmade paper absorbs ink slowly. Gently roll a kneaded eraser over the page to lift any remaining pencil marks without damaging the paper surface. -
Deckled edges:
If your paper doesn’t already have rough edges, you can dampen the edge with a wet paintbrush and carefully tear the paper against a ruler to create that torn, rustic look.
Display your celestial kitty in a floating frame to show off those beautiful rough paper edges
Surreal Cat Made of Everyday Shapes
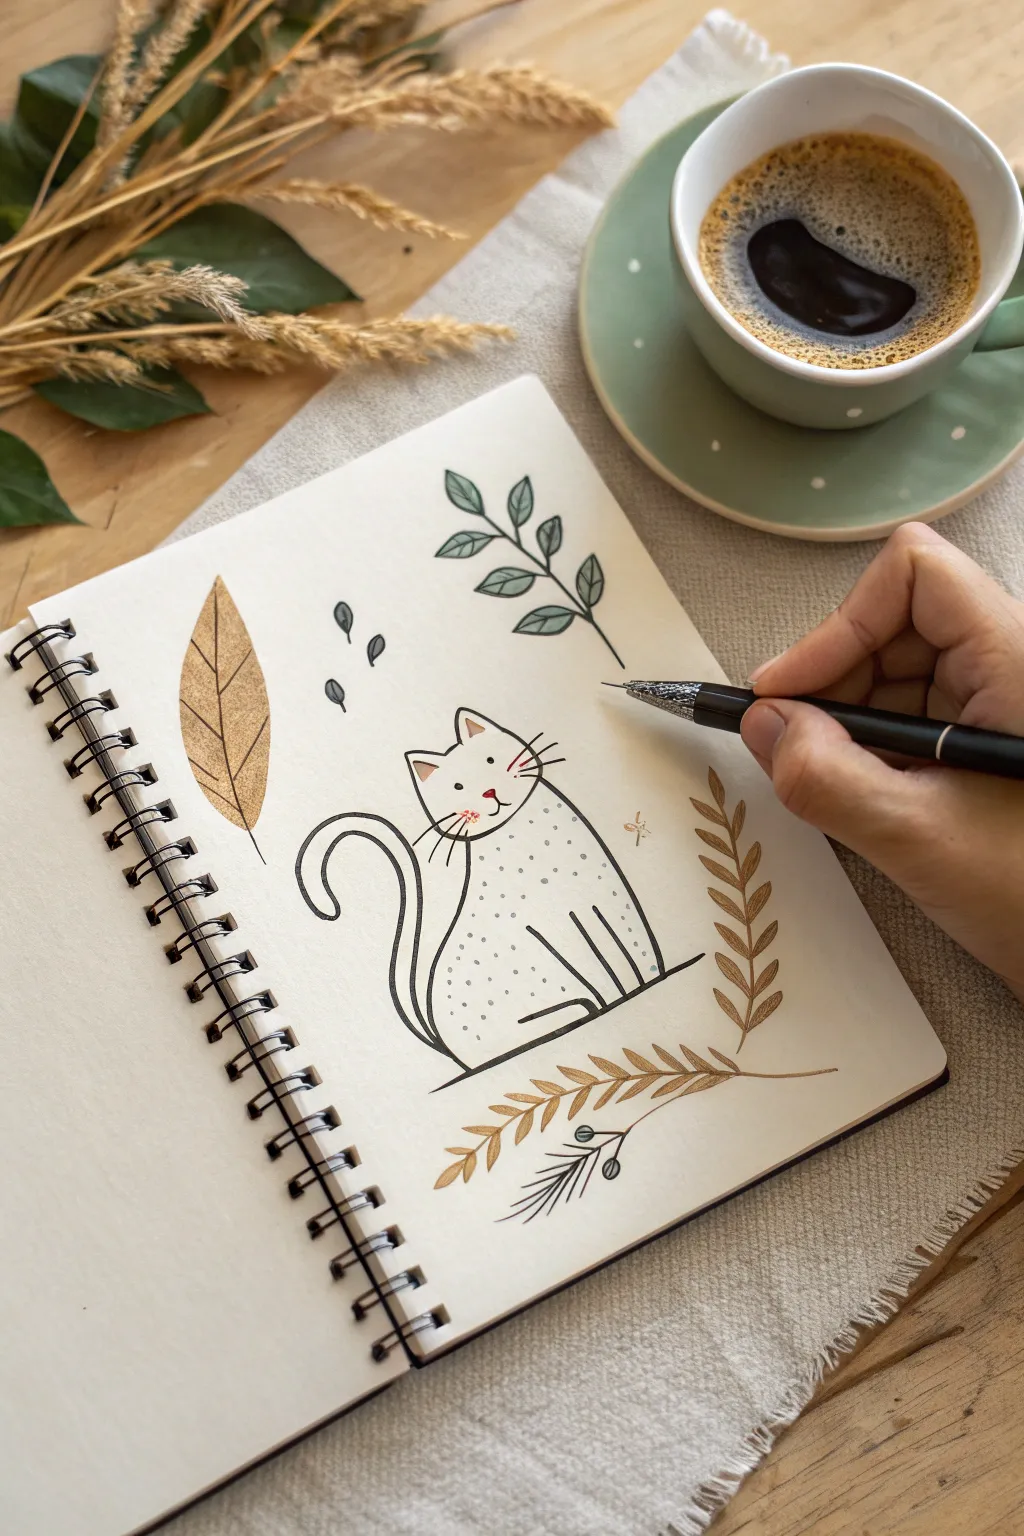
This charming sketchbook project combines simple line work with nature-inspired motifs to create a cozy, stylized cat illustration. Using basic shapes and stippling techniques, you’ll bring a playful feline character to life amidst floating leaves and branches.
Detailed Instructions
Materials
- Spiral-bound sketchbook (heavyweight paper preferred)
- Fine liner pen (0.3mm or 0.5mm, black)
- Gold or bronze metallic gel pen
- Sage green marker or colored pencil
- Pencil for sketching
- Eraser
Step 1: Planning and Sketching
-
Lightly sketch the focal point:
Start by positioning your cat in the center-left area of the page. Use your pencil to draw a soft, rounded triangular shape for the head and a larger, elongated curve for the body that swoops down and to the right. -
Add key features:
Pencil in two small triangular ears on top of the head. Add a long, curling tail that spirals up from the bottom left of the body. -
Plan the botanical elements:
Sketch the placement of the surrounding leaves. Mark a large vertical leaf to the left, a drooping branch above the cat, and a curved fern-like branch framing the bottom right corner.
Step 2: Inking the Cat
-
Outline the head:
Switch to your black fine liner. Trace the head shape, keeping the lines clean. Draw the ears, adding a tiny inside line for depth on one ear. -
Draw the facial details:
Place two small dots for eyes wide apart. Draw a tiny inverted triangle for the nose and a simple ‘w’ shape for the mouth. Add three long whiskers on the right side and a few shorter ones on the left. -
Define the body shape:
Ink the sweeping curve of the back. I define the front legs with simple vertical lines that don’t connect fully at the top, suggesting form without closing the shape. Draw the paws as simple, rounded stubs. -
Detail the tail:
Carefully ink the spiral tail using two parallel lines that taper slightly at the tip. Connect it smoothly to the rear of the body. -
Add texture with stippling:
This is the fun part: gently tap your pen to create small dots all over the cat’s body. Cluster them slightly denser near the bottom and back for shading, and keep them sparse on the face and chest. -
Erase pencil marks:
Once the ink is completely dry—give it a minute to be safe—gently erase all the underlying pencil sketch lines.
Smudge Alert
Wait at least 60 seconds before erasing pencil lines over the metallic gel pen areas. Metallic inks often sit on top of the paper longer and smear easily.
Step 3: Adding Botanical Accents
-
Color the gold leaf:
Take your metallic gold or bronze pen. Draw the large leaf on the left. Outline the leaf shape first, draw a central vein, and fill the inside with close, diagonal scribbles or solid color. -
Create the lower branch:
Using the same gold pen, draw a curved stem below the cat. Add small, tear-drop shaped leaves along both sides of this stem. -
Draw the top branch:
Switch back to your black fine liner to draw a thin branch stem floating above the cat. -
Add green leaves:
Use your sage green marker to draw small, oval leaves attached to the black branch stem. If your marker is transparent, you can draw the vein with the black pen afterward; otherwise, draw the black veins first. -
Incorporate floating details:
Using the black pen or a grey marker, draw three small teardrop shapes floating between the large gold leaf and the top branch. -
Final touches:
Draw tiny pine-needle sprigs near the bottom gold branch using the black pen. Add a tiny blush mark or flower near the cat’s cheek for extra cuteness.
Make It Yours
Try changing the metallic leaf color to copper or silver, or swap the sage green for an autumnal orange to change the seasonal vibe of the doodle.
Enjoy the relaxing process of filling your page with these gentle, nature-inspired lines


Have a question or want to share your own experience? I'd love to hear from you in the comments below!