When I need an instant mood-lift in my sketchbook, I draw a cute duckling—it’s basically impossible to overthink those round shapes and tiny feet. Here are my favorite cute duck drawing ideas that stay simple, sweet, and totally doable in a quick art session.
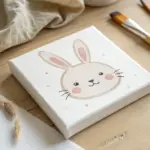
Kawaii Duckling Face Close-Up
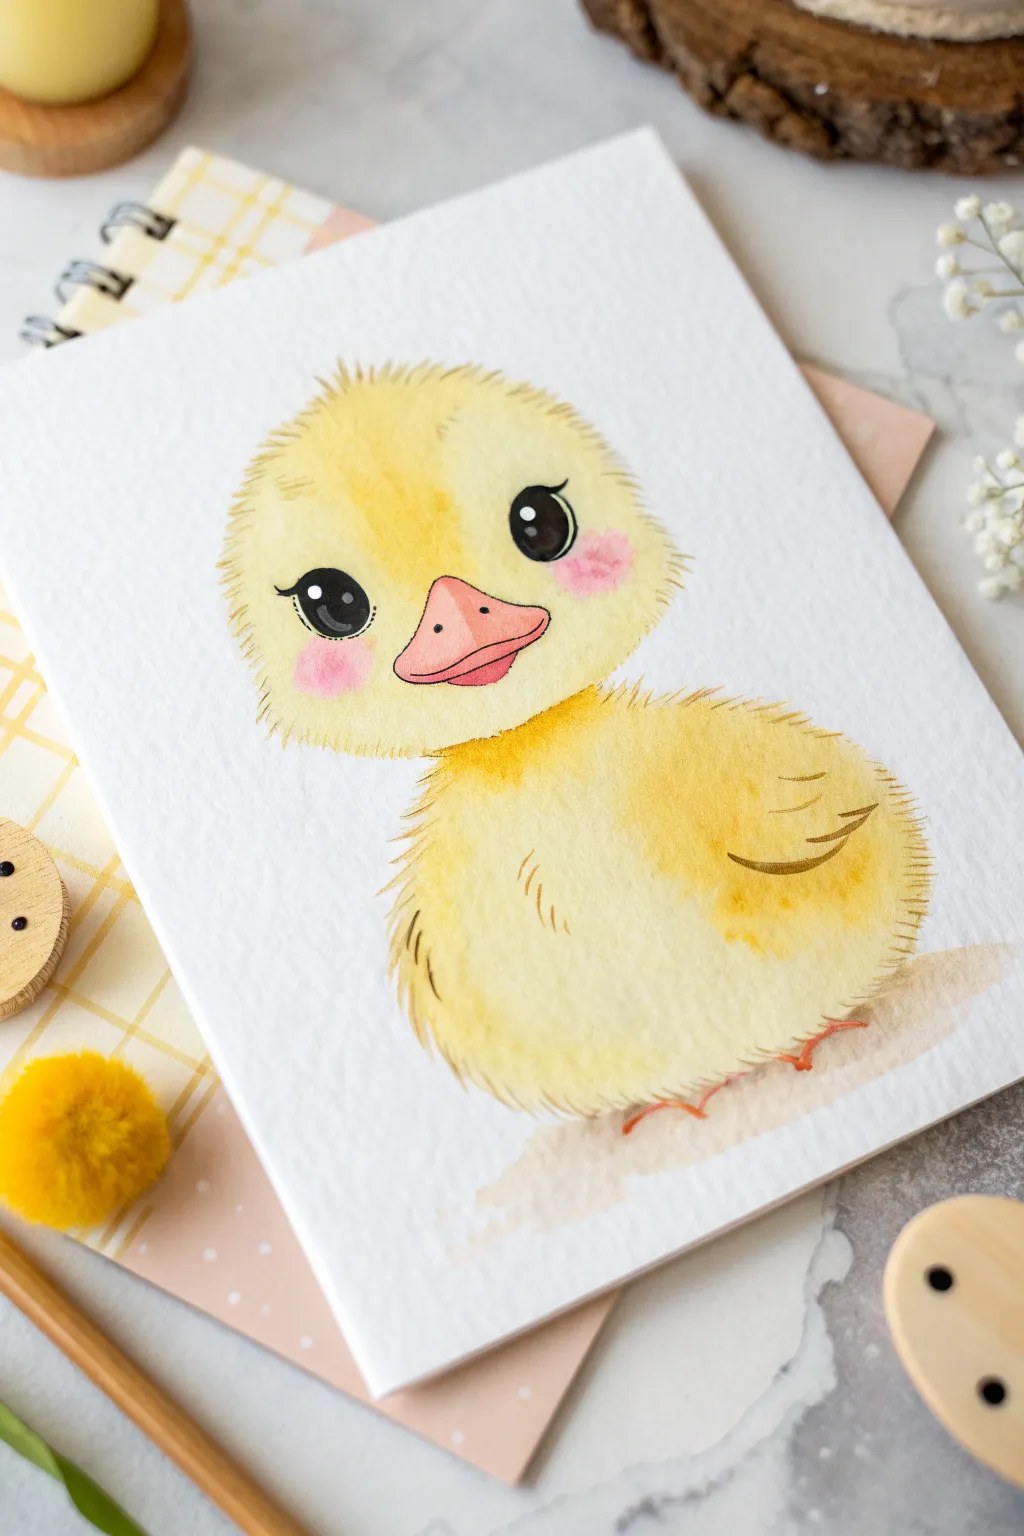
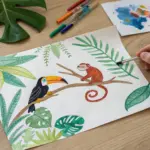
Capture the soft innocence of springtime with this charming watercolor illustration of a yellow duckling. This project focuses on building layers of translucent color to create a puffy, feathery texture without needing complex brushstrokes.
Detailed Instructions
Materials
- Cold press watercolor paper (300 gsm)
- Pencil (HB or H) and kneaded eraser
- Watercolor paints (Lemon Yellow, Cadmium Yellow, Rose/Pink, Black/Payne’s Grey, Burnt Sienna)
- Round watercolor brushes (sizes 4 and 0 or 1)
- Clean water jar and paper towels
- White gel pen or gouache for highlights
Step 1: Sketching the Base
-
Outline the head:
Start with a light pencil sketch. Draw a large, slightly flattened circle for the head, keeping your lines very faint so they don’t show through the yellow paint later. -
Add the body:
Draw a smaller, round oval shape directly beneath the head for the body. The head should be disproportionately large compared to the body to achieve that cute ‘chibi’ look. -
Sketch facial features:
Place two large circles for eyes wide apart on the face. Between and slightly below them, sketch a triangular beak with rounded corners. -
Refine the outline:
Use a kneaded eraser to lift most of the graphite, leaving only a ghost of the image. This is crucial for keeping the yellow paint bright and clean.
Step 2: Painting the Duckling
-
First wash:
Prepare a watery mix of Lemon Yellow. Apply a light wash over the entire head and body, but leave the eye circles completely white. Let the edges be slightly uneven to suggest fluff. -
Deepening the color:
While the first layer is still slightly damp, drop concentrated Cadmium Yellow into the wet areas, specifically the top of the head and the center of the chest. This creates a soft gradient. -
Define the beak:
Mix a soft pink using a touch of Rose and water. Paint the beak carefully. Add a slightly darker pink line through the middle for the mouth opening while the base is damp. -
Rosy cheeks:
Dilute your pink mixture heavily. Gently dab two oval blush spots on the cheeks just below the eyes. Soften the edges with a clean, damp brush so they fade into the yellow. -
Feathery texture:
Once the base yellow is completely dry, take a size 0 brush with a slightly thicker Cadmium Yellow mix. Use tiny, flicking strokes around the perimeter of the head and body to create jagged, feathery edges. -
Wing detail:
On the right side of the body, paint a small curved wing shape using the darker transparency of the yellow. Add a touch of brown to the tip for definition.
Clean Edges
Wait for the yellow paint to dry completely before painting the black eyes. If the yellow is wet, the black will bleed and ruin the crisp look.
Step 3: Face and Details
-
Painting the eyes:
Using black paint or Payne’s Grey, carefully fill in the eye circles. Leave a tiny white circle unpainted in each eye for the highlight, or paint over it and add white later. -
Eye lashes:
With your smallest brush and black paint, draw a thick, curved lash line extending from the top outer corner of each eye. -
Adding texture lines:
Mix a light brown or ochre color. Paint very fine, short curved lines on the tummy and forehead to suggest layers of downy feathers. -
The feet:
Using an orange-brown mix, paint tiny triangular feet peeking out from under the fluff. Keep these simple and loose. -
Ground shadow:
Mix a very watery grey-brown wash. Paint a loose, irregular patch under the duckling to ground it so it isn’t floating in space. -
Final highlights:
Use a white gel pen or a dot of white gouache to add the sparkle in the eyes if you painted over them earlier. This brings the character to life.
Accessorize
Add personality by painting a tiny blue bow tie on the neck or a small flower tucked into the head feathers for extra sweetness.
Allow your painting to dry fully before erasing any remaining stray pencil marks to keep the paper pristine


Two-Shape Baby Duck Sketch

Capture the irresistible charm of a baby duck with this loose, expressive ink drawing. By focusing on simple shapes and textured line work, you will create a character that feels fluffy and full of life, perfect for a sketchbook study.
Step-by-Step
Materials
- Sketchbook with cream or off-white paper (heavyweight preferred)
- Black drawing pen (fineliner, size 0.5 or 0.8)
- Pencil (HB or 2B) for initial sketching
- Soft eraser
- Reference photo of a duckling (or a live model if you’re lucky!)
Step 1: Laying the Foundation
-
Sketch the head shape:
Begin with your pencil by drawing a simple circle for the duckling’s head. Keep your pressure very light so these lines can be erased later. -
Add the body oval:
Draw a larger, slightly tilted oval connected to the bottom of the head circle. This should look a bit like a snowman or a peanut, with the body angled downward to the right. -
Position the beak:
On the right side of the head circle, lightly sketch a small triangle shape to indicate where the beak will go. It should point slightly upward. -
Outline the feet:
Draw two stick-figure lines coming down from the bottom of the body, ending in triangle shapes for the webbed feet. Simple geometric placeholders are all you need right now.
Step 2: Inking the Outline
-
Define the forehead and eye:
Switch to your black ink pen. Start at the top of the head circle and draw a broken, fuzzy line down to the beak. Draw a large, solid black circle for the eye, leaving a tiny spot of white for the highlight. -
Draw the beak:
Ink the beak contours within your triangle guide. Add a small nostril line and a slight separation line for the mouth, giving the duck a tiny smile. -
Create fluffy texture:
Instead of drawing a smooth continuous line for the body, use short, quick hatching strokes. This mimics soft downy feathers. Follow the curve of the pencil oval, creating the chubby chest and back. -
Detail the wing:
On the side of the body, draw a small, tucked wing shape. Use slightly longer, curved strokes here to suggest folded feathers.
Loose Lines Only
Don’t connect every line! Leaving gaps in the outline (especially on the back and chest) makes the viewer’s eye fill in the rest, creating a softer, fluffier appearance.
Step 3: Refining and Finishing
-
Ink the feet:
Go over the feet guidelines with stronger, solid lines. Duck feet have a specific shape, so define the webbing between the toes clearly. -
Add shadow to the feet:
Thicken the lines on the underside of the feet and toes to give them weight and show that they are pressing against the ground. -
Sketch the tail feathers:
Where the back meets the bottom of the duck, add a tiny, upturned tail using short, jagged strokes. -
Ground the subject:
Sketch a few loose blades of grass near the feet and to the right side of the duckling. This gives context without needing a full background. -
Draw a small flower:
Add a simple, five-petal flower among the grass blades for a touch of whimsy. Keep the style loose to match the rest of the sketch. -
Erase pencil guides:
Wait several minutes to ensure the ink is completely dry—I usually give it a full five minutes to be safe. Gently erase all your underlying pencil structure lines. -
Final texture check:
Look over your drawing. If any areas look too flat, add a few more tiny ticks or dashed lines to suggest more fluffiness, particularly on the chest. -
Add a signature:
Sign your name or add a playful scribble at the bottom to claim the artwork as your own.
Add Watercolor
Once the ink is waterproof-dry, add a loose wash of yellow watercolor over the body and orange on the beak. Let the color bleed outside the lines slightly for an artsy look.
Now you have a charming little companion permanently nesting in your sketchbook pages


Minimal Line Art Duck
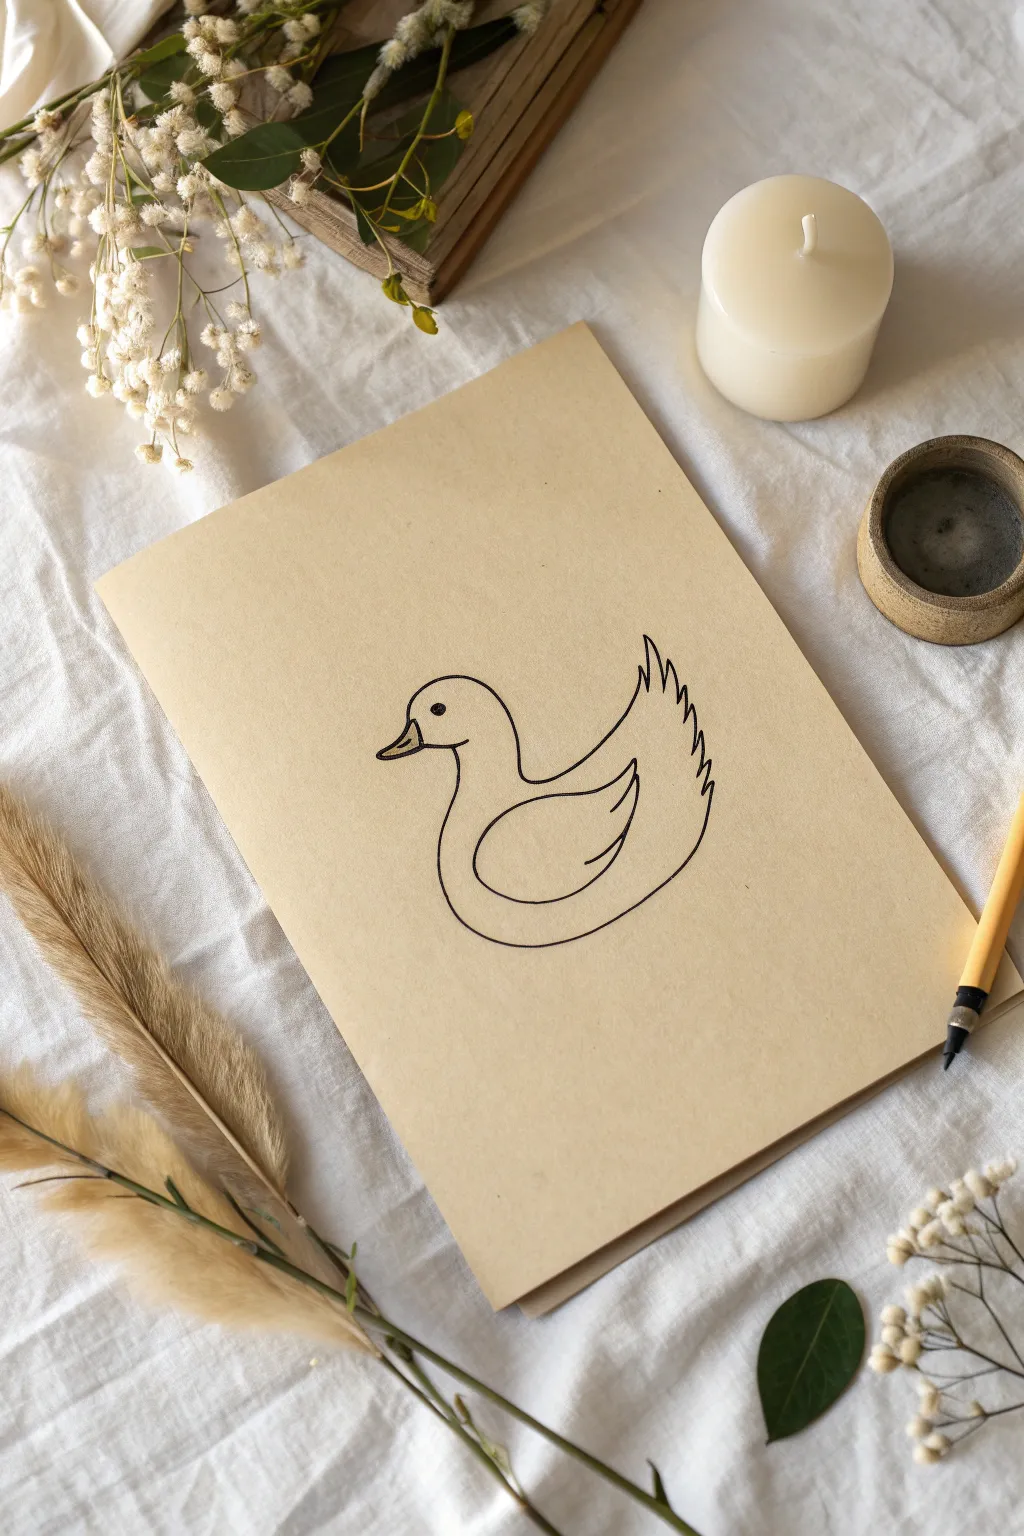
Embrace simplicity with this clean, continuous-style line art duck that pops beautifully against a warm, neutral background. The minimalist black lines on tan paper create a modern, sophisticated look perfect for greeting cards or wall art.
Step-by-Step Tutorial
Materials
- Beige or tan cardstock (A5 size)
- Black felt-tip fineliner pen (0.5mm or 0.8mm)
- Pencil (HB or H)
- Soft eraser
- Ruler (optional, for centering)
Step 1: Planning Composition
-
Center layout:
Begin by finding the visual center of your tan cardstock. You want the duck to sit comfortably in the middle, slightly below the vertical center to ground it. -
Basic shapes:
Using your pencil very lightly, sketch a simple oval for the body. This oval should be tilted slightly upward at the front. -
Head placement:
Add a smaller circle above the left side of your oval for the head. Connect it to the body with a gently curved neck line.
Smooth Operator
To get perfectly smooth curves on the belly and neck, try to lock your wrist and move your entire arm from the elbow while drawing the long strokes.
Step 2: Drafting the Outline
-
Refining the head:
Shape the rounded head, extending the front slightly where the beak will attach. sketching lightly allows you to erase without damaging the paper’s texture. -
Beak details:
Draw a triangular beak shape pointing left. Add a small internal line to separate the top and bottom beak sections. -
Neck curve:
Draw a sweeping ‘S’ curve from the back of the head down to the back of the body. This creates that elegant duck posture. -
The tail feathers:
Instead of a smooth oval back, sketch a series of small, pointed triangles curving upward at the rear to suggest fluffy tail feathers. -
Wing shape:
inside the body oval, draw a teardrop shape that points towards the tail feathers. The top of the wing should curve parallel to the back. -
Eye placement:
Place a small dot for the eye in the upper center of the head area. Keep it simple; no complex shading is needed here.
Step 3: Inking the Final Lines
-
Start with the eye:
Take your black fineliner and carefully fill in the small circular eye, leaving a tiny speck of white paper for a highlight if you can manage it. -
Trace the beak:
Outline the beak with a steady hand. Draw the line separating the upper and lower beak, adding a tiny dot for the nostril near the top. -
Head and chest:
Draw a continuous line from the top of the beak, over the head, and down the front of the chest, curving underneath to form the belly. -
Underbelly curve:
Continue that belly line all the way to the back, keeping the curve smooth and rounded. Stop right before the tail feathers begin. -
The back curve:
Start a new line from the neck, sweeping down the back. Let this line flow naturally into the first tail feather. -
Feather details:
Carefullyink the jagged tail feathers. Make the points sharp but the connections between them curved. I find rotating the paper helps me get better angles here. -
Wing definition:
Ink the wing shape. Add a second, smaller curve inside the wing tip to suggest layers of feathers without overcomplicating the design.
Wobbly Lines?
If a line gets shaky, don’t try to redraw over it immediately. Instead, thicken the line slightly along the entire curve to hide the wobble naturally.
Step 4: Finishing Touches
-
Wait for drying:
Let the ink sit for at least 5 to 10 minutes. Fineliners can smudge easily on cardstock, which is less absorbent than regular printer paper. -
Erase guidelines:
Gently erase your pencil sketch marks. Hold the paper taut with one hand while erasing with the other to prevent crinkling the sheet. -
Assess line weight:
Check if any lines look too thin. You can carefully go over the outer contour one more time to thicken it slightly, making the duck stand out more boldly.
Your charming duck sketch is now ready to frame or gift to a friend


Floating Duckling With Ripples

Capture the serenity of a quiet pond with this charming watercolor illustration of a yellow duckling. The soft ripples and textured deckled edges of the paper give this piece a timeless, handcrafted feel perfect for framing.
Step-by-Step Guide
Materials
- Cold-pressed watercolor paper (300 gsm)
- Watercolor paints (Cadmium Yellow, Yellow Ochre, Burnt Sienna, Teal or Viridian Green, Paynes Grey, Orange)
- Round watercolor brushes (sizes 2, 4, and 8)
- Pencil (HB) and kneadable eraser
- Ruler or straight edge (optional, for tearing paper)
- Jar of clean water
- Paper towel
Step 1: Preparing the Surface
-
Create deckled edges:
To achieve that beautiful, rustic border, don’t use scissors. Instead, fold your watercolor paper back and forth along the desired dimension line, dampen the crease slightly with a wet brush, and gently tear the paper to create soft, uneven ‘deckled’ edges. -
Sketch the outline:
Using your HB pencil, lightly sketch the oval body of the duckling in the center of the paper. Keep the lines very faint so they won’t show through the yellow paint later. -
Add details:
Draw the small round head slightly overlapping the body oval. Add a small triangular beak and mark the position of the eye. Sketch curved lines around the duck to indicate where the main ripples will flow.
Water Woes?
If your water wash dries with unwanted ‘blooms’ or cauliflower marks, it means you added water to drying paint. Fix it by gently lifting the pigment with a damp sponge or painting ripples over the marks.
Step 2: Painting the Water
-
Mix your water color:
Create a watery mix of Teal or Viridian Green with plenty of water. You want a soft, transparent wash, not a solid opaque block of color. -
Apply the base wash:
Use your size 8 brush to paint the entire background, carefully painting around the duckling sketch. Keep your brush wet to avoid hard streaks, but don’t flood the paper. -
Deepen the color:
While the paper is still slightly damp (but not soaking), drop in a bit more concentrated Teal into the lower section of the painting to create a subtle gradient, making the foreground slightly darker than the background. -
Dry completely:
Let this background layer dry thoroughly. If the paper feels cool to the touch, it’s still wet.
Step 3: Painting the Duckling
-
Base yellow layer:
Mix a bright Cadmium Yellow and paint the entire body and head of the duckling. Use the size 4 brush for better control around the edges. -
Add texture:
While the yellow is still wet, dab in small touches of Yellow Ochre on the back and neck to suggest fluffy feathers and shadow. This wet-on-wet technique keeps the fluff looking soft. -
Shadow and reflection:
Mix a little Burnt Sienna with Paynes Grey. Paint the very bottom of the duckling where it meets the water, dragging the color downwards slightly to start the reflection. -
The beak:
Once the head is dry, use a size 2 brush to paint the beak with a vibrant Orange. Leave a tiny sliver of white paper for a highlight if you can manage it. -
The eye:
Using the tip of your smallest brush and Paynes Grey (or black), carefully dot the eye. Leave a microscopic white spot for the ‘catchlight’ to bring the duckling to life.
Make It Glossy
Once the painting is 100% dry, add a tiny drop of clear glossy medium or transparent nail polish specifically on the eye and the beak to give them a permanent wet shine.
Step 4: Ripples and Final Details
-
Painting dark ripples:
Mix a stronger, darker version of your Teal color, perhaps adding a touch of Paynes Grey. Using the size 4 brush, paint arc-shaped strokes following your initial ripple sketches. -
Shape the water movement:
Focus the darkest, thickest ripple lines directly around the duck’s chest and reflection. Let the lines become thinner and more broken as they move further away. -
Define the reflection:
Enhance the duck’s reflection in the water using the dark brownish mix from before. Paint loose, wavy horizontal strokes directly under the bird to mimic distortion. -
Highlighting feathers:
I like to take a fairly dry brush with a bit of opaque white gouache (or very thick yellow paint) to add tiny wispy strokes on the top of the head for extra fluffiness. -
Softening edges:
If any ripple lines look too harsh, start with a clean, damp brush and gently run it along one edge of the line to soften it into the background water.
Allow your painting to dry flat completely before mounting or framing to preserve the beautiful texture of the paper
BRUSH GUIDE
The Right Brush for Every Stroke
From clean lines to bold texture — master brush choice, stroke control, and essential techniques.
Explore the Full Guide
Waddling Duck With Tiny Feet
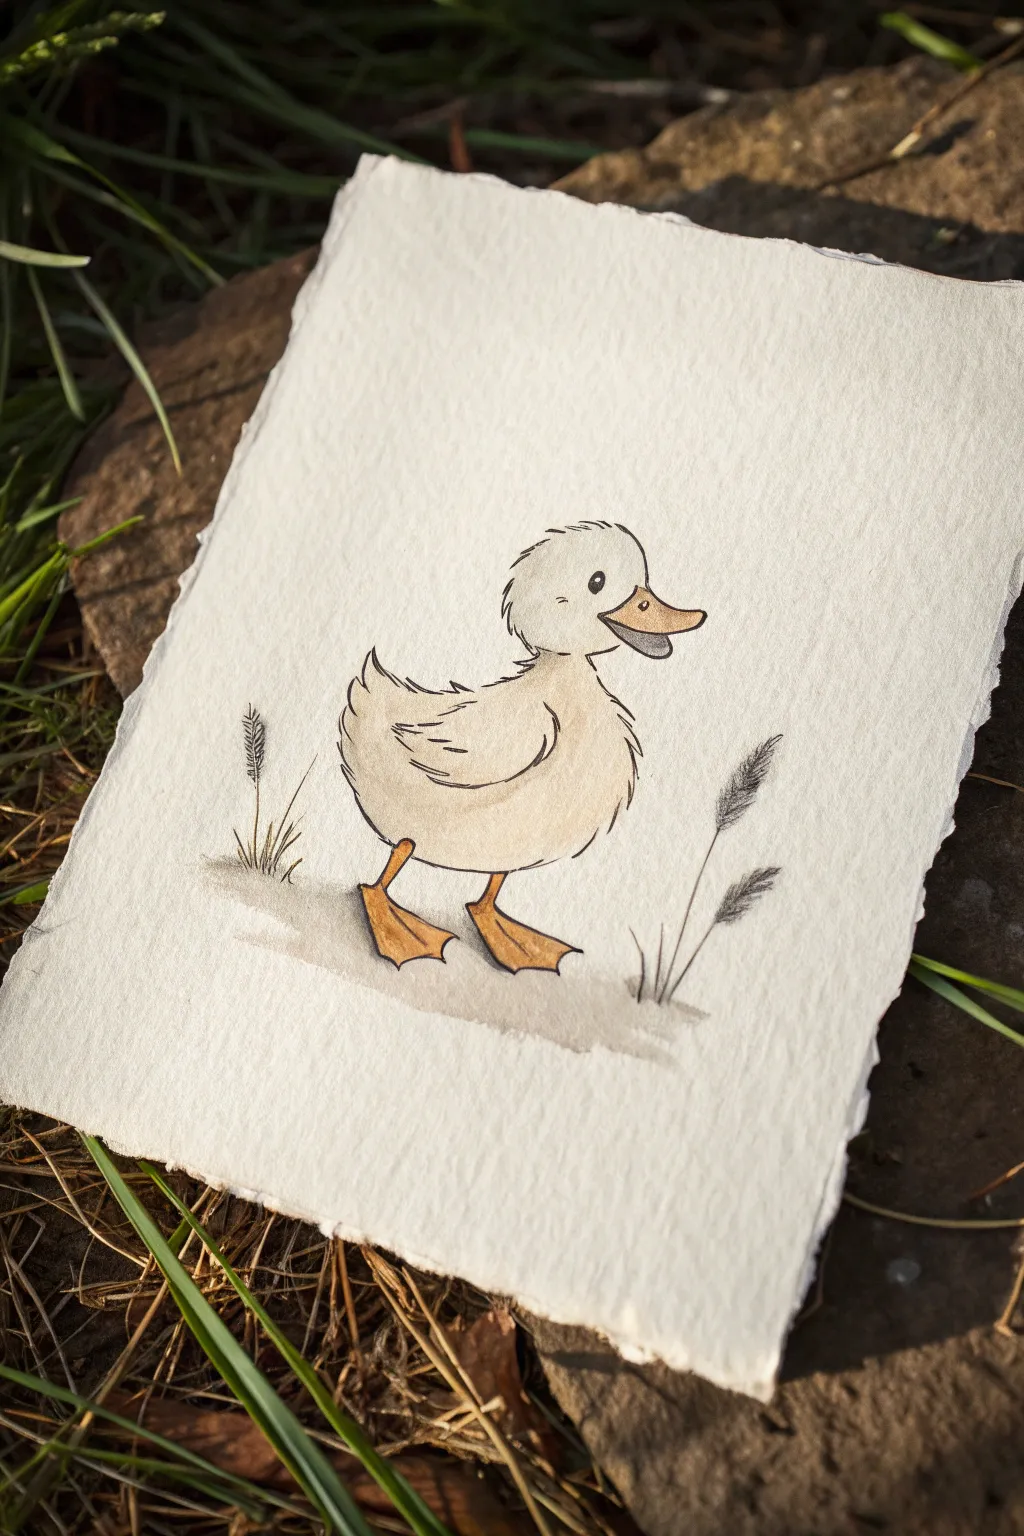
Capture the charm of a clumsy little duckling on textured paper with this gentle watercolor and ink tutorial. The result is a sweet, character-filled illustration that looks lovely framed or as a greeting card.
Step-by-Step Tutorial
Materials
- Cold press watercolor paper (deckle edge optional)
- Waterproof fine liner pen (black or sepia, 0.1mm – 0.3mm)
- Watercolor paints (Yellow Ochre, Burnt Sienna, Payne’s Grey, Buff Titanium)
- Round watercolor brush (size 2 or 4)
- Pencil (HB or H)
- Kneaded eraser
- Clean water and paper towels
Step 1: Sketching the Shape
-
Head and Body Basics:
Begin lightly with your pencil. Draw a rounded, slightly flattened circle for the head. Below and slightly to the left, sketch a larger oval for the body, tilting it upward at the back to suggest a tail. -
Connecting the Form:
Connect the head to the body with two short, curved lines to create a neck. Refine the chest so it puffs out slightly, giving the duckling that proud, waddling posture. -
Adding the Beak:
Draw the beak on the right side of the head. It should be relatively large and slightly open, shaped like a rounded triangle with a soft curve for the smile line. -
Feet and Tail:
Sketch a small, pointed tail flicking upward at the back. Add two legs beneath the body; position the front leg straight down and the back leg caught mid-step to emphasize the waddle. Draw large, triangular webbed feet. -
Final Pencil Details:
Add a simple wing shape on the side of the body—it should look like a folded leaf. Place a simple dot for the eye near the beak.
Muddy colors?
If your shadows look dirty, wait for the first yellow layer to dry completely before adding darker shading. Wet-on-wet can sometimes mix too much.
Step 2: Inking the Outline
-
Tracing the Contours:
Using your waterproof fine liner, go over your pencil lines. Don’t make the line perfectly continuous; use broken, slightly jittery lines for the feathers to suggest fluffiness. -
Adding Texture:
Add small, flicking strokes around the chest, the top of the head, and the tail feathers. This breaks the silhouette and makes the duckling look soft rather than rigid. -
Defining the Eye:
Color in the eye with your pen, leaving a tiny white speck uncolored for the highlight. This spark of life is crucial for a cute expression. -
Environmental details:
Sketch a few tall, thin stalks of grass on either side of the duckling. Use quick, upward strokes for the leaves and add little textures at the tips to look like seed heads. -
Clean Up:
Once the ink is completely dry—give it a minute or two—erase all your visible pencil marks gently with the kneaded eraser.
Deckle Edge Trick
If you don’t have fancy paper, create a faux deckle edge by wetting a ruler, placing it on the paper, and tearing the excess off against the sharp edge.
Step 3: Watercolor Wash
-
Base Color:
Mix a very watery wash of Buff Titanium or a pale Yellow Ochre. Paint the entire body of the duckling, avoiding the beak and feet. Keep this layer very light and transparent. -
Adding Shadow:
While the paper is still slightly damp, drop a tiny bit of slightly darker Yellow Ochre or light brown along the bottom of the belly and under the wing. This adds immediate volume. -
Painting the Feet and Beak:
Mix a brighter orange using Yellow Ochre and a touch of Burnt Sienna. Carefully fill in the beak and the webbed feet. I like to let the orange be a bit more saturated here to contrast the pale feathers. -
Mouth Detail:
For the inside of the open mouth, use a very grayed-down pink or a light wash of Payne’s Grey just to show depth. -
Grounding the Duck:
Mix a watery grey-brown wash. Paint a loose, horizontal patch beneath the feet to represent the ground. Let the color fade out naturally at the edges so it doesn’t look like a hard box. -
Grass Accents:
Take a very small amount of Payne’s Grey or a desaturated green and lightly touch the tips of the grass illustrations you drew earlier. You don’t need to fill them in perfectly; offset color adds artistic flair.
Allow your little artwork to dry completely before signing your name near the grass
Side Profile Duckling Doodle
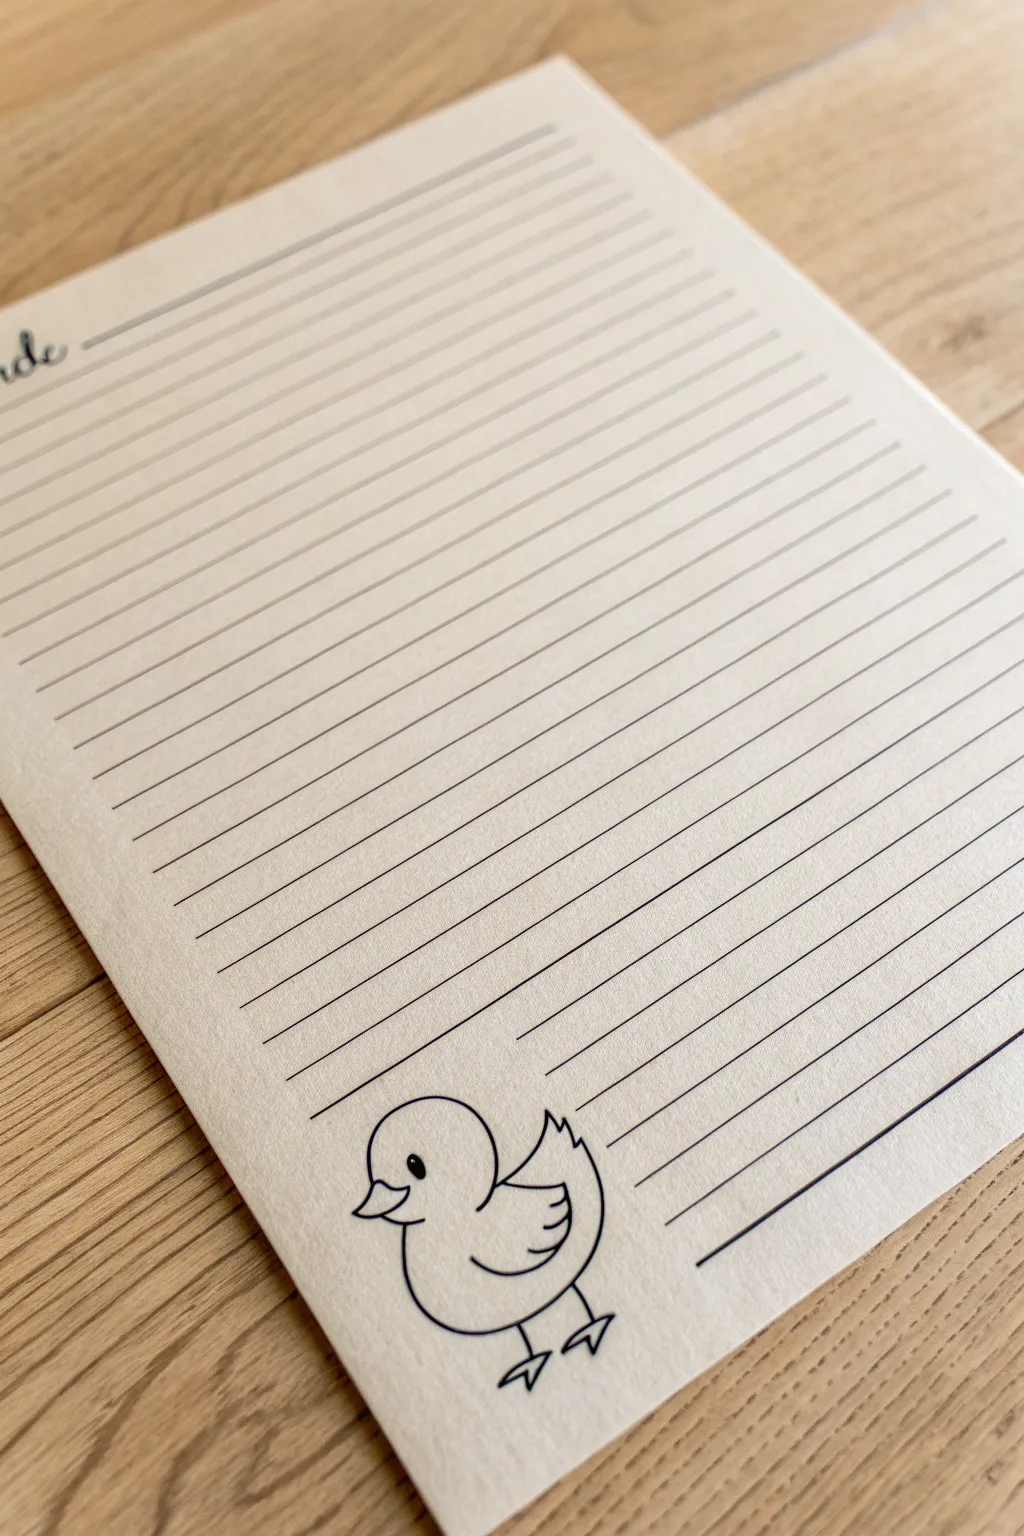
Transform plain paper into charming custom stationery with this simple side-profile duckling doodle. It’s a minimalist, clean line drawing that adds a sweet touch to your handwritten notes without overpowering the page.
Detailed Instructions
Materials
- Smooth cream or off-white paper (A5 size recommended)
- Fine-point black pen (0.3mm or 0.5mm)
- Ruler
- Pencil (HB or H)
- Eraser
Step 1: Setting Up the Page
-
Paper Selection:
Start with a sheet of high-quality cream or off-white paper. The slight texture adds a nice, organic feel compared to stark bright white copy paper. -
Drafting Guidelines:
Using your ruler and a very light pencil touch, measure out horizontal lines for your writing space. Leave about 1 cm between lines. -
Creating the Header:
At the very top left, sketch a horizontal line for the date or recipient area. You can add a prompt word like ‘Date’ or ‘To’ in a cursive font, similar to the partial ‘de’ seen here. -
Inking the Lines:
Carefully trace over your ruled pencil lines with your fine-point black pen. Keep your hand steady and consistent. -
Interruption Space:
For the bottom 4-5 lines on the left side, stop your ink lines early. Leave a blank space roughly 5cm wide to accommodate the duck drawing later.
Ink Smearing?
If your ruler causes ink to streak when drawing lines, tape a penny to the underside of the ruler. This raises the edge off the paper, preventing contact smears.
Step 2: Drawing the Duckling Head
-
Head Shape:
In the blank space you left at the bottom, start with the head. Draw a smooth, rounded curve that looks like an inverted ‘C’ or a half-circle. -
Beak Placement:
Attached to the front (left side) of the head curve, draw a small, pointy triangle shape for the upper beak. -
Lower Beak:
Add a smaller, slightly curved line underneath the top triangle to form the lower beak, connecting it back to the head. -
Adding the Eye:
Place a small oval for the eye just above and behind the beak. Fill it in with black ink, leaving a tiny white speck for a highlight.
Step 3: Completing the Body
-
Chest Curve:
From underneath the beak, draw a line curving downward and outward to create a puffed-out chest. -
Belly Line:
Continue that chest line, sweeping it underneath to form a round belly. -
Back Definition:
Go back to the top of the head and draw a line curving down for the back, stopping just where the tail feathers will begin. -
Wing Feathers:
Inside the body outline, draw a simple wing shape. Use a curved line for the front of the wing and add three scalloped bumps on the back edge for feathers. -
Tail Feathers:
Connect the back line to the wing area with a small, pointed tail feather sticking upward.
Variation Idea
Try drawing the duckling facing the opposite direction on alternate pages, or adding a tiny puddle beneath its feet with light blue highlighter.
Step 4: Final Details
-
Legs:
Draw two straight lines extending down from the belly for the legs. I like to keep these short to make the duckling look stubby and cute. -
Webbed Feet:
At the end of each leg, draw a triangle or ‘W’ shape to represent the webbed feet. One foot can be slightly forward to suggest walking. -
Clean Up:
Let the ink dry completely for at least a minute to prevent smearing. -
Erasing:
Gently erase all underlying pencil marks, including the guide lines behind the text areas.
Now you have a lovely piece of custom stationery ready for your next letter

PENCIL GUIDE
Understanding Pencil Grades from H to B
From first sketch to finished drawing — learn pencil grades, line control, and shading techniques.
Explore the Full Guide
Duckling With Heart Bubbles
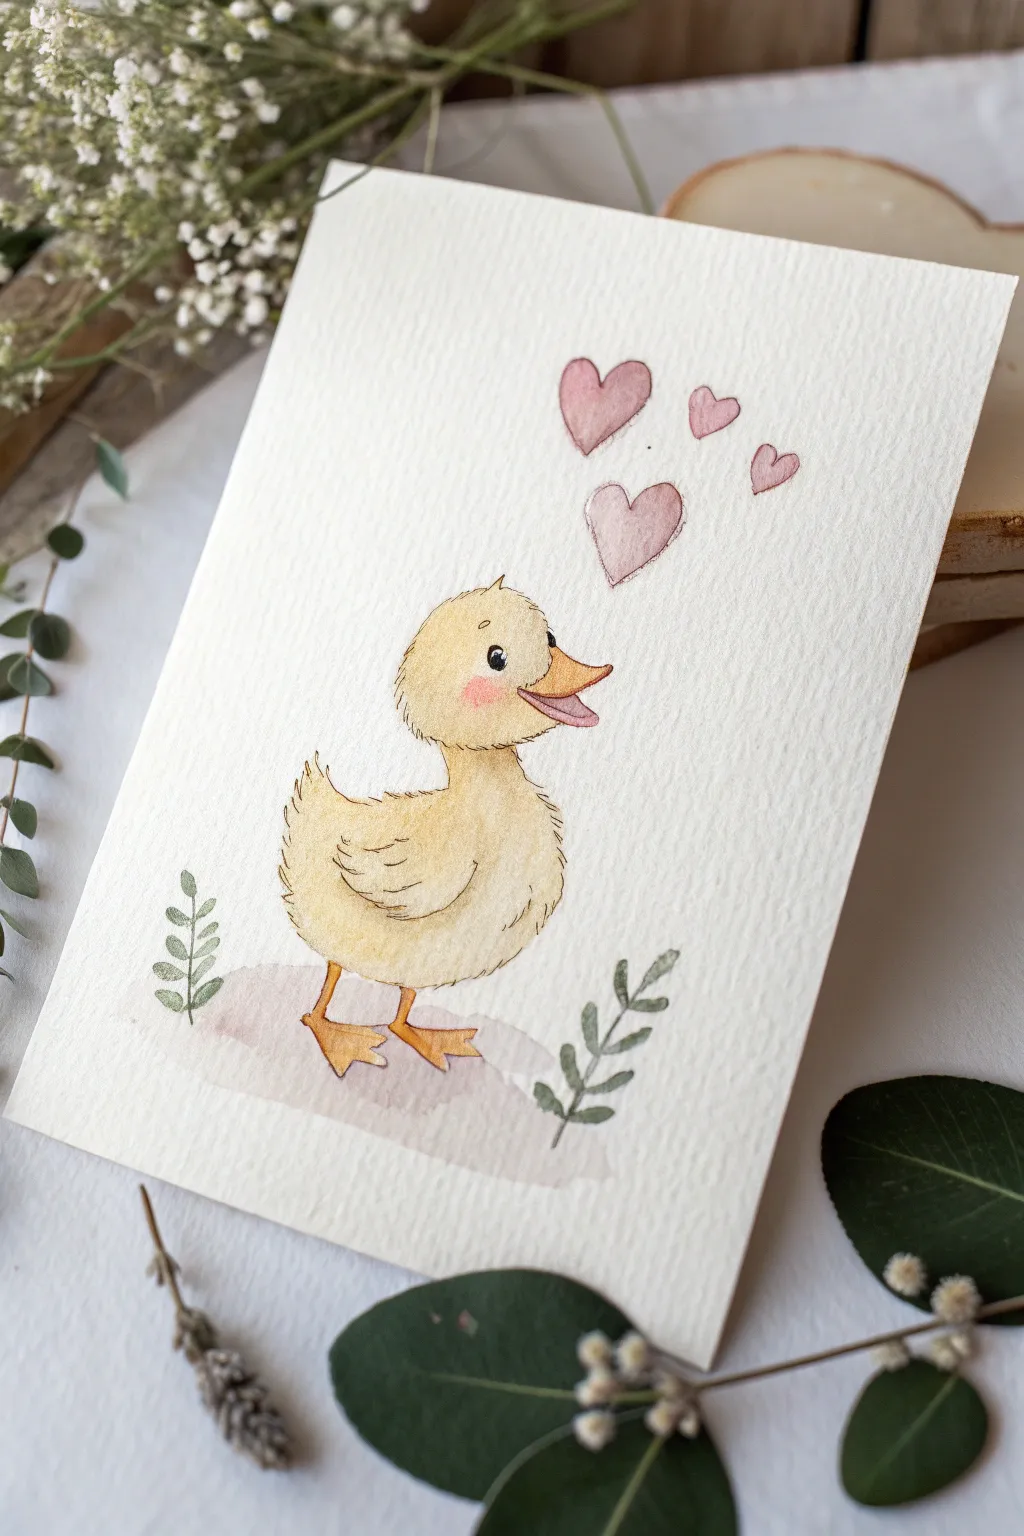
Capture the sweetness of affection with this charming watercolor illustration features a fluffy yellow duckling surrounded by floating hearts. The soft textures and gentle palette make it a perfect card design for loved ones or a cute addition to a nursery wall.
Step-by-Step
Materials
- Cold press watercolor paper (300 gsm)
- Watercolor paints (Yellow Ochre, Lemon Yellow, Cadmium Orange, Alizarin Crimson, Sap Green, Burnt Umber)
- Fine liner pen (0.1mm, brown or sepia ink)
- Round watercolor brushes (size 4 for washes, size 0 or 1 for details)
- H or HB pencil for sketching
- Kneaded eraser
- Small palette for mixing
- Clean water jar and paper towels
Step 1: Sketching the Outline
-
Map out the shapes:
Begin by lightly sketching a simple circle for the duckling’s head and a slightly larger oval for the body. Connect them with curved lines to form the neck. -
Add features:
Draw a small, curved beak on the right side of the head, opening slightly as if getting ready to quack. Place a small oval for the eye just above the beak line. -
Define the wings and feet:
Sketch a wing shape folding against the side of the body, adding small jagged lines at the ends to suggest feathers. Be sure to draw the webbed feet at the bottom, positioned slightly apart for stability. -
Sketch the extras:
Draw four heart shapes floating upwards from the beak, varying their sizes to look like bubbles. Add two small leafy sprigs on either side of the duckling near the ground.
Tip: Fluffy Edges
When painting the duckling’s outline, use a ‘dry brush’ technique with very little water on the edges to mimic the texture of fuzzy down feathers.
Step 2: Painting the Duckling
-
Base wash:
Mix a watery wash of Lemon Yellow with a touch of Yellow Ochre. Apply this to the duckling’s body and head, avoiding the eye and beak. Keep the edges soft. -
Adding depth:
While the paper is still slightly damp, drop in a slightly more concentrated Yellow Ochre mixture near the bottom of the belly and under the chin to create roundness. -
Beak and feet:
Mix Cadmium Orange with a tiny bit of Yellow to create a bright tangerine color. Carefully paint the beak and the webbed feet. For the inside of the open beak, use a pale pink wash. -
Rosy cheeks:
Once the yellow layer is dry, dilute a tiny bit of red or pink paint. Gently dab a circle on the cheek area to give the duckling a blush effect.
Fix: Blotchy Wash?
If your yellow wash dries with hard water lines (blooms), soften them by scrubbing very gently with a clean, damp brush then blotting with a tissue.
Step 3: Painting the Surroundings
-
Heart bubbles:
Paint the floating hearts with a soft wash of Alizarin Crimson or pink. Let the color pool naturally in some areas to create texture. -
Grounding shadow:
Mix a very pale purple-grey wash. I usually sweep this horizontally under the feet to ground the figure so it doesn’t look like it’s floating. -
Leafy sprigs:
Using your Sap Green (muted with a little brown), paint the small leaves on either side using short, simple strokes with the tip of your brush.
Step 4: Inking and Details
-
Outline work:
Ensure the paint is completely dry. Using your 0.1mm sepia pen, trace over your pencil lines with a loose, sketchy hand. Don’t make the line continuous; broken lines look fluffier. -
Feather texture:
Add small, curved ‘C’ shapes and tiny tick marks inside the body and on the wing to suggest soft downy feathers. -
The eye:
Color in the eye with dark brown or black, leaving a tiny white speck unpainted for the highlight. This sparkle brings the character to life. -
Final touches:
Add gentle outline definitions to the hearts and the leaves. Erase any remaining visible pencil marks gently with the kneaded eraser.
Now you have an adorable painted friend ready to brighten someone’s day
Two Ducklings Beak-to-Beak
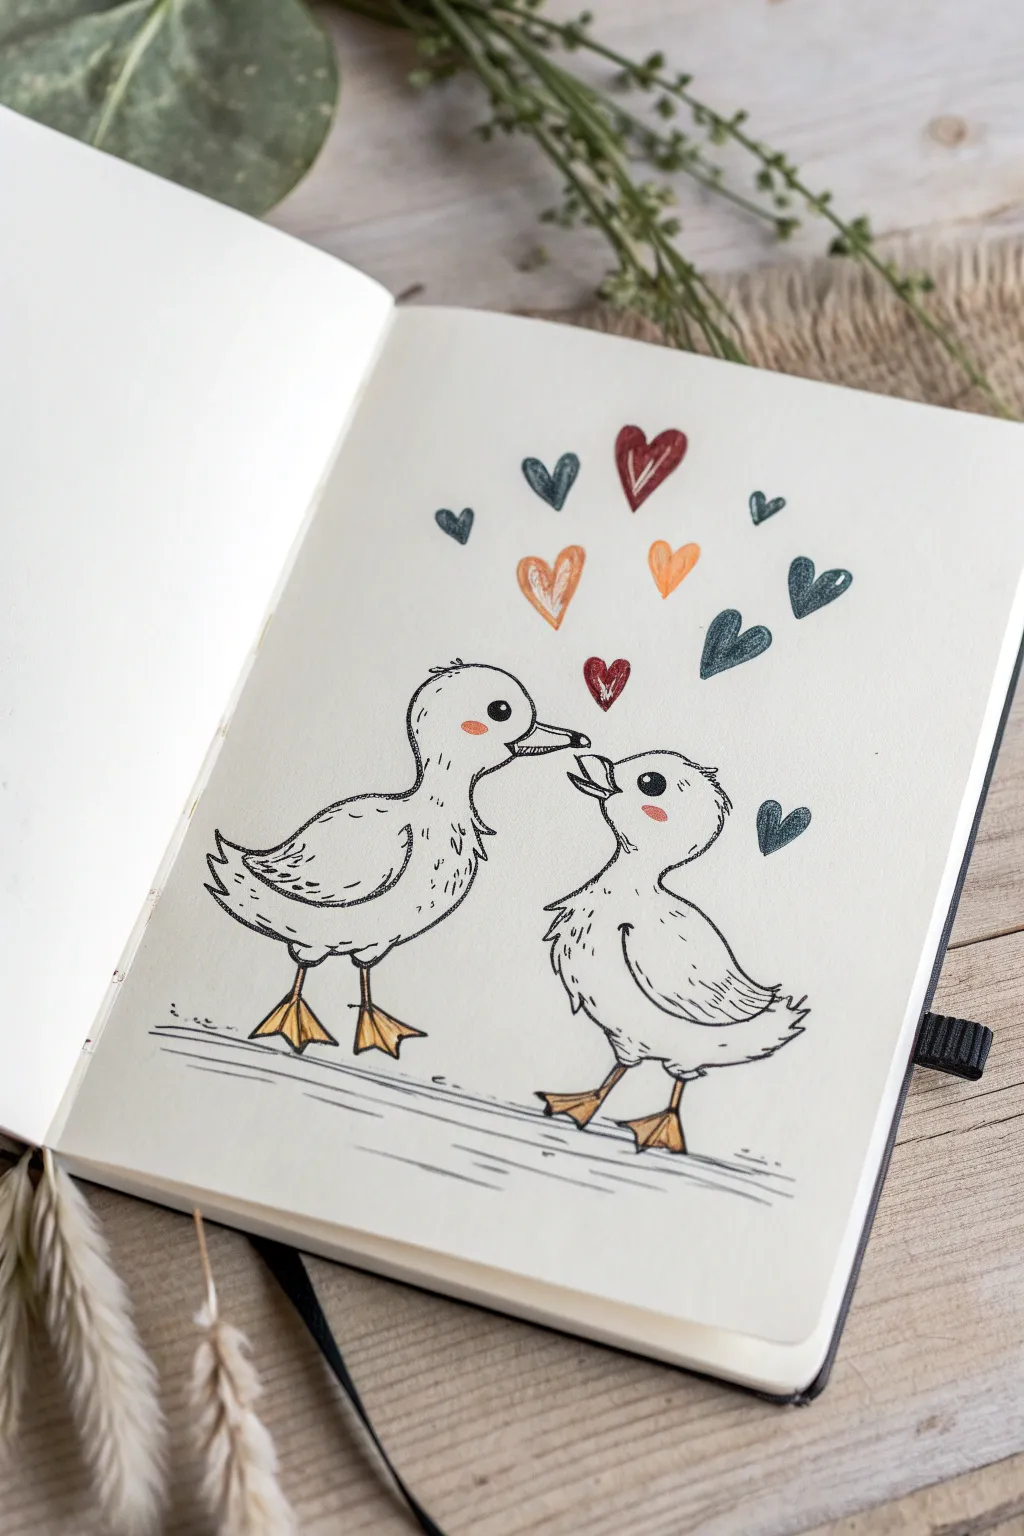
Capture a tender moment between two adorable ducklings with this simple yet expressive sketchbook spread. This project combines loose fineliner sketching with touches of colored pencil to create a heartwarming scene perfect for greeting cards or journal pages.
Detailed Instructions
Materials
- Sketchbook or drawing paper (heavyweight preferred)
- HB graphite pencil
- Eraser (kneaded eraser works best)
- Black fine-point pigment liner (0.3mm or 0.5mm)
- Colored pencils (orange, yellow-orange, red, dark teal/grey, pink)
Step 1: Sketching the Foundations
-
Position the bodies:
Start by lightly drawing two oval shapes for the bodies of the ducklings. Place the left oval slightly horizontal and the right oval tilted upwards, ensuring there is a small gap of negative space between them for their heads. -
Add the heads:
Sketch a circle on top of each oval body. The left duckling’s head should be level, while the right duckling’s head should look slightly upward so their beaks will eventually align. -
Outline the necks:
Connect the head circles to the body ovals with curved lines. Keep the necks relatively short and thick to maintain that chubby, fluffy duckling appearance. -
Draft the beaks:
Draw the beaks meeting in the center. The left beak should be horizontal and slightly open. The right beak should be angled upward, also open, as if they are quacking at each other or sharing a kiss. -
Place the limbs:
Sketch simple stick lines for the legs coming from the bottom of the ovals. At the bottom of each line, draw triangular shapes for the webbed feet. I usually angle the feet outward slightly to give them a grounded stance.
Step 2: Inking and Refining
-
Ink the eyes and beaks:
Switch to your black pigment liner. Draw the eyes first—large black dots with a tiny white speck left uncolored for a highlight. Then, carefully trace the outline of the beaks. -
Create the feathery texture:
Instead of tracing the body with a solid line, use short, broken, and slightly jagged strokes. This technique mimics fluffy down feathers, especially around the chest, tails, and back of the necks. -
Line the wings:
Draw the small wings on the side of each body. Use the same broken-line technique, adding a few curved strokes inside the wing shape to suggest layers of feathers. -
Define the legs and feet:
Ink the legs and webbed feet with stronger, more solid lines than you used for the feathers. Add a tiny v-shape at the bottom of the legs where they meet the feet for texture. -
Add floating hearts:
Above the ducklings, draw a cluster of hearts in varying sizes. Scatter them upward in a loose V-shape, as if they are bubbling up from the interaction. -
Erase pencil guides:
Wait a moment for the ink to dry completely to avoid smudging. Gently erase all the underlying graphite pencil sketches until the page is clean.
Wobbly Lines?
If your ink lines look shaky, embrace it! Ducklings are fluffy and imperfect. A slightly wobbly line actually adds to the soft, feathery texture better than a perfect rigid line.
Step 3: Adding Color
-
Color the beaks and feet:
Using a yellow-orange colored pencil, fill in the beaks and the webbed feet. Press harder near the edges for a slight shading effect. -
Add rosy cheeks:
Take a pink colored pencil or crayon and lightly shade a small oval directly under each eye to give the ducklings a permanent blush. -
Color the hearts:
Fill in the floating hearts using a mix of colors. Use red for the central heart, orange for the middle ones, and a dark teal or grey for the outer hearts to balance the palette. -
Shade the hearts:
For the teal and orange hearts, apply the color roughly or leave tiny white streaks to give them a textured, hand-drawn ‘sketchy’ feel rather than a solid block of color. -
Ground the scene:
Using your black pen again, sketch a few very loose horizontal lines beneath their feet. This suggests the ground or water surface without needing a full background.
Pro Tip: Eye Highlights
Make sure the white ‘sparkle’ in both ducklings’ eyes faces the same direction (e.g., top right). This subtle detail makes the gaze look focused and brings the characters to life.
Now you have a sweet illustration that perfectly captures the joy of connection


Duck Holding a Balloon
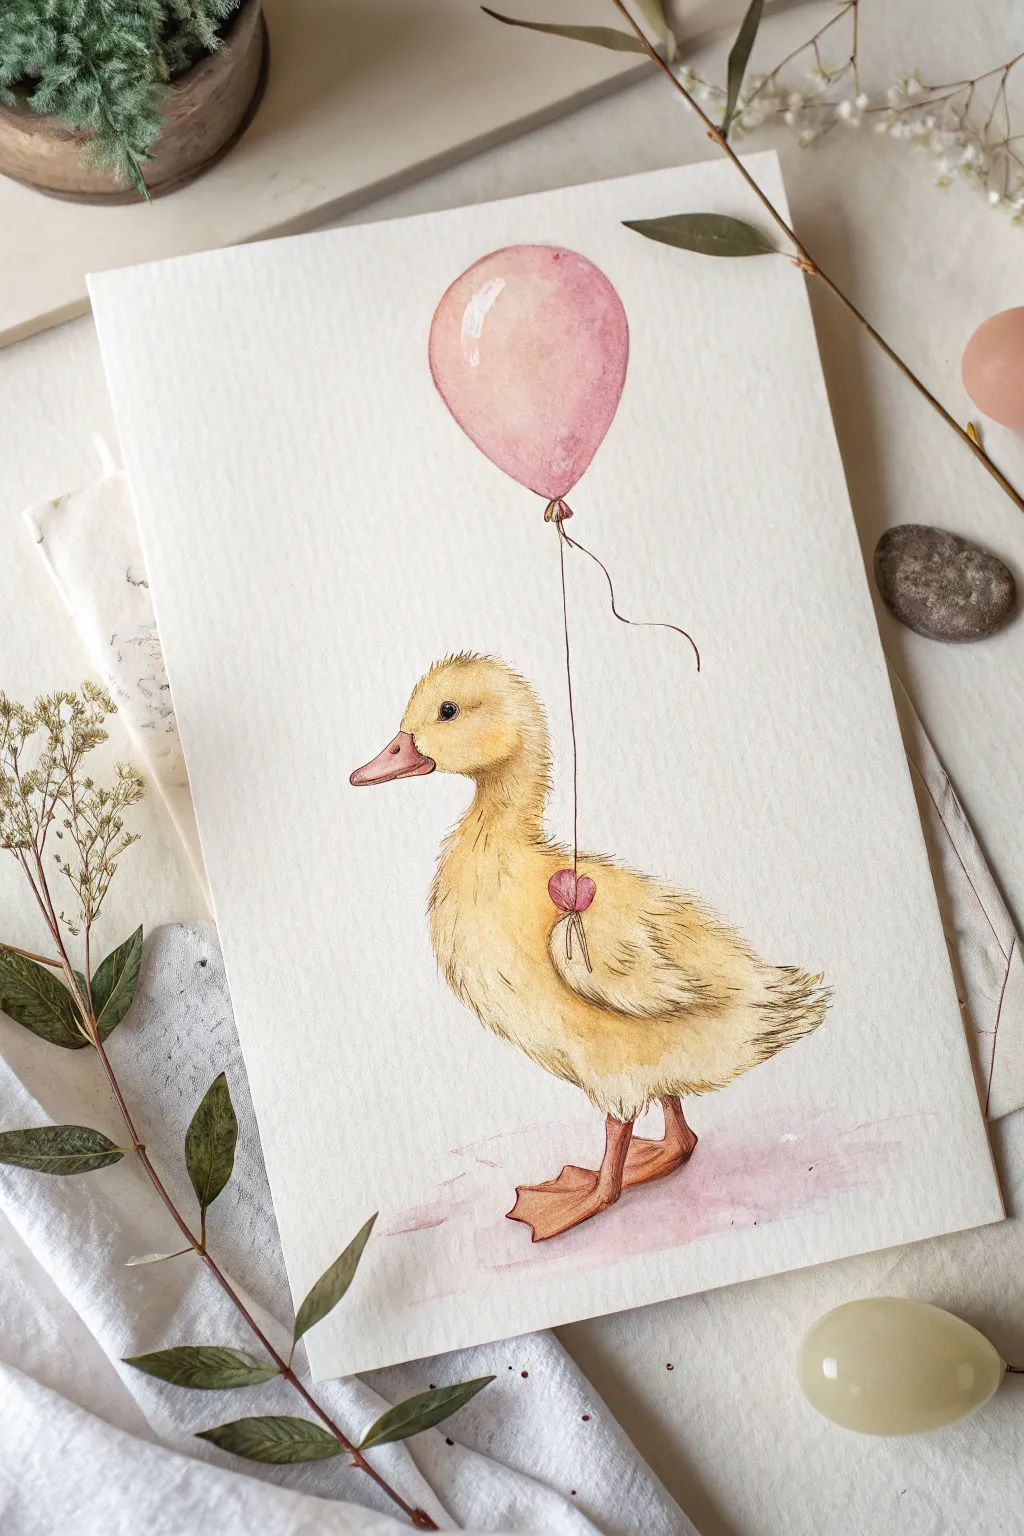
Capture the innocence of childhood with this delicate watercolor painting of a fuzzy duckling holding a pink balloon. The soft yellow tones and gentle pink wash create a heartwarming scene perfect for a nursery or greeting card.
How-To Guide
Materials
- Cold-pressed watercolor paper (300 gsm)
- Watercolor paints (Yellow Ochre, Lemon Yellow, Burnt Sienna, Alizarin Crimson, Paynes Grey)
- Round watercolor brushes (Size 2, 4, and 00 for details)
- Graphite pencil (HB or H)
- Kneaded eraser
- Clean water jar
- Palette
- Paper towels
Step 1: Sketching the Outline
-
Basic Shapes:
Start lightly with your HB pencil. Draw a small circle for the head and a larger oval shape for the body, connecting them with a curved neck. -
Adding Details:
Sketch the triangular beak and the webbed feet. Position the legs slightly back to show the duck is walking. -
The Balloon:
Draw an inverted tear-drop shape floating above the duckling. Add a squiggly line for the string down to the duck’s back. -
Refining Lines:
Gently erase your construction lines until they are barely visible, leaving just a faint guide for your painting.
Muddy colors?
If your yellow fluff looks dirty, ensure your base layer is 100% dry before adding texture. Wet layers will mix into a blob.
Step 2: First Washes
-
Duckling Base:
Mix a very watery wash of Lemon Yellow with a touch of Yellow Ochre. Apply this to the entire duck body, avoiding the beak and eye area. -
Wet-on-Wet Texture:
While the yellow layer is still damp, dab in slightly more concentrated Yellow Ochre near the neck and under the wing to suggest shadows. -
Beak and Feet:
Paint the beak and feet with a light wash of diluted Burnt Sienna mixed with a tiny drop of red. Keep it pale for now. -
Balloon Wash:
Using a dilute Alizarin Crimson, paint the balloon. Leave a small, unpainted white patch on the upper left side for a highlight.
Step 3: Building Depth and Texture
-
Feather Texture:
Once the base is completely dry, mix a slightly darker yellow-brown. Use your size 00 brush to paint tiny, flicking brushstrokes to mimic fluff. -
Defining the Wing:
Concentrate your texture strokes around the wing shape to separate it visually from the body, using darker tones underneath the wing feathers. -
Face Details:
Darken the area around the eye socket slightly. Paint the eye carefully with Paynes Grey, leaving a tiny speck of white paper for the glint. -
Beak Shadow:
Add a second, more saturated layer of orange-brown to the bottom and tip of the beak to give it volume. -
Feet Contours:
Use a darker orange mix to outline the feet and add shadow between the toes.
Level Up: Background
Splatter tiny drops of watered-down pink and yellow paint around the background for a festive, confetti-like effect.
Step 4: Final Flourishes
-
Balloon Shading:
Glaze a darker pink on the bottom right curve of the balloon to make it look round and 3D. Blend the edge with a damp brush. -
The String:
Mix a fine brownish-grey and paint the delicate string connecting the balloon to the duckling’s back. -
Grounding Shadow:
Mix a very watery purple-grey wash. Paint a loose, irregular patch under the duck’s feet to ground the figure. -
Bow Detail:
If you sketched a small bow or knot where the string meets the duck, paint it now with a touch of pink. -
Final Contrast:
I like to take a step back here and add a few final dark flicks of paint to the darkest shadow areas of the fluff for maximum contrast.
Now you have a charming little character ready to float off the page
Duck in a Rain Puddle
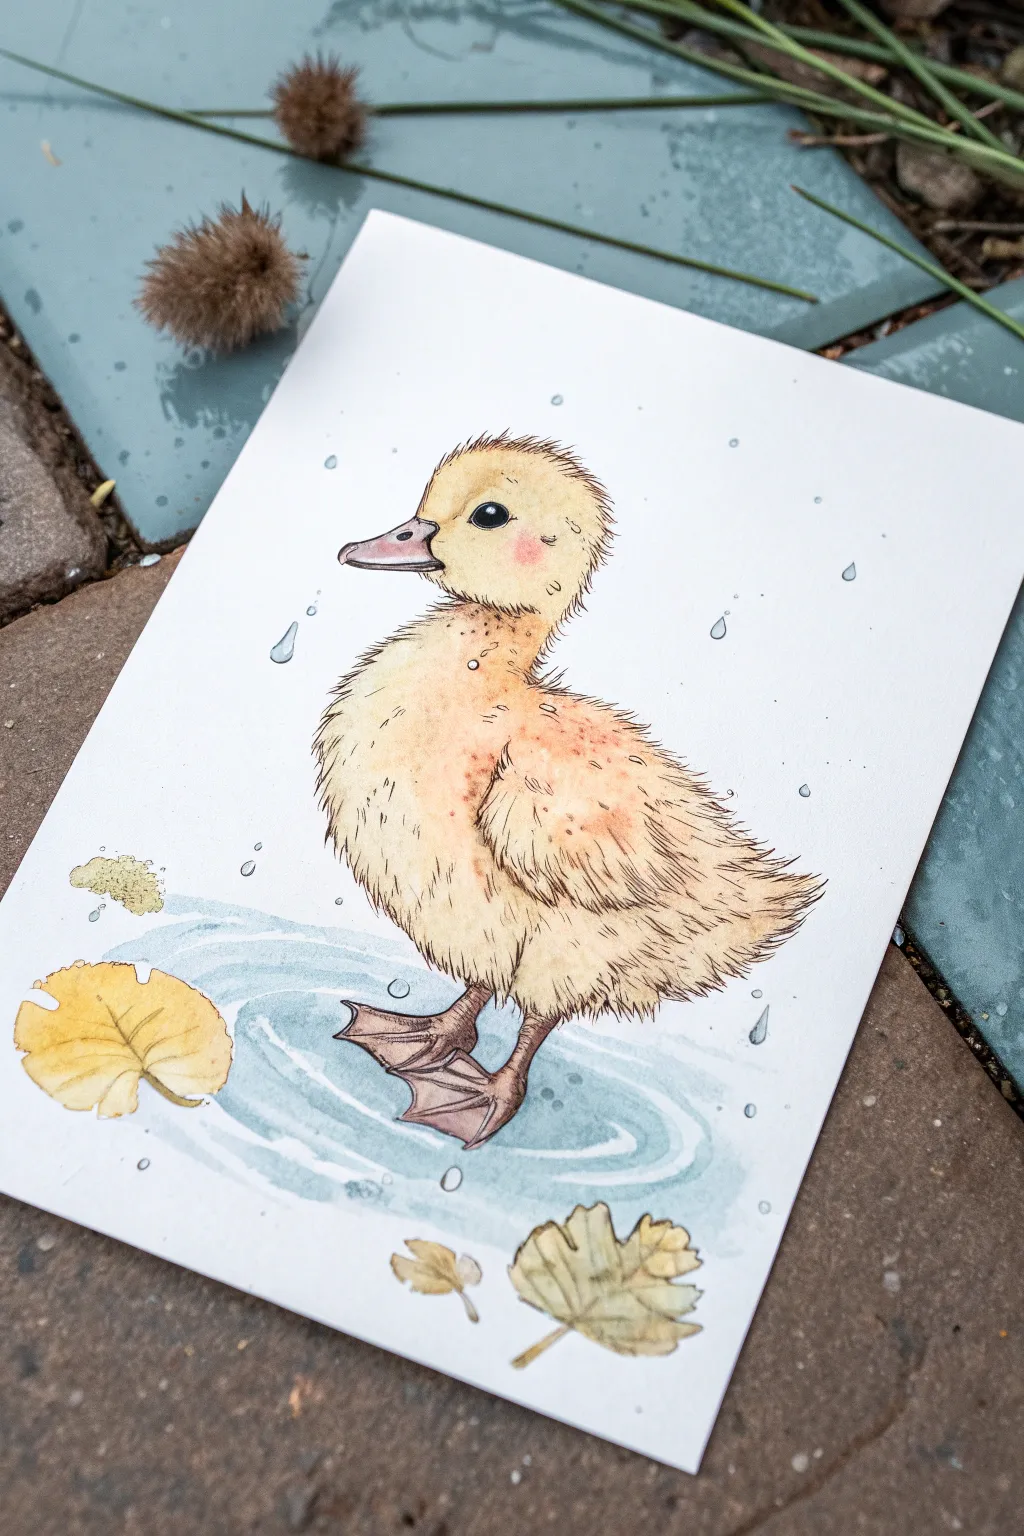
Capture the joy of a rainy day with this adorable illustration of a fluffy yellow duckling splashing in a puddle. This project combines delicate ink linework with soft watercolor washes to create a heartwarming scene full of character.
Detailed Instructions
Materials
- Cold-press watercolor paper (300 gsm)
- Waterproof fine liner pens (0.1mm and 0.3mm, black and brown)
- Watercolor paints (Cadmium Yellow, Yellow Ochre, Burnt Sienna, Payne’s Grey, Cerulean Blue)
- Round watercolor brushes (size 4 and size 0)
- Pencil (HB) and eraser
- Paper towels
- Jar of water
Step 1: Sketching the Duckling
-
Drafting the basic shapes:
Start lightly with your pencil. Draw a small circle for the head and a larger, slightly indented oval below it for the body. Connect them with a short, curved neck. -
Adding facial features:
Position the eye slightly forward on the head circle. Draw the beak jutting out to the left, giving it a slight upward scoop for a smile. -
Sketching the wings and tail:
lightly sketch the wing folded against the body. Add a small, pointed tail sticking out at the back, fluffing the lines slightly to suggest feathers. -
Drawing the feet:
Draw the legs extending down into where your puddle will be. Sketch the webbed feet—make the one in the foreground slightly larger and more detailed. -
Setting the scene:
Draw an irregular oval around the feet to form the puddle. Add a few floating leaves and simple teardrop shapes in the air for raindrops.
Ink Confidence
Don’t stress about perfect lines! Slight wobbles in your ink work actually add to the ‘fluffy’ texture of the duckling’s down feathers.
Step 2: Inking the Outline
-
Inking the body fluff:
Using a 0.1mm fine liner (brown looks softer, but black works too), ink the outline of the duck. Instead of a solid line, use short, flicking strokes to mimic fluffy down feathers. -
Defining the features:
Switch to a steadier hand for the beak and eye. Leave a tiny white circle inside the eye as a highlight to bring your duckling to life. -
Inking the environment:
Outline the feet, the puddle ripples, and the floating leaves. I like to keep the water ripples very light and broken to keep them fluid. -
Erasing pencil marks:
Wait for the ink to dry completely, then gently erase all your initial pencil sketches.
Make a Splash
Add tiny dots of white gouache or a white gel pen over the blue puddle ripples to create sparkles or extra splash effects.
Step 3: Watercolor Washes
-
Base yellow wash:
Dilute Cadmium Yellow with plenty of water. Paint the entire duckling’s body, avoiding the beak and eye. Let the color fade slightly towards the belly for a highlight. -
Adding warmth and depth:
While the yellow is still slightly damp, drop in a touch of Yellow Ochre or diluted Burnt Sienna on the wing, the top of the head, and under the neck to create shadow and texture. -
Painting the beak and feet:
Mix a diluted Burnt Sienna or a soft pinkish-brown. Paint the beak and the legs. Add a second layer to the webbing between the toes for shadow once the first layer dries. -
Cheeky details:
Add a tiny dab of diluted red or pink just below the eye for a rosy cheek. Paint the eye carefully with dark grey or black, preserving that white highlight.
Step 4: Atmosphere and Finish
-
The blue puddle:
Dilute Cerulean Blue heavily. Paint elliptical strokes inside your puddle outline, leaving white paper showing between strokes to look like ripples and reflections. -
Painting the leaves:
Use a mix of yellow and light brown for the floating leaves. Once dry, you can add tiny vein details with your pen. -
Raindrops:
Use the very tip of your brush with pale blue to fill in the falling raindrops. Keep them translucent. -
Final textures:
Once everything is bone dry, use your finest pen to add a few more ‘hair’ scribbles on the darkest parts of the yellow down to enhance the fluffiness.
Now you have a charming little friend ready to brighten up any rainy afternoon
Duck With a Tiny Umbrella
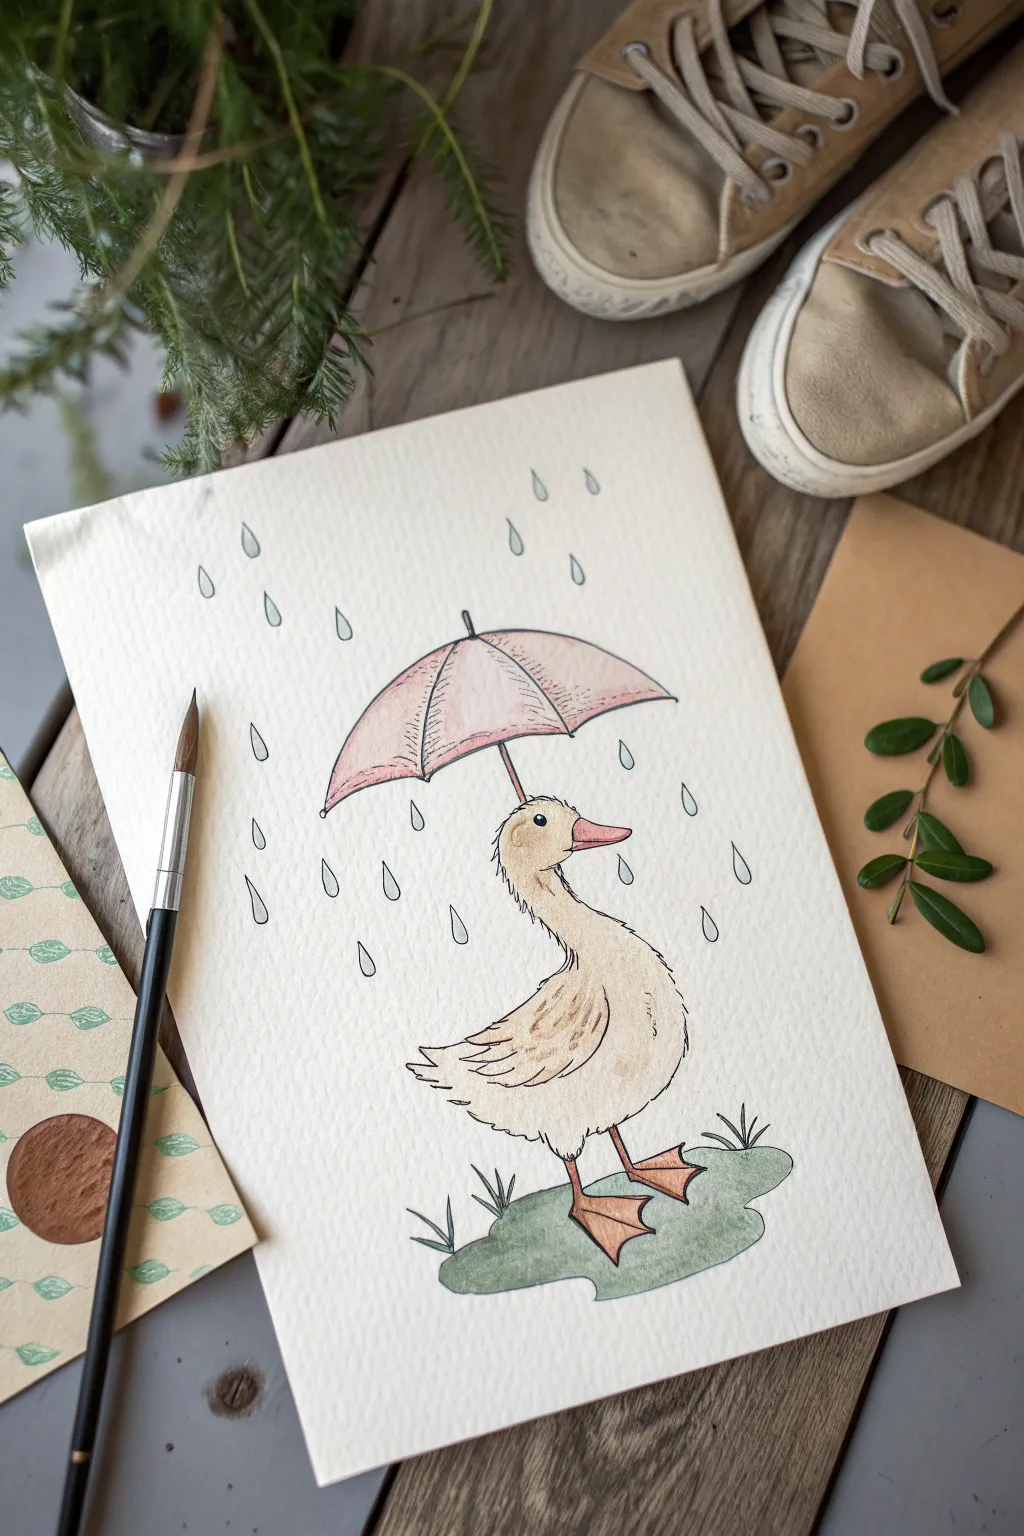
Capture the whimsy of a rainy day with this adorable watercolor and ink illustration featuring a duck sheltering under a pink umbrella. The combination of delicate ink lines and soft watercolor washes creates a cozy, storybook feel perfect for greeting cards or wall art.
Step-by-Step Guide
Materials
- Cold press watercolor paper (approx. 140lb/300gsm)
- Waterproof fine liner pen (size 01 or 03, black)
- Watercolor paints (Yellow Ochre, Burnt Sienna, Alizarin Crimson, Sap Green, Payne’s Grey/Blue)
- Round watercolor brush (size 4 or 6)
- Pencil (HB) and soft eraser
- Jar of clean water
- Paper towel
Step 1: Planning and Sketching
-
Establish the composition:
Begin by lightly marking the center of your paper. Draw a vertical line to help align the umbrella shaft with the duck’s body, ensuring the character feels balanced. -
Sketch the umbrella:
Near the top of your guide line, draw a wide, curved arch for the top of the umbrella. Connect the ends with a scalloped line at the bottom to form the fabric edge. Add a small point at the very top. -
Outline the duck’s head and neck:
Just below the umbrella, sketch a smooth circle for the head. Extend two curved lines downward to form a slender, slightly s-curved neck. -
Draw the body and wings:
Continue the neck lines into an oval shape for the body. Sketch a wing on the side, using layered, scalloped lines to suggest feathers near the tail. -
Add facial features and feet:
Draw a small, rounded triangle for the eye and a slightly curved beak. Sketch two legs extending down, ending in wide, webbed feet planted firmly on the ground. -
Include environment details:
Draw an irregular puddle shape around the feet. Add small grass tufts near the puddle and sketch several varying teardrop shapes in the sky for raindrops.
Ink Smearing?
If your black lines bleed when you paint, your pen isn’t waterproof or wasn’t dry. Test your pen on scrap paper with water first, or do the painting first and ink last.
Step 2: Inking the Lines
-
Trace with waterproof ink:
Using your fine liner pen, carefully go over your pencil lines. Use a confident, continuous stroke for the umbrella and legs, but try a slightly broken or textured line for the duck’s feathers to imply softness. -
Add texture and details:
Draw the internal ribs of the umbrella with curved lines radiating from the center. Add small dashed lines on the duck’s neck and chest to suggest fluff. -
Erase pencil marks:
Wait until the ink is completely dry—this is crucial to avoid smudging. Gently erase all underlying pencil sketches to leave a clean black-and-white drawing.
Step 3: Watercolor Washes
-
Paint the duck’s body:
Dilute Yellow Ochre with plenty of water for a pale, creamy base color. Wash this over the duck’s head and body, leaving the eye white. -
Add shading to the feathers:
While the yellow layer is still slightly damp, drop in a tiny bit of diluted Burnt Sienna on the lower neck and under the wing to create a sense of volume and shadow. -
Color the beak and feet:
Mix a stronger orange using Yellow Ochre and a touch of Alizarin Crimson. Paint the beak and legs. Once the legs dry a bit, add a second coat to the webbing for depth. -
Paint the pink umbrella:
Create a watery wash of Alizarin Crimson. Paint the umbrella panels, perhaps lifting a little color from the center of each panel with a thirsty brush to create a highlight effect. -
Ground the scene:
Mix Sap Green with a tiny touch of Payne’s Grey for a muted, earthy green. Paint the puddle shape beneath the duck, letting the color pool naturally for a watery look. -
Finish with rain droplets:
Using a very dilute blue-grey mix, carefully fill in the raindrops. I sometimes like to leave a tiny white highlight unpainted in each drop for sparkle.
Feathery Texture
To make the duck look extra fluffy, try a ‘dry brush’ technique. Wipe most paint off your brush and lightly drag it over the dry base coat to create soft texture.
Once dry, you’ll have a charming piece of art ready to frame or gift to a friend who loves rainy days
Duck With a Flower Crown
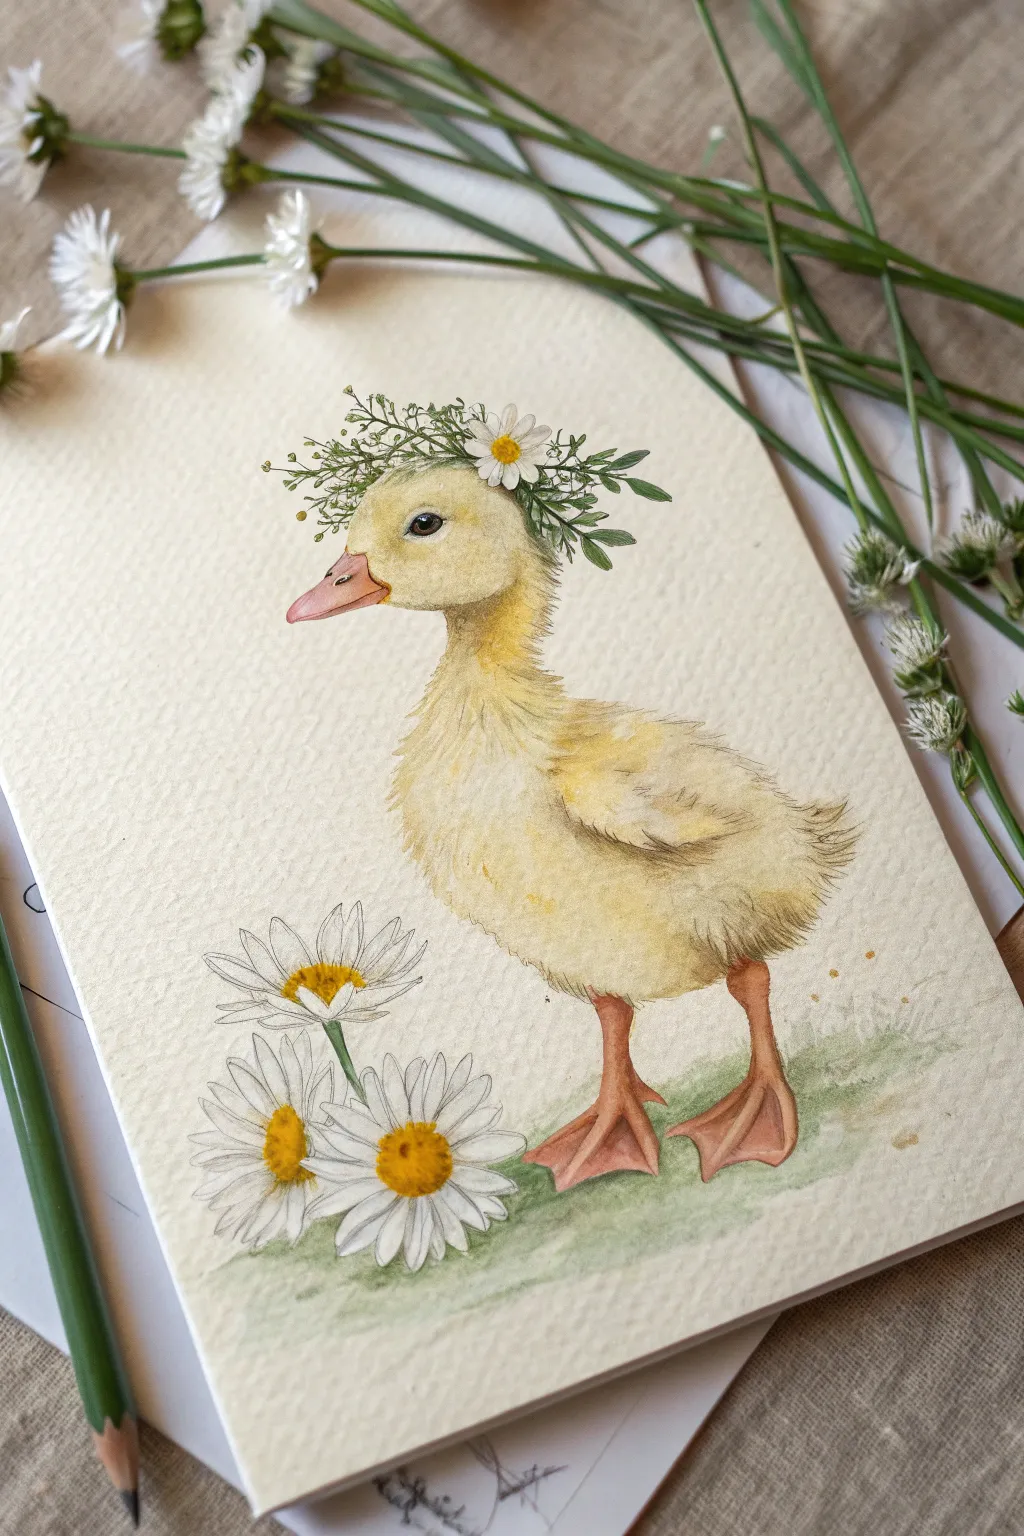
Capture the innocence of spring with this delightful watercolor portrait featuring a fluffy duckling adorned with a delicate flower crown. The soft yellow washes and fine ink details bring a charming, illustrative quality to the textured paper.
Step-by-Step Guide
Materials
- Cold press watercolor paper (300 gsm)
- HB graphite pencil
- Kneaded eraser
- Watercolors (Yellow Ochre, Lemon Yellow, Burnt Sienna, Sap Green, Payne’s Grey, Alizarin Crimson)
- Round watercolor brushes (Size 4 and Size 0 or 00 for details)
- White gouache or white gel pen
- Clean water and paper towels
Step 1: Sketching the Composition
-
Basic Shapes:
Start lightly with your HB pencil. Draw a smaller oval for the head and a larger, slightly tilted oval below it for the body. Connect them with curved lines to form the neck. -
Refining the Features:
Map out the beak’s placement, ensuring it points slightly upward. Sketch the eye as a small circle just above the beak line. Add the webbed feet, positioning one forward and one slightly back for a walking pose. -
Adding Flora:
Lightly sketch the flower crown sitting on the head, using simple circles for daisies and loose lines for greenery. Draw three larger daisies near the feet on the left side. -
Clean Up:
Use a kneaded eraser to roll over your sketch, lifting the graphite until the lines are barely visible so they won’t show through the transparent watercolor.
Feathery Texture Tip
Use a “dry brush” technique for the fluff. Wipe most paint off your brush and drag it lightly over the paper’s tooth to create broken, soft lines.
Step 2: Painting the Duckling
-
First Wash:
Mix a watery Lemon Yellow. Apply a wet-on-dry wash over the entire duckling body, avoiding the beak, eye, and flower crown. Keep the edges soft and feathery to suggest down. -
Building Form:
While the first layer is still slightly damp, drop in touches of Yellow Ochre on the chest, under the wing, and along the back of the neck to create shadow and volume. -
Texture Work:
Once the base is dry, use your Size 0 brush with a mix of Yellow Ochre and a tiny bit of Burnt Sienna. Paint short, flicking strokes in the direction of feather growth to build texture, especially on the chest and wing tips. -
The Beak and Feet:
Mix Alizarin Crimson with a touch of Yellow to create a soft peachy pink. Paint the beak and feet. When dry, add a slightly darker mix to the underside of the beak and the webbing shadows on the feet for dimension. -
The Eye:
Paint the eye carefully with Payne’s Grey or black. Leave a tiny speck of white paper for the highlight, or add it later with white gouache. Outline the eye rim with a very thin line of dark brown.
Make It a series
Change the accessories for different seasons! Try painting the same duckling with a tiny wool scarf for winter or rain boots for autumn.
Step 3: Floral Details
-
Flower Centers:
Paint the centers of the daisies (both on the crown and ground) with a concentrated Yellow Ochre. Add tiny dots of Burnt Sienna to the bottom edge of each center to make them look domed. -
Greenery Base:
Using Sap Green, paint the delicate stems and leaves of the crown. Use the tip of your smallest brush to create fine, vine-like strokes that weave around the head. -
Defining Petals:
For the white daisy petals, use a very watery grey wash to paint just the shadows between the petals, defining their shape without painting them solid white. -
Grounding Shadow:
Mix a light wash of Sap Green and Burnt Sienna. Apply this loosely under the feet and around the bottom daisies to ground the subject, letting the paint fade out naturally.
Step 4: Final Touches
-
Ink Details:
Wait for the artwork to be completely bone dry. Then, use an ultrafine brush or a sepia fine-liner to reinforce the fluffiest parts of the feathers and the outline of the crown. -
Highlights:
I particularly like to use a touch of white gouache or a gel pen to add extra crispness to the flower petals and the catchlight in the eye.
Step back and admire your sweet little character, ready to bring a smile to anyone’s face
Duck Reading a Tiny Book

Capture the charm of a studious duckling immersed in a tiny green book with this gentle watercolor and ink tutorial. The finished piece features warm yellow tones and delicate textures on high-quality paper, perfect for a greeting card or sketchbook page.
How-To Guide
Materials
- Cold press watercolor paper (300 gsm)
- Watercolor paints (Cadmium Yellow, Yellow Ochre, Burnt Sienna, Sap Green, Sepia)
- Fine liner pigment pens (Sizes 0.1 and 0.3, waterproof/archival ink)
- Pencil (HB or H for light sketching)
- Soft kneading eraser
- Round watercolor brushes (Size 2 and 4)
- Cup of water and paper towels
Step 1: Sketching the Outline
-
Basic Shapes:
Start by lightly sketching a large oval for the body and a slightly smaller, rounded circle on top for the head. Add a small triangle jutting out to the right for the beak. -
Refining the Face:
Define the head shape, adding a few tufts of feathers at the very top. Draw the beak open slightly in a smile, and place two small oval eyes, with the right eye slightly obscured by the perspective. -
Adding the Book:
Draw a rectangular book shape held in the duckling’s wings. The book should be open, showing the cover and a hint of pages. Position the wings (small rounded shapes) to look like they are gripping the edges. -
Feet and Feathers:
Sketch two large, webbed feet poking out from under the rounded belly. Add jagged, fluffy lines along the back and chest to indicate soft downy feathers. -
Environmental Details:
Lightly sketch a few stalks of tall grass on either side of the duckling to ground the composition. -
Inking the Drawing:
Going over your pencil lines with a 0.3 waterproof pen, use broken, sketchy strokes for the feathers to keep them looking soft. Use a solid, sharper line for the book and beak. -
Cleanup:
Once the ink is completely dry—I usually wait at least 5 minutes to be safe—gently erase all the pencil marks with a kneading eraser.
Pro Tip: Furry Texture
When inking the outline, don’t close your shapes completely. Gaps in the line work on the duckling’s back make the feathers look fluffier and less stiff.
Step 2: Watercolor Washes
-
Base Yellow Layer:
Dilute Cadmium Yellow with plenty of water. Paint the entire body of the duckling, avoiding the beak and the book. Keep the wash loose and light. -
Shadows and Depth:
While the yellow is still slightly damp, drop a mix of Yellow Ochre and a tiny touch of Burnt Sienna into the shadowed areas: under the chin, beneath the wings, and at the base of the belly. -
The Beak and Feet:
Paint the beak and feet with a more concentrated mix of Yellow Ochre and orange. Let the color pool slightly at the bottom of the feet for natural shading. -
The Tiny Book:
Use a diluted Sap Green to fill in the book cover. If you want it to look vintage, add a tiny bit of brown to the green mix. -
Cheek Blush:
Using a very watery red or pink, dab a small circle specificially on the cheek area for a cute, flushed effect. -
Grounding Shadows:
Mix a watery grey-green using Sap Green and a touch of Sepia. Paint an irregular patch of grass beneath the duckling so it isn’t floating in space. -
Decorative Reeds:
Use a light brown or tan wash to paint the seed heads of the grass stalks you sketched earlier, keeping the stems thin and green.
Step 3: Final Touches
-
Deepening Values:
Once dry, use a size 2 brush to add a second layer of darker yellow texture lines to mimic individual feathers on the wings and chest. -
Book Details:
Add a slightly darker green shade to the spine of the book and the back cover to show dimension. -
Eye Highlights:
Fill the eyes with black ink or dark brown paint, but be sure to leave a tiny white unpainted speck in each pupil for the ‘sparkle’ of life. -
Final Ink Accents:
Use the 0.1 fine liner to add very delicate hatching lines in the deepest shadow areas (under the wing and feet) to make the drawing pop.
Level Up: Literary Detail
Use a white gel pen to add tiny scribbles on the open pages of the book to mimic text, or draw a tiny bookmark ribbon hanging down.
Now your studious little duckling is ready to bring a touch of quiet joy to your day
Wizard Duck With a Starry Hat
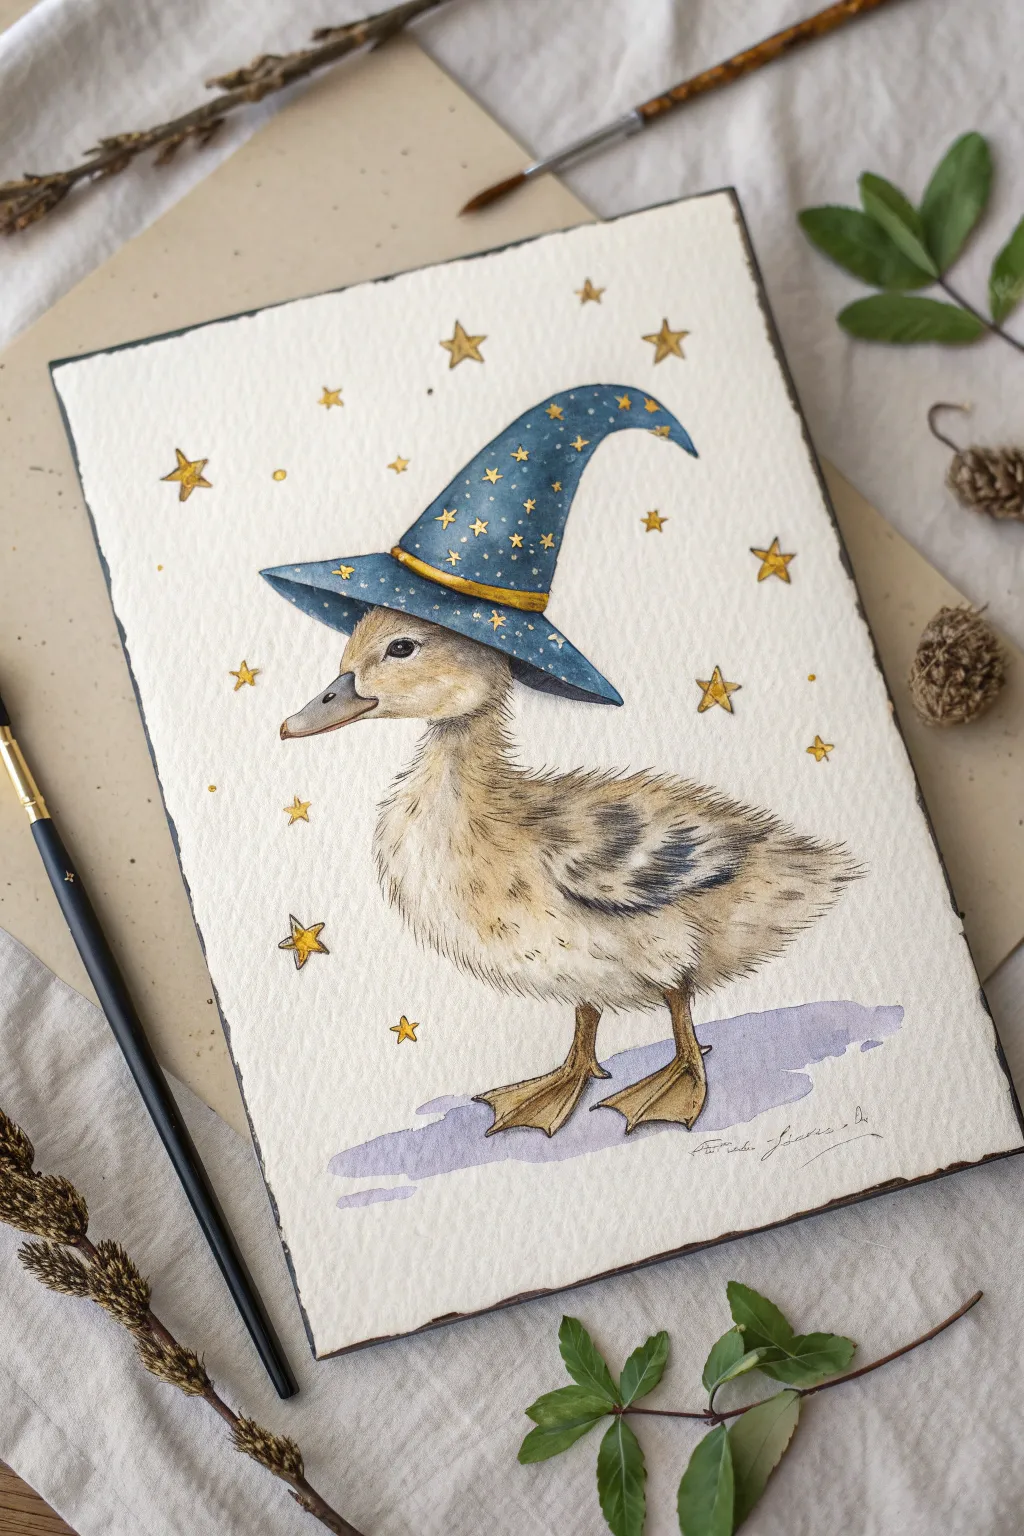
This enchanting project captures a fluffy duckling ready to cast its first spell with a celestial blue hat. Using delicate watercolor washes and metallic accents, you’ll create a magical illustration full of character and charm.
Step-by-Step Guide
Materials
- Cold press watercolor paper (300 gsm)
- Watercolor paints (Payne’s Grey, Yellow Ochre, Burnt Umber, Prussian Blue, Ultramarine)
- Gold metallic paint or gold gouache
- Fine liner brushes (sizes 0 and 2)
- Standard round brush (size 6)
- Pencil (HB or H) for sketching
- Kneaded eraser
- Two jars of water
- Masking tape
Step 1: Sketching the Magical Subject
-
Map the basic shapes:
Start lightly with your pencil. Draw an oval for the duckling’s body and a smaller circle for the head, connecting them with a gentle neck curve. Position the feet near the bottom center to ground your subject. -
Create the wizard hat:
Sit a wide, curved brim directly on top of the duck’s head, extending past the beak and back of the neck. Draw the cone of the hat with a playful curve at the tip, making it look slightly oversized and floppy. -
Refine the details:
Outline the beak, eye, and tiny webbed feet. Add jagged, fluffy lines around the chest and tail to indicate downy feathers. Lightly sketch varying sizes of stars across the hat and scattered in the background. -
Lift excess graphite:
Roll your kneaded eraser gently over the entire drawing. You want the lines to be barely visible guides so the pencil doesn’t smudge into your beautiful watercolors later.
Step 2: Painting the Duckling
-
Base wash for the down:
Mix a very watery wash of Yellow Ochre with a tiny touch of Burnt Umber. Using your size 6 brush, apply this pale cream color to the head and body, leaving the chest slightly lighter. -
Define the beak and feet:
While the body dries, paint the beak and feet with a mix of Burnt Umber and a dab of Yellow Ochre. Make the top ridge of the beak slightly darker for dimension. -
Build the feather texture:
Switch to your size 2 brush. Mix a darker beige using Burnt Umber and Payne’s Grey. Using short, flicking strokes, layer texture onto the wing area and tail feathers to simulate fluff. -
Add deep shadows:
Use a more concentrated dark brown mixture to paint the primary wing feathers. Add small shadow accents under the chin and where the hat brim touches the head to create depth. -
Paint the eye:
With your smallest brush and dark grey or black paint, fill in the eye. Leave a tiny speck of white paper unpainted for the highlight—this spark of life is crucial for a cute expression.
Starry Precision
If painting around tiny stars is frustrating, use liquid masking fluid on the star shapes before applying the blue wash. Rub it off once the paint is dry to reveal perfect white stars.
Step 3: The Celestial Hat
-
First layer of blue:
Mix Prussian Blue with a little Ultramarine. Carefully paint around the stars on the hat (negative painting). If this is too tricky, you can cover the stars with masking fluid first, but careful brushwork works beautifully too. -
Deepen the fabric color:
While the blue is still slightly damp, drop in concentrated Payne’s Grey or dark blue near the edges and the underside of the brim to make the hat look rounded and velvety. -
Add the gold band:
Once the blue is completely dry, paint the band around the hat using Yellow Ochre or your gold paint. Add a thin shadow line underneath the band to show it sitting on the fabric. -
Fill the stars:
Using your gold metallic paint or opaque yellow gouache, carefully fill in the stars on the hat. I find it helpful to rotate the paper to get the sharpest points on your stars.
Level Up: Cosmic Texture
Sprinkle a pinch of table salt onto the wet blue hat paint. As it dries, the salt pushes pigment away, creating a mottled, galaxy-like texture perfect for a wizard’s accessory.
Step 4: Magical Finishes
-
Ground shadow:
Mix a very watery purple-grey wash. Swipe a loose, horizontal shadow under the duck’s feet. Don’t overwork this; let the pigment settle naturally into the paper texture. -
Define outlines:
Take your size 0 brush with a dark, semi-dry brown paint. Very lightly trace crucial details like the bottom of the feathers and the outline of the beak to sharpen the illustration. -
Background magic:
Dip your brush into the gold paint and fill in the scattered background stars drawn earlier. Vary their sizes; some can be simple dots, others fully formed five-point stars. -
Final highlights:
If needed, use a white gel pen or white gouache to add tiny dots to the hat for extra sparkle or to sharpen the eye highlight if it got lost.
Now your little wizard is ready to waddle off into a magical adventure.
Geometric Blocky Duckling
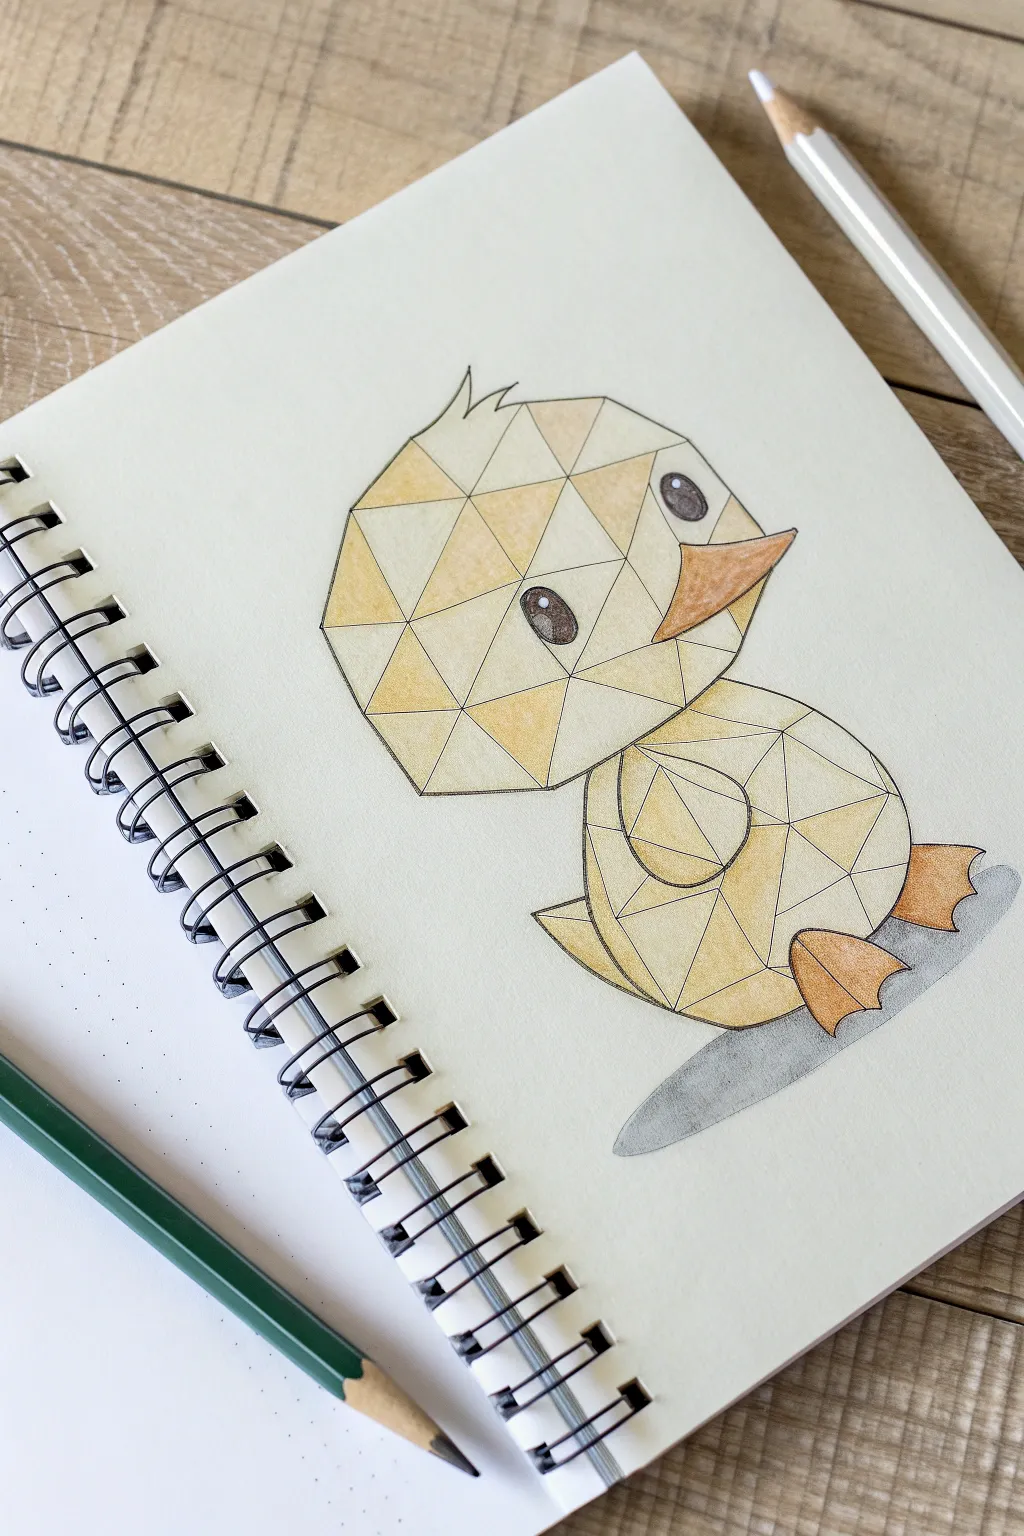
Transform a classic cute duckling into a modern piece of art using simple geometric shapes. This drawing relies on a playful low-poly style where triangles and polygons come together to form an adorable character perfect for bullet journals.
Step-by-Step Tutorial
Materials
- Sketchbook or drawing paper
- Pencil (HB or similar for sketching)
- Eraser
- Fine-liner pen (black, 0.3mm or 0.5mm)
- Colored pencils (yellow, orange, brown, grey)
- Ruler (optional, but helpful for straight lines)
Step 1: Sketching the Structural Shapes
-
Head and body base:
Start by lightly sketching a large circle for the head. Below it, draw a slightly smaller oval shape that connects to the bottom of the circle for the body. This is just a guide, so keep your pencil pressure very light. -
Adding feature guides:
Mark the center of the face lightly. Sketch two small ovals for the eyes, placing them wide apart for maximum cuteness. Add a triangle shape for the beak pointing to the right. -
Triangulating the head:
This is where the geometric magic happens. Instead of tracing the round circle, begin breaking the head shape into straight-edged polygons. Draw a series of connecting triangles that span across the face, using the eye and beak placements as anchor points where lines meet. -
Triangulating the body:
Repeat the process for the body. Break the smooth oval into angular shapes. Create a central pentagon-like shape for the wing area, and surround it with triangles that connect to the outer edge of the body. -
Refining the outline:
Go over your sketch to ensure the outer silhouette is made entirely of straight lines, not curves. It should look like a low-poly 3D model. Add two small triangular feet at the bottom.
Straight Edge Secret
If you struggle drawing freehand straight lines, use the edge of an unused index card or a clear ruler as a guide for your pen to keep the geometric look crisp.
Step 2: Inking the Lines
-
Outline the perimeter:
Using your fine-liner pen, trace the heavy outer perimeter of the duckling first. Make this line confident and sharp. -
Interior geometry:
Carefully ink all the internal lines that create the triangular mesh. I find it helpful to rotate the sketchbook as I go to keep my hand comfortable and steady. -
Facial details:
Ink the eyes as smooth ovals to contrast the sharp lines, adding a tiny white circle inside for a highlight. Ink the outline of the beak triangles. -
Clean up:
Wait at least a full minute for the ink to dry completely to avoid smudging. Then, gently erase all your underlying pencil sketches until the paper is clean.
Step 3: Adding Geometric Color
-
Base yellow tones:
Select a light yellow colored pencil. Color about half of the geometric shapes on the head and body. Do not color adjacent shapes the exact same shade; leave some blank for now. -
Darker yellow shading:
Take a slightly darker, more golden yellow. Color the remaining empty shapes. This variation creates the illusion of depth and facets catching the light differently. -
Orange accents:
Use an orange pencil to color the beak and the feet. Press harder near the edges of these shapes to create a slight gradient effect within the small triangles. -
Eye details:
Fill in the eyes with a dark brown or black pencil, being very careful to leave the small white highlight circles pure white. This brings the character to life. -
Grounding shadow:
Using a grey pencil, draw a flat, elongated oval shape underneath the duckling. Color it in smoothly to give the character a surface to stand on so it isn’t floating in space. -
Final polish:
Review your coloring. If you want more contrast, lightly layer a bit of light brown over the bottom-most triangles of the body to suggest a shadow side.
Palette Swap
Try a monochromatic cool palette! Instead of yellows, use varies shades of blue and teal for an ‘ice sculpture’ duckling vibe or pinks for a valentine version.
Enjoy your charming, angular little friend and try sketching other animals in this distinctive style
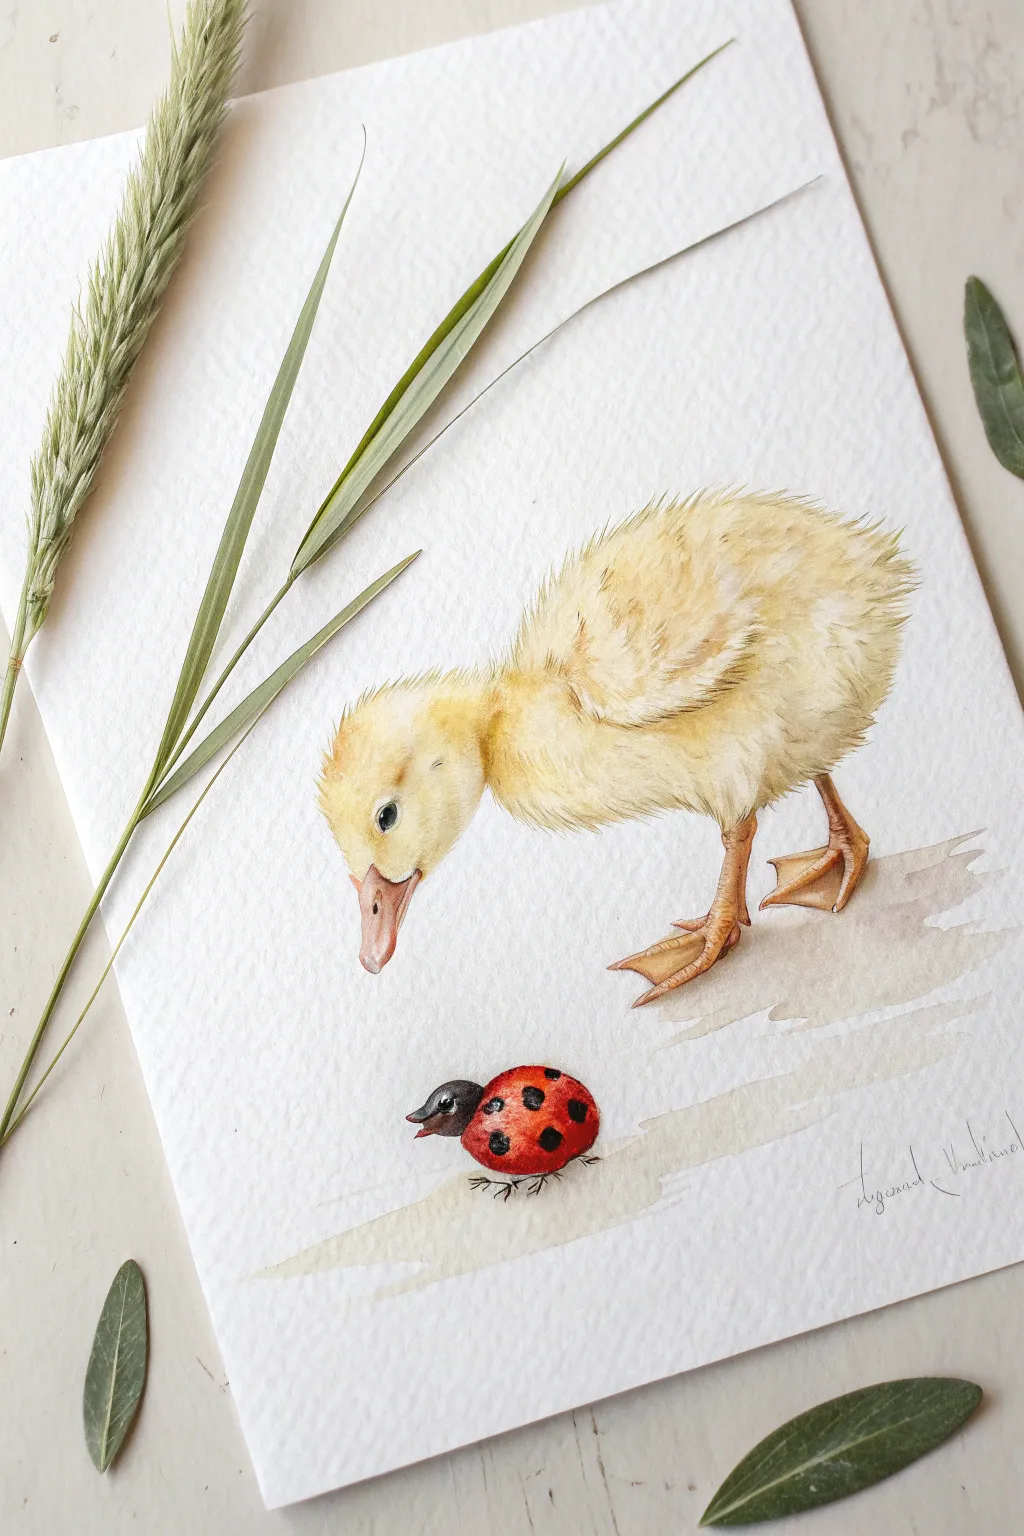
Duckling Meeting a Ladybug

Capture a moment of gentle curiosity with this charming watercolor illustration featuring a fluffy yellow duckling investigating a friendly ladybug. This project focuses on building distinct textures—soft downy feathers versus a glossy beetle shell—using delicate layering techniques.
Step-by-Step Guide
Materials
- Cold press watercolor paper (300 gsm)
- HB pencil and kneaded eraser
- Watercolors: Lemon Yellow, Yellow Ochre, Burnt Sienna, Cadmium Red, Alizarin Crimson, Lamp Black, Sepia
- Round watercolor brushes (sizes 2, 4, and 0 for details)
- White gouache or white gel pen
- Clean water and paper towels
Step 1: Sketching the Encounter
-
Map out the shapes:
Begin by lightly sketching a large oval for the duckling’s body and a smaller circle for the head. Position them slightly to the right to leave negative space on the left. Draw a small semi-circle on the ground below the head for the ladybug. -
Refine the duckling:
Connect the head and body with a curved neck line. Sketch the beak pointing downwards and pencil in the legs and webbed feet. Keep your pencil pressure very light so the graphite doesn’t show through the yellow paint later. -
Detail the feathers and face:
Instead of a solid outline, use short, broken pencil strokes to define the edge of the duckling’s body, hinting at the fluffiness of the feathers. Add the eye placement and the small nostril on the beak. -
Finalize the sketch:
Define the ladybug’s shape, splitting the shell for the wings and adding the head segment. Gently lift any heavy graphite lines with your kneaded eraser until only a faint ghost image remains.
Muddy Yellows?
Yellow is fragile! If your brush isn’t perfectly clean, shadows turn green or gray. Always wash your brush thoroughly before dipping back into yellow, and let shadow layers dry fully.
Step 2: Painting the Duckling
-
First wash of yellow:
Mix a watery Lemon Yellow. Apply this wash over the entire duckling, avoiding the eye and beak. While the paint is still wet, drop in tiny touches of Yellow Ochre near the wings and under the neck to start building volume. -
Building texture:
Once the first layer is dry, switch to a size 2 brush. Mix a thicker consistency of Yellow Ochre and use short, flicking strokes to create the appearance of downy feathers. Follow the curve of the body, especially around the chest and wing area. -
Painting the beak and feet:
Mix a pale wash of Cadmium Red with a touch of Yellow Ochre for a fleshy pink tone. Paint the beak and legs. Let this dry, then add a second layer of the same mix to the shadowed areas of the webbed feet and formatting the underside of the beak. -
Deepening the shadows:
Mix a small amount of Burnt Sienna with your yellow mix. Apply this shadow color under the wing, beneath the belly, and where the legs meet the body to ground the figure. -
The eye detail:
Using your smallest brush (size 0) and Sepia or Lamp Black, carefully paint the eye, leaving a tiny spot of white paper for the highlight. Paint the nostril on the beak with a watered-down version of this dark color.
Step 3: The Ladybug and Finish
-
Ladybug base coat:
Paint the main shell of the ladybug with bright Cadmium Red. I like to let this dry briefly before adding a second layer of Alizarin Crimson on the bottom edge to create a rounded, 3D effect. -
Ladybug details:
Paint the head and legs of the ladybug with black. Once the red shell is completely dry, carefully dab on the black spots. Use the very tip of your size 0 brush for the tiny legs. -
Ground shadows:
Mix a very watery grey-brown wash. Apply a loose, horizontal puddle of shadow underneath the duckling’s feet and the ladybug to anchor them to the ground. Keep the edges soft. -
Final highlights:
Use white gouache or a gel pen to add a sharp highlight to the ladybug’s shell to make it look shiny. You can also add a few stray white feather strokes on the duckling’s back for extra texture.
Level Up: Realism
Add a few faint blades of grass in the background using a very watery green mix. Keep them out of focus (wet-on-wet) so they don’t distract from the main characters’ interaction.
Now you have a sweet scene of nature’s little meetings ready to frame or give as a card


Have a question or want to share your own experience? I'd love to hear from you in the comments below!