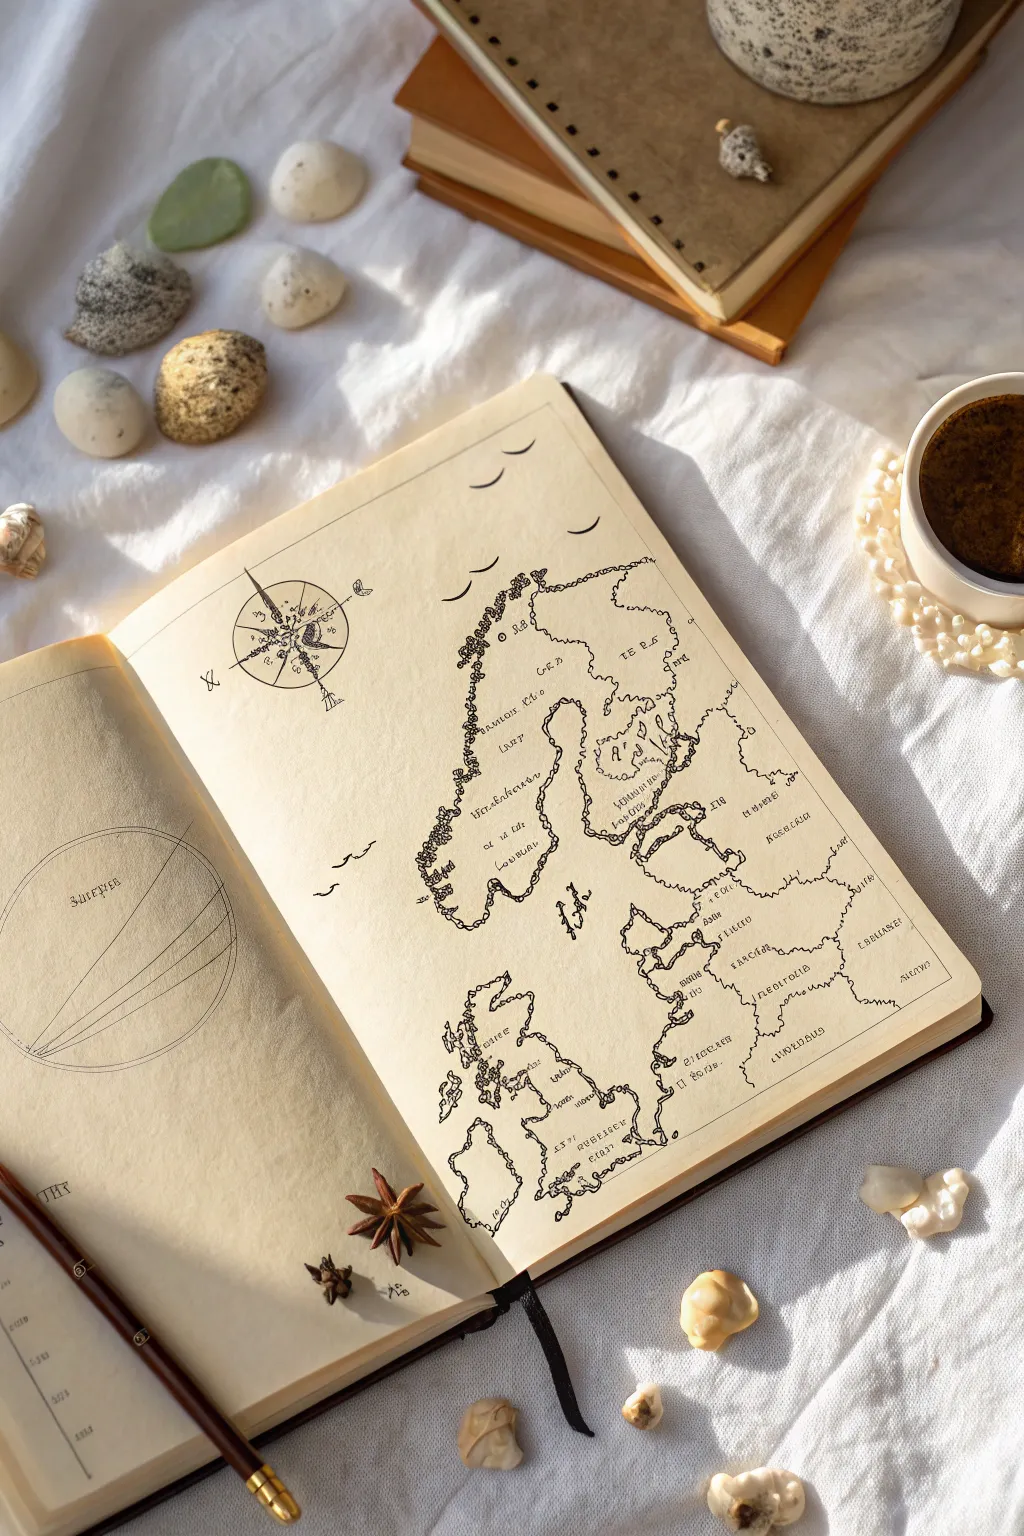
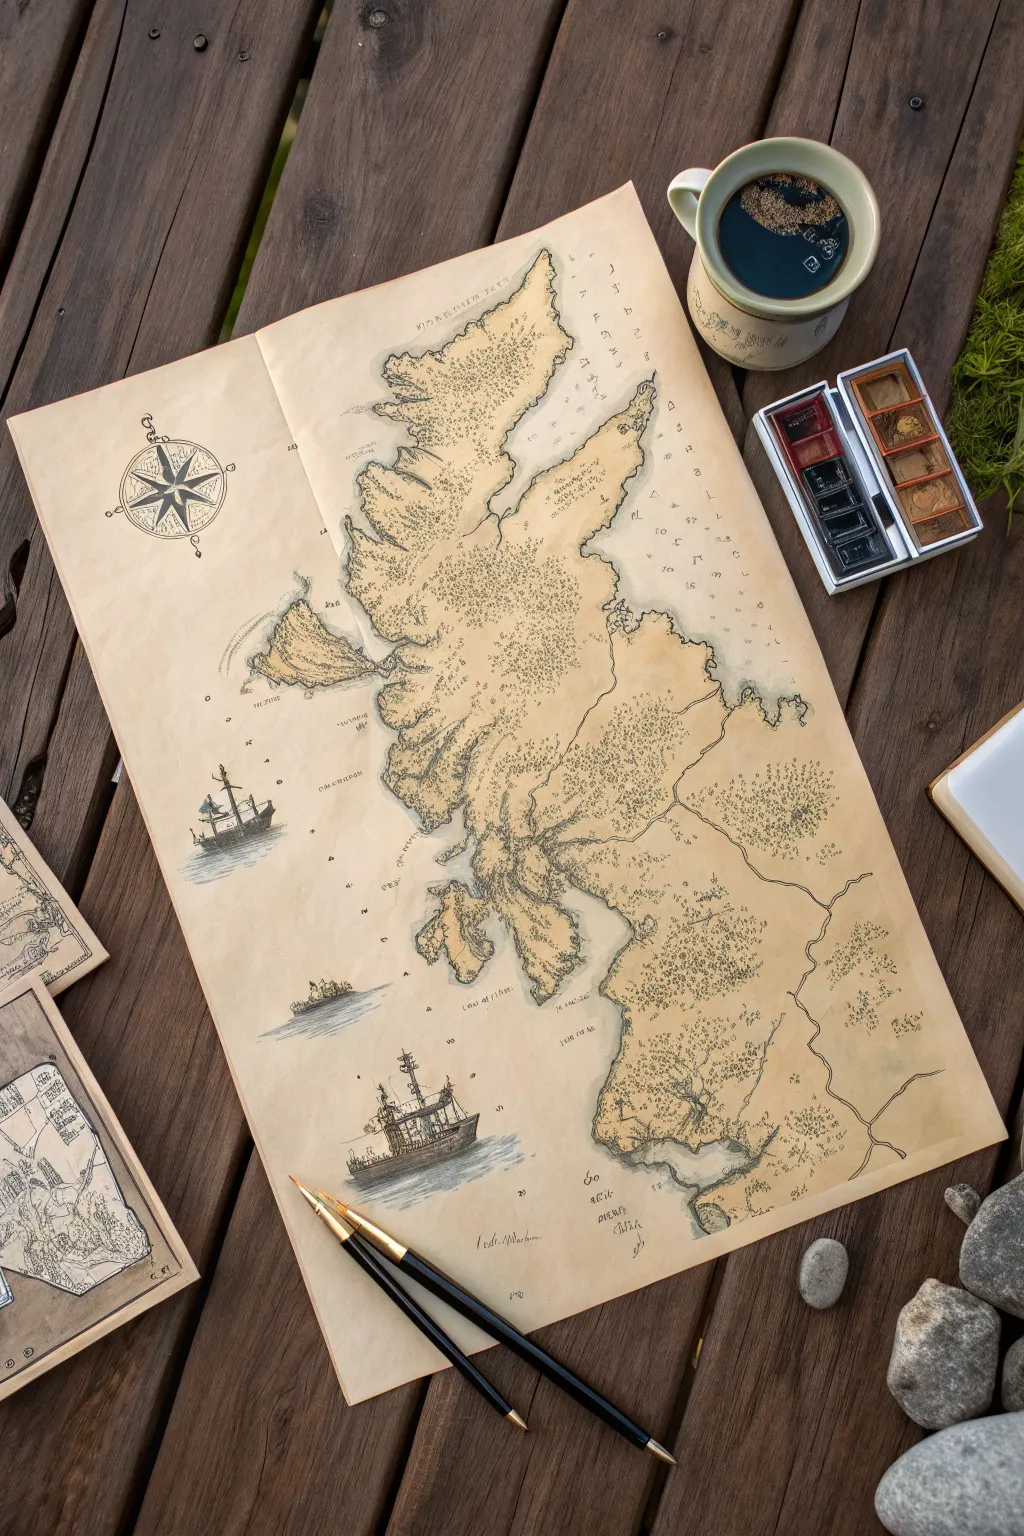
When I’m sketching a fantasy map, I treat it like a tiny painting of a whole world—part geography, part story. These drawing fantasy map ideas will give you a bunch of fun starting points, from land shapes and terrain symbols to the little cartography details that make your map feel believable.
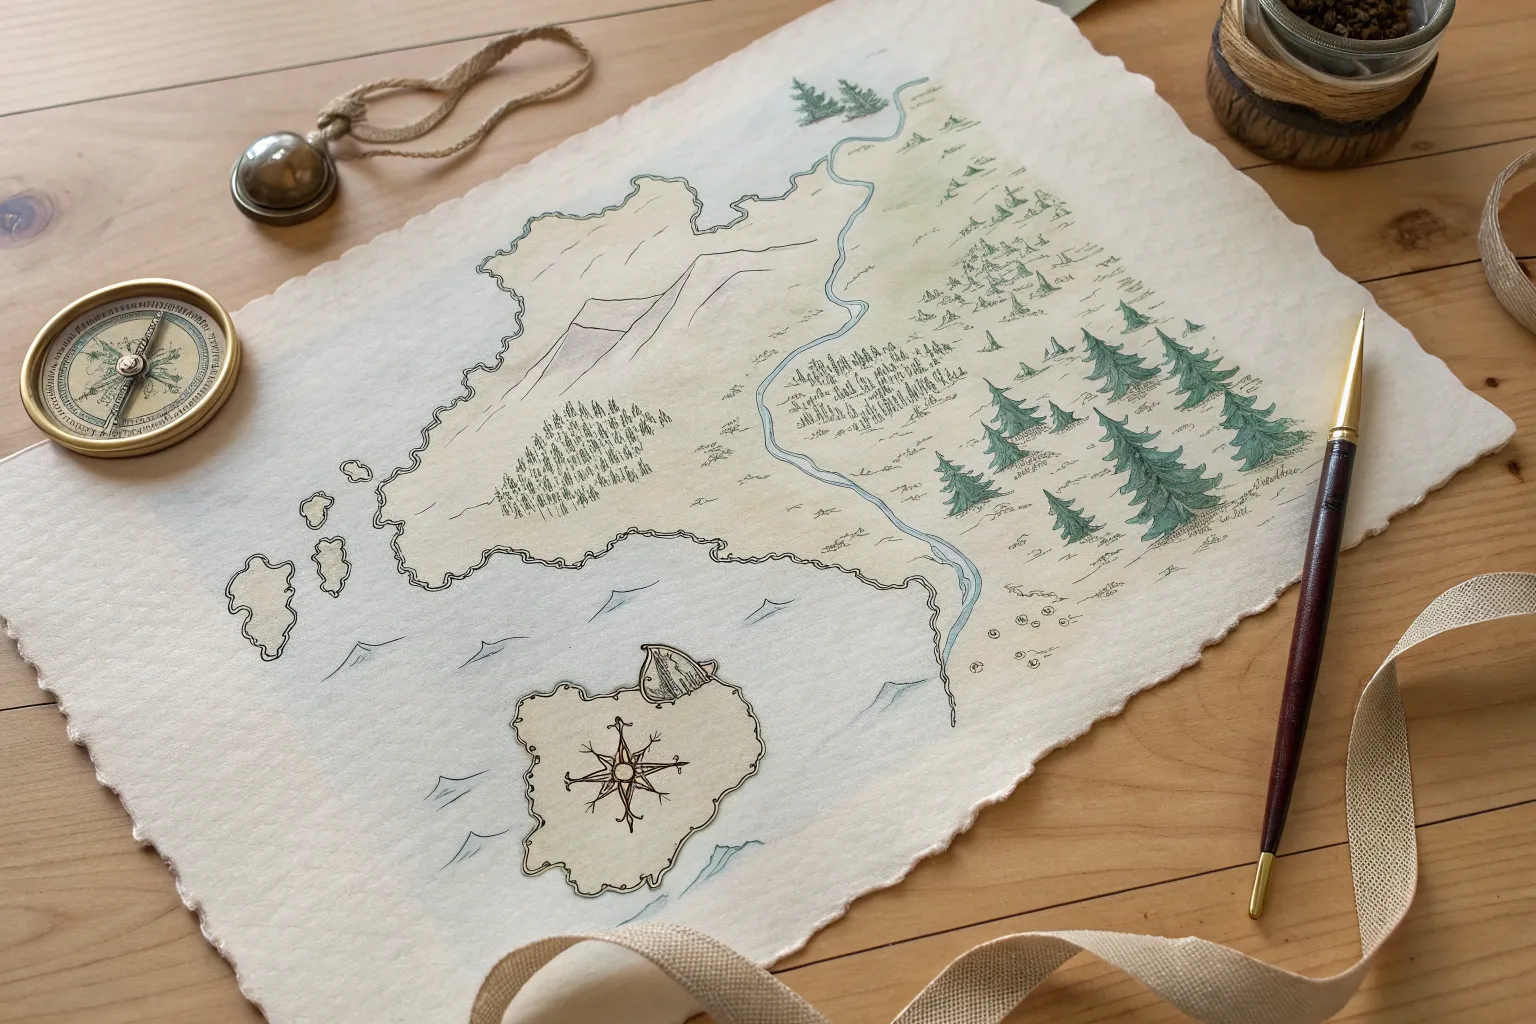
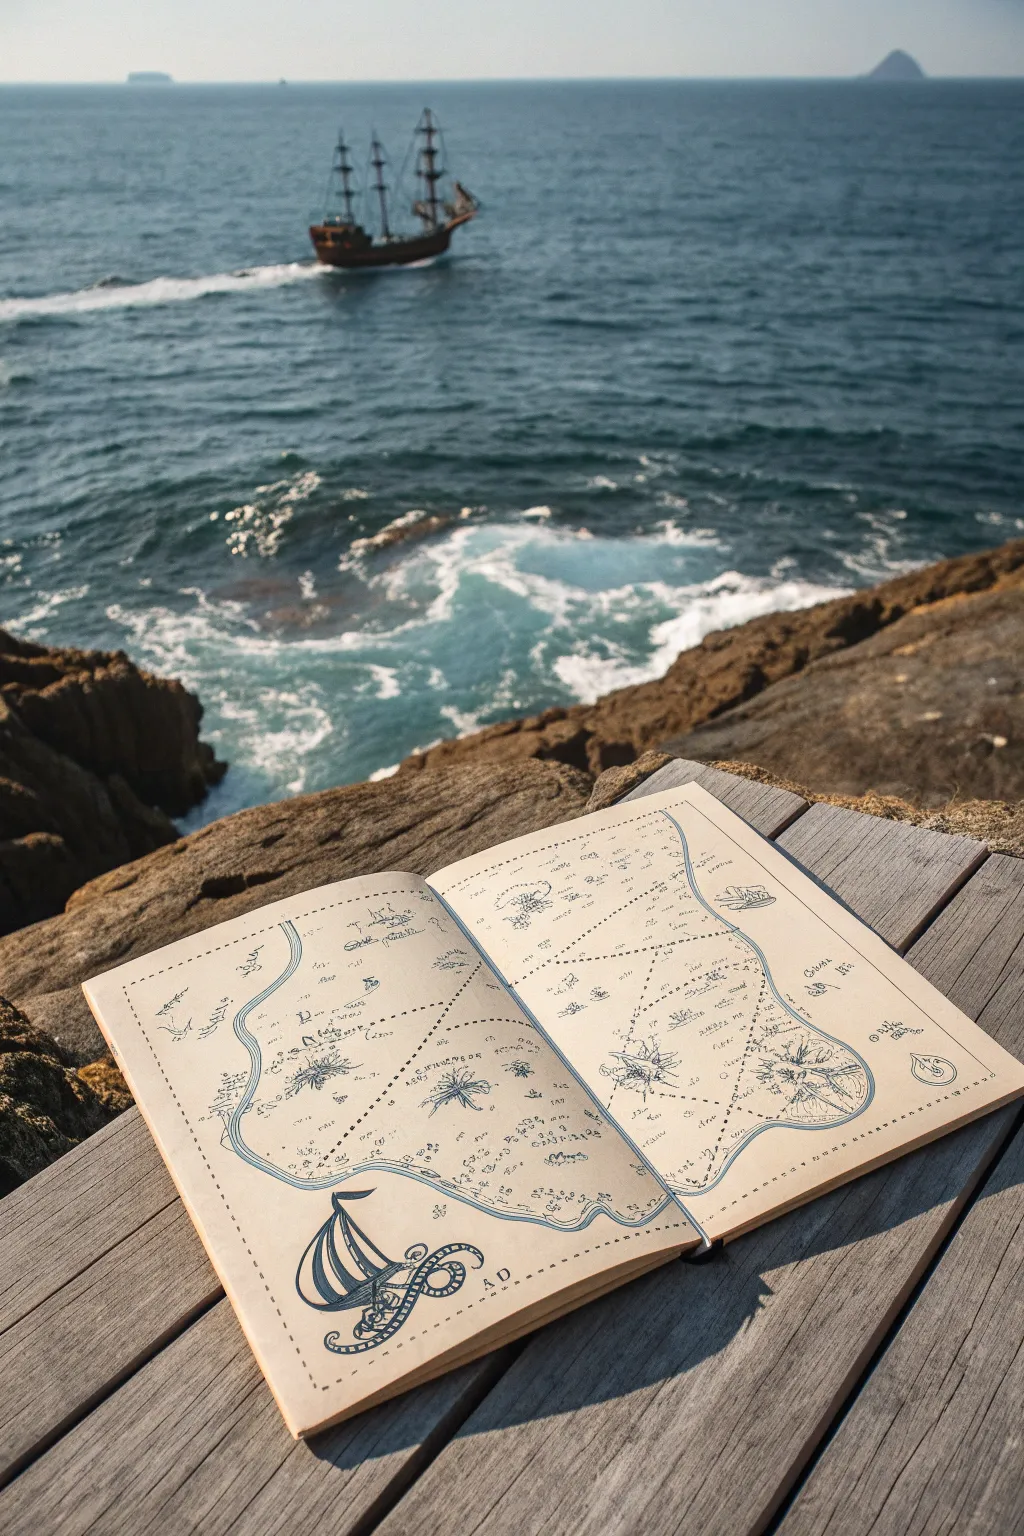
Start With a Classic Coastline
This project captures the essence of classic fantasy cartography by focusing on a rugged, fjord-rich coastline reminiscent of Scandinavia. Using simple fineliners and aged paper, you’ll create a map that looks like it was discovered in an explorer’s ancient journal.
Step-by-Step Guide
Materials
- A5 size heavy sketchbook (cream or ivory paper preferred)
- Black fineliner pens (0.1mm, 0.3mm, and 0.5mm)
- HB or 2B pencil
- Kneadable eraser
- Ruler
- Compass (optional for the wind rose)
- Reference image of Norway or Sweden (optional)
Step 1: Planning and Pencil Work
-
Establish the landmass orientation:
Begin with your pencil. Lightly sketch a long, vertical peanut-like shape slightly off-center to the right of the page. This will act as the general boundary for your landmass. -
Block in the coastline:
Inside your boundary shape, draw the rough outline of the coast. Don’t worry about details yet; just focus on the major ins and outs. Create a large central bay area and a bottom section that fragments into islands. -
Sketch the wind rose guide:
On the opposite page (the left page), use your pencil or a compass to draw a faint circle where your compass rose will sit. Add a vertical and horizontal cross through the center to guide the points. -
Add a planetary diagram:
Below the compass rose area, sketch a larger circle. Draw a few curved lines slicing through it to represent planetary orbits or latitude lines, giving the map a scholarly feel.
Ink Smearing?
Fantasy maps have dense lines. Place a scrap sheet of paper under your drawing hand to protect the wet ink from your palm while you work across the page.
Step 2: Inking the Coastline
-
Start the main outline:
Switch to your 0.3mm fineliner. Begin tracing your pencil coastline, but instead of a smooth line, use a nervous, jittery hand motion. -
Create the jagged effect:
The key to a believable coastline is fractal detail. As you draw, make tiny squiggles and abrupt turns to simulate fjords, inlets, and rocky peninsulas. -
Detail the northern section:
For the top part of the map, make the coast particularly deep and jagged to mimic glacial valleys. Ink small, separate islands just off the main coast to break up the silhouette. -
Fragment the southern tip:
As you move to the bottom of the map, break the landmass apart significantly. Instead of one solid line, draw several large, puzzle-piece islands that look like they’ve drifted away from the mainland. -
Thicken the eastern border:
For the inland border on the right side, switch to a slightly dashed or broken line style to suggest that the land continues beyond the edge of the map, rather than being an island.
Make it Ancient
Before drawing, lightly stain your paper with cold tea/coffee and let it dry flat. The brown tint instantly adds centuries of history to your map.
Step 3: Adding Topography and Labels
-
Texture the coastline:
Using your finest 0.1mm pen, add tiny tick marks or hatching on the water side of the coastline. This ‘coastal raking’ technique adds depth and differentiates land from sea. -
Draw internal borders:
With the 0.1mm pen, draw very faint, dotted lines snake across the interior of the land. These represent political borders or regional divides. -
Letter the regions:
Using a simple serif or runic-inspired print, label the regions. Place the text along curved baselines that follow the shape of the land rather than keeping them strictly horizontal. -
Ink the compass rose:
Go back to the left page. Ink the main cross of your wind rose with the 0.5mm pen for emphasis. Add the diagonal points with the 0.3mm pen, and sketch the feathery details or arrows at the tips. -
Ink the planetary circle:
Trace over your planetary diagram with the 0.1mm pen. Keep these lines extremely thin and delicate to precise astronomical tools. -
Add ‘flight’ paths:
Draw a few curved, dashed trajectory lines connecting different parts of the map or leading off the page, hinting at sea routes or magical leylines.
Step 4: Atmosphere and Finishing Touches
-
Draw the sea birds:
In the empty ocean spaces, add simple ‘m’ shaped birds. Vary their sizes to create a sense of scale and distance. -
Erase pencil guides:
Wait at least 15 minutes for all ink to fully dry. Gently erase all your pencil lines with the kneadable eraser to avoid smudging or tearing the paper. -
Add decorative elements:
If I feel a corner looks too empty, I like to add a tiny anchor or a sea monster fin. Simple geometric shapes or triangles can also look like distant ships. -
Age the edges (optional):
For a final antique touch, you can lightly stipple the very edges of the landmass with your 0.1mm pen to suggest erosion or sandy beaches.
Now your sketchbook holds a world waiting to be explored, perfect for your next campaign or story setting


Place Cities With Tiny Icons
Capture the essence of a fantasy world by drawing miniature landmarks directly into your sketchbook. These distinct black ink illustrations—including a lighthouse, a chapel, and cozy cottages—are perfect for populating the cities of your imaginary maps with character and clarity.
Step-by-Step
Materials
- Sketchbook (heavyweight cream or off-white paper preferred)
- Fountain pen or fine liner (0.3mm or 0.5mm, black ink)
- Pencil (HB or 2B)
- Kneaded eraser
- Ruler (optional)
Step 1: Planning layout
-
Define the spread:
Since we are working across a two-page spread, visualize where each building will sit. Aim for four distinct landmarks: two on the left page arranged vertically, and two on the right. Keep plenty of negative space around them to maintain that clean, icon-like aesthetic. -
Pencil placement:
Lightly sketch geometric primitives to block out the shapes. Use a tall rectangle for the lighthouse tower, a simple triangle atop a square for the chapel, and low rectangular blocks for the farmhouses. Don’t press hard; these guide lines will be erased.
Wobbly Lines?
Don’t stress over straight lines. In map making, slightly shaky or organic lines actually make the buildings look older and more rustic, adding to the fantasy charm.
Step 2: Drawing the Lighthouse (Left Page)
-
Base structure:
Start inking the lighthouse on the upper left. Draw the vertical edges of the tower first, tapering them slightly inward as you go up. Add the lantern room at the top with small vertical lines for the glass. -
Roof and railings:
Cap the lantern room with a small, triangular roof. Draw a tiny horizontal line for the railing around the gallery deck just below the glass. -
Keeper’s house attached:
Sketch the small house attached to the base. Use angled lines for the roof and add a tiny chimney. I find that keeping these attached structures smaller emphasizes the height of the tower. -
Windows and details:
Add small arched windows running up the tower. Draw the sun to the left using a simple circle with short, radiating lines to balance the composition. -
Grounding texture:
Use short, scribbly horizontal strokes at the base of the lighthouse to simulate grass and rocks, anchoring the building to the page.
Add Pop with Color
Once the black ink is fully waterproof-dry, use a watercolor brush pen to add a single wash of color—like terracotta for roofs or pale yellow for windows—to bring them to life.
Step 3: Drawing the Chapel (Left Page)
-
Main nave:
For the building below the lighthouse, draw the main body of the chapel first. Give it a steep, pitched roof using hatching lines to suggest tiles or shingles. -
Steeple addition:
Add a taller tower section attached to the right side of the nave. Top it with a sharp, triangular spire and a tiny flag or cross at the peak. -
Architectural features:
Ink in tall, narrow windows on both the main building and the tower. Adding a double door at the front gives it a welcoming sense of scale.
Step 4: Drawing the Landscapes (Right Page)
-
The lonely cottage:
On the top right page, draw a simple house shape. The focus here is the setting. Draw a stylized tree to its left using a cloud-like shape for the foliage and a simple trunk. -
Horizon lines:
Create the landscape by drawing three or four long, horizontal lines stretching beneath the house and tree. Vary the length to suggest rolling hills or fields. -
The farmhouse complex:
For the bottom right drawing, sketch a more complex structure. Draw a main barn with a large, textured roof using cross-hatching to show thatch or heavy tile. -
Outbuildings:
Add a smaller silo or shed attached to the side. Sketch a small fence line extending from the building to suggest property boundaries. -
Sky elements:
Draw fluffy, cumulus-style clouds above the farmhouse. Keep the bottom of the clouds flat and the tops rounded for a classic map style.
Step 5: Finishing touches
-
Erase pencil lines:
Wait until the ink is completely dry—usually about 5 to 10 minutes depending on your pen. Gently use the kneaded eraser to lift all the graphite guidelines. -
Enhance contrast:
Review your icons. If a roof feels too light, go back and add more density to your hatching. Darken the windows to make them look like hollow spaces. -
Final clean-up:
Add stray grass tufts or pebbles around the bases of all buildings to ensure none of them feel like they are floating in white space.
Now you have a library of tiny architectural elements ready to be populated onto your next fantasy map


Sketch Roads, Trails, and Bridges
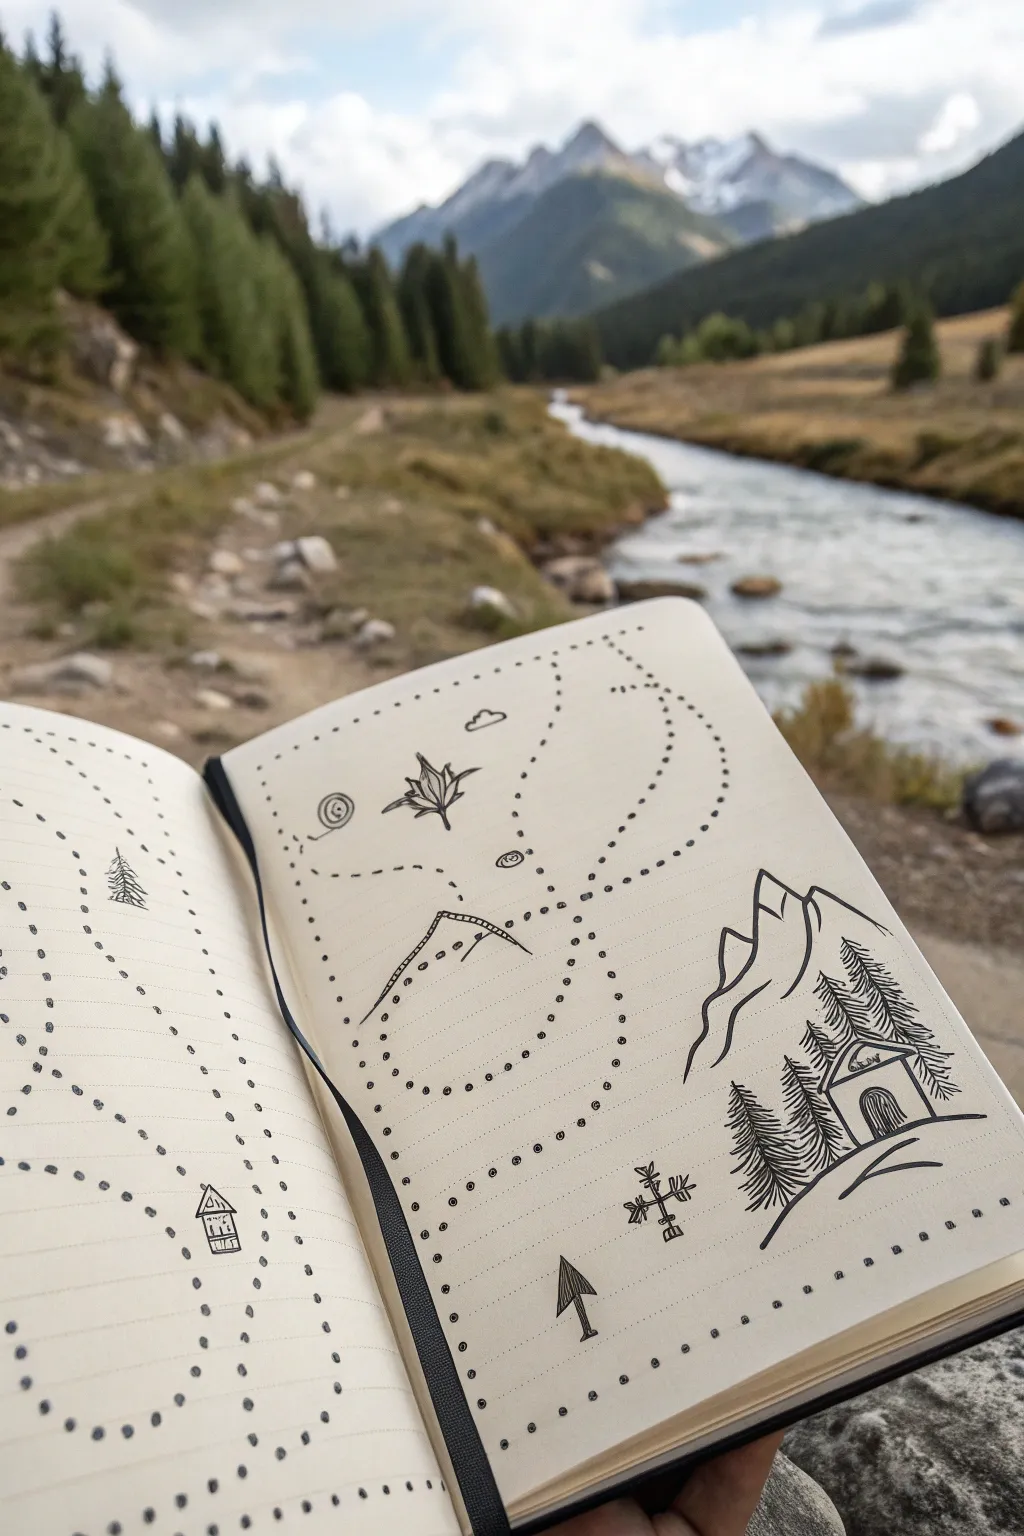
Capture the spirit of adventure with this charming, hand-drawn fantasy map that mimics the very landscape you might be exploring. Using simple symbols and dotted trails on lined paper creates an authentic, traveler’s journal aesthetic perfect for documenting your hiking memories.
Detailed Instructions
Materials
- Lined A5 sketchbook or notebook (hardcover preferred)
- Fine liner pen (black, 0.3mm or 0.5mm)
- Pencil (HB or 2B) for initial layout
- Eraser
- Ruler (optional)
Step 1: Setting the Scene
-
Outline the Composition:
Begin by lightly sketching the main elements with your pencil. On the right page, place a large mountain range in the upper right quadrant and a small cabin nestled below it. -
Plan the Trails:
Still using pencil, draw faint, sweeping curves that connect different points on the page. Create a large loop in the center of the right page and a winding path leading off the left page. -
Add Key Landmarks:
Sketch a small four-point flower or star shape near the top center of the right page. Below that, indicate a smaller, rounded hill shape.
Step 2: Inking the Mountains & Cabin
-
Draw the Mountain Peaks:
With your fine liner, ink the mountain range on the right page. Use jagged, confident lines for the peaks and add a few internal vertical strokes to suggest rocky texture and depth. -
Detail the Cabin:
Ink the small cabin at the base of the mountains. Draw a simple pitched roof, a rectangular body, and an arched door. I like to add a tiny chimney for extra character. -
Create the Forest:
Surround the cabin with pine trees. Start with a vertical line for the trunk, then use quick, downward zig-zag strokes to create the needle texture, tapering slightly as you go up. -
Ground the Scene:
Draw a curved horizon line underneath the cabin and trees to establish the ground, making sure the trees sit firmly on top of it.
Mapping Pro-Tip
Vary your dot spacing on the trails. Placing dots closer together on tight curves and further apart on straightaways creates a better sense of movement and speed.
Step 3: Mapping the Journey
-
Ink the Dotted Trails:
Go over your penciled trail lines with the fine liner. Instead of a solid line, use small, evenly spaced dots. Vary the spacing slightly where paths curve to keep the flow natural. -
Connect the Pages:
Ensure the dotted trail flows seamlessly from the left page across the gutter to the right page. This visual connection makes the two pages feel like one large map. -
Add the Central Hill:
On the right page, inside the trail loop, ink the smaller hill. Instead of a solid outline, try using a dashed or hatched line to differentiate it from the major mountains. -
Draw the Flower Compass:
Ink the four-pointed flower/star shape at the top. Give it sharp petals and a small center circle. This acts as a decorative compass rose or a magical landmark.
Ink Smearing?
If you are left-handed or your pen is particularly wet, place a scrap piece of paper under your hand as a guard sheet while you draw to prevent smudging your fresh lines.
Step 4: Adding Charming Details
-
Include a Cloud:
Draw a small, fluffy cloud near the top center using bumping, curved lines. Keep it simple and outlined without shading. -
Sketch the Tiny House:
On the left page, along one of the trails, draw a tiny, standalone house icon. A simple square with a triangle roof and a few vertical lines for siding works perfectly. -
Add Directional Arrows:
Draw a simple arrow near the bottom of the right page, pointing upwards (North). Shade one half of the arrowhead to give it a classic map symbol look. -
Create a Spiral Maker:
Add a small spiral or snail-shell shape near the flower landmark. This adds a bit of whimsy and fills negative space nicely. -
Draw the Totem Icon:
Near the bottom right, draw a small cross-like structure or totem pole with horizontal bars. This adds variety to your map symbols beyond just nature elements.
Step 5: Final Touches
-
Erase Pencil Guidelines:
Wait at least five minutes for the ink to truly dry—smudging is the enemy here! Once dry, gently erase all your initial pencil sketches. -
Reinforce Key Lines:
Look over the drawing. If the mountains or the main cabin need to stand out more, go over their outlines one more time to thicken the line weight slightly.
Now you have a personalized guide to your imaginary world ready for your next adventure


Shape Borders Using Natural Barriers
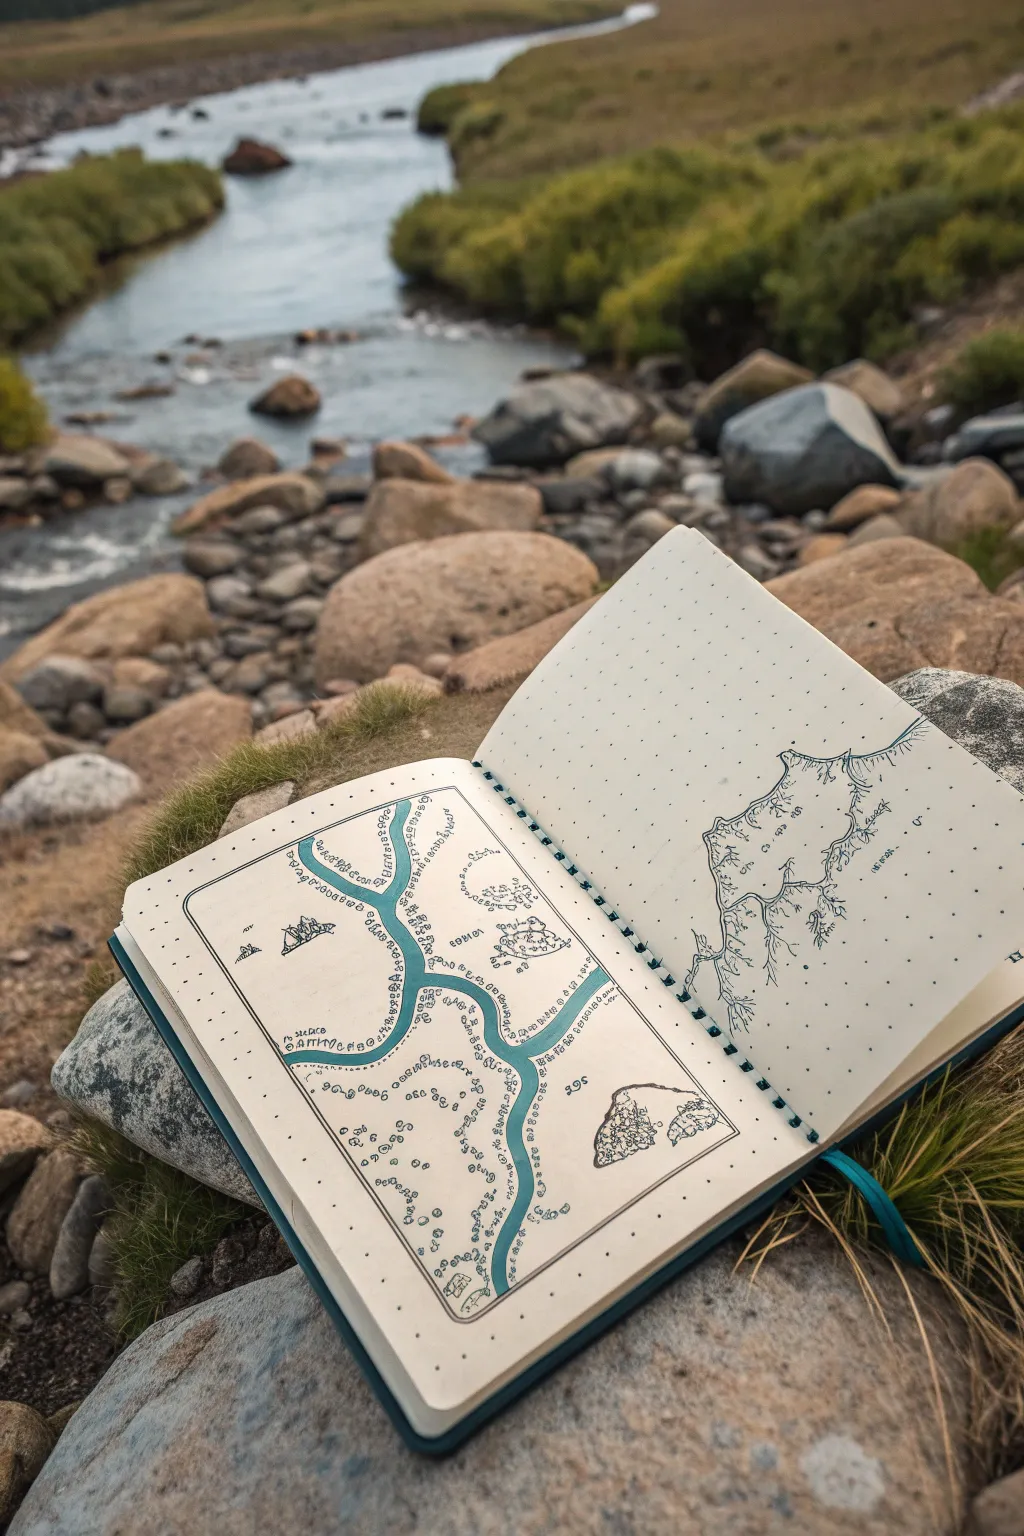
Capture the essence of a tranquil stream by drawing a fantasy map that uses a flowing river as its primary border and structure. This project utilizes a dot-grid notebook to guide gentle curves and precise details, creating a clean yet whimsical cartographic illustration.
Step-by-Step Tutorial
Materials
- A5 Spiral-bound dot grid notebook (cream or off-white paper)
- Fine liner pens (Black, sizes 0.1mm and 0.3mm)
- Teal or Slate Blue marker (medium tip or brush pen)
- Pencil (HB or 2H for sketching)
- Eraser
- Ruler (optional)
Step 1: Laying the River Foundation
-
Establish the focal point:
Open your dot grid notebook to a fresh two-page spread. On the left page, visualize a central Y-shaped river system. Lightly pencil in the main artery flowing from the bottom center upwards. -
Branching out:
Pencil in the upper branches of the river. One arm should curve towards the top left corner, and the other should sweep gently towards the spine of the book. -
Define the banks:
Using your pencil sketch as a guide, draw the parallel banks of the river. Keep the width fairly consistent, but allow it to widen slightly at junctions. I like to keep the lines smooth but organic, avoiding perfect geometric arcs. -
Ink the water:
Switch to your teal or slate blue marker. Carefully fill in the space between your pencil lines. The dot grid will show through faintly, which adds a nice texture. -
Outline the waterway:
Once the marker ink is fully dry, take your 0.3mm black fine liner and outline the blue river. This sharp barrier separates the water from the land and defines the territory borders.
Step 2: Adding Topography and Text
-
Sketch circular zones:
Around the river branches, lightly pencil in several distinct circular or oval zones. These don’t need to be closed shapes; just use dotted lines to suggest grouped areas of interest. -
Draw simple mountains:
In the open western section (left side of the page), use the 0.1mm pen to draw a small cluster of triangular mountains. Keep them minimal—just a few jagged peaks with a shadow line on one side. -
Add forest clusters:
In the eastern section near the spine, sketch tiny cloud-like shapes or clumps of loops to represent forests. Vary the sizes to make the terrain look natural. -
Create the script borders:
Instead of solid lines for your regional borders, use a made-up script or small runes. Follow the circular pencil guides you made earlier, writing small, unintelligible symbols to create ‘text walls’ that act as soft borders. -
Inking the details:
Go over your mountain and tree sketches with the 0.1mm fine liner. Add tiny dots or ‘stippling’ near the base of the mountains to ground them.
Bleed-Through Blues?
If your markers bleed through the paper, glue two pages together before starting, or slip a sheet of scrap paper behind your current page while coloring.
Step 3: The Eastern Expansion
-
Start the right page:
On the right-hand page, we will focus on a coastline or a large lake edge. Pencil a jagged, vertical coastline that runs roughly parallel to the book’s spine. -
Detail the coast:
Using the 0.1mm pen, ink this coastline with a shaky, deliberate hand. Add small inlets and peninsulas to make the landmass look rugged and weathered. -
Add coastal tributaries:
Draw hairline rivers branching off from the main coastline into the blank space on the right. These should look like lightning bolts or tree roots—thin and branching. -
Connect the pages:
Visually link the two pages by continuing the style of the blue river from the left page onto the very edge of the right page if your composition allows, or simply maintain the same dot-grid scale. -
Erase guidelines:
Wait at least ten minutes to ensure all ink is bone dry. Gently erase all visible pencil marks from both pages to reveal the crisp design. -
Final weathering:
Add a few stray dots or tiny birds (simple ‘v’ shapes) in the empty negative spaces to balance the composition without cluttering it.
Map Legend Mastery
Use the empty corners to draw a compass rose or a small legend box explaining what your runic symbols represent, adding lore depth.
Close your notebook knowing you have charted a completely new world on a lazy afternoon
BRUSH GUIDE
The Right Brush for Every Stroke
From clean lines to bold texture — master brush choice, stroke control, and essential techniques.
Explore the Full Guide
Label With Banner-Style Titles

Transform a simple journal page into an explorer’s artifact with this beautifully detailed fantasy map spread. Featuring crisp linework, a prominent banner for your world’s name, and delicate terrain features, this project captures the essence of classic cartography.
Step-by-Step
Materials
- A5 dot grid notebook or journal (cream or ivory paper recommended)
- Black fineliners (0.1mm for details, 0.3mm or 0.5mm for outlines)
- Pencil (HB or lighter)
- Eraser
- Ruler or straight edge
- Compass or circle stencil (optional)
Step 1: Planning the Layout
-
Define the borders:
Begin by lightly sketching a rectangular border about 1 cm from the edge of the page using your pencil and ruler. Create a double line for this frame to give it weight. -
Draft the banner:
Locate the optical center of the upper third of the page. Sketch a long, waving ribbon shape. Start with a central rectangle that arches slightly upward, then add the folded ends tucked behind and hanging down. -
Place landmasses:
Lightly outline the coastlines. In this design, draw a large landmass on the left and bottom, leaving a channel or sea running diagonally from top-left to bottom-right. -
Sketch major icons:
Mark the position for a compass rose in the top left corner. Indicate mountain ranges at the top right with simple triangular peaks.
Clean Lines
When drawing coastlines, lift your pen occasionally to create broken lines. It makes the map look aged and less rigid than a continuous solid stroke.
Step 2: Inking the Foundations
-
Ink the frame:
Using a 0.3mm pen, carefully trace over your pencil border lines. Add small decorative squares in the corners to join the lines, filling them with tiny diagonal hatching or geometric patterns. -
Draw the banner:
Outline the main ribbon shape with a steady hand. Emphasize the folds where the fabric turns back on itself. Add vertical hatching lines at the ends of the ribbon to suggest texture and shadow. -
Create the compass rose:
Draw a circle for the compass base. Add a four-point star extending beyond the circle, then four smaller points between them. Carefully cross-hatch one side of each point to give it a 3D effect.
Tea Staining
Before drawing, lightly dab the page with a damp tea bag and let it dry fully. This gives the paper an authentic, parchment-like weathered texture.
Step 3: Detailing the Terrain
-
Ink the coastline:
Trace your land outlines with a 0.3mm pen. Make the line slightly jittery or ‘wobbly’ to represent natural geography; avoid perfectly smooth curves. -
Add coastal ripples:
Using your finest 0.1mm pen, draw a second line mirroring the coast about 1-2mm inward or outward. This ‘waterline’ effect adds depth to the shore. -
Draw the mountains:
Ink the triangular peaks at the top right. Add jagged lines down the shading side (usually the right) of each mountain to create volume. Group them so smaller peaks sit in front of larger ones. -
Plant the forests:
In the lower right section, draw clusters of tiny pine trees. Start with a vertical line for the trunk and add zigzag strokes for branches. Vary their sizes to show perspective. -
Add the central meridian:
Draw a vertical line running straight down the center of the map using a ruler. Break the line periodically with small geometric shapes or rune-like markers to make it look like a navigational tool.
Step 4: Atmosphere and Finishing Touches
-
Texture the ocean:
In the open water areas, draw small, horizontal squiggles to represent waves. Scatter these sparsely rather than filling the whole space. -
Add fine details:
Sprinkle some dots near the coastlines for sand. You can also sketch a tiny sea monster or ship outline in the open water for flavor. -
Erase pencil lines:
Wait until the ink is completely dry—I usually give it at least 10 minutes to be safe. Gently erase all underlying pencil sketches. -
Shade the banner:
If you want the banner to pop, use a very light grey marker or a stippling technique (lots of tiny dots) along the bottom edge of the ribbon to create a subtle shadow.
Now you have a pristine map ready for you to letter the names of your fictional kingdoms
Fill the Ocean With Cartographic Flair
Capture the spirit of adventure by drawing a stylized fantasy coastline that mirrors the sea itself. This project focuses on clean linework, subtle iconography, and cartographic flourishes to turn a blank spread into a navigator’s chart.
Step-by-Step Tutorial
Materials
- A4 or A5 Sketchbook (heavyweight cream paper preferred)
- Fine liner pens (sizes 0.1, 0.3, and 0.5)
- Blue fine liner or gel pen (for water elements)
- Pencil (HB or 2B)
- Kneadable eraser
- Ruler (optional)
Step 1: Drafting the Coastline
-
Plan the Layout:
Begin with a light pencil sketch to define the boundaries of your map. Since this is a two-page spread, ensure the focal point isn’t lost in the book’s gutter (the center fold). -
Sketch the Shore:
Draw a large, organic landmass shape. Start the line from the bottom left, curve it up through the middle, and exit toward the top right, leaving plenty of open space for the ‘ocean’. -
Ink the Coastline:
Using a 0.5 blue pen, ink over your pencil line. I like to double this line up slightly in some areas to give it the appearance of waves hitting the shore. -
Add River Arteries:
Draw a major river winding from the inland areas out to the sea using the blue pen. Make sure it tapers, getting wider as it reaches the coast.
Step 2: Mapping the Terrain
-
Sketch Key Landmarks:
Identify three or four main locations for settlements or geographical features. Lightly sketch these positions with a pencil. -
Draw Mountain Clusters:
Using your 0.1 black pen, draw small, triangular ridges to represent mountain ranges. Group them together rather than scattering them evenly. -
Add Forest Zones:
Instead of individual trees, draw small, fluffy cloud-like shapes or clustered vertical ticks to represent dense forests near your riverbanks. -
Detail the Settlements:
Draw tiny clusters of geometrical shapes—squares and rectangles—to mark towns. Use a 0.3 pen for these to make them stand out slightly against the terrain. -
Connect the Dots:
Draw dotted trails connecting your settlements. These represent trade routes or footpaths winding through your fantasy landscape.
Ink Consistency Pro Tip
When drawing long coastlines, don’t lift your pen often. A shaky, continuous line looks more natural and organic than a series of perfect, short strokes.
Step 3: Cartographic Flourishes
-
Create the Rhumb Lines:
This is a classic nautical touch. Draw a large, simple compass rose or star shape at an intersection of interest. Extend straight lines from its points across the map using a ruler and a 0.1 pen. -
Add Sea Monsters:
In the large empty ocean spaces, sketch subtle sea creatures. A simple winding serpent or a whale tail breaking the surface adds instant character. -
Illustrate the Ship:
In the bottom left corner, draw a stylized ship profile. This serves as both a decoration and a scale reference. Use the blue pen for the hull to tie it to the water theme. -
Label the Map:
Using your best hand-lettering, name your regions. Write the names of major bodies of water in a larger script, and settlements in smaller, block letters. -
Decorative Border:
Draw a simple dashed border around the very edge of the page to frame your work. This creates a finished, professional look. -
Clean Up:
Once the ink is completely dry (give it a few minutes to avoid smudging), gently erase all underlying pencil marks with your kneadable eraser.
Age Your Paper
Before drawing, lightly stain your paper with cold coffee or tea and let it dry flat. This gives your map an authentic, weathered parchment look.
Now you have a charted world ready for your next imaginary voyage

PENCIL GUIDE
Understanding Pencil Grades from H to B
From first sketch to finished drawing — learn pencil grades, line control, and shading techniques.
Explore the Full Guide
Add Inset Maps for Extra Detail
Transport yourself to a bygone era of exploration with this hand-drawn fantasy map project, capturing the rugged beauty of a fictional coastline. Using simple staining techniques and precise ink work, you will create a cartographic masterpiece that feels plucked straight from a sea captain’s cabin.
How-To Guide
Materials
- A3 heavy-weight watercolor paper or mixed media paper
- Cold tea or watered-down coffee (for staining)
- Foam brush or wide paintbrush
- Fine liner pens (sizes 0.05, 0.1, 0.3, and 0.5) – black and sepia
- Pencil (HB or 2H)
- Kneaded eraser
- Watercolor set (earth tones: ochre, burnt sienna, sepia)
- Small round brushes (size 0, 2)
- Ruler
- Drafting compass (optional)
Step 1: Preparing the Parchment
-
Brewing the stain:
Brew a very strong cup of black tea or coffee and let it cool completely. The darker the liquid, the more aged your paper will appear. -
Applying the wash:
Lay your paper on a flat, protected surface. Using a wide foam brush, apply the tea or coffee wash unevenly across the entire sheet. Allow pools to form in some areas to create natural discoloration. -
Drying technique:
Let the paper air dry until it is damp, then scrunch it gently or press it under heavy books while finishing drying to create texture. Once bone dry, flatten it out.
Pro Tip: Instant Age
While the coffee stain is wet, sprinkle a few grains of coarse salt onto the paper. As it dries, the salt pushes the pigment away, creating amazing starburst textures.
Step 2: Drafting the Coastlines
-
Pencil outline:
Lightly sketch the general shape of your landmass with an HB pencil. Focus on a jagged, vertical orientation similar to the reference, with deep inlets and a scattering of western islands. -
Refining the edge:
Go over your pencil line to add ‘fractal’ detail—wobbly, erratic lines that mimic real erosion. Avoid smooth curves; think jagged rocks and craggy bays. -
Inking the coast:
Use a 0.3mm black fine liner to trace your final coastline. Vary your pressure slightly to give the line an organic, hand-drawn character. -
Coastal hatching:
With a thinner 0.05mm pen, add tiny, perpendicular hatch marks along the water side of the coastline. This ‘coastal ripple’ technique helps separate land from sea visually.
Level Up: Mythical Beasts
Don’t stop at ships! Check medieval bestiaries and draw a sea serpent or kraken emerging from the water in an empty corner of your map.
Step 3: Filling the Landscape
-
Mapping mountains:
Draw mountain ranges using inverted V-shapes and ridge lines. Cluster them in the central or northern parts of your map to simulate highlands. Shade the eastern side of each peak to suggest a light source from the west. -
Forest stippling:
This step requires patience. To create the dense forests shown in the reference, use a stippling technique or tiny, repetitive ‘cloud’ shapes. Concentrate these clusters in valleys and near your river lines. -
River networks:
Draw rivers flowing from your mountains down to the sea using a 0.1mm pen. Remember that rivers merge as they flow downstream and almost never split apart. -
Adding color:
Dilute a yellow ochre or pale green watercolor very heavily. Paint faint washes over the landmass, keeping the color transparent so the ink lines show through clearly. Leave the ocean the color of the stained paper.
Step 4: Cartographic Embellishments
-
Compass rose:
In the upper-left open ocean area, draw a classic compass rose. Start with a circle, then divide it into eight points. Shade alternating halves of the points black for that traditional look. -
Ocean vessels:
Sketch two or three ships sailing the seas. Use simple shapes—a curved hull and rectangular sails—and draw them with a 0.1mm pen to keep them delicate. -
Adding text:
Pencil in guidelines for your place names. Use a calligraphic or serif style for your lettering, curving the text slightly to follow the geography of the land. -
Decorative border:
Draw a faint border line about half an inch from the paper’s edge, or simply darken the very edges of the paper with a bit of sepia watercolor to frame the composition. -
Finishing touches:
Erase any remaining pencil marks gently with a kneaded eraser. Add a few final rhumb lines (navigation lines) radiating from your compass rose across the ocean.
With your landmass fully charted, you now have a compelling artifact ready to guide adventurers to new worlds
Invent Magical Geography Features
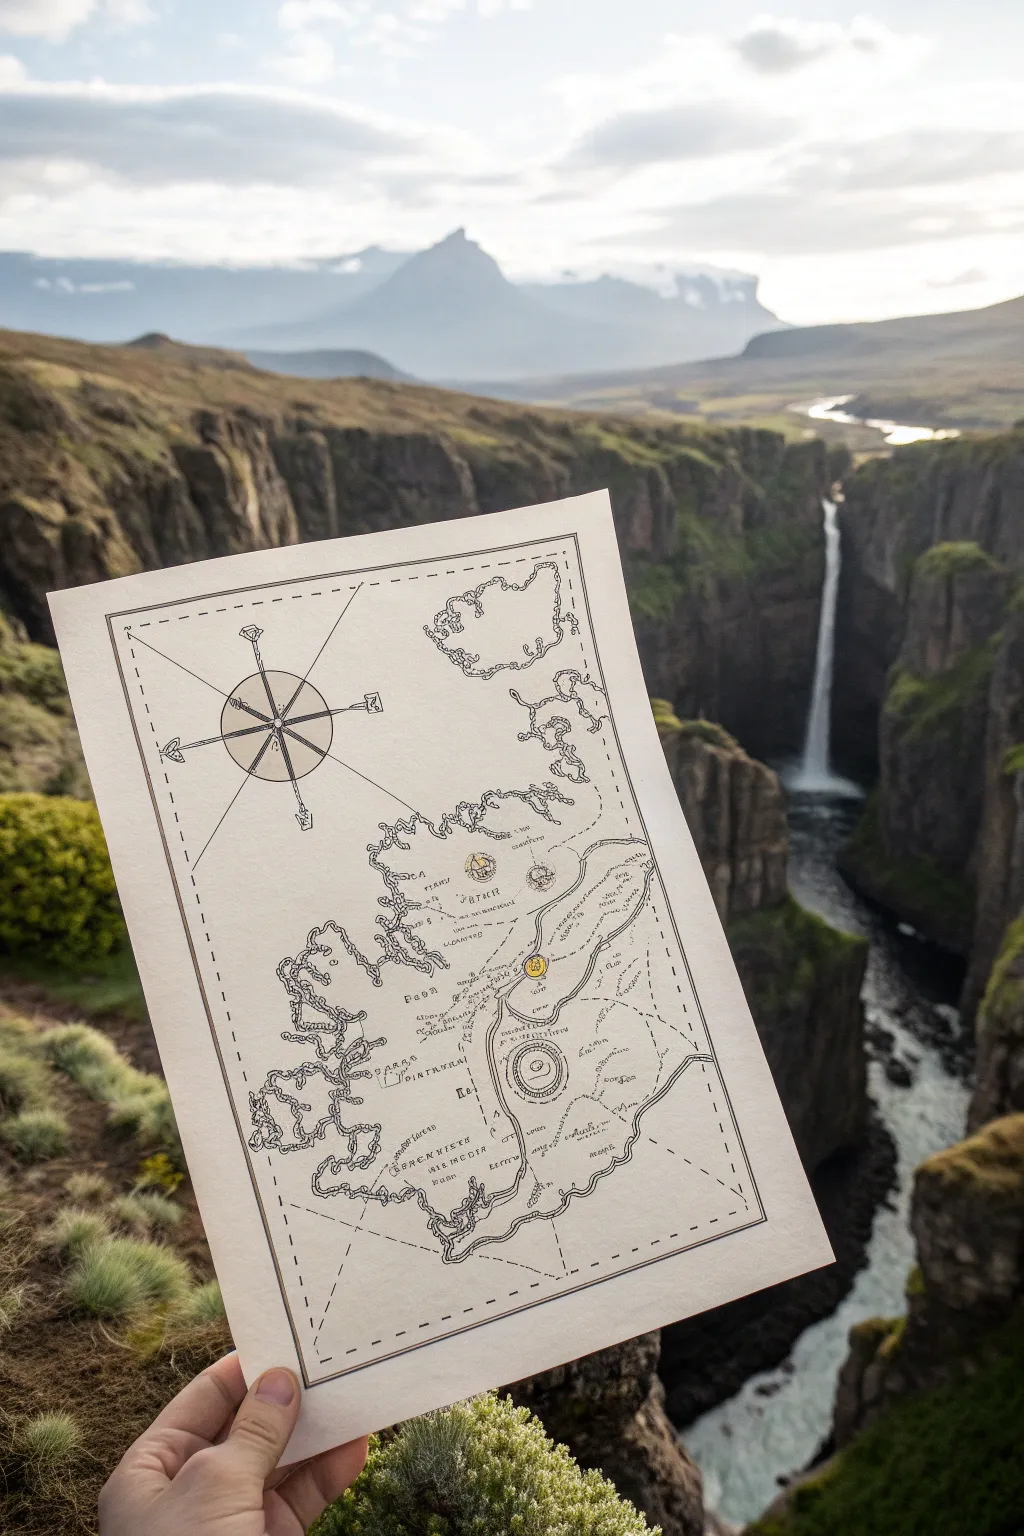
This project guides you through creating an elegant, hand-drawn fantasy map that feels like an artifact from another world. By combining delicate fineliner work with gold leaf accents on quality paper, you’ll produce a stunning chart ready for your next adventure.
Step-by-Step Tutorial
Materials
- Heavyweight textured paper (cream or off-white, approx. 180gsm)
- Pencil (HB or 2H)
- Eraser (kneaded is best)
- Ruler
- Compass
- Fine liner pens (Black, sizes 0.05, 0.1, and 0.3)
- Gold ink pen or gold leaf liquid
- Light table or tracing paper (optional)
Step 1: Planning and Layout
-
Define the borders:
Begin by lightly sketching a rectangular border about an inch from the edge of your paper using a pencil and ruler. This frames your world and gives the map a professional finish. -
Draft the grid markings:
Inside your border, lightly mark small dash intervals. Drawing diagonal lines connecting corners can help add a subtle navigational aesthetic without overcrowding the space. -
Placement of the compass rose:
Decide on a focal point for your compass rose; in the example, it sits prominently in the upper left. Use your drawing compass to sketch a perfect circle as a guide. -
Sketch the coastline:
Lightly form the main landmass. Don’t worry about perfect lines yet; focus on a jagged, organic shape that suggests inlets, peninsulas, and bays. -
Isolate the islands:
Add a few smaller island clusters off the main coast. These help balance the composition, especially in the upper right empty space.
Smudged Ink?
If you accidentally smudge wet ink, don’t erase! Turn the smudge into a rocky shoal, a sea monster, or a storm cloud. Maps are forgiving of organic mistakes.
Step 2: Inking the Outlines
-
Ink the border:
Switch to your 0.3 fine liner to ink the outer rectangular frame. Use a ruler to ensure these lines contain the rest of your organic drawing cleanly. -
Detail the compass rose:
Using a 0.1 pen, draw the directional arrows of the compass. Extend the main north-south and east-west lines significantly, letting them intersect visibly to create that classic cartographic look. -
Trace the coastlines:
Use your 0.05 or 0.1 pen for the coast. Instead of a solid line, use a slightly shaky hand or broken stippled line to mimic fractal geometry of rocks and shores. This adds instant realism. -
Add coastal ripples:
Draw very faint, thin lines parallel to your coastlines on the water side. This technique, called ‘water lining,’ suggests waves and depth. -
Create the topography:
Inside the landmass, use small, clustered markings to denote terrain. Simple, inverted ‘V’ shapes work well for mountains, while dotted circles can represent magical locations or craters.
Level Up: Aged Paper
Before drawing, lightly stain your paper with cold tea or diluted coffee and let it dry flat. This gives your map an authentic, ancient parchment texture.
Step 3: Adding Magical Features & Text
-
Mark key locations:
Choose 3-4 specific spots for special attention. Draw small icons like a tower, a concentric circle vortex, or a monolithic stone. -
Lettering the labels:
carefully pencil in your place names first. When inking, use a capitalized, serif style for regions and a smaller cursive script for rivers or features. I find rotating the paper helps me keep cursive lines smooth. -
Connect the paths:
Draw dotted lines winding between your key locations to represent roads or trade routes. Let them curve around mountains rather than going straight through them. -
Erase pencil marks:
Wait until the ink is completely dry—give it a few extra minutes to be safe—then gently erase all underlying pencil sketches.
Step 4: Golden Accents
-
Selecting gold highlights:
Identified your ‘magical’ geography features—the compass center, the vortex, or capital cities. -
Applying the gold:
Using a gold gel pen or a fine brush with metallic ink, carefully fill in the specific icons you chose. Keep this minimal; a little gold goes a long way. -
Final dashes:
Add a touch of gold to the compass rose tips or the border corners to tie the color scheme together across the page.
Now roll up your map and prepare to guide your party through these new lands


Have a question or want to share your own experience? I'd love to hear from you in the comments below!