Rain is basically nature’s special effects machine—instant mood, instant glow, instant reflections. Here are my favorite rain painting ideas to help you capture that cozy, cinematic feeling of water in the air and light on the ground.
A Bright Umbrella in a Gray Rain Scene
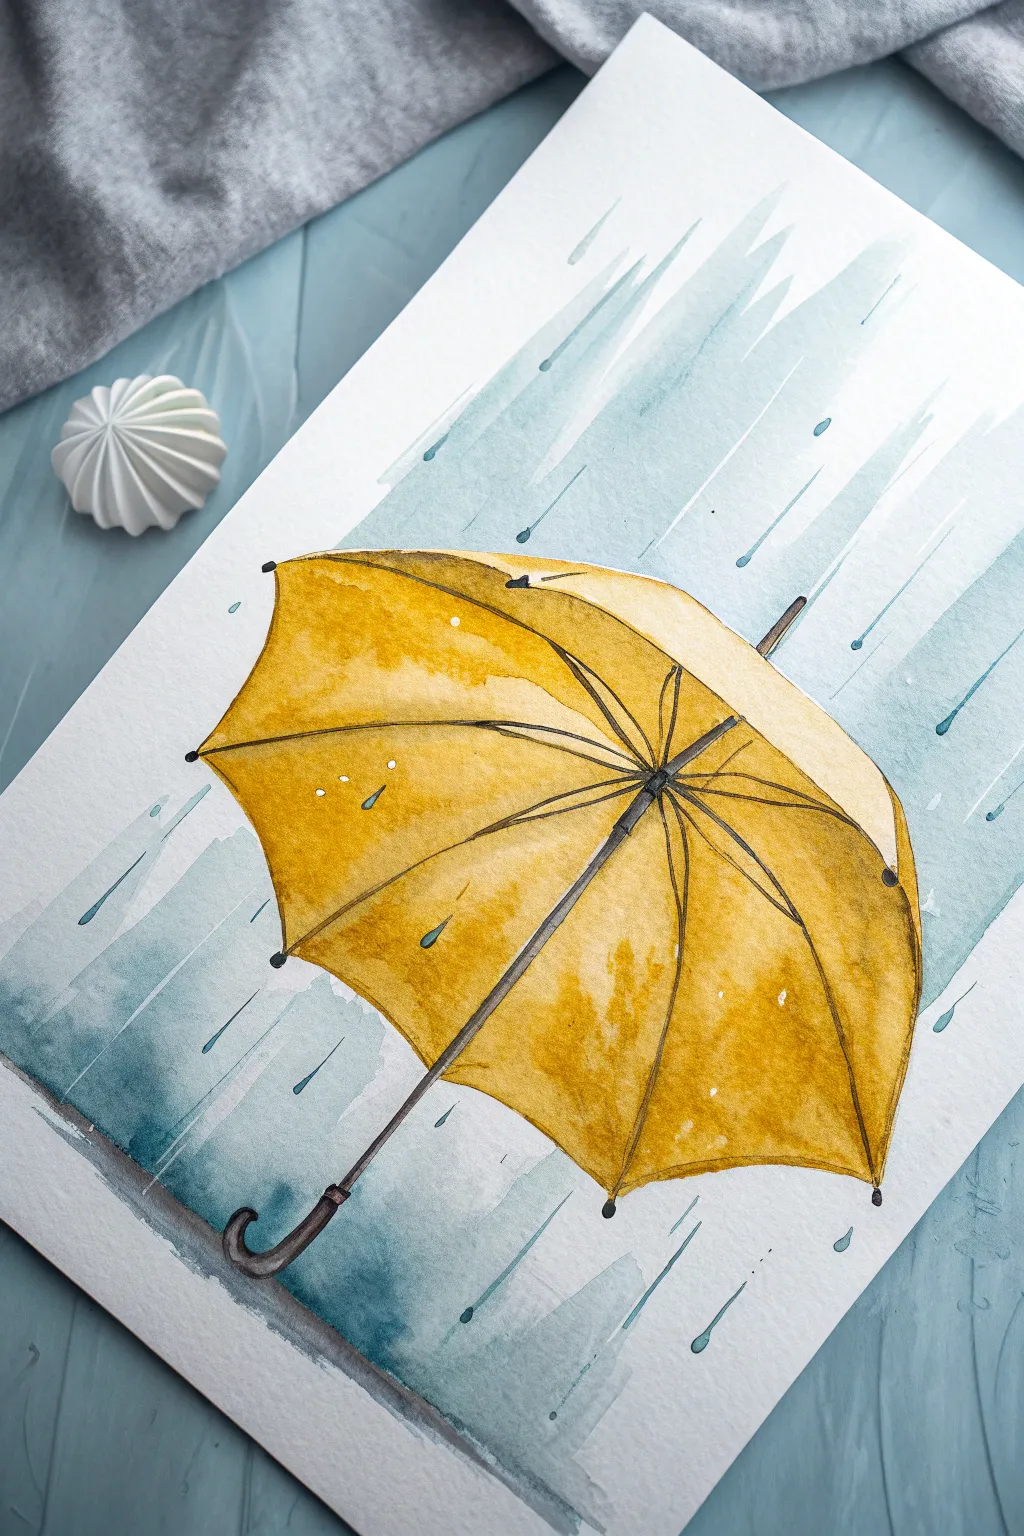
This cheerful watercolor project captures the cozy contrast of a vibrant yellow umbrella shielding against a cool, rainy backdrop. The loose, streaky background wash creates a sense of movement, making the crisp details of the umbrella pop beautifully.
How-To Guide
Materials
- Cold press watercolor paper (A4 or similar size)
- Watercolor paints (Yellow Ochre, Cadmium Yellow, Payne’s Grey, Indigo, Burnt Umber)
- Round brushes (size 6 or 8 for washes, size 2 or 0 for details)
- HB pencil and soft eraser
- Masking fluid (optional)
- Palette for mixing
- Two jars of water
- Paper towels
- Fine black waterproof liner pen (0.3mm or 0.5mm)
Step 1: Sketching the Outline
-
Establish the curve:
Begin by lightly sketching the umbrella’s canopy. Draw a large, gentle arc across the middle of your paper, tilting it slightly to the right for a dynamic angle. -
Define the ribs:
From the center top point of the canopy, draw curved lines radiating outward to the bottom edge to form the umbrella’s ribs. These segments give the umbrella its structural shape. -
Add the scalloped edge:
Connect the bottom points of the ribs with small, downward-curving arcs. This creates that classic scalloped look along the umbrella’s rim. -
Draw the handle:
Sketch the central shaft coming down from the center of the underside. Finish it with a curved ‘J’ handle at the bottom. Don’t forget the tiny ferrule (tip) sticking out of the very top center.
Wet-on-Dry Precision
Ensure the background is 100% dry before starting the yellow umbrella. If damp, the yellow will bleed into the blue, creating unwanted green edges.
Step 2: Painting the Backdrop
-
Mix the rain color:
Create a cool, rainy mix using Payne’s Grey diluted with plenty of water. You can add a touch of Indigo or a tiny bit of teal for that stormy blue-green hue. -
Initial background wash:
Using your larger brush, paint diagonal strokes from the top right to bottom left, mimicking falling rain. Keep the strokes loose and leave some white paper showing for highlights. -
Cutting around the shape:
Carefully paint up to the pencil line of the umbrella, defining its edges with the background color. This negative painting technique makes the yellow pop later. -
Add darker streaks:
While the paper is still slightly damp, drop in slightly more concentrated grey/blue pigment in streaks to suggest heavier rain areas. -
Suggesting the ground:
Add a horizontal wash near the bottom where the rain hits the ground, creating a blurry reflection effect below the handle.
Step 3: Painting the Umbrella
-
Base yellow wash:
Once the background is completely bone dry, mix a vibrant Cadmium Yellow. Paint the entire canopy, but try to leave tiny speckles of white paper randomly for sparkle. -
Add shadows:
While the yellow is still wet, drop in some Yellow Ochre or a light orange-brown mix along the rib lines and the bottom edges of each segment. This adds volume and curve. -
Deepening the form:
Let the first layer dry. Now, gently glaze a darker yellow-brown mix (Yellow Ochre with a dot of Burnt Umber) on the shadowed side of each rib segment to intensify the 3D effect. -
Painting the underside:
For the inside of the umbrella visible near the handle, use a slightly darker, muted yellow to indicate it is in shadow.
Add a Little Reflection
Extend a faint, blurry yellow wash vertically below the umbrella into the grey ground area to mimic a reflection on a wet sidewalk.
Step 4: Details & Raindrops
-
Define the structure:
Using a fine brush or a waterproof black pen, carefully outline the ribs, the shaft, and the handle. Keep the lines confident but not too heavy. -
Paint the handle:
Fill in the handle with a mix of Burnt Umber and Payne’s Grey. Leave a tiny sliver of white on the curve to serve as a highlight on the glossy material. -
Add rain droplets:
Mix a semi-opaque blue-grey. Paint small teardrop shapes falling through the air and a few ‘bouncing’ off the top of the umbrella canopy. -
Final highlights:
If you have white gouache or a gel pen, add tiny dots to the raindrops and the wettest parts of the umbrella ribs to make them glisten.
Now you have a vibrant splash of color to brighten even the greyest day


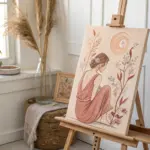
Couple Under One Umbrella
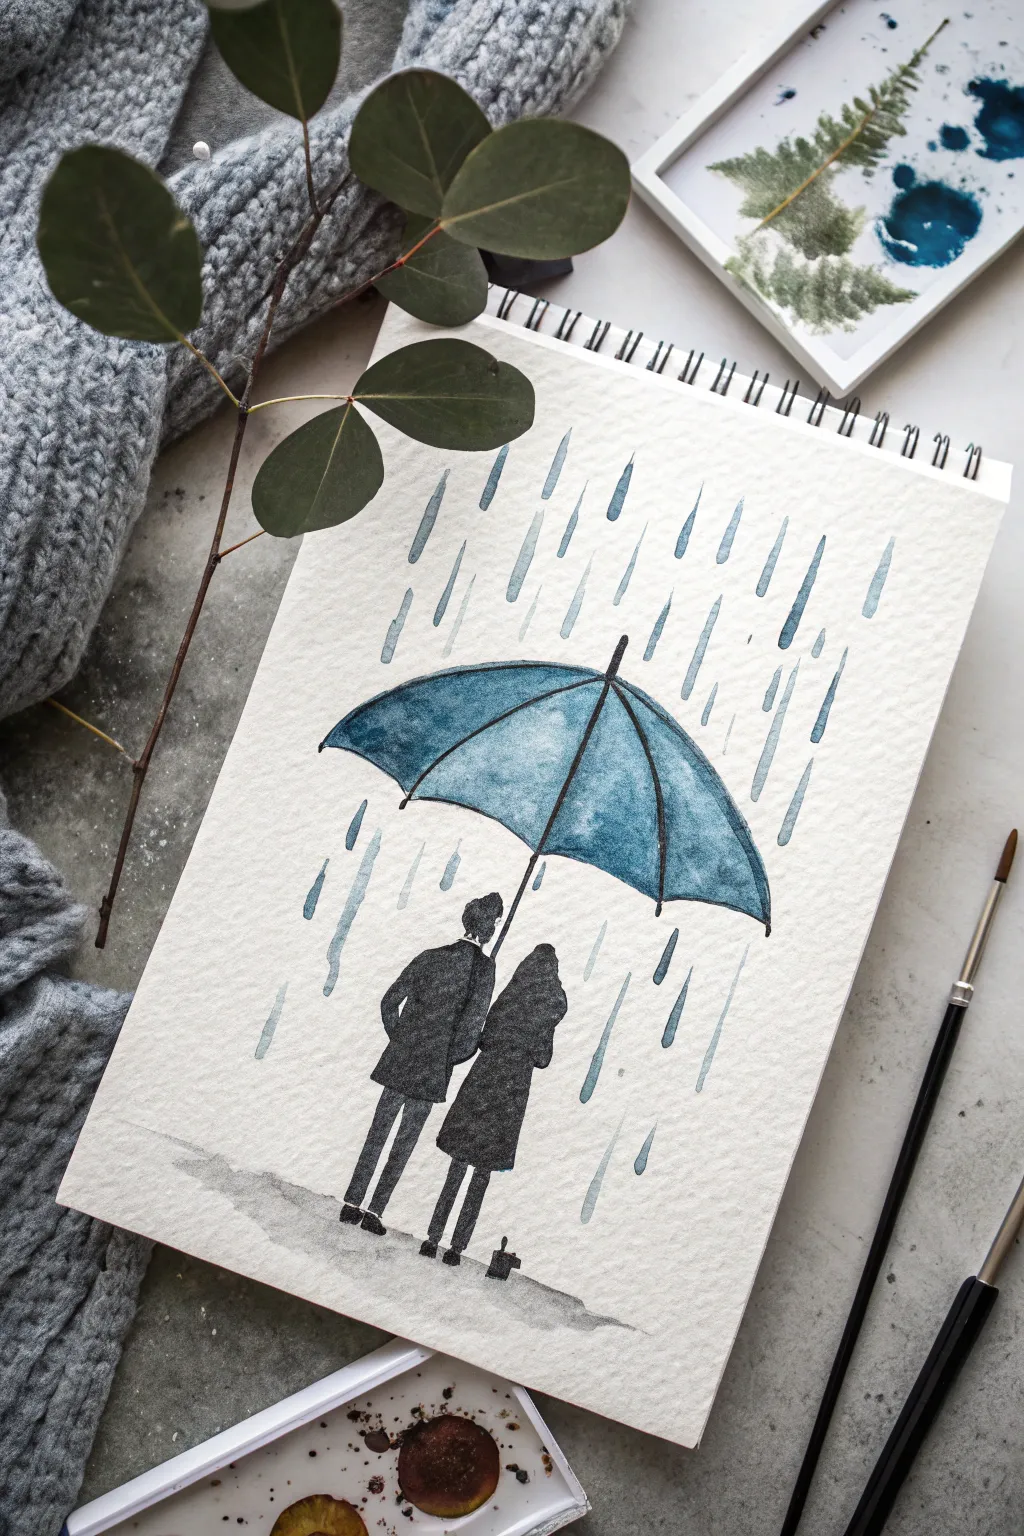
Capture a cozy moment amidst a storm with this minimalist watercolor illustration of a couple sharing a large blue umbrella. Using simple washes and clean lines, you’ll learn to create the illusion of falling rain and silhouetted figures on textured paper.
Step-by-Step Guide
Materials
- Cold press watercolor paper (A5 or similar size)
- Watercolor paints (Indigo, Payne’s Grey, Prussian Blue, Black)
- Round watercolor brushes (Size 4 for washes, Size 0 or 1 for details)
- Pencil (HB or 2B) and eraser
- Ruler (optional)
- Jar of clean water
- Paper towel or rag
Step 1: Sketching the Composition
-
Outline the umbrella:
Begin by lightly drawing a large, wide arc near the center of the page for the top of the umbrella. Connect the ends with a slightly curved line underneath to form the canopy shape. Add a small point at the very top. -
Draw the ribs:
From the top center point of the canopy, draw curved lines extending down to the bottom edge of the umbrella to create the ribs. This divides the umbrella into triangular segments. -
Sketch the figures:
Beneath the umbrella, sketch two simple figures standing close together. Draw the outline of the person on the left slightly taller and the person on the right leaning in slightly. Keep the shapes simple—focus on the coats and heads rather than facial features. -
Add the handle and legs:
Draw the umbrella shaft coming down between the two figures, held by the taller figure. Sketch simple, straight legs and shoes for both characters. -
Prepare the ground:
Lightly mark a horizontal area beneath their feet to represent the wet pavement or ground.
Bleeding Lines?
If the umbrella segments blur into one big blob, wait longer between sections. Use a hair dryer on low heat to speed up drying so you can paint adjacent areas safely.
Step 2: Painting the Elements
-
Paint the umbrella segments:
Mix a watery wash of Prussian Blue with a touch of Payne’s Grey. Paint one segment of the umbrella at a time. To add depth, drop slightly more concentrated pigment along the edges of the ribs while the paper is still damp. -
Create variation:
Let adjacent segments dry slightly before painting the next one to prevent colors from bleeding together, or paint skipping a segment (1, 3, 5 then 2, 4, 6). This defines the structure. Vary the blue intensity slightly for a natural look. -
Paint the figures:
Switch to a dark grey or black mix. Carefully fill in the silhouettes of the figures. Use the tip of your small brush to keep the edges of the coats and heads distinct. -
Detail the legs and handle:
Using your smallest brush and black paint, draw the thin lines for the legs and shoes. Carefully trace the umbrella shaft extending from the hand to the canopy. -
Ground the scene:
Mix a very diluted, watery grey. Paint a loose, horizontal wash beneath their feet to suggest a wet reflection. Don’t overwork this; a simple swipe works best.
Step 3: Adding the Rain
-
Mix the rain color:
Create a medium-strength wash of blue-grey. It needs to be transparent enough to look like water but dark enough to show up against the white paper. -
Paint rain drops:
Using a round brush with a fine point, paint vertical tear-drop shapes. I find it helpful to start with the brush tip and press down slightly as I pull down, then lift up to create a tapered droplet. -
Vary the direction:
Paint these droplets all around the umbrella, angling them slightly to suggest wind. Ensure the drops above the umbrella follow the curve of the rain falling, while drops below fall straight past the sides. -
Create layers:
Vary the size and length of the rain strokes. Some can be short dashes, others longer streaks. Leave empty white space around the immediate outline of the figures to keep the focal point clear. -
Final touches:
Once everything is fully dry, erase any visible pencil marks. If the umbrella ribs need more definition, gently go over the dividing lines with a fine liner brush and dark blue paint.
Make it Splash
Use a toothbrush to flick tiny specks of white gouache or masking fluid over the dried painting to create a mist effect or highlights on the wet umbrella.
Now you have a charming, atmospheric piece that perfectly captures a rainy day mood


Storm Clouds Breaking Into Rain
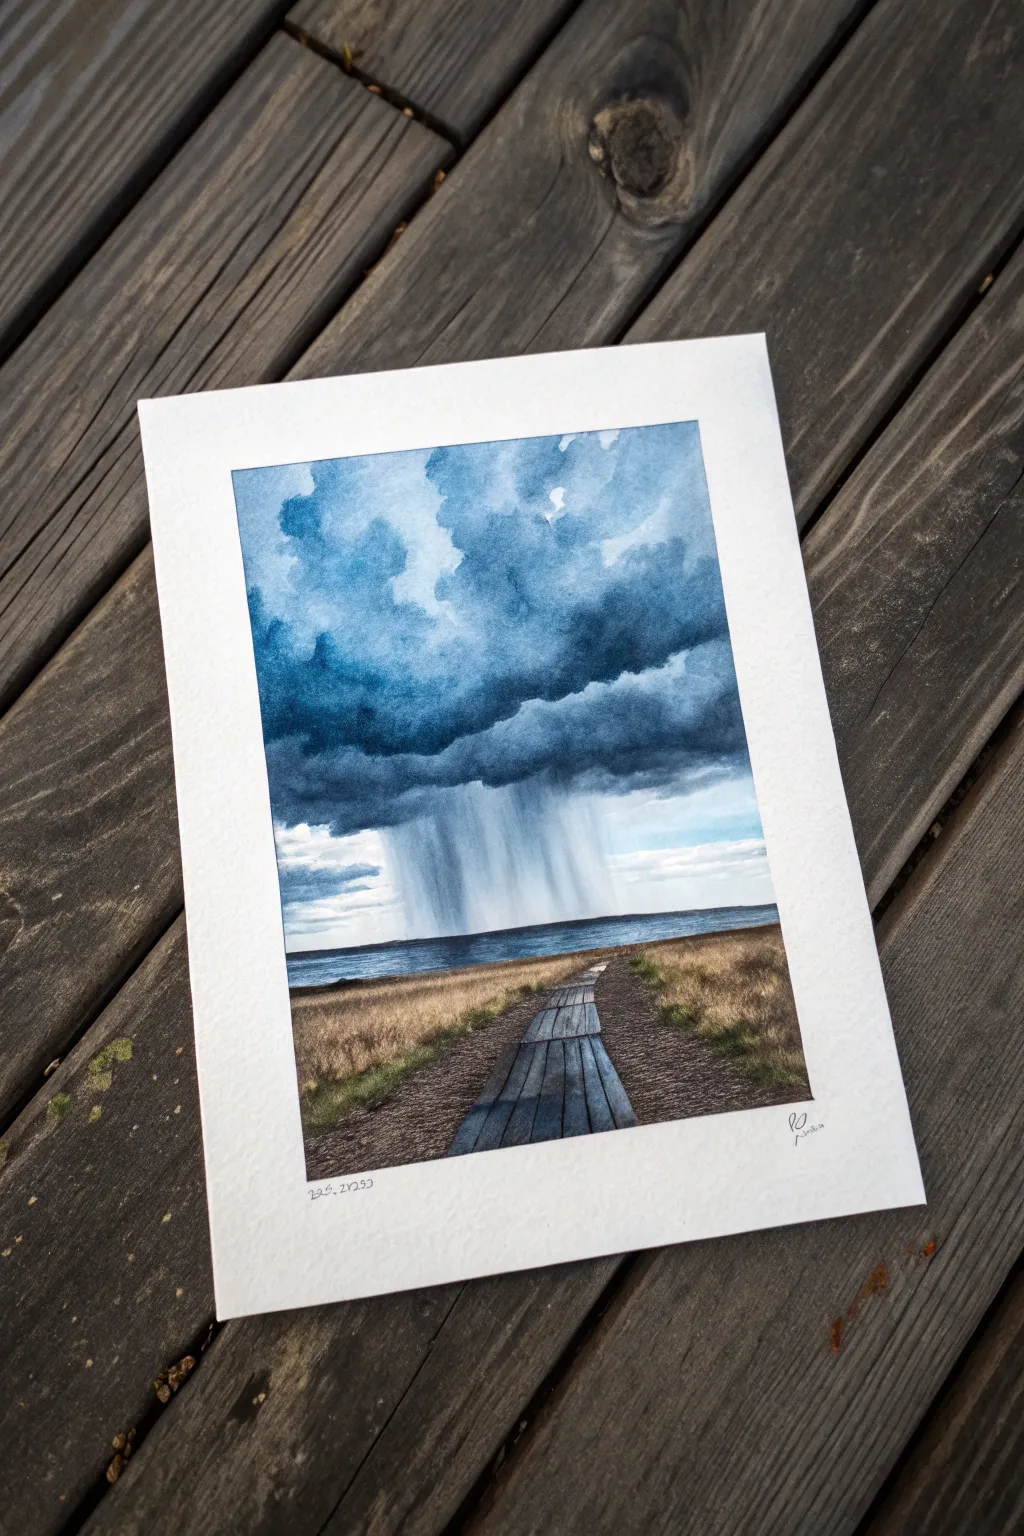
Capture the moody atmosphere of an approaching storm with this dramatic watercolor landscape featuring rain sheets falling over the ocean. You’ll learn how to paint heavy, layered clouds and create the illusion of rain pouring in the distance while grounding the scene with a textured wooden boardwalk.
Step-by-Step Guide
Materials
- Watercolor paper (cold press, 300gsm/140lb recommended)
- Watercolor paints: Indigo, Payne’s Gray, Ultramarine Blue, Burnt Sienna, Yellow Ochre, Sepia
- Masking tape
- Drawing board
- Pencil (HB) and eraser
- Round brushes (sizes 4, 8, and 12)
- Flat brush (1 inch for washes)
- Two jars of water
- Paper towels
- White gouache (optional)
Step 1: Preparation and Sketching
-
Tape down your paper:
Secure your watercolor paper to a board using masking tape on all four sides. This creates a crisp white border and prevents the paper from buckling when wet. -
Sketch the horizon:
Lightly draw a straight horizontal line about one-third of the way up from the bottom of the paper to mark the horizon where the sea meets the sky. -
Outline the path:
Sketch the wooden boardwalk leading from the bottom center, narrowing as it recedes toward the horizon to create perspective. Add loose lines for the surrounding grass.
Step 2: Painting the Stormy Sky
-
Wet the sky area:
Using your large flat brush, apply clean water to the entire sky area above the horizon line. The paper should be glistering but not swimming in puddles. -
Lay in the light blues:
While the paper is wet, drop in a diluted wash of Ultramarine Blue near the top and middle, leaving some white paper visible for the brightest cloud highlights. -
Build the storm clouds:
Mix a strong concentration of Indigo and Payne’s Gray. With a size 12 round brush, dab this dark mixture into the upper portion of the wet sky, letting the paint bloom naturally to form soft cloud edges. -
Deepen the shadows:
While the previous layer is still damp, add even darker pigment (Indigo mixed with a touch of Sepia) to the undersides of the main cloud mass to give it weight and volume. -
Create the rain curtain:
This is the crucial step. While the dark cloud bottom is still wet, take a clean, damp brush and gently drag the paint downwards towards the horizon in vertical strokes. This softens the pigment and creates the look of rain sheets falling. -
Refine the rain:
If I want a stronger rain effect, I sometimes gently lift pigment out with a dry brush in vertical streaks or add very faint vertical washes of gray below the cloud base. -
Let the sky dry completely:
Do not touch the bottom section until the sky is 100% bone dry to prevent bleeding.
Make Rain Real
To get realistic rain streaks, tilt your board slightly upright while the paint is wet. Gravity helps pull the pigment down into natural vertical streaks.
Step 3: Ocean and Horizon
-
Paint the water:
Mix a dark blue-grey using Ultramarine and a touch of Payne’s Gray. Paint a horizontal strip for the ocean, keeping the color darker at the horizon line and slightly lighter near the shore. -
Soften the meeting point:
Allow the water color to touch the ‘rain’ area gently so the horizon isn’t too sharp where the rain is falling, enhancing the atmospheric depth.
Too Much Water?
If a ‘cauliflower’ bloom appears in your sky, don’t fuss with it while wet. Wait until dry, then gently scrub the edge with a damp stiff brush to soften it.
Step 4: Foreground and Boardwalk
-
Base wash for the grass:
Mix Yellow Ochre with a tiny bit of Burnt Sienna. Apply a wash to the land areas on either side of the path. While wet, drop in bits of Sepia or Green near the bottom for shadow variety. -
Texture the grass:
Once the base wash is dry, use a smaller round brush with a dry-brush technique (minimal water) using Sepia and Burnt Sienna to flick upward repetitive strokes, simulating tall, dry grass. -
Paint the boardwalk planks:
Mix a watery grey-brown using Sepia and Ultramarine. Paint the individual planks of the boardwalk. Vary the tone slightly on different planks to make the wood look weathered. -
Define the boardwalk details:
Use a darker mixture (Payne’s Gray) and a fine brush to paint the thin gaps between the planks and the edges of the walkway. -
Add wood grain texture:
With a nearly dry brush and dark pigment, lightly drag texture lines along the length of the planks to suggest wood grain. -
Final touches:
Check your contrast. You might want to darken the grass right next to the path to make the light boardwalk pop. Sign your name in the corner once fully dry. -
Reveal the border:
Gently peel away the masking tape at a 45-degree angle to reveal your clean, crisp edges.
Step back and admire the stormy mood you’ve captured without getting a single drop of rain on you


Limited-Palette Rainscape in Cool Blues
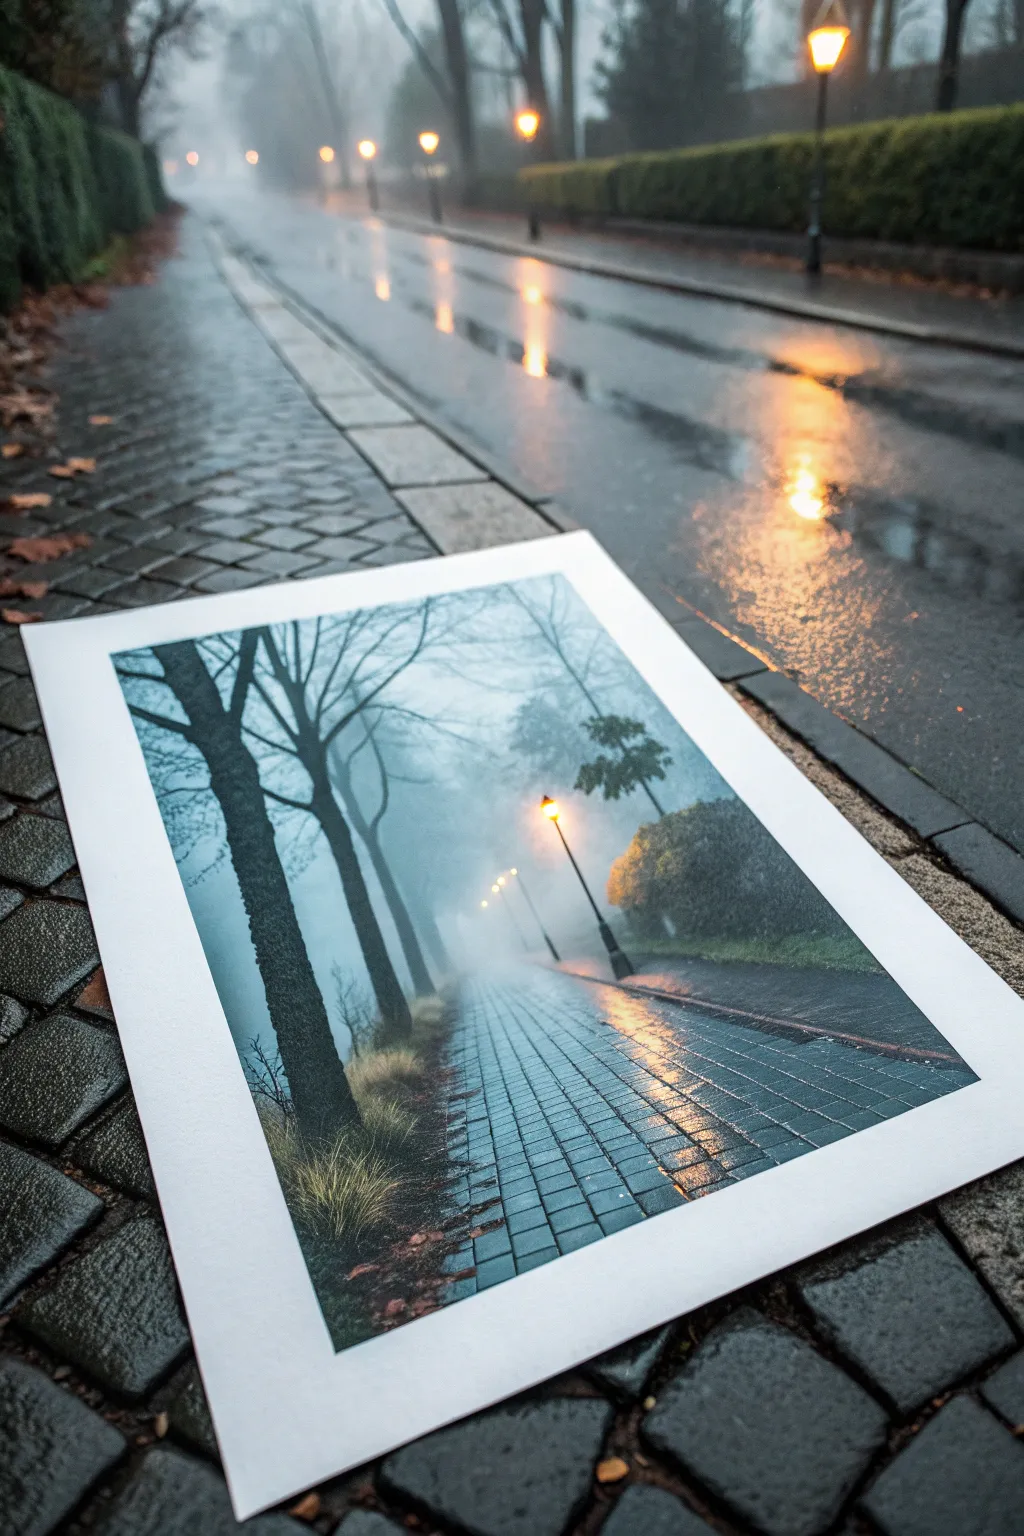
Capture the moody atmosphere of a foggy, rain-slicked evening using a restricted palette of cool blues and warm streetlight accents. This project focuses on creating depth through atmospheric perspective and mastering the reflective quality of wet pavement.
Detailed Instructions
Materials
- Cold press watercolor paper (300 gsm)
- Painter’s tape and drawing board
- Watercolor paints: Indigo, Payne’s Grey, Phthalo Blue, Burnt Sienna, Cadmium Yellow
- Flat shader brush (3/4 inch)
- Round brushes (sizes 4 and 8)
- Rigger brush for fine branches
- White gouache or white gel pen
- Paper towels
- Two jars of water
- HB pencil
Step 1: Preparation and Initial Wash
-
Secure the paper:
Tape down all four edges of your watercolor paper to a board to prevent buckling. Ensure the tape is pressed firmly to create a clean white border later. -
Sketch the perspective:
Using an HB pencil, lightly sketch a single-point perspective grid. Draw a horizon line about a third of the way up the page, and radiate diagonal lines outward to define the path and tree line. -
Wet-on-wet background:
Pre-wet the entire paper with clean water using your large flat brush. The surface should sheen but not hold puddles. -
Create the fog:
Mix a very dilute wash of Phthalo Blue and a touch of Payne’s Grey. Apply this to the center and upper background, keeping it incredibly pale to mimic thick fog.
Muddy colors?
If your blues look dull, you likely overmixed them on the palette. Let the colors mix partially on the paper instead for a vibrant, shimmering rain effect.
Step 2: Building Atmospheric Depth
-
Distant trees:
While the paper is still damp, mix a slightly stronger grey-blue. Drop in vague, soft shapes in the background for distant trees; the wet paper will diffuse the edges naturally. -
Mid-ground foliage:
As the paper begins to lose its sheen (damp, not soaking), mix a darker Indigo. Paint the tree shapes on the right side, allowing the bottom edges to blur slightly into the misty ground. -
Dry time:
Let this layer dry completely. This is crucial because the foreground trees need sharp, crisp edges to stand out against the soft background.
Step 3: Foreground Elements
-
Foreground trees:
Using the size 8 round brush and a heavy mix of Indigo and Payne’s Grey, paint the large trunks on the left. Press down for the base and lift as you go up. -
Adding branches:
Switch to your rigger brush. With a very inky consistency, pull fine branches extending from the main trunks, tapering them towards the sky. -
Bush texture:
Stipple a thick mix of dark blue and green (mix Phthalo Blue and Burnt Sienna) to create the heavy bush on the right side. Leave the edges somewhat loose. -
Foreground grass:
Use quick, upward flicking motions with a semi-dry brush at the base of the left trees to suggest tall, wintry grass clumps.
Add texture
Sprinkle a tiny pinch of table salt onto the wet path area while painting. Once dry, brush it off to create a speckled texture that looks like hitting raindrops.
Step 4: The Path and Lighting
-
Paving stones:
Mix a watery grey wash. Paint horizontal strokes across the path area, leaving thin white gaps between them to represent the grout lines of the cobblestones. -
Streetlamps:
Mix a warm glow using Cadmium Yellow and a tiny dot of Burnt Sienna. Paint the lamp heads carefully. While wet, soften the edges with a clean, damp brush to create a glowing halo effect. -
Reflections:
Beneath the streetlamps and on the wet path, drag vertical strokes of your yellow-orange mix. I like to keep these strokes loose and wavy to mimic light distorting on wet stone. -
Deepening shadows:
Glaze a transparent layer of Indigo over the bottom corners of the path to guide the viewer’s eye toward the light in the center. -
Final highlights:
Use white gouache or a gel pen to add the brightest point of the lamp bulb and tiny highlights on the wettest parts of the paving stones. -
The reveal:
Once the painting is 100% dry, carefully peel away the painter’s tape at a 45-degree angle to reveal your crisp white border.
Step back and admire how a few simple colors can create such a moody, atmospheric world
BRUSH GUIDE
The Right Brush for Every Stroke
From clean lines to bold texture — master brush choice, stroke control, and essential techniques.
Explore the Full Guide
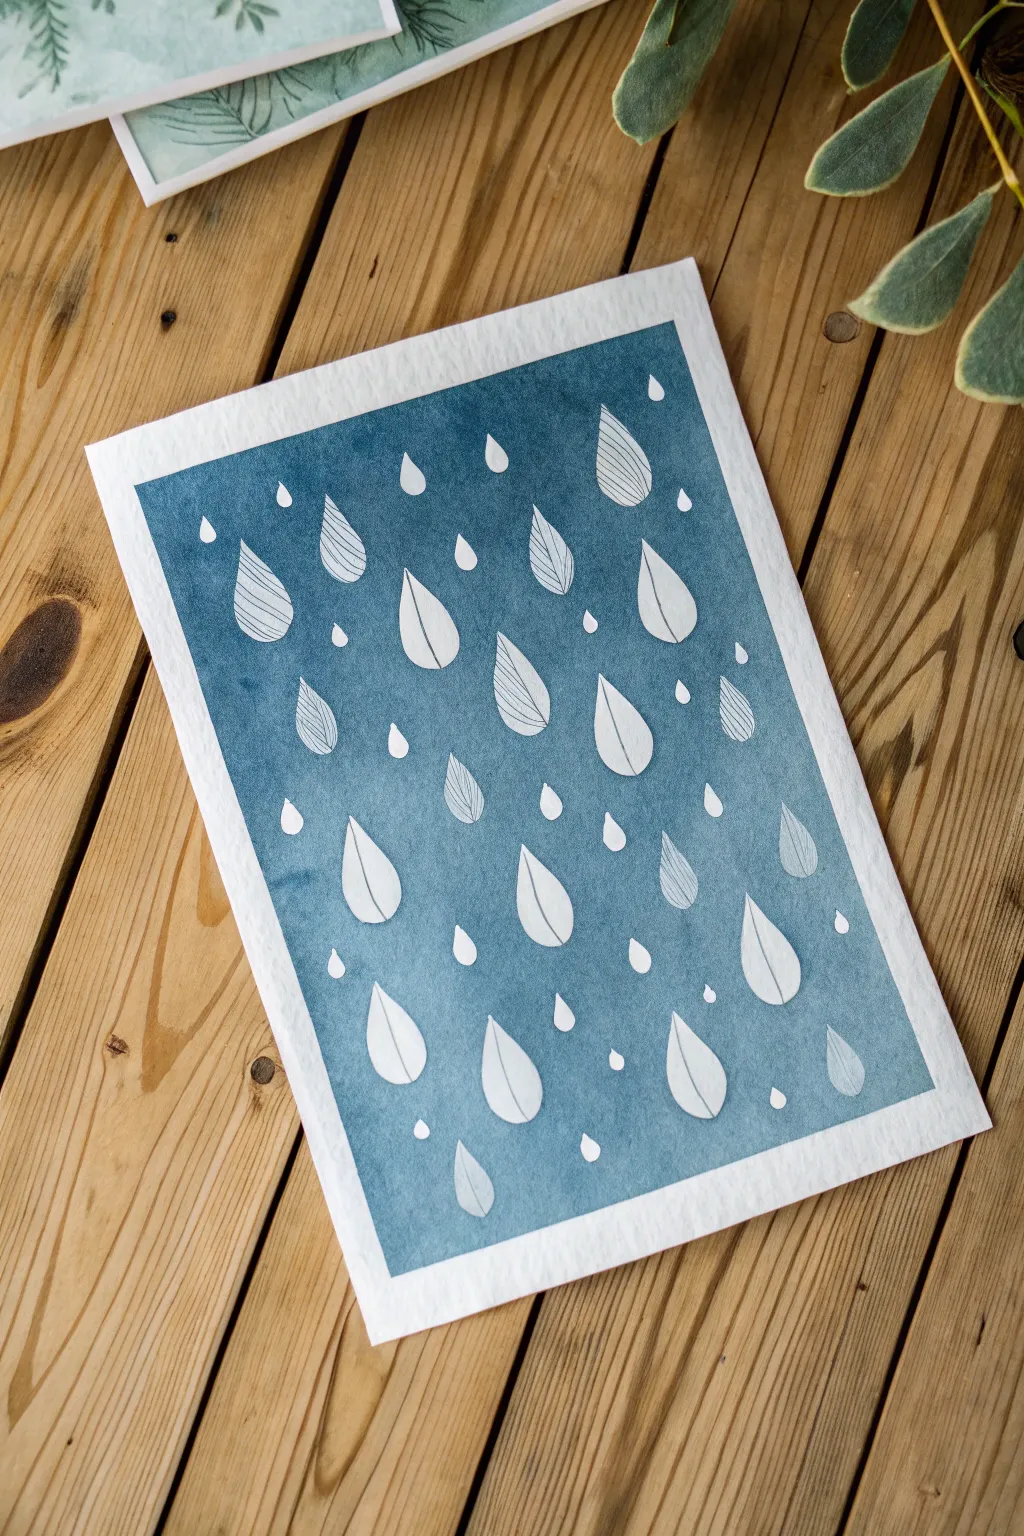
Droplet Resist for Crisp Raindrop Highlights

Capture the essence of a downpour with this stylized watercolor project that uses masking fluid to keep your raindrops pristine white against a moody blue sky. The contrast between the organic wash and the sharp, patterned droplets creates a striking modern illustration.
Step-by-Step Guide
Materials
- Cold press watercolor paper (A4 or 5×7)
- Blue watercolor paint (Indigo or Prussian Blue)
- Masking fluid (drawing gum)
- Fine liner brush or mapping pen
- Large flat wash brush
- Pencil and eraser
- Black waterproof fine liner pen (01 or 03 size)
- Painter’s tape
- Rubber cement pickup tool (optional)
Step 1: Drafting and Masking
-
Tape it down:
Start by securing your cold press watercolor paper to a board or table using painter’s tape on all four sides. This creates that crisp white border seen in the final piece and prevents the paper from buckling when wet. -
Sketch the drops:
Lightly sketch a random assortment of raindrops falling vertically. Vary the sizes, making some large teardrops and others tiny specks. Aim for a scattered, natural distribution rather than perfect rows. -
Prepare the masking fluid:
Stir your masking fluid gently. Do not shake it, as this creates bubbles that can ruin the crisp lines we are aiming for. -
Apply the mask:
Using an old brush or a silicone applicator, carefully fill in every drawn raindrop with masking fluid. Be precise with the edges, as the paint will go everywhere the mask isn’t. -
Safety check:
Double-check that your tiny circular ‘droplets’ are fully covered. I like to hold the paper up to the light to catch the sheen of the fluid and spot any missed gaps. -
Let it cure:
Allow the masking fluid to dry completely. It should feel transparent or yellowish and tacky to the touch, but not wet. Patience here ensures you don’t smear the resist.
Step 2: The Wash and Reveal
-
Mix the blue:
Prepare a generous amount of blue watercolor wash. Use a moody shade like Indigo or Prussian Blue diluted with enough water to flow easily but keep a strong saturation. -
Apply the background:
Using your large flat wash brush, paint over the entire paper, going right over the masked droplets. Work quickly from top to bottom to create an even, flat wash without harsh streaks. -
Add texture (optional):
While the paint is still wet, you can dab it gently with a tissue in random spots to create subtle tonal variations in the sky, though a solid flat wash works beautifully too. -
complete drying:
Let the blue paint dry completely. This is crucial—if the paper is damp when you remove the mask, you will tear the surface. -
Remove the mask:
Gently rub away the masking fluid using your finger or a rubber cement pickup tool. Reveal the stark white paper underneath your blue wash.
Soap Savior
Before dipping your brush in masking fluid, coat the bristles in dish soap. This prevents the fluid from drying deep in the ferrule and ruining the brush.
Step 3: Pattern and Detail
-
Group the drops:
Look at your revealed white drops. Choose about half of the larger ones to remain pure white, and select the other half for detailing. -
Draw internal lines:
Using a waterproof black fine liner, draw a vertical line down the center of your selected ‘detail’ drops. -
Add veining:
On these same drops, draw angled lines branching from the center line, resembling a leaf skeleton or a stylized hatching pattern. Keep your hand steady but light. -
Vary the direction:
For some drops, you might only draw horizontal hatch marks instead of the leaf pattern to add visual variety. -
Clean up:
Erase any remaining pencil marks that might be showing on the pure white drops. -
Final reveal:
Slowly peel away the painter’s tape at a 45-degree angle to reveal the clean border that frames your rainy scene.
Torn Paper?
If the paper tears when removing tape, use a hair dryer to heat the tape adhesive slightly as you peel. Pull away from the artwork, not toward it.
Now you have a serene, modern piece of rain art ready to frame or gift

Have a question or want to share your own experience? I'd love to hear from you in the comments below!