
I love how outlet covers can be the tiniest detail that makes a room feel fully “done,” especially once they stop screaming bright white at you. Think of each one as a mini canvas: you can either make it quietly blend in or turn it into a little moment of art.
Wall-Matching Painted Outlet Covers
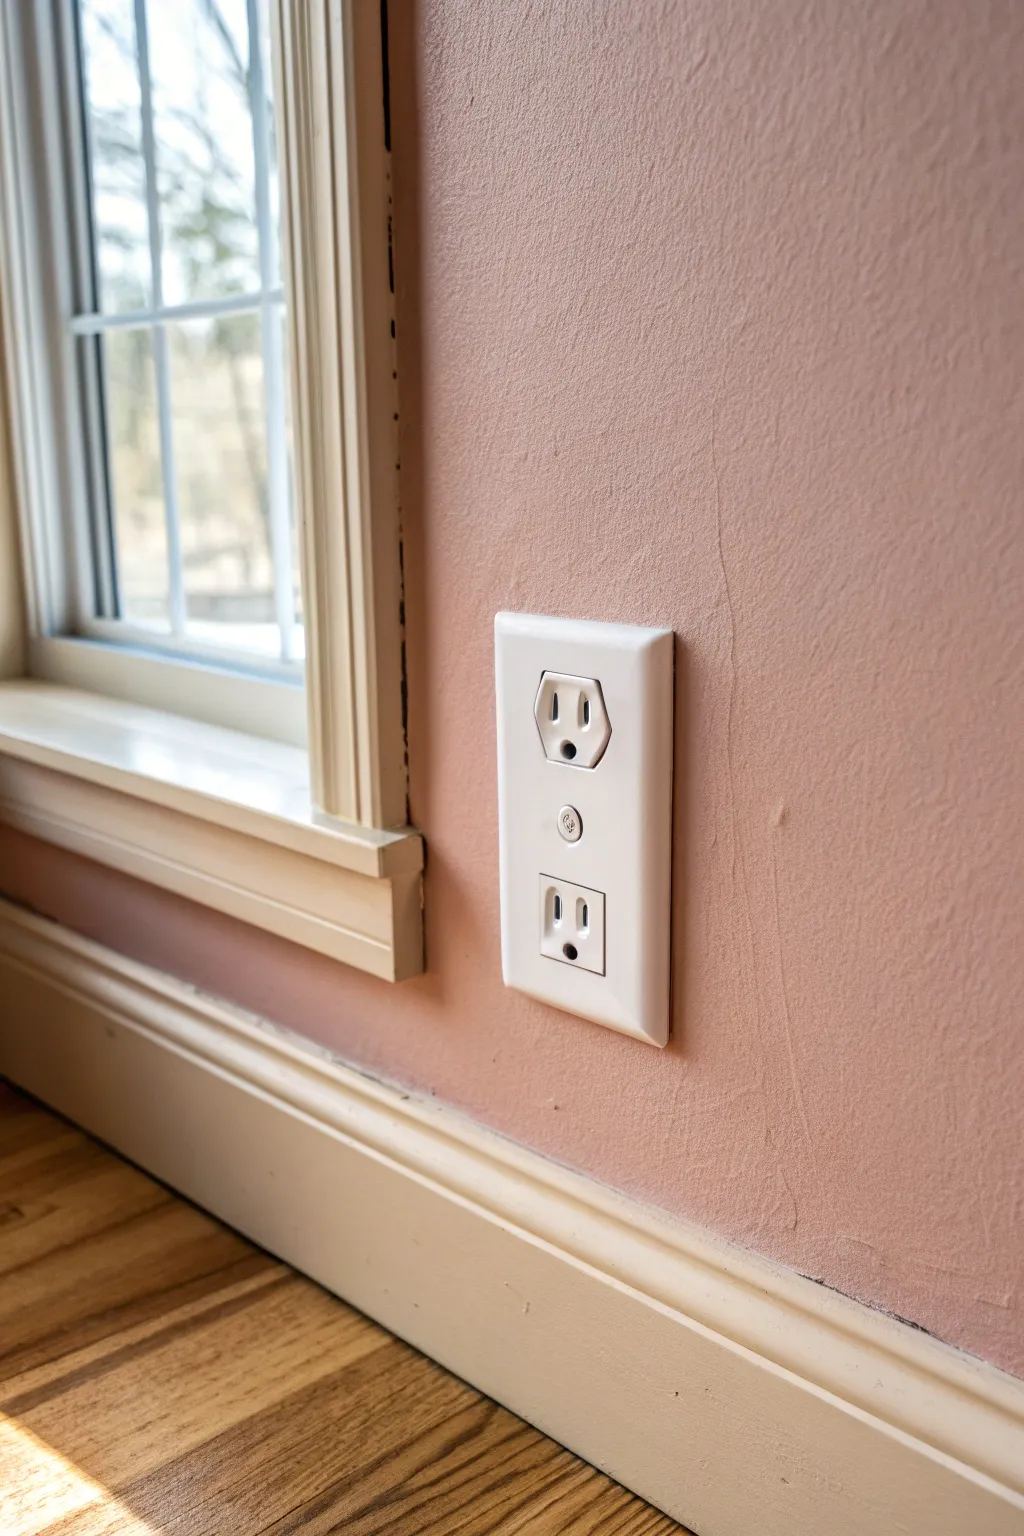
Achieve a sleek, custom look by camouflaging your outlet covers to perfectly match your wall color. This project creates a seamless visual flow, making unsightly plastic plates disappear into your decor for a high-end designer finish.
Detailed Instructions
Materials
- Standard plastic outlet cover
- Sandpaper (220-grit fine)
- Clean cloth or tack cloth
- Plastic primer spray (specifically for bonding to plastic)
- Leftover wall paint (matching your room exactly)
- Small foam roller or high-quality synthetic angled brush
- Paint tray
- Drop cloth or scrap cardboard
- Painter’s tape
- Clear matte or satin sealer (optional)
Step 1: Preparation
-
Remove the Plate:
Using a flathead screwdriver carefully remove the screw holding the outlet cover to the wall. Keep the screw safe; you’ll be painting the head of it later to match. -
Clean Thoroughly:
Wash the outlet plate with warm soapy water to remove any grease, fingerprints, or dust. This is crucial because even invisible oils can prevent paint adhesion. -
Dry Completely:
Wipe the plate down with a clean towel and let it air dry for a few minutes to ensure zero moisture remains in the screw holes. -
Scuff Sanding:
Take your 220-grit sandpaper and lightly scuff the entire front surface and edges of the plastic plate. You don’t need to gouge it; just create a hazy, dull texture to give the primer something to grip. -
Remove Dust:
Wipe away all the sanding dust using a tack cloth or a slightly damp rag. Any leftover dust will create tiny bumps in your final finish. -
Prep the Screw:
Stick the screw into a piece of scrap cardboard or styrofoam so it stands upright. This allows you to paint the head without getting paint on the threads.
Step 2: Priming
-
Setup Workspace:
Lay down your drop cloth or cardboard in a well-ventilated area, preferably outside or in a garage. -
Apply Primer:
Shake your plastic bonding primer can vigorously. Hold the can about 8-10 inches away and spray a light, even coat over the outlet cover and screw head. Don’t forget the edges. -
Dry Time:
Let the primer cure according to the manufacturer’s instructions. Usually, I like to give it at least an hour to ensure a solid bond.
Texture Trick
To match the ‘orange peel’ texture of a roller-painted wall, use a small mini foam roller instead of a brush. It mimics the stipple effect perfectly for a true match
Step 3: Painting
-
First Coat:
Pour a small amount of your matching wall paint into a tray. Using a small foam roller (for texture matching) or a brush, apply a thin first coat to the primed plate. -
Don’t Forget the Screw:
Lightly dab the screw head with your brush to cover the primer. Be careful not to gum up the slot where the screwdriver goes. -
Avoid Drips:
Check the edges of the plate immediately for any drips or pooling paint and smooth them out. -
Let it Dry:
Allow the first coat to dry completely. If you engage with it too soon, the paint might lift off the smooth plastic. -
Second Coat:
Apply a second coat of paint. This usually provides full coverage. If you are using a brush, try to stroke in the same direction as the surrounding wall texture if possible. -
Check Coverage:
Inspect the plate in good light to ensure no white primer is showing through, especially around the socket openings. -
Optional Sealer:
If this outlet is in a high-traffic area, apply a light coat of clear matte sealer once the paint is fully cured to prevent chipping.
Make It Stone
Use a specialized stone-texture spray paint in a coordinating color before painting it to give the outlet a tactile, high-end architectural finish usually found in luxury homes
Step 4: Reinstallation
-
Full Cure:
Wait at least 24 hours before reinstalling. The paint needs to harden so it doesn’t stick to the wall or peel off when you tighten the screw. -
Install:
Place the cover back over the outlet and gently tighten the painted screw. Use a piece of cloth over the screwdriver tip to avoid scratching the new paint on the screw head.
Now your outlets will blend discreetly into your walls, letting your decor take center stage


Tile-Matching Outlet Covers for Backsplashes
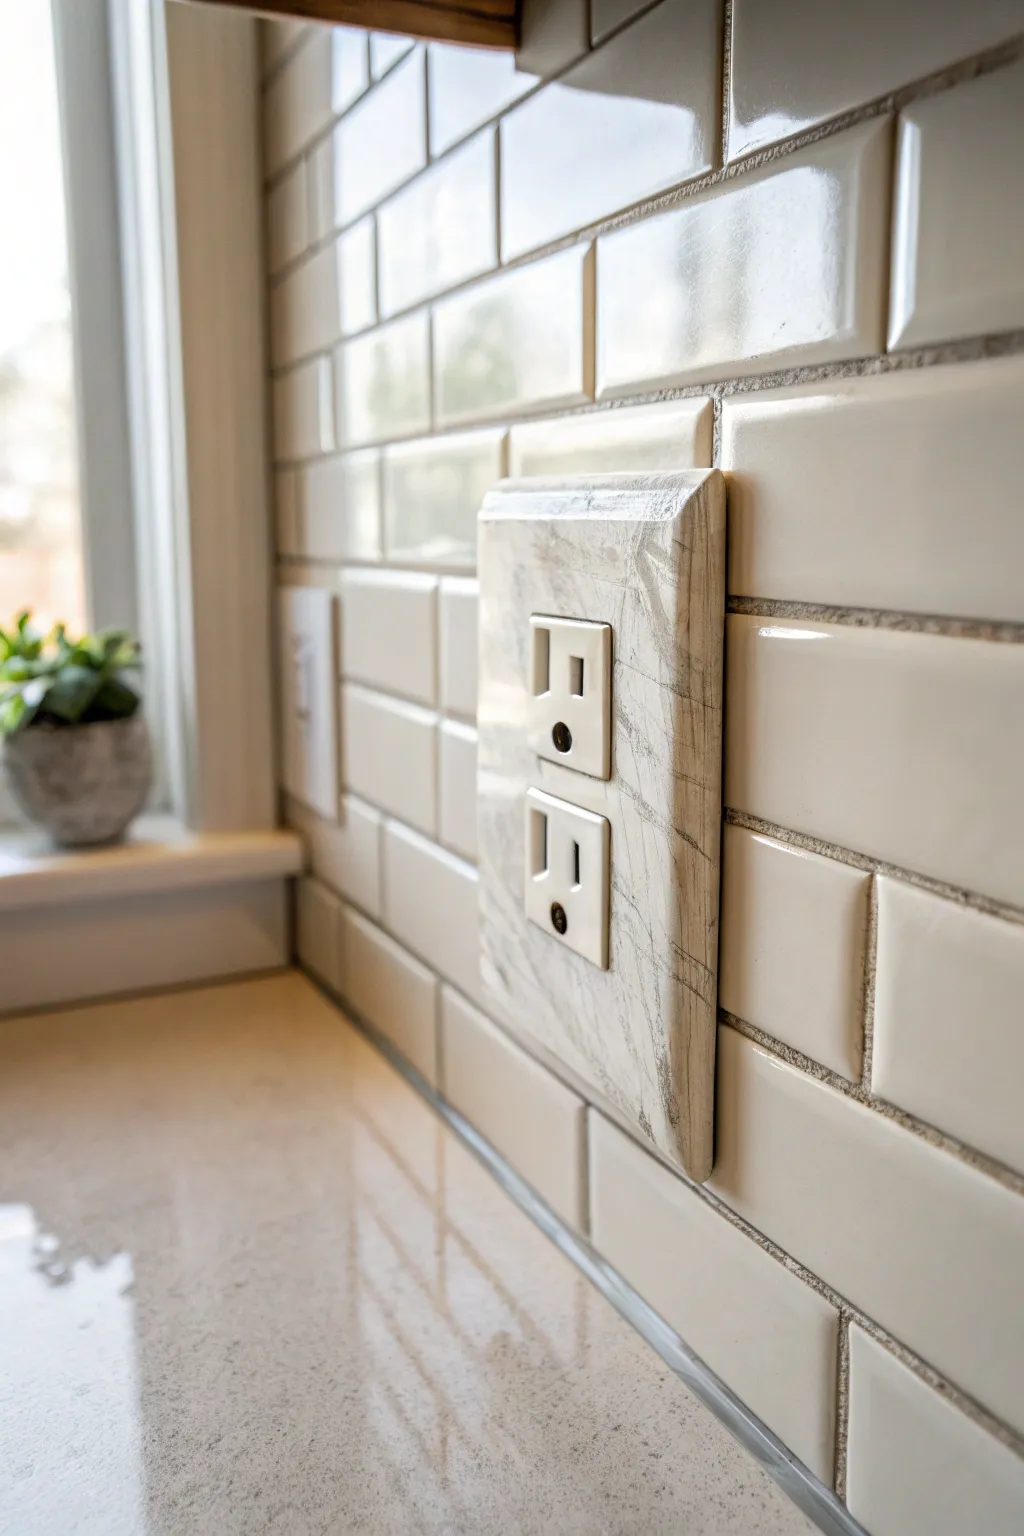
For a seamless look in your kitchen or bathroom, this project transforms a standard plastic outlet cover into a convincing ceramic tile illusion. By mimicking the glossy finish and imperfect grout lines of subway tile, you can make unsightly outlets virtually disappear into your backsplash.
How-To Guide
Materials
- Standard plastic outlet cover (with screw)
- Fine-grit sandpaper (220-grit)
- Adhesive primer spray or paint
- Cream white acrylic paint (gloss or satin)
- Light gray acrylic paint
- Dark charcoal or brown acrylic paint (for aging)
- Small flat artist brush
- Fine liner brush
- Polyurethane topcoat (high gloss)
- Pencil
- Ruler or straight edge
- Palette or small mixing dish
Step 1: Preparation and Base Coat
-
Surface Prep:
Remove the outlet cover from the wall and clean it thoroughly with soap and water to remove any grease or oils. Dry completely. -
Sanding:
Lightly scuff the shiny plastic surface with 220-grit sandpaper. This specific step is crucial because it gives the primer something to grip onto, preventing peeling later. -
Wipe Down:
Wipe away all sanding dust with a damp cloth or tack cloth. Ensure the surface is perfectly clean before proceeding. -
Priming:
Apply a thin, even coat of adhesive primer. An adhesive-specific primer works best on plastic. Let it dry according to the manufacturer’s instructions. -
Base Color:
Apply the cream white acrylic paint to the entire cover, including the edges. This will serve as your tile color. You may need two to three coats for full opacity. -
Drying Time:
Allow the base color to dry completely between coats. I prefer to let the final coat cure for at least an hour to ensure a hard surface for drawing.
Step 2: Simulating the Tile Pattern
-
Mapping the Lines:
Hold the cover up to your existing backsplash to align the grout lines. Mark lightly with a pencil where the horizontal and vertical grout lines should intersect the plate. -
Drawing Guidelines:
Remove the plate from the wall and use a ruler to connect your pencil marks, drawing the grout grid directly onto the painted cover. -
Painting Grout:
Using a fine liner brush and light gray paint, carefully trace over your pencil lines. Don’t worry about being perfectly straight; a slightly wavering hand mimics aged grout better. -
Adding Depth:
Mix a tiny amount of charcoal paint with your gray. Add subtle shadows along one side of the grout lines to create a dimensional, recessed effect.
Uneven Grout Lines?
If your painted grout lines look too shaky, wait for them to dry. Then, use the base cream color to cut back into the line, straightening the edge and thinning the grout line.
Step 3: Adding Texture and Finish
-
Creating Texture:
The tiles in the image have a slightly aged, crackled look. Use a dry brush with a very faint amount of gray or brown paint to lightly sweep random, jagged marks across the white sections. -
Simulating Cracks:
With your finest liner brush, paint thin, vein-like cracks using watered-down gray paint. These should be barely visible and broken lines, not solid strokes. -
Screw Head Camouflage:
Don’t forget the center screw! Paint the screw head to match the specific area of tile or grout where it will sit once installed. -
Sealing the Art:
Once all paint is visibly dry, apply a high-gloss polyurethane topcoat. The gloss is essential to mimic the reflective quality of ceramic subway tiles. -
Final Cure:
Apply a second coat of gloss if needed for extra shine and durability. Let the cover cure for 24 hours before reinstalling it to prevent tackiness.
Match the Glaze
For ultra-realistic depth, mix a tiny drop of iridescent or pearl medium into your topcoat. This mimics the specific sheen of fired ceramic glaze.
Now you have a custom outlet cover that blends beautifully into your backsplash design


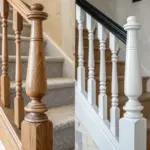
Trim-Matching Outlet Covers for a Cohesive Look
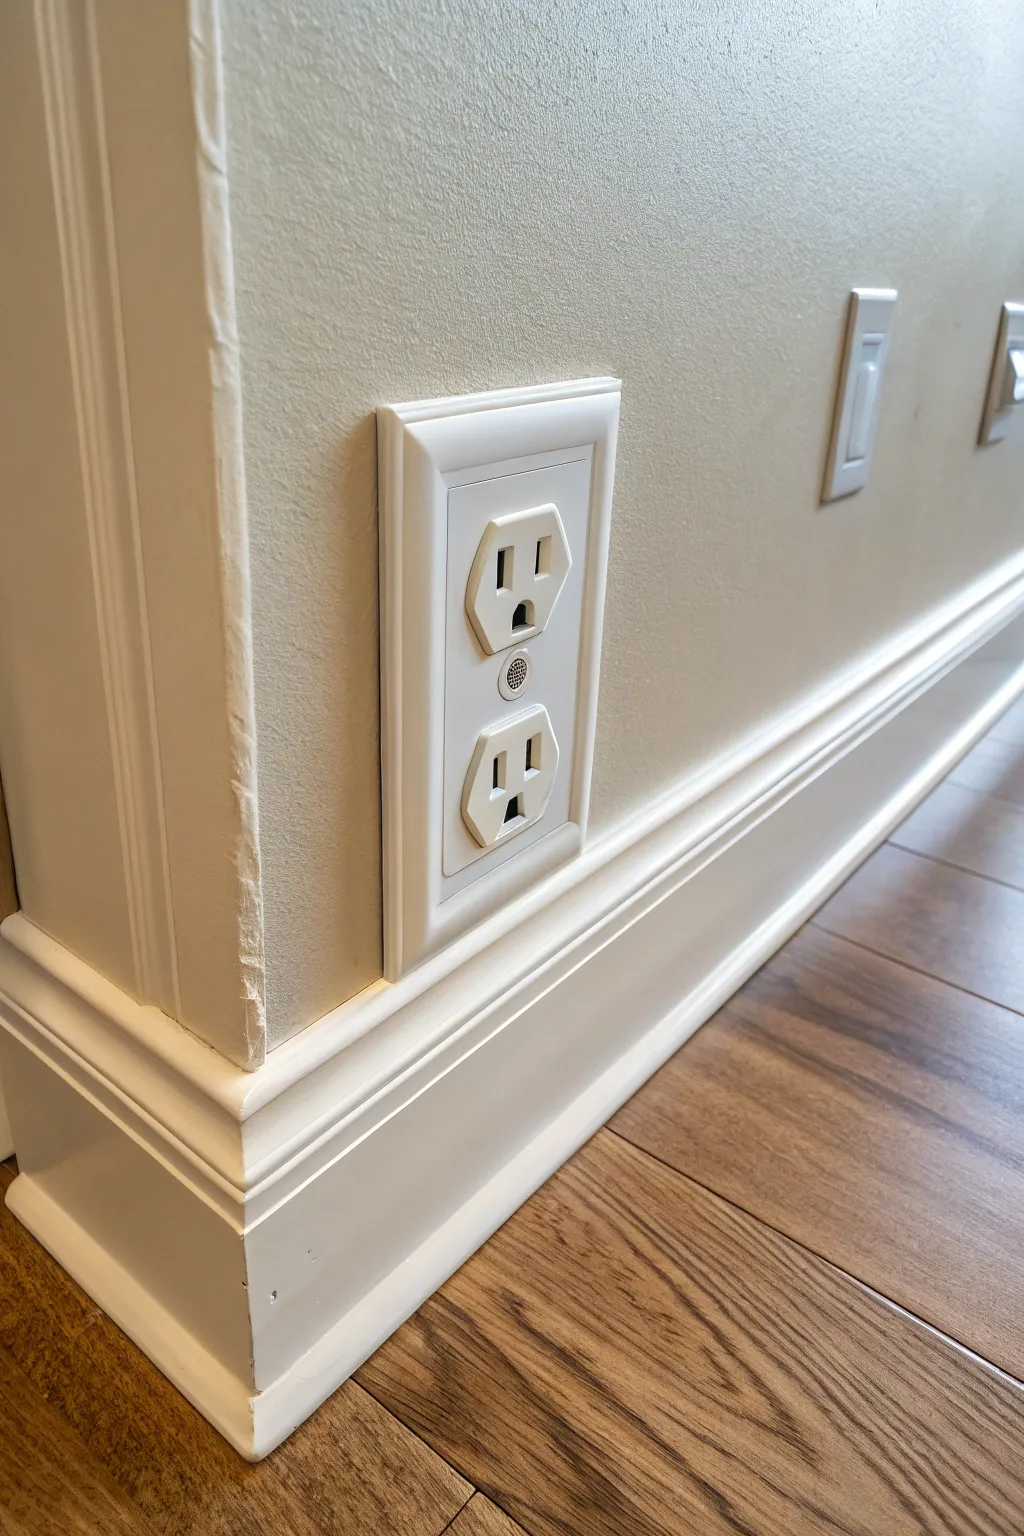
Achieve a high-end, custom finish by painting your outlet covers to perfectly match your baseboards and trim. This subtle detail creates a cohesive, streamlined look that eliminates visual clutter and elevates the entire room’s aesthetic.
Step-by-Step
Materials
- Plastic or wood outlet cover plate
- Fine-grit sandpaper (220-grit)
- Tack cloth or microfiber rag
- High-quality bonding primer (spray or liquid)
- Trim paint (matching your baseboards, usually semi-gloss or satin)
- High-quality angled sash brush or mini foam roller
- Painter’s tape
- Screwdriver
- Cardboard or drop cloth (for workspace)
- Paint stirrer
Step 1: Preparation
-
Remove the plate:
Using a flathead or Phillips screwdriver, carefully unscrew the existing outlet cover from the wall. If the screws are painted over, score the edge gently with a utility knife first to avoid peeling the wall paint. -
Clean thoroughly:
Wash the outlet cover with warm, soapy water to remove any grease, dust, or oils from fingers. This step is crucial for paint adhesion. Dry completely with a clean towel. -
Scuff sanding:
Taking your 220-grit sandpaper, lightly scuff the entire surface of the plastic plate. You aren’t trying to remove material, just taking off the glossy sheen to give the primer something to bite into. -
Dust removal:
Wipe away all the sanding dust using a tack cloth or a slightly damp microfiber rag. Ensure the surface is perfectly clean and dry before moving on. -
Set up workspace:
Lay down a piece of cardboard or a drop cloth in a well-ventilated area. Place the outlet cover face-up on the surface. I like to elevate it slightly on a small block or bottle cap so the edges don’t stick to the cardboard. -
Prepare the screws:
Don’t forget the screws! Push them through a piece of cardboard so they stand upright, leaving the heads exposed for painting. This ensures they will blend in perfectly once reinstalled.
Step 2: Priming and Painting
-
Apply primer:
Apply a thin, even coat of bonding primer. A spray primer often gives the smoothest finish, but a liquid primer applied with a foam brush works too. Let this dry according to the manufacturer’s instructions. -
Inspect the prime coat:
Once dry, check for any drips or rough spots. If necessary, lightly sand imperfections with the fine-grit paper and wipe clean again. -
First coat of paint:
Using your trim paint and a high-quality brush or mini foam roller, apply the first coat of paint. stroke in one direction to minimize brush marks. Apply thin coats rather than one thick one to avoid pooling. -
Paint the screws:
Lightly dab or brush the paint onto the screw heads you set up earlier. Be careful not to fill the screwdriver slots completely with paint, or they will be hard to install later. -
First coat drying:
Allow the first coat to dry completely. Consult your paint can for specific recoat times, usually 2-4 hours for latex or acrylic paints. -
Second coat application:
Apply a second thin coat of paint for full opacity and a durable finish. This ensures the color depth matches the adjacent trim perfectly. -
Final drying stage:
Let the final coat cure for at least 24 hours before handling. Even if it feels dry to the touch, the paint needs time to harden so it won’t scratch during installation.
Sticky Paint?
If the cover sticks to the wall after drying, the paint wasn’t fully cured. Wait 24-48 hrs before installing. You can also lightly dust the back edge with baby powder to prevent sticking.
Step 3: Installation
-
Reinstall the plate:
Gently place the cover back over the outlet. Handling it by the edges helps prevent fingerprints on the fresh paint. -
Secure with screws:
Insert the painted screws. Tighten them by hand with a screwdriver gently until just snug. Overtigtening can crack the paint or the plastic plate itself. -
Align the screws:
For that professional electrician’s finish, align the slots of the screws vertically so they are all uniform.
Pro Tip: Texture Match
Use a mini roller for the final coat to exactly mimic the texture of rolled trim paint, or a high-quality brush if your trim has brush marks. Matching texture is as vital as color.
Now you have a sleek, custom look that makes your outlet covers disappear into the woodwork beautifully


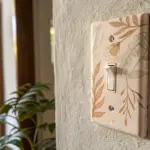
Border-Line Detail on Painted Outlet Covers
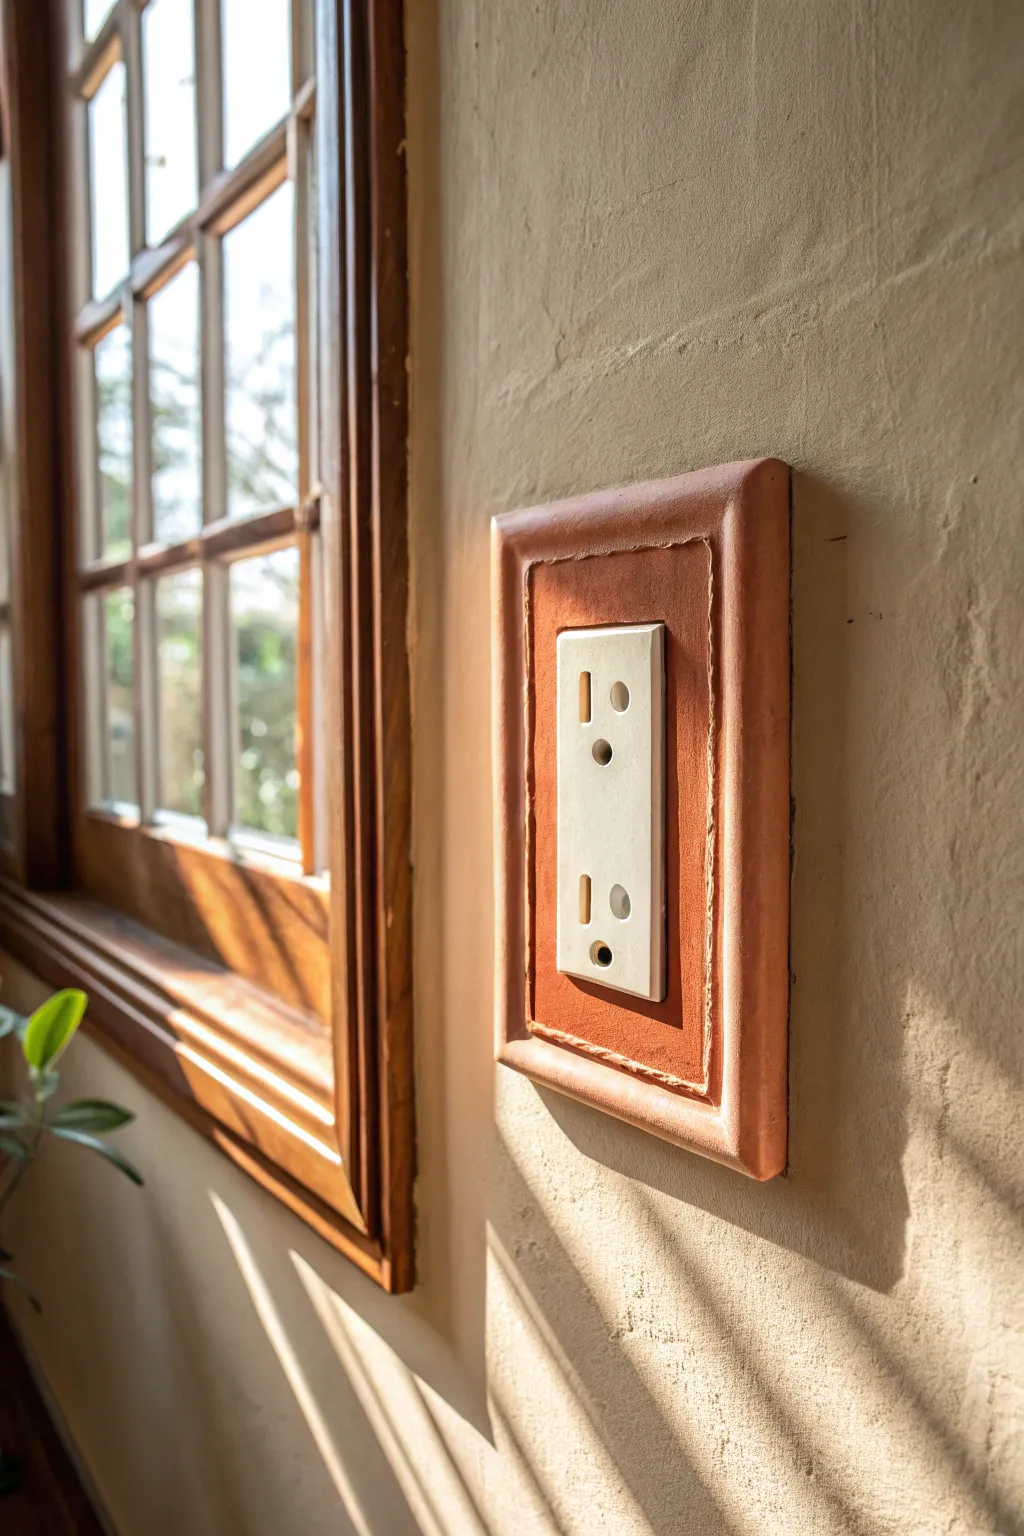
Transform a standard outlet cover into a charming architectural detail with this faux-finish painting technique. By adding a warm, terracotta-colored border with an intentionally imperfect edge, you can mimic the look of handcrafted clay tile or rustic stoneware.
Step-by-Step Guide
Materials
- Plastic or wood outlet cover plate
- Sandpaper (220-grit)
- Primer suitable for plastic (spray or brush-on)
- Acrylic craft paint (Terracotta or Burnt Sienna)
- Acrylic craft paint (Cream or Antique White)
- Small flat artist brush (size 4 or 6)
- Painter’s tape (optional but helpful)
- Matte clear coat sealer
- Clean cloth
Step 1: Preparation
-
Clean the surface:
Remove the outlet cover from the wall and wash it thoroughly with warm soapy water to remove any grease or fingerprints. Dry it completely. -
Scuff sand:
Lightly sand the entire surface of the plate using 220-grit sandpaper. This creates a ‘tooth’ for the primer to grip onto, which is crucial for plastic surfaces. -
Wipe away dust:
Use a damp cloth or tack cloth to remove all sanding dust. Ensure the surface is perfectly clean before moving to the next step. -
Apply primer:
Apply a thin, even coat of high-quality primer. If you are using a spray primer, use short bursts to avoid drips. Let this dry completely according to the manufacturer’s instructions.
Natural Texture
Mix a tiny pinch of baking soda into your terracotta paint. This creates a gritty, stone-like texture that feels authentic to the touch.
Step 2: Base and Border
-
Apply base color:
Paint the entire face of the outlet cover with your Cream or Antique White acrylic paint. This will be the color of the inner rectangle. -
Add a second coat:
Once dry to the touch, apply a second coat of the cream paint to ensure full opacity. Let this cure fully for at least an hour. -
Establish the border width:
Visualize or lightly mark a rectangle around the central outlet openings. The painted border should be roughly 1/2 to 3/4 inch wide around the perimeter. -
Paint the outer edge:
Using your flat artist brush and the Terracotta paint, start painting the very outer sides and bevels of the plate first to establish the frame. -
Create the inner line:
Carefully drag your brush to create the inner edge of the border. I prefer to do this freehand rather than taping it off, as the slight wobble adds to the organic, hand-molded clay aesthetic. -
Fill in the border:
Fill in the space between your inner line and the outer edge with the Terracotta paint. Use visible brush strokes to enhance the rustic texture. -
Build up texture:
While the paint is still slightly wet, stipple (dab) the brush lightly over the border area to create a subtle, uneven surface texture resembling fired earth.
Step 3: Detailing and Sealing
-
Add the ridge detail:
Dip just the very tip of a fine brush into the Terracotta paint. Go back over the inner edge of your border, applying a slightly thicker bead of paint to create a raised ‘lip’ effect. -
Create depth (optional):
If you want more dimension, mix a tiny drop of brown into your terracotta shade and paint a very thin shadow line right along the inside edge of your border. -
Let it dry thoroughly:
Allow the painted design to dry completely, preferably overnight, to ensure the acrylic hardens properly. -
Apply clear coat:
Brush or spray on a matte clear coat sealer. A matte finish is essential here to maintain the realistic look of unglazed clay or stone. -
Reinstall:
Once the sealer is fully cured (non-tacky), screw the plate back onto the wall outlet. Be careful not to over-tighten the screw, which could crack the paint.
Paint Peeling?
Plastic is slippery. If paint lifts, you likely skipped sanding or didn’t use a specialized bonding primer. Sand it back and re-prime properly.
This simple technique adds a surprising amount of warmth and character to your room’s corners
BRUSH GUIDE
The Right Brush for Every Stroke
From clean lines to bold texture — master brush choice, stroke control, and essential techniques.
Explore the Full Guide
Striped Outlet Covers With Clean Tape Lines
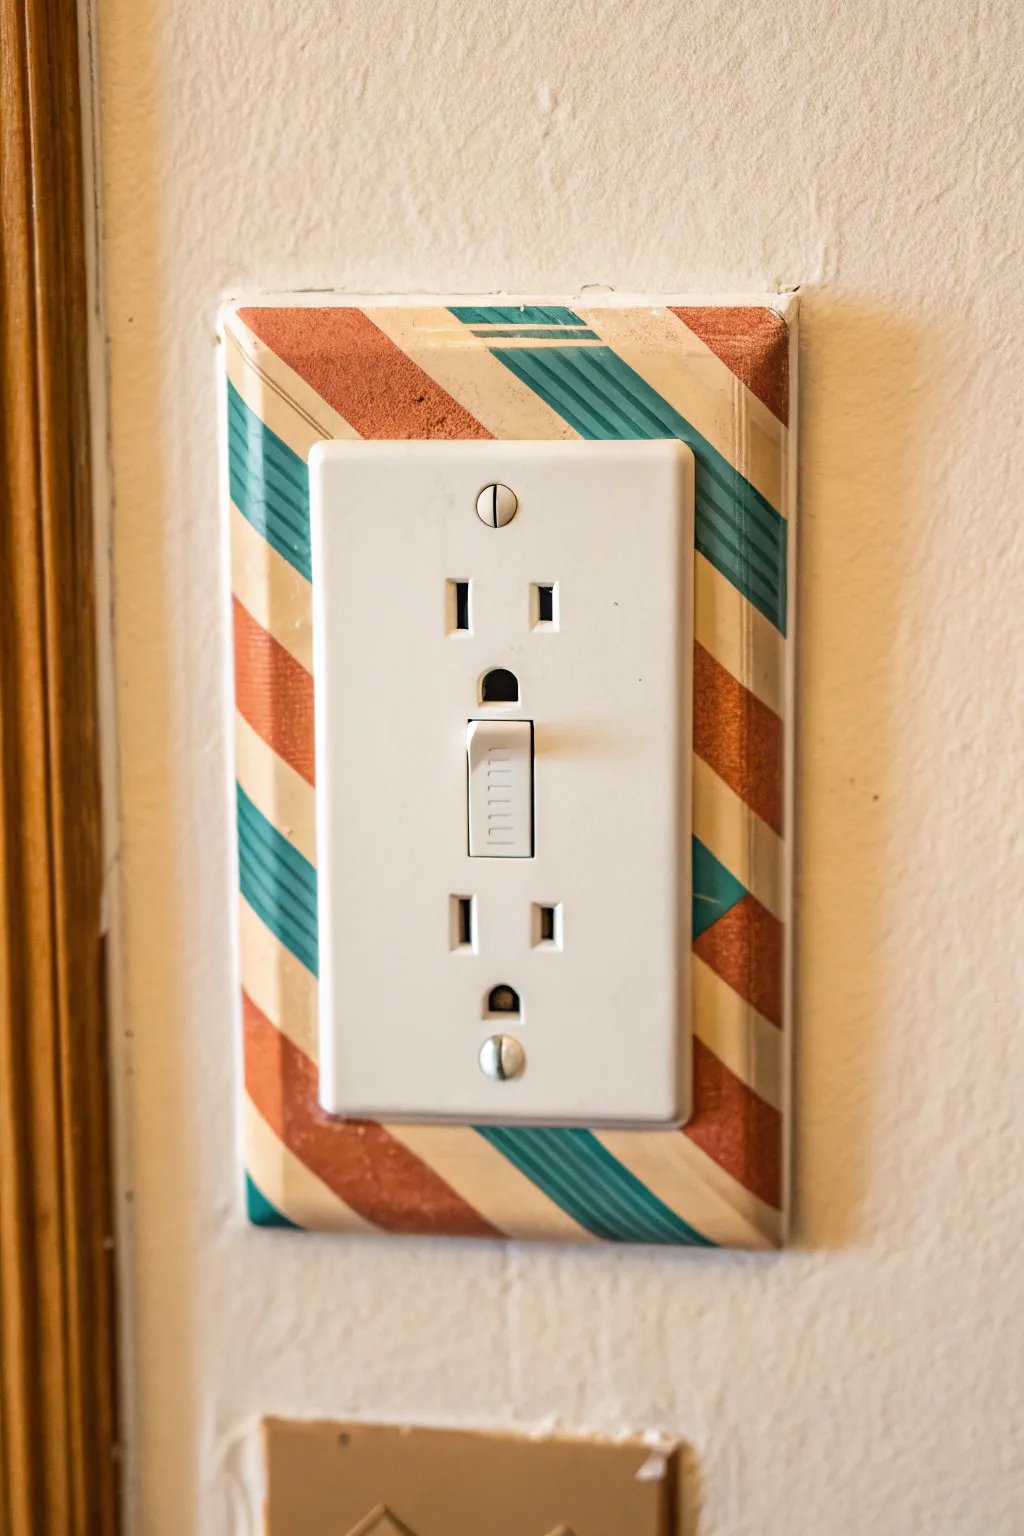
Transform a boring plastic plate into a fun, retro-inspired accent piece with this simple striping technique. The combination of warm terra cotta and cool teal stripes creates a playful, nostalgic vibe perfect for brightening up plain walls.
Step-by-Step Guide
Materials
- White or cream plastic outlet cover plate
- Screwdriver
- Fine-grit sandpaper (220 grit)
- Painter’s tape (various widths recommended)
- Terra cotta orange acrylic paint
- Deep teal or turquoise acrylic paint
- Small flat paintbrush
- Primer (spray or brush-on)
- Clear sealant or varnish (matte or satin finish)
- Craft knife or scissors
- Rubbing alcohol
Step 1: Preparation
-
Remove the plate:
Using a screwdriver, carefully remove the existing outlet cover from the wall. Be sure to keep the center screw in a safe place so you don’t lose it. -
Clean surface:
Wipe down the entire front surface of the plate with rubbing alcohol to remove any grease, fingerprints, or wall dust. -
Light sanding:
Gently scuff the shiny plastic surface with 220-grit sandpaper. This specific step is crucial because acrylic paint doesn’t stick well to slick plastic. -
Wipe clean:
Wipe the plate down one more time with a damp cloth to remove all plastic dust from sanding. -
Prime the plate:
Apply a thin, even coat of primer to the face and detailed edges of the plate. Let this dry completely according to the manufacturer’s instructions.
Tape Hack
To get perfectly even spacing between stripes, place a piece of tape down as a ‘spacer,’ place the next piece, and then remove the spacer tape.
Step 2: Taping the Design
-
Plan the angles:
Start applying strips of painter’s tape diagonally across the plate. For this specific look, aim for a 45-degree angle. -
Create spacing:
Place your tape strips to mask off the areas that will remain white (or the background color). The gaps between the tape will be your painted stripes. -
Vary the widths:
To match the image exactly, use tape to create both wide gaps (for the orange) and clusters of very thin gaps (for the teal stripes). -
Seal edges:
Run your fingernail or a credit card firmly along the edges of every piece of tape. This burnishing step prevents paint from bleeding underneath. -
Trim excess tape:
Flip the plate over and use a craft knife to trim the tape flush with the edges, wrapping it slightly around the back for a clean finish.
Step 3: Painting
-
Apply base color:
Paint the wider exposed diagonal sections with the terra cotta orange acrylic paint. Use smooth strokes following the direction of the tape. -
Add detail stripes:
In the thinner gap sections, carefully paint your deep teal color. You might need a smaller brush here to stay neat. -
Second coat:
Allow the first layer to dry to the touch, then apply a second coat to ensure the colors are opaque and vibrant. -
Remove tape:
I always peel the tape off while the second coat of paint is still slightly wet. This helps create a sharp, crisp line without chipping the dried paint. -
Touch ups:
If any paint bled through, let the plate dry fully, then gently scratch the excess away with a craft knife or touch it up with white paint.
Bleeding Lines?
If paint seeps under the tape, paint a coat of your base color (white) over the tape edge first to seal it before adding the colored stripes.
Step 4: Finishing
-
Clear coat:
Once the stripes are fully cured (give it a few hours), apply a clear sealant over the entire plate. This protects your hard work from scratches and cleaning sprays. -
Dry time:
Let the clear coat dry completely overnight to avoid tackiness. -
Reinstall:
Screw the cover plate back onto the wall outlet. Don’t tighten the screw too aggressively, or you might crack the plastic.
Now you have a custom piece of functional art that adds a pop of personality to your room
Faux Marble Veined Outlet Covers
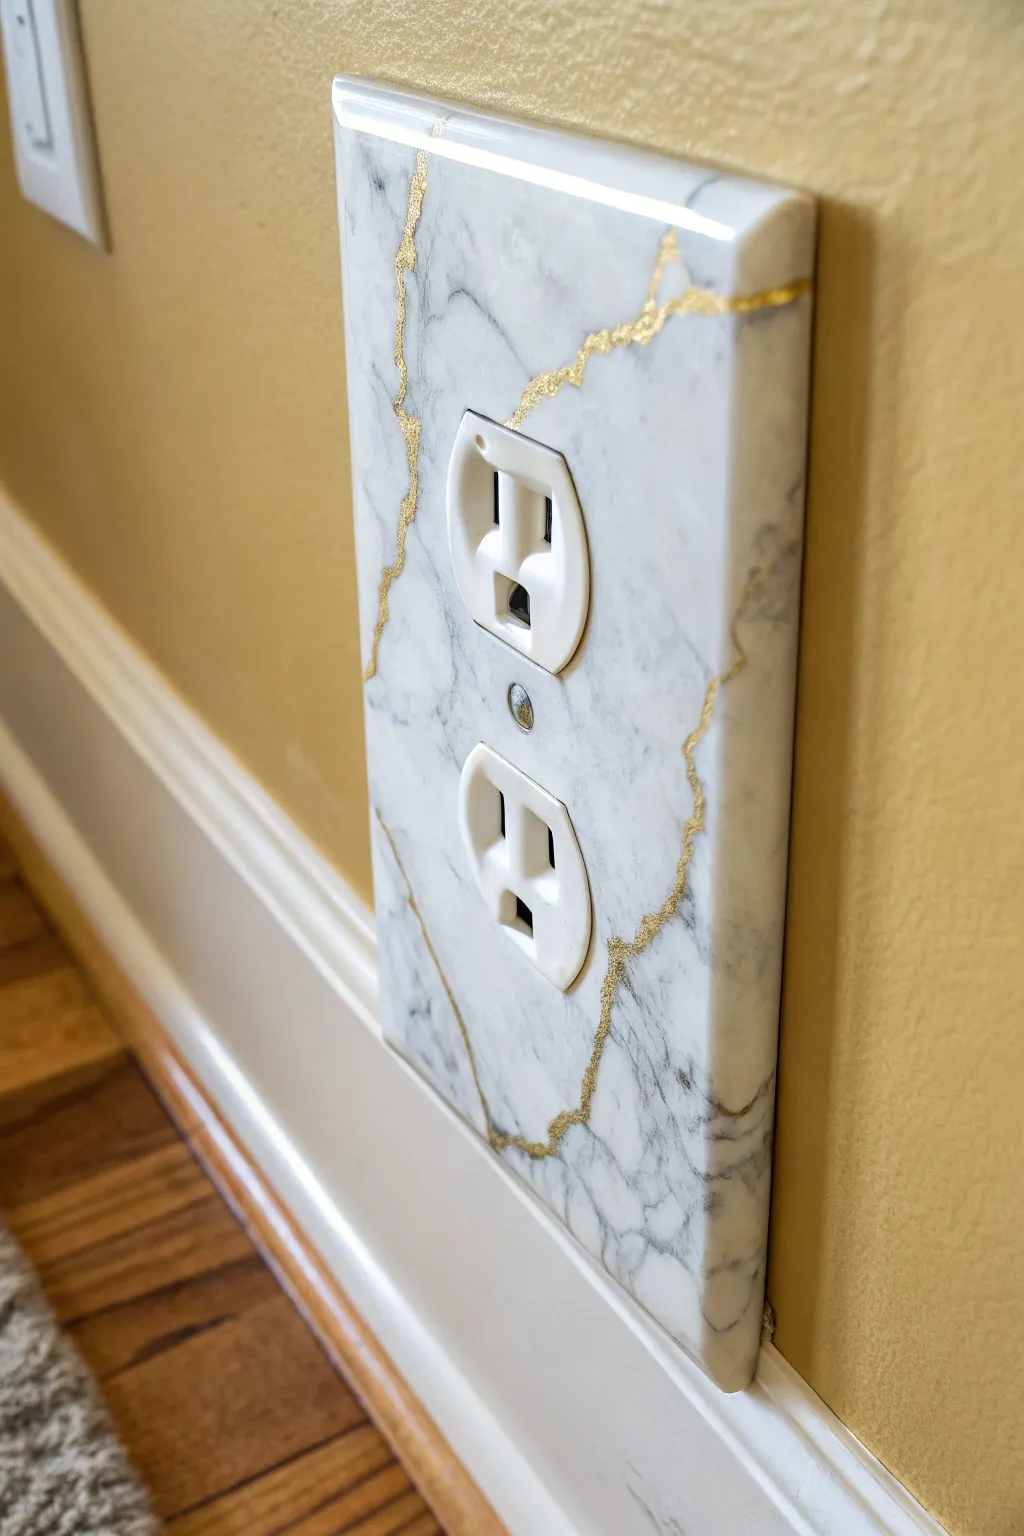
Transform standard plastic outlet covers into high-end decor with this elegant faux marble technique. By combining subtle gray veining with striking gold leaf accents, you’ll mimic the ancient Japanese art of Kintsugi—repairing broken pottery with gold—for a sophisticated, modern finish.
Step-by-Step Guide
Materials
- Plastic outlet cover
- Sandpaper (220-grit)
- White spray paint or chalk paint (matte finish)
- Grey acrylic paint
- Glaze medium or water
- Fine detail paintbrush
- Feather or sea sponge (optional)
- Gold leaf adhesive size
- Gold leaf sheets or gold flakes
- Soft brush for gold leaf application
- Clear gloss polyurethane sealant
Step 1: Preparation & Base Coat
-
Clean and prep:
Remove the outlet cover from the wall and wash it thoroughly with soap and water to remove oils and dirt. Dry completely. -
Scuff the surface:
Lightly sand the glossy plastic surface with 220-grit sandpaper; this gives the paint something to grip onto so it doesn’t peel later. -
Prime with white:
Apply two or three thin coats of matte white spray paint or chalk paint. Let each coat dry fully according to the can’s instructions before adding the next.
Feather touch
For the most realistic veins, try dipping a real feather in paint and dragging it. The organic structure creates randomness hard to mimic with a brush.
Step 2: Creating the Marble Veins
-
Mix your glaze:
Create a mixture of grey acrylic paint and a glazing medium (or a little water) to make the paint translucent and flowy. You want a consistency like heavy cream. -
Map out major veins:
Using a fine detail brush or even a feather, lightly drag a few jagged lines across the surface. Let the brush tremble slightly in your hand to create natural, organic deviations rather than straight lines. -
Add secondary veins:
Branch smaller, fainter veins off the main lines. I like to keep a damp paper towel nearby to blot and soften lines that look too harsh or deliberate. -
Soften the look:
While the paint is still wet, use a sea sponge or a dry soft brush to gently dapple over the veins, blurring the edges into the white background for a realistic stone effect. -
Layer depth:
Once the first layer of grey is dry, go back in with a slightly darker grey mix on just a few spots to add depth and dimension to the ‘cracks.’ -
Dry completely:
Allow the painted marble effect to dry for at least an hour before moving on to the gold steps.
Gemstone glam
Instead of gold leaf, mix clear glitter into your glossy topcoat for a subtle ‘quartz’ sparkle that catches the light differently.
Step 3: Adding the Gold Accents
-
Apply adhesive size:
Select specific veins you want to highlight—usually the deepest or most prominent ones. Carefully paint a thin line of gold leaf adhesive size directly over these painted cracks. -
Wait for tackiness:
Let the adhesive sit until it becomes clear and tacky. This typically takes 10 to 20 minutes, but check your bottle’s specific instructions. -
Apply gold leaf:
Press a sheet of gold leaf (or flakes) onto the sticky areas. Don’t worry about being neat; the gold will only stick where you applied the size. -
Brush away excess:
Using a soft, dry brush, gently sweep away the loose gold leaf. You will be left with brilliant, jagged gold veins that look like precious metal repairs. -
Clean lines:
If any gold stuck where you didn’t want it, you can usually gently scrape it away with a fingernail or the tip of a craft knife.
Step 4: Sealing & Installation
-
Seal the deal:
To protect your artwork from fingerprints and scratches, apply two coats of clear gloss polyurethane. The gloss finish reinforces the look of polished stone. -
Paint the screw head:
Don’t forget the screw! Stick it in a piece of cardboard and give it a quick dab of white paint and a tiny dot of grey or gold so it blends seamlessly. -
Final dry:
Let the sealant cure overnight to ensure a hard, durable finish before handling. -
Reinstall:
Screw the cover plate back onto the outlet, being careful not to over-tighten and crack your new masterpiece.
Enjoy the sophisticated touch this small detail adds to your room regardless of your budget

PENCIL GUIDE
Understanding Pencil Grades from H to B
From first sketch to finished drawing — learn pencil grades, line control, and shading techniques.
Explore the Full Guide
Terrazzo-Speckled Outlet Covers
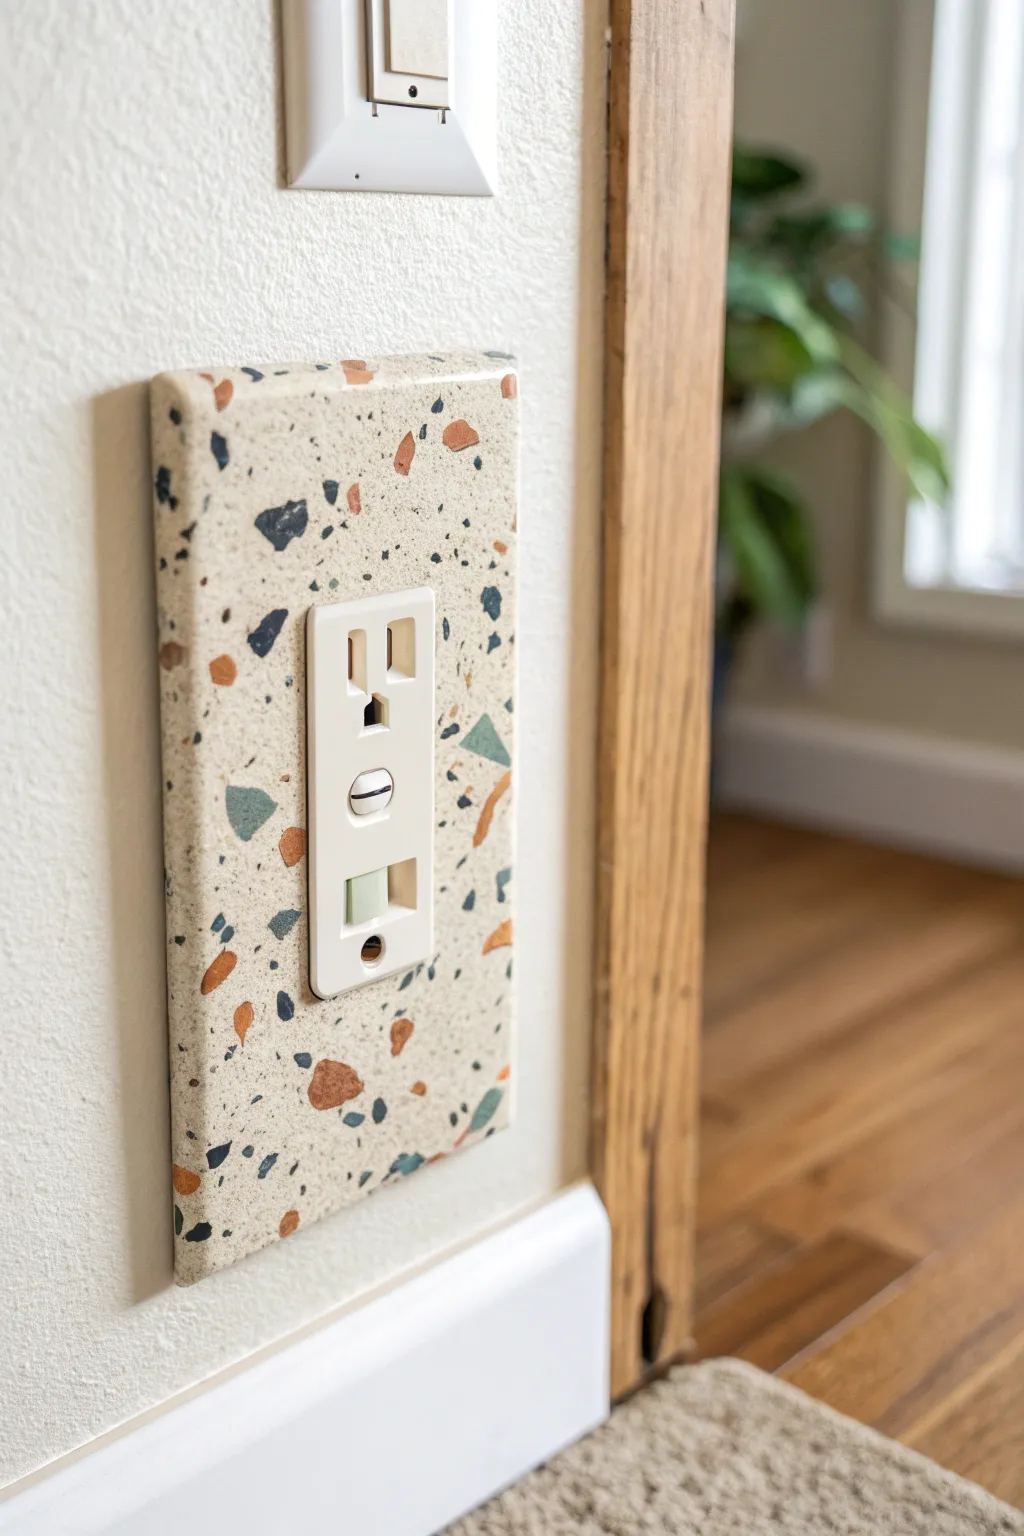
Transform plain plastic outlet covers into trendy stone-like accents with this simple painting technique. The speckled terrazzo effect adds a playful, organic texture that looks surprisingly high-end but takes just minutes to execute.
Detailed Instructions
Materials
- Plastic outlet cover
- Sandpaper (220-grit)
- Primer spray paint
- Stone-textured spray paint (e.g., Krylon or Rust-Oleum, beige/sand base)
- Acrylic craft paints (navy blue, terracotta orange, teal/sage green, black)
- Small fine-point paintbrushes
- Palette or paper plate
- Clear matte sealer spray
- Cardboard or drop cloth
Step 1: Preparation
-
Remove hardware:
Before starting, verify you have the right outlet cover style for your wall. If recreating an existing one, unscrew the cover plate and set the small center screw aside safely. -
Clean surface:
Wash the plastic plate thoroughly with warm soapy water to remove any grease or fingerprints. Dry strictly with a lint-free cloth. -
Scuff sand:
Lightly sand the glossy surface of the plastic using 220-grit sandpaper. You don’t need to remove finish, just create enough ‘tooth’ for the primer to grip firmly. -
Dust off:
Wipe away all sanding residue with a tack cloth or a damp rag. Let it air dry completely before moving to the painting area.
Step 2: Base Coat Application
-
Setup:
Place your outlet cover on a piece of cardboard or a drop cloth in a well-ventilated area, preferably outdoors. -
Prime:
Apply a thin, even coat of spray primer. This step is crucial for durability, ensuring your faux stone finish doesn’t scratch off easily. -
Apply texture spray:
Shake your stone-effect spray paint vigorously for at least one minute. Hold the can about 10-12 inches away and apply a light coat. -
Build coverage:
Let the first coat dry for 15 minutes, then apply a second coat of the stone spray paint until the original plastic is fully obscured by the speckled sandy beige texture. -
Dry thoroughly:
Allow the base texture to cure fully according to the can’s instructions. I usually let this sit for at least an hour so the surface is hard enough to paint on.
Paint Slipping?
If acrylic paint slides off the textured base, your stone spray might be too glossy or fresh. Wait longer for it to cure, or lightly scuff the specific spot with sandpaper.
Step 3: Creating the Terrazzo Pattern
-
Prepare palette:
Squeeze small amounts of your acrylic paints onto a palette. You want a mix of earthy tones: deep navy, warm terracotta, muted sage, and pure black. -
Paint large chips:
Using a small flat brush, paint irregular geometric shapes—vaguely triangular or trapezoidal—scattered randomly across the plate. Start with your largest color, usually the terracotta or sage. -
Add medium shapes:
Switch to a clean brush and add the next color, perhaps the navy blue. Paint these shapes slightly smaller than the first set, filling in some empty zones. -
Paint small speckles:
Use your finest tip brush to add tiny flecks of black and the other colors. These represent the smallest aggregate stones in real terrazzo. -
Refine edges:
Real terrazzo chips have sharp, angular edges. Go back and sharpen any rounded paint blobs to make them look like fractured stone shards. -
Check density:
Step back and look at the overall balance. If one area looks too empty, add a few more medium-sized ‘chips’ to even out the pattern. -
Wrap surfaces:
Don’t forget to paint the pattern over the curved edges of the plate so the design looks consistent from the side. -
Paint the screw head:
Stick the mounting screw into a piece of cardboard and lightly dab the head with the base color and a tiny speck of paint so it blends in once mounted.
Pro Tip: Layering
To make it look authentic, let some painted ‘chips’ overlap slightly. Real terrazzo is a chaotic mix, so perfect separation actually looks less realistic.
Step 4: Sealing and Installation
-
Seal the work:
Once the acrylic paint is bone dry, spray the entire cover with a clear matte sealer. This protects your artwork from finger oils and cleaning products. -
Second seal coat:
Apply a second light coat of sealer for extra durability, letting it dry for at least 24 hours to fully cure before handling. -
Reinstall:
Screw the beautiful new cover back onto the wall outlet using the painted screw. Be gentle with the screwdriver to avoid chipping the fresh paint.
With your finished piece mounted, step back and admire how a tiny detail can add so much character to the room


Have a question or want to share your own experience? I'd love to hear from you in the comments below!