When I’m painting with kids, I’m always chasing that sweet spot: big color, simple steps, and a finish they’re genuinely proud of. These easy acrylic painting ideas for kids are my go-to picks for relaxed studio time and fridge-worthy art.
Rainbow Sky With Fluffy Clouds
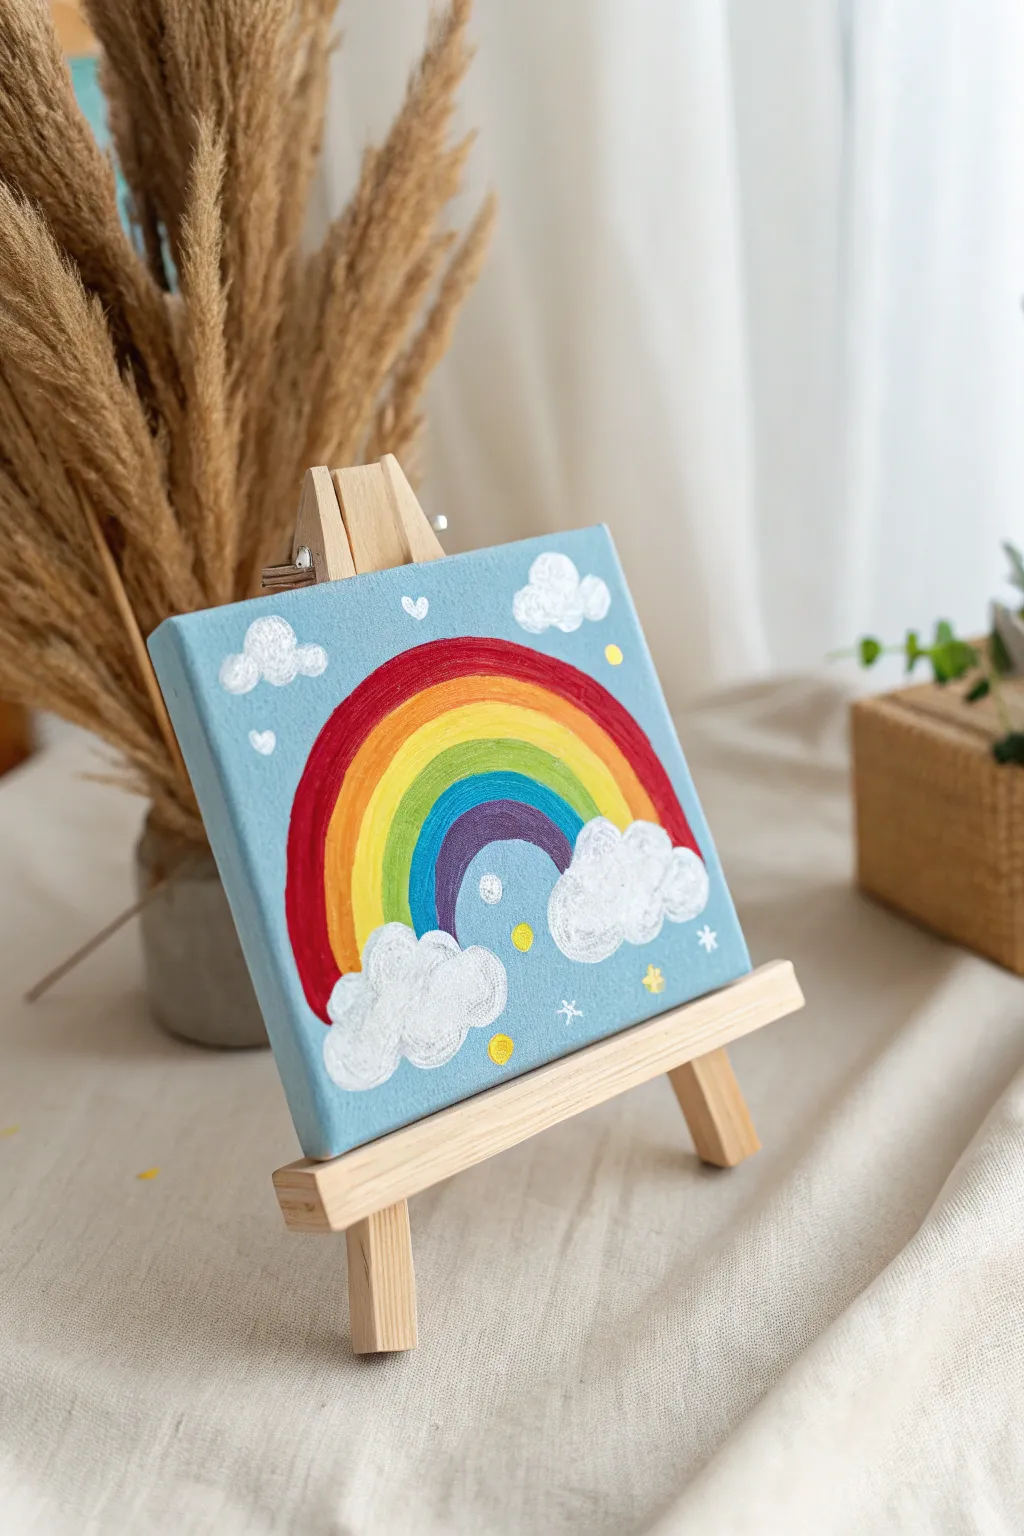
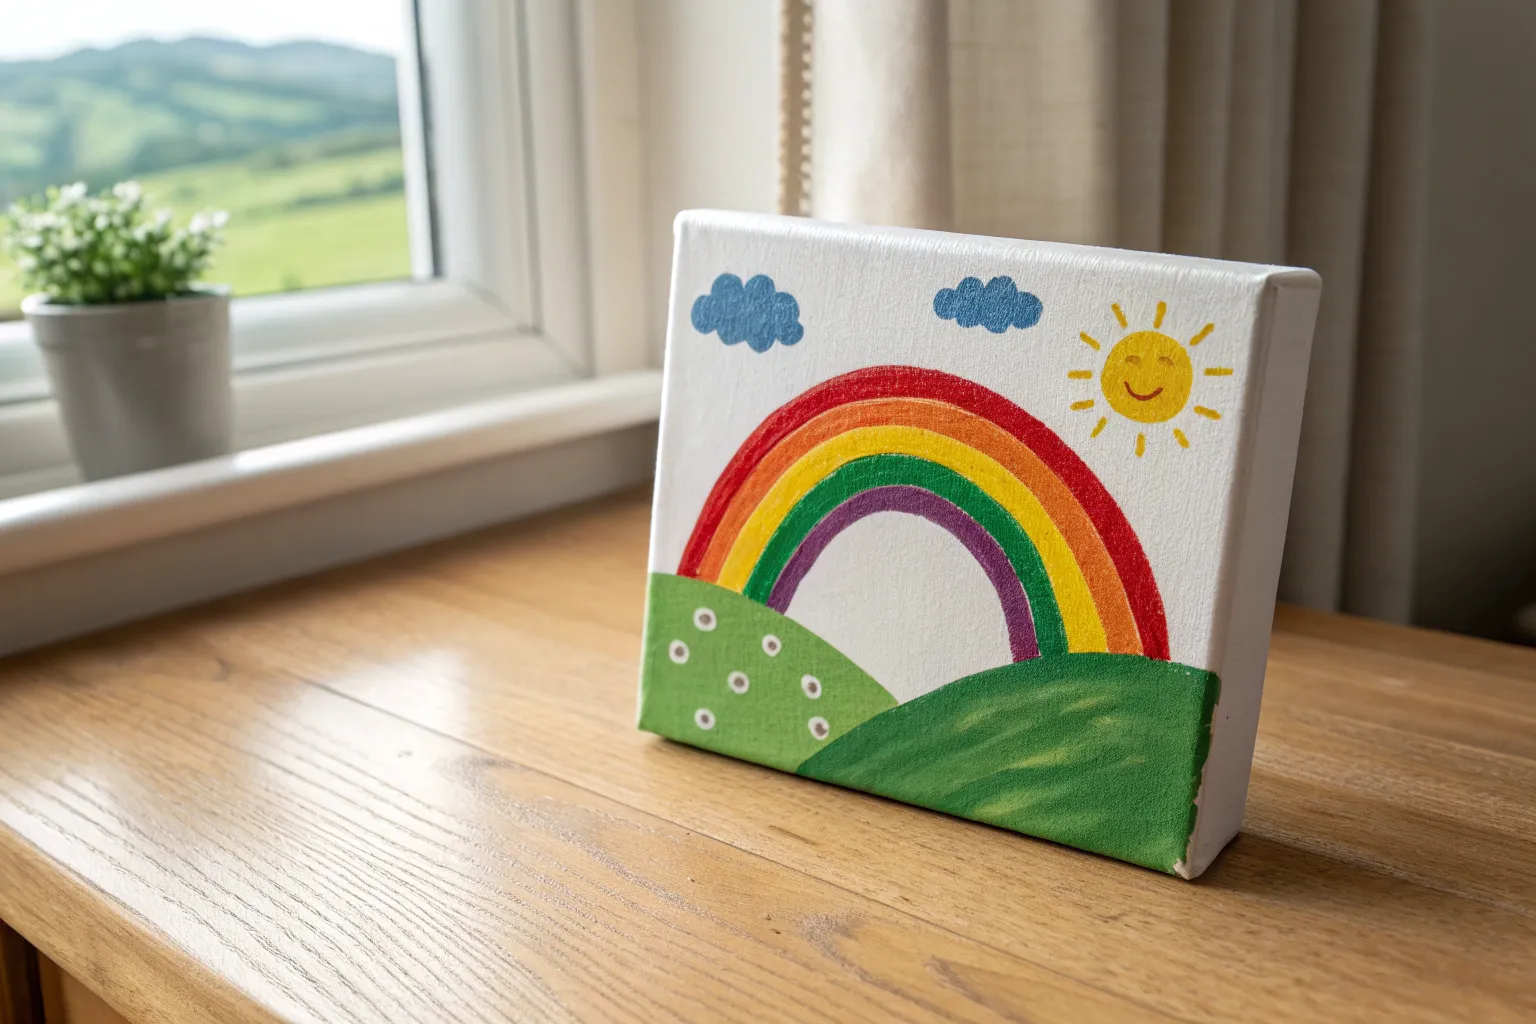
This cheerful canvas painting captures a classic rainbow arching over soft, white clouds against a dreamy blue sky. It is a fantastic beginner project that teaches basic layering and brush control while offering plenty of room for creative expression.
Step-by-Step Tutorial
Materials
- Small square canvas or canvas panel (e.g., 6×6 inches)
- Acrylic paints: Light blue, red, orange, yellow, green, dark blue, purple, white
- Flat paintbrush (medium size)
- Round paintbrush (small size)
- Pencil (optional)
- Cup of water
- Paper towels or rag
- Palette or paper plate
Step 1: Setting the Scene
-
Paint the background:
Start by squeezing a generous amount of light blue paint onto your palette. Using your medium flat brush, cover the entire front face of the canvas with smooth, even horizontal strokes. -
Cover the edges:
Don’t forget the sides! Paint the edges of the canvas with the same light blue so the artwork looks finished from every angle when displayed on an easel. -
Let it dry completely:
Allow the blue background to dry fully before moving on. If the paint is wet, your rainbow colors might mix with the blue and turn muddy. I usually give it about 10-15 minutes or use a hairdryer to speed things up.
Cloud Texture Tip
For fluffier clouds, don’t mix water into your white paint. Use thick, heavy paint straight from the tube and dab it on for a raised, 3D texture.
Step 2: Arching the Rainbow
-
Start with red:
Using a clean medium brush, paint a wide red arch starting from the left side towards the right. This will be the largest, outermost band of your rainbow. -
Add the orange band:
Clean your brush thoroughly. Paint an orange stripe directly underneath the red one, following the same curve closely. -
Paint the yellow stripe:
Rinse your brush again and apply the yellow band next. Try to keep the width of the stripes consistent, but don’t worry if they wobble a little; it adds charm. -
Apply the green layer:
Next comes the green stripe. Paint this curve right under the yellow, making sure there is no blue sky showing between the colors. -
Add the blue band:
Paint a dark blue stripe beneath the green. Switch to a slightly smaller brush if you find you are running out of space near the center. -
Finish with purple:
Paint the final, smallest arch in purple. This completes the rainbow structure. Let all these colorful stripes dry before adding the clouds.
Step 3: Fluffy Clouds & Details
-
Outline the main clouds:
Load a round brush with white paint. At the base of each end of the rainbow, paint a bumpy, cloud-like outline to anchor the arch. -
Fill the clouds in:
Fill in the cloud shapes with white paint using a circular scrubbing motion. This technique adds texture and makes them look extra fluffy rather than flat. -
Add floating clouds:
Paint two smaller clouds floating higher up in the sky, one near the top left and one near the top right corner. -
Paint tiny heart accents:
Use the tip of your smallest brush or a toothpick dipped in white paint to create tiny white hearts floating in the blue space. -
Add yellow sparkles:
Dip the back end of your paintbrush handle into yellow paint. Dot a few small yellow circles around the rainbow to look like distant stars or magic sparkles. -
Create white glimmers:
Using your smallest brush again with white paint, add a few tiny asterisks or star shapes (*) scattered in the empty blue areas. -
Final touches:
Look over your painting. If any rainbow colors look transparent, add a second coat now that the first layer is dry to make them pop.
Level Up: Glitter Sky
Once the painting is totally dry, paint a thin layer of clear glitter glue over the rainbow stripes or the white clouds to make the whole piece sparkle.
Place your finished canvas on a mini easel to brighten up any corner of your room


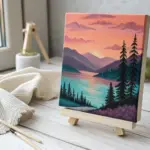
Simple Sunset Over Rolling Hills
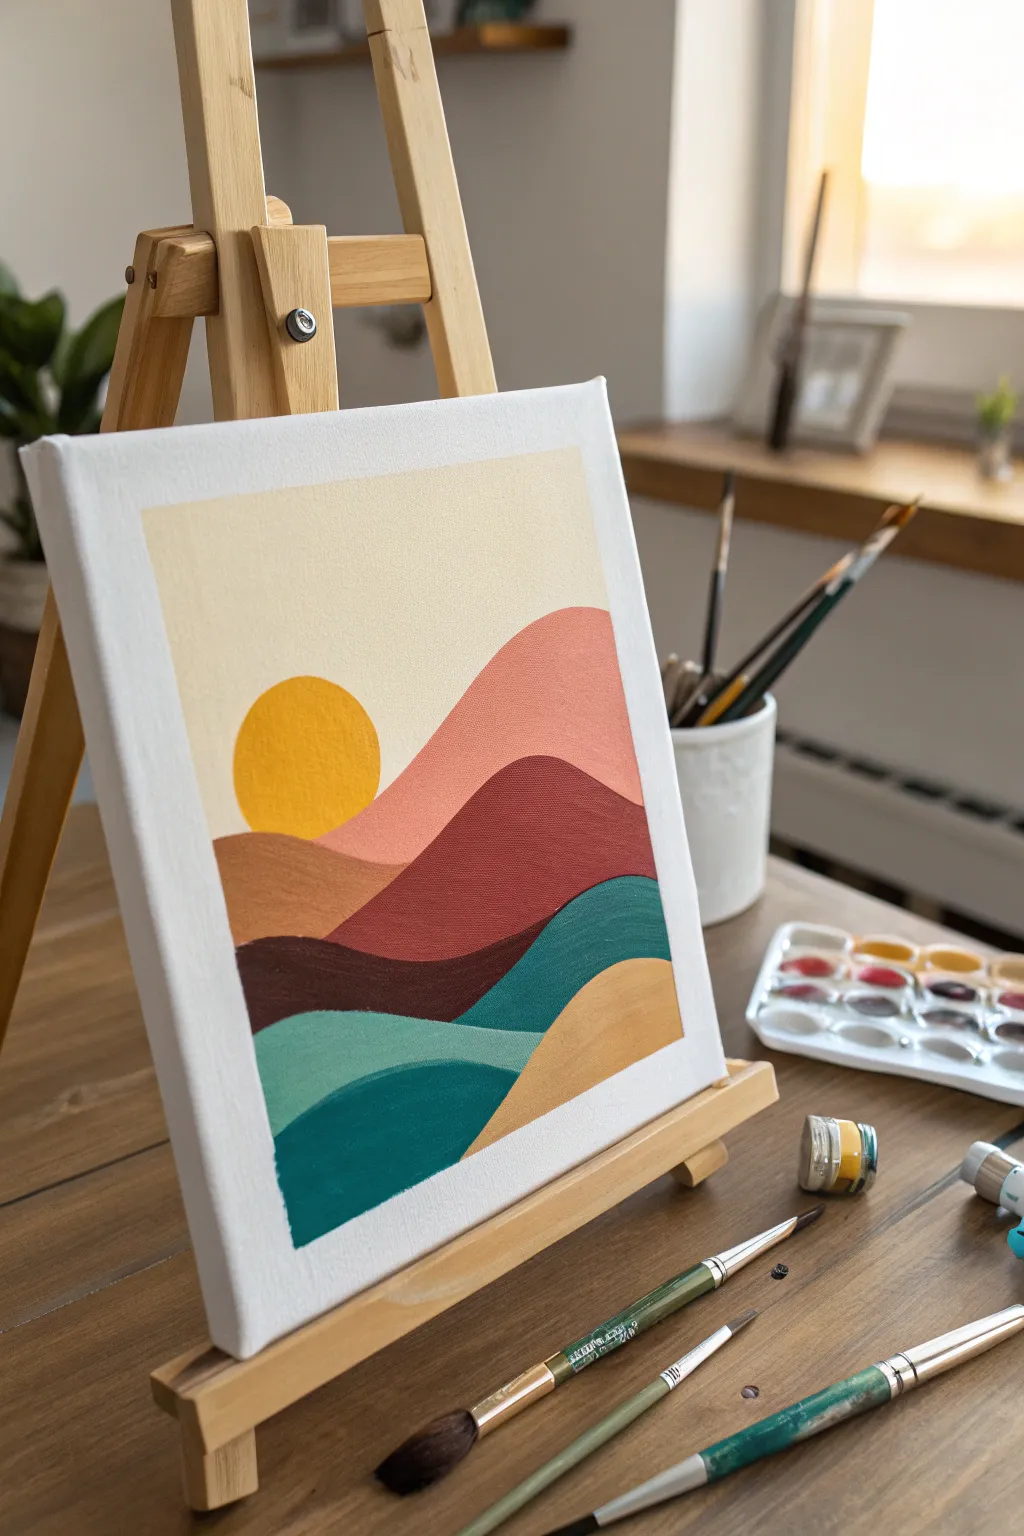
Create a calming landscape with this abstract sunset painting, featuring smooth, sweeping hills in warm and cool tones. It’s a perfect project for practicing color blocking and clean lines on canvas.
Step-by-Step
Materials
- Small square canvas or canvas panel (e.g., 8×10 or 10×10 inches)
- Acrylic paints: Cream/Light Beige, Yellow, Coral/Salmon Pink, Burnt Sienna (Red-Brown), Dark Chocolate Brown, Teal, Deep Blue-Green, Ochre/Mustard
- Flat shader brushes (medium and small sizes)
- Small round brush for details
- Pencil and eraser
- Palette or paper plate
- Water cup and paper towels
- Masking tape (optional for border)
Step 1: Preparation & Sketching
-
Set the boundaries:
If you want the clean white border seen in the example, apply masking tape evenly around the edges of your canvas. Press it down firmly so paint won’t seep underneath. -
Plan the hills:
Lightly sketch your design with a pencil. Start by drawing a few wavy, intersecting lines across the canvas to represent the rolling hills. -
Add the sun:
In the upper left quadrant, lightly trace a perfect circle for the setting sun. If free handing is tricky, trace a small lid or coin. -
Check your composition:
Take a step back and look at your sketch. Ensure your hills overlap in a way that feels natural, with some appearing closer (lower on the canvas) and some further away.
Step 2: Painting the Sky & Sun
-
Paint the background:
Start with the sky area. Mix a generous amount of cream or very pale beige paint. Using a medium flat brush, fill in the entire sky section above the hills, carefully painting around your pencil circle for the sun. -
Fill in the sun:
Using a bright yellow acrylic, carefully fill in the sun circle. Use a smaller brush here to keep the edges crisp. -
Wait for the sky to dry:
Let this top section dry completely before moving downward. This prevents your hand from smudging the wet paint as you work on the hills.
Wobbly Lines?
If you struggle to paint smooth curves, try using a little bit of water to thin your paint slightly. It will flow much easier off the brush, helping you create longer, continuous strokes.
Step 3: Painting the Hills
-
Start with the farthest hill:
Identify the hill highest up on your canvas (closest to the sky line). Paint this shape with a soft coral or salmon pink color. -
Paint the middle ground:
Moving downward, paint the next hill shape using a reddish-brown or darker terracotta shade. Use the edge of your flat brush to cut a clean line where it meets the pink hill. -
Add darker contrast:
For the prominent shadowed hill in the center, mix a dark chocolate brown. Paint this wavy section boldly, ensuring it contrasts well with the lighter hills above it. -
Introduce cool tones:
Switch to your teal paint for the hill directly below the dark brown section. Use smooth, long brushstrokes to follow the curve of the hill. -
Paint the bottom foreground:
Use a deep blue-green paint for the lowest section on the left side. This anchors the painting with a cool, heavy color. -
Finish with warmth:
For the final hill shape in the bottom right corner, use a mustard or ochre yellow. This balances the composition by bringing a warm tone back into the cool foreground.
Color Harmony
To make the painting feel cohesive, try mixing a tiny dot of your background cream color into every single other color on your palette. This unifies the tones instantly.
Step 4: Final Touches
-
Second coats:
Acrylics can sometimes look streaky after one layer. Once the first coat is dry, I usually go back over lighter colors like the yellow sun and the cream sky with a second coat for solid opacity. -
Tidy up edges:
Use a small detail brush to neaten up any lines where colors meet. If you accidentally painted over a line, just paint over the mistake once it’s dry. -
Reveal the border:
Once the painting is 100% dry to the touch, slowly and carefully peel away the masking tape at a 45-degree angle to reveal your crisp white border.
Display your new serene landscape on a mini easel or hang it up to brighten a small corner of your room


Cute Ladybug on a Big Leaf
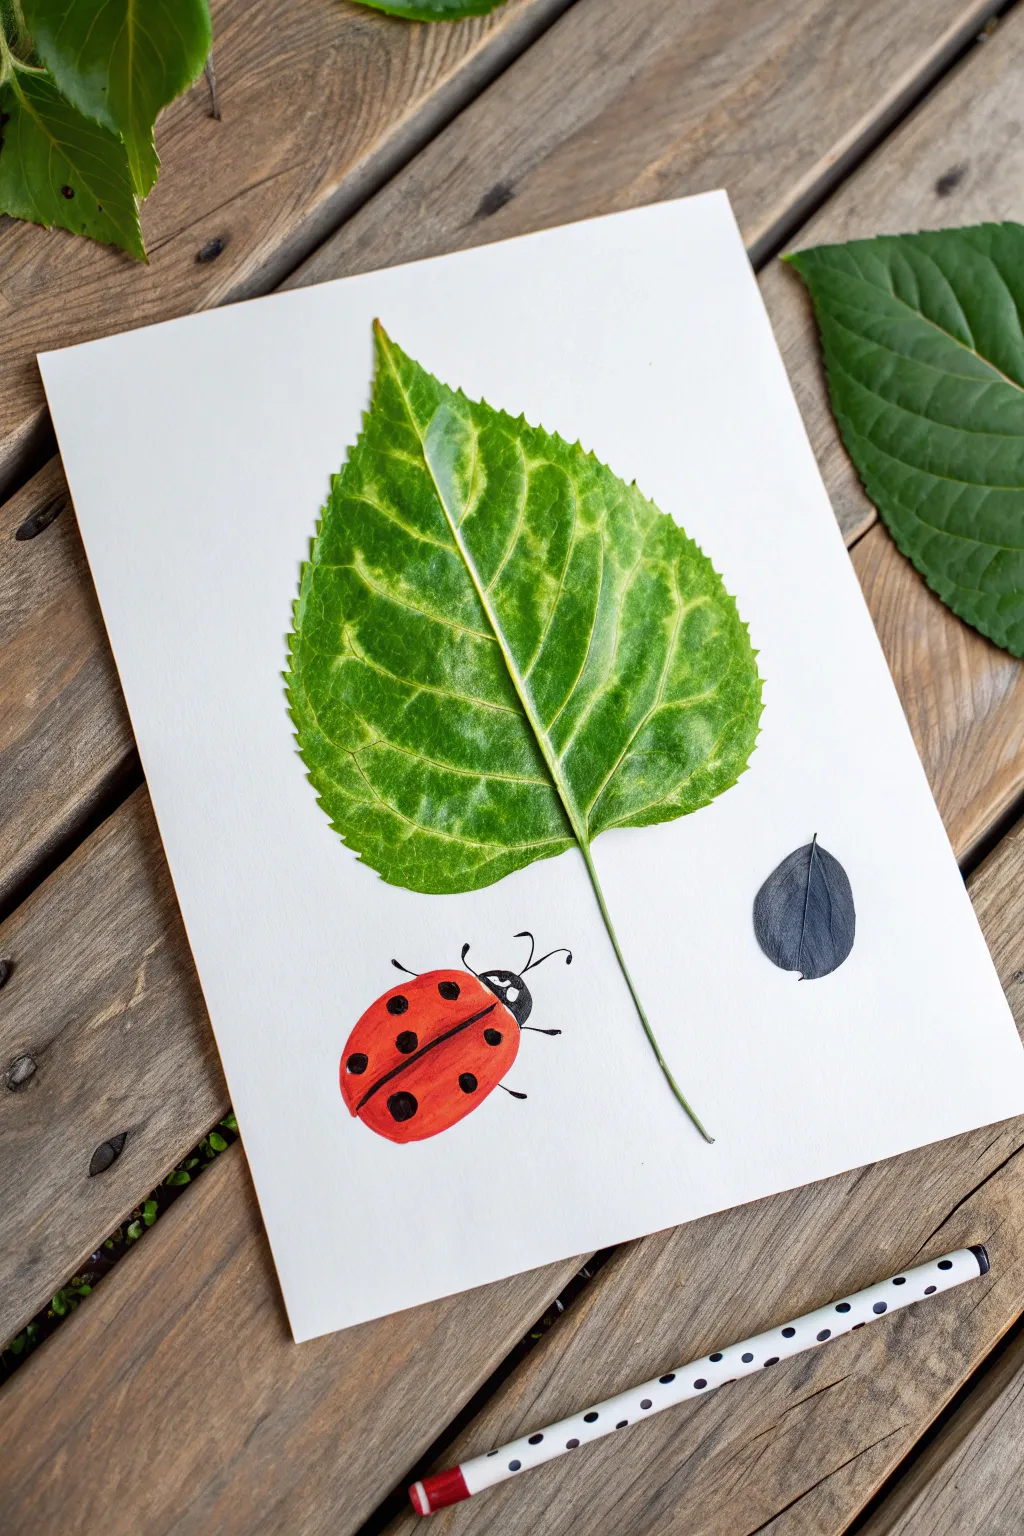
This charming nature craft combines the texture of real pressed leaves with simple acrylic painting techniques. By pairing a vibrant green leaf with a hand-painted ladybug, you create a striking contrast that brings the tiny insect to life on the page.
Detailed Instructions
Materials
- Heavy white cardstock or watercolor paper
- Large fresh green leaf (pressed flat)
- Small dried dark leaf or petal
- Red acrylic paint
- Black acrylic paint
- Fine detail paintbrush
- Medium flat paintbrush
- Craft glue or Mod Podge
- Pencil (optional for sketching)
- Heavy books (for pressing)
Step 1: Preparing the Canvas
-
Select your paper:
Choose a sturdy piece of white cardstock or watercolor paper as your base. A thicker paper will hold the weight of the glued leaf and the paint without buckling. -
Prepare the big leaf:
Find a large, vibrant green leaf from your garden. Ensure it is clean and dry. If it is very fresh and curly, press it under a heavy book for a few hours or overnight to flatten it out. -
Position the main leaf:
Place the large green leaf in the center of your paper, slightly towards the top. Experiment with the angle until it looks pleasing, then lift it up to apply adhesive. -
Glue the leaf down:
Apply a thin, even layer of craft glue or Mod Podge to the back of the leaf. Press it firmly onto the paper, smoothing from the center stem outward to the edges to remove air bubbles. -
Add the smaller leaf:
Take your small dried dark leaf or petal and glue it to the right of the main leaf stem. This acts as a supporting element or perhaps another abstract bug shape.
Curly Leaf Trouble?
If your leaf keeps curling up at the edges after gluing, place a sheet of wax paper over it and weigh it down with a heavy book while the glue dries.
Step 2: Painting the Ladybug
-
Outline the body:
Using a pencil, lightly sketch a smooth oval shape below the large green leaf for the ladybug’s body. Adding a small semi-circle at the top of the oval will serve as the head. -
Paint the red shell:
Dip your medium brush into bright red acrylic paint. Fill in the main oval body shape, using smooth strokes to keep the color solid and opaque. -
Let the red dry:
Allow the red paint to dry completely. Acrylics dry fast, but if the red is still wet, the black details we add next might bleed and become muddy. -
Paint the head:
Switch to your fine detail brush and black paint. Carefully fill in the semi-circle head shape on top of the red body. -
Create the dividing line:
Using the very tip of your fine brush, paint a thin, curved black line down the center of the red shell to separate the wings. -
Add the spots:
Dip the back end of your paintbrush handle into black paint—this is a great trick for perfect dots! Stamp several black spots onto the red wings. -
Draw the legs:
With the detail brush, paint three tiny, thin legs extending from the right side of the body and two or three on the left side near the top. -
Paint the antennae:
Add two delicate, curved lines coming from the black head for antennae. Keep your hand light so the lines remain thin. -
Add the eyes:
Once the black head is dry, use a toothpick or a very fine brush to add two tiny white dots for eyes, giving the ladybug a cute expression. -
Final touches:
Check your composition. If the leaf stem is sticking up, add a tiny dot of glue to secure it. Let the entire artwork dry completely before displaying.
Make It Shine
Once the red paint is totally dry, brush a little gloss varnish or clear nail polish over just the ladybug’s shell. It makes the bug look shiny and wet!
Now you have a wonderful piece of mixed media art that captures a little slice of the garden


Friendly Fox Face in Warm Colors
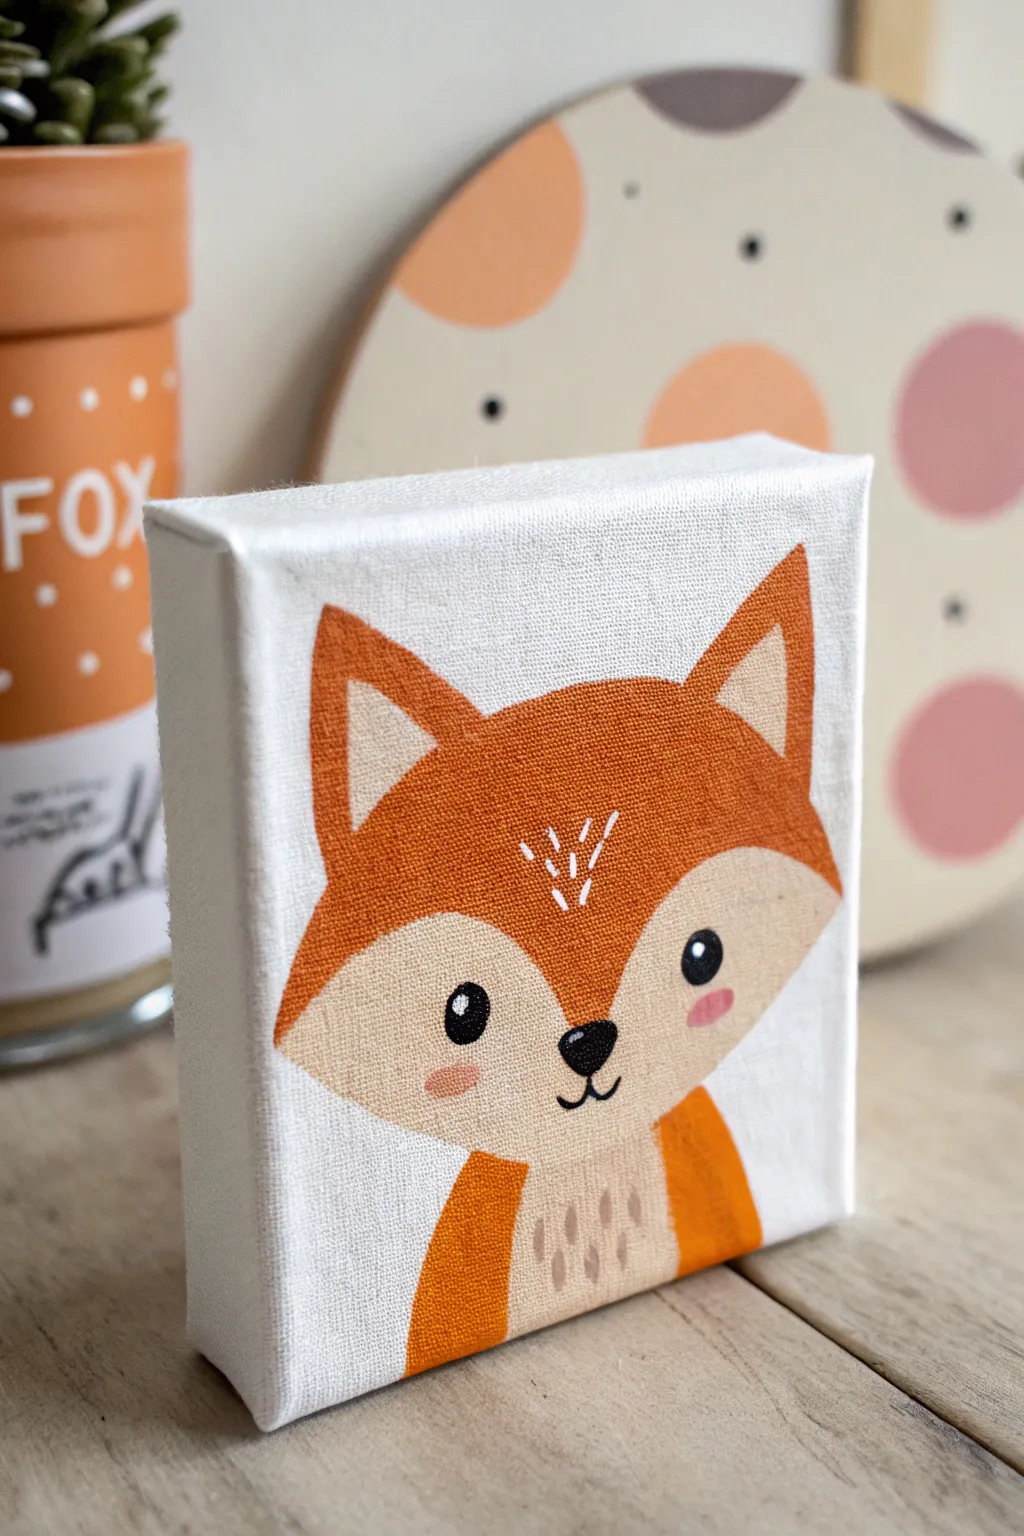
Capture the charm of the forest with this adorable fox portrait on a mini canvas. Using simple geometric shapes and a warm, inviting color palette, you’ll create a stylized animal friend perfect for decorating a nursery or desk.
How-To Guide
Materials
- Small square stretched canvas (e.g., 4×4 or 6×6 inches)
- Acrylic paints: Bright Orange, Cream/Beige, White, Black, Pink
- Flat shader brush (size 6 or 8)
- Small round detail brush (size 0 or 1)
- Pencil and eraser
- Palette for mixing
- Cup of water and paper towels
Step 1: Sketching the Shape
-
Outline the head:
Start with a light pencil sketch. Draw a wide, curved ‘U’ shape for the bottom of the fox’s face, occupying the lower two-thirds of the canvas. Connect the top with a slightly curved horizontal line. -
Add the ears:
Draw two large triangles on top of the head. Make them tall and pointed, leaving a gap between them in the center. -
Define the face mask:
Inside the head shape, draw a broad ‘M’ shape or a curved line dipping down in the middle to separate the orange forehead from the cream-colored cheeks. -
Detail the ears and body:
Add smaller triangles inside the ears for the inner ear detail. Below the chin, sketch the top of the body and shoulders.
Step 2: Applying Base Colors
-
Paint the background:
Using a clean white paint and your flat brush, paint the entire background around the fox. Carefully cut in around the ears and head shape. Since canvas is already white, this step ensures a uniform texture. -
Fill the orange fur:
Load your brush with bright orange paint. Fill in the top part of the head (the forehead area), the outer triangles of the ears, and the shoulder areas of the body. -
Paint the creamy cheeks:
Switch to a cream or beige color. Fill in the lower face mask area, careful to meet the orange line cleanly without blending. -
Inner ears and chest:
Use the same cream color to fill in the inner triangles of the ears and the chest patch in the center of the body.
Clean Lines
If you struggle with shaky hands on the straight lines, use artist tape to mask off the background areas while you paint the geometric fox head.
Step 3: Adding the Cute Details
-
Dry check:
Ensure the base layers are completely dry to the touch before proceeding. This prevents the detail colors from muddying. -
Paint the eyes:
Using black paint and a small round brush, paint two solid black circles in the cream cheek area for eyes. -
Add the nose:
Paint a small, inverted triangle or rounded heart shape in black right at the bottom center of the face, slightly overlapping the cream and orange boundary if you adjusted the sketch, or just centered in the cream area. -
Create the mouth:
With the very tip of your detail brush and black paint, draw a small anchor shape or a ‘w’ attached to the bottom of the nose for the mouth. -
Blushing cheeks:
Dip a clean brush into pink paint (or mix red and white). Dab two small oval spots just below the eyes for rosy cheeks.
Make it Pop
For a smoother opaque look on the orange fur, I find applying two thin coats is better than one thick, gloopy layer.
Step 4: Final Touches
-
Sparkle in the eyes:
Using the handle end of a paintbrush or a toothpick dipped in white paint, place a tiny white dot in the upper corner of each black eye. -
Forehead texture:
Mix a tiny bit of white into your orange paint to lighten it slightly, or use plain white. Paint three small, dashed lines in a fan shape between the eyes on the orange forehead to mimic fur texture. -
Chest fur details:
Using a slightly darker beige (mix a tiny drop of brown or orange into your cream), paint small vertical dashes on the chest patch to suggest fluffy fur. -
Clean up edges:
Look over your canvas edges. Paint the sides of the canvas to match the background or wrap the fox’s colors around the sides for a polished, frameless look.
Allow your little fox to dry completely and find the perfect shelf to display its friendly face
BRUSH GUIDE
The Right Brush for Every Stroke
From clean lines to bold texture — master brush choice, stroke control, and essential techniques.
Explore the Full Guide
Silly Frog on a Lily Pad
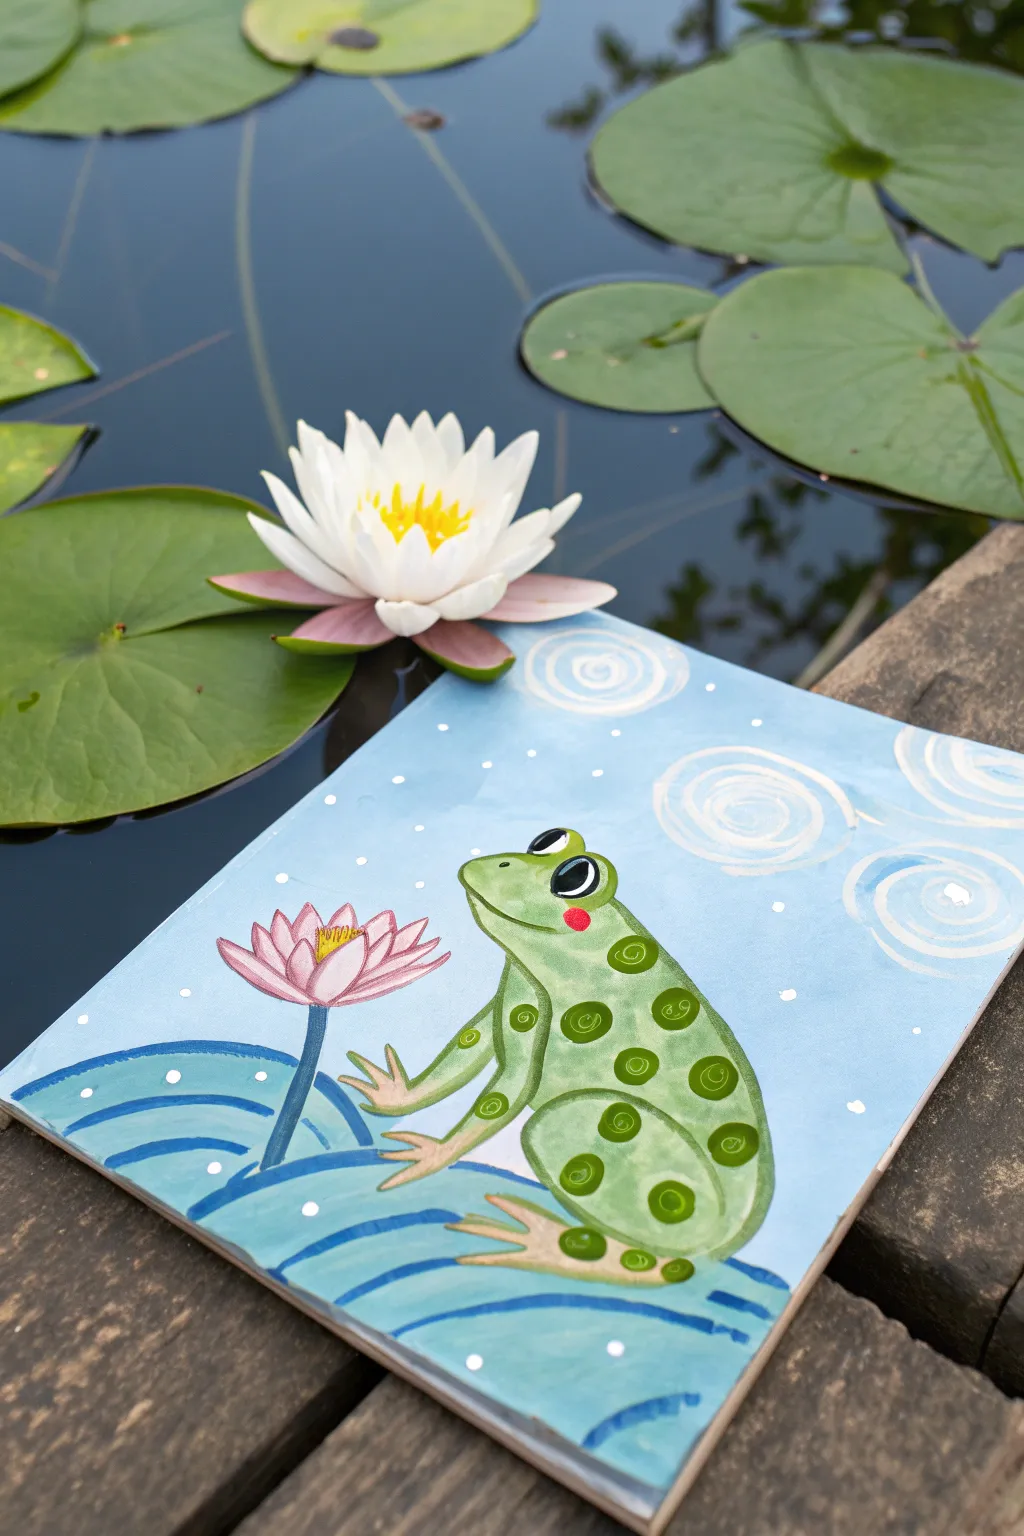
Ribbit! In this charming project, you’ll paint a cheerful spotted frog sitting beside a pink water lily. The swirly sky and gentle water ripples give this piece a playful and dreamy storybook feel.
Step-by-Step Guide
Materials
- Canvas panel or thick watercolor paper
- Acrylic paints: Light blue, white, green (light and dark), pink, yellow, red, black
- Flat brush (medium size)
- Small round detail brush
- Palette or paper plate
- Pencil
- Cup of water and paper towels
Step 1: Setting the Scene
-
Block in the Background:
Start by mixing light blue with a generous amount of white to create a soft sky color. Paint the entire upper two-thirds of your canvas with this mixture, keeping your brushstrokes smooth and even. -
Add Swirling Clouds:
While the sky is still a bit wet or just after it dries, take your round brush with pure white paint. Create fun, spiral shapes in the sky to represent whimsical clouds. -
Dot the Sky:
Use the very tip of your small brush or the back end of a paintbrush handle dipped in white paint. Gently stamp tiny white dots scattered across the blue sky for a magical, starry effect. -
Paint the Water Base:
For the water at the bottom, mix a slightly darker blue than your sky tone. Paint curved, sweeping lines across the bottom third of the canvas to establish the water’s surface.
Paint Too Sheer?
If the blue background shows through your green frog, let the first green layer dry completely, then apply a second coat for solid coverage.
Step 2: Sketching and Base Layers
-
Outline the Frog:
Once the background is fully dry, lightly sketch the frog’s shape with a pencil. Draw a large oval for the body and a smaller rounded shape for the head, making sure to include the big eye bumps on top. -
Draw Legs and Flower:
Add the bent back leg, the front arms reaching forward, and the webbed feet. To the left, sketch a vertical stem rising from the water topped with a simple lotus flower shape. -
Fill the Frog Body:
Mix a nice, grassy light green using green, yellow, and white. Fill in the frog’s entire body shape with this color. You might need two coats to hide the blue background completely. -
Paint the Flower:
Use a light pink to paint the petals of the lotus flower. Start from the center and brush outwards. Paint the stem a dark green to connect it to the water.
Make it Shine
Mix a tiny bit of silver or gold glitter paint into the white dots on the water or sky to make your painting shimmer in the light.
Step 3: Bringing it to Life
-
Add Darker Details:
Using a thinner round brush and dark green paint, create outlines around the frog’s back leg and body to define the shapes. Paint curved lines on the belly and legs to suggest volume. -
Create the Spots:
Dip your round brush into the dark green paint. Press down firmly and lift up to create circle spots all over the frog’s back and legs. Vary the sizes for a natural look. -
Highlight the Spots:
I like to add a tiny swirl or dot of lighter green inside the dark spots once they dry; it makes the pattern look more interesting and textured. -
Paint the Eyes:
Paint two large white circles within the eye bumps you sketched earlier. Once the white is dry, add large black pupils, leaving a tiny white speck in each for a reflection. -
Give Him Rosy Cheeks:
Mix a little red with white to make a bright pink. Paint a small, round circle right below the eye on the cheek area to give your frog a friendly expression. -
Define the Flower:
Use a darker pink to outline the flower petals and add a pop of yellow in the very center for the pollen area. -
Final Water Accents:
Using a dark blue, paint sweeping, curved lines over your water area to create ripples. Add a few more white dots near the water line for sparkle.
Now you have a happy frog friend ready to hang on your wall
Unicorn Head With Rainbow Mane
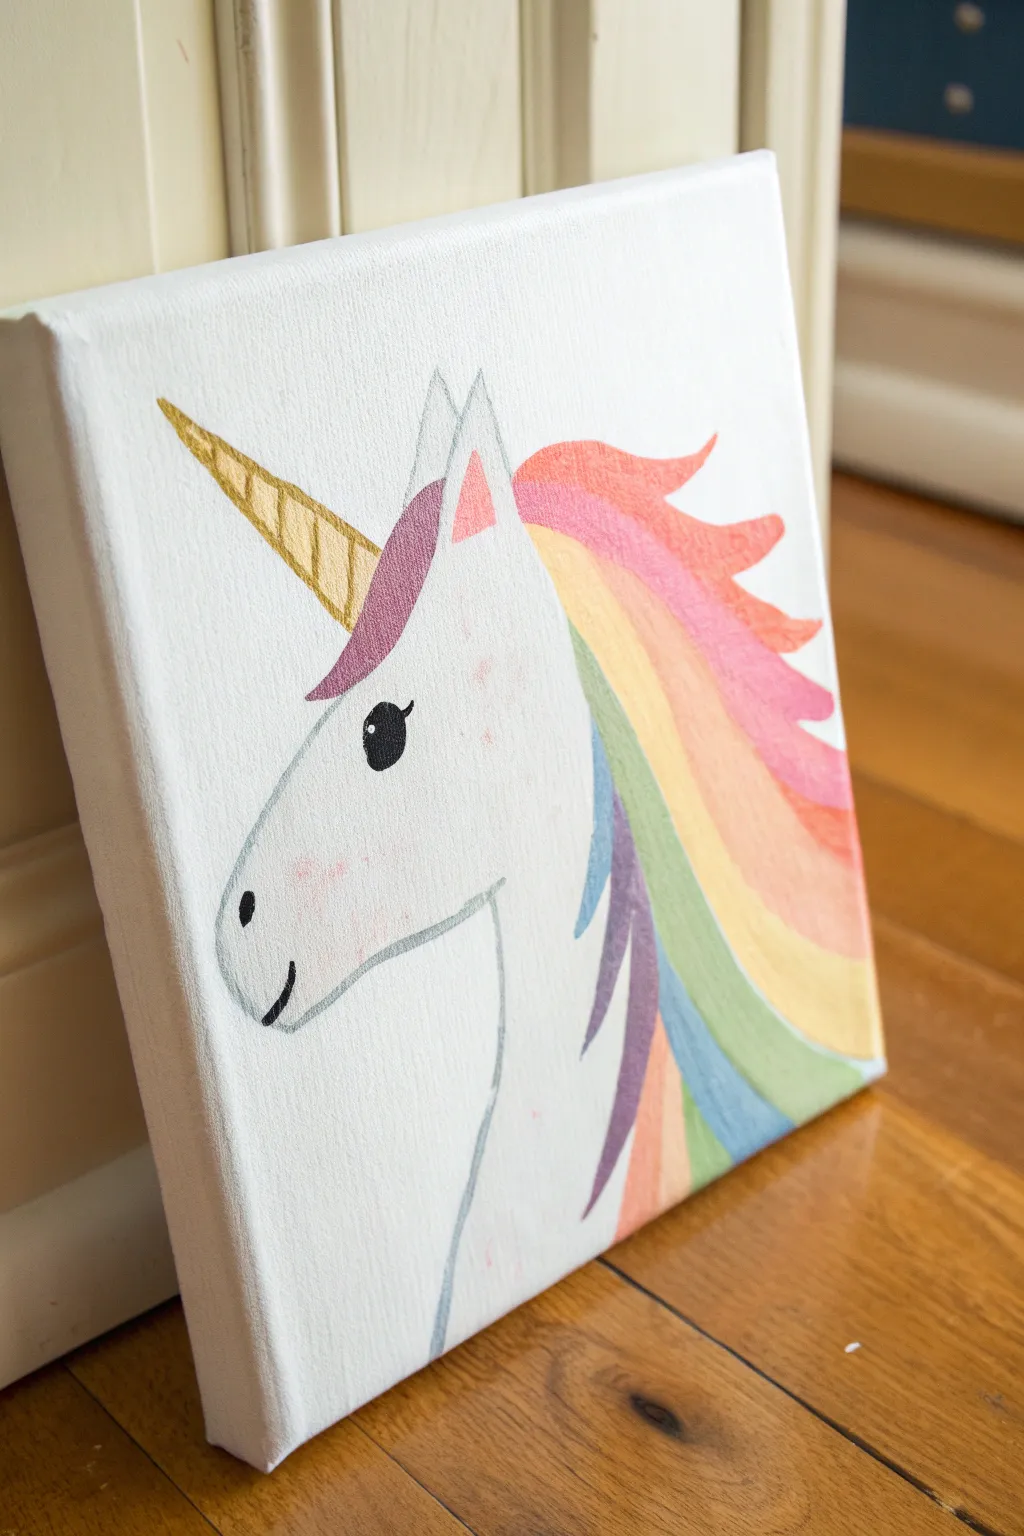
Create a magical piece of art featuring a gentle white unicorn with a vibrant, flowing rainbow mane and a glittering gold horn. This project uses soft pastel acrylics on a clean white canvas for a bright, dreamy look that fits perfectly in any kid’s room.
Step-by-Step Tutorial
Materials
- Square canvas (e.g., 10×10 or 12×12 inches)
- Acrylic paints (white, black, gold, pink, purple, yellow, orange, blue, green)
- Pencil and eraser
- Medium flat paintbrush
- Small round detail brush
- Palette or paper plate
- Cup of water
- Paper towels
Step 1: Sketching the Unicorn
-
Map out the head shape:
Start with a light pencil sketch. Draw a sloping curve for the unicorn’s nose on the left side of the canvas, curving down and around for the jawline. -
Add the neck and ears:
Extend a long, gentle line down from the jaw for the neck. At the top of the head, draw a pointed triangle shape for the front ear. -
Draw the horn:
Position a long, tapered cone shape jutting out from the forehead. Add diagonal spiraling lines across it to give it that classic unicorn texture. -
Outline the mane:
Sketch flowing, wavy sections coming from behind the ear and cascading down the right side of the canvas. Think of these as thick ribbons of hair. -
Add facial details:
Draw an oval for the eye halfway down the face, adding a little lash line. Place a small oval for the nostril near the snout’s tip.
Keep it Clean
Since the background is white, keep a damp cloth nearby. If you smudge a bright color onto the canvas background, wipe it immediately before it dries/stains.
Step 2: Painting the Base
-
Base coat the head:
Mix a tiny dot of black into your white paint to create a very faint grey. Use a medium brush to fill in the entire unicorn head and ear, avoiding the eye and horn. -
Paint the background:
If you want a solid background, paint around the unicorn now with white or a contrasting color. The example uses pure white canvas, so you can skip this to keep it clean. -
Golden horn:
Use your gold paint to fill in the horn sections. You might need two layers here for a really solid, metallic shine. -
Inner ear detail:
Paint the inside triangle of the ear with a soft pink color.
Step 3: Creating the Rainbow Mane
-
Start with the top tuft:
Paint the small piece of hair in front of the ear. The example uses a soft purple or pink shade here. -
Layer the colors:
Move to the main mane behind the ear. Paint the top section a warm coral or orange-pink. -
Continue the rainbow:
Work your way down the mane sections. Paint the next stripe yellow, followed by a soft green. -
Finish the bottom waves:
Paint the lower sections of the mane with blue and purple. I like using slightly watered-down acrylics here to keep the colors looking soft. -
Add floating strands:
Paint a few loose, curved strands of hair (purple and blue) overlapping the neck area to make the mane look like it’s blowing in the wind.
Glitter Magic
Once the paint is fully dry, brush a layer of clear glitter glue over the mane or the gold horn to make your unicorn sparkle in the light.
Step 4: Adding Details and Defining
-
Paint the eye:
Use your smallest brush and black paint to fill in the eye. Leave a tiny white dot near the top for a highlight, or add it later with white paint. -
Define the nostril and mouth:
Paint the small nostril oval black. Add a small curved line for a smile at the bottom of the snout. -
Outline the profile:
Mix a slightly darker grey than your base coat. Use a thin brush to loosely outline the jaw, neck, and ear to separate the white unicorn from the white background. -
Cheek blush:
Dip a dry brush into a tiny amount of pink paint. Dab it on a paper towel until almost dry, then gently stipple a rosy cheek onto the face. -
Final touches:
Add faint pink speckles or ‘freckles’ on the neck or nose for extra texture if desired.
Now step back and admire your magical creation

PENCIL GUIDE
Understanding Pencil Grades from H to B
From first sketch to finished drawing — learn pencil grades, line control, and shading techniques.
Explore the Full Guide
Cat Silhouette Under a Moon
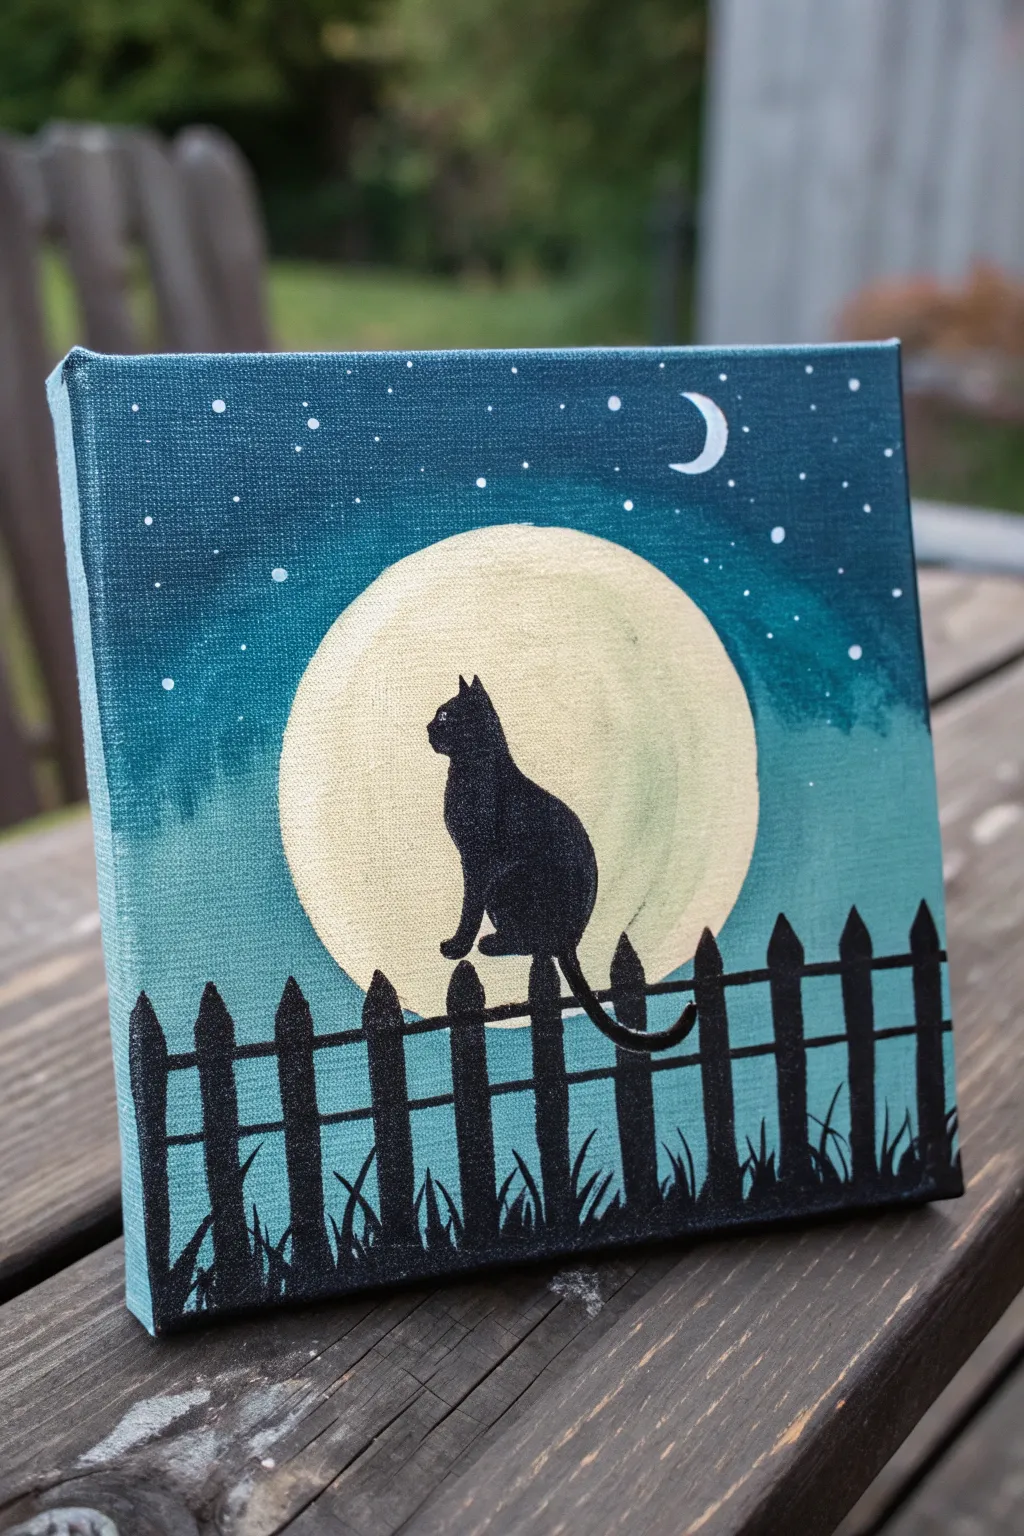
Capture the quiet mystery of a night scene with this striking acrylic painting that features a bold cat silhouette against a glowing moon. The blend of deep teals and bright golds creates a magical atmosphere perfect for a beginner artist.
Step-by-Step Guide
Materials
- Small square canvas (e.g., 6×6 or 8×8 inches)
- Acrylic paints: Dark blue, teal/turquoise, white, yellow, and black
- Wide flat brush (for the background)
- Medium round brush (for the moon)
- Small detail brush (for the silhouette and stars)
- Cup or circular object (for tracing the moon)
- Pencil
- Palette or paper plate
- Water cup and paper towels
Step 1: Painting the Night Sky
-
Prepare your colors:
Squeeze out dark blue, teal, and white paint onto your palette. You want enough to cover the entire canvas easily. -
Start at the top:
Using your wide flat brush, load up the dark blue paint and apply horizontal strokes across the top third of the canvas to create the deepest part of the night sky. -
Blend the middle gradient:
Without washing your brush completely, pick up some teal paint. Blend this into the bottom distinct edge of the dark blue, working your way down to the middle of the canvas. -
Lighten the horizon:
Mix a little white into your teal paint to create a lighter turquoise shade. Paint the bottom third of the canvas with this lighter color, blending upwards into the teal. -
Let it dry completely:
Allow the background to dry fully. If you’re impatient, a hairdryer on a cool setting works wonders here.
Uneven Moon Edges?
If your hand shakes while painting the moon, let it dry, then use the background blue color to carefully ‘cut in’ and tidy up the outer circle line.
Step 2: Creating the Moon
-
Trace the moon shape:
Place your circular object (like a cup or jar lid) in the center of the canvas. Lightly trace around it with a pencil to get a perfect circle. -
Paint a white base:
Fill in the circle with white paint first. This blocks out the blue background so your yellow will look bright and opaque rather than greenish. -
Add the yellow glow:
Once the white is dry, paint over the circle with a pale yellow. I like to add a tiny touch of white to the center while the yellow is wet to give it a spherical, glowing look. -
Add the crescent moon accent:
Paint a tiny crescent moon shape in the upper right corner using white paint, adding a whimsical touch to the deep blue sky.
Make It Your Own
Try adding a different silhouette! Instead of a cat, paint an owl perched on a branch or a howling wolf profile against the bright moon.
Step 3: Adding the Silhouette
-
Sketch the fence layout:
Lightly draw a horizontal line across the lower third of the canvas for the fence rail, and mark vertical lines for the pickets. -
Sketch the cat:
Draw the outline of a sitting cat on top of the fence rail, positioned directly in front of the moon. Focus on the simple shape—a round body, a smaller head, and pointed ears. -
Paint the fence:
Switch to black paint. Use your small brush to fill in the fence rails and the pointed fence posts. Keep your edges as crisp as possible. -
Fill in the cat shape:
Carefully paint the cat silhouette black. Add a sleek, curved tail hanging down or curling near the fence rail to give the figure some personality. -
Paint the grass details:
Using the very tip of your detail brush, flick small, quick strokes of black paint upward from the bottom of the canvas to create wild grass blades in front of the fence.
Step 4: Final Touches
-
Create the stars:
Dip the handle end of a small paintbrush into white paint. Gently dot the sky area to create random stars. -
Vary star sizes:
Make some stars slightly larger than others by varying the pressure, but try to keep them out of the moon’s surface. -
Clean up edges:
Check the edges of your canvas. Painting the sides with the matching background colors or solid black gives the piece a professional, finished look.
Hang your spooky and sweet night scene on the wall to enjoy the glow of the moon every day
Underwater Fish With Bubble Dots
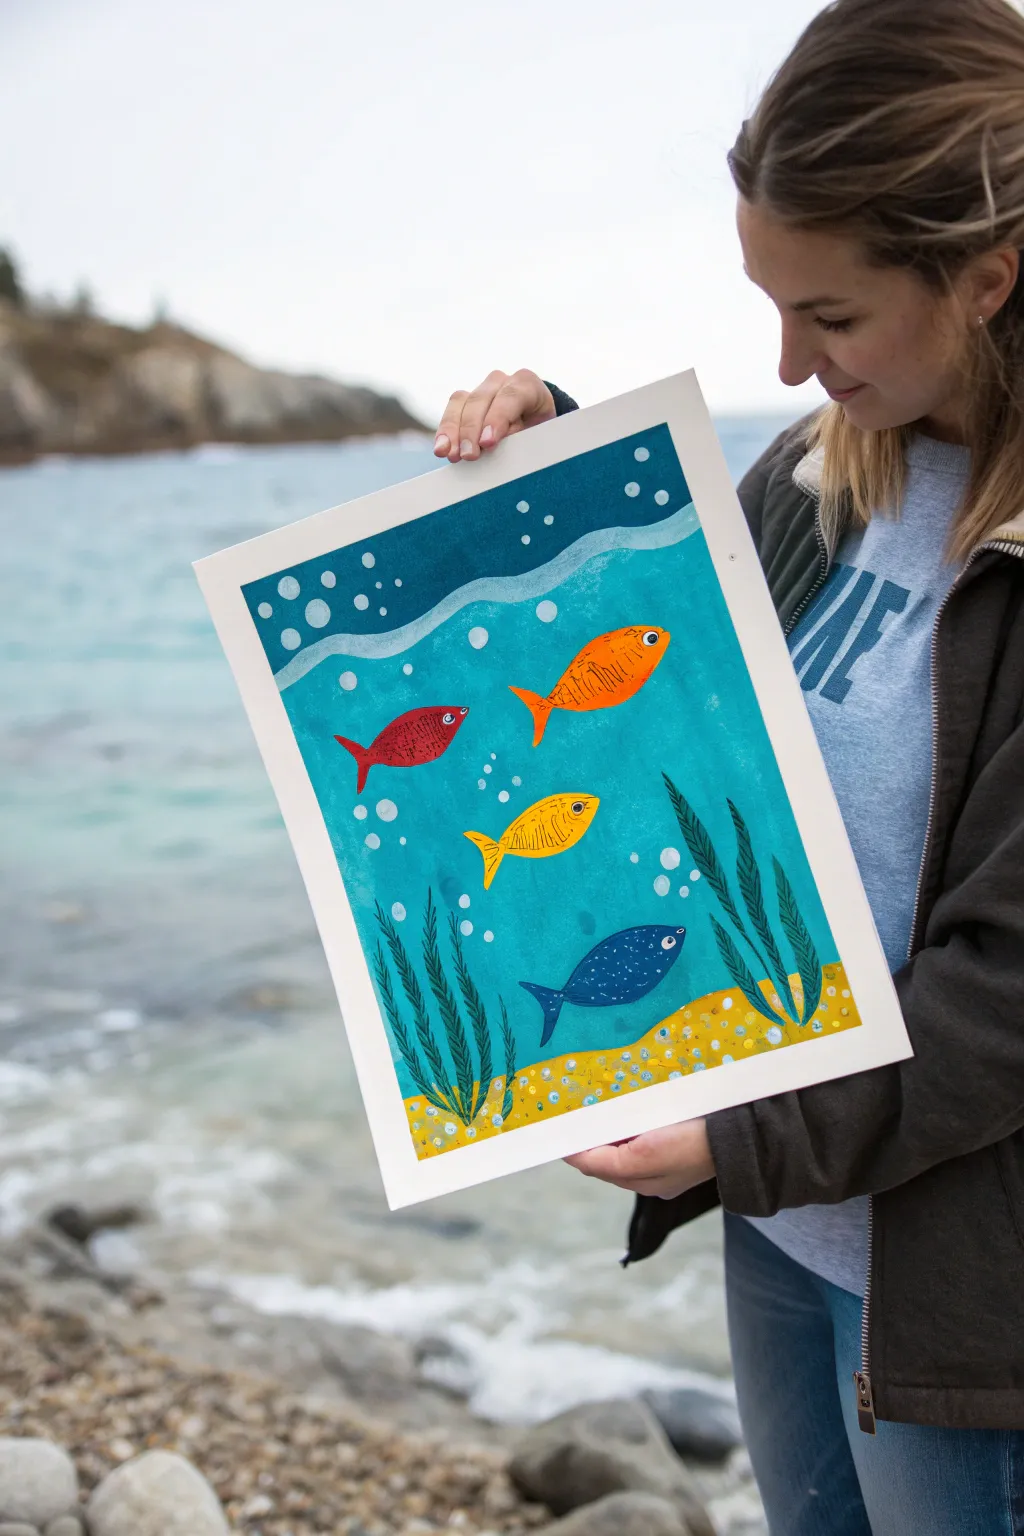
Dive deep with this vibrant underwater scene that combines layered acrylic backgrounds with playful, patterned fish. The bright pops of orange, red, and yellow stand out beautifully against the rich teal waters, making it a perfect project for learning about color contrast and composition.
How-To Guide
Materials
- Heavyweight watercolor paper or mixed media pad
- Acrylic paints (Dark teal, light aqua, white, yellow, orange, red, dark blue)
- Set of acrylic paint brushes (large flat brush, medium round brush, fine liner brush)
- Painter’s tape or masking tape
- Palette for mixing colors
- Pencil and eraser
- Cotton swabs (optional for texture)
- Water cup and paper towels
Step 1: Preparing the Ocean Floor
-
Tape the borders:
Start by taping down all four edges of your paper with painter’s tape. This secures the paper to prevent buckling and creates that crisp, professional white border when you peel it off later. -
Map out standard zones:
Using a pencil, lightly sketch a wavy line near the top for the surface water and a gentle curve at the bottom for the sandy ocean floor. Don’t worry about being perfect; ocean currents are naturally wavy. -
Paint the sandy bottom:
Mix a bright yellow with a tiny touch of orange or brown to create a golden sand color. Fill in the bottom section completely using a medium brush. -
Add texture to the sand:
While the yellow paint is still slightly tacky, mix a slightly darker ochre shade and dab small dots or textured spots onto the sand to make it look like grainy seabed.
Stamp Master
Use household items to stamp perfect circles! A pencil eraser makes great medium bubbles, while the end of a paintbrush handle makes tiny ones.
Step 2: Painting the Water Layers
-
Mix the mid-water teal:
Create a vibrant aqua-teal color. You want this to be the main color of your ocean, covering the large middle section of the paper. -
Fill the middle section:
Paint the entire middle area with your teal mix, carefully painting around the wavy line you drew at the top. Bring the paint right down to meet the yellow sand line. -
Create the deep water:
Mix a darker, more navy-toned blue. Paint the top strip of the paper above the wavy line. This represents the deeper or distant water surface. -
Add the wave highlight:
Once the blue layers are dry to the touch, mix a semi-transparent white wash (white paint with a little water). Paint a thick, wavy stripe exactly where the dark blue meets the teal to create a shimmering water separation line.
Texture Time
For the fish scales, try scratching into wet paint with a toothpick (sgraffito technique) instead of painting them on top for cool 3D texture.
Step 3: Bringing in the Sea Life
-
Sketch the fish:
With a pencil, lightly draw four simple fish shapes swimming in various directions. Aim for an oval body with a simple triangular tail. -
Color the fish base layers:
Paint each fish a solid color using your brightest acrylics—orange, red, yellow, and a deep blue. You may need two coats here to cover the teal background completely. -
Paint the seaweed:
Using a dark green (or mix blue and yellow), paint long, flowy seaweed strands rising from the sand. Use the tip of a round brush to make the leaves curve naturally upward. -
Add highlights to seaweed:
I like to mix a lighter green and add quick, small strokes on one side of the seaweed leaves to give them dimension and make them look underwater.
Step 4: Details & Bubbles
-
Detail the fish:
Once the fish are fully dry, use a fine liner brush or an acrylic marker to draw scales, fins, and gills. Use contrasting colors (black over lighter fish, white over darker fish). -
Add the eyes:
Paint a small white circle for the eye on each fish, let it dry, and then add a tiny black pupil in the center. -
Create background bubbles:
Dip the handle end of a paintbrush into white paint. Stamp random white dots of varying sizes throughout the blue water sections to create rising air bubbles. -
Detail the sandy floor:
Add small grey and white pebbles along the bottom of the sand area using the tip of your brush or a cotton swab. -
Final touches:
Check for any areas that need a touch-up, and once completely dry, slowly peel off the masking tape to reveal your finished masterpiece.
Hang your underwater creation on the wall to add a splash of ocean fun to any room


Cherry Blossom Tree With Dabbed Paint
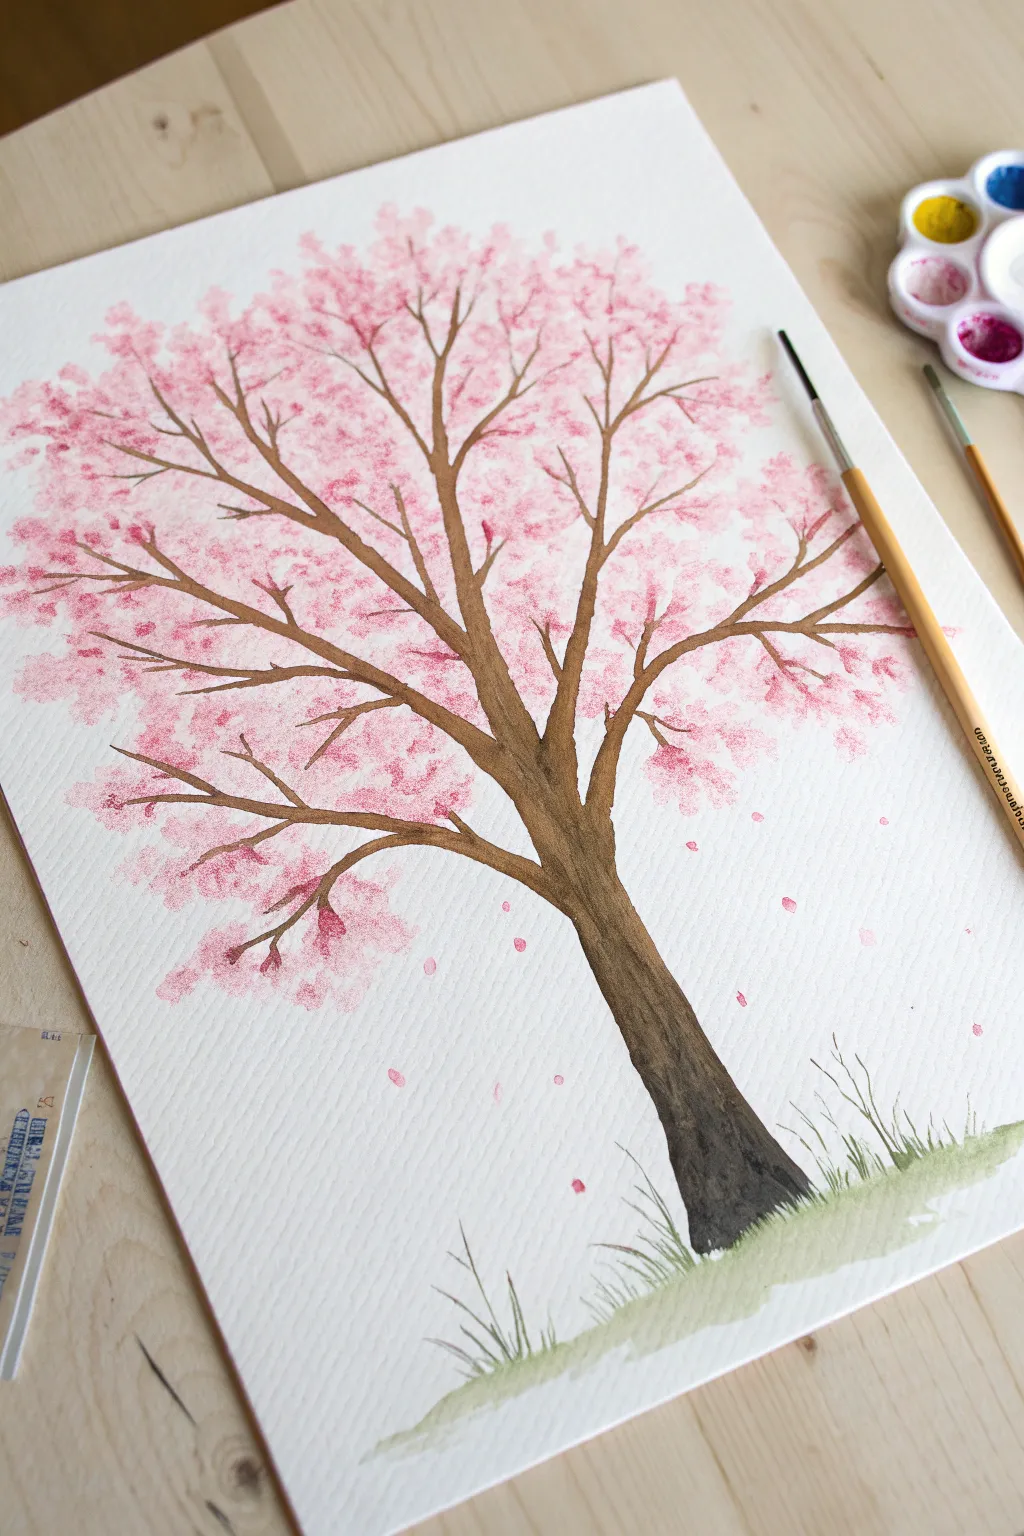
Create a breathtaking cherry blossom tree using simple dabbing techniques that capture the airy, delicate feel of spring blooms. This project blends soft pinks and sturdy browns to form a lovely tree that looks impressive but is surprisingly easy for young artists to master.
Step-by-Step
Materials
- Heavyweight painting paper or watercolor paper
- Acrylic paints (brown, white, red or pink, yellow, green)
- Small round paintbrush (size 4 or 6)
- Medium round paintbrush (size 8 or 10)
- Palette or paper plate for mixing
- Water cup
- Paper towels
Step 1: Painting the Trunk and Base
-
Mix your brown:
Start by squeezing out brown paint onto your palette. If it’s too dark, mix in a tiny drop of white or yellow to warm it up. If it’s too thick, add a drop of water to make it flow smoothly like ink. -
Draw the main trunk:
Using your medium round brush, paint a slightly curved line starting near the bottom center of your paper, moving upwards about halfway up the page. Thicken the base slightly so the tree looks strong enough to hold branches. -
Add major branches:
From the top of your trunk, paint two or three main branches extending outward in a ‘Y’ shape. Make these lines thinner than the trunk but still substantial. -
Branch out further:
Switch to your smaller brush. From each main branch, paint smaller twigs splitting off. Think of the letter ‘V’ as you add these forks. Keep your hand loose to create natural, slightly wiggly lines rather than perfectly straight rulers. -
Create the grassy base:
While the brown dries, mix a light green using yellow and a touch of blue or green. Paint a soft, uneven patch of grass at the very bottom where the trunk meets the paper. -
Add grass blades:
Use the very tip of your small brush to flick quick, short upward strokes from the green patch. These little flicks create the texture of grass blades growing around the tree roots. -
Darken the trunk:
Once the first layer of brown is dry to the touch, mix a slightly darker brown. Paint a thin shadow along the right side of the trunk and under the main branches to give your tree a 3D rounded look.
Pro Tip: Fluffy Texture
For fluffier flowers, try using a small piece of natural sea sponge or a balled-up piece of wrinkled paper towel instead of a brush to dab on the paint.
Step 2: Creating the Blossoms
-
Prepare your pinks:
On your palette, create three shades of pink: a very pale pink (mostly white with a dot of red), a medium pink, and a slightly darker, vibrant pink. Having variety adds depth. -
Loading the brush for dabbing:
I like to use a dryer brush for this step. Dip your medium brush into the lightest pink paint, then dab it once on a paper towel to remove excess gob. -
Dab the first layer:
Gently dab the brush tip onto the paper around the ends of your branches. Don’t paint strokes; just press and lift. Group these dabs in clusters to look like fluffy clouds of flowers. -
Fill the canopy:
Continue dabbing light pink all over the upper part of the tree. It’s okay to overlap the brown branches. Leave some white space between clusters so the tree doesn’t look like a solid blob. -
Add medium pink depth:
Switch to your medium pink shade. Dab this color over the light pink areas, focusing near the centers of your flower clusters. This layering makes the blossoms look full and real. -
Pop with dark pink:
Using your smallest brush, take the darkest pink and add tiny, deliberate dots sparingly within the flower clusters. These represent the shadows or individual buds. -
Falling petals:
To show a gentle breeze, add a few stray pink dabs floating in the air below the branches, drifting down toward the grass. -
Ground petals:
Add a few small pink dots on top of your green grass area to show where petals have already landed. -
Wait and evaluate:
Step back and look at your tree. If any area looks too bare, add a few more light pink dabs. Let the painting dry completely before touching it.
Level Up: Morning Light
Mix a tiny bit of yellow into your white paint and dab it on the top-left edges of your flower clusters to create the effect of sunlight hitting the blooms.
Your beautiful cherry blossom tree is now ready to bring a touch of eternal spring to your room
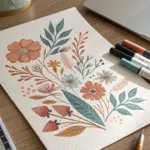
Sponge-Stamped Garden Flowers
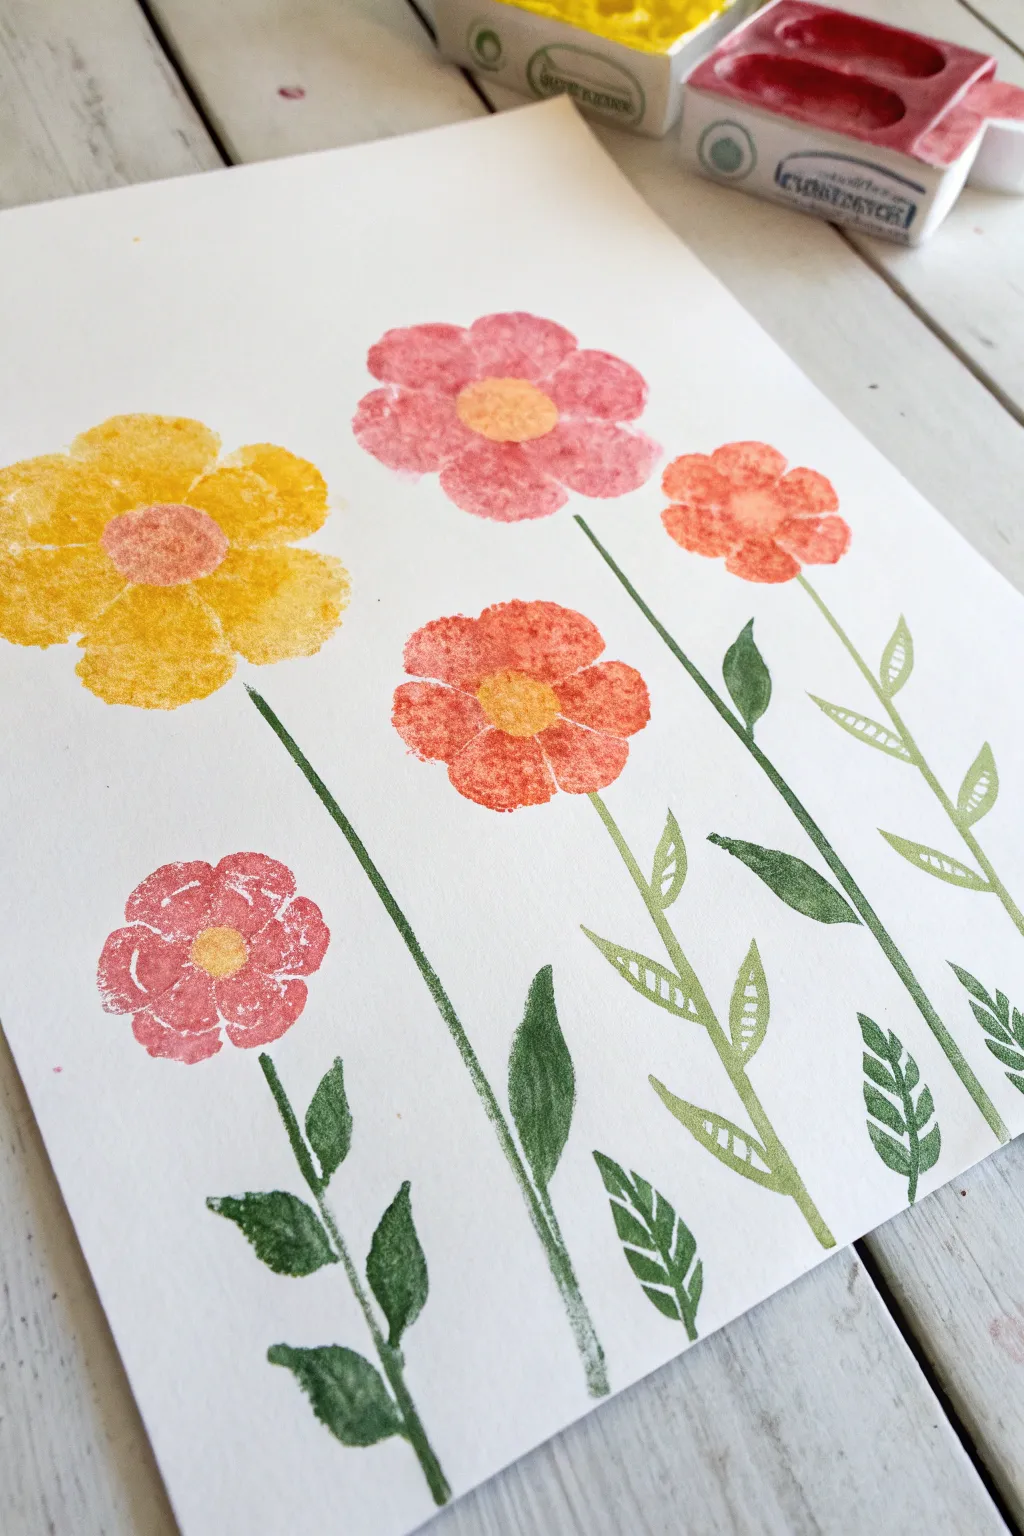
Transform simple household sponges into a blooming garden with this delightful stamping project. The texture of the sponge creates a beautifully organic, soft petal effect that looks stunning against crisp white paper.
Detailed Instructions
Materials
- Heavy white cardstock or watercolor paper
- Clean kitchen sponges (yellow cellulose sponges work best)
- Acrylic paints (red, yellow, orange, green, white)
- Scissors
- Small flat paintbrush
- Paper plate or palette
- Pencil
- Water cup and paper towels
Step 1: Preparing the Sponge Stamps
-
Outline your shapes:
Before you start painting, you need to create your tools. Take a dry kitchen sponge and draw a simple petal shape (like a teardrop or oval) about an inch long on the surface using a marker or pen. -
Create a center stamp:
Draw a small circle, roughly the size of a dime, on a different section of the sponge. This will be used for the flower centers. -
Cut out the shapes:
Carefully use scissors to cut out your petal shape and your circle shape. Dampen them slightly with water and squeeze them out completely so they are soft but not dripping. -
Mix your colors:
Squeeze dabs of red, yellow, and orange acrylic paint onto your palette. I like to mix a tiny bit of white into the red to create a soft pink, and keep some pure yellow for the centers.
Pro Tip: Better Texture
Don’t overload the sponge with paint. A ‘dry’ sponge with less paint creates that beautiful, airy texture where the paper shows through slightly.
Step 2: Stamping the Blooms
-
Load the petal sponge:
Dip the flat bottom of your petal-shaped sponge into your first flower color (let’s start with yellow). Dab it on a clean part of the palette a few times to ensure the paint is evenly distributed and not gloppy. -
Stamp the first flower:
Press the sponge firmly onto your paper to make the first petal. Lift it straight up to preserve the texture. -
Complete the circle:
Rotate your paper slightly and stamp four more petals in a radial pattern around an imaginary center point, creating a full five-petal flower shape. -
Switch colors:
Rinse your sponge thoroughly and squeeze it dry, or use a second petal sponge for the next color. Pick up some pink or red paint now. -
Add variety:
Stamp a second flower nearby, varying the height. For this one, try pressing a little lighter to get a more textured, ‘spongey’ look. -
Create a smaller bloom:
For variety, you can stamp a smaller flower lower on the page using just the very tip of your petal sponge or by cutting a smaller petal shape. -
Stamp the centers:
Take your small circle sponge and dip it into a contrasting color, like yellow or orange. Press it firmly into the middle of each flower ring to connect the petals.
Step 3: Painting Stems and Leaves
-
Prepare green paint:
Squeeze out some green acrylic paint. If you want a more natural look, mix a tiny dot of red or brown into the green to tone down the brightness. -
Paint the stems:
Using a small flat paintbrush, paint a long, thin line extending from the bottom of each flower head down to the bottom edge of the paper. -
Curve the lines:
Don’t make the stems perfectly straight; give them a slight, gentle curve so they look like they are swaying in a breeze. -
Add solid leaves:
On the larger flowers, use your brush to paint simple, solid leaf shapes attaching to the stem. Make them pointed at the tip and wider at the base. -
Paint detailed leaves:
For visual interest, try painting open leaf shapes on the stems of the taller flowers. Outline the leaf shape and add small diagonal lines inside for veins, rather than filling them in completely solid. -
Vary leaf placement:
Place leaves at different heights on each stem to keep the composition balanced and interesting. -
Final touches:
Check for any gaps in your flower centers or stems. If the centers feel too flat, you can dab a second layer of paint on them for a bit of impasto texture.
Troubleshooting: Blobby Petals
If your shape looks like a solid blob, you likely have too much water in the sponge. Squeeze it really tight in a paper towel before dipping in paint again.
Now you have a vibrant, everlasting garden that captures the joy of spring on paper
Rocket Ship in Outer Space
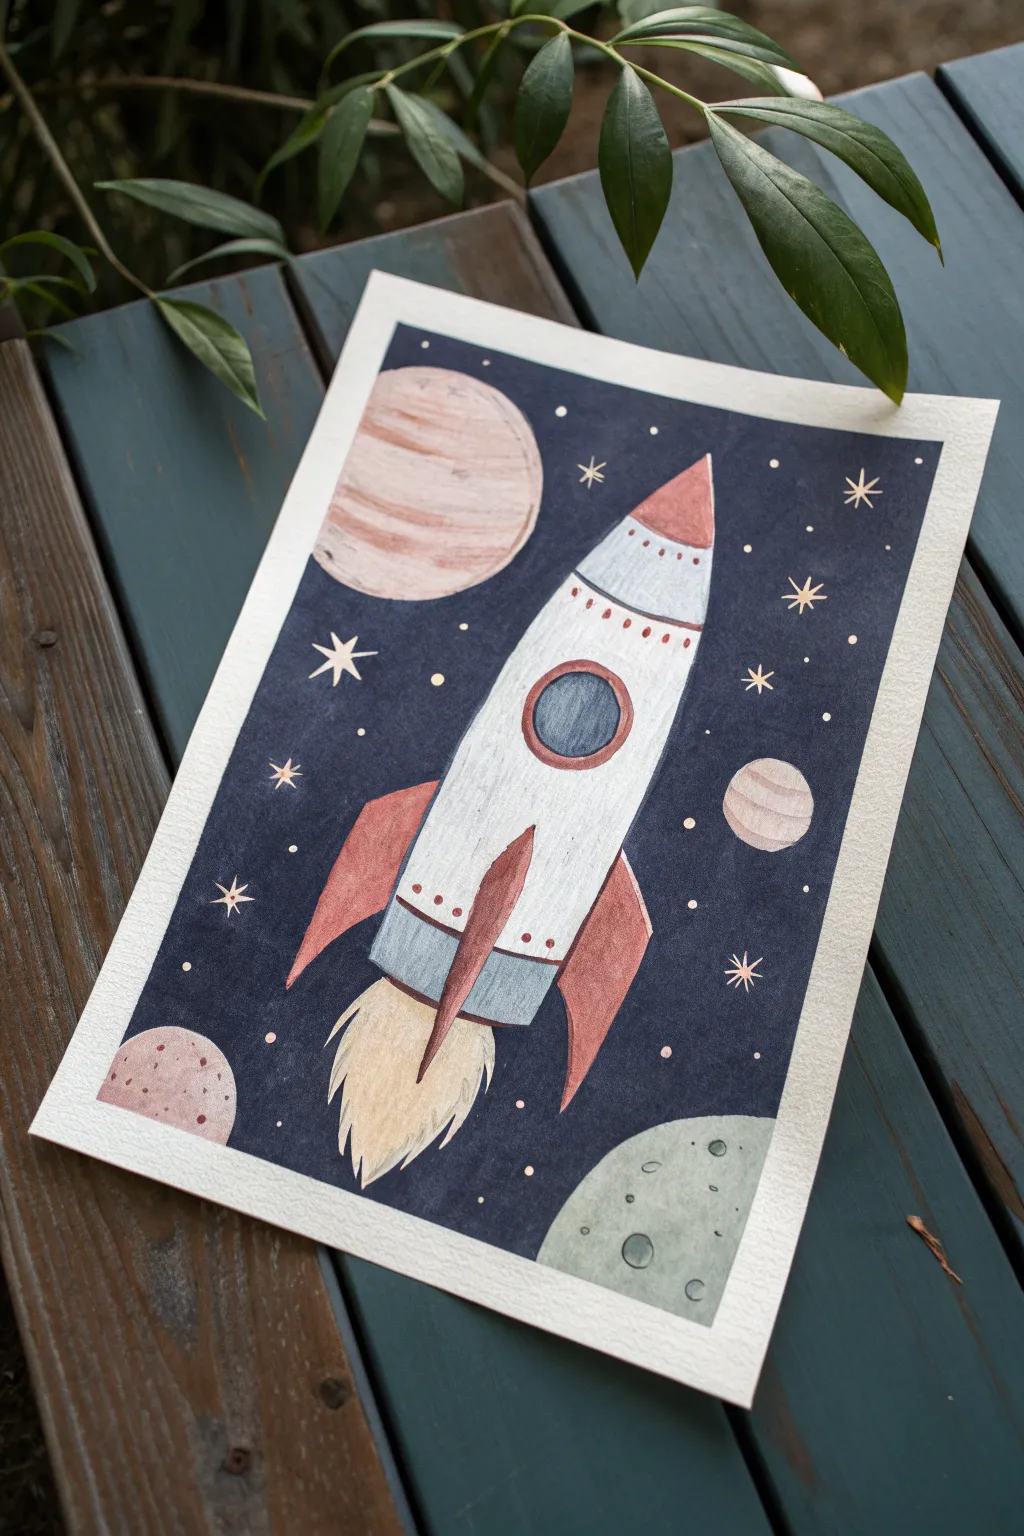
Blast off into creativity with this charming rocket ship painting that features a deep, starry background and softly textured planets. Using simple shapes and contrasting colors, you’ll create a whimsical space scene perfect for a bedroom wall or a budding astronaut’s collection.
Step-by-Step
Materials
- Cold press watercolor paper (A4 or similar size)
- Painter’s tape or masking tape
- Acrylic paints (dark indigo/navy blue, white, muted red/coral, light blue-grey, beige, pale yellow, sage green)
- Round brushes (sizes 2, 4, and 6)
- Fine detail brush (size 0 or 00)
- Pencil and eraser
- Palette for mixing
- Jar of water and paper towels
Step 1: Preparation & Drawing
-
Tape the borders:
Begin by taping down all four edges of your watercolor paper to your work surface. This creates that crisp, clean white border frame seen in the final piece and keeps the paper flat while you paint. -
Sketch the rocket body:
In the center of the paper, lightly sketch a tall, slender oval shape that tapers to a point at the top. Flatten the bottom edge slightly. This is your main fuselage. -
Add the fins and window:
Draw three fins: one large fin centered at the bottom overlapping the body, and two curved triangular fins on either side. Near the top third of the rocket, draw a circle for the porthole window. -
Sketch the planets:
Around the rocket, lightly draw circular outlines for planets. Place a large one in the top left, a medium one in the bottom right, and smaller spheres scattered elsewhere to balance the composition.
Step 2: Painting the Background
-
Mix the space color:
Creating a deep, rich background is key. Mix a dark navy blue with a tiny touch of black or purple to get that deep indigo ‘space’ shade. -
Fill the void:
Using your size 6 brush, carefully paint around your pencil sketches, filling the entire background with your dark mix. Take your time edging around the rocket and planets to keep their shapes clean. -
Let it dry completely:
This step is crucial. Wait until the background is fully dry to the touch so your lighter colors don’t bleed into the dark blue.
Starry Splatter
For a magical galaxy effect, dilute some white paint with water. Load an old toothbrush and flick the bristles to spray tiny mist-like stars over the background before painting the main big stars.
Step 3: Painting the Rocket
-
Base coat the rocket:
Paint the main body of the rocket with white acrylic. It might need two thin coats to cover the paper texture fully and look bright against the dark surroundings. -
Paint the nose cone and fins:
Mix a muted red or coral shade. Paint the tip of the nose cone and the two side fins. For the central bottom fin, you can use a slightly darker version of this red to show depth. -
Add the metal details:
Use a light blue-grey color to paint the circular frame of the window and the band near the bottom of the rocket engine. Fill the center of the window with a darker grey-blue to look like glass. -
Blast off flames:
Below the central fin, paint a burst of flames using a pale yellow or beige. Use jagged, feathery strokes at the bottom to mimic fire texture.
Metallic Magic
Swap the pale yellow star paint for metallic gold or silver acrylic. The shimmer will catch the light and make your space scene look truly cosmic and high-quality.
Step 4: The Planets & Details
-
Paint the striped world:
For the top-left planet, paint the circle a pale beige. While wet, mix in streaks of white and light brown to create a striped, Jupiter-like texture. -
Paint the cratered moon:
Paint the bottom-right partial planet with sage green. Once dry, use a darker green to paint small oval rings to represent craters. -
Fill the smaller planets:
Paint the remaining small circles with varying shades of dusty pink and light grey. Add tiny dots or lines on them for texture. -
Add detail lines:
Switch to your fine detail brush. Use the dark background color (or a dark grey) to outline the rocket parts lightly if needed, or add small dots and rivets along the metal bands. -
Paint the stars:
Using a gold or pale yellow paint and your smallest brush, paint small 8-pointed stars and tiny dots scattered throughout the dark blue background. -
Reveal the border:
Once everything is 100% dry, slowly peel away the painter’s tape at a 45-degree angle to reveal your clean white edges.
Hang your masterpiece on the wall and enjoy the view of your personal galaxy
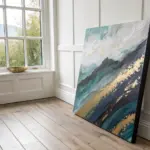
Tape-Resist Geometric Color Blocks
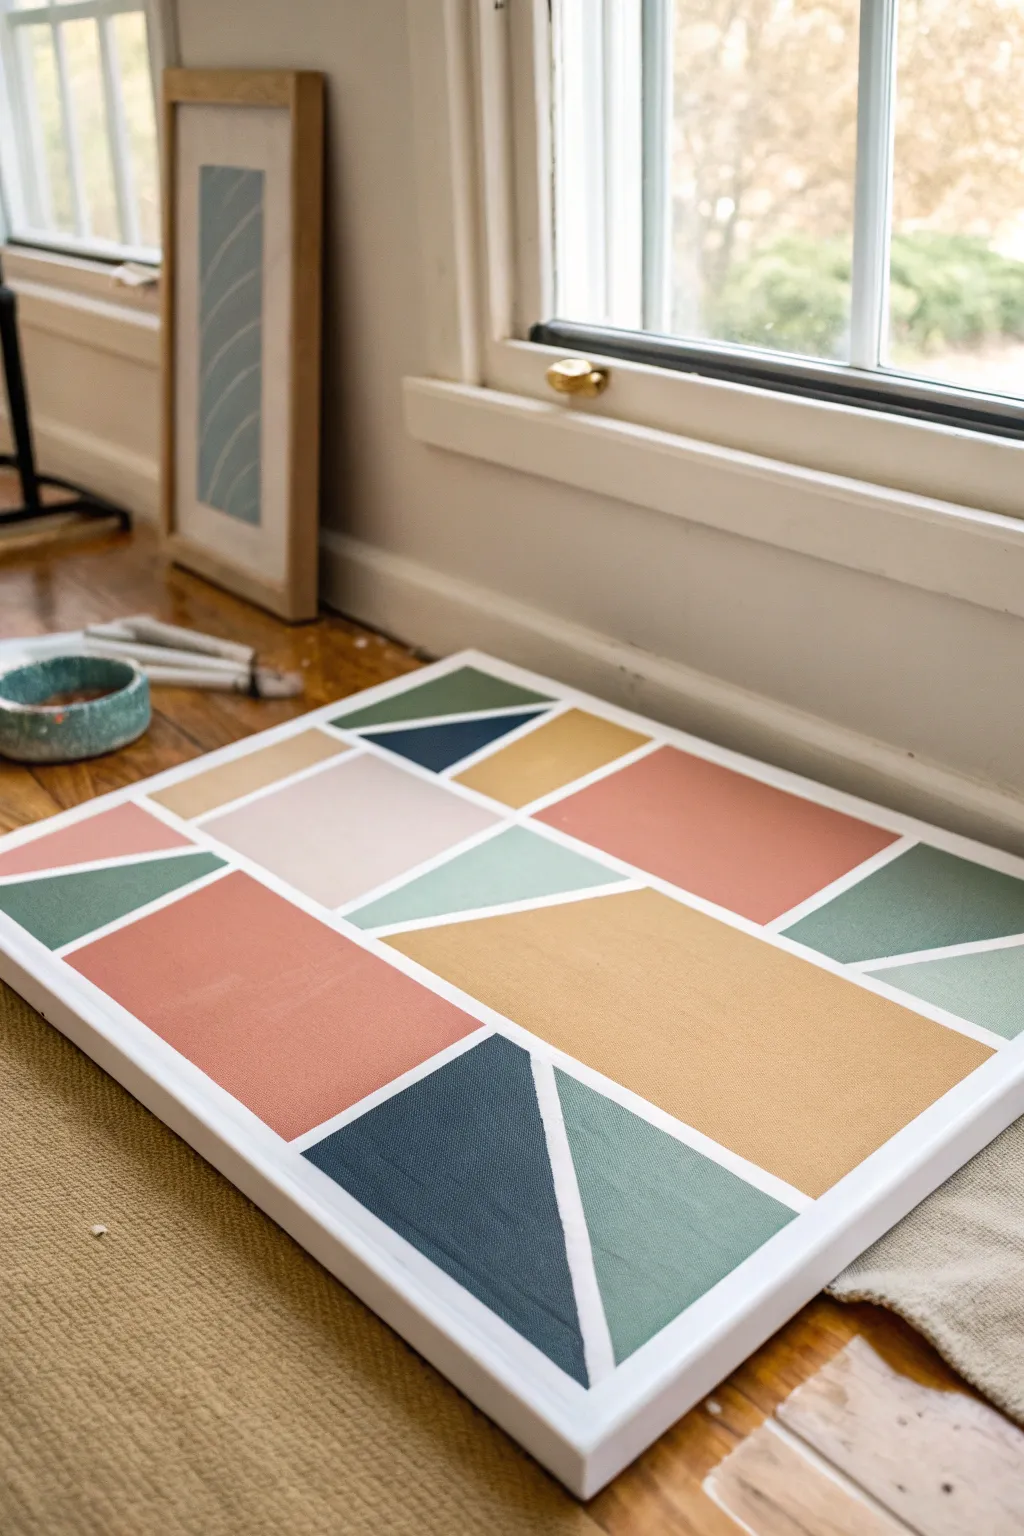
This modern, gallery-worthy piece relies on masking tape to create crisp, clean lines between blocks of earthy color. The result is a sophisticated geometric abstraction that looks complicated but is surprisingly simple to achieve.
Step-by-Step Guide
Materials
- Stretched canvas (rectangular or square)
- Painter’s tape or masking tape (1/4 inch to 1/2 inch width recommended)
- Acrylic paints (terracotta, mustard yellow, sage green, dark teal, blush pink)
- Medium flat synthetic paintbrush
- Paint palette or disposable plate
- Cup of water and paper towels
Step 1: Creating the Geometric Framework
-
Prepare your canvas:
Start with a clean, dry canvas. If your canvas isn’t pre-primed, apply a coat of white gesso and let it dry completely to ensure the tape adheres well. -
Lay the first tape lines:
Begin by placing long strips of painter’s tape across the canvas. You can go diagonal, horizontal, or vertical. Press down firmly as you go. -
Create smaller sections:
Add intersecting strips of tape to break up the larger spaces into smaller triangles, trapezoids, and rectangles. Aim for a balanced composition with a mix of large and small shapes. -
Seal the edges:
I like to run a fingernail or a credit card firmly along the edges of every piece of tape. This crucial step prevents paint from bleeding underneath for those sharp, professional lines. -
Optional white seal (for perfectionists):
For razor-sharp lines, paint a very thin layer of white paint (or your base canvas color) over the tape edges and let it dry. This seals any tiny gaps before you add color.
Clean Line Secret
Apply a thin layer of matte medium over the tape edges before painting. It dries clear and creating an impenetrable barrier against bleeds.
Step 2: Adding the Color
-
Plan your palette:
Squeeze your acrylic colors onto the palette. This design uses a harmonious mix of warm tones like terracotta and mustard alongside cool tones like sage and dark teal. -
Paint the first block:
Choose a large shape and fill it with your first color, such as the mustard yellow. Use a flat brush to paint away from the tape edge initially to minimize seepage. -
Distribute colors evenly:
Select another non-adjacent shape and paint it the same color. Distributing the colors across the canvas creates a balanced look for the final piece. -
Switch and rinse:
Rinse your brush thoroughly and dry it on a paper towel before switching to the next color, like the terracotta or coral shade. -
Fill adjacent shapes:
Continue painting the remaining shapes. Be careful when precise corners meet; ensure you don’t accidentally paint over the tape into a neighboring section meant for a different color. -
Apply a second coat:
Some lighter colors, particularly yellows and blush pinks, might look streaky with just one coat. Let the first layer dry to the touch and apply a second coat for solid opacity. -
Check for missed spots:
Look closely at the canvas texture. Dab paint into any weave pockets that might have been missed to ensure full coverage within each shape.
Step 3: The Reveal
-
Let it dry… mostly:
Allow the paint to dry until it is no longer wet to the touch, but don’t leave the tape on for days, as it can become difficult to remove. -
Peel the tape:
Slowly peel back the tape at a 45-degree angle. Pulling slowly helps ensure sharp lines and prevents the paint from peeling up with the tape. -
Touch up if needed:
If a little paint bled through, don’t worry. Use a small detail brush with white paint to carefully tidy up the lines once the colors are fully dry. -
Finish the edges:
Paint the sides of the canvas white to match the lines, or extend the geometric colors around the edges for a gallery-wrap effect.
Metallic Pop
Replace one of the solid colors, like the grey or smaller triangles, with gold or copper leaf for a glamorous, mixed-media finish.
Hang your new geometric masterpiece in a spot that needs a modern splash of color and enjoy your handiwork
Mini Acrylic Pour Rainbow Swirls
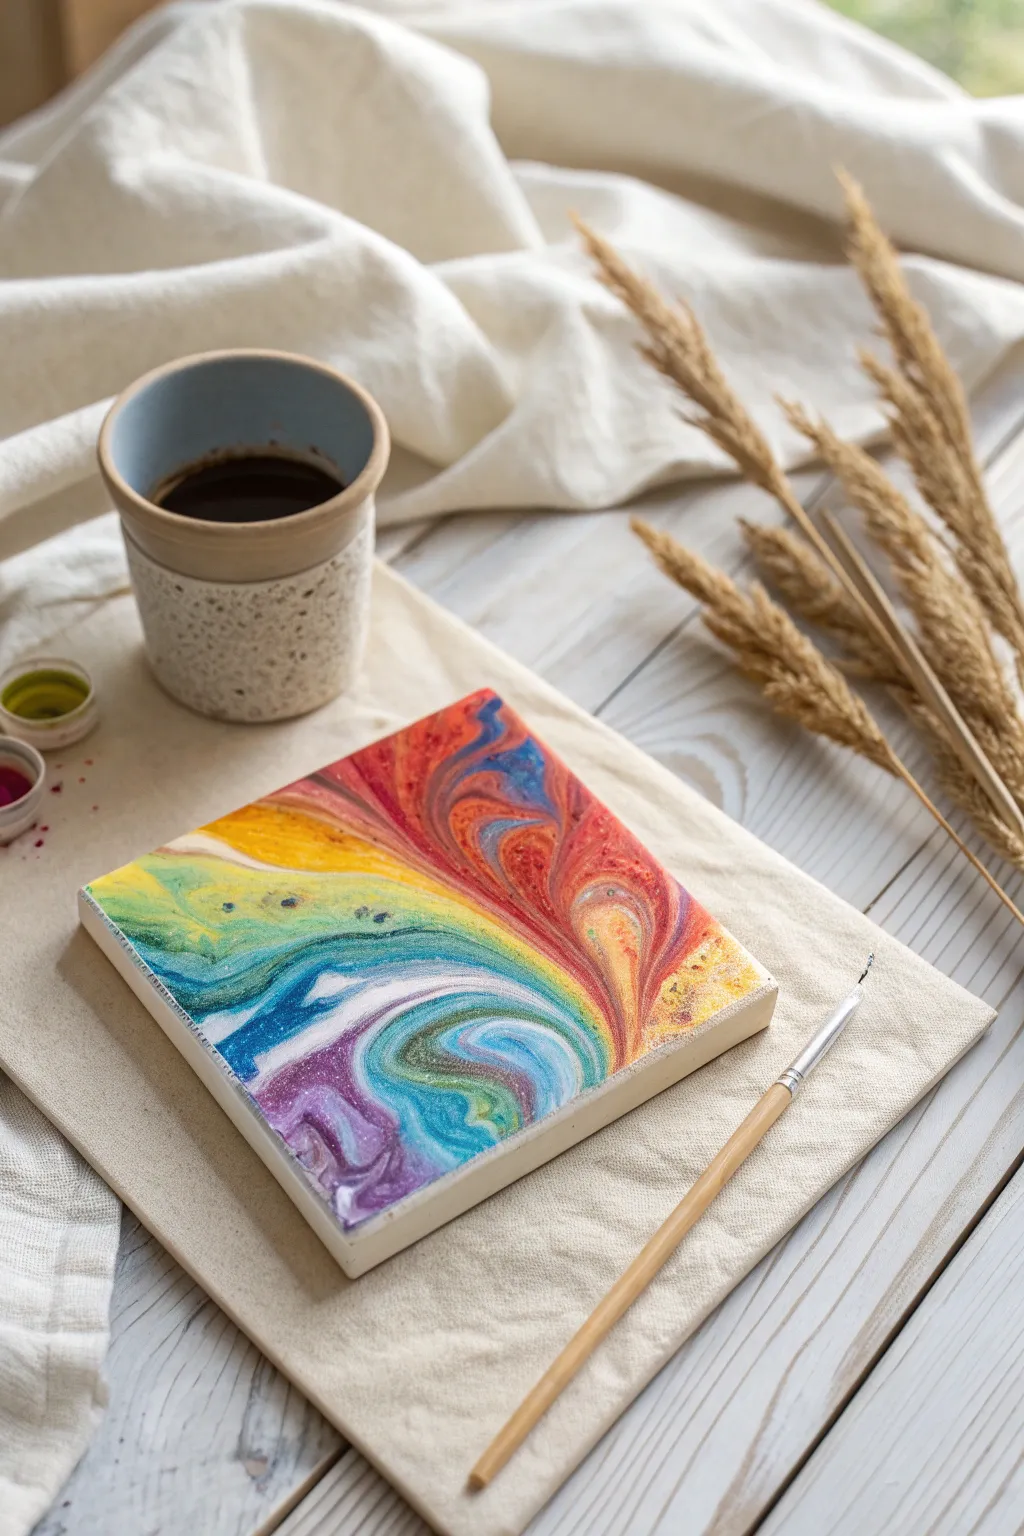
These mesmerizing swirls capture the full spectrum of the rainbow in a pocket-sized masterpiece, perfect for little hands to create. The fluid technique creates organic, flowing lines and shimmering cells that make each piece completely unique.
How-To Guide
Materials
- Small square canvas (e.g., 4×4 or 6×6 inches)
- Acrylic paints (red, orange, yellow, green, blue, purple, white)
- Acrylic pouring medium
- Fine iridescent glitter (optional)
- Small paper or plastic cups (one for each color)
- One larger ‘dirty pour’ cup
- Popsicle sticks for stirring
- Cardboard box or tray to catch drips
- Gloves and apron
- Push pins (4 per canvas)
Step 1: Preparation & Mixing
-
Set up your workspace:
Cover your table with plastic sheets or newspapers. Place your canvas inside a cardboard box or on a tray to contain the inevitable overflow of paint. -
Elevate the canvas:
Press four push pins into the corners on the back of the canvas frame. This acts like a little table, keeping the canvas off the messy tray so the edges can dry freely. -
Mix the pouring medium:
In your small cups, mix each acrylic paint color with the pouring medium. A common ratio is 1 part paint to 1 part medium, but check your bottle’s instructions. You want a consistency like warm honey. -
Add the sparkle:
If you want that magical shimmer seen in the photo, stir a pinch of fine iridescent glitter into the blue, purple, and white paint cups. -
Check consistency:
Lift your stirring stick. The paint should flow off in a smooth, continuous stream without breaking. If it’s too thick, add a tiny drop of water.
Step 2: The Pouring Technique
-
Layer the ‘dirty’ cup:
Take your larger empty cup. Pour a small amount of white paint into the bottom. This helps the other colors flow. -
Stack the rainbow:
Slowly pour the other colors into this single cup one by one. Layer them in rainbow order (red, orange, yellow, green, blue, purple) or alternate simply with white. Don’t stir! Just let them sit on top of each other. -
Use the flip cup method:
Place the canvas face down on top of your cup. Hold the cup and canvas tightly together and quickly flip them over so the cup is now resting upside down on the canvas face. -
Wait a moment:
I like to let the cup sit upside down for about 30 seconds. This allows the heavy pigments to sink and mix slightly, creating those beautiful cells. -
The reveal:
Gently lift the cup straight up. The paint will puddle out onto the canvas in a beautiful, marbled blob.
Paint Consistincy Tip
If your paint is too thick, the colors won’t flow; too thin, and they turn muddy. Aim for melted ice cream texture so stripes stay distinct.
Step 3: Tilting & Drying
-
Tilt to spread:
Gently pick up the canvas by the push-pin legs. Slowly tilt it in various directions to encourage the paint to flow toward the corners. -
Cover the corners:
Continue tilting until the entire surface is covered and paint is dripping over the sides. The colors will stretch and swirl into new shapes. -
Enhance the swirls:
If there are large blocks of color, you can gently drag the back of a clean paintbrush through the paint to create intentional swirls or separate the colors more. -
Pop air bubbles:
Look closely for tiny bubbles. You can pop them lightly with a toothpick or a quick pass of a kitchen torch (with adult supervision) to smooth the surface. -
Let it cure:
Leave the canvas in a dust-free area to dry. It needs to stay perfectly flat. It will take at least 24-48 hours to dry completely due to the thickness of the paint.
Make It a Coaster
Once fully dry (give it a week to cure), seal with a high-gloss resin or waterproof varnish to turn these mini canvases into colorful drink coasters.
Now you have a stunning, galactical swirl painting that captures a whole rainbow in a tiny square.
Scrape-Paint Color Mixing Monsters
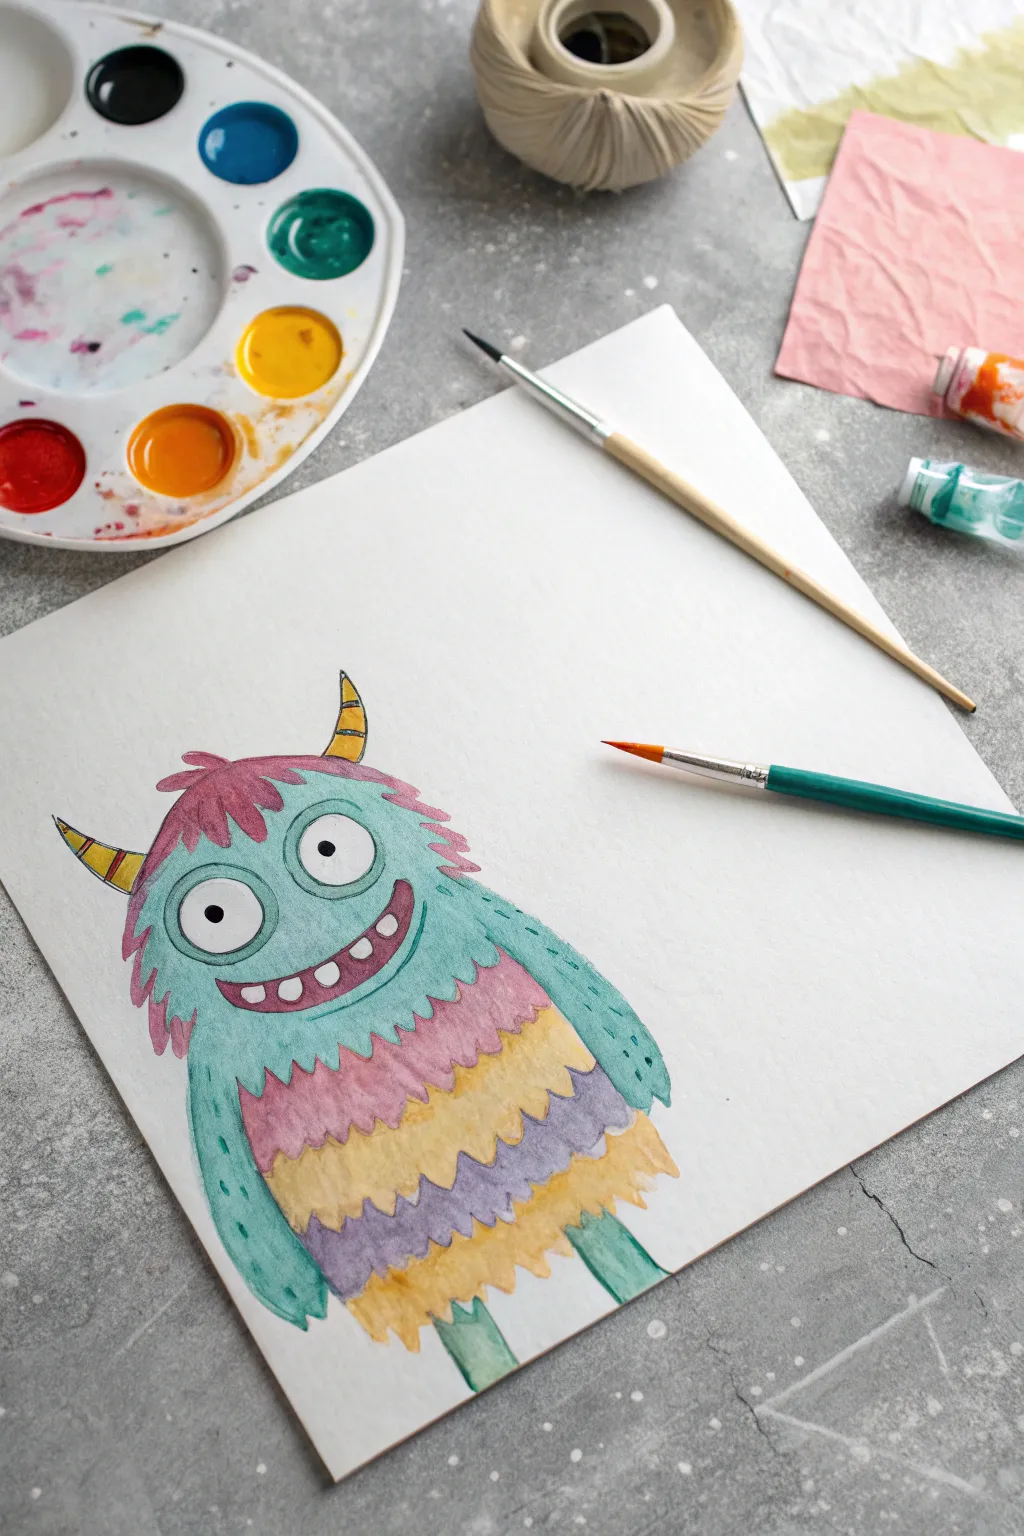
Create a lovable, furry creature using simple brush strokes and bright, translucent colors. This friendly monster features soft textures and a layered, colorful tummy that makes him pop off the page.
Step-by-Step
Materials
- Heavyweight watercolor paper or mixed media paper
- Watercolors or diluted acrylic paints (teal, pink, yellow, purple)
- Round watercolor brushes (size 6 and size 2 for details)
- Black fine liner pen or thin brush with black ink
- Palette for mixing colors
- Jar of water
- Paper towels
Step 1: Drawing the Base
-
Outline the body shape:
Start by sketching a large gumdrop shape very lightly with a pencil to define the monster’s main body. It should be wider at the bottom and slightly rounded at the top. -
Add the horns:
Draw two small, curved triangular horns on top of the head. -
Face features:
Sketch two large circles for the eyes, making one slightly larger than the other for a goofy look. Add a wide, curved smile below the eyes showing a row of square teeth.
Step 2: Painting the Body
-
Mix your teal color:
Prepare a watery teal or turquoise paint on your palette. You want it fluid enough to create soft edges. -
Paint the fur outline:
Using a medium round brush, paint the outer edge of the monster using short, flicking strokes outward to simulate messy fur. Avoid the horns and the tummy area. -
Fill in the body:
Fill the rest of the body with the teal wash, being careful to paint around the eyes and teeth. Keep the paint wet so it blends smoothly. -
Add the arms:
Paint two simple teal arms hanging down the sides, ensuring they blend into the body, and add small legs at the bottom. -
Top fur tuft:
While the teal is drying, mix a soft pinkish-purple. Paint a tuft of fur right on top of the head, between the horns, using the same flicking motion.
Furry Edges
Don’t paint smooth outlines! Use the tip of your round brush to flick paint outward at the edges. This creates that essential fuzzy, monster-fur look instantly.
Step 3: Adding the Colorful Tummy
-
First tummy layer:
Mix a diluted purple or mauve color. Paint a jagged, zigzag band across the upper chest area, just below the mouth. -
Second tummy layer:
Switch to a warm yellow-ochre or gold color. Paint a second zigzag band below the purple one, letting the edges touch slightly if you want a soft blend. -
Third tummy layer:
Use a light lavender or purple again for the next band down. -
Final tummy layer:
Finish the bottom of the belly with another band of the yellow-ochre color, using jagged strokes at the bottom edge to mimic fur texture.
Googly Eyes
Glue on plastic googly eyes instead of painting them. Different sizes of googly eyes make the monster look even sillier and add a fun 3D element.
Step 4: Details & Definition
-
Let it dry completely:
Wait until the paint is bone dry before adding fine details to prevent bleeding. -
Outline the horns:
Use a fine liner or very thin brush with black paint to outline the horns and add small stripes across them. Fill the stripes with yellow paint. -
Define the eyes:
Outline the large eye circles with a thin black line. Add small black dots in the center for pupils. -
Paint the mouth:
Fill the mouth area with a dark mauve or maroon color, leaving the teeth white. Once dry, outline the mouth and teeth with your fine black liner. -
Texture details:
Using a slightly darker teal and a small brush, add tiny ticking or dash marks over the teal body fur to give it extra texture and depth. -
Final touches:
Add small black dots or dashed lines on the arms for extra character.
Now you have a charming little monster friend ready to brighten up your wall
Q-Tip Dot Fireworks Night Sky
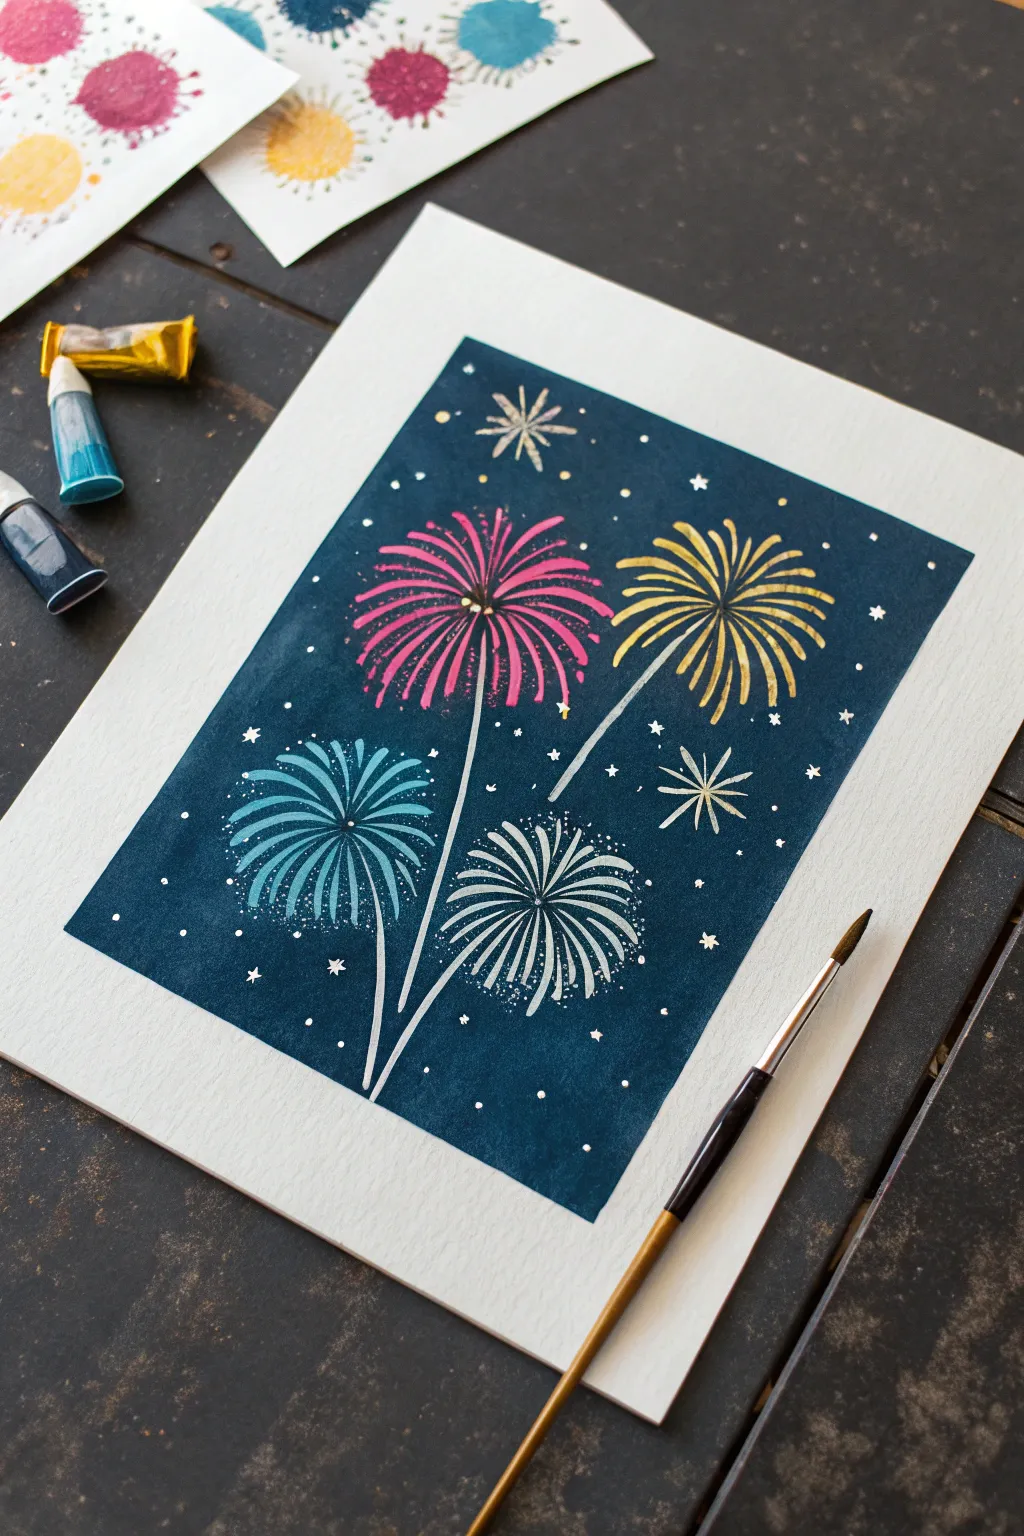
Capture the magic of a holiday celebration with this vibrant fireworks painting set against a deep moody sky. Using simple strokes and a few dazzling colors, you’ll create an explosion of joy that pops right off the dark background.
Detailed Instructions
Materials
- Heavyweight watercolor paper or mixed media paper
- Painter’s tape or masking tape
- Dark blue acrylic paint (Navy or Prussian Blue)
- Acrylic paints (Magenta/Pink, Yellow, Light Blue, White, Silver)
- Flat wash brush
- Fine detail brush (round size 0 or 1)
- Small round brush (size 2 or 4)
- Palette or paper plate
- Cup of water
- Paper towels
Step 1: Setting the Stage
-
Tape the Edges:
Start by securing your paper to your workspace with painter’s tape on all four sides. This creates that crisp, clean white border you see in the final piece and keeps the paper from buckling while you paint. -
Paint the Night Sky:
Squeeze out a generous amount of dark blue acrylic paint. Using a flat wash brush, cover the entire rectangular area inside the tape with smooth, even strokes. You want a solid, opaque background, so if the first coat looks streak, let it dry and add a second one. -
Let It Dry:
Patience is key here. Allow your blue background to dry completely before moving on. If you paint the fireworks while it’s wet, the colors will mix with the blue and turn muddy.
Clean Lines Pro-Tip
For the thinnest, sharpest firework lines, add a drop of water to your acrylic paint until it has the consistency of heavy cream. This helps the paint flow off the brush.
Step 2: Creating the Fireworks
-
Plan Your Composition:
Visualize where you want your four main fireworks to be. You’ll want one large pink one near the top left, a yellow one on the top right, a blue one on the bottom left, and a silver one centrally located near the bottom. -
Start the Pink Burst:
Load your fine detail brush with bright pink or magenta paint. Starting from a central point, paint curved lines radiating outward. Think of it like drawing the petals of a messy flower or the legs of a spider. -
Layer the Lines:
Make some lines slightly shorter and others longer to give the burst a natural, explosive shape. Leave a tiny empty spot in the very center where the lines originate. -
Add the Yellow Burst:
Rinse your brush thoroughly. Move to the upper right section and repeat the process with bright yellow paint. Painting these lines with a quick, flicking motion helps taper the ends for a more realistic look. -
Paint the Blue Burst:
On the lower left, create your third firework pattern using light blue paint. Try to make this one slightly smaller or lower than the pink one to keep the balance interesting. -
Create the Silver Burst:
For the bottom-center firework, use metallic silver or white paint mixed with a tiny drop of grey. Create the radiating lines just like before, nesting this one slightly between the blue and yellow bursts.
Step 3: Details & Stems
-
Draw the Trails:
Dilute a bit of white or very light grey paint with a tiny drop of water to make it flow smoothly. Using your finest brush, paint a thin, curved line extending downward from the center of each firework. These are the smoke trails showing where the rocket launched. -
Connect the Stems:
Bring all four stem lines downward so they converge near the bottom center of the page, creating a bouquet-like arrangement. -
Add Starbursts:
Using a metallic gold or silver paint, paint two small star shapes—one near the top center and one on the right side. Simply paint an asterisk symbol (*) with long thin lines. -
Sprinkle the Stars:
Dip the very tip of your detail brush into white paint. Dot tiny stars randomly all over the blue background. Vary the pressure to make some dots tiny and others slightly larger. -
Add Tiny Crosses:
To make some stars twinkle, paint a few tiny ‘plus’ signs or four-pointed stars scattered among the dots. -
Highlight the Centers:
Go back to the center of your colored fireworks. Add a tiny dab of a darker shade (or black) right in the middle where the lines meet to add depth. -
The Reveal:
Once the paint is completely dry to the touch, slowly peel away the painter’s tape at a 45-degree angle to reveal your clean edges.
Level Up: Glitter
While the firework paint is still wet, lightly sprinkle ultra-fine glitter over specific colors (like gold glitter on the yellow burst) for extra sparkle.
This dazzling display is now ready to be framed or gifted to brighten someone’s day


Have a question or want to share your own experience? I'd love to hear from you in the comments below!