
There’s something about painting fireflies that instantly feels like summer—soft night air, deep blues, and tiny sparks of light drifting through the dark. If you’re craving a little magic on your paper or canvas, these ideas will help you build that dreamy glow in a bunch of different ways.
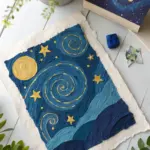
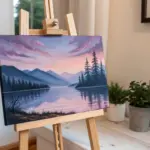
Firefly Swirl Trails Escaping a Jar
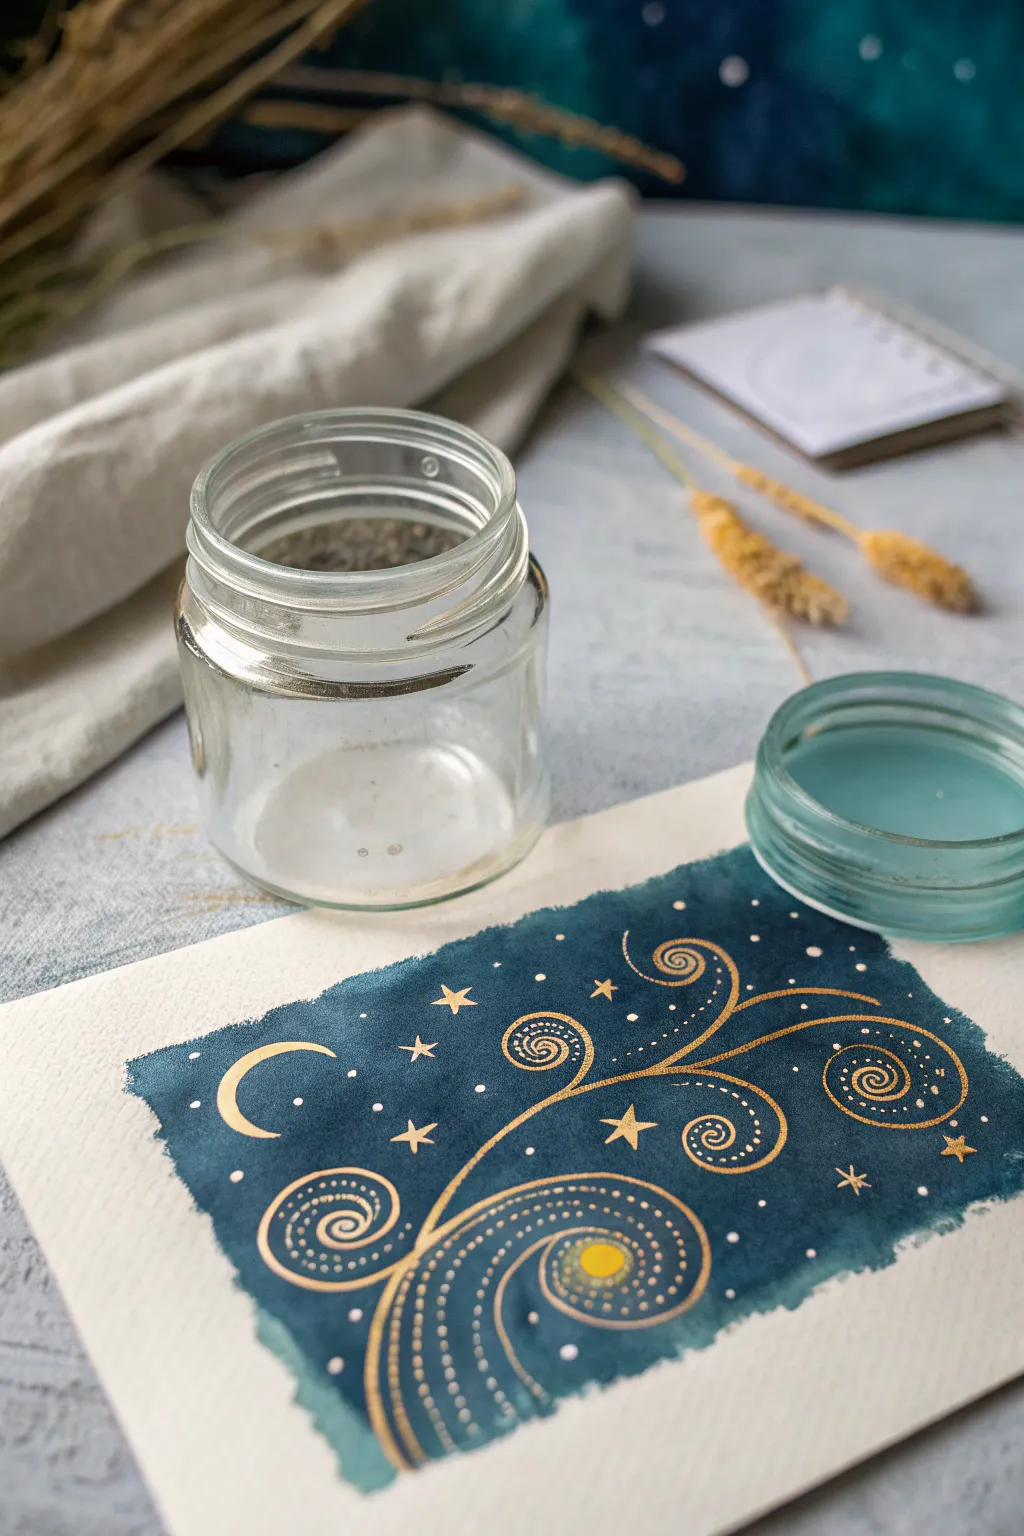
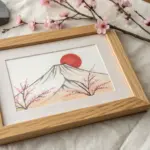
This elegant mixed-media piece combines a moody, deep teal watercolor wash with intricate gold linework to create the illusion of magical firefly trails escaping into the night sky. The contrast between the matte dark background and the shimmering metallic ink creates a sophisticated, starlit effect.
Step-by-Step Guide
Materials
- Cold press watercolor paper (300 gsm recommended)
- Deep teal or Indigo watercolor paint
- Wide flat wash brush (3/4 inch or 1 inch)
- Metallic gold gel pen (fine tip) or gold ink with a dip pen
- Fine detail brush (size 0 or 00) if using gold paint
- Pencil and eraser
- Jar for water
- Paper towels
Step 1: Creating the Night Sky Base
-
Prepare your paper:
Start with a clean sheet of cold press watercolor paper. You can tape down the edges if you want a clean border, but for this organic look, leaving the paper loose is fine. -
Mix your night color:
Load your palette with a generous amount of deep teal or indigo watercolor. You want the consistency to be rich and saturated, not too watery, to achieve that deep midnight look. -
Paint the background block:
Using your flat wash brush, paint a rectangular shape in the center of the paper. Don’t worry about perfect edges; the rough, dry-brush edges add character to the piece. -
Create texture:
While the paint is wet, allow some areas to be slightly more transparent than others. This natural variation mimics the depth of a night sky. -
Let it dry completely:
This is crucial. The paper must be bone dry before you add the gold, otherwise, the ink will bleed. I often use a hairdryer on a low setting to speed this up.
Ink Skipping?
If your gel pen skips over the textured watercolor paper, try working slower. The rough tooth of cold press paper can break flow; a dip pen handles texture better.
Step 2: Designing the Golden Trails
-
Sketch the main curves:
Lightly sketch the main swirling motion with a pencil if you feel unsure. Think of the motion of smoke or fireflies dancing upward from the bottom left to top right. -
Start the main stems:
Using your gold gel pen or dip pen, draw the thickest lines first. Create three to four main curved branches stemming from a central point near the bottom. -
Add the spiral motifs:
At the end of each curved line, draw tight, deliberate spirals. These are the focal points of the firefly trails. -
Thicken the lines:
Go back over your main stem lines to add weight. I like to make the base of the curves slightly thicker and let them taper off as they reach the spirals.
Step 3: Adding Celestial Details
-
Draw the crescent moon:
In the upper left quadrant of your painted block, draw a simple, elegant crescent moon shape with the gold ink. -
Add the dotted trails:
Along the main gold curves, add rows of tiny, evenly spaced dots. These follow the contour of your lines, enhancing the sense of movement and flow. -
Create the larger stars:
Draw several five-pointed stars scattered throughout the composition. Place a large one near the center to balance the layout. -
Incorporate tiny starbursts:
Fill in the gaps with smaller four-stroke starbursts or simply tiny ‘x’ shapes to represent distant twinkling stars. -
Fill the void:
Scatter singular gold dots randomly across the remaining dark blue background to represent distant stars or stray firefly gleams. -
Add the glowing center:
Inside the largest spiral at the bottom, carefully color in a solid circle of gold to serve as the ‘source’ or the brightest firefly. -
Review and refine:
Step back and look at the balance. If an area looks too empty, add a few more micro-dots or a small star to even out the composition.
Pro Tip: Layering Gold
For an extra bright pop, wait for the first layer of gold ink to dry fully, then trace over just the moon and largest stars again to double the opacity.
Once the gold ink shimmers dry, your magical night scene is ready to frame or gift

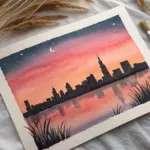
Enchanted Forest Clearing Firefly Field
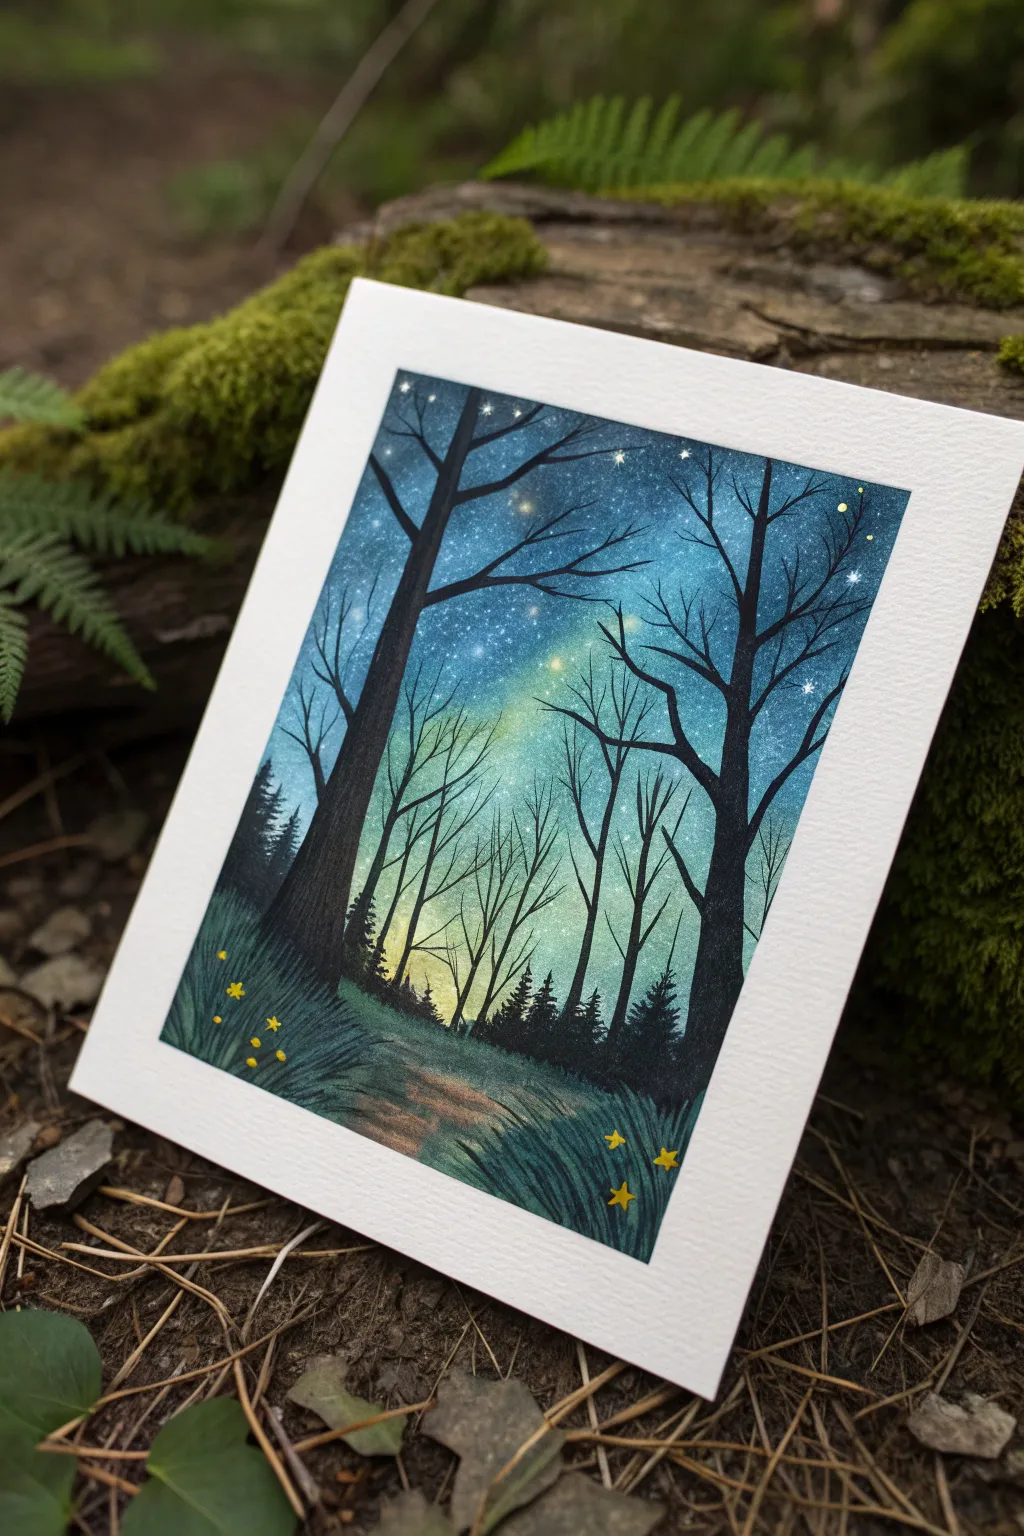
Capture the magic of a quiet forest evening with this stunning watercolor and gouache landscape painting. The scene features deep silhouette trees framing a luminous, star-filled sky that transitions from midnight blue to a soft, grassy green glow.
Detailed Instructions
Materials
- Cold press watercolor paper (approx. 140lb/300gsm)
- Painter’s tape or masking tape
- Watercolor paints (Indigo, Prussian Blue, Turquoise, Sap Green, Lemon Yellow)
- Black gouache or waterproof black ink
- White gouache or white gel pen
- Posca paint pens (Yellow and White)
- Round brushes (sizes 2, 6, and 10)
- Detail liner brush (size 0 or 00)
- Small stiff bristle brush (e.g., old toothbrush)
- Water cups and paper towels
Step 1: Setting the Sky and Atmosphere
-
Prepare your canvas:
Tape down all four edges of your watercolor paper to a drawing board or table. Press the tape firmly to ensure clean, crisp white borders when you peel it off later. -
Wet-on-wet base:
Using your largest round brush, apply clean water to the entire paper surface until it glistens but doesn’t form puddles. This prepares the surface for smooth blending. -
Apply the glow:
Start at the bottom center horizon line with a mix of Lemon Yellow and a touch of Sap Green. Drop this color in, letting it bleed slightly upwards to create the light source of the aurora or galaxy. -
Transition to teal:
Surround the yellow glow with a Turquoise or bright blue. Blend the edges gently where it meets the yellow so you get a soft green transition rather than a hard line. -
Deepen the night sky:
For the upper corners and top edge, load your brush with concentrated Indigo and Prussian Blue. Paint downwards, blending into the turquoise. The sky should be darkest at the very top. -
Creating the starry field:
While the paint is still damp but not soaking wet, use a stiff brush or toothbrush loaded with white gouache to flick tiny speckles across the upper blue section. This creates distant stars. -
Dry completely:
This is crucial: allow the background to dry completely. If the paper is cold to the touch, it’s still wet. Using a hair dryer on low heat can speed this up.
Star Sprinkle Tip
Cover the bottom half of your painting with a sheet of scrap paper before splattering white paint. This prevents stars from accidentally landing on your dark foreground trees or grass.
Step 2: Silhouettes and Foreground
-
Paint the distant tree line:
Mix a dark green-black using Sap Green and Indigo. With a size 6 brush, paint a jagged, small tree line across the horizon, just where the yellow glow meets color. Keep these small to show distance. -
Add the main tree trunks:
Switch to black gouache or ink for opacity. Using a size 6 or 10 brush, paint two large tree trunks on the left and right sides. Make them wider at the base and have them curve slightly inward as they rise. -
Branching out:
Use a liner brush or size 2 round brush to pull thin branches extending from the main trunks. Let the branches reach across the sky, creating a natural archway effect. -
Adding secondary trees:
Paint thinner, vertical lines for smaller trees in the middle distance. These should be thinner and slightly lighter in value than the main foreground trees if possible, but solid black works fine too. -
Painting the path:
Establish a dirt path leading into the clearing using a watered-down brown or grey watercolor mix. Keep the edges soft where it will meet the grass. -
Connect the path to shadows:
Darken the foreground corners with deep green or black to ground the image, leaving the center path lighter to reflect the sky’s glow.
Make It Glow
After the yellow firefly dots dry, gently glaze a tiny circle of very diluted white or pale yellow watercolor around each dot. This creates a soft halo effect, making them look luminescent.
Step 3: Details and Magic
-
Grass texture:
Using a dry brush technique or a liner brush with black gouache, flick quick upward strokes along the edges of the path and the bottom corners to simulate tall grass. -
Highlight the stars:
Once everything is dry, use a white gel pen or liner brush with white gouache to add distinct, larger stars. Draw small crosses or four-pointed stars on top of a few white speckles for a twinkling effect. -
The fireflies appear:
Take a yellow Posca pen or opaque yellow tempera. Dot small, bright circles mainly in the grassy areas and floating near the tree trunks. Vary the sizes slightly for depth. -
Add yellow flowers:
Near the bottom foreground, paint tiny five-petal flower shapes in yellow to match the fireflies, making the ground feel just as starry as the sky. -
Final reveal:
Wait until every drop of paint is bone dry, then carefully peel away the masking tape at a 45-degree angle to reveal your clean white border.
Frame this piece to create a portal to a peaceful world right on your wall


Silhouette Figure Holding a Firefly Jar
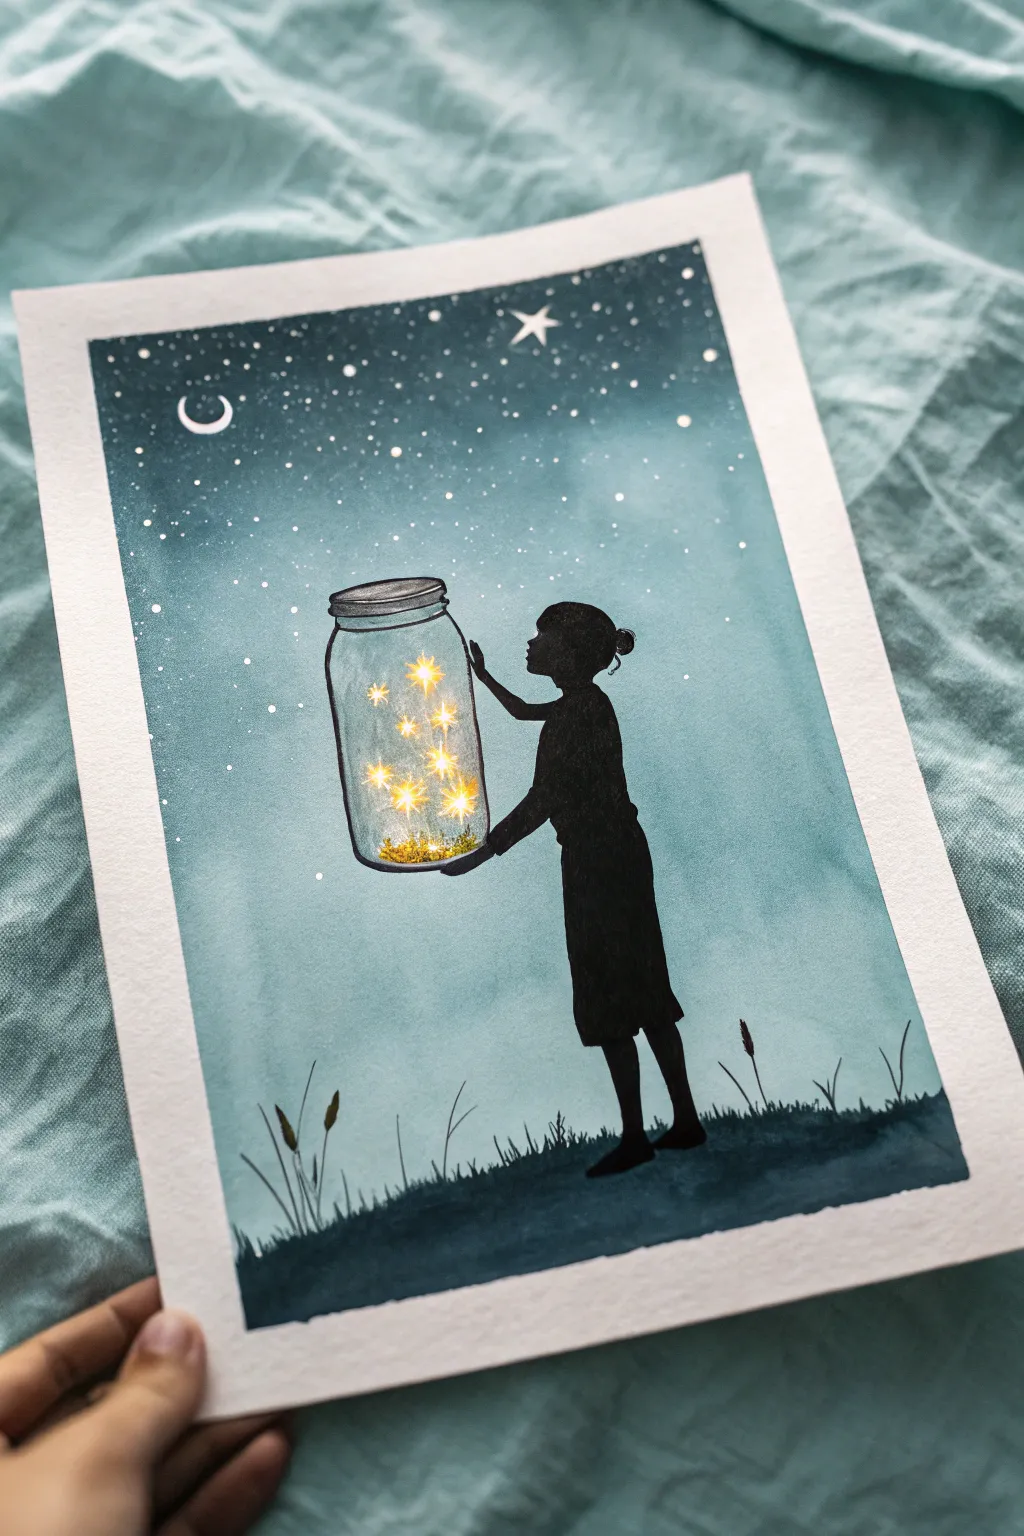
This enchanting watercolor piece contrasts a deep, blended night sky with the sharp, crisp silhouette of a child discovering magic. The glowing jar becomes the focal point, radiating warmth against the cool celestial backdrop.
Step-by-Step Guide
Materials
- Cold press watercolor paper (300 gsm)
- Watercolor paints (Indigo, Payne’s Gray, Prussian Blue, Teal)
- Black waterproof ink or gouache
- Yellow and orange watercolor or gouache
- White gel pen or white gouache
- Masking tape
- Pencil and eraser
- Round brushes (sizes 2, 6, and 10)
- Fine liner brush
- Two jars of water
Step 1: Setting the Scene
-
Prepare the canvas:
Tape down all four edges of your watercolor paper to a board using masking tape. This creates that crisp white border seen in the reference and prevents the paper from buckling when wet. -
Sketch the outline:
Lightly sketch the horizon line near the bottom third of the paper. Draw the outline of the girl standing on top of it. Then, sketch the large jar she is holding. Keep pencil marks faint, especially inside the jar area. -
Mask the jar:
To keep the inside of the jar bright, apply masking fluid to the interior shape of the jar. If you don’t have masking fluid, just be extremely careful to paint around this area in the next steps.
Uneven Sky Gradient?
If you get hard lines in your sky, re-wet the entire area gently with a large clean brush and tilt the paper to encourage the pigments to blend again while wet.
Step 2: Painting the Sky
-
Wet-on-wet technique:
With a large, clean brush, apply a coat of clean water to the entire sky area, stopping at the horizon line and avoiding the girl/jar figure. -
Drop in color:
While the paper is glistening wet, load your brush with Teal or Turquoise and paint the lower mid-section of the sky. As you move upward, blend in Prussian Blue. -
Deepen the night:
At the very top of the paper, introduce Indigo mixed with a touch of Payne’s Gray. Allow the colors to bleed downward naturally into the lighter teal to create a gradient effect. -
Let it dry completely:
Wait for the paint to be bone dry. If the paper feels cool to the touch, it’s still damp. Using a hairdryer on a low setting can speed this process up.
Step 3: Creating the Glow
-
Remove mask:
If you used masking fluid, gently rub it away with your finger once the paper is totally dry to reveal the white paper underneath. -
Inner jar wash:
Wet the inside of the jar slightly. Touch in some pale yellow watercolor, keeping it very light to represent the glass texture and ambient light. -
Paint the fireflies:
Using opaque yellow and orange gouache (or heavy watercolor), paint small star-shaped bursts inside the jar. Make the centers almost white-hot and the edges warmer orange. -
Add sparkles:
Use a white gel pen or thin white gouache to draw a tiny cross or ‘starbursts’ on the brightest points of light inside the jar to make them twinkle. -
Ground glow:
Dab a little yellow pigment at the very bottom of the jar where the ‘light’ is settling, suggesting a collection of magical dust.
Add Magic Dust
Mix a tiny pinch of gold mica powder or shimmer watercolor into the yellow paint for the fireflies. The jar will literally sparkle when the light hits it.
Step 4: The Silhouette & Details
-
Block in the figure:
Using thick black gouache or waterproof ink, carefully fill in the girl’s silhouette. Use a size 2 brush for the edges to get a sharp, defined line. -
Outline the jar:
With a fine liner brush and diluted black paint, draw the rim and outline of the jar. Keep the line thin so it looks like glass. -
Paint the ground:
Fill in the ground area beneath the horizon line with a dark mix of Indigo and Black. I prefer making the ground slightly textured rather than perfectly flat. -
Add grass blades:
While the ground is still slightly damp or just after drying, flick your smallest brush upward to create thin blades of grass and a few taller reeds poking up. -
Starry sky:
Load a toothbrush or stiff brush with white gouache. Flick the bristles to splatter tiny stars across the dark blue sky. Add a crescent moon and a large northern star with a gel pen. -
Final reveal:
Once absolutely everything is dry, slowly peel off the masking tape at a 45-degree angle to reveal your clean edges.
Step back and admire how the dark silhouette makes the captured light in the jar shine even brighter

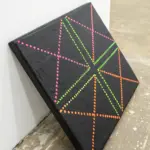
Finger-Blur Glow Dots for Fireflies
Capture the magic of a warm summer evening with this atmospheric firefly painting. By combining a gradient wash background with careful dry-brushing, you’ll create soft, radiant lights floating above silhouetted grasses.
Step-by-Step Guide
Materials
- Cold Press watercolor paper (heavyweight, e.g., 300gsm)
- Watercolor paints (Indigo, Payne’s Grey, Prussian Blue, Sap Green)
- Opaque yellow gouache or acrylic paint (Lemon Yellow)
- Masking tape
- Wide flat wash brush
- Fine detail brush (size 0 or 1)
- Old, small flat brush (for dry brushing)
- White ink or diluted white gouache
- Pencil
- Two jars of water
Step 1: Setting the Scene
-
Prepare your surface:
Tape down all four edges of your watercolor paper to a board using masking tape. This creates that crisp white border seen in the example and prevents the paper from buckling during the wash. -
Mix the night sky:
On your palette, prepare a large puddle of a deep, dark blue mix. Indigo mixed with a touch of Payne’s Grey works well for the upper sky. -
Mix the meadow glow:
Prepare a second mix for the bottom area using Sap Green and a little yellow to create an earthy, lighter tone. -
Paint the gradient wash:
Using a clean, wet flat brush, dampen the entire paper surface evenly. While it’s still glossy, start painting the dark blue mix at the top, bringing it down about 3/4 of the page. -
Blend the transition:
Rinse your brush and pick up the green mix. Paint from the bottom up meeting the blue. Let the colors bleed slightly into each other to create a misty horizon line where the sky meets the grass. -
Dry completely:
Let this layer dry 100%. If the paper feels cool to the touch, it’s still damp. Using a hairdryer on a low setting can speed this up.
Clean Edges Only
To prevent paper tearing when removing tape, warm the tape slightly with a hairdryer first. Pull slowly, away from the painting area.
Step 2: Creating the Glow
-
Map the lights:
Lightly visualize where your biggest fireflies will sit. You want a scattered, random arrangement. -
Create the halos:
Take a small, dry flat brush—one that’s a bit stiff is perfect here—and dip it into very slightly diluted yellow gouache. Dab off almost all the paint onto a paper towel until it’s barely there. -
Scumble the glow:
Gently rub this dry brush in small circles where you want the fireflies. You are creating a soft, transparent haze, not a solid dot. Make some larger and some smaller. -
Add the bright centers:
Once the hazy halos are dry, use your fine detail brush loaded with thick, creamy yellow gouache. Paint a solid, crisp circle right in the center of each halo. -
Vary the sizes:
Paint a few tiny yellow dots without halos in the background to suggest fireflies that are further away in the distance.
Step 3: Silhouettes and Stars
-
Mix shadow color:
Mix a very dark, concentrated black-green or indigo. It should be much darker than your background. -
Paint grass blades:
Using your detail brush, paint long, sweeping strokes starting from the bottom edge and flicking upward. Vary the pressure: press down at the base and lift as you go up to get a sharp tip. -
Add seed heads:
On a few stems, dab small clusters of dots to mimic seeds or flowers. Keep these loose and organic. -
Overlap carefully:
Allow some grass blades to cross in front of the lower firefly glows. This adds incredible depth, making the lights look like they are floating within the grass. -
Splatter stars:
Cover the bottom grassy area with a piece of scrap paper to protect it. Dip a brush in white ink or diluted white gouache and tap the handle against another brush to spray fine mist droplets over the blue sky. -
Review and refine:
Step back and check the balance. If needed, darken the very bottom edge of the grass with another layer of indigo to ground the composition. -
The reveal:
Once everything is bone dry, carefully peel away the masking tape at a 45-degree angle to reveal your clean, crisp frame.
Glow Up
For an even brighter effect, perform the ‘halo’ step with white gouache first, let it dry, and then glaze over it with neon yellow watercolor.
Frame your mini masterpiece in a simple white mat to let those luminous colors really shine
BRUSH GUIDE
The Right Brush for Every Stroke
From clean lines to bold texture — master brush choice, stroke control, and essential techniques.
Explore the Full Guide
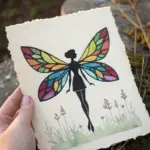
Fireflies With Tiny Painted Bodies and Wings
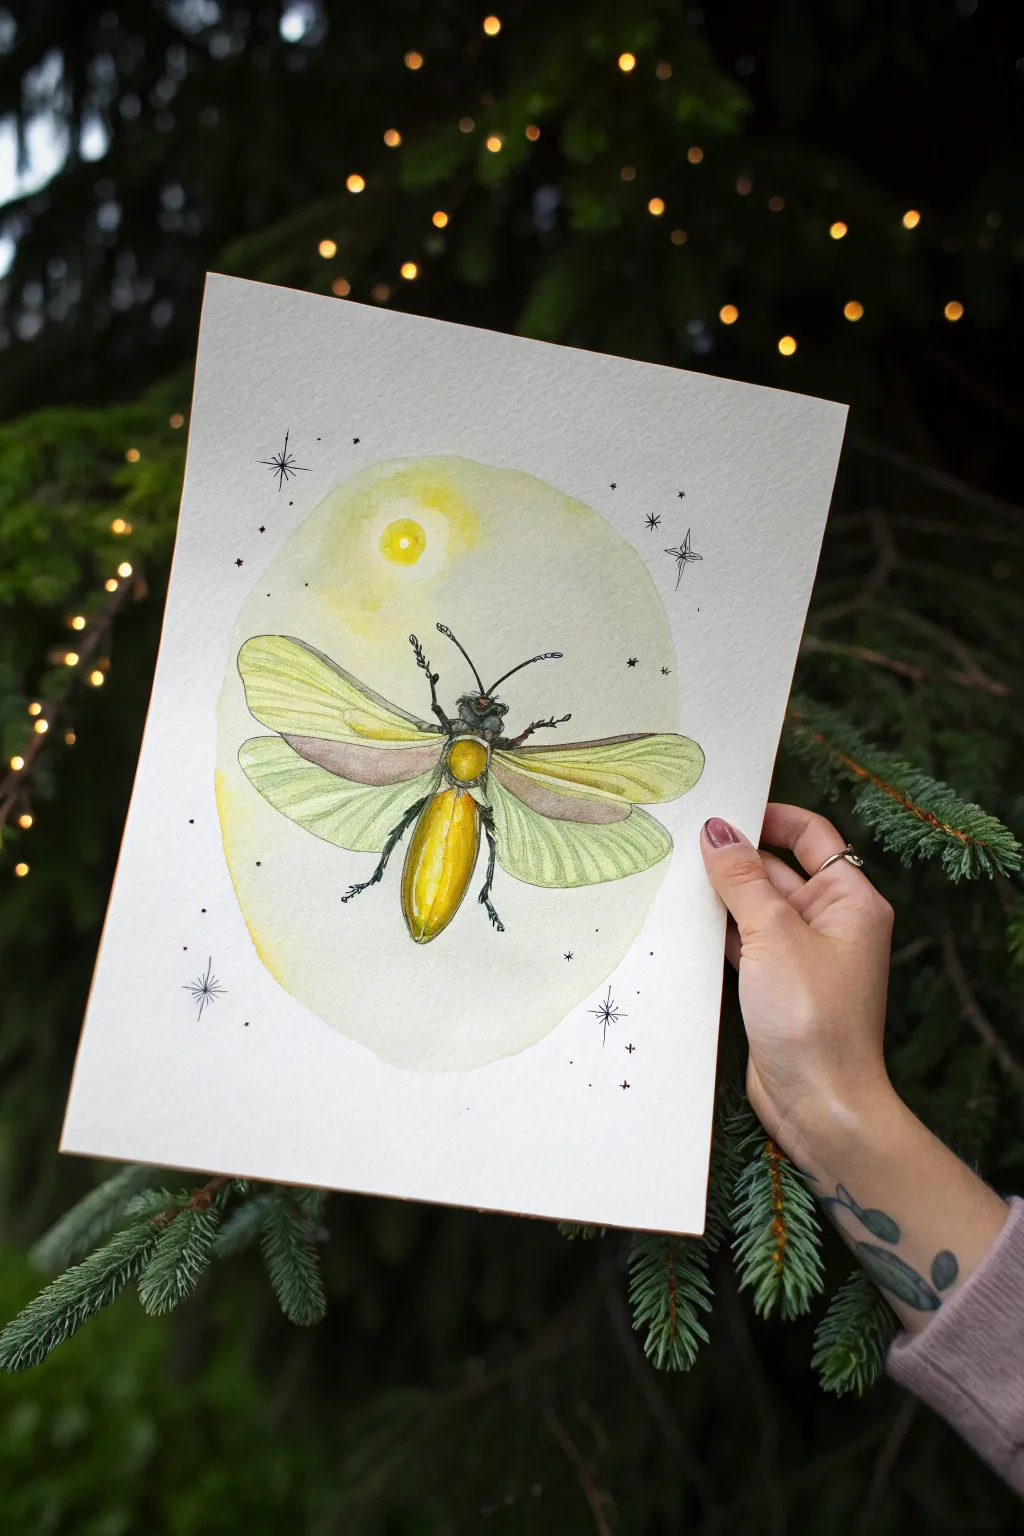
Capture the magic of twilight with this beautiful mixed-media firefly illustration. Combining soft watercolor washes with crisp ink details creates a glowing, ethereal effect that makes the insect seem ready to take flight.
Step-by-Step Tutorial
Materials
- Cold-press watercolor paper (140lb/300gsm)
- Watercolor paints (Lemon Yellow, Yellow Ochre, Sap Green, Burnt Umber)
- Black archival fineliner pens (sizes 0.1, 0.3, and 0.5)
- Pencil (HB or 2H) and eraser
- Round watercolor brushes (sizes 2 and 6)
- White gouache or white gel pen
- Compass or round object for tracing (optional)
- Masking tape
Step 1: Sketching the Composition
-
Create the glowing backdrop boundary:
Start by lightly sketching a large oval shape in the center of your paper. This doesn’t need to be perfectly symmetrical; a slightly organic egg shape works well to contain the watercolor wash later. -
Outline the insect body:
In the center of your oval, sketch the main segments of the firefly. Draw a small head, a thorax (middle section), and a longer abdomen. Keep the lines very faint so they won’t show through the yellow paint. -
Draft the wings:
Draw two sets of wings extending outward. The top pair (elytra) should be slightly thicker and stiffer, while the bottom pair should look delicate and membranous, fanning out wider than the top set. -
Add celestial details:
Sketch a small circle near the top left of the oval to represent a glowing orb or moon. Lightly mark positions for tiny stars scattered around the main oval boundary.
Wet-on-Wet Magic
For the softest background glow, pre-wet the paper with clean water before adding pigment. The paint will flow into the wet areas naturally, creating effortless, dreamy gradients.
Step 2: Applying Watercolor Washes
-
Paint the background glow:
Using your size 6 brush, wet the area inside the large oval with clean water. Drop in a very watery mix of Lemon Yellow and a touch of Yellow Ochre, letting the color bloom softly. Keep the edges soft and uneven. -
Highlight the celestial orb:
While the background is still slightly damp, paint the small moon circle with a concentrated Lemon Yellow. Let it bleed slightly into the surrounding wash for a glowing effect. -
Base layer for the body:
Once the background is dry, paint the firefly’s abdomen with a bright, saturated Lemon Yellow. This mimics the creature’s bioluminescence. Use a mix of Yellow Ochre and Burnt Umber for the thorax. -
Base layer for the wings:
Mix a very dilute Sap Green with a hint of yellow. Paint the lower wings with this transparent wash. For the upper wings (elytra), add a touch of brown to the green mix to make them appear sturdier. -
Creating volume:
While the body paint is still workable, drop a tiny amount of Burnt Umber on the sides of the abdomen and thorax to create a 3D rounded effect. Let everything dry completely.
Step 3: Inking and Detailing
-
Outline the body segments:
Using the 0.3 fineliner, carefully trace the outline of the head, thorax, and abdomen. Use broken or stippled lines on the abdomen to suggest a glowing, soft texture rather than a hard shell. -
Draw the legs and antennae:
Switch to the 0.5 fineliner for bold definition. Draw the antennae curving gracefully from the head. Add the legs, paying attention to the joints and tiny claws at the ends. -
Detail the wing veins:
With your finest 0.1 pen, draw delicate veins on the lower wings. Start from the base of the wing and fan the lines out toward the edges, keeping your hand loose and light. -
Texture the upper wings:
Add subtle striations or lines along the length of the upper wings using the 0.1 pen. This differentiates their texture from the translucent lower wings.
Metallic Shimmer
Use metallic gold watercolor paint for the firefly’s glowing abdomen or the stars. This adds a subtle, surprising sparkle that catches the light beautifully when viewed at an angle.
Step 4: Final Touches
-
Add magical stars:
With the 0.3 pen, draw various star shapes—some simple four-point stars, some tiny dots, and some larger sparklers—around the outside of the painted oval. -
Enhance the glow:
I like to use a white gel pen or a tiny dot of white gouache to add a highlight to the eyes and the center of the celestial orb to make them pop. -
Clean up:
Wait at least 15 minutes to ensure all ink is bone dry, then gently erase any remaining pencil lines to reveal your crisp illustration.
Now you have a captured piece of twilight magic to brighten up your wall
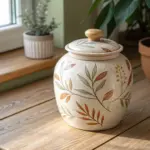
Fireflies in a Misty Woodland Path
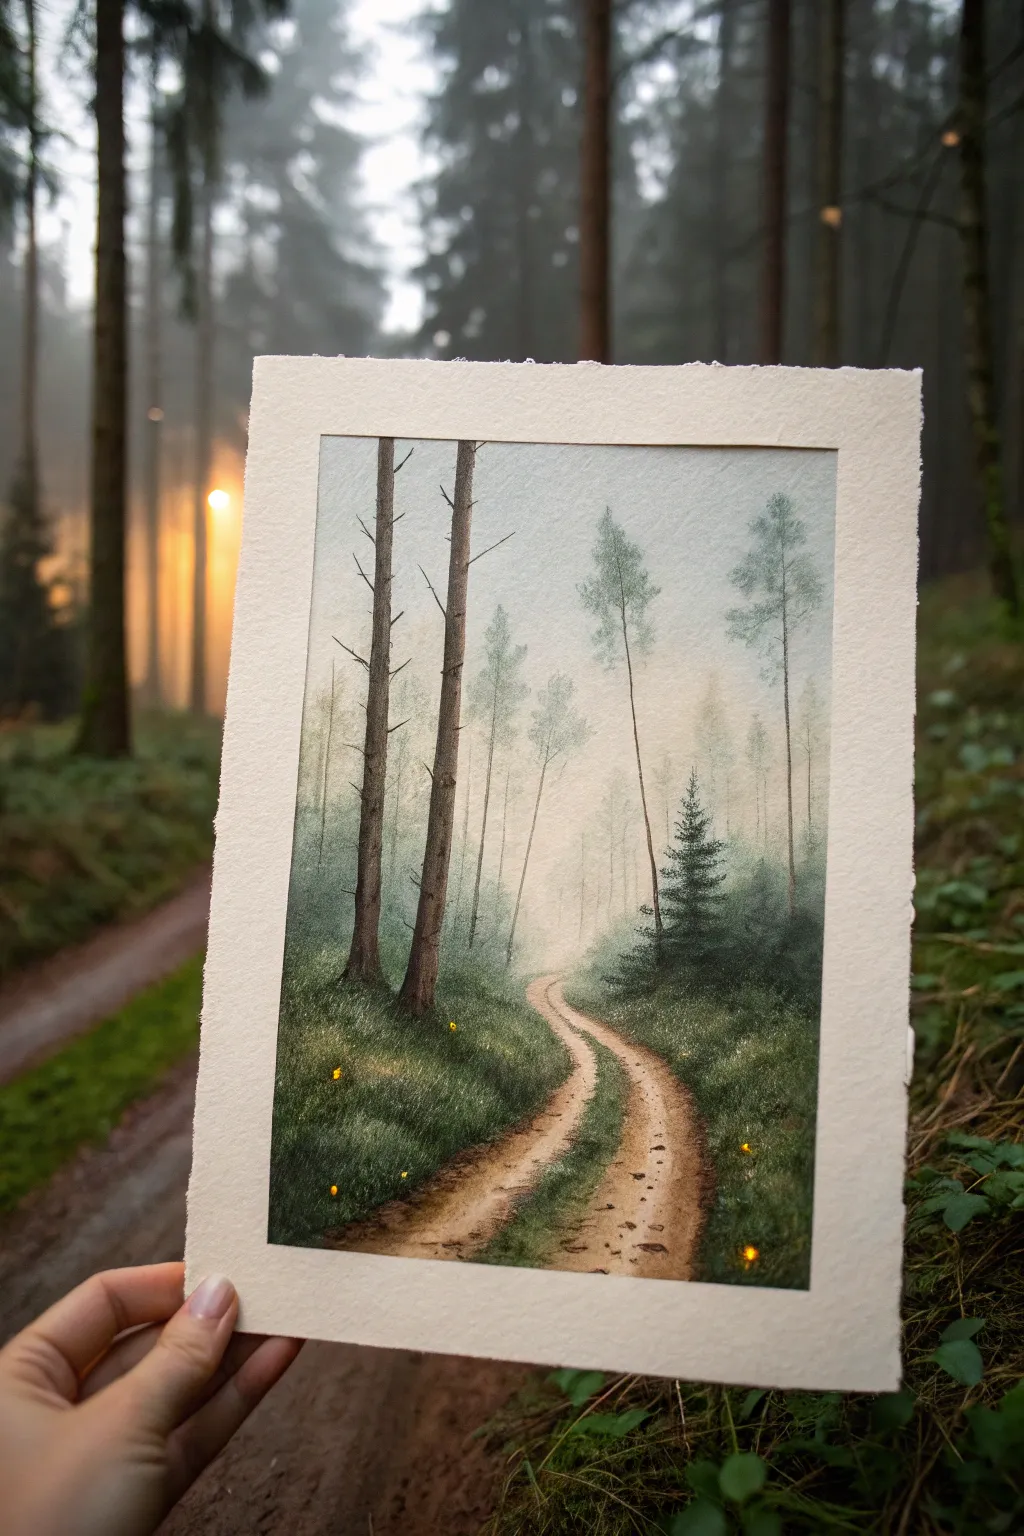
Capture the serene magic of a foggy morning walk illuminated by gentle fireflies with this atmospheric painting. Using a blend of watercolor for the misty depths and gouache for the crisp foreground details creates a stunning sense of depth and mystery.
How-To Guide
Materials
- Cold press watercolor paper (300 gsm)
- Watercolor paints (Indigo, Sap Green, Burnt Sienna, Yellow Ochre, Payne’s Grey)
- White and lemon yellow Gouache
- Masking tape
- Round brushes (sizes 2, 6, and 10)
- Fine liner brush (size 0 or 00)
- Two jars of water
- Paper towels
- Mixing palette
Step 1: Setting the Atmosphere
-
Prepare the paper:
Begin by taping down all four edges of your watercolor paper to a board. This ensures a crisp white border later and prevents the paper from buckling during the wet-on-wet stages. -
Sketch the composition:
Lightly sketch the winding S-curve of the path starting wide at the bottom and vanishing into the center. Mark the vertical placement of the two large foreground trees on the left. -
Wet the sky area:
With clean water and your largest brush, wet the entire upper two-thirds of the paper, avoiding the foreground path area. The sheen should be even, not puddling. -
Paint the misty background:
Drop in a very diluted wash of Indigo and Payne’s Grey into the wet paper. Keep it pale and ethereal, letting the white of the paper show through in the center to suggest a light source or opening in the woods. -
Create distant trees:
While the paper is still damp but no longer shiny, mix a slightly stronger grey-green. Use the size 6 brush to paint vertical, indistinct tree shapes in the distance. They should blur slightly, creating that ‘foggy’ effect.
Misty Mess?
If your background trees are spreading too much, the paper is too wet. Wait a minute for the sheen to disappear. If they have hard edges, the paper is too dry—mist it lightly with water.
Step 2: Grounding the Scene
-
Block in the path:
Once the sky is dry, mix Burnt Sienna with a touch of Yellow Ochre. Paint the path using horizontal strokes to follow the curvature of the earth. Let the color fade as the path winds deeper into the mist. -
Add grassy textures:
Mix a deep mossy green using Sap Green and Indigo. Stipple paint along the edges of the path, bringing the grass slightly over the brown edge to make it look organic and overgrown. -
Deepen the shadows:
While the grass layer is drying, mix a darker, more saturated green. Glaze this over the foreground grassy areas, particularly at the bottom corners, to pull the viewer’s eye into the bright center. -
Paint the foreground trees:
Using a mix of Burnt Sienna and Payne’s Grey (making a near-black brown), paint the two prominent tree trunks on the left. Keep your hand steady but allow for natural wavering in the bark. -
Add branches:
Switch to your fine liner brush. Extend thin, spindly branches reaching out from the main trunks. Remember that dead lower branches on pines often point slightly downwards or snap off abruptly.
Step 3: Details & Magic
-
Add the fir tree:
On the right side of the path, paint the silhouette of a small fir tree. Use a dabbing motion to replicate pine needles, keeping the top sharp and the base wider. -
Texture the path:
With a damp brush and some darker brown, add small spots and streaks to the dirt path to represent tire ruts, stones, or uneven earth. Keep these details sharpest in the immediate foreground. -
Highlight the grass:
I like to mix a little white gouache with lime green for this step. Use the liner brush to flick tiny individual blades of grass in the foreground where the light would hit them. -
Create the fireflies:
Mix Lemon Yellow gouache with a tiny dot of white. Using the tip of your smallest brush or a toothpick, place small dots floating low near the grass and path. -
Add the glow:
To make the fireflies glow, gently soften the area around a few of the dots with a barely damp clean brush, spreading a tiny halo of yellow into the surrounding dark greenery. -
Final reveal:
Wait until the painting is completely bone dry. Carefully peel away the masking tape at a 45-degree angle to reveal those clean, professional edges.
Level Up: Golden Hour
Instead of a cool grey mist, try a warm peach and violet gradient for the background to simulate a sunset. Use orange dots for fireflies to match the warmer palette.
Now you have a tranquil forest scene that brings a little bit of illuminated magic into your home

PENCIL GUIDE
Understanding Pencil Grades from H to B
From first sketch to finished drawing — learn pencil grades, line control, and shading techniques.
Explore the Full Guide
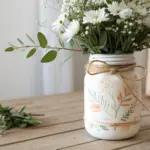
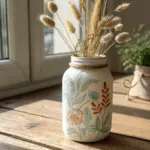
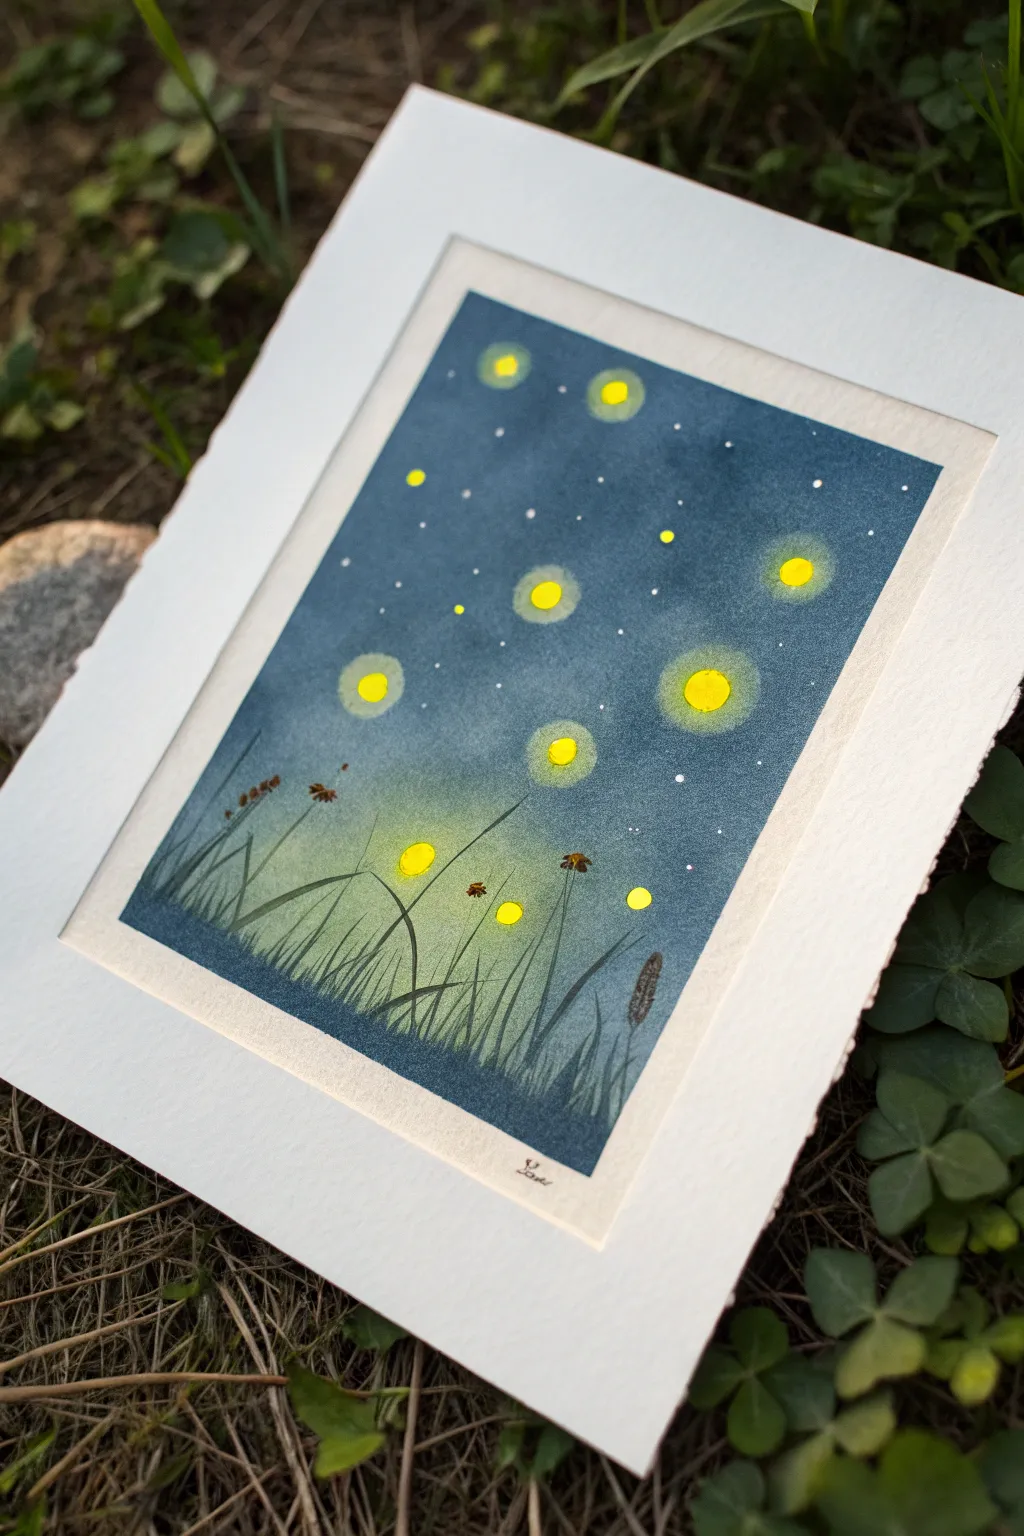
Glow-in-the-Dark Firefly Highlights
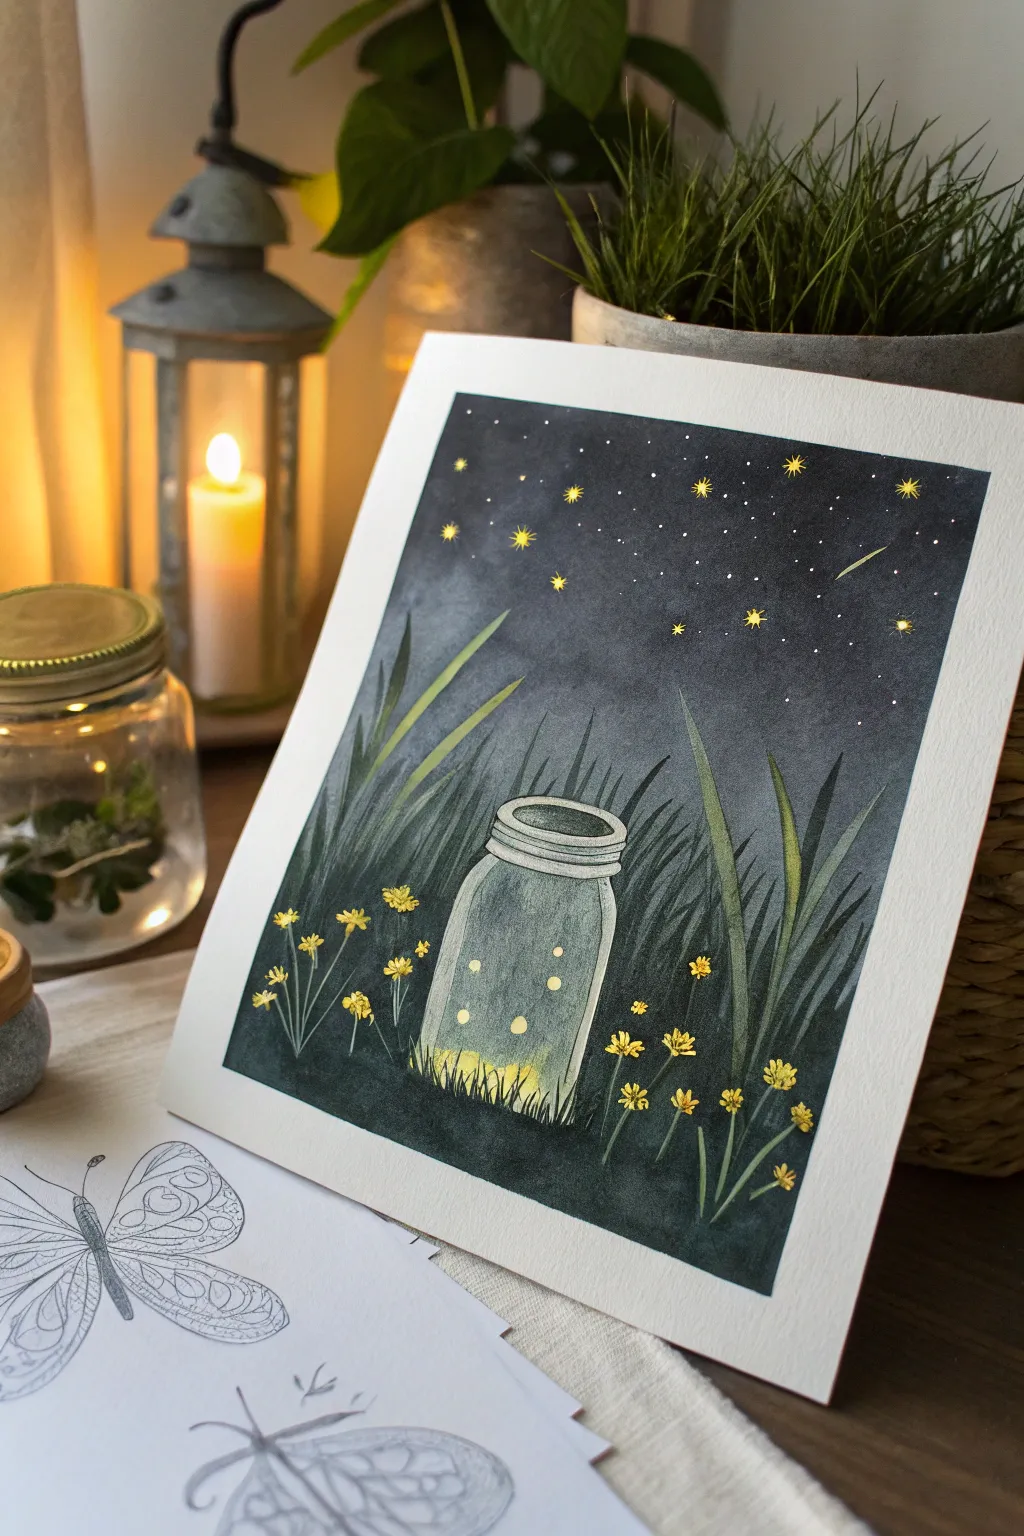
Capture the nostalgic magic of summer evenings with this enchanting watercolor painting. Featuring a mason jar nestled in tall grass against a starry night sky, this project uses heavy dark washes and bright pops of yellow to create a stunning illuminated effect.
Step-by-Step
Materials
- Cold press watercolor paper (140 lb / 300 gsm)
- Watercolor paints (Indigo, Payne’s Gray, Sap Green, Lemon Yellow, Golden Yellow)
- White gouache or white gel pen
- Gold metallic watercolor or pen (optional)
- Round synthetic brushes (sizes 6 and 2)
- Pencil and eraser
- Masking tape
- Water cups and paper towels
Step 1: Sketching and Preparation
-
Secure the paper:
Tape down all four edges of your watercolor paper to a board or table. This creates a clean white border and prevents the paper from buckling under heavy washes. -
Sketch the jar:
Lightly sketch the outline of a mason jar in the lower center of the page. Include the rim details and the curve of the glass, keeping your lines very faint so they don’t show through later. -
Add grass blades:
Draw several long, sweeping blades of grass rising from the bottom, some crossing in front of the jar and others positioned behind it to create depth. -
Identify light sources:
Mark small circles inside the jar for the fireflies. Also, lightly sketch the positions of the tiny yellow flowers scattered in the grass.
Step 2: Painting the Background
-
Mix the night sky color:
Create a rich, dark mixture using Indigo and Payne’s Gray. You want a deep, saturated color to make the yellow lights pop. -
Apply the first wash:
Start painting the sky from the top down. Use a wet-on-dry technique for control, carefully painting around the grass blades, the jar, and the tiny flowers. -
Create a gradient:
As you move down the paper towards the horizon line, slightly dilute your dark paint with water or mix in a touch of deep green to suggest foliage in the distance. -
Deepen the shadows:
Once the first layer is dry, add a second coat of your dark indigo mix to the upper sky area to ensure it is opaque and velvety.
Starry Night Secret
Mix your white gouache to the consistency of heavy cream before splattering. Too watery, and stars will fade; too thick, and they won’t splatter.
Step 3: Painting the Foreground
-
Base layer for grass:
Mix a dark Sap Green with a little Indigo. Paint the blades of grass, varying the pressure on your brush to get tapered tips. -
Adding dimension to foliage:
While the grass is still slightly damp, drop darker pigment (Payne’s Gray) into the bottom of the blades to anchor them. -
Painting the glass jar:
Use a very diluted wash of the sky color (grey-blue) to paint the glass. Leave the firefly circles white for now. Add slightly darker strokes on the sides of the jar to show curvature. -
The rim and details:
Use a size 2 brush and a medium-grey tone to define the screw-top rim of the jar, leaving thin white highlights to suggest reflection.
Level Up: Real Glow
For a magical surprise, paint over the firefly dots and stars with glow-in-the-dark acrylic medium or fabric paint once the watercolor is fully dry.
Step 4: Adding the Glow
-
Firefly core:
Paint the small circles inside the jar with opaque Lemon Yellow or white gouache mixed with yellow. -
Creating the halo:
To make them glow, take a clean, damp brush and gently soften the edges of the yellow dots, pulling a tiny amount of pigment outward into the grey glass area. -
Bottom jar glow:
Paint a wash of bright yellow at the very bottom of the jar, letting it fade upwards into the glass. Paint the grass blades in front of this area with a lighter, yellowish-green to show the light hitting them. -
Field flowers:
Dab small clusters of Golden Yellow for the flowers in the grass. I like to add a tiny center dot of orange or brown to give them definition.
Step 5: Stars and Final Touches
-
Splatter the stars:
Cover your foreground with a scrap piece of paper. Load a stiff brush with white gouache (or watered-down white acrylic) and tap the handle to splatter tiny stars across the dark sky. -
Specific stars:
Use a white gel pen or a fine brush with gouache to add a few larger, manual stars and perhaps a shooting star streak. -
Gold accents:
If you have metallic gold paint, add tiny touches to the center of the fireflies or the larger stars for extra sparkle. -
Reveal:
Wait until the painting is bone dry, then carefully peel away the masking tape at a 45-degree angle to reveal your crisp white border.
Frame your illuminated masterpiece or gift it to someone who brightens your life

Have a question or want to share your own experience? I'd love to hear from you in the comments below!